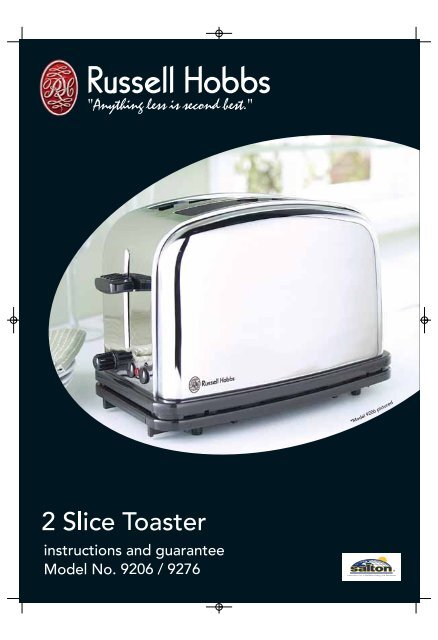
how to use your classic satin toaster - Russell Hobbs
how to use your classic satin toaster - Russell Hobbs
how to use your classic satin toaster - Russell Hobbs
You also want an ePaper? Increase the reach of your titles
YUMPU automatically turns print PDFs into web optimized ePapers that Google loves.
IMPORTANT SAFEGUARDS<br />
Read these instructions before using <strong>your</strong> <strong>to</strong>aster. Keep this in a safe place for<br />
future reference. When using electrical appliances, basic safety precautions<br />
should always be followed, including the following:<br />
1. To protect against electrical hazards do not immerse the power cord, plug,<br />
stand, or <strong>to</strong>aster in water or any other liquid.<br />
2. Do not <strong>use</strong> in the bathroom or near any source of water.<br />
Do not <strong>use</strong> outdoors.<br />
3. Always <strong>use</strong> the appliances handles as some parts may be hot.<br />
4. This appliance is not intended for <strong>use</strong> by young children or infirmed persons.<br />
Close supervision is necessary when this appliance is <strong>use</strong>d near children or<br />
infirmed person.<br />
5. Always turn off and unplug from the power outlet before cleaning the<br />
appliance.<br />
6. Do not operate this appliance with a damaged cord/plug or after the<br />
appliance has malfunctioned, dropped or damaged in any manner. Contact<br />
Cus<strong>to</strong>mer Service for replacement, examination, repair or adjustment.<br />
7. There are no <strong>use</strong>r serviceable parts. If power cord or appliance is damaged,<br />
it must be replaced by the manufacturer or similarly qualified person in order<br />
<strong>to</strong> avoid a hazard.<br />
8. Do not <strong>use</strong> on an inclined plane or unstable surface.<br />
9. Do not operate the <strong>to</strong>aster unless there is bread/similar content inside.<br />
10. Do not move the <strong>to</strong>aster while it is switched on.<br />
11. Do not cover the <strong>to</strong>aster when in <strong>use</strong>.<br />
12. Always take care when removing <strong>to</strong>ast after <strong>to</strong>asting as it is hot.<br />
13. Bread may burn. Always moni<strong>to</strong>r when using this appliance.<br />
14. Do not <strong>use</strong> the <strong>to</strong>aster near or below any curtains or other combustible<br />
materials.<br />
15. Always take care when removing food from the <strong>to</strong>aster.<br />
16. Do not <strong>to</strong>ast items that do not fit in<strong>to</strong> the <strong>to</strong>asting slots.<br />
17. Keep the <strong>to</strong>aster and the power cord away from the edge of table or<br />
counter<strong>to</strong>ps and out of reach of children and infirmed persons.<br />
18. To disconnect, press OFF, then grasp the plug and remove from wall power<br />
socket. Never pull by the cord.<br />
19. Ensure the <strong>to</strong>aster is switched off before removing <strong>to</strong>ast.<br />
20. Do not cook food wrapped in plastic film or polythene bags or aluminum<br />
foil. It will ca<strong>use</strong> a fire hazard.<br />
21. Do not place on or near any heat sources.<br />
22. Do not leave the <strong>to</strong>aster unattended when in <strong>use</strong>.<br />
23. Follow the instructions when cleaning this appliance<br />
24. Do not <strong>use</strong> appliance for other than its intended purpose.<br />
25. Clean the crumb tray regularly.<br />
26. This appliance is not a <strong>to</strong>y.<br />
27. This appliance is not intended <strong>to</strong> be operated by means of an external timer<br />
or separate remote control system.<br />
SAVE THESE INSTRUCTIONS<br />
THIS APPLIANCE IS FOR HOUSEHOLD USE ONLY<br />
3
POWER CORD<br />
A short power-supply cord is provided <strong>to</strong> reduce the risks of becoming<br />
entangled in or tripping over a longer cord. Longer detachable power-supply<br />
cords or extension cords are available and may be <strong>use</strong>d if care is exercised in<br />
their <strong>use</strong>. If a longer detachable power-supply cord or extension cord is <strong>use</strong>d,<br />
the marked electrical rating of the cord set or extension cord should be at<br />
least as great as the electrical rating of the appliance, and the cord should be<br />
arranged so that it will not drape over the counter<strong>to</strong>p or table<strong>to</strong>p where it can<br />
be pulled on by children or tripped over unintentionally.<br />
BEFORE USE<br />
Read these instructions before using <strong>your</strong> Classic Toaster and keep them<br />
in a safe place for future reference. If you pass the <strong>to</strong>aster on <strong>to</strong> anyone else,<br />
you should also pass on the instructions.<br />
Remove all packaging before using the product, but keep the packaging until<br />
you are satisfied that the product is operating correctly.<br />
You may find a plastic label on the outside of the product, listing its features.<br />
This must be peeled off before <strong>use</strong>.<br />
Before making <strong>to</strong>ast for the first time, operate the <strong>to</strong>aster without bread and<br />
with the browning control set at the maximum setting. This will help <strong>to</strong> burn<br />
off any dust etc. which may have accumulated on the elements. The new<br />
elements may give off an unpleasant smell but this should not be a ca<strong>use</strong> for<br />
alarm. Ensure the room is well ventilated while doing this.<br />
HOW TO USE YOUR CLASSIC SATIN TOASTER<br />
1. Position the <strong>to</strong>aster on a firm, level, heat-resistant surface, clear of<br />
curtains, draperies, and other combustible materials. Do not place the<br />
<strong>to</strong>aster on or near items that may become damaged even by moderate<br />
sources of heat, and keep it out of reach of children.<br />
2. Shorten the power cord by wrapping excess cord round the clips underneath<br />
the <strong>to</strong>aster.<br />
3. Plug the power cord in<strong>to</strong> the electrical outlet.<br />
4
TOASTING BREAD<br />
5
HINTS AND TIPS<br />
1. When <strong>to</strong>asting more than one slice of bread, <strong>use</strong> slices of similar size,<br />
thickness and freshness.<br />
2. Old or thin bread will cook faster than fresh or thick bread, so <strong>use</strong> a lower<br />
setting.<br />
3. Do not <strong>use</strong> <strong>to</strong>rn, curled up, or misshapen slices of bread as these may jam<br />
the ejection mechanism and could catch fire.<br />
4. Sweet bread products (tea cakes, fruit loaf, etc.) brown much more quickly<br />
than ordinary bread, so should be <strong>to</strong>asted on the lighter settings.<br />
5. Should the bread carriage handle become jammed during the <strong>to</strong>asting<br />
cycle, do not attempt <strong>to</strong> release it. Unplug the <strong>to</strong>aster and allow it <strong>to</strong> cool<br />
down before carefully removing the bread. Do not <strong>use</strong> a knife, fork or<br />
similar sharp instrument, as these may ca<strong>use</strong> damage <strong>to</strong> the elements.<br />
CARE AND CLEANING<br />
Unplug the <strong>to</strong>aster from the electrical outlet and let it cool down fully before<br />
attempting any cleaning operation.<br />
Wipe the outside surfaces with a soft damp cloth. If necessary, <strong>use</strong> a little mild<br />
liquid soap.<br />
Do not allow anything <strong>to</strong> enter the slots, as this might damage the elements.<br />
Do not <strong>use</strong> harsh or abrasive cleaning agents or solvents.<br />
Do not immerse the <strong>to</strong>aster in water or any other liquid.<br />
Crumbs<br />
Crumbs will collect in the base of the <strong>to</strong>aster. Letting them build up could<br />
ca<strong>use</strong> a fire hazard, so remove them frequently.<br />
Unplug the <strong>to</strong>aster from the electrical outlet and pull out the crumb tray.<br />
Empty the crumbs out of the crumb tray and wipe it with a clean damp cloth.<br />
Dry it thoroughly before sliding it back in<strong>to</strong> the base of the <strong>to</strong>aster.<br />
6
AFTER SALES SERVICE<br />
If the appliance is not operating correctly, please check that:<br />
1. You have followed the instructions correctly.<br />
If you need <strong>to</strong> return the appliance please follow these instructions:<br />
1. Pack it carefully.<br />
2. Enclose <strong>your</strong> name and address.<br />
3. Give the reason why you are returning it.<br />
4. If within the guarantee period, state where and when purchased and<br />
include proof of purchase (e.g. receipt).<br />
5. Contact Sal<strong>to</strong>n Cus<strong>to</strong>mer Service (details on back page)<br />
7
Limited 2 year warranty<br />
Nothing in this guarantee or the instructions relating <strong>to</strong> the product excludes,<br />
restricts or otherwise affects the statu<strong>to</strong>ry rights of the consumer.<br />
Register <strong>your</strong> warranty card now <strong>to</strong> receive these benefits:<br />
• Receive information on special price offers and promotions<br />
• Notification of any issues concerning <strong>your</strong> product<br />
Sal<strong>to</strong>n (Aust) Pty Ltd / Sal<strong>to</strong>n NZ Ltd warrants this product free from defects<br />
in material and workmanship for two (2) years from provable date of<br />
purchase. Within this warranty period Sal<strong>to</strong>n (Aust) Pty Ltd / Sal<strong>to</strong>n NZ Ltd<br />
will repair or replace defective parts at no charge, provided the product is<br />
returned <strong>to</strong> the place of purchase with proof of purchase date.<br />
The warranty does not cover improper installation, mis<strong>use</strong>, ab<strong>use</strong> or neglect<br />
on the part of the owner.<br />
Warranty is also invalid in any case that the product is taken apart, altered or<br />
serviced by an unauthorised repairer.<br />
Please keep <strong>your</strong> receipt as proof of purchase.<br />
To register <strong>your</strong> product please:<br />
•Visit www.sal<strong>to</strong>n.com.au/warranty OR<br />
•Fill in the warranty card below and send it <strong>to</strong> the address s<strong>how</strong>n on the back<br />
AUSTRALIAN CUSTOMER SERVICE<br />
Sal<strong>to</strong>n (Aust) Pty. Ltd.<br />
P.O. Box 683<br />
Braeside Vic<strong>to</strong>ria 3195<br />
Australia<br />
Freecall: 1800 427 842<br />
Hours: 9am - 5pm (EST) Mon - Fri<br />
CUSTOMER SERVICE<br />
8<br />
NEW ZEALAND CUSTOMER SERVICE<br />
Sal<strong>to</strong>n NZ Limited<br />
P.O. Box 300 201<br />
Albany, Auckland<br />
New Zealand<br />
Freecall: 0508 629 777<br />
Hours: 9am - 5pm Mon - Fri


