CONVECTION TOASTER OVEN - Russell Hobbs
CONVECTION TOASTER OVEN - Russell Hobbs
CONVECTION TOASTER OVEN - Russell Hobbs

You also want an ePaper? Increase the reach of your titles
YUMPU automatically turns print PDFs into web optimized ePapers that Google loves.
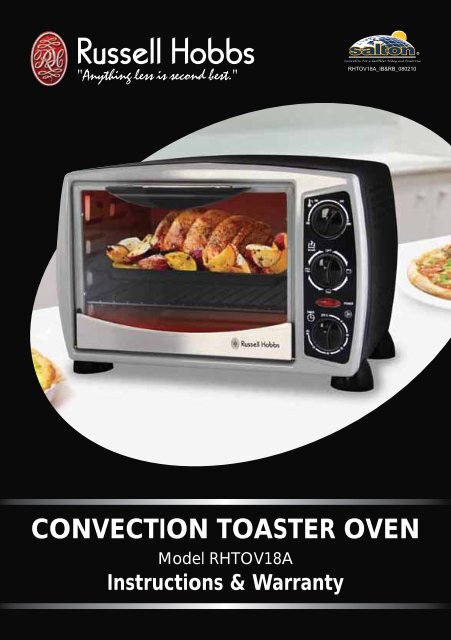
<strong>CONVECTION</strong> <strong>TOASTER</strong> <strong>OVEN</strong><br />
Model RHTOV18A<br />
Instructions & Warranty<br />
RHTOV18A_IB&RB_080210
Congratulations on the purchase of your <strong>Russell</strong> <strong>Hobbs</strong> toaster oven. Each unit is<br />
<br />
please read this instruction manual carefully and keep it for future reference. Pass it on if<br />
you pass on the toaster oven.<br />
<br />
<br />
IMPORTANT SAFEGUARDS<br />
1. To protect against electrical hazards do not immerse the power cord, plug or toaster oven<br />
in water or any other liquid.<br />
2. Do not use in the bathroom or near any source of water. Do not use outdoors.<br />
3. Always use the appliance's handles or use oven gloves as some parts may be hot. The temperature of<br />
accessible surfaces/parts may become very hot when the appliance is operating.<br />
4. This appliance is not intended for use by persons (including children) with reduced physical, sensory<br />
or mental capabilities, or lack of experience and knowledge, unless they have been given supervision or<br />
instruction concerning use of the appliance by a person responsible for their safety.<br />
5. This appliance is not a toy. Children should be supervised to ensure they do not play with the appliance.<br />
6. Always turn off and unplug from the power outlet and allow the oven to cool before cleaning.<br />
7. Do not operate this appliance with a damaged cord/plug or after the appliance has malfunctioned, or<br />
been dropped or damaged in any manner. Contact Customer Service for replacement, examination, repair<br />
or adjustment.<br />
8. There are no user serviceable parts. If power cord or appliance is damaged, it must be replaced by the<br />
manufacturer or similarly qualified person in order to avoid a hazard.<br />
9. Do not use on an inclined plane or unstable surface.<br />
10. Do not move the toaster oven while it is switched on.<br />
11. Do not cover the toaster oven when in use.<br />
12. Always take care when removing food items as they may be hot.<br />
13. Food may burn. Always monitor when using this appliance.<br />
14. Do not use the toaster oven near or below any curtains or other combustible materials.<br />
15. Do not cook food items too large for the toaster oven.<br />
16. Keep the toaster oven and the power cord away from the edge of table or countertops and out of reach of<br />
children and infirmed persons. Keep it at least 30cm away from other items when in use.<br />
17. To disconnect, set controls to OFF. Turn Off the wall power outlet, then grasp the plug and remove from<br />
wall power socket. Never pull by the cord.<br />
18. Toaster oven is hot after use. Oven gloves should be used when removing food items.<br />
19. Do not cook food wrapped in plastic film or polythene bags. It will cause a fire hazard.<br />
20. Do not place on or near any heat sources.<br />
21. Do not leave the toaster oven unattended when in use.<br />
22. Follow the instructions when cleaning this appliance.<br />
23. Do not use appliance for anything other than its intended purpose.<br />
24. Clean the toaster oven and crumb tray regularly. Failure to do so may cause a fire hazard.<br />
25. This appliance is not intended to be operated by means of an external timer or separate remote<br />
control system.<br />
26. Only use the accessories supplied with the toaster oven.<br />
SAVE THESE INSTRUCTIONS<br />
THIS APPLIANCE IS FOR HOUSEHOLD USE ONLY<br />
3
9<br />
8<br />
10<br />
1. Power Cord and Plug<br />
2. Timer Dial<br />
3. Mode Selector<br />
4. Indicator Light<br />
5. Temperature Select Dial<br />
6. Housing<br />
7 6<br />
4<br />
100<br />
°C150<br />
TIMER<br />
OFF-0<br />
Min.<br />
60<br />
MODE<br />
OFF<br />
40<br />
200<br />
10<br />
50 30<br />
250<br />
POWER<br />
11 1<br />
7. Door Handle<br />
8. Wire Rack<br />
9. Baking Tray<br />
10. Crumb tray<br />
11. Tray Handle<br />
20<br />
5<br />
3<br />
4<br />
2
Before Using your Toaster Oven for the First Time<br />
1. Read all of the instructions included in this manual.<br />
2. Make sure that the oven is unplugged and the mode and timer controls are in the<br />
"OFF" position.<br />
3. Wash all the accessories in hot soapy water.<br />
4. Thoroughly dry all accessories and re-assemble in oven.<br />
5. Plug the oven into a power outlet and switch the outlet on if it is switchable.<br />
6. Set the mode selector to . Set the temperature to maximum (250°) and set the timer for<br />
approximately 15 minutes to condition/cure the elements.<br />
7. Leave the oven door partly open to release odours. Ensure the room is well ventilated.<br />
NOTE: It is normal during this process for the new elements to give off some odour and a<br />
small amount of vapour.<br />
To Operate<br />
Important Note: For the toaster to operate you must select a cooking mode, set the<br />
temperature and set a cooking time using the timer.<br />
Pre-heating your Toaster Oven<br />
8. Generally you are not required to pre-heat the oven to cook.<br />
9. However, if you would like to pre-heat it or the recipe requires you to do so, select a cooking<br />
mode using the mode selector, turn the temperature select dial to the required<br />
temperature setting and set the timer control for 5 minutes. When the timer times out, the<br />
elements will switch off and the bell will sound letting you know the oven is ready to use.<br />
Using your Toaster Oven to Defrost Foods<br />
10. With the mode selector set to off, the oven can be used to assist or accelerate the defrosting<br />
times of frozen foods.<br />
11. Place the frozen food onto the tray and insert the tray into the desired position in the<br />
toaster oven.<br />
12. Turn the timer dial to the maximum time setting. The fan will run but the heating elements<br />
will remain off. The fan forced air circulating through the toaster oven will help reduce<br />
standing defrost times. The toaster oven also keeps your defrosting food in a clean, closed<br />
environment.<br />
How to Bake<br />
13. Pre-heat the oven if required.<br />
14. Turn the mode selector to position.<br />
15. Turn the temperature selector dial to the desired temperature.<br />
16. Place the removable tray or wire rack into the desired position in the toaster oven.<br />
17. Turn the timer dial to the desired cooking time.<br />
18. When finished, turn both the mode selector and the timer dial to the “0ff” position to<br />
switch the oven off.<br />
(Note: the bell will sound and elements will switch off when set cooking time has expired.)<br />
5
How to Toast<br />
19. Turn the mode selector to position.<br />
20. Turn the temperature selector dial to 250°C.<br />
21. Turn the timer dial to the desired cooking time allowing a minute or so for pre-heating.<br />
22. Place the food to be toasted onto the wire rack and close the door.<br />
23. When finished, turn both the mode selector and the timer dial to the “0ff” position to<br />
switch the oven off.<br />
24. The wire rack should be positioned in the middle of the oven for toasting.<br />
(Note: the bell will sound and elements will switch off when set cooking time has expired.)<br />
How to Grill<br />
25. Turn the mode selector to position.<br />
26. Turn the temperature selector dial to the desired temperature.<br />
27. Turn the timer dial to the desired cooking time allowing a minute or so for pre-heating.<br />
28. Insert the tray or wire rack to the highest position without your food touching the element.<br />
29. Keep the door partly open.<br />
30. When finished grilling, turn both the mode selector and the timer dial to the “0ff” position<br />
to switch the oven off.<br />
(Note: the bell will sound and elements will switch off when set cooking time has expired.)<br />
Cleaning<br />
31. It is important that you clean the entire appliance after each use to prevent an accumulation<br />
of grease and to avoid unpleasant odours.<br />
32. Do not immerse the appliance, power cord or plug in any liquid.<br />
33. Always allow the appliance to cool and unplug from the power outlet before cleaning.<br />
34. Remove the removable baking tray, wire shelf and crumb tray. These can be washed under<br />
warm water with detergent.<br />
35. Do not use any abrasive material or sharp utensils to clean the oven or any of its parts, such<br />
as the baking tray.<br />
36. If any food is baked onto the wire rack or baking tray, soak it in warm detergent water for 1<br />
hour before cleaning. Use a sponge or soft cleaning brush to remove stains.<br />
37. Clean the exterior with a damp cloth. Do not use any abrasive material or sharp utensils on<br />
the exterior of the toaster oven, it will damage the surface and finish.<br />
38. Let all the parts and surface dry thoroughly before using the appliance again.<br />
6
Limited 2 year warranty<br />
Nothing in this warranty or the instructions relating to the product excludes, restricts or otherwise<br />
affects your statutory rights under the Trade Practices Act 1974 and other relevant legislation.<br />
In addition to your statutory rights, Salton (Aust) Pty Ltd and Salton NZ Ltd (hereafter referred to as<br />
“Salton”) provide a LIMITED 2 YEAR WARRANTY for this product. Salton warrants this product free from<br />
defects in material and workmanship for two (2) years from the date of purchase. Within this warranty<br />
period Salton will repair or replace defective parts at no charge. Defective products may be returned<br />
to Salton or the place of purchase. Salton recommends you keep your receipt as proof of purchase. If<br />
distance prevents you from taking the product to the place of purchase, please call the Salton<br />
customer service department freecall within Australia 1800 427 842, or freecall within New Zealand<br />
0508 629 777.<br />
The warranty does not cover improper installation, misuse, abuse or neglect of the product. This<br />
warranty also does not cover any product taken apart, altered or serviced by an unauthorised repairer.<br />
Registration of your warranty card is not compulsory, but entitles you to receive these benefits:<br />
Information on special price offers and promotions,<br />
Notification of any issues concerning your product.<br />
To register your product please:<br />
isit www.salton.com.auwarranty R<br />
ill in the warranty card below and send it to the address shown on the back<br />
Limited 2 year warranty<br />
Received as a gift<br />
Prior experience with Salton<br />
Prior experience with <strong>Russell</strong> <strong>Hobbs</strong><br />
Recommendation of family/friend<br />
Recommendation of Salesperson<br />
Product features<br />
Salton reputation<br />
<strong>Russell</strong> <strong>Hobbs</strong> reputation<br />
7<br />
Ease of operation<br />
Seen in store<br />
Seen on television<br />
Seen in newspaper/magazine<br />
(email address must be supplied)<br />
RH_WC_250110<br />
In store demo<br />
Special offer