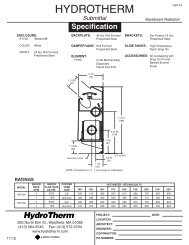
Boiler Manual
Boiler Manual
Boiler Manual

Create successful ePaper yourself
Turn your PDF publications into a flip-book with our unique Google optimized e-Paper software.
Cast Iron Condensing <strong>Boiler</strong>s – Installation <strong>Manual</strong><br />
CHECKING, ADJUSTMENT & OPERATION<br />
Spark Gap<br />
The gap has to be measured and adjusted with the<br />
igniter removed from the boiler. Observe the trial for<br />
ignition to confirm that the spark is strong and<br />
continuous. If not, allow the electrodes to cool. Check<br />
and adjust the spark gap as shown in Figure 19.<br />
Electrode tips should face slightly downward.<br />
Figure 19 - Spark Gap<br />
Table 10<br />
Recommended Electrode Insertion Depth<br />
Model DIM “A”<br />
KN-30 11 /2"<br />
KN-26 11 /2"<br />
KN-20 11 /2"<br />
KN-16 17 /8"<br />
KN-10 17 /8"<br />
KN-6 17 /8"<br />
Pilot Adjustment<br />
Verify the pilot pressure has been set within a range of<br />
2.5 in.- 3.5 in WC. To check the pilot pressure close the<br />
manual main shut-off valve and the pilot gas shut-off<br />
valve, (Figure 15). Remove the 1/8 in pipe plug from the<br />
pilot tee and connect a manometer having a minimum<br />
range of 6 in, 154 mm WC to it. Open the pilot gas shutoff<br />
valve. With the unit powered generate a call for heat.<br />
When the prepurge is complete the ignition/pilot trial will<br />
begin. At this point put the Honeywell 7895C<br />
test switch in the test position. The control will hold in<br />
the ignition/pilot sequence allowing you to check the<br />
pressure.<br />
To adjust the pilot the following steps must be<br />
taken:<br />
1. Remove the pilot gas pressure regulator cap.<br />
2. Turn the pressure regulator adjustment screw clockwise<br />
to increase the pressure and counterclockwise<br />
to decrease it.<br />
3. Replace the pressure regulator adjustment screw<br />
cap.<br />
Never force the regulator adjustment screw<br />
beyond the stop limits or damage to the<br />
regulator will occur!<br />
Figure 20 - Pilot Flame<br />
Pilot fl ame UV signal<br />
Before you check the pilot signal you need to make sure<br />
the polarity of the 120v supply to the ignition transformer<br />
is correct. To do this close the manual main shut-off<br />
valve 2 (Figure 17) and the manual pilot shut-off valve.<br />
With the unit powered generate a call for heat. The boiler<br />
will start to go through it start up sequence. During the<br />
ignition/pilot sequence observe the lights on the<br />
Honeywell 7895C. The pilot light should come on but not<br />
the fl ame light. If the fl ame light comes on along with<br />
the pilot light, interrupt the call for heat and turn off the<br />
main power. Reverse the 120v supply leads to the<br />
Honeywell 652B ignition transformer and run this test<br />
again. With this done the flame signal should be<br />
between 3vdc and 5vdc. Check the voltage on the test<br />
connections of the Honeywell 7895C's amplifi er with a<br />
dc voltmeter.<br />
27