

Troop Camp Basics Manual - Girl Scout Council - Appalachian
Troop Camp Basics Manual - Girl Scout Council - Appalachian
Troop Camp Basics Manual - Girl Scout Council - Appalachian

Create successful ePaper yourself
Turn your PDF publications into a flip-book with our unique Google optimized e-Paper software.
1<br />
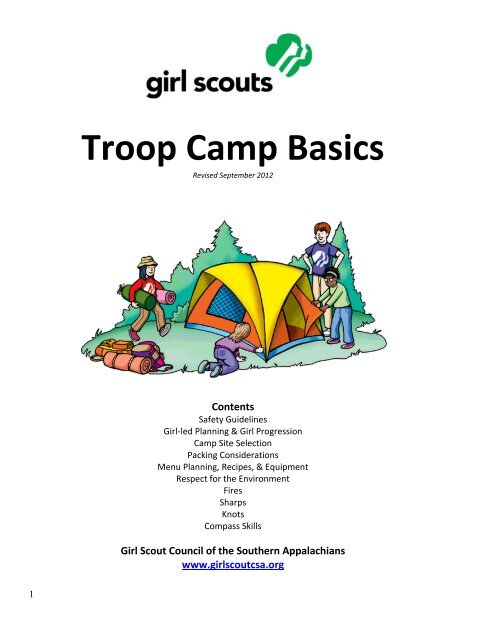
<strong>Troop</strong> <strong>Camp</strong> <strong>Basics</strong><br />
Revised September 2012<br />
Contents<br />
Safety Guidelines<br />
<strong>Girl</strong>-led Planning & <strong>Girl</strong> Progression<br />
<strong>Camp</strong> Site Selection<br />
Packing Considerations<br />
Menu Planning, Recipes, & Equipment<br />
Respect for the Environment<br />
Fires<br />
Sharps<br />
Knots<br />
Compass Skills<br />
<strong>Girl</strong> <strong>Scout</strong> <strong>Council</strong> of the Southern <strong>Appalachian</strong>s<br />
www.girlscoutcsa.org
<strong>Troop</strong> <strong>Camp</strong> <strong>Basics</strong> Part 1:<br />
3<br />
Safety Guidelines<br />
Contents<br />
Approaching Activities Safely<br />
Health Histories<br />
<strong>Camp</strong> and Travel Forms<br />
<strong>Girl</strong> <strong>Scout</strong> Activity Insurance<br />
Emergency Procedures<br />
Safety Activity Checkpoints – Group <strong>Camp</strong>ing<br />
Safety Activity Checkpoints – Hiking<br />
Safety Activity Checkpoints – Outdoor Cooking<br />
What to Do When Separated from the Group<br />
Weather<br />
Insects, Animals, Poisonous Plants, and Allergies<br />
Tool Craft Safety<br />
<strong>Girl</strong> <strong>Scout</strong> <strong>Council</strong> of the Southern <strong>Appalachian</strong>s<br />
www.girlscoutcsa.org
Approaching Activities Safely<br />
How can you, as a <strong>Girl</strong> <strong>Scout</strong> volunteer, determine whether an activity is safe and appropriate? Good<br />
judgment and common sense often dictate the answer. What is safe in one circumstance may not be safe in<br />
another. An incoming storm, for example, might force you to assess or discontinue an activity. If you are<br />
uncertain about the safety of an activity, call the council staff with full details and don’t proceed without<br />
approval. Err on the side of caution and make the safety of girls your most important consideration. Prior to<br />
any activity, read the specific Safety Activity Checkpoints related to any activity you plan to do with girls.<br />
When planning activities with girls, note the abilities of each girl and carefully consider the progression of skills<br />
from the easiest part to the most difficult. Make sure the complexity of the activity does not exceed girls’<br />
individual skills — bear in mind that skill levels decline when people are tired, hungry, or under stress. Also<br />
use activities as opportunities for building teamwork, which is one of the outcomes for the connect key in the<br />
<strong>Girl</strong> <strong>Scout</strong> Leadership Experience.<br />
Health Histories (Including Examinations and Immunizations)<br />
You are to maintain Health Histories and other necessary medical information records for your group. Please<br />
keep in mind that information from a health examination is confidential and may be shared only with people<br />
who must know this information (such as the girl herself, her parent/guardian, and a health practitioner).<br />
For various reasons, some parents/guardians may object to immunizations or medical examinations. <strong>Council</strong>s<br />
must attempt to make provisions for these girls to attend <strong>Girl</strong> <strong>Scout</strong> functions in a way that accommodates<br />
these concerns.<br />
It is important for you to also be aware of any medications a girl may take or allergies she may have.<br />
Medication, including over-the-counter products, must never be dispensed without prior written permission<br />
from a girl’s custodial parent or guardian. (Ask your council staff person if you need a form for this situation)<br />
Some girls may need to carry and administer their own medications, such as bronchial inhalers, an EpiPen, or<br />
diabetes medication.<br />
Common food allergies include dairy products, eggs, soy, wheat, peanuts, tree nuts, and seafood. This means<br />
that, before serving any food (such as peanut butter and jelly sandwiches, cookies, or chips), ask whether<br />
anyone is allergic to peanuts, dairy products, or wheat! <strong>Girl</strong> <strong>Scout</strong> Daisies and Brownies should be aware of<br />
their allergies, but double-checking with their parents/guardians is always a good idea.<br />
<strong>Camp</strong> and Travel Forms<br />
Day trips and limited overnights do not need council approval.<br />
The Application for Extended Travel and/or High Risk Activity Participation form must be completed for all<br />
travel lasting three or more nights, as well as any trips involving special equipment and/or activities not listed<br />
in the Safety Activity Checkpoints and/or activities with high risk. Applications are due in the council office a<br />
minimum of two months prior to a regional or national trip, or one year prior to an international trip. The<br />
application must be approved before girls proceed with further planning.<br />
4
<strong>Girl</strong> <strong>Scout</strong> Activity Insurance<br />
A portion of the individual annual membership dues pays for supplementary insurance for the member only.<br />
This insurance provides up to a specified maximum for medical expenses incurred as a result of an accident<br />
while a member is participating:<br />
● in an approved <strong>Girl</strong> <strong>Scout</strong> Activity<br />
● at a supervised <strong>Girl</strong> <strong>Scout</strong> activity<br />
● after the individual’s primary insurance pays out<br />
Non-registered parents, tagalongs (brothers, sisters, friends), and other persons are not covered by basic<br />
coverage. This is one reason all adults and girls should be registered members.<br />
This insurance coverage:<br />
● Is not intended to diminish the need for or replace family health insurance<br />
● Does not duplicate medical-expense benefits collected under other programs<br />
● After approximately $100 in benefits have been paid under this plan, the family’s medical insurance<br />
takes over<br />
● If there is no family insurance or healthcare program, a specified maximum of medical benefits is<br />
available<br />
A separate plan of activity insurance is available for purchase (at a relatively small price) for <strong>Girl</strong> <strong>Scout</strong>s taking<br />
extended trips and for non-members who participate in <strong>Girl</strong> <strong>Scout</strong> activities. These plans are secondary<br />
insurance that individuals are entitled to receive while participating in any approved supervised <strong>Girl</strong> <strong>Scout</strong><br />
activity. This type of insurance coverage is for any <strong>Girl</strong> <strong>Scout</strong> activity that involves non-<strong>Girl</strong> <strong>Scout</strong>s or lasts<br />
longer than three days and two nights. Contact the council staff to find out how to apply.<br />
Providing Emergency Care<br />
As you know, emergencies can happen. <strong>Girl</strong>s need to receive proper instruction in how to care for themselves<br />
and others in emergencies. There are great awards that address emergency preparedness. They also need to<br />
learn the importance of reporting to adults any accidents, illnesses, or unusual behaviors during <strong>Girl</strong> <strong>Scout</strong><br />
activities.<br />
To this end, you can help girls:<br />
● Know what to report. See “Procedures for Accidents” below.<br />
● Establish and practice procedures for weather emergencies. Certain extreme-weather conditions may<br />
occur in your area. Please consult with the council for the most relevant information for you to share<br />
with girls.<br />
● Establish and practice procedures for such circumstances as fire evacuation, lost persons, and buildingsecurity<br />
responses. Every girl and adult must know how to act in these situations. For example, you<br />
and the girls, with the help of a fire department representative, should design a fire evacuation plan for<br />
meeting places used by the group.<br />
● Assemble a well-stocked first-aid kit that is always accessible. First-aid administered in the first few<br />
minutes can mean the difference between life and death. In an emergency, secure professional<br />
medical assistance as soon as possible, normally by calling 911.<br />
5
Procedures for Accidents<br />
Although you hope the worst never happens, you must observe council procedures for handling accidents and<br />
fatalities.<br />
At the scene of an accident:<br />
● If a child needs emergency medical care as the result of an accident or injury, first contact emergency<br />
medical services, implement procedures learned in CPR and First Aid courses, and then follow council<br />
procedures for accidents and incidents.<br />
● Provide all possible care for the sick or injured person.<br />
● Follow established council procedures for obtaining medical assistance and immediately reporting the<br />
emergency. To do this, you must always have on hand:<br />
○ Names and telephone numbers of council staff<br />
○ Names and telephone numbers of parents/guardians<br />
○ Contact information for local emergency services such as the police, fire department, or<br />
hospital emergency technicians.<br />
○ Your region's Regional Emergency Contact Information<br />
● After receiving a report of an accident, council staff will arrange for additional assistance, if needed, at<br />
the scene, and will notify parents/guardians, as appropriate. Your adherence to these procedures is<br />
critical, especially with regard to notifying parents or guardians.<br />
● If the media is involved, ALWAYS let council-designated staff discuss the incident with these<br />
representatives.<br />
● In the event of a fatality or other serious accident, notify the police. A responsible adult must remain<br />
at the scene at all times.<br />
● In the case of a fatality, do not disturb the victim or surroundings. Follow police instructions. Do not<br />
share information about the accident with anyone but the police, the council, and, if applicable,<br />
insurance representatives or legal counsel.<br />
Regional Emergency <strong>Council</strong> Contact Information<br />
Remember, this number is for serious emergencies only. You are to use your knowledge gained in First Aid /<br />
CPR Training for less serious incidences. For less serious situations, be sure to contact your council staff person<br />
as soon as you can the next business day to inform them of the incident.<br />
All GSCSA Regions: (800) 474-1912<br />
6
Group <strong>Camp</strong>ing: Safety Activity Checkpoints<br />
<strong>Camp</strong>ing, a great <strong>Girl</strong> <strong>Scout</strong> tradition, is one of the very first activities that <strong>Girl</strong> <strong>Scout</strong>s founder Juliette Gordon Low<br />
encouraged for girls. The key to an enjoyable group-camping experience is being prepared by packing just enough gear,<br />
supplies, and clothing that are appropriate for the weather, sleeping situation, and cooking meals. <strong>Girl</strong> <strong>Scout</strong>s advocate<br />
for the Leave No Trace method of camping, which involves leaving a campground the way it exists in nature, free of<br />
garbage and human impact.<br />
Caution: <strong>Girl</strong>s are not allowed to use firearms unless 12 years and older and with council permission; girls are never<br />
allowed to hunt or go on high-altitude climbs. <strong>Girl</strong>s are also never allowed to ride all-terrain vehicles or motor bikes.<br />
<strong>Camp</strong>ing with <strong>Girl</strong> <strong>Scout</strong> Daisies: Under the leadership of an adult, a Daisy troop may participate in an occasional<br />
overnight camping experience. Daisies who have completed kindergarten may independently participate at day camp<br />
and in resident camp experiences lasting up to three nights. Daisies who have completed first grade may independently<br />
participate in resident camp experiences lasting four or more nights.<br />
Know where to camp. <strong>Girl</strong> <strong>Scout</strong> camps, public, private, state, and national parks and sites deemed appropriate by local<br />
and state authorities. Connect with your <strong>Girl</strong> <strong>Scout</strong> council for site suggestions and for information on using a noncouncil-owned<br />
site. Search for campground locations by location at Reserve America.<br />
Include girls with disabilities. Communicate with girls with disabilities and/or their caregivers to assess any needs and<br />
accommodations. Learn more about the resources and information that Global Explorers and Wilderness Inquiries<br />
provide to people with disabilities.<br />
<strong>Camp</strong>ing Gear<br />
Basic Gear<br />
7<br />
● Clothing and rain jacket or poncho that can be layered<br />
● Hat, gloves, and thermal underwear for cool temperatures<br />
● Socks with sturdy shoes, hiking boots, or sneakers (no sandals, clogs, flip-flops, or bare feet)<br />
● Waterproof sunscreen (SPF of at least 15)<br />
● Hat<br />
● Sunglasses<br />
● Towels and basic personal hygiene supplies (shampoo, soap, comb, and so on)<br />
● Daypack<br />
● Insect repellent<br />
Specialized Gear<br />
Flame-resistant tents or tarp (no plastic tents)<br />
Compass and map or map and global positioning system (GPS)<br />
Sleeping bag (rated for the anticipated temperature)<br />
Mosquito netting where necessary<br />
Cooking supplies (pots, pans, utensils, mess kit and dunk bag, and so on)<br />
Cooler for food storage<br />
Portable cook stoves and fuel whenever possible (to reduce the use of firewood)
8<br />
Flashlight and other battery-powered lights (no candles, kerosene lamps, portable cook stoves, heaters, or other<br />
open-flame devices are used inside tents)<br />
Lantern fueled by propane, butane, kerosene, or gas (for outdoor use)<br />
Water-purification kit<br />
Prepare for Group <strong>Camp</strong>ing<br />
Communicate with council and parents. Inform your <strong>Girl</strong> <strong>Scout</strong> council and girls’ parents/guardians about the<br />
activity, including details about safety precautions and any appropriate clothing or supplies that may be<br />
necessary. Follow council procedures for activity approval, certificates of insurance, and council guidelines about<br />
girls’ general health examinations. Make arrangements in advance for all transportation and confirm plans<br />
before departure.<br />
<strong>Girl</strong>s plan the activity. Keeping their grade-level abilities in mind, encourage girls to take proactive leadership<br />
roles in organizing details of the activity and to plan menus, rules for group living, and on-site activities.<br />
Obtain camping credentials. Ensure that the adult has been a part of council group or troop-camp learning on<br />
supervising group camping. Group camp education generally covers outdoor program activities, minimal-impact<br />
camping skills, safety procedures and standards, and methods of dealing with homesickness.<br />
Arrange for transportation and adult supervision. The recommended adult-to-girl ratios are two non-related<br />
adults (at least one of whom is female) to every:<br />
6 <strong>Girl</strong> <strong>Scout</strong> Daisies (See “<strong>Camp</strong>ing With <strong>Girl</strong> <strong>Scout</strong> Daisies” details in this checkpoint’s introduction)<br />
12 <strong>Girl</strong> <strong>Scout</strong> Brownies<br />
16 <strong>Girl</strong> <strong>Scout</strong> Juniors<br />
20 <strong>Girl</strong> <strong>Scout</strong> Cadettes<br />
24 <strong>Girl</strong> <strong>Scout</strong> Seniors<br />
24 <strong>Girl</strong> <strong>Scout</strong> Ambassadors<br />
Plus one adult to each additional:<br />
● 4 <strong>Girl</strong> <strong>Scout</strong> Daisies (See “<strong>Camp</strong>ing With <strong>Girl</strong> <strong>Scout</strong> Daisies” details in this checkpoint’s introduction)<br />
● 6 <strong>Girl</strong> <strong>Scout</strong> Brownies<br />
● 8 <strong>Girl</strong> <strong>Scout</strong> Juniors<br />
● 10 <strong>Girl</strong> <strong>Scout</strong> Cadettes<br />
● 12 <strong>Girl</strong> <strong>Scout</strong> Seniors<br />
● 12 <strong>Girl</strong> <strong>Scout</strong> Ambassadors<br />
Compile key contacts. Give an itinerary to a contact person at home; call the contact person upon departure<br />
and return. Create a list of girls’ parents/guardian contact information, telephone numbers for emergency<br />
services and police, and council contacts—keep on hand or post in an easily accessible location. Also know the<br />
location of the nearest landline telephone in case cellular phones do not receive reception.<br />
Ensure the safety of sleeping areas. Separate sleeping and bathroom facilities are provided for adult males;<br />
many councils make exceptions for girls’ fathers. Ensure the following:<br />
● Each participant has her own bed. Parent/guardian permission must be obtained if girls are to share a bed.<br />
● Adults and girls never share a bed.<br />
● It is not mandatory that an adult sleep in the sleeping area (tent, cabin, or designated area) with the girls. If an<br />
adult female does share the sleeping area, there should always be two unrelated adult females present.
9<br />
During family or “He and Me” events (in which girls share sleeping accommodations with males), ensure the<br />
details are clearly explained in parent/guardian permission slip.<br />
● <strong>Girl</strong>s share resources. Encourage girls to make a list of the gear and supplies, and determine what can be<br />
shared. Support girls in creating a checklist of group and personal equipment and distribute to group members.<br />
● Prepare for emergencies. Ensure the presence of a waterproof first-aid kit and a first-aider with a current<br />
certificate in First Aid, including Adult and Child CPR or CPR/AED, who is prepared to handle cases from<br />
extremes of temperature, such as heat exhaustion, heat stroke, frostbite, cold exposure, hypothermia, as well as<br />
sprains, fractures, and altitude sickness. If any part of the activity is located 60 minutes or more from emergency<br />
medical services, ensure the presence of a first-aider (level 2) with Wilderness and Remote First Aid. A vehicle is<br />
available or an ambulance is on call at all times to transport an injured or sick person. See Volunteer Essentials<br />
for information about first-aid standards and training.<br />
On the Day of Group <strong>Camp</strong>ing<br />
● Get a weather report. On the morning of the camping trip, check weather.com or other reliable weather<br />
sources to determine if conditions are appropriate. If severe weather conditions prevent the camping trip, be<br />
prepared with a backup plan or alternate activity. Write, review, and practice evacuation and emergency plans<br />
for severe weather with girls.<br />
● Use the buddy system. <strong>Girl</strong>s are divided into teams of two. Each girl chooses a buddy and is responsible for<br />
staying with her buddy at all times, warning her buddy of danger, giving her buddy immediate assistance if safe<br />
to do so, and seeking help when the situation warrants it. If someone in the group is injured, one person cares<br />
for the patient while two others seek help.<br />
● Respect the environment and keep campsite clean. Use the principles of minimal-impact camping described by<br />
Leave No Trace. Store garbage in insect- and animal-proof containers with plastic inner linings, and cover it<br />
securely when there is a campsite garbage-pickup service. When there is no garbage-pickup service, remove<br />
garbage from campsite in plastic bags and discard, as appropriate. Recycle whenever possible. Do not bury food;<br />
carry out garbage, grease, and fuel canisters. Do not remove natural materials such as leaves or branches.<br />
● Be prepared for primitive campsites. For sites that don’t have electric lights and toilet facilities, observe these<br />
standards:<br />
● Choose and set up campsite well before dark.<br />
● Use a previously established campsite if available.<br />
● Make sure the campsite is level and located at least 200 feet from all water sources and below tree line.<br />
● Avoid fragile mountain meadows and areas of wet soil.<br />
● Avoid camping under dead tree limbs.<br />
● Use existing fire rings if a fire is necessary.<br />
● If a latrine is not available, use individual cat holes—holes for human waste that are at least 200 feet<br />
away from the trail and known water sources—to dispose of human waste (visit www.lnt.org for more<br />
information).<br />
● Do dishwashing and personal bathing at least 200 feet away from water sources.<br />
● Store food well away from tents and out of reach of animals. Where necessary, hang food at least 10<br />
feet high from a rope stretched between two trees. If the site is in bear country, check with local<br />
authorities on precautions to take.<br />
● See that garbage, tampons, sanitary supplies, and toilet paper are carried out.
Group <strong>Camp</strong>ing Links<br />
10<br />
● American <strong>Camp</strong> Association: www.acacamps.org<br />
● Go <strong>Camp</strong>ing America: www.gocampingamerica.com<br />
● Leave No Trace: http://www.lnt.org<br />
● National <strong>Camp</strong> Association: www.summercamp.org<br />
Group <strong>Camp</strong>ing Know-How for <strong>Girl</strong>s<br />
● Create a camp kaper chart. Divvy up cooking duties and get creative about pre-planning outdoor meals.<br />
● Be ready with camp entertainment. Before you go camping, read about camping stories, songs, activities, and<br />
games.<br />
Group <strong>Camp</strong>ing Jargon<br />
● Kindling: Small pieces of dry wood used to start a campfire<br />
● Mummy bag: A sleeping bag that is tapered at the ends to reduce air space and to conserve heat
Hiking: Safety Activity Checkpoints<br />
Unlike short walks, hiking involves lengthy, cross-country walking trips and often requires sturdy boots to provide<br />
traction on rocks and unruly earth floors. With respect to the Leave No Trace philosophy, it’s important for hikers to<br />
leave trails as (or better than) they found them. Although the action of one hiker may not strongly affect the<br />
environment, the effects of large groups of hikers can degrade trails.<br />
Caution: <strong>Girl</strong>s are not allowed to use firearms unless 12 years and older and with council permission; girls are never<br />
allowed to hunt or go on high-altitude climbs. <strong>Girl</strong>s are also never allowed to ride all-terrain vehicles or motor bikes.<br />
Know where to hike. Connect with your <strong>Girl</strong> <strong>Scout</strong> council for site suggestions. Also, to locate hiking areas near U.S.<br />
metropolitan areas, visit localhikes.com.<br />
Include girls with disabilities. Communicate with girls with disabilities and/or their caregivers to assess any needs and<br />
accommodations. Contact national parks to inquire about their accommodations for people with disabilities, and learn<br />
more about the resources and information that Global Explorers and Wilderness Inquiries provide to people with<br />
disabilities.<br />
Hiking Gear<br />
Basic Gear<br />
11<br />
● Lightweight, layered clothing and outerwear appropriate for weather conditions<br />
● Rain jacket or poncho<br />
● Waterproof sunscreen (SPF of at least 15) and lip balm<br />
● Hat or bandana<br />
● Sunglasses<br />
● Water bottle or hydration pack (each girl carries at least one quart)<br />
● Nonperishable, high-energy foods such as fruits and nuts<br />
● Insect repellent<br />
● Flashlight<br />
● Whistle<br />
Specialized Gear<br />
● Day pack<br />
● Hiking/trail boots or footwear<br />
● Map and compass or map and global positioning system (GPS)<br />
● Pocket knife<br />
Prepare for Hiking<br />
● Communicate with council and parents. Inform your <strong>Girl</strong> <strong>Scout</strong> council and girls’ parents/guardians about the<br />
activity, including details about safety precautions and any appropriate clothing or supplies that may be<br />
necessary. Follow council procedures for activity approval, certificates of insurance, and council guidelines about<br />
girls’ general health examinations. Make arrangements in advance for all transportation and confirm plans<br />
before departure.
12<br />
● <strong>Girl</strong>s plan the activity. Keeping their grade-level abilities in mind, encourage girls to take proactive leadership<br />
roles in organizing details of the activity. Encourage girls to plan routes, activities, rules for group living, and<br />
guidelines for dealing with problems that may arise with other groups of hikers.<br />
● Arrange for transportation and adult supervision. Ensure that the hiking adult or instructor has experience in<br />
teaching hiking techniques and trip planning. Ensure that one adult is in front of the group of hikers, and the<br />
other is in the rear of each group, and that both are familiar with the area. The recommended adult-to-girl ratios<br />
are two non-related adults (at least one of whom is female) to every:<br />
● 6 <strong>Girl</strong> <strong>Scout</strong> Daisies<br />
● 12 <strong>Girl</strong> <strong>Scout</strong> Brownies<br />
● 16 <strong>Girl</strong> <strong>Scout</strong> Juniors<br />
● 20 <strong>Girl</strong> <strong>Scout</strong> Cadettes<br />
● 24 <strong>Girl</strong> <strong>Scout</strong> Seniors<br />
● 24 <strong>Girl</strong> <strong>Scout</strong> Ambassadors<br />
Plus one adult to each additional:<br />
● 4 <strong>Girl</strong> <strong>Scout</strong> Daisies<br />
● 6 <strong>Girl</strong> <strong>Scout</strong> Brownies<br />
● 8 <strong>Girl</strong> <strong>Scout</strong> Juniors<br />
● 10 <strong>Girl</strong> <strong>Scout</strong> Cadettes<br />
● 12 <strong>Girl</strong> <strong>Scout</strong> Seniors<br />
● 12 <strong>Girl</strong> <strong>Scout</strong> Ambassadors<br />
● Compile key contacts. Give an itinerary to a contact person at home; call the contact person upon departure<br />
and return. Create a list of girls’ parents/guardian contact information, telephone numbers for emergency<br />
services and police, and council contacts—keep on hand or post in an easily accessible location. Also know the<br />
location of the nearest landline telephone in case cellular phones do not receive reception.<br />
● <strong>Girl</strong>s share resources. Encourage girls to distribute a list of hiking gear and supplies, and to determine which<br />
resources can be shared.<br />
● Choose an appropriate hiking route. Terrain, mileage, and hiking time are known to the hikers in advance. Hikes<br />
are restricted to a reasonable length as determined by age, level of experience, nature of the terrain, physical<br />
condition of the hikers, disabilities, weather conditions, and time of day. The hiking pace always accommodates<br />
the slowest hiker.<br />
● Assess safety of hiking routes. The route is known to at least one of the adults or a report is obtained in advance<br />
to assess potential hazards such as poisonous plants, dangerous animals, unsafe drinking water, cliffs, and dropoffs.<br />
Ensure that a land-management or similar agency is contacted during the trip-planning stage to determine<br />
available routes and campsites, recommended group size, water quantity and quality, and permits needed.<br />
● Ensure that hikers have a comprehensive understanding of the trip. Group members are trained to be<br />
observant of the route, surroundings, and fatigue of individuals. Instruction is given on the safety rules for<br />
hiking, such as staying together in a group, recognizing poisonous plants and biting or stinging insects and ticks,<br />
respecting wild animals, and behaving effectively in emergencies. Ensure that girls know how to read maps, use<br />
a compass, navigate a route, and estimate distance.<br />
● Take safety precautions. Search-and-rescue procedures for missing persons are written out in advance,<br />
reviewed, and practiced by girls and adults. Methods of communication with sources of emergency care, such as<br />
hospitals, and park and fire officials, are known and arranged in advance.
13<br />
● Prepare for emergencies. Ensure the presence of a waterproof first-aid kit and a first-aider with a current<br />
certificate in First Aid, including Adult and Child CPR or CPR/AED, who is prepared to handle cases from<br />
extremes of temperature, such as heat exhaustion, heat stroke, frostbite, cold exposure, hypothermia, as well as<br />
sprains, fractures, insect stings, tick bites, snake bites, sunburn, and altitude sickness; a first-aider (level 2) with<br />
Wilderness and Remote First Aid is present for hikes of 10 miles or more and away from emergency assistance. If<br />
feasible, a vehicle is available to transport an injured or sick person. See Volunteer Essentials for information<br />
about first-aid standards and training.<br />
On the Day of Hiking<br />
● Get a weather report. On the morning of the camping trip, check weather.com or other reliable weather<br />
sources to determine if conditions are appropriate. If severe weather conditions prevent the hiking activity, be<br />
prepared with a backup plan or alternate activity. Write, review, and practice evacuation and emergency plans<br />
for severe weather with girls.<br />
● Use the buddy system. <strong>Girl</strong>s are divided into teams of two. Each girl chooses a buddy and is responsible for<br />
staying with her buddy at all times, warning her buddy of danger, giving her buddy immediate assistance if safe<br />
to do so, and seeking help when the situation warrants it. If someone in the group is injured, one person cares<br />
for the patient while two others seek help.<br />
● Respect the environment and keep trails clean. Use the principles of minimal-impact camping. Store garbage in<br />
insect- and animal-proof containers with plastic inner linings, and cover it securely when there is a campsite<br />
garbage-pickup service. When there is no garbage-pickup service, remove garbage from campsite in plastic bags<br />
and discard, as appropriate. Recycle whenever possible. Do not bury food; carry out grease and fuel canisters.<br />
Do not remove natural materials such as leaves or branches. In addition, avoid eating wild foods, walking on or<br />
uprooting plants, interfering with or feeding wild animals, and littering.<br />
● Practice safe hiking. Instructions are given on the safety rules for hiking, which include forbidding hiking off-trail<br />
and after dusk. <strong>Girl</strong>s stay on the pathway to avoid trampling trailside plants and causing erosion. In addition,<br />
take adequate rest periods, with time to replenish fluids and eat high-energy food (such as fruits and nuts).<br />
Hiking Links<br />
● American Hiking Society: www.americanhiking.org<br />
● <strong>Appalachian</strong> Mountain Club: www.outdoors.org<br />
● <strong>Appalachian</strong> Trail Conference: www.atconf.org<br />
● Leave No Trace: www.lnt.org<br />
Hiking Know-How for <strong>Girl</strong>s<br />
● Practice with maps and a compass. Before heading out on a lengthy hike, learn how to read a map and use a<br />
compass. Look at a map to understand where you started, and where you plan to finish. What do you anticipate<br />
you’ll see during your hike?<br />
● Learn about regional nature. What flowers, trees, insects are unique to the area you’re hiking in?<br />
Hiking Jargon<br />
● Blaze: A mark, often on a tree, that indicates a trail’s route; most often, the blaze is painted with a bright color
14<br />
● Hot spot: A place on the foot that is sore as a result of a shoe’s rubbing and irritation, and where a blister will<br />
form; use moleskin to make a doughnut shape around the hot spot to prevent blisters<br />
Outdoor Cooking: Safety Activity Checkpoints<br />
Historically, wood fires were the primary source of heat for camp cooking, but the practice of cooking with large fires is<br />
no longer recommended, because of the detrimental effects on camping areas. Instead, use an established fire pit to<br />
ignite a small fire, or use alternative cooking methods such as a portable cook stove (electric or fuel-based). When<br />
cooking outdoors, it’s important to pack the appropriate amount of food for the group, so as to avoid discarding unused<br />
food. To properly plan food supplies, consider the activities you’ll be participating in, keeping in mind that girls will burn<br />
more calories and hence need to eat more when participating in rigorous activities. Also, more calories are needed<br />
during cold weather. Extensive outdoor cooking is not recommended for <strong>Girl</strong> <strong>Scout</strong> Daisies, but a less extensive activity,<br />
such as roasting marshmallows, is appropriate.<br />
Know where to cook outdoors. Preferably at campsites with designated fire-pit areas. Connect with your <strong>Girl</strong> <strong>Scout</strong><br />
council for site suggestions.<br />
Include girls with disabilities. Communicate with girls with disabilities and/or their caregivers to assess any needs and<br />
accommodations. Learn more about the resources and information that Global Explorers and Wilderness Inquiry provide<br />
to people with disabilities.<br />
Outdoor Cooking Gear<br />
Basic Gear<br />
● Pots and pans<br />
● Portable water for drinking, cooking, and cleaning<br />
● Biodegradable dishwashing soap<br />
● Pot scrubber<br />
● Hand sanitizer or soap and paper towels<br />
● Mess kit with nonbreakable plates, bowls, mugs, and cutlery in dunk bag<br />
● Knives<br />
● Containers to store leftover food<br />
● Can opener<br />
● No plastic garments, such as ponchos, are worn around open flame<br />
● Rubber band, barrette, or bandana to tie back hair<br />
Specialized Gear<br />
● Firefighting equipment, including fire extinguisher, water, loose soil or sand, and a shovel and rake<br />
● Portable cook stove and fuel<br />
● Long-handled cooking utensils such as ladles<br />
● Pot holders and/or insulated gloves<br />
● Insulated cooler and ice for food storage<br />
● Water purification method (tablets or filter), if needed
Prepare for Outdoor Cooking<br />
15<br />
● Communicate with council and parents. Inform your <strong>Girl</strong> <strong>Scout</strong> council and girls’ parents/guardians about the<br />
activity, including details about safety precautions and any appropriate clothing or supplies that may be<br />
necessary. Follow council procedures for activity approval, certificates of insurance, and council guidelines about<br />
girls’ general health examinations. Make arrangements in advance for all transportation and confirm plans<br />
before departure.<br />
● <strong>Girl</strong>s plan the activity. Keeping their grade-level abilities in mind, encourage girls to take proactive leadership<br />
roles in organizing details of the activity.<br />
● Arrange for transportation and adult supervision. The adult supervising the outdoor cooking has taken council<br />
learning opportunities. The recommended adult-to-girl ratios are two non-related adults (at least one of whom<br />
is female) to every:<br />
● 6 <strong>Girl</strong> <strong>Scout</strong> Daisies (non-extensive cooking activities only)<br />
● 12 <strong>Girl</strong> <strong>Scout</strong> Brownies<br />
● 16 <strong>Girl</strong> <strong>Scout</strong> Juniors<br />
● 20 <strong>Girl</strong> <strong>Scout</strong> Cadettes<br />
● 24 <strong>Girl</strong> <strong>Scout</strong> Seniors<br />
● 24 <strong>Girl</strong> <strong>Scout</strong> Ambassadors<br />
Plus one adult to each additional:<br />
● 4 <strong>Girl</strong> <strong>Scout</strong> Daisies (non-extensive cooking activities only)<br />
● 6 <strong>Girl</strong> <strong>Scout</strong> Brownies<br />
● 8 <strong>Girl</strong> <strong>Scout</strong> Juniors<br />
● 10 <strong>Girl</strong> <strong>Scout</strong> Cadettes<br />
● 12 <strong>Girl</strong> <strong>Scout</strong> Seniors<br />
● 12 <strong>Girl</strong> <strong>Scout</strong> Ambassadors<br />
● Compile key contacts. Give an itinerary to a contact person at home; call the contact person upon departure<br />
and return. Create a list of girls’ parents/guardian contact information, telephone numbers for emergency<br />
services and police, and council contacts—keep on hand or post in an easily accessible location.<br />
● Consult with council about permits where necessary, and prepare for fire safety. Connect with your <strong>Girl</strong> <strong>Scout</strong><br />
council to inquire about permits with the local fire district, land-management agency, or conservation office.<br />
Fires are not permitted when there is excessive dryness or wind. The adult volunteer also checks the fire index<br />
with local authorities. Local air-pollution regulations are followed.<br />
● <strong>Girl</strong>s share resources. Support girls in creating a checklist of group and personal equipment and distribute to<br />
group members. <strong>Girl</strong>s learn to use a variety of cooking methods, including use of wood fire, propane, butane,<br />
and gas stoves, charcoal, canned heat, and solar energy. Repackage all food to minimize waste and the amount<br />
of garbage that needs to be removed from the campsite.<br />
● Be prepared for primitive campsites. If cooking in primitive areas with little to no modern conveniences,<br />
observe these standards:<br />
● Choose and set up campsite well before dark.<br />
● Use a previously established campsite if available.<br />
● Make sure the campsite is level and located at least 200 feet from all water sources and below tree line.<br />
● Avoid fragile mountain meadows and areas of wet soil.<br />
● Avoid camping under dead tree limbs.<br />
● Use existing fire rings if a fire is necessary.
16<br />
● If a latrine is not available, use individual cat holes—holes for human waste that are at least 200 feet<br />
away from the trail and known water sources—to dispose of human waste (visit www.lnt.org for more<br />
information).<br />
● Do dishwashing and personal bathing at least 200 feet away from water sources.<br />
● Store food well away from tents and out of reach of animals. Where necessary, hang food at least 10<br />
feet high from a rope stretched between two trees. If the site is in bear country, check with local<br />
authorities on precautions to take.<br />
● See that garbage, tampons, sanitary supplies, and toilet paper are carried out.<br />
● Take safety precautions. Fire-safety rules, emergency procedures, and first aid for burns are reviewed with the<br />
group and understood. Procedures are established and known in advance for notifying the fire department or<br />
land-management agency officials in case of a fire. Fire drills are practiced at each site.<br />
● Prepare for emergencies. Ensure the presence of a waterproof first-aid kit and a first-aider with a current<br />
certificate in First Aid, including Adult and Child CPR or CPR/AED, who is prepared to handle burns and other<br />
injuries related to the location, including extremes of temperature, such as heat exhaustion, heat stroke,<br />
frostbite, cold exposure, hypothermia, as well as sprains, fractures, and sunburn. If any part of the activity is<br />
located 60 minutes or more from emergency medical services, ensure the presence of a first-aider (level 2) with<br />
Wilderness and Remote First Aid. If feasible, a vehicle is available to transport an injured or sick person. See<br />
Volunteer Essentials for information about first-aid standards and training.<br />
On the Day of Outdoor Cooking<br />
● Get a weather report. On the morning of the outdoor cooking activity, check weather.com or other reliable<br />
weather sources to determine if conditions are appropriate. If severe weather conditions prevent the cooking<br />
activity, be prepared with a backup plan or alternate activity. Write, review, and practice evacuation and<br />
emergency plans for severe weather with girls.<br />
● Use the buddy system. <strong>Girl</strong>s are divided into teams of two. Each girl chooses a buddy and is responsible for<br />
staying with her buddy at all times, warning her buddy of danger, giving her buddy immediate assistance if safe<br />
to do so, and seeking help when the situation warrants it. If someone in the group is injured, one person cares<br />
for the patient while two others seek help.<br />
● Respect the environment and keep site clean. Use the principles of minimal-impact camping. Store garbage in<br />
insect- and animal-proof containers with plastic inner linings, and cover it securely when there is a campsite<br />
garbage-pickup service. When there is no garbage-pickup service, remove garbage from campsite in plastic bags<br />
and discard, as appropriate. Recycle whenever possible. Do not bury food; carry out grease and fuel canisters.<br />
Do not remove natural materials, such as leaves or branches.<br />
Tips for Cooking with Cook Stoves and Open Fires<br />
● Prepare for safe usage of portable cook stoves. Portable cook stoves differ in size and in fuel use. Follow the<br />
manufacturer’s instructions carefully, and closely supervise the girls when using any stove. Take an adequate<br />
amount of fuel, and store the extra fuel supply away from the cooking flame. Never use portable cook stoves<br />
inside a tent. Keep all stove parts clean. Check that lines and burners are not clogged. Do not refuel the cook<br />
stove or change canisters near an open flame. Take care not to spill fuel; if fuel does spill, relocate the stove<br />
before lighting it. Place portable cook stoves in safe, level, and stable positions, shielded from the wind and<br />
away from foot traffic. Do not pile rocks or other items around the cook stove for stability. Do not overheat the<br />
fuel tank. Use pots of appropriate size, so that the stove is not top-heavy. Do not dispose of pressurized cans in a
17<br />
fire, leave them in direct sunlight, or keep them in enclosed areas where the temperature is high. See the<br />
manufacturer’s instructions on the label. Store and dispose of fuel canisters in the recommended manner. Be<br />
sure to check with local authorities to make sure cook stoves are permitted during times of extreme fire danger.<br />
● Cook safely with solar stoves. If using solar cookware, remember that pots and food inside a solar oven are hot<br />
even if the stove does not feel hot. Use insulated gloves when removing pots and opening the lid.<br />
● Practice safe cooking with open fire. If cooking over open flames, build fires in designated areas, and avoid<br />
establishing new fire sites. An established fire site is clear of overhanging branches, steep slopes, rotted stumps<br />
or logs, dry grass and leaves, and cleared of any burnable material, such as litter, duff, or pine needles. Where<br />
wood gathering is permitted, use only dead, fallen wood, and keep the cooking fires small. Store wood away<br />
from the fire area. Watch for flying sparks and put them out immediately. Before leaving the site, check that the<br />
fire is completely out by sprinkling the fire with water or smothering it with earth or sand, stirring, and then<br />
sprinkling or smothering again; finally, hold hands on coals, ashes, partially burned wood, or charcoal for one<br />
minute to ensure it is cool to the touch. Make a plan for disposing of cold ashes and partially burned wood. You<br />
may scatter ashes and burned wood throughout the woods away from the campsite. Do not put ashes and<br />
burned wood in a plastic pail; do not leave a pail with ashes or burned wood against the side of a building or on<br />
a wood deck. Obtain wood from local sources to avoid bringing pests and diseases from one location to another.<br />
● Practice safe cooking with charcoal fires. If using charcoal, fires are started with fuels explicitly labeled as<br />
“charcoal starters”—never use gasoline as a fire starter. Never add charcoal lighter fluid to a fire once it has<br />
started.<br />
Tips for Food Preparation and Storage<br />
● Prepare nutritious meals. Meals are prepared with consideration of food allergies, religious beliefs, and dietary<br />
restrictions (such as vegetarianism and veganism) of group members. Whenever possible, buy food and supplies<br />
that avoid excess packaging, and buy in bulk. Review health considerations, including the importance of keeping<br />
utensils and food preparation surfaces sanitized, cleaning hands, cooking meats thoroughly, refrigerating<br />
perishables, and using clean water when preparing food. Do not use chipped or cracked cups and plates.<br />
● Cook with caution. <strong>Girl</strong>s learn about the safe use of kitchen tools and equipment, including knives. Maintain<br />
discipline in the cooking area to prevent accidents with hot food and sharp utensils. Do not overfill cooking pots,<br />
and do not use pressurized cans, soda-can stoves, or plastic basins, bottles, and cooking utensils near an open<br />
flame.<br />
● Avoid spreading germs. Each person has an individual drinking cup. Cooks roll up long sleeves and tie back long<br />
hair. Wash hands before food preparation and eating. No person with a skin infection, a cold, or a<br />
communicable disease participates in food preparation.<br />
● Keep perishables cool. Store perishables such as creamed dishes, dairy products, meats, and salads at or below<br />
45 degrees Fahrenheit in a refrigerator or insulated cooler with ice. If this will not be possible, use powdered,<br />
dehydrated, freeze-dried, or canned foods. On extended trips, do not use foods requiring refrigeration. Use safe<br />
drinking water (see the “Water Purification Tips”) to reconstitute powdered, dehydrated, or freeze-dried food.<br />
Once reconstituted, eat perishable items within one hour or refrigerate them.<br />
Water Purification Tips<br />
● Access a safe drinking water supply for cooking, drinking, and personal use. Safe drinking water is defined as<br />
tap water tested and approved by the local health department. All other sources are considered potentially<br />
contaminated and must be purified before use. Giardia lamblia (a parasite) is suspected in all surface water<br />
supplies.
18<br />
● Use one of the three water-purification methods. First, strain water through a clean cloth into a clean container<br />
to remove sediment, and then choose one of the following methods:<br />
● Boil water rapidly for a full minute and let cool.<br />
● Disinfect water with water-purification tablets, following the manufacturer’s instructions. Check the<br />
product’s shelf life to make sure it has not expired.<br />
● Pour water through a water purifier or specially designed water-filtration device that removes Giardia.<br />
These filters will also remove many other contaminants. Follow the manufacturer’s instructions<br />
carefully.<br />
● Important note: These methods will not remove chemical pollutants. In addition, only boiling the water<br />
or pouring it through a specially designed filter will remove Giardia lamblia.<br />
Dishwashing Tips<br />
● Wash dishes in a prescribed area according to this procedure:<br />
● Remove food particles from utensils and dishes.<br />
● Wash dishes in warm, soapy water.<br />
● Rinse dishes in hot, clear water.<br />
● Sanitize dishes by dipping in clear, boiling water or immersing for at least two minutes in a sanitizing<br />
solution approved by the local health department. Use long-handled utensil, tongs, or tool to remove<br />
sanitized dishes. (1 tablespoon of bleach per 1 gallon of cold clean water)<br />
● Air-dry and store dishes in a clean, covered area.<br />
● Dispose of dishwashing and rinse water according to the campsite regulations. In backcountry areas,<br />
scatter wastewater on the ground at least 200 feet beyond any water source or trail.<br />
Outdoor Cooking Links<br />
● OutdoorCook.com: www.outdoorcook.com<br />
● Leave No Trace: www.lnt.org<br />
Outdoor Cooking Know-How for <strong>Girl</strong>s<br />
● Learn how to start a fire without matches. What are the ways that you can get a fire going without using<br />
matches or a lighter? Read camping how-to books or online sources to learn how.<br />
● Plan outdoor recipes. Vote for your favorite meals and plan how to cook them outdoors. For additional outdoor<br />
recipe ideas, read Discover the Outdoors, netwoods.com, and outdoorcook.com.<br />
Outdoor Cooking Jargon<br />
● Dunk kit: A mesh bag used to hold dirty dishes; the bag is dunked into hot water or chlorine solution and then<br />
hung to dry with clean, sterilized dishes inside<br />
● Dutch oven: A cooking kettle used for baking in an open fire (do not use soap on cast iron)
What to Do If You Get Lost or Separated From the Group<br />
Everyone needs to safeguard against getting lost. Carrying a whistle is a good practice, as three blasts of a<br />
whistle is considered as a universal distress signal. The “Hug-a-Tree” program is an excellent prevention<br />
training for you and your girls.<br />
In the event that buddies get lost or separated from the group and become disoriented, the best thing is for<br />
them to do is STOP and try not to panic. They should:<br />
● Sit down and evaluate the circumstances.<br />
● Try to determine the last location where they knew where they were.<br />
● Orient themselves to the landscape by using a map (if they have one) or try to recognize familiar<br />
landmarks such as large boulders or a fallen tree.<br />
● Listen carefully for noises, such as traffic or barking dogs that could lead them to a road. Sounds of<br />
moving water can lead to a river. Walking parallel to the river can be another way to reach a road.<br />
● Make sure there is sufficient daylight to walk to the nearest trail, road, or campsite to obtain helps.<br />
If the buddies cannot figure out where they are or need to go, moving about will waste energy and will<br />
confuse them even more. In that case, buddies should:<br />
● Sit down and conserve energy.<br />
● Find shelter to keep warm and dry as possible and out of the wind. (Make sure the shelter is not home<br />
to potentially dangerous animals or insects and leave some sort of sign, such as a piece of clothing,<br />
outside of the shelter to alert searchers).<br />
● Find water (treat surface water before drinking by boiling, filtering or using chemical purifiers) or<br />
collect water from wet vegetation.<br />
● Build a fire, if matches are available and the danger of a fire spreading out of control is low.<br />
● Devise as many ways as possible to attract the attention of those searching for them. For example:<br />
● Tie a piece of brightly colored cloth to a high branch or rock.<br />
● Flash a mirror or other reflective surface at any passing aircraft.<br />
● Make a smoky fire in a safe, open place.<br />
● Draw large signs on the ground that could be seen from the air.<br />
● Stay in the area. Don’t wander.<br />
● Yell or whistle if someone is heard nearby.<br />
If a camper does become missing for more than an hour, notify authorities, and follow crisis communications<br />
procedures. Be sure to notify everyone concerned when the camper is found.<br />
19
How to Predict the Weather without a Forecast<br />
(Source: http://www.wikihow.com/Predict-the-Weather-Without-a-Forecast)<br />
Long before technology was developed to predict the weather, people had to rely on observation, patterns<br />
and folklore to avoid being caught off guard by the elements. If your plans, livelihood or even your survival<br />
depend on the weather, it certainly wouldn't hurt to become familiar with some of these methods, especially<br />
since you never know when you might be out of touch with the local weather report. These methods aren't<br />
foolproof, but they have their usefulness, and if you don't have a forecast on hand, what do you have to lose<br />
by trying them?<br />
● Check the grass for dew at sunrise. If the grass is dry, this indicates clouds or strong breezes, which can<br />
mean rain. If there's dew, it probably won't rain that day. However, if it rained during the night, this<br />
method will not be reliable.<br />
● Remember the rhyme: "Red sky at night, sailor's delight; Red sky at morning, sailors take warning." Look<br />
for any sign of red in the sky (not a red sun); it will not be a bold orange or red the majority of the time,<br />
but that depends a little on where you live.<br />
○ If you see a red sky during sunset (when you're looking to the west), there is a high pressure system<br />
with dry air that is stirring dust particles in the air, causing the sky to look red. Since prevailing front<br />
movements and jet streams weather usually move from west to east (see Tips), the dry air is heading<br />
towards you.<br />
○ A red sky in the morning (in the East, where the sun rises) means that the dry air has already moved<br />
past you, and what follows behind it (on its way towards you) is a low pressure system that carries<br />
moisture.<br />
● Look for a rainbow in the west. This is the result of the rising sun's morning rays from the east striking<br />
moisture in the west. Most major storm fronts travel west to east, and a rainbow in the west means<br />
20
moisture, which can mean rain is on its way. On the other hand, a rainbow in the east around sunset<br />
means that the rain is on its way out and you can look forward to sunny days. Remember: Rainbow in the<br />
morning, need for a warning.<br />
● Detect which direction the wind is blowing. If unable to immediately detect the wind's direction, throw a<br />
small piece of grass in to the air and watch its descent. Easterly winds can indicate an approaching storm<br />
front, westerly winds the opposite. Strong winds indicate high pressure differences, which can be a sign of<br />
advancing storm fronts. Deciduous trees show the undersides of their leaves during unusual winds,<br />
supposedly because they grow in a way that keeps them right-side up during typical prevalent winds.<br />
● Take a deep breath. Close your eyes and smell the air.<br />
○ Plants release their waste in a low pressure atmosphere, generating a smell like compost and<br />
indicating an upcoming rain.<br />
○ Swamps will release methane just before a storm because of the lower pressure, which leads to<br />
unpleasant smells.<br />
○ A proverb says "Flowers smell best just before a rain." Scents are stronger in moist air, associated with<br />
rainy weather.<br />
● Check for humidity. Many people can feel humidity, especially in their hair (it curls up and gets frizzy). You<br />
can also look at the leaves of oak or maple trees. These leaves tend to curl in high humidity, which tends to<br />
precede a heavy rain. Pine cone scales remain closed if the humidity is high, but open in dry air. Under<br />
humid conditions, wood swells (look out for those sticky doors) and salt clumps (is that shaker working<br />
well?).<br />
● Watch the clouds.<br />
○ Clouds going in different directions (e.g. one layer going west, another layer going north) - bad weather<br />
coming, probably hail<br />
21<br />
○ Cumulonimbus clouds early in the day and developing throughout the day - greater chances of severe<br />
weather<br />
○ Mammatus cloud (formed by sinking air) - thunderstorm is dissipating (not forming)
22<br />
○ Cirrus clouds high in the sky like long streamers - bad weather within the next 36 hours<br />
○ Altocumulus clouds like mackerel scales - bad weather within the next 36 hours. The old sailor's saying<br />
for these types of clouds is "Mares tails and mackerel scales, tall ships carry short sails."<br />
○ Cloud cover on a winter night - expect warmer weather because clouds prevent heat radiation that<br />
would lower the temperature on a clear night.<br />
○ Cumulus towers (cumulus castellanus) - possibility of showers later in the day.<br />
● Observe animals. They are more likely to react to changes in air pressure than we are.<br />
○ If birds are flying high in the sky, there will probably be fair weather. (Falling air pressure caused by an<br />
imminent storm causes discomfort in birds' ears, so they fly low to alleviate it. Large numbers of birds<br />
roosting on power lines indicates swiftly falling air pressure.)<br />
○ Seagulls tend to stop flying and take refuge at the coast if a storm is coming.<br />
○ Animals, especially birds, get quiet immediately before it rains.<br />
○ Cows will typically lie down before a thunderstorm. They also tend to stay close together if bad<br />
weather's on the way.<br />
○ Ants build their hills with very steep sides just before a rain.<br />
○ Cats tend to clean behind their ears before a rain.<br />
○ Turtles often search for higher ground when a large amount of rain is expected. You will often see<br />
them in the road during this period (1 to 2 days before the rain).<br />
● Make a campfire. The smoke should rise steadily. Smoke that swirls and descends is caused by low<br />
pressure (i.e. rain on the way).
● Look at the moon during the night. If it is reddish or pale, dust is in the air. But if the moon is bright and<br />
sharply focused, it's probably because low pressure has cleared out the dust, and low pressure means rain.<br />
Also, a ring around the moon (caused by light shining through cirrostratus clouds associated with warm<br />
fronts and moisture) can indicate that rain will probably fall within the next three days. Remember: Circle<br />
around the moon, rain or snow soon.<br />
● Look for pine cones Pine trees are an excellent indicator of the overall harshness of the coming winter. In<br />
fall, look to the pine trees in your area and note if the cones are high on the tree or low. Low hanging<br />
cones indicate a mild winter.<br />
Emergency Procedures for Tent <strong>Camp</strong>ing During a Tornado<br />
When you take a trek out into the backcountry, your goal is to get away from man-made structures and bond<br />
with nature. If you find yourself faced with severe weather - especially a tornado, it can be challenging to find<br />
a safe zone when in the wilderness or open plains. Even if you are far away from buildings that contain cut<br />
wood and metal, a tornado can still inflict damage and carry debris - including rocks, trees and dirt.<br />
Always look for the lowest possible ground area to take shelter; this includes ditches, culverts and river banks.<br />
You can also take cover in caves or along one side of a large boulder or rock. When you find the lowest<br />
possible location, be sure to lie flat on your stomach and cover your hands over your head for protection.<br />
23
Emergency Procedures When Spotting a Bear<br />
Content in this section is most applicable to groups camping in Northeast Tennessee<br />
<strong>Troop</strong> Leaders will notify TWRA (TN Wildlife Resources Agency) immediately:<br />
If an aggressive bear is spotted<br />
If a bear is spotted getting into food or trash<br />
Contact TWRA in an emergency situation from 7:00 a.m. – midnight:<br />
Dial 1-800-332-0900<br />
When prompted enter 105 for Dispatcher<br />
After midnight contact the Sullivan County Sheriff’s Department – 423-279-7600 (only applicable to groups<br />
camping in Sullivan County)<br />
<strong>Troop</strong> leaders will contact <strong>Council</strong> by calling the emergency number if TWRA or Sullivan County Sheriff’s<br />
Department is called.<br />
Non-emergency procedures:<br />
<strong>Troop</strong> Leaders will notify <strong>Council</strong> in a non-emergency situation, such as:<br />
Bears continually seen in one general location.<br />
Mother with cubs is spotted.<br />
What to do when you spot a bear<br />
● Make noises --- air horns, clapping, singing, yelling, etc<br />
● Walk backwards away from bear<br />
● DO NOT RUN!!!!<br />
● Do not use direct eye contact, as bears see this as aggression<br />
● Make sure to use the Buddy System at all times.<br />
Black bear attacks are extremely rare; however, if you are attacked by a black bear, DO NOT play dead, fight<br />
back.<br />
24
26<br />
995-2007 The Nemours Foundation. All rights reserved.<br />
KidsHealth<br />
www.KidsHealth.org<br />
©1
©1995-2007 The Nemours Foundation. All rights reserved.<br />
28<br />
KidsHealth<br />
www.KidsHealth.org
<strong>Troop</strong> <strong>Camp</strong> <strong>Basics</strong> Part 2:<br />
<strong>Girl</strong>-led Planning & Progression<br />
31<br />
Contents<br />
Outdoor Philosophy<br />
Travel Progression & Readiness<br />
Determining the Trip’s Focus<br />
Progression in the Outdoors by Activity Type<br />
Progression in the Outdoors by Grade-Level<br />
Planning Steps for an Overnight<br />
Kapers<br />
<strong>Girl</strong> <strong>Scout</strong> <strong>Council</strong> of the Southern <strong>Appalachian</strong>s<br />
www.girlscoutcsa.org
Outdoor Philosophy<br />
Outdoor education occurs when <strong>Girl</strong> <strong>Scout</strong> programs are held outside. The most important outcomes we want<br />
to accomplish include are:<br />
32<br />
● A change in how the girl feels about herself & relates to others<br />
● <strong>Girl</strong>s develop values that relate to the environment<br />
● Potential contribution to the community<br />
The goal is to allow each girl opportunities to explore and develop an understanding of the outdoors. It is the<br />
girls’ ability to feel good about herself and her contribution to the success of the group that is important, not<br />
her ability to name twenty birds or tie ten kinds of knots.<br />
Travel Progression Checklist<br />
If your group is thinking about travel, consider first whether the girls are mature enough to handle the trip. In<br />
determining a group’s readiness for travel or camp, assess the group’s:<br />
● Ability to be away from their parents and<br />
their home<br />
● Ability to adapt to unfamiliar surroundings<br />
and situations<br />
● Ability to make decisions well and easily<br />
● Previous cross-cultural experiences<br />
● Ability to get along with each other and<br />
handle challenges<br />
● Ability to work well as a team<br />
● Skills and interests<br />
Determining the Trip’s Focus<br />
Making the choice to explore the outdoors should be girl’s decision in your troop. Whether the trip is a day<br />
hike or a cross-country trek, basic steps of trip planning are essentially the same. It’s true that as the locale<br />
gets farther away, the itinerary more complex, and the trip of greater duration, the details become richer and<br />
more complex, but planning every trip—from a day-long hike to an international trek—starts by asking the<br />
following of your troop so that the girls lead the process:<br />
● What do we hope to experience?<br />
● Who will we want to talk to and meet? What will we ask?<br />
● Where are we interested in going?<br />
● When are we all available to go?<br />
● Will everyone in our group be able to go?<br />
● Are there physical barriers that cannot be accommodated?<br />
● What are visiting hours and the need for advance reservations (if any)?<br />
● What are our options for getting there?<br />
● What’s the least and most this trip could cost?<br />
● What can we do now to get ourselves ready?<br />
● How will we earn the money?<br />
● What’s the availability of drinking water, restrooms, shelter, and food?<br />
● Where is emergency help available?<br />
● What safety factors must we consider?<br />
● What will we do as we travel?<br />
● What will we do when we get there?<br />
● How will we share the Take Action story?
As girls answer these questions, they begin the trip-planning process. In time, girls begin to make specific<br />
arrangements, attend to a myriad of details, create a budget and handle money, and accept responsibility for<br />
their personal conduct and safety. Younger girls may not be capable to be as intimately involved in the details,<br />
however as the girls grow older, their responsibility level should increase. Ask the girls to stretch themselves<br />
to become leaders within their own troop, therefore practicing their leadership skills. And later, after they’ve<br />
returned from a successful camp-out or trip, girls also have the chance to evaluate their experiences and share<br />
them with others.<br />
Sample Progression in <strong>Girl</strong> <strong>Scout</strong> Outdoor Program, by Activity Type<br />
33<br />
Meet Out<br />
Use senses to look, listen, feel, smell<br />
Earn Brownie awards related to outdoor experiences<br />
Earn Junior awards related to outdoor experiences<br />
Move Out<br />
Learn the 8 Basic Skills<br />
Visit an outdoor spot<br />
Record your observations<br />
Explore Out<br />
Go with a purpose<br />
Take a snack to eat outdoors<br />
Take a short trip walking, biking, or rowing<br />
Cook Out<br />
Whittle a fuzz stick<br />
Light a fire and put it out<br />
Sleep Out<br />
Prepare for an overnight<br />
Make needed equipment: bedroll, stuff bags, dunk bags, sit upon<br />
Plan: What to take, what to eat<br />
Make a Kaper Chart<br />
Choose a good safe spot for sleeping<br />
<strong>Camp</strong> Out<br />
Plan what to wear and take<br />
Know safety rules and first aid<br />
Handle dishwashing, garbage and grease disposal in environmentally sound ways.<br />
Pack Out<br />
Plan meals, menus, purchase and provide storage for food<br />
Earn Finding Your Way, Hiker Badges<br />
Plan a trip extending over several days Earn a Red Cross First Aid Certificate
Progression in 8 Outdoor Skills<br />
Progression in camping skills is an essential part of troop camping. At the Daisy & Brownie levels the basic<br />
skills are simple and improved upon by practice. Each succeeding program level should increase proficiency<br />
and build upon skills already required. Consult Volunteer Essentials or the handbooks for more information on<br />
grade-level-appropriate skills and abilities.<br />
8 OUTDOOR SKILLS<br />
34<br />
1. Know and practice good outdoor manners in town and in the country.<br />
2. Know how to dress for the outdoors in your locality, in relation to expected weather.<br />
3. Know how to tie, use, and release a square knot & a clove hitch.<br />
4. Know how to handle and care for a knife.<br />
5. Know how to use & put out a fire for outdoor cooking.<br />
6. Know how to cook something for yourself, something for patrol or troop.<br />
7. Know simple first aid for cuts, insect bites, and skinned knees.<br />
8. Know how to protect the natural world.<br />
Example Progression by Grade-level<br />
DAISY GIRL SCOUTS<br />
● Buddy system. Appreciation of nature-use all senses to explore. Safety/Manners for short hikes near<br />
home.<br />
● Discuss what they should bring/wear plus note to parents.<br />
● May need help tying shoes/bows.<br />
● Leader uses and explains safety precautions.<br />
● Leader builds fire. Safety around fires.<br />
● Simple cooking activities away from fire. One pot meals- leader handles. Fireless foods.<br />
● Personal safety. What to do in case of emergencies when hurt or scared.<br />
● Short hikes/discovery. Explore the out-of-doors. Encourage questions.<br />
BROWNIE GIRL SCOUTS<br />
Learn how to be considerate of others and living things in nature. Leave places cleaner than you found<br />
them. Safety/Manners for overnight.<br />
Discuss proper attire and why, especially for new experiences like camping. Learn camping equipment<br />
needed.<br />
Learn square knot, half hitch, clove hitch.<br />
Learn to use knives safely, open, close, clean, simple use/passing, Use cardboard knives to teach.<br />
Wood piles, Simple fire building: fire starters, foundation fire, A frame, tepee. Putting out fires.<br />
One pot meals, Nosebag/trail meals, Skillet meals.<br />
Simple first aid, see handbook, first aid kits, Emergency procedures, Health & Safety practices in all<br />
troop activities.<br />
Hikes with purpose/ nature hikes. Practice conservation- plant /water trees, flowers, litter pickup,<br />
gardening, recycling. Hurt no living things, look for tracks and traces of animals.
JUNIOR GIRL SCOUTS<br />
35<br />
● Review & Elaborate. Safety/Manners for camping simple maps & compass.<br />
● <strong>Girl</strong>s should be able to help make equipment lists.<br />
● Bowline, sheet bend, taut line hitch, sheepshank, slip knot, Lashing Tents<br />
● Review Knives, do some whittling; sharpening<br />
● Hard vs. Soft wood. Different types, uses, hunter's/ trench fire criss-cross, buddy burner, charcoal, safe<br />
use of tools.<br />
● Stick cooking, tin can cookery, dutch oven, ember cooking, Safe cooking, eating, food storage<br />
procedures. <strong>Camp</strong> stoves (2 burner)<br />
● Simple first aid-see handbook, Emergency procedures, Health & Safety Practices.<br />
● Observe impact on environment, pollution. Service projects- trails, erosion dams, etc. Explore nature in<br />
action & discover why's. Proper dishwashing/garbage disposal.<br />
CADETTE, SENIOR, AND AMBASSADOR GIRL SCOUTS<br />
● Low impact camping, plan routes, transportation and make necessary arrangements, Safety/Manners<br />
for extended trips, Orienteering.<br />
● May need help for more advanced experiences--backpacking canoeing, bike tripping. How to pack for<br />
extensive trips.<br />
● Review & elaborate uses of knots. Lashing campsite furnishings.<br />
● Review Knife safety.<br />
● Alter fire for reflector oven, pit, fire, bean pot hole. Develop and dismantle fire scar, wet weather fires.<br />
● Reflector oven, Bean hole, Planking, Backpacking meals, dehydrating foods, camp stoves, back packing,<br />
edible foods.<br />
● Certified first aid, lifesaving, survival camping, emergency shelters/procedures, hypothermia weather.<br />
● Minimal impact camping. Rebuild trails/erosion control, pollution environmental concern awareness<br />
projects. learn about ecology of certain areas, Wildlife/plant identification.
PLANNING STEPS FOR AN OVERNIGHT<br />
Ensure the girls are involved in each of these steps!<br />
Step # 1 Is the troop ready to do an overnight?<br />
Step # 2 Why are we going, (Program)?<br />
Step # 3 Where will we go?<br />
Step # 4 How we will get there, (budget & transportation)?<br />
Step # 5 When will we go?<br />
Step # 6 What will we need, (equipment, food planning checklist)?<br />
36<br />
# of volunteers<br />
Transportation<br />
Sleeping arrangements<br />
Food/cooking considerations<br />
Clothing requirements<br />
Paperwork / Approval of Parents & <strong>Council</strong> Staff<br />
Equipment<br />
Kaper Chart<br />
Safety Wise: Safety Activity Checkpoint<br />
Step # 7 What will we do?<br />
Plan activities<br />
learn skills (before camping or during camp)<br />
Step # 8 Establish behavior and expectations to also include:<br />
Safety skills<br />
Buddy system<br />
Simple First Aid<br />
Step # 9 Go on the trip, have fun!<br />
Step # 10 Evaluate afterward with the girls.<br />
Would they do it again?<br />
What would they do differently next time?<br />
WAS IT FUN?<br />
HINT: Planning takes time! Many girls are used to having things done for them. Be patient! Don't over plan! It's<br />
OK if the activity didn't turn out perfect!
KAPER CHARTS<br />
In <strong>Girl</strong> <strong>Scout</strong>ing, a job is called a kaper. The list of kapers and who does them is called a kaper chart. More<br />
information can be found in all levels of handbooks. Kapers should be included in the planning process and<br />
will be a part of the girl’s progression. However, even a Daisy <strong>Girl</strong> <strong>Scout</strong> can clean up after herself!<br />
HOW TO MAKE A KAPER CHART:<br />
● Write down the jobs to be done and a brief description of what each job includes.<br />
● Plan how to divide the work: individual, buddies, group or troop.<br />
● Combine some jobs if necessary, keeping an equal amount of work in each if possible.<br />
● Have girls make a chart, which shows the group, who does what, and when.<br />
● Let the girls be creative! The chart can be big or small, square like a table or round like a wheel. It can<br />
even be 3-D or have moving pieces that represent each girl.<br />
Sample Kapers for <strong>Troop</strong> <strong>Camp</strong>ing<br />
Grounds: Picks up all litter within her unit, tends drains under all spigots, tends dishwater drain (if they are<br />
required for that outing)<br />
Unit house: Sweeps floor and at the closing day, follow clean up guidelines of the camp, cleans refrigerator in<br />
her unit house, general cleaning and checking of equipment, takes charge of hand washing system<br />
Lanterns: Cleans and fills lanterns, picks up in morning and sets out at night, fixes lanterns (if needed and<br />
possible), reports to leader all wicks, globes, kerosene needed<br />
Woodpile: Sorts and replenishes, covers woodpile<br />
Restroom: Sweeps and disinfects toilets and showers, responsible for emptying cans, cleans sink and shelves,<br />
responsible for replacing toilet paper when needed, picks up litter in her area<br />
NOTE: Program activities such as <strong>Scout</strong>'s Own, flag ceremony, campfire program should be incorporated into<br />
the general kaper chart.<br />
Sample Kapers for Meals<br />
Hostess: Invite guests, Set table, Prepare centerpiece, Select, teach, and lead the grace, Serve guests and<br />
leaders first, Are responsible for good table manners and conversation, Wash dishes of guests and leaders<br />
Fire Builders: Build, care for and extinguish cooking fires, Are responsible for fire safety during meal<br />
preparation, May be responsible for fireplace and woodpile kaper jobs<br />
Cooks: Prepare, cook, and serve food, Responsible for kitchen health and safety, Put food away after meal,<br />
Dispose of all food not to be used again, Get all food preparation dishes and pots ready to be washed, Put dish<br />
water on to heat during the meal<br />
Clean-Up: Set up dishwashing area, Watch to see that garbage is sorted properly for disposal, Supervise<br />
individual dishwashing, Wash all cooking dishes and pots, Clean up cooking area and wash tables, Sweep,<br />
Dispose of garbage and trash<br />
NOTE: Program activities such as <strong>Scout</strong>'s Own, flag ceremony, campfire program should be incorporated into<br />
the general kaper chart.<br />
37
<strong>Troop</strong> <strong>Camp</strong> <strong>Basics</strong> Part 3:<br />
39<br />
<strong>Camp</strong> Site Selection<br />
Contents<br />
Types of <strong>Camp</strong>ing<br />
Tents<br />
Temporary Shelters<br />
Platform Tents<br />
Cabins<br />
<strong>Girl</strong> <strong>Scout</strong> <strong>Council</strong> of the Southern <strong>Appalachian</strong>s<br />
www.girlscoutcsa.org
Types of <strong>Camp</strong>ing<br />
Front-country camping (“car camping”) consists of camping at a developed campground. Developed<br />
campgrounds typically have restrooms and sites with fire rings, grates and picnic tables. We recommend you<br />
choose to camp at one of GSCSA’s camps. The following types of camping are made available to <strong>Girl</strong> <strong>Scout</strong>s<br />
through GSCSA. Some camps or camping types are unavailable in certain seasons. GSCSA currently operates 5<br />
<strong>Girl</strong> <strong>Scout</strong> <strong>Camp</strong>s: <strong>Camp</strong> Wildwood (Johnson City, TN), <strong>Camp</strong> Windy Knob (Greenville, TN), <strong>Camp</strong> Sky-Wa-Mo<br />
(Bluff City, TN), <strong>Camp</strong> Tanasi (Andersonville, TN), <strong>Camp</strong> Adahi (Cloudland, GA)<br />
Resident <strong>Camp</strong>ing is one of the most well-known <strong>Girl</strong> <strong>Scout</strong> camp experiences. <strong>Camp</strong>ers live at an established<br />
site for a period of several days. <strong>Girl</strong>s and their counselors/leaders enjoy activities that take advantage of<br />
resources available at the camp. The <strong>Girl</strong> <strong>Scout</strong> <strong>Council</strong> of the Southern <strong>Appalachian</strong>s offers resident camp at<br />
select locations during the summer months of June and July.<br />
<strong>Troop</strong>/Group <strong>Camp</strong>ing is a camping experience of 24 or more consecutive hours and often takes advantage of<br />
council-owned/established camp sites. A group of girls and their advisors/leaders usually plan and carry out<br />
this type of camping. The <strong>Girl</strong> <strong>Scout</strong> <strong>Council</strong> of the Southern <strong>Appalachian</strong>s offers summer troop/group camping<br />
year-round by registration at select camp sites. <strong>Girl</strong>s and their leaders may also camp at council-approved sites<br />
around the region. Call your service center for more information.<br />
Day <strong>Camp</strong>ing is a favorite with <strong>Girl</strong> <strong>Scout</strong>s who want to experience camp in shorter sessions, or are not ready<br />
for progression into an overnight. <strong>Girl</strong>s participate in activities for a day. If sponsored by the <strong>Council</strong> Staff or a<br />
Service Unit, girls may register as individual campers or go with buddies. A day camp event may be at a<br />
council-owned site or a site contracted by the council.<br />
Travel <strong>Camp</strong>ing/Trip <strong>Camp</strong>ing is a camping experience planned and carried out by a group of experienced<br />
participants and their advisors or staff. Travel/trip campers may camp at established camping sites. Travel<br />
camping usually involved motorized transportation. Trip camping usually involves self or animal-assisted<br />
transportation, i.e., walking or riding horseback.<br />
Minimal Impact <strong>Camp</strong>ing is a method that encourages each person to leave no trace of their outdoor or<br />
camping experience. It covers everything from the planning stages to the outdoor experience itself. The<br />
concept of minimal impact can apply to any outdoor activity or camping environment.<br />
The <strong>Girl</strong> <strong>Scout</strong> <strong>Council</strong> of the Southern <strong>Appalachian</strong>s is committed to establishing a camping experience that<br />
will protect and maintain the well-being of every <strong>Girl</strong> <strong>Scout</strong> by providing Program Standards and safety<br />
guidelines for camping activities. GSCSA is affiliated with the American <strong>Camp</strong> Association (ACA), a private,<br />
nonprofit educational organization that provides members with educational and accreditation services. An<br />
ACA accreditation indicates that a camp has met ACA standards. The <strong>Girl</strong> <strong>Scout</strong> <strong>Council</strong> of the Southern<br />
<strong>Appalachian</strong>s meets <strong>Girl</strong> <strong>Scout</strong> standards as well as national and state standards set by law.<br />
Research other places to camp:<br />
www.recreation.gov – Reservations<br />
www.nps.gov – National Park Service<br />
http://www.fs.fed.us/ - USDA Forest Service<br />
http://www.tennessee.gov/environment/parks/ - Tennessee State Parks<br />
http://gorp.away.com/gorp/resource/us_nra/ace/tn.htm - U.S. Army Corps of Engineers<br />
http://www.trails.com/activity.asp?area=13564<br />
http://www.thecampingsource.com/<br />
http://www.koakampgrounds.com/ - KOA <strong>Camp</strong>grounds<br />
40
Tents<br />
Important features of a tent to consider are:<br />
Flame retardant.<br />
Weight.<br />
Capacity.<br />
Portability.<br />
Ease of set-up.<br />
Ventilation.<br />
Floor design.<br />
Netting for doors and windows.<br />
Headroom.<br />
Waterproof tent fly, Waterproof material<br />
and design.<br />
41<br />
Pole construction (should be strong and<br />
lightweight).<br />
Strong zippers.<br />
Accessory interior pockets for small items<br />
and loops to hang a flashlight.<br />
Stakes and poles packed in a separate bag<br />
from the tent.<br />
Fabric (breathable).<br />
Color (should blend in with the<br />
environment).<br />
Choose a tent that suits the type of camping activity and the needs of the troop. Consider the following<br />
questions during planning:<br />
○ How many girls are going on the trip and how many girls can share a tent?<br />
○ How much room is necessary for each person and her gear? Is it important to have standing room?<br />
○ How will the tents be transported?<br />
○ What styles of tents are needed? Dome? A-frame?<br />
○ What types of weather conditions are possible?<br />
If you are front-country camping it does not matter how big the tent is, as long as you have enough people to<br />
help assemble it. However, if you're doing any backpacking or backcountry camping, you will want a small,<br />
light weight tent. Remember to consider how much gear will need to go in the tent along with the number of<br />
girls. A "dome"-style tent will allow plenty of movement inside the tent, and can be quite spacious in<br />
inclement weather. An A-frame tent has very little headroom, but uses less material in the tent design<br />
therefore; it is usually a lighter style tent. In addition, A-frame tents typically cost less than other designs and<br />
are suitable for summertime troop camping.<br />
Tips:<br />
○ Never place a candle, camp stove, lantern, heater, open flame or uncovered mirror in or near a tent.<br />
○ Pitch tents far enough away from any cooking area so that the wind cannot blow a spark onto the tent.<br />
○ Never use plastic as a sleeping shelter because it is highly flammable.<br />
○ Prior to the trip, check the condition of all tents, poles, ropes, pegs, etc.<br />
○ Apply seam sealant to new tents as instructed by the tent manufacturer.<br />
○ Use a plastic sheet or ground cloth under the floor of the tent to give added protection from stones<br />
and sharp sticks and to keep the tent dry.<br />
○ Keep the interior clean by sweeping or shaking it out each day and before packing it.<br />
○ Make sure the tent is completely dry before storing it.<br />
○ Place stakes and poles in a separate bag.<br />
○ Bring materials to repair holes or rips in tents with you on the trip (needle and nylon thread, special<br />
tapes, or self-adhesive fabrics).<br />
○ Bring spare parts on the trip including tent stakes, guy rope and poles.
Site Selection tips for front-country camping:<br />
Know in advance where campsites can be found.<br />
If possible, make advance reservations.<br />
Obtain your site permit as early as possible on the day of your departure (or the day before).<br />
Learn what the rules and regulations are in the area you will be camping.<br />
Arrive at your chosen campsite at least 2 hours before sunset to allow enough time to set-up the<br />
campsite before dark.<br />
Avoid camping under dead tree limbs.<br />
If mosquitoes are a problem where you want to camp, try to select a site where there is a breeze.<br />
Choose a site that offers a sufficient amount of shade during the day to minimize the amount of time<br />
your tent is exposed to the sun. A tent's nylon canopy will begin to deteriorate when left in direct<br />
sunlight for an extended period of time.<br />
If it is windy, try to select a campsite where boulders or trees provide a windbreak.<br />
Be mindful of low spots. Low spots tend to collect water. In additions, because cold air sinks, low spots<br />
are chillier.<br />
Pitching a Tent:<br />
Practice pitching the tent with your troop before the trip.<br />
To make set-up easier, assemble the matched poles and color code them with tape, paint, or<br />
permanent markers.<br />
Locate your tent on high, level ground (but below tree-line). If it rains, water will tend to flow away<br />
from your tent rather than gather under it, and you won’t be rolling downhill in your sleeping bag.<br />
Remove any loose stones, twigs or branches from the ground before pitching your tent, but keep pine<br />
needles and dead leaves for added cushion.<br />
Put a plastic ground cloth/tarp under the tent floor to protect it from moisture.<br />
Roll out your tent on the ground cloth and assemble the poles.<br />
Run the poles through the loops or hooks on the tent and secure; set the tent upright.<br />
Drive tent stakes into the ground at a 90-degree angle to the guy ropes.<br />
Once the tent is upright and staked down, place the rain fly over the tent and secure it to the tent<br />
structure.<br />
Securely anchor down all key points of the tent with tent stakes and guide ropes.<br />
Line the ground cloth up with the edge of the tent floor by rolling the excess ground cloth downward<br />
under the tent floor to avoid water from being able to flow under the tent.<br />
To avoid the buildup of condensation in the tent, open the roof vent and zip a door or window partially<br />
open. If you have no roof vent, crack two doors or windows open. Either way will create a slight cross<br />
breeze that will help to remove body moisture and prevent condensation inside your tent.<br />
42
Temporary Shelters<br />
Uses of tarps while camping:<br />
Ground cloth for under your tent<br />
Rain shelter<br />
Sun shades<br />
Wind barrier<br />
Coverings for your gear, campfire, or firewood<br />
Sleeping shelters<br />
What you will need to create a shelter, sun shade or wind barrier:<br />
A tarp (a large plastic/polyethylene tarp with aluminum grommets is sufficient and inexpensive)<br />
Rope (50-100 feet of approximately 3/8-inch nylon cord or clothesline rope)<br />
A few light weight tent stakes<br />
Duct tape (to repair rips in the tarp)<br />
Bungee cords (optional)<br />
Tips:<br />
● It is very important to think about drainage when you are setting up your tarp. Naturally, if the site has<br />
a slope, you need to consider the slope when setting up the tarp. Ideally, you want to have the tarp<br />
drain on the downhill side of the site.<br />
● Angle the tarp with the low edge facing the wind. The wind will be forced over the campsite instead of<br />
through it, more importantly water can run off the tarp instead of collecting in a pool. If water collects<br />
on top of your tarp, raise the top corner with a stick or pole to allow the water to run off the sides.<br />
● To create a lean-to, orient the tarp so that the low end is towards the prevailing weather. Tie the high<br />
end to a rope stretched from tree to tree. Peg down the low end at or close to the ground to help<br />
deflect the wind. It is important to stretch the tarp tight. If it is not tight, it will flap in the wind.<br />
● If your tarp loses a grommet, find a small stone, In the corner where the grommet is missing, wrap a<br />
small amount of tarp fabric around the stone, then tie it off with a piece of cord. You can then use that<br />
nub as an attachment spot for a guy line.<br />
43
Platform Tents<br />
Several of GSCSA’s camps offer large tents on wooden platforms for troops/groups to use, called platform<br />
tents. It is important that girls understand how to take care of platform tents.<br />
44<br />
Never use a heater or any open flame in or near a tent.<br />
The guy ropes along the sides may need to be loosened in rain. When they are wet, they tighten and<br />
put undue strain on the canvas.<br />
Do not hang anything on the ropes. This pulls the tent out of line.<br />
Roll side walls and door flaps up toward the inside of the tent, so they can be let down from the inside.<br />
This prevents water from catching in the roll when it rains. Be sure to roll side walls and door flaps<br />
back down, and secure them when leaving site.<br />
Never roll up the side walls or door flaps unless they are completely dry. Damp canvas will mildew<br />
when not open to the air.<br />
Drop the side walls periodically. Mice sometimes nest in the rolled-up flaps.<br />
Never touch the inside of the tent during a rain. Touching the fabric can cause the canvas to leak.<br />
Do not use insect sprays or other kinds of sprays inside a tent. The chemicals can dissolve the waterrepellent<br />
treatment.<br />
Do not pin anything to the tent, since this can cause tears and leaking.<br />
Tie the tapes with a half bow so they can be untied when wet.<br />
Keep mirrors under cover. Sunlight reflected in a mirror can be hot enough to burn a hole in a tent or<br />
start a fire.<br />
Report small tears and missing ropes or tapes so that they can be replaced.<br />
Cabins<br />
Several of GSCSA’s camps offer cabins or indoor camping spaces. Current rules and regulations vary based on<br />
the space reserved.
<strong>Troop</strong> <strong>Camp</strong> <strong>Basics</strong> Part 4:<br />
45<br />
Packing Considerations<br />
Contents<br />
Packing Checklist<br />
Ten Essentials for Backcountry<br />
Sleeping Bags<br />
Sleeping Pads<br />
Packs<br />
Footwear<br />
<strong>Girl</strong> <strong>Scout</strong> <strong>Council</strong> of the Southern <strong>Appalachian</strong>s<br />
www.girlscoutcsa.org
Packing<br />
Below is a possible packing list for hikes and camping trips. Some items are not needed on every trip. Refer to<br />
the Safety Activity Checkpoints for the activities you plan to participate in for further guidance on equipment<br />
required. Also check the rules and regulations of the place you plan to camp for a list of prohibited items.<br />
Essentials<br />
Drinking Water<br />
Water Bottles<br />
Waterproof Matches<br />
Fire Starters<br />
Swiss Army Knife<br />
First Aid Kit<br />
Food and Cooking Gear<br />
Energy Bars<br />
Trail Mix<br />
Raw Veggies or Fruit<br />
Crackers<br />
Cheese<br />
Oatmeal<br />
Clothing and Outerwear<br />
Warm Hat<br />
Sun Hat or Baseball Cap<br />
Raingear<br />
Gloves<br />
Long Underwear<br />
Personal Items<br />
Toilet Paper<br />
Biodegradable Soap<br />
Feminine Hygiene<br />
Products<br />
Washcloth<br />
<strong>Camp</strong>ing Gear<br />
Tent<br />
Rain Fly<br />
Tent Stakes<br />
Extras<br />
Watch<br />
Camera<br />
46<br />
Insect Repellent<br />
Map of the Area<br />
Compass Flashlight w/<br />
fresh bulb<br />
Extra Batteries<br />
Sunglasses<br />
Hot Chocolate, Tea,<br />
Instant Coffee<br />
Re-sealable Storage<br />
Containers or Bags<br />
<strong>Camp</strong>ing Stove and Fuel<br />
Lightweight Cooking and<br />
Eating Utensils<br />
Extra Underwear<br />
Quick-drying Swimsuit<br />
Fleece Shirt and Pants<br />
Change of Clothes<br />
Footwear<br />
Toothbrush and<br />
Toothpaste<br />
Comb<br />
Deodorant<br />
Shampoo<br />
Ground Tarp<br />
Sleeping Bag<br />
Sleeping Pad<br />
Duct Tape<br />
Cord or Rope<br />
Sunscreen<br />
Whistle<br />
Trash Bags<br />
Park, Fire, and <strong>Camp</strong>ing<br />
Permits<br />
Cup and Bowl<br />
Cooking Pots and Pans<br />
Pot Holders<br />
Dish Scrubber<br />
Biodegradable<br />
Dishwashing Soap<br />
Hiking Socks<br />
Extra Socks<br />
Hiking Boots or Shoes<br />
Suited to the Terrain<br />
Small Towel<br />
Bandana<br />
Lip Balm w/ SPF<br />
Tent Repair Kit<br />
Binoculars
The "Ten Essentials" for Backcountry Day Hiking Packs<br />
Source: (http://www.mra.org/training/General_Backcountry_Safety.pdf)<br />
Every backcountry user, even on seemingly insignificant day hikes, should carry the most basic equipment;<br />
commonly referred to as the “Ten Essentials.” The survival equipment, clothing and other resources you carry<br />
will increase your chances of surviving an emergency. Technically skilled and highly experienced rescue<br />
mountaineers never go into the field on search or rescue missions without these ten essentials. Carefully<br />
selected, these items can easily fit within a small backpack. This list of "Ten Essentials" assumes your trip is a<br />
summer excursion. At any other time of the year, be sure to bring more of the right kind of clothes. When<br />
choosing your equipment, remember that the body's ability to maintain its core temperature is critical to your<br />
survival in the backcountry.<br />
1. Topographic map and magnetic compass<br />
Too often, backcountry users venture deep into the backcountry without a map and compass. The fact that<br />
they are able to safely venture back out is usually pure dumb luck. With a map and compass, it is much easier<br />
to identify your location and direction of travel. This is especially important in the event that you become lost.<br />
2. Flashlight (with extra batteries and bulb)<br />
How far do you suppose you could safely travel at night in the backcountry without a flashlight? Could you<br />
signal others, if you saw a campsite far away? A flashlight makes travel at night possible and aids in signaling<br />
when lost.<br />
3. Extra clothing (including mittens, hat, jacket and rain gear)<br />
Hypothermia is the most common killer of backcountry users. Inability to maintain body heat can quickly rob<br />
an unsuspecting victim of all energy and common sense. Since severe weather may present itself very quickly<br />
in the backcountry, extra clothing should be carried to help maintain body heat.<br />
4. Sunglasses<br />
Especially in the winter, ultraviolet glare from the sun can cause blindness. Worst of all, the backcountry user<br />
may not realize this is happening until it is too late. A good pair of sunglasses, designed to limit ultraviolet<br />
light, will eliminate this risk.<br />
5. Extra food and water<br />
These items will maintain energy levels in the case of an emergency and help maintain body temperature in<br />
cold weather. While you can survive three days without water and three weeks without food, your energy<br />
levels will be seriously depleted without these.<br />
6. Waterproof matches in waterproof container<br />
Waterproof matches, available from most backcountry supply stores, are capable of igniting in high winds<br />
and/or blinding rain. Building a fire may be impossible without these. Fires are critical since they not only<br />
provide heat, but also make the job of search and rescue teams easier by providing a visible signal.<br />
7. Candle/Fire starter<br />
A candle burns much longer than does a match. This is helpful when trying to start a fire, especially if your<br />
firewood is wet.<br />
8. Pocket knife<br />
There are a multitude of applications for a pocketknife in emergencies. The common Swiss Army Knife is socalled<br />
because it is standard issue for the Swiss Army, which has devised 246 uses for their standard 7instrument<br />
knife.<br />
9. First aid kit<br />
Proper first aid care is difficult, if not impossible, without a good first aid kit. Backcountry shops carry several<br />
brands of small, lightweight first aid kits including small first-aid manuals.<br />
10. Space blanket or two large heavy-duty trash bags<br />
These items can help provide shelter in an emergency situation and can be used as a raincoat or a windbreak.<br />
The additional warmth they provide far outweighs their minimal weight.<br />
47
Sleeping Bags<br />
Sleeping bags come in a wide range of designs, shapes and fills. The main function of a sleeping bag is to keep<br />
you warm on chilly nights. It should also be comfortable and breathable.<br />
Sleeping bags work by trapping warm air created by the body and prevent it from cooling off. The smaller the<br />
airspace is inside the bag, the warmer the bag will be. There are three main styles of sleeping bags: mummy<br />
bags, rectangular bags and tapered bags (semi-rectangular). Tapered bags and mummy bags are tight-fitting<br />
bags that can keep you very warm. However, if you plan to camp only when it is warm, the rectangular bag<br />
may be more suitable. The down-side to rectangular bags is that they are often heavy and bulky which makes<br />
them less practical on backpacking trips. The warmth and insulating properties of the sleeping bag are also<br />
related to what it is filled with. Down-filled bags are lightweight and last long but are more expensive than<br />
synthetic-filled bags. Synthetic-filled bags are also more resistant to wetness than the down-filled bags.<br />
Care and Cleaning Tips:<br />
Sleeping bags should be removed from their carry sacks and shaken out periodically.<br />
Store sleeping bags flat or hang them up in a large bag. Storing bags for long periods of time in their<br />
traveling bags compresses the fibers and results in a loss of insulating properties.<br />
Occasionally, wash synthetic and down-filled bags in a washing machine (commercial machines with no<br />
agitator) with mild soap.<br />
Dry the bag on low and tumble dry with a number of tennis balls to encourage the bag to loft.<br />
Sleeping Pads<br />
Sleeping pads are essential to tent camping; not only do they provide comfort; they provide insulation and<br />
protection from the ground.<br />
Closed-cell foam sleeping pads offer the most insulating value for their weight and are the least expensive<br />
choice. These camping mats don't roll up very compactly, though, and they’re usually fairly thin, so they<br />
offer the least amount of cushioning.<br />
Self-inflating open-cell pads are compact and expensive, but are ideal for backpacking.<br />
Make sure the length fits you, your tent and your sleeping bag.<br />
For backpacking, consider weight vs. comfort.<br />
Look for non-slip pads to help you keep from sliding off in the night.<br />
Don’t use plain air mattresses without any foam inside. As the air gets colder during the night, these<br />
mattresses often deflate until they're not providing enough padding. They don't offer very much<br />
insulation to protect you from the cold ground.<br />
If you do opt for an inflatable sleeping pad, make sure you bring a repair kit on your trip.<br />
48
Packs<br />
The type of pack depends upon the requirements of the trip. There are three major styles:<br />
Frameless/Daypack: Day packs are small packs designed to carry raingear, a lunch, water bottle, map, and a<br />
few extra items. Some people take a daypack with them on an extended trip in order to use it for day hikes<br />
during the trip. A daypack should have padded shoulder straps.<br />
Internal-Frame Pack: Internal-frame packs are worn close to the body and have a low center of gravity<br />
(transfers the weight of the pack to the hips). The frame is integrated into the pack, making it flexible to<br />
movement and manageable to carry, but hotter to wear then the external-frame pack. This pack is best when<br />
hiking on uneven or brushy terrain, rock-climbing, or cross-country skiing.<br />
External-Frame Pack: External-frame packs are distinguished by three components: the frame, the pack bag,<br />
and the suspension system. The frame distributes the load to the wearer’s hips to eliminate weight on the<br />
back muscles and allows the wearer to stand straighter when walking. The frame also holds the load away<br />
from the wearer’s back, which allows air to circulate, making it cooler to wear then an internal-frame pack.<br />
This pack is best for carrying heavy loads and traveling on established trails.<br />
Before choosing a type of pack, consider the following:<br />
● Age and body size of the person.<br />
● Type of trip (day hike or overnight).<br />
● Amount of gear needed.<br />
● Amount of weight the person can reasonably carry.<br />
● Kind of activity that will take place.<br />
● Ways to organize gear.<br />
● Cost of the pack.<br />
Packing a Daypack:<br />
49<br />
Practice packing your backpack, lifting properly, adjusting the straps, and carrying the loaded pack<br />
before your trip.<br />
Line the inside of the pack with a garbage bag (to keep items dry).<br />
Roll-up clothing and place items inside of plastic baggies (sorted by day or clothing type) and then<br />
release all of the air inside the baggies. Not only will this keep your clothing items dry and clean, it will<br />
conserve space in your pack.<br />
Place your soft things (clothing, etc.) in the lower part of your pack.<br />
Place heavier items (stoves, food, pots, pans, etc.) in the middle to upper part/center of the pack.<br />
Place toiletries and things you may need to use during the day (toilet paper, insect repellent, first aid<br />
kit, rain gear, etc.) where they can be easily accessed, such as in a side pocket or on the top of your<br />
pack.
Footwear and Care<br />
Factors to consider before selecting footwear:<br />
● What will the terrain be like?<br />
● How heavy a load will be carried?<br />
● How much support do the hiker’s feet and ankles require?<br />
● Are the hiker’s feet still growing?<br />
● How much do the boots or shoes cost?<br />
Sturdy walking shoes, running shoes or lightweight hiking boots are usually adequate for light to moderate<br />
loads, on-trail hiking and for hikes less then 2-hours in duration. Heavy boots are tiring to walk in and may<br />
tear up fragile vegetation. Don’t choose a pair heavier than you need!<br />
Boots should fit snugly but not constrict the feet. The heel should be seated firmly with no side-to-side<br />
movement and only a slight up-and-down motion. On a flat surface, the toes should be about a thumb’s width<br />
from the front of the boot. On a steep slope, the foot should slide toward the front of the boot – just enough<br />
to allow a finger to fit between the ankle and the collar of the boot. The arch ball of the foot should<br />
correspond to the shape of the boot.<br />
New hiking boots should be worn inside for the first few days to assure a comfortable fit and to break them in<br />
before the trip/hike.<br />
Foot Care:<br />
Proper foot care is very important. A painful blister can ruin your hike!<br />
● Do not wear cotton socks or cotton liners! They will soak up foot perspiration, stay damp, and cause<br />
blistering.<br />
● Wear socks that wicks perspiration away from your feet and allows it to evaporate.<br />
● Wear socks that are comfortable and provide extra padding.<br />
● Wear a polypropylene, Capiline or Thermax liner under wool or a wool/synthetic blend sock (even in hot<br />
climates).<br />
● Change socks several time a day.<br />
● Wash and dry feet at the end of the day.<br />
● During the first hour of the hike, allow time to stop and readjust shoes or boots and socks.<br />
● If rubbing or a red spot occurs, stop and place moleskin or molefoam padding over the site. Do not wait<br />
until a blister forms!<br />
● Never put moleskin directly on a blister that has already formed, instead, place the moleskin or molefoam<br />
padding around it. If possible, put an antiseptic on the affected area and allow it to dry before applying<br />
the moleskin.<br />
50
51<br />
<strong>Troop</strong> <strong>Camp</strong> <strong>Basics</strong> Part 5:<br />
Menu Planning, Recipes, & Equipment<br />
Contents<br />
Basic Menu Planning<br />
Purchasing & Storing Food<br />
Food Storage<br />
Water Sources & Purification<br />
Cooking & Clean-up Stations<br />
Advanced Nutrition<br />
Outdoor Cooking Progression<br />
Nosebag<br />
One Pot Meals<br />
Stick Cooking<br />
Skillet/Griddle Cooking<br />
Grilling<br />
Foil Packets<br />
Dutch Oven Cooking<br />
Charcoal Cooking<br />
Box Oven Cooking<br />
Solar Cooking<br />
<strong>Girl</strong> <strong>Scout</strong> <strong>Council</strong> of the Southern <strong>Appalachian</strong>s<br />
www.girlscoutcsa.org
Basic Menu Planning<br />
In order to plan the “right” menu, girls will need to find the answers to the following questions for each meal:<br />
What is the purpose of the outing?<br />
How much time will we have for cooking this meal?<br />
Will we be cooking indoors or out?<br />
Will we be using familiar cooking techniques – or do we want to try out new method?<br />
What kind of stove and type of fuel or fire will we be using?<br />
What kind, and how much, cooking equipment will we have available?<br />
Will each patrol cook for itself, or will one patrol cook for all?<br />
Are there any concerns about spoilage, weight, cost, season of the year that have to be considered?<br />
What food preferences or dietary restrictions need to be considered?<br />
With the answers to all these questions in hand, your girls are ready to plan their menus. They will find these<br />
menu planning tips helpful:<br />
52<br />
Include some no-cook foods in every meal - to save time and to be sure girls won’t go hungry if there is<br />
a cooking failure.<br />
Include something from each of the basic food groups in every meal.<br />
Plan some extra – for snacks or “filler-uppers”.<br />
For meals that are to be cooked, concentrate on one-pot dish meals, keep ingredients simple and<br />
equipment at the minimum.<br />
To involve all of the girls in menu planning, have them work in patrols or committees. If cooking is to be done<br />
in patrols, have each patrol plan its own food. This variety will be stimulating and the fun of sampling another<br />
patrol’s food will add to the adventure.<br />
The Grab (or Grub) Bag is a fun way to plan menus. Use several large grocery bags. Label the bags: breakfast,<br />
lunch, dinner, and snacks OR main dish, salad, dessert, beverage OR grain group, meat group, fruit and<br />
vegetables, and milk group. Have the girls write on 3x5 cards their favorite food for each meal. Once they<br />
have finished all three meals, they place their cards in the appropriate bag. Now have the girls tally the<br />
results, with the majority of the “food selections” being your menu.<br />
Shopping for Food<br />
Shopping for the trip is an important experience for the girls. Encourage girls to comparison shop. Read labels,<br />
determine the nutritional value, weight, cooking time, and cost of items. Terms such as "instant," "quickcooking,"<br />
"pre-cooked," partially pre-cooked, or just add water, indicate that the food item may be prepared<br />
quickly. Food selection can be more varied in weight and cooking time are not important factors. If the girls<br />
are camping at an established site, greater varieties of foods can be chosen, including fresh foods and<br />
refrigerated items<br />
Packaging Food
The food purchased for a trip can be repackaged into meal- or patrol-sized servings and packed by the meal<br />
and day. Reduce the weight by leaving excess packaging at home and repacking some foods into plastic bags<br />
that seal across the top. Be sure to include the directions for cooking.<br />
Sample Outdoor Cooking Ingredient List<br />
53<br />
Menu item How Many It<br />
Serves<br />
Ingredients Amount to buy<br />
Food Storage<br />
When staying inside a building or cabin, store food in a refrigerator, or in containers, and rodent-proof<br />
cabinets so that mice or other small animals cannot chew through packaging. Mice will even nibble on a bar<br />
of soap. At an established campsite, store food inside rodent-proof areas, if available, or in a vehicle. <strong>Girl</strong>s<br />
must be cautioned not to keep any food in their tents, duffel bags, or packs. Mice and other animals will chew<br />
through clothing and packs to get to we food. Careful cleanup will help to keep away unwanted ants and other<br />
insects.<br />
● Most black bear and human encounters involve food.<br />
● Food to a bear = food, garbage, as well as scented items such as: soap, lip balm, sunscreen, deodorant,<br />
toothpaste, etc.<br />
● Store food and scented objects inside your car if you are front-country camping. Dispose of waste in the<br />
designated garbage bins in the campground. Use the public bathhouses provided by the park.<br />
Garbage Area<br />
Efficient plans for garbage disposal should be made in advance. If garbage cans are used, line them with plastic<br />
bags and be sure that they are kept tightly covered at all times. Do not allow trash to overflow and spill onto<br />
the ground. If no pickup is available, carry all garbage out with you. Garbage may be burned only if it can be<br />
entirely consumed by fire and only if local regulations permit<br />
Water Sources<br />
While planning an outdoor activity, check on the available water supply at the site. Even for a day hike each<br />
girl should carry an adequate supply of water. Only water from a tap that has been tested and approved by the<br />
local health department can be considered safe to use. Other sources of water such as lakes, streams, or ponds<br />
must be purified. Even a sparkling clear river in the wilderness can be contaminated by bacteria, viruses,<br />
protozoa, chemicals, dead animals, or unsanitary conditions upstream out of view.
Water Purification<br />
Portable water purification is used to treat water for drinking purposes. Large rivers, streams, springs, and<br />
wells may contain bacterial or protist contamination originating from human and animal waste, pathogens,<br />
such as Giardia lamblia and Cryptosporidium spp., both of which cause diarrhea, among other forms of<br />
contamination.<br />
Portable drinking water systems or chemical additives are available for hiking, camping, and travel in remote<br />
areas.<br />
The most common systems for purifying water while camping are:<br />
● Boiling water is the most certain way of killing all microorganisms. According to the Wilderness<br />
Medical Society, water temperatures above 160° F (70° C) kill all pathogens within 30 minutes and<br />
above 185° F (85° C) within a few minutes. So in the time it takes for the water to reach the boiling<br />
point (212° F or 100° C) from 160° F (70° C), all pathogens will be killed, even at high altitude. The<br />
moment your drinking water reaches a rolling boil, the water has already become safe to drink (except<br />
for the risk of chemical toxins).<br />
● Portable pump filters are commercially available. Water purifiers or filters can be carried. Be sure the<br />
filter is small enough to trap the harmful microorganisms.<br />
● Add iodine to water, as a solution or in tablet form, to kill many, but not all of the most common<br />
pathogens present in natural fresh water sources. Carrying iodine for water purification is an imperfect<br />
but lightweight solution for those in need of field purification of drinking water. Directions for iodine<br />
tablets: Place one tablet in a quart of water and allow time for it to dissolve. Shake the bottle to make<br />
sure the iodine is distributed throughout, making sure to include water that might be on the cap and<br />
threads of the bottle. Allow approximately 30 minutes for the process to take place. Iodine kits are<br />
available in camping stores that include an iodine tablet and a second pill (vitamin C or ascorbic acid)<br />
that will remove the iodine taste from the water after it has been disinfected. Iodine alone is not<br />
considered effective against Cryptosporidium, and is limited in its effectiveness against Giardia.<br />
Cooking/Eating Area<br />
Many areas have tables available which can be used for food preparation. If a table is not available, portable<br />
tables may be brought from home, or lashed. Keep the area organized and clean, and provide instruction,<br />
supervision and discipline in safe cooking, fire building, and use of kitchen tools and equipment.<br />
The method used for cooking will be determined by the activities planned, the experience of the campers,<br />
availability of resources, and regulations pertaining to the types of fires permitted for the area. The camp site<br />
may have established fire areas such as built in fireplaces, barbecue units, sheepherder (shepherd) stoves, fire<br />
rings or be limited to the use of portable cook stoves. Be sure that appropriate permits, where applicable have<br />
been secured.<br />
54
Equipment area<br />
Every piece of camping equipment needs to have a designated place for its storage. <strong>Camp</strong>ers need to be<br />
instructed in proper care and usage as well as responsibility for safe storage of equipment after usage. Saws,<br />
axes, hatchets, and knives present a safety hazard if handled negligently. Always be sure that the equipment<br />
is appropriate for the activity, and suitable for the girls with regard to age, size, maturity, and ability.<br />
Equipment should be maintained in good repair to prevent unnecessary injury – a safety check prior to an<br />
activity is advised.<br />
55
Dishwashing at Established Site<br />
Dishwashing for a group in an established setting works most efficiently with a little planning. Water can be<br />
conserved by using the following hints.<br />
56<br />
● To make pots used for cooking over a fire easier to clean, rub soap over the bottom and sides of the<br />
outside of the pots before placing them on the fire. A bar of soap or liquid dishwashing soap can be<br />
used.<br />
● Scrape plates and presoak pots before washing.<br />
● Heat dishwater on the camp stove or cooking fire so it will be ready when the meal is finished.<br />
● Keep the dishwater clean as long as possible by washing the least dirty items such as cups and<br />
silverware first, and pots last.<br />
Use three buckets or deep pans for dishwashing. The first bucket contains hot, soapy water; the second bucket<br />
contains clean water for rinsing; and the third contains boiling water, or cool water containing a sanitizing<br />
solution approved by the local health department (1 tablespoon bleach for every gallon of clean cool water).<br />
Sanitize dishes by immersing them in clear boiling water for one minute or by immersing them in the bleach<br />
solution for two minutes.<br />
Each individual is responsible for bringing and washing her own dishes, silverware, except when these items<br />
are provided on site. The dishes are kept in a “DISH BAG” or “DUNK BAG.” These individual net bags to hold<br />
dishes during the final sterilizing rinse. Hang up the net bags to air dry. If a clothesline is put up for the net<br />
bags, be sure that it is away from dust and areas where someone might walk into it and be injured. When dry,<br />
dishes and eating utensils should be stored away from dust.<br />
The dishwashing line is set up as follows:<br />
● SCRAPE – Use rubber scraper and large can or pan.<br />
● WASH – dishpan with soap, cloth or mop – hot water (110-112 degrees F)<br />
● RINSE – dishpan with hot water (keep it hot) (110-112 degrees F)<br />
● STERILIZE – place all dishes in the “DUNK BAG” and hold in kettle of hot water (170 degrees F) for 1<br />
minutes or rinse thoroughly in a chemical solution for 2 minutes.<br />
● HANG ON TREE OR LINE TO DRY<br />
Used dishwater should be filtered to remove any food particles. Place the filtered food particles in the<br />
garbage. At an established site, follow the rules and regulations of that site to dispose of waste-water. Some<br />
sites prohibit draining wastewater into sinks, due to age or condition of plumbing.<br />
CHEMICALS<br />
Use 1 tablespoon of chlorine bleach for each gallon of water.<br />
Dishes should be completed submerged in this solution for 2 minutes for proper sanitation.
Advanced Nutrition<br />
An average person will usually need to consume about 2,500-3,500 calories per day during an active camping<br />
trip or more if it includes hiking.<br />
60% of the diet/menu should consist of carbohydrates.<br />
20-25% of the diet/menu should consist of fats.<br />
15-20% of the diet/menu should consist of proteins.<br />
Example (3,500 calorie diet):<br />
2100 calories = carbohydrates (60%)<br />
875 calories = fats (25%)<br />
525 calories = proteins (15%)<br />
Total Food Planning (For Backcountry Trips/Backpacking)<br />
WEIGHT:<br />
Average = 2 pounds/person/day<br />
# People X # days X # pounds/persons/day = pounds of food to bring<br />
CALORIES:<br />
Average = 3,500/person/day<br />
# People X # days X # calories/persons/day = minimum calories needed for trip<br />
COST:<br />
Average = $3.25/person/day<br />
# People X # days X cost/persons/day = amount to be spent on food<br />
EXAMPLE:<br />
12 people x 2 days x 2 pounds = 48 pounds<br />
12 people x 2 days x 3,500 calories = 84,000 calories<br />
12 people x 2 days x $3.25 = $78.00<br />
Carbohydrates: 84,000 x .6 = 50,400 cal / 1,700 calories per pound = 29.6 pounds<br />
Fats: 84,000 x .25 = 21,000 cal / 3,000 calories per pound = 7 pounds<br />
Proteins: 84,000 x .15 = 12,600 cal / 2,000 calories per pound = 6.3 pounds<br />
57
Outdoor Cooking Progression<br />
Progression is a common thread within the <strong>Girl</strong> <strong>Scout</strong> Program. We train the girls in the basics and keep adding<br />
more complex aspects of these basics. This list of cooking progression is by no means all inclusive. It is meant<br />
to be a sampling from which to choose. After the initial Nosebag and One Pot Meals (generally aimed at<br />
Brownies) and simple stick cooking (S'Mores), the girls are ready to venture out into the other areas of this list.<br />
Below are some hints for each of these cooking, which are roughly in order of difficulty.<br />
58<br />
1. Nosebag<br />
2. One Pot Meals<br />
3. Stick Cooking<br />
4. Skillet/Griddle Cooking<br />
5. Grilling<br />
6. Foil Packets<br />
7. Dutch Oven Cooking<br />
8. Box Oven Cooking<br />
9. Solar Cooking<br />
Nosebag<br />
"Nosebag" refers to a bag filled with grain that fits over a horse's muzzle. In <strong>Girl</strong> <strong>Scout</strong>s, it generally refers to<br />
anything that can be carried with us and eaten on the way. Simple things such as a walking salad of carrots<br />
and celery sticks fit nicely into this category. Remember that if the weather is hot, recipes using mayonnaise<br />
should be avoided unless you have a way to keep it cool.<br />
Each person can eat what she herself brings. Of course, a greater variety and choice is possible if everyone<br />
pools sandwiches, fruit, vegetables, cookies, etc. This would be a good time to check the contents of each<br />
"nosebag" to see how many contained a balanced meal with:<br />
● Egg, meat, fish, or cheese<br />
● Milk if possible<br />
● One vegetable at least (carrot sticks, cucumber sticks, celery, radishes)<br />
● Fruit (oranges, apples, peaches, pears (good thirst quenchers), dried raisins); The "walking salad"<br />
● Enriched bread (in sandwiches or as bread and butter if you have a hard-cooked egg (carried in the<br />
shell) or chunk of cheese)<br />
● Cookies fit here too<br />
Walking Salad<br />
Cut the top off an apple and core it, leaving the bottom skin over the hole.<br />
Scoop out the pulp of apple and chop.<br />
○ Mix with peanut butter (cottage cheese or cream cheese may substitute) raisins, nuts<br />
and granola cereal<br />
Stuff mixture back into apple shell and replace top.<br />
G.O.R.P. “Good Old Raisins & Peanuts”<br />
Yield 12 cups<br />
Combine:<br />
● 2 cups peanuts<br />
● 2 cups raisins<br />
● 2 cups chopped apricots or other dried fruit<br />
● 2 cups M&M’s<br />
● 4 cups bite-sized shredded wheat or rice<br />
cereal
Super Peanut Butter Spread<br />
Combine:<br />
● 1 cup peanut butter<br />
● ½ cup honey<br />
If necessary, add pineapple juice until spread is right consistency.<br />
59<br />
● ½ cup wheat germ<br />
● 1 cup well-drained crushed pineapple<br />
Ants on a Log<br />
Spread peanut butter on celery and decorate with raisins on top. Cream cheese or soft yellow cheese may<br />
substitute for peanut butter. Rye Crisp or other whole grain crackers can substitute for celery.<br />
One Pot Meals<br />
If you have a group that numbers more than about 8 or if appetites are unusually large, plan on using two pots<br />
on your cookstove for your "one pot" meals. A large Dutch oven is ideal (but that the one with the feet). The<br />
large pot of the standard nested camp cookware sets also works well. One big advantage of a one-pot meal is<br />
that there is only one pot to clean. Therefore, you tend to avoid recipes where more than one pot is required<br />
(like pasta dishes where the pasta is cooked separately) when referring to "one pot" meals.<br />
One Pot Master Plan<br />
Feeds 12<br />
Base:<br />
● 3 pounds hamburger, browned<br />
● 1 large onion, chopped<br />
● 1 large bell pepper, chopped<br />
● 2 cans tomato soup<br />
● Salt and pepper to taste<br />
Put all into one pot.<br />
Additions to create variation:<br />
American Chop Suey<br />
● 4 cans spaghetti<br />
Spanish Rice<br />
● 1 large package of minute rice, cooked<br />
separately<br />
Spaghetti<br />
● 1 large package spaghetti, cooked<br />
separately<br />
Macaroni Beef<br />
● 1 large package of macaroni, cooked<br />
separately<br />
Chili<br />
● 4 cans red kidney beans<br />
● 2-4 tsp. chili powder<br />
Yoki Special<br />
● 3 cans of spaghetti<br />
● 2 cans of peas<br />
Squaw Corn<br />
● 3 cans of corn<br />
● ½ pound diced cheese<br />
● 3 cans chicken soup<br />
● 3 cans of water<br />
● 4 cups uncooked macaroni<br />
Gumbo<br />
● Omit tomato soup<br />
● 3 cans chicken gumbo soup<br />
<strong>Camp</strong>fire Stew<br />
● 4 cans of vegetable soup<br />
Hunter’s Stew<br />
● Omit tomato soup<br />
● 1 pound regular rice<br />
● 3 cans vegetable soup<br />
● 3 cans beef broth<br />
Hungarian Hot Pot<br />
● 4 cans pork and beans<br />
Day <strong>Camp</strong> Special<br />
● Omit tomato soup<br />
● 2 cans chicken gumbo soup
Stick Cooking<br />
Stick cooking should be done over hot coals, not flames. Make sure that your coals are about the right<br />
temperature. To test for medium coals, place your hand above the coals about 6". If you can leave your hand<br />
there for 4 seconds, they are medium (3 seconds for medium-high).<br />
One very common stick-cooking dish is kabobs. You can cook many of your favorite food combinations with<br />
your favorite marinades for tasty kabobs. Skewers come in many sizes and styles. You may want to design your<br />
own. Wooden skewers are best used with quick cooking foods. Avoid the ones that are sold in craft stores<br />
rather than grocery stores as sometimes they have wood or oil that is toxic. Soaking wooden skewers in water<br />
for 30 minutes prior to use can help prevent them from burning. Avoid metal skewers that are round as the<br />
food often rolls on the skewer when you try to turn them. Some people prefer the skewer baskets but the<br />
ones that don't have non-stick coating need to be sprayed with cooking spray each time prior to using them.<br />
They do required more clean up than traditional skewers, however.<br />
Skillet/Griddle Cooking<br />
A portable cookstove (Coleman stove) is the best way to cook using this method as it provides the most even<br />
temperatures. You can also cook over coals using a cast iron skillet or Dutch oven. Make sure you have<br />
potholders for the skillet handy as the handle gets very hot when you cook this way. Cast iron cookware is<br />
best if cooking over coals as when properly treated it lasts a long time, handles the temperatures of fires well,<br />
and is easiest to clean.<br />
Grilling<br />
How much charcoal do I use? Actually, most people tend to use too much and thus waste the charcoal.<br />
Generally, you need about 30 briquettes to grill one pound of meat. You need enough charcoal in a single<br />
layer to extend 1"-2" beyond the sides of the cooking area. To determine your needs, spread the charcoal out.<br />
When ready to light, pile coals into a pyramid. Weber makes a good quality fire starter if you don't want to<br />
make your own. In general, a 10-pound bag of charcoal has about 150-180 briquettes. This should help you<br />
decide what size you need when you go to purchase your charcoal.<br />
To adjust the heat for your grilling needs, if raising the cooking surface is not an option (which is generally true<br />
when camping), simply spread the coals or push them together depending on whether you wish to lower or<br />
raise the temperature (respectively). If you need to add more coals, add them to the outer edges of the hot<br />
coals. NEVER add charcoal lighter fluid to hot coals.<br />
Charcoal Cooking<br />
Procedures<br />
Line stove with foil or lay sheet of foil on the ground (for easy clean-up).<br />
Place a fire starter in the center. Paraffin, sawdust, or milk carton fire starters, or trench candles may<br />
be used.<br />
Place charcoal ring around fire starters<br />
Stack charcoal inside charcoal ring. About 30 briquettes are enough for an average fire, unless you are<br />
cooking a large quantity of foil-wrapped food.<br />
Light the starter and allow it to burn undisturbed for 30-45 minutes or until the briquettes begin to<br />
turn ash grey. Vigorous fanning with a piece of heavy cardboard will speed up the process.<br />
Cooking should not begin until all briquettes are grey over most of their surface. When fire is ready for<br />
cooking, the coals should be arranged to the type of cooking desired.<br />
60
Types of Charcoal Cooking<br />
Pot cooking - a flat-topped pile just the size and shape of the bottom of the pot is best. Pot should be<br />
placed directly on the coals. Soaping pot is not necessary.<br />
Foil cooking - spread the coals so there is ½ - 1 inch space between them, and lay foil-wrapped food<br />
directly on them with tongs.<br />
Broiling - arrange coals .flat over an area large enough to provide heat for the food which is cooked on<br />
a rack above.<br />
Stick cooking - a flat topped heap of coals is best for this.<br />
Skillet cooking - a flat topped pile of coals just the size of griddle or skillet will prevent overheated<br />
hands and wrists. Support the skillet on small rocks at each corner so that the bottom of the skillet is ¼<br />
inch above the coals. This allows some air circulation in the fire and keeps it hotter.<br />
Dutch Oven Cooking – see following pages<br />
Foil Packets<br />
Foil packets can be a fun alternative in outdoor cooking. One advantage is that many recipes may be prepared<br />
in advance, at home, then placed in the ice chest until time to cook. Also, there is minimal clean up. Our girls<br />
simply eat out of their foil, thus eliminating the need for doing dishes – a welcome relief!!<br />
To be successful with foil packets, use heavy-duty foil, and put a layer of wet paper towels between two layers<br />
of foil. Have long handled tongs available but have the kind with rounded edges so you don't puncture the<br />
packets when turning them. Another good accessory is a good pair of heat-resistant oven mitts. <strong>Girl</strong>s often<br />
want to eat out of the foil packet they made, so consider marking them with permanent markers (best to do<br />
before wrapping – since condensation from cold meat or vegetables can make it difficult afterwards.) Tip:<br />
label or draw design all over the foil.<br />
Another key to successful foil packet cooking is how you fold the packets. You need to allow room for heat<br />
expansion. Use a piece of foil approximately 18"x12" for each serving. The best way to fold is using a drug<br />
store fold:<br />
61<br />
1. Bring the long edges of the foil together and fold down 2-3 times leaving room above the food for<br />
expansion.<br />
2. Fold in each side 2 times and crimp to make a seal.<br />
Generally, you cook with the seam side up but if the folds are secure, this allows you to turn the packets to<br />
avoid burning the bottom if you place them directly on the coals. Most recipes are best when cooked 4"-6"<br />
above medium coals. See Stick Cooking for information about coals and how to judge when they are<br />
"medium".<br />
The fire is important in foil cookery. A shallow bed of glowing coals is needed, that will last for the time<br />
required for cooking. Use a log cabin type fire and let it burn down to embers.
COOKING TIME<br />
Hamburgers 8-12 minutes<br />
Frankfurters 5-10 minutes<br />
Chops 20-35 minutes<br />
Carrot sticks 15-20 minutes<br />
Corn 6-10 minutes<br />
Potatoes, sliced 10-15 minutes<br />
Apple 20-30 minutes<br />
Biscuits 6-10 minutes<br />
Chicken 25 minutes<br />
With some practice, you will be able to judge cooking time and come up with some new recipes of your own.<br />
Hints:<br />
● For biscuits--grease sheet and allow room for rising.<br />
● Poached eggs--make little cups. Place in fry pan, drop egg in each cup. 2" of water in fry pan. Cover.<br />
● Meat, sliced potatoes and vegetables---make a meal in one.<br />
● Minute rice--foil in shape of bowl, add rice and water. Seal top with a twist. Place on grill over fire. Use<br />
heavy duty foil.<br />
● Thin sliced potatoes-use plenty of butter, add a little water. Turn often.<br />
● Corn on the cob--remove husks. Rub with butter. Wrap.<br />
Pocket Stew<br />
Put stew beef, carrot, onion, spices, and potato in foil. Note: Using 2 pieces of foil INDEPENDENTLY hastens<br />
the cooking time by acting as a small scale pressure cooker. Place packages on hotbed of coals and begin<br />
timing. Allow 10 minutes for each side. Be careful NOT to puncture foil when turning. Use tongs, shovel,<br />
and/or gloves.<br />
Banana Boat<br />
Slice lengthwise an unpeeled banana, place marshmallows and chocolate inside. Bake in coals.<br />
Pi-Che-Hams<br />
Ingredients: Sliced Ham, Cheese, Pineapple, Hamburger Bun<br />
1. Drain pineapple thoroughly. 2. Place a slice of ham on bottom half of hamburger bun, followed by cheese<br />
slice, then pineapple slice, then bun top. 3. Wrap in foil and heat well in coals.<br />
Toasted Cheese Sandwiches<br />
Make cheese sandwiches. Butter outside of bread. Wrap in several layers of foil and turn frequently to prevent<br />
burning.<br />
Fried Chicken in Foil (per person)<br />
1-2 pieces of frying chicken<br />
Pat of butter, salt, pepper<br />
Place butter and seasoning with chicken inside foil. Use drug store wrap. Wrap each piece in foil twice. Place<br />
on coals, never in flame. Remove test piece in 10 minutes with tongs. Check and rewrap. Turn over each foil<br />
package without puncturing as steam will escape. Takes about 20 minutes.<br />
62
Dutch Oven Cooking<br />
The Dutch oven is the utensil that can make it possible for you to enjoy the same type of foods in camp that<br />
you have at home. To a large extent, it is true that if you can cook it at home, you can cook it in a Dutch oven<br />
at camp.<br />
Dutch ovens are made of cast iron or cast aluminum. Cast iron ovens are easier to find than cast aluminum.<br />
The thickness of the metal helps to distribute the heat around the entire dish that is being cooked. With the<br />
Dutch oven set over coals and with coals on the lid, the temperature within the Dutch oven can be varied by<br />
increasing or decreasing the number of coals.<br />
Dutch ovens come in various sizes. Diameters of 10, 12, 14 and 16 inches are common, with depths of 4 or 6<br />
inches. For cooking for groups of 8 persons, a number 12 oven is fine. A number 10 oven is fine for pies and<br />
cakes. The lid to the Dutch oven is important. A Dutch oven that is used in one's kitchen usually has a dome<br />
lid, but this type of lid is not suitable for camp cookery. For camp cookery the lid should have a flanged or<br />
raised lip around the rim. With the top recessed, coals can be placed on the lid to increase the heating<br />
efficiency of the Dutch oven.<br />
A new cast iron Dutch oven needs to be broken in before it is used. This involves covering the inside of the<br />
Dutch oven with a coating of shortening. The inside of the lid is also coated. The oven is then placed over low<br />
heat and the shortening is allowed to melt. This should be done several times prior to using it for the first<br />
time. Any surplus shortening in the oven after it has been conditioned should be drained out. When you are<br />
through with the cast iron oven, you have the problem of cleaning it. Some people will tell you never to wash<br />
out a Dutch oven. Some prefer to wash the Dutch oven if needed and recondition it immediately after washing<br />
it. If the cast iron Dutch oven is not going to be used for some time make certain that there is a heavy coating<br />
of shortening worked into it. If it has been stored for a long time, it is always a good idea to recondition it<br />
before it is used again. This sounds like a lot of work, but actually it takes little time after YOU have broken the<br />
Dutch oven in.<br />
After placing food in the Dutch oven, cover the top with aluminum foil. This will help prevent ashes getting<br />
into your food when you check your food’s progress.<br />
Use charcoal briquettes to cook in the oven. For a 12” oven:<br />
300 degrees - 14 on top and 7 bottom<br />
325 degrees - 15 on top and 7 bottom<br />
350 degrees - 16 on top and 8 bottom<br />
375 degrees - 17 on top and 9 bottom<br />
400 degrees - 18 on top and 9 bottom<br />
425 degrees - 19 on top and 10 bottom<br />
450 degrees - 21 on top and 10 bottom<br />
500 degrees - 23 on top and 11 bottom<br />
A pair of kitchen tongs is fine for handling hot coals<br />
For stews and soups, most of the heat should be on the bottom. Meat, poultry, and vegetable dishes can be<br />
cooked with even heat. To bake biscuits or bread in the Dutch oven, you will want at least two-thirds of the<br />
63
heat on top of the lid, and even then it's wise to lift the oven off the coals after part of the cooking time, to<br />
avoid blackening the biscuit bottoms while the tops brown.<br />
It is important to have a small air space between the coals and the bottom of the oven. This can be as little as<br />
1/4 inch. If there is no air space when you set the oven over the coals, set the legs on flat thin rocks to get this<br />
space.<br />
Placing the charcoal on a piece of aluminum foil will cut down on heat loss if the ground is wet or cold.<br />
Aluminum foil can also be used as a windbreak, either by placing it over the coals on the lid or around the<br />
oven. When foil is used as a windbreak, more frequent checks are needed to make certain that you do not<br />
burn the food.<br />
Although many types of foods can be cooked right in the Dutch oven, it is usually better to have the food in a<br />
pan that is set in the Dutch oven. If the pan is set on some type of rack, more uniform heat circulation around<br />
the entire dish results in more even cooking. The rack can be one from the kitchen or it can be made out of<br />
three or four small stones.<br />
You will want to check the progress of your food within 10 minutes of putting the coal on. This can be done<br />
simply by lifting the lid enough to see your dish - Remember to use foil to cover top so that when checking you<br />
do not get ashes into the dish. Do this quickly so you do not lose too much heat. (I use a pair of pliers to lift the<br />
hot lid - I also have a heavy oven mitt on my hand).<br />
If you are baking a cake or bread, you can test it by pushing a straw into the dough and pulling it out. If it<br />
comes out dry or with crumbs on it, the dish is done. If it has a golden brown crust, you can remove it from the<br />
oven. If you want to brown it some more, you can remove the coals from under the oven and place additional<br />
coals on the lid. If it is not done, keep the oven on the coals and possibly place additional coals on the lid if the<br />
top needs to be browned more. You can also obtain a quickly golden crust when the dish has been completely<br />
cooked by placing a piece of aluminum foil over the coals on the lid. In one or two minutes you should have<br />
the brown you want.<br />
Extinguishing charcoal<br />
● With tongs, place each briquette one- at a time into metal pail of water.<br />
● When water has cooled, dump water out of pail, leaving coals in bucket.<br />
● Sprinkle ashes in stove with water and stir.<br />
● Gather up foil lining together with ashes and dispose in trash bag.<br />
● Coals may be reused when dry.<br />
64
Cherries and Chocolate Cake<br />
1 can (20 oz) cherry pie filling ¾ cup brown sugar<br />
½ cup chopped walnuts 1 stick butter or margarine<br />
1 box chocolate cake mix and needed ingredients<br />
Mix cake mix according to directions on package. Melt butter or margarine in bottom of oven, carefully<br />
coating sides. Add brown sugar, cherry pie filling and walnuts. Top with cake mix. Bake for 25 minutes with<br />
14 coals on top and 8 on bottom.<br />
Serves 10-12.<br />
Ham & Potatoes Au Gratin<br />
1 1/2 cups cooked ham (diced) margarine<br />
2 cups milk 3 cups potatoes, diced<br />
Seasoned salt & pepper to taste<br />
1/2 cup grated cheese (cheddar) 1 onion (minced)<br />
2 TBS fine bread crumbs 3 TBS flour<br />
Layer potatoes and ham in oven. Melt margarine and sauté onion. Blend in flour to make a light rue. Gradually<br />
add milk and cook; stirring until thickened. Add pepper and seasoned salt. Pour over ham and potatoes in<br />
oven. Sprinkle cheese and bread crumbs over top. Bake at 400 degrees for 20 minutes or until done.<br />
Broccoli Casserole<br />
2 cups cooked rice 2 pkgs. frozen broccoli 1 cup milk<br />
1 can cream of chicken soup 1 small jar Cheese Whiz 1 tsp. Salt<br />
1/2 cup chopped onion 1 Tbsp. vegetable oil 1 sleeve Ritz crackers<br />
Pre-heat Dutch Oven (lid off) with 10 charcoal briquettes under the oven. In hot oven, sauté onion in oil. Add 1<br />
can cream of chicken soup, 2 cups cooked rice and broccoli that has been thawed and drained. Add 1<br />
teaspoon salt, cheese whiz and milk. Stir well. Crumble sleeve of Ritz crackers over top. Cover with oven lid.<br />
Place 10-12 charcoal briquettes on top of oven. Bake for 30 minutes. Check at least 1 time.<br />
Pepperoni Casserole<br />
1 lb. Spaghetti, uncooked 2 Jars (28oz) spaghetti sauce<br />
1 cup grated parmesan cheese 8 oz. shredded cheddar cheese<br />
8 oz. shredded mozzarella cheese 8 oz. sliced pepperoni<br />
Layer all in oiled oven, beginning with 1/2 inch of spaghetti sauce. Spaghetti sauce should coat both sides of<br />
spaghetti pasta as the pasta will cook while absorbing the flavor of the sauce. Bake 1 hour with 14 coals on top<br />
and 10 on bottom.<br />
65
S ‘mores Bars<br />
8 to 10 whole graham crackers (about 5 inches x 2-1/2 inches)<br />
1 pkg. fudge brownie mix (13 x 9 inch pan size pkg)<br />
2 cups miniature marshmallows 1 cup (6 oz) semisweet chocolate chips<br />
2/3 cup chopped peanuts<br />
Arrange graham crackers in a single layer in a greased 13 x 9 x 2 baking pan. Prepare brownie batter according<br />
to package directions. Spread over crackers. Bake at 350 for 25-30 minutes or until a toothpick inserted near<br />
the center comes out clean. Sprinkle with marshmallows, chocolate chips and peanuts. Bake 5 minutes longer<br />
or until marshmallows are slightly puffed and golden brown. Cool on a wire rack before cutting. Yield: 2 dozen<br />
Biscuit Pizza Bake<br />
1 pound ground beef 1 can (15 oz) pizza sauce<br />
1 cup chopped green pepper 1/2 cup chopped onion<br />
1 pkg (3 1/2 oz) sliced pepperoni 1 cup (4 oz) shredded mozzarella cheese<br />
1 cup (4 oz) shredded cheddar cheese 1 can (4 oz) mushroom stems and pieces, drained<br />
2 tubes (12 oz. each) refrigerated buttermilk biscuits<br />
In a skillet, cook beef over med. heat until no longer pink. Meanwhile, quarter the biscuits; place in a greased<br />
oven. Top with pizza sauce. Drain beef, sprinkle over biscuits and sauce. Layer with green pepper, onion,<br />
mushrooms, pepperoni, and cheeses. Bake at 350 degrees for 25-30 minutes or until cheese is melted. Let<br />
stand for 5-10 minutes before serving.<br />
Cheeseburger Pie<br />
2 lbs. ground beef 2 medium onions, peeled and chopped<br />
1 Tbs. salt 2 cups (8 oz) shredded cheddar cheese<br />
1 large green pepper, cored and chopped 2 cups Bisquick<br />
1 cup milk 3 eggs 1 Tbsp cooking oil<br />
In a frying pan, brown the ground beef, chopped onions, and chopped pepper. Drain if necessary. Stir in salt.<br />
Meanwhile, thoroughly blend Bisquick, eggs, and milk. (You can use a ziplock plastic bag to do this - saves a<br />
dirty bowl). Grease the oven with cooking oil. Spread the beef mixture evenly in bottom. Pour Bisquick mix<br />
evenly over top. Do not stir in. Sprinkle cheese over top, evenly. Do not stir in. Bake for 30-40 minutes or until<br />
knife in center comes out clean. Suggestion: Save some campsite preparation time by browning the beef,<br />
onions and pepper the night before the outing, place in a freezer bag and freeze; wrap in newspapers to keep<br />
cool until oven time.<br />
Quick Biscuits<br />
While you are preheating the oven (10 charcoal briquettes underneath), make rolled (or drop, if you're<br />
camping) biscuits, using the recipe off a Bisquick box. Powdered milk works just fine. Put the biscuits into the<br />
oven and cover. Let sit for 5-7 minutes (this browns them on the bottom). Lift the oven off the bottom coals<br />
and put 25 coals on top. Cook another 8-10 minutes (check 5 minutes to make sure they aren't burning). Key -<br />
oven needs to be HOT!!<br />
66
German Pancakes<br />
1 ½ cups milk 9 eggs 6 Tbs. Butter<br />
1 ½ cups flour ¾ tsp salt Lemon juice<br />
Powdered sugar<br />
In a mixing bowl whisk together milk, eggs, flour, and salt to form a thin batter. Heat a 14” oven using 14-16<br />
briquettes bottom and 18-20 briquettes top until very hot. Add butter to oven and let melt. Pour batter into<br />
oven and cook for 25-30 minutes until pancake is fluffy and light brown. Sprinkle pancake with lemon juice<br />
and dust with powdered sugar. Serves: 6<br />
Mountain Man Breakfast Omelet<br />
1 lb country sausage 2 cups chopped mushrooms 1 lb bacon<br />
18 eggs 1 large yellow onion, diced ¾ cup mile<br />
3 cloves garlic, minced 1 green bell pepper, chopped<br />
3 cups grated Cheddar cheese 1 red bell pepper, diced<br />
Picante sauce<br />
Salt and pepper to taste<br />
Heat a 12” oven using 20-22 briquettes bottom until hot. Add sausage to oven and fry until brown. Remove<br />
sausage from oven. Cut bacon into 1 inch slices. Add to oven and fry until brown. Add sausage, onions, garlic,<br />
bell peppers, and mushrooms. Sauté until vegetables are tender. Whisk together eggs and milk. Season with<br />
salt and pepper. Pour eggs over vegetable mixture. Cover and bake using 8 briquettes bottom and 14-16<br />
briquettes top for 20 minutes until eggs are set up. Cover top with cheese and replace lid. Let stand until<br />
cheese is melted.<br />
Serve topped with picante sauce. Serves: 8-10<br />
Blackberry Cobbler<br />
2 sticks butter 1 egg<br />
1 Tbsp. Baking powder 4 cups fresh blackberries or 2 bags frozen (thawed)<br />
1 tsp salt 1 ½ tsp fresh grated lemon zest<br />
1 ½ cup milk 1 tsp cinnamon<br />
2 cups flour 2 ½ cups sugar<br />
Melt butter in a 12” oven using 10-12 briquettes bottom heat. Wash fresh blackberries and drain. In a large<br />
bowl combine blackberries, sugar and lemon zest; stir to coat blackberries. Let rest. In separate bowl combine<br />
flour, sugar, baking powder, salt, milk, and egg; mix until smooth. Pour batter over melted butter -- do not stir.<br />
Carefully spoon blackberries over top of the batter -- do not stir. Sprinkle cinnamon over top. Cover and bake<br />
using 10-12 briquettes bottom and 18-20 briquettes top for 35 to 45 minutes rotating the oven and lid 1/4<br />
turn in opposite directions every 10 minutes until crust is golden brown. Serve topped with whipped cream or<br />
serve with vanilla ice cream. Serves: 10<br />
67
Box Oven Cooking<br />
Anything that can be baked can be fixed in a box oven. Generally, the most successfully things are those that<br />
don't cook too long (1 hour or less) because you will not need to add more coals during cooking to maintain<br />
the temperature.<br />
How to make a box oven:<br />
Take a large heavy-duty cardboard box - an apple crate works well. Line the inside with heavy-duty foil, shiny<br />
side out. Use duct tape to secure to side of box. Make sure it is as smooth as possible to fit over what you are<br />
cooking.<br />
How to cook in a box oven:<br />
Find a flat spot. Place 4 empty soda cans in a rectangle on the ground. Place a cookie sheet (that will fit<br />
when the box is inverted over it) on top of the cans and the pan that you are cooking in on top of that.<br />
Use an aluminum pie plate and place hot coals in pan and place between soda cans below cookie sheet.<br />
A charcoal briquette gives off about 40-50 degrees of heat; so, for baking at 350 degrees, use about 9-<br />
10 briquettes). Invert box over the assembly and place a small stick on the ground for the box to sit on<br />
to serve as a vent. See the illustration above (illustration shows coals directly on the ground and also<br />
shows a viewing window fixed into the box oven, both of which are options):<br />
Solar Cooking<br />
Solar cooking is fun to experiment with, especially since the food doesn't really burn. You can leave it for<br />
extended periods and let it cook. Directions for making a solar cooker are included in many <strong>Girl</strong> <strong>Scout</strong> level<br />
handbooks. If you aren't that adventuresome, you can purchase one from Solar Cookers International. You can<br />
also make a portable solar cooker using a cardboard box cut in half diagonally, covering it in foil, then cooking<br />
in plastic oven bags. Cookware for solar oven cooking should be black. The enamel camp ware works well. The<br />
9" round is the ideal size for most recipes. Again, Solar Cookers International sells these pots. You can cook<br />
most anything in a solar oven. Try your favorite recipe and cook twice as long as the recipe says. Soft<br />
vegetables, eggs, cheese, and precooked or ground meals cook very well and fast in the solar cooker. Meats<br />
and hard vegetables take longer. Make sure your solar oven is positioned to catch the most amount of sun,<br />
turning if necessary as the sun shifts. If you need to leave, position it so it will get most of the sun by placing in<br />
the sun's path estimating its halfway point while you're gone.<br />
If the girls can’t do it alone, it is too advanced for them. Cooking success is determined by fire building ability.<br />
68
<strong>Troop</strong> <strong>Camp</strong> <strong>Basics</strong> Part 6:<br />
69<br />
Respect for the Environment<br />
Contents<br />
Minimal Impact<br />
Leave No Trace Activities<br />
<strong>Girl</strong> <strong>Scout</strong> <strong>Council</strong> of the Southern <strong>Appalachian</strong>s<br />
www.girlscoutcsa.org
Minimal Impact<br />
“Leave Nothing But Footprints . . . Take Only Pictures”<br />
In <strong>Girl</strong> <strong>Scout</strong>s, we have long advocated leaving a place better and cleaner than when you found it, but even<br />
seemingly innocent outdoor practices can inflict serious harm on the environment. It is important that <strong>Girl</strong><br />
<strong>Scout</strong>s of all ages learn and practice minimal impact outdoor skills.<br />
Minimal impact is also known as low-impact or no trace. Such practices help to preserve the physical<br />
landscape of the campsite, as well as the solitude and spirit of the wilderness. <strong>Girl</strong>s should be encouraged to<br />
live lightly on the land and leave no trace of their presence after an activity. Everyone needs to adopt a code<br />
of behavior that reflects a commitment to preserving the natural quality of our lands. We should begin to<br />
incorporate the concepts of a minimal impact approach with the first, simple activities the troop does. <strong>Girl</strong>s<br />
need to understand that their daily actions have an effect on the environment. In all <strong>Girl</strong> <strong>Scout</strong> program<br />
activities, girls can learn and practice simple practices that will lead to an understanding and application of<br />
minimal impact outdoor skills.<br />
Leave No Trace Activities<br />
(Source: http://www.lnt.org/training/activities/index.html)<br />
Leave No Trace is a national outdoor skills and ethics education program. The activities found here were<br />
created to help share the value and importance of Leave No Trace principles with young people; many can be<br />
adapted for adults. The following information describes how the activities are designed and how to fit them to<br />
your personal needs.<br />
Why Leave No Trace? Between 1965 and 1980, backcountry visits jumped from 4 million visitor days per year<br />
to 10 million per year.(A visitor day is a 12 hour stay by one person.) In 1984 the number grew to 15 million<br />
visitor days up 275 percent in less than 20 years. The numbers of backcountry (and front-country) visitors<br />
continue to grow at a fast pace. As cities grow and populations encroach upon wild lands and recreation areas,<br />
we must do more than just pick up litter and extinguish campfires; we must learn how to maintain the<br />
integrity and character of the outdoors for all living things. However, Leave No Trace is not simply a program<br />
for visiting the backcountry, it is a way of life, and learning Leave No Trace concepts begins at home.<br />
The knowledge and concepts enabling visitors to Leave No Trace are easily taught both before and during<br />
outings. With a little preparation, you can teach people the value of our reviving natural areas and methods to<br />
preserve them for future generations.<br />
70<br />
● Incorporating Leave No Trace skills contributes to a safe and fun outdoor trip.<br />
● Leave No Trace methods help preserve limited recreational resources for today and tomorrow.<br />
● Helps to ensure a positive outdoor experience for all those who spend time outside.<br />
The Seven Principles of Leave No Trace<br />
1. Plan Ahead and Prepare<br />
Know the regulations and special concerns for the area you'll visit.<br />
Prepare for extreme weather, hazards, and emergencies.<br />
Schedule your trip to avoid times of high use.<br />
Visit in small groups when possible. Consider splitting larger groups into smaller groups.<br />
Repackage food to minimize waste.<br />
Use a map and compass to eliminate the use of marking paint, rock cairns or flagging.
71<br />
2. Travel and <strong>Camp</strong> on Durable Surfaces<br />
Durable surfaces include established trails and campsites, rock, gravel, dry grasses or snow.<br />
Protect riparian areas by camping at least 200 feet from lakes and streams.<br />
Good campsites are found, not made. Altering a site is not necessary.<br />
In popular areas:<br />
Concentrate use on existing trails and campsites.<br />
Walk single file in the middle of the trail, even when wet or muddy.<br />
Keep campsites small. Focus activity in areas where vegetation is absent.<br />
In pristine areas:<br />
Disperse use to prevent the creation of campsites and trails.<br />
Avoid places where impacts are just beginning.<br />
3. Dispose of Waste Properly<br />
Pack it in, pack it out. Inspect your campsite and rest areas for trash or spilled foods. Pack out<br />
all trash, leftover food, and litter.<br />
Deposit solid human waste in catholes dug 6 to 8 inches deep at least 200 feet from water,<br />
camp, and trails. Cover and disguise the cathole when finished.<br />
Pack out toilet paper and hygiene products.<br />
To wash yourself or your dishes, carry water 200 feet away from streams or lakes and use small<br />
amounts of biodegradable soap. Scatter strained dishwater.<br />
4. Leave What You Find<br />
Preserve the past: examine, but do not touch, cultural or historic structures and artifacts.<br />
Leave rocks, plants and other natural objects as you find them.<br />
Avoid introducing or transporting non-native species.<br />
Do not build structures, furniture, or dig trenches.<br />
5. Minimize <strong>Camp</strong>fire Impacts<br />
<strong>Camp</strong>fires can cause lasting impacts to the backcountry. Use a lightweight stove for cooking and<br />
enjoy a candle lantern for light.<br />
Where fires are permitted, use established fire rings, fire pans, or mound fires.<br />
Keep fires small. Only use sticks from the ground that can be broken by hand.<br />
Burn all wood and coals to ash, put out campfires completely, then scatter cool ashes.<br />
6. Respect Wildlife<br />
Observe wildlife from a distance. Do not follow or approach them.<br />
Never feed animals. Feeding wildlife damages their health, alters natural behaviors, and<br />
exposes them to predators and other dangers.<br />
Protect wildlife and your food by storing rations and trash securely.<br />
Control pets at all times, or leave them at home.<br />
Avoid wildlife during sensitive times: mating, nesting, raising young, or winter.<br />
7. Be Considerate of Other Visitors<br />
Respect other visitors and protect the quality of their experience.<br />
Be courteous. Yield to other users on the trail.<br />
Step to the downhill side of the trail when encountering pack stock.<br />
Take breaks and camp away from trails and other visitors.<br />
Let nature's sounds prevail. Avoid loud voices and noises.<br />
The member-driven Leave No Trace Center for Outdoor Ethics teaches people how to enjoy the outdoors<br />
responsibly. This copyrighted information has been reprinted with permission from the Leave No Trace Center<br />
for Outdoor Ethics: www.LNT.org
ACTIVITY # 1: Our Natural World - Quick Activity<br />
Grabbing Your Groups Attention<br />
Your group will be going on a Nature Scavenger Hunt. Rather than collecting objects, they will be listing ideas<br />
on paper. The hunt will help participants discover how much they have in common with the natural world and<br />
how the natural world influences their survival. This activity sets the stage for learning and embracing Leave<br />
No Trace principles.<br />
Begin the activity by conducting one of the following:<br />
● an excursion to an outdoor setting such as a park, canyon, river, or desert.<br />
● an excursion to a natural setting via a slide show, color photographs, or posters.<br />
● a mind excursion where participants imagine their favorite natural setting<br />
● a mind excursion where participants close their eyes while you describe a natural setting.<br />
The Activity<br />
Give each participant a piece of paper and a pencil. Have them make three columns with the titles, Things in<br />
Nature, Things We Have in Common, How It Helps Me. Participants are to observe their environment<br />
physically if they are outdoors, or mentally if they are indoors. They must find objects in nature and tell how<br />
they are like that object. Make sure they consider less noticeable things such as air, soil, sun. For example:<br />
Things in Nature, Things We Have in Common, How It Helps Me<br />
72<br />
● Tree. We both have an outer layer to protect us (bark/skin). A tree gives me oxygen.<br />
● Soil. We both contain minerals. Soil helps grow my food.<br />
● Ant . We both need shelter. They are fun to watch.<br />
The Discussion<br />
Have participants share one or more of their connections. Help them to discover that this personal connection<br />
is where a commitment to land stew ship begins. Land stewardship is the goal of Leave No Trace. Outline for<br />
them what they will be learning about Leave No Trace in the future.<br />
ACTIVITY #2: Plan Ahead & Prepare - Quick Activity<br />
Note: Tell your group you are going to take an imaginary hiking trip and ask each person to pack a small<br />
backpack for your meeting. Don't tell the participants their imaginary destination or what to bring. Before your<br />
meeting, find pictures or posters depicting a local or regional environment (high alpine, desert, river). You will<br />
use these pictures to serve as your imaginary destination.<br />
Grabbing Your Group's Attention<br />
Break participants into small groups of three to five when they arrive. Build suspense by asking them to guess<br />
the destination of their imaginary trip.<br />
The Activity<br />
Show the destination pictures and describe the location you have selected (weather, terrain, etc.). Explain the<br />
goal of the trip: wildlife viewing or fishing. Ask the groups to unpack their packs and discuss their answers to<br />
the following questions (the leader must read the back ground information in order to facilitate discussion.)<br />
Note: Because participants packed their packs without proper information, it is unlikely they will be adequately<br />
prepared for their destination. This activity demonstrates the importance of planning before packing.<br />
● Do the contents of your pack properly prepare you for this trip?
73<br />
● Do the contents of your pack ensure your safety?<br />
● Do the contents of your pack ensure you will Leave No Trace that you will not damage natural or<br />
cultural resources?<br />
● Do the contents of your pack ensure your trip will meet your goal for example, wildlife viewing or fish<br />
safely and enjoyably?<br />
The Discussion<br />
Facilitate a discussion with all participants about the results of the activity. Ask groups to briefly share their<br />
answers to the above questions and add:<br />
● How would the contents of your pack differ with different destinations?<br />
● What other information do you need to pack properly for a trip?<br />
● What is the value of knowing these pieces of information before packing?<br />
ACTIVITY #3: Travel and <strong>Camp</strong> on Durable Surfaces - Quick Activity<br />
Grabbing Your Group's Attention<br />
Gather your group outside a home or in a park. Ask them why we construct sidewalks. Focus the resulting<br />
discussion on the need to provide durable surfaces for travel by many people. Explain that concentrating<br />
activity on one durable surface can protect the surviving land. Define the concept of durability for the group.<br />
The Activity<br />
Break your group into pairs and give them the following assignment: Imagine you are looking for durable<br />
surfaces to travel over or set up camp. Find five different surfaces in the immediate area and rate them from<br />
one to five for durability, one being the most durable surface and five being the least durable surface. Give the<br />
group approximately 5 to 10 minutes to explore the area.<br />
The Discussion<br />
Have each pair share their findings with the group. Using the Background Information, conduct a discussion to<br />
help group members develop an understanding of how to identify durable surfaces and the cumulative effects<br />
of many visitors to any one area. Relate the surfaces they find to the rocks, trails, meadows, and other areas<br />
they may find in the backcountry. Refer to the Background Information for details.<br />
ACTIVITY #4: Pack It In & Pack It Out - Quick Activity<br />
Find a location that is littered with garbage. For example, a park, or a high school parking lot right after school.<br />
If you cannot find a littered area near you, simulate one at or near your meeting site.<br />
Grabbing Your Group's Attention<br />
Have your group observe the littered site and record in writing what they think of this situation and how it<br />
makes them feel. Present each member of the group with a garbage bag and with the challenge to make the<br />
area look more pleasant.<br />
The Activity<br />
Have a contest to see who can collect the most garbage in 5 to 10 minutes. Instruct the group to use care<br />
when picking up sharp, rusty, or unsanitary waste. You may wish to have participants bring light gloves for this<br />
activity.<br />
The Discussion<br />
Discuss what litter is and the effects of litter in general. Discuss the effects of litter in the back try. Divide<br />
participants into pairs and have them devise a plan for packing out their garbage on their next trip into the
ackcountry. Discuss each plan. How do one-pot meals contribute to the creation of less bulk and therefore<br />
less garbage? What, if anything, can an individual do about the litter of other backpackers?<br />
ACTIVITY # 5: Leave What you Find - Quick Activity<br />
Grabbing Your Group's Attention<br />
Ask participants how scientists know what dinosaurs looked like. (They find fossils and reconstruct the<br />
skeletons.) It is important for scientists to find the pieces in their original positions (relative to one another) so<br />
that they can see how the pieces fit back together. The same is true for cultural human made artifacts.<br />
The Activity<br />
Use three simple picture puzzles. Break the puzzles into their pieces. In a yard, sandlot, or playground, scatter<br />
all the pieces of one puzzle in a small area. In another location scatter just two or three pieces, and in another<br />
location leave just one piece. Split your group into three teams and have one group at each location recover<br />
the pieces. Ask each group to try and reconstruct the puzzle or describe the picture based on the pieces they<br />
found.<br />
The Discussion<br />
Ask each group how easy it was to reconstruct the puzzle. Discuss the importance to scientists of finding<br />
fossils or artifacts where they were originally deposited. Discuss the impacts of intentional vandalism or theft<br />
of fossils or artifacts. Discuss the effects of unintentional impacts, i.e.; driving off-road, hobby collecting,<br />
campsite construction. Ask the group if they can think of other ways in which fossils and artifacts can be lost or<br />
damaged. Discuss ways in which these resources can be viewed and enjoyed on-site without damage. Remind<br />
the group that it is against the law to remove or destroy these resources! Refer to the Back ground<br />
Information for more details about this discussion.<br />
Note: Although this Quick Concept deals with fossils and artifacts, the principle of leaving what you find applies<br />
to all things that should remain undisturbed in the backcountry. Wildlife, petrified rock, and nests are examples<br />
of other discoveries to leave for people to enjoy.<br />
ACTIVITY #6: Minimize Use and Impact of Fire - Quick Activity<br />
Grabbing Your Group's Attention<br />
Share this scenario with your group. Imagine you are camping in the mountains. The air is a bit chilly as your<br />
group begins preparation for the evening meal. You plan to build a fire to cook hot-dogs and heat up cans of<br />
chili. The fire will also take the chill out of the night air. As you begin to pile sticks inside the fire ring, a ranger<br />
approaches your group and informs you that there is a ban on fires due to dry weather. You will not be able to<br />
build a fire.<br />
The Activity<br />
How will your group solve this problem? What will you do about dinner? How will you deal with the chilly air?<br />
How will not having a fire change your night time activities?<br />
The Discussion<br />
It is recommended that all visitors to natural areas minimize their use of fires, even when there is not a fire<br />
ban. Create a plan for your next outing which does not include fires. You may wish to discuss different types of<br />
food, food repackaging, and the value of using lightweight foods instead of canned goods. Discuss the value of<br />
contacting land managers to learn about local regulations. Refer to the Back ground Information for details to<br />
assist your decision.<br />
74
ACTIVITY #7: Respect Wildlife - Quick Activity<br />
Grabbing Your Group's Attention<br />
Travel to a city park containing wildlife, a wildlife viewing area, or show pictures or slides of wildlife. Ask the<br />
group why loud noises and quick movements are stressful to wildlife. Ask if there are particularly sensitive<br />
times of the year for wildlife. Have someone explain how they can tell if they are too close to wildlife. Have<br />
someone explain how wildlife survive very cold winters or very hot summers.<br />
The Activity<br />
Have the group observe the wildlife in the area and list things that might disturb each type of wildlife. Have<br />
them list the things they could do to minimize their impacts to wildlife<br />
The Discussion<br />
Have each of the participants share their observations and things they would do to minimize disturbing<br />
wildlife and or wildlife habitat. Discuss the negative effects if they did not observe these precautions with<br />
wildlife. Discuss ways to view wildlife without harming them. Encourage the group to observe wildlife from a<br />
distance (to include the use of binoculars) so the wildlife are not scared or forced to flee. Remind them to<br />
always be kind to wildlife.<br />
ACTIVITY # 8: Be Considerate of Other Visitors - Quick Activity<br />
Grabbing Your Group's Attention<br />
Tell the group that while traveling along a trail, they will likely pass others hiking and or camping near the trail.<br />
Ask what things they can do to respect these other users. Also ask what else they might do to show respect for<br />
others if they were to pass individuals on horseback or on mountain bikes.<br />
The Activity<br />
Have 1/3 of the group sit down on the trail and 1/3 move off the trail where an adjoining campsite is located.<br />
Have both groups be somewhat loud and rowdy. Have the remaining 1/3 pass along the trail where the group<br />
is sitting and near the campsite. Once this group has walked by those on the trail and observed the actions of<br />
those at the campsite, have the entire group meet at the campsite.<br />
The Discussion<br />
Have the participants who passed by those sitting in the middle of the trail and at the camp, express how they<br />
felt when they encountered these groups. Discuss what affect it had on their experience. Ask what they feel<br />
would improve their experience on the trail and at the campsite. Ask if the loud and rowdy behavior would<br />
have had any additional impacts on those using horses or mountain bikers along the trail.<br />
Visit: http://www.lnt.org/training/activities/index.html for more Leave No Trace activity plans!<br />
75
<strong>Troop</strong> <strong>Camp</strong> <strong>Basics</strong> Part 7:<br />
77<br />
Fires<br />
Contents<br />
Fire Safety<br />
Fire Starters<br />
Laying a Fire<br />
Fire Alternative<br />
Edible Fire<br />
<strong>Girl</strong> <strong>Scout</strong> <strong>Council</strong> of the Southern <strong>Appalachian</strong>s<br />
www.girlscoutcsa.org
Fire safety<br />
● Make sure area is clear of overhanging branches.<br />
● Have fire bucket of water or sand ready before lighting first match.<br />
● Tie back long hair and loose clothing. (use bandana)<br />
● Do not wear plastic or synthetics around the fire (i.e. nylon windbreaker jacket)<br />
● Have adult supervision at all times.<br />
● Guard fire, keep it small, and avoid overcrowding.<br />
● Never reach over a fire<br />
● Be sure stove is sturdy enough to support pots.<br />
● Do not use liquid fire starter.<br />
Fire Starters<br />
Trench candle<br />
One handy fire starter is made from newspaper. Take one section of a newspaper, and cut it into one-inch<br />
wide strips. Roll up a strip tightly, and tie with a piece of string. Holding the string, you can now dip the starter<br />
into melted paraffin. This starter may be placed in fire tinder and lit.<br />
Egg Carton Lint<br />
To start your fire easily, before your trip fill the cups of a cardboard egg carton with lint from a clothes dryer<br />
(cotton or wool lint only; lint from synthetic fabrics like acrylic, nylon, fleece and polypropylene produce toxic<br />
fumes when burned) or with small pieces of paper. Then fill each cup half-full with melted wax. As you build<br />
your fire, break off one cup and nestle it in your tinder. When you're ready, simply light the "fire starter."<br />
These may be stored in a Ziploc bag to keep them dry and handy.<br />
Egg carton charcoal<br />
Place charcoal briquette in each section of a cardboard egg carton. Fill with hot paraffin.<br />
Egg carton sawdust<br />
Fill sections of carton with sawdust. Fill with hot paraffin.<br />
Candy Kiss<br />
Place chunks of old candle in twists of wax paper.<br />
Nail Polish Matches<br />
Cover the heads of a tied bundle of matches with nail polish.<br />
Sawdust cupcakes<br />
Fill cupcake paper with sawdust. Cover with hot paraffin.<br />
Another sure way to start a fire, especially handy when the wind is blowing, requires only two flashlight<br />
batteries and some fine steel wool (double 00 or finer). Line up the batteries in the same order that they go<br />
into a flashlight. Hold a long coil of fine steel wool to the bottom of the batteries; then brush the other end<br />
across the steel knob at the top of the batteries. A spark will appear in the steel wool like magic. Nestle steel<br />
wool in tinder and blow gently.<br />
78
Laying a Fire<br />
The A Frame<br />
Make the letter “A” out of large kindling or small fuel in the center of your fire pit. The wood you choose<br />
should be about 12" long and about 1"-2" in diameter. The sides of the “A” can rest directly on the floor of the<br />
fire pit; the “crossbar” should rest on top of the sides.<br />
Place tinder inside the top triangle of the “A” so that one end of each twig is resting on the floor of the fire pit<br />
and the twigs are all leaning against the crossbar of the “A”. The result should be a sort of miniature lean-to of<br />
twigs. Don’t pack your tinder too closely—make sure you’re leaving enough space for good ventilation.<br />
The TeePee<br />
The picture below shows how to build a small teepee of tinder and kindling to use in lighting a larger fire. It<br />
uses a ball of fibrous tinder, which is just another tinder option.<br />
To make a cooking or bonfire sized teepee, start by making a small a-frame in the center of your fire pit. Take<br />
small fuel and create a teepee of wood around the a-frame (the picture below will show you the general<br />
idea—just upsize the scale significantly). Make sure you leave at least one opening large enough for you to<br />
reach the a-frame inside, and make sure that the sides of your teepee are close enough to the a-frame to<br />
catch when you light the fire.<br />
The Log Cabin<br />
Start by making a small a-frame or teepee in the center of your fire pit. Build a miniature log cabin of small or<br />
medium-sized fuel around the a-frame or teepee. The size of wood you choose will be determined by the size<br />
of the fire you wish to have. Gradually lay the logs toward the center as you build the cabin. Remember to<br />
leave plenty of space for good ventilation. In the end, it will have the appearance of a pyramid.<br />
79
Fire Alternative<br />
The use of portable camping stoves is strongly suggested for trips. A one-burner stove is needed for each<br />
cooking group of two to four people. To reduce the need for fuel, plan nutritious meals that need little cooking<br />
time. Before departure, become well versed in the use of the camp stove to be taken on the trip. If water is to<br />
be purified by boiling, be sure to carry additional fuel supplies.<br />
Backpacking Stoves<br />
Cooking on a backing packing stove is most preferable in the backcountry. Remember, many wilderness areas<br />
ban fires to reduce the risk the forest fires. <strong>Camp</strong> stoves are designed to burn at least one type of gas (ex:<br />
white gas, kerosene, butane or propane). Butane and propane cartridge stoves are handy and light-weight<br />
and are a good choice for warm-weather campers and hikers. Always test the stove and become familiar with<br />
its operation before using it on a trip.<br />
Safety tips:<br />
● An adult must be present to supervise the use of any stove while girls are cooking.<br />
● In preparation for working near any open flame, tie back long hair, roll up loose sleeves, and do no<br />
wear clothing with dangling ends. Plastic or synthetic garments are extremely flammable and can<br />
cause severe burns, as they often melt rather than burn.<br />
● Take an adequate amount of fuel. Store extra fuel supply away from the cooking flame.<br />
● To avoid an accident, a stove must be used on a level surface and out of the way of foot traffic. Do not<br />
pile rocks or other items around the cook stove for stability.<br />
● When using butane or propane, be sure to carefully thread the canisters to the stove coupling so there<br />
is no leakage.<br />
● A liquid fuel stove should not be refueled in the cooking area. Carry the stove away from any<br />
flammable equipment and the cooking area before refueling it.<br />
● Refuel the stove on a level surface after it has cooled down.<br />
● When using liquid fuels, use a funnel to transfer the fuel from the container to the stove.<br />
● To avoid a flare-up when lighting the stove, do not overfill it.<br />
● If the stove has a refillable tank, before each meal make sure that the tank has enough fuel to cook the<br />
meal.<br />
● No flame should be present in any site where fuel may have spilled.<br />
● Never open a refillable fuel tank while the stove is ignited, even if the tank is running low.<br />
● Liquid fuel must be carried in a clearly marked bottle with a tight-fitting gasket. Avoid contamination<br />
of food or spillage on clothing by carrying the stove and fuel upright in plastic bags separated from<br />
food and clothing.<br />
● Never cook inside a tent or indoors.<br />
● Keep all parts of the stove clean. Check that lines are not clogged.<br />
● Do not dispose of pressurized cans in a fire, place them in direct sunlight, or keep them in enclosed<br />
areas where the temperature is high.<br />
80
Edible Fire<br />
As you help your girls put the fire together, explain what they are doing and how it relates to a real campfire.<br />
Materials Needed<br />
Safety Circle / clear area = Paper plate or paper napkin (1 per person)<br />
Fire ring = Jelly beans, M & M’s, or Cheerios (a handful per person)<br />
Tinder = Shredded coconut or potato sticks (a small pinch per person)<br />
Kindling = Pretzel sticks (a small handful per person)<br />
Matches = Toothpick (1 or 2 per person)<br />
Fire = Red hots for small flames and candy corn for large flames (2-3 or each per person)<br />
Fuel = Pretzel logs, licorice Twizzlers, or Tootsie Rolls (4-5 per person)<br />
Fire starters = Mini marshmallows (3-4 per person)<br />
Fire bucket = Mini cup of water or juice (1 per person)<br />
Shovel = Spoon (1 per person)<br />
Directions<br />
1. First, have girls tie back hair and check for items that might dangle into fire and for nylon or synthetic<br />
fabrics.<br />
2. Clear a safety circle 5-10 feet out from the fire circle. Make sure the area is clear of debris and that<br />
there are no overhanging branches. (Open up and spread out the napkin or put down paper plate).<br />
3. Lay your fire ring. (Arrange jelly beans, M&M’s or Cheerios on the napkin/plate in a wide circle).<br />
4. Fill your fire bucket and place it near the fire circle. (Put water or juice in the mini cup).<br />
5. Put your shovel nearby. (Put the spoon nearby).<br />
6. Lay the A-frame using kindling. The opening (the bottom of the A) needs to be facing you and your<br />
back needs to be to the wind. (Lay down three pretzel sticks so that they form a capital “A” with the<br />
crosspiece on top of the two sides).<br />
7. Place the firestarters in the center of the A-frame, with two or three under the crosspiece. (Distribute a<br />
few mini-marshmallows in the A-frame).<br />
8. Now add tinder in the center of the A-frame/resting on the cross piece of the A-frame. (Sprinkle<br />
coconut or potato sticks).<br />
9. Kneel next to fire. Light match away from your body. Hold lit match under the crosspiece of the Aframe<br />
and light the firestarters and tinder. (Use a toothpick as the match. If the fire has been built<br />
correctly, the leader then adds the red hots to show that the fire has been lit).<br />
10. Add kindling in a crisscross fashion, being careful not to smother the fire. (Add more pretzel sticks).<br />
11. When the kindling is burning well, add fuel. (Add pretzel logs, Twizzlers, or Tootsie Rolls and candy corn<br />
for large flames).<br />
12. When you are done with your campfire, put the flames out by sprinkling water from the fire bucket<br />
(simulate sprinkling or sip your beverage).<br />
13. Use shovel to stir the ashes (use spoon to stir).<br />
14. Place hand over ashes for one minute to make sure they are cool. When the fire is completely<br />
extinguished, girls can eat their campfire!<br />
81
<strong>Troop</strong> <strong>Camp</strong> <strong>Basics</strong> Part 8:<br />
83<br />
Sharps<br />
Contents<br />
Knives<br />
Axes<br />
Saws<br />
<strong>Girl</strong> <strong>Scout</strong> <strong>Council</strong> of the Southern <strong>Appalachian</strong>s<br />
www.girlscoutcsa.org
Tool Craft Safety<br />
Always establish a safety circle around you (a ring about an arm’s length in all directions around, above and<br />
below) before using any sharp object (i.e. knife, saw, ax/hatchet).<br />
KNIVES<br />
Knives can be an indispensable tool to use in the outdoors when used properly and safely. The main emphasis<br />
should be on the safety aspect. Here are some safety rules to consider:<br />
84<br />
Make sure that the girls have a three foot safety circle. This is an imaginary circle drawn around them<br />
with a three foot radius with them in the center. It is their responsibility to respect each other’s "circle<br />
of safety" and to warn others when that three foot safety circle is being compromised.<br />
Jackknives (Swiss Army Knife) are the only appropriate knives to bring on a camping trip (other than<br />
kitchen knives).<br />
Never walk with an open jackknife.<br />
Whittling should be done in a sturdy, seated position with feet planted and legs apart. This way, arms<br />
can be rested on the knees and whittling will occur away from any body parts.<br />
Be sure to hold the knife firmly without placing the thumb on the blade (a common "bad habit").<br />
Always whittle away from you, never toward you.<br />
Make sure to open and close the knife with the blade facing up. Never "snap" a blade closed.<br />
When passing any knife, never release your grip until the receiver acknowledges receipt (eg., says<br />
"thank you"). This way, a knife does not get dropped while in transit.<br />
A good progression for the use of knives is to start with cardboard knives carving soap and progress to<br />
real ones whittling wood.<br />
AXES/HATCHETS<br />
Always use a safety circle.<br />
Stand up when using an ax or hatchet.<br />
If right-handed, put the right foot forward and cut on an angle to the left.<br />
If left-handed, put the left foot forward and cut on an angle to the right.<br />
You don’t need to swing an ax! It is heavy enough to cut without swinging.<br />
Lift the ax and guide it down into the wood.<br />
Always make sure no one is standing or sitting close to you when you are cutting.<br />
Carry an ax or hatchet to the side of your body with the handle facing down and your hand around the<br />
top. The blade should be facing to the backside of you.<br />
Lay the ax or hatchet on the ground for another person to pick-up and use.<br />
Keep the ax or hatchet in its case (if it has one) when not being used.<br />
SAWS<br />
Always use a safety circle.<br />
Place the piece of wood that is going to be cut on the ground<br />
If you are right handed, put your right knee on the ground (if left-handed, vice versa).<br />
Hold the wood down securely with your left hand.<br />
Keep fingers, hands, legs, and feet away from the blade at all times.<br />
Cut with long straight strokes.<br />
Carry the saw safely to the side of your body with the blade pointing toward your back.<br />
If you must pass the saw, place it on the ground or pass it by the handle with the blade down.
<strong>Troop</strong> <strong>Camp</strong> <strong>Basics</strong> Part 9:<br />
85<br />
Knots<br />
Contents<br />
Bowline<br />
Clove Hitch<br />
Constrictor<br />
Half Hitch<br />
Lark’s Head<br />
Sheepshank<br />
Sheetbend<br />
Square Knot<br />
Tautline Hitch<br />
<strong>Girl</strong> <strong>Scout</strong> <strong>Council</strong> of the Southern <strong>Appalachian</strong>s<br />
www.girlscoutcsa.org
Bowline<br />
Clove Hitch<br />
86<br />
A very useful and common knot which forms a loop that can not slip.<br />
(Image source: http://www.28thcambridgescouts.org.uk/images/bowline.jpg)<br />
Used to fasten one end of a rope to a tree or post.<br />
(Image source: http://www.28thcambridgescouts.org.uk/images/clovehitch.jpg)
Constrictor Knot<br />
Used to tie a knot in the middle of a rope; commonly used to hang a bear bag.<br />
87<br />
(Image source: http://www.realknots.com/knots/constric.htm)<br />
Half Hitch<br />
Used to fasten a rope to a ring or tent stake. (Image shows a round turn and two half hitches).<br />
(Image Source: http://www.28thcambridgescouts.org.uk/images/roundturn.jpg)
Lark’s Head To loop cord or rope around a ring or hang your dish bag to a clothesline.<br />
Sheetbend<br />
88<br />
(Image source: http://home.att.net/~troop50/images/larks_head.gif)<br />
Used to tie a thin rope to a thicker rope.<br />
(Image source: http://www.28thcambridgescouts.org.uk/images/sheetbend.jpg)
Square Knot<br />
Used for many situations; most commonly used to tie two ropes of the same thickness together at their ends.<br />
Tautline Hitch<br />
89<br />
(Image Source: http://letsgooutdoors.com/fav/howto/tautline_329x282.gif)<br />
Used to make a loop that will slip when you want it to.<br />
(Image source: http://letsgooutdoors.com/fav/howto/tautline_329x282.gif)
<strong>Troop</strong> <strong>Camp</strong> <strong>Basics</strong> Part 10:<br />
91<br />
Compass Skills<br />
Contents<br />
Compass Skills<br />
How to Use a Silva Compass<br />
A Sample Course<br />
Compass Games<br />
Make Your Own Compass<br />
Find Your Pace<br />
<strong>Girl</strong> <strong>Scout</strong> <strong>Council</strong> of the Southern <strong>Appalachian</strong>s<br />
www.girlscoutcsa.org
Compass Skills<br />
(Reference: http://www.funsocialstudies.learninghaven.com/articles/compass.htm)<br />
The compass has four main points or cardinal points. These are North (N), South (S), East (E), and West (W). If<br />
you think of a compass like a clock, the North is a 12, East at 3, South at 6 and West at 9.<br />
The intercardinal points are the points half way between the cardinal points. They are named for the points<br />
they lie between. They always begin with North or South. They are Northeast (NE), Southeast (SE), Southwest<br />
(SW), and Northwest (NW).<br />
92
The secondary intercardinal points lay half way between the cardinal points (N, S, W, & E) and the<br />
intercardinal points (NE, SE, SW & NW). They are named according to the points they lie between. The cardinal<br />
point comes first, and then the intercardinal point. For example, the first four are: North-northeast (NNE),<br />
East northeast (ENE), East southeast (ESE), and South-southeast (SSE).<br />
The compass is divided into 360 degrees (°), the same as any other circle. North is at 0 degrees. The cardinal<br />
points are 90 degrees apart, therefore North=0°, East=90°, South=180°, West=270°. The intercardinal points<br />
mark the midway point between the cardinal points. Therefore, NE=45°, SE=135°, SW=225°, and NW=315°.<br />
93
How to Use a Silva Compass<br />
The parts of the Compass:<br />
● Plastic base:<br />
■ Direction of Travel Arrow (see below: “read bearing here arrow”)<br />
■ Scale (inches or millimeters)<br />
● Metal or Plastic Housing Dial<br />
■ Red-tipped magnetic needle (the red tip always points toward the north magnetic pole<br />
unless another magnetic influence is nearby)<br />
● Black or Red Outlined Arrow (see below: “internal north arrow”)<br />
■ (Orienting arrow)<br />
● Numerical Degrees (0 to 360 degrees)<br />
● Letter Directions / cardinal points (N, E, S, W)<br />
94<br />
(Reference: http://www.nonprofitpages.com/nica/Attic/Compass.htm)<br />
How to find the bearing from an object:<br />
● Point the direction of travel arrow at the object.<br />
● Turn the degree housing dial until the orienting arrow (internal north arrow) lines up with the red end of<br />
the magnetic needle.<br />
● Read the numerical degree at the bearing where the direction of travel (read bearing here arrow)<br />
intersects with the housing dial.<br />
Some notes about using the compass:<br />
Hold the compass flat so that the magnetic needle easily moves. Since the needle is a magnet, you need to be<br />
a couple feet away from any metal or other magnets.<br />
The smallest unit on the compass is 2 degrees. There are 20 degrees between numbers, the larger mark on the<br />
dial between two numbers represents halfway between them, so the larger mark between 340 and 360 equals<br />
350 degrees.
Using a Silva Compass to Follow a Trail:<br />
● Decide the direction that you wish to go in numerical degrees.<br />
● Hold the plastic base and turn the housing so as to align the desired direction reading with the direction of<br />
travel arrow on the base.<br />
● With the direction of travel arrow pointing in the direction you are facing, turn your body, holding the<br />
compass level and close in front of you, until the red-tipped needle and the outlined arrow (orienting<br />
arrow) point the same way. You should now be facing the direction you want to go.<br />
● Sight over the direction of travel arrow into the distance to some object. Walk the given distance toward<br />
that object.<br />
Using a Silva Compass Construct a Trail:<br />
● Hold the compass level. Point the direction of travel arrow at the object to which you wish to know the<br />
direction/degree reading.<br />
● Turn the housing until the red-tipped needle and the outlined arrow (orienting arrow) point the same way.<br />
● Read the degree on the housing above the direction of travel arrow. This is the direction you must travel<br />
to get to that point.<br />
A Sample Compass Course<br />
(Used at Lorado Taft Field <strong>Camp</strong>us of Northern Illinois University)<br />
COMPASS ORIENTATION COURSE – Group A / Card 1<br />
TEAM MEMBERS:___________________________________________________________________________<br />
Follow directions carefully.<br />
Answer all questions.<br />
● Leave Poley House through the east door, and step to the tray. Walk 54 meters (59 yards) at an azimuth of<br />
159 degrees. What human-made structure do you see immediately to the west?<br />
______________________ Why might someone build something like this here? Is there some local history<br />
about this that we might want to explore? Where and how can we find out?<br />
__________________________________________________<br />
● Walk 82 meters (268 feet) at an azimuth of 100 degrees. You should now be at the corner of a residence.<br />
Next go, 53 meters (175 feet) at an azimuth of 30 degrees, and stand on human-made stone. Next take 12<br />
steps at an azimuth of 84 degrees. Enter the room nearest you. What would you assume is the purpose of<br />
this room? _____________________________________________________________________________<br />
● If there is an envelope labeled for Group A open it and follow the directions. Do not disturb and envelopes<br />
not intended for your team.<br />
95
Games with a Magnetic Compass<br />
On a separate piece of paper, give one set of directions to the group, and have them follow the directions,<br />
using the compass to make a geometric shape. When done, have them unfold the shape name and see if they<br />
used the compass correctly to make the shape.<br />
Directions for a SQUARE<br />
Place Marker go 6 steps @ 360 degrees<br />
Place Marker go 6 steps @ 270 degrees<br />
Place Marker go 6 steps @ 180 degrees<br />
Place Marker go 6 steps @ 90 degrees<br />
Directions for Z<br />
Place Marker go 10 steps @ 90 degrees<br />
Place Marker go 10 steps @ 240 degrees<br />
Place Marker go 10 steps @ 90 degrees<br />
Directions for an OCTAGON<br />
Place Marker go 5 steps @ 45 degrees<br />
Place Marker go 5 steps @ 90 degrees<br />
Place Marker go 5 steps @ 135 degrees<br />
Place Marker go 5 steps @ 180 degrees<br />
Place Marker go 5 steps @ 225 degrees<br />
Place Marker go 5 steps @ 270 degrees<br />
Place Marker go 5 steps @ 315 degrees<br />
Place Marker go 5 steps @ 360 degrees<br />
Directions for a TRIANGLE<br />
Place Marker go 10 steps @ 120 degrees<br />
Place Marker go 10 steps @ 240 degrees<br />
Place Marker go 10 steps @ 360 degrees<br />
Directions for a RECTANGLE<br />
Place Marker go 6 steps @ 360 degrees<br />
Place Marker go 10 steps @ 270 degrees<br />
Place Marker go 6 steps @ 180 degrees<br />
Place Marker go 10 steps @ 90 degrees<br />
Directions for a RIGHT TRIANGLE<br />
Place Marker go 6 steps @ 270 degrees<br />
Place Marker go 8 steps @ 360 degrees<br />
Place Marker go 10 steps @ 160 degrees<br />
Directions for a PENTAGON<br />
Place Marker go 6 steps @ 72 degrees<br />
Place Marker go 6 steps @ 144 degrees<br />
Place Marker go 6 steps @ 216 degrees<br />
Place Marker go 6 steps @ 288 degrees<br />
Place Marker go 6 steps @ 360 degrees<br />
96
Making your own Compass<br />
Explanation:<br />
The earth produces a magnetic field. This field, although weak, is sufficient to align iron and other<br />
paramagnetic compounds such as your needle within it. By floating the needle on a cork or piece of<br />
Styrofoam, you let it rotate freely so it can orient itself within the earth's magnetic field, to point toward the<br />
north or south poles of the planet.<br />
Overview:<br />
Make a simple compass to find magnetic north.<br />
Equipment:<br />
Sewing needle ~1 inch long.<br />
Small bar magnet. Refrigerator magnets may work if you don't have a bar magnet.<br />
A small piece of cork or piece of Styrofoam.<br />
A small glass or cup of water to float the cork or Styrofoam and needle.<br />
Safety:<br />
Needles are sharp; treat them appropriately.<br />
How to do the experiment:<br />
Your compass will work better if you first run a magnet over the needle a few times, always in the<br />
same direction. This action 'magnetizes' is to some extent. Drive the needle through a piece of cork or<br />
Styrofoam so that is will be able to lie flat in/parallel to the water. Cork from wine bottles works well.<br />
Cut off a small circle from one end of the cork, and drive the needle through it, from one end of the<br />
circle to the other, instead of through the exact middle - be careful not to stick yourself!<br />
Float the cork + needle in your cup of water so the floating needle lies roughly parallel to the surface of<br />
the water.<br />
Place your 'compass' on a still surface and watch what happens. The needle should come to point<br />
towards the nearest magnetic pole.<br />
If you want to experiment further, try placing a magnet near your compass and watch what happens.<br />
How close/far does can the magnet be to cause any effects?<br />
Finding your Pace<br />
Mark off 100 feet on a flat surface.<br />
Walk the distance three times. Always start with your left foot. Count each time your foot hits the<br />
ground as you walk.<br />
Add up the three numbers and divide by three. The number you get is the average number of paces it<br />
takes for you to walk 100 feet.<br />
____ + ____ + ____ = ____<br />
97<br />
Now divide your average into 100 feet to get the length of your pace.<br />
100 / ____ (your average) = ____ feet<br />
There are 5280 feet in one mile. How many steps would it take for you to walk one mile?<br />
5280 / ____ (your pace) = ______ steps per mile
98<br />
NOTES
