Chris Pye #2½ Finishing Gouges - Tools for Working Wood
Chris Pye #2½ Finishing Gouges - Tools for Working Wood Chris Pye #2½ Finishing Gouges - Tools for Working Wood
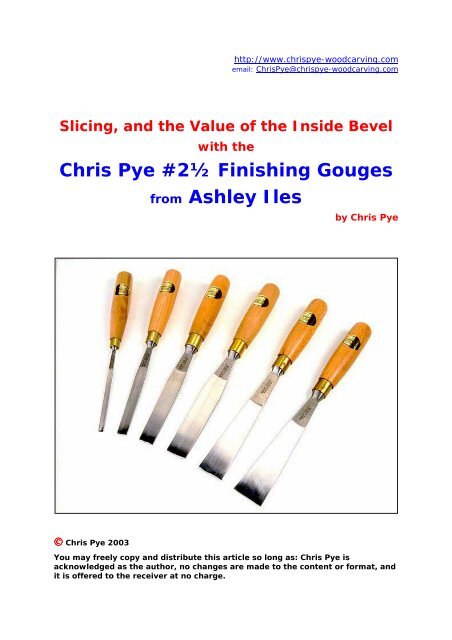
http://www.chrispye-woodcarving.com email: ChrisPye@chrispye-woodcarving.com Slicing, and the Value of the Inside Bevel with the Chris Pye #2½ Finishing Gouges © Chris Pye 2003 from Ashley Iles by Chris Pye You may freely copy and distribute this article so long as: Chris Pye is acknowledged as the author, no changes are made to the content or format, and it is offered to the receiver at no charge.
- Page 2 and 3: Comments and suggestions welcome: C
- Page 4 and 5: Now, in the work of students I was
- Page 6 and 7: 2. What, then, are the real benefit
- Page 8 and 9: Do this experiment first: You'll ne
- Page 10 and 11: Try the exercise - try carving! - w
- Page 12 and 13: 4. Slicing—how to do it… Use th
- Page 14 and 15: 6. Sharpening Sharpen as normal: K
- Page 16: USA Tools for Working Wood Website
http://www.chrispye-woodcarving.com<br />
email: <strong>Chris</strong><strong>Pye</strong>@chrispye-woodcarving.com<br />
Slicing, and the Value of the Inside Bevel<br />
with the<br />
<strong>Chris</strong> <strong>Pye</strong> <strong>#2½</strong> <strong>Finishing</strong> <strong>Gouges</strong><br />
© <strong>Chris</strong> <strong>Pye</strong> 2003<br />
from Ashley Iles<br />
by <strong>Chris</strong> <strong>Pye</strong><br />
You may freely copy and distribute this article so long as: <strong>Chris</strong> <strong>Pye</strong> is<br />
acknowledged as the author, no changes are made to the content or <strong>for</strong>mat, and<br />
it is offered to the receiver at no charge.
Comments and suggestions welcome: <strong>Chris</strong><strong>Pye</strong>@chrispye-woodcarving.com<br />
Slicing, and the Value of the Inside Bevel<br />
with the <strong>Chris</strong> <strong>Pye</strong> <strong>#2½</strong> <strong>Finishing</strong> <strong>Gouges</strong><br />
from Ashley Iles<br />
Contents page<br />
1. How these tools came about 3<br />
2. The real benefits to carvers? 6<br />
The Range 6<br />
Thinness 6<br />
Outer Bevel 7<br />
Inner Bevel 7<br />
An experiment… 8<br />
3. Flatness and <strong>Finishing</strong> 11<br />
4. Slicing: How to do it… 12<br />
5. Slicing: The real beauty… 13<br />
6. Sharpening 14<br />
7. The Iles Guarantee 14<br />
8. Where to buy them… 15<br />
by <strong>Chris</strong> <strong>Pye</strong><br />
<strong>Chris</strong> <strong>Chris</strong> <strong>Pye</strong>: <strong>Pye</strong>: Ashley Ashley Iles Iles #2 #2 ½ ½ ½ <strong>Finishing</strong> <strong>Finishing</strong> <strong>Gouges</strong> <strong>Gouges</strong><br />
2
1. How these tools came about.<br />
If you have read any of my articles and books, you will no doubt know<br />
that <strong>for</strong> the most time my style is to finish off my carvings 'straight from<br />
the chisel' - <strong>for</strong> which mostly read, 'flat gouge'. It's how I learned my<br />
carving and the way I love to work.<br />
'Carving smooth' as opposed to 'sanding smooth' is not a matter of 'right'<br />
or 'wrong' as many carvers would have it, but more a choice that depends<br />
on what a carver has in mind. The worst thing is to be sanding smooth<br />
because you haven't the skill to do anything different.<br />
I see final surface tool cuts as having something of the brush strokes of a<br />
painter, which may be very smooth, or textured, or quite vigorous<br />
depending on the subject. <strong>Finishing</strong> from the tools gives me a level of<br />
subtlety and individuality of expression that is not available to me when I<br />
sand. (And it's also a lot quicker! As is sanding if you start with a<br />
smoothed surface.)<br />
<strong>Finishing</strong> from the chisel usually involves flat gouges – the no.3 sweeps in<br />
the Sheffield list – particularly on simple, broad surfaces. The background<br />
of a relief carving, or a face, would be examples.<br />
I have to use the flattest sweep<br />
possible to carve the background very<br />
smooth while leaving it subtly 'tooled';<br />
a gouge just flat enough not to be a<br />
straight chisel.<br />
I'll show you how I do this in a<br />
moment, but the point of this merest<br />
sweep (curvature across the blade) is<br />
it allows me to keep my corners clear.<br />
<strong>Chris</strong> <strong>Chris</strong> <strong>Pye</strong>: <strong>Pye</strong>: Ashley Ashley Iles Iles #2 #2 ½ ½ ½ <strong>Finishing</strong> <strong>Finishing</strong> <strong>Gouges</strong> <strong>Gouges</strong><br />
3
Now, in the work of students I was often seeing backgrounds that were<br />
more tooled than they could be. I had always thought this was a matter of<br />
technique until I started critically looking at flat gouges. And it seems to<br />
me that many no. 3 gouges made today are both thicker in the blade and<br />
not as flat in the sweep as they could be.<br />
Supporting this: one of my (to me, priceless) carving tools is an old 1" no.<br />
3 gouge made by Herring Bros. This tool is both thinner and flatter than<br />
any of those I've acquired over the last 25 years made by contemporary<br />
manufacturers. This flattest of gouges works so well <strong>for</strong> smoothing and<br />
finishing off any surface—it is a real joy and I use it all the time.<br />
It was no wonder students couldn't match my smooth, lightly textured<br />
surface, without borrowing my gouge (or trying to!). Their own, flattest<br />
gouges were not as flat as mine, and certainly not flat enough <strong>for</strong> what<br />
was wanted.<br />
I felt there was a definite need <strong>for</strong> a flatter gouge than currently available<br />
– if only because I myself wanted to extend the range of what I had. With<br />
this in mind I approached Barry Iles from Ashley Iles, a well-established<br />
family firm, who still able to respond to the needs of carvers and make<br />
'specials'.<br />
Drawings and samples went back and <strong>for</strong>th and I was very pleased with<br />
the way that Barry worked to get exactly what I wanted, even making jigs<br />
and tooling to <strong>for</strong>ge and grind the shapes accurately) and I was quite<br />
fussy).<br />
<strong>Chris</strong> <strong>Chris</strong> <strong>Pye</strong>: <strong>Pye</strong>: Ashley Ashley Iles Iles #2 #2 ½ ½ ½ <strong>Finishing</strong> <strong>Finishing</strong> <strong>Gouges</strong> <strong>Gouges</strong><br />
4
The result is a small range of very flat gouges – flatter even that Iles' own<br />
no.3's, and what they are now number "2 ½".<br />
Thin, and very flat:<br />
The precedent of this flatness doesn't make these tools 'new', but they<br />
have another added feature not found on any tool that I know of offered<br />
to carver today: an inner bevel.<br />
I have asked <strong>for</strong> some bevel to be<br />
added to the inside of the gouges:<br />
I'll explain the use of this in a moment.<br />
It is these 3 features: the thinness of blade, flatness of sweep, and inner<br />
bevel that make these tools unique, and so useful <strong>for</strong> finishing surfaces.<br />
<strong>Chris</strong> <strong>Chris</strong> <strong>Pye</strong>: <strong>Pye</strong>: Ashley Ashley Iles Iles #2 #2 ½ ½ ½ <strong>Finishing</strong> <strong>Finishing</strong> <strong>Gouges</strong> <strong>Gouges</strong><br />
5
2. What, then, are the real benefits of these new<br />
2½ finishing gouges to you and me as carvers?<br />
1. The Range<br />
There is a principle in carving: 'always use the biggest tool possible <strong>for</strong> the<br />
job'. One upshot of this is that I am always seem to be thinking<br />
'downwards': I work with the widest possible gouge until space won't<br />
permit entry then move down to a narrower one.<br />
There are 6 finishing gouges in the range: ¼, ½, ¾, 1", 1¼" and 1½",<br />
which pretty much covers every possibility:<br />
The 2 wider tools are allongee –<br />
splaying from the shoulder –<br />
making them lighter to work<br />
with than regular gouges.<br />
2. Thinness<br />
You have done all the heavy work, modelled towards the finish with<br />
quicker gouges and are moving to the finishing stages: it is here that<br />
these tools come into their own, finishing off to a smooth, delicately<br />
facetted surface.<br />
The blades are thin and designed to be used by hand, with not more than<br />
light work with the mallet. This means that the amount of metal that has<br />
to be pushed through the cut – the 'wedge' of the bevels – is reduced to<br />
the least amount. Again, less ef<strong>for</strong>t.<br />
<strong>Chris</strong> <strong>Chris</strong> <strong>Pye</strong>: <strong>Pye</strong>: Ashley Ashley Iles Iles #2 #2 ½ ½ ½ <strong>Finishing</strong> <strong>Finishing</strong> <strong>Gouges</strong> <strong>Gouges</strong><br />
6
3. Outer Bevel<br />
Ashley Iles have set the outer bevel at 20°, flat (ie without secondary or<br />
micro bevels to raise the cutting angle).<br />
This really is the maximum it wants to be, dealing with the tougher range<br />
of normal carving woods.<br />
If anything, you can lengthen this bevel by reducing the cutting angle<br />
(between where the blade starts to nick a flat board of wood, and the<br />
board itself) towards 15°. Less and you'll find it difficult to wrap your<br />
knuckles around the handle!<br />
4. Inner Bevel<br />
The inner bevel is also around 20°, but shorter. This means that the<br />
cutting edge is tougher: it is thrown towards the middle – buttressed, as it<br />
were, on both sides - and has a greater overall bevel angle. However, the<br />
shortness of the inner bevel counters a lot of the overall wedge effect of<br />
the metal as it enters the wood, which you would have if the bevels were<br />
equal on both sides.<br />
Again, you can lengthen this if it suits you to have a lower cutting.<br />
Besides toughening the cutting edge, there are other benefits from the<br />
inner bevel. I explain these in some detail in my <strong>Wood</strong>carving <strong>Tools</strong>,<br />
Materials & Equipment, Vol. 1 (GMC 2002) so let me pick just the greatest<br />
advantage – using the tools 'upside down.<br />
My argument <strong>for</strong> the presence of an inner bevel becomes convincing<br />
if you:<br />
<strong>Chris</strong> <strong>Chris</strong> <strong>Pye</strong>: <strong>Pye</strong>: Ashley Ashley Iles Iles #2 #2 ½ ½ ½ <strong>Finishing</strong> <strong>Finishing</strong> <strong>Gouges</strong> <strong>Gouges</strong><br />
7
Do this experiment first:<br />
You'll need a sharp woodworker's, or carpenter's, chisel - flat on one side, bevel<br />
on the other - and a scrap of carveable waste wood, held in a vice.<br />
1. Use the chisel in the normal' way: push the edge of the<br />
chisel, flat side down, straight into the edge of the wood.<br />
Notice the self-jigging action: the chisel rests on the initial flat face of<br />
its cut and uses this to guide itself further.<br />
The result is a true flat surface – and what you.<br />
2. Repeat but, instead of cutting a flat surface, try to take a<br />
scoop out from the edge of the wood.<br />
See how the chisel judders as you<br />
try to rise from the cut, leaving<br />
strong ridges.<br />
The results of using a carpenter's<br />
chisel to take a 'scoop' out of the<br />
corner of a piece of wood.<br />
It is impossible to do this: the chisel continually wants to self-jig in a<br />
straight line as be<strong>for</strong>e.<br />
3. Turn the chisel upside down (bevel to the wood) and repeat<br />
what you just did (3).<br />
You should find that you can get the chisel to rise out of the scoop and<br />
give a smooth cut.<br />
<strong>Chris</strong> <strong>Chris</strong> <strong>Pye</strong>: <strong>Pye</strong>: Ashley Ashley Iles Iles #2 #2 ½ ½ ½ <strong>Finishing</strong> <strong>Finishing</strong> <strong>Gouges</strong> <strong>Gouges</strong><br />
8
Look at the smooth 'scoop' that is<br />
possible when you turn the tool bevel<br />
down and pivot on the heel.<br />
The result will depend on the shortness of the bevel, the thickness of the<br />
blade and whether the heel (the angle between bevel and blade) is<br />
rounded or not.<br />
Not necessarily perfect, or very deep, but definitely much easier<br />
that when you first used the chisel flat side down – yes?<br />
4. Try this step of the exercise (3) again. Observe carefully how<br />
it is the heel that allows the bevel and thus the cutting edge<br />
to pivot and rise to the surface.<br />
This effect is what we want the carving chisel or gouge to do: rise to the<br />
surface taking out a scoop or facet of wood.<br />
And—here's the crunch:<br />
Because woodcarvers use gouges in both a 'normal' and<br />
'upside down' orientation to shape wood, we need this<br />
effect to happen either way.<br />
So, we need bevels both outside and inside.<br />
<strong>Chris</strong> <strong>Chris</strong> <strong>Pye</strong>: <strong>Pye</strong>: Ashley Ashley Iles Iles #2 #2 ½ ½ ½ <strong>Finishing</strong> <strong>Finishing</strong> <strong>Gouges</strong> <strong>Gouges</strong><br />
9
Try the exercise - try carving! - with any new gouge as it comes, without<br />
an inside bevel. You'll find that using it upside down is like trying to<br />
control an unwilling horse.<br />
However, add some inner bevel—even 1-2mm—and compare. Freedom to<br />
go where you wish!<br />
One proviso here is that if you want carve a marked convex surface with<br />
the inside of the gouge to the wood then you would find a lack of inner<br />
bevel helps because your cutting angle will be quite high as it is.<br />
Also, if I do want to cut a dead flat face, then it's the single bevelled<br />
woodworker's chisel <strong>for</strong> me every time: this is what it does best.<br />
If you don't use a gouge 'upside down'—and we all work, or have been<br />
taught, or learned, differently—then I'm suggesting that you are only<br />
using half its possibilities.<br />
The inner bevel on a carving gouge<br />
allows it to scoop facets from wood<br />
when used upside down, shaping<br />
convex surfaces <strong>for</strong> example.<br />
I am so convinced of the usefulness of this inner bevel on flat gouges that,<br />
rather than let the carver have to put one on, as is the case with all other<br />
makes of carving tools, that I asked Ashley Iles to include it in these new<br />
flat gouges.<br />
<strong>Chris</strong> <strong>Chris</strong> <strong>Pye</strong>: <strong>Pye</strong>: Ashley Ashley Iles Iles #2 #2 ½ ½ ½ <strong>Finishing</strong> <strong>Finishing</strong> <strong>Gouges</strong> <strong>Gouges</strong><br />
10<br />
10
3. Flatness and <strong>Finishing</strong><br />
Back at the <strong>#2½</strong> finishing gouges they, let me demonstrate the best way<br />
of using them.<br />
The trick is in the 'slice':<br />
The slicing cut is the cut of the carver:<br />
The cutting edge slides across at the same time as<br />
The result is a very smooth surface.<br />
the blade cuts <strong>for</strong>ward.<br />
Slicing is a superb way of working anyway. If the sweep is pronounced<br />
then the tool must me rotated or 'rocked' as it is pushed.<br />
However, tools as flat as these smoothing gouges are not really 'rocked' at<br />
all.<br />
The flatter the gouge the less you can rock, because you don't want to<br />
bury the corners in the wood and tear the grain—it's more a 'drift' to the<br />
side, a paring action.<br />
You can smooth a surface with the flat gouges you have, it's just that you<br />
would find it difficult to match the smoothness produced by these 2½<br />
gouges unless yours are as flat.<br />
<strong>Chris</strong> <strong>Chris</strong> <strong>Pye</strong>: <strong>Pye</strong>: Ashley Ashley Iles Iles #2 #2 ½ ½ ½ <strong>Finishing</strong> <strong>Finishing</strong> <strong>Gouges</strong> <strong>Gouges</strong><br />
11<br />
11
4. Slicing—how to do it…<br />
Use the fingers and leading hand to pull the blade to the side as you make<br />
a short, <strong>for</strong>ward stroke and you'll find a thin shaving peel away.<br />
You can make the slice to the left or the right and, of course, swap hands.<br />
This gives you 4 ways of working.<br />
Here is a sequence of photographs showing you how the flat slice<br />
works:<br />
The Slicing Cut starts towards one<br />
corner. The blade is pushed<br />
<strong>for</strong>ward and the edge not so much<br />
rotated as 'drifted' across...<br />
and the shaving is pared by the<br />
middle of the blade...<br />
and the slice finished with the<br />
shaving released just short of the<br />
opposite corner.<br />
Take care not to dig in the corner.<br />
The flatness of the sweep produces<br />
a very fine shaving and a desirably<br />
smooth, lightly tooled to the<br />
surface.<br />
<strong>Chris</strong> <strong>Chris</strong> <strong>Pye</strong>: <strong>Pye</strong>: Ashley Ashley Iles Iles #2 #2 ½ ½ ½ <strong>Finishing</strong> <strong>Finishing</strong> <strong>Gouges</strong> <strong>Gouges</strong><br />
12<br />
12
5. Slicing—here's the real beauty of it:<br />
If you work across the grain, it follows that the edge must slice along, the<br />
grain, in the direction of the fibres—yes?<br />
This means that, depending how it lies, you can slice with or against the<br />
grain as you choose—yes?<br />
And it follows that if you use these flat, finishing gouges in this manner,<br />
there is no grain you cannot clean up. I mean that: there is no knot,<br />
anywhere, which cannot be cleaned up by slicing in this manner.<br />
Why?<br />
Because, approaching from across the grain, if I slice the edge to the left<br />
and it cutting against the grain and tearing it, then I just slice to the right<br />
and I must be working with the grain. A clean cut is always available to<br />
me...<br />
So:<br />
1. Use short strokes with these finishing gouges,<br />
2. work from across the grain while…<br />
3. drifting (slicing) to the left or the right.<br />
You can even slice with these thin tools against the grain - takes my<br />
breath away!<br />
<strong>Chris</strong> <strong>Chris</strong> <strong>Pye</strong>: <strong>Pye</strong>: Ashley Ashley Iles Iles #2 #2 ½ ½ ½ <strong>Finishing</strong> <strong>Finishing</strong> <strong>Gouges</strong> <strong>Gouges</strong><br />
13<br />
13
6. Sharpening<br />
Sharpen as normal:<br />
Keep the corners and the edge straight as you can.<br />
Keep the bevel flat and at the correct cutting angle 15-20°<br />
Maintain and lengthen the inner bevel.<br />
Ashley Iles have set the bevels at the maximum angles a carver would<br />
really want. You may want to lengthen both the outer and inner bevels a<br />
little and so lower the cutting angles; you can only really assess this when<br />
you begin to use them.<br />
You can find full details of how to sharpen woodcarving tools in my<br />
<strong>Wood</strong>carving <strong>Tools</strong>, Materials & Equipment, Vol. 1 (GMC 2002)<br />
Make sure the cutting edge itself is immaculate: no scratches—after all,<br />
the result of cutting with these gouges will be your finished surface.<br />
Strop well, making sure the heel (only) is slightly rounded or softened.<br />
7. The Iles Guarantee<br />
All reputable manufacturers unconditionally<br />
guarantee their carving tools: the steel,<br />
tempering, <strong>for</strong>ging and so on. You should never<br />
buy from a firm offering less.<br />
Ashley Iles go one step further: they will re-<br />
grind or re-sharpen any of their gouges<br />
returned to the factory (with return postage).<br />
So if you break the edge or can't keep your<br />
corners, they will help.<br />
<strong>Chris</strong> <strong>Chris</strong> <strong>Pye</strong>: <strong>Pye</strong>: Ashley Ashley Iles Iles #2 #2 ½ ½ ½ <strong>Finishing</strong> <strong>Finishing</strong> <strong>Gouges</strong> <strong>Gouges</strong><br />
14<br />
14
8. Where to buy the Ashley Iles, <strong>Chris</strong> <strong>Pye</strong> <strong>#2½</strong><br />
<strong>Finishing</strong> <strong>Gouges</strong> …<br />
UK<br />
Ashley Iles (Edge tools) Ltd<br />
Website: http://www.ashleyiles.co.uk<br />
Email: sales@ashleyiles.co.uk<br />
Address: Ashley Iles (Edge tools) Ltd<br />
East Kirkby<br />
Spilsby<br />
Lincolnshire PE23 4DD<br />
England<br />
Tel: 01790 763372<br />
Fax: 01790 763 610<br />
John Boddy's Fine <strong>Wood</strong> & Tool Store Ltd<br />
Website: not available<br />
Email: not available<br />
Address: Riverside Sawmills<br />
Boroughbridge<br />
N. Yorks YO5 9LI<br />
England<br />
Tel: 01434 322370<br />
Fax: 01432 323810<br />
<strong>Chris</strong> <strong>Chris</strong> <strong>Pye</strong>: <strong>Pye</strong>: Ashley Ashley Iles Iles #2 #2 ½ ½ ½ <strong>Finishing</strong> <strong>Finishing</strong> <strong>Gouges</strong> <strong>Gouges</strong><br />
15<br />
15
USA<br />
<strong>Tools</strong> <strong>for</strong> <strong>Working</strong> <strong>Wood</strong><br />
Website: www.tools<strong>for</strong>workingwood.com<br />
Email: sales@tools<strong>for</strong>workingwood.com<br />
Address: <strong>Tools</strong> <strong>for</strong> <strong>Working</strong> <strong>Wood</strong><br />
Suite 507<br />
27 West 20th Street<br />
New York<br />
NY 10011<br />
USA<br />
(Hours: m-f 10:30 - 6:00 EST)<br />
Tel: 800-426-4613 (toll free within USA) or<br />
212-604-9535<br />
Fax: 212-604-9533


