Create successful ePaper yourself
Turn your PDF publications into a flip-book with our unique Google optimized e-Paper software.
First select your colors for your quilt. Either select<br />
similar colors to those we have used in our quilt or<br />
choose from fabric that you already have at home.<br />
Select either one-color family, all blue, or choose two<br />
color families, and select a light, medium and dark<br />
shade. If you are making a quilt for your kids then any<br />
numbers of colors will work. Keep in mind the fabric<br />
needs to flow from one color to the other. Cotton<br />
fabrics are ideal to work with.<br />
Sewing Supplies:<br />
SmartEr <strong>by</strong> PFaFF C1100 Pro Sewing machine<br />
Sewing Thread:<br />
robison anton rayon Embroidery thread<br />
Sewing thread to match your quilt<br />
Fabric and Notions:<br />
For this quilt you need eleven fabrics of different<br />
colors. Here is how much you need of each color.<br />
• Fabric 1(1 color) 24”x45” (60x114cm)<br />
• Fabric 2-10(9 different colors) 8”x45” (20x114cm )<br />
• Fabric 11(1 color) 16”x45” (40x114cm)<br />
• backing<br />
(select a color from the quilt) 53”x57” (135x145cm)<br />
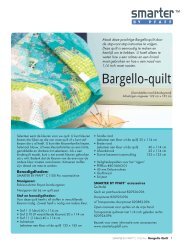
Make this lovely <strong>Bargello</strong> quilt <strong>by</strong><br />
following the step-<strong>by</strong>-step instructions.<br />
It is easy to make and a wonderful<br />
quilt to have. All you need to know<br />
• Small border<br />
(select a color from the quilt) 10”x45” (25x114cm )<br />
• Large border<br />
(select a color from the quilt) 16”x45” (40x114cm )<br />
• binding 10”x45” (25x114cm )<br />
• thin Cotton batting 48”x53”(125x135cm)<br />
• Safety pins for “basting”<br />
• Pfiffikus #4016663-01<br />
• 45mm Deluxe rotary Cutter<br />
• <strong>Quilt</strong> ruler<br />
• Cutting mat<br />
SmarTer By PFaFF accessories<br />
<strong>Quilt</strong> table<br />
¼” <strong>Quilt</strong>ing Foot #820926-096<br />
Stitch-in Ditch- Foot #820925-096<br />
or Clear Stitch-in-Ditch Foot #820882-096<br />
Open toe Free motion Foot<br />
1/4" right Guide Foot #820924-096<br />
NCS S 1560-R90B<br />
is how to use a rotary cutter, ruler<br />
and how to sew a ¼ inch seam.<br />
NCS S 7005-R80B<br />
<strong>Bargello</strong> <strong>Quilt</strong><br />
(Intermediate skill level)<br />
approx. size 48" x 53" (122x135 cm)<br />
For more information regarding accesssories please visit<br />
www.<strong>smarter</strong><strong>by</strong><strong>pfaff</strong>.com.<br />
SMARTER BY PFAFF ® C1100 Pro <strong>Bargello</strong> <strong>Quilt</strong><br />
1
Cut:<br />
(Include ¼" (6 mm) seam allowance)<br />
Cut fabric 1into six strips, from edge to edge, the entire<br />
width of the piece. make each strip 4” (10cm) wide.<br />
this will give you 6 strips about 45” (114cm) long.<br />
Cut fabrics 2-10 into two of each color, from edge to<br />
edge, the entire width of the piece. make each strip 4"<br />
(10 cm) wide. this will give you 18 strips about<br />
45" (114 cm) long.<br />
Cut fabric 11 into four strips, from edge to edge, the<br />
entire width of the piece. make each strip 4" (10cm)<br />
wide. this will give you 4 strips about 45" (114 cm)<br />
long.<br />
this gives you a total of 28 strips which is enough to<br />
make two tunnels.<br />
make your top before you cut the borders and backing<br />
for your quilt. When your quilt top is complete, you will<br />
measure your quilt so your borders will be the correct size.<br />
Small border (color 4)<br />
Cut 5 pieces 2"x45" (4,5cmx110 cm). then cut one<br />
of the strips so you have enough for the longer sides<br />
which should measure 2"x48" (4,5 cmx125 cm). Cut<br />
into two pieces.<br />
Sew the pieces together do right side to right on the bias.<br />
Large border (color 6)<br />
Cut 5 pieces 3"x45" (7,5x110 cm). measure and sew<br />
pieces together to fit the length of each side of the quilt.<br />
to sew mitered corners you need to add the width of<br />
illu your 1 binder for the start and end of the each piece.<br />
1<br />
2<br />
3<br />
4<br />
5<br />
6<br />
7<br />
8<br />
9<br />
10<br />
11<br />
12<br />
13<br />
14<br />
Backing (color 6)<br />
11<br />
Cut two pieces, from edge to edge, the entire 10 width of<br />
the fabric. Cut the piece 47" (120 cm) long. 11<br />
2<br />
assembly instructions<br />
3<br />
1. you are now going to make two tubes of 4fabric.<br />
Lay out your strips, one from each fabric, in a<br />
striped design. Go from light to dark to light, 5 or<br />
6<br />
7<br />
8<br />
9<br />
1<br />
1<br />
1<br />
the other way around. Each fabric doesn’t have to<br />
match or even go nicely with every other piece, but<br />
each fabric needs to complement the fabrics it is<br />
touching. Lay out 14 stripes, in a pleasing pattern<br />
or use our pattern, for each tube.<br />
illu 1<br />
1<br />
2<br />
3<br />
4<br />
5<br />
6<br />
7<br />
8<br />
9<br />
10<br />
11<br />
12<br />
13<br />
14<br />
3. Sew the strips together, using a ¼ inch seam allowance,<br />
illu to make 3 one piece of striped fabric.<br />
4. Press all the seams in the same direction.<br />
11<br />
10<br />
11<br />
2<br />
9<br />
1<br />
2. thread with sewing thread top and bobbin. Snap<br />
on the ¼” <strong>Quilt</strong>ing Foot # 820926-096<br />
5. Now we will create two tubes and then make it into<br />
circles. Fold the striped fabric in half. Sew the strips<br />
together, illu 2 creating a tube of stripes. all of the seam<br />
allowances will be on the outside.<br />
1<br />
1<br />
SMARTER BY PFAFF ® C1100 Pro <strong>Bargello</strong> <strong>Quilt</strong><br />
3<br />
4<br />
5<br />
6<br />
7<br />
8<br />
2<br />
i
6. Lay the tubes on the table or cutting board with the<br />
seams running horizontally. Cut the fabric vertically<br />
to create a series of rings. to create our design cut<br />
following widths on the rings:<br />
two 7/8" (2,2cm )<br />
Five 1 1/4" (3,2cm )<br />
Six 1 3/4" ( 4,2cm )<br />
two 2 1/8" (5,2cm )<br />
Five 2 1/2" (6,2cm )<br />
Four 2 7/8" (7,2cm )<br />
two 3 1/4" ( 8,2cm )<br />
two 4" (10,2cm )<br />
Now you have a total of 28 rings.<br />
7. make sure you keep different widths separated,<br />
place the strips in 8 piles and mark a piece of paper<br />
with the measurement. turn all the rings right<br />
side out.<br />
8. Pick a ring from the 1 3/4" (4,2cm) pile. Pick one<br />
fabric to be the fabric in the upper left corner of<br />
illu 2<br />
the quilt. Use the seam-ripper and open the top<br />
11<br />
seam of your selected square. Use the seamripper<br />
10<br />
to remove the two last squares. 11 Keep 12 squares.<br />
Do a quick finger press to 2 the seam allowance so it<br />
will lie flat.<br />
3<br />
illu 1<br />
1<br />
2<br />
3<br />
4<br />
5<br />
6<br />
7<br />
8<br />
9<br />
9. Pin this strip up on a design 5 wall, with the corner<br />
fabric on the top.<br />
10. Choose another ring of a 8different<br />
width from the<br />
first. In our design we selected 9 a ring from the 2<br />
1<br />
7/8" (7,2cm) pile. Find the same corner fabric on<br />
1<br />
this second ring and make 1 this corner square now<br />
become the second square from the top. remove<br />
the two last squares.<br />
10<br />
11<br />
12<br />
13<br />
14<br />
11. Use your seam-ripper and open the seam on the<br />
top of the selected fabric square.<br />
illu 3<br />
4<br />
6<br />
7<br />
12. Now place the second strip on the design board<br />
in such a way that the same fabric square of the<br />
second strip is one square below the first one.<br />
See illustration below. this is how we put together<br />
the strips in our quilt:<br />
Illu 4<br />
1 1/3” (4,2cm)<br />
2 7/8” (7,2cm)<br />
illu 5<br />
3 1/4” (8,2cm)<br />
1,2” (3,2cm)<br />
2 1/2” (6,2cm)<br />
2 1/8” (5,2cm)<br />
2 1/8” (5,2cm)<br />
1 1/3” (4,2cm)<br />
1 1/4” (3,2cm)<br />
7/8” (2,2cm)<br />
1 1/4” (3,2cm)<br />
1 1/3” (4,2cm)<br />
1 1/3” (4,2cm)<br />
2 1/2” (6,2cm)<br />
2 7/8” (7,2cm)<br />
2 1/2” (6,2cm)<br />
1 1/4” (3,2cm)<br />
1 1/4” (3,2cm)<br />
3 1/4” (8,2cm)<br />
2 1/2” (6,2cm)<br />
illu 6<br />
SMARTER BY PFAFF ® C1100 Pro <strong>Bargello</strong> <strong>Quilt</strong><br />
4” (10,2cm)<br />
2 1/2” (6,2cm)<br />
1 1/3” (4,2cm)<br />
1 1/4” (3,2cm)<br />
7/8” (2,2cm)<br />
1 1/3” (4,2cm)<br />
2 7/8” (7,2cm)<br />
13. When you have finished designing the top to your<br />
liking. Keep the strips pinned to the design wall<br />
until you sew them. Start with the first and second<br />
strips, sew them together. Keep adding strips until<br />
you have taken them all off the design wall in order<br />
and have finished your bargello quilt. Use a ¼ inch<br />
seam allowance when you stitch the stripes together.<br />
14. measure the edges of your quilt. Cut the small<br />
borders (color 4) according to your measurement.<br />
you will need to cut 5 pieces 2"x45" (4,5cm<br />
x110cm) on the full width of the fabric for this<br />
quilt. For the short sides of the quilt, the length of<br />
the pieces will be perfect. For the long side, you<br />
need to stitch the three pieces together and cut in<br />
the middle to fit the length. Sew the pieces right<br />
sides together, on the bias.<br />
15. Place the longer border pieces right sides together<br />
on the two opposite sides of the bargello top.<br />
Follow the instruction for the short pieces to create<br />
a mightered corner. Pin and sew. Press.<br />
16. repeat step 14 to 15 but make the border 3"<br />
(7,5cm) wide.<br />
17. Place the backing pieces right sides together. Pin<br />
and stitch with a straight stitch. Press.<br />
18. Layer your quilt top, batting and backing creating<br />
a quilt “sandwich”. make sure it is flat and even.<br />
make sure all the layers match at the edges.<br />
19. Safety pin bastes the quilt through the layers.<br />
thread your machine with invisible thread in the<br />
top and use matching sewing thread in the bobbin.<br />
Use the Clear Stitch- in- Ditch foot 820882-096<br />
when you want to quilt in the ditch. make sure to<br />
engage the DFS (Dual Feed System).<br />
4” (10,2cm)<br />
2 1/2” (6,2cm)<br />
3
©2010 KSIN Luxembourg II, S.ar.l. all rights reserved. SmartEr <strong>by</strong> PFaFF and DFS are trademarks of KSIN Luxembourg II, S.ar.l.<br />
20. to start quilting with free motion, use the Open toe<br />
Free motion Foot. Disengage the DFS illu 5<br />
(Dual Feed<br />
System). remove the presser foot ankle and attach<br />
the Open toe Free motion Presser Foot. Lower the<br />
feed dogs, <strong>by</strong> taking off the accessory tray and<br />
bring the lever for the feed dogs to the right. Select<br />
a straight stitch. Keeping an even speed manually<br />
move the fabric. remember: because the feed dogs<br />
are lowered, you must move the fabric manually.<br />
For even stitches, move your fabric in a smooth,<br />
even motion.<br />
21. We have also done straight lines shaped with<br />
a sharp edge along the waves. Use the Edge/<br />
<strong>Quilt</strong>ing Guide which is very useful when stitching<br />
straight lines. remove the safety pins as you come<br />
to them.<br />
illu 8<br />
Illu 4<br />
1,2” (3,2cm)<br />
22. thread your sewing machine with matching<br />
embroidery thread in the top and bobbin. Stitch a<br />
decorative stitch along the wide border. We have<br />
used stitch 46 from menu D.<br />
1,6” (4,2cm)<br />
2,8” (7,2cm)<br />
3,2” (8,2cm)<br />
2,4” (6,2cm)<br />
2” (5,2cm)<br />
2” (5,2cm)<br />
1,6” (4,2cm)<br />
1,2” (3,2cm)<br />
1” (2,2cm)<br />
1,2” (3,2cm)<br />
1,6” (4,2cm)<br />
1,6” (4,2cm)<br />
2,4” (6,2cm)<br />
2,8” (7,2cm)<br />
2,4” (6,2cm)<br />
1,2” (3,2cm)<br />
1,2” (3,2cm)<br />
23. trim the edges of your quilt and measure the sides.<br />
Cut strips for binding a 2" (5 cm) wide. Stitch the<br />
binding strips together end to end to make one<br />
long strip. Fold in half lengthwise, wrong sides<br />
together and press. align the raw edges of the<br />
binding with the raw edge of the quilt top. Pin<br />
the binding to the back of the quilt and sew along<br />
the sides. Start about 8-10" (20 – 25cm ) from the<br />
folded end of your binding.<br />
24. Stop at corner. Stop stitching ¼" from corner and<br />
backstitch. remove the quilt from your machine.<br />
illu 5<br />
3,2” (8,2cm)<br />
2,4” (6,2cm)<br />
4” (10,2cm)<br />
illu 6<br />
2,8” (7,2cm)<br />
1,6” (4,2cm)<br />
1,2” (3,2cm)<br />
1” (2,2cm)<br />
1,6” (4,2cm)<br />
2,8” (7,2cm)<br />
4” (10,2cm)<br />
2,4” (6,2cm)<br />
25. Fold binding up. Fold the binding back on itself,<br />
perpendicular to the seam you just stitched.<br />
illu 6<br />
26. Fold binding down. Fold the binding this time align<br />
the fold in the binding with the raw edges of the<br />
seam you just sewed and align the raw edges of the<br />
unstitched binding with the next edge of the quilt.<br />
Starting at the edge of the quilt, stitch the binding<br />
with a straight stitch to the next side of the quilt.<br />
illu 7<br />
repeat for each corner of your quilt.<br />
illu 8<br />
27. When you are back to the starting position make<br />
sure to match starting point and ending point. Cut<br />
the binding allowing for a seam allowance.<br />
28. Unfold ending binding and smooth along edge of the<br />
quilt. Fold the ending binding back on itself to get a<br />
nice ending. Lay the creased end of the beginning<br />
binding over the ending binding. Pin and stitch.<br />
29. Fold the binding over the raw edges of the quilt<br />
top. Press and pin. Stitch from the top of the quilt<br />
with a straight stitch using the ¼" right Guide Foot<br />
to get a perfect topstitch distance from the edge of<br />
the binding.<br />
30. Press your bargello quilt.<br />
Finished!<br />
SMARTER BY PFAFF ® C1100 Pro <strong>Bargello</strong> <strong>Quilt</strong><br />
4
SMARTER BY PFAFF 5<br />
® C1100 Pro <strong>Bargello</strong> <strong>Quilt</strong>