Easy Ways with Hypertufa - Alpine Garden Society
Easy Ways with Hypertufa - Alpine Garden Society
Easy Ways with Hypertufa - Alpine Garden Society
Create successful ePaper yourself
Turn your PDF publications into a flip-book with our unique Google optimized e-Paper software.
Volume: 08<br />
AGS © 2008 Tel: 01386 554790<br />
Info Leaflet: <strong>Hypertufa</strong><br />
<strong>Easy</strong> ways <strong>with</strong> <strong>Hypertufa</strong><br />
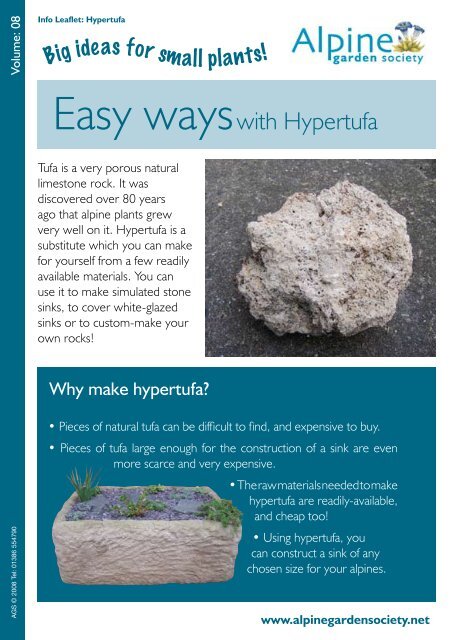
Tufa is a very porous natural<br />
limestone rock. It was<br />
discovered over 80 years<br />
ago that alpine plants grew<br />
very well on it. <strong>Hypertufa</strong> is a<br />
substitute which you can make<br />
for yourself from a few readily<br />
available materials. You can<br />
use it to make simulated stone<br />
sinks, to cover white-glazed<br />
sinks or to custom-make your<br />
own rocks!<br />
Why make hypertufa?<br />
• Pieces of natural tufa can be difficult to find, and expensive to buy.<br />
• Pieces of tufa large enough for the construction of a sink are even<br />
more scarce and very expensive.<br />
• The raw materials needed to make<br />
hypertufa are readily-available,<br />
and cheap too!<br />
• Using hypertufa, you<br />
can construct a sink of any<br />
chosen size for your alpines.<br />
www.alpinegardensociety.net
<strong>Easy</strong> ways <strong>with</strong> <strong>Hypertufa</strong><br />
Raw materials<br />
Coarse sand.<br />
Suitable grades of sand are widely available from builders’ merchants<br />
and Do-it-Yourself stores under the names ‘Concreting Sand’, ‘Coarse<br />
Sand’ or ‘Grit Sand’. Pass through a garden sieve (about 7 mm or ¼<br />
inch) to remove any larger particles.<br />
Peat.<br />
A popular raw material which has been used since the 1930’s, <strong>with</strong><br />
good results. Moss peat is preferred, as its fibrous nature gives a good<br />
texture to the product. Anyone not wishing to use peat may choose<br />
to use composted bark.<br />
Composted Bark.<br />
An increasingly popular replacement for peat. As yet its long term<br />
performance in hypertufa cannot be fully assessed. Choose a fine<br />
grade, and pass through a sieve, as for sand.<br />
Cement.<br />
Buy fresh Portland cement just before you intend to use it.<br />
Do not be tempted to use up that old bag which has been<br />
lying about in the back of the garage, and has become lumpy.<br />
It may give a weaker product which will not stand up to the<br />
test of time. Some manufacturers include additives which improve<br />
workability and frost resistance.<br />
Polystyrene fish box, plastic plant crate, cardboard boxes<br />
Fine Bark, Irish Moss peat, sharp sand & cement
Recipes<br />
The proportions of the ingredients can be varied, so that the hypertufa takes on<br />
the appearance of various kinds of stone. Three popular ones are listed here (all<br />
quantities are measured by volume).<br />
Limestone: Sand:<br />
Cement:<br />
Peat or bark:<br />
Sandstone: Sand:<br />
Cement:<br />
Peat or bark<br />
Tufa: Sand:<br />
Cement:<br />
Peat or bark:<br />
Mixing and handling.<br />
1 part<br />
1 part<br />
1 part<br />
5 parts<br />
2 parts<br />
3 parts<br />
1 part<br />
1 part<br />
2 parts<br />
The ‘Tufa’ recipe gives a very porous product very similar to natural tufa, which may<br />
be vulnerable to frost damage. If you live in a very cold area, it can be toughened<br />
up by slightly reducing the volume of peat or bark.<br />
It is usually possible to mix the materials for your chosen recipe ‘straight from the bag’,<br />
but if the sand is very wet, it may be useful to allow it to dry out somewhat first. The<br />
mixture is messy! If you intend to make several batches, it may be advisable to buy a Spot<br />
Board. These are made of heavy-duty plastic and available from larger Do-it-Yourself<br />
stores and builders merchants. Alternatively, the store of ‘things which might come in<br />
useful’ at the back of the garage may yield something suitable. Measure out appropriate<br />
volumes of the raw materials and mix them thoroughly together, then continue mixing<br />
and cautiously add water. The amount of water used<br />
should be just sufficient to completely wet the mix,<br />
but not enough to make it ‘sloppy’.<br />
Cement and wet hypertufa are highly alkaline, so are<br />
corrosive and irritant to the skin. Household gloves give<br />
suitable protection. Working on a sheet of polythene<br />
(a redundant compost bag perhaps?) helps to keep<br />
the working area clean.<br />
Spot board <strong>with</strong> mixed <strong>Hypertufa</strong>
<strong>Easy</strong> ways <strong>with</strong> <strong>Hypertufa</strong><br />
Making a sink <strong>with</strong> hypertufa.<br />
There are numerous ways of using hypertufa to create a sink, depending upon what<br />
other items you choose to use: you can cover a polystyrene fishbox, a plastic crate<br />
or white-glazed sink, or cast a sink using 100% hypertufa. The following methods are<br />
widely used by alpine enthusiasts.<br />
The Fishbox.<br />
Expanded Polystyrene Fishboxes<br />
are now very widely available and<br />
can usually be had for the asking;<br />
enquire at your local fishmonger<br />
or fish-and-chip shop. The finished<br />
sink is light and robust. With an<br />
average-size box, begin by cutting<br />
two drainage holes in the base, at<br />
least 2 cm in diameter. Next wrap<br />
small-gauge galvanised chicken wire<br />
A half completed demonstration fish box<br />
closely around the box. This is not essential, but does give a more robust product.<br />
Turn the box upside down, and begin applying the mixture to the bottom of the box<br />
by hand, forcing it into the wire mesh. Smooth the surface <strong>with</strong> sweeping movements<br />
of the fingers. Aim to apply a layer not less than 2 cm thick. (Obviously, the thicker<br />
the layer, the stronger the product is, but the heavier it is too!) Next, carefully turn<br />
the box right-side-up onto a sheet of polythene, using a gentle rolling movement,<br />
to avoid dislodging the covering. Finally, extend the coating up the sides of the<br />
box, over the rim, and at least 5 cm down the inside. For a very robust product,<br />
a thinner layer of the mix can be extended over the whole of the inner surface.<br />
This newly-planted fish box sink will give many years of pleasure
Covering a glazed sink.<br />
The procedure is much the same as for a fish box. The tricky part is to ensure that the<br />
hypertufa mixture sticks firmly to the glazed surface. The first step is to thoroughly clean<br />
the surface, particularly to remove any deposits of a greasy nature: a vigorous scrub <strong>with</strong><br />
hot water containing a detergent, followed by rinsing <strong>with</strong> fresh water will do the trick. A<br />
key for the hypertufa can then be provided in either of two ways. The first is to cautiously<br />
chip off small areas of the glaze at intervals across the outer surface using a hammer.<br />
(Caution: the particles of glaze are sharp; wear hand and eye protection). The second,<br />
less vigorous one is to coat the whole of the outer surface, top rim and 5 cm down the<br />
inside surface <strong>with</strong> a PVA adhesive. This is allowed to dry to the point that it does not<br />
come off when touched, but still feels tacky. At this stage the hypertufa mixture is firmly<br />
applied by hand to the surface. The application of PVA and hypertufa is easier if the sink is<br />
raised up on a few bricks before work is started. You will not, of course, be able to apply<br />
hypertufa where the bricks are. These areas can be patched-up later.<br />
Casting a solid sink.<br />
This is the traditional method, using two stout cardboard boxes, which can be ‘nested’<br />
to give a space about 50 mm wide between them. The outer box is set up on a flat<br />
surface, and two 50 mm lengths of dowel or broom handle stood on the base to form<br />
drainage holes. The hypertufa mix is made to a more fluid consistency than in the previous<br />
examples, and poured in and levelled to form the base. The inner box is then lowered<br />
into place and filled <strong>with</strong> sand or bricks to hold it in shape. The outer box will need similar<br />
support. Continue to add the hypertufa mix, tamping down at intervals <strong>with</strong> a scrap of<br />
wood to remove air pockets.<br />
Casting a sink around a plastic crate<br />
A finished hypertufa sink<br />
There are many variations on this theme. The boxes can be made of wood (but<br />
remember to put a slight taper on the inner box; otherwise you may not be able to get<br />
it out!) Covering the surfaces of the wood <strong>with</strong> light-gauge polythene sheet will give easy<br />
release. Another successful scheme is to use a plastic plant or bread tray <strong>with</strong> just an outer<br />
wooden former, when a stiffer mix can be used, and the inner box is unnecessary.
<strong>Easy</strong> ways <strong>with</strong> <strong>Hypertufa</strong><br />
Finishing off.<br />
Whichever method is used,<br />
your masterpiece will need to<br />
be finished off. The mixture sets<br />
slowly, so should be covered<br />
<strong>with</strong> damp hessian sacking<br />
or polythene sheet and left<br />
undisturbed for a day or two.<br />
Any cardboard boxes, wooden<br />
formers, or whatever can then<br />
be removed. Now you can use<br />
all of your artistic talent, in the<br />
process known as ‘bashing’.<br />
Many genuine stone troughs<br />
show a rather irregular surface, or a regular pattern of marks left by the stonemason’s<br />
chisel. These can be simulated by striking the still slightly-soft surface <strong>with</strong> a steel<br />
chisel, broad screwdriver or a scrap<br />
of wood. Finally, all sharp edges are<br />
rounded off by rubbing over <strong>with</strong> a<br />
stiff brush; you can add centuries of<br />
age and wear in a few minutes. The<br />
hypertufa will continue to cure and<br />
harden to its full strength for the next<br />
week or two. It is best not to move<br />
your sink to its planting position until<br />
it is fully cured.<br />
The irregular surface of a real stone trough<br />
Making hypertufa rocks.<br />
Mason’s chisel marks on a sandstone trough.<br />
The moss and lichen are added by time alone<br />
Artificial rocks can be cast in moulds of many kinds. The mixture can be dropped<br />
into an irregular hole dug in the garden or a light-gauge polythene bag. Drop the bag<br />
into a cardboard box for a rectangular shape, a bucket, or whatever you choose.<br />
Bashing can add a suitably rugged shape.<br />
tel: 01386 554790 email: ags@alpinegardensociety.net<br />
1<br />
web: www.alpinegardensociety.net<br />
AGS Centre Avon Bank Pershore Worcestershire WR10 3JP UK Version


