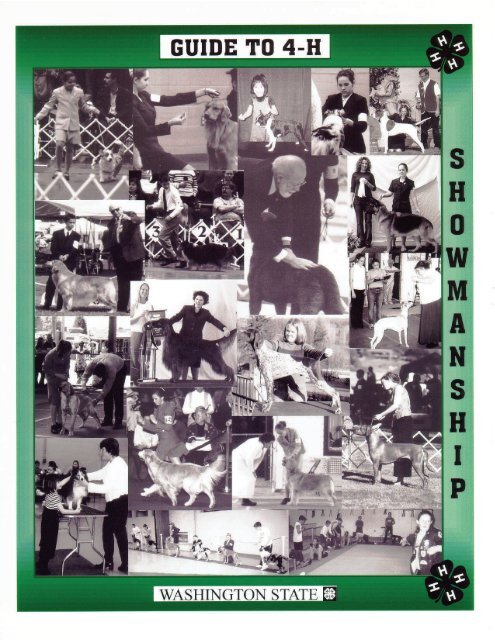
Showmanship Guide - 4-H Youth Development Program ...
Showmanship Guide - 4-H Youth Development Program ...
Showmanship Guide - 4-H Youth Development Program ...

Create successful ePaper yourself
Turn your PDF publications into a flip-book with our unique Google optimized e-Paper software.
<strong>Showmanship</strong> manual revised 2009; Jo Simpson . 4-H photos<br />
by; 4-H member Kristina Gunderson and 4-H leaders Matt<br />
Ginther and Sarah Gunderson. Photo editing; Kristina<br />
Gunderson. <strong>Showmanship</strong> manual edit ; Cathy Soule and photo<br />
graphics done by Barb Taylor. Thanks for all your help.<br />
Copyright © 2011 by Washington State 4-H.<br />
All rights reserved. No part of the contents of this document may be reproduced or transmitted in any form or by<br />
any means without the written permission of the Washington State University Extension 4-H <strong>Youth</strong> <strong>Development</strong>.<br />
i
Table of Contents<br />
Section 1<br />
How to Prepare, Train and Show in the 4-H <strong>Showmanship</strong> Event<br />
1. Getting Started………………………………………………………………………………..1<br />
Purpose of 4-H <strong>Showmanship</strong>…………………………………………………………..1<br />
Learn About the Breed………………………………………………………………….1<br />
Choosing a Show Lead and Collar……………………………………………………..2<br />
11. Grooming and General Appearance of Your Dog………………………………………...3<br />
Coat Types……………………………………………………………………………….3<br />
Bathing…………………………………………………………………………………...4<br />
Toenails and Clippers…………………………………………………………………...6<br />
Coat Trimming…………………………………………………………………………..7<br />
Ears……………………………………………………………………………………….8<br />
Teeth……………………………………………………………………………………...8<br />
111. Exhibitor Appearance……………………………………………………………………...9<br />
For Girls………………………………………………………………………………….9<br />
For Boys…………………………………………………………………………………..9<br />
General Appearance for Both…………………………………………………………...9<br />
What Not to Wear……………………………………………………………………….10<br />
1V. Handling <strong>Guide</strong>lines……………………………………………………………………….11<br />
Between the Dog and the Judge (BDJ Rule)…………………………………………..11<br />
The New BDJ Method ………………………………………………………………….12<br />
Tips about the BDJ Skill………………………………………………………………..12<br />
V. Handling Skills: Gaiting…………………………………………………………………….12<br />
Gaiting Around the Ring: Training and Practice……………………………………..13<br />
Tips for Gaiting Around the Ring……………………………………………………...15<br />
Pattern Gaiting: Training and Practice…………......…………………………………16<br />
Down and Back Pattern…………………………………………………………………18<br />
Triangle Pattern…………………………………………………………………………20<br />
Down and Back Tips…………………………………………………………………….20<br />
The “L” Pattern…………………………………………………………………………21<br />
The “T” Pattern…………………………………………………………………………21<br />
V1. Handling Skills: Stacking…………………………………………………………………21<br />
Using Bait to Hand Stack……………………………………………………………….22<br />
Hand Stacking…………………………………………………………………………..23<br />
Using Bait to Free Stack………………………………………………………………..23<br />
ii
Handling Skills: Stacking Cont. ……………………………………………………...21<br />
Table Stacking…………………………………………………………………25<br />
General Stacking Tips………………………………………………………...26<br />
V11. Ring Procedures…………………………………………………………………… ..29<br />
Individual Examination……………………………………………………….29<br />
How to Show the Bite………………………………………………………….30<br />
Showing the Teeth or Mouth…………………………………………………30<br />
Checking Ears, Nails and Coat……………………………………………….30<br />
V111. General Knowledge Questions………………………………………………………..31<br />
1X. It’s Show Time…………………………………………………………………………31<br />
In the Ring……………………………………………………………………………..32<br />
X. Conclusion…………………………………………………………………………………34<br />
Section 2<br />
Judging Criteria for Judges, Leaders and 4-H members in the<br />
4-H <strong>Showmanship</strong> Event<br />
1. Qualifications………………………………………………………………………………37<br />
Safety………………………………………………………………………………...…37<br />
Ring Procedures and Judging Routine………………………………………………38<br />
Judging Patterns………………………………………………………………………39<br />
Possible Additions to Your Judging Routine………………………………………..40<br />
Things That Judges Should Avoid……………………………………………………40<br />
11. Group <strong>Showmanship</strong> Scorecard……………………………………………………...41<br />
111. Individual <strong>Showmanship</strong> Scorecard…………………………………………………42<br />
1V. Judges <strong>Guide</strong>lines……………………………………………………………………...43<br />
V. References……………………………………………………………………………...44<br />
iii
Section 1<br />
Introduction to the<br />
4-H <strong>Showmanship</strong> Event<br />
How to Prepare, Train and Show in the 4-H Event<br />
This section will provide information in a generic fashion. It should be left up to the members<br />
to research and decide what is right for their breed. They should be allowed to present their dog<br />
in the style and presentation they choose, within the rules and regulations. This section tells<br />
how to find information, train yourself and your dog for the showmanship event, get the right<br />
equipment and know how to dress. It also includes grooming skills and presentation skills, ring<br />
procedures and basic preparation for the ring. Using this section will benefit new members and<br />
leaders.<br />
Section 2<br />
Judging criteria: for Judges, Leaders and 4-H Members<br />
This section will offer judging criteria for those who judge our 4-H <strong>Showmanship</strong> event. This<br />
information will also be helpful to the members, leaders and parents. Those that judge the 4-H<br />
<strong>Showmanship</strong> events must be familiar with the judging criteria, rules and regulations as well as<br />
all other policies that apply. Developing the criteria will help standardize judging across the<br />
state, make 4-H <strong>Showmanship</strong> more consistent, and give members a better opportunity at preparing<br />
for competition, no matter who the judge is. 4-H <strong>Showmanship</strong> will always be subjective,<br />
but we can still improve upon the current nature of it by developing a set of guidelines and<br />
score sheet, so judges and members are receiving the same information.<br />
Purpose or Goal<br />
4-H showmanship classes are judged on the ability, knowledge and skill of the 4-H<br />
members to groom, handle and present their dogs according to 4-H guidelines.<br />
Objectives<br />
To introduce and encourage members to participate in the sport of dogs.<br />
To provide members with a meaningful competition in which they can learn, practice,<br />
and improve in all areas of dog care, including handling skills and sportsmanship.<br />
iv
Section 1<br />
How To Prepare, Train and Show in the 4-H <strong>Showmanship</strong> Event<br />
v
Getting Started<br />
The goal of 4-H <strong>Showmanship</strong> is to teach 4H members how to properly care for and exhibit<br />
their animals. This includes the animal’s grooming, condition and cleanliness. <strong>Showmanship</strong> also<br />
refers to the member’s ability to present their dog to its best advantage before a judge. Mixed breeds,<br />
purebreds and spayed or neutered dogs may be used. The member does not have to own the dog, but<br />
he or she must have regular access to it for training purposes. 4-H showmanship is a completely different<br />
competition from obedience, do not confuse the two so that you do not confuse the dog. Think<br />
of your dog as a first grade student, he or she will be taught both obedience and showmanship, but<br />
they are as different as math and spelling. Use different commands for each class.<br />
The purpose of 4-H <strong>Showmanship</strong><br />
In order for you to show your dog in this event, you will need to recognize what the judge is<br />
looking for when they judge a dog. 4-H showmanship is not a competition to see who has the best<br />
dog. Your dog is not being judged, but your handling skills are. You and your dog are a team. When<br />
you present the profile, the front, or the rear of your dog in a stacked position, what is the judge looking<br />
for? What is the purpose of gaiting your dog around the ring? How is the dog supposed to look?<br />
In order for you to present your dog to a judge you will need to understand these questions. To become<br />
successful at dog handling you will need to study, research, and learn from experienced people.<br />
You can start now by learning the basics.<br />
Learn about the Breed<br />
Before you learn to show your dog, it is a good idea to find out how your dog would be shown in<br />
conformation. Every breed is shown differently and the best way to find out how to show your breed<br />
is to:<br />
Study pictures of your breed of dog and research your dog's breed standard, or the breed standards<br />
that most resemble your dog if you have a mixed breed. The standard is a description<br />
of an ideal specimen for a specific breed. It is like a blueprint against which every dog is<br />
judged. (Go to the American Kennel Club web site, AKC.org for breed standards.) The AKC<br />
also has a video on each breed standard. This can help you see what it is supposed to look<br />
like. You can find other books that have other breed standards if the AKC does not have<br />
your breed. Look at photographs in books and magazines from breed clubs, look at breed<br />
books and study pedigrees. Go to other breed registries as well for rare breeds not listed by<br />
the AKC.<br />
Ask your leaders or superintendent to recommend someone for you to talk to.<br />
Talk to a reputable breeder for your breed. Look at how your breed’s feet are placed and how<br />
the head and tail are held. If you are watching a class of dogs, either on TV or at a show, notice<br />
how fast the dogs are moved and how the handler holds the lead. You will need to gait<br />
your dog at a speed that makes your dog move its best. If you have a mixed breed dog, you<br />
must choose the one breed which your dog most resembles and show him or her as if purebred.<br />
When you enter a showmanship event, put an “X” after the breed of dog so the judge<br />
knows it’s a mixed breed. Also, check what types of show leads and collars are used in the<br />
breed ring.<br />
1
Choosing a Show Lead and Collar<br />
There are several different kinds of show leads. The main difference between them is the<br />
amount of control they give you. Any of the leads are okay for any breed of dog, although some<br />
are more commonly used than others. In selecting a lead/collar, it is necessary for the it to compliment<br />
and enhance your dog. For example if you have a black dog use a black show lead. It<br />
should not distract from the dog or stand out. You should try to find a leash that is barely noticeable.<br />
Do not use a black show lead and collar on a white dog, or any bright colors. The most common<br />
types of show leads/collars are described as follows:<br />
Spring Clasp is a leash and collar combination often used on smaller dogs. It does not<br />
give the handler a lot of control. Another problem with this lead is the clasp. The spring in<br />
the clasp breaks very quickly allowing the leash to slip off. This can lead to problems in<br />
the ring.<br />
Martingale is a collar and leash combination. This lead gives a fair amount of control and<br />
is usually the best choice for a small to medium dog. It works well on the spaniel breeds,<br />
like cockers and springers. It is also used on terriers, whippets and some larger dogs and<br />
smooth coated breeds. Martingale leads come in various lengths and colors. On some, the<br />
collar section is made of chain, this gives even more control. When you buy a Martingale<br />
lead, make sure that when the leash is pulled tight, the two metal rings on the collar do not<br />
touch when fitting it on your dog.<br />
Collar and Lead have two separate parts, the collar and the lead. The collar is a slip<br />
collar similar to those used in obedience. It is usually made of very fine chain (snake)<br />
or nylon. Check to see which is best for you and your dog. Leads come in different<br />
lengths and are made of nylon or thin leather. They are shorter than obedience leashes<br />
and are thinner, and lighter weight. They are easier to roll up into your hand, keeping the<br />
leash work neat and tidy. This combination is a good choice for a medium or large dog<br />
that is strong and may pull a smaller handler. Generally smaller dogs use longer leads,<br />
larger dogs use shorter leads.<br />
Types of show leads and collars:<br />
(Left) Choke collar made of<br />
either a fine chain or leather,<br />
combined with a fine lead, with<br />
or without a snap.<br />
(Center) “RESCO” type, an<br />
adjustable, non-choking, one<br />
piece lead.<br />
(Right) “Martingale” A one<br />
piece lead that allows a limited<br />
extent of tightening on the neck.<br />
It is a good idea to have someone that knows about leads and collars<br />
help you select the right one for your breed, your dog and for<br />
you.<br />
2
Grooming and General Appearance of Your Dog<br />
Each breed of dog requires more grooming than you would think. For your dog to look<br />
his or her best in the show ring, you should groom regularly. Each breed has specific needs,<br />
making it impossible to list them all here. Talk with breeders, professional groomers, handlers<br />
or your leader or superintendent to help you learn how to groom your breed. If the dog is professionally<br />
clipped or groomed, ask the groomer to leave ears, teeth, toenails, and some trimming<br />
for you to do. Your dog will receive a score in the grooming category. Points may be<br />
deducted in any or all of the following categories:<br />
The number one requirement is to have your dog clean! Even if your breed standard<br />
says that they should be shown in a natural state, that does not mean the dog can be<br />
dirty, stink or have fleas, mats, or dead hair.<br />
Long coated dogs should be brushed thoroughly and regularly to prevent matting. The<br />
length of your dog’s coat will determine what supplies you will need to keep his or her<br />
coat in shape.<br />
He or she should not have dandruff or untreated sores.<br />
Nails must be trimmed. They must be cut regularly to prevent the quick from growing<br />
too long.<br />
Teeth should be cleaned often to prevent tartar buildup.<br />
Keep ears clean to prevent infection.<br />
If the dog’s eyes weep or the dog drools in the ring, the handler should keep them<br />
wiped. Eye discharge can mean a number of ocular problems and should not be ignored.<br />
Tears react with oxygen to form a red stain on the coat. Tear stain removers are available<br />
and can be used if this has been recommended. Red stains anywhere on the dog are<br />
usually caused by saliva and excessive licking in that area. Constant licking may be<br />
cause for veterinarian attention.<br />
Whiskers do not have to be trimmed depending on the breed. But, if they are, it should<br />
be done neatly and carefully.<br />
Coat Types<br />
Short coats usually require some trimming to tidy up scraggly hairs under the tail, tuckup,<br />
belly and neck.<br />
Wire coats usually require hand plucking and stripping. Most Terriers have wire coats,<br />
as do some other breeds. Clipping a wire coat is acceptable for most pet dogs, however<br />
this exposes the soft undercoat ruining the hard harsh texture needed in the show ring.<br />
Sometimes this harsh texture can be lost by washing the dog right before the show.<br />
Special shampoos are made for these breeds. These coats require the artistic talents and<br />
skills of professionals. Seek out those who know and you can learn this talent too!<br />
Long coats usually require trimming, brushing, bathing and blow drying. The best kind<br />
of blow dryers force cool or warm air to dry the dog. These blasters and stand dryers<br />
are very effective in drying the coat quickly, but can be expensive. You can use your<br />
hair dryer to start with. Keep it on low heat or a cool setting. Brushing long coats<br />
as you dry the hair will straighten the hair and give the coat more body. In some breeds,<br />
a straighter, fuller bodied coat is more desirable. Long coats must be kept clean and free<br />
from dirt and oil which will make the coat tangle or mat. Mats will cause hair loss and<br />
will need to be cut or stripped out. Some breeds with long flowing coats can have their 3
hair wrapped, (ie: cockers, springers etc.) Each breed has a different technique, one way is to<br />
brush the coat straight and wrap it or pin it up. Sometimes ears are wrapped so as not to hang<br />
down and get dirty. You can purchase a special vet-wrap. (A special vet bandage that clings<br />
to itself). You can also buy it at the drug store. Sometimes a snood ( a cloth hood) may be used<br />
to keep the ears back from the face and protect them from dragging and getting dirty. The afghan,<br />
basset and spaniels are examples of breeds that sometimes wear a snood to keep their ears<br />
away from their face and the ground. In male dogs, the coat on the sides can be held out of the<br />
way of any urine by securing the coat to the hair on the side of the body by a claw type clip.<br />
You can be very resourceful when it come to creating ways to protect your dogs coat.<br />
Bathing<br />
Before showing your dog, your dog should be bathed. It is okay to use any of the available dog<br />
shampoos, but you should check with your breeder or 4H leader to ask which one you should<br />
use and how often you should bathe your dog. Concentrated shampoos should be diluted. Follow<br />
these steps when bathing your dog:<br />
Brush your dog to remove any mats or dead hair. You may need to rake out the under<br />
coat if you have a long coated breed.<br />
Soak your dog to the skin in warm water. Do not get water in ears or eyes. You can<br />
place cotton balls in the ears to keep the water out.<br />
Apply shampoo, starting with a ring around the head, neck and ears while working it<br />
into the skin with your fingers. Work all the way back to the end of the tail, and down to<br />
all of the toes. Like washing a car start from the top (the head) and work down to<br />
the ground.<br />
Rinse your dog well with warm water. Any shampoo left on the dog will dry and look<br />
like dandruff. Excess shampoo can also cause hot spots. You can use a wash cloth to<br />
wash your dog’s face. Again, the car principle applies - start the rinse at the top and<br />
work down to the ground. If your dog is very dirty shampoo him or her again. After the<br />
final rinse, take the cotton balls out of the dog’s ears. Keep your dog warm and away<br />
from drafts until he or she is dry. Drafts can cause health problems for your dog.<br />
Dry your dog quickly to make his or her coat fluffier, you can use a blow dryer or<br />
blaster, depending on the coat type. If you have a long coated dog like an afghan or old<br />
english sheepdog this technique is not recommended. Drying with a blaster could cause<br />
the hair to tangle and mat. Use a stand dryer or hand dryer. If you use a blaster (for<br />
Goldens, Setters etc.), use a low heat setting and blast the water out of your dogs coat.<br />
Keep the nozzle close to the dog and go back and forth quickly until you have most of<br />
the really drippy water out. If your dog is not used to the dryer (blaster) start near his<br />
croup, back or legs not on his head, ears or face. When your dog becomes more comfortable,<br />
you can get closer to the ears and head. Once you blast out most of the water,<br />
you can start to shape and blow the hair in the correct direction using the proper pin<br />
brush, slicker brush or other brush depending on your breed. All breeds are finished<br />
differently and you should learn what is correct for your breed and which brushes to use.<br />
If you use a grooming table with an arm and noose, do not leave your dog unattended<br />
on the table, even for a few seconds. Dogs can hang or injure themselves by trying to<br />
jump down.<br />
4
Make sure you have everything you need before you put your dog onto the table and in<br />
the noose.<br />
Wash or clean out your brushes at the same time you wash your dog so they will not<br />
make the dog dirty again.<br />
COMBS: The best all around comb we can recommend is<br />
one with half medium and half fine teeth. The medium side<br />
is used first to help tease out mats or tangles. The comb is<br />
used for final combing of the coat.<br />
PIN BRUSH: This brush is used for the regular<br />
brushing of long coated dogs.<br />
Common Grooming Utensils<br />
STRIPPING<br />
KNIVES: The fine<br />
stripping knife is<br />
used on the head,<br />
ears and other<br />
sensitive areas.<br />
The coarse stripping<br />
knife is used<br />
on the other parts<br />
of the body.<br />
SLICKER BRUSH: A light<br />
weight brush recommended<br />
for the novice, it is used on<br />
poodles and Bichon coat types.<br />
It is used to remove dead hair<br />
from short coated breeds.<br />
SLICKER BRUSH: This is a<br />
curved brush used on long<br />
coated dogs and highly recommended<br />
for dematting the coat.<br />
5
Toenails and Clippers<br />
In the ring, the judge will check to see that your dog’s toenails have been trimmed. Even if your<br />
dog’s toenails were not judged, it would still be important to clip them as toenails left unclipped<br />
can cause the dog’s feet to spread. The nail can also grow back into the foot. Three ways to<br />
shorten the nails are described below. No matter which method you use, the toenails should be<br />
clipped almost to the quick.<br />
The quick is the place where the blood vessel ends in the toenail. If you cut beyond that point,<br />
the nail will bleed. It will also hurt the dog and cause him to be shy of the clippers the next<br />
time. To stop bleeding, use Kwik Stop, flour, cornstarch, or a Styptic Stick (what men or<br />
women use while shaving). If your dog has white toenails, you can see the quick. If your dog<br />
has black toenails it is more difficult so trim small portions at a time. As you near the quick the<br />
dog will become more sensitive. If you clip your dog’s toenails regularly, the quick will recede<br />
and you will be able to cut the nails shorter. If you do not clip the toenails, the quick will grow<br />
out. When your dog’s toenails are long, your dog does not move as smoothly as he or she<br />
should. It can also cause the dog to walk farther back on its pasterns. Eventually, the dog can<br />
begin to limp from the pain.<br />
Quick→<br />
Nail →<br />
Scissor type of nail clippers<br />
Now, let’s look at the tools used on the toenails. Have your leader or groomer show you<br />
how to safely cut your dog’s toenails.<br />
Toenail clippers. There are two different styles available: Guillotine, or scissors type.<br />
Choose a quality clipper that is sharp.<br />
Files. Special metal files, emery boards and sandpaper can be used on toenails. It takes<br />
longer to shorten nails this way, but if your dog really fights, it may be your only choice.<br />
Another use for files is to smooth nails you have clipped with clippers.<br />
Pictures show long pointed nails with Kwik. Use your nail trimmers to cut along<br />
the dotted line so the nails do not turn under or come to a point.<br />
6
Grinders or a Rotary Hand Tool. The grinder is like an electric file. Grinders work very<br />
well, but they are also expensive and must be used very carefully to avoid injuring the<br />
dog. If the dog has long hair between the toes you must pull the hair back and expose the<br />
nail completely. This will prevent the hair from winding around the shaft of the grinder<br />
while it is spinning. Use the sand paper wheel not the sand stone because the sanding stone<br />
can get too hot. You can buy a Dremel hand-grinder at the hardware store. Do not use a<br />
grinder unless you have someone show<br />
you how.<br />
Coat Trimming:<br />
All breeds require some trimming. The trimming described here is used on most breeds. However,<br />
some breeds require more trimming; some less. It is up to you to find out what trimming<br />
is appropriate for your breed. It is best to buy a special pair of scissors for your dog. This way<br />
you always know they are sharp. As you become familiar with your breed standard, and the<br />
areas in which your dog does not quite measure up, you will be able to learn how to trim your<br />
dog to compensate for those shortcomings. In all cases, seek help from a knowledgeable person<br />
to learn the skills of trimming, scissoring, shearing, thinning and clipping. If possible<br />
practice on the right side (non show side) of your dog first, until you get comfortable and can<br />
study your effects on the coat before tackling the left (show side) of your dog.<br />
Scissoring is an art! It takes many years to become a great sculptor. If you have a breed of<br />
dog that requires scissor work you will need to learn this skill. It will take time to learn<br />
how to shape Poodles, Bichons, Portuguese Water Dogs, Irish Water Spaniels and other<br />
breeds that require this talent. Sometimes these breeds are clipped or sheared instead<br />
which is okay as long as you are not showing the dog in an AKC dog show. Sometimes<br />
shearing is the easiest way to keep these dogs clean and neat looking. However, if you decide<br />
you want to go into the AKC ring you will need to learn from a professional or from<br />
a breeder or a groomer that knows how to scissor.<br />
Thinning Shears. These are used to avoid scissors marks and to thin out areas that you<br />
want to look more even and smooth. In some breeds thinning shears are used to hide<br />
faults. Examples; topline, neck, shoulders, elbows or croup just to mention a few. When<br />
using the thinning shears, you should always cut with the jagged edge turned out so the<br />
blade of the scissors touches the dogs coat first. Learn how and why to use the thinning<br />
shears and you will be amazed at what you can create.<br />
Scissors<br />
Curved Scissors<br />
Nail Grinder<br />
Thinning Shears<br />
7
Pads (bottom of the feet). For some breeds, the hair on the under side of the foot should be<br />
trimmed, while some breeds are not trimmed at all. You should check with your leader,<br />
breeder or other knowledgeable person to determine which is the proper method for your<br />
breed.<br />
Feet (top). Some breed standards call for a neat, tight foot. There are many breeds with<br />
carefully shaped hair on the top and edges of the feet. To achieve a neat and tight foot, use<br />
regular scissors to trim the excess hair around the pads at the bottom of the foot. Use thinning<br />
shears to trim the excess hair in between the toes to make the foot look neat, round or<br />
cat-like. Next trim the hair around the edge of the pad with small regular scissors. Some<br />
breeds do not trim the feet at all. Research to see which is correct for your breed.<br />
Front Legs. Again check with those that know what is to be trimmed on your breed. Even if<br />
you have a mix breed dog, some trimming may be necessary.<br />
Back Legs. Some breed standards call for good bone in the legs. If you trim too much on<br />
the hind legs you will make the legs look thin. Trim the back of the hind legs from the pad<br />
to the hock joint. As you trim the hock, hold the thinning shears vertically, not horizontally.<br />
By trimming vertically you will trim up the hock versus horizontally when you would be<br />
more apt to cut out chunks.<br />
Whiskers: Whiskers may or may not be cut, and some breeds require that they not be cut.<br />
If you cut them, trim them as short as possible. Push the whisker toward the nose as you<br />
clip. If you don’t do this, the dog can partially retract the whisker. Don’t forget the whiskers<br />
around the eyes, chin and cheeks.<br />
Ears<br />
The judge will check to see if your dog’s ears are neat and clean. You should clean your dog’s<br />
ears as needed. Always look at the matter you take from the ears. If the matter is black or red,<br />
your dog could have ear mites. If there is a lot of liquid matter or an odor to the ears, your dog<br />
could have an infection. Have your vet check the ears. To clean the ears use a cotton ball to<br />
wipe out all the little crevasses in the ear. The dog will usually flinch if you start to poke too<br />
far. When the crevices are cleaned, use a piece of cotton dipped in Novasan, a special ear medication,<br />
or an ear wipe. Rub it over the inside of the ear. Some long coated, long eared breeds<br />
have excessive hair growing inside the ear canal which should be removed to prevent infection.<br />
(ex. Poodles, Terriers, Maltese or Bichons) Check with a breeder or groomer to see if it is necessary<br />
for your breed, if so you can cut out the excess hair, or use your fingers or a pair of<br />
tweezers or hemostats to pluck out the hairs.<br />
Teeth<br />
Plaque is the yellow substance you often see on teeth. If your dog has a bad buildup of tartar,<br />
you may want to have it removed by your vet. Once the teeth are clean, keep them clean yourself.<br />
If the tartar is not removed, the teeth will eventually rot and fall out, or your dog could develop<br />
a gum disease or abscess which could lead to other internal problems. The best way to<br />
keep your dog’s teeth clean is to prevent tartar buildup by feeding dry dog food, (or other hard<br />
biscuit type products), or beef knuckle or leg bones. Watch your<br />
dog while he or she is chewing the bones so that he or she doesn’t<br />
get the bone stuck or have other problems. You should also brush<br />
your dog’s teeth with dog toothpaste (not human toothpaste) on a<br />
regular basis. Tooth scalers can be used if necessary. Have your<br />
leader or groomer show you how to do this. Scrape from the top of<br />
the tooth down on the top teeth and the bottom up on the bottom<br />
teeth. Remember the tool is sharp, so don’t poke the gums. Don’t<br />
forget to clean your dog’s molars. Cleaning the teeth will also<br />
help to keep your dog from having bad breath.<br />
Plaque and tartar buildup on teeth 8
Exhibitor Appearance<br />
In the showmanship event, you should prepare yourself as carefully as you prepare your<br />
dog. If your dog is to look his or her best, you must too. Be poised, alert, neat and clean. Dress<br />
in business-like attire. Your outfit should be an appropriate backdrop for your dog. You should<br />
show respect for the judge and the <strong>Showmanship</strong> Ring. The main rule is dress conservatively.<br />
<strong>Showmanship</strong> is not a fashion show. You shouldn’t distract from your dog. We recognize for<br />
some 4-H members these suits and “nice” clothes are not your preference, nor would you be<br />
caught dead at school looking like this, but you can tolerate the “look” for a short time, out of<br />
respect for the 4-H <strong>Showmanship</strong> ring.<br />
For Girls<br />
Suits, Dresses and skirts are the most popular choices. If you wear a dress or skirt, make<br />
sure it is not too short or too tight because you will have to kneel and bend over, you should<br />
be able to move freely. Your neckline should remain in place when you bend over. The<br />
height of your dog and the hem line of your dress/skirt should not be the same, this could<br />
distract from your dog and he could be hidden by your dress.<br />
Pants or pant suits are a sensible choice if you have a small breed and need to bend or<br />
kneel a lot. They should not drag on the ground or have ragged hems. You should present<br />
a modest and attractive image to the judge.<br />
CAUTION Wraparound skirts have a tendency to unwrap as you run around the ring or if<br />
a wind catches it just right (or wrong).<br />
Long Full Skirts are often loose and wide and might obscure the judge’s view of your<br />
dog’s movement. A gust of wind at an outside show could blow the skirt: How embarrassing!<br />
If you have a small dog, they can get under the skirt and become hidden.<br />
For Boys<br />
Suits, Sport Jacket and Casual Slacks, or other nice pants that are neat and clean, do not<br />
drag on the ground, sag or have holes in them are good choices.<br />
Dress Shirts: Sports or Polo shirts, sweaters or vests, are recommended. Make sure the<br />
jacket is buttoned so it does not flap around when you are moving or bending. T-shirts are<br />
not a good idea. A relaxed look is not desirable in the ring.<br />
General Appearance for Both<br />
What you choose to wear could leave a lasting impression on the judge. Your clothing should<br />
fit properly and be neat, clean and in good repair. It should not interfere with your dog or the<br />
judge when you move or present your dog.<br />
Hair: You should have your hair in a neat style or tied back so it will not fall over your<br />
face when you bend over or move.<br />
Scarves and neckties should be secured so they do not flap, distract, or hang across the<br />
dog.<br />
Jewelry should not flap, clank, rattle or roll, or make noise when it moves. It should not hit<br />
the dog when you bend over. Remember to remove any loose change or keys from your<br />
pockets.<br />
Bait: If you are using bait with your dog, make sure your outfit has pockets at the proper<br />
places (right side) or you can use a bait pouch. The best outfits have pockets in which you<br />
can carry combs, bait or a toy. They should not be bulging or distracting. If you like an<br />
outfit at the store but it does not have pockets you can have a tailor or friend sew them into<br />
almost any dress, suit or skirt.<br />
9
Color is as important as style. A black dog would be invisible if your clothing were black.<br />
Your clothing should contrast with your dog so your dog stands out. If you have a multicolored<br />
dog, solid colors will look the best and not seem too busy or detract from your dog.<br />
Shoes should be comfortable, clean and attractive. A flat non-skid sole is a must for safety<br />
and traction: avoid wearing high heels because they can cause tripping or turned ankles.<br />
Tennis shoes or running shoes are okay, but giant running shoes are awkward and can distract<br />
from the dog, they also look out of place with a suit or dress. Tied shoes or slip-ons are<br />
good. Make sure tied shoes stay tied neatly and slip-on shoes stay on your feet while you<br />
run and gait your dog. Avoid shoes that make noise or light up when you run or walk.<br />
Shoes should not be a distraction to your dog, the judge or your clothes. No open toed or<br />
open back shoes are allowed.<br />
You do not need to go out and purchase name brand clothing to compete at fair. Many discount<br />
and thrift stores will carry stylish clothes. After all you only need to wear it while you<br />
are in the ring. Many times you have the perfect outfit hanging in your closet. Remember<br />
you want to be a great picture paired with your dog in the judge’s viewpoint. When in<br />
doubt, opt for the more conservative choices.<br />
What NOT to Wear<br />
Jeans or ragged pants that are torn or have holes in them. You can leave the denim at home<br />
for one day or change after the event.<br />
T-Shirts. Again, for the respect of the sport no t-shirts please.<br />
The same colors as your dog. It will be hard for the judge to see your dog. It is better to<br />
contrast.<br />
Sandals or opened toed and backed shoes are not allowed.<br />
Short skirts or short dresses, low cut and or gapping necklines. These are not allowed<br />
under the 4-H dress code.<br />
Low cut or gapping necklines<br />
Hats or caps<br />
Club, organizational affiliation, personal identification or Junior showmanship pins<br />
A great outfit is a backdrop for your dog and a signal of respect for the 4-H <strong>Showmanship</strong><br />
event. It is not to draw attention to yourself, but enhances the teamwork and balance with your<br />
dog. You should NOT draw attention away from your dog. If you have other questions on appropriate<br />
dress, please refer to the 4-H dress code in the Wa. State 4-H Leaders <strong>Guide</strong>.<br />
Examples of appropriate outfits that make a nice backdrop for your dog.<br />
10
Handling <strong>Guide</strong>lines<br />
You have practiced and practiced. Now you are ready to show your dog. Your dog is groomed<br />
and so are you. It’s time to show. Most judges follow the same basic routine. This section will<br />
help you prepare for what you will do in the ring. From the moment you enter the ring your objective<br />
is to present your dog to his or her best advantage. Through your actions and attitude<br />
you should convey to the judge that you are confident, prepared, businesslike and courteous.<br />
The quality or conformation of the dog is not being judged in this class. 4-H <strong>Showmanship</strong><br />
classes are judged on the ability of the exhibitor to handle their dog in the following areas.<br />
4-H members should:<br />
Know correct handling of the leash, how to free stack, hand stacking, and properly gait<br />
(for your breed).<br />
Be able to present your dog in a smooth, efficient and quiet manner to the judge without<br />
creating unnecessary movement.<br />
Make your dog looks its best in both pose (stacking) and motion, (gaiting).<br />
Use bait (food or a small toy) appropriately. If bait is used, it must be used correctly.<br />
Strive to make your DOG stand out as the most important part of the team effort.<br />
Be able to control your dog at all times<br />
Keep your dog’s attention without using dramatic or unnecessary noise or movements.<br />
Gait your dog in a controlled trot without distracting or interfering with the judge’s view<br />
of the dog.<br />
Concentrate on your dog first, then you and the judge next. Make occasional eye contact<br />
with the judge to show attentiveness, but focus the majority of your attention on<br />
your dog. Always make sure your dog is looking it’s best. The dog is the number one<br />
consideration in the ring.<br />
Make an effort not to distract or interfere with the judge’s view of your dog. Brief<br />
blocking moments of moving from side to side inline, done smoothly and efficiently are<br />
allowed. The use of necessary courtesy turns while gating in patterns or around the ring,<br />
done in a smooth and efficient manner is allowed. Let’s look at and compare the old interpretation<br />
to the new.<br />
Between the Dog and the Judge (BDJ rule)<br />
Old interpretation: This will be one of the most apparent changes for all 4-H members and<br />
showmanship judges. The intention of BDJ is a good one, however the interpretation of this<br />
phrase left it very unclear as to what was intended. It meant different things for some than for<br />
others. When many leaders, members and parents were asked to explain this rule there were<br />
many different explanations. Over the years many people have considered this saying to be the<br />
number one “Golden Rule” in 4-H and interpreted it to mean; “Do not, at any time, under any<br />
circumstances, ever get between the dog and the judge”. For some, this even included all parts<br />
of the dog’s body. For instance, while stacking the dog, you couldn’t reach over the top of the<br />
dog’s shoulder to stack the left side because your arm would be BDJ. The old interpretation has,<br />
at times, created unnecessary movement on the part of the handler and the dog. The motion of<br />
moving around the back of your dog is usually awkward and unnatural and sometimes pulls the<br />
dog out of its stack, not allowing proper presentation by the handler. However, this method of<br />
passing behind your dog may still be used and will not be penalized if; the timing and smoothness<br />
is not compromised and the 4-H member can still present their dog smoothly. 11
The New BDJ Method<br />
Everyone agrees the handler should not interfere with the judges view of the dog. However,<br />
brief blocking moments will be allowed if warranted. This method of moving from side to<br />
side, allows the handler to move quickly and smoothly, without pulling the dog out of position.<br />
If movement to the other side is needed, a simple step around the front of your dog to<br />
the other side is allowed. This will take less movement, be less distracting, and will not pull<br />
the dog out of position. The presentation on the other side of your dog, the front, the profile,<br />
or the rear can be done without adding unnecessary movement or distractions by you and<br />
most importantly you will be able to continue to present your dog. This move to the other<br />
side can be done right before the judge gets to you or whenever the timing or movement<br />
warrants switching sides. Timing of when to move is important. Have a more experienced<br />
leader or 4-H member help you. You can move quietly and smoothly continuing to present<br />
your dog efficiently.<br />
Tips About the BDJ Skill<br />
BDJ is not how you get from side to side, or how you line up your dog or get from point A<br />
to point B. It’s not which method you choose to use. It’s about how you accomplish the following<br />
objectives; moving smoothly, with the least amount of movement and distraction;<br />
keeping the dog in their stack; not interfering with the judge’s view of your dog; and most<br />
of all, continuing to present your dog to the judge. The use of the courtesy turn in-line, at<br />
the beginning or ending of patterns, or gaiting around the ring is also considered a brief<br />
blocking moment and will be allowed if one chooses to use them and use them for the reasons<br />
they were intended. It is better to not use a courtesy turn, than to use it and use it<br />
wrong, or for the wrong reasons. Have a knowledgeable person help you with understanding<br />
these turns and how to use them.<br />
Handling Skills: Gaiting<br />
Gaiting your dog around the ring and in an individual pattern are two different kinds of gaiting,<br />
both accomplishing different objectives. In order for you to gait your dog correctly you need to<br />
understand what the judge is looking for in most breeds- sound movement coming and going.<br />
Sound Movement<br />
Coming and Going<br />
12
This is the reason for the patterns. The judge might ask you to do a down and back pattern.<br />
They are looking a the dog’s rear movement as it goes away from them and its front movement<br />
as it comes back to them. This is why it is important to go in a straight line.<br />
Reach and Drive from the side (side gait): Reach refers to the dogs ability to fully extend their<br />
front legs in balance with the Drive from the rear legs. Patterns that show side movement are<br />
the “L” pattern, the “Triangle pattern” and the “T” pattern. Side movement is also judged by<br />
gaiting around the ring, as a group or individually. So when you hear the request,“ Take them<br />
around the ring,” you know that the judge is looking at your dog’s side movement. Practice going<br />
in a counterclockwise circle with the dog on your left side. Use bait to free stack your dog<br />
when you come back to the judge at the end of a pattern or when you get to the end of the line<br />
after gaiting your dog around the ring.<br />
Gaiting Around The Ring: Training and Practice<br />
Practically the whole propelling force of<br />
the hind limb is dependent on the ability<br />
of the dog to straighten the leg from the<br />
state of angulation to complete extension,<br />
as forcibly and as rapidly as may<br />
be required. This is dependent entirely<br />
upon the muscle power of a welldeveloped<br />
second thigh.<br />
Dogs should move at a brisk trot, not a walk or a gallop. Young puppies may start this training.<br />
After the puppy is accustomed to wearing a soft collar, take them outside (if possible), and fasten<br />
a show leash to the collar. Let them go where they wish at first. If they resist, try luring the<br />
pup with food a couple of feet away from their nose and walk them toward it. Use a happy fun<br />
tone of voice, pat your leg and encourage the pup. When the pup is walking well, give it an upbeat<br />
command such as, “Let’s go!” or “Gait!” Do not use the obedience command “Heel!” If<br />
your dog always wears their show collar and show leash in showmanship practice, they will<br />
eventually learn the behavior that goes with that equipment. If your dog breaks into a gallop,<br />
give a quick command and leash correction. As soon as the dog is back under control, say,<br />
“Good gait” or “good let’s go” depending on your choice of command. Remember, the most<br />
important part in any dog training is praise. Soon your dog will be moving proudly, with it’s<br />
head up on a loose leash. There is more to gaiting than running. To make it less complicated,<br />
let’s look at each aspect of gaiting separately.<br />
Gait or Speed: Your dog should move at the proper gait.<br />
Gait is the a pattern of footsteps at various rates of speed,.<br />
Each pattern is distinguished by a particular rhythm and foot<br />
placement. The walk, the gallop and the trot are the most<br />
common gaits. The amble, the pace, and the canter are also<br />
types of gait. The two types of gait acceptable in the show<br />
ring are the walk and the trot. The trot is the movement you<br />
should be working on with your dog.<br />
Top photo shows dog pacing and the<br />
bottom photo shows dog trotting.<br />
13
The Trot is a rhythmic two-beat diagonal gait in which the feet at diagonally opposite ends<br />
of the body strike the ground together (right hind with left front and left hind with right<br />
front). Because only two feet are on the ground at a time, the dog must rely on forward momentum<br />
for balance. At a normal trot, when the weight is transferred from one pair of legs<br />
to the other, there is a slight, period of suspension as the body is propelled forward. This is<br />
referred to as “Spring.” If a dog is of proper proportion, the imprint of the hind feet will<br />
cover the tracks of the front feet. Each handler must learn which gait it correct for their dog<br />
and breed, you must work with your dog to determine how fast you should gait so that the<br />
judge can correctly evaluate your dogs movement. With a small dog you can walk. Some<br />
small breeds, like the miniature Pincher, are distinguished by their high flashy steps. This<br />
type of gaiting is called hackney gaiting. The suspended or flying trot is a fast gait in which<br />
the forward thrust contributes to a longer reach in the front and the dog tends to hang or fly<br />
during each stride. The German Shepherd dog is an example of the flying or suspended trot.<br />
It is helpful to have someone watch you gait your dog and tell you at which speed your dog<br />
looks best. If you go too fast, your dog will gallop (run), or canter; too slow and they will<br />
pace (legs on the same side moving together) or walk. At the proper speed, your dog will<br />
move smoothly with little bounce with his or her legs reaching forward efficiently. This is<br />
called (reach and drive).<br />
Handler’s Arm Position: The next step is to get your arm in the proper position. Hold the<br />
leash in your left hand next to the dog, with the excess lead hidden in your hand. Do not<br />
hold the leash so tightly that it chokes the dog. Work with your leader and club members to<br />
develop a natural arm position that looks good for you and your dog and keeps your dog<br />
slightly away from your body and next to you or in front of you. Your free hand should<br />
swing naturally at your side, moving as it normally does when you run. Do not have bait in<br />
your free hand unless you can hide it while you are moving. You can pull it out of your<br />
pocket when you near the end of your pattern or the end of the line so you can use it for free<br />
stacking.<br />
Dog Position: Your dog will gait on your left side around the ring. You will be going counterclockwise<br />
in a big circle. You will also need to remember to use the whole ring if you<br />
have a large or medium sized dog. With a smaller dog it is okay to make a smaller circle.<br />
When you gait, your dog should stay away from<br />
your body and be next to or ahead of you. Many<br />
dogs do not like to trot at their correct speed and will<br />
lag. This makes it look like you have a tight lead and<br />
it does not look good to be dragging your dog<br />
around the ring. In most cases a dog that lags tends<br />
to go progressively slower with continued training,<br />
not faster. Hopefully gaiting was taught the correct<br />
way from the beginning. In <strong>Showmanship</strong> or handling<br />
you want to encourage your dog to go out<br />
ahead of you as you start gaiting your dog on the go<br />
around. This is the opposite of obedience where he<br />
needs to be corrected for forging or pulling you. Do<br />
not correct your dog for going out in front of you. As<br />
long as your dog holds a gait, it is encouraged for<br />
them to go out ahead. Once your dog can hold his<br />
Handler moving dog out in front. gait, you can start working the proper speed and con- 14<br />
trol as you go around the ring.
Moving your<br />
dog on a loose<br />
lease is important<br />
for correct<br />
movement.<br />
←Side pull on<br />
the lead accentuates<br />
the dogs<br />
tendency to<br />
“cross.”<br />
Swing from<br />
the end of a<br />
tight lead<br />
causes this dog<br />
to “cross” →<br />
in front. →<br />
Tips for Gaiting Around the Ring<br />
You can start this training by using lots of encouragement and making it fun. Even dogs<br />
that have been allowed to lag can be taught to move out.<br />
In obedience some are taught to hold the leash in both hands, not for showmanship handling.<br />
Hold the leash in the left hand only, with the excess balled up into the hand. Do<br />
not wrap the leash around your hand. Most handlers will bend their arm at the elbow and<br />
hold their hand about waist high or slightly higher. Do what feels comfortable and what<br />
looks natural for you with your dog. Have someone watch how you hold your arm and<br />
hand and see which looks best. Mirrors are a good training tool.<br />
Your dog will be on your left side as you gait around the ring. You will need to place<br />
your dog’s collar: (1) high up under the chin, right behind the ears, in the little gap between<br />
the head and neck (occiput). or, (2) rotate the collar so that the leash comes out<br />
from under the dog’s chin on his right side. There are pros and cons for both methods.<br />
Method one is used mostly for smaller dogs while the second is preferred by larger<br />
dogs. Talk with an experienced handler or leader to find out which one works best for<br />
you and your dog and under which circumstances. Whichever method you choose,<br />
make sure you position the collar and lead high up under the chin before you start gaiting<br />
the dog.<br />
Do not tell your dog to heel. “Heel” means stay on your left and sit when you stop. It is<br />
an obedience term. Encourage your dog by saying, “C’mon,” or “Let’s go,” before you<br />
start moving and as you run. This is allowed in the ring. Your dog will learn the difference<br />
between a “Heel” in obedience and a “Let’s Go” in Handling. You will need to be<br />
consistent on whatever words you use.<br />
Do not jerk him back to you if he pulls you, use your voice (praise) to control his forging!<br />
Forging is desirable in handling. Now you need to learn how to shape and control it<br />
into what you want and need.<br />
While training your dog, it is good to throw treats out straight ahead of him as he is gaiting<br />
so that he looks ahead for cookies and not at you. This also helps a lagging dog<br />
move out faster. In obedience we want our dog looking at us. Not in the show ring! This<br />
will tend to throw his movement off. Throwing the food ahead of your dog will keep<br />
your dog next to you or out in front of you. Lagging will not be a problem any more!<br />
Remember throwing the bait in the ring is not allowed, but it is a good practice technique.<br />
You may have seen a well trained, experienced dog that goes out on the end of<br />
the lead on the go around. This is good training as long as the dog maintains the correct<br />
15
gaiting speed and you can maintain control. Timing is important also. Time when to let<br />
your dog go out and when not to. Crowding or running up on the dogs in front of you<br />
can happen if you do not have timing and control. Practice moving in a group. Individual<br />
gaiting around the ring is slightly different than pattern gaiting. Pattern gaiting will be<br />
covered in the Pattern section.<br />
If your dog gallops, canters or gets a bit goofy and wants to play do not pull him back or<br />
jerk on the lead….say “easy”, slow down a bit and start over. Dogs that are happy workers<br />
are easier to train than those that are taught to just comply. If you do this every time, your<br />
dog will learn what you want.<br />
Dot not pass other dogs and handlers when you move in a group.<br />
Leave enough room or space (when group gaiting) between dogs so you do not crowd or<br />
run up on the dog in front of you. If you are behind a little dog, remember the judge usually<br />
watches only one part of the ring. When you are out of the judge’s sight, slow down<br />
or even stop and allow more spacing to build up in front of you. As you pass in front of<br />
the judge you should time your gait to be correct for your dog. This varying gait is called<br />
timing. Practice following behind different breeds, large and small; going slow and fast is<br />
very important.<br />
When you gait around the ring the judge will not move outside the circle or create unnecessary<br />
movement. You do not need to pass behind your dog or change hands while gaiting<br />
around the ring.<br />
Watch the judge occasionally as you gait around the ring. Make eye contact at least once<br />
when you are gaiting in front of the judge. However, most of your focus is on your dog,<br />
where you are going and your timing.<br />
If you have a medium to large dog, be sure you use the whole ring. Smaller breeds may<br />
make a smaller circle.<br />
Keep your dog on your left side, away from your body. Your dog can be even with your<br />
body or ahead of you. Maintain the proper gaiting speed for your dog and control the dog<br />
at all times.<br />
You may be asked to gait around the ring individually or as a group. Remember to finish<br />
the picture at the end of the circle after you go around the ring by either hand stacking or<br />
free stacking your dog.<br />
Pattern Gaiting: Training and Practice<br />
Gaiting in a Pattern: Now it is time for the individual gaiting patterns. Practice gaiting with<br />
your dog on your right and left sides so he or she will move smoothly on either side in the ring. In<br />
4-H <strong>Showmanship</strong>, you will be asked to gait your dog individually. You will be given a specific<br />
pattern to do. Each pattern is named for its shape. Do you Remember the reasons why you do the<br />
patterns in the first place? In all of the patterns make sure you are lined up with the judge before<br />
you move away. Look at a spot straight out from the judge in the direction he or she sends you.<br />
Gait your dog straight toward that spot. You should be able to do any pattern as asked. When<br />
moving away from the judge, keep your eyes mostly focused on your dog and move in a straight<br />
line. When you do your patterns make your turns smoothly, but sharply, do not round off corners.<br />
Make sure the lines you make are straight.<br />
Your dog: Pattern gaiting is slower and more deliberate than gaiting around the ring. You<br />
need to remember what the judge is looking for, concerning your dog, in each part of the pattern.<br />
Every dog has a correct speed and you need to decide which is correct for your dog. The speed<br />
may vary for coming and going and for side movement.<br />
16
In coming and going (down and back) you want to move your dog at a speed that will allow<br />
the legs to move in a straight line from their body to the ground. Usually the line will merge<br />
toward the center as they move faster. In general moving slower is better. Most dogs move<br />
more erratically and unsoundly with more speed, or the faster they gait. So why show that to<br />
the judge? When you are gaiting your dog in a pattern that shows side movement, you want<br />
to move at a speed that will allow for reach and drive. You want your dog’s front and rear<br />
legs to stride out with full extension. You do not want its legs like pistons, or have them<br />
flipping up their front feet. Faster is not always better. In all cases of pattern movement you<br />
want your dog to move smoothly and flow similar to slow motion with long reaching and<br />
driving strides. If you go too fast it will all be a blur of legs and awkwardness racing<br />
around the ring. If you go too slowly it will not allow for your dog to reach and drive fully<br />
and show the judge your dogs full potential. It is also important to start and end gradually<br />
and build up to the speed you want. Do not take off running when you begin the pattern or<br />
come out of the turns. Your dog will be confused and not ready for that fast pace. Don’t<br />
stop abruptly. You will need to have someone experienced watch you and your dog at different<br />
speeds to decide which is correct for your dog and makes the dog look his best. Using<br />
a full length mirror is another way of watching movement.<br />
The handler: You will also need to practice your running or movement. You and your<br />
dog are a team. With small dogs you can walk at a normal pace. With larger dogs, you will<br />
need to run. This will take some time and practice. You do not want to run on your toes or<br />
kick your heels up behind you. This will make you bob up and down and be bouncy. These<br />
are the most common mistake made by novices. It will also distract from your dogs movement.<br />
You will need to practice running without your dog first. When it looks smooth and<br />
natural, add your dog. Have someone knowledgeable watch and help you with your running<br />
technique. Access to a mirror can help you learn this skill also. When you run, use your<br />
whole foot with heel to toe impact. Running should be smooth and natural. You should take<br />
longer, smoother strides than a normal run. Before you attempt any of the patterns below,<br />
practice moving your dog on both your right and left side, so both you and the dog can<br />
become familiar and smooth while gaiting on either side. Also practice hand changes from<br />
both your right and left sides. Start with your dog on either side. Move directly<br />
away in a straight line. At the end of the ring, change hands on the leash, turn the dog’s head<br />
toward you, pivot toward the dog and come back. Once you and your dog are proficient in<br />
gaiting on both sides and you are able to make smooth hand changes, its time to work on the<br />
four patterns the “Down and Back” pattern, the “L” Pattern, the “Triangle” pattern and<br />
the “T” pattern.<br />
Hand change,<br />
turning dog’s<br />
head toward you.<br />
17
Down and Back Pattern<br />
Turn Into Dog, Down and Back Pattern.<br />
For the judge to watch the dog’s rear<br />
movement and front movement. Shaped<br />
like an “I”<br />
One way of doing the down and back is to turn left<br />
into the dog at the turn. Start the dog on your left<br />
side. Move directly away from the judge. At the<br />
end of the ring, make a tight turn toward your dog<br />
(left), using your free hand if you need to turn your<br />
dog’s head to go back the way you just came.<br />
Keep the dog on your left side while you return.<br />
Watch or listen for the judge’s signal to stop while approaching. If the judge does not<br />
indicate verbally or with a hand signal to stop, you should stop at a comfortable distance<br />
from them. (About 6 feet with bigger dogs or dogs that show profile or angle<br />
stacks and about 4 feet for the smaller dogs that come straight in to show head and expression).<br />
Do not crowd the judge or get too close. If the judge wants to be able to<br />
walk around your dog or get closer to see expression they will have the room to do so.<br />
When you come back to the judge free stacking can be used. You may angle the dog<br />
to show profile or bring the dog in straight to the judge to show expression. See what<br />
techniques are best used with your breed and why. You can also use the angle free<br />
stack to hide faults making your dog look better. Make your movements smoothly,<br />
calmly, and quickly. Then present your dog to the judge to show proper expression.<br />
This applies to all patterns.<br />
Courtesy Turn Down and Back. Another way to<br />
do the down and back pattern is using a courtesy turn<br />
in the corner. Put you dog on your left side. Move directly<br />
away from the judge. At the end of the ring, do a<br />
tight about turn to the right, away from your dog. Line<br />
your dog up and go back the way you just came, keeping<br />
the dog on the left side. A brief blocking moment<br />
will occur during the courtesy turn. As you are returning,<br />
be watching and listening for a signal to stop your<br />
dog. If the judge does not give a hand signal or verbal<br />
cue to stop, you should stop your dog as above. Again<br />
present straight on, with an angle or profile free stack,<br />
depending on your breed presentation. The courtesy<br />
turn approach is used to line the dog up and to help the<br />
Courtesy turn down and back<br />
on a diagonal<br />
dog work into their proper speed or gait. Courtesy<br />
turns may also be use at the beginning of a pattern<br />
18
to line the dog up and to get the dog up to proper gaiting speed. Small dogs rarely need to do<br />
courtesy turns. The turn is mostly used with the larger breeds that need more space for lining<br />
up, settling down and moving into gaiting speed. Only use this turn if your dog moves quickly<br />
around the turn. The use of courtesy turns in patterns are only necessary if it benefits the dog.<br />
Otherwise it will be considered unnecessary movement. So if you decide to use this turn make<br />
sure you know why you are using it and that you use it correctly. Using this turn when it is not<br />
necessary or used incorrectly will only hinder your performance. Find out from someone who<br />
knows the ins and outs of handling and about the usage of the courtesy turn.<br />
Pair Gaiting Down and Back: There are times you may need to start the dog out on<br />
the right or left side and turn the dog towards you, using a hand change at the turn and<br />
come back to the judge. You may be asked to pair gait with another dog and handler. This<br />
allows the judge to compare how two handlers show the front and rear movement of the<br />
two dogs. Conformation is not being judged here, but your handling skills are. The two<br />
handlers bring their dogs to the judge and free stack or hand stack. Unless they judge asks<br />
you to face one way or another, it will be up to you to decide how to present when you get<br />
in front of the judge. Either face toward or face away from the judge. The dogs will be<br />
next to each other, handlers on the outside and dogs on the inside. Dogs should be kept<br />
close enough for comparison (3-4 feet apart) but not too close as to distract or interfere<br />
with each other. At the judge’s direction take the dogs down and back in an “I” pattern.<br />
You will be working on either side of the dog depending on which side of the pair you are<br />
on. You will also be using a hand change at the turn. Keep the dogs on the inside and next<br />
to each other. Handlers and dogs must move together. The faster dog must hold up a bit to<br />
wait for the slower or smaller dog and the smaller or slower dog should move a bit faster.<br />
Both dogs must give and take. Every effort should be made to keep the dogs gaiting, not<br />
walking, running or pacing. An example pair would be gaiting a German Shepherd Dog<br />
and a Pomeranian together. Realistically you would not have this size difference for pair<br />
gaiting. However the judge is watching your handling skills here, not really comparing the<br />
two dogs. In this situation the German Shepherd Dog must move at a slower gait and the<br />
Pomeranian must move at a faster gait. Try not to<br />
walk or gallop on the part of both dogs. Try to<br />
maintain a trot, just adjust the speed of the trot. It<br />
is not just the responsibility of the bigger dog to<br />
wait for the little dog. Little dogs must move<br />
faster. Little dogs can move out quite quickly if<br />
needed and can trot alongside the bigger dog without<br />
much slowing down from the bigger dog. The<br />
handler should at least attempt to gait their dogs at<br />
a speed which will accommodate both dogs. It is<br />
not fair for the handler of the big dog to make all<br />
the effort to keep the dogs together. If effort is also<br />
made by the handler of the smaller or slower dog<br />
to move a bit faster you have shown to the judge<br />
you understand the meaning of this skill.<br />
19
Down and Back Tips<br />
The judge may tell you to do a down and back. It is your choice of which type of “Down<br />
and Back” you want to use. Which ever method you choose, keep in mind that you want<br />
to use the one that makes your dog look and do its best.<br />
Handlers with smaller dogs usually turn into their dogs using the first method mentioned.<br />
Larger breeds tend to use the courtesy turn down and back. It gives the larger dog time<br />
to adjust to lining up straight coming back to the judge and to work into the proper gaiting<br />
speed required of their breed/dog.<br />
Whichever method you choose, every effort should be made to keep the dog on your left<br />
side.<br />
A hand change at the corner is unnecessary for most down and back patterns, except in<br />
pair gaiting or when the ring procedure warrants this hand change. Seek out the advice<br />
of those who can help you.<br />
Align your DOG (not you) in front of the judge.<br />
Make a straight line when going away from and coming back to the judge.<br />
When returning to the judge, free stack to show expression or profile and know what<br />
you are presenting and why.<br />
Triangle Pattern<br />
Triangle pattern If the judge is at the<br />
edge of the ring, move directly away<br />
from the judge parallel to the edge of<br />
the ring. At the end of the ring, make a<br />
90 degree turn toward your dog. Continue<br />
across the top of the ring. Turn<br />
and move back diagonally to the judge.<br />
Keep the dog on the inside of the triangle<br />
to avoid any unnecessary hand<br />
changes. A courtesy turn can be used to<br />
come back to the judge if needed. Present<br />
your dog upon finish as you did in<br />
the down and back patterns. Try to go<br />
from corner to corner and use the whole<br />
ring. If the judge is in the middle of the<br />
ring, you may ask the judge which way<br />
they would prefer you go. Go straight<br />
away or go corner to corner. The down<br />
and back and triangle patterns are recommended<br />
for younger and less experienced<br />
4H members.<br />
The courtesy turn is optional to start in front<br />
of the judge and in the corner<br />
20
The “T” Pattern. Move straight away from the judge. At the end of<br />
the ring make a 90 degree left turn toward your dog. Move in this direction<br />
to the side of the ring. Change hands. The dog will be on your<br />
right, so as not to get between the dog and the judge, turn the dog’s<br />
head toward you, pivot toward the dog and come back; move all the<br />
way across the top of the ring. When you reach the other side, change<br />
hands again. Reverse direction and move back to the point directly<br />
across from the judge. (Hand change is optional to put your dog on<br />
your left side). Make a 90 degree turn and move back to the judge.<br />
Stop about six feet away unless the judge raises his or her hand to stop<br />
you sooner. These more difficult patterns, the “T” and the “L” will<br />
show the judge which handlers are smooth, polished and have trained<br />
their dog to work on either side. These patterns could be used as tiebreakers<br />
or for the more skilled and advanced handlers.<br />
The left side of your dog is considered it’s show side. You will be facing your dog on the dog’s<br />
right side. It is important to remember to not let go of the dogs’ head/collar while you stack them. Once<br />
you let go of the head/collar you have NO control over your dog. Their body follows their head. If you<br />
hold onto the collar or the chin under the jaw you will maintain control<br />
and your dog will not be able to move. Adjust the collar high up under<br />
your dog’s chin and at the occiput on top of the dog’s head just behind<br />
the ears. You do not need to worry about the leash at this<br />
learning stage. Keep it attached to the collar but let it hang<br />
down to the ground. You can easily grab it if you need to.<br />
Bait can be used to keep your dog focused and motivated.<br />
Hold the bait in your right hand in front of your dogs nose,<br />
or let him chew on it. Hold the collar/leash with the left<br />
hand and walk your dog to a gradual stop. Use the words<br />
“STAND” and “STAY.” You might need to use your left hand<br />
in front of his stifle (knee), to get him to stand rather than<br />
sit. In most cases sit has been taught first, so stand is something<br />
that you will need to teach your dog to do. Release<br />
and reward with the bait when your dog stands for just a few<br />
seconds. You can build the length of time later once your<br />
dog understands the concept of stand and stay. Do not worry<br />
about foot placement at this time.<br />
The “L” Pattern. Move directly away from the<br />
judge. At the end of the ring, make a 90 degree left<br />
turn toward your dog. Move to the side of the ring.<br />
Change hands on the leash, turn the dog’s head toward<br />
you, pivot toward the dog and come back, the<br />
dog will be on your right side now. Move back until<br />
you are directly across the ring from the judge, hand<br />
change or turn and gait back to the judge. (A hand<br />
change can be used coming back to the judge to put<br />
the dog on your left side). Present your dog to the<br />
judge as above.<br />
Handling Skills; Stacking<br />
Proper<br />
collar<br />
placement,<br />
high up<br />
Poor collar<br />
placement.<br />
Retrace steps<br />
21
Once the dog understands the concept of stand/stay and is no longer trying to sit, wiggle or<br />
dance around you are ready to move to the next phase.<br />
Using Bait to Hand Stack: Now you are ready to position the feet and legs. This method of<br />
stacking is good with puppies or dogs that work for bait. It aids as a distraction and keeps<br />
them interested in the bait while you position their legs. Let the dog nibble on the bait that is<br />
in your right hand in front of your dog’s nose. Start stacking with the front left foot. If the<br />
foot is out of place, use your left hand to pick up the leg by the elbow and place the foot directly<br />
under your dog’s chest in a straight line to the ground. You can reach over the top of<br />
Correct<br />
East West<br />
Bowed<br />
your dog’s shoulder or go under your dog to stack this front left leg. Check to<br />
see which method should be used for your dog and why. When you pick up a<br />
foot you may need to adjust it so that the toes point forward. Some dog’s front<br />
legs twist outward (east, west) or toe inward throwing their elbows out. In<br />
most breeds, both are structure faults. You will want to show the judge that<br />
you know how to correct this, or at least try to. Sometimes by setting the foot<br />
in the proper position on the ground and shifting the dog’s weight over that<br />
leg before you let go of the elbow, helps keep the foot and leg positioned<br />
properly; keeping the toes facing forward and the legs in a straight line. A<br />
good judge will most likely recognize this structure fault in your dog no matter<br />
what you do. However, a good handler will not allow a judge to see this<br />
fault or will be able to minimize it by stacking their dog properly. Next, check<br />
the right front leg. If it is out of place, stack it in the same manner as the front<br />
left. To do so you will need to change hands. Put the bait in your left hand,<br />
in front of your dog. Use your right hand to stack your dogs right leg. Make sure you continue<br />
to say stand/stay during this stacking phase. Now you are ready to stack the rear legs of<br />
your dog. You may or may not need to change hands from setting the front. If you stacked the<br />
right front leg of your dog you will need to change the bait back to the right<br />
hand and let the dog nibble on it again. You will use your left hand to stack<br />
both the rear legs. If both legs need stacking, you will want to stack the<br />
judge’s side first (the back left) then, the back right leg if needed. Pick up<br />
the dog’s leg at the hock joint. Place the rear legs straight down to the ground<br />
and under your dog. Cow hocking is a common fault with the rear legs in<br />
some dogs. This is where the hocks (from the joint to the ground) twist inward<br />
and are not straight up and down to the ground. You could use the same<br />
principles to fix this fault as you did with the front. Twist the hock so it is<br />
straight up and down while placing it on the ground and shift the dog’s<br />
weight over the leg. Use the stay command every time you place a foot so<br />
your dog will understand what you want. Once your dog will stay in the<br />
stack you can hold the collar and bait the head or present your dog’s tail etc.<br />
Many different options can be used at this point.<br />
Good<br />
cow hock<br />
Bowed<br />
22
Hand Stacking: You can also stack your dog without using bait. Some dogs do not need bait<br />
to stack and some actually do better without it. Instead of putting the bait at the dogs nose, you<br />
can hold the collar, chin or side of your dogs face with the right hand and start the stacking procedure<br />
as above. Start with the left hand at the elbow to stack the dogs left front (show side),<br />
change hands and stack the dogs right leg with your right hand, change hands again and stack<br />
the rear of your dog with your left hand. Hold your dogs head up high and make sure your presentation,<br />
positioning and leash work is smooth. Use some eye contact with the judge to show<br />
you are done stacking and that you are ready.<br />
Hand stack holding collar with hand changes (preferred)<br />
This shows another method of stacking without a hand change.<br />
Using Bait To Free Stack<br />
In all cases of using bait learn how to use it correctly. If you drop or place bait on the ground,<br />
be courteous and pick it up.<br />
Stand in front of your dog.<br />
Have your leash in your left hand. You will not be using the leash at all with this method of<br />
free stacking. Keep the leash loose and down near your side while baiting your dog into position.<br />
Lure your dog with the bait. Hold the bait in your right hand close to the dogs nose or mouth.<br />
You can walk your dog forward into a stack or move the bait right and left. Your dog will move<br />
his feet to wherever the bait goes. Where the head goes the body and legs follow! If you move<br />
the bait to the dogs right, the left leg moves forward and toward center or crosses over making<br />
the dogs right leg fall naturally in place next to the left leg. You can position the dogs front legs<br />
by moving the bait right or left. Once the front is in place say, “stay”, and reward the dog with<br />
the bait. The back legs will usually fall into place when the dog moves forward. It is the front<br />
end that you will be positioning most of the time.<br />
23
Handler uses Bait and Cross-Over method to Free Stack<br />
Without bait: Front Cross-Over Stack<br />
Some handlers with giant breeds will free stack by using<br />
their hands to move the dogs’ head and front from side<br />
to side while walking their dog into a stack. This crossover<br />
stack, as we call it, allows the feet to cross into a<br />
nice front stacked position, allowing the front to line up<br />
with the rear leg placement.<br />
You could also use your leash to move the dog from<br />
side to side as they are moving forward in the same<br />
cross over manner as you did with the bait. The rear legs<br />
will usually fall into the correct place when you walk<br />
your dog forward a couple steps.<br />
Handler uses “Hands-On” cross over method<br />
to Free Stack<br />
Free Stacking Tips:<br />
You can walk the dog into a stack to set all four, three or just two legs. You can hand stack the<br />
legs that are out of place if needed. Only position the legs that are out of place. Do not reset legs<br />
that are in proper placement. In other words don’t fidget!<br />
When you walk your dog into a stack or you have positioned your dogs legs, give the command,<br />
“STAY.” You can take a step back to give more distance between you and your dog to make your<br />
dog stand out. Hold the bait still and at the right level to present proper head placement for your<br />
breed.<br />
You may angle your dog to the judge after returning from your pattern to present profile or to hide<br />
faults, or present the head and expression straight in to the judge. Either is acceptable, you will<br />
need to research and learn why and which presentation is correct for your breed and dog.<br />
Do not crowd the judge when you return from your pattern, stay 4-6 feet away, depending on the<br />
size of your dog and your presentation.<br />
When in-line you can use a combination of hand and free stacking techniques. This will keep your<br />
dog alert, interested and attentive. Playing catch with the bait in-line will motivate and keep it fun<br />
for your dog, providing that your dog has learned to catch. Playing quietly with your dog while in<br />
the ring is allowed if you are not a distraction to others and when the judge is not looking at you or<br />
the line. These are good relaxation drills for you too!<br />
24
Table Stacking<br />
Some breeds are presented to the judge on a table. Smaller dogs that<br />
can be lifted by the handler will be presented on a table for their individual<br />
exam. The table helps aid the judge in the examination of your<br />
dog. You will present smaller (table) dogs on the table and on the<br />
floor while in-line. You will need to practice with your dog so they<br />
will feel comfortable stacking up on a table without the fear of falling<br />
off. You will pick your dog up and place<br />
the dog on the table to be examined and then remove your dog back to<br />
the floor. Many methods can be used to place your dog on a table.<br />
Please check to see which one is right for your breed or dog. Find experienced<br />
leaders and other 4-H members to help you learn options and<br />
skills.<br />
If the handler is too small, or the dog too large or heavy to safely lift<br />
the dog onto the table, the dog should be examined on the ground.<br />
Small, long coated or lightweight breeds (terriers and toys) can be<br />
picked up by the chin and tail and put up onto the table quickly, in<br />
one motion. This method tends not to mess up the carefully brushed<br />
coat. Picking up a terrier by the tail is natural for them. Their tails<br />
are like handles and are very strong. You can also lift a lightweight,<br />
coated breed, (like a Yorkie, Pekinese, Lhasa, etc.) by the chin, leash or collar, with your<br />
other arm from behind between their rear legs while supporting the dog on your arm, going<br />
all the way up to its chest. Make sure you learn these techniques before you lift your<br />
dog onto a table.<br />
If you are a smaller handler with a heavier dog, you might want to use the scoop method.<br />
Scoop the dog up with both arms from front and back and place it up onto the table.<br />
Another method to place a small dog onto the table is to use one arm under the chin or collar<br />
and your back arm over the top of your dog, drawing it toward your body and placing it<br />
on the table.<br />
Place your dog centered at the front end of the table. Make sure all four legs are stacked in<br />
the proper position for your breed of dog. Right at the edge, or two-three inches from the<br />
front of the table is sufficient to place the front feet.<br />
You may drape the leash around your neck to free up your hands to stack and pick up your<br />
dog. You can also ball up the excess leash into your palm. Whatever method you use, keep<br />
the leash neat, without dangling it across your dog or the table.<br />
Present the left side (show side) of your dog on the table to the judge.<br />
After removing your dog from the table, place him on the ground in the direction you will<br />
be moving. You may fix or quickly bush the coat if it was messed up during the examination.<br />
A quick go over is all it should take.<br />
Taking a comb or brush into the ring is permissible, if you have a<br />
place to keep it without interfering with your presentation. Some handlers<br />
will place a comb in their armband, hair or pocket.<br />
There are many methods to free stack, hand stack and table stack that<br />
are acceptable– these are just a few. You will need to research your<br />
breed presentation and determine how to stack according to your<br />
breed. Get the stack done quickly and smoothly, with the feet in the<br />
proper position. 25
The more you teach your dog through repetition the better you and your dog will work together<br />
as a team. The more you practice stacking the more polished your techniques will become. This<br />
will result in you and your dog comfortably working together as a team.<br />
General Stacking Tips<br />
Stacking procedures and leg positions vary from<br />
breed to breed. Check your breed standard or<br />
learn from experienced breeders or knowledgeable<br />
people that handle your breed. Watch and<br />
learn from 4-H leaders and other experienced<br />
members how to present your breed of dog in a<br />
Be gentle with your dog. Heavy handedness is not allowed in the ring.<br />
Make sure the collar stays high up under the dogs chin and at the top of the dogs<br />
neck. Keeping control of the dogs head will help keep your dog in a stack. Maintain<br />
this collar position throughout the stack when you have your hand holding the collar.<br />
Wrapping your fingers around the collar and holding up the dogs head will help you<br />
maintain proper head and shoulder positioning. Try to avoid stringing the dog up by<br />
the leash to stack (holding the leash instead of the collar). Your<br />
dog can move all over and you do not have good control of the<br />
dog’s head. Although using this method may work on some<br />
small breeds, with dogs that have been already taught how to<br />
stack. Learning about your breed and how to stack it is going to<br />
take some research, watching and practicing on your part. Not all<br />
dogs and all breeds stack in the same fashion. There may be are<br />
other good methods of stacking your dog as well, however the<br />
above two methods are just a few of many that might work for<br />
you.<br />
If your dog is “Posting” (rocking back), lure it forward with the<br />
bait. A good handler will be able to keep their dog over their<br />
front or leaning forward slightly. Another method you could try is to pull back<br />
slightly on the tail. Your dog will pull or lean forward to counterbalance your pull.<br />
← Picture shows dog<br />
rocking or posting.<br />
Picture shows dog→<br />
correctly presented<br />
over it’s front.<br />
26
If your dog moves his feet during the stack, remove the bait and use the word “no” or<br />
“stay.” Training “blocks” (blocks of wood that the dog’s feet are placed on) can be used<br />
for extra wiggly dogs, or dogs that move their feet a lot. Check with a knowledgeable<br />
person to help you with this. As long as the dog remains still you should reward with<br />
bait or allow them to chew on the bait. Slowly build distance between the bait and the<br />
dog’s nose and increase the time the dog stands still. Eventually you will have a dog that<br />
will be able to stand still for a long period of time, looking at the bait in your hand.<br />
The excess leash should be held or presented neatly, either in the palm of your hand at<br />
the collar, or draped neatly across your lap while kneeling, or draped around your neck<br />
if you have a small breed to present on the table or kneeling on the ground. There are<br />
many different and acceptable methods of holding/draping your leash. The objective is<br />
to have a smooth and neat presentation, not sloppy or dangling on the ground or on your<br />
dog.<br />
Be attentive and alert to your dog and present your dog’s best qualities to the judge.<br />
Even if your dog has conformation faults, as all dogs do, you<br />
should attempt to stack your dog correctly for its breed.<br />
You will be judged on your skill and effort.<br />
Be aware of the judges presence, but do not stare or smile excessively<br />
at the judge. Remember the focus is on your dog and<br />
how to present the dog to the best of your ability.<br />
Observe proper spacing. Do not crowd the dog in front of you.<br />
To stand your dog, do not lift up under its stomach. This will<br />
cause your dog to roach its back like a camel. A roached topline<br />
is a fault for most dogs. Walk your dog in a small circle,<br />
without disrupting the dog behind you, and restart, or lure and<br />
walk the dog slightly forward with the bait, getting them to<br />
stand. Place your left hand at the stifle to stand them if needed.<br />
If your dog is standing correctly and the feet<br />
are where they should be, don’t move them. Do<br />
not fidget!<br />
Handler focusing<br />
intently on her dog.<br />
Leash draped around<br />
neck; presented neatly.<br />
Practice a quick stack. One goal should be to stack your dog within<br />
5 seconds. This will take some practice.<br />
You should be able to stack in a quiet, smooth and efficient manner.<br />
Your dog should appear posed or interested and under control.<br />
You and your dog should show confidence in the ring. Try to present<br />
two, three or more “pictures” or positions to the judge as they glance<br />
down the line. Use a combination of hand stacks and free stacking techniques.<br />
Whichever methods you use make sure that the dog looks its<br />
best. Remember the focus is on how good the dog looks.<br />
27
Handler presents different pictures, poses or positions to the judge continuing<br />
to make the dog look good.<br />
The timing of your stack is very important. Know when the judge is looking down the line<br />
and have your dog looking good in a stack or free stack. Some judges will look down the<br />
line often and others will not. When the judge is busy going over another dog or watching<br />
someone else do their pattern, you and your dog can relax and play a bit.<br />
If you use bait, use it correctly. Use the bait to get your dog’s attention and to show expression<br />
to the judge. Some breeds are not baited, some breeds bait to get their dogs ears up.<br />
Find out what is appropriate for your breed and why.<br />
Bait your dog quietly. Do not wave the bait around or make unnecessary<br />
jerky motions with your baiting hand. Show it to get your<br />
dogs attention and hold it still when the dog is in the proper position.<br />
Do not throw bait or distract other dogs or handlers in the ring.<br />
Throwing bait may be a good training method outside the ring<br />
while practicing but it is not allowed in the ring.<br />
Hold the bait at the proper level to present your dog’s head.<br />
Toy breeds look up more, sporting breeds lean out over their fronts<br />
with their head level or slightly lower. Learn the proper baiting position<br />
for your dog.<br />
Learn to stack your dog from either side, front or rear. Use a<br />
Using bait quietly to show<br />
expression.<br />
mirror to see what it looks like, or have someone watch you.<br />
Stack the part the judge is looking at first. If the judge wants to<br />
see fronts stack the front legs first. If the judge is coming from behind<br />
your dog, stack the back legs first.<br />
Set the front legs of your dog by picking them up by the elbow and set the back legs by<br />
lifting at the hock joint.<br />
Present your dog by baiting them with a treat, holding the face at the flews or chin, holding<br />
the collar, or presenting a tail depending on breed specifics.<br />
Continue to re-check your dog’s foot placement from time to time, to make sure your dog<br />
did not move his feet. Experienced handlers can “feel” when their dogs move their feet.<br />
You will eventually get to this point.<br />
Talk to your dog and give a command. “Stand”, “Stack” and “Stay’ are commonly used<br />
commands.<br />
28
Your dog should look forward to training time. Keep him<br />
or her happy. The use of food to lure and motivate during<br />
this training phase is recommended. Sometimes you can<br />
use toys. If you use a toy remember that it should not distract<br />
other handlers or dogs in the ring. Practice keeping<br />
your dog’s attention and interest by playing catching<br />
games. To teach these games start by tossing popcorn to<br />
your dog in an arch between his nose and eyes. If your dog<br />
does not catch it and the bait hits the ground, pick it up.<br />
The dog will not be motivated to catch if he can just eat it<br />
off the ground. For some dogs it takes awhile for the light<br />
switch to click on. Be sure to make it fun for your dog,<br />
even in the ring.<br />
All dogs do not need to be hand stacked. Some breeds are traditionally baited into a stance,<br />
rather than being hand stacked. The herding breeds (Collies, Aussies, Corgis, Shelties etc.) are<br />
breeds that can use this free stacking technique. Please check with your leader or breeder for<br />
proper stacking techniques for your breed. Learning a combination of hand stacking and free<br />
stacking techniques are important to learn with any dog. Free stacking takes practice and patience.<br />
Ring Procedures<br />
Handlers keep their dogs<br />
interested and alert.<br />
Individual Examination: The judge will want to see you stack,<br />
and present your dog according to what is proper for its breed.<br />
Remember a mixed breed dog should be presented in the same<br />
fashion as a purebred dog. If you declare your dog to be a Lab<br />
mix, then the judge will want you to present your dog as a Lab.<br />
The judge will be evaluating you on your stacking technique,<br />
showing the bite and the grooming of your dog. The judge will<br />
not be evaluating conformation or structure.<br />
The judge will call you out one at a time for an individual stack and examination. You should<br />
have your dog posed and ready if you are next in-line as first impressions are important.<br />
Watch for the judge to signal you to come out in front and stack your<br />
dog. Stack the show side (left side of the dog) to the judge. Stack<br />
quickly, and smoothly and with all four legs/feet in the proper position.<br />
Make sure you present yourself in the position you want to be<br />
and then….make eye contact with the judge to let the judge know you<br />
are ready with your presentation.<br />
Often a judge will allow the handlers and dogs in-line to relax. This<br />
means you don’t have to be in a perfect stack at all times. However<br />
this is a good time to bait, free stack, or play quietly with your dog to<br />
keep your dog happy and attentive in the ring while you are waiting<br />
your turn for the judge’s individual examination. You cannot expect<br />
to have your dog in a perfect stack without moving for a long time.<br />
This is unnatural and your dog will soon loose interest, becoming<br />
bored and will not enjoy being in the ring.<br />
29
You, too may become frustrated with your dog if he is not standing still. You should be aware<br />
of what is happening at all times with the judge and the ring and should not be talking with others.<br />
Concentrate on your dog and the judge. The timing of your stacks while you are in-line is<br />
very important. When the judge is going over someone else’s dog you can relax and play stack<br />
with your dog. As soon as the dog being examined is done with its pattern and is going around<br />
the ring to the end of the line you will want to have your dog looking good as the judge may<br />
glance down the line to see who is paying attention and working with their dogs. You will need<br />
to know who is the last person in-line. When the last handler and dog are called out for their<br />
exam everyone should get their dog back in-line, lined up with the first dog and restacked.<br />
When the judge turns to look at the rest of the line, all dogs and handlers should be stacked and<br />
looking good.<br />
What the judge is looking for in the exam:<br />
The judge will watch you coming from in-line to the point of stacking your dog. They want<br />
to see how you handle and stack your dog, according to its breed. The judge will watch your<br />
stacking technique and presentation of the dogs’ profile.<br />
Next the judge will go to the front of your dog to check the front<br />
quarters, legs and feet placement, the dog’s expression, the head<br />
and neck.<br />
The judge will ask you to show the bite, teeth or mouth. You will<br />
need to show this yourself, according to your breed standard.<br />
Not all breeds present in the same way. You will need to research<br />
what is proper presentation for your dog.<br />
How to Show the Bite: The bite is how the dogs’ front teeth<br />
(incisors) meet. Place the leash in your right hand (if you have it in<br />
your palm) under your dog’s jaw. Lift the head up toward the<br />
judge so the judge can see the bite. Make sure your head is<br />
Handler presenting head.<br />
out of the judges view. Your other hand will be on top of your dogs muzzle. Pull back the<br />
lips of the upper and lower jaw. Keep the mouth closed. Make sure all the incisors between the<br />
canine teeth are visible.<br />
Showing the Teeth or Mouth: Some breeds like sporting<br />
dogs need to have their teeth shown. First show the bite<br />
and then show the teeth, with the mouth closed. You will<br />
need to lift the lips and turn the head and show the first side<br />
of molars then the other side. Make sure you turn the dog’s<br />
head toward the judge so the judge sees both sides. If you<br />
have a breed that must have full dentition or proper tongue<br />
color according to their standard (German Shepherds, Dobermans,<br />
Chow Chows etc.) You will need to open the<br />
mouth to let the judge examine the entire mouth or tongue<br />
color. Remember to point your dog’s head to the judge. To<br />
show the mouth you will show the bite first then briefly<br />
open the mouth for the judge.<br />
Checking Ears, Nails, Coat: The judge will now continue with the examination gradually<br />
going down your dog. The judge will look inside your dogs ears and continue examining the<br />
body and legs, working towards the rear. The judge will check your dogs grooming, ears nails<br />
and coat.<br />
30
In the ring, you will usually:<br />
Gait around into place to get lined up.<br />
Leave at least 3-4 feet between dogs.<br />
Line-up straight in line behind the first dog in line.<br />
Stack your dog, or relax the dog if judge the is looking<br />
at arm band numbers. Be sure yours is visible when they<br />
look for your number.<br />
Keep your focus on your dog and the judge.<br />
The ring might be rearranged in order of gaiting speed,<br />
if requested by the judge. Faster gaiting dogs will move<br />
to the front. Slower dogs to the rear.<br />
When classes are large, the judge might make smaller<br />
groups to come back into the ring.<br />
Stack your dog up for the judge to begin.<br />
When gaiting around the ring be sure that<br />
you give room to the dog in front of you. If a<br />
dog is slower than you, be sure to give more<br />
room the next time around and slow down to<br />
compensate or hold back before you do your<br />
gaiting in front of the judge. (Timing.)<br />
Be ready when you are first in-line or next<br />
for your individual exam and present a nice<br />
picture to the judge when the judge turns to<br />
point to you to come out and present.<br />
Continue to move up the line one space<br />
after each dog has been called out to be examined<br />
and goes to the end of the line. You can<br />
relax your dog and use various free stacks and hand stacks to keep your dogs interest inline.<br />
Even quiet play is allowed. If you are next to be examined<br />
be sure your dog is looking good when the judge turns<br />
to signal you out.<br />
Have your dog looking good each time a dog is finished<br />
with the pattern and gaiting to the end of the line. Some<br />
judges will take a quick peak down the line at this time. Use<br />
different looks/stacks during this in-line stacking.<br />
After the last dog has been examined<br />
and moved, you should have<br />
your dog set up, stacked and ready.<br />
At this point the judge might; have all<br />
dogs stack fronts and rears; ask you to<br />
pair gait; ask you to go around the<br />
ring individually or by groups.; or ask you to go to point in the ring<br />
and free stack.<br />
Many things can happen. It is always important to be alert and attentive<br />
to what is going on in the ring and with your dog. Sometimes<br />
after scoring the judge might call back certain handlers as a tie<br />
breaker for more work. Be gracious and say thank you to the judge<br />
and congratulate the other participants. 32
Gaiting around the ring with<br />
dog on loose lead<br />
Exam Presentation of<br />
the boxer<br />
Toller free stack<br />
In-Line free stack. Leaving<br />
room for dogs/handlers<br />
After the pattern or in-line free stack<br />
Lab Exam Presentation<br />
Visla<br />
moving in<br />
the pattern<br />
close<br />
to<br />
handler<br />
Boston<br />
Table stack<br />
for Exam.<br />
Feet close to<br />
front edge of<br />
the table<br />
Mechanical Hand Stack<br />
Pointer out in<br />
front of<br />
handler on go<br />
around or<br />
group gaiting,<br />
showing side<br />
movement.<br />
Reach and<br />
Drive<br />
33
Conclusion<br />
When you are in the show ring, you are like an artist. You are creating a picture. You are emphasizing<br />
the dog’s assets (good points) and attempting to hide its faults (bad points). You are<br />
painting a picture for the judge. When you place the legs a certain way, hold up the head and<br />
push the tail in the air, you are molding the dog into a position that you think looks good to the<br />
judge. In order to create the picture you want with your dog, you must know and understand its<br />
good points and its faults. You must have studied and practiced standing and gaiting, so that<br />
you are familiar with “why” we do the skills we do in the ring. You will need to practice, and<br />
practice these skills correctly, showing off your dog so that the judge sees what you want to be<br />
seen. A big mistake a handler makes is to draw attention to the wrong part of their dog. If their<br />
dog has a fault in his hindquarter, for instance, the handler will set up their dog and every two<br />
seconds look back to make sure that the hindquarter is set properly. All you are doing is drawing<br />
attention to that part of your dog. Refrain from extra movement or activity in the area of the<br />
fault. With experience, you will know when you need to re-set the rear. Use a smooth and subtle<br />
presentation to look at, stare and admire the good parts of your dog. Concentrate on the best<br />
features of your dog, and by looking at these areas, you will draw the judge’s eye where you<br />
want her to look. If you have a dog with a fault in that area, set it up once and leave it alone.<br />
It does take work, effort and patience to do the job right. Receiving a high score rarely happens<br />
right off the bat. You will need to learn the sport, study your breed, train and condition<br />
your dog, and seek out and receive guidance from those that are knowledgeable. Start off slow<br />
and build on a good solid foundation of basics. Do not move to the next step until your dog has<br />
mastered the one you are working on. Don’t be in a big hurry. Make it fun for your dog!<br />
Training refers to the correct way to do things and the ability to do them the same way every<br />
time, by using (repetition). Teaching is the means by which you motivate your dog to do what<br />
you want happily and consistently.<br />
In this 4-H <strong>Showmanship</strong> event having a positive attitude while practicing or showing your dog<br />
will carry down the lead to your dog and effect your dog’s attitude and response. This will result<br />
in a more alert, interested and happy dog. Anyone can handle a dog, but it takes skill and<br />
teamwork to present a dog so that judges think this is the greatest specimen of the breed they<br />
have ever seen. It is the handler that is being judged not the quality of your dog. It does not<br />
matter if you have a purebred champion show dog or a mixed breed. All dogs have good and<br />
bad points even the top show dogs. It is your job as the handler to present the dog as efficiently<br />
as possible in the least amount of time. Just like the artist takes pride in their work, you must<br />
take pride in presenting your dog as if it were the best dog you have ever seen.<br />
As you enter the ring and your emotions and adrenaline are pumping, your actions will most<br />
likely speed up. You think you are doing things at a normal pace but in reality, you have done<br />
everything at double time, warp speed! This will also cause your dog to become uneasy and<br />
confused. They feel what you feel. When we are nervous our actions and motions are less<br />
smooth and our strength increases. Any little tug on the lead becomes a hard yank. The dog<br />
becomes less confident, unsure and may move their feet or not stand still. Sometimes the handler<br />
will fidget and place the feet over and over again when they are already stacked well. To<br />
overcome the “nervous bug”, take some deep breaths and slow down. Try to do everything at<br />
normal speed. Think about every move in advance and plan it out in your mind right before<br />
you go into the ring. By controlling your body motions, the dog will be reassured that everything<br />
is fine and will then show better for you.<br />
34
Remember being nervous is normal. Like anything else, practice often and correctly. The more<br />
you do it, the better you become at it. Right practice makes better, building confidence in yourself<br />
and consistency in your dog.<br />
Always remember Sportsmanship. Accept your ribbon politely, thank the judge, and<br />
leave the ring. Be a gracious and congratulate the other 4-H members too. The truly good handlers<br />
are those that are good sports. You will see these handlers, no matter what the outcome,<br />
congratulate everyone. They will most often go out of their way to help their competitors outside<br />
the ring. Good sportsmanship is a good lesson to be learned in presenting the dog properly.<br />
If you are going to show dogs over a period of years, you will find it more enjoyable to be<br />
known as a good sport. Many lasting friendships are made through participation in<br />
4-H and the sport of dogs.<br />
35
Section 2<br />
Judging Criteria for Judges, Leaders and 4-H members in the<br />
<strong>Showmanship</strong> Event<br />
36
Qualifications<br />
Judges who judge the “4-H <strong>Showmanship</strong>” event must be impartial and totally separate the handling<br />
ability of the exhibitors they judge from any other consideration. They have demonstrated<br />
successfully their ability to conduct their ring in a consistent, businesslike and safe manner that<br />
will instill confidence in exhibitors and spectators. Judges will utilize proper ring procedures to<br />
ensure the safety and consistency, equable treatment and enjoyment of all exhibitors and their<br />
dogs. Judges should have a genuine interest in promoting positive learning experiences for<br />
children. They should be teachers by example; they should be prompt, courteous, patient, and<br />
properly attired. The judge should be familiar with the appropriate presentation for the breeds<br />
they are to judge. This includes table presentations if applicable. A list of breeds will be made<br />
available upon request from the judge prior to the event. The quality of the dog is not being<br />
judged only the handler. <strong>Showmanship</strong> classes are judged solely on the ability and skill of the<br />
4-H member to properly care for and exhibit their dog to a judge. The judge will consider the<br />
dog’s grooming, condition and cleanliness and the ability of the handler to present their dog to<br />
the judge, to its best advantage. Mixed breeds, purebred, spayed and neutered dogs may be<br />
used. They should be handled and presented as the breed they most closely resemble. Some<br />
freedom of expression or expertise should be allowed to the exhibitors. Judges need to be familiar<br />
with this Judging Criteria and the “Washington <strong>Guide</strong> to 4-H <strong>Showmanship</strong>.”<br />
In judging the 4-H <strong>Showmanship</strong> Event, every effort should be made to evaluate the class of<br />
exhibitors in:<br />
Proper breed presentation, including grooming<br />
Skill in the individual dog’s presentation<br />
Handler Knowledge of ring procedures and showmanship skills<br />
Appearance and Grooming<br />
The “Danish System” of judging will be used. All 4-H exhibitors are judged to their score card<br />
and not exhibit to exhibit. Receiving a Blue is ranked “Excellent”, indicating a high degree of<br />
achievement toward the elements set in the standard for the exhibit or contest. Red is ranked<br />
“Good” in relation to the standard or excepted achievement for the class or contest. White is<br />
“Satisfactory”, these are exhibits that are lacking and rate only average or acceptable for the<br />
standards established. No award or No ribbons may be given if exhibits or individuals who for<br />
some reason or another fail to produce a level of achievement which can be reasonably expected<br />
in relation to the specific class or performance in which they are entered.<br />
You are judging the handler, but time should be spent looking at the dog to gain insight as to<br />
how well it is being presented, such as:<br />
Is the dog responsive to the handler? Do the dog and handler work as a team?<br />
Does the dog appear posed or interested at all times?<br />
Is the dog moved correctly to the best of its ability?<br />
Are the dog’s main faults being minimized? Are major strengths being presented?<br />
Do both dog and handler appear relaxed?<br />
Is the dog presented with an apparent minimum of effort?<br />
Safety<br />
Participants will vary in degrees of age and experience. Dogs will vary greatly in differences in<br />
size, breeds (including mixed breeds), temperament and training. Judges will need safe ring<br />
37
conditions and must make every effort to ensure the safety of the participants and their dogs<br />
during the competition.<br />
For a participant with an unmanageable dog, offer guidance, or seek guidance from the superintendent<br />
or person in charge.<br />
In the case of a dog that is too shy or reserved for examination, the handler should warn the<br />
judge. The handler may show the required parts (teeth, ears, feet). If the judge can not<br />
place their hands on the dog for the individual exam and to check for mats and cleanliness,<br />
the handler is to receive a deduction.<br />
A dog may be asked to leave the ring if:<br />
• The dog is considered unmanageable and the participant is unable to control the dog.<br />
• The dog is aggressive toward the judge, other participants, or other dogs.<br />
• If the dog is distracting or disrupting other dogs and handlers with menacing behavior.<br />
Only admit into the ring, at one time, the number of participants that can be safely examined,<br />
dividing the class into smaller numbers when:<br />
• The safety of the dogs and participants is compromised.<br />
• The participants need more room to gait and show their dogs.<br />
• It is too demanding to have the dogs and participants stand and stack, or be in the<br />
ring for a long period of time. Some dogs may be elderly or disabled and some participants<br />
may be too young, learning impaired, or inexperienced and unable to stay<br />
in the ring for an extended length of time. A lame dog or disabled dog will be allowed<br />
to compete and should be offered reasonable accommodations to ensure the<br />
comfort and safety of the dog and participant. (For example, moving the dog at a<br />
slower gait or allowing the dog to lie down in the ring).<br />
• Judges should arrange or rearrange competitors or have advanced participants arrange<br />
themselves in the order of gaiting speed.<br />
Ring Procedure and Judging Routine<br />
The actual routine of judging should be consistent with the procedures commonly used in the<br />
conformation ring in AKC. However, this is not limited to any one method. The number of<br />
participants, the size of the ring, the age and experience of the handlers, the ring conditions, the<br />
weather, the time of day and time restrictions will all influence the actual way you set up your<br />
ring and what procedures you should use.<br />
It is important that the judge:<br />
Strive to evaluate competitors in an appropriate and consistent manner. Judges should use<br />
the same judging routine for all participants in the ring. Give equal time and skills to perform<br />
for all participants. Watch all participants from start to finish. Give 100% attention<br />
from the time the handler enters the ring, stacks up their dog, the examination, executing the<br />
pattern and going around the ring to the end of the line and finishing their stack. This also<br />
applies to gaiting around the ring.<br />
During the Individual Exam: Request and watch each participant set up their dog for the individual<br />
exam. Set up can be on the ground or on a table. If a dog is normally presented on<br />
a table, but the exhibitor is too small to safely lift or present the dog on the table to the<br />
judge, they should be allowed to set their dog up on the ground. The judge should let the 4-<br />
H member make that decision. The individual presentation of their dog to the judge should<br />
38
e done as their breed is shown in the AKC ring. If the 4-H member has a mixed breed,<br />
they should show it as the breed that it most closely resembles. Remember it is not the<br />
quality of the dog being judged here, but the exhibitor’s handling skills.<br />
Request the participant to “show the bite, teeth or mouth” on their dog during the examination.<br />
However with younger 4-H members (primaries and some Juniors), the judge may use<br />
discretion or help the member to present the bite. Help may include holding the dog’s head<br />
for the participant to present the bite. It does not matter what type of bite or how misaligned<br />
the teeth are, but rather that the handler knows how to present this skill. The judge should<br />
note the condition of the teeth according to the age of the dog. Missing or yellow teeth shall<br />
not be considered, however plaque buildup can be penalized.<br />
Check the ears for cleanliness.<br />
Check the coat for cleanliness and to see that it shows evidence of care throughout the year.<br />
Dogs do not need to be in show coat or trim but should be neat and clean. They should be<br />
free from dirt, mats and parasites.<br />
Check to see that the dog’s toenails have been trimmed. An attempt should be made to trim<br />
the nails. You should consider the age of the exhibitor and dog.<br />
Questions will be asked of the exhibitor. You should confer with the superintendents to ask<br />
appropriate age and experience level questions relating to dogs. One question will be asked<br />
in all five different categories:<br />
1. Parts/Anatomy<br />
2. Breed History and Standard<br />
3. Care and Health<br />
4. AKC General Knowledge<br />
5. 4-H General Knowledge<br />
Judging Patterns<br />
Use only those patterns outlined in the 4-H <strong>Showmanship</strong> manual. A progression of steps or<br />
step system should apply for maximum learning to occur. Generally, the less experienced and<br />
the younger participants will do the easier patterns.<br />
For Primary, Junior or first year members: These are the younger, and in most cases, our<br />
less experienced members. A “Down and Back” pattern is recommended for each participant<br />
to perform. The “T” and “L” with hand and side changes are in most cases too difficult<br />
for most younger and inexperienced members to accomplish. The Down and Back and Triangle<br />
patterns are good pattern choices for first year members of all ages to understand and<br />
accomplish effectively. Once they receive this beginning foundation they will be ready to<br />
move on to the more difficult patterns.<br />
For Intermediate, Senior or more experienced members: Any of the four patterns can be<br />
used. It is recommended to use the down and back or triangle patterns during preliminary<br />
rounds. For semi-final, tie breakers or final rounds you may want to advance to a more<br />
technical pattern such as the “L” or the “T”. This should be left to the judge’s discretion.<br />
The judge should not cause unnecessary movement or awkwardness for the handlers. For<br />
example: When examining a group as a whole in motion (gaiting around the ring), the judge<br />
should be inside the circle so as not to create unnecessary movement for the handlers.<br />
Weaving in and out of the line to cause the handlers to run around their dogs is discouraged.<br />
When the dogs are stacked in-line do not move behind the line unless you are going to move<br />
them in a Down and Back, pair gaiting or to look at rear presentations.<br />
39
The majority of the exhibitor’s attention should be on their dog first, then the judge.<br />
Handlers should make every effort not to interfere with the judge’s view of the dog, however<br />
brief blocking movements, done smoothly and efficiently are allowed. Getting between<br />
the dog and the judge is not about how the exhibitor gets from side to side, how they<br />
align their dog or how they get from point A to point B. It is not about which method they<br />
choose to use. But how they accomplish the following objectives:<br />
• Moving smoothly, with the least amount of movement and distraction<br />
• Keeping their dog in a stack.<br />
• Not interfering with the judge’s view of the dog.<br />
• Continuing to present their dog to the judge.<br />
The use of courtesy turns in line, at the beginning or at the end of patterns, is also considered<br />
a brief blocking moment and should be allowed if one chooses to use them for the reasons<br />
they were intended. However, it is better to not use a courtesy turn, than to use it and<br />
use it wrong, or for the wrong reasons.<br />
In large classes, judges can tell exhibitors to relax their dogs while the other exhibitors are<br />
being examined. This does not mean dogs can lie down or the exhibitors can sit and talk to<br />
each other. Glancing down the line from time to time to see what the exhibitors are doing is<br />
recommended to see if they are keeping their dogs interested and happy. Handlers should<br />
have their dogs stacked and ready when they are next in line for their exam.<br />
Signal the next handler in line to come out and stack. Watch their technique. They should<br />
stack and present their dog according to its breed.<br />
Exhibitors should use the whole ring and not cut corners. Small breeds may make a smaller<br />
circle.<br />
Exhibitors should be stacked and ready when the last dog is moving in their pattern.<br />
Possible Additions to Your Judging Routine<br />
Ask the handler to stack their dogs facing into the ring to present fronts and rears.<br />
You may want to see profiles and/or walk down the line again to see fronts and expression.<br />
You may ask the handlers to pair gait their dogs.<br />
You may ask handlers to do another pattern.<br />
You may ask handlers to go around the ring individually or as a group.<br />
You may have a call back in the event of a tie and bring those exhibitors in for more work.<br />
Things That Judges Should Avoid:<br />
Avoid singling out certain exhibitors that are your favorite by giving them more of your<br />
time and attention or by having them demonstrate skills different from other participants.<br />
Give each exhibitor equal time. All participants in the ring together should be performing<br />
the same skills.<br />
Do not have participants do any patterns other than the down and back, the triangle, the “L”,<br />
or the “T”<br />
Do not create unnecessary movement.<br />
Do not try to trick participants into making mistakes. The goal is for them to be able to<br />
show their dogs without worrying that they will need to run around the dog or jump from<br />
side to side.<br />
Please refer to the “Washington State <strong>Guide</strong> To 4-H <strong>Showmanship</strong>” for complete coverage of<br />
the 4-H showmanship event.<br />
40
REFERENCES<br />
The Complete Dog Book for Kids: By American Kennel Club (AKC); This is an official<br />
publication of the American Kennel Club. This book is for kids like you who want to learn<br />
more about their best friends. This book as big, full color pictures of the AKC recognized<br />
breeds. It uses language that is easy to understand.<br />
The Encyclopedia of Dog Breeds: By Juliette Cunliffe. This book gives information on<br />
many aspects of owning and caring for a dog, the history and their place in the human<br />
world. Over 400 dog breed photographs. Many illustrations and information. Providing an<br />
excellent resource for the dog fancier.<br />
The Illustrated Encyclopedia of Dog Breeds: By Joan Palmer. This book is a directory<br />
of 235 dog breeds, organized by breed group. It gives information on 79 rare breeds, including<br />
the history and development of the breeds. It offers hints on caring, training and<br />
showing. It is a very visual directory.<br />
Complete <strong>Guide</strong> to Dogs: By ASPCA. This is an easy to read guide to 150 breeds plus<br />
popular mixed breeds. It has everything you want to know about selecting and understanding<br />
your dog and providing the best care. Provides answers on feeding, grooming, training<br />
and health questions about puppies and older dogs.<br />
The Winning Edge: By George Alston; Show Ring Secrets. This book is written for the<br />
amateur exhibitor who already knows the basics of showing a dog. It is for those that are<br />
truly interested in the sport of dogs.<br />
Show Me! A Dog Showing Primer: By D. Caroline Colie; This book explains the basics<br />
of dog showing, written for novice exhibitors and also has helpful advice for experienced<br />
handlers.<br />
Dog Owner’s Home Veterinary Handbook: By James M. Griffin, MD & Lisa D. Carlson,<br />
DVM; This is a great guide for general veterinary care and remedies for common ailments.<br />
The Complete Book of First Aid for Dogs: By Sue M. Copeland & John Hamil, DVM.<br />
A resource showing and telling general first aid for dogs.<br />
AKC.org web site: This is a resource guide into the AKC Registration forms, dog events,<br />
and educational information can be downloaded.<br />
4h.wsu.edu web site: 4-H <strong>Youth</strong> <strong>Development</strong> program.<br />
44