Water Specialist 1” Control Valve Series Model ... - ClackValves.Net
Water Specialist 1” Control Valve Series Model ... - ClackValves.Net
Water Specialist 1” Control Valve Series Model ... - ClackValves.Net

You also want an ePaper? Increase the reach of your titles
YUMPU automatically turns print PDFs into web optimized ePapers that Google loves.
Programming • Page 1<br />
OEM General Instructions<br />
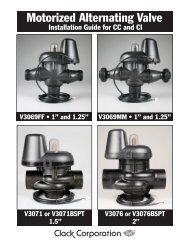
WS1TC & WS1.25 TC Manual<br />
The control valve offers multiple procedures that allow the valve to be modifi ed to suit the needs of the installation. These<br />
procedures are:<br />
• OEM System Setup<br />
• Installer Displays & Settings (either 1-99 Days Between Regeneration option or 7-Day option)<br />
• User Displays<br />
These procedures can be accessed in any order. Details on each of the procedures are provided below and on the following pages.<br />
When in operation, normal user displays show the time of day or days remaining before regeneration. When stepping through a<br />
procedure, if no buttons are pressed within fi ve minutes the display returns to a normal user display. Any changes made prior to the<br />
fi ve minute time out are incorporated.<br />
To quickly exit Installer Displays & Settings or OEM Setup, simultaneously press SET HOUR + DOWN. Any changes made prior<br />
to the exit are incorporated.<br />
To reinitialize the control valve, check to make sure the valve is in the User Display. Then simultaneously press SET HOUR +<br />
DOWN or unplug power source plug (black wire) on the circuit board, and plug back in.<br />
STEP 1SS<br />
STEP 2SS<br />
STEP 3SS<br />
OEM System Setup<br />
STEP 1SS – From normal mode, press SET HOUR + UP buttons simultaneously for 3 seconds<br />
and release. Then press SET HOUR + UP buttons simultaneously for 3 seconds and release.<br />
STEP 2SS – Choose the desired program by pressing the UP or DOWN buttons. Prior to<br />
selecting a program, verify the correct valve body, main piston, regenerant piston, and stack are<br />
being used, and that the injector or injector plug(s) are in the correct locations. See Compliance<br />
Table in Service Instructions under Injector Cap, Screen, Injector Plug and Injector section and<br />
Figure 6. Press SET HOUR button to go to Step 3SS.<br />
Program<br />
Regeneration Cycles and Times for Different Programs<br />
C1<br />
1st Backwash<br />
C2<br />
Regenerate<br />
All times in Minutes<br />
C3<br />
2nd Backwash<br />
STEP 3SS – If program P0 through P6 was selected, enter in the minutes of fi ll using the UP or<br />
DOWN buttons. The allowable values vary from a low of 1 to a high of 99. If program P7, P8<br />
or P9 was selected, dashes will appear for minutes of fi ll. Press SET HOUR button to go to Step<br />
4SS. Note: For each minute of fi ll 0.5 gallons of water is added to the solution tank. With salt<br />
(sodium chloride) this equates to approximately 1 1 /2 pounds of salt per minute of fi ll.<br />
C4<br />
Rinse<br />
C5<br />
Fill<br />
P0 3 50 3 3 1-99<br />
P1 8 50 8 4 1-99<br />
P2 8 70 10 6 1-99<br />
P3 12 70 12 8 1-99<br />
P4 10 50 Skipped 8 1-99<br />
P5 4 50 Skipped 4 1-99<br />
P6 12 6 Skipped 12 1-99<br />
P7 6 Skipped Skipped 4 Skipped<br />
P8 10 Skipped Skipped 6 Skipped<br />
P9 14 Skipped Skipped 8 Skipped