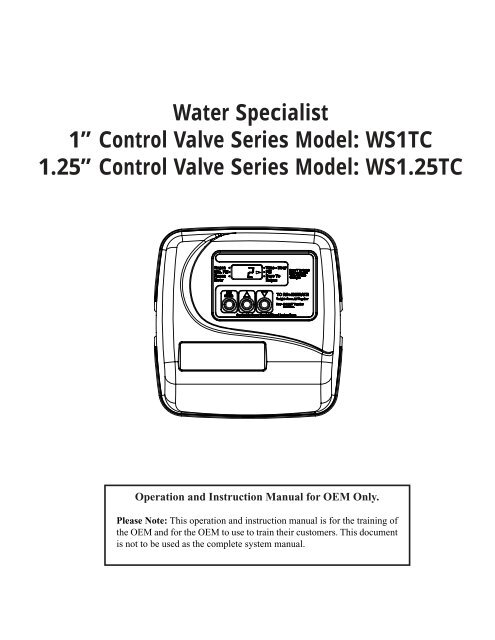
Water Specialist 1” Control Valve Series Model ... - ClackValves.Net
Water Specialist 1” Control Valve Series Model ... - ClackValves.Net
Water Specialist 1” Control Valve Series Model ... - ClackValves.Net

Create successful ePaper yourself
Turn your PDF publications into a flip-book with our unique Google optimized e-Paper software.
<strong>Water</strong> <strong>Specialist</strong><br />
<strong>1”</strong> <strong>Control</strong> <strong>Valve</strong> <strong>Series</strong> <strong>Model</strong>: WS1TC<br />
1.25” <strong>Control</strong> <strong>Valve</strong> <strong>Series</strong> <strong>Model</strong>: WS1.25TC<br />
Operation and Instruction Manual for OEM Only.<br />
Please Note: This operation and instruction manual is for the training of<br />
the OEM and for the OEM to use to train their customers. This document<br />
is not to be used as the complete system manual.
MANUAL REGENERATION<br />
NOTE: For softeners, if brine tank does not contain<br />
salt, fi ll with salt and wait at least 2 hours before<br />
regeneration.<br />
If you need to initiate a manual regeneration, either<br />
immediately, or tonight at the preprogrammed time<br />
(typically 2 a.m.), complete the following steps.<br />
For Immediate Regeneration:<br />
Press and hold UP and DOWN simultaneously until<br />
valve motor starts (typically 3 seconds).<br />
If the display shows “E1,” “E2” or “E3” (for error), call a<br />
service technician.<br />
Arrow will point to Regen if a<br />
regeneration is expected “Tonight.”<br />
To shut off water to the system, please position arrow handles as shown in the bypass operation diagram<br />
below. If your valve doesn’t look like the diagram below, contact your service technician for instructions<br />
on how to shut off water.<br />
NORMAL OPERATION<br />
BYPASS OPERATION<br />
Treated<br />
<strong>Water</strong> Exits<br />
GENERAL<br />
OPERATION<br />
When the system is operating<br />
one of two displays will be<br />
shown: time of day or days until<br />
the next regeneration. Pressing<br />
UP or DOWN will toggle<br />
between the two choices.<br />
TO SET TIME OF DAY<br />
In the event of a power outage, time<br />
of day needs to be reset. All other information<br />
will be stored in memory<br />
no matter how long the power<br />
outage. Please complete the steps<br />
as shown to the right. To access this<br />
mode, press SET HOUR.<br />
TO SET TIME OF<br />
REGENERATION<br />
For initial set-up or to make<br />
adjustments, please complete<br />
the steps as shown to the right.<br />
Access this mode by pressing SET<br />
HOUR and UP simultaneously for<br />
3 seconds.<br />
Supply <strong>Water</strong><br />
Enters<br />
➟<br />
➟<br />
For Regeneration Tonight:<br />
Press and release UP and DOWN simultaneously<br />
(notice that arrow points to Regen).<br />
Supply <strong>Water</strong><br />
Exits<br />
Arrow will point to Regen<br />
if a regeneration is<br />
expected “Tonight.”<br />
or<br />
Supply <strong>Water</strong><br />
Enters<br />
1. Accessed by pressing SET<br />
HOUR.<br />
2. Adjust to the nearest hour<br />
using UP or DOWN. An<br />
arrow points to PM during<br />
p.m. hours.<br />
3. Press SET HOUR to<br />
complete and return to<br />
normal operation.<br />
1. Accessed by pressing SET<br />
HOUR and UP simultaneously<br />
for 3 seconds.<br />
2. Adjust time of regeneration hour<br />
using the UP or DOWN. An<br />
arrow points to PM during p.m.<br />
hours. Simultaneously press SET<br />
HOUR and DOWN to return to<br />
normal operation.
WS1TC & WS1.25 TC Manual<br />
Table of Contents<br />
<strong>Control</strong> <strong>Valve</strong> Function and Cycles of Operation <strong>Control</strong> <strong>Valve</strong> Function and Cycles of Operation 1 - 2<br />
OEM General Programming Instructions Programming 1<br />
OEM System Setup Programming 1<br />
Installer Displays/Settings Programming 3<br />
User Displays/Settings Programming 4<br />
Drawings and Part Numbers<br />
Front Cover and Drive Assembly Drawings and Part Numbers 1<br />
WS1TC Drive Cap, Pistons and Spacer Stack Drawings and Part Numbers 2a<br />
WS1.25TC Drive Cap, Pistons and Spacer Stack Drawings and Part Numbers 2b<br />
WS1 & WS1.25 Identifi cation Figure Drawings and Part Numbers 2c<br />
FOR INFORMATION COMMON TO ALL <strong>1”</strong> & 1.25” CONTROL VALVES REFER TO THE WS1&WS1.25 COMMON<br />
INFORMATION MANUAL<br />
The common manual contains the Table of Contents shown below<br />
Other Drawings and Part Numbers<br />
Compliance Table No page number<br />
Injector Cap, Injector Screen, Injector, Plug and O-ring Drawings and Part Numbers 3a<br />
Injector Order Information Drawings and Part Numbers 3b<br />
Injector Graphs US Units: Injector Draw, Slow Rinse and Total Flow Rates Drawings and Part Numbers 3c-3d<br />
Injector Graphs Metric Units: Injector Draw, Slow Rinse and Total Flow Rates Drawings and Part Numbers 3e-3f<br />
Refi ll Flow <strong>Control</strong> Assembly and Refi ll Port Plug Drawings and Part Numbers 4<br />
Drain Line – 3/4” Drawings and Part Numbers 5<br />
Drain Line – <strong>1”</strong> Drawings and Part Numbers 6<br />
<strong>Water</strong> Meter, Meter Plug and Mixing <strong>Valve</strong> Drawings and Part Numbers 7<br />
Installation Fitting Assemblies Drawings and Part Numbers 8a – 8b<br />
Bypass <strong>Valve</strong> Drawings and Part Numbers 9<br />
Flow Diagrams – Service and Backwash Drawings and Part Numbers 10<br />
Flow Diagrams – Downfl ow and Upfl ow Drawings and Part Numbers 11<br />
Flow Diagrams – Rinse and Fill Drawings and Part Numbers 12<br />
WS1 Service Spanner Wrench Drawings and Part Numbers 13<br />
General Information General Information 1<br />
General Warnings (Must appear in OEM’s manual) General Information 1<br />
Specifi cations which must be included in OEM’s Manual General Information 2<br />
Quick Reference Specifi cations General Information 2<br />
Drive Assembly General Information 3<br />
Drive Cap Assembly, Main Piston and Regenerant Piston General Information 3<br />
Spacer Stack Assembly General Information 4<br />
Injector Cap, Screen, Injector Plug and Injector General Information 4<br />
Refi ll Flow <strong>Control</strong> Assembly or Refi ll Port Plug General Information 4<br />
Drain Line Flow <strong>Control</strong> and Fitting Assembly General Information 5<br />
<strong>Water</strong> Meter or Meter Plug General Information 6<br />
Mixing <strong>Valve</strong> General Information 6<br />
Installation Fitting Assemblies General Information 6<br />
Bypass <strong>Valve</strong> General Information 7 - 8<br />
Installation Installation 1 - 2<br />
Service Instructions Service Instructions 1 - 5<br />
Troubleshooting Troubleshooting 1 - 2<br />
Limited Warranty Last Page
<strong>Control</strong> <strong>Valve</strong> Function and Cycles of Operation • Page 1<br />
<strong>Control</strong> <strong>Valve</strong> Function and Cycles of Operation<br />
WS1TC & WS1.25 TC Manual<br />
This glass fi lled Noryl 1 (or equivalent) fully automatic control valve is designed as the primary control center to direct and regulate<br />
all cycles of a downfl ow regeneration water softener or fi lter.<br />
The time clock control valve can be set to perform downfl ow regeneration or simply backwash. The time clock control valve has<br />
two calendar options for regeneration frequency:<br />
1. an option where the user can choose the number of days (1-99) between each regeneration; and<br />
2. a seven-day option where the user can choose which day(s) of the week a regeneration should occur.<br />
The control valve is compatible with a variety of regenerants and resin cleaners. The control valve is capable of routing the fl ow<br />
of water in the necessary paths to regenerate or backwash water treatment systems. The injector regulates the fl ow of brine or<br />
other regenerants. The control valve regulates the fl ow rates for backwashing, rinsing, and the replenishing of treated water into a<br />
regenerant tank, when applicable.<br />
The control valve uses no traditional fasteners (e.g. screws); instead clips, threaded caps and nuts and snap type latches are used.<br />
Caps and nuts only need to be fi rmly hand tightened because radial seals are used. Tools required to service the valve include one<br />
small blade screw driver, one large blade screw driver, pliers and a pair of hands. A plastic wrench is available which eliminates the<br />
need for screwdrivers and pliers. Disassembly for servicing takes much less time than com pa ra ble products currently on the market.<br />
<strong>Control</strong> valve in stal la tion is made easy because the distributor tube can be cut ½” above to ½” below the top of tank thread. The<br />
distributor tube is held in place by an o-ring seal and the control valve also has a bayonet lock feature for upper distributor baskets.<br />
The AC adapter power pack comes with a 15 foot power cord and is designed for use with the control valve. The AC adapter power<br />
pack is for dry location use only. If the power goes out, only the time of day needs to be reset. All other values are permanently<br />
stored in the nonvolatile memory.<br />
Table 1 shows the time for the backwash, regenerative, and rinse cycles for the ten available programming options. Six different<br />
programs are available for a softener, one for a regenerative fi lter, and three programs for backwash only fi lters. When the control<br />
valve is used as a:<br />
1. softener, one or two backwashes occur and refi ll always occurs after the rinse cycle (P0 through P5);<br />
2. regenerative fi lter, one backwash occurs and refi ll always occurs after the rinse cycle (P6); and<br />
3. backwashing fi lter, one backwash occurs (P7 through P9).<br />
Program<br />
1 Noryl is a trademark of General Electric.<br />
Table 1<br />
Regeneration Cycles and Times for Different Programs<br />
C1<br />
1st Backwash<br />
C2<br />
Regenerate<br />
All times in Minutes<br />
C3<br />
2nd Backwash<br />
C4<br />
Rinse<br />
C5<br />
Fill<br />
P0 3 50 3 3 1-99<br />
P1 8 50 8 4 1-99<br />
P2 8 70 10 6 1-99<br />
P3 12 70 12 8 1-99<br />
P4 10 50 Skipped 8 1-99<br />
P5 4 50 Skipped 4 1-99<br />
P6 12 6 Skipped 12 1-99<br />
P7 6 Skipped Skipped 4 Skipped<br />
P8 10 Skipped Skipped 6 Skipped<br />
P9 14 Skipped Skipped 8 Skipped<br />
NOTE: During regeneration the display will show C1, C2, etc. If the cycle is skipped, that cycle number will not be displayed.
WS1TC & WS1.25 TC Manual <strong>Control</strong> <strong>Valve</strong> Function and Cycles of Operation • Page 2<br />
The user can initiate manual regeneration. The user has the option to request the manual regeneration at the delayed regeneration<br />
time or to have the regeneration occur immediately. Simultaneously press the UP + DOWN buttons to start a regeneration at the<br />
next delayed regeneration time. If a regeneration is to occur today an arrow will point to regeneration. For immediate regeneration,<br />
simultaneously press and hold the UP + DOWN buttons for three seconds.<br />
When in regeneration, step through the different regeneration cycles by simultaneously pressing the UP + DOWN buttons.
Programming • Page 1<br />
OEM General Instructions<br />
WS1TC & WS1.25 TC Manual<br />
The control valve offers multiple procedures that allow the valve to be modifi ed to suit the needs of the installation. These<br />
procedures are:<br />
• OEM System Setup<br />
• Installer Displays & Settings (either 1-99 Days Between Regeneration option or 7-Day option)<br />
• User Displays<br />
These procedures can be accessed in any order. Details on each of the procedures are provided below and on the following pages.<br />
When in operation, normal user displays show the time of day or days remaining before regeneration. When stepping through a<br />
procedure, if no buttons are pressed within fi ve minutes the display returns to a normal user display. Any changes made prior to the<br />
fi ve minute time out are incorporated.<br />
To quickly exit Installer Displays & Settings or OEM Setup, simultaneously press SET HOUR + DOWN. Any changes made prior<br />
to the exit are incorporated.<br />
To reinitialize the control valve, check to make sure the valve is in the User Display. Then simultaneously press SET HOUR +<br />
DOWN or unplug power source plug (black wire) on the circuit board, and plug back in.<br />
STEP 1SS<br />
STEP 2SS<br />
STEP 3SS<br />
OEM System Setup<br />
STEP 1SS – From normal mode, press SET HOUR + UP buttons simultaneously for 3 seconds<br />
and release. Then press SET HOUR + UP buttons simultaneously for 3 seconds and release.<br />
STEP 2SS – Choose the desired program by pressing the UP or DOWN buttons. Prior to<br />
selecting a program, verify the correct valve body, main piston, regenerant piston, and stack are<br />
being used, and that the injector or injector plug(s) are in the correct locations. See Compliance<br />
Table in Service Instructions under Injector Cap, Screen, Injector Plug and Injector section and<br />
Figure 6. Press SET HOUR button to go to Step 3SS.<br />
Program<br />
Regeneration Cycles and Times for Different Programs<br />
C1<br />
1st Backwash<br />
C2<br />
Regenerate<br />
All times in Minutes<br />
C3<br />
2nd Backwash<br />
STEP 3SS – If program P0 through P6 was selected, enter in the minutes of fi ll using the UP or<br />
DOWN buttons. The allowable values vary from a low of 1 to a high of 99. If program P7, P8<br />
or P9 was selected, dashes will appear for minutes of fi ll. Press SET HOUR button to go to Step<br />
4SS. Note: For each minute of fi ll 0.5 gallons of water is added to the solution tank. With salt<br />
(sodium chloride) this equates to approximately 1 1 /2 pounds of salt per minute of fi ll.<br />
C4<br />
Rinse<br />
C5<br />
Fill<br />
P0 3 50 3 3 1-99<br />
P1 8 50 8 4 1-99<br />
P2 8 70 10 6 1-99<br />
P3 12 70 12 8 1-99<br />
P4 10 50 Skipped 8 1-99<br />
P5 4 50 Skipped 4 1-99<br />
P6 12 6 Skipped 12 1-99<br />
P7 6 Skipped Skipped 4 Skipped<br />
P8 10 Skipped Skipped 6 Skipped<br />
P9 14 Skipped Skipped 8 Skipped
WS1TC & WS1.25 TC Manual Programming • Page 2<br />
Return to<br />
Normal Mode<br />
STEP 4SS<br />
STEP 5SS<br />
STEP 6SS<br />
or<br />
or<br />
or<br />
B<br />
NOTE: A regeneration will be initiated or scheduled after the<br />
control has received a signal for two minutes.<br />
A. Differential pressure switch connection<br />
B. Motor wire connection<br />
C. AC adapter wire connection<br />
STEP 4SS — Use UP or DOWN buttons to switch<br />
between:<br />
• 1-99 Days Between Regen; or<br />
• 7-Day.<br />
Press SET HOUR button to go to Step 5SS.<br />
STEP 5SS — Use UP or DOWN buttons to switch<br />
between 60 Hz or 50 Hz option. Press SET HOUR button<br />
to go to Step 6SS.<br />
STEP 6SS — If a differential pressure switch is installed<br />
and actuated:<br />
• a regeneration will occur immediately if no arrow<br />
points at Regen Hour; or<br />
• a regeneration will occur at the delayed regeneration<br />
hour if an arrow points at Regen Hour.<br />
Use UP or DOWN buttons to switch between the two<br />
choices. If a differential switch is not installed the<br />
settings in this display are ignored. Press SET HOUR to<br />
exit OEM system setup.<br />
C<br />
A
Programming • Page 3<br />
Return to<br />
Normal Mode<br />
STEP 1ID<br />
STEP 2ID<br />
STEP 3ID<br />
STEP 1I7<br />
STEP 2I7<br />
STEP 3I7<br />
STEP 4I7<br />
STEP 5I7<br />
WS1TC & WS1.25 TC Manual<br />
Installer Displays & Settings (1-99 Days Between Regeneration option)<br />
STEP 1ID – From normal mode, press SET HOUR + UP buttons simultaneously for 3 seconds<br />
and release.<br />
STEP 2ID – Regeneration Time: Set the clock to the hour the regeneration should occur by using<br />
the UP or DOWN buttons. An arrow points to PM after 12. Press SET HOUR to go to STEP 3ID.<br />
STEP 3ID – Days To Regen: Set the number of days between regenerations. The allowable range<br />
is 1 to 99. Press SET HOUR to exit Installer Displays & Settings.<br />
Installer Displays & Settings (7 day option)<br />
STEP 1I7 – From normal mode, press SET HOUR + UP buttons simultaneously for 3 seconds<br />
and release.<br />
STEP 2I7 – Regeneration Time: Set the clock to the hour the regeneration should occur by using<br />
the UP or DOWN buttons. An arrow points to PM after 12. Press SET HOUR to go to STEP 3I7.<br />
STEP 3I7 – Current Day of Week: Set the current day of the<br />
week by using the UP or DOWN buttons (See chart at right<br />
for date codes). Press SET HOUR to go to STEP 4I7.<br />
STEP 4I7 – Sunday Regeneration: To regenerate on Sunday<br />
use the UP or DOWN button until the arrow points to Regen.<br />
If the arrow does not point to Regen a regeneration will not<br />
occur on Sunday. Press SET HOUR to go to STEP 5I7.<br />
Display Day of Week<br />
d1 Sunday<br />
d2 Monday<br />
d3 Tuesday<br />
d4 Wednesday<br />
d5 Thursday<br />
d6 Friday<br />
d7 Saturday<br />
STEP 5I7 – Monday Regeneration: To regenerate on Monday use the UP or DOWN button until<br />
the arrow points to Regen. If the arrow does not point to Regen a regeneration will not occur on<br />
Monday. Press SET HOUR to go to STEP 6I7.
WS1TC & WS1.25 TC Manual Programming • Page 4<br />
Return to<br />
Normal Mode<br />
General Operation<br />
STEP 6I7 – Tuesday Regeneration: To regenerate on Tuesday use the UP or DOWN button until<br />
the arrow points to Regen. If the arrow does not point to Regen a regeneration will not occur on<br />
Tuesday. Press SET HOUR to go to STEP 7I7.<br />
STEP 7I7 – Wednesday Regeneration: To regenerate on Wednesday use the UP or DOWN button<br />
until the arrow points to Regen. If the arrow does not point to Regen a regeneration will not occur<br />
on Wednesday. Press SET HOUR to go to STEP 8I7.<br />
STEP 8I7 – Thursday Regeneration: To regenerate on Thursday use the UP or DOWN button<br />
until the arrow points to Regen. If the arrow does not point to Regen a regeneration will not occur<br />
on Thursday. Press SET HOUR to go to STEP 9I7.<br />
STEP 9I7 – Friday Regeneration: To regenerate on Friday use the UP or DOWN button until<br />
the arrow points to Regen. If the arrow does not point to Regen a regeneration will not occur on<br />
Friday. Press SET HOUR to go to STEP 10I7.<br />
STEP 10I7 – Saturday Regeneration: To regenerate on Saturday use the UP or DOWN button<br />
until the arrow points to Regen. If the arrow does not point to Regen a regeneration will not occur<br />
on Saturday. Press SET HOUR to exit Installer Displays & Settings.<br />
NOTE: If all arrows are turned off in d1-d7, Days to Regen in the User Displays will always read<br />
7 and a regeneration will never occur.<br />
User Displays<br />
When the system is operating one of two displays will be shown. Pressing UP or DOWN button will<br />
alternate between the displays. One of the displays is always the current time of day (to the nearest<br />
hour). The second display is the days remaining until the next regeneration. If the days remaining<br />
is equal to one, a regeneration will occur at the next preset regeneration time. The user can scroll<br />
between displays as desired.<br />
If the system has called for a regeneration that will occur at the preset time of regeneration, the arrow<br />
will point to Regen.<br />
Regeneration Mode<br />
STEP 6I7<br />
STEP 7I7<br />
STEP 8I7<br />
STEP 9I7<br />
STEP 10I7<br />
Typically a system is set to regenerate at a time of low water usage. An example of a time with<br />
low water usage is when a household is asleep. If there is a demand for water when the system is<br />
regenerating, untreated water will be used.<br />
When the system begins to regenerate, the display will change to indicate the cycle of the<br />
regeneration process (see Table 3) that is occurring and an arrow will also point to Regen. The<br />
system will run through the steps automatically and will reset itself to provide treated water when<br />
the regeneration is completed.<br />
or
Programming • Page 5<br />
Manual Regeneration<br />
Sometimes there is a need to regenerate the system sooner than when the system calls for it, usually referred to as<br />
a manual regeneration. There may be a period of heavy water usage because of guests or a heavy laundry day.<br />
To initiate a manual regeneration at the preset delayed regeneration time, simultaneously press UP<br />
+ DOWN buttons together and release. The arrow will point to the word Regen if a regeneration is<br />
expected “tonight.” To cancel the regeneration simultaneously press UP + DOWN buttons and release.<br />
Power Loss<br />
STEP 1U<br />
STEP 2U<br />
Set Time of Day<br />
STEP 1U – Press SET HOUR<br />
WS1TC & WS1.25 TC Manual<br />
To initiate a manual regeneration immediately, simultaneously press UP + DOWN buttons together for<br />
three seconds. The system will begin to regenerate immediately. The request cannot be cancelled.<br />
Note: For softeners, if brine tank does not contain salt, fi ll with salt and wait at least two hours before regenerating.<br />
STEP 2U – Current time: Set the clock to the closest hour by using the UP and DOWN button. An<br />
arrow points to PM after 12. After a power outage, the time of day will need to be reset. Press SET<br />
HOUR to exit.<br />
If the power goes out current time of day will need to be reset. If the power goes out while the system is regenerating, the cycle<br />
picks up where it was interrupted when the power returns.<br />
Error Message<br />
If “E1,” “E2” or “E3” appears on the display contact the OEM for help. This indicates that the<br />
valve did not function properly.<br />
An arrow will point<br />
to the word Regen<br />
if a regeneration is<br />
expected “tonight.”
WS1TC & WS1.25 TC Manual Drawings and Part Numbers • Page 1<br />
1<br />
2<br />
Front Cover and Drive Assembly<br />
Drawing No. Order No. Description Quantity<br />
1 V3175TC-01 WS1TC Front Cover ASY 1<br />
2 V3107-01 WS1 Motor 1<br />
3 V3106-01 WS1 Drive Bracket & Spring Clip 1<br />
4 V3108TC WS1TC PC Board 1<br />
5 V3110 WS1 Drive Reducing Gear 12 x 36 3<br />
6 V3109 WS1 Drive Gear Cover 1<br />
V3002TC WS1TC Drive ASY *<br />
Not Shown V3186 WS1 AC Adapter 110V - 12V 1<br />
Not Shown<br />
V3186 WS1 AC ADAPTER 110V-12V<br />
V3186EU WS1 AC ADAPTER 220-240V-12V EU<br />
V3186UK WS1 AC ADAPTER 220-240V-12V UK<br />
V3186-01 WS1 AC ADAPTER CORD ONLY<br />
* Drawing number parts 2 through 6 may be purchased as a complete assembly, part V3002.<br />
5<br />
4<br />
3<br />
1<br />
6
Drawings and Part Numbers • Page 2a<br />
2<br />
4b<br />
6<br />
4a 4<br />
1<br />
5<br />
3<br />
WS1TC & WS1.25 TC Manual<br />
WS1TC Drive Cap Assembly, Downfl ow Piston, Regenerant Piston and Spacer Stack Assembly<br />
Drawing No. Order No. Description Quantity<br />
1 V3005 WS1 Spacer Stack Assembly 1<br />
2 V3004 Drive Cap ASY 1<br />
3 V3178 WS1 Drive Back Plate 1<br />
4 V3011 WS1 Piston Downfl ow ASY 1<br />
5 V3174 WS1 Regenerant Piston 1<br />
6 V3135 O-ring 228 1<br />
7 V3180 O-ring 337 1<br />
8 V3105 O-ring 215 (Distributer Tube) 1<br />
Not Shown<br />
V3001 WS1 Body ASY Downfl ow<br />
V3001-02 WS1 Mixing <strong>Valve</strong> Body ASY<br />
Note: The regenerant piston is not used in backwash only applications.<br />
1<br />
Black Plug<br />
8<br />
7
2<br />
WS1TC & WS1.25 TC Manual Drawings and Part Numbers • Page 2b<br />
WS1.25TC Drive Cap Assembly, Downfl ow Piston, Regenerant Piston and Spacer Stack Assembly<br />
Drawing No. Order No. Description Quantity<br />
1 V3430 WS1.5 Spacer Stack Assembly 1<br />
2 V3004 Drive Cap ASY 1<br />
3 V3178 WS1 Drive Back Plate 1<br />
4 V3407 WS1.5 Piston Downfl ow ASY 1<br />
5 V3174 WS1 Regenerant Piston 1<br />
6 V3135 O-ring 228 1<br />
7 V3180 O-ring 337 1<br />
8<br />
V3358 O-ring 219 (Distributor Tube Opening 1.32")<br />
V3357 O-ring 218 (Distributor Tube Opening 32mm)<br />
V3020 WS1.25 Body ASY Downfl ow<br />
(Distributor Tube Opening 1.32")<br />
V3020-01 WS1.25 Mixing <strong>Valve</strong> Body Downfl ow ASY<br />
Not Shown<br />
V3020-02<br />
(Distributor Tube Opening 1.32")<br />
WS1.25 Body ASY Downfl ow<br />
(Distributor Tube Opening 32mm)<br />
V3020-03 WS1.25 Mixing <strong>Valve</strong> Body Downfl ow ASY<br />
(Distributor Tube Opening 32mm)<br />
Note: The regenerant piston is not used in backwash only applications.<br />
6<br />
4<br />
1<br />
5<br />
3<br />
1<br />
1<br />
8<br />
Grey Plug on all<br />
WS1.25 bodies<br />
*Grey Ring<br />
*Grey Distributor<br />
O-ring retainer<br />
*Only for valves that have a<br />
32mm Distributor Tube Opening<br />
7
Drawings and Part Numbers • Page 2c<br />
WS1 & WS1.25 Identifi cation Figure<br />
WS1TC with 1.050" Distributor Tube Opening Identifi cation<br />
Black Plug<br />
WS1.25 with 1.32" Distributor Tube Opening Identifi cation<br />
Grey Plug<br />
WS1.25 with 32mm Distributor Tube Opening Identifi cation<br />
Grey Plug<br />
Grey Ring<br />
Grey<br />
Distributor<br />
O-ring<br />
Retainer<br />
2<br />
4<br />
WS1TC & WS1.25 TC Manual<br />
Spacer Color:<br />
Grey<br />
1.25"<br />
1.25"<br />
Note: The WS1 downfl ow piston is a solid amber color.<br />
Spacer Color:<br />
Black<br />
1.5"<br />
1.5"<br />
Spacer Color:<br />
Black<br />
1.5"<br />
1.5"
WS1TC & WS1.25 TC Manual
Form No. V3115TC – Updated 12/20/07<br />
WS1TC & WS1.25 TC Manual<br />
FOR INFORMATION COMMON TO ALL <strong>1”</strong> & 1.25” CONTROL VALVES REFER TO THE WS1&WS1.25 COMMON<br />
INFORMATION MANUAL<br />
The common manual contains the Table of Contents shown below<br />
Other Drawings and Part Numbers<br />
Compliance Table No page number<br />
Injector Cap, Injector Screen, Injector, Plug and O-ring Drawings and Part Numbers 3a<br />
Injector Order Information Drawings and Part Numbers 3b<br />
Injector Graphs US Units: Injector Draw, Slow Rinse and Total Flow Rates Drawings and Part Numbers 3c-3d<br />
Injector Graphs Metric Units: Injector Draw, Slow Rinse and Total Flow Rates Drawings and Part Numbers 3e-3f<br />
Refi ll Flow <strong>Control</strong> Assembly and Refi ll Port Plug Drawings and Part Numbers 4<br />
Drain Line – 3/4” Drawings and Part Numbers 5<br />
Drain Line – <strong>1”</strong> Drawings and Part Numbers 6<br />
<strong>Water</strong> Meter, Meter Plug and Mixing <strong>Valve</strong> Drawings and Part Numbers 7<br />
Installation Fitting Assemblies Drawings and Part Numbers 8a – 8b<br />
Bypass <strong>Valve</strong> Drawings and Part Numbers 9<br />
Flow Diagrams – Service and Backwash Drawings and Part Numbers 10<br />
Flow Diagrams – Downfl ow and Upfl ow Drawings and Part Numbers 11<br />
Flow Diagrams – Rinse and Fill Drawings and Part Numbers 12<br />
WS1 Service Spanner Wrench Drawings and Part Numbers 13<br />
General Information General Information 1<br />
General Warnings (Must appear in OEM’s manual) General Information 1<br />
Specifi cations which must be included in OEM’s Manual General Information 2<br />
Quick Reference Specifi cations General Information 2<br />
Drive Assembly General Information 3<br />
Drive Cap Assembly, Main Piston and Regenerant Piston General Information 3<br />
Spacer Stack Assembly General Information 4<br />
Injector Cap, Screen, Injector Plug and Injector General Information 4<br />
Refi ll Flow <strong>Control</strong> Assembly or Refi ll Port Plug General Information 4<br />
Drain Line Flow <strong>Control</strong> and Fitting Assembly General Information 5<br />
<strong>Water</strong> Meter or Meter Plug General Information 6<br />
Mixing <strong>Valve</strong> General Information 6<br />
Installation Fitting Assemblies General Information 6<br />
Bypass <strong>Valve</strong> General Information 7 - 8<br />
Installation Installation 1 - 2<br />
Service Instructions Service Instructions 1 - 5<br />
Troubleshooting Troubleshooting 1 - 2<br />
Limited Warranty Last Page