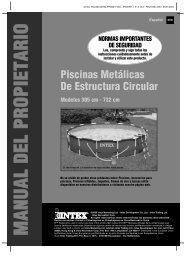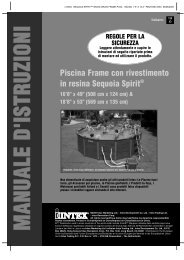
Round Metal Frame Pool - Piscine Atlantis
Round Metal Frame Pool - Piscine Atlantis
Round Metal Frame Pool - Piscine Atlantis

Create successful ePaper yourself
Turn your PDF publications into a flip-book with our unique Google optimized e-Paper software.
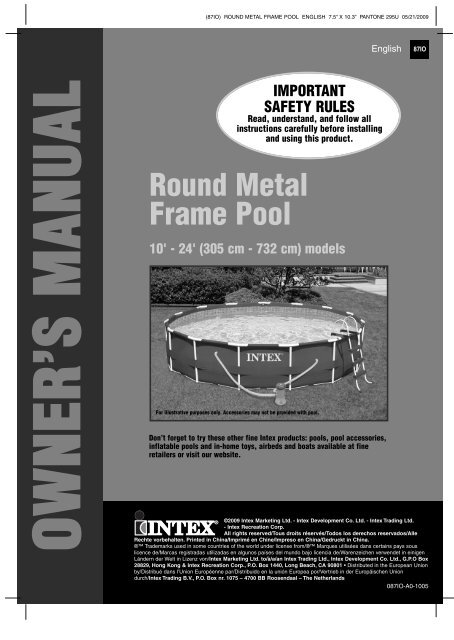
OWNER’S MANUAL<br />
(87IO) ROUND METAL FRAME POOL ENGLISH 7.5” X 10.3” PANTONE 295U 05/21/2009<br />
<strong>Round</strong> <strong>Metal</strong><br />
<strong>Frame</strong> <strong>Pool</strong><br />
IMPORTANT<br />
SAFETY RULES<br />
Read, understand, and follow all<br />
instructions carefully before installing<br />
and using this product.<br />
10' - 24' (305 cm - 732 cm) models<br />
For illustrative purposes only. Accessories may not be provided with pool.<br />
Don’t forget to try these other fine Intex products: pools, pool accessories,<br />
inflatable pools and in-home toys, airbeds and boats available at fine<br />
retailers or visit our website.<br />
English<br />
87IO<br />
©2009 Intex Marketing Ltd. - Intex Development Co. Ltd. - Intex Trading Ltd.<br />
- Intex Recreation Corp.<br />
All rights reserved/Tous droits réservés/Todos los derechos reservados/Alle<br />
Rechte vorbehalten. Printed in China/Imprimé en Chine/Impreso en China/Gedruckt in China.<br />
® Trademarks used in some countries of the world under license from/® Marques utilisées dans certains pays sous<br />
licence de/Marcas registradas utilizadas en algunos países del mundo bajo licencia de/Warenzeichen verwendet in einigen<br />
Ländern der Welt in Lizenz von/Intex Marketing Ltd. to/à/a/an Intex Trading Ltd., Intex Development Co. Ltd., G.P.O Box<br />
28829, Hong Kong & Intex Recreation Corp., P.O. Box 1440, Long Beach, CA 90801 • Distributed in the European Union<br />
by/Distribué dans l’Union Européenne par/Distribuido en la unión Europea por/Vertrieb in der Europäischen Union<br />
durch/Intex Trading B.V., P.O. Box nr. 1075 – 4700 BB Roosendaal – The Netherlands<br />
087IO-A0-1005
(87IO) ROUND METAL FRAME POOL ENGLISH 7.5” X 10.3” PANTONE 295U 05/21/2009<br />
Warnings............................................................................... 3<br />
Parts List & Reference......................................................... 4-7<br />
Setup Instructions................................................................ 8-10<br />
<strong>Pool</strong> Maintenance and Chemicals...................................... 11-12<br />
Common <strong>Pool</strong> Problems...................................................... 11<br />
<strong>Pool</strong> Draining........................................................................ 12<br />
Storage.................................................................................. 12-13<br />
General Aquatic Safety........................................................ 14<br />
Intex Service Center Locations.......................................... 15<br />
English<br />
Special Introductory note:<br />
Thanks for buying an Intex pool. Please take a few minutes to read this manual<br />
before setting up your pool. This information will help extend the pool life and<br />
make the pool safer for your family's enjoyment. View the video included before<br />
installation. A team of 2-3 people is recommended for pool set up. Additional<br />
people will speed up the installation.<br />
SAVE THESE INSTRUCTIONS Page 2<br />
87IO<br />
TABLE OF CONTENTS
(87IO) ROUND METAL FRAME POOL ENGLISH 7.5” X 10.3” PANTONE 295U 05/21/2009<br />
IMPORTANT SAFETY RULES<br />
Read, Understand and Follow All Instructions Carefully Before Installing and Using this Product.<br />
WARNING<br />
English<br />
• Continuous and competent adult supervision of children and the handicapped is<br />
required at all times.<br />
• Secure all doors, windows and safety barriers to prevent unauthorized, unintentional or<br />
unsupervised pool entry.<br />
• Install a safety barrier that will eliminate access to the pool for young children and pets.<br />
• <strong>Pool</strong> and pool accessories are to be assembled and disassembled by adults only.<br />
• Never dive, jump or slide into an above-ground pool or any shallow body of water.<br />
• Failure to set up pool on flat, level, compact ground could result in the pool’s collapse or the<br />
possibility that a person lounging in the pool could be swept out.<br />
• Do not lean, straddle, or exert pressure on the inflatable ring or top rim as injury or flooding<br />
could occur. Do not allow anyone to sit on, climb, or straddle the sides of the pool.<br />
• Remove all toys and flotation devices from, in and around the pool when it is not in use.<br />
Objects in the pool attract young children.<br />
• Keep toys, chairs, tables, or any objects that a child could climb on at least four feet away<br />
from the pool.<br />
• Keep rescue equipment by the pool and clearly post emergency numbers at the phone<br />
closest to the pool. Examples of rescue equipment: coast guard approved ring buoy with<br />
attached rope, strong rigid pole not less than twelve feet (12') [365.76cm] long.<br />
• Never swim alone or allow others to swim alone.<br />
• Keep your pool clean and clear. The pool floor must be visible at all times from the outside<br />
barrier of the pool.<br />
• If swimming at night use artificial lighting to illuminate all safety signs, ladders, pool floor and<br />
walkways.<br />
• Stay away from the pool when using alcohol or drugs.<br />
• Keep children away from pool covers to avoid entanglement, drowning, or other serious<br />
injury.<br />
• <strong>Pool</strong> covers must be completely removed before pool use. Children and adults cannot be<br />
seen under a pool cover.<br />
• Do not cover the pool while you or anyone else is in the pool.<br />
• Keep the pool and pool area clean and clear to avoid slips and falls and objects that may<br />
cause injury.<br />
• Protect all pool occupants from recreational water illnesses by keeping the pool water clean.<br />
Don’t swallow the pool water. Practice good hygiene.<br />
• All pools are subject to wear and deterioration. Certain types of excessive or accelerated<br />
deterioration can lead to an operation failure. And can ultimately cause the loss of large<br />
quantities of water from your pool. So, therefore it is very important that you properly maintain<br />
your pool on a regular basis.<br />
• This pool is for outdoor use only.<br />
• Empty and store the pool when not in use for a longer period.<br />
• While the swimming pool is in use, you will need to operate the filter pump to ensure that<br />
there is at least one complete change of water a day. Consult your pump’s manual to<br />
calculate the necessary operating hours.<br />
POOL BARRIERS AND COVERS ARE NOT SUBSTITUTES FOR CONTINUOUS AND<br />
COMPETENT ADULT SUPERVISION.<br />
FAILURE TO FOLLOW THESE WARNINGS MAY RESULT IN<br />
PROPERTY DAMAGE, SERIOUS INJURY OR DEATH.<br />
Advisory:<br />
<strong>Pool</strong> owners may need to comply with local or state laws relating to childproof fencing, safety<br />
barriers, lighting, and other safety requirements. Customers should contact their local building<br />
code enforcement office for further details.<br />
SAVE THESE INSTRUCTIONS Page 3<br />
87IO<br />
SAFETY RULES
1<br />
4 5<br />
7<br />
2<br />
8<br />
PARTS LIST<br />
10 11 12<br />
13<br />
* Optional<br />
14<br />
(87IO) ROUND METAL FRAME POOL ENGLISH 7.5” X 10.3” PANTONE 295U 05/21/2009<br />
* Optional<br />
English<br />
NOTE: Drawings for illustration purpose only. May not reflect actual product. Not to scale.<br />
SAVE THESE INSTRUCTIONS Page 4<br />
3<br />
6<br />
9<br />
87IO<br />
PARTS LIST
11<br />
PARTS REFERENCE<br />
(87IO) ROUND METAL FRAME POOL ENGLISH 7.5” X 10.3” PANTONE 295U 05/21/2009<br />
Before assembling your product, please take a few minutes to check the contents<br />
and become familiar with all the parts.<br />
6<br />
7<br />
8<br />
English<br />
NOTE: Drawings for illustration purpose only. May not reflect actual product. Not to<br />
scale.<br />
10' (305 cm), 12' (366 cm), 13' (396 cm), 14' (427 cm), 15' (457 cm) & 16' (488 cm) models<br />
(The number of sides may vary depending on the pool size)<br />
6<br />
7<br />
8<br />
9<br />
NOTE: Drawings for illustration purpose only. May not reflect actual product. Not to<br />
scale.<br />
18' (549 cm) & 24' (732 cm) models<br />
(The number of sides may vary depending on the pool size)<br />
9<br />
SAVE THESE INSTRUCTIONS Page 5<br />
10<br />
10<br />
1<br />
2<br />
3<br />
4<br />
5<br />
1<br />
2<br />
3<br />
4<br />
5<br />
87IO<br />
PARTS REFERENCE
POOL SIZE & QUANTITY<br />
REF<br />
NO.<br />
24'<br />
(732cm)<br />
18'<br />
(549cm)<br />
16'<br />
(488cm)<br />
15'<br />
(457cm)<br />
14'<br />
(427cm)<br />
13'<br />
(396cm)<br />
12'<br />
(366cm)<br />
10'<br />
(305cm)<br />
DESCRIPTION<br />
50<br />
50<br />
38<br />
38<br />
30<br />
30<br />
14<br />
14<br />
14<br />
14<br />
1<br />
14<br />
1<br />
28<br />
28<br />
13<br />
13<br />
13<br />
13<br />
1<br />
13<br />
26<br />
26<br />
12<br />
12<br />
12<br />
12<br />
1<br />
12<br />
22<br />
22<br />
10<br />
10<br />
10<br />
10<br />
1<br />
10<br />
PIN (WITH 2 EXTRA)<br />
SEAL (WITH 2 EXTRA)<br />
24<br />
24<br />
18<br />
18<br />
32<br />
32<br />
15<br />
15<br />
15<br />
15<br />
1<br />
15<br />
1<br />
1<br />
3<br />
1<br />
1<br />
1<br />
T - JOINT<br />
SPRING PIN<br />
24<br />
24<br />
1<br />
LEG CAP<br />
HORIZONTAL BEAM<br />
POOL LINER (DRAIN VALVE CAP INCLUDED)<br />
24<br />
1<br />
1<br />
18<br />
18<br />
1<br />
18<br />
1<br />
1<br />
34<br />
34<br />
16<br />
16<br />
16<br />
16<br />
1<br />
16<br />
1<br />
1<br />
3<br />
1<br />
1<br />
1<br />
1<br />
VERTICAL LEG (SPRING PIN INCLUDED)<br />
RESTRAINING ROPE<br />
(87IO) ROUND METAL FRAME POOL ENGLISH 7.5” X 10.3” PANTONE 295U 05/21/2009<br />
3<br />
1<br />
1<br />
1<br />
3<br />
1<br />
1<br />
3<br />
1<br />
1<br />
GROUND CLOTH (OPTIONAL)<br />
STRAINER HOLE PLUG (WITH 1 EXTRA)<br />
1<br />
2<br />
1<br />
1<br />
2<br />
1<br />
3<br />
1<br />
1<br />
1<br />
DRAIN CONNECTOR<br />
DRAIN VALVE CAP<br />
POOL COVER (OPTIONAL)<br />
1<br />
2<br />
3<br />
4<br />
5<br />
6<br />
7<br />
8<br />
9<br />
10<br />
11<br />
12<br />
13<br />
14<br />
English<br />
SAVE THESE INSTRUCTIONS Page 6<br />
87IO<br />
PARTS REFERENCE
15’ X 36”<br />
(457cm X 91cm)<br />
14’ X 42”<br />
(427cm X 107cm)<br />
12’ X 36” 13’ x 42”<br />
(366cm X 91cm) (396cm x 107cm)<br />
SPARE PART NO.<br />
10426 10312<br />
10648 10648<br />
10424 11126<br />
10313 10313<br />
10576 10309<br />
10618 10414<br />
10879 11141<br />
10880 10589<br />
10587<br />
12’ X 30”<br />
(366cm X 76cm)<br />
10’ X 30”<br />
(305cm X 76cm)<br />
DESCRIPTION<br />
REF<br />
NO.<br />
10312<br />
10648<br />
10310<br />
10313<br />
10309<br />
10414<br />
10584<br />
10590<br />
10587<br />
18932<br />
10127<br />
10201<br />
10649<br />
18901<br />
10312<br />
10648<br />
10310<br />
10313<br />
10309<br />
10414<br />
10987<br />
10589<br />
10587<br />
10426<br />
10648<br />
10424<br />
10313<br />
10576<br />
10618<br />
10616<br />
10619<br />
10426<br />
10648<br />
10463<br />
10313<br />
10576<br />
10618<br />
10615<br />
10619<br />
10127<br />
10201<br />
10649<br />
11054<br />
10127<br />
10201<br />
10649<br />
11142<br />
10127<br />
10201<br />
10649<br />
10127<br />
10201<br />
10649<br />
10127<br />
10201<br />
10649<br />
PIN (WITH 2 EXTRA)<br />
SEAL (WITH 2 EXTRA)<br />
T - JOINT<br />
SPRING PIN<br />
LEG CAP<br />
HORIZONTAL BEAM<br />
POOL LINER (DRAIN VALVE CAP INCLUDED) <br />
VERTICAL LEG (SPRING PIN INCLUDED)<br />
RESTRAINING ROPE<br />
GROUND CLOTH (OPTIONAL)<br />
STRAINER HOLE PLUG (WITH 1 EXTRA)<br />
DRAIN CONNECTOR<br />
DRAIN VALVE CAP<br />
POOL COVER (OPTIONAL)<br />
1<br />
2<br />
3<br />
4<br />
5<br />
6<br />
7<br />
8<br />
9<br />
10<br />
11<br />
12<br />
13<br />
14<br />
24’ X 52”<br />
(732cm X 132cm)<br />
18’ X 52”<br />
(549cm X 132cm)<br />
15’ X 48”<br />
(457cm X 122cm)<br />
15’ X 42”<br />
(457cm X 107cm)<br />
(87IO) ROUND METAL FRAME POOL ENGLISH 7.5” X 10.3” PANTONE 295U 05/21/2009<br />
16’ X 48” 18’ X 48”<br />
(488cm X 122cm) (549cm X 122cm)<br />
SPARE PART NO.<br />
10312 10312<br />
10648 10648<br />
10861 10861<br />
10313 10313<br />
10309 10309<br />
10414 10414<br />
10764 10314<br />
DESCRIPTION<br />
REF<br />
NO.<br />
10312<br />
10648<br />
10863<br />
10313<br />
10309<br />
10414<br />
10767<br />
11043<br />
10865<br />
10420<br />
18935<br />
10312<br />
10648<br />
10862<br />
10313<br />
10309<br />
10414<br />
10766<br />
10312<br />
10648<br />
10861<br />
10313<br />
10309<br />
10414<br />
10586<br />
10312<br />
10648<br />
10310<br />
10313<br />
10309<br />
10414<br />
10585<br />
1<br />
2<br />
3<br />
4<br />
5<br />
6<br />
English<br />
PIN (WITH 2 EXTRA)<br />
SEAL (WITH 2 EXTRA)<br />
T - JOINT<br />
SPRING PIN<br />
LEG CAP<br />
HORIZONTAL BEAM<br />
POOL LINER (DRAIN VALVE CAP INCLUDED) OR<br />
POOL LINER (DRAIN VALVE CAP INCLUDED) <br />
VERTICAL LEG (SPRING PIN INCLUDED)<br />
RESTRAINING ROPE<br />
GROUND CLOTH (OPTIONAL)<br />
STRAINER HOLE PLUG (WITH 1 EXTRA)<br />
DRAIN CONNECTOR<br />
DRAIN VALVE CAP<br />
POOL COVER (OPTIONAL)<br />
SAVE THESE INSTRUCTIONS Page 7<br />
7<br />
10865<br />
10317<br />
18933<br />
10864<br />
10317<br />
18933<br />
10201<br />
11044<br />
18929<br />
10201<br />
11044<br />
18937<br />
10201<br />
11044<br />
18937<br />
10864<br />
10317<br />
18927<br />
10127<br />
10201<br />
11044<br />
10754<br />
10864<br />
10587<br />
18932<br />
10127<br />
10201<br />
11044<br />
18901<br />
10589<br />
10587<br />
18932<br />
10127<br />
10201<br />
11044<br />
18901<br />
8<br />
9<br />
10<br />
11<br />
12<br />
13<br />
14<br />
87IO<br />
PARTS REFERENCE
IMPORTANT SITE SELECTION AND GROUND<br />
PREPARATION INFORMATION<br />
(87IO) ROUND METAL FRAME POOL ENGLISH 7.5” X 10.3” PANTONE 295U 05/21/2009<br />
• The pool location must allow you to secure all doors, windows, and safety<br />
barriers to prevent unauthorized, unintentional or unsupervised pool entry.<br />
• Install a safety barrier that will eliminate access to the pool for young children<br />
and pets.<br />
• Failure to set up the pool on flat, level, compact ground and in accord with the<br />
following instructions could result in the pool’s collapse or the possibility that<br />
a person lounging in the pool could be swept out, resulting in serious injury or<br />
property damage.<br />
• Risk of electric shock: connect the filter pump only to a grounding type<br />
receptacle protected by a ground-fault circuit interrupter (GFCI) or residual<br />
current device (RCD). To reduce the risk of an electrical shock, do not use<br />
extension cords, timers, plug adapters or converter plugs to connect the pump<br />
to an electrical supply. Always provide a properly located outlet. Locate the cord<br />
where it cannot be damaged by lawn mowers, hedge trimmers, and other<br />
equipment. See the filter pump manual for additional warnings and instructions.<br />
Select an outdoor location for the pool with the following in mind:<br />
1. The area where the pool is to be set up must be absolutely flat and level.<br />
Do not set up the pool on a slope or inclined surface.<br />
2. The ground surface must be compacted and firm enough to withstand the pressure and<br />
weight of a fully set up pool. Do not set up the pool on mud, sand, soft or loose soil<br />
conditions.<br />
3. Do not set up the pool on a deck or platform.<br />
4. The pool requires at least 4 feet of space all around pool from objects that a child could<br />
climb on to gain access to the pool.<br />
POOL SETUP<br />
WARNING<br />
5. The chlorinated poolwater could damage the surrounding vegetation. Certain types of<br />
grass such as St. Augustine and Bermuda, may grow through the liner.<br />
English<br />
SAVE THESE INSTRUCTIONS Page 8<br />
87IO<br />
SETUP INSTRUCTIONS
POOL SETUP (continued)<br />
(87IO) ROUND METAL FRAME POOL ENGLISH 7.5” X 10.3” PANTONE 295U 05/21/2009<br />
English<br />
You may have purchased this pool with the Intex Krystal Clear filter pump.<br />
The pump has its own separate set of installation instructions. First<br />
assemble your pool unit and then set up the filter pump.<br />
1. • Find a flat, level location that is free and clear of stones, branches or other sharp objects<br />
that may puncture the pool liner or cause injury.<br />
• Open the carton containing the liner, joints, legs, etc., very carefully as this carton can be<br />
used to store the pool during the winter months.<br />
• Take out the ground cloth (10) and spread it over the cleared area. Then take out the<br />
liner (7) and spread it out over the ground<br />
cloth, with the drain valve directed towards<br />
the draining area. Place the drain valve<br />
away from the house. Allow the sun to<br />
warm up the liner before inserting the<br />
beams (6) into the sleeve openings.<br />
IMPORTANT: Always set up the pool<br />
unit with at least 2 persons. Do not drag<br />
7<br />
the liner across the ground as this can<br />
cause leaks or other damages (see drawing 1).<br />
• During the setup of the pool liner, point the hose connections or openings in the<br />
direction of the electrical power source. The outer edge of the pool should be within<br />
reach of the pump’s electrical connection.<br />
2. • The frame pool’s legs (8) and beams (6) fall into two groups. The larger diameters are<br />
the horizontal beams that are slid (pushed) into the sleeve openings at the top of the<br />
liner. The smaller diameters are the vertical legs. Both these legs and beams fit into the<br />
T-joints (3).<br />
• Starting at any location, but always working in the same<br />
direction, push the horizontal beam into the sleeve.<br />
Once the beam is centered take one of the T- joints and<br />
using the connection pin (1), attach the joint to one end<br />
of the beam by inserting the pin through the seal (2)<br />
and in the pre-drilled holes. Repeat this procedure in a<br />
circular fashion until all the beams and joints have been<br />
connected (see drawing 2.1).<br />
The last joint connection may be difficult to complete.<br />
You can do it though, if you first simultaneously<br />
raisethe last joint and beam about 2 inches (5 cm).<br />
Now, insert the beam into the joint while lowering the<br />
pieces into position. The beam will easily slide into<br />
the joint (see drawing 2.2). Ensure that the last joint<br />
is fully connected before proceeding to assemble<br />
the legs.<br />
SAVE THESE INSTRUCTIONS Page 9<br />
1<br />
2<br />
3<br />
3<br />
6<br />
1<br />
2.1<br />
2.2<br />
87IO<br />
SETUP INSTRUCTIONS
POOL SETUP (continued)<br />
3. Next slide the vertical legs into the belt loop located<br />
in the middle of the pool liner.<br />
The bottom of the leg should be inside the white<br />
restraining rope (9) located near the liner’s bottom<br />
edge. Exceptions are the 10' (305cm) and 12' (366cm)<br />
size pools. Carefully slide the leg into the belt loop<br />
and place the leg’s bottom inside the rope and then<br />
insert the top of the leg into the bottom of the joint.<br />
Snap the leg into the joint’s holes by aligning the 3.1<br />
holes and the spring-loaded pin. Attach the leg’s end<br />
cap (5) to the bottom of the leg (see drawings 3.1 & 3.2).<br />
4. • Grab hold of the frame pool’s top beams in 2 – 3 locations.<br />
Shake the pool to be sure that all the joints, legs and beams fit<br />
into each other. Ensure that all pins are in position by pushing<br />
them downwards through the holes (see drawing 4.1).<br />
• Pull gently, in an outward direction, at the bottom of the leg;<br />
making sure the leg is inside the restraining rope.<br />
(87IO) ROUND METAL FRAME POOL ENGLISH 7.5” X 10.3” PANTONE 295U 05/21/2009<br />
5. The following applies to pool liners with hose connectors<br />
(16' (488 cm) & below pools). If the pool was purchased without a filter pump, stick two<br />
plugs (11) into the black filter pump outlets. Do this from the inside of the pool so that<br />
water will not run out when filling it.<br />
If the pool was purchased with a filter pump, consult the Krystal Clear Filter Pump<br />
Manual first and then go to step #6.<br />
6. • Before filling the pool with water, ensure that the drain plug inside the pool is closed and<br />
that the drain cap on the outside is screwed on tightly. Fill the pool with no more than 1<br />
inch of water. Check to see whether the water is level.<br />
IMPORTANT: If the water in the pool flows to one side, the pool is not completely<br />
level. Setting up the pool on unlevel ground will cause the pool to tilt resulting in<br />
the sidewall material bulging. If the pool is not completely level, you must drain the<br />
pool, level the area or move the pool to a different area that is level, and re-fill the<br />
pool.<br />
• Smooth out the remaining wrinkles (from inside the pool) by pushing out where the pool<br />
floor and pool sides meet. Or, (from outside pool) reach under the side of the pool ,<br />
grasp the pool floor and pull it out. If the ground cloth is causing the wrinkles, have 2<br />
adults pull from either side to remove all wrinkles.<br />
7. Fill the pool with water up to just below the<br />
sleeve line. (see drawing 4.2).<br />
SAVE THESE INSTRUCTIONS Page 10<br />
3<br />
8<br />
9<br />
5 3.2<br />
WATER LEVEL<br />
IMPORTANT<br />
Before allowing anyone to use the pool, hold a family meeting. Establish a set of<br />
rules that include, at a minimum, the important safety rules and general<br />
aquatic safety information in this manual. Review these rules on a regular basis<br />
and with all users of the pool, including guests.<br />
English<br />
4<br />
4.1<br />
4.2<br />
87IO<br />
SETUP INSTRUCTIONS
ALGAE<br />
PROBLEM DESCRIPTION CAUSE SOLUTION<br />
COLORED<br />
WATER<br />
FLOATING<br />
MATTER IN<br />
WATER<br />
CHRONIC LOW<br />
WATER LEVEL<br />
SEDIMENT ON<br />
POOL BOTTOM<br />
SURFACE DEBRIS<br />
POOL MAINTENANCE & CHEMICALS<br />
• Greenish water.<br />
• Green or black spots<br />
on pool liner.<br />
• <strong>Pool</strong> liner is slippery<br />
and/or has a bad odor.<br />
• Water turns blue,<br />
brown, or black when<br />
first treated with<br />
chlorine.<br />
• Water is cloudy or<br />
milky.<br />
• Level is lower than<br />
on previous day.<br />
• Dirt or sand on pool<br />
floor.<br />
• Leaves, insects etc.<br />
WARNING<br />
(87IO) ROUND METAL FRAME POOL ENGLISH 7.5” X 10.3” PANTONE 295U 05/21/2009<br />
REMEMBER TO<br />
• Protect all pool occupants from possible water-related illnesses by keeping the<br />
pool water clean. Do not swallow the pool water. Always practice good hygiene.<br />
• Keep your pool clean and clear. The pool floor must be visible at all times from<br />
the outside barrier of the pool.<br />
• Keep children away from pool covers to avoid entanglement, drowning, or other<br />
serious injury.<br />
• Chlorine and pH level<br />
need adjustment.<br />
• Copper, iron or<br />
manganese in water<br />
being oxidized by the<br />
added chlorine.<br />
Common.<br />
• "Hard water" caused by a<br />
too high pH level.<br />
• Chlorine content is low.<br />
• Foreign matter in water.<br />
• Rip or hole in pool liner<br />
or hoses.<br />
• Heavy use, getting in<br />
and out of pool.<br />
• <strong>Pool</strong> too close to trees.<br />
English<br />
The maintenance of a proper water balance is the single most important factor in<br />
maximizing the life and appearance of the liner as well as ensuring clean, healthy and<br />
safe water. Proper technique is important for water testing. See your pool professional<br />
for chemical, test kits and testing procedures. Be sure to read and follow the written<br />
instructions from the chemical manufacturer.<br />
1. Never let chlorine come in contact with the liner if it is not completely dissolved. Dissolve<br />
granular or tablet chlorine first in a bucket of water, then add it to the pool water. Likewise<br />
with liquid chlorine; mix it immediately and thoroughly with the pool water.<br />
2. Never mix chemicals together. Add the chemicals to the pool water separately. Thoroughly<br />
dissolve each chemical before adding another one to the water.<br />
3. An Intex pool skimmer and an Intex pool vacuum are available to assist in maintaining<br />
clean pool water. See your pool dealer for these pool accessories.<br />
4. Do not use a pressure washer to clean the pool.<br />
TROUBLESHOOTING<br />
• Super chlorinate with shock<br />
treatment. Correct pH to your<br />
pool store's recommended level.<br />
• Vacuum pool bottom.<br />
• Maintain proper chlorine level.<br />
• Adjust pH to recommended<br />
level.<br />
• Run filter until water is clear.<br />
• Replace cartridge frequently.<br />
• Correct the pH level. Check with<br />
your pool dealer for advice.<br />
• Check for proper chlorine level.<br />
• Clean or replace your filter.<br />
• Repair with patch kit.<br />
• Finger tighten all caps.<br />
• Replace the hoses.<br />
• Use Intex pool vacuum to<br />
clean bottom of pool.<br />
• Use Intex pool skimmer.<br />
SAVE THESE INSTRUCTIONS Page 11<br />
87IO<br />
MAINTENANCE
POOL MAINTENANCE & DRAINAGE<br />
CAUTION<br />
(87IO) ROUND METAL FRAME POOL ENGLISH 7.5” X 10.3” PANTONE 295U 05/21/2009<br />
ALWAYS FOLLOW THE CHEMICAL MANUFACTURER'S<br />
DIRECTIONS, AND THE HEALTH AND HAZARD WARNINGS.<br />
Do not add chemicals if the pool is occupied. This can cause skin or eye irritation.<br />
Concentrated chlorine solutions can damage the pool liner. In no event is Intex Recreation<br />
Corp., Intex Development Co. Ltd., their related companies, authorized agents and service<br />
centers, retailers or employees liable to the buyer or any other party for costs associated<br />
with the loss of pool water, chemicals or water damage. Keep spare filter cartridges on<br />
hand. Replace cartridges every two weeks. We recommend the use of a Krystal Clear<br />
Intex Filter Pump with all of our above-ground-pools.<br />
EXCESSIVE RAIN: To avoid damage to the pool, immediately drain rain water that<br />
causes the water level to be higher than the maximum.<br />
How to Drain Your <strong>Pool</strong> and Long Term Storage<br />
1. Check local regulations for specific directions regarding disposal of swimming pool water.<br />
2. Check to make sure that the drain plug inside the pool is plugged in place.<br />
3. Remove the cap from the drain valve on the outside pool wall.<br />
4. Attach the female end of the garden hose to the patented drain connector.<br />
5. Place the other end of the hose in an area where the water can be safely drained away<br />
from the house.<br />
6. Attach the drain connector to the drain valve. NOTE: The drain connector will push the<br />
drain plug open inside the pool and water will start to drain immediately.<br />
7. Disconnect hose and adapter when finished.<br />
8. Re-insert drain plug in drain valve on inside of pool for storage.<br />
9. Replace drain cap on outside of pool.<br />
10. Reverse set up instructions to disassemble the pool, and remove all plumbing parts.<br />
11. Be sure that the pool and all parts are completely dry before folding. Let it lie in the sun<br />
for an hour (see drawing 5). Sprinkle some talcum powder to prevent the vinyl from<br />
sticking together and to absorb any moisture you may have missed.<br />
12. Create a square shape. Starting at one side, fold one-sixth of liner in on itself twice. Do<br />
the same on the opposite side (see drawings 6.1 & 6.2).<br />
13. Once you have created two opposing folded sides, simply fold one over the other like<br />
closing a book (see drawings 7.1 & 7.2).<br />
14. Fold the two long ends to the middle (see drawing 8).<br />
15. Fold one over the other like closing a book and finally compact the liner (see drawing 9).<br />
16. Store the liner and accessories in a dry, temperature controlled, between 32 degrees<br />
Fahrenheit (0 degrees Celsius) and 104 degrees Fahrenheit (40 degrees Celsius),<br />
storage location.<br />
17. The original packing can be used for storage.<br />
5 6.1 6.2<br />
7.1<br />
English<br />
7.2 8 9<br />
SAVE THESE INSTRUCTIONS Page 12<br />
87IO<br />
STORAGE
WINTER PREPARATIONS<br />
(87IO) ROUND METAL FRAME POOL ENGLISH 7.5” X 10.3” PANTONE 295U 05/21/2009<br />
English<br />
Winterizing your Above Ground <strong>Pool</strong><br />
After usage, you can easily empty and store away your pool in a safe<br />
place. Some people however, choose to leave their pool up all year<br />
round. In cold areas, where freezing temperatures occur, there can be<br />
a risk of ice damage to your pool unit. We therefore recommend you to<br />
drain, disassemble and properly store away the unit, when the<br />
temperature drops below 32 degrees Fahrenheit (0 degrees Celsius).<br />
Also see the section ''How To Drain Your <strong>Pool</strong>''.<br />
Should you choose to leave your pool out, prepare it as follows:<br />
1. Clean the pool water thoroughly. If the type is an Easy Set <strong>Pool</strong> or an<br />
Oval <strong>Frame</strong> <strong>Pool</strong>, make sure that the top ring is properly inflated.<br />
2. Remove the skimmer (if applicable) or any accessories attached to the<br />
threaded strainer connector. Replace strainer grid if necessary. Be sure<br />
all accessories parts are clean and completely dry before storage.<br />
3. Plug the Inlet and Outlet fitting from the inside of the pool with the plug<br />
provided (sizes 16' and below). Close the Inlet and Outlet Plunger Valve<br />
(sizes 17' and above).<br />
4. Remove the ladder (if applicable) and store in a safe place. Be sure the<br />
ladder is completely dry before storage.<br />
5. Remove the hoses that connect the pump and filter to the pool.<br />
6. Add the appropriate chemicals for the winter period. Consult your local<br />
pool dealer as to which chemicals you should use and how to use them.<br />
This can vary greatly per region.<br />
7. Cover pool with Intex <strong>Pool</strong> Cover. IMPORTANT NOTE: INTEX POOL<br />
COVER IS NOT A SAFETY COVER.<br />
8. Clean and drain the pump, filter housing and hoses. Remove and discard<br />
the old filter cartridge. Keep a spare cartridge for the next season.<br />
9. Bring pump and filter parts indoors and store in a safe and dry area,<br />
preferably between 32 degrees Fahrenheit (0 degrees Celsius) and 104<br />
degrees Fahrenheit (40 degrees Celsius).<br />
SAVE THESE INSTRUCTIONS Page 13<br />
87IO<br />
STORAGE
GENERAL AQUATIC SAFETY<br />
(87IO) ROUND METAL FRAME POOL ENGLISH 7.5” X 10.3” PANTONE 295U 05/21/2009<br />
Water recreation is both fun and therapeutic. However, it involves<br />
inherent risks of injury and death. To reduce your risk of injury, read<br />
and follow all product, package and package insert warnings and<br />
English<br />
instructions. Remember, however, that product warnings, instructions<br />
and safety guidelines cover some common risks of water recreation,<br />
but do not cover all instances or risk and or danger.<br />
For additional safeguards, also familiarize yourself with the following<br />
general guidelines as well as guidelines provided by nationally<br />
recognized Safety Organizations:<br />
• Demand constant supervision.<br />
• Learn to swim.<br />
• Take the time to learn CPR and first aid.<br />
• Instruct anyone who is watching your children about potential pool<br />
hazards and about the use of protective devices such as locked doors,<br />
barriers, etc.<br />
• Teach children what to do in case of an emergency.<br />
• Always use common sense and good judgement when enjoying any<br />
water activity.<br />
• Supervise, supervise, supervise.<br />
SAVE THESE INSTRUCTIONS Page 14<br />
87IO<br />
SAFETY GUIDELINES
(87IO) ROUND METAL FRAME POOL ENGLISH 7.5” X 10.3” PANTONE 295U 05/21/2009<br />
English<br />
For service questions or to order replacement parts, please contact the appropriate office<br />
listed below or visit www.intexdevelopment.com for answers to most frequently asked<br />
questions.<br />
AREAS LOCATION AREAS LOCATION<br />
• ASIA INTEX DEVELOPMENT CO. LTD.<br />
8TH FLOOR,<br />
DAH SING FINANCIAL CENTRE,<br />
108 GLOUCESTER ROAD,<br />
WANCHAI, HONG KONG<br />
TEL: 852-28270000<br />
FAX: 852-23118200<br />
E-mail: xmservicesupport@intexcorp.com.cn<br />
Website: www.intexdevelopment.com<br />
• EUROPE INTEX TRADING B.V.<br />
POSTBUS 1075, 4700 BB ROOSENDAAL,<br />
THE NETHERLANDS<br />
TEL: 31-(0)165-593939<br />
FAX: 31-(0)165-593969<br />
E-mail: service@intexcorp.nl<br />
Website: www.intexcorp.nl<br />
• FRANCE INTEX SERVICE FRANCE<br />
(CASS INTEX FRANCE)<br />
52, ROUTE NATIONALE,<br />
39190 BEAUFORT, FRANCE<br />
TEL: 08 90 71 20 39<br />
FAX: 03 84 25 18 09<br />
E-mail: sav@intexcorp.com.fr<br />
Website: www.intex.fr<br />
• GERMANY STEINBACH VERTRIEBSGMBH<br />
AN DER WELLE 4<br />
60322 FRANKFURT<br />
TEL: 0800 468397665<br />
FAX: + 43 (7262) 61439<br />
E-mail: service@intexcorp.de<br />
Website: www.intexcorp.de<br />
• ITALY A & A MARKETING SERVICE<br />
VIA RAFFAELLO SANZIO<br />
20058 VILLASANTA (MI)<br />
TEL: 199 12 19 78<br />
FAX: +39 039 2058204<br />
E-mail: intex@aeamarketingservice.com<br />
Website: www.intexitalia.com<br />
• UK TOY BROKERS LTD<br />
MARKETING HOUSE,<br />
BLACKSTONE ROAD,<br />
HUNTINGDON, CAMBS.<br />
PE29 6EF. UK<br />
TEL: 0844 561 7129<br />
FAX: 01480 414761<br />
E-mail: sales@toybrokers.com<br />
Website: www.intexspares.com<br />
• SWITZERLAND GWM AGENCY<br />
GARTEN-U. WOHNMÖBEL,<br />
RÄFFELSTRASSE 25,<br />
POSTFACH,<br />
CH-8045 ZURICH/SWITZERLAND<br />
TEL: 0900 455456 or +41 44 455 50 60<br />
FAX: +41 44 455 50 65<br />
E-mail: gwm@gwm.ch<br />
Website: www.gwm.ch<br />
• SPAIN KOKIDO BVI LIMITED<br />
C/ LAS MORERAS PARCELA 1 NAVES 7-10<br />
POL. IND. CAMPORROSSO<br />
28350 CIEMPOZUELOS.<br />
MADRID<br />
TEL: 34 902 35 10 45<br />
FAX: +34 902 45 15 60<br />
E-mail: info@kokido.com<br />
• PORTUGAL KOKIDO BVI LIMITED<br />
AVENIDA ANTÓNIO AUGUSTO AGUIAR,<br />
Nº163 - 5ºDTº<br />
1050-014 LISBOA<br />
PORTUGAL<br />
TEL: 351 707 200 936<br />
FAX: 351 213 519 550<br />
E-mail: infopt@kokido.com<br />
• AUSTRALIA HUNTER OVERSEAS PTY LTD<br />
LEVEL 1, 225 BAY STREET,<br />
BRIGHTON, VICTORIA,<br />
AUSTRALIA<br />
TEL: 61-3-9596-2144 or 1800-224-094<br />
FAX: 61-3-9596-2188<br />
E-mail: enquiries@hunteroverseas.com.au<br />
Website: www.hunteroverseas.com.au<br />
• NEW ZEALAND HAKA NEW ZEALAND LIMITED<br />
UNIT 4, 11 ORBIT DIVE, ALBANY,<br />
AUCKLAND 0757, NEW ZEALAND<br />
TEL: 649-4159213<br />
FAX: 649-4159212<br />
E-mail: geoff@hakanz.co.nz<br />
• MIDDLE EAST FIRST GROUP INTERNATIONAL<br />
REGION AL MOOSA GROUP BUILDING, 1ST<br />
FLOOR, OFFICE 102 & 103, UMM HURAIR<br />
ROAD, KARAMA, DUBAI, UAE<br />
TEL: 00971-4-3373322<br />
FAX: 00971-4-3375115<br />
E-mail: info@firstgroupinternational.com<br />
Website: www.firstgroupinternational.com<br />
• SOUTH AFRICA WOOD & HYDE<br />
15-17 PACKER AVENUE, INDUSTRIA 2,<br />
CAPE TOWN, SOUTH AFRICA 7460<br />
TEL: 27-21-0800-204-692<br />
FAX: 27-21-505-5600<br />
E-mail: ygoldman@melbro.co.za<br />
• CHILE / URUGUAY COMEXA S.A.<br />
EL JUNCAL 100, PARQUE INDUSTRIAL PORTEZUELO,<br />
QUILICURA, SANTIAGO, CHILE.<br />
TEL: 600-822-0700<br />
E-mail: serviciotecnico@silfa.cl<br />
• ARGENTINA JARSE INDUSTRIAL Y COMERCIAL S.A<br />
MANUEL GARCIA Nº124, PARQUE PATRICO,<br />
BUENOS AIRES, ARGENTINA<br />
TEL: 4942-2238 (interno 106);<br />
TEL: 4942-2238( interno 145)<br />
E-mail: Martín Cosoleto: mcosoleto@jarse.com.ar<br />
E-mail: Daniel Centurion: dcenturion@jarse.com.ar<br />
• PERU COMEXA S.A.<br />
AVENIDA COMANDANTE ESPINAR 142,<br />
MIRAFLORES, LIMA, PERÚ<br />
TEL: 446-9014<br />
• SAUDI ARABIA SAUDI ARABIAN MARKETING &<br />
AGENCIES CO. LTD.<br />
PRINCE AMIR MAJED STREET,<br />
AL-SAFA DISTRICT. JEDDAH,<br />
KINGDOM OF SAUDI ARABIA<br />
TEL: 966-2-693 8496<br />
FAX: 966-2-271 4084<br />
E-mail: toy@samaco.com.sa<br />
Website: www.samaco.com.sa<br />
• AUSTRIA STEINBACH VERTRIEBSGMBH<br />
AISTINGERSTRAßE 2<br />
4311 SCHWERTBERG<br />
TEL: 0800 468397665<br />
FAX: + 43 (7262) 61439<br />
E-mail: service@intexcorp.at<br />
Website: www.intexcorp.at<br />
• CZECH REPUBLIC / INTEX TRADING S.R.O.<br />
EASTERN EUROPE BENESOVSKA 23,<br />
101 00 PRAHA 10,<br />
CZECH REPUBLIC<br />
TEL: +420-267 313 188<br />
FAX: +420-267 312 552<br />
E-mail: info@intexcorp.cz<br />
• BELGIUM N.V. SIMBA-DICKIE BELGIUM S.A.<br />
MOESKROENSESTEENWEG 383C,<br />
8511 AALBEKE, BELGIUM<br />
TEL: 0800 92088<br />
FAX: 32-56.26.05.38<br />
E-mail: intex@nicotoy.be<br />
E-mail: intexsupport@nicotoy.be<br />
• DENMARK K.E. MATHIASEN A/S<br />
SINTRUPVEJ 12, DK-8220<br />
BRABRAND, DENMARK<br />
TEL: +45 89 44 22 00<br />
FAX: +45 86 24 02 39<br />
E-mail: intex@keleg.dk<br />
Website: www.intexnordic.com<br />
• SWEDEN LEKSAM AB<br />
BRANDSVIGSGATAN 6,<br />
S-262 73 ÄNGELHOLM,<br />
SWEDEN<br />
TEL: +46 431 44 41 00<br />
FAX: +46 431 190 35<br />
E-mail: intex@leksam.se<br />
Website: www.intexnordic.com<br />
• NORWAY NORSTAR AS<br />
PINDSLEVEIEN 1,<br />
N-3221 SANDEFJORD,<br />
NORWAY<br />
TEL: +47 33 48 74 10<br />
FAX: +47 33 48 74 11<br />
E-mail: intex@norstar.no<br />
Website: www.intexnordic.com<br />
• FINLAND NORSTAR OY<br />
SUOMALAISTENTIE 7,<br />
FIN-02270 ESPOO,<br />
FINLAND<br />
TEL: +358 9 8190 530<br />
FAX: +358 9 8190 5335<br />
E-mail: info@norstar.fi<br />
Website: www.intexnordic.com<br />
• RUSSIA LLC BAUER<br />
KIEVSKAYA STR., 20,<br />
121165 MOSCOW, RUSSIA<br />
TEL: 099-249-9400/8626/9802<br />
FAX: 095-742-8192<br />
E-mail: intex.russia@gmail.com<br />
Website: www.intex.su<br />
• POLAND KATHAY HASTER<br />
UL. LUTYCKA 3, 60-415 POZNAN<br />
TEL: +48 61 8498 381/380<br />
FAX: +48 61 8474 487<br />
E-mail: inx@kathay.com.pl<br />
Website: www.intexpoland.pl<br />
• HUNGARY RECONTRA LTD./RICKI LTD.<br />
H-1113 BUDAPEST, DARÓCZI ÚT 1-3,<br />
HUNGARY<br />
TEL: +361 372 5200/113<br />
FAX: +361 209 2634<br />
E-mail: service@recontra.hu<br />
• BRASIL KONESUL MARKETING & SALES LTDA<br />
RUA ANTONIO DAS CHAGAS,<br />
1.528 - CEP. 04714-002,<br />
CHÁCARA SANTO ANTONIO - SÃO<br />
PAULO - SP - BRASIL<br />
TEL: 55 (11) 5181 4646<br />
FAX: 55 (11) 5181 4646<br />
E-mail: sacintexbrasil@uol.com.br<br />
• ISRAEL ALFIT TOYS LTD<br />
MOSHAV NEHALIM,<br />
MESHEK 32, 49950, ISRAEL<br />
TEL: +972-3-9076666<br />
FAX: +972-3-9076660<br />
E-mail: michald@chagim.co.il<br />
SAVE THESE INSTRUCTIONS Page 15<br />
87IO