EQUATOR® Convective Warmer - Smiths Medical
EQUATOR® Convective Warmer - Smiths Medical
EQUATOR® Convective Warmer - Smiths Medical

You also want an ePaper? Increase the reach of your titles
YUMPU automatically turns print PDFs into web optimized ePapers that Google loves.
S E C T I O N 4 • A s s e m b l y I n s t r u c t i o n s<br />
Step 2: Attach the Hose to the <strong>Convective</strong> <strong>Warmer</strong><br />
1 Attach the hose (a) to the air outlet. Push the hose firmly into the<br />
outlet.<br />
2 Move the retainer clip (b) next to the hose. Then lift the clip up<br />
over the lip of the hose connector (c) to secure the hose to the air<br />
outlet.<br />
3 Connect the thermistor cable from the hose to the thermistor<br />
receptacle (d). Align the three prongs in the thermistor with the<br />
three holes in the receptacle, then turn the knurled knob clockwise<br />
on the thermistor to secure it in the receptacle.<br />
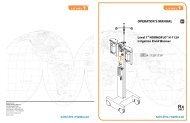
Step 3: Install the <strong>Convective</strong> <strong>Warmer</strong><br />
The convective warmer can be placed on a flat hard surface, mounted to<br />
an I.V. pole, or mounted to the EQUATOR ® <strong>Convective</strong> <strong>Warmer</strong> cart.<br />
Assemble the <strong>Convective</strong> <strong>Warmer</strong> Cart<br />
1 Place the pole (a) on the wheels.<br />
2 Insert washers (2) and bolt (b) and tighten.<br />
3 Place the convective warmer (c) on the pole and turn the clamp to<br />
tighten.<br />
4 Check the tightness of the convective warmer to ensure it is securely<br />
clamped to the pole.<br />
10 EQUATOR ® <strong>Convective</strong> <strong>Warmer</strong> | Operator’s Manual<br />
b<br />
c<br />
a<br />
d<br />
c<br />
a<br />
b