Operator's Manual - Smiths Medical
Operator's Manual - Smiths Medical
Operator's Manual - Smiths Medical

You also want an ePaper? Increase the reach of your titles
YUMPU automatically turns print PDFs into web optimized ePapers that Google loves.
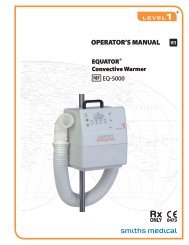
EQUATOR ®<br />
Convective Warmer<br />
< EQ-5000<br />
l ®<br />
OPERATOR’S MANUAL<br />
PN 4533900-EN Rev. 009<br />
s
EQUATOR ® Convective Warmer Operator’s <strong>Manual</strong><br />
Part Number: 4533900-EN Rev. 009 (2010-12)<br />
This revision supercedes all previous revisions.<br />
G e n e r a l I n f o r m a t i o n<br />
Every effort has been made to ensure that the information in this manual is accurate and details provided<br />
are correct at the time of printing. The company, however, reserves the right to improve the equipment<br />
shown. Mention of third-party products is for informational purposes only and constitutes neither an<br />
endorsement nor a recommendation. <strong>Smiths</strong> <strong>Medical</strong> ASD, Inc. (“<strong>Smiths</strong> <strong>Medical</strong>”) assumes no<br />
responsibility with regard to the performance or use of these products.<br />
The <strong>Smiths</strong> <strong>Medical</strong> and Level 1 design marks, and EQUATOR and Snuggle Warm are trademarks of the<br />
<strong>Smiths</strong> <strong>Medical</strong> family of companies. The symbol ® indicates the trademark is registered in the U.S. Patent<br />
and Trademark office and certain other countries.<br />
All other names and marks mentioned are the trade names, trademarks, or service marks of the respective<br />
owners.<br />
For further information, please call your local <strong>Smiths</strong> <strong>Medical</strong> distributor or <strong>Smiths</strong> <strong>Medical</strong> direct at<br />
1-800-258-5361 or +1-781-878-8011.<br />
©2010 <strong>Smiths</strong> <strong>Medical</strong> family of companies. All rights reserved.<br />
ii EQUATOR ® Convective Warmer| Operator’s <strong>Manual</strong>
Contents<br />
1. About this <strong>Manual</strong> 1<br />
Indications for Use 1<br />
Conventions Used in this <strong>Manual</strong> 1<br />
2. Description 2<br />
Convective Warmer Components 2<br />
Snuggle Warm ® Convective Warming Blankets 3<br />
Accessories 4<br />
3. Important Safety Information 5<br />
4. Assembly Instructions 9<br />
Step 1: Unpack the Convective Warmer 9<br />
Step 2: Attach the Hose to the Convective Warmer 10<br />
Step 3: Install the Convective Warmer 10<br />
Assemble the Convective Warmer Cart 10<br />
Mount to an I.V. Pole 11<br />
Install the Power Cord 11<br />
Step 4: Perform Electrical Safety Tests 11<br />
5. Operation 12<br />
Control Panel 12<br />
Controls, Indicators, and Displays 13<br />
6. Operating Instructions 14<br />
Step 1: Set Up for Use 14<br />
Step 2: Determine the Convective Warming Blanket Size 15<br />
Step 3: Position the Convective Warming Blanket 15<br />
Step 4: Attach the Hose to Convective Warming Blanket 16<br />
Step 5: Attach the Sheet Clip to the Sheet Under the Patient 16<br />
Step 6: Using the Convective Warmer 17<br />
Step 7: After Use 19<br />
Storage 19<br />
7. Troubleshooting 20<br />
8. Maintenance 22<br />
Clean the Convective Warmer and Hose 22<br />
Replace the Air Filter (F3-5000) 23<br />
Functional Tests 24<br />
Test 1: Self-Test Sequence 24<br />
Test 2: Disconnect Indicator Test 25<br />
Test 3: High (44°C) Temperature Test 25<br />
Test 4: Medium (40°C) Temperature Test 25<br />
Test 5: Low (36°C) Temperature Test 26<br />
Test 6: Low Over Temperature and Under Temperature Test 26<br />
Test 7: Medium Over Temperature and Under Temperature Test 26<br />
Test 8: High Over Temperature and Under Temperature Test 26<br />
Test 9: Ambient Over Temperature Test 27<br />
C o n t e n t s<br />
EQUATOR ® Convective Warmer | Operator’s <strong>Manual</strong> iii
C o n t e n t s<br />
9. Accessories 28<br />
Cord Wrap (CW-5000) 28<br />
Sheet Clip (SC-5000) 28<br />
10. Limited Warranty 29<br />
11. Service 31<br />
Non-Warranty Work 31<br />
Additional Documentation 31<br />
Disposal Information 32<br />
Service Contacts 32<br />
USA/Canada 32<br />
European Representative 32<br />
Australian Representative 32<br />
12. Specifications 33<br />
System Specifications 33<br />
Electromagnetic Environmental Recommendations 34<br />
13. Symbols 35<br />
A. Convective Warming Blanket Identification Chart A-1<br />
B. Position the Convective Warming Blanket B-1<br />
C. Ordering Information C-1<br />
iv EQUATOR ® Convective Warmer | Operator’s <strong>Manual</strong>
SECTION 1<br />
About this <strong>Manual</strong><br />
S E C T I O N 1 • A b o u t t h i s M a n u a l<br />
This Operator’s <strong>Manual</strong> describes the assembly, use, and maintenance of the EQUATOR ® Convective<br />
Warmer. This manual is intended for use by individuals trained in the healthcare and biomedical professions.<br />
WARNING: These instructions contain important information for safe use of the product. Read<br />
the entire contents of this Operator’s <strong>Manual</strong>, including Warnings and Cautions, before using<br />
this product. Failure to properly follow warnings, cautions, and instructions could result in death<br />
or serious injury to the patient.<br />
Indications for Use<br />
The EQUATOR ® 5000 Convective Warmer System is intended for thermal regulation of a patient's<br />
temperature to prevent hypothermia by a warm air heated blanket system to reduce cold discomfort during<br />
and after surgical procedures. It intended for use by appropriately trained healthcare professionals in clinical<br />
environments.<br />
Conventions Used in this <strong>Manual</strong><br />
This manual uses the following text and text conventions:<br />
Convention Description<br />
Note A Note statement alerts the user to important information that requires attention.<br />
CONTRAINDICATION A Contraindication statement alerts the user to conditions when the device<br />
should not be used.<br />
WARNING A Warning statement alerts the user to conditions that may cause death or<br />
serious injury to the patient or user.<br />
CAUTION A Caution statement alerts the user to conditions that may cause malfunction,<br />
failure, or damage to the device.<br />
EQUATOR ® Convective Warmer | Operator’s <strong>Manual</strong> 1
S E C T I O N 2 • D e s c r i p t i o n<br />
SECTION 2<br />
Description<br />
The EQUATOR ® Convective Warming system consists of a high-flow convective warmer with hose-end<br />
temperature control, a convective warming blanket, and accessories.<br />
The convective warmer draws ambient-temperature air through a particulate air filter. The filtered air is<br />
warmed to a selected temperature. The warmed air enters the convective warming blanket through the hose<br />
and is distributed through delivery channels. Perforations on the patient side of the air delivery channels in<br />
the blanket gently disperse warm air over the patient.<br />
The convective warmer has three outlet temperature settings, which provide flexibility in patient treatment:<br />
36°C, 40°C, and 44°C. These three temperature settings are servo-controlled by thermistors placed at the end<br />
of the hose where the hose connects to the convective warming blanket. A fourth temperature setting delivers<br />
ambient-temperature air. The temperature indicated on the control panel is the temperature of the air being<br />
delivered to the blanket at the end of the hose. A control thermistor adjusts the power applied to the heater to<br />
maintain the selected temperature. This enables the system to maintain the selected temperature under<br />
variations in ambient temperature.<br />
A safety thermistor provides a signal to a separate high-temperature comparison circuit. The safety thermistor<br />
activates and causes an alarm if the temperature exceeds the set point. The safety circuit provides an<br />
independent means of shutoff, which discontinues power to the heater and motor. This prevents patient<br />
exposure to excessive temperatures.<br />
Convective Warmer Components<br />
Front View<br />
1 Handle - used to lift and move the convective warmer<br />
2 Control Panel - contains controls and displays used during<br />
operation<br />
EQUATOR<br />
CONVECTIVE WARMING<br />
2 EQUATOR ® Convective Warmer | Operator’s <strong>Manual</strong><br />
1<br />
2
Rear View<br />
1 Thermistor Receptacle - connection for the thermistor cable<br />
2 Pole Clamp - mounts the convective warmer on a pole<br />
3 Air Outlet - opening where the hose attaches to the convective<br />
warmer<br />
4 Hose Retainer Clip - secures the hose to the air outlet<br />
5 Power Cord Lock - secures the power cord to the receptacle<br />
6 Power Cord Receptacle - connector for the power cord<br />
Rear View with Hose Attached<br />
7 Thermistor Cable - connection from the hose used to transmit<br />
a signal from the hose end<br />
8 Hose - transports air to the convective warming blanket<br />
9 Hose Nozzle - hose end that attaches to the convective<br />
warming blanket<br />
Snuggle Warm ® Convective Warming Blankets<br />
S E C T I O N 2 • D e s c r i p t i o n<br />
The convective warming blanket consists of two layers of non-woven polypropylene fabric coated with a layer<br />
of polyethylene. The layers are bonded together to form a distribution network of air delivery channels. The<br />
warm air is distributed around the blanket through the delivery channels and exits the blanket through a<br />
specially designed series of perforations in the patient side of the blanket. The distribution of air is designed to<br />
minimize temperature differences throughout the blanket. Refer to Appendix A, Convective Warming<br />
Blanket Identification Chart, for the list of blankets available.<br />
EQUATOR ® Convective Warmer | Operator’s <strong>Manual</strong> 3<br />
1<br />
2<br />
3<br />
4<br />
5<br />
6<br />
7<br />
8<br />
9
S E C T I O N 2 • D e s c r i p t i o n<br />
Accessories<br />
The convective warmer is supplied with the following accessories:<br />
• Sheet Clip Assembly - secures the hose to bed sheets to keep the convective warming blanket in place<br />
• Cord Wrap - keeps the power cord wrapped together<br />
4 EQUATOR ® Convective Warmer | Operator’s <strong>Manual</strong>
SECTION 3<br />
Important Safety Information<br />
S E C T I O N 3 • I m p o r t a n t S a f e t y I n f o r m a t i o n<br />
This section covers information for prescribers and guidelines for safe use of the EQUATOR ® Convective<br />
Warmer.<br />
CONTRAINDICATIONS<br />
• Thermal injury may occur if convective warming therapy is applied to lower extremities during<br />
aortic cross-clamping procedures.<br />
• Thermal injury may occur if convective warming therapy is applied to ischemic limbs.<br />
WARNINGS<br />
Death or serious injury may occur to the patient or users if these warnings are not followed:<br />
• These instructions contain important information for safe use of the product. Read the entire<br />
contents of this Operator’s <strong>Manual</strong>, including Warnings and Cautions, before using this<br />
product. Failure to properly follow warnings, cautions and instructions could result in death or<br />
serious injury to the patient.<br />
• Electrocution Hazard. There are no user-serviceable parts inside the enclosure. Only<br />
competent personnel knowledgeable in the safety procedures required for servicing live<br />
primary MAINS parts shall be allowed to open the enclosure.<br />
• Grounding reliability can only be achieved when the MAINS power cord is connected to a<br />
properly grounded receptacle. Risk of electrical shock exists if the equipment is not connected<br />
to a properly grounded receptacle.<br />
• Exposed conductor on the MAINS power cord can cause an electrocution hazard. Remove the<br />
device from service if the MAINS power cord has exposed wires.<br />
• The convective warmer meets the international electrical interference requirements of<br />
EN 60601-1-2. MRI, Portable and mobile RF communications equipment, and other such<br />
devices can affect the convective warmer.<br />
• Do not operate the convective warmer in the presence of a flammable anesthetic mixture with<br />
air, oxygen, or nitrous oxide. The risk of explosion exists if the device is operated in a<br />
potentially explosive environment.<br />
continued<br />
EQUATOR ® Convective Warmer | Operator’s <strong>Manual</strong> 5
S E C T I O N 3 • I m p o r t a n t S a f e t y I n f o r m a t i o n<br />
WARNINGS (continued)<br />
• To prevent fire hazard and possible damage to the convective warmer, use only fuses<br />
specified. Only competent personnel knowledgeable in the safety procedures required for<br />
servicing live primary MAINS parts shall be allowed to open the enclosure.<br />
• Ensure that the convective warmer IV pole mounting clamp is properly tightened before each<br />
use. Failure to securely mount the convective warmer onto the I.V. pole may cause it to slide<br />
down the I.V. pole, and injure the patient or user.<br />
• Do not mount the convective warmer higher than 117cm (46") on the IV pole. For<br />
convenience, 117cm (46") is indicated by a black mark on the power cord. Mounting the<br />
convective warmer above 117cm (46") may result in instability of the pole and cause tipping<br />
that may injure the patient or user.<br />
• Do not change the air filter while the convective warmer is operating. Risk of thermal injury<br />
exists if the device is operating.<br />
• This device can only be used in conjunction with a Snuggle Warm ® convective warming<br />
blanket. For the safe operation of this device, the user must follow all warnings, cautions,<br />
and instructions provided in the Instructions for Use supplied with the compatible convective<br />
warming blanket, in addition to this <strong>Operator's</strong> <strong>Manual</strong>.<br />
• Convective warming blankets can only be used in conjunction with the EQUATOR ® convective<br />
warmer (EQ-5000) and the Snuggle Warm ® convective warmer (SW-4000). For the safe<br />
operation of the blankets, the user must follow all warnings, cautions, and instructions<br />
provided in the Instructions for Use supplied with the compatible convective warmer, in<br />
addition to this Operator’s <strong>Manual</strong>.<br />
• Always start therapy on the lowest non-ambient temperature setting to prevent thermal<br />
injury. Increase the temperature setting, if required, using core body temperature and<br />
cutaneous response of skin in contact with the convective warming blanket as indicators.<br />
• To prevent thermal injury, do not use the highest temperature setting when treating patients<br />
who have decreased sensation, are nonsensate, or have poor perfusion.<br />
• Monitor patient's body core temperature, vital signs, and observe cutaneous response at<br />
regular intervals to prevent thermal injury. If erythema or instability in vital signs is evident,<br />
decrease the temperature setting or discontinue use of convective warming therapy.<br />
• To prevent thermal injury in hypotensive or hypoperfused patients, observe cutaneous<br />
response more frequently. Reduce the temperature setting or discontinue use of convective<br />
warming therapy if instability in vital signs or erythema occurs.<br />
• If the patient's nose or mouth is positioned against the convective warming blanket or the<br />
plastic drape, closely monitor the patient's breathing to prevent suffocation injury.<br />
continued<br />
6 EQUATOR ® Convective Warmer | Operator’s <strong>Manual</strong>
S E C T I O N 3 • I m p o r t a n t S a f e t y I n f o r m a t i o n<br />
WARNINGS (continued)<br />
• Cover all open wounds in contact with the convective warming blanket to prevent airborne<br />
contamination.<br />
• The hose nozzle MUST be connected to a Snuggle Warm ® convective warming blanket. Do<br />
not treat patients with the hose alone. Thermal injury may occur.<br />
• Use only one convective warmer and one hose. Use of multiple convective warmers in<br />
multiple inlet ports of the same convective warming blanket may cause damage to the<br />
blanket and thermal injury to the patient.<br />
• To prevent thermal injury, do not allow any of the patient's body parts to rest on the active<br />
hose inlet.<br />
• Do not place objects onto the convective warming blanket that will obstruct air flow. Items on<br />
the blanket can produce localized pressure on the patient’s skin, reducing cutaneous blood<br />
flow and causing thermal injury to the patient<br />
• For underbody blankets do not place objects, other than the patient’s body, onto the<br />
convective warming blanket that will obstruct air flow. Items on the blanket can produce<br />
localized pressure on the patient’s skin, reducing cutaneous blood flow and causing thermal<br />
injury to the patient.<br />
• For the SW-2013 Adult Underbody Convective Warming Blanket, always keep the arms at the<br />
patient’s side. Do not allow the patient’s arms to extend outside the blanket as they may<br />
obstruct airflow through the blanket. Airflow obstruction may result in insufficient patient<br />
warming and loss of therapy.<br />
• When replacing the hose, always disconnect the thermistor cable attached to the old hose. Be<br />
sure to attach the hose and thermistor cable from the new hose, prior to using the device.<br />
Never allow the use of two hoses where one hose is inserted in the air outlet of the device<br />
while the thermistor cable from another hose is connected to the device. Failure to replace<br />
the hose without replacing the associated thermistor cable may result in an uncontrolled<br />
temperature that may cause a serious burn to the patient.<br />
• Always place the perforated side of the convective warming blanket, the side with small holes,<br />
towards the patient. Failure to do so may result in thermal injury.<br />
• Do not use a convective warming blanket over transdermal medications as this may lead to<br />
increased drug delivery that may result in patient injury or death.<br />
• The convective warming blanket is for single-use only. Reusing the blanket may increase the<br />
risk of cross contamination.<br />
• Use with the EQUATOR ® convective warmer (EQ-5000) and the Snuggle Warm ® convective<br />
warmer (SW-4000). Using non-compatible convective warmers may cause damage to the<br />
convective warming blanket and thermal injury to the patient.<br />
continued<br />
EQUATOR ® Convective Warmer | Operator’s <strong>Manual</strong> 7
S E C T I O N 3 • I m p o r t a n t S a f e t y I n f o r m a t i o n<br />
WARNINGS (continued)<br />
• Do not sterilize convective warming blankets. Sterilizing blankets may damage the blanket<br />
and may cause thermal injury to the patient.<br />
• If Over Temperature audible alarm sounds and/or red Over Temperature alarm indicator<br />
illuminates, discontinue use of the convective warmer to prevent thermal injury to the patient.<br />
Remove the device from service. Contact <strong>Smiths</strong> <strong>Medical</strong> or your local <strong>Smiths</strong> <strong>Medical</strong><br />
distributor.<br />
• If the convective warmer does not perform its self-test properly, fails to operate, or stops<br />
while running, discontinue use of the convective warmer to prevent thermal injury to the<br />
patient. Remove the device from service. Contact <strong>Smiths</strong> <strong>Medical</strong> or your local <strong>Smiths</strong> <strong>Medical</strong><br />
distributor.<br />
• The convective warmer must be calibrated by competent personnel authorized by <strong>Smiths</strong><br />
<strong>Medical</strong>. Failure to calibrate the device correctly may result in thermal injury to the patient.<br />
• Do not use the SW-2008 convective warming blanket if the package is damaged or open.<br />
Sterility may be compromised.<br />
CAUTIONS<br />
Malfunction, failure, or damage to the device may occur if these cautions are not followed:<br />
• Do not use alcohol or other strong solvents to clean the hose or exterior surfaces. These<br />
solutions may damage labels and other parts.<br />
• Never use organic solvents (e.g., acetone), strong acids, or bases to clean any portion of the<br />
convective warmer.<br />
• Do not place the convective warmer directly under a faucet or use a faucet sprayer to rinse.<br />
Never spray cleaning or other fluids into openings on the convective warmer or into the<br />
external connectors.<br />
• <strong>Medical</strong> devices require specific material characteristics to perform as intended. These<br />
characteristics have been verified for single use only. Any attempt to re-process the device for<br />
subsequent re-use may adversely affect the integrity of the device or lead to deterioration in<br />
performance.<br />
• Federal (U.S.A.) law restricts this device to sale by or on the order of a physician.<br />
8 EQUATOR ® Convective Warmer | Operator’s <strong>Manual</strong>
SECTION 4<br />
Assembly Instructions<br />
S E C T I O N 4 • A s s e m b l y I n s t r u c t i o n s<br />
The EQUATOR Convective Warmer must be assembled and tested by authorized <strong>Smiths</strong> <strong>Medical</strong><br />
personnel, an authorized distributor of <strong>Smiths</strong> <strong>Medical</strong>, or competent personnel prior to placing the<br />
convective warmer in service. Read through the instructions completely prior to assembling the convective<br />
warmer.<br />
The following steps describe how to assemble and do preliminary set up of the convective warmer.<br />
Step 1: Unpack the Convective Warmer<br />
1 Check the contents and verify that all components are present. If any parts are missing or damaged, do<br />
not use the convective warmer. Contact <strong>Smiths</strong> <strong>Medical</strong> for replacement parts. Refer to the following list<br />
of components that are part of the convective warmer:<br />
• EQUATOR Convective Warmer<br />
• <strong>Operator's</strong> <strong>Manual</strong><br />
• Power Cord<br />
• Hose<br />
• Sheet Clip Assembly<br />
• Cord Wrap<br />
Note: After unpacking all the contents, recycle packaging material according to hospital policy for<br />
recyclable materials.<br />
EQUATOR ® Convective Warmer | Operator’s <strong>Manual</strong> 9
S E C T I O N 4 • A s s e m b l y I n s t r u c t i o n s<br />
Step 2: Attach the Hose to the Convective Warmer<br />
1 Attach the hose (a) to the air outlet. Push the hose firmly into the<br />
outlet.<br />
2 Move the retainer clip (b) next to the hose. Then lift the clip up<br />
over the lip of the hose connector (c) to secure the hose to the air<br />
outlet.<br />
3 Connect the thermistor cable from the hose to the thermistor<br />
receptacle (d). Align the three prongs in the thermistor with the<br />
three holes in the receptacle, then turn the knurled knob clockwise<br />
on the thermistor to secure it in the receptacle.<br />
Step 3: Install the Convective Warmer<br />
The convective warmer can be placed on a flat hard surface, mounted to<br />
an I.V. pole, or mounted to the EQUATOR ® Convective Warmer cart.<br />
Assemble the Convective Warmer Cart<br />
1 Place the pole (a) on the wheels.<br />
2 Insert washers (2) and bolt (b) and tighten.<br />
3 Place the convective warmer (c) on the pole and turn the clamp to<br />
tighten.<br />
4 Check the tightness of the convective warmer to ensure it is securely<br />
clamped to the pole.<br />
10 EQUATOR ® Convective Warmer | Operator’s <strong>Manual</strong><br />
b<br />
c<br />
a<br />
d<br />
c<br />
a<br />
b
S E C T I O N 4 • A s s e m b l y I n s t r u c t i o n s<br />
WARNINGS<br />
• Do not mount the convective warmer higher than 117cm (46") on the IV pole. For convenience,<br />
117cm (46") is indicated by a black mark on the power cord. Mounting the convective warmer<br />
above 117cm (46") may result in instability of the pole and cause tipping that may injure the<br />
patient or user.<br />
• Ensure that the convective warmer I.V. pole mounting clamp is properly tightened before each<br />
use. Failure to securely mount the convective warmer onto the I.V. pole may cause it to slide<br />
down the I.V. pole, and injure the patient or user.<br />
Mount to an I.V. Pole<br />
Note: Do not place the convective warmer higher than 117cm (46")<br />
from the floor.<br />
1 Place the convective warmer, on the pole and turn the clamp (d) to<br />
tighten.<br />
2 Check the tightness of the Convective Warmer to ensure it is securely<br />
clamped to the pole.<br />
WARNINGS<br />
• Grounding reliability can only be achieved when the MAINS power cord is connected to a<br />
properly grounded receptacle. Risk of electrical shock exists if the equipment is not connected<br />
to a properly grounded receptacle resulting in death or serious injury to the patient or user.<br />
Install the Power Cord<br />
1 Insert the plug on the power cord (e) into the power cord receptacle on<br />
the rear of the convective warmer.<br />
2 Push the power cord lock over the plug to secure it in the receptacle.<br />
Step 4: Perform Electrical Safety Tests<br />
Perform all applicable electrical safety tests as required per institutional procedure. Electrical safety check<br />
must be performed by competent personnel authorized by the institution to perform such testing. These tests<br />
include, but are not limited to: leakage current, ground bond test, and hypot. Refer to the EQUATOR <br />
Convective Warmer Service <strong>Manual</strong> (PN 4533902-GB) for further information about electrical safety testing.<br />
Perform electrical safety checks on a routine basis according to institutional policy.<br />
EQUATOR ® Convective Warmer | Operator’s <strong>Manual</strong> 11<br />
d<br />
e
S E C T I O N 5 • O p e r a t i o n<br />
SECTION 5<br />
Operation<br />
Operation of the EQUATOR ® Convective Warmer is monitored and controlled by the control panel. This<br />
section describes the control panel and the modes of operation.<br />
Control Panel<br />
The Control Panel provides the following controls, indicators, and displays used during operation of the<br />
convective warmer.<br />
1 Power ON/OFF Buttons<br />
2 Temperature Setting Buttons<br />
3 Operation Indicators<br />
4 Temperature Display<br />
On some convective warmers the control panel may contain the Elapsed Time Display (5). This function<br />
displays in hours (h = hours) the cumulative time use of the convective warmer.<br />
12 EQUATOR ® Convective Warmer | Operator’s <strong>Manual</strong>
Controls, Indicators, and Displays<br />
S E C T I O N 5 • O p e r a t i o n<br />
The following table defines each control, indicator, and display and the modes of operation.<br />
Control/Indicator Definition<br />
Power ON Button<br />
The green button powers ON the convective warmer.<br />
Power OFF Button<br />
The orange button powers OFF operating components of the convective warmer.<br />
Note: To remove all power from the convective warmer, the MAINS power cord must be<br />
removed from the electrical receptacle.<br />
Ambient Air Temperature Setting Button<br />
When selected, the heater is turned off and the motor still operates (air flows).<br />
36°C Temperature Setting Button<br />
When selected, the air temperature is set to 36°C at the hose end.<br />
40°C Temperature Setting Button<br />
When selected, the air temperature is set to 40°C at the hose end.<br />
44°C Temperature Setting Button<br />
When selected, the air temperature is set to 44°C at the hose end.<br />
Over Temperature Alarm Indicator<br />
If the hose end temperature is more than 3°C (± 1°C) above the selected temperature, the<br />
indicator illuminates, a continuous audible alarm sounds, and the heater and motor shut off.<br />
Under Temperature Indicator<br />
If the hose end temperature is more than 3°C (± 1°C) below the selected temperature, this<br />
indicator flashes.<br />
Disconnect Indicator<br />
If the thermistor cable or the hose is not attached properly, this indicator illuminates, an<br />
audible alarm sounds and repeats approximately every five seconds, and the heater and<br />
motor shut off.<br />
If the heater has an open wire circuit, this indicator illuminates, an audible alarm sounds and<br />
repeats approximately every five seconds, the heater shuts off, but the motor continues to<br />
operate (air flows).<br />
Hose End Temperature Display<br />
Displays the temperature of the air at the hose end.<br />
EQUATOR ® Convective Warmer | Operator’s <strong>Manual</strong> 13
S E C T I O N 6 • O p e r a t i n g I n s t r u c t i o n s<br />
SECTION 6<br />
Operating Instructions<br />
The Operating Instructions for the EQUATOR ® Convective Warmer are grouped into seven segments. Read<br />
through each segment before performing a procedure.<br />
Step 1: Set Up for Use<br />
WARNINGS<br />
• When replacing the hose, always disconnect the thermistor cable attached to the old hose. Be<br />
sure to attach the hose and thermistor cable from the new hose, prior to using the device.<br />
Never allow the use of two hoses where one hose is inserted in the air outlet of the device<br />
while the thermistor cable from another hose is connected to the device. Failure to replace<br />
the hose without replacing the associated thermistor cable may result in an uncontrolled<br />
temperature that may cause a serious burn to the patient.<br />
1 Verify that the correct hose, either SW5-HOSE7 (a) or<br />
SW5-HOSE-N (b), is attached to the convective warmer. Refer<br />
to Section 4, Assembly Instructions, for the procedure to install<br />
the hose.<br />
Note: When replacing the hose, always remove the thermistor<br />
cable with the hose. Never replace the hose without replacing the<br />
thermistor cable.<br />
Refer to Appendix A, Convective Warming Blanket<br />
Identification Chart, for a list of convective warming blankets and<br />
the appropriate hose.<br />
2 Verify that the hose thermistor cable is connected to the<br />
thermistor receptacle (c) on the convective warmer.<br />
Note: When using the blue Neonatal hose with the black<br />
connector (SW5-HOSE-N), orient the white shield (d) to the<br />
left. Do not use the hose retainer clip with this hose.<br />
14 EQUATOR ® Convective Warmer | Operator’s <strong>Manual</strong><br />
c<br />
d<br />
a<br />
b
Step 2: Determine the Convective Warming Blanket Size<br />
WARNINGS<br />
S E C T I O N 6 • O p e r a t i n g I n s t r u c t i o n s<br />
• The convective warming blanket is for single-use only. Reusing the blanket may increase the<br />
risk of cross contamination.<br />
• Cover all open wounds in contact with the convective warming blanket to prevent airborne<br />
contamination.<br />
• Use with the EQUATOR ® convective warmer (EQ-5000) and the Snuggle Warm ® convective<br />
warmer (SW-4000). Using non-compatible convective warmers may cause damage to the<br />
convective warming blanket and thermal injury to the patient.<br />
Determine which convective warming blanket is appropriate for the patient. Refer to Appendix A,<br />
Convective Warming Blanket Identification Chart for a description and dimensions of the convective<br />
warming blankets that are available.<br />
Do not use the convective warming blanket if the package has been opened or is damaged. Do not sterilize<br />
blankets.<br />
Product meets Consumer Products Safety Commission’s flammable fabric regulation, 16 CFR 1610;<br />
however, follow standard safety protocols when using high-intensity heat sources.<br />
Step 3: Position the Convective Warming Blanket<br />
Appendix B, Position the Convective Warming Blanket, describes how to position the convective warming<br />
blanket. Refer to Appendix B for the procedure to position the specific convective warming blanket being<br />
used.<br />
EQUATOR ® Convective Warmer | Operator’s <strong>Manual</strong> 15
S E C T I O N 6 • O p e r a t i n g I n s t r u c t i o n s<br />
Step 4: Attach the Hose to Convective Warming Blanket<br />
WARNINGS<br />
• The hose nozzle MUST be connected to a Snuggle Warm ® convective warming blanket. Do<br />
not treat patients with the hose alone. Thermal injury may occur.<br />
1 Insert the hose nozzle (a) into the collar ring<br />
(b).<br />
2 Ensure the hose barb (c) snaps into the collar<br />
ring (b).<br />
3 If the hose has locking tabs (d), secure the<br />
hose to the convective warming blanket using<br />
the hose retainer wings (e). The hose tabs will<br />
protrude through the retainer wings (e).<br />
Step 5: Attach the Sheet Clip to the Sheet Under the Patient<br />
Two types of sheet clips are available. Use the method appropriate for your clip.<br />
Attaching the New Style Sheet Clip<br />
1 Squeeze the handles (f) on the sheet clip to open the jaws-like<br />
opening.<br />
2 Insert the sheet into the open jaws (g) and release the handles to<br />
lock in place.<br />
Note: Proper attachment of the sheet clip to the sheet under the<br />
patient is essential to the proper function of the sheet clip assembly.<br />
The weight of the patient on the sheet helps hold the hose in place<br />
when the sheet clip is used.<br />
16 EQUATOR ® Convective Warmer | Operator’s <strong>Manual</strong><br />
a<br />
b<br />
d<br />
e<br />
b<br />
f<br />
c<br />
g<br />
e
Attaching the Older Style Sheet Clip<br />
1 Slide the sheet clip lock (h) away from the jaws-like opening.<br />
2 Insert the sheet into the open jaws (i) and slide the sheet clip lock<br />
towards the opening until it clicks and locks in place.<br />
Note: Proper attachment of the sheet clip to the sheet under the<br />
patient is essential to the proper function of the sheet clip assembly.<br />
The weight of the patient on the sheet helps hold the hose in place<br />
when the sheet clip is used.<br />
Step 6: Using the Convective Warmer<br />
CONTRAINDICATIONS<br />
S E C T I O N 6 • O p e r a t i n g I n s t r u c t i o n s<br />
• Thermal injury may occur if convective warming therapy is applied to lower extremities during<br />
aortic cross-clamping procedures.<br />
• Thermal injury may occur if convective warming therapy is applied to ischemic limbs.<br />
WARNINGS<br />
• Grounding reliability can only be achieved when the MAINS power cord is connected to a<br />
properly grounded receptacle. Risk of electrical shock exists if the equipment is not connected<br />
to a properly grounded receptacle resulting in death or serious injury to the patient or user.<br />
• Exposed conductor on the MAINS power cord can cause an electrocution hazard. Remove the<br />
device from service if the MAINS power cord has exposed wires.<br />
• Do not operate the Convective Warmer in the presence of a flammable anesthetic mixture<br />
with air, oxygen, or nitrous oxide. The risk of explosion exists if the device is operated in a<br />
potentially explosive environment.<br />
• Always start therapy on the lowest non-ambient temperature setting to prevent thermal<br />
injury. Increase the temperature setting, if required, using core body temperature and<br />
cutaneous response of skin in contact with the convective warming blanket as indicators.<br />
• To prevent thermal injury, do not use the highest temperature setting when treating patients<br />
who have decreased sensation, are nonsensate, or have poor perfusion.<br />
• Monitor patient's body core temperature, vital signs, and observe cutaneous response at<br />
regular intervals to prevent thermal injury. If erythema or instability in vital signs is evident,<br />
decrease the temperature setting or discontinue use of convective warming therapy.<br />
continued<br />
EQUATOR ® Convective Warmer | Operator’s <strong>Manual</strong> 17<br />
h<br />
i
S E C T I O N 6 • O p e r a t i n g I n s t r u c t i o n s<br />
WARNINGS (continued)<br />
• To prevent thermal injury in hypotensive or hypoperfused patients, observe cutaneous<br />
response more frequently. Reduce the temperature setting or discontinue use of convective<br />
warming therapy if instability in vital signs or erythema occurs.<br />
• If Over Temperature audible alarm sounds and/or red Over Temperature alarm indicator<br />
illuminates, discontinue use of the convective warmer to prevent thermal injury to the patient.<br />
Remove the device from service. Contact <strong>Smiths</strong> <strong>Medical</strong> or your local <strong>Smiths</strong> <strong>Medical</strong><br />
distributor.<br />
• If the convective warmer does not perform its self-test properly, fails to operate, or stops<br />
while running, discontinue use of the convective warmer to prevent thermal injury to the<br />
patient. Remove the device from service. Contact <strong>Smiths</strong> <strong>Medical</strong> or your local <strong>Smiths</strong> <strong>Medical</strong><br />
distributor.<br />
• Do not place objects onto the convective warming blanket that will obstruct air flow. Items on<br />
the blanket can produce localized pressure on the patient’s skin, reducing cutaneous blood<br />
flow and causing thermal injury to the patient.<br />
• For underbody blankets do not place objects, other than the patient’s body, onto the<br />
convective warming blanket that will obstruct air flow. Items on the blanket can produce<br />
localized pressure on the patient’s skin, reducing cutaneous blood flow and causing thermal<br />
injury to the patient.<br />
• To prevent thermal injury, do not allow any of the patient's body parts to rest on the active<br />
hose inlet.<br />
• Use only one convective warmer and one hose. Use of multiple convective warmers in<br />
multiple inlet ports of the same convective warming blanket may cause damage to the<br />
blanket and thermal injury to the patient.<br />
• Always place the perforated side of the convective warming blanket, the side with small<br />
holes, towards the patient. Failure to do so may result in thermal injury.<br />
• Do not use a convective warming blanket over transdermal medications as this may lead to<br />
increased drug delivery that may result in patient injury or death.<br />
1 Plug the power cord into a properly grounded MAINS receptacle.<br />
2 Press and release the green Power ON button (a) to turn the convective warmer ON. The convective<br />
warmer performs its self-test.<br />
18 EQUATOR ® Convective Warmer | Operator’s <strong>Manual</strong>
3 Verify that the self-test completes in the following<br />
order:<br />
• The indicators for Ambient Air, 36°C, 40°C, 44°C<br />
(b), and Under Temperature (c) light up at the<br />
same time.<br />
• The Disconnect indicator (d) flashes three times.<br />
• The Over Temperature indicator (e) flashes and an<br />
audible beep sounds, indicating the ending of the<br />
self-test.<br />
S E C T I O N 6 • O p e r a t i n g I n s t r u c t i o n s<br />
4 Press the 36°C Temperature Setting during or after the self-test. The temperature setting may be<br />
increased as tolerated by the patient.<br />
Note: If no temperature setting is selected, the device will blow ambient air until a temperature is<br />
selected.<br />
5 Monitor the patient’s temperature and vital signs continuously. Visually examine the heated skin surface<br />
at regular intervals. Adjust the temperature setting or discontinue therapy as required.<br />
Step 7: After Use<br />
1 Press and release the orange Power OFF button (f) to turn the convective warmer off.<br />
2 Remove the hose from the convective warming blanket.<br />
Note: Dispose of the convective warming blankets in a safe manner according to local guidelines for<br />
disposal of contaminated medical waste.<br />
3 Perform routine cleaning after each use. Refer to Section 8, Maintenance, for more details.<br />
4 Coil the power cord, wrap the cord wrap around the coiled power cord, and snap closed.<br />
Storage<br />
Store the convective warmer in a cool, dry place away from temperature extremes. Refer to Section 12,<br />
Specifications, for more details.<br />
EQUATOR ® Convective Warmer | Operator’s <strong>Manual</strong> 19<br />
a<br />
b<br />
f<br />
e<br />
c<br />
d
S E C T I O N 7 • T r o u b l e s h o o t i n g<br />
SECTION 7<br />
Troubleshooting<br />
If the suggested solutions do not correct the problem, discontinue use of the EQUATOR ® Convective<br />
Warmer and remove from service. Contact <strong>Smiths</strong> <strong>Medical</strong> or your local <strong>Smiths</strong> <strong>Medical</strong> distributor.<br />
Problem Possible Cause/Solution<br />
The convective warmer does not<br />
start when the ON button is<br />
pressed<br />
The convective warmer does not<br />
complete self-test<br />
1 The convective warmer is not plugged in.<br />
• Check that the power cord is plugged into the rear of the convective warmer<br />
and into a working electrical receptacle.<br />
2 Power cord is defective or cut.<br />
• Inspect the power cord and replace if necessary.<br />
1 The thermistor cable may be disconnected or not fully inserted.<br />
• Check the thermistor cable connection.<br />
2 The hose may not be fully inserted into the air outlet.<br />
• Push the hose firmly to secure it in the outlet.<br />
• Ensure the hose retainer clip is properly attached<br />
3 The hose has a malfunction.<br />
• Replace the hose.<br />
No air flow The hose and/or the thermistor cable may not be properly connected.<br />
• Check the hose and thermistor cable connections.<br />
Weak air flow Clogged air filter or obstructed air filter intake.<br />
• Check the air filter intake for an obstruction and remove.<br />
• Check the air filter for clogging or obstructions and replace if necessary.<br />
Air flow is too strong and the<br />
convective warmer is noisy<br />
No heat, but the motor is turned<br />
on and air is flowing<br />
The Disconnect indicator<br />
illuminates, the motor is<br />
operating, air is flowing but is no<br />
longer heated<br />
Over Temperature indicator<br />
illuminates<br />
Defective air filter or the air filter is not properly installed.<br />
• Check the air filter for proper installation. Replace if defective.<br />
1 Ambient air button is selected.<br />
• Select desired temperature.<br />
A blockage in the blanket or an object on the blanket is preventing air from flowing<br />
freely through the blanket.<br />
a Check the blanket for anything blocking airflow, such as an unfolded<br />
blanket, tight drawstrings around the blanket, drapes on the blanket. Correct<br />
the condition until the blanket fills with air.<br />
b Press the Ambient Air Temperature Setting button, then press a Temperature<br />
Setting button.<br />
c If the condition continues, remove the convective warmer from service.<br />
Contact <strong>Smiths</strong> <strong>Medical</strong> or your local <strong>Smiths</strong> <strong>Medical</strong> distributor.<br />
The temperature at the hose end is above the temperature selected on the control<br />
panel.<br />
• Turn the power off and then turn it on again. If the condition persists,<br />
discontinue use of the convective warmer and remove it from service.<br />
continued<br />
20 EQUATOR ® Convective Warmer | Operator’s <strong>Manual</strong>
Problem Possible Cause/Solution<br />
Under Temperature indicator<br />
illuminates<br />
The Disconnect indicator<br />
illuminates and the heater and<br />
motor have stopped operating<br />
Electromagnetic interference to<br />
other devices<br />
S E C T I O N 7 • T r o u b l e s h o o t i n g<br />
The temperature at the hose end is below the temperature selected on the control<br />
panel.<br />
• Wait until the air temperature reaches the selected temperature.<br />
The hose and/or the thermistor cable are not properly connected.<br />
a Check the hose and thermistor cable connections.<br />
Note: When the cable is disconnected, zeros (00) appear in the display.<br />
When the hose is disconnected, the temperature still appears in the display.<br />
b If they are connected correctly and the condition continues, remove the<br />
convective warmer from service. Contact <strong>Smiths</strong> <strong>Medical</strong> or your local <strong>Smiths</strong><br />
<strong>Medical</strong> distributor.<br />
This equipment has been tested and found to comply with the limits for medical<br />
devices to IEC 601-1-2/EN 60601-1-2. These limits are designed to provide<br />
reasonable protection against harmful interference in a typical medical installation.<br />
This equipment generates, uses, and can radiate radio frequency energy. If it is not<br />
installed and used in accordance with the instructions, it may cause harmful<br />
interference to other devices in the vicinity. However, there is no guarantee that<br />
interference will not occur in a particular installation. If this equipment does cause<br />
harmful interference to other devices, which can be determined by turning the<br />
equipment off and on, the user is encouraged to try to correct the interference by<br />
one or more of the following measures:<br />
• Reorient or relocate the receiving device.<br />
• Increase the separation between the equipment.<br />
• Connect the equipment to an outlet on a circuit different from that to which<br />
the other device(s) is (are) connected.<br />
• Consult the manufacturer or field service technician for help.<br />
If placed near monitoring equipment, or other electronic devices, this equipment<br />
must be IEC 601-1-2/EN 60601-1-2 approved or electromagnetic interference<br />
may result.<br />
EQUATOR ® Convective Warmer | Operator’s <strong>Manual</strong> 21
S E C T I O N 8 • M a i n t e n a n c e<br />
SECTION 8<br />
Maintenance<br />
Only competent personnel should perform any routine maintenance and repairs to the EQUATOR ®<br />
Convective Warmer.<br />
Clean the Convective Warmer and Hose<br />
Clean the enclosure and hose after every use.<br />
CAUTIONS<br />
• Do not use alcohol or other strong solvents to clean the hose or exterior surfaces. These<br />
solutions may damage labels and other parts.<br />
• Never use organic solvents (e.g., acetone), strong acids, or bases to clean any portion of the<br />
convective warmer.<br />
• Do not place the convective warmer directly under a faucet or use a faucet sprayer to rinse.<br />
Never spray cleaning or other fluids into openings on the convective warmer or into the<br />
external connectors.<br />
1 Disconnect the MAINS power cord from the electrical receptacle and from the rear of the convective<br />
warmer.<br />
2 Visually inspect the convective warmer to ensure there is no visible damage or deterioration of the<br />
enclosure such as cracks, or deterioration of the labels and power cord. Do not clean if there is a defect.<br />
Contact <strong>Smiths</strong> <strong>Medical</strong> or your local <strong>Smiths</strong> <strong>Medical</strong> distributor.<br />
3 Immerse a soft cloth or sponge as an applicator into the cleaning solution consisting of mild liquid<br />
detergent soap and warm tap water mixture. Squeeze out excess solution so that the applicator is not<br />
dripping. Wipe or scrub the entire surface of the enclosure and control panel. Use a soft brush to clean<br />
the power cord if necessary.<br />
4 Rinse a separate soft cloth or sponge in room temperature running potable water. Squeeze out excess<br />
water so that the applicator is not dripping. Wipe all of the aforementioned surfaces. Repeat rinsing the<br />
cloth or sponge several times with fresh running water during this process to insure all visible residue is<br />
removed.<br />
5 Dry the item with a hand towel or soft cloth.<br />
6 Visually inspect the convective warmer and its components to insure that they have been thoroughly<br />
cleaned. Repeat cleaning procedure if necessary.<br />
22 EQUATOR ® Convective Warmer | Operator’s <strong>Manual</strong>
7 After thoroughly cleaning the convective warmer, perform disinfection if required.<br />
S E C T I O N 8 • M a i n t e n a n c e<br />
8 If it is hospital policy to perform disinfection as part of reprocessing, then follow your institution's<br />
guidelines for disinfecting of the surfaces of non-critical medical devices. The list below includes lowlevel<br />
disinfectants that are commonly used in the medical community and high-level disinfectants that<br />
are claimed by the manufacturer. The effectiveness of these listed disinfectants should be validated using<br />
the hospital procedures.<br />
The following disinfectant agents can be used without causing damage to the enclosure:<br />
Low Level Disinfectants:<br />
• fantastik ® All Purpose Cleaner<br />
High Level Disinfectants:<br />
• 1.56% Phenol (e.g., Sporicidin ® )<br />
• 3.4% Glutaraldehyde (e.g., CIDEX ® Plus)<br />
• 10% Bleach solution<br />
• 1% Ammonia solution<br />
• Surface disinfectants compatible with plastic or metal materials.<br />
9 Rinsing of the disinfectant residue should be done using a soft cloth or sponge as the applicator.<br />
Replace the Air Filter (F3-5000)<br />
Replace the air filter every 12 months, or sooner if required.<br />
Note: Always perform functional tests after replacing the air filter.<br />
WARNINGS<br />
• Do not change the air filter while the convective warmer is operating. Risk of thermal injury<br />
exists if the device is operating.<br />
EQUATOR ® Convective Warmer | Operator’s <strong>Manual</strong> 23
S E C T I O N 8 • M a i n t e n a n c e<br />
1 Disconnect the MAINS power cord from both the electrical<br />
receptacle and from the rear of the convective warmer.<br />
2 Remove the convective warmer from the pole, if pole mounted,<br />
and lay it on its side (a).<br />
3 Remove the four small Phillips-head screws on the bottom<br />
securing the filter in place.<br />
4 Discard the old filter assembly [filter (b) and gasket (c)].<br />
5 Remove and discard the four standoffs (d).<br />
6 Install the four replacement standoffs.<br />
7 Inspect the new filter gasket to be sure it is clean and unmarked.<br />
8 Inspect the filter-mating surface to be sure it is clean.<br />
9 Install the new filter assembly using the original screws.<br />
Functional Tests<br />
Perform functional tests after replacing the air filter or opening the convective warmer enclosure. Perform all<br />
9 functional tests in the order they are presented in the following pages. Be sure to read through each test to<br />
obtain an understanding of the steps involved in each individual procedure before starting.<br />
Note: When performing any forced over temperature check, always start with the device turned OFF.<br />
Test 1: Self-Test Sequence<br />
The self-test sequence checks that the automatic self-test functions properly when the device is turned<br />
ON.<br />
1 Press the ON button and allow the device to complete its self-test sequence.<br />
2 During the self-test sequence, check the control panel to verify that all of the push-button Light Emitting<br />
Diodes (LEDs) and the Under Temperature LED ( ) are lit, and at the same time that the following<br />
sequence occurs:<br />
• Temperature Thermistor Open Circuit check OK = Flash .<br />
• Safety Thermistor Open Circuit check OK = Flash .<br />
• Open Heater Detector Circuit check OK = Flash .<br />
• Safety Thermistor Over Temperature check OK = Flash and BEEP.<br />
24 EQUATOR ® Convective Warmer | Operator’s <strong>Manual</strong><br />
b<br />
d<br />
a<br />
c
S E C T I O N 8 • M a i n t e n a n c e<br />
3 Check that all the LEDs turn off, except the Ambient button LED, and that the motor continues to run.<br />
4 The self-test is completed. If the self-test sequence did not complete properly, refer to the EQUATOR ®<br />
Convective Warmer Service <strong>Manual</strong>.<br />
Test 2: Disconnect Indicator Test<br />
1 If necessary, press the OFF button , then press the ON button . Wait for the self-test to complete.<br />
2 Disconnect the hose thermistor cable from the rear of the device. Verify that the Disconnect LED ( )<br />
lights, the alarm beeps, and the motor stops.<br />
3 Press the OFF button and then press the ON button . The self-test should stop on the first test.<br />
4 Reconnect the thermistor cable. The self-test should continue to completion.<br />
5 Disconnect the hose from the rear of the device. Verify that the Disconnect LED ( ) lights, the<br />
alarm beeps, and the motor stops.<br />
6 Reconnect the hose. Verify that the Disconnect LED ( ) turns off and the device continues to run.<br />
7 Press the High button . Wait for the temperature to rise to approximately 30°C.<br />
8 Disconnect the hose from the rear of the device. Verify that the Disconnect LED ( ) lights, the<br />
alarm beeps, and the motor stops.<br />
9 Reconnect the hose. Verify that the Disconnect LED ( ) turns off, the motor restarts, and the<br />
temperature continues to increase toward 44°C.<br />
10 Press the Ambient button .<br />
Test 3: High (44°C) Temperature Test<br />
This test verifies the High temperature readings.<br />
1 Press the High button and allow the temperature to stabilize for at least 5 minute.<br />
2 After the temperature has stabilized, verify that the High temperature readings appear as 44°C.<br />
Test 4: Medium (40°C) Temperature Test<br />
1 Press the Medium button , and allow the temperature to stabilize for at least 5 minutes.<br />
2 After the temperature has stabilized, verify that the Medium temperature readings appear as 40°C.<br />
EQUATOR ® Convective Warmer | Operator’s <strong>Manual</strong> 25
S E C T I O N 8 • M a i n t e n a n c e<br />
Test 5: Low (36°C) Temperature Test<br />
1 Press the Low button , and allow the temperature to stabilize for at least 5 minutes.<br />
2 After the temperature has stabilized, verify that the Low temperature readings appear as 36°C.<br />
Test 6: Low (36°C) Over Temperature and Under Temperature Test<br />
1 Press the OFF button and then press the ON button . The device will restart and proceed<br />
through the self-test sequence.<br />
2 If the device is hot, let it cool to approximately 30°C before proceeding.<br />
3 Press and hold the LOW button on the front panel for approximately 8 seconds, until the Low<br />
button LED starts to flash.<br />
4 As the temperature increases, verify that the following events occur:<br />
• Between 32°C and 34°C, the Under Temperature LED ( ) stops flashing.<br />
• Between 38°C and 40°C, the Over Temperature alarm sounds, the Over Temperature LED ( )<br />
lights, the motor stops, and the control panel displays the temperature at which the Over<br />
Temperature alarm was activated.<br />
Test 7: Medium (40°C) Over Temperature and Under Temperature Test<br />
1 Press the OFF button and then press the ON button . The device will restart and proceed<br />
through the self-test sequence.<br />
2 If the device is hot, let it cool to approximately 35°C before proceeding.<br />
3 Press and hold the Medium button on the control panel for approximately 8 seconds, until the<br />
Medium button LED starts to flash.<br />
4 As the temperature increases, verify that the following events occur:<br />
• Between 36°C and 38°C, the Under Temperature LED ( ) stops flashing.<br />
• Between 42°C and 44°C, the Over Temperature alarm sounds, the Over Temperature LED ( )<br />
lights, the motor stops, and the control panel displays the temperature at which the Over<br />
Temperature alarm was activated.<br />
Test 8: High (44°C) Over Temperature and Under Temperature Test<br />
1 Press the OFF button and then press the ON button . The device will restart and proceed<br />
through the self-test sequence.<br />
2 If the device is hot, let it cool to approximately 40°C before proceeding.<br />
26 EQUATOR ® Convective Warmer | Operator’s <strong>Manual</strong>
S E C T I O N 8 • M a i n t e n a n c e<br />
3 Press and hold the High button on the control panel for approximately 8 seconds, until the High<br />
button LED starts to flash.<br />
4 As the temperature increases verify that the following events occur:<br />
• Between 40°C and 42°C, the Under Temperature LED ( ) stops flashing.<br />
• Between 46°C and 48°C, the Over Temperature alarm sounds, the Over Temperature LED ( )<br />
lights, the motor stops, and the control panel displays the temperature at which the Over<br />
Temperature alarm was activated.<br />
Test 9: Ambient Over Temperature Test<br />
1 Press the OFF button and then press the ON button . The device will restart and proceed<br />
through the self-test sequence.<br />
2 If the device is hot, let it cool to approximately 44°C before proceeding.<br />
3 Press and hold the Ambient button on the control panel until the Ambient button LED starts to<br />
flash.<br />
4 As the temperature increases, verify that the following events occur:<br />
• Between 46°C and 48°C, the Over Temperature alarm sounds, the Over Temperature LED ( )<br />
lights, the motor stops, and the control panel displays the temperature at which the Over<br />
Temperature alarm was activated.<br />
5 Press the OFF button .<br />
EQUATOR ® Convective Warmer | Operator’s <strong>Manual</strong> 27
S E C T I O N 9 • A c c e s s o r i e s<br />
SECTION 9<br />
Accessories<br />
This section contains procedures to install and replace the cord wrap and the sheet clip.<br />
Cord Wrap (CW-5000)<br />
1 Disconnect the MAINS power cord from both the electrical<br />
receptacle and from the rear of the convective warmer.<br />
2 Slip the cord wrap over the end of the power cord (c) that plugs<br />
into the convective warmer.<br />
3 Pull the cord wrap tightly (d).<br />
Sheet Clip (SC-5000)<br />
1 Wrap the plastic strap of the sheet clip (e) around the hose<br />
near the hose nozzle.<br />
2 Close the snap (f) to secure the sheet clip to the hose.<br />
28 EQUATOR ® Convective Warmer | Operator’s <strong>Manual</strong><br />
c<br />
e<br />
New style sheet clip<br />
e<br />
Older style sheet clip<br />
f<br />
f<br />
d
SECTION 10<br />
Limited Warranty<br />
S E C T I O N 1 0 • L i m i t e d W a r r a n t y<br />
<strong>Smiths</strong> <strong>Medical</strong> ASD, Inc. (the “Manufacturer”) warrants to the Original Purchaser that the EQUATOR ®<br />
Convective Warmer (the “Convective Warmer”), not including accessories, shall be free from defects in<br />
materials and workmanship under normal use, if used in accordance with this Operator’s <strong>Manual</strong>, for a period<br />
of one year from the actual date of sale to the Original Purchaser. THERE ARE NO OTHER<br />
WARRANTIES.<br />
This warranty does not cover normal wear and tear and maintenance items, and specifically excludes hoses,<br />
warming blankets, roll stands or any other accessory items or equipment used with the Convective Warmer.<br />
Subject to the conditions of and upon compliance with this Limited Warranty, the Manufacturer will repair or<br />
replace at its option without charge (except for a minimal charge for postage and handling) any Convective<br />
Warmer (not including accessories) which is defective if a claim is made during such one-year period.<br />
The following conditions, procedures, and limitations apply to the Manufacturer's obligation under this<br />
warranty:<br />
A. Parties Covered by this Warranty: This warranty extends only to the Original Purchaser of the<br />
Convective Warmer. This warranty does not extend to subsequent purchasers. The Original Purchaser<br />
may be medical personnel, a hospital, or institution which purchases Convective Warmers for treatment<br />
of patients. The Original Purchaser should retain the invoice or sales receipt as proof as to the actual<br />
date of purchase.<br />
B. Warranty Performance Procedure: Notice of the claimed defect must be made in writing or by telephone<br />
to the Manufacturer as follows: Customer Service Department, <strong>Smiths</strong> <strong>Medical</strong> ASD, Inc., 160<br />
Weymouth Street, Rockland, MA 02370, (800) 258-5361. Notice to the Manufacturer must include<br />
date of purchase, model and serial number, and a description of the claimed defect in sufficient detail to<br />
allow the Manufacturer to determine and facilitate any repairs which may be necessary.<br />
AUTHORIZATION MUST BE OBTAINED PRIOR TO RETURNING THE CONVECTIVE<br />
WARMER. If authorized, the Convective Warmer must be properly and carefully packaged and<br />
returned to the Manufacturer, postage prepaid. Any loss or damage during shipment is at the risk of the<br />
sender.<br />
C. Conditions of Warranty: The warranty is void if the Convective Warmer has been 1) repaired by<br />
someone other than the Manufacturer or its authorized agent; 2) altered so that its stability or reliability<br />
is affected; 3) misused; or 4) damaged by negligence or accident. Misuse includes, but is not limited to,<br />
use not in compliance with the <strong>Operator's</strong> <strong>Manual</strong> or use with non-approved accessories. Removal or<br />
damage to the Convective Warmer’s serial number will invalidate this warranty.<br />
EQUATOR ® Convective Warmer | Operator’s <strong>Manual</strong> 29
S E C T I O N 1 0 • L i m i t e d W a r r a n t y<br />
D. Limitations and Exclusions: Repair or replacement of the Convective Warmer or any component part<br />
thereof is the EXCLUSIVE remedy offered by the Manufacturer. The following exclusions and<br />
limitations shall apply:<br />
1. No agent, representative, or employee of the Manufacturer has authority to bind the Manufacturer<br />
to any representation or warranty, expressed or implied.<br />
2. THERE IS NO WARRANTY OF MERCHANTABILITY OR FITNESS OR USE OF THE<br />
CONVECTIVE WARMER FOR ANY PARTICULAR PURPOSE.<br />
3. The Convective Warmer can only be used under the supervision of medical personnel whose skill<br />
and judgment determine the suitability of the Convective Warmer for any particular medical<br />
treatment.<br />
4. All recommendations, information, and descriptive literature supplied by the Manufacturer or its<br />
agents are believed to be accurate and reliable, but do not constitute warranties.<br />
The Manufacturer disclaims responsibility for the suitability of the Convective Warmer for any particular<br />
medical treatment or for any medical complications resulting from the use of the Convective Warmer. The<br />
Manufacturer shall not be responsible for any incidental damages or consequential damages to property, loss<br />
of profits, or loss of use caused by any defect or malfunction of the Convective Warmer.<br />
This warranty gives the Original Purchaser specific legal rights, and the Original Purchaser may have other<br />
legal rights which may vary from state to state.<br />
30 EQUATOR ® Convective Warmer | Operator’s <strong>Manual</strong>
SECTION 11<br />
Service<br />
S E C T I O N 1 1 • S e r v i c e<br />
All service must be performed by <strong>Smiths</strong> <strong>Medical</strong>, or competent personnel. Service by any other person or<br />
organization voids the warranty and transfers liability for malfunctions of the device to the servicing<br />
organization.<br />
WARNINGS<br />
• The convective warmer must be calibrated by competent personnel authorized by <strong>Smiths</strong><br />
<strong>Medical</strong>. Failure to calibrate the device correctly may result in thermal injury to the patient.<br />
• To prevent fire hazard and possible damage to the convective warmer, use only fuses<br />
specified. Only competent personnel knowledgeable in the safety procedures required for<br />
servicing live primary MAINS parts shall be allowed to open the enclosure.<br />
Non-Warranty Work<br />
Devices received that are no longer under warranty can be returned for repair at a cost. The device will be<br />
promptly inspected and a verbal estimate of the repair cost will be provided. A purchase order will be required<br />
from the original purchaser consistent with the verbal estimate. A written estimate will be provided upon<br />
request.<br />
Before returning the EQUATOR ® Convective Warmer for service, contact <strong>Smiths</strong> <strong>Medical</strong> for a Returned<br />
Goods Authorization.<br />
Note: The convective warmer must be cleaned and disinfected for repair shipment or it will be immediately<br />
returned as received.<br />
Additional Documentation<br />
Upon request <strong>Smiths</strong> <strong>Medical</strong> will provide the following documentation:<br />
• Circuit diagrams<br />
• Components parts list(s)<br />
• Description of function<br />
• Service and calibration instructions<br />
EQUATOR ® Convective Warmer | Operator’s <strong>Manual</strong> 31
S E C T I O N 1 1 • S e r v i c e<br />
Disposal Information<br />
Observe national and local codes or requirements for disposal of contaminated materials and for recycling<br />
solid waste materials that may impact the environment.<br />
Service Contacts<br />
Please know the serial number of the convective warmer when you contact the service department. The serial<br />
number is located on the rear of the convective warmer. Contact your <strong>Smiths</strong> <strong>Medical</strong> Technical Service<br />
Department or <strong>Smiths</strong> <strong>Medical</strong> distributor at:<br />
USA/Canada<br />
<strong>Smiths</strong> <strong>Medical</strong> ASD, Inc.<br />
160 Weymouth Street<br />
Rockland, MA 02370 USA<br />
USA/Canada 1-800-258-5361<br />
International +1-781-878-8011<br />
European Representative<br />
<strong>Smiths</strong> <strong>Medical</strong> International Ltd.<br />
1500 Eureka Park, Lower Pemberton,<br />
Ashford, Kent, TN25 4BF, UK<br />
Tel. +44 (0) 1233 722100<br />
Australian Representative<br />
<strong>Smiths</strong> <strong>Medical</strong> Australasia Pty. Ltd.<br />
61 Brandl Street,<br />
Eight Mile Plains, QLD 4113, Australia<br />
Tel. +61 (0) 7 3340 1300<br />
Fax +61 (0) 7 3340 1399<br />
New Zealand Tel. 0 800 444 200<br />
www.smiths-medical.com<br />
32 EQUATOR ® Convective Warmer | Operator’s <strong>Manual</strong>
SECTION 12<br />
Specifications<br />
System Specifications<br />
S E C T I O N 1 2 • S p e c i f i c a t i o n s<br />
Standard Compliance Guidelines<br />
Product Safety EN 60601-1, UL 2601-1<br />
Convective Warming Blanket Flammability NFPA 702, 16 CFR 1610<br />
EMC EN 60601-1-2, FCC 47 CFR Part 15, Class B<br />
Enclosure Protection IEC 60529 IP Code: IPX1<br />
Convective Warmers ASTM F2196-02<br />
Drop Test Compliance EN 60601-1<br />
Physical Dimensions<br />
Height, Overall 30 cm (11.75 inches)<br />
Width, Overall 24 cm (9.5 inches)<br />
Depth, Overall 19 cm (7.5 inches)<br />
Weight, Overall 6.8 Kg (15 lbs)<br />
Air Flow 8.4 to 12.7m/sec (1650 to 2500 feet/min)<br />
1.59 to 2.41 cm/min (56.2 to 85.2 cf/min)<br />
Filtration System 0.2 micron filter<br />
Maximum Height on I.V. Pole 117 cm (46 inches)<br />
Shipping Durability Vibration and Drop Compliant with ISTA 1A and 2A<br />
Environmental Temperature Humidity<br />
Operation 10 o C to 40 o C 10 to 95% (non condensing)<br />
Transportation -18 oC to 60oC 5 to 95% (non condensing)<br />
Storage 5o C to 40 o C 5 to 95% (non condensing)<br />
Thermal Temperature<br />
Hose End Temperature 36° ± 1°C (97°F ± 2°F)<br />
40° ± 1°C (104°F ± 2°F)<br />
44° ± 1°C (111°F ± 2°F)<br />
Over Temperature Alarm - Forced Air Over 36°C = 39° ± 1°C (102°F ± 2°F)<br />
Temperature Protection<br />
40°C = 43° ± 1°C (109°F ± 2°F)<br />
44°C = 47° ± 1°C (117°F ± 2°F)<br />
Electrical<br />
Supply Power Input:<br />
Type<br />
100V 100 VAC, 50/60 Hz, 9.00 Amps<br />
115V 115 VAC, 50/60 Hz, 8.05 Amps<br />
230V 230 VAC, 50/60 Hz, 4.0 Amps<br />
Protection Against Electrical Shock Class 1 Equipment<br />
Type BF<br />
EQUATOR ® Convective Warmer | Operator’s <strong>Manual</strong> 33
S E C T I O N 1 2 • S p e c i f i c a t i o n s<br />
Mode of Operation Continuous<br />
Type of Current Alternating<br />
Ingress Protection Rating<br />
Performance<br />
IPX1<br />
Relative Average Noise Level at 1000 Hz<br />
(front and back)<br />
44.1 dBA<br />
Hose End Temperature Control Servo-controlled by thermistors placed at hose end<br />
The Snuggle Warm ® Electrical Type<br />
convective warming Average Maximum<br />
blankets meet the average and maximum<br />
contact surface temperature specified in<br />
ASTM F2196.02<br />
46°C 48°C<br />
Approximate time to change the average<br />
contact surface temperature from 20°C to<br />
36°C<br />
7 minutes<br />
Electromagnetic Environmental Recommendations<br />
Recommended separation distances between portable and mobile RF communications<br />
equipment and the EQUATOR ® Convective Warmer<br />
The convective warmer is intended for use in an electromagnetic environment in which radiated RF<br />
disturbances are controlled. The customer or the user of the convective warmer can help prevent<br />
electromagnetic interference by maintaining a minimum distance between portable and mobile RF<br />
communications equipment (transmitters) and the convective warmer as recommended below, according to<br />
the maximum output power of the communications equipment.<br />
Rated maximum Separation distance according to frequency of transmitter m<br />
output power of 150 kHz to 80 MHz 80 MHz to 800 MHz 800 MHz to 2.5 GHz<br />
transmitter<br />
d=[3.5/V1]P<br />
d=[3.5/E1]P<br />
d=[7/E1]P<br />
W<br />
0.01 0.116 0.116 0.233<br />
0.1 0.368 0.368 0.737<br />
1 1.16 1.16 2.33<br />
10 3.69 3.69 7.38<br />
100 11.66 11.66 23.33<br />
For transmitters rated at a maximum output power not listed above, the recommended separation distance<br />
d in metres (m) can be estimated using the equation applicable to the frequency of the transmitter, where P<br />
is the maximum output power rating of the transmitter in watts (W) according to the transmitter<br />
manufacturer.<br />
NOTE 1 At 80 MHz and 800 MHz, the separation distance for the higher frequency range applies.<br />
NOTE 2 These guidelines may not apply in all situations. Electromagnetic propagation is affected by<br />
absorption and reflection from structures, objects and people.<br />
34 EQUATOR ® Convective Warmer | Operator’s <strong>Manual</strong>
SECTION 13<br />
Symbols<br />
Symbols Definitions<br />
S<br />
Power ON Button.<br />
Power OFF Button.<br />
Ambient Temperature Setting Button<br />
36°C Temperature Setting Button<br />
40°C Temperature Setting Button<br />
44°C Temperature Setting Button<br />
Over Temperature Alarm Indicator<br />
Under Temperature Alarm Indicator<br />
Disconnect Indicator<br />
Hose End Temperature<br />
Elapsed Time Display (h = hours)<br />
Type BF Equipment<br />
Protected Against Dripping Water<br />
S E C T I O N 1 3 • S y m b o l s<br />
EQUATOR ® Convective Warmer | Operator’s <strong>Manual</strong> 35
S E C T I O N 1 3 • S y m b o l s<br />
Symbols Definitions<br />
<<br />
><br />
?<br />
=<br />
@<br />
H<br />
J<br />
G<br />
7<br />
g<br />
f<br />
~ 9<br />
Catalog Number<br />
Serial Number<br />
Part Number<br />
Batch Code<br />
Authorized Representative in the European Community<br />
Manufacturer<br />
Date of Manufacture<br />
Quantity<br />
Protective Earth [Ground]<br />
Alternating Current<br />
Do Not Reuse<br />
Attention, see instructions for use<br />
Caution<br />
Consult instructions for use<br />
Electric Shock Hazard<br />
Latex Free<br />
36 EQUATOR ® Convective Warmer | Operator’s <strong>Manual</strong>
Symbols Definitions<br />
6<br />
CLASS 1<br />
;<br />
:<br />
C<br />
P<br />
_<br />
8<br />
Z<br />
2<br />
S E C T I O N 1 3 • S y m b o l s<br />
Federal (U.S.A.) law restricts this device to sale by or on the order of a physician.<br />
Device is class type 1 equipment<br />
No free hosing<br />
Non-sterile<br />
Protective earth terminal<br />
Do not use if package is damaged.<br />
Sterilized using ethylene oxide<br />
Temperature Limitation<br />
Humidity Limitation<br />
Use by<br />
Recyclable Product<br />
Device has been tested by National Technical Systems, a nationally recognized technical<br />
laboratory, to meet U.S. requirements for safety.<br />
Collect separately for electrical and electronic equipment.<br />
CE Mark and Notified Body number (0473 indicates AMTAC)<br />
EQUATOR ® Convective Warmer | Operator’s <strong>Manual</strong> 37
A P P E N D I X A • C o n v e c t i v e W a r m i n g B l a n k e t I d e n t i f i c a t i o n C h a r t<br />
APPENDIX A<br />
Convective Warming Blanket Identification Chart<br />
WARNINGS<br />
• Use with the EQUATOR ® convective warmer (EQ-5000) and the Snuggle Warm ® convective<br />
warmer (SW-4000). Using non-compatible convective warmers may cause damage to the<br />
convective warming blanket and thermal injury to the patient.<br />
• Convective warming blankets can only be used in conjunction with the EQUATOR ® convective<br />
warmer (EQ-5000) and the Snuggle Warm ® convective warmer (SW-4000). For the safe<br />
operation of the blankets, the user must follow all warnings, cautions, and instructions<br />
provided in the Instructions for Use supplied with the compatible convective warmer, in<br />
addition to this Operator’s <strong>Manual</strong>.<br />
The following chart provides the description, dimensions, and hose requirements, and list of compatible<br />
convective warmers for the Snuggle Warm ® convective warming blankets:<br />
Convective Warming<br />
Blanket<br />
Description Dimensions<br />
SW-2001<br />
Adult Full Body<br />
Convective Warming<br />
Blanket<br />
SW-2002<br />
Pediatric Full Body<br />
Convective Warming<br />
Blanket<br />
SW-2003<br />
Upper Body<br />
Convective Warming<br />
Blanket<br />
101.6cm W x 203.2cm L<br />
(40" W x 80" L)<br />
includes the non-inflating<br />
foot drape<br />
101.6cm W x 146.1cm L<br />
(40” W x 57.5” L)<br />
includes the non-inflating<br />
foot drape<br />
203.2cm W x 101.6cm L<br />
(80” W x 40” L)<br />
includes the non-inflating<br />
flaps<br />
Hose<br />
Selection<br />
SW5-HOSE7<br />
(White)<br />
SW5-HOSE7<br />
(White)<br />
SW5-HOSE7<br />
(White)<br />
Compatible Convective Warmers<br />
EQUATOR ® model EQ-5000<br />
Snuggle Warm ® model SW-4000<br />
EQUATOR ® model EQ-5000<br />
Snuggle Warm ® model SW-4000<br />
EQUATOR ® model EQ-5000<br />
Snuggle Warm ® model SW-4000<br />
A-1 EQUATOR ® Convective Warmer | Operator’s <strong>Manual</strong><br />
continued
Convective Warming<br />
Blanket<br />
A P P E N D I X A • C o n v e c t i v e W a r m i n g B l a n k e t I d e n t i f i c a t i o n C h a r t<br />
Description Dimensions<br />
SW-2004<br />
Lower Body<br />
Convective Warming<br />
Blanket<br />
SW-2005<br />
Neonate to Small<br />
Child Convective<br />
Warming Blanket<br />
SW-2006<br />
Preemie to Neonate<br />
Convective Warming<br />
Blanket<br />
SW-2007<br />
Tube Convective<br />
Warming Blanket<br />
SW-2008<br />
Sterile Cardiac<br />
Convective Warming<br />
Blanket<br />
101.6cm W x 162.6cm L<br />
(40” W x 64” L)<br />
includes the non-inflating<br />
foot drape<br />
129.5cm W x 71.1cm L<br />
(51” W x 28” L)<br />
includes the non-inflating<br />
flaps<br />
101.6cm W x 55.9cm L<br />
(40” W x 22” L)<br />
includes the non-inflating<br />
flaps<br />
58.4cm W x 175.3cm L<br />
(28” W x 69” L)<br />
101.6cm W x 162.6cm L<br />
(40” W x 64” L)<br />
includes the non-inflating<br />
foot drape<br />
Hose<br />
Selection<br />
SW5-HOSE7<br />
(White)<br />
SW5-HOSE-N<br />
(Blue)<br />
SW5-HOSE-N<br />
(Blue)<br />
SW5-HOSE7<br />
(White)<br />
SW5-HOSE7<br />
(White)<br />
Compatible Convective Warmers<br />
EQUATOR ® model EQ-5000<br />
Snuggle Warm ® model SW-4000<br />
EQUATOR ® model EQ-5000<br />
Snuggle Warm ® model SW-4000<br />
EQUATOR ® model EQ-5000<br />
Snuggle Warm ® model SW-4000<br />
EQUATOR ® model EQ-5000<br />
Snuggle Warm ® model SW-4000<br />
EQUATOR ® model EQ-5000<br />
Snuggle Warm ® model SW-4000<br />
EQUATOR ® Convective Warmer | Operator’s <strong>Manual</strong> A-2<br />
continued
A P P E N D I X A • C o n v e c t i v e W a r m i n g B l a n k e t I d e n t i f i c a t i o n C h a r t<br />
Convective Warming<br />
Blanket<br />
Description Dimensions<br />
SW-2009<br />
Pediatric Underbody<br />
Convective Warming<br />
Blanket<br />
SW-2010<br />
Small Upper Body<br />
Convective Warming<br />
Blanket<br />
SW-2011<br />
Large Pediatric<br />
Underbody<br />
Convective Warming<br />
Blanket<br />
SW-2013<br />
Adult Underbody<br />
Convective Warming<br />
Blanket<br />
66cm W x 94cm L<br />
(26” W x 37” L)<br />
includes the non-inflating<br />
flaps<br />
203.2cm W x 76.2cm L<br />
(80” W x 30” L)<br />
101.6cm W x 137.1cm L<br />
(40” W x 54” L)<br />
includes the non-inflating<br />
flaps<br />
101.6cm W 203.2cm L<br />
(40” W 80” L)<br />
Hose<br />
Selection<br />
SW5-HOSE7<br />
(White)<br />
SW5-HOSE7<br />
(White)<br />
SW5-HOSE7<br />
(White)<br />
SW5-HOSE7<br />
(White)<br />
Compatible Convective Warmers<br />
EQUATOR ® model EQ-5000<br />
Snuggle Warm ® model SW-4000<br />
EQUATOR ® model EQ-5000<br />
Snuggle War m ® model SW-4000<br />
EQUATOR ® model EQ-5000<br />
Snuggle Warm ® model SW-4000<br />
EQUATOR ® model EQ-5000<br />
Snuggle Warm ® model SW-4000<br />
A-3 EQUATOR ® Convective Warmer | Operator’s <strong>Manual</strong><br />
continued
Convective Warming<br />
Blanket<br />
A P P E N D I X A • C o n v e c t i v e W a r m i n g B l a n k e t I d e n t i f i c a t i o n C h a r t<br />
Description Dimensions<br />
SW-2014L<br />
Left Lateral Access<br />
Convective Warming<br />
Blanket<br />
SW-2014R<br />
Right Lateral Access<br />
Convective Warming<br />
Blanket<br />
SW-2015<br />
Upper Underbody<br />
Convective Warming<br />
Blanket<br />
SW-2016<br />
Full Body Split Access<br />
Convective Warming<br />
Blanket<br />
101.6cm W 203.2cm L<br />
(40” W 80” L)<br />
101.6cm W 203.2cm L<br />
(40” W 80” L)<br />
101.6cm W 203.2cm L<br />
(40” W 80” L)<br />
101.6cm W 203.2cm L<br />
(40” W 80” L)<br />
Hose<br />
Selection<br />
SW5-HOSE7<br />
(White)<br />
SW5-HOSE7<br />
(White)<br />
SW5-HOSE7<br />
(White)<br />
SW5-HOSE7<br />
(White)<br />
Compatible Convective Warmers<br />
EQUATOR ® model EQ-5000<br />
Snuggle Warm ® model SW-4000<br />
EQUATOR ® model EQ-5000<br />
Snuggle Warm ® model SW-4000<br />
EQUATOR ® model EQ-5000<br />
Snuggle Warm ® model SW-4000<br />
EQUATOR ® model EQ-5000<br />
Snuggle Warm ® model SW-4000<br />
EQUATOR ® Convective Warmer | Operator’s <strong>Manual</strong> A-4<br />
continued
A P P E N D I X A • C o n v e c t i v e W a r m i n g B l a n k e t I d e n t i f i c a t i o n C h a r t<br />
Convective Warming<br />
Blanket<br />
Description Dimensions<br />
SW-2018<br />
Multi Access<br />
Convective Warming<br />
Blanket<br />
SW-2019<br />
Poncho Convective<br />
Warming Blanket<br />
101.6cm W 203.2cm L<br />
(40” W 80” L)<br />
101.6cm W 203.2cm L<br />
(40” W 80” L)<br />
includes the non-inflating<br />
flaps<br />
Hose<br />
Selection<br />
SW5-HOSE7<br />
(White)<br />
SW5-HOSE7<br />
(White)<br />
Compatible Convective Warmers<br />
EQUATOR ® model EQ-5000<br />
Snuggle Warm ® model SW-4000<br />
EQUATOR ® model EQ-5000<br />
Snuggle Warm ® model SW-4000<br />
A-5 EQUATOR ® Convective Warmer | Operator’s <strong>Manual</strong>
APPENDIX B<br />
A P P E N D I X B • P o s i t i o n t h e C o n v e c t i v e W a r m i n g B l a n k e t<br />
Position the Convective Warming Blanket<br />
WARNINGS<br />
• If the patient's nose or mouth is positioned against the convective warming blanket or the<br />
plastic drape, closely monitor the patient's breathing to prevent suffocation injury.<br />
• Cover all open wounds in contact with the convective warming blanket to prevent airborne<br />
contamination.<br />
• Always place the perforated side of the convective warming blanket, the side with small holes,<br />
towards the patient. Failure to do so may result in thermal injury.<br />
• Do not use a convective warming blanket over transdermal medications as this may lead to<br />
increased drug delivery that may result in patient injury or death.<br />
• The convective warming blanket is for single-use only. Reusing the blanket may increase the<br />
risk of cross contamination.<br />
• Do not place objects onto the convective warming blanket that will obstruct air flow. Items on<br />
the blanket can produce localized pressure on the patient’s skin, reducing cutaneous blood<br />
flow and causing thermal injury to the patient.<br />
• For underbody blankets do not place objects, other than the patient’s body, onto the<br />
convective warming blanket that will obstruct air flow. Items on the blanket can produce<br />
localized pressure on the patient’s skin, reducing cutaneous blood flow and causing thermal<br />
injury to the patient.<br />
• For the SW-2013 Adult Underbody Convective Warming Blanket, always keep the arms at the<br />
patient’s side. Do not allow the patient’s arms to extend outside the blanket as they may<br />
obstruct airflow through the blanket. Airflow obstruction may result in insufficient patient<br />
warming and loss of therapy.<br />
The following sections describe how to position the convective warming blanket. Refer to the page number<br />
below for the specific blanket being used.<br />
Blanket Page Number<br />
SW-2001 Adult Full Body Convective Warming Blanket B-2<br />
SW-2002 Pediatric Full Body Convective Warming<br />
Blanket<br />
EQUATOR ® Convective Warmer | Operator’s <strong>Manual</strong> B-1<br />
B-2<br />
SW-2003 Upper Body Convective Warming Blanket B-3<br />
SW-2004 Lower Body Convective Warming Blanket B-3
A P P E N D I X B • P o s i t i o n t h e C o n v e c t i v e W a r m i n g B l a n k e t<br />
Blanket Page Number<br />
SW-2005 Neonate to Small Child Convective Warming<br />
Blanket<br />
SW-2006 Preemie to Neonate Convective Warming<br />
Blanket<br />
SW-2001 Adult Full Body Convective Warming Blanket and<br />
SW-2002 Pediatric Full Body Convective Warming Blanket<br />
1 Place the blanket on the patient with the perforated side<br />
against the patient's skin.<br />
2 Tuck the blanket flap (a) under the patient’s feet.<br />
3 If desired, place a light weight blanket over the convective<br />
warming blanket.<br />
4 Continue with Step 4, on page 16, to attach the hose to the<br />
blanket.<br />
B-2 EQUATOR ® Convective Warmer | Operator’s <strong>Manual</strong><br />
B-4<br />
B-4<br />
SW-2007 Tube Convective Warming Blanket B-5<br />
SW-2008 Sterile Cardiac Convective Warming Blanket B-6<br />
SW-2009 Pediatric Underbody Convective Warming<br />
Blanket<br />
SW-2010 Small Upper Body Convective Warming<br />
Blanket<br />
SW-2011 Large Pediatric Underbody Convective<br />
Warming Blanket<br />
B-7<br />
B-8<br />
B-10<br />
SW-2013 Adult Underbody Convective Warming Blanket B-11<br />
SW-2014L Left and SW-2014R Right Lateral Access<br />
Convective Warming Blanket<br />
SW-2015 Upper Underbody Convective Warming<br />
Blanket<br />
SW-2016 Full Body Split Access Convective Warming<br />
Blanket<br />
B-12<br />
B-14<br />
B-15<br />
SW-2018 Multi Access Convective Warming Blanket B-16<br />
SW-2019 Poncho Convective Warming Blanket B-18<br />
a<br />
SW-2001<br />
a<br />
SW-2002
A P P E N D I X B • P o s i t i o n t h e C o n v e c t i v e W a r m i n g B l a n k e t<br />
SW-2003 Upper Body Convective Warming Blanket<br />
1 Place the blanket on the patient with the perforated side<br />
against the patient's skin.<br />
2 Remove the paper backing from the adhesive strip (a) and<br />
tape the blanket to the patient to prevent air flow on the<br />
surgical site.<br />
3 Tuck the blanket flap (b) under the patient's outstretched<br />
arms.<br />
4 If desired, place a light weight blanket over the convective<br />
warming blanket.<br />
5 If desired, carefully lay the clear head drape loosely over the<br />
patients’s head.<br />
Note: Do not cover the patient's head with clear drape if the<br />
patient is not intubated and ventilated.<br />
6 Continue with Step 4, on page 16, to attach the hose to the blanket.<br />
SW-2004 Lower Body Convective Warming Blanket<br />
1 Place the blanket on the patient with the perforated side<br />
against the patient's skin.<br />
2 Remove the paper backing (c) from the adhesive strip and<br />
tape the blanket to the patient to prevent air flow on the<br />
surgical site.<br />
3 Tuck the blanket flap (d) under the patient's feet.<br />
4 If desired place a light weight blanket over the convective<br />
warming blanket.<br />
5 Continue with Step 4, on page 16, to attach the hose to<br />
the blanket.<br />
EQUATOR ® Convective Warmer | Operator’s <strong>Manual</strong> B-3<br />
b<br />
c<br />
d<br />
a
A P P E N D I X B • P o s i t i o n t h e C o n v e c t i v e W a r m i n g B l a n k e t<br />
SW-2005 Neonate to Small Child Convective Warming Blanket and SW-2006<br />
Preemie to Neonate Convective Warming Blanket<br />
Review the following blanket positioning diagrams to determine which method to use for each age group.<br />
Preemie to<br />
Neonate<br />
6 to 12<br />
Months<br />
12 to 30<br />
Months<br />
Abdomen/Chest Access Leg Access Full Coverage<br />
1 Place the blanket on the operating room table or bed with all flaps<br />
(a) extended to the side and the hose retainer (b) facing up.<br />
2 Fold the flap(s) over the perforations on the blanket at the location of<br />
the surgical site, as indicated by the white panels on the positioning<br />
diagram.<br />
3 Lay the patient in the center of the blanket as indicated by the<br />
positioning diagram.<br />
4 Place the remaining flap(s) over the patient as indicated by the shaded panels on the positioning<br />
diagram. Adjust the flap(s) to maximize coverage. Tuck any excess flap under the blanket.<br />
5 Continue with Step 4, on page 16, to attach the hose to the blanket.<br />
B-4 EQUATOR ® Convective Warmer | Operator’s <strong>Manual</strong><br />
a<br />
b
A P P E N D I X B • P o s i t i o n t h e C o n v e c t i v e W a r m i n g B l a n k e t<br />
SW-2007 Tube Convective Warming Blanket<br />
1 Place the blanket around the patient with the<br />
perforations facing toward the patient (a).<br />
2 Tie the drawstrings together (b).<br />
3 Continue with Step 4, on page 16, to attach the hose<br />
to the blanket.<br />
EQUATOR ® Convective Warmer | Operator’s <strong>Manual</strong> B-5<br />
a<br />
b
A P P E N D I X B • P o s i t i o n t h e C o n v e c t i v e W a r m i n g B l a n k e t<br />
SW-2008 Sterile Cardiac Convective Warming Blanket<br />
WARNINGS<br />
• Do not use the SW-2008 convective warming blanket if the package is damaged or open.<br />
Sterility may be compromised and may cause death or serious injury.<br />
1 Place the blanket on top of the patient (a) with the<br />
perforated side against the patient's skin.<br />
2 Position the blanket with the hose facing up and the collar<br />
ring accessible (b).<br />
3 Position the clear window (c) over the groin area to allow<br />
access to the region if needed.<br />
4 Remove the paper backing (d) from the adhesive strip and<br />
press the adhesive strip (e) firmly against the patient and<br />
bed to secure.<br />
Connect the SW-2008 Hose<br />
The hose for the cardiac blanket attaches differently than other<br />
blankets.<br />
5 Connect the blanket’s collar ring (f) to the hose nozzle (g). Press<br />
together, making sure the hose barb snaps into the collar ring (f).<br />
6 If desired, place a lightweight blanket over the convective warming<br />
blanket.<br />
7 Continue with Step 5, on page 16, to attach the sheet clip and<br />
begin using the convective warmer.<br />
B-6 EQUATOR ® Convective Warmer | Operator’s <strong>Manual</strong><br />
a<br />
d<br />
g<br />
f<br />
b<br />
c<br />
e
A P P E N D I X B • P o s i t i o n t h e C o n v e c t i v e W a r m i n g B l a n k e t<br />
SW-2009 Pediatric Underbody Convective Warming Blanket<br />
1 Place the blanket on the table with the perforated side facing<br />
up (a).<br />
2 Position the patient on top of the blanket (b). Place the<br />
patient’s head in the non-inflated head section (c) and the<br />
body centered between the absorbent pads (d).<br />
3 Select one of the two entry ports. Fold the port, then tear<br />
away the cardboard center in the collar ring (e).<br />
4 Fold the entry port back to open the collar ring and insert the<br />
hose nozzle (f) into the collar ring. Refer to Step 4, on page<br />
16, for more information.<br />
5 If desired, carefully lay the clear drape(s) loosely over the<br />
patient (g). Remove the paper backing (h) from the adhesive<br />
strip and press the adhesive strip firmly against the patient<br />
and bed to secure.<br />
Note: Do not cover the patient's head with clear drape if the<br />
patient is not intubated and ventilated.<br />
6 Continue with Step 5, on page 16, to attach the sheet clip.<br />
a b<br />
EQUATOR ® Convective Warmer | Operator’s <strong>Manual</strong> B-7<br />
h<br />
g<br />
c<br />
d<br />
e<br />
f
A P P E N D I X B • P o s i t i o n t h e C o n v e c t i v e W a r m i n g B l a n k e t<br />
SW-2010 Small Upper Body Convective Warming Blanket<br />
1 Place the blanket on the patient (a) with the perforated side<br />
against the patient's skin.<br />
2 Remove the paper backing from the adhesive strip (b) and tape<br />
the blanket to the patient to prevent air flow on the surgical<br />
site.<br />
3 Attach the hose to the blanket. Refer to Step 4, on page 16, for<br />
more information.<br />
4 Attach the sheet clip. Refer to Step 5 on page 16, for more<br />
information.<br />
New style sheet clip Older style sheet clip<br />
B-8 EQUATOR ® Convective Warmer | Operator’s <strong>Manual</strong><br />
a<br />
b
A P P E N D I X B • P o s i t i o n t h e C o n v e c t i v e W a r m i n g B l a n k e t<br />
5 Inflate the blanket before tying the drawstrings. Refer to<br />
Step 6, on page 17 for more information.<br />
Note: Do not tie the drawstrings too tightly. Ensure airflow<br />
moves freely through the blanket.<br />
6 Tie the drawstrings around the patient’s arms (c) to prevent<br />
the blanket from moving.<br />
7 If desired, place a light weight blanket over the convective<br />
warming blanket.<br />
8 If desired, carefully lay the clear head drape loosely over the<br />
patients’s head.<br />
Note: Do not cover the patient's head with clear drape if the<br />
patient is not intubated and ventilated.<br />
9 Continue with Step 6, on page 17, to begin using the<br />
convective warmer.<br />
EQUATOR ® Convective Warmer | Operator’s <strong>Manual</strong> B-9<br />
c
A P P E N D I X B • P o s i t i o n t h e C o n v e c t i v e W a r m i n g B l a n k e t<br />
SW-2011 Large Pediatric Underbody Convective Warming Blanket<br />
1 Place the blanket on the table with the perforated side facing<br />
up (a).<br />
2 Position the patient on top of the blanket (b). Place the<br />
patient’s head in the non-inflated head section (c) and the<br />
body centered between the absorbent pads (d).<br />
3 Select one of the two entry ports. Fold the port, then tear<br />
away the cardboard center in the collar ring (e).<br />
4 Fold the entry port back to open the collar ring and insert the<br />
hose nozzle (f) into the collar ring. Refer to Step 4, on page<br />
16, for more information.<br />
5 If desired, carefully lay the clear drape(s) loosely over the<br />
patient (g). Remove the paper backing (h) from the adhesive<br />
strip and press the adhesive strip firmly against the patient<br />
and bed to secure.<br />
Note: Do not cover the patient's head with clear drape if the<br />
patient is not intubated and ventilated.<br />
6 Continue with Step 5, on page 16, to attach the sheet clip.<br />
a b<br />
B-10 EQUATOR ® Convective Warmer | Operator’s <strong>Manual</strong><br />
h<br />
g<br />
c<br />
d<br />
e<br />
f
A P P E N D I X B • P o s i t i o n t h e C o n v e c t i v e W a r m i n g B l a n k e t<br />
SW-2013 Adult Underbody Convective Warming Blanket<br />
1 Place the blanket on the table with the perforated side<br />
facing up (a).<br />
WARNINGS<br />
• Always keep the arms at the patient’s side. Do not allow<br />
the patient’s arms to extend outside the blanket as they<br />
may obstruct airflow through the blanket. Airflow<br />
obstruction may result in insufficient patient warming<br />
and loss of therapy.<br />
2 Position the patient on top of the blanket (b). Place the<br />
patient’s head in the non-inflated head section (c) and<br />
center the body on the blanket.<br />
Note: Do not allow the patient’s arms to extend outside the<br />
blanket (d) as they may obstruct airflow through the<br />
blanket.<br />
3 Select one of the three entry ports. Fold the port, then tear<br />
away the cardboard center in the collar ring (e).<br />
4 Fold the entry port back to open the collar ring and insert<br />
the hose nozzle (f) into the collar ring. Refer to Step 4, on<br />
page 16, for more information.<br />
5 Continue with Step 5, on page 16, to attach the sheet clip.<br />
EQUATOR ® Convective Warmer | Operator’s <strong>Manual</strong> B-11<br />
d<br />
a<br />
c<br />
e<br />
f<br />
b
A P P E N D I X B • P o s i t i o n t h e C o n v e c t i v e W a r m i n g B l a n k e t<br />
SW-2014L Left and SW-2014R Right Lateral Access<br />
Convective Warming Blanket<br />
Note: Images in the following procedure show how to position<br />
the SW-2014L Left Lateral Access blanket. To position the<br />
SW-2014R Right Lateral Access blanket, follow the sequence of<br />
steps with the patient and blanket in the opposite direction.<br />
1 Place the blanket on the patient (a) with the perforated<br />
side against the patient's skin.<br />
2 Remove the paper backing from the adhesive strips (b)<br />
and tape the blanket to prevent air flow on the surgical<br />
site.<br />
3 Carefully tear along the perforation (c) to separate the<br />
panel used to secure the blanket to the arm.<br />
4 Wrap the panel under the patient’s arm (d).<br />
B-12 EQUATOR ® Convective Warmer | Operator’s <strong>Manual</strong><br />
a<br />
c<br />
d<br />
b
A P P E N D I X B • P o s i t i o n t h e C o n v e c t i v e W a r m i n g B l a n k e t<br />
5 Remove the paper backing from the adhesive strip at the top<br />
of the blanket (e), and fasten the panel to the adhesive strip.<br />
6 Continue with Step 4, on page 16, to attach the hose to the<br />
blanket.<br />
EQUATOR ® Convective Warmer | Operator’s <strong>Manual</strong> B-13<br />
e
A P P E N D I X B • P o s i t i o n t h e C o n v e c t i v e W a r m i n g B l a n k e t<br />
SW-2015 Upper Underbody Convective Warming Blanket<br />
1 Place the blanket on the table with the perforated side<br />
facing up (a).<br />
2 Position the patient on top of the blanket (b). Place the<br />
patient’s head in the non-inflated head section (c) and the<br />
body centered on the blanket with both arms extended.<br />
3 Attach the hose to the blanket. Refer to Step 4, on page 16,<br />
for more information.<br />
B-14 EQUATOR ® Convective Warmer | Operator’s <strong>Manual</strong><br />
a<br />
b<br />
c
A P P E N D I X B • P o s i t i o n t h e C o n v e c t i v e W a r m i n g B l a n k e t<br />
SW-2016 Full Body Split Access Convective Warming Blanket<br />
1 Place the blanket on the patient (a) with the perforated side<br />
against the patient's skin.<br />
2 Carefully tear along the perforation (b) to access the<br />
surgical site.<br />
3 Fold either the left or right panel back, remove the paper<br />
backing from the adhesive strip, and fasten the panel to the<br />
top of the blanket (c).<br />
4 Remove the paper backing from the adhesive strips (d) and<br />
tape the blanket to prevent air flow on the surgical site.<br />
5 If desired, place a light weight blanket over the convective<br />
warming blanket.<br />
6 Continue with Step 4, on page 16, to attach the hose to the<br />
blanket.<br />
EQUATOR ® Convective Warmer | Operator’s <strong>Manual</strong> B-15<br />
a<br />
c<br />
b<br />
d
A P P E N D I X B • P o s i t i o n t h e C o n v e c t i v e W a r m i n g B l a n k e t<br />
SW-2018 Multi Access Convective Warming Blanket<br />
1 Place the blanket on the patient with the opening over the<br />
patient’s head (a), and the perforated side against the<br />
patient's skin.<br />
2 Carefully tear along the perforations at either the left or right<br />
center panels (b) of the blanket to access the surgical site.<br />
3 Fold the panel back (c), remove the paper backing from the<br />
adhesive strip (d), and fasten the panel to the top of the<br />
blanket.<br />
B-16 EQUATOR ® Convective Warmer | Operator’s <strong>Manual</strong><br />
d<br />
a<br />
c<br />
b
A P P E N D I X B • P o s i t i o n t h e C o n v e c t i v e W a r m i n g B l a n k e t<br />
4 Remove the paper backing from the adhesive strips (e) and tape<br />
the blanket to prevent air flow on the surgical site.<br />
5 If desired, carefully lay the clear head drape loosely over the<br />
patients’s head.<br />
Note: Do not cover the patient's head with clear drape if the<br />
patient is not intubated and ventilated.<br />
6 Continue with Step 4, on page 16, to attach the hose to the blanket.<br />
EQUATOR ® Convective Warmer | Operator’s <strong>Manual</strong> B-17<br />
e
A P P E N D I X B • P o s i t i o n t h e C o n v e c t i v e W a r m i n g B l a n k e t<br />
SW-2019 Poncho Convective Warming Blanket<br />
1 Place the blanket on the table with the perforated side facing<br />
up (a).<br />
2 Position the patient on top of the blanket (b). Place the<br />
patient’s head in the opening (c) and the body centered on<br />
the blanket.<br />
3 Pull the top of the blanket over the patient’s head onto the<br />
upper body (d).<br />
4 Carefully tear along the perforation in the center of the<br />
blanket (e) as needed.<br />
a b<br />
B-18 EQUATOR ® Convective Warmer | Operator’s <strong>Manual</strong><br />
d<br />
c<br />
e
A P P E N D I X B • P o s i t i o n t h e C o n v e c t i v e W a r m i n g B l a n k e t<br />
5 Remove the paper backing from the adhesive strips (f) and<br />
tape the blanket as needed.<br />
6 Continue with Step 4, on page 16, to attach the hose to the<br />
blanket.<br />
EQUATOR ® Convective Warmer | Operator’s <strong>Manual</strong> B-19<br />
f
A P P E N D I X C • O r d e r i n g I n f o r m a t i o n<br />
APPENDIX C<br />
Ordering Information<br />
Replacement Components<br />
<<br />
Accessories<br />
Product Description<br />
SW-2001 Adult Full Body Convective Warming Blanket<br />
SW-2002 Pediatric Full Body Convective Warming Blanket<br />
SW-2003 Upper Body Convective Warming Blanket<br />
SW-2004 Lower Body Convective Warming Blanket<br />
SW-2005 Neonate to Small Child Convective Warming Blanket<br />
SW-2006 Preemie to Neonate Convective Warming Blanket<br />
SW-2007 Tube Convective Warming Blanket<br />
SW-2008 Sterile Cardiac Convective Warming Blanket<br />
SW-2009 Pediatric Underbody Convective Warming Blanket<br />
SW-2010 Small Upper Body Convective Warming Blanket<br />
SW-2011 Large Pediatric Underbody Convective Warming Blanket<br />
SW-2013 Adult Underbody Convective Warming Blanket<br />
SW-2014L Left Lateral Access Convective Warming Blanket<br />
SW-2014R Right Lateral Access Convective Warming Blanket<br />
SW-2015 Upper Underbody Convective Warming Blanket<br />
SW-2016 Full Body Split Access Convective Warming Blanket<br />
SW-2018 Multi Access Convective Warming Blanket<br />
SW-2019 Poncho Convective Warming Blanket<br />
SW5-HOSE7 Hose Assembly, 2.1 m (7 ft.)<br />
SW5-HOSE-N Neonatal Hose, 1.5 m (5 ft.)<br />
F3-5000 Filter Assembly<br />
<<br />
CW-5000<br />
Product Description<br />
Cord Wrap<br />
SC-5000 Sheet Clip Assembly<br />
RC-5000 Rolling Cart<br />
C-1 EQUATOR ® Convective Warmer | Operator’s <strong>Manual</strong>
I n d e x<br />
Numerics<br />
36°C Temperature Setting Button 13<br />
40°C Temperature Setting Button 13<br />
44°C Temperature Setting Button 13<br />
A<br />
Accessories 4<br />
ordering information C-1<br />
replace 28<br />
Additional documentation 31<br />
After Use 19<br />
Air filter<br />
replace 23<br />
Air outlet 3<br />
Ambient Air Temperature Setting Button 13<br />
Anesthetic use warning 5, 17<br />
Assembly instructions 9<br />
Australian Representative 32<br />
B<br />
Blanket<br />
contact surface temperatures 34<br />
determine size 15, A-1<br />
dimensions A-1<br />
discard contaminated waste 19<br />
identification chart A-1<br />
position on patient 15, B-1<br />
C<br />
Cautions 8<br />
Clean the enclosure 22<br />
Clean the hose 22<br />
Components<br />
description 2<br />
ordering information C-1<br />
Contact surface temperatures 34<br />
Contents list 9<br />
Contraindications 5, 17<br />
Control panel 2<br />
description 12<br />
Controls 12<br />
Convective Warmer<br />
description 2<br />
Convective warmer cart<br />
assemble 10<br />
Convective warming blanket<br />
description 3<br />
determine size 15, A-1<br />
dimensions A-1<br />
discard contaminated waste 19<br />
identification chart A-1<br />
position on patient 15, B-1<br />
Conventions used in manual 1<br />
Cord wrap<br />
replace 28<br />
EQUATOR ® Convective Warmer | Operator’s <strong>Manual</strong> Index-1<br />
D<br />
Description<br />
accessories 4<br />
convective warming blankets 3<br />
EQUATOR Convective Warmer 2<br />
Dimensions<br />
convective warming blankets A-1<br />
Disconnect Indicator 13<br />
Disposal information<br />
blankets 19<br />
electrical device 32<br />
E<br />
Elapsed time display 12<br />
Electrical Safety Tests 11<br />
Electrical specifications 33<br />
Electromagnetic environmental recommendations<br />
34<br />
Environmental specifications 33<br />
EQUATOR Convective Warmer<br />
assembly 9<br />
description 2<br />
install 10<br />
operating 17<br />
using 17<br />
European Representative 32<br />
F<br />
Flammable anesthetic warning 5, 17<br />
Functional Tests 24<br />
G<br />
Grounding reliability 5, 17<br />
Guidelines for safe use 5
H<br />
Handle 2<br />
Hose 3<br />
attach to the blanket 16, B-6, B-7, B-10, B-11<br />
install 10<br />
Hose end temperature display 13<br />
Hose nozzle 3<br />
Hose retainer clip 3<br />
attach clip to hose 10<br />
Hose selection A-1<br />
I<br />
I.V. pole mounting hight restriction 11<br />
Indicators 12<br />
Intended use 1<br />
M<br />
Maintenance<br />
after every use 22<br />
every 12 months 23<br />
Modes of operation 12, 13<br />
Mount to convective warmer cart 11<br />
Mount to I.V. pole 11<br />
mounting hight restriction 6, 11<br />
N<br />
Non-Warranty work 31<br />
O<br />
Operating Instructions 14<br />
Operating the EQUATOR Convective Warmer<br />
17<br />
Ordering information C-1<br />
Over Temperature Alarm Indicator 13<br />
P<br />
Parts<br />
ordering information C-1<br />
Performance specifications 34<br />
Physical specifications 33<br />
Pole clamp 3<br />
Position convective warming blanket B-1<br />
Power cord<br />
install 11<br />
store 19<br />
Power cord lock 3<br />
Power cord receptacle 3<br />
Power OFF button 13<br />
Power ON button 13<br />
Index<br />
Index-2 EQUATOR ® Convective Warmer | Operator’s <strong>Manual</strong><br />
R<br />
Replace<br />
air filter 23<br />
cord wrap 28<br />
sheet clip 28<br />
S<br />
Safety information 5<br />
Service 31<br />
contacts 32<br />
Set up for use 14<br />
Sheet clip<br />
attach to sheets 16<br />
replace 28<br />
Specifications 33<br />
electrical 33<br />
environmental 33<br />
performance 33<br />
physical 33<br />
thermal 33<br />
Standard compliance guidelines 33<br />
Storage 19<br />
SW5-HOSE7<br />
hose selection A-1, A-2, A-3<br />
verify set up 14<br />
SW5-HOSE-N<br />
hose selection A-2<br />
verify set up 14<br />
Symbols 35<br />
System specifications 33<br />
T<br />
Temperature display<br />
hose end 13<br />
Thermal specifications 33<br />
Thermistor cable 3<br />
install 10
I n d e x<br />
Thermistor receptacle 3<br />
Troubleshooting 20<br />
does not start 20<br />
no air flow 20<br />
no heat 20<br />
noisy 20<br />
self-test fails 20<br />
strong air flow 20<br />
weak air flow 20<br />
U<br />
Under Temperature Indicator 13<br />
USA and Canada service contacts 32<br />
Using the EQUATOR Convective Warmer 17<br />
W<br />
Warnings 5<br />
Warranty 29<br />
EQUATOR ® Convective Warmer | Operator’s <strong>Manual</strong> Index-3