

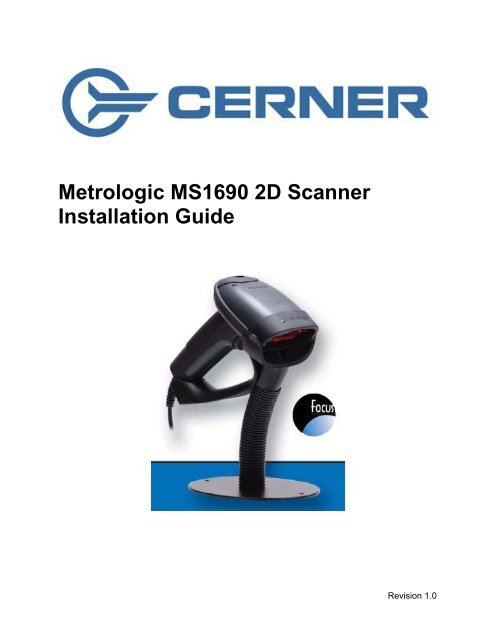
Metrologic MS1690 2D Scanner Installation Guide - Bar Code ...
Metrologic MS1690 2D Scanner Installation Guide - Bar Code ...
Metrologic MS1690 2D Scanner Installation Guide - Bar Code ...

You also want an ePaper? Increase the reach of your titles
YUMPU automatically turns print PDFs into web optimized ePapers that Google loves.
<strong>Metrologic</strong> <strong>MS1690</strong> <strong>2D</strong> <strong>Scanner</strong><br />
<strong>Installation</strong> <strong>Guide</strong><br />
Revision 1.0
Revision History<br />
1.0 04/17/2007 – Initial Release<br />
The latest version of this document can be found in the following places:<br />
• Internally for Cerner associates in the Cerner Knowledge Repository (KR) using the<br />
search function with the keywords: <strong>Metrologic</strong> or <strong>MS1690</strong><br />
• Internally for Cerner associates on “My Cerner” using the search function with the<br />
keywords: <strong>Metrologic</strong> or <strong>MS1690</strong><br />
• Externally for clients and Cerner associates on www.cerner.com under the Support tab,<br />
Millennium Infrastructure Documentation, Peripherals, <strong>Bar</strong>-<strong>Code</strong> <strong>Scanner</strong>s, <strong>Metrologic</strong>.<br />
2 <strong>Metrologic</strong> <strong>MS1690</strong> Focus <strong>Installation</strong> <strong>Guide</strong><br />
© Cerner Confidential and Proprietary All rights reserved. This document contains confidential information, which may not be<br />
reproduced or transmitted without the express written consent of Cerner Corporation.
Table of Contents<br />
Revision History............................................................................................................ 2<br />
Table of Contents.......................................................................................................... 3<br />
Overview ........................................................................................................................ 4<br />
LED and Beep Meanings ..................................................................................................5<br />
USB <strong>Scanner</strong> Setup....................................................................................................... 6<br />
PS/2 (Keyboard Wedge) <strong>Scanner</strong> Setup...................................................................... 7<br />
RS-232 (Serial) <strong>Scanner</strong> Setup..................................................................................... 8<br />
Symbology Selection.................................................................................................. 10<br />
Setting up the <strong>Scanner</strong> for Cerner Millennium Applications................................... 12<br />
Setting up the <strong>Scanner</strong> for Cerner Classic Applications ......................................... 12<br />
Miscellaneous Optional Setup Procedures............................................................... 13<br />
Hands Free (Presentation) Mode....................................................................................13<br />
Setting “Beep” Tone ........................................................................................................13<br />
Show Firmware Revision ................................................................................................14<br />
Reset to Factory Defaults................................................................................................14<br />
Sample <strong>Bar</strong> <strong>Code</strong>s....................................................................................................... 15<br />
“Linear” Sample <strong>Bar</strong> codes .............................................................................................15<br />
“<strong>2D</strong>” Sample <strong>Bar</strong> codes...................................................................................................16<br />
<strong>Metrologic</strong> <strong>MS1690</strong> Focus <strong>Installation</strong> <strong>Guide</strong> 3<br />
© Cerner Confidential and Proprietary All rights reserved. This document contains confidential information, which may not be<br />
reproduced or transmitted without the express written consent of Cerner Corporation.
<strong>Metrologic</strong> <strong>MS1690</strong> <strong>2D</strong> <strong>Scanner</strong><br />
<strong>Installation</strong> <strong>Guide</strong><br />
Overview<br />
This guide provides a Cerner-specific installation methodology for the following <strong>Metrologic</strong><br />
scanner models.<br />
<strong>Scanner</strong> Model Kit Part Number Description / Interface<br />
<strong>MS1690</strong>-14 MK1690-61B14 <strong>MS1690</strong> <strong>2D</strong> <strong>Bar</strong>code <strong>Scanner</strong> (RS232 Serial)<br />
<strong>MS1690</strong>-38 MK1690-61A38 <strong>MS1690</strong> <strong>2D</strong> <strong>Bar</strong>code <strong>Scanner</strong> (USB)<br />
<strong>MS1690</strong>-47 MK1690-61B47 <strong>MS1690</strong> <strong>2D</strong> <strong>Bar</strong>code <strong>Scanner</strong> (Keyboard Wedge)<br />
Verify the scanners model number by comparing the “Model” and the type located on the bottom<br />
of the scanner to the ones listed above. You also can compare the number on the box the<br />
scanner came in with the kit part number above. If the numbers do not match then this<br />
document should not be used to set up the scanner.<br />
To determine your scanners model number see the above two circles.<br />
In this example the model number is: <strong>MS1690</strong>-47<br />
Note: Each scanner model is specifically designed for a particular interface. Do not mix<br />
scanners and interfaces.<br />
This documentation should be used in place of the manufacturers’ documentation. The<br />
manufacturer’s documentation is provided with the scanner in the event that it might be needed<br />
at a later date. It is assumed that the reader understands how to attach peripheral devices and<br />
load software on Windows ® based PCs. If you need additional assistance, contact your<br />
institution’s help desk, your Cerner account team or Cerner’s Client Care Team in Kansas City<br />
Missouri call 816-201-9800 or toll free at (866) 221-8877 for assistance.<br />
4 <strong>Metrologic</strong> <strong>MS1690</strong> Focus <strong>Installation</strong> <strong>Guide</strong><br />
© Cerner Confidential and Proprietary All rights reserved. This document contains confidential information, which may not be<br />
reproduced or transmitted without the express written consent of Cerner Corporation.
LED and Beep Meanings<br />
The <strong>MS1690</strong> has three LED indicators (yellow, white and blue) located on the top of the<br />
scanner. When the scanner is on, the flashing or stationary activity of the LED’s indicates the<br />
status of the current scan and the scanner. The Beep also indicates the status of the scans.<br />
Normal Operation Feedback<br />
LED Beep Meaning<br />
None None <strong>Scanner</strong> not powered on or no barcode being scanned.<br />
Steady Yellow None <strong>Scanner</strong> is in the presentation stand.<br />
Steady Blue None The blue LED is illuminated when the scanner is active and linear<br />
illumination is on or when the scanner is attempting to decode a<br />
barcode.<br />
Steady Blue &<br />
Single White Flash<br />
1 Beep When the scanner successfully reads a bar code it will beep once and<br />
the White LED will turn on indicating data is being transmitted.<br />
Steady White 1 Beep When the scanner successfully reads a bar code it will beep once and<br />
the White LED will turn on indicating data is being transmitted. If the<br />
host is not ready to accept the information, the scanner’s white LED<br />
Alternating<br />
Flashing Blue and<br />
White<br />
will remain on until the data can be transmitted.<br />
None This indicates the scanner is in configuration mode. A short razzberry<br />
tone indicates that an invalid bar code has been scanned while in this<br />
mode.<br />
Flashing Blue None The blue LED will flash if the trigger is pressed while the scanner is in<br />
the in-stand presentation mode. The blue LED will stop flashing after a<br />
Long Razzberry<br />
Tone – During<br />
Power Up<br />
Short Razzberry<br />
Tone – Durring<br />
Scanning<br />
3 Beep after<br />
power up<br />
White LED Flash 3 Beeps in<br />
Configuration<br />
Mode<br />
3 beeps – Med /<br />
High / Low<br />
3 Beeps in<br />
Normal Mode<br />
brief period of time.<br />
Failed to initialize or configure the scanner. If the scanner does not<br />
respond after reprogramming, return the scanner for repair.<br />
An Invalid bar code has been scanned when in configuration mode or<br />
the trigger has been pulled too fast.<br />
<strong>Scanner</strong> ready for use.<br />
<strong>Scanner</strong> has entered configuration mode.<br />
When using single code configuring this 3 beeps indicate that the<br />
barcode successfully configured the scanner.<br />
Communication Error<br />
<strong>Metrologic</strong> <strong>MS1690</strong> Focus <strong>Installation</strong> <strong>Guide</strong> 5<br />
© Cerner Confidential and Proprietary All rights reserved. This document contains confidential information, which may not be<br />
reproduced or transmitted without the express written consent of Cerner Corporation.
USB <strong>Scanner</strong> Setup<br />
If you are installing your <strong>MS1690</strong> scanner using the USB port on your PC please perform the<br />
following steps. If you are installing your <strong>MS1690</strong> scanner using PS/2 or RS-232 style<br />
connection please move to that section of this document as the instructions in this section are<br />
not designed for your scanner.<br />
1. Connect the USB interface cable to the base of the scanner and to an unused USB port<br />
on the PC. Wait for the 3 beeps indicating that the scanner is ready.<br />
2. The scanner should be pre-configured for use with a USB interface. You should not have<br />
to scan any barcodes to configure this interface.<br />
USB Connections<br />
Please proceed to the section titled “Symbology Selection”<br />
6 <strong>Metrologic</strong> <strong>MS1690</strong> Focus <strong>Installation</strong> <strong>Guide</strong><br />
© Cerner Confidential and Proprietary All rights reserved. This document contains confidential information, which may not be<br />
reproduced or transmitted without the express written consent of Cerner Corporation.
PS/2 (Keyboard Wedge) <strong>Scanner</strong> Setup<br />
If you are installing your <strong>MS1690</strong> scanner using the PS/2 Mini-Din keyboard port on your PC<br />
please perform the following steps. If you are installing your <strong>MS1690</strong> scanner using USB or<br />
RS-232 style connection please move to that section of this document as the instructions in this<br />
section are not designed for your scanner.<br />
1. Shut down the PC or thin client.<br />
2. Unplug the keyboard from the back of the PC or thin client.<br />
3. Mate the DIN to Mini DIN adapter cable (P/N: 45988) to the interface cable.<br />
4. Connect the PS/2 Interface cable to the scanner and connect the male PS/2 connector<br />
to the keyboard port on the PC or thin client.<br />
5. Plug the keyboard into the female PS/2 cable on the interface cable.<br />
PS/2 Cable Connections<br />
6. Once the scanner and the computer or are fully connected, power up the computer.<br />
7. The scanner should be pre-configured for use with a Keyboard Wedge (PS/2) interface.<br />
You should not have to scan any barcodes to configure this interface.<br />
Please proceed to the section titled “Symbology Selection”<br />
<strong>Metrologic</strong> <strong>MS1690</strong> Focus <strong>Installation</strong> <strong>Guide</strong> 7<br />
© Cerner Confidential and Proprietary All rights reserved. This document contains confidential information, which may not be<br />
reproduced or transmitted without the express written consent of Cerner Corporation.
RS-232 (Serial) <strong>Scanner</strong> Setup<br />
If you are installing your <strong>MS1690</strong> scanner using the serial RS-232 port on your PC please<br />
perform the following steps. If you are installing your <strong>MS1690</strong> scanner using USB or PS/2 style<br />
connection please move to that section of this document as the instructions in this section are<br />
not designed for your scanner.<br />
1. If Data Technologies “Keyport version 4.3 or higher is not installed please install it now.<br />
The procedure can be found in the following location:<br />
Data Technologies Keyport <strong>Installation</strong> <strong>Guide</strong><br />
• Internally for Cerner associates in the Cerner Knowledge Repository (KR) using the<br />
search function with the keywords: Keyport<br />
• Internally for Cerner associates on “My Cerner” using the search function with the<br />
keywords: Keyport<br />
• Externally for clients and Cerner associates on www.cerner.com under the Support<br />
tab, Millennium Infrastructure, Peripherals, <strong>Bar</strong>-<strong>Code</strong> <strong>Scanner</strong>s, Data Technologies.<br />
2. Shut down the PC or thin client.<br />
3. Connect the RS-232 Interface cable to the bottom of the scanner and connect the serial<br />
RS-232 (DB9) connector to the PC or thin client and tighten the screws.<br />
4. Plug the power supply into the power jack on the cable and then into a wall power outlet.<br />
RS-232 (Serial) and Power Connections<br />
8 <strong>Metrologic</strong> <strong>MS1690</strong> Focus <strong>Installation</strong> <strong>Guide</strong><br />
© Cerner Confidential and Proprietary All rights reserved. This document contains confidential information, which may not be<br />
reproduced or transmitted without the express written consent of Cerner Corporation.
RS-232 (serial) <strong>Scanner</strong> Setup (Continued)<br />
Note: The scanner will start to initialize. All LED’s (yellow, white, and blue) will light for<br />
approximately 2 seconds then start to alternately flash and then beep 3 times.<br />
5. Power on the computer or thin client.<br />
6. Bring up the Keyport software and click the start button to activate the software.<br />
Note: make sure that your communication settings in the Keyport software are set properly<br />
(9600 Baud, Even Parity, 7 Data Bits, 1 Stop Bit).<br />
7. Scan the following bar codes.<br />
Factory Defaults<br />
³ 9 9 9 9 9 8<br />
Enter/Exit Config Mode<br />
³ 9 9 9 9 9 9<br />
Even Parity<br />
³ 3 1 6 0 2 5<br />
9600 Baud<br />
³ 4 1 5 8 5 0<br />
7 Data Bits<br />
³ 1 1 6 0 0 3<br />
1 Stop Bit<br />
³ 1 1 6 0 1 4<br />
Enter/Exit Config Mode<br />
³ 9 9 9 9 9 9<br />
Please proceed to the section titled “Symbology Selection”<br />
<strong>Metrologic</strong> <strong>MS1690</strong> Focus <strong>Installation</strong> <strong>Guide</strong> 9<br />
© Cerner Confidential and Proprietary All rights reserved. This document contains confidential information, which may not be<br />
reproduced or transmitted without the express written consent of Cerner Corporation.
Symbology Selection<br />
Scan the following bar codes in the order in which they appear.<br />
Enter/Exit Config Mode<br />
³ 9 9 9 9 9 9<br />
Enable RSS 14<br />
³ 1 0 0 4 1 3<br />
No RSS 14 App ID<br />
³ 1 1 4 9 1 1<br />
No RSS 14 Sym ID<br />
³ 1 1 4 9 1 2<br />
Enable RSS Limited<br />
³ 1 0 0 4 1 4<br />
No RSS Limited App<br />
³ 1 1 4 9 1 4<br />
No RSS Limited Sym<br />
³ 1 1 4 9 1 5<br />
Enable <strong>Code</strong> 39 (Full<br />
³ 1 0 0 2 1 7<br />
Enable Standard 2 of<br />
³ 1 0 0 1 1 0<br />
10 <strong>Metrologic</strong> <strong>MS1690</strong> Focus <strong>Installation</strong> <strong>Guide</strong><br />
© Cerner Confidential and Proprietary All rights reserved. This document contains confidential information, which may not be<br />
reproduced or transmitted without the express written consent of Cerner Corporation.
Symbology Selection (Continued)<br />
Enable ISBT 128<br />
³ 1 3 8 4 1 7<br />
Enable Aztec<br />
³ 1 0 0 6 1 0<br />
Enable Data Matrix<br />
³ 2 0 0 5 3 2<br />
Enter/Exit Config Mode<br />
³ 9 9 9 9 9 9<br />
Please proceed to the section titled “Set Postamble for Cerner Classic & Cerner Millennium<br />
Applications”<br />
<strong>Metrologic</strong> <strong>MS1690</strong> Focus <strong>Installation</strong> <strong>Guide</strong> 11<br />
© Cerner Confidential and Proprietary All rights reserved. This document contains confidential information, which may not be<br />
reproduced or transmitted without the express written consent of Cerner Corporation.
Setting up the <strong>Scanner</strong> for Cerner Millennium Applications<br />
Note: If you are not running Cerner Millennium applications skip this section.<br />
Scan the following barcodes to sets up the scanners suffix to a “Horizontal TAB” for most<br />
Cerner Millennium applications. If this does not work for your application try scanning the<br />
configuration barcodes for Cerner Classic.<br />
Disable CR Suffix<br />
³ 1 1 6 6 0 3<br />
Enable TAB Suffix<br />
³ 1 1 6 6 1 0<br />
Setting up the <strong>Scanner</strong> for Cerner Classic Applications<br />
Note: If you are not running Cerner Classic applications skip this section.<br />
Scan the following barcodes to set up the scanners suffix to a “Carriage Return” for Cerner<br />
Classic applications.<br />
Disable TAB Suffix<br />
³ 1 1 6 6 0 0<br />
Enable CR Suffix<br />
³ 1 1 6 6 1 3<br />
Please proceed to the section titled “Symbology Selection”<br />
12 <strong>Metrologic</strong> <strong>MS1690</strong> Focus <strong>Installation</strong> <strong>Guide</strong><br />
© Cerner Confidential and Proprietary All rights reserved. This document contains confidential information, which may not be<br />
reproduced or transmitted without the express written consent of Cerner Corporation.
Miscellaneous Optional Setup Procedures<br />
Hands Free (Presentation) Mode<br />
To use the <strong>MS1690</strong> scanner in presentation mode place the scanner in the presentation stand.<br />
Placing the scanner in the stand automatically configures the scanner into presentation mode.<br />
Once the scanner is in the stand and the IR sensor detects an object in the IR activation range<br />
the scanner’s light automatically starts to flash as it attempts to scan the bar code. The scanner<br />
continuously attempts to scan the bar code until either it succeeds or the bar code is removed<br />
from the scanner’s field of view. When scanner successfully reads the bar code it will beep<br />
once, the white LED will flash and the decoded data will be transmitted to the host.<br />
Setting “Beep” Tone<br />
To adjust the beepers frequency and volume scan the appropriate bar code(s).<br />
Normal<br />
³ 3 1 8 5 7 5<br />
Low Fequency<br />
³ 3 1 8 5 2 5<br />
Med Fequency<br />
³ 3 1 8 5 7 5<br />
High Fequency<br />
³ 3 1 8 5 6 5<br />
<strong>Metrologic</strong> <strong>MS1690</strong> Focus <strong>Installation</strong> <strong>Guide</strong> 13<br />
© Cerner Confidential and Proprietary All rights reserved. This document contains confidential information, which may not be<br />
reproduced or transmitted without the express written consent of Cerner Corporation.
Show Firmware Revision<br />
Follow this procedure to display the firmware revision of your scanner.<br />
1. Bring up Microsoft Word, WordPad or Notepad and make sure your curser is in the<br />
editors window.<br />
2. Scan the following barcode.<br />
Scan Count Mode On<br />
³ 1 1 8 0 1 6<br />
Note: be careful not to open or click any other windows after you enter scan count mode.<br />
You should now be seeing something that looks like this:<br />
118016 1 2127 2127 15370<br />
0 0 0 15370<br />
0 0 0 15370<br />
0 0 0 15370<br />
0 0 0 15370…<br />
Note: The last block of numbers is the firmware revision level. In this case it would be: 15370.<br />
Scan the following barcode to turn off Scan Count.<br />
Reset to Factory Defaults<br />
Scan Count Mode Off<br />
³ 1 1 8 0 0 6<br />
Scan the following barcode to reset the scanner back to factory defaults.<br />
Factory Defaults<br />
³ 9 9 9 9 9 8<br />
14 <strong>Metrologic</strong> <strong>MS1690</strong> Focus <strong>Installation</strong> <strong>Guide</strong><br />
© Cerner Confidential and Proprietary All rights reserved. This document contains confidential information, which may not be<br />
reproduced or transmitted without the express written consent of Cerner Corporation.
Sample <strong>Bar</strong> <strong>Code</strong>s<br />
Use these bar codes to test your imager using Microsoft Word or WordPad.<br />
“Linear” Sample <strong>Bar</strong> codes<br />
Codabar<br />
A 1 2 3 4 5 B<br />
<strong>Code</strong> 39 (Normal)<br />
A B C 1 2 3<br />
<strong>Code</strong> 39 (Full ASCII)<br />
A B C 1 2 3 &<br />
Interleaved 2 of 5<br />
1234567890<br />
RSS Limited<br />
12345678901231<br />
<strong>Code</strong> 128<br />
1234567890<br />
RSS-14<br />
12345678901231<br />
UPC-A<br />
1 23456 78901<br />
Standard 2 of 5<br />
1 2 3 4 5 6 7 8<br />
<strong>Metrologic</strong> <strong>MS1690</strong> Focus <strong>Installation</strong> <strong>Guide</strong> 15<br />
© Cerner Confidential and Proprietary All rights reserved. This document contains confidential information, which may not be<br />
reproduced or transmitted without the express written consent of Cerner Corporation.<br />
2<br />
9
“<strong>2D</strong>” Sample <strong>Bar</strong> codes<br />
PDF417<br />
This is a sample of the “PDF417”symbology. This symbology can store a lot of information in a small space.<br />
Aztec <strong>Code</strong><br />
This is a sample of the <strong>2D</strong> "Aztec <strong>Code</strong>" symbology. This symbology can store a lot of information in a small space.<br />
Data Matrix<br />
This is a sample of the <strong>2D</strong> "Data Matrix" symbology. This symbology can store a lot of information in a small space.<br />
16 DS3408 <strong>Installation</strong> <strong>Guide</strong> (PCs and Thin Clients)<br />
© Cerner Confidential and Proprietary All rights reserved. This document contains confidential information, which may not be<br />
reproduced or transmitted without the express written consent of Cerner Corporation.
This page intentionally left blank.<br />
4600G <strong>Installation</strong> <strong>Guide</strong> (PCs and Thin Clients) 17<br />
© Cerner Confidential and Proprietary All rights reserved. This document contains confidential information, which may not be<br />
reproduced or transmitted without the express written consent of Cerner Corporation.