Digital Heart Rate Monitor - user - Timex.com assets
Digital Heart Rate Monitor - user - Timex.com assets
Digital Heart Rate Monitor - user - Timex.com assets

You also want an ePaper? Increase the reach of your titles
YUMPU automatically turns print PDFs into web optimized ePapers that Google loves.
W270 EU 103-095001<br />
digital heart rate monitor guide<br />
<strong>Digital</strong> <strong>Heart</strong> <strong>Rate</strong> <strong>Monitor</strong><br />
English page 1<br />
Français page 39<br />
Español página 85<br />
Português página 129<br />
Italiano pagina 173<br />
Deutsch Seite 219<br />
Nederlands pagina 265
TablE oF CoNTENTS<br />
WaTCh MoDES/bUTToNS .................................................................................. 5<br />
Display Icons and Descriptions .......................................................................... 5<br />
Watch Modes ...................................................................................................... 6<br />
Determining Your Optimal <strong>Heart</strong> <strong>Rate</strong> Zone ....................................................... 7<br />
GETTING STarTED WITh yoUr hEarT raTE MoNITor.................................. 8<br />
To Use Your <strong>Digital</strong> <strong>Heart</strong> <strong>Rate</strong> <strong>Monitor</strong> .............................................................. 8<br />
<strong>Digital</strong> <strong>Heart</strong> <strong>Rate</strong> <strong>Monitor</strong> Notes & Tips ............................................................ 9<br />
TaPSCrEEN TEChNoloGy ............................................................................. 10<br />
TIME oF Day ...................................................................................................... 11<br />
Second Time Zone ............................................................................................ 11<br />
ChroNoGraPh ................................................................................................. 12<br />
Lap/Split ............................................................................................................ 12<br />
Using the Chronograph .................................................................................... 13<br />
Changing the Chronograph Display Format ..................................................... 13<br />
TarGET TIME PaCEr ......................................................................................... 14<br />
Setting the Target Time Pacer .......................................................................... 14<br />
hyDraTIoN aND NUTrITIoN TIMErS ............................................................. 16<br />
Setting the Hydration and Nutrition Timers ..................................................... 16<br />
INTErval TIMEr WITh labElS ........................................................................ 16<br />
Setting Interval Timers ..................................................................................... 16<br />
Using the Interval Timer ................................................................................... 17<br />
CoUNTDoWN TIMEr ......................................................................................... 18<br />
Setting the Timer .............................................................................................. 18<br />
Using the Timer ................................................................................................ 19<br />
rECovEry .......................................................................................................... 20<br />
About Recovery <strong>Heart</strong> <strong>Rate</strong> .............................................................................. 20<br />
To Manually Determine a Recovery <strong>Heart</strong> <strong>Rate</strong> ............................................... 21
ECall ............................................................................................................... 21<br />
Reviewing your Workout Data .......................................................................... 22<br />
Locking Workouts in Recall .............................................................................. 23<br />
hrM SETUP ........................................................................................................ 24<br />
To Set a Target <strong>Heart</strong> <strong>Rate</strong> Zone ....................................................................... 24<br />
To Choose a Target <strong>Heart</strong> <strong>Rate</strong> Zone ................................................................ 25<br />
<strong>Digital</strong> <strong>Heart</strong> <strong>Rate</strong> <strong>Monitor</strong> Notes & Tips .......................................................... 26<br />
USEr INFo .......................................................................................................... 26<br />
alarM ................................................................................................................ 27<br />
CarE & MaINTENaNCE .................................................................................... 28<br />
<strong>Digital</strong> <strong>Heart</strong> <strong>Rate</strong> <strong>Monitor</strong> ................................................................................ 28<br />
<strong>Digital</strong> <strong>Heart</strong> <strong>Rate</strong> Sensor Battery .................................................................... 29<br />
Watch Battery ................................................................................................... 31<br />
INDIGlo ® NIGhT-lIGhT...................................................................................... 31<br />
WaTEr rESISTaNCE .......................................................................................... 31<br />
Watch ................................................................................................................ 31<br />
<strong>Digital</strong> <strong>Heart</strong> <strong>Rate</strong> Sensor ................................................................................. 32<br />
WarraNTy & SErvICE ..................................................................................... 32<br />
FCC NoTICE (U.S.) / IC NoTICE (CaNaDa) ...................................................... 35<br />
DEClaraTIoN oF CoNForMITy ..................................................................... 36<br />
1<br />
INTroDUCTIoN<br />
Wel<strong>com</strong>e!<br />
Thank you for purchasing your new <strong>Timex</strong> ® Ironman ® Target Trainer<br />
<strong>Heart</strong> <strong>Rate</strong> <strong>Monitor</strong> watch with TapScreen Technology. This new<br />
generation of performance tools was developed in conjunction with<br />
world-renowned athletes who helped make sure that the Target<br />
Trainer watch’s features are relevant to your training needs. If you<br />
are running for the first time or training for your 10th marathon, this<br />
watch will help you along your way.<br />
register your product at www.timex.<strong>com</strong><br />
Congratulations!<br />
With your purchase of this <strong>Timex</strong> ® Ironman ® <strong>Digital</strong> <strong>Heart</strong> <strong>Rate</strong><br />
<strong>Monitor</strong> you have hired a new personal trainer. Your <strong>Digital</strong> <strong>Heart</strong><br />
<strong>Rate</strong> <strong>Monitor</strong> offers you the ability to track, store, and analyze key<br />
indicators of your personal fitness level over 3 workouts.<br />
You will find your <strong>Digital</strong> <strong>Heart</strong> <strong>Rate</strong> <strong>Monitor</strong> to be a <strong>user</strong>-friendly<br />
fitness tool. But, like any new device, you should take the time to<br />
familiarize yourself with its <strong>com</strong>ponents to optimize its usefulness.<br />
So, check out the features and functions of your <strong>Digital</strong> <strong>Heart</strong> <strong>Rate</strong><br />
<strong>Monitor</strong> to develop a basic understanding of this fitness tool. But<br />
most of all, enjoy your new partner on the road to increased fitness!<br />
2
a Fit heart<br />
Recent fitness findings indicate that anyone can get fit and stay fit<br />
without being overzealous. It can be as simple as:<br />
• Exercising 3 to 4 times per week.<br />
• Exercising for 30 to 45 minutes during each exercise session.<br />
• Exercising at the appropriate heart rate.<br />
<strong>Heart</strong> rate represents the effects of exercise on all parts of the<br />
body. Selecting the appropriate heart rate zone conditions the<br />
heart, lungs, and muscles to perform at optimal levels to get and<br />
keep your body in shape. Once set, your <strong>Digital</strong> <strong>Heart</strong> <strong>Rate</strong> <strong>Monitor</strong><br />
can automatically show you when you are in the exercise zone<br />
you choose and signal you when you are not. It can help keep your<br />
body exercising at an intensity level that can help you achieve your<br />
desired fitness objectives without over or under exercising.<br />
WarNING:<br />
This is not a medical device and is not re<strong>com</strong>mended for use<br />
by persons with serious heart conditions. Consult your physician<br />
before beginning any exercise program.<br />
Interference with the radio signal, poor contact between your skin<br />
and the <strong>Digital</strong> <strong>Heart</strong> <strong>Rate</strong> Sensor, or other factors may prevent<br />
accurate transmission of heart rate data.<br />
3<br />
Print resources<br />
heart Zones ® Tools for Success (U.S. customers only):<br />
Information to use your <strong>Digital</strong> <strong>Heart</strong> <strong>Rate</strong> <strong>Monitor</strong> in conjunction<br />
with the <strong>Heart</strong> Zones ® Training System fitness program, meant to<br />
help you to increase the strength and endurance of your heart.<br />
Web resources<br />
<strong>Timex</strong> ® websites offer beneficial information to help you optimize<br />
your <strong>Digital</strong> <strong>Heart</strong> <strong>Rate</strong> <strong>Monitor</strong>.<br />
• Register your product at www.timex.<strong>com</strong>.<br />
• Visit www.timex.<strong>com</strong>/hrm/ for more information on <strong>Timex</strong> ®<br />
<strong>Heart</strong> <strong>Rate</strong> <strong>Monitor</strong>s, including product features and simulations.<br />
• Visit www.timextrainer.<strong>com</strong> for fitness and training tips using<br />
<strong>Timex</strong> ® <strong>Heart</strong> <strong>Rate</strong> <strong>Monitor</strong>s.<br />
4
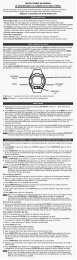
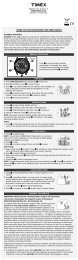
WaTCh MoDES/bUTToNS<br />
5<br />
SToP/rESET/SET<br />
MoDE<br />
INDIGlo ®<br />
NIGhT-lIGhT<br />
STarT/SPlIT<br />
hEarT raTE<br />
Display Icons and Descriptions<br />
y Flashing heart icon indicates watch is searching for a signal<br />
from the <strong>Digital</strong> <strong>Heart</strong> <strong>Rate</strong> Sensor. This icon will flash as long<br />
as the watch receives a signal from the <strong>Digital</strong> <strong>Heart</strong> <strong>Rate</strong><br />
Sensor.<br />
w Stopwatch icon indicates the watch is timing your workout in<br />
Chrono Mode.<br />
H Hourglass icon indicates the watch is timing your workout in<br />
Interval Timer or Timer Mode.<br />
j Repeat icon in Interval Timer or Timer Mode indicates you have<br />
set the timer to repeat at the end of a countdown cycle.<br />
x Alarm clock icon indicates you have set the alarm to alert you<br />
at a designated time.<br />
N Melody icon indicates you have set the hourly chime to sound<br />
every hour on the hour.<br />
Small heart/timer icon in Time of Day or Recovery Mode when<br />
the watch is tracking a heart rate recovery.<br />
Indicates the TapScreen Technology is activated.<br />
k Indicates that the Night-Mode ® feature is active and any<br />
button press will illuminate the INDIGLO ® night-light.<br />
Watch Modes<br />
Press MODE to cycle through the watch main functions<br />
TIME > ChroNo > INTErval TIMEr > TIMEr > rECovEry ><br />
rECall > hrM SETUP > USEr INFo > alarM<br />
Most modes use the watch buttons in the same way, and button<br />
labels are displayed on-screen close to the button.<br />
SToP/rESET/SET (DoNE) = enter, accept and exit<br />
MoDE (NEXT) = advance to next setting option<br />
STarT/SPlIT (+) = increase/advance the setting value<br />
hEarT raTE(-) = decrease/reverse the setting value<br />
Note: Hold either button to rapidly increase/advance or decrease/<br />
reverse the setting value.<br />
6
For setting, press STOP/RESET/SET and then follow the instructional<br />
prompts (+, –, NEXT, DONE) that appear on the display.<br />
Determining your optimal heart rate Zone<br />
There are five basic heart rate target zones. Simply select a zone<br />
that matches your percent of maximum (%) heart rate based on the<br />
fitness goal you want to achieve during a particular exercise. Before<br />
you can set your %, you first need to determine your maximum<br />
heart rate. You can use many methods to estimate your maximum<br />
heart rate. The booklet “<strong>Heart</strong> Zones ® Tools For Success” included in<br />
your Personal <strong>Heart</strong> <strong>Rate</strong> <strong>Monitor</strong> packaging (U.S. customers only)<br />
provides excellent procedures and <strong>Timex</strong> re<strong>com</strong>mends you use one<br />
of these methodologies.<br />
However, if you cannot use any of the procedures you might<br />
consider using the government re<strong>com</strong>mended age-based method.<br />
Begin with the number 220 and then subtract your age. For<br />
instance, a 35-year old would begin with 220 and subtract 35<br />
(her age), which gives an estimated maximum heart rate of 185.<br />
Once you know your maximum heart rate, you can set the zones<br />
described in the following table.<br />
7<br />
Zone % Goal benefit<br />
1 50% to 60% Light exercise Maintain a healthy heart and<br />
get fit<br />
2 60% to 70% Weight management Lose weight and burn fat<br />
3 70% to 80% Aerobic base building Increase stamina and aerobic<br />
endurance<br />
4 80% to 90% Optimal conditioning Sustain excellent fitness<br />
condition<br />
5 90% to 100% Elite athletic training Achieve superb athletic condition<br />
GETTING STarTED WITh yoUr hEarT raTE<br />
MoNITor<br />
before you begin<br />
Once you have determined your fitness goal and maximum heart<br />
rate, <strong>Timex</strong> re<strong>com</strong>mends you input this information into the HRM<br />
SETUP Mode. This will allow you to tailor your <strong>Digital</strong> <strong>Heart</strong> <strong>Rate</strong><br />
<strong>Monitor</strong> to your personal parameters.<br />
To Use your <strong>Digital</strong> heart rate <strong>Monitor</strong><br />
1. Wet the <strong>Digital</strong> <strong>Heart</strong> <strong>Rate</strong> Sensor pads.<br />
2. Center the Sensor on your chest with the<br />
<strong>Timex</strong> ® logo facing up and out and fasten it<br />
firmly, just below your sternum.<br />
3. Standing at least six feet (two meters) away<br />
from other heart rate monitors or other<br />
8
sources of radio or electrical interference, press MODE until your<br />
desired mode appears. You can view heart rate information in<br />
Time of Day, Chrono, Interval Timer or Timer Modes.<br />
4. Press the HEART RATE button on your watch if the flashing heart<br />
icon does not appear.<br />
5. Begin your workout.<br />
NoTE: The watch automatically records your heart rate and other<br />
statistical data about your workout (available in Review Mode) only<br />
if you run Chrono Mode during your workout.<br />
6. If the watch is set to alert you when you go above or below your<br />
chosen target heart rate zone press and hold HEART RATE to<br />
turn the audible alert off. Otherwise it will continue beeping until<br />
you return to your target zone. When you are turning the audible<br />
alert off, you will see the message HOLD ALERT OFF. Continue<br />
pressing HEART RATE until you see the message AUDIBLE ALERT<br />
OFF. Conversely, when you are turning the audible alert on, you<br />
will see the message HOLD ALERT ON. Continue pressing HEART<br />
RATE until you see the message AUDIBLE ALERT ON.<br />
7. When you have finished your workout in Chrono Mode, press<br />
STOP/RESET/SET to stop recording data for the workout, and<br />
press and hold STOP/RESET/SET to save your workout.<br />
8. Press MODE until you see Review Mode. This Mode includes<br />
heart rate and other statistical data about your workout.<br />
<strong>Digital</strong> heart rate <strong>Monitor</strong> Notes & Tips<br />
The watch and the <strong>Digital</strong> <strong>Heart</strong> <strong>Rate</strong> Sensor need to be within three<br />
feet (one meter) of each other to function properly. If the watch is<br />
not receiving heart rate information, you may receive the message<br />
9<br />
NO HRM DATA on the watch display. Try the following:<br />
• Shorten the distance between the watch and the <strong>Digital</strong> <strong>Heart</strong><br />
<strong>Rate</strong> Sensor.<br />
• Adjust the position of the <strong>Digital</strong> <strong>Heart</strong> <strong>Rate</strong> Sensor and elastic<br />
chest strap.<br />
• Make sure the <strong>Digital</strong> <strong>Heart</strong> <strong>Rate</strong> Sensor pads are wet.<br />
• Check the battery in the <strong>Digital</strong> <strong>Heart</strong> <strong>Rate</strong> Sensor and replace it<br />
if necessary.<br />
• Move away from other heart rate monitors or other sources of<br />
radio or electrical interference.<br />
TaPSCrEEN TEChNoloGy<br />
The TapScreen Technology works with one firm tap on the watch<br />
face. TapScreen Technology is used for CHRONO, INTERVAL TIMER,<br />
and TIMER modes. The tap sensitivity can be adjusted to light (LITE),<br />
medium (MED), hard (HARD), or off (OFF). The watch <strong>com</strong>es with a<br />
medium default setting.<br />
1. In TIME mode press and hold the STOP/RESET/SET button.<br />
2. Press the MODE (NEXT) button until TAP FORCE appears.<br />
3. Press START/SPLIT (+) or HEART RATE (-) to select LITE, MED,<br />
HARD, or OFF for the tap force.<br />
Tips:<br />
• We re<strong>com</strong>mend you select your TAP FORCE depending on the<br />
activity you are performing: Walking (LITE), Running (MED),<br />
Biking (HARD) and Swimming (HARD).<br />
10
• If you are experiencing higher TAP activations inadvertently,<br />
move your tap force to the next level.<br />
• If you are in a triathlon transition or just changing clothes, we<br />
re<strong>com</strong>mend you press MODE to switch to the TIME mode to<br />
avoid accidental tap activation of the chronograph which will<br />
continue running in the background.<br />
Return to CHRONO when you are finished.<br />
TIME oF Day<br />
1. Press MODE until Time of Day appears.<br />
2. Press and hold STOP/RESET/SET to start.<br />
3. Press START/SPLIT (+) or HEART RATE (-) to increase or decrease<br />
or select values for Time Zone (1 or 2), Hours, Minutes, Seconds,<br />
Month, Day, Date, Year, 12/24-Hour Format, Date Format, Hourly<br />
Chime, Button Beep and Tap Force.<br />
4. Press NEXT to set each field as desired and proceed to the next<br />
one.<br />
5. Press STOP/RESET/SET (DONE) to exit.<br />
Tips:<br />
• The date format can be selected as month-date (MMM-DD),<br />
day-month (DD, MMM), month-day-year (MM-DD-YY) or<br />
day-month-year (DD.MM.YY).<br />
Second Time Zone<br />
Your watch has two time zones that are useful when you are travelling<br />
to a place with a different time zone or when you are switching<br />
to daylight savings time.<br />
11<br />
Tips:<br />
• You can easily switch from TIME 1 to TIME 2 and vice versa by<br />
pressing and holding the START/SPLIT button for 5 seconds.<br />
ChroNoGraPh<br />
The chronograph will time and record your workout session. During<br />
your event, recording laps/splits will give you real-time feedback<br />
to pace yourself and allow you to adjust your effort to meet your<br />
overall training goals.<br />
lap/Split<br />
Lap is the time to <strong>com</strong>plete an individual segment of your workout.<br />
Split is the cumulative time from the beginning to that specific point<br />
in your workout. Below is an example of a 4-mile run. The runner<br />
records laps/splits every mile.<br />
This watch records up to 100 hours and counts up to 200 laps. It<br />
stores the most recent 200 laps in Recall Mode.<br />
12
Using the Chronograph<br />
1. In CHRONO Mode, TAP your screen to START.<br />
2. TAP your screen every time you need to log a LAP/ SPLIT.<br />
3. Press STOP/RESET/SET to finish.<br />
4. Press and Hold STOP/RESET/SET to reset the CHRONO.<br />
WKOUT SAVED will appear in your screen to notify you that your<br />
workout was automatically saved, and can be viewed in Recall<br />
mode.<br />
Tips:<br />
• You can also use the START/SPLIT button to start your chrono<br />
and take laps.<br />
• Unless workouts are locked, saving a workout will replace the<br />
oldest workout in memory.<br />
• You can take up to 200 laps across three workouts. Please<br />
consider that each succeeding workout will require three laps<br />
of storage that will be used to stamp the time/date, target time,<br />
and delta times for that workout.<br />
Changing the Chronograph Display Format<br />
This determines what is shown in middle and bottom lines of the<br />
display. The middle line has the larger font. You have the option for<br />
LAP/SPLIT, SPLIT/LAP, LAP#/SPLIT, and LAP#/LAP.<br />
1. Press Mode until CHRONO appears.<br />
2. Press STOP/RESET/SET to start setting.<br />
3. Press START/SPLIT (+) or HEART RATE (-) to select the display<br />
format.<br />
13<br />
4. Press STOP/RESET/SET (DONE) to exit or press MODE (NEXT) to<br />
set up the Target Time feature (described later in this section).<br />
Note:<br />
If you are receiving a heart rate signal, you have further options for<br />
the Chrono display.<br />
Press HEART RATE to change to:<br />
• <strong>Heart</strong> rate on top line with Chrono on middle and bottom lines<br />
• <strong>Heart</strong> rate on middle lines with Chrono on top and bottom lines<br />
• <strong>Heart</strong> rate only data<br />
• Chrono only data<br />
TarGET TIME PaCEr<br />
Because pace is important to achieve your goals, a built-in audible<br />
tracker indicates whether your target lap times are achieved. Rise<br />
above or fall below your predetermined target times, and varying<br />
chimes and messages will provide feedback. Slow beeps indicate<br />
you’re behind pace (SLOW), a single beep lets you know you’re<br />
on pace (ON-PACE) and rapid beeps tell you are ahead (FAST). The<br />
screen will also display your performance data.<br />
Setting the Target Time Pacer<br />
1. Press MODE until CHRONO appears (Chrono reads 00:00:00 or<br />
press STOP/RESET/SET to reset).<br />
2. Press STOP/RESET/SET to start setting.<br />
3. Press MODE (NEXT) button until TARGET TIME appears.<br />
4. Press START/SPLIT (+) or HEART RATE (-) to turn TARGET TIME ON<br />
or OFF.<br />
14
5. If you select ON, press the MODE (NEXT) button until Target Pace<br />
(TRGT PACE) appears.<br />
6. Press START/SPLIT (+) or HEART RATE (-) to enter the Target Pace<br />
per lap time in hours (HH), minutes (MM) and seconds (SS).<br />
Target Pace per lap can be set from a minimum of 1 minute<br />
(1.00) to a maximum of 1 hour (1:00.00).<br />
7. Press MODE (NEXT) button to enter the (TRGT RANGE) which is<br />
the margin of error (+/-) you are willing to consider your lap as<br />
“ON-PACE”. When Target Range appears, enter minutes (MM)<br />
and seconds (SS).<br />
8. Press MODE (NEXT) button until Target Distance (TARGET DIST)<br />
appears.<br />
9. Press START/SPLIT (+) or HEART RATE (-) to select either OFF or<br />
ON.<br />
10. If you select ON, press MODE (NEXT) button until Target Distance<br />
(TARGET DIST) appears.<br />
11. Press START/SPLIT(+) or HEART RATE (-) and MODE (NEXT) to set<br />
the Target Distance number.<br />
12. Press MODE (NEXT) to set the Target Distance Unit.<br />
13. Press START/SPLIT (+) or HEART RATE (-) to select either miles<br />
(MI) or kilometers (KM).<br />
14. To finish, press STOP/RESET/SET (DONE). If a Total Target<br />
Distance was set, the watch will estimate and display your<br />
TARGET TOTAL time based on the Target Pace and Target<br />
Distance you just provided in previous steps.<br />
15<br />
hyDraTIoN aND NUTrITIoN TIMErS<br />
The optional hydration and nutrition timers will prompt you when<br />
it’s time to drink or eat. This countdown timer will repeat and will<br />
run parallel to your chronograph.<br />
Setting the hydration and Nutrition Timers<br />
1. Press MODE until CHRONO appears.<br />
2. Press SET to start.<br />
3. Press MODE (NEXT) button until Hydration (DRINK) appears.<br />
4. Press START/SPLIT (+) or HEART RATE (-) to turn it ON.<br />
5. Press MODE (NEXT) button to move to the time section and press<br />
START/SPLIT (+) or HEART RATE (-) to set the time.<br />
6. Press MODE (NEXT) to select and to repeat the setting process<br />
for the Nutrition (EAT) timer.<br />
7. Press STOP/RESET/SET (DONE) to finish.<br />
INTErval TIMEr WITh labElS<br />
Complex interval training routines be<strong>com</strong>e automatic and effortless<br />
with two interval programs, each with up to 8 labeled intervals<br />
that can be started or stopped with the TapScreen Technology<br />
interface. We also added labels to help you see the intensity you<br />
should follow in your training (Interval #, WARM, SLOW, MED, FAST<br />
and COOL).<br />
Setting Interval Timers<br />
1. Press MODE until INT TIMER appears.<br />
2. Press STOP/RESET/SET to select the workout you want to use<br />
(WKOUT-1 or 2) using the (+) or (-), and press MODE (NEXT).<br />
16
3. To select the interval (1-8) press START/SPLIT (+) or HEART RATE<br />
(-).<br />
4. Press MODE (NEXT) to set the interval time (HH:MM: SS) with<br />
START/SPLIT (+) or HEART RATE (-).<br />
5. Press MODE (NEXT) to select the HEART RATE ZONE (None, 1-5,<br />
or C1-C5).<br />
6. Press Mode (NEXT) to select interval name (Interval #, WARM-UP,<br />
SLOW, MEDIUM, FAST and COOL) with START/SPLIT (+) or HEART<br />
RATE (-).<br />
7. Press MODE (NEXT) to select STOP AT END or REPEAT AT END<br />
with START/SPLIT (+) or HEART RATE (-). Repeat all these steps<br />
until you have set all intervals needed for your workout.<br />
8. Press SET when done.<br />
Using the Interval Timer<br />
1. Tap the watch lens, or press START/SPLIT to start the Interval<br />
Timer.<br />
2. An Interval timer melody chime will sound when the Timer<br />
reaches zero and then starts the next interval timer.<br />
17<br />
START INT 1<br />
(slow 3:00)<br />
INT 2<br />
(fast 2:00)<br />
(x10)<br />
• The display will show the label at the top of the timer (Interval#,<br />
WARM, SLOW, MED, FAST and COOL).<br />
• If your workout was set with REPEAT AT END, you will see the<br />
repetition counter on the bottom line.<br />
3. Tap the watch lens, or press STOP/RESET to stop the Interval<br />
Timer once you reach all the repetitions that you need to do.<br />
4. When finished, press and hold STOP/RESET to reset the Interval<br />
Timer to the original time. If you press and hold STOP/RESET a<br />
second time you will clear the timer to 0.<br />
Tips:<br />
• H appears in Time display when interval timer is running. j,<br />
appears when interval timer is running and set to repeat at end.<br />
• If you select REPEAT AT END the timer will countdown all<br />
intervals and then repeat the entire sequence.<br />
• INDIGLO ® night-light flashes and the interval timer melody will<br />
sound between each interval.<br />
• The interval timer will continue to run if you exit the INT TIMER<br />
mode.<br />
• If you want to view the Time of Day, press and hold MODE,<br />
release to return to current INT TIMER.<br />
CoUNTDoWN TIMEr<br />
The Timer is used to countdown a fixed event time. The timer can be<br />
set to repeat and countdown continuously, or to stop at the end of<br />
the countdown. You can use the TapScreen Technology to activate<br />
and stop the timer at any time.<br />
Setting the Timer<br />
1. Press MODE until TIMER appears.<br />
18
2. Press STOP/RESET/SET to begin setting the timer.<br />
3. Press START/SPLIT (+) or HEART RATE (-) to increase/decrease the<br />
countdown timer values.<br />
4. Press MODE (NEXT) to advance to the next setting option.<br />
5. Press START/SPLIT (+) or HEART RATE (-) to select STOP AT END or<br />
REPEAT AT END.<br />
6. Press STOP/RESET/SET (DONE) to finish the setting process.<br />
Using the Timer<br />
1. Tap the watch lens, or press START/SPLIT to start Timer.<br />
2. A timer melody chime will sound when the Timer reaches zero<br />
and stops and repeats. The melody can be turned off with the<br />
press of any button.<br />
3. If you need to stop or pause the timer, tap the watch lens or<br />
press STOP/RESET/SET.<br />
4. When finished, press and hold STOP/RESET/SET to reset the<br />
Timer to the original time. If you Press and hold STOP/RESET/SET<br />
a second time you will clear the timer to 0.<br />
Note: If the Repeat timer is set under 15 seconds a single beep will<br />
ring between repetitions.<br />
Tips:<br />
• H appears in Time display when Timer is running. j appears<br />
when timer is running and set to repeat at end.<br />
• For repeat Timer operation, repetition number appears on<br />
bottom of screen.<br />
• Maximum number of counted repetitions is 99.<br />
19<br />
• Timer will continue to run if you exit Timer mode.<br />
• The INDIGLO ® night-light flashes and the timer melody will<br />
sound when the timer countdowns to zero.<br />
rECovEry<br />
about recovery heart rate<br />
<strong>Heart</strong> rate recovery provides an indicator of fitness and training<br />
level. As you be<strong>com</strong>e more fit, your heart rate should return more<br />
quickly to a lower heart rate value at the end of your workout,<br />
indicating a higher level of cardiovascular fitness.<br />
a slower recovery rate might also indicate a need to take a<br />
break from training due to fatigue, illness, or other factors.<br />
Your recovery rate represents the change in your heart rate over a<br />
period of time. Your <strong>Digital</strong> <strong>Heart</strong> <strong>Rate</strong> <strong>Monitor</strong> records the change<br />
in your heart rate for any of five preset periods. To set the recovery<br />
timer duration:<br />
1. Press MODE until RECVRY appears.<br />
2. Press STOP/RESET/SET to clear the last thorough heart rate<br />
recovery reading, if necessary.<br />
3. Press STOP/RESET/SET to toggle a 30-second, one-, two-, five-, or<br />
ten-minute recovery time, or to turn the timer OFF.<br />
While running the chronograph, the recovery heart rate timer will<br />
begin automatically after pressing STOP/RESET/SET if the watch is<br />
receiving data from the <strong>Digital</strong> <strong>Heart</strong> <strong>Rate</strong> Sensor, and the recovery<br />
timer is set for a time duration.<br />
NoTE: The watch cannot record a recovery unless it is receiving a<br />
current heart rate and a valid pulse from the <strong>Digital</strong> <strong>Heart</strong> <strong>Rate</strong><br />
20
Sensor. Without a current heart rate or if the ending rate is higher<br />
than the starting heart rate, the display will read NO REC.<br />
To Manually Determine a recovery heart rate<br />
You can also manually initiate a recovery heart rate without<br />
stopping the chronograph by following these steps.<br />
1. Press MODE until RECVRY appears.<br />
2. Press STOP/RESET/SET to clear the last heart rate recovery<br />
reading, if necessary.<br />
3. Press STOP/RESET/SET to select a recovery time.<br />
4. Press START/SPLIT. The top line of the watch display will show<br />
the heart rate at the beginning of the recovery period (on the left)<br />
as well as your current heart rate. The bottom line will show the<br />
recovery countdown.<br />
5. After the countdown, the watch will beep indicating the end of<br />
the recovery period. The watch will capture your heart rate a<br />
second time, subtract the second value from the first value and<br />
display the difference as the recovery (R value).<br />
NoTE: The watch cannot start or record a recovery unless it is<br />
receiving a current heart rate and a valid pulse from the <strong>Digital</strong><br />
<strong>Heart</strong> <strong>Rate</strong> Sensor. Without a current heart rate or if the ending rate<br />
is higher than the starting heart rate, the display will read NO REC.<br />
6. You can continue to initiate a recovery period by repeating steps<br />
2 through 4.<br />
rECall<br />
The dated training log will enable you to review your CHRONO<br />
workout performance.<br />
21<br />
Data groupings appear in the order listed.<br />
• Total Time: The amount of time the chronograph was running<br />
during your workout.<br />
• laps Stored: The number of laps in the workout.<br />
• Time In Zone: time spent in a pre-selected heart rate zone.<br />
• average heart rate: The average achieved during a workout.<br />
• Peak heart rate: The highest recorded during a workout.<br />
• Minimum heart rate: The lowest recorded during a workout.<br />
• Total Calories: The Calories burned during a workout.<br />
• recovery heart rate: The result of the most recent recovery<br />
heart rate calculation.<br />
• average lap: The average time of all laps recorded.<br />
• best lap: The fastest lap recorded in the workout.<br />
• lap or Split recall: The amount of time and average heart rate<br />
for the last 200 laps (segments) of your workout.<br />
reviewing your Workout Data<br />
1. Press MODE until RECALL appears.<br />
2. Press START/SPLIT to select the date/time of the workout you<br />
want to review. Your workouts appear in reverse chronological<br />
order.<br />
3. Once you find the workout you want to review, press STOP/<br />
RESET/SET to review all the information saved in that workout.<br />
• Press START/SPLIT (+) or HEART RATE (-) to review your data<br />
• If your Target Time Pacer was ON, you will be able to review<br />
22
your settings of the target time pacer (target pace, target<br />
distance and target total), your actual lap/split times, your delta<br />
results per lap (+/- from target time per lap with labels), Total<br />
delta time (if a Total Target Distance was set), best lap and<br />
average lap.<br />
4. Press SET (DONE) to exit.<br />
locking Workouts in recall<br />
Locking a workout prevents it from automatic deletion as new workouts<br />
are performed.<br />
1. Press MODE until RECALL appears.<br />
2. Press START/SPLIT to scroll among your workout dates.<br />
3. Once you find the workout press and hold HEART RATE to LOCK.<br />
A small lock icon l will appear along with the workout date to<br />
confirm the data’s status.<br />
4. To unlock any workout repeat the three steps above and press<br />
and hold HEART RATE to UNLOCK.<br />
Tips:<br />
• In order to LOCK your latest workout you must reset the Chrono<br />
(00:00:00) to save the workout.<br />
• As the memory is filled (3 workouts maximum), the oldest<br />
unlocked workouts are automatically deleted.<br />
If two workouts are locked and the memory has fewer than 30<br />
laps available, the watch will signal that memory is be<strong>com</strong>ing full<br />
by displaying “x laps free”. Once no memory is available the watch<br />
will display “memory full” and it will be necessary to unlock saved<br />
workouts to free up the space for the next workout to be recalled.<br />
23<br />
hrM SETUP<br />
To customize your digital heart rate monitor, follow these simple<br />
steps.<br />
1. Press MODE until HRM SETUP appears. The screen will show the<br />
last item viewed or changed:<br />
• HR Format (BPM or %-Max)<br />
• Zone Alert (ON/OFF)<br />
• Target Zone (5 Based on Max HR or 5 Custom Ranges)<br />
• Max <strong>Heart</strong> <strong>Rate</strong><br />
2. To choose another item to set up, press START/SPLIT (+) or HEART<br />
RATE (-).<br />
3. To set, press STOP/RESET/SET and a choice (or digit) will flash.<br />
4. Make the desired adjustment by pressing START/SPLIT (+) or<br />
HEART RATE (-). In some setting groups pressing START/SPLIT (+)<br />
will increase a value and pressing HEART RATE (-) will decrease a<br />
value. At other times pressing START/SPLIT (+) or HEART RATE (-)<br />
will toggle between two options or cycle through a setting group.<br />
5. Press MODE (NEXT) to move to the next digit or setting group you<br />
want to set.<br />
6. Press STOP/RESET/SET (DONE) to save your changes and exit the<br />
setting process.<br />
7. Press MODE to exit HRM SETUP.<br />
To Set a Target heart rate Zone<br />
You can choose one of the Preset Target Zones based on Max <strong>Heart</strong><br />
<strong>Rate</strong> or set up to 5 custom Target <strong>Heart</strong> <strong>Rate</strong> Zones. Your Target<br />
24
<strong>Heart</strong> <strong>Rate</strong> Zone range will be displayed in the same manner as set<br />
up under HR Format.<br />
The Preset <strong>Heart</strong> <strong>Rate</strong> Zones described in the table below are<br />
applied to your maximum heart rate.<br />
Zone lower lImit Upper limit<br />
1 50% 60%<br />
2 60% 70%<br />
3 70% 80%<br />
4 80% 90%<br />
5 90% 100%<br />
To Choose a Target heart rate Zone<br />
1. Press MODE until HRM SETUP appears.<br />
2. Press START/SPLIT (+) or HEART RATE (-) until HR-ZONE appears<br />
with a zone on the middle line and a range on the bottom line of<br />
the display.<br />
3. Press STOP/RESET/SET to enter the Zone Selection setting<br />
process, and then press START/SPLIT (+) or HEART RATE (-) to<br />
cycle through the target heart rate zones (labeled ZONE 1 to<br />
ZONE 5 or ZONE C1 to ZONE C5).<br />
4. To select any Target <strong>Heart</strong> <strong>Rate</strong> Zone, press STOP/RESET/SET<br />
(DONE), or to set a Custom Target <strong>Heart</strong> <strong>Rate</strong> Zone range, press<br />
MODE (NEXT).<br />
25<br />
5. Press START/SPLIT (+) to increase, or press HEART RATE (-) to<br />
decrease the flashing value.<br />
6. Press MODE (NEXT) to move to the next digit’s value.<br />
7. When you have finished setting the upper and lower target heart<br />
rate zone limits, you can press STOP/RESET/SET (DONE) to save<br />
your settings and exit the zone setting process.<br />
NoTE: You will not hear an out-of-zone indicator unless the<br />
HR-ZONE ALERT is set to “ON” in HRM Setup mode.<br />
The Custom Target <strong>Heart</strong> <strong>Rate</strong> Zone allows you to individualize your<br />
lower and upper target heart rate zone limits when the 10% range in<br />
the Preset <strong>Heart</strong> <strong>Rate</strong> Zones is either too large or too small for your<br />
exercise goals.<br />
<strong>Digital</strong> heart rate <strong>Monitor</strong> Notes & Tips<br />
• At any time during the setting process, you can save your<br />
changes and return to the main heart rate display by pressing<br />
STOP/RESET/SET (DONE).<br />
• While setting the watch, if you do not press any buttons on the<br />
watch for a period of 2 to 3 minutes, the watch will automatically<br />
save whatever changes you have made and exit the setting<br />
process.<br />
USEr INFo<br />
Entry of this information helps to personalize and refine the Calories<br />
Burned data <strong>com</strong>puted by the digital heart rate monitor.<br />
1. Press MODE until USER INFO appears. The screen will show the<br />
last item viewed or changed:<br />
26
• Birthday<br />
• Weight (pounds or kilograms)<br />
• Height (inches or centimeters)<br />
• Activity Type (Bike, Brick, Hike, Interval, Other, Race, Row, Run,<br />
Ski, Strength, Walk, X-Train)<br />
• Activity Level (Very Low, Low, Moderate, High, Very High)<br />
• Gender (Male or Female)<br />
2. To choose another item to set up, press START/SPLIT (+) or<br />
HEART RATE (-).<br />
3. Press STOP/RESET/SET to enter the setting process.<br />
4. Press START/SPLIT (+) or HEART RATE (-) to cycle through the<br />
choices, and press MODE (NEXT) to advance to the next setting<br />
field.<br />
5. When you are finished, press STOP/RESET/SET (DONE) to confirm<br />
the User Info setting.<br />
6. Repeat Steps 2-5 as necessary to <strong>com</strong>plete all of your custom<br />
settings.<br />
alarM<br />
Up to three alarms may be set to remind you of up<strong>com</strong>ing events.<br />
You can customize by day according to your needs.<br />
1. Press MODE until ALARM appears.<br />
2. Press HEART RATE to select Alarm 1, 2, or 3.<br />
3. Press STOP/RESET/SET to set selected alarm.<br />
4. Press START/SPLIT (+) or HEART RATE (-) and MODE (NEXT) to<br />
27<br />
change alarm time and how often you would like the alarm to<br />
sound (ONCE, DAILY, WKDAY, WKEND, or a particular day of the<br />
week).<br />
5. Press STOP/RESET/SET (DONE) to confirm and exit.<br />
6. Press START/SPLIT to turn any Alarm ON or OFF. If the Alarm is<br />
activated, the frequency of the alarm will show in the bottom line<br />
of the display.<br />
Tips:<br />
• When the Alarm is on, x appears in Time display.<br />
• When the Alarm reaches its set time the INDIGLO ® night-light<br />
and the alarm icon flash, and the alert sounds. Press any button<br />
to silence.<br />
• If no button is pressed, the alert will cease after 20 seconds and<br />
a backup alarm will activate after 5 minutes.<br />
NoTE: It is not necessary for a heart rate value to appear on the<br />
display during this test.<br />
CarE & MaINTENaNCE<br />
<strong>Digital</strong> heart rate <strong>Monitor</strong><br />
• To avoid build up of materials that can interfere with the <strong>Digital</strong><br />
<strong>Heart</strong> <strong>Rate</strong> <strong>Monitor</strong>’s ability to receive a valid pulse, rinse the<br />
<strong>Digital</strong> <strong>Heart</strong> <strong>Rate</strong> Sensor with fresh water.<br />
• Do not clean the <strong>Digital</strong> <strong>Heart</strong> <strong>Rate</strong> <strong>Monitor</strong> sensor or chest<br />
strap with abrasive or corrosive materials. Abrasive cleaning<br />
agents may scratch the plastic parts and corrode the electronic<br />
circuit.<br />
28
• Do not subject the <strong>Digital</strong> <strong>Heart</strong> <strong>Rate</strong> <strong>Monitor</strong> to excessive force,<br />
shock, dust, temperature, or humidity. Such treatment may<br />
result in malfunction, a shorter electronic life span, damaged<br />
batteries, or distorted parts.<br />
• Do not tamper with the <strong>Digital</strong> <strong>Heart</strong> <strong>Rate</strong> <strong>Monitor</strong>’s internal<br />
<strong>com</strong>ponents. Doing so will terminate the <strong>Monitor</strong>’s warranty<br />
and may cause damage.<br />
• The <strong>Digital</strong> <strong>Heart</strong> <strong>Rate</strong> <strong>Monitor</strong> contains no <strong>user</strong>-serviceable<br />
parts, except batteries.<br />
<strong>Digital</strong> heart rate Sensor battery<br />
If your heart rate readings be<strong>com</strong>e erratic or stop, you may need<br />
to replace the battery on your <strong>Digital</strong> <strong>Heart</strong> <strong>Rate</strong> Sensor. You can<br />
change the battery yourself without any special tools.<br />
This product uses a CR2032 lithium battery for the <strong>Digital</strong> <strong>Heart</strong> <strong>Rate</strong><br />
Sensor. To change the battery:<br />
29<br />
BATTERY<br />
OPEN<br />
BATTERY<br />
1. Open the Sensor battery lid with a coin, turning the coin counterclockwise.<br />
2. Replace the battery with a new CR2032, 3V lithium battery with<br />
(+) facing you, taking care not to touch the two contacts and<br />
discharge the battery.<br />
3. When you have finished inserting the battery, press the reset<br />
button (located in the lower left corner) with a toothpick or<br />
straightened paper clip and close the lid with a coin -- screwing<br />
in a clockwise direction.<br />
To test the new battery after you have inserted it:<br />
1. Move away from any possible sources of electrical or radio<br />
interference.<br />
2. Wet the <strong>Digital</strong> <strong>Heart</strong> <strong>Rate</strong> Sensor pads and securely fasten the<br />
chest strap below your sternum.<br />
3. While wearing the watch, press the HEART RATE button. A set of<br />
three dashes (- - -) and the flashing heart rate icon will appear on<br />
the display.<br />
4. If you do not see a flashing heart icon on your watch, reinstall the<br />
sensor battery.<br />
NoTE: It is not necessary for a heart rate value to appear on the<br />
display during this test.<br />
30
Watch battery<br />
When the battery of the watch is running low, the display or<br />
INDIGLO ® night-light will dim. This watch uses a CR2025 lithium<br />
battery.<br />
To avoid the possibility of permanently damaging the watch, TIMEX<br />
STRONGLY RECOMMENDS TAKING YOUR HEART RATE MONITOR<br />
WATCH TO A LOCAL RETAILER OR JEWELER TO HAVE THE BATTERY<br />
REPLACED.<br />
INDIGlo ® NIGhT-lIGhT<br />
Press the INDIGLO ® button to activate the night-light. This electroluminescent<br />
technology illuminates the watch display at night and in<br />
low light conditions.<br />
WaTEr rESISTaNCE<br />
Watch<br />
• Your 100 Meter Water Resistant watch withstands water<br />
pressure to 200 p.s.i. (equals immersion to 328 feet or<br />
100 meters below sea level).<br />
• The watch is only water-resistant as long as the lens,<br />
pushbuttons, and case remain intact.<br />
• <strong>Timex</strong> re<strong>com</strong>mends rinsing your watch with fresh water after<br />
exposure to salt water.<br />
WarNING: To MaINTaIN WaTEr-rESISTaNCE, Do NoT PrESS<br />
aNy bUTToNS UNDEr WaTEr.<br />
31<br />
<strong>Digital</strong> heart rate Sensor<br />
• Your 30 Meter Water Resistant <strong>Digital</strong> <strong>Heart</strong> <strong>Rate</strong> Sensor can<br />
withstand water pressure to 60 p.s.i. (equals immersion to<br />
98 feet or 30 meters below sea level).<br />
WarNING: ThIS UNIT WIll NoT TraNSMIT yoUr hEarT raTE<br />
WhEN oPEraTED IN or UNDEr WaTEr.<br />
WarraNTy & SErvICE<br />
<strong>Timex</strong> International Warranty (U.S. limited Warranty)<br />
Your <strong>Timex</strong> ® <strong>Digital</strong> <strong>Heart</strong> <strong>Rate</strong> <strong>Monitor</strong> is warranted against manufacturing defects by <strong>Timex</strong> for<br />
a period of ONE YEAR from the original purchase date. <strong>Timex</strong> Group USA, Inc and its worldwide<br />
affiliates will honor this International Warranty.<br />
Please note that <strong>Timex</strong> may, at its option, repair your <strong>Heart</strong> <strong>Rate</strong> <strong>Monitor</strong> by installing new or<br />
thoroughly reconditioned and inspected <strong>com</strong>ponents or replace it with an identical or similar<br />
model.<br />
IMPORTANT: PLEASE NOTE THAT THIS WARRANTY DOES NOT COVER DEFECTS OR DAMAGES TO<br />
YOUR HEART RATE MONITOR:<br />
1. after the warranty period expires;<br />
2. if the <strong>Heart</strong> <strong>Rate</strong> <strong>Monitor</strong> was not originally purchased from an authorized <strong>Timex</strong> retailer;<br />
3. from repair services not performed by <strong>Timex</strong>;<br />
4. from accidents, tampering or abuse; and<br />
5. lens or crystal, strap or band, <strong>Heart</strong> <strong>Rate</strong> <strong>Monitor</strong> case, attachments or battery. <strong>Timex</strong> may<br />
charge you for replacing any of these parts.<br />
THIS WARRANTY AND THE REMEDIES CONTAINED HEREIN ARE EXCLUSIVE AND IN LIEU OF<br />
ALL OTHER WARRANTIES, EXPRESS OR IMPLIED, INCLUDING ANY IMPLIED WARRANTY OF<br />
MERCHANTABILITY OR FITNESS FOR PARTICULAR PURPOSE.<br />
TIMEX IS NOT LIABLE FOR ANY SPECIAL, INCIDENTAL OR CONSEQUENTIAL DAMAGES. Some<br />
countries and states do not allow limitations on implied warranties and do not allow exclusions<br />
or limitations on damages, so these limitations may not apply to you. This warranty gives you<br />
specific legal rights and you may also have other rights which vary from country to country and<br />
state to state.<br />
32
To obtain warranty service, please return your <strong>Heart</strong> <strong>Rate</strong> <strong>Monitor</strong> to <strong>Timex</strong>, one of its affiliates<br />
or the <strong>Timex</strong> retailer where the <strong>Heart</strong> <strong>Rate</strong> <strong>Monitor</strong> was purchased, together with a <strong>com</strong>pleted<br />
original Repair Coupon or, in the U.S. and Canada only, the <strong>com</strong>pleted original Repair Coupon<br />
or a written statement identifying your name, address, telephone number and date and place<br />
of purchase. Please include the following with your <strong>Heart</strong> <strong>Rate</strong> <strong>Monitor</strong> to cover postage and<br />
handling (this is not a repair charge): a US $8.00 check or money order in the U.S.; a CAN $7.00<br />
cheque or money order in Canada; and a UK£2.50 cheque or money order in the U.K. In other<br />
countries, <strong>Timex</strong> will charge you for postage and handling. NEVER INCLUDE ANY ARTICLE OF<br />
PERSONAL VALUE IN YOUR SHIPMENT.<br />
For the U.S., please call 1-800-328-2677 for additional warranty information. For Canada, call<br />
1-800-263-0981. For Brazil, call +55 (11) 5572 9733. For Mexico, call 01-800-01-060-00. For<br />
Central America, the Caribbean, Bermuda and the Bahamas, call (501) 370-5775 (U.S.). For Asia,<br />
call 852-2815-0091. For the U.K., call 44 208 687 9620. For Portugal, call 351 212 946 017. For<br />
France, call 33 3 81 63 42 00. For Germany, call 49 7 231 494140. For the Middle East and Africa,<br />
call 971-4-310850. For other areas, please contact your local <strong>Timex</strong> retailer or <strong>Timex</strong> distributor<br />
for warranty information. In Canada, the U.S. and in certain other locations, participating <strong>Timex</strong><br />
retailers can provide you with a postage-paid, pre-addressed <strong>Heart</strong> <strong>Rate</strong> <strong>Monitor</strong> Repair Mailer<br />
for your convenience in obtaining factory service.<br />
Service<br />
If your <strong>Timex</strong> ® <strong>Digital</strong> <strong>Heart</strong> <strong>Rate</strong> <strong>Monitor</strong> should ever need servicing, send it to <strong>Timex</strong> as set<br />
forth in the <strong>Timex</strong> International Warranty or addressed to:<br />
HOTLINE WATCH SERVICE, P.O. Box 2740, Little Rock, AR 72203<br />
For service questions, call 1-800-328-2677.<br />
For your convenience in obtaining factory service, participating <strong>Timex</strong> retailers can provide you<br />
with a pre-addressed <strong>Heart</strong> <strong>Rate</strong> <strong>Monitor</strong> Repair Mailer.<br />
See the <strong>Timex</strong> International Warranty for specific instructions on the care and service of your<br />
<strong>Timex</strong> ® <strong>Digital</strong> <strong>Heart</strong> <strong>Rate</strong> <strong>Monitor</strong>.<br />
Should you need a replacement strap or band, call 1-800-328-2677.<br />
33<br />
ThIS IS yoUr rEPaIr CoUPoN. KEEP IT IN a SaFE PlaCE.<br />
TIMEX INTErNaTIoNal WarraNTy rEPaIr CoUPoN<br />
Original Purchase Date: ______________________________________________<br />
(attach a copy of sales receipt, if available)<br />
Purchased By: _______________________________________________________<br />
(name, address, telephone number)<br />
Place of Purchase: ___________________________________________________<br />
(name and address)<br />
Reason for Return ___________________________________________________<br />
____________________________________________________________________<br />
____________________________________________________________________<br />
34
FCC NoTICE (U.S.) / IC NoTICE (CaNaDa):<br />
This device <strong>com</strong>plies with Part 15 of the FCC Rules. Operation is subject to the following two<br />
conditions: (1) this device may not cause harmful interference, and (2) this device must accept<br />
any interference received, including interference that may cause undesired operation.<br />
Warning: Changes or modifications to this unit not expressly approved by the party responsible<br />
for <strong>com</strong>pliance could void the <strong>user</strong>’s authority to operate the equipment.<br />
NOTE: This equipment has been tested and found to <strong>com</strong>ply with the limits for a Class B digital<br />
device, pursuant to Part 15 of the FCC Rules. These limits are designed to provide reasonable<br />
protection against harmful interference in a residential installation. This equipment generates,<br />
uses, and can radiate radio frequency energy and, if not installed and used in accordance with<br />
the instructions, may cause harmful interference to radio <strong>com</strong>munications. However, there is<br />
no guarantee that interference will not occur in a particular installation. If this equipment does<br />
cause harmful interference to radio or television reception, which can be determined by turning<br />
the equipment off and on, the <strong>user</strong> is encouraged to try to correct the interference by one or<br />
more of the following measures:<br />
— Reorient or relocate the receiving antenna.<br />
— Increase the separation between the equipment and receiver.<br />
— Connect the equipment into an outlet on a circuit different from that to which the receiver<br />
is connected.<br />
— Consult the dealer or an experienced radio TV technician for help.<br />
This Class [B] digital apparatus <strong>com</strong>plies with Canadian ICES-003. Cet appareil numérique de la<br />
classe [B] est conforme à la norme NMB-003 du Canada<br />
35<br />
DEClaraTIoN oF CoNForMITy<br />
Manufacturers Name: <strong>Timex</strong> Group USA, Inc.<br />
Manufacturers address: 555 Christian Road<br />
Middlebury, CT 06762<br />
United States of America<br />
declares that the product:<br />
Product Name: TAP <strong>Digital</strong> <strong>Heart</strong> <strong>Rate</strong> <strong>Monitor</strong><br />
Model Numbers: M103 & M640<br />
conforms to the following specifications:<br />
r&TTE: 1999/05/EC Model 103<br />
Standards: CENELEC EN 55022:2006+A1:2007<br />
CFR47 FCC Part 15 Subpart B:2011<br />
VCCI V-3/2010.04<br />
IC RSS-310 Issue 3 December 2010<br />
IC RSS-Gen Issue 3 December 2010<br />
IC ICES-003 Issue 4 February 2004<br />
AS/NZS Cispr 22:2009<br />
lvD: 2006/95/EC Model 103<br />
Standards: CENELEC EN 60950-1<br />
lvD: 73/23/EEC Model 640<br />
Safety: IEC 60950<br />
EMC: 89/336/EEC Model 640<br />
Emissions: EN300-683<br />
Radiated Emission 30 MHz to 1000 MHz E-Field (Electric).<br />
Ref.EN55022<br />
Immunity: EN300-683<br />
Radiated Immunity 80 MHz to 1000 MHz. Ref. EN61000-4-3<br />
ESD Electrostatic discharge. Ref. EN61000-4-2<br />
Radiated Immunity 900 MHz. Ref. ENV50204<br />
36
Supplemental Information: The product herewith <strong>com</strong>plies with the requirements of the Radio<br />
& Tele<strong>com</strong>munications Terminal Equipment Directive 1999/05/EC, the Low Voltage Directive<br />
2006/95/EC, 73/23/EEC, EMC Directive 89/336/EEC and carries the CE and 7 marking<br />
accordingly.<br />
Agent:<br />
David Wimer<br />
Quality Assurance Project Engineer<br />
Date: 27 July, 2011, Middlebury, Connecticut, U.S.A.<br />
©2011 <strong>Timex</strong> Group USA, Inc. TIMEX, INDIGLO, TAPSCREEN and NIGHT-MODE are<br />
registered trademarks of <strong>Timex</strong> Group B.V. and its subsidiaries. IRONMAN and<br />
M-DOT are registered trademarks of World Triathlon Corporation. Used here by<br />
permission.<br />
37<br />
38