2001 – 2003 QX4; DRIVER'S SEAT (WITH ADP ONLY ... - JustAnswer
2001 – 2003 QX4; DRIVER'S SEAT (WITH ADP ONLY ... - JustAnswer
2001 – 2003 QX4; DRIVER'S SEAT (WITH ADP ONLY ... - JustAnswer

You also want an ePaper? Increase the reach of your titles
YUMPU automatically turns print PDFs into web optimized ePapers that Google loves.
PARTS INFORMATION<br />
DESCRIPTION PART # QUANTITY<br />
Seat Slide Motor Kit 87562-C9925 1<br />
CLAIMS INFORMATION<br />
NOTE: This is the <strong>ONLY</strong> approved repair procedure for this incident. A claim to Infiniti division for the<br />
repair of this incident may be denied if the repair is not performed exactly as outlined in this bulletin.<br />
Submit a Primary Failed Part (PP) line claim using the following claims coding:<br />
DESCRIPTION PFP OP CODE SYM DIA FRT<br />
RPL Slide motor & gear assy 87562-C9925 VH80AA ZE 32 1.1 hrs<br />
SERVICE PROCEDURE<br />
1. Using the power seat switch, tilt the front edge of the seat bottom all the way up.<br />
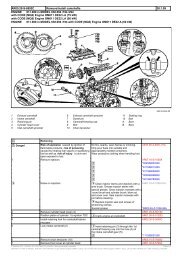
2. Check voltage to the seat slide motor as follow:<br />
• Measure voltage between terminal 1 ("BR" wire) and terminal 2 ("W/B" wire) in the seat slide motor<br />
connector (B518).<br />
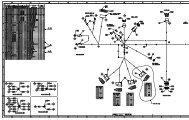
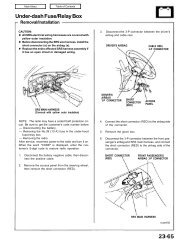
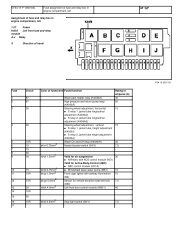
• See Figure 2. For more detailed information, refer to "Automatic Drive Positioner" in the EL section of<br />
the appropriate Service Manual (ESM).<br />
WARNING: When checking the power seat slide motor circuit, do not confuse its black connector<br />
(B518) with the side air bag module yellow connector.<br />
Side air bag connector.<br />
Do Not probe this connector.<br />
Seat slide motor<br />
Figure 2<br />
• This voltage check can be done with the seat slide motor connected.<br />
B518 connector.<br />
Back-probe here (harness side)<br />
• If the voltage is about 12V when the seat slide switch is pressed to the “forward” and “backward”<br />
positions this bulletin applies, proceed to step 3.<br />
• If voltage is 0V when the seat slide switch is pressed to either the “forward” or “backward” positions,<br />
this bulletin does not apply. Use the EL section of the appropriate Service Manual (ESM) to further<br />
diagnosis and repair the incident.<br />
2/8