

Instruction Manual - Evenflo
Instruction Manual - Evenflo
Instruction Manual - Evenflo

You also want an ePaper? Increase the reach of your titles
YUMPU automatically turns print PDFs into web optimized ePapers that Google loves.
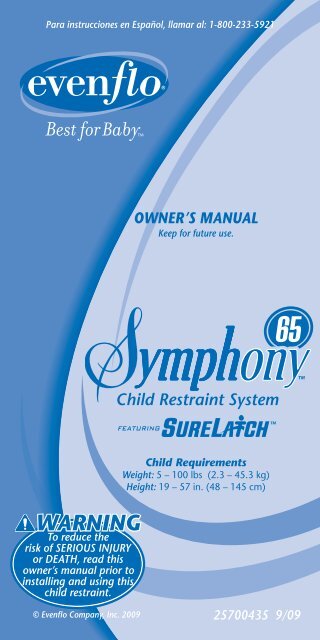
Para instrucciones en Español, llamar al: 1-800-233-5921<br />
WARNING<br />
To reduce the<br />
risk of SERIOUS INJURY<br />
or DEATH, read this<br />
owner’s manual prior to<br />
installing and using this<br />
child restraint.<br />
OWNER’S MANUAL<br />
Keep for future use.<br />
Child Restraint System<br />
Child Requirements<br />
Weight: 5 – 100 lbs (2.3 – 45.3 kg)<br />
Height: 19 – 57 in. (48 – 145 cm)<br />
© <strong>Evenflo</strong> Company, Inc. 2009 25700435 9/09
More children are killed every year as passengers in<br />
car crashes than by any other type of injury.<br />
To reduce the risk of SERIOUS INJURY or DEATH, read<br />
this owner’s manual and your vehicle owner’s manual<br />
before installing and using this child restraint. Using a<br />
child restraint makes a big difference. By properly using<br />
this child restraint and following these instructions (and<br />
the instructions that accompany your vehicle), you will<br />
greatly reduce the risk of serious injury or death to your<br />
child from a crash. Do not be misled by the commonly<br />
used term “safety seat”; no restraint system can prevent<br />
all injuries in all crashes. Many properly restrained<br />
adults and children are injured in motor vehicle crashes,<br />
including relatively minor crashes. A properly used child<br />
restraint is the best way to minimize injuries to your child<br />
and to increase the chances for your child’s survival in<br />
most crashes.<br />
• NOTICE •<br />
• This child restraint meets all applicable requirements of<br />
Federal Motor Vehicle Safety Standard 213.<br />
• No restraint can guarantee absolute protection from<br />
injury in every crash.<br />
• This child restraint is designed for use by children in<br />
rear-facing, forward-facing, and booster modes. To use<br />
this child restraint properly, children MUST meet weight/<br />
size specifications as follows:<br />
For Rear-facing Use<br />
• The child weighs 5 – 35 lbs (2.3 – 15.8 kg)<br />
• Top of child’s head is at least 1 inch (25 mm) below<br />
the top of the child restraint headrest in either of its<br />
two lowest positions.<br />
For Forward-facing Use<br />
• The child weighs 20 – 65 lbs (9 – 29.4 kg)<br />
• The child is 50 inches (127 cm) tall, or less, AND the<br />
top of their ears are at (or below) the child restraint<br />
headrest.<br />
• Child is one year old or older<br />
For Booster Use<br />
• The child weighs 30 – 100 lbs (13.6 – 45.3 kg)<br />
• The child is 57 inches (145 cm) tall, or less, AND the<br />
top of their ears are below the child restraint headrest.<br />
• Child is three years old or older<br />
Table of Contents<br />
Important Information<br />
Warnings ....................................................................2<br />
Safe Practices ...........................................................10<br />
Recall Information ....................................................10<br />
Airplane Usage .........................................................11<br />
LATCH Information ..................................................11<br />
Symbol Legend ........................................................11<br />
Visual Glossary .........................................................12<br />
Rear-facing Use<br />
Installation Checklist .................15<br />
Moving LATCH to Rear-facing ...16<br />
Installation with LATCH .............18<br />
Installation with Seat Belt ..........20<br />
Securing the Child ....................23<br />
Removing the Child ..................25<br />
Forward-facing Use<br />
Installation Checklist .................27<br />
Moving LATCH to Forward-facing ..28<br />
Installation with LATCH .............30<br />
Installation with Seat Belt ..........34<br />
Booster Use<br />
When to Put Your Child in<br />
a Booster Seat ........................38<br />
Installation Checklist .................41<br />
Converting into a Booster Seat ..42<br />
General Information<br />
Using the SureLatch Connectors ...........................48<br />
Adjusting the Headrest .............................................48<br />
Adjusting the Recline Position ..................................49<br />
Removing Seat Pad ..................................................49<br />
Installing the Locking Clip ........................................50<br />
Installing the Accessories ..........................................52<br />
Care and Cleaning ..................................................54<br />
Replacement Parts ....................................................56<br />
Limited Warranty......................................................57<br />
General Booster Forward-facing<br />
Rear-facing<br />
Important<br />
1
Air Bag Warnings<br />
WARNING WARNING<br />
Rear-facing, Forward-facing, and Booster Use<br />
• DO NOT use this child restraint in the front seat of a<br />
vehicle equipped with an air bag. Interaction between<br />
a rear-facing restraint and air bags may cause serious<br />
injury or death. Air bags may cause serious injury or<br />
death to children under 13 years of age.<br />
If your vehicle has an air bag, refer to your vehicle<br />
owner’s manual for child restraint installation.<br />
• If the rear seat of your vehicle is equipped with side<br />
air bags, refer to the following information for proper<br />
usage.<br />
Vehicles built prior to the 2002 model year:<br />
DO NOT use this restraint in a vehicle seating position<br />
equipped with a side air bag unless authorized by the<br />
vehicle manufacturer.<br />
Model year 2002 and newer vehicles:<br />
Refer to your vehicle owner’s manual before placing this<br />
restraint in a seating position equipped with a side air bag.<br />
• DO NOT place any objects between the restraint and<br />
the side air bag, as an expanding air bag may cause<br />
the items to strike the child.<br />
NO coloque el asiento infantil orientado<br />
hacia atrás en el asiento delantero con<br />
bolsa de aire.<br />
Puede causar MUERTE o LESIONES<br />
GRAVES. El asiento trasero es el lugar más<br />
seguro para los niños de 12 años de edad y<br />
General Warnings<br />
Rear-facing, Forward-facing, and Booster Use<br />
• Failure to follow installation instructions can result in<br />
the child striking the vehicle’s interior during a sudden<br />
stop or crash. Serious injury or death may result.<br />
These instructions and the instructions in your vehicle<br />
owner’s manual must be followed carefully. If there is a<br />
conflict between the two, the vehicle owner’s manual<br />
regarding child restraint installation must be followed.<br />
• NEVER leave child unattended.<br />
• DO NOT use child restraint if it is damaged, broken,<br />
or missing parts.<br />
• DO NOT use this restraint if it has been involved in a<br />
crash. It must be replaced.<br />
• DO NOT remove back cover.<br />
• NEVER use this child restraint without the headrest<br />
installed.<br />
Location Warnings<br />
Rear-facing, Forward-facing, and Booster Use<br />
• ALWAYS read and follow exactly the instructions that<br />
accompany your vehicle and child restraint.<br />
• According to statistics, children are safer when properly<br />
restrained in a rear seating position than in the front<br />
seating position. Generally, the center rear position is<br />
safest and should be used if available.<br />
• Some child restraints do not fit all vehicles or all seating<br />
locations. There are many thousands of combinations of<br />
vehicle makes, models, child restraint configurations,<br />
vehicle seat belt designs, and seat cushion shapes. The<br />
easiest way to determine whether your child restraint is<br />
suitable for a particular seating position is to check<br />
for a tight installation. If the child restraint can not be<br />
properly installed, DO NOT use the child<br />
restraint. Consult vehicle owner’s manual, try a different<br />
seating location or call <strong>Evenflo</strong> at 1-800-233-5921.<br />
2 3<br />
Important
Location Warnings – cont.<br />
Rear-facing, Forward-facing, and Booster Use<br />
• ONLY use this child restraint on forward-facing<br />
vehicle seats. DO NOT use this restraint with vehicle<br />
seats that face the rear or side.<br />
• ONLY use this child restraint on vehicle seats with<br />
backs that lock into place.<br />
Premature Infants<br />
Rear-facing, Forward-facing, and Booster Use<br />
• DO NOT use this or any child restraint with a<br />
premature infant until after consulting your doctor.<br />
Premature infants may have difficulty breathing when<br />
in a seated or semi-reclined position. Using additional<br />
padding or pillows behind the infant’s head, or failure<br />
to properly recline the child restraint could increase<br />
the child’s risk of serious injury or death.<br />
Rear-facing Position Warnings<br />
Rear-facing Use Only<br />
WARNING WARNING<br />
• DO NOT use this child restraint rear-facing in a vehicle<br />
equipped with lap belts that only lock during a sudden<br />
stop or crash (emergency locking retractor – ELR). You<br />
must use a seating location with a locking seat belt.<br />
Check your vehicle owner’s manual to see if you have<br />
lap belts with ELR’s.<br />
• When using this restraint rear-facing, DO NOT loosen<br />
the vehicle seat belt to provide more leg room as this will<br />
prevent the child restraint from protecting the child.<br />
• Fold-down armrests could pose a hazard to a rear-<br />
facing child in certain types of collisions. Consult your<br />
vehicle owner’s manual before installing any rear-<br />
facing child restraint in front of a fold-down armrest.<br />
• NEVER turn a child restraint forward-facing with an infant<br />
weighing less than 20 lbs (9 kg) or less than one year of<br />
age. Crash forces may cause serious injury or death.<br />
• NEVER use Recline Position #2 or Recline Position #3<br />
when using this child restraint rear-facing. Use ONLY<br />
Recline Position #1.<br />
• DO NOT use the tether strap when the child restraint<br />
is in the rear-facing position.<br />
• The headrest on the vehicle seat that the child faces<br />
when sitting in the rear facing mode should be placed<br />
in the lowest position. The vehicle seat back that the<br />
child faces must be fully padded and free of any hard<br />
objects.<br />
Forward-facing Position Warnings<br />
Forward-facing and Booster Use Only<br />
• When using the harness straps to secure a child who<br />
is more than 40 lbs (18 kg), NEVER place the child<br />
restraint in Recline Position #2. Use ONLY Recline<br />
Position #3.<br />
• DO NOT use Recline Position #1 or Recline Position #2<br />
when using this child restraint in Booster Mode. Use<br />
ONLY Recline Position #3.<br />
• Install this child restraint with a vehicle seat belt (NOT<br />
SureLatch connectors) when using the restraint’s<br />
harness straps to secure a child who weighs more than<br />
48 lbs (21.7 kg).<br />
• If the child weighs more than 65 lbs (29.4 kg) OR<br />
their shoulders are above the highest harness level,<br />
you MUST use this child restraint as a booster (p. 40).<br />
• Adjust, or remove, the vehicle headrest, in the seat<br />
where the child restraint is to be installed, so that<br />
the back of the child restraint rests against the vehicle<br />
seat back.<br />
• The headrest on the vehicle seat in front of the child<br />
should be put in its lowest position. The vehicle seat<br />
back that the child faces must be fully padded and<br />
free of any hard objects.<br />
4 5<br />
Important
WARNING<br />
Booster Seat Position Warnings<br />
Booster Use Only<br />
• DO NOT use this booster seat rear-facing.<br />
Seat Belt Warnings<br />
Rear-facing and Forward-facing Use Only<br />
• DO NOT use this child restraint if it moves more than<br />
1 inch (25 mm) forward or side-to-side at either<br />
rear-facing or forward-facing belt path on the child<br />
restraint. Serious injury or death may result from poor<br />
installation. If you can not tightly secure the child<br />
restraint, try again or move it to another location.<br />
• DO NOT use this child restraint in a seating position<br />
with door-mounted seat belts.<br />
• DO NOT use this child restraint in a vehicle with seat<br />
belts that automatically move along the vehicle frame<br />
when the door is opened. These seat belts will not<br />
hold a child restraint properly.<br />
• If the vehicle seat belts are not routed and fastened<br />
correctly, the child restraint may not protect the child<br />
in a crash.<br />
• DO NOT allow the vehicle seat belt release button to<br />
touch the child restraint. Accidental contact may cause<br />
the seat belt to release. If necessary, turn the seat belt<br />
release button away from the child restraint or move<br />
the child restraint to a different location.<br />
• Failure to adjust the harness or vehicle seat belts<br />
snugly around the child may result in the child striking<br />
the vehicle’s interior during a sudden stop or crash.<br />
Serious injury or death may occur.<br />
• Remove locking clip from vehicle seat belt<br />
when not used with a child restraint, or the<br />
Locking Clip<br />
vehicle seat belt will not properly restrain<br />
an adult or child. Serious injury or death may occur.<br />
Booster Mode Only<br />
WARNING<br />
• To prevent serious injury, use ONLY the<br />
vehicle’s lap and shoulder belt system<br />
when restraining the a child in this<br />
booster seat.<br />
• DO NOT use the locking clip when using<br />
this child restraint as a booster seat.<br />
• The shoulder belt MUST be threaded through the<br />
shoulder belt guide (p. 40).<br />
• DO NOT use this booster seat if the top of the child’s<br />
ears are above the back of the booster seat headrest.<br />
• The shoulder belt MUST NOT cross the child’s neck<br />
or fall off the child’s shoulder. If you can not adjust<br />
the shoulder belt to properly lay midway between<br />
the child’s shoulder and neck AND at or above the<br />
shoulder, try another seating location or do not use<br />
the booster seat.<br />
LATCH Warnings<br />
Rear-facing and Forward-facing Modes Only<br />
• This LATCH system is intended to be used ONLY as<br />
described in these instructions. Serious injury or death<br />
may result from misuse.<br />
• In addition to these instructions, read and follow your<br />
vehicle owner’s manual regarding installation of the<br />
child restraint and LATCH. If there is a discrepancy,<br />
follow your vehicle owner’s manual.<br />
• ONLY use for securing child restraint to lower LATCH<br />
anchor points.<br />
• NEVER attach two SureLatch (LATCH) connectors to one<br />
vehicle lower anchor point.<br />
• NEVER use the vehicle seat belts when using the<br />
LATCH system. Using both together can cause slack in<br />
a sudden stop or crash.<br />
• When not in use, the SureLatch connectors should<br />
be securely attached to the D-rings on child restraint<br />
seat pad. Keep out of reach of children.<br />
6 7<br />
Important
LATCH Warnings – cont.<br />
Rear-facing and Forward-facing Modes Only<br />
• ALWAYS be sure that the SureLatch (LATCH) connectors<br />
are fully engaged onto the LATCH anchor points<br />
by pulling hard on the LATCH harness. If they are not<br />
fully engaged, the LATCH system will not secure your<br />
child restraint. Serious injury or death may result.<br />
• DO NOT use this child restraint if it moves more than<br />
1 inch (25 mm) forward or side-to-side at either the<br />
rear-facing or forward-facing belt path on the child<br />
restraint. Serious injury or death may result from poor<br />
installation. If you can not tightly secure the child<br />
restraint, try again or move it to another location.<br />
Tether Strap Warnings<br />
Forward-facing and Booster Use Only<br />
WARNING WARNING<br />
• To avoid a strangulation hazard, you MUST tightly roll<br />
or fold excess or unused tether strap and secure with<br />
a rubber band. Attach the tether hook to the storage<br />
clip when not in use (p. 13). This will keep an unused<br />
tether from hitting someone during a crash.<br />
Additional Warnings<br />
Rear-facing, Forward-facing, and Booster Use<br />
• In hot or sunny weather, ALWAYS check the seat, the<br />
buckle and LATCH hooks, and adjuster for hot areas<br />
before placing a child into the child restraint. The child<br />
could be burned. Cover the child restraint with a light<br />
colored blanket when you leave the vehicle.<br />
• This child restraint must be securely fastened to the<br />
vehicle, even when unoccupied, using the vehicle<br />
seat belts or SureLatch connectors. An unsecured<br />
child restraint may injure someone if a crash occurs.<br />
• DO NOT use the cup holder to store cans or hard<br />
cups. Only for use with soft cups (such as styrofoam<br />
or paper).<br />
• DO NOT place any cups that contain hot liquids<br />
(such as coffee or tea) in the cup holder.<br />
• DO NOT attach additional padding, toys or other<br />
devices not made by <strong>Evenflo</strong> or described in these<br />
instructions to the child restraint. Items not tested with<br />
the child restraint could injure the child. Additional<br />
pads or pillows may interfere with the function of the<br />
harness system, or cause breathing problems if the child’s<br />
head falls forward, increasing the risk of serious injury<br />
or death.<br />
• Failure to follow installation instructions could result<br />
in serious injury or death. These instructions and the<br />
instructions in your vehicle owner’s manual must be<br />
followed carefully. If there is a conflict between the<br />
two, the vehicle owner’s manual regarding child<br />
restraint installation must be followed.<br />
• In cold weather, DO NOT dress the child in bulky<br />
clothing like snowsuits if the child is riding in a child<br />
restraint. Bulky coats/snowsuits make it difficult to<br />
properly tighten the harness to the child which may<br />
allow the child to be ejected from the restraint during<br />
a crash. If necessary, place a blanket over the<br />
harnessed child without interfering with the child<br />
restraint harness system.<br />
8 9<br />
Important
Safe Practices<br />
• Everyone rides buckled up or the vehicle does<br />
not go. Make no exceptions for adults or children.<br />
If someone unbuckles, stop the vehicle. Being firm<br />
and consistent from the start will mean fewer discipline<br />
problems as children get older. An unrestrained person<br />
can be thrown into and injure other passengers.<br />
• Many safety advocates and healthcare professionals<br />
recommend that children ride rear facing for as long<br />
as possible. See limitations recommended on rear-<br />
facing use on the inside front cover.<br />
• NEVER try to tend to a crying baby’s needs while<br />
driving. NEVER take a baby out of a child restraint for<br />
comforting while the vehicle is moving.<br />
• DO NOT allow a child in a vehicle to have objects<br />
such as lollipops or ice cream on a stick. The object<br />
can injure the child if the vehicle swerves or hits a<br />
bump.<br />
• DO NOT feed an infant who is riding in a child restraint.<br />
• Put sharp or heavy items in the trunk. Anything loose<br />
can be deadly in a crash.<br />
Recall Information<br />
• Child restraints could be recalled for safety reasons.<br />
You must register this restraint to be reached in a<br />
recall. Send your name, address, the restraint’s<br />
model number, and manufacturing date to<br />
<strong>Evenflo</strong> Company, Inc.,<br />
1801 Commerce Dr.,<br />
Piqua, OH 45356<br />
or call 1-800-233-5921.<br />
You may also register on-line at<br />
https://plweb.evenflo.com/productreg.aspx<br />
• For recall information call the U.S. Government’s<br />
Vehicle Safety Hotline at 1-888-327-4236<br />
(TTY:1-800-424-9153), or go to<br />
http://www.NHTSA.gov<br />
When used WITH the 5-point harness system:<br />
This restraint is certified for use in motor vehicles<br />
and aircraft.<br />
When used WITHOUT the<br />
5-point harness as a Booster:<br />
This booster seat is NOT certified<br />
for aircraft use. A belt-positioning<br />
booster seat requires the use of a<br />
lap/shoulder belt system, which is<br />
not available on aircraft.<br />
For future reference, record the model number of your child<br />
restraint AND the date of manufacture below (p. 55).<br />
Model Number:<br />
Airplane Usage<br />
Tip!<br />
Check with<br />
your airline before<br />
departure to make sure<br />
this restraint meets<br />
their requirements.<br />
LATCH Information<br />
“LATCH” (Lower Anchorage and Tether for Child<br />
Restraints) is a system for attaching the child restraint to<br />
your vehicle seat. It can be used in place of the seat belts<br />
in vehicles with LATCH anchors. Refer to your vehicle<br />
owner’s manual for the locations of LATCH anchors.<br />
Note: Your vehicle owner’s manual may refer to this<br />
system as ”ISOFIX.”<br />
Symbol Legend<br />
Air Bag Symbol – Alerts you to important<br />
information about air bag safety.<br />
LATCH Symbol – Alerts you to important<br />
information about LATCH safety.<br />
Tether Anchor Symbol – Alerts you to<br />
important information about tether anchor safety.<br />
Date of Manufacture:<br />
10 11<br />
Important
Visual Glossary Visual Glossary<br />
Your vehicle components may be significantly different than pictured.<br />
Consult your owner’s manual to help you identify your vehicle components.<br />
Tether Anchors<br />
Forward-facing<br />
ONLY<br />
Back Seat<br />
Belt Retractor<br />
Lap/Shoulder<br />
Belt<br />
LATCH<br />
Anchors<br />
Rear<br />
Headrests<br />
Fold-down Armrest<br />
Consult your vehicle’s<br />
owners manual.<br />
Back Seat<br />
Belt Buckles<br />
Center Lap<br />
Belt<br />
Seat Crease<br />
IMPORTANT: If your vehicle has side air bags, please refer to the<br />
warnings on page 2.<br />
Front<br />
Shoulder Belt Guide<br />
Harness Tabs<br />
EZ Off Seat Pad<br />
Harness Straps<br />
SureLatch Connector<br />
(Shown in Rear-facing<br />
belt path)<br />
Base<br />
Headrest<br />
Shoulder Belt Guide<br />
Chest Clip<br />
Buckle<br />
Harness<br />
Release Button<br />
Recline Lever<br />
Back<br />
Front Seat<br />
Retractor<br />
Headrest Adjust Lever<br />
<strong>Instruction</strong>s<br />
Forward-facing<br />
Belt Path<br />
D-rings for<br />
SureLatch Harness<br />
Adjust Strap<br />
Connector SureLatch Connector<br />
(Shown in Rear-facing<br />
belt path)<br />
Front Seat Lap<br />
and Shoulder Belts<br />
Base<br />
Front<br />
Headrests<br />
Para instrucciones en Español, llamar al: 1-800-233-5921<br />
OWNER’S MANUAL<br />
Keep for futur e use.<br />
Symphony <br />
WA RNING<br />
To r educe the risk<br />
of SERIOUS INJUR Y or<br />
DEA TH, r ead this owner’ s<br />
manual prior to installing<br />
and using this child<br />
r estraint.<br />
Child Restraint System<br />
© Evenfl o Company , Inc. 2008 2570xxxx 7/08<br />
10<br />
2030<br />
4<br />
NO coloque el asiento infantil orientado<br />
hacia atrás en el asiento delantero con<br />
bolsa de aire.<br />
Puede causar MUERTE o LESIONES<br />
GRAVES. El asiento trasero es el lugar más<br />
seguro para los niños de 12 años de edad y<br />
120<br />
Headrest<br />
A I R B A G<br />
imporTanT<br />
Consult your vehicle<br />
owner’s manual to determine<br />
proper placement of child restraint<br />
in your vehicle and familiarize<br />
yourself with your vehicle’s<br />
components.<br />
Locking Clip<br />
Tether Strap<br />
and Hook<br />
(Shown fastened to<br />
storage clip)<br />
Forward-facing<br />
Belt Path<br />
SureLatch Connector<br />
(Shown in Rear-facing<br />
belt path)<br />
12 13<br />
Important
Using Symphony in the<br />
Rear-facing Position<br />
Child Requirements<br />
Weight: 5 – 35 lbs (2.3 – 15.8 kg)<br />
Height: Top of child’s head is at least 1 inch (25 mm)<br />
below the top of the child restraint headrest in<br />
either of its two lowest positions.<br />
1 inch (25 mm)<br />
or more<br />
Rear-facing Installation Checklist<br />
1. Secure child restraint to the vehicle seat.<br />
aRestraint is in Recline Position #1 (p. 49).<br />
aLocking clip is installed, if necessary (p. 50).<br />
aThe level line is level with ground (p. 19/22).<br />
A towel/small blanket is rolled up and placed beneath<br />
the front edge of the base, if necessary (p. 19/22).<br />
aChild restraint is securely installed with LATCH system<br />
(shown) through rear-facing belt path (p. 18)<br />
OR<br />
Child restraint is securely installed with vehicle<br />
seat belt through rear-facing belt path (p. 20).<br />
2. Place the child in the child restraint.<br />
aThe child’s back and bottom are flat against the<br />
back and bottom surfaces of the child restraint.<br />
aTop of child’s head is at least 1 inch (25 mm)<br />
below the top of the child restraint headrest in<br />
either of its two lowest positions.<br />
3. Make necessary adjustments.<br />
aRed harness tabs MUST be at, or slightly below,<br />
shoulder level (p. 23).<br />
aHarness is no more than two-finger widths<br />
from child (p. 24).<br />
aHeadrest is adjusted to either of the bottom two<br />
positions closest to the harness tabs (p. 48).<br />
4. Fasten both buckle tongues. Refer to page 24.<br />
5. Position and connect chest clip.<br />
aChest clip MUST be placed at armpit level (p. 24).<br />
6. Check your work.<br />
aTo properly secure this child restraint, it MUST<br />
NOT move more than 1 inch (25 mm) from<br />
side-to-side or from front-to-back at the<br />
rear-facing belt path.<br />
Tip!<br />
To make installation easier, watch the installation<br />
video of this child restraint at www.evenflo.com.<br />
14 15<br />
Rear-facing
Moving LATCH to Rear-facing Belt Path<br />
To install this child restraint properly in rear-facing position,<br />
the LATCH harness must be in the rear-facing belt path,<br />
as shown below (seat pad has been removed for clarity).<br />
If the LATCH harness is in the forward-facing belt path<br />
(shown below), use the following procedures to move it to<br />
the rear-facing belt path.<br />
To access the LATCH harness, you will first need to:<br />
• Loosen internal harness straps (p. 25);<br />
• Disconnect SureLatch connectors (p. 48);<br />
• Remove seat pad (p. 49).<br />
LATCH Harness in<br />
Rear-facing Belt Path<br />
FORWARD FACING<br />
LATCH Harness in<br />
Forward-facing Belt Path<br />
1. Remove SureLatch <br />
connectors from<br />
the forward-facing<br />
belt path.<br />
Reach through the<br />
harness straps and<br />
remove each SureLatch<br />
connector, one at a time.<br />
Moving LATCH to Rear-facing Belt Path<br />
2. Place each connector<br />
in the rear-facing<br />
belt path.<br />
3. Make sure the<br />
buckle and crotch<br />
strap is positioned<br />
through the<br />
harness straps,<br />
as shown.<br />
Note: Don’t forget to install the seat pad before installing<br />
the child restraint in your vehicle.<br />
16 17<br />
REAR FACING<br />
Rear-facing
Rear-facing Installation with LATCH<br />
IMPORTANT:<br />
• If you are using the vehicle seat belt to secure the child<br />
restraint, DO NOT use the LATCH system.<br />
• DO NOT use the tether strap when the child restraint is<br />
in the rear-facing position.<br />
Near Side<br />
LATCH Anchor<br />
1. Place the child<br />
restraint in position.<br />
Adjust the child restraint<br />
to the most reclined<br />
position (Recline Position<br />
#1, p. 49) then place it on<br />
vehicle seat in the rear-<br />
facing a position, as shown.<br />
2. Attach SureLatch Connectors.<br />
Push a SureLatch connector onto each seat anchor.<br />
Note: You may need to vary the angle of the SureLatch<br />
connectors, as shown above, to attach to the anchor.<br />
Also, make sure LATCH harness is in the rear-facing<br />
belt path (p. 16).<br />
Strap<br />
IMPORTANT: Make sure both<br />
SureLatch connectors are<br />
facing upward and the straps<br />
are not twisted.<br />
LATCH Anchor<br />
Far side<br />
Rear-facing Installation with LATCH<br />
Rear-facing Belt Path<br />
4. Secure the child<br />
restraint.<br />
Push downward on the<br />
child restraint, as shown,<br />
to set it in place.<br />
IMPORTANT: To properly secure this child restraint, it<br />
MUST NOT move more than 1 in. (25 mm) from side-toside<br />
or from front-to-back at the rear-facing belt path.<br />
If you can not tightly secure the child restraint, try again or<br />
move it to another location.<br />
18 19<br />
THIS SIDE UP<br />
Recline<br />
Positions<br />
Used for<br />
Rear-facing ONLY.<br />
Used for<br />
Forward-facing ONLY.<br />
Arrow must be level with ground<br />
when used rear-facing.<br />
1<br />
2 & 3<br />
Tightly rolled towel<br />
or small blanket<br />
1<br />
Used for<br />
Rear-facing ONLY.<br />
2 & 3<br />
Recline<br />
Positions<br />
Level Line<br />
Used for<br />
Forward-facing ONLY.<br />
Arrow must be level with ground<br />
when used rear-facing.<br />
3. Increase recline<br />
angle, if necessary.<br />
If level line is not parallel<br />
to the ground, disconnect<br />
SureLatch connectors<br />
and place a tightly rolled<br />
towel/small blanket<br />
beneath the front edge<br />
of the child restraint.<br />
Repeat Step 2.<br />
IMPORTANT: Infants may have difficulty breathing when<br />
in a sitting position. Make sure they recline enough for their<br />
head to lie back comfortably and safely. Failure to properly<br />
recline the child restraint could increase the child’s risk<br />
of serious injury or death.<br />
Note: In some vehicles, you may<br />
need to prop up the connector<br />
while pushing downward on the<br />
seat to secure it tightly. Repeat<br />
for the other connector.<br />
Rear-facing
Rear-facing Installation with Seat Belt<br />
IMPORTANT:<br />
• If you are using the LATCH system to secure the child<br />
restraint, DO NOT use vehicle seat belt.<br />
• DO NOT use the tether strap when the child restraint is<br />
in the rear-facing position.<br />
1. Place the child<br />
restraint in position.<br />
Adjust the child restraint<br />
to the most reclined<br />
position (Recline Position<br />
#1, p. 49) then place it on<br />
vehicle seat in the rear-<br />
facing a position, as shown.<br />
2. Route seat belt<br />
through rear-facing<br />
belt path.<br />
Unhook the front of the<br />
seat pad and move it out<br />
of the way.<br />
Thread the vehicle seat<br />
belt buckle tongue<br />
through the rear-facing<br />
belt path, as shown.<br />
IMPORTANT: Make sure the vehicle seat belt is in front of<br />
the crotch strap.<br />
3. Buckle seat belt.<br />
Rear-facing Installation with Seat Belt<br />
Locking Clip<br />
installed properly<br />
4. Remove all slack<br />
from the seat belt.<br />
Push downward on<br />
child restraint while<br />
tightening the vehicle<br />
seat belt to remove<br />
excess slack.<br />
5. Install locking clip,<br />
if necessary.<br />
You MUST use a locking<br />
clip if your vehicle has:<br />
a) Lap/shoulder seat<br />
belts with a buckle<br />
tongue that slides freely<br />
along the belt without<br />
locking into place; OR<br />
b) Seat belts equipped<br />
with an emergency<br />
locking retractor (ELR).<br />
Consult your vehicle owner’s manual before<br />
installing the locking clip.<br />
To see an example of seat belt types and to properly<br />
install a locking clip, go to p. 50.<br />
20 21<br />
Rear-facing
Rear-facing Installation with Seat Belt<br />
Rear-facing<br />
Belt Path<br />
Recline<br />
Positions<br />
Arrow must be level with ground<br />
when used rear-facing.<br />
1<br />
Used for<br />
Rear-facing ONLY.<br />
Used for<br />
Forward-facing ONLY.<br />
2 & 3<br />
Tightly rolled towel<br />
or small blanket<br />
1<br />
Used for<br />
Rear-facing ONLY.<br />
2 & 3<br />
Recline<br />
Positions<br />
Level Line<br />
Used for<br />
Forward-facing ONLY.<br />
Arrow must be level with ground<br />
when used rear-facing.<br />
6. Increase recline<br />
angle, if necessary.<br />
If the level line is not<br />
parallel to the ground,<br />
disconnect the seat belt<br />
and place a tightly rolled<br />
towel/small blanket<br />
beneath the front edge<br />
of the child restraint.<br />
Repeat Step 2.<br />
IMPORTANT: Infants may have difficulty breathing when<br />
in a sitting position. Make sure they recline enough for their<br />
head to lie back comfortably and safely. Failure to properly<br />
recline the child restraint could increase the child’s risk of<br />
serious injury or death.<br />
7. Ensure child<br />
restraint is secure.<br />
Reconnect the seat pad to<br />
the front of the restraint.<br />
Try to move the child<br />
restraint in all directions.<br />
IMPORTANT: To properly secure this child restraint, it<br />
MUST NOT move more than 1 in. (25 mm) from side-toside<br />
or from front-to-back at the rear-facing belt path.<br />
If you can not tightly secure the child restraint, try again<br />
or move it to another location.<br />
Securing the Child in the Child Restraint<br />
1. Loosen Harness.<br />
Press the harness release<br />
button on the front of the<br />
seat, then pull up on the<br />
harness strap behind the<br />
fastened chest clip.<br />
2. Position harness<br />
straps.<br />
Unfasten chest clip and<br />
place the child in the<br />
child restraint.<br />
Bring each harness strap<br />
over the child’s shoulders.<br />
IMPORTANT: The baby’s back and bottom should be flat<br />
against the restraint. If there is a gap, the baby will not be<br />
comfortable.<br />
3. Adjust harness straps.<br />
Grasping both red harness<br />
tabs, slide downward until<br />
the harness straps are at,<br />
or slightly below, the child’s<br />
shoulders.<br />
22 23<br />
Rear-facing
Securing the Child in the Child Restraint<br />
4. Buckle the harness.<br />
Insert both buckle<br />
tongues into the buckle.<br />
Note: Pull up on the<br />
harness straps to ensure<br />
that the buckle tongues<br />
are fastened securely.<br />
5. Tighten harness.<br />
Pull the harness adjuster strap to tighten the harness.<br />
Note: Make sure the harness straps are snug against<br />
the child with no more than two finger-widths<br />
between the child and straps.<br />
IMPORTANT: A snug strap should not allow any slack.<br />
It lies in a relatively straight line without sagging. It does<br />
not press on the child’s flesh or push the child’s body into<br />
an unnatural position.<br />
Check the harness straps near the shoulders for slack and<br />
adjust as needed.<br />
6. Fasten and adjust<br />
chest clip.<br />
Snap the two halves of<br />
the chest clip together,<br />
as shown, and slide to<br />
armpit level.<br />
Removing the Child from the Restraint<br />
1. Loosen harness<br />
straps.<br />
Press the harness release<br />
button on the front of the<br />
seat while pulling up on<br />
the harness strap behind<br />
the fastened chest clip.<br />
2. Disconnect chest clip.<br />
Push the release button<br />
and pull the chest clip<br />
apart.<br />
3. Unbuckle harness.<br />
Press the red button on<br />
the buckle and release<br />
both buckle tongues.<br />
You may now remove<br />
your child.<br />
24 25<br />
Rear-facing
Using Symphony in the<br />
Forward-facing Position<br />
Child Requirements<br />
Weight: 20 – 65 lbs (9 – 29.4 kg)<br />
Height: 50 inches (127 cm) tall, or less AND the top of the<br />
child’s ears are at, or below, the child restraint headrest.<br />
Age: At least one year old<br />
IMPORTANT<br />
<strong>Evenflo</strong> strongly recommends using the top<br />
anchorage (tether) strap when securing a child in this<br />
child restraint with the harness straps. Using the tether<br />
strap will improve the stability of this child restraint<br />
and may reduce the risk of injury.<br />
Tether Strap<br />
WARNING<br />
If the child weighs more than 65 lbs (29.4 kg) OR<br />
their shoulders are above the highest harness level,<br />
you MUST use this child restraint as a Booster.<br />
Forward-facing Installation Checklist<br />
1. Secure child restraint to the vehicle seat.<br />
aRestraint is in Recline Position #2 or #3 (p. 49).<br />
aLocking clip is installed, if necessary (p. 50).<br />
aIf the child weighs 48 lbs (21.7 kg) or less, the<br />
child restraint is securely installed with LATCH system<br />
(shown) through forward-facing belt path (p. 30);<br />
OR<br />
If the child weighs more than 48 lbs (21.7 kg), the<br />
child restraint is securely installed with the vehicle<br />
seat belt through forward-facing belt path (p. 34).<br />
aTether strap is attached and tightened (p. 33/37).<br />
2. Place the child in the child restraint.<br />
aThe child’s back and bottom are flat against the<br />
back and bottom surfaces of the child restraint.<br />
aThe top of the child’s ears MUST be below the<br />
top of the child restraint headrest.<br />
3. Make necessary adjustments.<br />
aRed harness tabs MUST be at shoulder level.<br />
aHarness is no more than two-finger widths<br />
from child (p. 24).<br />
aHeadrest is adjusted so that its bottom is nearest<br />
to the red harness tabs (p. 48).<br />
4. Fasten both buckle tongues. Refer to page 24.<br />
5. Position and connect chest clip.<br />
aChest clip MUST be at armpit level (p. 24).<br />
6. Check your work.<br />
aTo properly secure this child restraint, it MUST<br />
NOT move more than 1 inch (25 mm) from<br />
side-to-side or from front-to-back at the<br />
forward- facing belt path.<br />
Tip!<br />
To make installation easier, watch the installation<br />
video of this child restraint at www.evenflo.com.<br />
26 27<br />
Forward-facing
Moving LATCH to Forward-facing Belt Path<br />
To install this child restraint properly in forward-<br />
facing position, the LATCH harness must be in the forwardfacing<br />
belt path, as shown below (seat pad has been<br />
removed for clarity). If the LATCH harness is in the rear-<br />
facing belt path (shown below), use the following procedures<br />
to move it to the forward-facing belt path.<br />
To access the LATCH harness, you will first need to:<br />
• Loosen internal harness straps (p. 25);<br />
• Disconnect SureLatch connectors (p. 48);<br />
• Remove seat pad (p. 49).<br />
LATCH Harness in<br />
Forward-facing Belt Path<br />
LATCH Harness in<br />
Rear-facing Belt Path<br />
FORWARD FACING<br />
1. Remove one SureLatch <br />
connector from the<br />
rear-facing belt path.<br />
Moving LATCH to Forward-facing Belt Path<br />
2. Place the connector<br />
in the forward-<br />
facing belt path.<br />
Pull the harness strap out<br />
of the way and insert the<br />
connector, behind the<br />
straps, into the forwardfacing<br />
belt path opening,<br />
as shown.<br />
Repeat on the other side.<br />
3. Make sure the<br />
LATCH harness<br />
does not interfere<br />
with the internal<br />
harness straps.<br />
Note: Don’t forget to install the seat pad before installing<br />
the child restraint in your vehicle.<br />
28 29<br />
Forward-facing
30<br />
Forward-facing Installation with LATCH<br />
IMPORTANT:<br />
• If you are using the vehicle seat belt to secure the child<br />
restraint, DO NOT use the LATCH system.<br />
• Install this child restraint with the vehicle seat belt<br />
(NOT LATCH connectors) if the child weighs more than<br />
48 lbs (21.7 kg).<br />
Note: Some vehicle manufacturers have lower maximum<br />
weight ratings for LATCH anchors. Consult your vehicle<br />
Near Side Far side<br />
owner’s manual, or call the vehicle manufacturer, to<br />
confirm the limits on your vehicle’s LATCH anchors. LATCH Anchor<br />
LATCH Anchor<br />
Tether Strap<br />
OWNER’S MANUAL<br />
Keep for future use.<br />
Symphony <br />
Child Restraint System<br />
1. Disconnect tether<br />
hook from the back<br />
of the child restraint.<br />
2. Place the child<br />
restraint in position.<br />
Make sure child restraint<br />
is in Recline Position #2<br />
or #3 (p. 49).<br />
Set child restraint on<br />
vehicle seat in forwardfacing<br />
position, as<br />
shown. Lay the tether<br />
strap over the back of<br />
the vehicle seat.<br />
IMPORTANT: NEVER use Recline Position #1 for forwardfacing,<br />
AND NEVER use Recline Position #2 with children<br />
who weigh more than 40 lbs (18 kg).<br />
Forward-facing Installation with LATCH<br />
3. Attach SureLatch Connectors.<br />
Push a SureLatch connector onto each seat anchor.<br />
Note: You may need to vary the angle of the SureLatch<br />
connectors, as shown above, to attach to the anchor.<br />
Also, make sure LATCH harness is in the forward-facing<br />
belt path (p. 28).<br />
IMPORTANT: Make sure both<br />
SureLatch connectors are<br />
facing upward and the straps<br />
are not twisted.<br />
Strap<br />
Forward-facing<br />
31
Forward-facing Installation with LATCH<br />
Forward-facing<br />
Belt Path<br />
4. Secure the child<br />
restraint.<br />
Push downward on the<br />
child restraint, as shown,<br />
to set it in place.<br />
IMPORTANT: To properly secure this child restraint, it<br />
MUST NOT move more than 1 inch (25 mm) from side-<br />
to-side or from front-to-back at the forward-facing<br />
belt path. If you can not tightly secure the child<br />
restraint, try again or move it to another location.<br />
Note: In some vehicles, you<br />
may need to prop up the<br />
connector while pushing<br />
downward on the seat to<br />
secure it tightly. Repeat for<br />
the other connector.<br />
Forward-facing Installation with LATCH<br />
5. Connect and tighten<br />
tether strap.<br />
Connect the tether hook<br />
to the anchor behind the<br />
vehicle seat, as shown.<br />
Pull the strap and tighten<br />
the tether securely.<br />
IMPORTANT: If your tether strap is too short to reach<br />
from your child restraint to your vehicle tether anchor,<br />
you will need a Tether Extender. Please call ParentLink at<br />
1-800-233-5921.<br />
32 33<br />
Forward-facing
Forward-facing Installation with Seat Belt Forward-facing Installation with Seat Belt<br />
IMPORTANT:<br />
• Before installing this child restraint forward-facing with<br />
the vehicle seat belt, you MUST move the LATCH harness<br />
to the rear-facing belt path (p. 16) so that is does not<br />
interfere with the vehicle seat belt. Also, make sure the<br />
SureLatch connectors are attached to the storage<br />
D-rings on the seat pad.<br />
• When using the vehicle seat belt to secure the child<br />
restraint, DO NOT use the LATCH system.<br />
OWNER’S MANUAL<br />
Keep for future use.<br />
Symphony <br />
Child Restraint System<br />
Tether Strap<br />
1. Disconnect tether<br />
hook from the back<br />
of the child restraint.<br />
2. Place the child<br />
restraint in position.<br />
Make sure child restraint<br />
is in Recline Position #2<br />
or #3 (p. 49).<br />
Set child restraint on<br />
vehicle seat in forwardfacing<br />
position, as<br />
shown. Lay the tether<br />
strap over the back of<br />
the vehicle seat.<br />
IMPORTANT: NEVER use Recline Position #1 for forward-<br />
facing, AND NEVER use Recline Position #2 with children<br />
who weigh more than 40 lbs (18 kg).<br />
Access Flap<br />
3. Route seat belt through forward-facing<br />
belt path.<br />
Move the harness out of the way and raise the<br />
access flap. Route the seat belt buckle tongue through<br />
the forward-facing belt path, as shown.<br />
4. Buckle seat belt.<br />
34 35<br />
Forward-facing
Forward-facing Installation with Seat Belt<br />
Locking Clip<br />
installed properly.<br />
5. Remove all slack<br />
from the seat belt.<br />
Push downward on<br />
child restraint while<br />
tightening seat belt to<br />
remove excess slack.<br />
6. Install locking clip,<br />
if necessary.<br />
You MUST use a locking<br />
clip if your vehicle has:<br />
a) Lap/shoulder seat<br />
belts with a buckle<br />
tongue that slides freely<br />
along the belt without<br />
locking into place; OR<br />
b) Seat belts equipped<br />
with an emergency<br />
locking retractor (ELR).<br />
Consult your vehicle owner’s manual before<br />
installing the locking clip.<br />
To see an example of seat belt types and to properly<br />
install a locking clip, go to p. 50.<br />
Forward-facing Installation with Seat Belt<br />
Vehicle Belt<br />
Path<br />
7. Ensure child<br />
restraint is secure.<br />
Try to move the child<br />
restraint in all directions.<br />
IMPORTANT: To properly<br />
secure this child restraint, it<br />
MUST NOT move more than<br />
1 inch (25 mm) from side-toside<br />
or from front-to-back at<br />
the vehicle belt path.<br />
If you can not tightly secure<br />
the child restraint, try again<br />
or move it to another<br />
location.<br />
8. Connect and tighten<br />
tether strap.<br />
Connect the tether hook<br />
to the anchor behind the<br />
vehicle seat, as shown.<br />
Pull the strap and tighten<br />
the tether securely.<br />
IMPORTANT: If your tether strap is too short to reach from<br />
your child restraint to your vehicle tether anchor, you will need<br />
a Tether Extender. Please call ParentLink at 1-800-233-5921.<br />
36 37<br />
Forward-facing
When to Put Your Child<br />
in a Booster Seat<br />
Booster seats raise the child up and help to position the<br />
vehicle lap and shoulder belt correctly. When the child is<br />
properly restrained in a booster seat, their risk of injury<br />
in all types of crashes is reduced, as the lap and shoulder<br />
belt provides excellent restraint of both the upper and<br />
lower torso.<br />
It is important for the child to sit properly within the<br />
vehicle seat belts. When the vehicle belt is buckled, the lap<br />
belt should be low on the hips, just touching the thighs,<br />
and the shoulder belt should lie across the middle of the<br />
shoulder. If the child leans out or moves the belt behind<br />
the back or places it under the arm, it will not provide the<br />
intended restraint.<br />
There are a number of things to consider when deciding<br />
whether a child is ready to sit in a booster seat, including:<br />
the weight and height rating on their current child seat,<br />
the child’s own weight and height, their maturity, and the<br />
seating positions available in your vehicle.<br />
How is a booster seat used?<br />
Using a booster seat is very similar to buckling yourself into<br />
the vehicle:<br />
• Read the instruction manuals for both the booster seat<br />
and the vehicle before you start.<br />
• Put the booster in the back seat in a location with<br />
a lap and shoulder belt. Never use a booster with<br />
only a lap belt, as this could cause serious injuries.<br />
• After the child is in the booster, pull the lap and shoulder<br />
belt across him/her and buckle it.<br />
• Check that the shoulder belt lies across the middle of the<br />
shoulder and that the lap belt is low on the hips, just<br />
touching the thighs.<br />
How can you tell if a child is ready to transition to a<br />
booster seat?<br />
You should consider using a booster seat if the following<br />
conditions apply:<br />
• The child is mature enough to sit in the booster seat and<br />
not put the belts under their arm or behind their back.<br />
• The child is approaching the weight or height limit of the<br />
child restraint they are currently using. (Even children<br />
who have not outgrown their toddler seat can benefit<br />
from the use of a booster seat, if it is used properly.)<br />
• If you have a vehicle that does not have a tether anchorage<br />
but has lap/shoulder belts available in the back seat,<br />
a booster seat may provide better protection than an<br />
internal harness seat without the tether.<br />
The shoulder belt MUST<br />
pass through shoulder<br />
belt guide.<br />
The shoulder belt MUST<br />
cross midway between<br />
child’s shoulder and neck.<br />
The lap belt is stretched low and snug<br />
across the child’s hips, within the belt<br />
guides, and fastened into the buckle.<br />
38 39<br />
Booster
Using Symphony as a<br />
Booster Seat<br />
Child Requirements<br />
Weight: 30 – 100 lbs (13.6 – 45.3 kg)<br />
Height: Less than 57 inches (145 cm)<br />
Age: At least three years old<br />
Ears below the top of the headrest<br />
The shoulder belt MUST<br />
pass through shoulder<br />
belt guide.<br />
The shoulder belt MUST<br />
cross midway between<br />
child’s shoulder and neck.<br />
The lap belt is<br />
stretched low and<br />
snug across the<br />
child’s hips, within<br />
the belt guides, and<br />
fastened into the<br />
buckle.<br />
Booster Installation Checklist<br />
1. Convert child restraint to booster seat.<br />
See “Converting into a Booster Seat,” p. 42.<br />
2. Secure booster seat to the vehicle seat.<br />
Make sure the bottom and back of the booster seat<br />
are touching vehicle seat and back.<br />
3. Place the child in the booster seat.<br />
aMake sure the booster seat is in Recline Position #3.<br />
aMake sure the child’s back and bottom are flat<br />
against the back and bottom surfaces of the<br />
booster seat.<br />
4. Adjust headrest for proper shoulder belt fit.<br />
The shoulder belt MUST cross midway between the<br />
child’s shoulder and neck, as shown.<br />
5. Secure child and booster seat to vehicle seat.<br />
Stretch the lap/shoulder belt across the child and<br />
fasten the buckle. Make certain the shoulder belt is<br />
threaded through the shoulder belt guide, as shown.<br />
6. Check your work.<br />
Make sure the lap belt is stretched low and snug<br />
across the child’s hips, within the belt guides, and<br />
fastened into the buckle. The shoulder belt must cross<br />
the child midway between his/her shoulder and neck.<br />
IMPORTANT<br />
Always secure the booster seat with the<br />
SureLatch connectors or vehicle seat belt<br />
when not occupied. An unsecured booster seat<br />
can fly into and injure other occupants in<br />
WARNING<br />
The shoulder belt MUST NOT cross the child’s neck or fall<br />
off the child’s shoulder. If you can not adjust the shoulder<br />
belt to properly lay midway between the child’s shoulder<br />
and neck AND at or above the shoulder, try another<br />
seating location, or do not use the booster seat.<br />
40<br />
the event of a crash.<br />
41<br />
Booster
Converting into a Booster Seat Converting into a Booster Seat<br />
1. Remove the Seat<br />
Pad (p. 49).<br />
Adjust the headrest to<br />
its uppermost position<br />
(p. 48).<br />
Pull the SureLatch<br />
connectors from the<br />
forward-facing belt path<br />
and place them in the<br />
seat, as shown.<br />
2. Loosen Harness.<br />
Press the harness release<br />
button and pull the<br />
harness straps outward.<br />
3. Push the Chest Clip<br />
and Buckle Tongues<br />
through the Forwardfacing<br />
Belt Path.<br />
Buckle the chest clip<br />
behind the child<br />
restraint, as shown<br />
below.<br />
4. Conceal Harness<br />
Tabs.<br />
Tuck harness tabs<br />
completely into<br />
adjustment slots,<br />
as shown.<br />
Note: If the harness tabs<br />
are not tucked completely<br />
into the slots, they will<br />
press uncomfortably<br />
against your child’s back.<br />
42 43<br />
Booster
Converting into a Booster Seat Converting into a Booster Seat<br />
5. Tighten Harness<br />
Straps.<br />
Pull harness adjustment<br />
strap until harness straps<br />
are tight.<br />
6. Insert SureLatch<br />
Connectors.<br />
Insert both SureLatch<br />
connectors through the<br />
forward-facing belt path.<br />
7. Remove the Crotch<br />
Strap.<br />
Place the child restraint in<br />
Recline Position #1 (p. 49)<br />
then lay it on its back.<br />
Locate the crotch strap<br />
anchor on the bottom.<br />
Unclip the anchor, push<br />
it through the seat and<br />
remove, as shown.<br />
Insert the crotch strap<br />
anchor back into the<br />
opening from the<br />
bottom of the child<br />
restraint.<br />
Pull the anchor<br />
completely through<br />
the seat and arrange it<br />
so it lies flat, as shown.<br />
44 45<br />
Booster
Converting into a Booster Seat<br />
8. Install the Seat Pad (p. 49).<br />
Connect each SureLatch connector to its D-ring for<br />
storage (p. 48).<br />
IMPORTANT<br />
Make sure the child restraint is adjusted to Recline<br />
Position #3 (p. 49) and the headrest is adjusted for<br />
proper shoulder belt fit (p. 40).<br />
Your Symphony Child Restraint is now in Booster Mode<br />
and ready for a child who weighs 30 – 100 lbs<br />
(13.6 – 45.3 kg), is less than 57 inches (145 cm) tall,<br />
is at least three years old, and whose ears are below<br />
the top of the child restraint headrest.<br />
This page has been left intentionally blank.<br />
46 47<br />
Booster
General Information<br />
Operating the SureLatch Connectors<br />
Adjusting the Headrest<br />
Headrest Adjust Lever<br />
Release Button<br />
When the LATCH harness is<br />
in the forward-facing belt<br />
path, store each SureLatch<br />
connector by snapping it<br />
onto the forward D-rings.<br />
To remove the SureLatch<br />
connector from a LATCH<br />
anchor or its storage D-ring,<br />
press the red Release Button.<br />
When the LATCH harness is in<br />
the rear-facing belt path,<br />
store each SureLatch connector<br />
by snapping it onto the<br />
rear D-rings.<br />
To adjust, squeeze the<br />
headrest adjust lever, as<br />
shown, while sliding the<br />
headrest up or down to<br />
the desired position.<br />
Adjusting the Recline Position<br />
This child restraint can be adjusted into three positions.<br />
Recline Lever<br />
Squeeze the recline lever at<br />
the bottom of the child<br />
restraint, as shown, and<br />
select the desired recline<br />
position.<br />
CORRECT RECLINE POSITIONING<br />
• In rear-facing position: Use Recline Position #1 ONLY.<br />
• In forward-facing position when child is secured with<br />
harness straps: Use Recline Position #2 for children who<br />
weigh 20 – 40 lbs (9 – 18 kg); use Recline Position #3<br />
for children who weigh 20 – 65 lbs (9 – 29.4 kg).<br />
• In booster mode: Use Recline Position #3 ONLY.<br />
Removing Seat Pad<br />
EZ Off Pad<br />
Enclosure<br />
1. Disconnect both<br />
SureLatch connectors<br />
from D-rings on<br />
seat pad.<br />
2. Open “EZ Off” pad<br />
enclosure.<br />
3. Disconnect all seat<br />
pad hooks. Remove<br />
the seat pad.<br />
48 49<br />
General
Installing the Locking Clip<br />
To view a video about installing a locking clip, go to www.<br />
evenflo.com.<br />
Use the locking clip with:<br />
• Lap/shoulder seat belt<br />
combinations that have a<br />
buckle tongue that slides<br />
freely along the belt<br />
without locking into place;<br />
OR<br />
• Seat belts equipped with an emergency locking<br />
retractor (ELR). Some ELR vehicle belts can be switched so<br />
that they lock when tightened.<br />
Consult your vehicle owner’s manual before<br />
installing the locking clip.<br />
WARNING 1/2 in.<br />
Locking Clip • Remove locking clip from vehicle<br />
seat belt when not used with a<br />
child restraint, or the vehicle seat<br />
belt will not properly restrain an<br />
adult or child. Serious injury could<br />
occur.<br />
• DO NOT use the locking clip in<br />
booster mode.<br />
(13 mm)<br />
1. Using your full weight,<br />
press down on the child<br />
restraint as you tighten<br />
the seat belt.<br />
Installing the Locking Clip<br />
2. Hold the lap/shoulder<br />
belts together just<br />
behind the free sliding<br />
buckle tongue while you<br />
unfasten the seat belt.<br />
3. While holding the belts<br />
and buckle tongue,<br />
thread the locking clip<br />
onto the seat belt, and<br />
slide it into place.<br />
Note: Locking clip must<br />
be placed within 1/2 in.<br />
(13 mm) of seat belt<br />
buckle.<br />
4. Buckle the seat belt with<br />
the locking clip in place.<br />
Return to the installation procedure:<br />
• Rear-facing installation – Step 6, page 22<br />
• Forward-facing installation – Step 7, page 37<br />
50 51<br />
General
Installing the Accessories<br />
WARNING<br />
• Use the fold-down cup holder with the child restraint in the<br />
forward-facing position ONLY.<br />
• DO NOT use the cup holder to store bottles or hard<br />
containers. Only for use with soft cups (such as styrofoam<br />
or paper).<br />
• DO NOT place any cups that contain hot liquids<br />
(such as coffee or tea) in the accessories.<br />
• DO NOT attach any other item to this child restraint<br />
unless it has been certified for use with this specific child<br />
restraint.<br />
To install the fold-down cup holder on either side of<br />
the restraint, move seat pad out of the way and install<br />
on the side, as shown.<br />
To use, flip it open.<br />
Installing the Accessories<br />
WARNING<br />
Use the Body Pillow and Infant Head Support with the<br />
child restraint in the rear-facing position ONLY.<br />
To attach the head pillow,<br />
insert the strap through<br />
the slot in the headrest<br />
cover, as shown, and<br />
connect to the Velcro<br />
tab beneath.<br />
The optional body pillow is used to help support the<br />
child by placing it in the restraint, as shown.<br />
IMPORTANT:<br />
• The optional head pillow (Infant Head Support) should<br />
lie flat against the seat back, as shown. Be sure to cut off<br />
the plastic attachment between the head support and<br />
the seat pad. Small parts may be a choking hazard.<br />
• Support the child’s head. Infants may have difficulty<br />
breathing when in a sitting position. Using additional<br />
padding or pillows behind the infant’s head, or failure<br />
to properly recline the child restraint could increase the<br />
child’s risk of serious injury or death.<br />
52 53<br />
General
Care and Cleaning<br />
• DO NOT lubricate or immerse the SureLatch connectors,<br />
the buckle, or any other part of this child restraint.<br />
• Plastic and metal parts may be wiped clean with<br />
mild soap and water and dried with a soft cloth.<br />
Do not use abrasive cleaners or solvents.<br />
• Take care not to damage any labels.<br />
• The harness can be wiped clean with mild soap and<br />
water. Allow harness to air dry. DO NOT immerse<br />
buckle in water.<br />
• The seat pad can be machine washed separately in<br />
cold water, delicate cycle. Tumble dry 10 – 15 minutes<br />
on low heat.<br />
• NEVER use child restraint without the seat pad.<br />
Tip!<br />
• To help protect the<br />
vehicle upholstery, place a<br />
towel beneath and behind<br />
the child restraint.<br />
Proper Disposal of this Child Restraint<br />
At the end of this child restraint’s useful life, <strong>Evenflo</strong><br />
encourages you to dispose of it properly. Most of the<br />
components in this child restraint are recyclable.<br />
1. Remove all fabric and padding.<br />
2. Remove all screws and disassemble the restraint.<br />
3. Recycle all plastic/foam parts and discard the rest.<br />
If your local recycling center won’t accept the padding,<br />
you may dispose of it in the landfill.<br />
Note: <strong>Evenflo</strong> uses recycled materials in the<br />
manufacturing process whenever possible but never<br />
for components that are critical for safety.<br />
To prevent injury due to hidden damage, lost instructions,<br />
outdated technology, etc., discontinue use of this restraint<br />
after eight years, or if it has been involved in a crash.<br />
Para instrucciones en Español, llamar al: 1-800-233-5921<br />
OWNER’S MANUAL<br />
Keep for future use.<br />
Symphony <br />
WARNING<br />
To reduce the risk<br />
of SERIOUS INJURY or<br />
DEATH, read this owner’s<br />
manual prior to installing<br />
and using this child<br />
restraint.<br />
Child Restraint System<br />
© Evenfl o Company, Inc. 2008 2570xxxx 7/08<br />
Para instrucciones en Español, llamar al: 1-800-233-5921<br />
OWNER’S MANUAL<br />
Keep for future use.<br />
Symphony <br />
After thoroughly reading and<br />
following these instructions,<br />
store them in the slots provided<br />
on the back of the child<br />
restraint, as shown.<br />
WARNING<br />
To reduce the risk<br />
of SERIOUS INJURY or<br />
DEATH, read this owner’s<br />
manual prior to installing<br />
and using this child<br />
restraint.<br />
Child Restraint System<br />
© Evenfl o Company, Inc. 2008 2570xxxx 7/08<br />
Para instrucciones en Español, llamar al: 1-80<br />
OWNER’S MA<br />
Keep for future u<br />
Sympho<br />
WARNING<br />
To reduce the risk<br />
of SERIOUS INJURY or<br />
DEATH, read this owner’s<br />
manual prior to installing<br />
and using this child<br />
restraint.<br />
Child Restraint S<br />
© Evenfl o Company, Inc. 2008 25<br />
54 55<br />
General
56<br />
Replacement Parts<br />
Not available on all models.<br />
You can order replacement parts on-line at www.evenflo.com<br />
or contact <strong>Evenflo</strong> at 1-800-233-5921. When you contact<br />
us, please have the product model number and date of<br />
manufacture (found on the back of the child restraint).<br />
Locking<br />
Clip<br />
Body<br />
Pillow<br />
Tether<br />
Extender<br />
Headrest<br />
Cup<br />
Holder<br />
Head<br />
Pillow<br />
LATCH Harness with<br />
SureLatch Connectors<br />
Right Right Left Left<br />
Upper Seat<br />
Foam<br />
Right Left<br />
Right Left<br />
Lower Seat<br />
Foam<br />
Headrest<br />
Pad<br />
Seat<br />
Pad<br />
Limited Warranty<br />
For a period of 90 days from the original purchase of this Product,<br />
<strong>Evenflo</strong> warrants to the original end user (“Purchaser”) this<br />
Product (including any accessories) against defects in material<br />
or workmanship. <strong>Evenflo</strong>’s sole obligation under this express<br />
limited warranty shall be, at <strong>Evenflo</strong>’s option, to repair or replace<br />
any Product that is determined to be defective by <strong>Evenflo</strong><br />
and determined to be covered by this warranty.<br />
Repair or replacement as provided under this warranty is the<br />
exclusive remedy of the Purchaser. Proof of purchase in the<br />
form of a receipted invoice or bill of sale evidencing that the<br />
Product is within the warranty period must be presented to obtain<br />
warranty service. This express limited warranty is extended<br />
by <strong>Evenflo</strong> ONLY to the original Purchaser of the Product and is<br />
not assignable or transferable to subsequent purchasers or end<br />
users of the Product. For warranty service, contact <strong>Evenflo</strong>’s<br />
ParentLink Consumer Resource Center at 1-800-233-5921 or<br />
www.evenflo.com.<br />
EXCEPT TO THE EXTENT PROHIBITED BY APPLICABLE LAW,<br />
ANY IMPLIED WARRANTY OF MERCHANTABILITY OR FITNESS<br />
FOR A PARTICULAR PURPOSE ON THIS PRODUCT IS HEREBY<br />
DISCLAIMED. EVENFLO SHALL NOT BE LIABLE FOR ANY<br />
INCIDENTAL, CONSEQUENTIAL, SPECIAL OR PUNITIVE DAM-<br />
AGES OF ANY KIND FOR BREACH OF THE EXPRESS LIMITED<br />
WARRANTY ON THIS PRODUCT, OR ANY WARRANTY IMPLIED<br />
BY OPERATION OF LAW. OTHER THAN THE EXPRESS LIMITED<br />
WARRANTY SET FORTH ABOVE, THERE ARE NO OTHER WAR-<br />
RANTIES THAT ACCOMPANY THIS PRODUCT AND ANY ORAL,<br />
WRITTEN OR ANY OTHER EXPRESS REPRESENTATION OF ANY<br />
KIND IS HEREBY DISCLAIMED.<br />
Answers. Advice. Affirmation.<br />
• www.evenflo.com<br />
• USA: 1-800-233-5921, 8 AM to 5 PM E.T.<br />
• Mexico: 01-800-706-12-00<br />
General<br />
57
Answers. Advice. Affirmation.<br />
• www.evenflo.com<br />
• USA: 1-800-233-5921, 8 AM to 5 PM E.T.<br />
• Mexico: 01-800-706-12-00