Architext05 wrc Shakes Shingles - Tilling Timber
Architext05 wrc Shakes Shingles - Tilling Timber
Architext05 wrc Shakes Shingles - Tilling Timber

You also want an ePaper? Increase the reach of your titles
YUMPU automatically turns print PDFs into web optimized ePapers that Google loves.
<strong>Shingles</strong>—450mm long<br />
An attractive smooth sawn appearance<br />
on both faces. Available in No. 1 Blue<br />
Label (Premium clear grade, fully<br />
quarter sawn—recommended for<br />
roofing), or No. 2 Red Label (General<br />
purpose grade with limited sap wood.<br />
Contains both quarter and back sawn<br />
<strong>Shakes</strong>—600mm long<br />
One sawn and one textured face split<br />
naturally along the grain—the<br />
appearance and feel is far less regular<br />
than shingles. Only one grade is<br />
distributed by <strong>Tilling</strong> <strong>Timber</strong>.<br />
WALLS<br />
<strong>Shingles</strong> and <strong>Shakes</strong> can be applied to internal or external walls with a solid nailing base. <strong>Timber</strong> battens must be applied over brick or other<br />
nail resistant surface.<br />
Coverage Walls<br />
Measure area in square metres. Deduct windows, doors etcetera. From<br />
table, determine coverage per bundle at intended recommended<br />
exposure. Divide area by coverage, adding 5% to give required number of<br />
bundles. Note: Greater exposures are only possible in non weather exposed applications.<br />
Exposure m/m<br />
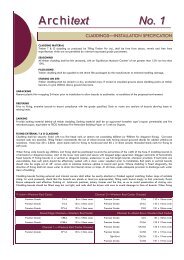
Archi text No. 5<br />
WESTERN RED CEDAR SHAKES & SHINGLES<br />
Suitable for cladding and roofing applications, Western Red Cedar <strong>Shakes</strong> and <strong>Shingles</strong> can<br />
easily be installed by the handyman or professional. Over many decades, Western Red Cedar<br />
<strong>Shingles</strong> and <strong>Shakes</strong> have established a reputation as attractive, natural and practical roofing<br />
products. Cyclonic and high wind areas provide challenges for any fixing application. The<br />
information provided below takes into account assessment tests carried out at the Cyclonic<br />
Testing Station at the James Cook University of North Queensland.<br />
Approximate Square Metre Coverage per Bundle<br />
450mm <strong>Shingles</strong> 600mm <strong>Shakes</strong><br />
100 1.7 0.7<br />
125 2.1 0.8<br />
140 2.3 0.9<br />
190 3.2 1.4<br />
210 3.6 1.6<br />
290 N/R 2.1<br />
Exposure Limit—Walls<br />
<strong>Shingles</strong> 210mm <strong>Shakes</strong> 290mm<br />
Exposure: The portion of each Shake or Shingle left<br />
uncovered.<br />
Installation—Walls<br />
Set out string line from the lowest common point on total job.<br />
Fix lowest row of <strong>Shingles</strong> or <strong>Shakes</strong> spaced 5-10mm apart to<br />
allow for expansion. Fix the second row of <strong>Shingles</strong> directly<br />
over the first row to create a weatherproof double layer<br />
situation. Straight edge or random set next row at required<br />
exposure. Do not drive nail heads below timber surface.<br />
Sarking<br />
It is essential that only “breather type” (vapour permeable)<br />
sarking products be employed beneath battens for either<br />
cedar shingles or shakes roofs. In regions other than tropical,<br />
it remains good practice to utilize vapour permeable sarking in<br />
order to achieve optimum performance and maximum service<br />
life for cedar Shingle and Shake roofing systems.<br />
ROOFS<br />
Installation -Roofs<br />
Begin with a double or triple layer at gutter edge of roof. Nail <strong>Shingles</strong> so that following row will cover nails by 40mm. Use a straight edge to<br />
line up rows of <strong>Shingles</strong> and <strong>Shakes</strong>. For quantity of <strong>Shingles</strong> or <strong>Shakes</strong> required, refer to table (Quantity Required—Roofs) on back page.<br />
Valleys<br />
Valleys must be constructed with utmost care and from durable materials to avoid leaks. Metal valley sheets, colourbond or fully painted<br />
zincalume at least 500mm wide should be laid over double sarking and only nailed at extreme edge. <strong>Shingles</strong> and <strong>Shakes</strong> abutting the<br />
valley should be trimmed 75mm from the centre line.<br />
Battening<br />
A Cedar roof may be laid on spaced battens or solid surfaced roofs. In normal conditions, 50 x 25mm or 75 x 25mm battens at centres the<br />
same as the weather exposure intended, will be sufficient. In snow or cyclonic areas, special requirements apply. Refer <strong>Tilling</strong> <strong>Timber</strong>.
Hips & Ridges<br />
Factory manufactured hip and ridge cappings are available to complement both <strong>Shingles</strong> and <strong>Shakes</strong>. Alternatively, after sarking, a hip or<br />
ridge may be built by selecting uniform width shingles or shakes. Bevel cut exposed face and interlace between temporary straight edges on<br />
either side of the hip. Mitred hips must be flashed with Alcor or lead flashing.<br />
Flashing<br />
Any structural members protruding through the roof should be flashed and counter flashed on all edges. Flashing should extend at least<br />
150mm under the <strong>Shingles</strong> or <strong>Shakes</strong> and should be counter flashed. Metal should be painted after bending to shape, and be dry before<br />
installation. A mastic or silicon caulk should be used to seal all possible water entry areas. Flashing may also be required at ridges or pitch<br />
changes in complex roof structures.<br />
Sizing up the Job: Roofs<br />
Bundle sizes: The coverage per bundle depends on the exposure but will be around 2.3m² for <strong>Shingles</strong> and 1.4m² for <strong>Shakes</strong> at the<br />
maximum recommended exposures. Pitch: The pitch of the roof is determined by the increase in height (the rise) over its length (the run). ie:<br />
Rises: 150mm in 300mm Pitch = 1:2. Exposure: The portion of each Shake or Shingle left uncovered.<br />
Exposure Limits: Roofs<br />
<strong>Shingles</strong> 450mm long.<br />
Pitch—1 in 3 and steeper.<br />
140mm max. Minimum recommended pitch is 1 in 3 (18°).<br />
<strong>Shakes</strong> 600mm long.<br />
1 in 3 and steeper.<br />
190mm max. *Minimum recommended pitch is 1 in 3 (18°).<br />
A good Cedar roof should be a minimum three layers thick—maximum<br />
exposures shown will achieve bare three layers and reductions in<br />
exposure will result in additional roof thickness.<br />
Coverage—Roofs<br />
Exposure mm Square metres per bundle<br />
140 2.3 0.9<br />
190 N/R 1.4<br />
210 N/R N/R<br />
290 N/R N/R<br />
Maintenance<br />
The life span of Western Red Cedar Shingle and Shake roofs can vary from area to area, primarily because of different climatic conditions,<br />
varying roof slopes and the presence of overhead vegetation. Thus it is almost impossible to predict accurately the life of a roof. It is possible<br />
however, to increase the roof’s longevity through proper and regular maintenance. Wind blown debris such as leaves, pine needles and the<br />
like should be removed from the roof on a regular basis by sweeping with a stiff broom or wire brush. This is basic but important housekeeping<br />
because accumulated debris may retain moisture . Moisture retention is believed to be the major contributing factor to the growth of moss,<br />
fungus and mildew, any or all of which may eventually cause decay and reduce the service life of the roof. Additional protection may be given<br />
to Shingle and Shake roofs by the application of a proprietory timber treatment that contains an effective water repellant. When combined with<br />
regular removal of accumulated debris, due care will enhance the service life of your roof. <br />
Head Office : 31-45 Orchard Street, KILSYTH 3137 VICTORIA<br />
Telephone: +61 3 9725 0222 Facsimile: +61 3 9725 3045 Email: sales@tilling.com www.tilling.com<br />
FREECALL 1800 337 703 ABN 52 004 621 121<br />
Revised June 2003<br />
<strong>Shingles</strong> 450mm <strong>Shakes</strong> 600mm<br />
Quantity Required—Roofing<br />
Determine ground area of the building, including overhangs, in square metres. Calculate the pitch of the roof and increase ground area in<br />
total by appropriate percentage.<br />
1 in 4 Add 3% 1 in 1.5 Add 20%<br />
1 in 3 Add 5½% 1 in 1 Add 42%<br />
1 in 2.5 Add 8½% 1¼ in 1 Add 60%<br />
1 in 2 Add 12% 1½ in 1 Add 80%<br />
Divide adjusted area by coverage per bundle from (exposure limits) chart to determine quantity required. For <strong>Shingles</strong>, add 1 bundle per 8<br />
lm of hips, ridges and valleys/1 per 3.3lm for <strong>Shakes</strong>. For <strong>Shingles</strong>, add 1 bundle per 18lm of perimeter to allow double starter course over<br />
guttering. For <strong>Shakes</strong>, 1 bundle per 7½lm.<br />
Nails<br />
Fixing<br />
Specification<br />
No. 1 Blue Label<br />
<strong>Shingles</strong><br />
Fixing Centres Hardwood Battens Softwood Battens<br />
140mm 40 x 2.5mm flat head hot dipped galvanized<br />
straight shank nails<br />
No. 1 <strong>Shakes</strong> 190mm 50 x 2.8mm flat head<br />
hot dipped galvanized straight shank nails<br />
50 x 2.8mm flat head hot dipped<br />
galvanized ring shank nails<br />
50 x 2.8mm flat head hot dipped<br />
galvanized ring shank nails<br />
Use only corrosion resistant galvanized steel or stainless steel nails, fixed in accordance with specification.<br />
For double coursing or non specified methods, consult your <strong>Tilling</strong> <strong>Timber</strong> stockist.