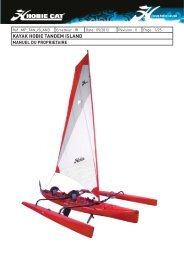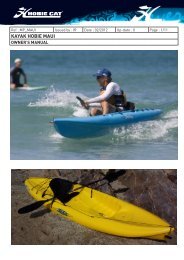
HOBIE TIGER - Hobie-cat
HOBIE TIGER - Hobie-cat
HOBIE TIGER - Hobie-cat

You also want an ePaper? Increase the reach of your titles
YUMPU automatically turns print PDFs into web optimized ePapers that Google loves.
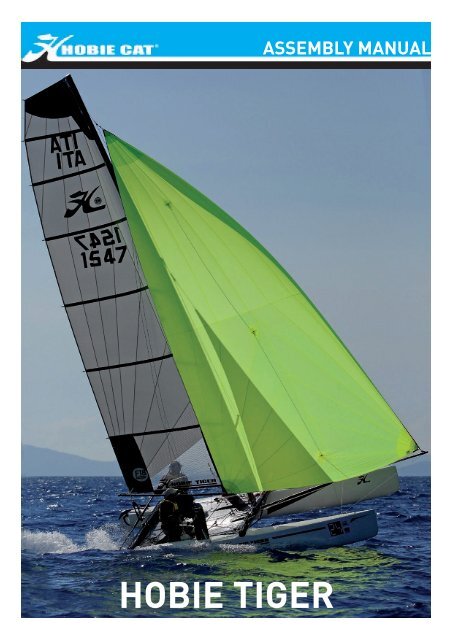
<strong>HOBIE</strong> <strong>TIGER</strong><br />
ASSEMBLY MANUAL
Necessary tools :<br />
2 spanners #17<br />
1 pair of universal plier<br />
TABLE OF CONTENT<br />
List of parts ..............................................2<br />
Hull assembly ..........................................4<br />
Trampoline ...............................................5<br />
Rudder assembly .....................................7<br />
Tiller crossbar & stick .............................8<br />
Mast set up ...............................................9<br />
Spreader bars ........................................10<br />
Preparation of the mast 11<br />
Stepping the mast ..................................12<br />
Trapeze ...................................................13<br />
Boom ......................................................14<br />
Mainsail ..................................................15<br />
Cunningham ...........................................16<br />
Mast rotation ..........................................18<br />
Jib furler (option) ...................................19<br />
Fully battened jib (serial) .......................21<br />
Jib sheet self tacking system ................23<br />
Self tacker traveller car control ............24<br />
Main sheet system .................................25<br />
Trumpet Spinnaker (option) ...................27<br />
Before Sailing.........................................32<br />
Safety advice ..........................................33<br />
CAUTION - DANGER ALUMINIUM<br />
MAST - STAY AWAY OF<br />
ELECTRICAL WIRES<br />
It is advisable to be at least 2 people to<br />
assemble the <strong>Hobie</strong> Tiger .<br />
LIST OF PARTS<br />
Hulls (2)<br />
Front crossbar<br />
Rear crossbar<br />
Mast<br />
Boom<br />
Trampoline<br />
Part bag (wires)<br />
Rigging bag<br />
Ropes bag<br />
Spinnaker rig bag<br />
Rudder assemblies (2)<br />
Tiller crossbar<br />
Tiller extension FX6<br />
Mainsail + battens (7)<br />
Jib<br />
Trampoline lacing rod<br />
Daggerboards (2)
WIRES :<br />
1. Shrouds<br />
2. Bridles<br />
3. Diamond wires<br />
ROPES :<br />
1. Kit trapeze handle<br />
2. Jib sheet<br />
3. Jib halyard<br />
4.6. Side lines for Cunningham<br />
5. Central line for Cunningham<br />
7. Mast rotation line<br />
8. trapeze shock cord<br />
9. Trapeze line<br />
10. Trapeze handles<br />
11. Trampoline laces<br />
12. Righting line<br />
13. Main sheet system<br />
RIG BAG :<br />
LIST OF PARTS<br />
4.5. Forestay + pigtail + jib halyard rope<br />
6.7. Trapeze wires<br />
8. rigid forestay<br />
9. Stay adjuster<br />
10. Spreader bars<br />
11. Stay adjuster covers<br />
12. Shackle D8<br />
1. Drain plug + gasket<br />
2. Plastic spring for boom<br />
3. Main cunningham blocks<br />
4. Heart shackle + cunningham blocks<br />
5. Gooseneck connector<br />
6. Ball stop<br />
7.Stay adjusters<br />
8. Batten kit<br />
9. Cunningham blocks<br />
10. Inox rudder pins + split rings
Hull assembly<br />
1. Position the hulls in parallel with the inner<br />
sides facing the ground.<br />
Lift the right hull. One person straddles the hull<br />
to hold it in place. The other person applies the<br />
silicone sealant (for waterproofing) around the<br />
screw holes.<br />
2. Take the front crossbar (with dolphin striker).<br />
Place it in its support so that the trampoline<br />
track faces the rear of the boat. Insert the two<br />
bolts. Pass your hand through the inspection<br />
port to position the nuts and washers onto the<br />
screws photo). Fasten loosely.<br />
Lift the left hull, and follow the same steps as for<br />
the right hull. Do not fully tighten the screws.<br />
***Respect same order for the washers as assembled<br />
at the delivery***<br />
3. Apply silicone sealant around the screw holes<br />
at the back of the hulls. Place the rear crossbar<br />
on the right side. Insert the bolts, washers and<br />
nuts as shown for the front crossbar. Do the<br />
same thing for the left side.<br />
Once the frame has been mounted, tighten all the<br />
bolts fully and then install the lock nuts.<br />
It is advisable to check the fastening of the bolts<br />
after the first trip out onto the water, and recheck<br />
these at regular intervals.
Trampoline assembly<br />
1. Unfold the trampoline. Note that the trampoline has side tension lines that are already pre-threaded.<br />
Insert the front edge of the trampoline into the track at the left, rear side of the front crossbar.<br />
Continue feeding the trampoline into the track and position it in the center. line up the grommet in the<br />
center of the trampoline with the dolphin striker post to ensure it is centered.<br />
3. Move to the rear of the trampoline. Very closely to<br />
where the side tensioning line exits the rear of the trampoline<br />
tie a loop. ensure you pull the side tensioning line<br />
firmly as to tie the loop as closely to the trampoline where<br />
the rope exits as possible. Tie a bowline or a similar loop<br />
in the line which will be used for a 4:1 purchase of the<br />
side tensioning lines. Repeat this step for the opposite<br />
side rear corner.<br />
2. Take one of the side tensioning lines and pass the line<br />
through the pad-eye that is fixed to the front crossbar then<br />
through the grommet of the trampoline near where the<br />
rope exits the trampoline and back to the pad-eye. Then<br />
fix it through the grommet that is near the crossbar using<br />
a bowline knot.<br />
Repeat this step at the opposite side front corner.<br />
4. Now take the tale of the side tensioning line and pass the rope through the pad-eye mounted on the<br />
rear cross beam closest to where the line exits the trampoline. Then pass the line back through the<br />
loop tied in step3. Again go through the pad-eye on the beam and back through the loop. This will provide<br />
a 4:1 purchase. Pull the line slightly as to take some tension for the sides but do not completely<br />
tension at this stage. Repeat this step for the opposite side rear corner. Ensure that the trampoline is<br />
still centered.
Trampoline assembly<br />
5. Find the trampoline rod and insert it into the rear of the<br />
trampoline.<br />
beginning<br />
6. Commence lacing the rear of the trampoline. The lacing line starts at the left, rear lacing button on<br />
the rear crossbar. Lace the rear of the trampoline as tightly as possible as per the photographs and<br />
diagrams supplied. Continue across the rear crossbar and tie off securely when finished.<br />
7. Again, take the side tensioning line and very<br />
firmly pull the line in order to tighten the trampoline.<br />
Repeat this for the opposite side rear corner.<br />
NB : It is important that the trampoline be<br />
strongly tightened.<br />
Check the tension on a regular basis.<br />
8. Once the sides of the trampoline have been<br />
further tightened, tie off the line and hide the tail<br />
under the trampoline. Repeat this step for the<br />
opposite side rear corner.
1.<br />
Identify the right rudder from the left rudder<br />
(green sticker = right ; red sticker = left)<br />
Take the left rudder, and align the lower rudder<br />
casting onto the rear gudgeon.<br />
Rudder assembly<br />
2. Insert the rudder pin.<br />
Do not forget to put in the two split rings: one on top and one at the bottom of the rudder pin.<br />
Repeat the procedure for the right rudder assembly.
Tiller crossbar & extension<br />
1.<br />
Take the tiller crossbar and insert the right side into the<br />
right rudder arm and the left side into the left rudder arm.<br />
2. Take the yoke connection of the tiller extension<br />
and fix it into the middle of the tiller crossbar<br />
3. Then fix the tiller head into the yoke connection<br />
as shown on the photo.
1.<br />
Place the mast onto two supports (eg: two<br />
pieces of polystyrene).<br />
Unroll the trapeze wires and fix them using<br />
a 6 mm shackle to the upper hole on the<br />
mast tang (two on each side).<br />
Preparation of the mast<br />
2.<br />
Unroll the shrouds and the forestay wire +<br />
pigtail + jib halyard rope and fix them to the<br />
lower hole of the mast tang using a shackle<br />
8 mm. The shrouds go onto each side<br />
of the forestay.<br />
3. IMPORTANT : Do not forget to attach the jib halyard rope to the small single block at the end of the<br />
jib halyard wire. Tie off the jib halyard wire and rope near the base of the mast.
1. Unroll the diamond wires.<br />
Attach the joint end of<br />
the diamond wires onto the<br />
turnbuckle adjuster near the<br />
base of the mast (level with<br />
the security sticker) using the<br />
pin and split ring.<br />
Take the loose ends of the<br />
diamond wires and hold tight<br />
to adjust to the same length,<br />
using the turnbuckle adjuster<br />
which is lo<strong>cat</strong>ed on the<br />
lower section of one of the<br />
wires. Once they are the same<br />
length, attach the two wires<br />
to the shield plaes situated on<br />
each side of the mast under<br />
the mast tang.<br />
Spreader Bars<br />
2. Assemble the spreaders on the<br />
centre of the mast. The spreader<br />
root attaches to the front of the<br />
mast section onto the one-piece<br />
stainless steel strap. The spreader<br />
rake adjuster barrel attaches<br />
on each side to the individual<br />
fittings on both sides of the mast<br />
nearer the sail track. To adjust<br />
the spreader rake, adjust the<br />
length of the barrel (by winding<br />
in or out) and measure from the<br />
wire positions at the tips of each<br />
spreader.<br />
Caution : do not try to adjust<br />
spreader rake while diamond<br />
wires are tensioned. Only adjust<br />
under no diamond wire tension<br />
and screwing the barrel by hand.<br />
3. Slide the diamond Wires into the corresponding<br />
slots at the end of the spreaders. Ensure the black<br />
plastic roller is above the spreader arm. It may be<br />
necessary to release tension from the diamond wire<br />
turnbuckle adjuster near the base of the mast. Secure<br />
the diamond wire with the thin wire supplied. Pass<br />
the wire through the small hole near the spreader tip,<br />
bend the wire and on one side of the spreader turn the<br />
wire around the thicker diamond wires two or three<br />
times. Do the same for the other side of the spreader.<br />
Cut off the excess thin wire ensuring it is bent neatly<br />
onto the diamond wires as to prevent the wire from<br />
tearing the sails. Once secured, tape over the spreader<br />
tips to further ensure there are no sharp edges. 0
1.<br />
Lay the mast on top of the boat with the sail track<br />
to the bottom and the mast base toward the<br />
bows. Place padding under the mast to prevent<br />
scratching.<br />
2. Lay the shroud wires and trapeze wires down<br />
each side of the mast. Secure the trapeze wires<br />
temporarily near the base of the mast.<br />
5. OPTION JIB FURLER<br />
Now, attach the jib furler to the bridle wires.<br />
NB: Ensure that the hole in the furler housing is facing towards<br />
the front crossbar.Now also is a good time to roll some line onto<br />
the furler drum. Leave enough line unfurled to reach the front<br />
crossbar mounted furler cleat.<br />
The cleat for the jib furler is lo<strong>cat</strong>ed at the left side of the front<br />
cross bar. The furler line passes under the cross bar and through<br />
a small eyelet in the trampoline. Directly above the eyelet is a<br />
small black cleat. Pass the line through the cleat and tie a figure<br />
eight knot in the end. This will prevent the line from falling out.<br />
Preparation of the Mast<br />
3.<br />
Ensure that the shroud anchor pins are sealed,<br />
tight and pointing at 90° to the centreline of the<br />
hull. Attach the twist toggles to the anchor pins<br />
using the clevis pins and rings. If you have the<br />
optional spinnaker kit use the 6-mm bow shackles<br />
provided instead of the clevis pins.<br />
Attach the stay adjusters to the twist toggles<br />
with the clevis pins and rings.<br />
Attach both shrouds into the top hole of the<br />
respective stay adjusters. This is only a temporary<br />
position for raising the mast.<br />
4.<br />
Attach the bridle wires to the bow tangs.
CAUTION - DANGER<br />
ALUMINIUM MAST<br />
STAY AWAY OF ELECTRICAL WIRES<br />
1.<br />
Place the mast foot on the mast base and<br />
place the pin in it. This prevents the mast<br />
from leaving its base when lifted. Check that<br />
the wires are not tangled.<br />
2. Then, with one person on the trampoline, the second person lifts the mast by<br />
the top and moves down the mast until the person on the trampoline can take the<br />
mast on their shoulder. Then this person pushes his feet against the rear crossbar<br />
and pushes the mast forward with the weight of his body.<br />
Once the mast is secured, remove the pin from the base of the mast which can<br />
now turn freely.Fix the cunningham blocks on each side of the base of the mast.<br />
3.<br />
The second person can now take the forestay, make sure it is not tangled and<br />
pin it into one of the top holes of the stay adjuster or of the furler mounted<br />
stay adjuster (for the option roller jib).<br />
4.<br />
Once the mast is secure remove the bolt from the base<br />
of the mast and stow it in a<br />
secure place. You will need the bolt later for safe lowering<br />
of the mast.<br />
Stepping the mast<br />
Now you can affix the cunningham blocks to<br />
the brackets on each side of the mast.<br />
For the st time you raise the mast,<br />
it is recommended<br />
you use people for extra safety.
Trapeze<br />
1.<br />
Release the trapeze wires from the base of the mast. The crew’s trapeze has the clamcleat swaged to<br />
the wire. Ensure that the crews trapeze wire is positioned in front of the shroud.<br />
2. Attach the trapeze handles and kits to the trapeze wires.<br />
3. Pass the skipper trapeze shock cords underneath<br />
the trampoline and up through the grommets<br />
at the side of the trampoline. Attach to the<br />
trapeze system as shown in the photographs.<br />
4.. For the crew trapeze, take the shock cord that<br />
comes out of the cross bar and fix to it the end of<br />
the trapeze adjustable rope using a bowline knot.<br />
(see above photo)
1. Slide the outboard end of the boom through the<br />
webbing loop attached to the clew of the mainsail.<br />
2.Connect the boom to the mast using the hinge vertex, clevis pin and split ring.<br />
3. Connect the shackle on the boom outhaul line<br />
to the grommet in the clew of the mainsail.<br />
4. Tie one end of the rotation line to the front of<br />
the clamcleat on top of the boom. Pass the other<br />
end of the line through the end of the rotation<br />
arm on the mast. Take the line back through the<br />
clamcleat.<br />
5. fit a plastic ball stopper at the end.<br />
Boom
Main Sail<br />
Always point your <strong>Hobie</strong> directly into the wind before you raise the mainsail.<br />
1. Unfold the mainsail onto the trampoline and insert each batten into its respective pocket. The battens<br />
are numbered (from 1 to 7) the smallest (N ° 1) goes at the top of the sail and the longest (N° 7)<br />
at the bottom of the sail. Attach the batten end caps with the batten lines as shown on the photos.<br />
2.<br />
Undo the main halyard rope which is rolled around<br />
the mast. Pass one end through the hole in the<br />
mainsail head plate and stop with a 8 figure knot.<br />
(on the left side).<br />
3.<br />
Go onto the trampoline. Feed the luff of the mainsail into the<br />
opening of the mast track ensuring that the hook is on one side<br />
of the mast and the halyard rope on the other side. Raise the<br />
mainsail by pulling the halyard and feeding the sail<br />
until it reaches the top. When the sail is all the<br />
way up, turn the mast slightly to the left in order<br />
to hook on the mainsail. Insert the bottom end of<br />
the luff into the base of the mast track. Roll up<br />
the halyard rope and place it into the pocket on the<br />
trampoline at the foot of the mast.
1.<br />
Attach the cunningham blocks (with the hooks) into the grommet of<br />
the mainsail tack. Take the cunningham line and feed as follows :<br />
(NB : the line must go through the inside of the rotation arm).<br />
Start with the A line and insert it into the cleat, round the single<br />
block and attach the end to one double block supplied with a bowline<br />
knot.<br />
Same thing on the other side with the B line.<br />
take the central line (C). Insert it in the cunningham block on the left<br />
side of the mast and feed it up through the first sheave in the left<br />
pulley from the rear to the front,<br />
take it down in the left sheave at the bottom of the mast from the<br />
front to the rear,<br />
take it back up into the second sheave of the left block from the rear<br />
to the front<br />
take it down in the single block of the bottom of the mast<br />
take it back up in the first sheave of the right hand block from the<br />
rear to the front<br />
take it down in the right sheave at the bottom of the mast from the<br />
rear to the front<br />
take it back up in the second sheave of the right hand block from<br />
front to the rear<br />
and finish in the right cunningham block on the other side of the<br />
mast.<br />
Attach each end of the cunningham line to the shrouds.<br />
A B<br />
2. Take the righting line from the rope bag. Attach it to the dolphin striker post under the front crossbar (photo). Pass it<br />
under the trampoline through the grommet at the base of the mast. Fold up the end of the line and stow it in the trampoline<br />
pocket at the base of the mast.<br />
C<br />
Cunningham
3. To finalise the main cunningham, take each<br />
end of the central line (C) lead them behind the<br />
shrouds, under the trampoline and attach them<br />
on the inox rings that are hold by shock cords.<br />
Be careful to cross the lines. Attach the end coming<br />
fromt he right to the left ring and the end coming from<br />
left to the right ring.<br />
Cunningham
Mast rotation<br />
1. On the 2009 Tiger, the rotation arm is on the<br />
mast base. Take the grey spectra line with 2<br />
micro blocks. Insert the line through the rotation<br />
arm, center it and make two turns. They feed it<br />
under the trampoline through the eyelet and fix<br />
one micro block at each end.<br />
2. Take the green and white<br />
lines. Attach them, using a<br />
bowline knot, to the trampoline<br />
chain plates on the<br />
inside of the hulls. Take<br />
each free end, feed each of<br />
them into one of the micro<br />
block (installed in point 1<br />
above) and lead each of<br />
them out to the respective<br />
cleat lo<strong>cat</strong>ed on the hulls<br />
near the shrouds.
Jib furler (option)<br />
1.<br />
Unroll the jib and open the zipper on the luff. Using the 4mm bow<br />
shackle connect the tack point to the third hole of the stay adjuster.<br />
2.<br />
Shackle the jib head to the jib<br />
halyard. Then position the jib<br />
and the halyard line against<br />
the forestay. Close the zipper<br />
ensuring that the halyard line<br />
remains inside the zipper. As you<br />
pull down on the halyard line<br />
close the zipper as the sail is<br />
raised.<br />
To use without the jib cunningham, please follow the instructions<br />
3 & 4 below, otherwise see next page<br />
4.<br />
Now pass the line through the small pulley at the end of<br />
the jib halyard, then back down through the cleat on the<br />
tack of the jib. Remove the jib halyard line and stow it in<br />
the trampoline pocket.<br />
3.<br />
Once the jib is fully raised, take the jib luff tensioner line<br />
and secure it to the bottom holes in the stay adjuster.
To use with the cunningham kit, please follow steps , , & below<br />
7.<br />
Lead it through the block fixed on the briddle<br />
toggle of the opposite side (right hull).<br />
Jib furler (option)<br />
5.<br />
Block the jib halyard in the cleat at the tack point, then feed it<br />
through the small pulley. Then lead it down through the stay<br />
adjuster and through the furler.<br />
6.<br />
After that, lead it through the small pulley at the end of<br />
the line that is attached on the briddle toggle on the left<br />
hull .<br />
8.<br />
Lastly secure it in<br />
the cleat on the<br />
front crossbar.<br />
0
line pending.<br />
1.<br />
Take the jib cunningham<br />
kit. Attach the 2 m<br />
lang line on the dolphin<br />
striker. Lead the free<br />
end through one of the<br />
supplied blocks and fix<br />
it to the jib cleat on the<br />
front crossbar.<br />
2.<br />
Then take the 4 m<br />
lang line. Attach<br />
one of the ends to<br />
the block installed<br />
in point 1, lead the<br />
other end through<br />
the block lo<strong>cat</strong>ed<br />
on the briddle fix<br />
plate on the hull<br />
and in the last<br />
block of the rigid<br />
forestay. Let the<br />
Fully battened jib<br />
3.<br />
Unroll the jib and open the zipper on the luff.<br />
Attach the jib head using the shackle of the white halyard rope. Take the other end of the halyard (with<br />
the small pulley). Then position the jib and the halyard line against the forestay as shown on the picture.<br />
As you pull down on the halyard line close the zipper as the sail is raised.
Fully battened jib<br />
4.<br />
When the Jib is fully hoisted, replace the yellow line by the red one (that comes from the rigid forestay).<br />
Lead it down to the cleat that is on the jib and pull strongly to tighten the jib. Attach the line and<br />
stow the excess line into the zip to avoid disturbance while sailing.
1. Attach the middle of the<br />
grey spectra line supplied<br />
to the pad-eye on the spi<br />
pole. Make a knot to fix<br />
the line. Atttach one micro<br />
block to each end of the<br />
spectra.<br />
2. Using the small black<br />
line attached to the trampoline<br />
pad-eye, pull to get<br />
the jib shock cord out of<br />
the front crossbar. Take the jib sheet out of the<br />
line bag and attach one end to the shock cord<br />
using a tight bowline knot. Let the line go back<br />
inside the crossbar.<br />
Jib sheet (self-tacker)<br />
3. Take one micro block and fix it to one end of the self tacker spectra line. Take the other end of the<br />
jib sheet and start feeding it through the cam cleat on the crossbar, then through the first micro block<br />
installed at point 1 above, then in the pulley of the white spectra, continue in the other block installed<br />
at point 1, and lastly in the cam cleat on the other side of the crossbar. Lastly, attach the end of the<br />
jib sheet to the other jib shock cord on the other side of the crossbar (same way as at point 2). As a<br />
result, the lines form a W.<br />
4. Take the other end of the white spectra<br />
and lead it through the carbo pulley attached<br />
to the traveller car on the self-tacking track.<br />
5. then passes through the carbo block of the jib<br />
clew and then ties off to the carbo block mounted<br />
on the traveller car. Tie a bowline knot through<br />
the hole in the middle of the pulley.
2.<br />
The line then passes through the plastic<br />
pad-eye that is fixed to the spinnaker<br />
pole near the base. This line passes<br />
from the front to back through the padeye.<br />
The line then passes through the black<br />
cleat on the crossbar (lead the line<br />
between the rail and the crossbar) and<br />
tie an 8 figure knot at the end to prevent<br />
the line from falling off.<br />
Self tacker traveller<br />
car control<br />
1.<br />
Take the 3mm piece of line and tie it onto the center of<br />
the jib traveller car.<br />
3.<br />
To adjust the limit of the jib traveller car simply pull or<br />
release the thin line and replace in the cleat once set.
1.<br />
Your mainsheet system<br />
has been pre-assembled<br />
for you by your <strong>Hobie</strong><br />
dealer. If not, see the following<br />
page for assembly<br />
instructions.<br />
2.<br />
Shackle the mainsheet ratchet block to the<br />
top of the main traveller car.<br />
4.<br />
Thread the tail of the main sheet<br />
through the swivel cleat assy on the<br />
rear beam, through the sheaves on the<br />
traveller car, down through the eyestrap<br />
on the rear of the beam and tie a<br />
figure «8» knot in the end.<br />
Main sheet system<br />
3.<br />
Shackle the boom block to the boom block hanger.
Main sheet system<br />
1 2 3<br />
4 5 6<br />
7 8 9<br />
10 11 12
1.<br />
Take the spi halyard and<br />
lead it through the pulley<br />
and thread as per the<br />
photograph. One end of<br />
the spi halyard must go<br />
through the spreader<br />
bars along the mast.<br />
2.<br />
Connect the spi pole in<br />
the middle of the front<br />
crossbar.<br />
3.<br />
Fix the spi pole bridles to<br />
the bridle plates at the bow of the hull.<br />
4.<br />
Take the spi bag and insert<br />
it in the trumpet as shown<br />
on the picture. Then fix the<br />
whole thing to the pole using<br />
the screws supplied in the<br />
kit.<br />
Trumpet spinnaker kit<br />
5.<br />
Attach the spi bag to the pole using the velcro stripes, and attach the rear part of the bag to the crossbar<br />
using the plastic pad-eye and the spi pole attachment.
6.<br />
Take the loose end of the spi halyard (out of the spreader bars) and fix<br />
it to the spinnaker head. Take the spinnaker tack line at the end of the<br />
spi pole and fix it to the tack point of the spinnaker.<br />
Trumpet spinnaker kit<br />
7.<br />
Take the other end of the spinnaker halyard, the one that is along the mast between the spreader<br />
bars. Lead it through the cam cleat that is on the mast, then through the pulley on the crossbar, then<br />
through the pulley on the shock cord near the rear crossbar, then back on the pulley that is on the<br />
trampoline, and lastly in the eyelet that is in front of the trampoline pulley.
Trumpet spinnaker kit<br />
8.<br />
Lead it then through<br />
the spinnaker bag and<br />
then out to attach it to<br />
the 3 patches on the spi<br />
while hoisting the spi at<br />
the same time. On the<br />
last patch tight a figure<br />
8 knot.<br />
9.<br />
Attach the security line<br />
between the last patch<br />
and the spinnaker head.<br />
10.<br />
To avoid the trumpet mouth to move during the handlings, it must be fixed using a grey spectra line<br />
as shown on the photos. The line must be attached on the pole, then through the trumpet and fixed on<br />
the bridle plate on the hull.
1.<br />
Take the spinnaker sheet. Notice<br />
the spectra line that is in the middle<br />
of the line. Attach this spectra<br />
line to the spinnaker clew point.<br />
2.<br />
Take the grey spectra line supplied with the spinnaker, and fix<br />
the 40 mm carbo block as shown on the pictures below.<br />
3.<br />
Attach the<br />
white spectra<br />
to the dolphin<br />
striker after<br />
you have lead<br />
it through the<br />
trampolin<br />
eyelet.<br />
Spi barber<br />
4.<br />
Take one end of the spinnaker sheet line, lead it through the carbo block near the trampolin, through<br />
the spi block with plastic spring, mounted on the trampolin, back to the carbo block installed on the<br />
self tacker track support. Proceed in the same way on the other side and join the two ends by a knot.<br />
0
Spinnaker tack line<br />
Spinnaker line circuit<br />
Spinnaker halyard<br />
Spinnaker sheet line
the rubbers.<br />
Transport and launching<br />
Advices and Maintenance<br />
Before sailing check the following points :<br />
1/ Install the drain plugs – do not overtighten,<br />
hand tight is sufficient. Overtightening<br />
may cause the drain plug flange to distort<br />
and cause leakage.<br />
2/ Tension the rig. This can be accomplished<br />
by having your assistant hang from<br />
the trapeze or you can use mainsheet tension<br />
on one side at a time so that you can<br />
adjust the shroud position in the side stay adjusters.<br />
3/ Fit the daggerboards into the<br />
daggerboards wells and adjust<br />
4/ Check all fastenings :<br />
- Mast tang shackles and shrouds (to prevent the mast to fall down)<br />
- pins and trapeze rope locks (to prevent falling out in the water if the trapeze is not well fastened)<br />
- pins and spring rings on the forestay and shrouds (to prevent the mast to fall down)<br />
- spring rings on the rudder pins (to prevent loosing the rudder assembly in case of capsizing)<br />
In order to avoid hull damages :<br />
- Always use a dolley with craddles<br />
to transport your <strong>Hobie</strong> Tiger on the<br />
beach (even if it is sand beach) and for<br />
launching. Step into the water with the<br />
dolley and once the <strong>cat</strong>a is afloat take<br />
out the dolley.<br />
- DO NOT BEACH. Beaching, even smoothly, may damage the hulls. use your beach dolley to take the<br />
boat out of the water.<br />
- For towing, always use an homologated road trailer with cradles.<br />
Maintenance and repair<br />
- Always wash the hulls and the sails with fresh water after sailing in salt water.<br />
- Take off the plugs to drain the water from the hulls.<br />
- In order to avoid expensive repairs, it is recommended to check wear of hull bottoms as follows :<br />
as soon as the first woven glass cloth appears, you should apply gelcoat or resin to protect the glassfiber.<br />
If the wear is already so advanced that several layers of glass fiber have been worn through<br />
or the colored wear indi<strong>cat</strong>or is showing, stop using them and rebuild the bottom with glassfiber and<br />
resin.<br />
CAREFULLY READ AND OBSERVE THE SAFETY ADVICES MENTIONED<br />
IN THE FOLLOWING PAGE.
TO READ CAREFULLY BEFORE SAILING<br />
Whether on land or on the water, watch for overhead<br />
power lines. Contact with power lines can cause serious injury or<br />
death.<br />
DO NOT sail while under the influence of alcohol and/or drugs<br />
Only sail in conditions in which you feel comfortable and where you<br />
feel confident that you can safely sail the boat. Never go out in conditions<br />
beyond your ability.<br />
Everyone on board should wear a life jacket at all times.<br />
If you are in the water, remain in contact with the boat, even if it is<br />
capsized. A sailboat can drift away faster than a person can swim.<br />
Never sail without a righting line.<br />
Wear appropriate clothes. Wear a wet suit or dry suit in cold weather<br />
or cold water conditions.<br />
Learn the right of way rules and when in doubt, give way to others.<br />
When not sailing, always keep the boat pointed into the wind whether<br />
in the water or on the beach.<br />
Read the instruction manual carefully.<br />
Make sure everyone on the boat reads and understnads these safety<br />
instructions.<br />
ALWAYS check that the drain plugs are screwed in before launching<br />
your <strong>cat</strong>amaran. Remove the plugs after sailing to drain any water<br />
that may have leaked into the hulls. Store the boat with the plugs<br />
removed to allow for pressure changes due to heating, cooling and<br />
altitude changes. This will prevent warping of the hull surface.<br />
Sécurité