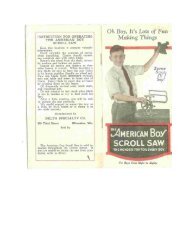
You also want an ePaper? Increase the reach of your titles
YUMPU automatically turns print PDFs into web optimized ePapers that Google loves.
Pulling back slowly on the tool will eventually put<br />
it into position where it will bite into the wood. Raising<br />
the handle increases the depth of cut; lowering the<br />
handle makes the cut less. As with the gouge, the<br />
skew can be advanced in either direction. The part<br />
of the skew which does the actual ~utting is the center<br />
portion and toward the heel. It is worthwhile to stop<br />
a test cut in progress and note just how the skew cuts.<br />
You will note that the back portion of the grind or<br />
bevel supports the tool, and the handle hand controls<br />
the depth of cut by rocking the chisel on this pivot<br />
point. For this reason it is important that the skew<br />
bevel be kept perfectly flat, not a double bevel nor<br />
rounded.<br />
IF CUT IS<br />
OVE~ ~:;<br />
J2£EE!, RUN IN<br />
SECOND ~UT<br />
FOR ~UIlRIlNCE<br />
Fig 55 Fig 56 Fig 57<br />
SQUARING AN END. This operation can be done<br />
with parting tool. However, the parting tool is a rough<br />
cutter, so that ultimately the skew must be used in<br />
cleaning the cut. The whole operation can be done<br />
- with the skew, and this technique is illustrated by<br />
the drawings in Fig. 58, 59 and 60. The first movement<br />
is a nicking cut with the toa of the skew, as shown<br />
in Fig. 58. This cut cannot be made very deep without<br />
danger of burning the chisel, so a clearance cut is<br />
made by inclining the skew away from the first cut and<br />
again pushing the too.l into the work. This procedure<br />
of side cut and clearance cut is continued as often<br />
as needed. The important point to note is that while<br />
the skew can be pushed into the wood in any direction,<br />
the cutting edge itself must be inclined a little away<br />
from this plane, see Fig. 60. Note that if the full<br />
cutting edge of skew bears against the cut surface,<br />
the tool will have a tendency to run. Now, observe<br />
the proper way to make the cut, as shown at left end<br />
of Fig. 60. The chisel is pushed straight into the work,<br />
but the cutting edge is inclined away from the cut<br />
surface - only the extreme toe cuts. This is the most<br />
important principle in skew handling, and you will<br />
run into it repeatly in making shoulders, beads and<br />
vee cuts.<br />
USING THE PARTING TOOL. The parting tool is<br />
perhaps the easiest turning chisel to handle. It is<br />
a scraping tool, and is simply pushed into the work,<br />
as shown in Fig. 55 , '56 and 57. A somewhat better<br />
cutting action is obtained if the handle is held low,<br />
raising gradually as the work diameter decreases, as<br />
shown in Fig. 55. The tool is frequently used with<br />
one hand, the other hand holding calipers, in the groove<br />
being cut. When parting tool cuts are deep, a clearance<br />
cut should be made along-side the first cut, as shown<br />
in Fig. 56, to prevent burning the tool point.<br />
16<br />
FIR5TCUTI~<br />
SQUARING £NO<br />
Fig 58 Fig 59<br />
I