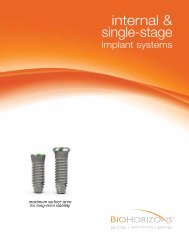
External Dental Implant Catalog - BioHorizons
External Dental Implant Catalog - BioHorizons
External Dental Implant Catalog - BioHorizons

You also want an ePaper? Increase the reach of your titles
YUMPU automatically turns print PDFs into web optimized ePapers that Google loves.
3inOne Abutment Removal<br />
To remove the 3inOne Abutment, engage the Abutment Screw with the .050” (1.25mm)<br />
Hex Driver. Apply firm apical pressure to the Hex Driver and rotate counter-clockwise until<br />
the screw is completely disengaged from the implant body.<br />
In soft bone, or when the implant lacks initial stability, an Abutment Clamp (ref. IMPAH, sold<br />
separately) should be used to grasp the outside of the abutment to provide counter-torque<br />
during the loosening of the Abutment Screw.<br />
The 3inOne Abutment and the Abutment Screw should be retained with the patient’s chart.<br />
They can later be used in the impression making procedure and as a temporary or final<br />
abutment for cement retention.<br />
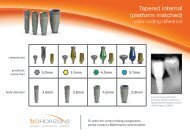
Hex Orientation<br />
The longest flat surface on the external aspect of the 3inOne Abutment is indexed to one<br />
of the six flats of the implant’s external hexagon. In most cases one of the hex flats should<br />
be oriented to the facial aspect, as it allows for angulation correction with stock angled<br />
abutments. Placing the long flat of the 3inOne Abutment to the facial also leaves more<br />
room for porcelain in that area on the final prosthesis.<br />
products products shown shown not to scale scale<br />
The implant’s rotational position can be adjusted following<br />
removal of the 3inOne Abutment using the <strong>Implant</strong>-level<br />
Insertion Tools.<br />
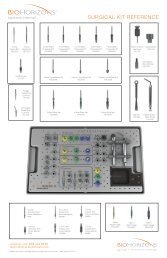
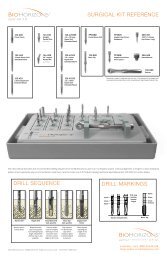
Insertion Tools (<strong>Implant</strong>-level)<br />
Purpose: Engages external hex allowing implant’s position to be adjusted in the osteotomy.<br />
• May be used following removal of the 3inOne Abutment<br />
• Offers a narrower path of insertion and better clearance than the<br />
3inOne Abutment / Abutment-level Adapter option<br />
• Square drive shaft interfaces with the Ratchet and Hand Wrench<br />
Mate the appropriate Insertion Tool with the external hex of the implant and<br />
lightly screw into place. Engage the Insertion Tool with either the Ratchet or<br />
Hand Wrench and rotate the implant to the required position.<br />
36<br />
ABUTMENT REMOVAL