Durasan Brochure - National Gypsum Company
Durasan Brochure - National Gypsum Company
Durasan Brochure - National Gypsum Company

You also want an ePaper? Increase the reach of your titles
YUMPU automatically turns print PDFs into web optimized ePapers that Google loves.
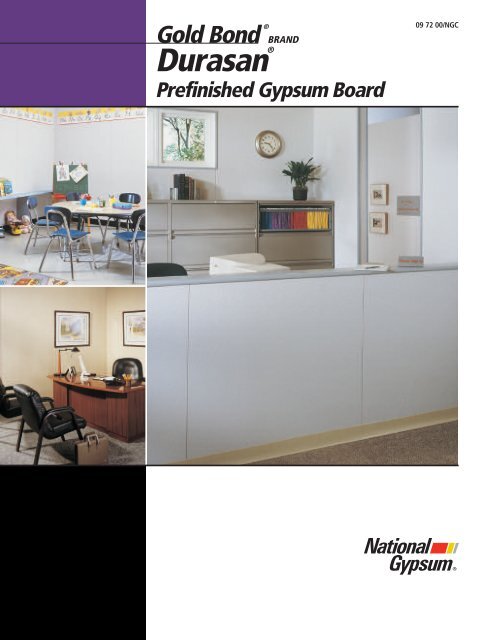
Gold Bond ®<br />
BRAND<br />
<strong>Durasan</strong> ®<br />
Prefinished <strong>Gypsum</strong> Board<br />
09 72 00/NGC
Beautiful Wa ls<br />
Don’t Get Any Easier Than This!<br />
2<br />
With <strong>National</strong> <strong>Gypsum</strong> Gold Bond ®<br />
BRAND <strong>Durasan</strong> ® Prefinished <strong>Gypsum</strong><br />
Board, durable yet elegant interior<br />
walls don’t require a lot of work!<br />
Or a lot of time! Or a lot of money!<br />
Because the panels are already<br />
finished, there’s no taping, no joint<br />
finishing, no sanding, no priming,<br />
no painting, and no wall covering<br />
application.<br />
All those steps, all those trades, all<br />
that mess and all those expenses<br />
are eliminated. Installation is quick<br />
and easy. In most cases, your walls<br />
are up and finished in one day<br />
or less.<br />
Colors And Textures<br />
For A New Century<br />
Today’s workspace continues to<br />
evolve, and <strong>Durasan</strong> panels are<br />
designed to take on the challenge.<br />
With a variety of stylish patterns<br />
and colors to choose from, <strong>Durasan</strong><br />
panels will fit right in. Whatever the<br />
look, whatever the feeling you are<br />
trying to achieve in your space,<br />
<strong>Durasan</strong> panels can help you<br />
achieve it beautifully, simply and<br />
cost effectively.<br />
Santa Fe Adobe Santa Fe Porcelain<br />
The Perfect Panel<br />
For Perpetually<br />
Changing<br />
Work Spaces<br />
Once the exception, now the rule,<br />
change is as much a part of<br />
today’s workplace as computers<br />
and networks. Because so much of<br />
the usual effort and expense of<br />
wall installation is eliminated,<br />
<strong>Durasan</strong> panels provide you with<br />
the flexibility to accommodate<br />
changing workspace configurations,<br />
so important in today’s highly<br />
“wired” environments.<br />
Benefits Go To<br />
The Bottom Line<br />
Yes, the installed cost of <strong>Durasan</strong><br />
panels is typically less than<br />
conventional drywall with fieldapplied<br />
wall coverings. But,<br />
that’s only the beginning. Their<br />
washability and low maintenance<br />
provides an additional savings in<br />
overhead costs.<br />
In addition, depending on the<br />
design plan, when <strong>Durasan</strong> panels<br />
are installed as part of a relocatable<br />
wall system, they may be eligible<br />
for accelerated depreciation. Thus,<br />
they can generally be depreciated<br />
over seven years instead of the<br />
usual 39 years for conventional<br />
construction. Your tax adviser can<br />
give you the specifics.<br />
A Tradition Of Value<br />
Business owners, architects, builders,<br />
facility managers and interior<br />
designers have recognized <strong>Durasan</strong><br />
panels as the leader, and the<br />
dependable constant, in the everchanging<br />
gypsum board market.<br />
That trusted reputation is built on<br />
<strong>National</strong> <strong>Gypsum</strong>’s continuing<br />
commitment to quality, value and<br />
performance.<br />
An Easy Choice<br />
With all these advantages, it is<br />
easy to see why <strong>Durasan</strong><br />
Prefinished <strong>Gypsum</strong> Board is the<br />
preferred choice for distinctive<br />
walls that are elegant, economical<br />
and easy to install.
Pattern and Color Selection<br />
Group 1 – Stipple<br />
Champagne<br />
Off White<br />
Group 3 – Santa Fe<br />
Group 3 – Harvest<br />
Cotton<br />
Rice<br />
Chiffon<br />
Cloud<br />
Porcelain Adobe<br />
Color accuracy of these <strong>Durasan</strong><br />
panel patterns is limited in printing.<br />
Therefore, it is suggested that<br />
reference also be made to actual<br />
samples in the <strong>Durasan</strong> Pocket<br />
Selector. Contact your <strong>National</strong><br />
<strong>Gypsum</strong> Sales Representative for<br />
Selectors and for information on<br />
<strong>Durasan</strong> panel delivery schedules<br />
in your area.<br />
Oyster White<br />
<strong>Durasan</strong> Patterns by Price Group<br />
(in order of ascending value)<br />
Group 1 – Stipple<br />
Group 3 – Santa Fe, Harvest<br />
3
Gold Bond ®<br />
BRAND <strong>Durasan</strong> ®<br />
Prefinished <strong>Gypsum</strong> Board<br />
Description<br />
The <strong>Durasan</strong> line consists of Gold<br />
Bond ® BRAND <strong>Durasan</strong> ® vinyl covered<br />
panels.All <strong>Durasan</strong> panels can be<br />
applied directly to studs or as a<br />
finish layer over gypsum board.<br />
<strong>Durasan</strong> panels are especially suited<br />
for most demountable partition<br />
systems. Because <strong>Durasan</strong> is prefinished,<br />
it is generally less expensive<br />
to install than building a wall and<br />
then applying a wall covering<br />
material.<br />
<strong>Durasan</strong> is the registered trademark<br />
for <strong>National</strong> <strong>Gypsum</strong> <strong>Company</strong><br />
prefinished gypsum wall panels.<br />
This quality paneling combines the<br />
time-proven characteristics of<br />
gypsum board with the beauty,<br />
colors, textures, and durability of a<br />
wide variety of vinyl coverings.<br />
<strong>Durasan</strong> can be toploaded on<br />
gypsum trucks and is available<br />
from most <strong>National</strong> <strong>Gypsum</strong><br />
plants. Some plants maintain<br />
inventories of the most popular<br />
colors and patterns, which are<br />
available for immediate shipment.<br />
Technical Data<br />
PHYSICAL PROPERTIES<br />
Thickness: Available 1/2" thick<br />
as a standard product. Fire-Shield<br />
<strong>Durasan</strong> is also available as a<br />
special order item in 5/8" thickness.<br />
Width: <strong>Durasan</strong> panels are 4' wide.<br />
Lengths: 8', 9' and 10'.<br />
Other lengths between 8' and 14'<br />
are available on special order.<br />
4<br />
Edges: The long edges of all<br />
<strong>Durasan</strong> panels are wrapped with<br />
a vinyl film covering. Panel edges<br />
are beveled.<br />
Vinyl covered <strong>Durasan</strong> panels<br />
comply with ASTM Specification<br />
C 1396 and Federal Specification<br />
SS-L-30D. Approved by Board of<br />
Standards and Appeals for use<br />
in New York City under Calendar<br />
Nos. 709-39.<br />
NONCOMBUSTIBLE<br />
<strong>Durasan</strong> panels are considered<br />
noncombustible, since they meet<br />
the following generally accepted<br />
requirements:<br />
1. A structural base of noncombustible<br />
material such as gypsum.<br />
2. A surface material not over 1/8"<br />
thick which has a flame spread<br />
of not over 50.<br />
FIRE RATED CONSTRUCTION<br />
Assemblies employing <strong>Durasan</strong><br />
panels used as a wall surfacing<br />
material have been accorded fire<br />
resistance ratings by Factory Mutual<br />
Research Corp. and Underwriters<br />
Laboratories.<br />
VAPOR PERMEANCE<br />
The water vapor permeance of<br />
<strong>Durasan</strong> panels is less than 1.0<br />
perms by the Wet Cup Method and<br />
less than 0.5 perms by the Dry Cup<br />
Method at typical conditions of 73˚F<br />
and 50% relative humidity, tested<br />
in accordance with ASTM E 96.<br />
Caution: <strong>Durasan</strong> vinyls are vapor<br />
retarders, and a second vapor<br />
retarder should not be placed<br />
behind these products, i.e. kraft<br />
face insulation. For this reason, foil<br />
backed <strong>Durasan</strong> is not available.<br />
COLOR PERMANENCE<br />
The high-quality vinyl surface of<br />
<strong>Durasan</strong> panels offers good fade<br />
resistance. The vinyl films are<br />
specially formulated with lightstable<br />
compounds and pigments<br />
to provide maximum stability and<br />
color retention under varying<br />
environmental conditions.<br />
SURFACE BURNING CHARACTERISTICS<br />
(Fire Hazard Classification)<br />
(ASTM E 84) Source: Underwriters Laboratories, Inc.<br />
Product Flame Spread Smoke Developed<br />
<strong>Durasan</strong> Vinyl 25 or less 50 or less<br />
DURASAN AVERAGE LIGHT REFLECTANCE VALUES*<br />
Group Pattern Color Reflectance Value<br />
Group 1 Stipple Champagne 69<br />
Chiffon 77<br />
Cloud 69<br />
Off White 85<br />
Group 3 Santa Fe Porcelain 69<br />
Adobe 55<br />
Harvest Cotton 65<br />
Oyster White 52<br />
Rice 68<br />
*X-RITE 968 Reflection Spectrophotometer used in accordance<br />
with ASTM Test Method E 97.<br />
DURASAN VAPOR PERMEANCE VALUES<br />
Patterns Perms mil (mm)<br />
Stipple 0.49 6 0.15<br />
Santa Fe 0.25 6 0.15<br />
Harvest 0.28 6 0.15<br />
Above vapor permeance values determined using the Dry Cup (Desiccant) Method<br />
at typical conditions of 70˚F (21.1˚C) and 50% Relative Humidity in accordance with<br />
ASTM E 96.<br />
CLEANING<br />
Complete removal of dirt, stains<br />
and marks is easier if cleaning<br />
action is started before staining<br />
material has dried, cured or set.<br />
To remove most common dirt and<br />
marks, simply rub lightly with a<br />
moistened cloth, sponge or soft hair<br />
bristle brush, using a mild soap,<br />
detergent or non-abrasive cleaner.<br />
Then rinse with water and wipe dry.<br />
More stubborn stains can be safely<br />
removed by wiping away excess<br />
material, scrubbing the stained area<br />
with a stiff bristle brush wetted<br />
with appropriate solvent as listed in<br />
chart below, and quickly wiping dry<br />
with a clean cloth.<br />
Caution: The use of strong organic<br />
solvents (such as ketones), harsh<br />
abrasive cleaners or steel wool are<br />
not recommended. These materials<br />
may cause dulling, discoloration,<br />
softening and other permanent<br />
damage to the vinyl surface.<br />
Some proprietary solvent cleaners<br />
used for fabric spot stain removal<br />
may remove the vinyl surface<br />
overprint pattern.<br />
If the suitability of any cleaning<br />
agent is unknown, check its effect<br />
on the <strong>Durasan</strong> surface in a hidden<br />
area or on a scrap piece before<br />
attempting to remove a field stain.<br />
CLEANING RECOMMENDATIONS<br />
Common Staining Material Recommended Solvent<br />
Grease, tar, shoe polish, Kerosene or mineral spirits<br />
lipstick, oil paints<br />
Nail polish Denatured alcohol<br />
Ink (regular or ballpoint) 1:1 mixture—Denatured alcohol<br />
and Aromatic 150*<br />
*Aromatic 150 is a proprietary solvent manufactured by Exxon <strong>Company</strong> USA.
ABRASION RESISTANCE<br />
<strong>Durasan</strong> panels are extremely<br />
abrasion resistant, and are tested<br />
by a Taber Abraser with CS-17<br />
Calibrate wheels and a 500 gram<br />
loading. <strong>Durasan</strong> has withstood<br />
over 10,000 revolutions without<br />
breaking through the vinyl film.<br />
During this testing, some loss of<br />
texture and overprint resulted.<br />
PAINTING<br />
<strong>Durasan</strong> is a factory-finish decorative<br />
product which does not require<br />
painting.<br />
However, if desired, <strong>Durasan</strong> can<br />
be satisfactorily painted with the<br />
following products:<br />
1. Two coats of an alkyd or latex<br />
semigloss enamel.<br />
2. Oil primer with finish coat of oil<br />
paint or flat latex.<br />
3. Two coats of flat oil paint.<br />
PATCHING<br />
It is suggested that scraps of<br />
<strong>Durasan</strong> be saved in case patching<br />
a damaged area is necessary. When<br />
patching small rips or tears, remove<br />
the vinyl film from a <strong>Durasan</strong> scrap.<br />
Place the film over the damaged<br />
area and, using a razor blade or<br />
very sharp knife, make straight cuts<br />
through both layers of film. The<br />
damaged film underneath is then<br />
removed and the patch cemented<br />
in its place with a good quality<br />
vinyl-to-vinyl adhesive.<br />
WALLCOVERING<br />
Matching <strong>Durasan</strong> in<br />
30 Lineal Yard Rolls<br />
Fabric-backed vinyl film is available<br />
in most <strong>Durasan</strong> patterns, colors<br />
and textures for field application to<br />
provide a close, commercial<br />
color match for use on columns,<br />
curved surfaces or where extensive<br />
cutouts would make <strong>Durasan</strong> panels<br />
difficult to use. Because fieldapplied<br />
vinyl is fabric-backed, the<br />
<strong>Durasan</strong> panels and the complementary<br />
vinyl roll goods<br />
may vary slightly in color and<br />
texture.<br />
<strong>Durasan</strong> fabric-backed wallcoverings<br />
meet or exceed the criteria outlined<br />
in Federal Specification CCC-W-408B.<br />
LIMITATIONS<br />
High Heat<br />
<strong>Durasan</strong> panels have the same<br />
limitations regarding heat as regular<br />
gypsum board and should not be<br />
used in areas where surface temperatures<br />
will exceed 125˚F.<br />
<strong>Durasan</strong> panels are not suitable for<br />
use behind stoves where direct<br />
heat or steam could affect the<br />
panel covering.<br />
Moisture Conditions<br />
<strong>Durasan</strong> panels should not be used<br />
around bath tubs, in shower enclosures<br />
or in areas where panels will<br />
be subject to free moisture.<br />
When <strong>Durasan</strong> panels abut<br />
concrete floors and/or ceilings, cut<br />
the panel to allow a minimum of<br />
1/8" clearance between panels<br />
and floors and/or ceilings to<br />
prevent potential wicking.<br />
Treated Lumber<br />
If <strong>Durasan</strong> panels will be applied<br />
over treated lumber, tests should be<br />
conducted prior to application to be<br />
sure the chemical treatment of the<br />
wood does not affect the bond or<br />
color of the panel covering.<br />
Masonry Walls<br />
Do not apply <strong>Durasan</strong> panels over<br />
wet or damp masonry walls.<br />
Mildew or staining problems could<br />
result if the walls are not dry or will<br />
not remain dry.<br />
Trim Application<br />
Plastic, wood or metal trim must be<br />
applied at both floor and ceiling.<br />
Trim should be applied carefully to<br />
<strong>Durasan</strong> panels to avoid creating<br />
excessive pressures which might later<br />
cause delamination of the covering.<br />
Color Variation<br />
Since manufacturers of the laminate<br />
used on <strong>Durasan</strong> panels finish to a<br />
commercial color match, minor<br />
color variations are possible. Therefore,<br />
care should be taken during<br />
application to ensure that panels<br />
applied on single walls or visual<br />
areas are color matched to minimize<br />
any such variations in the laminate.<br />
Storage and Handling<br />
<strong>Durasan</strong> panels are a prefinished<br />
product, and as such, special care<br />
should be taken during their storage<br />
and handling.<br />
<strong>Durasan</strong> panels should be stored<br />
inside a warehouse or other suitable<br />
structure where it will not be<br />
exposed to the weather or to<br />
temperatures exceeding 125˚ F.<br />
<strong>Durasan</strong> panels should never be<br />
stored outside. A firm, dry and level<br />
floor is recommended to ensure<br />
that stacks of <strong>Durasan</strong> panels are<br />
evenly supported and away from<br />
dampness. <strong>Durasan</strong> panels should<br />
not be stored in areas of excessive<br />
Correct Method Of Placing Risers<br />
humidity or in heavy traffic areas<br />
where they may be damaged by<br />
fork trucks or other warehouse<br />
equipment.Avoid storing <strong>Durasan</strong><br />
panels at aisle corners whenever<br />
possible.<br />
Units of <strong>Durasan</strong> panels should be<br />
properly supported to minimize<br />
sagging and waviness.<br />
Use extra care in the placement of<br />
risers (also known as dunnage or<br />
spacers). Vertical alignment of these<br />
risers is critical to the proper storage<br />
of <strong>Durasan</strong> panels.The diagrams<br />
below indicate the correct and<br />
incorrect method of placing risers<br />
when storing <strong>Durasan</strong> panels.<br />
Note that all risers are placed in proper vertical alignment so each tier is evenly supported.<br />
Arrows indicate pressure.<br />
Incorrect Method Of Placing Risers<br />
Cumulative pressure on unsupported lower units causes gypsum board to sag.<br />
Risers are not spaced evenly or in proper vertical alignment.<br />
A minimum number of risers should be used based on the length of<br />
the <strong>Durasan</strong> panels as indicated by the following chart.<br />
MINIMUM NUMBER OF RISERS PER UNIT<br />
Unit length in feet 7–8 9–11 12–14 15–16<br />
Minimum number of risers 4 5 6 7<br />
The following guidelines should be used when warehousing <strong>Durasan</strong><br />
panels to avoid the potential of sagging, blocking or emboss flattening.<br />
WAREHOUSING REQUIREMENTS<br />
Laminated panels shall be warehoused as follows:<br />
Pieces Units Total Pieces<br />
Product<br />
Thickness<br />
Per Unit<br />
(Max.)<br />
Per Stack<br />
(Max.)<br />
Per Stack<br />
(Max.)<br />
1/2" 50 4 200<br />
60 3 180<br />
100 2 200<br />
5/8" 40 4 160<br />
48 3 144<br />
80 2 160<br />
Unusual conditions during warehousing such as high humidity and long term storage<br />
may require the use of additional risers per unit length and/or a reduction in the number<br />
of total pieces per stack.<br />
5
Accessories<br />
MATCHING TRIM (Snap-On)<br />
Two-part, Snap-On Outside Corner<br />
and Interior Trim consist of galvanized<br />
steel retainers and matching vinyl<br />
snap-on facings. Both trim pieces are<br />
installed after the <strong>Durasan</strong> panels<br />
SNAP-ON OUTSIDE<br />
CORNER TRIM<br />
SNAP-ON INTERIOR TRIM<br />
6<br />
1-11/16"<br />
are erected. Each may be used with<br />
any <strong>Durasan</strong> thickness. Retainers are<br />
secured through the <strong>Durasan</strong> into<br />
the framing.<br />
Snap-On Interior Trim may also be<br />
used at interior corners, at ceiling line<br />
and as a batten. Snap-on Trim can be<br />
used in Fire Rated Assemblies.<br />
1-5/8"<br />
3/4"<br />
7/8"<br />
5/16"<br />
1-3/8"<br />
5/16"<br />
1-1/2"<br />
Edge grip clips provide for a simple one-step partition. The patented clips<br />
work with common framing wood or metal. Refer to pages 9 and 10 for<br />
installation recommendations.<br />
1"<br />
1/2" PANELS ONLY<br />
MATCHING TRIM<br />
(One Piece for 1/2" panels only)<br />
Single-Part Trim (see below) is<br />
available in vinyl shapes to match<br />
all standard vinyl <strong>Durasan</strong> colors<br />
for 1/2" panels. Dimensions shown<br />
are trim for 1/2" panels.<br />
One piece trims are progressive<br />
in nature and as such must be<br />
installed at the same time as<br />
the <strong>Durasan</strong> panels.<br />
ONE-PIECE MATCHING TRIM FOR 1/2" PANELS ONLY<br />
Shapes Vinyl<br />
Divider<br />
Outside Corner<br />
Inside Corner<br />
End Cap<br />
1/2"<br />
1/2"<br />
5/8"<br />
1/2"<br />
1-1/8"<br />
11/16"<br />
1/2"<br />
Ground<br />
Only<br />
1/2" Ground<br />
Only<br />
1/2"<br />
Ground<br />
Only<br />
1/2" Ground<br />
Only
General Installation<br />
INSTALLING DURASAN PANELS<br />
Several methods of installation<br />
may be used with <strong>Durasan</strong> products<br />
in order to meet specific job<br />
requirements. As in regular drywall<br />
construction, ceilings are installed<br />
first, before <strong>Durasan</strong> paneling is<br />
erected. Panels are attached<br />
vertically. <strong>Durasan</strong> should not be<br />
applied to ceilings.<br />
CUTTING DURASAN PANELS<br />
Scoring and snapping is the easiest<br />
and fastest way to make straight<br />
cuts. To do this, merely score the<br />
pre-decorated surface with a sharp<br />
knife guided by a thin board with a<br />
straight edge. Then position the<br />
scored panel so the piece to be<br />
removed is overhanging a straight<br />
edge parallel to the scored mark.<br />
Press this free end until the gypsum<br />
core snaps. Cut the back paper to<br />
remove excess piece.<br />
Sawing <strong>Durasan</strong> Panels is<br />
easier than cutting lumber. For best<br />
results, keep the prefinished surface<br />
up and use a sharp, fine-tooth saw<br />
or appropriate router bit.<br />
Note: Cut <strong>Durasan</strong> panels to<br />
length, 1/4" shorter than ceiling<br />
height so panels are not forced<br />
into place.<br />
PANEL LAYOUT<br />
Before application, proper arrangement<br />
of panels should be studied.<br />
For a most pleasing result, all joints<br />
of panels should be centered on<br />
architectural features of the wall,<br />
such as fireplaces, windows, doors,<br />
etc. If the wall contains no such<br />
openings, arrange for the two end<br />
panels to be of equal width. Narrow<br />
strips are difficult to install and<br />
should be avoided. Any special use<br />
of decorative trims and moulding<br />
should be considered at this time.<br />
CORNER TREATMENT<br />
Inside Corners: Where two walls<br />
intersect to form an inside corner,<br />
the last panel installed at this intersection<br />
should have two finished<br />
edges to create a professionally<br />
installed look. See photographs,<br />
“Forming A Narrow Plank With Two<br />
Finished Edges,” for directions on<br />
finishing an edge on the job.This<br />
treatment can be eliminated by<br />
using <strong>Durasan</strong> Snap-On Interior Trim.<br />
Outside Corners: Wood,<br />
plastic or metal corner mouldings,<br />
nailed or glued to wood or steel<br />
framing, are recommended for<br />
edge protection where panels meet<br />
to form outside corners. These<br />
mouldings can be stained or<br />
painted either in matching or<br />
contrasting colors, or use matching<br />
<strong>Durasan</strong> Snap-On Cornerbead.<br />
Curved Cuts can be made easily<br />
with a keyhole saw. If an area<br />
must be cut from the center of the<br />
board, it is recommended that a<br />
hole be bored that will take the<br />
point of the saw.<br />
Where Two Cuts Join, one cut<br />
must be made with a saw, the<br />
other cut can be made by scoring<br />
and snapping. Cuts like this are<br />
required around door and window<br />
openings.<br />
Electrical Outlet Box openings<br />
can be made easily by cutting the<br />
<strong>Durasan</strong> as shown by the solid<br />
lines in the picture above. Strike a<br />
sharp hammer blow to the “X”.<br />
Cut away back paper.<br />
FORMING A NARROW PLANK<br />
WITH TWO FINISHED EDGES<br />
1. Cut Decorative Surface<br />
with a sharp knife to a dimension<br />
of 1" wider than the panel width<br />
desired. Then turn vinyl surface<br />
face down.<br />
2. Score Back Surface with<br />
knife to the desired panel width.<br />
Snap gypsum core and peel this 1"<br />
piece from decorative surface.<br />
Smooth core if uneven.<br />
3. Wrap the excess flap of vinyl<br />
over the exposed gypsum core and<br />
staple to back.<br />
7
Three Options<br />
of Installation<br />
OPTION 1<br />
ADHESIVE RECOMMENDATIONS<br />
<strong>Durasan</strong> panels are quality wall<br />
paneling products that can be<br />
applied to wood studs, provided an<br />
appropriate drywall adhesive<br />
meeting ASTM C 557 is applied to<br />
the studs. <strong>Durasan</strong> panels can be<br />
adhesively applied to steel studs,<br />
provided an appropriate adhesive<br />
recommended for use with vinyl<br />
faced gypsum board and steel<br />
studs is used. Consult adhesive<br />
manufacturer for a suitable<br />
adhesive product. Steps for this<br />
application, which are limited to<br />
walls only, are as follows:<br />
1. <strong>Durasan</strong> panels are applied<br />
vertically to steel or wood studs<br />
or to furring strips that are straight,<br />
on one plane, and located 16" or<br />
24" o.c.<br />
2. All panels must be<br />
“bowed,” or pre-curved the<br />
length of the board, so that when<br />
applied to the adhesive coated<br />
studs, a natural pressure will result<br />
at the center of the panel when<br />
nailed or screwed top and bottom.<br />
(See “Bowing the Board”<br />
on page 9.)<br />
8<br />
3. Each stud that has two<br />
panels meeting to form a<br />
joint should have two beads of<br />
adhesive, each one located as close<br />
to each edge of the stud as possible.<br />
This reduces the possibility of<br />
adhesive oozing through the joint<br />
and getting on the prefinished<br />
surface. All other studs must<br />
receive a single bead of adhesive.<br />
Apply panels within 15 minutes<br />
of adhesive application.<br />
4. When using adhesive, nail<br />
or screw the panel at the floor and<br />
ceiling line, spacing fasteners 6"<br />
to 8" apart.<br />
5. If cove moulding or baseboards<br />
are to be omitted,<br />
you may wish to attach each panel<br />
at top and bottom with 1-3/8"<br />
matching Color Pins in place of<br />
1-1/4" wallboard nails when using<br />
wood studs.<br />
6. Immediately remove any<br />
adhesive that may have been<br />
deposited on tools or the prefinished<br />
surface.<br />
APPLICATION – ADHESIVE<br />
Two beads<br />
of adhesive<br />
at common<br />
stud.<br />
Nailing or screwing is required only at top<br />
and bottom of prefinished gypsum panels<br />
when adhesive is applied and panels are<br />
prebowed to give pressure at the center of<br />
the board.<br />
OPTION 2<br />
LAMINATING<br />
RECOMMENDATIONS<br />
1. Apply to clean, dry, sound<br />
surfaces only. Remove all wallpaper,<br />
high points, calcimine, loose<br />
paint, and scratch any other paint<br />
for good bond. Test any painted<br />
surface by laminating a small sample.<br />
Allow to dry and check bond.<br />
2. Bow the <strong>Durasan</strong> panels<br />
(see Bowing the Board) so that<br />
each panel, when nailed at top<br />
and bottom, will have built-in<br />
pressure being exerted at the<br />
center of the board on the existing<br />
wall until the adhesive dries.<br />
3. Apply the drywall adhesive<br />
with a caulking gun to the back<br />
surface of each panel, using 3/8"<br />
diameter beads 16" apart. Apply<br />
beads parallel to and 3/4" to 1"<br />
from each long edge of the panel.<br />
4. Laminate with Joint<br />
Compound. <strong>Durasan</strong> panels can<br />
be laminated to existing surfaces<br />
with ProForm ® BRAND Quick SetTM Setting Compound or ProForm All<br />
Purpose Ready Mix Joint Compound.<br />
Joint compound is applied as<br />
nominal 5" ribbons or four 1/4" x<br />
1/4" beads located around the<br />
perimeter and center of the panels.<br />
(approximate coverage for Ready Mix<br />
is 9-10 gal./1000 sq. ft. and Quick<br />
SetTM is 50-60 lbs./1000 sq. ft.)8<br />
An alternative is 2" diameter<br />
daubs 1/2" thick, 16" o.c. (approximate<br />
coverage for Ready Mix is 5-<br />
1/2–6 gal./1000 sq. ft. and Quick<br />
SetTM is 30-35 lbs./1000 sq.ft.).<br />
5. Nail or screw panels at top<br />
first. Locate 6d nails or 1-7/8"<br />
drywall screws 6" to 8" apart.<br />
Press panels progressively from<br />
ceiling to floor line. Nail at floor<br />
line if necessary. If panels do not<br />
stay in proper alignment, add<br />
temporary bracing for 24 hours.<br />
Use suitable moulding at floor<br />
and ceiling line to cover exposed<br />
fasteners.
BOWING THE BOARD<br />
(Required in Methods #2 and #3)<br />
<strong>Durasan</strong> panels must be warped<br />
or bowed to give pressure at the<br />
center of the board during adhesive<br />
and cementing applications. If the<br />
boards were not bowed, temporary<br />
bracing would be required.<br />
Illustrated are two methods of<br />
bowing. Be sure to remove<br />
bundling tape from the boards. Cut<br />
to proper ceiling height, and stack<br />
as shown with all prefinished surfaces<br />
facing up or down depending<br />
on which method of bowing is<br />
used. Use padded blocks cut from<br />
2 x 4’s to protect prefinished surfaces.<br />
Stack in such a manner that,<br />
when applying, each panel would<br />
have a tendency to spring away at<br />
the top when nailed at the bottom.<br />
Proper bowing can take from one<br />
to several days depending on<br />
weather conditions.<br />
BOWING METHOD #1<br />
Finish side down<br />
BOWING METHOD #2<br />
OPTION 3<br />
EDGE GRIP CLIP<br />
RECOMMENDATIONS<br />
Edge Grip Clips are the key to a<br />
simple concept for installing gypsum<br />
board – plain or predecorated. It’s<br />
called the Edge Grip Clip System. It<br />
provides mechanical attachment of<br />
the board over steel framing, wood<br />
framing, over steel or wood furring<br />
on concrete block, or any other<br />
sound and level wall surface. The<br />
clip is positioned on the back of<br />
the board and tapped in place,<br />
using the installation tool, so the<br />
prongs are driven into the board<br />
edges. The leading edge of each<br />
clip along one edge of the board<br />
is screw or nail attached<br />
to the studs, furring or other wall<br />
surface. The clips on succeeding<br />
panels slip under the previously<br />
applied panel causing the clips to<br />
Finish side up<br />
disappear behind the panels.<br />
Top and bottom edges must be<br />
fastened to the framing, furring, or<br />
wall. The Edge Grip Clips hold the<br />
board firmly in place. When using<br />
4'-wide panel, use adhesive along<br />
intermediate studs.<br />
In a battenless system, <strong>Durasan</strong><br />
panels must be absolutely flat to<br />
prevent lipping. Prebowing<br />
overnight with the vinyl surface<br />
concave is recommended.<br />
Steel Framing<br />
Align floor and ceiling tracks or<br />
plates to ensure plumb partition,<br />
and secure with suitable fasteners<br />
24" o.c. max. Position studs or<br />
furring 24" o.c. max. (30" o.c. for<br />
30" panels). Secure steel studs<br />
located adjacent to door and<br />
window frames, intersections and<br />
corners with 3/8" Type S Pan<br />
Head or low-profile head screws.<br />
Application over steel furring<br />
requires that the channels have a<br />
flat surface in contact with the<br />
board (Screw Furring Channel<br />
has beaded edges).<br />
APPLICATION OF DURASAN<br />
Apply the 1/2" or 5/8" <strong>Durasan</strong><br />
vertically. Start at the end of a wall<br />
or partition intersection and cut the<br />
first panel if necessary so that its<br />
leading, uncut edge (the direction<br />
in which work will progress) falls at<br />
the center of a framing member.<br />
CLIP INSTALLATION<br />
INSTRUCTIONS<br />
Edge Grip Clips should be installed<br />
into the edge of the <strong>Durasan</strong> with<br />
the wooden tool included in each<br />
box of clips.<br />
EDGE GRIP CLIP<br />
INSTALLATION TOOL<br />
1. Place the clip into the slot of the<br />
tool, as shown on the drawing,<br />
making sure the back edges of the<br />
teeth are against the wood.<br />
2. Position the clip and tool, as<br />
shown, against the back surface of<br />
the <strong>Durasan</strong> so that the clip is flat<br />
to the back, and perpendicular to<br />
the edge of the <strong>Durasan</strong>.<br />
3. Using a hammer, tap the end of<br />
the installation tool until both<br />
teeth of the clip are fully inserted<br />
and the back legs are tight against<br />
the edge. Do not over drive the<br />
clips, as this can cause deformation<br />
of the board edge.<br />
9
Apply clips to the leading edge of<br />
the panel 16" o.c., starting 16"<br />
down from the top. Clips on the<br />
trailing edge of the next panel are<br />
also spaced 16" o.c. but are about<br />
2" from those on the first panel’s<br />
leading edge. If greater rigidity is<br />
desired, clip spacing may be<br />
reduced. All panels require clips<br />
along both edges except when<br />
panels abut doors, windows, intersections<br />
or corners, in which case<br />
one edge of the panel will be directly<br />
fastened with nails or screws.<br />
Position the first panel, aligning the<br />
uncut edge at the center of the<br />
framing member, plumb, and<br />
attach it top and bottom as well as<br />
directly to the starting stud. Attach<br />
top and bottom with fastener 1"<br />
from each panel edge and 12" o.c.<br />
between. Fasten clips to steel studs<br />
with screws provided, wood studs<br />
with 1" nails or 1-1/4" Type W<br />
screws through the hole in the clip.<br />
Do not fasten clips before securing<br />
top and bottom of this first panel.<br />
On all intermediate framing, apply<br />
1/4" diameter beads of drywall<br />
adhesive. In fixed wood or furred<br />
wall construction, adhesive must be<br />
applied progressively with <strong>Durasan</strong><br />
application. In a steel stud system,<br />
adhesive need not be applied until<br />
the opposite face of the partition<br />
is finished. Intermediate studs are<br />
rotated back into position. This<br />
procedure allows the intermediate<br />
studs, which are joint studs on the<br />
opposite face, to be adjusted as<br />
necessary when second side panels<br />
are erected.<br />
Apply base trim at bottom of partition;<br />
install snap-on accessories at<br />
inside corners, outside corners, and<br />
wall-ceiling juncture if desired.<br />
Note: Substrate must be straight<br />
and true. <strong>Durasan</strong> must be flat or<br />
prebowed.<br />
10<br />
EDGE GRIP CLIP SYSTEM<br />
1. Edge Grip Clips are driven along<br />
both edges of the <strong>Durasan</strong> panels<br />
with attention not to over drive or<br />
allow points to move up towards<br />
vinyl surface.<br />
2. With edge of panel centered<br />
on stud face, clip is secured with<br />
standard Type S Pan Head Screws.<br />
3. Clips on adjoining panel slide<br />
behind the first panel without<br />
screws.<br />
4. Edges butt snugly for fine line<br />
joint.<br />
EDGE GRIP CLIP APPLICATION METHODS<br />
1. Wood Stud 2. Wood Furring<br />
3. Z Furring Channel 4. Double Layer<br />
SNAP-ON TRIM<br />
1. Apply <strong>Durasan</strong> and base trim in<br />
normal manner before installing<br />
outside corner trim, then proceeding<br />
with any interior ceiling and<br />
corner trim.<br />
2. Cut steel retainers to fit outside<br />
corners, interior ceiling and corner<br />
trim.<br />
3. Nail or screw attach retainer<br />
strip. Space fasteners 8" o.c. for<br />
interior ceiling and corner retainers,<br />
and 12" o.c. for outside corner<br />
SNAP-ON TRIM APPLICATION METHODS<br />
Exterior Corner Interior Corner<br />
retainers. All retainers should begin<br />
fasteners 1/2" from each end.<br />
4. Cut face cover to length with tin<br />
snip or miter cut. After cutting<br />
cover, restore flanges to original<br />
configuration by using a screwdriver<br />
blade as a wedge. Snap cover over<br />
retainer by engaging one leg on<br />
retainer flange. Then use palm or<br />
thumb pressure until opposite leg<br />
engages retainer flange and snaps<br />
into place.
Specifications<br />
Section 09 72 00<br />
Prefinished <strong>Gypsum</strong><br />
Wall Panels<br />
This section is written in CSI 3-part<br />
format and it assumes that the<br />
general conditions of the contract<br />
will be AIA A201. This section is<br />
proprietary and includes only<br />
<strong>National</strong> <strong>Gypsum</strong> products.<br />
PART 1 GENERAL<br />
1.01 Summary<br />
A. Section Includes: Factory finished<br />
gypsum board with trim system<br />
for joints.<br />
1.02 System Description<br />
A. Performance Requirements:<br />
Provide UL listed materials<br />
with fire hazard classification of<br />
surface covering, as determined<br />
by ASTM E 84, as follows:<br />
1. Flame spread not more than<br />
25 (Vinyl <strong>Durasan</strong>).<br />
2. Smoke developed of not<br />
more than 50 (Vinyl <strong>Durasan</strong>).<br />
1.03 Submittals<br />
A. Product Data: Manufacturer’s<br />
specifications and installation<br />
instructions for each product<br />
specified.<br />
B. Samples: Minimum 2"x5" samples<br />
of manufacturer’s full range of<br />
patterns and colors for each<br />
panel covering material specified.<br />
PART 2 PRODUCTS<br />
2.01 Manufacturer<br />
A. <strong>National</strong> <strong>Gypsum</strong> <strong>Company</strong>.<br />
2.02 Materials<br />
A. <strong>Gypsum</strong> Board:<br />
1. <strong>National</strong> <strong>Gypsum</strong> <strong>Durasan</strong><br />
Prefinished Regular <strong>Gypsum</strong><br />
Board.<br />
2. <strong>National</strong> <strong>Gypsum</strong> <strong>Durasan</strong><br />
Prefinished Fire-Shield <strong>Gypsum</strong><br />
Board.<br />
B. Panel Covering:<br />
1. <strong>National</strong> <strong>Gypsum</strong> Vinyl<br />
<strong>Durasan</strong>.<br />
2.03 Accessories<br />
A. Trim: <strong>Durasan</strong> Matching Trim,<br />
Snap-On.<br />
B. Trim: <strong>Durasan</strong> Matching Trim,<br />
One Piece.<br />
C. Fasteners, Adhesives, and Joint<br />
Compounds:<br />
1. Edge Grip Clips.<br />
2. Screws: ASTM C 954 or<br />
ASTM C 1002 or both with<br />
threads, points, and finish as<br />
recommended by the<br />
manufacturer.<br />
3. <strong>National</strong> <strong>Gypsum</strong> ProForm ®<br />
BRAND All Purpose Ready Mix<br />
Joint Compound.<br />
4. <strong>National</strong> <strong>Gypsum</strong> ProForm ®<br />
BRAND Multi-Use Joint Compound.<br />
5. <strong>National</strong> <strong>Gypsum</strong> ProForm ®<br />
BRAND Quick SetTM Setting<br />
Compound.<br />
PART 3 EXECUTION<br />
3.01 Installation<br />
A. In accordance with the manufacturer's<br />
recommendations.<br />
1. <strong>National</strong> <strong>Gypsum</strong>’s <strong>Durasan</strong><br />
Prefinished <strong>Gypsum</strong> Board<br />
3.02 Protection<br />
A. Protect prefinished gypsum wall<br />
panel installations from damage<br />
and deterioration until the date<br />
of Substantial Completion.<br />
11
CUSTOMER SERVICE SALES AREAS<br />
Atlantic Area<br />
Phone: (800) 237-9167<br />
Fax: (877) 252-0430<br />
Central Area<br />
Phone: (800) 252-1065<br />
Fax: (866) 232-0440<br />
Gulf Area<br />
Phone: (800) 343-4893<br />
Fax: (866) 482-8940<br />
Midwest Area<br />
Phone: (800) 323-1447<br />
Fax: (866) 692-8590<br />
Northeast Area<br />
Phone: (800) 253-3161<br />
Fax: (866) 632-1480<br />
Southeast Area<br />
Phone: (800) 548-9394<br />
Fax: (866) 732-1990<br />
Southwest Area<br />
Phone: (800) 548-9396<br />
Fax: (866) 792-7520<br />
Western Area<br />
Phone: (800) 824-4227<br />
Fax: (800) 438-6266<br />
Corporate Headquarters Technical Information<br />
<strong>National</strong> <strong>Gypsum</strong> <strong>Company</strong> Phone: (800) NATIONAL<br />
2001 Rexford Road<br />
(800) 628-4662<br />
Charlotte, NC 28211<br />
Fax: (800) FAX-NGC1<br />
Phone: (704) 365-7300<br />
Web: nationalgypsum.com<br />
nationalgypsum.com/espanol<br />
(800) 329-6421<br />
<strong>National</strong> Accounts<br />
Phone: (800) 440-1230<br />
Fax: (866) 622-3590<br />
Manufactured Housing<br />
Phone: (800) 455-3185<br />
Fax: (800) 639-1714<br />
LIMITED WARRANTY<br />
AND REMEDIES<br />
Products manufactured and sold by<br />
<strong>National</strong> <strong>Gypsum</strong> are warranted by <strong>National</strong><br />
<strong>Gypsum</strong> to its customers to be free from<br />
defects in materials and workmanship at<br />
the time of shipment. THIS EXPRESS<br />
WARRANTY IS THE ONLY WARRANTY<br />
APPLICABLE TO SUCH PRODUCTS, AND IS<br />
IN LIEU OF AND EXCLUDES ALL OTHER<br />
EXPRESS ORAL OR WRITTEN WARRANTIES<br />
AND ALL IMPLIED WARRANTIES, INCLUDING<br />
BUT NOT LIMITED TO THE IMPLIED<br />
WARRANTIES OF MERCHANTABILITY AND<br />
FITNESS FOR A PARTICULAR PURPOSE.<br />
<strong>National</strong> <strong>Gypsum</strong> will not be liable for any<br />
incidental, indirect or consequential losses,<br />
damages or expenses. The customer’s<br />
exclusive remedy for any type of claim or<br />
action for defective products will be limited<br />
to the replacement of the products (in the<br />
form originally shipped) or, at <strong>National</strong><br />
<strong>Gypsum</strong>’s option, to a payment or credit<br />
not greater than the original purchase<br />
price of the products.<br />
<strong>National</strong> <strong>Gypsum</strong> will not be liable for<br />
products claimed to be defective where the<br />
defect resulted from causes not within<br />
<strong>National</strong> <strong>Gypsum</strong>’s control, or which arose<br />
or occurred after shipment, including but<br />
not limited to accidents, misuse, mishandling,<br />
improper installation, contamination or<br />
adulteration by other materials or goods,<br />
or abnormal conditions of temperature,<br />
moisture, dirt or corrosive matter.<br />
Any claim that products sold by <strong>National</strong><br />
<strong>Gypsum</strong> were defective or otherwise did<br />
not conform to the contract of sale is<br />
waived unless the customer submits it in<br />
writing to <strong>National</strong> <strong>Gypsum</strong> within thirty<br />
(30) days from the date the customer<br />
discovered or should have discovered the<br />
defect or nonconformance. No legal action<br />
or proceeding complaining of goods sold<br />
by <strong>National</strong> <strong>Gypsum</strong> may be brought by the<br />
customer more than one year after the<br />
date the customer discovered or should<br />
have discovered the defect or problem of<br />
which it complains.<br />
110705 Rev. 8/10