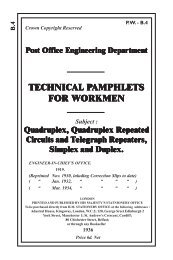
TRAFFIC CONTROL TELEPHONE SYSTEMS Circuit - Sam Hallas
TRAFFIC CONTROL TELEPHONE SYSTEMS Circuit - Sam Hallas
TRAFFIC CONTROL TELEPHONE SYSTEMS Circuit - Sam Hallas

You also want an ePaper? Increase the reach of your titles
YUMPU automatically turns print PDFs into web optimized ePapers that Google loves.
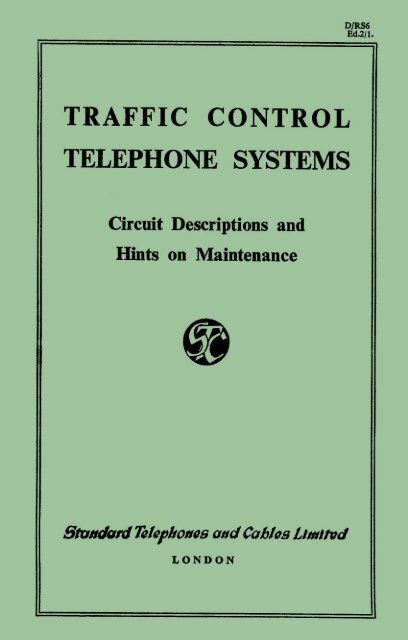
<strong>TRAFFIC</strong> <strong>CONTROL</strong><br />
<strong>TELEPHONE</strong> <strong>SYSTEMS</strong><br />
<strong>Circuit</strong> Descriptions and<br />
Hints on Maintenance<br />
This bulletin deals with the operation and mainte-<br />
nance of the apparatus used in the "Standard" Traffic<br />
Control Telephone Systems. These systems are extremely<br />
simple to erect and maintain and if the following hints<br />
and instructions are carefully followed no difficulty will<br />
be found in installing and keeping the equipment in the<br />
best condition.<br />
Standard Telephones & Cables Ltd., its Representa-<br />
tives and Agents are always willing to give expert advice<br />
and assistance if desired.<br />
Registered Office: Connaught House, Aldwych, London, W.C.2.<br />
(<strong>TELEPHONE</strong> DIVISION)<br />
OAKLEIGH ROAD, NEW SOUTHGATE, LONDON, N.11<br />
Telegrams : Essteecee Telex, London. Telephone : Enterprise 1234.<br />
D/RS6<br />
Ed. 2/1<br />
Page 1
Page 2<br />
Control Office on British Railways
CONTENTS<br />
Part Title Page<br />
1 Key System, <strong>Circuit</strong> Description ......................................................... 4<br />
2 Selector Key, 4001-A ........................................................................... 17<br />
3 Selector, 4304-A and 4301-A ............................................................ 24<br />
4 Selector Test Set, 4001-B .................................................................. 35<br />
5 Dial System, <strong>Circuit</strong> Description ....................................................... 39<br />
6 Line Construction and Line Voltage Curves .................................. 50<br />
7 Line Test Set, LU.3101 ...................................................................... 53<br />
8 Relays, Adjustment of .......................................................................... 64<br />
9 Line Switch, 4120 Type ..................................................................... 73<br />
10 Line Switch, 4150 Type ..................................................................... 78<br />
11 Adjusting Tools..................................................................................... 84<br />
LIST OF ILLUSTRATIONS<br />
Figure Title Page<br />
1 General Schematic Key Sending System ............................ (facing) 8<br />
2 Selector <strong>Circuit</strong> operated through a No. 341-A or<br />
AAJ 4100-1 Transformer ............................................................... 12<br />
3 Selector <strong>Circuit</strong> operated through 2 Q.4104-1 or 2 No. 70A<br />
Repeating Coils in Series ................................................................ 12<br />
4 Branch Line operated through Repeating Coil .............................. 13<br />
5 Intermediate Telegraph Station . ..................................................... 13<br />
6 Selector Key Case (Capacity 40 Keys) ............................................ 17<br />
7 Selector Key, illustrating method of coding ................................... 18<br />
8 Selector Key, 4001-A ........................................................................... 21<br />
9 Selector 4304-A .................................................................................... 24<br />
10 Selector 4301-A exploded views........................................................ 32<br />
10a Selector 4304-A exploded views........................................................ 34<br />
11 Selector Test Set, 4001-B ................................................................... 35<br />
12 Selector Test Set, Schematic .............................................................. 37<br />
13 Dial System, Schematic .......................................................(facing) 84<br />
14 Line-Voltage Curves-direct signalling............................................... 51<br />
15 Line-Voltage Curves-signalling through one transformer ............ 52<br />
16 Line-Voltage Curves-signalling through two Repeating ....................<br />
Coils ......................................................................................................... 52<br />
17 The Line Test Set ................................................................................. 53<br />
18 Line Test Set-Battery Voltage Test, Schematic . ........................... 55<br />
19 Line Test Set, Resistance by Wheatstone Bridge Test, .....................<br />
Schematic................................................................................................ 56<br />
20 Line Test Set, Earth Fault by Murray Earth Test, Schematic .... 5 8<br />
21 Line Test Set, Resistance by Voltmeter Test, Schematic ............. 5 9<br />
22 Line Test Set, Volts, Resistance Curves .......................................... 60<br />
23 Line Test Set, Selector <strong>Circuit</strong> Impulse Ratio Test, Schematic.. 61<br />
24 Line Test Set, Reduced Voltage Test for 4301-A and 4304-A .........<br />
Selectors Schematic .............................................................................. 62<br />
25 Line Test Set, Telephone and Ringing <strong>Circuit</strong>, Schematic .......... 6 3<br />
26 The B.P.O. type Relay ........................................................................ 65<br />
Page 3
Page 4<br />
PART 1<br />
KEY SENDING SYSTEM DESCRIPTION<br />
GENERAL<br />
Selection of the required way station is obtained by a coded train of impulses,<br />
normally comprising three groups. The sum of the impulses in the three groups is the<br />
same for all codes, and the receiving apparatus is designed to respond only to the<br />
correct total, so that lost or additional impulses (due to external interference) cannot<br />
cause wrong calls. The constant total feature ensures that line interference cannot<br />
establish a wrong call but would make that call ineffective.<br />
The presence or absence in the Controller's receiver of "ring back" tone, generated<br />
by the way station bell, immediately advises him of either the completion or<br />
failure of the call.<br />
Selector Key No. 4001-A<br />
The function of the selector key is to control the operation of the battery and<br />
battery reversing relays which switch the line battery and transmit the appropriate<br />
sequence of current impulses to the line. The 4001-A Selector Key is fully described<br />
in Part 2, and this should be read in conjunction with the circuit description on page<br />
8.<br />
Battery Relay 4664-DA<br />
This relay designated BR, applies the line battery to the line before impulsing<br />
commences and switches off after the end of the ringing period. The operation of BR<br />
is controlled by the selector key.<br />
Battery Reversing Relay 4664-MX<br />
This relay, designated SR, reproduces the impulses originated by the selector<br />
key, reversing the polarity of the line with each impulse. A train of impulses therefore<br />
consists of a succession of pulses of alternating polarity.<br />
The adjustment figures for the 4664-MX Relay are given at the end of Part 8,<br />
and attention is drawn to the two notes relating to any adjustments made to this relay.<br />
It is important that the impulses due to line battery reversals sent out by SR to<br />
line should be of equal duration. The impulse ratio can be determined quite closely by<br />
observation, but more accurately by use of a centre zero voltmeter or a centre zero<br />
milliammeter with a resistance in series to limit the current. The meter should be<br />
connected directly across the line terminals and an uninterrupted train of impulses,<br />
such as the General Call code should be transmitted. If the impulse ratio is correct the
swing of the meter needle either side of zero during impulsing will be equal. This<br />
shows that the positive impulses are of the same duration as the negative impulses.<br />
To get the best result of this test it is preferable to use a heavily damped meter.<br />
The relay SR is shunted by a rheostat and by adjusting this the release time of<br />
SR can be varied thereby controlling the impulse ratio of the impulses transmitted. To<br />
increase the time during which SR is on its back contact, turn the adjusting screw of<br />
the rheostat in a clockwise direction. If, in the above test the swing of the meter needle<br />
either side of zero is unequal, the rheostat should be adjusted until the ratio is correct.<br />
It is assumed, of course, that the selector key originating the test impulses has itself<br />
been checked for impulse ratio (prior to the test) as described in Part 2.<br />
<strong>Circuit</strong> Breaker No. 4001-A<br />
The <strong>Circuit</strong> Breaker opens the line battery circuit if excessive current is taken<br />
from the battery, such as would be caused by a short circuit on the line or line circuit.<br />
Its resistance is 2 ohms and it is normally adjusted to trip at 0.6 ampere. On<br />
resetting the circuit breaker after it has been operated, care should be taken not to hold<br />
it in forcibly by hand, so that, if the short circuit still exists, the circuit breaker will<br />
have an opportunity to re-open the battery circuit.<br />
Controller's Telephone <strong>Circuit</strong><br />
Since the controller is normally listening on the line, a head-set is the most<br />
convenient form of receiver and transmitter to employ. The head-set is connected to<br />
the talking circuit by means of plug and jack, so arranged that two sets can be used at<br />
the same time. When no head-set is connected an alarm circuit is completed through<br />
the jacks. This circuit may be used to operate an extension bell or an amplifier and<br />
loud speaker. In the former case, way stations would require a magneto for calling the<br />
controller while the second arrangement retains the normal method of operation, but<br />
enables way station calls to be heard at a reasonable distance from the control position.<br />
Foot Switch No. 4001-A<br />
The Foot Switch is used instead of a speak-listen key, thus leaving both of the<br />
Controller's hands free for recording messages. The Controller's talking circuit is of a<br />
high efficiency type, so arranged that by operating the foot switch when talking, the<br />
impedance matching is made optimum for both the transmitter and the receiver.<br />
Page 5
Page 6<br />
Retard Coils No. V.4400-6<br />
These coils, together with their associated capacitors, smooth out the impulses<br />
of current during signalling, so that the code is heard in the Controller's receiver as<br />
slight dull thumps, and not as objectionable sharp clicks.<br />
This network also tunes the circuit so that with average line conditions the<br />
transmitted wave form is practically sinusoidal.<br />
Way Station Selectors 4304-A & 4301-A<br />
The selector is the receiver of the system and will only operate its associated<br />
call bell on receipt of its own particular code, general call code or time signal code.<br />
It is fully described in Part 3, and this should be read in conjunction with the<br />
circuit description below.<br />
Way Station Selector Set 4001-A<br />
The Way Station Selector Set contains the selector with its tuning capacitors,<br />
ring back tone capacitors, and local battery bell. With this type a separate telephone<br />
set is used but Selector Sets containing both selector and telephone circuits are also<br />
supplied.<br />
Way Station Telephone Set<br />
This can be either a wall or desk set. The "Speak-Listen" switch takes the form<br />
of either a key fitted in the wall set or a foot switch connected to the desk set.<br />
Battery Supplies<br />
At the Control<br />
At each Way Station<br />
APPARATUS USED ON A TYPICAL KEY SENDING<br />
<strong>TRAFFIC</strong> <strong>CONTROL</strong> SYSTEM<br />
At Control Station<br />
Local Battery : 10 volts for operating the relays.<br />
Line Battery : The voltage is dependent on the length<br />
of line and the number of way stations employed.<br />
(See the Line-Voltage curves, Part 6.)<br />
3-volt battery for talking and ringing.<br />
One No. 4001-C Selector Apparatus Case.<br />
One No. 4002-A Selector Key Case (capacity twenty Selector Keys) to accommodate<br />
first twenty selector keys.
One No. 4002-B Selector Key Case (capacity twenty Selector Keys) for each<br />
additional twenty or fraction of twenty keys.<br />
One No. 4001-A Selector Key for each No 4301-A or 4304-A Selector installed<br />
at Way Stations.<br />
One No. 4001-A Selector Key for "General Call."<br />
One No. 4001-A Selector Key for " Time Sending."<br />
One No. 4001-C Selector Key Space for each position in items 2 and 2a not<br />
fitted with a key.<br />
Two No. 4110 Type Protectors.<br />
One No. 4001-A Selector Time Sending Set.<br />
One No. 4086-A Telephone Set.<br />
One No. 4002-A Jack Box.<br />
Three No. 4403-AA or 4405-C Telephone Sets.<br />
One No. 4001-A Foot Switch.<br />
One No. 4001-A or 4001-B Foot Switch Attachment (if required).<br />
One Storage Battery (4 volts) for Controller's Telephone.<br />
One Storage Battery (10 to 12 volts) for control and impulsing relays.<br />
Main signalling supply voltage to be in accordance with curves on pages 51 and<br />
52 derived from A.C. mains rectifier, storage battery and charger or primary<br />
cell battery, as required.<br />
One 4001-B Selector Test Set (if required).<br />
NOTE.-For each way station equipped with a No. 4305-B Selector, the 4001-A<br />
Selector Key specified under Item 3 is to be replaced by a No. 4001-B Selector<br />
Key. One 4001-B Selector Key is also required for each additional extension<br />
bell connected to the 4305-B Selector.<br />
At Each Way Station<br />
Wall Mounted Telephone<br />
One No. 4001-A Selector Set and<br />
One No. 4308-C Telephone Set, or<br />
One No. 4002-A Selector Set.<br />
(Combined Telephone and Selector Set.)<br />
Desk Telephone Set<br />
One 4001-A Selector Set.<br />
One 4311-A Telephone Set.<br />
One 4001-A Foot Switch.<br />
Page 7
Page 8<br />
Common Parts<br />
One 4304-A Selector.<br />
(For the 4001-A or the 4002-A Selector Sets.)<br />
Three Dry Cells.<br />
One No. 4110-A Protector.<br />
Alternative patterns of telephone sets and the method of ordering any piece of<br />
apparatus will be found in our Catalogue "Railway Systems (Apparatus)" D/TD17DI.<br />
NOTE.-Way stations equipped with the 4305-B instead of the 4304-A Selector (see<br />
under Common Parts above) will require from one to three extension bells and<br />
additional telephone sets (with dry cells and battery boxes) the quantity depending<br />
upon the number of extension sets connected to the Selector. Additional<br />
No. 4110-A Protectors may also be required.<br />
<strong>Circuit</strong> Description<br />
Figure 1, facing page 8, is a schematic diagram showing the Controller's circuit<br />
together with the two way station circuits. References mentioned in the following<br />
description apply to this figure.<br />
The controller operates the selector key having the same code, which we will<br />
assume is 3-11-3, as that of the selector at the way station he wishes to call.<br />
On the release of the key, contacts K1 and K3 are closed, and remain closed<br />
during the revolution of the code wheel. The closing of these contacts operates the<br />
BR relay via 10 volts positive, B4 terminal, call key contacts (Time Sending Set), K1<br />
to K3 of Selector Key, winding of BR relay to B3 terminal and 10 volts negative. The<br />
operation of BR connects the line battery to line, thus:-line battery positive, B1<br />
terminal, circuit breaker, line battery switch, SR contacts, retard coils, BR contacts,<br />
line switch, line protectors thence to L1 or L3 or both. The circuit to the other line is<br />
made via line battery negative, B2 terminal, line battery switch, SR contacts, retard<br />
coils. BR contacts, line switch, line protectors and L2 or L4 or both.<br />
All the selectors (each with its tuning capacitors in series) at the way stations<br />
are in parallel across the line so that when the line battery is first applied they receive<br />
an impulse which clears them from any code pins on which they may be held, so<br />
preparing them for the reception of the code. When the selector key spring K1 rides<br />
over the first tooth of the code wheel, it makes contact with spring K2 (at this stage<br />
K1, 2, and 3 are all in contact) and operates the SR relay via 10 volts negative, B3<br />
terminal, winding of SR, call key (Time Sending Set), K2 to K1 (Selector Key), Call<br />
Key (Time Sending Set), B4 terminal and 10 volts positive. The operation of SR<br />
reverses the line battery connections to the line, thus reversing the polarity of the line
wires. This change of polarity is the first impulse of the code and causes all selectors<br />
on the line to advance one step. The selector key contact K1 now leaves the top of the<br />
first tooth and drops into the hollow between the first and second teeth. This opens<br />
the K1 and K2 contacts with the result that SR is de-energised, thus another impulse<br />
is transmitted and all selectors advanced another step by this second reversal of<br />
polarity to line. The third impulse is transmitted and all selectors advanced another<br />
step when contact K1 rides over the top of the second tooth and K1, K2 contacts<br />
close, SR is operated and the battery to line is again reversed. This is the end of the<br />
first digit, and the condition of the selector key contacts K1, K2 (i.e., closed or open)<br />
and that of the SR relay (operated or unoperated), as obtained at the last impulse,<br />
must be maintained to ensure a steady line condition, equal in duration to five impulses.<br />
This inter-digital pause in impulsing is done by means of shading cams as<br />
described in Part 2. Although, during the pause, battery is held on the line, the<br />
capacitor in series with each selector stops the flow of current and all selectors are deenergised.<br />
The code wheels on all selectors then return to the normal position, except<br />
those that have a code pin on the code wheel for the holding pawl to engage with in<br />
this particular position. This means that all selectors with a first digit of three are held<br />
at the third step by the holding spring. All selectors are then advanced by the second<br />
group of impulses, which, in the case we are considering totals eleven.<br />
Of the selectors that were held in an advanced position before, only the one<br />
called will now have a code pin in position to be engaged by the holding spring as no<br />
two selectors on the same line are coded alike. The selectors that returned to normal<br />
after the first digit and whose first and second digits total eleven will also be in<br />
position to be held up by the holding spring. All other selectors will return to the<br />
normal position during the second inter-digital pause of approximately one second.<br />
The third group of impulses, 3 in this case, advances all selectors three steps. Only<br />
the selector with its code pins set for the code 3-11-3 (the selector called) will have<br />
been advanced to its ringing position, that is, a total of 17 steps from the normal<br />
position. Those selectors which were restored to normal after the second digit and are<br />
coded with a first digit of three will now be held on their first code pins.<br />
In the ringing position the contact carried by the code wheel will be directly<br />
over and making contact with the first ringing terminal. During the ringing period of<br />
approximately two seconds a ring-back tone is heard by the controller or any other<br />
receiver across the line. After the ringing period an impulse is transmitted by the<br />
selector key which advances all selectors one step. This releases all selector holding<br />
springs from the code pins (including the selector called) and the selectors return to<br />
the normal position. When the way station bell rings the operator lifts his receiver<br />
and is in communication with the controller.<br />
Page 9
Page 10<br />
General Call<br />
To call all stations the controller operates his general call key which transmits<br />
an uninterrupted train of 17 impulses. This train advances all selectors, irrespective<br />
of their codes, to the 17th step which is the ring position. A clearing pulse is transmitted<br />
at the end of the ring period, which restores the selectors to normal in the same<br />
manner as described for an ordinary code. In this way all the call bells are energised,<br />
all way station operators come to the telephone and the controller is then able to issue<br />
his general instruction.<br />
Time Sending (see also Part 3)<br />
Time signals given to way stations are normally obtained from a telegraph<br />
circuit, master clock or similar arrangement, the apparatus used for producing the<br />
signals being usually arranged to give a series of short duration closures of a local<br />
circuit. If these are applied to the pole-changing relay, the selectors will receive<br />
double impulses due to the double reversals of line battery resulting from operation<br />
and release of the pole-changing relay.<br />
Figure 1 shows the time sending set containing a relay circuit to give successive<br />
reversals of line battery for successive closures of the local circuit.<br />
The Controller operates the time sending selector key which advances all selectors<br />
to the time receiving position, i.e., the 22nd step, which is one step before the<br />
time ringing position. At the end of the code, that is, when the selector key arrives at<br />
its normal position, the lever key of the time sending set is operated to the "Time"<br />
position. This disconnects the selector keys from the sending circuit and connects the<br />
time sending set.<br />
On operating the time key, the battery relay BR in the Selector Apparatus Case<br />
is operated, which connects the line battery to line. The application of battery to the<br />
line sends an impulse to all selectors but this impulse should be disregarded. The first<br />
closure of the time signalling contacts (connected to terminals T1 and T2) operates<br />
relay R, the circuit being as follows:-10 volts negative, B3 terminal (Apparatus<br />
Case), B3 terminal (Time Sending Set), T2 terminal, time signalling contacts, T1<br />
terminal, contacts of AN Relay, contacts of R relay, winding of R relay, 100 ohm<br />
resistor, time contacts of lever key, K1 terminal, B4 terminal (Apparatus Case) to 10<br />
volts positive.<br />
The relay AN does not operate because it is short-circuited by 10 volts negative<br />
as follows :- 10 volts negative, B3 terminal (Apparatus Case), B3 terminal (Time<br />
Sending Set), T2 terminal, time signalling contacts, TI terminal, contacts of AN to one<br />
side of AN coil, contacts of R (operated or unoperated) to the other side of AN coil.<br />
The operation of R relay energises SR (battery reversing) relay via 10 volts<br />
negative, B3 terminal (Apparatus Case), winding of SR, K2 terminal (Apparatus
Case), K2 terminal (Time Sending Set), time key contacts, R relay contacts, K3<br />
terminal, time key contacts, K1 terminal (Time Sending Set), K1 terminal (Apparatus<br />
Case), B4 terminal (Apparatus Case) and 10 volts positive. When SR operates an<br />
impulse is sent to line which steps all selectors momentarily to the time ringing<br />
position, thus giving the first "pip" of a pre-arranged time signal.<br />
The relay R remains operated when the time sending contacts are opened via 10<br />
volts negative, B3 terminal (Apparatus Case), B3 terminal (Time Sending Set), make<br />
before break contacts of R, coil of R, 100 ohms, K3 terminal, time key contacts, K1<br />
terminal (Time Set and Apparatus Case), B4 terminal (Apparatus Case) and 10 volts<br />
positive.<br />
Relay R holds SR operated so that on the opening of the time signalling contacts<br />
no impulse is transmitted. The opening of the time signalling contacts removes the<br />
short circuit across the AN relay coil and allows it to operate. On the second closure<br />
of the time sending contacts, negative 10 volts is applied to both sides of R relay, thus<br />
shorting it, and it becomes de-energised. The dropping off of R releases SR and the<br />
second impulse of the time signal is transmitted. The opening of the time sending<br />
contacts releases relay AN thus one cycle of operations of the time sending relay<br />
circuit corresponds to two impulses from the time sending contacts.<br />
Relay AN is made slow releasing so that when the time sending impulses are<br />
obtained from a telegraph circuit, telegraph code impulses which may be in transmission<br />
may be in transmission after the key has been thrown to “Time” will be ineffective.<br />
At the end of the time sending transmission, the key is restored to the “Call”<br />
position, a code is sent out to the line (this can be originated by any selector key in the<br />
key case), the selectors are restored to normal and the system is then ready for<br />
ordinary calls.<br />
SUPERIMPOSED CIRCUITS<br />
Since the impulses for operating selectors are transmitted as alternating current<br />
at a definite frequency, suitable repeating coils or transformers may be connected in<br />
the line. The requirements for such coils are that they shall introduce low loss at both<br />
the signalling frequency and at speech frequencies.<br />
Page 11
Page 12<br />
Selector <strong>Circuit</strong> operated through a No. 341-A or AAJ,4100-1 Transformer<br />
Fig. 2.<br />
Selector <strong>Circuit</strong> operated through two Q4101-1 or two No. 70A<br />
Repeating Coils in Series<br />
Fig. 3.<br />
Operation of Selector <strong>Circuit</strong> through Transformer<br />
Where it is desired to operate a traffic control circuit without metallic connection<br />
between the line and the signalling battery, the transformer should be connected<br />
in the line as shown in Fig. 2. Capacitor C has a capacitance of 10 μF plus 1 μF for<br />
each selector bridged across the line and the capacitors in the way station selector sets<br />
should be short-circuited. Resistor R has a value of 2,000 ohms and must be noninductive<br />
as its purpose is to prevent oscillatory discharge of the capacitor from<br />
interfering with operation of the selectors. For maximum speech efficiency the controller's<br />
telephone set should be connected to the line side of the transformer.<br />
If it is desirable to talk through the transformer at the Control Station and keep<br />
the transmission loss to a minimum the Q.4104-1 Repeating coil should be used.
Where satisfactory operation cannot be obtained through a single Repeating<br />
coil, two or more may be connected in series-aiding as shown in Fig. 3.<br />
Branch <strong>Circuit</strong><br />
Intermediate Telegraph Station<br />
Fig. 5.<br />
When it is required to operate selectors on a branch circuit and part of the main<br />
circuit without metallic connection between the two circuits, a transformer connected<br />
as in Fig. 4 may be used between the main circuit and the branch circuit. The capacitor<br />
C is then 10 μF plus 1 μF for each selector on the branch circuit and branch circuit<br />
selector sets have their tuning capacitors short circuited, sets on the main line remaining<br />
normal. Again, if the branch line is too long for satisfactory working through one<br />
transformer or repeating coil, two or more Repeating coils may be connected in<br />
series-aiding.<br />
Page 13
Page 14<br />
Superimposed Telegraph <strong>Circuit</strong><br />
A telegraph circuit may be worked over a line used for traffic control telephone<br />
as a phantom circuit. The traffic control circuits divided by a Repeating coil at the<br />
first telegraph station and bridged by coils at subsequent stations. Where it is required<br />
to divide a telegraph circuit at an intermediate station, a Repeating coil is used<br />
in place of the bridging coil. The telegraph arrangements are shown in Fig. 5.<br />
Composite <strong>Circuit</strong>s<br />
Composite circuits including one or more traffic control circuits may be set up<br />
in any of the arrangements used for telegraphy and telephony as long as the components<br />
used allow transmission of the 32 cycle signalling current used for selective<br />
calling.<br />
TESTS ON SELECTIVE APPARATUS<br />
We give below suggestions for testing under two headings, viz.:— periodic tests<br />
and tests on failure of operation.<br />
If the periodic tests are made regularly, this will largely reduce the necessity for<br />
making the other tests.<br />
Periodic Tests<br />
1. Line tests should be made daily, as the line as a rule is subject to extreme<br />
variations due to its exposed condition and interference from outside sources,<br />
also to the variable weather conditions, etc. No attempt will be made here to<br />
indicate the best way to determine the faults in the line such as opens, shorts,<br />
crosses, leaks, etc., as this depends in a great measure on the local conditions<br />
and the testing apparatus available.<br />
2. Test (every two weeks) the potential of the local and main batteries when the<br />
normal operating current is flowing.<br />
3. Test (once a month) by operating each calling key and determine that the time<br />
the positive potential is put to the line is equal to the time that the negative<br />
potential is put to the line for each impulse as described in Parts 1 and 2,<br />
pages 4 and 19. If the results for all keys are the same, the local battery in<br />
good condition and the time that the positive and negative potential is put to<br />
line is not equal, then the potentiometer YD should be adjusted.<br />
If a few keys give unequal results, the K1 and K2 contacts on these keys should<br />
be adjusted to give the same result as the other keys.<br />
4. Test (once a month) the time of one complete operation of each key. The time<br />
should be within the allowable variation for each key given on page 19. If not,<br />
adjust the governor springs as described to make it so. A convenient way to<br />
do this is to make sure that one key is right by timing with a stop watch, if
one is available (if not, with an ordinary watch). Then test the remaining keys<br />
by winding the timed key with one hand and the key under test with the other<br />
hand ; release both at the same time and see if they complete their operation<br />
at approximately the same time.<br />
5. Another test that should be made when the selectors are installed, and one<br />
that it is well to make from time to time (say, every three months) after the<br />
line tests and tests on apparatus in the calling circuit are made and found<br />
correct, is to reduce the potential of the main battery by 50 to 75 volts or<br />
such value as the local conditions warrant, and then call each station in turn.<br />
If there is a failure it will show that some of the apparatus has not the margin<br />
that it should have above the minimum operating voltage. This will give an<br />
opportunity to investigate any weak points that may exist so that they may<br />
be remedied and thus avoid future failure.<br />
Tests on Failure of Operation<br />
When a call is made and the bell does not ring or no answer-back is heard in the<br />
receiver, it is an indication that there is trouble somewhere in the system.<br />
First notice if the usual dull thumps are heard in the receiver when a key is<br />
operated, if not, this is an indication that battery is not being supplied to the line. The<br />
battery connections and operation of the relays in the calling circuit should be examined.<br />
Then call the station on each side of the station that failed. If these do not<br />
respond, it is an indication of line trouble or else trouble in the calling apparatus. Test<br />
the line wires, and if found correct, test the apparatus in the calling circuit as described<br />
under Periodic Tests 2, 3 and 4.<br />
If the stations on each side of the station that failed respond, it is an indication<br />
of trouble with the calling key or else in the apparatus at the way station. This key<br />
should be tested as described under Periodic Tests 2 and 3. If the key is in order, have<br />
the call made for that station and observe if the selector steps up properly to the<br />
ringing position ; if it does and the bell does not ring, test the bell by making a metallic<br />
connection between terminals 1 and 2 on the selector. If the bell rings, it shows a poor<br />
contact or loose connections on the selector. The wiring to the contact springs and the<br />
contact itself should then be examined.<br />
If the bell does not ring when a connection is made between terminals 1 and 2 on<br />
the selector, test the local battery and examine operation of the bell and the answerback.<br />
If it is possible to call the stations on each side of the station that fails and the<br />
calling key for this selector and the bell circuit are correct, it indicates that the selector<br />
is at fault. If the selector does not move at all when a call is made, it indicates an open<br />
in the selector circuit at the way stations.<br />
Page 15
Page 16<br />
It is difficult to measure the current through the selectors, due to the smallness<br />
and the fact that each impulse is of short duration and in opposite direction to the<br />
preceding one. However, with a centre zero 10 milliampere-scale ammeter the swing<br />
of the needle on each side of the zero point should be equal for the regular stepping<br />
impulses. The value of the reading will depend on the damping of the meter and a<br />
minimum value only can be obtained by trial.<br />
If a voltmeter is used to measure the potential at that station, a high-resistance<br />
meter, of not less than 15,000 ohms, must be used. A centre zero scale meter is<br />
preferable and, in this case also, the swing of the needle on each side of the zero point<br />
should be equal for the regular stepping impulses. The amount of the swing will<br />
somewhat depend on the damping of the meter and a definite value cannot be given.<br />
A minimum value can be obtained by trial.<br />
As a general rule, adjustment of the selector in the field is not recommended. If<br />
the cause of failure of operation of the selector is quite obvious there is no objection<br />
to correcting the trouble at once. Extreme care should be taken in adjusting the<br />
selector. If the cause of the failure is not easily seen or corrected, we recommend that<br />
a spare selector be substituted in its place and the faulty selector returned to Standard<br />
Telephones and Cables Limited for investigation. When a selector is returned, a<br />
statement of the conditions and, as nearly as possible, the manner in which the<br />
selector acted, should be sent along with the selector to aid in determining the cause<br />
of failure.
PART 2<br />
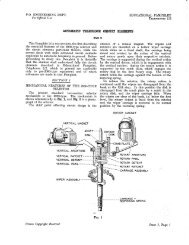
4001-A SELECTOR KEY<br />
Selector Key Case (capacity 40 Keys) comprising 4002-A<br />
Base Unit and 4002-B Extension Unit<br />
Fig. 6.<br />
The function of the selector key (Fig. 8) is to control the operation of the<br />
battery relay and the battery reversing relay of the system, so that the appropriate<br />
sequence of current reversals required to operatethe selector at the station called, will<br />
be transmitted to line. The selector key is operated by twisting the handle P one<br />
quarter turn and releasing it. On release, the key returns to normal driven by a<br />
clockwork mechanism, the speed of which is controlled by a governor Q. At the end<br />
of the shaft and rotating with it, is mounted the impulse wheel A with its coding<br />
segments C. The keys are mounted in a wooden key case, supplied in units with a<br />
capacity for 20 keys. The units may be bolted together if more than twenty keys are<br />
required, as shown in Fig. 6.<br />
The code of the base unit is 4002-A, and the extension unit 4002-B Selector<br />
Key Case.<br />
Page 17
Page 18<br />
4001-A Selector Key, Coded 3-11-3<br />
Fig. 7.
The keys are easily removed from the key case by simply turning the mounting<br />
screw U counter-clockwise for a quarter turn. This causes the spring latch B to<br />
disengage from the framework bars. The spring latch B, in addition to securing the<br />
key, completes the K3 connection through the key case framework to the external K3<br />
terminal. The keys, when mounted, make contact with springs in the back of the case,<br />
and these springs are connected with the external terminals K1 and K2. Connections<br />
are therefore automatically accomplished when a key is mounted in its key case<br />
making the changing of a key a very simple matter.<br />
General Requirements and Description<br />
The speed of the key is regulated by a governor Q which can be adjusted by<br />
bending the springs carrying the weights, inwards or outwards, to increase or decrease<br />
respectively the speed of the key. The springs should be so adjusted that the<br />
impulse wheel makes one complete revolution in 7½ to 8 seconds.<br />
Fig. 7 illustrates how a key is coded, and will be referred to in the following<br />
description.<br />
When the key is normal, the end of the inner spring J1 should clear the impulse<br />
wheel K3, as shown at A in Fig. 7, and when the wheel is revolving, should make<br />
contact with it for the duration of the revolution. It is this contact between K1 and K3<br />
which operates the battery relay of the system, thus applying battery to the line. K1<br />
and K2 should be closed only when K1 passes over a tooth of the impulse wheel, or<br />
when passing over a flat coding segment, and should be open when K1 drops into a<br />
hollow between teeth, or is passing over a bent-up segment. These makes and breaks<br />
of K1 and K2 are reproduced by the battery reversing relay of the system, thus<br />
sending reversed impulses to line.<br />
Impulse Ratio<br />
The springs K1 and K2 should be so adjusted that the time the contacts are<br />
closed when passing over the teeth of the impulsing wheel equals the time they are<br />
open. The impulse ratio, or comparison of the closed and open periods, of K1 and K2<br />
can be determined with the use of a damped voltmeter and battery or a milli-ammeter,<br />
battery and non-inductive resistor in series with KI and K2. The coding segments<br />
should be adjusted so that an uninterrupted train of impulses, such as General Call<br />
(see General Call, page 22) are transmitted, then the average reading of the meter,<br />
during the impulsing period, should be one half of the steady reading of the meter<br />
when the contacts K1, K2 are closed or shorted. (See also Mechanical Requirements<br />
page 23 paragraph 6.)<br />
Method of Coding the Key<br />
When the impulse wheel is rotating each closure of KI, K2 is one impulse, and<br />
each opening of the contacts is another impulse. The code consists of three digits, the<br />
sum of which, for any code is always 17 impulses. The inter-digital pauses in impulsing<br />
are obtained by the use of two segments, of which there are two types.<br />
Page 19
Page 20<br />
One segment is flat and in close contact with the impulse wheel and keeps K1<br />
and K2 closed, whilst the other has a bent up portion which clears the wheel by<br />
approximately ¼ inch and engages the insulated piece on K2, thus raising the spring<br />
sufficiently to keep the contacts open during this period. The setting of the segments<br />
is done by counting the first number of the code from the first tooth (remembering<br />
that the top of a tooth is one impulse and the space between the teeth is also one<br />
impulse) in a clockwise direction and the last number of the code from the ringing<br />
position in a counter-clockwise direction. As the total number of impulses is 17 for all<br />
codes, it follows that if the first and last digits are correct the space between the two<br />
segments must give a number of impulses equal to the middle number of the code.<br />
During the inter-digital pauses the condition of K1, K2 contacts (open or closed)<br />
must be maintained, therefore, if the digit ends on a tooth use a flat coding segment,<br />
if in a space use a bent-up segment. Thus, two of either style or one of each will be<br />
required for each key as indicated in the following table.<br />
Referring to Fig. 7, the key is shown set for the code 3-11-3 using a flat and a<br />
bent up segment. When the impulse wheel rotates K1 makes contact with K3,<br />
through the impulse wheel, for a comparatively long period before impulsing. This<br />
gives a wide margin for the operation of the battery relay before the impulsing period<br />
commences. The initial operation of K1, K3 connects battery to the line (over the<br />
battery relay contacts) and transmits an impulse. This isolated impulse advances all<br />
selectors one step which clears them from any code pins, on which they may have<br />
held during a previous transmission and prepares them for the code about to be sent.<br />
K1 then moves to the top of the first tooth which closes K1, K2 K1 still in contact<br />
with K3) thus operating the battery reversing relay and transmitting the first impulse<br />
of the code. K1 then drops into the space between the first and second teeth, opening<br />
K1 and K2 contacts, so releasing the reversing relay, thus transmitting the second<br />
impulse. (This procedure is repeated for as many impulses as there are in the digit).<br />
The third and last impulse of the first digit is made by a closure of K1, K2 contacts,<br />
therefore they must remain closed during the inter-digital pause, so a flat segment is<br />
used as shown. Counting counter-clockwise from the ringing position, for the third<br />
digit, we find that it starts on the top of a tooth which indicates that the second digit<br />
ended in a space, we therefore use a bent up segment in the position shown. With the<br />
two segments in position the second digit automatically becomes 11 because 17 is the<br />
total impulses.
Letter. Name. S.T.C. Code.<br />
A Impulse Wheel Assembly ..................................................... LP.22227<br />
B Spring Latch .......................................................................... LP.22206<br />
C Flat Segment.......................................................................... LP.22257<br />
D Segment Screw ....................................................................... LP.26728<br />
E Contact Spring ...................................................................... LP.22254<br />
F Contact Spring ...................................................................... LP.22252<br />
G Insulator Bushing .................................................................. LP.22246<br />
H Insulator................................................................................. LP.22249<br />
I Pile-Up Screw ........................................................................ LP.62489<br />
J Governor Pivot ..................................................................... LP.22290<br />
K Governor Pivot ..................................................................... LP.22290<br />
L Pivot Lock Nut ..................................................................... LP. 1097<br />
M Main Spring ........................................................................... LP.22272<br />
N Stop ........................................................................................ LP.22282<br />
O Stop Screw ............................................................................. LP.22286<br />
Knob .......................................... LP.22247<br />
P Handle Metal Strap ............................... LP.22250<br />
Screw .......................................... LP.30040<br />
Q Governor Assembly ............................................................... LP.22244<br />
R Governor Shaft -LP.22267 -Assembled as<br />
S Governor Worm -LP.22268 one unit ................................ LP.22269<br />
T Governor Cup ........................................................................ LP.22245<br />
U Mounting Screw ..................................................................... LP.28972<br />
V Ratchet Gear and Shaft Assembly ....................................... LP.22240<br />
W Gear and Pinion Assembly.................................................... LP.22222<br />
X Gear and Pinion Assembly.................................................... LP.22223<br />
Y Face Plate Assembly ............................................................. LP.22211<br />
Z Worm Wheel Assembly ........................................................ LP.22216<br />
AA Distance Collar ...................................................................... LP.22274<br />
AB Card ........................................................................................ LP.22265<br />
AC Card Holder ............................................................................ LP.22266<br />
AD Face Strip ............................................................................... LP.22264<br />
AE Rear Bearing Plate Assembly ............................................... LP.22273<br />
Bent up Segment ................................................................... LP.22260<br />
Page 21
Page 22<br />
Thus:<br />
17 minus (1st digit + 3rd digit) = 2nd digit.<br />
= 17 minus (3 + 3) = 11 impulses.<br />
Commencing at the 17th impulse K1, 2 and 3 are in contact for a period of 2 to<br />
3 seconds during the ringing period, then K1 and 2 open, but K1 and 3 remain in<br />
contact, holding the battery relay until the key arrives at the normal position. On the<br />
opening of K1, K2 contacts the reversing relay is de-energised and an impulse is<br />
transmitted which releases the selector called and any other selector which may have<br />
held on an intermediate code pin. When the key arrives at the normal position and K1,<br />
K3 open, the battery relay is released and an ineffective impulse is transmitted. The<br />
system is now at normal and ready for further calls.<br />
General Call<br />
To set the key to call all stations seventeen uninterrupted impulses are sent to<br />
line. These impulses advance all selectors, irrespective of the position of their code<br />
pins, to the 17th step which is the ringing position. Thus the call bells at all Way<br />
Stations are energised calling all the operators.<br />
This is done by using two flat segments bridging all teeth from the top of the<br />
ninth tooth to the ringing position.<br />
Time Sending<br />
In this case 22 successive impulses are transmitted which advance all selectors<br />
to the time bar. To do this use a flat segment bridging from the centre of the first tooth<br />
to the centre of the fourth tooth.<br />
Mechanical Requirements for Maintenance Purposes<br />
1. The main spring M and shafts where exposed, should be greased lightly with<br />
petroleum jelly to Standard Spec. 50518. Appendix No. 1.<br />
2. Pinions to be very lightly oiled with oil dag to Standard Spec. 50227.<br />
3. Governor bearings to be very lightly lubricated with clock oil to Spec. 57544<br />
Grade 2.<br />
N.B. - It is important that this should be done carefully, as any oil on the<br />
governor weights will affect the speed of the key.<br />
As a guide to what is intended by the term "very lightly oiled" the following<br />
definition will be of assistance.<br />
"To apply oil very lightly, insert a pointed match-stick in the oil and allow the<br />
amount of oil picked up by the match-stick to drain on the part to be lubricated."<br />
We suggest that oiling is made a routine job every three months.<br />
The above mentioned oils are obtainable from Standard Telephones and Cables<br />
Ltd. in 1 pint, 2 pint, ½ and 1 gallon cans.
4. When the key is normal the tip of the spring K1 must be approximately in the<br />
centre of the gap in the wheel and clear the wheel by 0.015 inch minimum.<br />
5. The inner spring when at the bottom of a tooth shall exert a pressure of 10<br />
grams minimum on the wheel and when at the top of a tooth 175 grams<br />
maximum, including the pressure of the outer spring. When at the top of a<br />
tooth the inner spring shall have a pressure of 15 grams minimum exerted<br />
upon it by the outer spring.<br />
6. The nickel silver contact spring shall be adjusted to give a 50/50 make to<br />
break ratio, as previously described. The permissible variation being between<br />
53/47 and 47/53. To give this there should be a clearance of 0.030 inch<br />
minimum 0.034 inch maximum between the inner and outer spring contacts<br />
when the operating spring occupies a midway position between any two<br />
teeth. This dimension is to ensure a good contact gap and also checks the set<br />
of the tip of the steel impulsing spring.<br />
7. When a bent-up segment is used the bent-up portion shall engage the insulator,<br />
on the tip of the outer spring, approximately on either side of the centre<br />
line of the insulator.<br />
Page 23
Page 24<br />
General Description<br />
PART 3<br />
4301-A SELECTOR<br />
4304-A SELECTOR<br />
4303-A Selector<br />
Fig. 9.<br />
The function of the selector is to provide a quick and reliable means to calling<br />
selectively one of a large number of way stations on the same telephone line circuit<br />
without producing a signal at the other stations.<br />
The coils of the selector are wound to 21,000 ohms and are tuned to 32 cycles<br />
per second by a 1.25 μF capacitor. The impedance of the selector and capacitor at its<br />
operating frequency of 3½ cycles is approximately 35,000 ohms and the impedance<br />
at 800 c/s (speech frequency) is over 1 megohm. The loss to speech due to the<br />
selector is therefore negligible and invariably is considerably less than the loss due to<br />
line leakage. The selector with its associated capacitors and bell (or if desired, a<br />
combined set which includes the telephone circuit) is contained in a wooden box<br />
known as a selector set.<br />
The selector (Fig. 9), shown with the glass cover removed, is a polarised relay<br />
arranged to advance a ratchet wheel, tooth by tooth, as successive impulses of<br />
opposite polarity are received. The ratchet wheel carries a code wheel into which<br />
code pins can be fitted in positions corresponding to any ratchet wheel tooth.<br />
The code wheel carries a contact arm which is in contact with the ringing<br />
terminal in one position of the code wheel and with the time terminal in another<br />
position.<br />
The code wheel is set so that the same total number of steps is necessary to<br />
advance the code wheel of all selectors on the same line to the ringing position.<br />
Similarly a series of 22 uninterrupted impulses will advance all selectors on the line to
the time terminal. During selective calling the impulses received are divided into three<br />
groups, making a 3 digit code, and the selector coded to correspond with the three<br />
impulse groups transmitted, is stepped to its ringing position and operates a local<br />
bell.<br />
The selector is normally set for codes using a total of 17 steps which gives the<br />
choice of 78 code settings for the Key System and 66 settings for the Dial System<br />
(see Table No. 1). When a greater number of code settings is required the total number<br />
of steps for each code must be increased to 27 which gives a total of 241 code settings<br />
(see Table No. 2).<br />
The method of changing the selector from 17 to 27 step code is described on<br />
page 30.<br />
CODE TABLE No. 1 (Key or Dial Systems)<br />
N.B.— The Codes marked * cannot be used with the Dial System.<br />
The code pins on each selector are located so that after the first set of impulses<br />
of its particular code, the code wheel will be in position for the holding spring K, Fig.<br />
10, to engage with the first code pin C. The second code pin is located so that after the<br />
second set of impulses, the code wheel will be in position for the holding spring to<br />
engage with the second code pin. The third set of impulses then advances the code<br />
wheel, so that the permanent code pin is in position to engage with the holding spring,<br />
and at the same time, the contact spring is directly over and makes contact with, the<br />
first ringing terminal, thus completing the calling circuit and energises the bell or<br />
buzzer. Each selector is capable of being set for any station code given in Table No. 1<br />
without any change other than the location of the two code pins in the code wheel.<br />
For changing code pins use Coding Tools No. 4332 and No. 4333.<br />
Page 25
Page 26<br />
CODE TABLE No. 2 (Key System only)
Cycle of Events on Receiving a Code<br />
Taking the same code as used in the description of the 4001-A Selector Key,<br />
viz.: 3-11-3, the sequence of events is as follows :<br />
On operating the selector key the battery relay of the system is operated,<br />
connecting the line battery to the line, and remaining operated during the complete<br />
revolution of the key. The initial operation of the battery relay sends an isolated<br />
impulse (not included in the 17 coding impulses) which energises all selectors on the<br />
line giving a flick to the holding spring, thereby releasing any selector which might<br />
have been held on a coding pin. The first-set of impulses from the calling key are<br />
reproduced by the impulsing relay which gives three impulses of alternating polarity<br />
to the line. These three impulses advance all the selectors three steps. Then, although<br />
the battery is held on the line the condenser in series with each selector (see Fig. 1)<br />
stops the flow of current and the armatures of all selectors release. The code wheels<br />
of all selectors, then return to normal except those coded with three as the first digit,<br />
these are held in position by the holding spring K (Fig. 10). All selectors are then<br />
advanced by the second set of impulses, 11 in this case.<br />
Of the selectors that were held in an advanced position before, only the one<br />
called will now have a code pin in the second pin position to be engaged by the<br />
holding spring, because there would be only one station on the line with the first digit<br />
of three and second digit of eleven. The selectors that returned to normal after the first<br />
digit and which have a first digit of 11 will be in position to be held by the holding<br />
spring. All other selector code wheels will restore to normal during the pause of<br />
approximately one second after the second digit.<br />
A total of 14 impulses have now been received and the selector under consideration<br />
is therefore held at the 14th step. The third set of impulses, three in number,<br />
advances all selectors three steps.<br />
Only the selector that had its code pins in the code wheel set for 3-11-3 (the<br />
selector called) will have reached the permanent code pin or ringing position, that is,<br />
a total of 17 steps from the normal position. In this position the contact spring on the<br />
top of the code wheel will be directly over the first ringing terminal and making<br />
contact with it. Some of the selectors may be held on the first code pin, but will not<br />
have advanced to the third or ringing code pin. It will be seen therefore that all<br />
selectors respond to the impulsing but only the one coded to correspond with the<br />
code transmitted reaches the ringing position. During the ringing period of approximately<br />
two seconds, a ring-back tone is heard by the Controller or other receiver<br />
across the line while the call bell is ringing.<br />
Referring to Fig. 1, the ring-back circuit is as follows: L1, .02 μF capacitor<br />
through the selector contacts, ringing battery, bell contacts, .02 μF capacitor, L2,<br />
controller's telephone and back to L1.<br />
Page 27
Page 28<br />
After the ringing period, one impulse is transmitted to line by the calling key<br />
and all selectors are advanced one step then return to the normal position.<br />
A similar sequence is followed in the operation of a selector with a different<br />
code setting.<br />
General Call<br />
When it is necessary to communicate with all stations simultaneously the<br />
Controller operates the General Call key which transmits an uninterrupted train of 17<br />
impulses. These impulses advance all selectors on the line, irrespective of the positions<br />
of intermediate code pins, to the ringing position, thus calling all Way Station<br />
Operators to the telephone. The ringing period and clear down of selectors is identical<br />
to that described for individual calling.<br />
Time Sending<br />
Selectors are set to the time receiving position by an unbroken train of 22<br />
impulses. Again all selectors respond and irrespective of intermediate coding pins<br />
arrive in position 22. Instead of the normal holding pin they are held by the holding<br />
finger engaging with an are which covers four code wheel positions commencing in<br />
position 22. Single impulses received while the selector is held in this position will<br />
cause the code wheel to advance to position 23 and fall back into position 22. In<br />
position 23 there is a contact connected in parallel with the normal ringing contact so<br />
that the momentary contact made with the code wheel contact spring results in short<br />
strokes of the bell thus repeating the time signal code.<br />
As the time arc on the selector covers four code wheel positions it follows that<br />
to clear this condition more than three impulses must be sent to line. Therefore to<br />
restore the selectors to normal, operate any key other than General Call or Time<br />
Sending.<br />
Test Requirements<br />
General. — As a rule, adjustment is not recommended unless the fault is quite<br />
obvious and easy to rectify. If the cause of the failure is not easily seen or corrected,<br />
we recommend that a spare selector be substituted, and the faulty selector tested<br />
with the 4001-B Selector Test Set (described in this book) or returned to Standard<br />
Telephones and Cables Limited for investigation. When a selector is returned, a<br />
statement of the conditions and as nearly as possible, the manner in which the<br />
selector acted, should be sent to assist in determining the cause of the failure.<br />
Extreme care should be taken when any adjustments have to be made.
Mechanical Requirements<br />
To assist in checking selectors at definite intervals, the main mechanical tests<br />
are outlined below :<br />
(The letter references are indicated in Fig. 10 at the end of this description.)<br />
Stepping Pawl<br />
(a) The stepping pawl (U) when in the normal position should clear all teeth of<br />
the ratchet wheel (W), when revolved by hand, by not less than 0.005 inch.<br />
(b) The stepping pawl (U) in the normal position should press against its guide<br />
post with a pressure of 1 gramme minimum to 3 grammes maximum.<br />
(c) The stepping pawl guide post may be set to meet the above but the upper<br />
part which contacts the pawl must be at right angles to the frame.<br />
Holding Pawl<br />
(a) The holding pawl (Q) when in the normal position should clear all teeth of<br />
the ratchet wheel (W) when revolved by hand, by not less than 0.005 inch.<br />
The nearer this adjustment is to 0.005 the better will be the operation of the<br />
selector.<br />
(b) The ratchet wheel (W) shall be in position for the holding pawl (Q) to fall<br />
reliably in the first tooth before the ratchet wheel is advanced.<br />
(c) The holding pawl (Q) should press against the face of each tooth as the<br />
ratchet wheel (W) is advanced with a pressure of 1 gramme minimum to 3<br />
grammes maximum.<br />
Core Adjustment<br />
(a) The two cores shall be adjusted so that when the armature (O) is advanced<br />
to touch each non-freezing cap in turn, the stepping pawl (U) advances the<br />
ratchet wheel (W) one tooth, and just allows the holding pawl to drop into a<br />
tooth. The maximum backlash of the ratchet wheel between the forward<br />
position of the stepping pawl (U) and the holding pawl (Q) shall be 0.005<br />
inch.<br />
(b) In the ideal condition the stepping pawl (U) should engage its front stop at<br />
the instant that the armature (O) touches the non-freezing caps, but as the<br />
armature must take preference a maximum overthrow of 0.005 inch is allowed<br />
on the ratchet wheel (W).<br />
Page 29
Page 30<br />
(c) The total travel of the stepping pawl (U) shall not be less than 1¾ nor more<br />
than two teeth of the ratchet wheel (W).<br />
(d) The movement at the end of the stepping pawl (U) shall be such that it will<br />
obtain full engagement with the teeth on the ratchet wheel (W) at all times.<br />
(e) The holding pawl (Q) shall fall reliably into each tooth of the ratchet wheel<br />
(W) as it is advanced by the stepping pawl (U) with a maximum backlash of<br />
0.005 inch.<br />
Holding Spring and Code Wheel<br />
(a) When the code wheel (E) is revolved by hand the cup-shaped part of the<br />
holding spring (K) shall clear the inside of the code pins (C) and time arm by<br />
not less than 0.005 inch, and shall clear the lower surface of the enlarged part<br />
of the code pins and nuts by not less than 0.015 inch.<br />
(b) When the code wheel (E) is advanced by the armature (O) the holding spring<br />
(K) shall clear the code pins (C) and the time arm in its outward motion by<br />
not less than 0.005 inch.<br />
(c) The code wheel (E) and code pins (C) shall be located so that after each<br />
group of impulses in its own particular code the holding spring (K) shall, on<br />
the release of the armature (O), engage with each code pin in turn so that the<br />
pin is held in the cup and retains the code wheel in that position until advanced<br />
by the next group of impulses or the releasing impulse. The holding<br />
spring (K) in normal position shall press against the insulating stud on the<br />
rocker arm (S) with a pressure of 1 gramme minimum to 3 grammes maximum.<br />
(d) The holding spring (K) shall be adjusted to lie flat along the whole length of<br />
the buffer and the tension against the buffer measured at the end of the buffer<br />
shall not exceed 10 grams.<br />
(e) Altering the Selector from 17 to 27 Step Code. To change the setting from 17<br />
to the 27 step code, loosen slightly the two code wheel screws (F) holding the<br />
code wheel (E) on the shaft. Step the ratchet wheel (W), by operating the<br />
armature (O) by hand, to the 27th step and hold it. Then rotate the code<br />
wheel on the shaft so that the contact spring makes contact with the first<br />
ringing terminal and the permanent code pin will be in position to be engaged<br />
by the holding spring (K). Tighten firmly the two code wheel screws (F).<br />
Contact Spring<br />
(a) When the selector is mounted in a horizontal position or in a vertical position<br />
with the armature (O) at the bottom, the contact spring (Z) shall be<br />
raised by the ringing terminals by not less than 0.02 inch when in the ringing<br />
position.
(b) The contact spring (Z) in the normal position shall press against the code<br />
wheel (E) with a pressure of ? gramme minimum to 1 gramme maximum.<br />
(c) The contact spring (Z) when one step before or beyond the ringing terminals<br />
shall not make contact with them.<br />
Spiral Spring<br />
(a) When the selector is mounted in a horizontal or in a vertical position with<br />
the armature (O) at the bottom, the tension of the spiral spring (AB) shall be<br />
sufficient to restore the code wheel (E), either to the normal or to the time<br />
receiving position, whenever the rocker arm (S) comes into its normal position<br />
during the operation of the selector and the code wheel is not in such a<br />
position that it will be held by the holding spring (K) engaging with the code<br />
pins (E) or time arm lug. For this test the contact spring on the code wheel<br />
shall be advanced by operating the armature by hand:-<br />
1. One step beyond the normal position.<br />
2. One step beyond each ringing terminal.<br />
3. One step beyond the time ringing terminal. In each case the armature shall<br />
be released slowly.<br />
Retractile Spring on Rocker Arm<br />
(a) The tension of the retractile spring (R) on the rocker arm (S) including the<br />
tension of the holding spring shall be sufficient to restore the rocker arm to<br />
normal at all times when no current is flowing through the selector and also to<br />
meet the tests specified in the electrical requirements.<br />
Armature and Magnet Cores<br />
(a) The centre line of the magnet (AJ) shall be equally distant from the cores<br />
(AK) within 0.02 inch either side.<br />
(b) The armature lever shall clear all adjacent parts except the rocker arm (S)<br />
throughout its entire stroke. The allowable vertical or horizontal play shall<br />
not permit the lever to touch such parts.<br />
(c) The end play of the armature shaft, the ratchet wheel shaft, the rocker wheel<br />
shaft and the holding pawl, shall not be greater than 0.01 inch,<br />
Page 31
Page 32<br />
Exploded Views of 4301-A Selector<br />
Fig. 10.
Letter Name 4301-A 4304-A 4305-B<br />
A Felt Washer LP.71703 LP.71703 LP.71703<br />
B Clamping Stud LP.71722 LP.71722 C<br />
C Code Pin LP.71709 LP.71709 C<br />
D Code Nut LP. 71710 LP. 71710 C<br />
E Code Wheel, Time Arm and<br />
Contact Spring Assembly LP.71731 LP.71731 LP.71734<br />
F Code Wheel Screw LP.71719 LP.71719 C<br />
G Insulator Bushing LP.26886 LP.26886 C<br />
H Clamping Plate LP.71718 LP.71718 C<br />
I Clamping Plate Screw LP. 17727 LP. 17727 C<br />
J Insulator LP. 18992 LP. 18992 C<br />
K Holding Spring LP.71726 LP.71726 C<br />
L Upper Plate LP.71727 LP.64941 C<br />
M Hex. Nut LP.21639 LP.21639 LP.29865<br />
N Adjusting Screw LP.71711 LP.64936 C<br />
O Armature Assembly LP.71724 LP.71724 C<br />
P Middle Plate LP.71723 -<br />
Q Holding Pawl LP.71713 LP.71713 C<br />
R Retractile Spring (Holding<br />
Pawl) LP.71697 LP.71697 C<br />
S Rocker Arm Assembly LP.71728 LP.71728 C<br />
T Rocker Arm Spring LP.71698 LP.71698 C<br />
U Stepping Pawl LP.71769 LP.71769 C<br />
V Stepping Pawl Spring LP.71696 LP.71696 C<br />
W Ratchet Assembly LP.71732 LP.71732 C<br />
X Terminal Plate LP.71729 LP.71729 LP.71735<br />
Y Terminal Bridge Screw LP.62603 -<br />
Z Contact Spring Assembly LP.71790 LP.71790 C<br />
AA Terminal Plate Screw LP.5294 LP. 5294 C<br />
AB Spiral Spring LP.71798 LP.71798 C<br />
AC Base LP.57472 LP.57472 LP.57473<br />
AD Base Terminal LP.71809 LP.71809 C<br />
AE Terminal Screw LP.32489 LP.32489 C<br />
AF Core Lock Nut LP.20832 LP.20832 C<br />
AG Winding Assembly LP.56418 LP.138992 LP.138992<br />
AH Frame LP.71706 LP.64942 C<br />
AI Frame Screw LP.8289 LP.8289 C<br />
AJ Magnet LP.71805 LP.71805 C<br />
AK Core LP.71725 LP.71725 C<br />
AL End Play Washer LP.71708 LP.71708 C<br />
Glass Cover LP.71701 LP.71701 C<br />
AM Pad LP.71702 LP.71702 C<br />
AN Terminal LP.71802 LP.71802 C<br />
AO Screw LP.62603 LP.62603 C<br />
Page 33
Page 34<br />
Exploded Views of 4304-A Selector<br />
Fig. 10a.
General<br />
PART 4<br />
4001-B SELECTOR TEST SET<br />
4901-B Test Set<br />
Fig. 11.<br />
The 4001-B Selector Test Set (Figures 11 and 12) is a portable set designed for<br />
testing selectors and selector sets for their electrical operation.<br />
The more important pieces of apparatus contained in the set are as follows :—<br />
The battery switching relay (A. Figure 12) code 4662-MAZ. The battery<br />
reversing or impulsing relay (B, Figure 12) code 4662-MAZ.<br />
Potentiometer YJ, code 4014-AG, shunted across B relay provides a means of<br />
adjusting the impulse ratio.<br />
Page 35
Page 36<br />
The “low” and “release” potentiometers are provided for the adjustment of the<br />
current through the selector for low and release tests.<br />
Lever type keys for applying the various test conditions.<br />
A centre zero micro-ammeter, with shunts for measuring test currents and<br />
observing the impulse ratio.<br />
A mounting with spring contacts which automatically connects the selector in<br />
the test circuit.<br />
Two terminals L1 and L2 for connecting the set to an outside line, and three<br />
terminals K1, K2 and K3 for connection to an external selector key, key case<br />
or external source of impulsing.<br />
When a key case is mounted in this manner it must be entirely disconnected<br />
from its associated selector apparatus case.<br />
The apparatus is mounted on a removable wooden panel in a wooden case with<br />
cover and carrying handle. Inside the cover is pasted a schematic (LP. 15500) of the<br />
test circuit, together with step-by-step instructions for operating the set, similar to<br />
the following :-<br />
Operating Instructions<br />
Connect a battery of 240 ± 8 V D.C. to the terminals so marked, and connect<br />
another battery of 10 ± 1 V D.C. to its marked terminals.<br />
Insert the selector key to be tested under the five spring terminals at the back of<br />
the selector tray, and operate the main switch.<br />
To Adjust the Test Set<br />
The Selector Key provided is a general call key, and will step any selector to its<br />
ringing position. The speed and ratio of this selector key should be checked in the<br />
following way :-<br />
Speed. — Operate the selector key and make sure that the time taken for the<br />
mechanism to run back, from start to finish, is between 7½ and 8 seconds. If<br />
the timing is not correct the governor springs of the key must be adjusted<br />
either inwards or outwards to obtain more or less speed respectively.<br />
Ratio.—Throw the Ratio Key (KIR on diagram). Again operate the selector<br />
key, and observe that when impulses are being transmitted the needle of the<br />
meter oscillates equally about the zero mark. If this is not so, variations can<br />
be eliminated by turning with a suitable screwdriver the head of the ratio<br />
rheostat in the centre of the panel (YJ on diagram). When this adjustment has<br />
been made restore the ratio key.<br />
Test Current.— Adjust the test currents through the selector by proceeding as<br />
follows :- Throw the "Low" key (KL on diagram) and hold the "Meter" key<br />
(KM on diagram) operated, then adjust the knob of the rheostat marked<br />
"low" till the micro-ammeter reads 125. The meter multiplier in this case is
4001-B Selector Test Set, Schematic.<br />
Fig. 12.<br />
Page 37
Page 38<br />
20, so that the true readings will be 2.5 milliamperes. Then restore the “low”<br />
key and throw the “release” key (KRL on diagram), after which the rheostat<br />
knob marked " release " should be adjusted till the microammeter reads 140.<br />
This is a direct reading of the release current. Finally restore both the “release”<br />
key and the "meter " key, after which the selector is ready for test.<br />
N.B. — No adjustment of the selector currents for the “high” or the “saturate”<br />
conditions of test are provided, but by throwing the “meter” key (KM on diagram)<br />
and leaving all other keys normal the saturate current can be read on the meter, and by<br />
throwing in addition to the “meter” key the "high" key (KH on diagram) the high<br />
current can be read. In both these cases the meter multiplier is 80.<br />
To Test the Selector<br />
1. For release-throw the “saturate” key. This puts the saturate current through<br />
the windings of the selector. Observe that the armature of the selector is attracted to<br />
one of the poles. Then throw the “release” key, after which the armature should<br />
return to normal. Repeat this test for the other pole of the selector by throwing both<br />
the “saturate” key and the “rev.” key (KRV on diagram) when the armature should be<br />
attracted by the saturate current to the other pole. On throwing the “release” key, the<br />
armature should return to normal.<br />
2. For high current-throw the “high” key (keeping “meter” key normal) and<br />
operate the test selector key. The selector should step to its ringing position, and the<br />
buzzer should sound for approximately 2 seconds, after which the selector should<br />
restore to normal as the selector key completes its run. Repeat this test with the<br />
“rev.” key thrown in addition to the “high” key. This circuit switching directs the<br />
impulses the opposite way through the winding, and should allow the selector to<br />
step correctly to its ringing position and release as in the first part of this test.<br />
3. For low current-throw the “low” key (keeping “meter” key normal) and<br />
operate the test selector key. The selector should step to its ringing position and the<br />
buzzer should sound for approximately 2 seconds, after which the selector should<br />
return to normal. Repeat this test with the “ rev.” key thrown in addition to the “low”<br />
key. With the impulses passing in the opposite direction through the windings the<br />
selector should step to its ringing position and release correctly as in the first part of<br />
this test.<br />
The three terminals, K1, K2 and K3 provide facilities for connection direct to a<br />
selector key case. When so used, the selector key case must be completely disconnected<br />
from its associated selector case.<br />
To Test a Selector Set<br />
Connect L1, L2 of the selector set to L1, L2 of the Test Set, and proceed as<br />
above, except that the meter key KM must be held operated.
General<br />
PART 5<br />
DIAL SYSTEM, SELECTIVE RINGING<br />
CIRCUIT DESCRIPTION<br />
The control apparatus is operated from a 50 volt battery and the signalling<br />
current is supplied by the line battery. The voltage of the line battery is dependent on<br />
the length of line and the number of selectors across the line (see the Line-Voltage<br />
Curves, pages 51, 52). Since a short circuit on the lines when impulses are being<br />
transmitted would result in excessive current flowing in the impulsing circuits, a<br />
circuit breaker relay (code 4624-L) is provided for each selective circuit to disconnect<br />
the line battery should the current reach 500 milliamps. Two make contacts of the<br />
circuit breaker relay are wired in series so that the effective opening of the circuit is<br />
more rapid.<br />
Although the contacts are heavy duty and are practically unweldable, a spark<br />
quench comprising 1 ohm and 1 μF is used to keep the voltage across the gap to a<br />
minimum at the instant when the contacts open.<br />
The 100 ohm resistor YM + YN is included to limit the current in the event of<br />
a short circuit (or arc) across the contacts of the signalling relay SR. This resistance<br />
does not appreciably affect the signalling wave-form. The circuit breaker relays are<br />
adjusted (see Part 7) not to operate on 450 milliamperes. When operated, an alarm<br />
lamp is lit and the circuit breaker can be restored (when switch SC is in the home<br />
position) by operating a push key provided in the circuit breaker reset cabinet. If, on<br />
attempting to reset, the circuit breaker will not remain operated, the fault causing the<br />
excessive current must, of course be located and cleared. The circuit breaker must on<br />
no account be held operated by unorthodox methods, such as holding it forcibly<br />
operated by hand, or holding the reset key operated.<br />
In order that the speed of impulsing and the wave-form of the traffic control<br />
code shall be independent of the operation of the dial, a method has been devised<br />
wherein the 1st and 3rd digits of the selector code are dialled and stored on standard<br />
telephone line switches. Thereafter, the full selector code is transmitted with a predetermined<br />
speed and wave form, the second digit being automatically inserted to<br />
complete the constant total of 17 impulses.<br />
It should be noted that the highest digit which can be dialled is 10, therefore the<br />
total number of codes is restricted to those with the first and last digits of 10 or less.<br />
Page 39
Page 40<br />
The total number of code settings which are applicable is 66, as shown in Code Table<br />
No. 1, page 25. The possibility of requiring more than 66 selectors on one line is<br />
remote but should it be required a system can be supplied catering for the larger<br />
number of code settings by increasing the total number of steps in the code.<br />
Three line switches are incorporated in each selective circuit, SA for registering<br />
the first digit, SB for registering the third digit, and SC for controlling the impulses<br />
sent to line. Several control positions may be multiplied together each using the same<br />
selective apparatus. Where a controller is required to handle several lines a method of<br />
indicating incoming calls is necessary. This is effected either by providing magneto<br />
generators at way stations or by a central battery system with loop calling.<br />
Facilities for general call and time sending are available controlled by individual<br />
lever type keys.<br />
A prolonged ring can be given on any call, so that, instead of the usual short ring<br />
of two or three seconds duration, ringing will be continued until the controller restores<br />
the long ring key.<br />
The Schematic Figure 13 shows the supply for calling lamps designated CBX-<br />
CNX and that for the busy lamps BBX-BNX. These supplies may be A.C. or D.C.<br />
and of a value to suit local conditions. It is usual to maintain the calling lamps from a<br />
battery to cover the possibility of mains failure whereas the busy lamps can be fed<br />
from A.C. only in order to minimise battery drain when the main supply and presumably<br />
charging supply have failed.<br />
Incoming Calls<br />
When a way station makes a call by operating his call key, a loop is connected<br />
across the lines. This operates relay TC, Fig. 13, as follows :- Line 1, BR3, BC2,<br />
BCA3, TC winding d-e, to 50 volts negative. Line 2, BR1, BC4, BCA2, TC winding<br />
b-a, to 50 volts positive.<br />
Relay TC is locked over 50 volts negative, TC winding e-d, BCA3, BC2, TC1,<br />
YL resistor, TC2, BC4, BCA2, TC winding b-a, to 50 volts positive. The controller's<br />
call lamp is illuminated from CBX, TC3, call lamp TCL to CNX and this lamp<br />
remains alight until the controller operates his speak key to accept the call. Operating<br />
the speak key operates relay BC via 50 volts positive, speak key, BC winding to 50<br />
volts negative. BC operating operates BCA and breaks the circuit for TC which<br />
releases.<br />
The release of TC extinguishes the call lamp TCL and the operation of BCA<br />
lights all busy lamps BL via BBX, BCAL BL and BNX. The busy lamp LP on the<br />
relay panel (mounted on the apparatus rack) associated with the speak key operated<br />
is also illuminated indicating to the maintenance staff that that particular circuit is in<br />
use.
The speak key also connects the controller's telephone circuit to the line through<br />
contacts of the speak key, T1 and T2 terminals, capacitors QG and QH to lines 1 and<br />
2.<br />
On completion of the conversation, the speak key is restored, relays BC and<br />
BCA release, and the circuit for all busy lamps is broken at BCA 1.<br />
Outgoing Calls<br />
The Controller operates the speak key of the circuit required which operates<br />
BC relay. BC operating removes the "Call" relay TC from the line by opening BC2<br />
and BC4. BC1 connects a 3,000 ohm resistor YP + YQ across the line which is<br />
intended to load the line during signalling and so prevent excessive peaks in the waveform<br />
which would tend to occur in the case of short lines with a relatively small<br />
number of way stations. The loss of signalling or speech efficiency due to this<br />
artificial loading is found to be negligible. BC3 operates relay BCA which lights all<br />
busy lamps.<br />
The Controller then operates the dial key DK which operates IR relay via 50<br />
volts positive, impulsing springs of dial, dial key, speak key, IR windings in series to<br />
50 volts negative. The guard relay G operates via 50 volts negative, resistor YE, DC2,<br />
winding of G, IR1 to 50 volts positive thus breaking the self interrupting homing<br />
circuit for the line switches SA and SB at G4 and completing the circuit for the digit<br />
counting relay DC via 50 volts negative, winding e-d of DC, DS3, SA2, G2, GC3,<br />
TS2 to 50 volts positive.<br />
Relay DC breaks the circuit for Relay G via resistor YE200, at DC2, but relay<br />
G does not release, being held operated via 50 volts positive, IR1 winding of relay G,<br />
DC2, relay DC 3 ohm winding a-b with resistor YA 50 ohm in parallel, DS2, line<br />
switch SA operating coil b-e, to 50 volt negative.<br />
Assuming that the Controller dials the first digit of the code 53, Relay IR will<br />
release on the first impulse (break of dial) from the dial, and line switch SA operating<br />
coil will be energised via 50 volt negative, SA operating coil, DS2, Relay DC 3 ohm<br />
winding b-a with resistor YA 50 ohms in parallel, DC2, IR1 (make before break<br />
contact); G3 to 50 volt positive. The operation of IR1 momentarily short circuits<br />
Relay G, but this short circuit makes it slow releasing and it remains operated during<br />
impulsing.<br />
Relay IR is operated again when the dial remakes the impulsing contact after the<br />
first impulse. This removes the short circuit from relay G at IR1 and connects the<br />
winding of Relay G in series with line switch SA operating coil, causing the latter to<br />
release and step the line switch wiper arms SA1, 2, 3 and 4, one step. At line switch<br />
Page 41
Page 42<br />
SA wiper 2, the circuit for relay DC, through its 1,000 ohm winding, is broken when<br />
this switch steps one step from its normal (home) position, and during subsequent<br />
impulses Relay DC is held over its 3 ohm winding in series with IR1 contact and line<br />
switch SA operating coil. Being slow to release, Relay DC does not release during<br />
impulsing.<br />
Line switch SA will take one step for each dial impulse, which, in the case of<br />
code 53, will be five steps, leaving line switch wipers SA3 and 4 connected to line<br />
switch SA bank contacts 6 and line switch SC bank contacts 12 and 10 respectively.<br />
After the tens impulses are completed there will be a pause, whilst the controller reoperates<br />
the dial to send the three (unit) impulses.<br />
During this inter-digital pause, Relay IR will remain operated and Relay DC<br />
releases after a short interval. This causes the digit switching Relay DS to operate via<br />
50 volt negative, Relay DS winding e-a DCl, line switch wiper SA2, G2, GC3, TS2,<br />
to 50 volt positive.<br />
Relay DS locks up via DS1, leaving it independent of DC1 and line switch SA2.<br />
Contact DS3 changing over causes Relay DC to re-operate via 50 volt negative, Relay<br />
DC winding e-d DS3, line switch wiper SB2, G2, GC3, TS2, to 50 volt positive.<br />
Relay G remains operated via IR1, Relay G winding, DC2, Relay DC 3 ohm winding<br />
with resistor YA 50 ohm in parallel, DS2, line switch SB operating coil to 50 volt<br />
negative.<br />
The Controller now dials the three (unit) impulses and Relay IR releases with<br />
the first impulse (break of dial) and line switch SB operating coil will be energised via<br />
50 volt negative, SB coil, DS2, Relay DC 3 ohm winding b-a with resistor YA 50 ohm<br />
in parallel, DC2, IRI, G3, to 50 volt positive. Note. — The operation of IR1 momentarily<br />
short circuits Relay G, but this short circuit makes it slow releasing and it<br />
remains operated during impulsing. Relay IR is again operated when the dial remakes<br />
the impulsing contact after the first impulse, this removes the short circuit from<br />
Relay G at IR1, and connects the winding of Relay G in series with line switch SB<br />
operating coil, which releases and steps the line switch wiper arms. At line switch<br />
wiper SB2, the circuit for Relay DC is broken when this line switch steps one step<br />
from its normal (home) position, and during subsequent impulses Relay DC is held<br />
over its 3 ohm winding in series with IR1 contact and line switch SB operating coil.<br />
Being slow to release, Relay DC does not release during impulsing.<br />
Line switch SB will take one step for each dial impulse (three in this case),<br />
leaving line switch SB 3 and 4 wipers connected to line switch SB bank contacts 4 and<br />
line switch SC bank contacts 23 and 25 respectively. When the dial has returned to
normal, Relay IR is held operated and Relay DC (held over its 3 ohm winding)<br />
releases, as it will not hold in series with Relay G.<br />
When the Controller restores his dial key, Relay IR releases and completes a<br />
circuit for the operation of Relay LC via 50 volt negative, Relay LC e-a winding, IR2,<br />
DC3, bank contact of line switch SB2, G2, GC3, TS2 to 50 volt positive. Relay G<br />
releases after the opening of IR1 the short circuit delaying its release sufficiently to<br />
permit the operation of Relay LC as described above. When G2 opens, Relay DS<br />
releases, but Relay LC remains operated over LC5, line switch SC banks 3 and 4<br />
wiper arms to 50 volt positive. Relay BR operates at LC 4 and connects the impulsing<br />
battery to the line as follows :<br />
Line Battery negative, resistor YN and YM, CB3, CB2 circuit breaker (CB) trip<br />
coil 2 ohm winding, SR3, smoothing chokes A and B, BR2 to Line 2. Line battery<br />
positive, SRI, smoothing chokes A and B, BR4, to Line 1. Relay SD operates via 50<br />
volt negative Relay SD, line switch SC drive contacts, line switch SC wiper arms 1<br />
and 2, LC2, to 50 volt positive. Relay SD completes the driving circuit for line switch<br />
SC at SDI, via line switch SC wiper arms 1 and 2, and LC2. Line switch SC drive<br />
contacts open the circuit for Relay SD, when the magnet is fully energised. Relay SD<br />
releases, and at SD opens the driving magnet circuit of line switch SC, and the switch<br />
takes one step when the magnet releases. The drive contacts SC, remake contact<br />
when SC magnet releases, and Relay SD again operates via SC wiper arm and bank<br />
contacts 1 and 2 to 50 volt positive.<br />
This cycle of operations between Relay SD and the driving magnet of line<br />
switch SC, will continue until Relay LC has released and wiper SCI is stepped round<br />
until it reaches its normal (home) contact.<br />
Relay SD is in parallel with a rheostat and by adjusting this rheostat, the release<br />
time of Relay SD can be varied until line switch SC steps at the correct speed. As the<br />
wipers of line switch SC step round, there is a short preparatory period until SC<br />
wipers 5/6 reach SC bank contacts 5, when Relay IS will be operated via 50 volt<br />
negative, resistor YF. Relay IS winding, SC wipers 5/6, SC bank contacts 5, to 50 volt<br />
positive. Ignoring, for the moment, any 50 volt positive connections applied to the<br />
bank contacts of line switch SC by banks 3 and 4 of line switches SA and SB, it will<br />
be seen that on each alternate step of line switch SC, Relay IS will be operated until<br />
it has completed 25 operations and line switch SC reaches its home position.<br />
Page 43
Page 44<br />
Relay IS operated Relay SR at IS1 and the line battery is reversed at SRI, SR2,<br />
SR3 and SR4 contacts, giving one impulse to line for each reversal. In the case under<br />
notice, line switch SA at wipers SA 3 and 4 is registering the 5 impulses (tens digit)<br />
dialled, and as line switch SC5 passes its bank contact 5, Relay IS operates and sends<br />
one impulse to line via Relay BR contacts. On SC bank contact 6, there is no 50 volt<br />
positive, so that IS releases giving a second (reverse) pulse to line, SC bank contact 7<br />
is connected to 50 volt positive and Relay IS operates, giving a third impulse to line;<br />
SC bank contact 8 is disconnected and Relay IS releases, giving a fourth impulse to<br />
line ; SC bank contact 9 is connected to 50 volt positive and Relay IS operates, giving<br />
a fifth impulse to line. Now comes an inter-digital pause consisting of four steps of<br />
line switch SC, (contacts 10, 11, 12 and 13) which are connected to 50 volt positive<br />
as follows :<br />
SC bank contact 10 through wiper SA4, SC bank contact 11 direct, SC bank<br />
contact 12 through wiper SA3, and SC bank contact 13 direct. During this interdigital<br />
pause, Relay IS is held operated and no impulses are passed to line. When line<br />
switch SC moves to SC bank contact 14, Relay IS is again released since there is no<br />
positive battery connected to this contact, and the second train of impulses start to<br />
be sent out since Relay IS releases Relay SR. SC bank contact 15 is connected to<br />
positive, Relay IS operates, and through SR the second impulse is transmitted. SC<br />
bank contact 16 is disconnected and Relay IS releases transmitting the third impulse<br />
to line. SC bank contact 17 is connected to positive and IS operates, giving the fourth<br />
impulse to line; and so on until when SC bank contact 22 is reached, a second train of<br />
9 impulses will have been sent to line. On this contact Relay IS is released, and on SC<br />
bank contact 23 positive battery is applied through SB3 wiper on SB contact 4. This<br />
positive through SC wipers 7/8, short circuits Relay IS, which therefore remains<br />
released, starting the second interdigital pause. As SC bank contact 24 is disconnected,<br />
Relay IS remains released. On SC bank contact 25, Relay IS is again short<br />
circuited, wipers SC5 and 6 being direct to positive and wipers SC7 and 8 to positive,<br />
through line switch SB wiper 4. Bank contact SC26 is disconnected, but on SC bank<br />
contact 27, Relay IS is again operated due to this contact being connected to positive,<br />
and the first of the third train of three (units) impulses is sent to line through Relay<br />
SR, again operating and reversing the line battery. SC bank contact 28 is disconnected,<br />
Relay IS is released and the second impulse transmitted to line. SC bank contact 29 is<br />
connected to positive, and Relay IS again operates, sending the third impulse to line.<br />
At this point it should be remembered that all codes sent to line total 17<br />
impulses. In the case being considered, the first train of impulses was five, the<br />
second, nine, and the last, three. The bell at the station with its Selector set to the code<br />
5-9-3, is now ringing, the selector being held mechanically in the ringing position. The<br />
bell continues to ring until line switch SC steps on to SC bank contact 46 which, being<br />
disconnected, allows Relay IS to release, sending one final reverse impulse to line.<br />
This impulse advances the selector one step so that it is no longer held mechanically,<br />
thus allowing the selector code wheel to return to its normal position. It can be noted
here that from SC bank contacts 29 to 39, Relay IS is held by direct positive battery<br />
connections to these bank contacts. SC bank contacts 41, 43 and 45 are also connected<br />
direct to positive, whilst SC bank contacts 40, 42 and 44 are connected to<br />
positive via TS2.<br />
It will be remembered that line switch SC stepped under the control of Relay<br />
SD. When it has stepped to SC bank contact 49, Relay LC will be released at SC<br />
wipers 3/4. LC4 releases Relay BR, which at BR2 and BR4 disconnects the impulsing<br />
circuit and removes the battery from the lines. LC3 completes the driving circuit for<br />
stepping the line switches SA and SB to normal from 50 volt negative through the<br />
operating magnets, self drive contacts, wiper arms SA1 and SBI, G4, LC3, to 50 volt<br />
positive. When the wiper arms reach the normal position, these driving circuits are<br />
broken.<br />
Line switch SC continues to drive under the control of Relay SD (until it<br />
reaches its home position) from 50 volt negative, SC driving magnet SD, wiper arms<br />
SC 1/2. At the home position, Relay SD releases since there is no 50 volt positive<br />
through LC2.<br />
At the conclusion of the conversation the Controller restores his speak key<br />
which releases relays BC, BCA and the circuit is ready for further calls.<br />
In order to avoid false operation of relay TC (when BC releases) due to the<br />
charging of the line capacity, the auxiliary relay BCA is introduced which follows BC<br />
but is slow to release. After the release of BC and during the release time of BCA<br />
(approximately ¼ second) the line is charged to the normal voltage and polarity over<br />
contacts BCA 2 and 3, and resistor YR. When BCA finally releases the resistor YR is<br />
replaced by the windings of the relay TC but by this time the charging current to the<br />
line will have ceased or dropped to such a small value that it cannot give a false<br />
operation of TC relay.<br />
It should be noted that at the instant when BC releases the line may be completely<br />
discharged (as it would be at the end of a long call) or it may be holding a<br />
charge which has been imparted by the signalling battery (as it would be if the call is<br />
released immediately after signalling). In either of these cases the device described<br />
will safeguard the TC relay from false operation.<br />
General Call<br />
No dialling is necessary with a "general call." A "general call" is given by sending<br />
out one continuous train of 17 impulses, thereby operating all telephone selectors to<br />
the ringing position past all code pins. To make a "general call," the Controller<br />
operates the <strong>Circuit</strong> Key to the "Speak" position, and then the "General Call" Key.<br />
This latter key operates Relay GCA via 50 volt positive, "General Call" key, "Speak"<br />
key, Terminal LR, Relay GCA to 50 volt negative, and also Relay GC via 50 volt<br />
positive. "General Call" key, "Speak" key, Terminal GC, Relay GC to 50 volt negative.<br />
Relay GC locks over its second winding via 50 volt negative, Relay GC, GC1,<br />
Line switch SC bank 3 and 4 to 50 volt positive. A circuit to operate Relay LC is set<br />
up via 50 volt negative, Relay LC, GC7, line switch SC banks 3/4, to 50 volt positive.<br />
Page 45
Page 46<br />
The operation of Relay LC completes a circuit for the driving of line switch SC as<br />
described above for an ordinary call, and also operates Relay BR. Line switch SC will<br />
drive, and its wipers SC5/6, and SC7/8, will control the operation of Relay IS. Relay<br />
IS controls Relay SR as before, the latter sending impulses to line. From line switch<br />
bank contacts 5 to 22, Relay IS will be operated on odd bank contact numbers and<br />
released on the even bank contact numbers causing Relay SR to send 17 reverse<br />
battery impulses to line. All selectors will be stepped to the ringing position and the<br />
bells will continue to ring until the Controller restores the “General Call” key. Actually<br />
line switch SC steps on to SC bank contact 40 when its drive circuit is broken at<br />
SC1/2 bank contact 40 through GCA1 being operated. It should be noted that GC4,<br />
GC5 and GC6 contacts connect 50 volt positive battery to line switch SC bank<br />
contacts 22, 24 and 26 to maintain the circuit for Relay IS, whilst GC3 provides 50<br />
volt positive to SC bank contacts 40, 42 and 44 for the same reason.<br />
When the “General Call” key is released Relay GCA is released, and at GCAI<br />
restores the drive circuit for line switch SC which again drives until it reaches its home<br />
position. When line switch SC wipers 5/6 reach SC bank contact 46 Relay IS releases<br />
and causes Relay SR to release, thereby sending a final impulse to line to clear down<br />
the selectors. When it reaches SC bank contact 49, Relays LC and GC are released at<br />
SC wipers 3/4. When line switch SC reaches its home position, its drive circuit being<br />
broken at wipers SCI /2, as already described.<br />
Prolonged Ringing<br />
If it is desired to prolong the ringing on a normal call, the Controller will operate<br />
the “Long ring” key before dialling. This will cause Relay GCA to operate, and at<br />
GCAI remove the 50 volt positive from line switch SC1/2 bank contact 40. Line<br />
switch SC will step, as before described, until it reaches this contact, when it will<br />
stop because the drive circuit is broken. Relay IS will remain operated and relay SR<br />
will continue to apply battery to line. When a sufficiently long ring has been given,<br />
the Controller will restore the “Long ring” key, which will release Relay GCA. On the<br />
fall back of GCA1, 50 volt positive will be applied to line switch SC 1/2 bank contact<br />
40 and restore the driving circuit, allowing line switch SC to drive home to its normal<br />
position as before. Relay LC is released when SC wipers 3/4 reach SC bank contact<br />
49.<br />
Time Sending<br />
To send a time signal, the Controller operates the circuit Speak key and a Time<br />
Sending key, which completes a circuit for Relay TS. Relay TS operates and locks<br />
over its own contact TS1 and Line switch SC3/4 bank contacts. Relay TS at TS3<br />
completes the circuit for Relay LC and TS2 connects positive to Line switch SC bank<br />
5/6 contact 28. The operation of Relay LC causes Line switch SC to step in the<br />
manner described for an ordinary call. Relay IS will operate and release on alternate<br />
steps of Line switch SC from SC bank contacts 5 to 27, thus sending 23 reverse<br />
impulses to line via Relay SR contacts. This will step all selectors to the time signal<br />
position. Relay GCA is also operated by the time sending key, removing the positive
from Line switch SC banks 1 and 2 at contact 40, causing Line switch SC to stop on<br />
this contact and leaving the line battery connected to line. A special time signal unit<br />
would be provided to operate Relay SR direct, and this would cause the selectors to<br />
be stepped to and past the special time signal ringing contact to give the required<br />
code. When the Controller releases the Time Sending key, Relay GCA at GCA1 reconnects<br />
positive to Line switch SCI/2 bank contact 40, restoring the drive circuit of<br />
Line switch SC which drives to normal. Relay TS is also released by the restoration<br />
of the Time Sending key, and at TS2 removes the positive connection from Line<br />
Switch SC6 bank contacts 40,42, 44. When Line switch SC drives over these bank<br />
contacts, Relay IS is alternately operated and released via SC bank contacts 41-45<br />
sending 6 reverse impulses to line via Relay SR contacts. These 6 impulses step the<br />
selectors clear of the time holding bar and all selectors return to normal.<br />
Special Adjustments<br />
(a) Line switch SC driving speed should be adjusted so that three complete<br />
revolutions of the wipers take approximately 20 seconds. To increase the speed,<br />
rheostat YJ should be turned in a clockwise direction, and to decrease the speed, turn<br />
in a counter-clockwise direction.<br />
(b) It is essential that the line battery positive and negative impulses sent to line<br />
should be of equal duration. The facility to test this is incorporated in the line testing<br />
set. If it is necessary to adjust this impulse duration, rheostat YH should be adjusted.<br />
To increase the time Relay SR is on its back contacts, the rheostat YH adjusting screw<br />
should be turned in a clockwise direction.<br />
Line Battery <strong>Circuit</strong> Breaker Indication and Reset Cabinet<br />
The circuit breaker Relay CB is operated via its 2,000 ohm winding when the<br />
non-locking key CBK in one or other of the cabinets is operated, and provided switch<br />
SC is in the home position. The Relay CB mechanically latches in the operated<br />
position and releases if the current in the CB Relay 2 ohm winding exceeds 500<br />
milliamps. CBI released lights the circuit breaker ‘out’ indicator lamps in the cabinet.<br />
A spark quencher circuit is provided across CB contacts 3 and 2 via resistor YK and<br />
capacitor QJ.<br />
Engaged Lamp<br />
A lamp, LP, is provided on each selective circuit apparatus panel to indicate<br />
when the apparatus is engaged. If the selective apparatus is unjacked and removed,<br />
Jack contacts 5 and 7 make together and light all engaged lamps on the Switch Sets via<br />
BNX, Jack points 5 and 7 to BBX. Contacts G1 and LC1 keep the lamp alight after<br />
the circuit key is restored to normal whilst the switches, etc., are returning to their<br />
normal position.<br />
Page 47
Page 48<br />
APPARATUS USED ON A TYPICAL DIAL<br />
SENDING <strong>TRAFFIC</strong> <strong>CONTROL</strong> SYSTEM<br />
At the Control Station<br />
Keyboard . . . . . . . . . . . .<br />
Selective <strong>Circuit</strong> Panel,<br />
Code LX.3215 . . . . . . . .<br />
Selective <strong>Circuit</strong>s Rack . . . . . .<br />
<strong>Circuit</strong> Breaker Indicator and Reset<br />
Cabinet . . . . . . . . . .<br />
*Auxiliary Apparatus Rack . . . .<br />
Main Distribution Frame . . . .<br />
One for each Controller.<br />
One for each Selective circuit.<br />
For mounting the selective circuits<br />
apparatus.<br />
Usually two per Control, one in the<br />
Apparatus Room and one in the<br />
Control Office.<br />
One or more, depending on the<br />
number of additional circuits, such<br />
as Junction, Omnibus circuits, etc.,<br />
required.<br />
Usually one per System. Intermediate<br />
Distribution Frame Supplied<br />
if required.<br />
* This may be combined with the Selective <strong>Circuit</strong> Rack on small installations.<br />
Battery Supplies. 50-volt D.C. for operating the relays at the Control.<br />
The Busy lamps (P.O. Switchboard type) are usually illuminated from an A.C.<br />
source, since the load on a battery might, at certain periods, be a heavy one. In the<br />
event of a mains failure, the system can still be operated without the busy lamp<br />
indications. It is recommended that the call lamps be operated from a battery, since<br />
the load is not as heavy as that of the busy lamps.<br />
As they cannot easily be dispensed with it is preferable to have a constant<br />
source of supply, independent of the local mains. In some cases, 6 volt switchboard<br />
lamps have been used for both call and busy positions, thus giving a lower power<br />
consumption.<br />
Line Signalling Supply . . . . This voltage to be in accordance with<br />
the curves on pages 51 or 52, derived<br />
from A.C. mains rectifier, storage<br />
battery and charger or primary<br />
cell battery, as required.
Line Test Set . . . . . . Designed for the purpose of making periodic<br />
line tests or locating faults which<br />
occur on the line.<br />
At Each Way Station<br />
For use where the Controller is listening continuously, one of three methods<br />
may be employed.<br />
1. One 4001-A Selector Set and<br />
One 4308-C Telephone Set<br />
or 2. One 4002-A Selector Set<br />
(Combined Selector and Telephone Set)<br />
or 3. One 4001-A Selector Set<br />
One 4311-A Telephone Set<br />
One 4001-A Foot Switch<br />
For use where the Controller is not listening continuously:-<br />
Magneto Calling<br />
Wall Mounting types<br />
Desk type Telephone<br />
1. With the addition of the 4013-A Generator either of the three<br />
methods previously described may be used.<br />
or 2. One 4001-A Selector Set Wall Mounting type<br />
One 4101-AK Telephone Set<br />
Line Loop Calling<br />
1. One 4001-B Selector Set<br />
One 4311-D Telephone Set<br />
or 2. One 4002-B Selector Set<br />
or 2. One 4002-C Selector Set<br />
4304 Type Selector<br />
Wall Mounting type<br />
Desk type Telephone<br />
Wall Mounting type<br />
A selector is required at each way station, irrespective of the type of selector<br />
set used. It is not an integral part of the selector set, and must be ordered separately.<br />
Page 49
Page 50<br />
PART 6<br />
LINE CONSTRUCTION AND LINE<br />
VOLTAGE CURVES<br />
Any form of construction suitable for ordinary telephone working is also suitable<br />
for the Control System, but the ohmic resistance of the line is rather more<br />
important than in ordinary telephone practice, as the voltage of the main sending<br />
battery is dependent on this. The effect of line resistance on battery voltage can be<br />
clearly seen from the curves on pages 51 and 52.<br />
The use of hard drawn copper wire 150 lb per mile is recommended on short<br />
lines, and 200 lb per mile copper wire where longer lines are required. Open wire<br />
construction is usually the best because the static capacitance of wire to wire is small.<br />
The insulation resistance should be maintained as high as possible.<br />
Inductive interference from neighbouring telephone and telegraph lines and<br />
power circuits must be kept to a minimum to ensure good transmission. This can be<br />
best obtained by frequent transposition of the control line and, when practicable, of<br />
the neighbouring circuits. Where specially designed telephone cable is used, only the<br />
ordinary precautions which are usually taken in the case of cable circuits are necessary.<br />
It should be noted that the Line Voltage curves consider the action of the<br />
Selective Mechanism only and ignore Telephone Transmission.<br />
In most cases, wires of sufficient size to give satisfactory Selective working at<br />
a practical voltage also give lines which will be within the limits of good transmission.<br />
In cases of very long lines with many instruments it is possible that, while Selective<br />
requirements may be met, the Transmission would be below the standard.<br />
The transmission efficiency between the Controller and the Way Station sets is<br />
comparable with the high grade of speech obtainable between ordinary telephones.<br />
Owing to improvements made by the arrangement of the high impedance reception<br />
circuit, on sets using the speak listen key, it is possible to maintain this high grade of<br />
transmission, even when as many as 40 of these sets, equally spaced across an open<br />
line 200 miles long, made up of 1501b per mile copper wire, are all in the listening<br />
position. This indicates that good reception will be obtained with the maximum<br />
number of stations which would be listening in at any one time in practice.
Line Voltage Curves<br />
Fig. 14.<br />
The operating battery voltage required depends on the line resistance and the<br />
number of selectors bridged across the line. Figure 14 shows the voltage required for<br />
10-80 selectors bridged across a line from 400 to 6,000 ohms loop resistance, calculated<br />
on the assumption that the selectors are equally spaced. These curves may be<br />
used for all normal arrangements of way stations and only fail when a large number of<br />
selectors are connected to a long line at one point.<br />
Figure 15 gives the corresponding curves for 10-60 selectors operated over a<br />
line of 400 to 3,000 ohms through a 341-A or AAJ 4100-1 Transformer.<br />
Figure 16 gives line voltage corresponding to Figure 15, but for operation through<br />
two 70-A or Q 4104-1 Repeating Coils connected in series-aiding.<br />
The voltage figures allow for average line conditions, irregularities in the distribution<br />
of Way Stations, etc., and have been decided upon after a number of tests<br />
under practical working conditions. We therefore strongly recommend that these<br />
figures be used where at all possible, and although perfectly good results are often<br />
obtained with considerably higher or lower voltages, we do not recommend a variation<br />
of more than 10 per cent. above or below these figures without preliminary<br />
working tests.<br />
Page 51
Page 52<br />
Fig. 15.<br />
Fig. 16.
General<br />
PART 7<br />
LINE TEST SET-LU.3101<br />
Fig. 17.<br />
The LU.3101 Test Set (Fig. 17) is designed primarily for use with the Standard<br />
Train Control System, but will also be found useful in the maintenance of any<br />
other line network. Facilities are provided for the following tests :—<br />
Page 53
Page 54<br />
1. Voltage measurements of Test, Main and Line Signalling Batteries.<br />
2. Measurement of external resistance by simplified Wheatstone Bridge.<br />
3. Line resistance measurement by simplified Wheatstone Bridge.<br />
4. Earth leakage measurement direct reading in ohms.<br />
5. Earth fault location, by simplified Murray Earth Test, direct reading as<br />
percentage of line.<br />
6. Resistance measurements by voltmeter method.<br />
7. Line resistance measurement by voltmeter method.<br />
8. Line to earth resistance measurement by voltmeter method.<br />
9. Measurement of incoming volts from line.<br />
10. Impulse ratio check on selective signalling.<br />
11. Operational check for Traffic Control Selectors on reduced voltage.<br />
12. Telephone communication with line under test.<br />
The voltmeter movement resistance is 100 ohms with series and shunt resistors<br />
to give the various rest conditions. This instrument is centrally pivoted and has two<br />
scales, 350-0-350 and 70-0-70 volts.<br />
When used on Wheatstone Bridge and Murray Earth tests, it is most important<br />
that an approximate zero reading be obtained before attempting to make the final<br />
balance test by operating the sensitivity key, SK. Failure to do this may result in<br />
irreparable damage to the voltmeter movement.<br />
If, in measuring line loop or line earth resistance, difficulty is experienced in<br />
obtaining a steady balance with Wheatstone Bridge or Murray Earth Test, the voltmeter<br />
method should be used.<br />
When making any line tests it is important that the terminals T1 and T3 should<br />
be isolated, and conversely, when measuring an external resistance, the lines should<br />
not be connected.<br />
Installation Notes<br />
The Test Set should be installed adjacent the main frame so that it can be<br />
connected to any line by inserting test plugs into the appropriate Protector Mounting.<br />
The various battery supplies, ringing supply and earth should be connected as<br />
indicated on the Test Set. It is essential that a separate 50 volt battery should be used<br />
for the Test Set battery, since under fault conditions it is possible that the main 50<br />
volt battery may be connected in some way with the line under test, and this might<br />
give rise to false reading if the main battery was also used to operate the Test Set.
Operating Instructions<br />
1. Voltage Measurements. (See Fig. 18).<br />
(a) 50 volt Main Battery :— operate VBK and read voltage on the 70-volt<br />
scale of meter.<br />
(b) 50 volt Test Battery :— operate CVK and SCK and read voltage on<br />
70-volt scale.<br />
(c) Line Signalling Battery :— operate VAK and read voltage on 350-volt<br />
scale.<br />
Battery Voltage Test<br />
Fig. 18.<br />
2. Wheatstone Bridge. (See Fig. 19).<br />
Measurement of External Resistance :-Connect the unknown resistance<br />
across T1 and T3 terminals. Operate Range Key (RBK, RAK) to the<br />
appropriate range. The ranges are as follows :<br />
If resistance is less than 1,000 ohms operate range key upwards : i.e. x 1.<br />
If resistance is between 1,000 and 10,000 ohms set range key to central<br />
position : i.e. x 10.<br />
If resistance is greater than 10,000 ohms operate range key downwards :<br />
i.e. x 100.<br />
Operate Wheatstone Bridge Key (WBK).<br />
Operate Meter Key (MK), observe deflection of meter and adjust<br />
potentiometer until the voltmeter reads zero.<br />
Page 55
Page 56<br />
For a more accurate balance operate Sensitivity Key (SK) and readjust<br />
potentiometer until voltmeter again reads zero.<br />
The reading of the potentiometer scale multiplied by 1, 10 or 100,<br />
according to the position of the range key, gives the value of the resistance<br />
under test.<br />
To confirm resistance measurements by the Wheatstone Bridge it is<br />
desirable to operate the Reverse Battery Key<br />
Resistance by Wheatstone Bridge Test<br />
Fig. 19.<br />
(RTB) after a balance has been obtained and verify that the meter remains<br />
at zero. If the meter gives a reading other than zero this indicates that the<br />
resistance under test is not a "pure" resistance, and probably contains a<br />
rectifier element or is affected by some external voltage. If this condition<br />
occurs it will generally be better to use the voltmeter method, described in<br />
paragraph 6.<br />
3. Line Resistance Tests by Wheatstone Bridge. (See Fig. 19).<br />
Insert test plugs into the line to be tested and proceed as described<br />
under Wheatstone Bridge in paragraph 2.<br />
4. Earth Leakage Measurement, direct reading in ohms. (See Figure 19)<br />
Proceed as in paragraph 3 but in addition operate EAK for measurement<br />
of the resistance between line "A" and earth and key EBK for measurement<br />
of the resistance between the "B" line and earth. The resistance of
the particular line to the earthed point is then read on the potentiometer<br />
scale.<br />
5. Earth Fault Location by Simplified Murray Earth Test. (See Fig. 20).<br />
When there is a single earth or resistance earth connection on one line,<br />
it can be located by means of the earth fault location test.<br />
Have line short-circuited at distant end. Operate WBK and MEK.<br />
Operate meter key (MK) and adjust potentiometer to bring meter near<br />
zero.<br />
Operate sensitivity key (SK) and make final adjustment of<br />
potentiometer to bring meter to zero.<br />
The percentage indicated on the inner scale of the potentiometer represents<br />
the distance of the fault from the control station, stated as a percentage<br />
of the total line.<br />
In order to obtain the best advantage from this test, it is desirable to<br />
prepare a chart showing the measured percentage to convenient test points<br />
on all lines. For example :<br />
If the total circuit loop resistance is 1,000 ohms, and at test points A,<br />
B and C, the loop resistance is recorded as, A = 250 ohms, B = 500 ohms<br />
and C = 750 ohms, then<br />
At test point A the percentage of the total circuit would be<br />
250 X 100 = 25%<br />
100 1<br />
and at Test Point B, 500 X 100 = 50%.<br />
1000 1<br />
and at Test Point C, 750 X 100 = 75%.<br />
1000 1<br />
An earth fault actually at these points would be recorded by the Murray<br />
Test as 25%, 50% and 75% respectively. An earth fault tested to be say<br />
40% would be localised between test points A and B. To obtain the full<br />
value of this facility, as many loop readings as are possible should be<br />
obtained and recorded.<br />
If the Main <strong>Circuit</strong> has a branch or branches, the loop resistance should<br />
be recorded to test points on both the Main, Branch or Branches. The<br />
chart can then be made up to cover these Branches.<br />
Page 57
Page 58<br />
Earth Fault by Murray Test<br />
Fig. 20.<br />
When using the Murray Earth fault test on a circuit with a branch or<br />
branches, the following procedure must be observed :<br />
Have lines looped at far end of Main <strong>Circuit</strong> and make test as described<br />
above.<br />
If the earth is on one of the branches, the percentage recorded will give<br />
the junction point of the branch with the main circuit.<br />
The fault may therefore be either at the junction point or on the branch.<br />
The loop should then be removed from the far end of main circuit and<br />
the far end of the branch looped; a further test being made.<br />
The percentage reading obtained will give the approximate location of<br />
the fault by reference to the chart covering the branch concerned.<br />
6. Resistance Measurements by Voltmeter Method. (See Fig. 21).<br />
To measure a resistance other than line resistance, connect resistance to<br />
T1, T3 terminals.
Operate CVK, note meter reading on the 70-volt scale, and if necessary<br />
operate range key so that reading is near 25 volts.<br />
Note this reading, and check the test battery voltage by operating SCK.<br />
The resistance multiplied by 1, 10 or 100 can then be determined from the<br />
appropriate curve on the chart, or by interpolating between curves (Fig.<br />
22).<br />
Resistance by Voltmeter Test<br />
Fig. 21.<br />
7. Line Resistance Measurements by Voltmeter Method. (See Fig. 21.)<br />
If the resistance to be measured is fluctuating (line leakage in wet<br />
weather for instance), if may be difficult to obtain a balance on the<br />
Wheatstone Bridge, and a voltmeter test, which will show the fluctuations,<br />
may be preferred.<br />
To measure the Line Loop Resistance. Insert test plugs into the line to<br />
be tested then proceed as in paragraphs 6 or 7.<br />
8. Line to Earth Measurement by Voltmeter Method. (See Fig. 21.)<br />
Insert plugs into line to be tested. Operate CVK and EAK for measuring<br />
"A" line to earth, or EBK for measuring "B" line to earth, and proceed<br />
as in paragraph 6 except that the test battery voltage should be checked<br />
before the earth test keys are operated.<br />
9. Measurement of Incoming Volts from Line.<br />
Insert test plugs into appropriate line, operate LVK, CVK and RAK,<br />
read voltage on the 70-volt scale of meter. N.B.— If CVK is operated<br />
without LVK, the 50-volt test battery will be connected in series with the<br />
incoming voltage.<br />
Page 59
Page 60<br />
Volts, Resistance Curves.<br />
Fig. 22.
10. Impulse Ratio Check on Selective Signalling. (See Fig. 23.)<br />
It is important that the impulses due to line battery reversals sent out<br />
to line on selective ringing circuits should be of equal duration. This can be<br />
checked as follows:<br />
Insert test plugs into line under test. Operate Line Cut Off Key (LCO)<br />
(to avoid calling all stations). Operate Impulse Ratio Key (IRK) and transmit<br />
a "General Call."<br />
Selector <strong>Circuit</strong> Impulse Ratio Test.<br />
Fig. 23.<br />
The voltmeter needle should move a short equal distance on either side<br />
of the zero marking, and at the end of the code give a full swing to the right.<br />
This will only apply if the impulse ratio is correct, that is 50% operated,<br />
50% unoperated. If, however, the pointer vibrates on either side of, say,<br />
the 10 volt marking to the right on the 70 volt scale, then the ratio would be<br />
incorrect at approximately 60% operated and 40% unoperated. The function<br />
of the Relay IRR is to ensure that the voltmeter is not connected<br />
across the lines when the line battery is applied to line before impulses are<br />
sent out. If this were not done the voltmeter needle would receive an initial<br />
deflection and might not settle down to the correct indication before the<br />
end of the General Call code.<br />
Page 61
Page 62<br />
11. Operational Check for Selectors on Reduced Voltage. (See Fig. 24.)<br />
Testing Selectors No. 4301 or 4304 on Reduced Voltage.<br />
In order to ascertain whether a selector will operate correctly on a voltage<br />
less than the full line battery, the following tests can be carried out :<br />
(a) If a Selector only is to be tested, it should be connected to Terminals<br />
Test 1 and 2.<br />
(b) If a Selector complete in the Selector Set is to be tested, Ll and L2<br />
terminals of the set should be connected to Test Set Terminals Test 1<br />
and 3.<br />
Reduced Voltage Test for 4301-A and 4304-A Selector<br />
Fig. 24.<br />
(c) A selector at a station can be tested if someone is there to observe its<br />
operation.<br />
In the case of (a) and (b), a spare Selective circuit should be used if<br />
available, or if a working circuit has to be used the key LCO should be used<br />
to cut off the line. In the case of (c), key LCO should not of course, be<br />
operated. Operate key RVA and adjust potentiometer to the fraction of the<br />
voltage required. Then transmit the code of the Selector under test.<br />
Repeat the test with key RVB operated, which will show whether the<br />
selector is free from bias, since it reverses the polarity of the impulses.<br />
A good selector should operate down to 80 volts when connected<br />
direct to the Test Set, and down to 0.7 of the normal line voltage when<br />
tested with the line wires in circuit.
12. Telephone Communication. (See Fig. 25.)<br />
With the Test Set plugged into the line under test, and the telephone<br />
handset connected by means of the Telephone Jack, speech may be established<br />
with either the Controller or Way Station. The equipment (Controller)<br />
can, if desired, be disconnected by operating equipment cut off key<br />
(ECO). Conversely, the Way Station may be cut off by operating Line Cut<br />
Off Key (LCO). The telephone circuit is connected by the telephone key<br />
(TK).<br />
To ring on the line operate Ringing Out Key (ROK). To ring the<br />
Controller operate Ringing In Key (RIK).<br />
Telephone and Ringing <strong>Circuit</strong><br />
Fig. 25.<br />
The Test Set is supplied either for wall mounting, or as a portable set.<br />
Of the two, we recommend the use of the wall mounting set wherever possible<br />
since the permanently connected set is ready for immediate use, and furthermore the<br />
staff at a particular location will become familiar with the use of the set and its<br />
associated local line data.<br />
Page 63
Page 64<br />
PART 8<br />
ADJUSTMENT OF RELAYS<br />
In the following pages two sets of limits are quoted, known respectively as test<br />
and re-adjust. Test limits are wider than re-adjust limits, and are used for acceptance<br />
testing and, in maintenance, to ascertain whether the relay is adjusted satisfactorily.<br />
When a relay is found to be outside the test limits, it should be readjusted to the closer<br />
re-adjustment limits to ensure that it will have a satisfactory life before again falling<br />
outside the test limits.<br />
For convenience in ordering spares, the part numbers of the common components<br />
are shown in Fig. 26.<br />
Relays are usually adjusted to mechanical requirements which completely cover<br />
their performance, and, when so adjusted, automatically satisfy the current requirements<br />
unless their coils are faulty.<br />
A certain amount of adjustment within the mechanical limits may, however, be<br />
necessary and on certain codes spring pressures and residual gaps have to be specially<br />
adjusted to meet current tests. The customer's marking label indicates whether<br />
or not special adjustments of this kind are required.<br />
Labels<br />
The customer's marking label shown in the Fig. 26 is either red, green or white.<br />
A white label indicates that the relay has 14 mil springs and must be strictly adjusted<br />
to the standard mechanical requirements, in which condition it should satisfy the<br />
electrical requirements.<br />
A green label indicates that the relay has 12 mil springs and must be adjusted in<br />
the same way as the white label relay, except that the buffer spring pressure conforms<br />
to the lighter standard.<br />
As shown in Fig. 26, the customer's marking label may bear a letter X and a<br />
number. The letter X indicates that one of the contacts functions before the remainder<br />
and the relay has an armature travel of 43 mil. The number is the value in mil of the<br />
residual air gap.<br />
White and green label relays are absolutely standard except for the presence or<br />
otherwise of X contacts and the adjustment of the residual screw. Since these features<br />
are indicated on the label, reference to the individual specifications is unnecessary.<br />
For maintenance purposes, current tests on white and green label relays may be<br />
omitted.<br />
A red label indicates that some of the features of the relay are special, and that<br />
some spring tensions may have to be adjusted to suit requirements other than those
Page 65
Page 66<br />
given in the standard specification. These relays should not be re-adjusted without<br />
checking the current requirements.<br />
Residual Air Gap<br />
The residual air gap is defined as the shortest air gap between the pole-face and<br />
the inner surface of the armature when the relay is operated. It is provided by means<br />
of a stud or screw and locknut. Measurement is made by placing the holed end of the<br />
feeler, with the stud or screw passing through the hole, so that the pole-face is<br />
covered. With the relay operated and the armature held on to its knife edge, the<br />
minimum limit feeler must be free to move while the maximum limit feeler should be<br />
gripped by the armature.<br />
It is unnecessary to check stud residuals unless the relay gives faulty holding or<br />
release performance.<br />
TABLE 1.<br />
When screw residuals are fitted to white or green label relays, the value of the<br />
gap is given on the customer's marking label.<br />
On certain codes of relay which may have red, white or green labels, it is<br />
necessary to vary the residual gap to suit timing or electrical requirements. The<br />
required value, which may differ from the nominal figure shown in the specification,<br />
is marked on the label and enclosed in brackets thus :— (7).<br />
The limits for screw residuals are given in Table 2.<br />
TABLE 2.
Armature Travel<br />
Armature travel is the amount of available movement of the armature measured<br />
at the residual stud (or screw). Travel is varied by bending the armature.<br />
The amount of travel is gauged by successively inserting feelers in the air gap to<br />
cover the residual stud or screw but not to touch the armature itself. The armature<br />
should be held on to its knife edge with the back stop pin resting against the polepiece<br />
and the minimum limit feeler should be loose in the gap. The maximum limit feeler<br />
should either be gripped or fail to enter the gap.<br />
White or green label type relays have a travel of 31 mil and with an X contact 43<br />
mil travel.<br />
Red label relays may have special travels but, where 31 or 43 mil travel is used,<br />
the standard limits quoted in Table 3 apply unless otherwise specified in the individual<br />
relay specification.<br />
Spring Pressures<br />
TABLE 3.<br />
Contact pressure is determined by the pressure with which the buffer springs<br />
bear upon the buffer block. The pressure is measured by applying a tension gauge to<br />
the tip of the spring in line with the contacts. A gauge set to the minimum value should<br />
not cause the spring to lift clear from the buffer block. A gauge set to the maximum<br />
tension should cause the spring to lift from the buffer block. Contact pressure is<br />
measured when the contacts are open, i.e., in the case of break contacts when the<br />
armature is operated and in the case of make contacts when the armature is at rest.<br />
Lever springs (i.e., those which bear directly, or through the lifting pins of other<br />
springs on to the armature) are also individually adjusted to tension requirements.<br />
Page 67
Page 68<br />
The measurement is made by applying the tension gauge finger to the contact<br />
and noting the pressure necessary to lift the lifting pin or kermot stud off the support<br />
beneath it. While making the measurements the pressure of other springs normally<br />
bearing on the one under consideration must be removed by holding the springs away<br />
with a small screwdriver.<br />
In the case of the lever springs of break or change-over contact units, the lever<br />
spring pressure has to exceed the buffer pressure of the back springs by the specified<br />
amount. This excess pressure (re-adjust 5 to 8 grammes) is measured by applying the<br />
tension gauge finger to the back of the back-spring in line with the contact. The<br />
application of the minimum pressure may neither lift the lifting pin or kermot stud<br />
from its support nor close up the buffer spring lift of the back contact. The application<br />
of maximum pressure must either lift the lifting pin or kermot stud from its<br />
support or close up the buffer spring lift of the back contact.<br />
The Table 4 gives the pressure limits in grammes allowed for re-adjust purposes,<br />
except in special cases.<br />
TABLE 4.<br />
In cases where an individual specification necessitates the adjustment of lever<br />
springs to fulfil current tests, the minimum test limit is 4 grammes, but no maximum<br />
is imposed.<br />
Contact Clearance<br />
On relays with standard armature travel the minimum contact clearance is 12<br />
mil (re-adjust) and 10 mil (test). On relays with reduced travel the re-adjust limit is 7<br />
mil min., and the test limit 5 mil min.<br />
Contact clearance is measured with the relay operated in the case of break<br />
contacts and unoperated in the case of make contacts.
Contact Sequence<br />
The standard contact sequence is as follows :<br />
Group 1.— All Break Contacts, including break portion of change-over contacts.<br />
These contacts may function in any order amongst themselves, but<br />
must all operate before any contacts in group 2.<br />
Group 2. — Comprises all make contacts including the make portion of changeover<br />
contacts.<br />
Group 3. — Make-before-Break Contacts. There is no requirement governing<br />
the sequence of these contacts in relation to any contacts on the relay other<br />
than " X " contacts.<br />
Spring Lift<br />
Group 4.— "X " Contacts. When an “X” contact forms part of a relay an “X”<br />
is included in the customer's marking. “X” contact must function before<br />
the pip clearance between the “X” contact and the break or change-over<br />
contact above it, is closed up, and also before the pip clearance of the break<br />
or change-over contact in the opposite pile-up is closed. It is also required<br />
that they function before any other contacts.<br />
When contacts are closed, buffer springs should be lifted from the buffer by<br />
means of the lever spring. The re-adjust limit is 4 mil minimum and the test limit is 2<br />
mil minimum. This does not apply to the break spring of a make-before-break unit<br />
which is tensioned hard against the buffer block so that no lift takes place. Pip<br />
Clearance<br />
The pip clearance required on “X” action is limited to 4 mil minimum (readjust)<br />
and 2 mil minimum (test). The position of the pip clearance in a typical relay<br />
with an “X” make contact is shown in the figure.<br />
Tensioning of Springs in Special Cases<br />
There are three cases where springs are not tensioned to the requirements<br />
quoted in the Table giving “spring pressure.” i.e.: Break or change-over springs above<br />
"X" contacts. Lever springs of “Y” contacts and top spring of make before break<br />
units.<br />
GENERAL REQUIREMENTS<br />
(1) Springs. — Springs must be adjusted to appear straight, when examined<br />
with the armature at approximately half stroke. To obtain spring lift, contact sequence<br />
and contact clearance requirements, the portion of the spring between the<br />
contacts and the lugs or lifting pins may be slightly set. When setting springs in this<br />
manner care must be taken to share the total set between the springs concerned in<br />
order that the set on any individual spring is as small as possible.<br />
Page 69
Page 70<br />
(2) Armature.—The armature must be free throughout its stroke and held<br />
down on the knife edge by the armature fixing screw and spring, so that the<br />
spring will restore it if it is slightly displaced.<br />
(3) Contact Alignment.— Contacts must not be out of alignment by more than<br />
a of the contact diameter. (See Fig. 26.)<br />
(4) Twin Contacts.— Twin contacts of springs must function simultaneously<br />
and as closely as can be judged by visual inspection. The individual ends of<br />
the springs are adjusted to secure this con dition, the lever spring being<br />
adjusted so that the two forks are co-planar.<br />
(5) Spring Clearance.—Clearance of not less than 10 mil must exist between<br />
the surfaces of springs not intended to be in contact.<br />
Adjustment<br />
In adjusting the relay, the following order of procedure is recommended :<br />
Contact Cleaning<br />
(a) If a residual screw is fitted, set this to the required value by means of<br />
screwdriver and spanner 4218.<br />
(b) Set the armature to the required armature travel.<br />
(c) Tension the buffer springs against the buffer block to the required<br />
tensions. If the relay is unmounted or is otherwise easily accessible,<br />
bent nosed pliers may be used. For mounted relays the spring bender,<br />
4292-A Tool, is usually more convenient.<br />
(e) Examine the relay for spring lift and contact sequence; correct where<br />
necessary either by straightening the springs, or by slightly setting the<br />
ends of the springs (between the contact and lifting pin only).<br />
(f) Ascertain that twin contacts open and close simultaneously and, if<br />
necessary, correct by bending one or other of the twin contact tongues<br />
by means of tongue bender tool 4293-A.<br />
(g) Apply the current tests. In the case of white and green label relays, no<br />
re-adjustment should be necessary to satisfy these. If any more than<br />
slight restriction of the mechanical requirements is imposed by the<br />
current test on such a relay, the coil should be changed. In the case of<br />
red label relays restriction of the range of spring pressure may be<br />
necessary. In the latter case a note will appear on the individual relay<br />
specification calling for the lever springs to be re-adjusted to current<br />
requirements.<br />
This should very rarely be necessary owing to the use of twin contacts. Contacts<br />
should be cleaned with the 4258 Contact Cleaner and pure clean carbon tetra-
chloride or trichlorethylene. The tool and the liquid must be kept scrupulously clean.<br />
Replacement of Parts<br />
The assembly of the relay is simple and will be understood by examination. It<br />
should be noted, however, that spring sets are secured to the yoke by the two end<br />
screws. The centre screw holds the pile-up together as a unit and is not threaded into<br />
the yoke.<br />
A coil may be changed without dismounting the relay, by removing the armature<br />
and core nut and unsoldering the tags. The coil can then be withdrawn from the front.<br />
Coils are denoted by an LP number, but as a given coil may be used on many relays<br />
the paper label on the front cheek will not be supplied unless the coil is ordered as :<br />
LP ............................................................................ coil labelled for use on<br />
Code No .................................................................. Relays.<br />
When a relay has its residual value shown on the label in brackets, the fitting of<br />
a new coil necessitates the re-determination of the residual gap to omit the current or<br />
timing requirements given in the individual specification. This new value should be<br />
marked on the label. New labels can be conveniently made on a typewriter and<br />
secured by clear cellulose varnish.<br />
When either a new armature or coil is fitted, the armature travel requires readjustment<br />
and the adjustment of the remaining features should be checked and<br />
corrected where necessary.<br />
ADJUSTMENT DATA<br />
of the more critical Relays of Traffic Control Systems<br />
The relays to be considered under this heading are :<br />
The following Table shows the adjustment figures for each of these relays.<br />
Page 71
Page 72
PART 9<br />
ADJUSTMENT AND MAINTENANCE DATA<br />
FOR No. 4120 TYPE SELECTORS<br />
General<br />
The tolerances shown in the following paragraphs are maximum figures and are<br />
only to be allowed for testing purposes.<br />
When re-adjustments are being made, the mean figures should be used and the<br />
tolerances reduced to a minimum.<br />
The adjustments apply to the selectors mounted vertically on their associated<br />
banks, with the selector magnets at the top.<br />
For all electrical tests or adjustments the appropriate spark quenching device<br />
must be connected in the circuit.<br />
1. Armature Lever Back Stop:— The armature lever back stop shall be adjusted<br />
so that the tips of the non-bridging wipers are flush (within ± .005<br />
in) with the entering edges of the first bank contacts. Gauge by eye.<br />
N.B.— To obtain this adjustment, set the armature lever stop and wipers so<br />
that the wiper tips are off the contacts, then gradually move the armature lever back<br />
stop downwards until the wipers have moved forward to the correct position. Use<br />
4267-A Tool. Check that the tips of bridging wipers are not less than .020 in. clear of<br />
the previous bank contacts.<br />
2. Armature Lever Forward Stop:— Check that when the armature lever is<br />
operated by hand, the pawl is just prevented from dropping over the<br />
second tooth of the ratchet wheel by the armature lever forward stop. If<br />
this requirement is not obtained, the armature lever stop must be changed.<br />
3. Driving Pawl:— The tip of the driving pawl shall engage squarely in the<br />
ratchet notch.<br />
4. Detent Spring :— The detent spring shall be adjusted to drop into each<br />
rotary notch without allowing more than perceptible back lash in the wiper<br />
assembly. This back lash must not be such that the tips of the wipers when<br />
lightly forced backwards, move more than .005 in. Gauge by eye and feel.<br />
The tip of the detent spring shall rest squarely and firmly in the root of the<br />
ratchet notch. Readjust with 4267-A Tool.<br />
5. Pawl Stop :—The pawl stop shall be adjusted so that, with the armature in<br />
its normal position there is a slight forward rotational play in the wiper<br />
assembly. This play must not be such that the tips of the wipers when<br />
Page 73
Page 74<br />
lightly forced forward move more than .020 in. Gauge by eye and feel.<br />
Readjust with 4267-A Tool. (This adjustment must not affect the detent<br />
spring adjustment No. 4.)<br />
6. Bank:— Rotate the wiper assembly by hand to the 25th bank contact. The<br />
non-bridging wipers must now occupy the same relative position on this<br />
contact as they occupied on the bank contacts No. 1. (See adjustment No.<br />
1). N.B.- Should the wipers not occupy this position, adjust the position<br />
of the mechanism by means of the mechanism positioning gland until the<br />
wiper position is correct. Use 4218-B and 4260 Tools.<br />
7. Brushes:—Test each brush for tension. This should be 35 grammes ±10<br />
grammes when measured at the extreme tip. The tension should be measured<br />
when the wipers are standing on the 11th bank contact and the tool<br />
applied to the tip of the brush. Test with 4270-B and 4271-G Tools.<br />
Readjust with 4268-A Tool.<br />
8. Wipers:— When the wipers are standing on the first bank contact, the<br />
opposite ends must be in alignment with the bank levels, within the thickness<br />
of the bank contracts (.015 in). Gauge by eye. Now check the alignment<br />
of the wipers with the first bank contacts.<br />
N.B.— If the alignment is bad, loosen the two top mechanism securing screws<br />
and adjust the position of the mechanism so that the wipers enter the bank<br />
levels with no more than .015 inside movement. Re-tighten the mechanism<br />
securing screws. Use 4215-A Tool.<br />
The wiper springs must be flared outwards from the hub to the heels,<br />
but when the wipers are standing on the bank contacts No. 23 the opposite<br />
ends must clear the brushes by 10 mils minimum when the wiper assembly<br />
is moved sideways on the spindle. Use 4229 Tool.<br />
N.B.— Care must be taken to ensure that when the wipers are standing on the<br />
25th bank contacts, the heels at the opposite ends do not touch the first<br />
bank contacts when the wiper assembly is moved sideways on the spindle.<br />
Use 4229 Tool.<br />
The wipers shall be adjusted for tension so that they exert a pressure<br />
on the bank contacts of 30 grammes ± 10 grammes; this is to be measured<br />
when the wipers are standing on the 25th bank contacts Test using 4270-<br />
B and 4271-E Tool applied with the tip of the latter in engagement with the<br />
centre of the wiper prong at the bend nearest the heel of the wiper. Readjust<br />
with 4429 Tool.<br />
Each end of the wipers, when not in contact with the bank, must be<br />
adjusted so that the outermost contact points only of each pair are touching.<br />
There must be a gap of approximately 4 mil between the innermost<br />
contact points. This is to ensure that the wipers make good contact with<br />
the bank terminals, Gauge by eye:— Readjust with 4232 Tool. 9.
9. Armature Restoring Springs:— The tension of the two armature restoring<br />
springs must be evenly distributed by adjustment of the spring adjusting<br />
screw. The tension must be such that the wipers will positively step on to<br />
the bank contacts on the release of the armature when retarded by hand.<br />
Excess tension must be avoided. Readjust with 4215-A Tool.<br />
10. Magnets:— The position of the magnet coils shall be adjusted by means of<br />
the magnet glands so that the armature strikes both magnet cores simultaneously<br />
and so that the pawl will step between the limits of 1¼ and 1 1 / 3 ,<br />
ratchet teeth. Gauge by eye.<br />
N.B.— To check this adjustment the armature must be operated electrically<br />
with the interrupter springs short circuited. Rotation of the wipers by<br />
operating the armature lever by hand should be avoided as it is possible<br />
under these conditions that the armature may become displaced. Readjust<br />
with 4218-B and 4260 Tools.<br />
11. Interrupter Springs:— The interruptor springs must have good contact<br />
alignment. The lever spring must be tensioned to give a contact pressure of<br />
150 grammes ± 50 grammes. Test with 4270-D and 4271-E Tool applied as<br />
near as possible to the point of contact. Readjust with 4249-B Tool. The<br />
contacts must break just as the pawl drops over the first forward tooth of<br />
the ratchet wheel. Gauge by eye.<br />
N.B.—The point of interruption must in all cases be adjusted by bending<br />
the interrupter spring operating lever. Use 4268-A Tool.<br />
12. Pointer:— The position of the pointer shall be as follows :<br />
(a) Homing Selector.— Indicate the “Home” position when the wipers<br />
are on the home contacts. When used in the Dial System Traffic<br />
Control the indicator should be opposite No. 1 when the selector is<br />
in the “Home” position.<br />
(b) Non-Homing Selector.— Indicate the first position when the wipers<br />
are standing on No. 1 bank contacts. Use 4267-A Tool.<br />
13. Screws:— Test all screws for tightness but do not strain them.<br />
14. Running Test:— When testing or adjusting a switch for running, always<br />
see that the proper spark quench circuit is used.<br />
(a) According to the type of selector under test, the wipers must rotate<br />
smoothly and reliably at a hunting speed within the following limits:<br />
Page 75
Page 76<br />
(b) The wipers must rotate smoothly and reliably with the test voltage<br />
across the magnet coils and the test resistance all in series as follows:<br />
(c) The wipers of all homing selectors shall home reliably and stop<br />
accurately on the home position with the Exchange voltage across the<br />
magnet coils in series via the homing lever and wiper.<br />
15. Lubrication:- Oil dag to Standard Spec. 50227 shall be applied sparingly<br />
to :<br />
(a) All teeth of the ratchet wheel.<br />
(b) The back of pawl where it strikes the pawl stop.<br />
High grade clock oil to Standard Spec. 57544 Grade 2 shall be applied<br />
sparingly to :<br />
(a) Both ends of the wiper spindle.<br />
(b) The pawl arm bearing on 6 and 8 level switches.<br />
(c) Top of springs immediately above the felt inserts.<br />
(d) Armature knife edge bearings.<br />
(f) Collector rings of “heavy duty” switches.<br />
(g) Wiper tips of “heavy duty “ switches.*<br />
*Those switches associated with banks having nickel silver contacts.
Oil dag should be applied as above to ratchet wheels when clean. Subsequent<br />
lubrication to be carried out as follows:<br />
A small stiff bristle brush should be moistened with high grade clock oil and<br />
worked down into the roots of the teeth in order to work up the remaining graphite<br />
into a suitable consistency and to distribute the lubricant. Where insufficient graphite<br />
remains, or where the lubricant is dirty, the ratchet should be cleaned by means of the<br />
bristle brush and clock oil (the detent springs being removed). The brush should be<br />
pressed well down on to the roots of the teeth in order to remove as much as possible<br />
of the old lubricant and the brush should, during this process be wiped on a piece of<br />
rag. When the ratchet has been cleaned, oil dag should be applied sparingly to all teeth<br />
by means of a soft sable hair brush.<br />
Page 77
Page 78<br />
PART 10<br />
ADJUSTMENT AND MAINTENANCE DATA<br />
FOR No. 4150 TYPE SELECTORS<br />
General<br />
1. The following pages cover the tests and adjustments for the 4150 type<br />
selector mounted on its appropriate bank. (In the case of selectors obtained without<br />
banks the requirements under sections 8, 9, 10 and 11 and electrical requirements<br />
must be met by adjustment after assembly on its bank).<br />
2. The test figures are provided for checking the condition of selectors and are<br />
the maximum tolerances and are only allowed for testing purposes. When readjustments<br />
are being made the readjust figures shall apply.<br />
Preliminary<br />
1. The wiper assembly shall be secure on the hub, it shall rotate freely and<br />
have slight side play but not greater than 15 mil.<br />
2. The brush assembly shall be securely fixed to the bank frame. (The feeder<br />
brushes must be free from any distortion).<br />
3. The armature assembly shall be seated with both grooves on the knife edge<br />
and shall be clear of all other parts of the frame.<br />
4. The pawl spring and clamp plate shall be clear of the pawl stop when the<br />
armature is fully operated.<br />
5. The armature restoring spring adjusting screws shall not bind in the springs,<br />
and shall not be so loose as to allow the turns of the springs to slip over the<br />
threads.<br />
Adjustments<br />
1. All adjustments shall apply to the selector mounted vertically on its associated<br />
bank with the magnet assembly uppermost.<br />
2. Armature Knife Edge.<br />
2.1 The armature knife edge shall be adjusted so that the pawl tip overlaps the<br />
ratchet wheel on both sides, and that when viewed from the side the<br />
armature strikes the core within a in. of the centre of the core, judged by<br />
eye.<br />
2.2 Check that when the armature is fully operated by hand, the armature<br />
assembly clears the coil box by 10 mil in all directions.
3. Pawl Spring Tension<br />
3.1 With the armature fully operated the pawl tip shall lie flat on the ratchet<br />
wheel with a pressure of 150 grammes minimum 250 grammes maximum.<br />
(Readjust 160 grammes minimum 240 grammes maximum) measured in the<br />
book of the pawl.<br />
4. Detent<br />
4.1 The tension of the detent spring shall be such that the tip lies flat on the<br />
ratchet wheel with a pressure of 50 grammes minimum, 110 grammes<br />
maximum, measured at the tip. (Readjust 60 grammes minimum 100 grammes<br />
maximum).<br />
4.2 The detent shall be so positioned that the following conditions are met.<br />
With the short face of the ratchet wheel tooth held lightly against the tip of<br />
the detent, the pawl shall drop over the tip of the adjacent tooth when the<br />
armature is electrically operated with a 2 mil feeler inserted between the<br />
armature and core, but shall not do so when operated with an 8 mil feeler<br />
between the armature and core. (Readjust 3 mil and 7 mil feeler gauges).<br />
Check in 4 positions of the rotor. The detent spring shall be clear of the<br />
frame and the tip must overlap the ratchet wheel on both sides.<br />
5. Armature Back Stop<br />
5.1 The armature back stop screw shall be adjusted so that when the armature<br />
is operated by hand and released slowly, the detent will drop over one<br />
tooth of the ratchet wheel, and after stepping, backlash shall not exceed 5<br />
mil at the wiper tips, judged by the eye. In checking this requirement the<br />
rotor should be lightly retarded by hand to prevent overthrow, and the<br />
check should be made in four positions of the rotor. After adjustment<br />
the end of the back stop screw shall be flush or proud of the lock nut.<br />
6. Pawl Stop<br />
6.1 The pawl shall be lightly wedged between the pawl stop and ratchet<br />
wheel, in at least one position of the ratchet wheel. The pawl stop adjustment<br />
shall not prevent the detent spring from dropping into engagement<br />
with the ratchet- wheel teeth. Forward play not to exceed 15 mil at wiper<br />
tips (i.e., ¼ width of contact).<br />
7. Interrupter Contacts<br />
7.1 With the armature normal the buffered spring shall rest on the inner buffer,<br />
and there shall be a clearance between the lever spring and the interrupter<br />
striker.<br />
7.2 With the lever spring in the normal position and the buffered spring in<br />
Page 79
Page 80<br />
contact with the dome of the inner buffer, the clearance between the buffered<br />
spring and the dome of the outer buffer to be 10 to 20 mil<br />
7.3 The pressure required to separate the contacts with the buffered spring<br />
resting on the outer buffer shall be 150 grammes minimum 250 grammes<br />
maximum, measured at contact. (Readjust 160 grammes minimum 240<br />
grammes maximum).<br />
7.4 With the armature in the unoperated position, the combined pressure of<br />
the two springs resting on the inner buffer shall be 10 grammes minimum<br />
measured behind contact.<br />
7.5 With armature operated the buffered spring shall rest on the dome of the<br />
outer buffer with a pressure of 30 grammes minimum measured at the<br />
contact. (Readjust 32 grammes minimum).<br />
7.6 The contact opening shall be such that the electrical tests are met and the<br />
contacts shall not be out of alignment by more than 1/4 diameter of contact.<br />
8. Wipers<br />
8.1 In positions No. 1 and 25 the line of contact of the nonbridging wipers<br />
shall lie within the limits of 1/3 to 2/3 the width of the contact from the<br />
entering edge. The centre line of the bridging wipers shall lie between the<br />
centre line and the leaving edge of the contact, to be judged by the eye.<br />
(The position on the first bank contact is obtained by adjusting the position<br />
of the wiper assembly on the hub, on the 25th contact the adjustment<br />
is obtained by adjusting the gland). When standing on the centre contacts<br />
the centre of the crimp on non-bridging wipers and the centre line of the<br />
contact area of the bridging wipers shall lie between the entering and leaving<br />
edge of the bank contacts.<br />
8.2 The tips of the bridging wipers when standing on any contact shall be not<br />
less than 7 mil clear of the plane through the leaving edge of the previous<br />
contact. This requirement also applies to wiper tips in the first position<br />
after leaving the bank.<br />
8.3 Before checking the wiper positions on any contact it is necessary to take<br />
up any overthrow by lightly forcing back the ratchet wheel against thepawl<br />
tip by hand. Force must not be used while making this check.<br />
8.4 With the rotor assembly moved sideways in any position, no portion of<br />
the wipers other than the tips shall touch the bank contacts.<br />
8.5 When the wipers are clear of the bank contacts there shall be no gap<br />
perceptible to the eye at the outermost contact points. Between the innermost<br />
contact points there may be a gap not greater than 8 mil.<br />
(Readjust 6 mil.)
8.6 The wipers shall exert a pressure of 20 grammes minimum 40 grammes<br />
maximum on the bank contacts. (Readjust 22 grammes minimum 38 grammes<br />
maximum). The tension is measured with the gauge inserted at the heel so<br />
that the pointer tip engages at the centre point of the width of the wiper<br />
and at the inward set of the wiper tip, after stepping the rotor to the 25th<br />
row of contacts electrically, or by hand operation of armature.<br />
8.7 The side movement of the wipers on entering and leaving the bank contact<br />
shall in no case exceed the thickness of a bank contact, i.e., 15 mil.<br />
8.8 After adjustment the wipers shall be free from bows and kinks and shall<br />
conform to shape shown on the assembly drawing.<br />
9. Feeder Brush<br />
9.1 The pressure of each feeder brush on the collector ring measured as near<br />
the tip as possible, shall be 20 grammes minimum. (Readjust 24 grammes<br />
minimum).<br />
9.2 The clearance between the feeder brushes and wipers shall be 10 mil minimum<br />
with the rotor assembly moved sideways in the 23rd position.<br />
10. Armature Restoring Springs<br />
10.1 The tension of the armature restoring springs shall be evenly distributed<br />
between the two springs and shall be sufficient to step the wipers reliably<br />
when the armature is released slowly. On the 3, 4 and 5 level uniselectors<br />
the combined pull of the two springs should give a back pressure of 900<br />
grammes minimum measured immediately in front of the back stop screw.<br />
10.2 After the adjustments in 10.1 have been made there shall be from 2 to 4<br />
threads exposed on each adjusting screw.<br />
11. Pointer<br />
11.1 The pointer shall be set to coincide with a marking on the number wheel<br />
when the armature is unoperated.<br />
11.2 In the case of homing selectors the pointer shall be set to indicate the zero<br />
position when the wipers are on the home contacts.<br />
11.3 In the case of non-homing selectors, the pointer shall be set to indicate the<br />
first position when the wipers are standing on the first set of bank contacts.<br />
Page 81
Page 82<br />
Lubrication<br />
1. Oil to spec. 57544 Grade 2 shall be applied sparingly to :<br />
(a) Ratchet wheel hub inner diameter and bearing pin.<br />
(b) Ratchet wheel hub outer diameter.<br />
(c) Wiper tips. The lubricant shall be distributed over the bank contacts<br />
by rotating the wipers electrically.<br />
(d) Collector rings.<br />
(e) The felt inserts in the armature restoring springs shall be steeped in oil<br />
before assembly.<br />
2. Oil dag to spec. 50227 shall be applied sparingly to :<br />
Operation Tests<br />
(a) All teeth of the ratchet wheel.<br />
(b) Striking face of the armature back stop.<br />
(c) Striking face of pawl stop.<br />
(d) Knife edge and sides of armature locating lug.<br />
(e) Point of attachment or armature restoring springs to armature.<br />
1. The electrical operation shall be tested with a spark quench circuit of 1 μF<br />
and 200 ohms, connected to earth from a point between the magnet coil<br />
and the interrupter contacts. The selector shall be mounted vertically with<br />
the magnet assembly uppermost.<br />
2. Hunting Test<br />
2.1 With the nominal voltage applied to the magnet coil in series with the<br />
interrupter contacts, the wipers shall rotate smoothly and reliably and the<br />
hunting speed shall be within the following limits :
2.2 The wipers shall rotate smoothly and reliably when the nominal voltage is<br />
applied across the magnet coil interrupter contacts and a fixed resistor, all<br />
in series. The value of the fixed resistor is that shown in the following<br />
table:—<br />
3. Homing Test<br />
3.1 All selectors fitted with a homing arc shall home reliably and stop accurately<br />
on the home contacts with the test voltage, as specified below,<br />
applied to the magnet coil, interrupter contacts, homing arc and wiper all in<br />
series.<br />
Page 83
Page 84<br />
PART 11<br />
ADJUSTING TOOLS
Registered Office:<br />
CONNAUGHT HOUSE<br />
63 ALDWYCH, LONDON, W.C.2.<br />
Telephone: Holborn 8765 Telegrams: Relay, London<br />
Works:<br />
NORTH WOOLWICH, E.16<br />
Telephone: Albert Dock 1401<br />
NEWPORT, MON.<br />
Telephone: Newport (Mon.) 72281<br />
NEW SOUTHGATE, N.11<br />
Telephone: Enterprise 1234<br />
FOOTSCRAY, KENT<br />
Telephone: Footscray 3333<br />
HARLOW, ESSEX<br />
Telephone: Harlow 26811 (Rectifier Division) Harlow 24212 (Quartz Crystals)<br />
PAIGNTON, DEVON<br />
Telephone: Paignton 58685<br />
ILMINSTER, SOMERSET<br />
Telephone: Ilminster 237<br />
Home Branch Offices:<br />
BIRMINGHAM LEEDS<br />
BRISTOL GLASGOW<br />
MANCHESTER<br />
SOUTHAMPTON, HANTS<br />
Telephone: Southampton 74751<br />
TREFOREST, GLAMORGAN<br />
Telephone: Treforest 2182<br />
Overseas Branch Offices:<br />
DUBLIN KARACHI<br />
JOHANNESBURG NEW DELHI<br />
SALISBURY<br />
Resident Representatives at:—<br />
ACCRA, COLOMBO, ISTANBUL and NAIROBI<br />
Associated Companies in Europe, the U.S.A., Canada,<br />
South America, the Far East and Australasia.<br />
EUROPE<br />
CYPRUS<br />
GREECE<br />
MALTA<br />
AFRICA Union of South Africa<br />
CAPE PROVINCE (West)<br />
NATAL<br />
Federation of the Rhodesias<br />
and Nyasaland<br />
NORTHERN RHODESIA<br />
(Copper Belt)<br />
SOUTHERN RHODESIA<br />
(Bulawayo District)<br />
British West Africa<br />
GAMBIA<br />
SIERRA LEONE<br />
British East Africa<br />
KENYA<br />
TANGANYIKA<br />
UGANDA<br />
ZANZIBAR<br />
Ghana<br />
ACCRA<br />
Sudan<br />
SUDAN<br />
Agents in:<br />
INDIA<br />
ANDHRA<br />
ASSAM<br />
BIHAR<br />
BOMBAY & SAURASHTRA<br />
EAST PUNJAB<br />
HIMACHAL PRADESH &<br />
UTTAR PRADESH<br />
HYDERABAD<br />
MADRAS<br />
MYSORE<br />
ORISSA<br />
PATIALA STATES<br />
TRAVANCORE-COCHIN<br />
WEST BENGAL<br />
(including Calcutta)<br />
PAKISTAN<br />
EAST PAKISTAN<br />
CEYLON<br />
CEYLON<br />
FAR EAST<br />
BRITISH NORTH BORNEO<br />
BRUNEI<br />
BURMA<br />
HONG KONG<br />
INDONESIA<br />
MALAYA (Federation of)<br />
SARAWAK<br />
SINGAPORE (Colony of)<br />
THAILAND<br />
MIDDLE EAST<br />
BAHREIN<br />
IRAN<br />
IRAQ<br />
JORDAN<br />
KUWAIT<br />
LEBANON<br />
SAUDI-ARABIA<br />
SYRIA<br />
SOUTH AMERICA<br />
BRITISH GUIANA<br />
Page 85