

Mini TightRope® CMC Fixation - Arthrex
Mini TightRope® CMC Fixation - Arthrex
Mini TightRope® CMC Fixation - Arthrex

You also want an ePaper? Increase the reach of your titles
YUMPU automatically turns print PDFs into web optimized ePapers that Google loves.
<strong>Mini</strong> TightRope ® <strong>CMC</strong><br />
Surgical Technique<br />
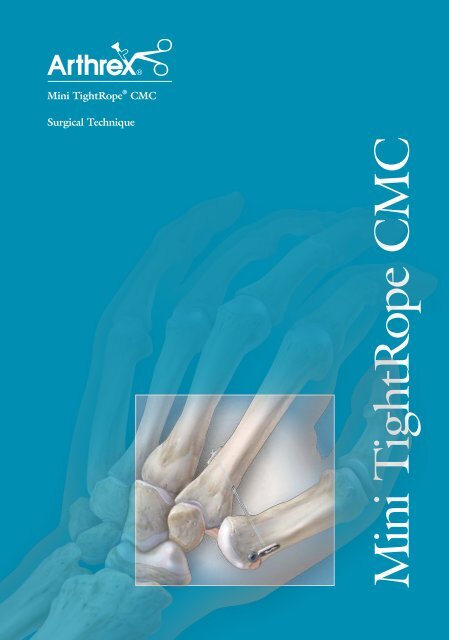
<strong>Mini</strong> TightRope <strong>CMC</strong>
<strong>Mini</strong> TightRope <strong>CMC</strong> <strong>Fixation</strong><br />
The <strong>Mini</strong> TightRope provides a unique means to suspend the<br />
thumb metacarpal after partial or complete trapezial resection for<br />
treatment of <strong>CMC</strong> arthritis, thumb <strong>CMC</strong> instability and in revision<br />
cases with proximal migration after failed tendon reconstruction.<br />
The <strong>Mini</strong> TightRope supports and maintains the thumb and index<br />
metacarpals in the proper relationship, while allowing for capsular<br />
healing, hematoma and scar tissue formation in the trapezial space.<br />
The construct consists of two strands of #2 FiberWire ® which are<br />
fixed with two oblong stainless steel buttons for cortical fixation.<br />
The trapezial space may be left empty, or filled with an autograft,<br />
allograft or artificial spacer.<br />
Advantages:<br />
• Stabilizes and protects biologic repair<br />
• May allow earlier rehabilitation<br />
• Maintains trapezial space<br />
• Solid and stable suspensionplasty<br />
• Allows flexible suture-based fixation<br />
Note: The <strong>CMC</strong> <strong>Mini</strong> TightRope is<br />
approved as an adjunct in the healing<br />
process of the reconstruction of the<br />
ligament at the base of the thumb<br />
metacarpal. Please refer to technique<br />
guide LT0410 “Ligament Reconstruction<br />
– Tendon Interposition for Thumb<br />
<strong>CMC</strong> Arthroplasty” for a detailed<br />
surgical technique guide of this procedure.<br />
<strong>Mini</strong> TightRope Repair Kit – AR-8914DS
1 2<br />
Create a 3 – 4 cm dorsoradial skin incision over the<br />
trapeziometacarpal joint. Safely retract the radial artery by<br />
means of a vessel loop, and take care to protect the branches<br />
of the dorsal radial sensory nerve. Make a longitudinal incision<br />
in the capsule and sharply dissect around the abductor pollicis<br />
longus which is attached to the radial base of the thumb<br />
metacarpal. Perform a hemi- or full trapeziectomy to eliminate<br />
the bone-on-bone contact that is the source of pain. Make an<br />
additional 2 cm incision between the 2nd and 3rd metacarpal<br />
bases. Elevate the 2nd dorsal interosseous muscle subperiosteally<br />
from the ulnar aspect of the 2nd metacarpal to view the ulnar base<br />
of the index metacarpal – the eventual exit point of the K-wire.<br />
There is always a branch of the dorsal radial sensory nerve that<br />
should be identified and protected in this wound.<br />
3<br />
<strong>Mini</strong> TightRope <strong>CMC</strong> <strong>Fixation</strong><br />
Once proper trajectory is established, continue to advance the<br />
K-wire through the 2nd metacarpal exiting the small incision in<br />
the interspace. Four cortices should be penetrated. Continue<br />
to advance the K-wire until the thinner tapered portion of the<br />
guide wire is completely through all four cortices. The K-wire<br />
should now slide easily by hand.<br />
Place the 1.1 mm tapered Suture Passing K-wire starting on the<br />
proximal dorsoradial aspect of the 1st metacarpal. The K-wire<br />
should start as close to the base of the 1st metacarpal as possible.<br />
The hand should be in a relaxed neutral position. (Placing one<br />
rolled towel between the thumb and palm will help maintain the<br />
position of the thumb in an abducted position.) The K-wire is<br />
advanced through the base of the 1st metacarpal aiming towards<br />
the 2nd metacarpal base. The trajectory recommended is to place<br />
the K-wire within the proximal one-third of the 2nd metacarpal.<br />
A more proximal trajectory is easier to accomplish and suggested.<br />
The wire MUST exit in the central portion of the 2nd metacarpal<br />
(wire may tend to travel dorsally). Confirm the trajectory under<br />
fluoroscopy, while advancing the K-wire. An aiming guide is very<br />
useful and available if desired (see C-Ring Aiming Guide page).<br />
Note: Advancing the K-wire under oscillation is suggested and<br />
maximizes control of the K-wire.<br />
4<br />
Place the single strand of the <strong>Mini</strong><br />
TightRope into the Nitinol loop of<br />
the K-wire. Only place 2 – 3 cm of<br />
suture though the loop, as more may<br />
bind in the small tunnel.<br />
2 cm
5 6<br />
Pull the opposite end of the Suture<br />
Passing K-wire, bringing the suture<br />
completely through and exiting<br />
the 2nd metacarpal. Pull the suture<br />
and bring the oblong button to<br />
contact the radial side of the thumb<br />
metacarpal.<br />
7<br />
Tie approximately five knots over the second ulnar button to<br />
lock the construct into place. Knot strands may be left long and<br />
buried beneath the 2nd dorsal interosseous to prevent irritation.<br />
The 2nd dorsal interosseous fascia, <strong>CMC</strong> capsule and skin is<br />
closed in a standard fashion.<br />
Cut the suture on the ulnar side to<br />
create two strands of FiberWire and<br />
load the second oblong button onto<br />
the suture, bringing the oblong<br />
button down to the 2nd metacarpal.<br />
Remove any slack from the construct<br />
and position the thumb into the<br />
desired position. Tightening of the<br />
suture is not recommended as it may<br />
lead to decreased range of motion<br />
and possibly impingement of the<br />
base of the thumb metacarpal on the<br />
base of the 2nd metacarpal. Tie one<br />
provisional knot and check the range of motion clinically<br />
and under fluoroscopy to confirm full motion and no<br />
impingement.<br />
Post-op Protocol<br />
Follow up with hand therapy at 10 – 14 days. Provide a thermoplastic hand-based thumb spica splint to<br />
be worn for lifting > 5 lbs and for sleep. Otherwise, allow partial mobilization of up to 50% of grip power<br />
between two and six weeks. Increase mobilization steadily and advance to strengthening, as tolerated,<br />
until week 12. Afterwards, allow full mobilization with no activity restrictions.
C-Ring Aiming Guide<br />
A C-Ring Aiming Guide is available as an option to assist with placement<br />
of the 1.1 mm tapered Suture Passing K-wire through the 1st and 2nd<br />
metacarpal. After initial dissection, the C-Ring Aiming Guide can be placed<br />
with the sharp pointed tip on the desired exit point of the 2nd metacarpal.<br />
Care is taken to insure the exit point is in the proximal one third of the<br />
bone and central to the bone in a dorsal/volar orientation.<br />
Note: It may be helpful to use the 1.1 mm K-wire to drill the cortex of the<br />
2nd metacarpal on the ulnar side at the desired exit point. In doing so,<br />
the sharp point of the C-Ring guide will recess into this hole and prevent<br />
the guide from skiving along the bone<br />
The ratcheting barrel guide is rotated with the teeth<br />
facing down and advanced until desired starting point<br />
on the 1st metacarpal. Once the guide is in place and<br />
an acceptable trajectory is achieved, the 1.1 mm<br />
tapered Suture Passing K-wire is placed into the<br />
inner K-wire sleeve of the guide and advanced<br />
with a wire driver through all four cortices<br />
of the 1st and 2nd metacarpal.<br />
Once the K-wire exits the ulnar side<br />
of the 2nd metacarpal, the guide<br />
may be dismantled and the remaining<br />
procedure completed as described.<br />
Ordering Information<br />
C-Ring Aiming Guide AR-8826G<br />
<strong>Mini</strong> TightRope Repair Kit (AR-8914DS) includes:<br />
<strong>Mini</strong> TightRope, 1.1 mm, qty. 2<br />
Suture Passing Wire, 8"<br />
Suture Passing K-wire, 1.1 mm, qty. 4<br />
Oblong Button, 2.6 mm, qty. 2<br />
Ruler, 6"<br />
C-Ring Aiming Guide
2<br />
<strong>Mini</strong> TightRope <strong>CMC</strong> <strong>Fixation</strong> Alternate Technique<br />
An alternate surgical technique is presented which<br />
may allow for a more controlled placement of the<br />
<strong>Mini</strong> TightRope through the 2nd metacarpal.<br />
Using the same radial dissection as the standard<br />
technique described previously, attention is directed<br />
to making an incision overlying the proximal<br />
one-third of the 2nd metacarpal measuring<br />
approximately 2 cm. Care is taken to protect the<br />
dorsal sensory radial nerve branch. The soft tissues<br />
are dissected off the radial and ulnar borders of<br />
the base of the 2nd metacarpal so direct visualization<br />
of the bone is achieved.<br />
2 – 3 cm of the <strong>Mini</strong> TightRope construct end is placed through<br />
the 1.1 mm tapered Suture Passing K-wire loop and pulled<br />
through the base of the 1st metacarpal, exiting through only<br />
the soft tissue on the dorsal 2nd metacarpal incision.<br />
1<br />
Soft tissue is dissected approximately 1 cm distal to the base of<br />
the 1st metacarpal, which is just past the insertion of the abductor<br />
pollicis longus. The 1.1 mm tapered Suture Passing K-wire is<br />
passed through the radial side of the 1st metacarpal parallel to<br />
the base, until it exits the ulnar cortex. Pass the K-wire only a<br />
few millimeters through the ulnar side to establish the hole.<br />
The thumb is then abducted and the K-wire is advanced through<br />
the 1st metacarpal towards the 2nd, pointing towards the proximal<br />
one-third of the 2nd metacarpal and exiting through the soft<br />
tissue that brings it onto the dorsal side of the 2nd metacarpal<br />
cortex. Do not pass the K-wire through the 2nd metacarpal<br />
at this time. Allow the wire to exit dorsal to the bone out the<br />
2nd metacarpal incision. Care is taken to protect the dorsal<br />
sensory branch of the radial nerve.<br />
3<br />
A second hole is established through the base of the 2nd<br />
metacarpal using the 1.1 mm tapered Suture Passing K-wire to<br />
establish a central hole from the radial to the ulnar side of the<br />
2nd metacarpal proximal diaphysis. This is done under direct<br />
visualization of both the radial and ulnar sides of the 2nd metacarpal.<br />
Attention is paid to central placement of the drill hole<br />
in the 2nd metacarpal.
4<br />
Once the hole is established, the nontapered, small diameter, blunt tipped, flexible Suture Passing K-wire<br />
is used to pass the <strong>Mini</strong> TightRope construct through the 2nd metacarpal, exiting the ulnar side of 2nd<br />
metacarpal. The wire is grasped in the interspace between the 2nd and 3rd metacarpals with a hemostat or<br />
needle holder, directed dorsally out the incision and the suture is pulled taut.<br />
The <strong>Mini</strong> TightRope construct is cut to free two suture ends.<br />
The second button is secured on the ulnar side of the 2nd<br />
metacarpal using five or six knots. Remove all slack, but do not<br />
overtighten. Over-tensioning of the TightRope construct will<br />
cause decreased thumb motion, abduction, and possible ulnar<br />
impingement pain. Check thumb position before securing the<br />
knot. The suture of the tied knot can be buried easily in the<br />
interspace between the 2nd and 3rd metacarpals, and the soft<br />
tissue is closed over the 2nd metacarpal. The joint capsule of the<br />
carpometacarpal joint is closed securely with suture. A thumb-<br />
spica forearm splint, or a hand-based thumb spica splint, is<br />
loosely applied to protect the thumb, hand, and wrist.<br />
Ordering Information<br />
<strong>Mini</strong> TightRope Repair Kit (AR-8914DS) includes:<br />
<strong>Mini</strong> TightRope, 1.1 mm, qty. 2<br />
Suture Passing Wire, 8"<br />
Suture Passing K-wire, 1.1 mm, qty. 4<br />
Oblong Button, 2.6 mm, qty. 2<br />
Ruler, 6"
This description of technique is provided as an educational tool and clinical aid to assist properly licensed medical professionals<br />
in the usage of specific <strong>Arthrex</strong> products. As part of this professional usage, the medical professional must use<br />
their professional judgment in making any final determinations in product usage and technique.<br />
In doing so, the medical professional should rely on their own training and experience and should conduct<br />
a thorough review of pertinent medical literature and the product’s Directions For Use.<br />
Developed in conjunction with<br />
Jeffrey Yao, M.D., Stanford University Medical Center, Redwood City, CA; and<br />
Mark DeHaan, M.D., Orthopaedic Associates of Michigan, Grand Rapids, MI<br />
U.S. PATENT NO. 6,716,234 and PATENT PENDING<br />
©2012, <strong>Arthrex</strong> Inc. All rights reserved. LT1-0427-EN_E