Custom Instrument User Guide - Siemens Hearing Instruments
Custom Instrument User Guide - Siemens Hearing Instruments Custom Instrument User Guide - Siemens Hearing Instruments
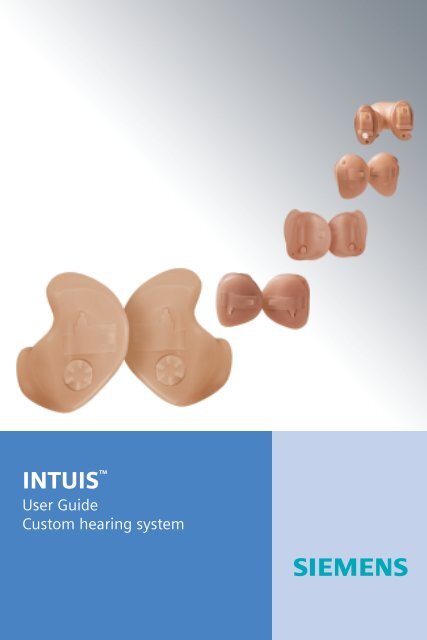
TM INTUIS User Guide Custom hearing system s
- Page 2 and 3: Congratulations ! As the owner of a
- Page 4 and 5: IT CT CS CIC Description of your IN
- Page 6 and 7: 6 Inserting the battery: Before usi
- Page 8 and 9: Inserting and removing your custom
- Page 10 and 11: Turning your hearing system on and
- Page 12 and 13: Your hearing instrument specialist
- Page 14 and 15: Using the telephone Automatic telep
- Page 16 and 17: Maintenance and care Your new INTUI
- Page 18 and 19: Important notes • Never expose yo
- Page 20: 20 PROBLEM CAUSE POSSIBLE SOLUTION
TM<br />
INTUIS<br />
<strong>User</strong> <strong>Guide</strong><br />
<strong>Custom</strong> hearing system<br />
s
Congratulations !<br />
As the owner of a new hearing system, you may once again<br />
enjoy the sounds of your environment, and conversation<br />
with your family and friends.<br />
These instructions as well as guidance from your hearing<br />
instrument specialist will help you understand how your<br />
new hearing system works. In this guide, you’ll find instructions<br />
on insertion, removal and use of your INTUIS TM hearing<br />
system. There are also tips and information on proper<br />
handling, cleaning, care and changing of the batteries. In<br />
addition, a troubleshooting section is offered for your<br />
reference.<br />
Your hearing improvement with a hearing system depends<br />
on the fit of the hearing instruments, the type and degree<br />
of hearing loss, and proper diagnostic testing. Of course,<br />
a hearing system cannot restore normal hearing, and not<br />
everyone will benefit equally.<br />
More than 80 percent of individuals with a hearing loss have<br />
a hearing loss in both ears. Studies show that even when a<br />
hearing loss is worse in one ear, most people with a hearing<br />
loss in both ears will benefit from wearing two hearing<br />
instruments.<br />
Remember, a hearing system consists of finely-tuned devices<br />
that have been specially designed and expertly adjusted for<br />
your individual needs. Proper care and handling will ensure<br />
the best possible performance of your INTUIS hearing<br />
system.<br />
2
Contents<br />
Page<br />
Description of your INTUIS custom hearing system 4<br />
Handling the battery 5<br />
Inserting and removing your custom hearing system 8<br />
Turning your hearing system on and off 10<br />
Using the program button 11<br />
Using the volume control 13<br />
Using the telephone 14<br />
Maintenance and care 16<br />
Important notes 18<br />
Troubleshooting tips 19<br />
3
IT<br />
CT<br />
CS<br />
CIC<br />
Description of your INTUIS<br />
custom hearing system<br />
1<br />
4<br />
4<br />
4<br />
3<br />
6<br />
1<br />
3<br />
5<br />
6<br />
Your hearing system is individually<br />
manufactured according to the<br />
shape of your ears or ear canals.<br />
1. First Microphone<br />
2. Second microphone TwinMicTM (optional)<br />
3. Battery compartment<br />
<strong>Hearing</strong> system Battery type<br />
IT 312 or 13*<br />
CT 312<br />
CS/ CIC 10<br />
* Consult your hearing instrument<br />
specialist.<br />
4. Program button (optional)<br />
5. Volume control (optional)<br />
6. Vent<br />
7. Removal cord (optional)<br />
Each hearing instrument can be<br />
identified by the serial number<br />
located on the outside of the instrument.<br />
If the number is written<br />
in red, the hearing instrument is<br />
for the right ear. If the number is<br />
written in blue, the hearing instrument<br />
is for the left ear.
Handling the battery<br />
Battery type<br />
original size<br />
Low battery indicator<br />
Your hearing system may be programmed<br />
to inform you when the<br />
battery should be replaced for<br />
best system performance. You<br />
may hear an intermittent series of<br />
beeps and/or experience low<br />
amplification power or volume.<br />
Change the battery when either<br />
of these occurs.<br />
The protective tab on your battery<br />
should only be removed when<br />
you are ready to use the battery.<br />
Three useful tips:<br />
• The positive (+) side of the battery is always the<br />
smooth side. You can recognize the negative (-) side<br />
by the colored ring.<br />
• Always keep spare batteries with you.<br />
• If you think you cannot change the battery by yourself,<br />
ask someone to help you: a family member, friend or<br />
your hearing instrument specialist.<br />
5
6<br />
Inserting the battery:<br />
Before using your hearing instrument,<br />
place the battery into the battery compartment<br />
door. Using the fingernail of<br />
either your thumb or index finger, pull<br />
the tab on the battery compartment<br />
door outward until the door swings<br />
open all the way (see illustration).<br />
Place the proper size battery into the<br />
battery compartment door, making<br />
sure that the "+" symbol on the<br />
smooth side of the battery matches<br />
the "+" symbol on the edge of the<br />
battery compartment door, as shown<br />
in the illustration. (Ask your hearing<br />
instrument specialist if you have<br />
questions about the correct battery<br />
size for your system)<br />
Gently close the battery compartment. Do not force the<br />
door shut. If it does not close easily, check to see if the battery<br />
is inserted properly. When the battery compartment<br />
is completely closed, your hearing system is ready for use.
Caution:<br />
Keep batteries and instruments away from the reach of<br />
children. Batteries can be harmful if swallowed. If swallowed<br />
consult a physician or a hospital immediately.<br />
Change the batteries when any of the following occur:<br />
- volume becomes softer or weak<br />
- you hear a battery signal beep<br />
Do NOT throw used batteries into household trash. Return<br />
them to your hearing instrument specialist for environmentally<br />
correct disposal.<br />
7
Inserting and removing your<br />
custom hearing system<br />
8<br />
Hold the hearing instrument with<br />
your thumb and index finger,<br />
carefully push the instrument in<br />
the ear canal. Gently work it into<br />
its proper position by slightly<br />
twisting until it is firmly seated.<br />
Lightly press inward for a secure<br />
and comfortable fit.<br />
You may find it helpful to pull<br />
your ear slightly upward or to the<br />
back. Once inserted, you should<br />
be able to feel if the hearing<br />
instrument is correctly positioned.<br />
Tip:<br />
Practice inserting and removing<br />
your hearing instrument correctly.<br />
An easy way to practice is to sit<br />
down at a table. Place a mirror in<br />
front of you and prop your elbows<br />
on the table so you can guide<br />
your hands easily and safely. This<br />
will help you stay relaxed and<br />
comfortable while you practice.
To remove the hearing instrument,<br />
push lightly on the back of your<br />
ear to help loosen it or pull gently<br />
on your ear. Then using your index<br />
finger, slowly pull the hearing<br />
instrument from your ear.<br />
The completely-in-the-canal<br />
hearing instruments can be<br />
removed by pulling the small<br />
removal cord toward the back<br />
of your head.<br />
Caution:<br />
Never pull on the battery<br />
compartment door or volume<br />
control wheel to remove the<br />
hearing instrument, as this could<br />
cause damage to your hearing<br />
instrument.<br />
9
Turning your hearing<br />
system on and off<br />
Using the battery compartment<br />
Insert a battery into your INTUIS hearing instrument and<br />
completely close the compartment to turn the instrument<br />
on. To turn it off open the compartment completely.<br />
Using the program button<br />
Your hearing instrument may also be programmed to allow<br />
you to turn it on and off using the program button.<br />
Press and hold the button for approximately 2 seconds to turn<br />
your hearing instrument off.<br />
To turn your hearing instrument on again, press and hold<br />
the program button for approximately 2 seconds.<br />
Please note that after having turned the instrument off, you<br />
must wait approximately 10 seconds for the system to reset<br />
before turning the instrument back on again by using the<br />
button.<br />
Using the volume control<br />
The volume control also incorporates an on/off switch. In the<br />
full backwards position the hearing instrument will be<br />
switched off.<br />
Power-on Delay<br />
Your hearing instrument may be equipped with an advanced<br />
"Power-on Delay" feature. This feature delays sound from<br />
entering your hearing instrument when it is first turned on,<br />
so that you may insert the hearing instrument in to your ear<br />
without experiencing unpleasant feedback (whistling).<br />
10
Using the program button<br />
Your INTUIS hearing system can<br />
have up to 4 programs. They can<br />
be selected with the program<br />
button.<br />
These programs change the characteristics<br />
of the sound coming<br />
through the hearing system for<br />
specific listening environments.<br />
How to select programs<br />
To change programs using the program button, press the<br />
button. Each time the button is pressed the system changes<br />
to the next program, which may be confirmed with a beep.<br />
The number of beeps you hear coincides with the selected<br />
program. That means when Program "4" is selected, for<br />
example, you will hear 4 beeps.<br />
11
Your hearing instrument specialist has programmed<br />
your instruments as follows:<br />
<strong>Hearing</strong> program<br />
1<br />
2<br />
3<br />
4<br />
Using the directional microphone system (where provided)<br />
According to your hearing needs,<br />
your INTUIS hearing system can be<br />
adjusted to focus on those sounds<br />
in front of you (directional mode)<br />
when you are having a face-to-face<br />
conversation in a noisy environment.<br />
The hearing system can also be<br />
adjusted when you are in quieter<br />
environments and want to hear the sounds around you<br />
(omnidirectional mode). To make this adjustment use the<br />
program button to change to the directonal program. Your<br />
hearing instrument specialist will tell you which program is<br />
configured for directonal mode.<br />
12<br />
Description of the hearing situation
Using the volume control<br />
Volume control<br />
Your INTUIS hearing system is<br />
fully automatic. There is no need<br />
to manually adjust the volume<br />
control. However, if you prefer<br />
manual volume control, your<br />
INTUIS hearing system can be<br />
programmed for manual adjustment, too.<br />
If your system is programmed for manual adjustment, the<br />
wheel-shaped volume control can be rotated forward<br />
(louder) or backwards (softer) to select the desired listening<br />
volume.<br />
The volume control incorporates an on/off switch. In the full<br />
backwards position the hearing instrument will be switched<br />
off.<br />
To increase volume, place your index finger gently against<br />
the volume control wheel and rotate it forward. If your<br />
hearing system is equipped with a warning tone for volume<br />
control limits, once it is heard, adjusting the volume control<br />
further in that direction will have no effect. To reduce the<br />
volume, rotate the wheel in the opposite direction.<br />
If your hearing system has not been programmed for manual<br />
control adjustment, the volume will automatically adjust and<br />
rotating the volume control wheel will have no effect.<br />
13
Using the telephone<br />
Automatic telephone program<br />
(Not all systems)<br />
With the AutoPhone function, your<br />
INTUIS hearing system will automatically<br />
switch to the telephone program<br />
when you hold a telephone<br />
handset near your hearing instrument.<br />
It will return to the<br />
previously used hearing program<br />
after you have finished speaking and move the handset away<br />
from the hearing instrument.<br />
You can also select the telephone program manually by using<br />
the program push button.<br />
The telephone program can be set to microphone mode or<br />
telecoil mode. Your hearing instrument specialist will program<br />
your hearing system to fit your individual requirements.<br />
AutoPhone magnet accessory<br />
Not all telephones produce a magnetic field strong enough to<br />
activate the AutoPhone function. In this case, use the<br />
AutoPhone magnet, enclosed in your hearing instrument<br />
package, and attach it to the telephone receiver to activate the<br />
AutoPhone function.<br />
Consult your hearing instrument specialist to find out if this<br />
accessory is right for your hearing care needs.<br />
14
Note:<br />
Magnets can pose risks to electronics and magnetic storage<br />
mediums when placed in close proximity. Take care not to<br />
set magnets near computers, color monitors, television sets,<br />
floppy discs, video/audio tapes and other electronic<br />
equipment.<br />
Keep magnets away from the reach of children. If swallowed<br />
consult your physician.<br />
Magnets may interfere with the operation of life supporting<br />
systems (i.e. pacemakers, magnetic valves etc). Use magnet<br />
only if not in doubt about the safe distance.<br />
The Safe distance between pacemaker and magnet should<br />
be at least 10 cm (4 inch).<br />
See the AutoPhone magnet user guide for instructions on<br />
how to position the magnet.<br />
Use only the magnet, which is delivered with the hearing<br />
instrument.<br />
15
Maintenance and care<br />
Your new INTUIS hearing system is a highly sensitive system.<br />
Proper care and handling will ensure best possible performance.<br />
If soreness or skin irritation develops in the ear, discontinue<br />
wearing your hearing system, and bring it to your hearing<br />
instrument specialist. Minor fit adjustments and polishing can<br />
often correct this condition. If soreness persists, discontinue<br />
wearing the hearing system and see your physician.<br />
If excessive earwax accumulates when wearing your hearing<br />
system, consult your hearing instrument specialist.<br />
16<br />
1. Caution:<br />
Water will damage your hearing<br />
system. Never put your hearing<br />
system in water!<br />
2. Your hearing system may be<br />
equipped with a sieve, recess or<br />
guard on the sound outlet to<br />
prevent earwax from entering the<br />
hearing system. Your hearing care<br />
specialist will provide you with the<br />
wax protection appropriate for your<br />
system and can advise you how to<br />
clean or replace it.
Always store your<br />
hearing system in<br />
the case provided.<br />
3. Occasionally bring your hearing<br />
system to your hearing instrument<br />
specialist to change the wax guard,<br />
clean the venting channel, the<br />
microphone and sound outlets, and<br />
for general system maintenance.<br />
Your hearing instrument specialist<br />
will make sure that the hearing<br />
system functions correctly and fits<br />
properly in your ear.<br />
Note:<br />
If your hearing instrument sounds distorted or weak and<br />
cleaning it does not improve the sound then exchange the<br />
wax protection or have it exchanged.<br />
Care tips:<br />
• You should place your hearing system in a "dry aid kit"<br />
with a special moisture-attracting capsule overnight. The<br />
drying capsule draws damaging moisture out of the<br />
system.<br />
• Your hearing instrument specialist can provide you with<br />
special care sets and drying capsules to keep your hearing<br />
system in good condition.<br />
17
Important notes<br />
• Never expose your hearing system to extreme<br />
temperatures or high humidity. Do not store it in direct<br />
sunlight. Do not wear it when taking a shower or when<br />
applying hairspray.<br />
• As with all electrical, non gas-encapsulated systems,<br />
the hearing system must not be operated in explosionendangered<br />
rooms.<br />
• Do not wear your hearing system, during short-wave<br />
therapy, or if you work with medical treatments that use<br />
strong magnetic or high-frequency fields, such as MRIs or<br />
X-rays.<br />
• Make sure to turn off the system when not in use.<br />
This helps preserve the batteries.<br />
• When not wearing your system for long periods of time,<br />
remove the batteries. This prevents leakage, which can<br />
sometimes occur in batteries. Replace batteries that have<br />
a leakage immediately.<br />
18
Troubleshooting tips<br />
Your INTUIS hearing system is an extremely reliable device.<br />
However, should a problem occur, this can usually be corrected<br />
quickly. Use this trouble shouting guide to sort out simple<br />
problems.<br />
PROBLEM CAUSE POSSIBLE SOLUTION<br />
System has no Battery polarity Make sure battery is<br />
sound or reversed inserted correctly<br />
sound is weak<br />
Weak or dead Replace with new<br />
Battery battery<br />
<strong>Instrument</strong> not Close battery door<br />
turned on completely or press and<br />
hold program button (if<br />
present) for 3 seconds<br />
System clogged Clean system /exchange<br />
wax protection<br />
Volume too low Turn up volume control<br />
(if present)<br />
System Improper seating in Try reinserting the<br />
whistles ear instrument until it<br />
fits securely<br />
Volume control too Lower the volume control<br />
high (if present)<br />
19
20<br />
PROBLEM CAUSE POSSIBLE SOLUTION<br />
Clogged with wax Clean your instruments<br />
or excessive wax or see your hearing<br />
in ears instrument specalist<br />
Sound is Volume control too Lower volume<br />
distorted or high (if present)<br />
intermittent<br />
Weak battery Replace battery<br />
“Buzzing” or Battery compartment Gently close the<br />
“whistling” is not completely battery compartment<br />
sound closed<br />
Weak battery Replace battery<br />
Change to another System is in telecoil<br />
program mode<br />
<strong>Hearing</strong> System not Turn on system<br />
system does turned on<br />
not work<br />
Battery compart- Gently close the battery<br />
ment is not compartment completely<br />
completely close<br />
Dead battery Replace with new battery<br />
If you still encounter problems after trying these suggestions,<br />
take the system to your hearing instrument specialist.
With the CE marking <strong>Siemens</strong> confirms compliance with the European Directive 93/42/EEC<br />
concering medical devices.<br />
Within the European Union, the marked equipment is covered by<br />
"Directive 2002/96/EC of the European Parliament and of the Council<br />
of 27 January 2003 on waste electrical and electronical equipment.<br />
Amended by Directive 2003/108/EC" (WEEE).<br />
<strong>Siemens</strong><br />
Audiologische Technik GmbH<br />
Gebbertstraße 125<br />
91058 Erlangen<br />
Germany<br />
www.hearing-siemens.com<br />
Order-No.: A91SAT-00079-99T1-7600<br />
Printed in Germany<br />
1106.ANR<br />
101 751 54<br />
Subject to change without prior notice.<br />
0123


