

Excalibur XT - Atwood Mobile Products
Excalibur XT - Atwood Mobile Products
Excalibur XT - Atwood Mobile Products

You also want an ePaper? Increase the reach of your titles
YUMPU automatically turns print PDFs into web optimized ePapers that Google loves.
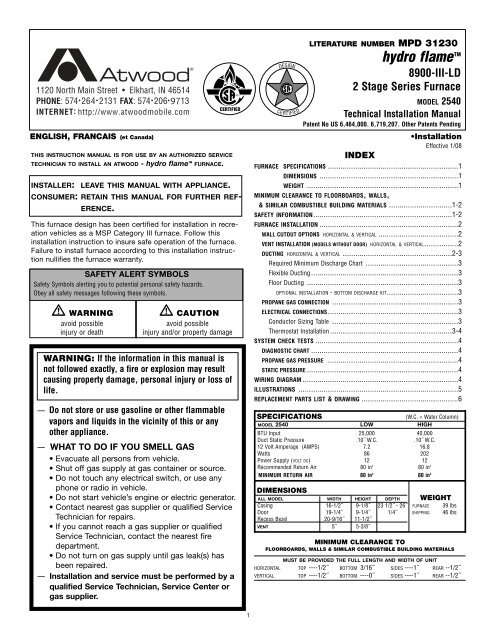
LITERATURE NUMBER MPD 31230<br />
hydro flame<br />
ENGLISH, FRANCAIS (et Canada) •Installation<br />
Effective 1/08<br />
TM<br />
8900-III-LD<br />
2 Stage Series Furnace<br />
9<br />
MODEL 2540<br />
Technical Installation Manual<br />
Patent No US 6,464,000. 6,719,207. Other Patents Pending<br />
THIS INSTRUCTION MANUAL IS FOR USE BY AN AUTHORIZED SERVICE<br />
TECHNICIAN TO INSTALL AN ATWOOD - hydro flame TM FURNACE.<br />
INSTALLER: LEAVE THIS MANUAL WITH APPLIANCE.<br />
CONSUMER: RETAIN THIS MANUAL FOR FURTHER REF-<br />
ERENCE.<br />
This furnace design has been certified for installation in recreation<br />
vehicles as a MSP Category III furnace. Follow this<br />
installation instruction to insure safe operation of the furnace.<br />
Failure to install furnace according to this installation instruction<br />
nullifies the furnace warranty.<br />
SAFETY ALERT SYMBOLS<br />
Safety Symbols alerting you to potential personal safety hazards.<br />
Obey all safety messages following these symbols.<br />
WARNING CAUTION<br />
avoid possible avoid possible<br />
injury or death injury and/or property damage<br />
WARNING: If the information in this manual is<br />
not followed exactly, a fire or explosion may result<br />
causing property damage, personal injury or loss of<br />
life.<br />
— Do not store or use gasoline or other flammable<br />
vapors and liquids in the vicinity of this or any<br />
other appliance.<br />
— WHAT TO DO IF YOU SMELL GAS<br />
• Evacuate all persons from vehicle.<br />
• Shut off gas supply at gas container or source.<br />
• Do not touch any electrical switch, or use any<br />
phone or radio in vehicle.<br />
• Do not start vehicle’s engine or electric generator.<br />
• Contact nearest gas supplier or qualified Service<br />
Technician for repairs.<br />
• If you cannot reach a gas supplier or qualified<br />
Service Technician, contact the nearest fire<br />
department.<br />
• Do not turn on gas supply until gas leak(s) has<br />
been repaired.<br />
— Installation and service must be performed by a<br />
qualified Service Technician, Service Center or<br />
gas supplier.<br />
1<br />
INDEX<br />
FURNACE SPECIFICATIONS ..............................................................1<br />
DIMENSIONS ..................................................................1<br />
WEIGHT ........................................................................1<br />
MINIMUM CLEARANCE TO FLOORBOARDS, WALLS,<br />
& SIMILAR COMBUSTIBLE BUILDING MATERIALS ..............................1-2<br />
SAFETY INFORMATION..................................................................1-2<br />
FURNACE INSTALLATION ..................................................................2<br />
WALL CUTOUT OPTIONS HORIZONTAL & VERTICAL ......................................2<br />
VENT INSTALLATION (MODELS WITHOUT DOOR) HORIZONTAL & VERTICAL................2<br />
DUCTING HORIZONTAL & VERTICAL ....................................................2-3<br />
Required Minimum Discharge Chart ............................................3<br />
Flexible Ducting......................................................................3<br />
Floor Ducting ........................................................................3<br />
OPTIONAL INSTALLATION - BOTTOM DISCHARGE KIT..................................3<br />
PROPANE GAS CONNECTION ............................................................3<br />
ELECTRICAL CONNECTIONS..............................................................3<br />
Conductor Sizing Table ............................................................3<br />
Thermostat Installation..........................................................3-4<br />
SYSTEM CHECK TESTS ....................................................................4<br />
DIAGNOSTIC CHART ......................................................................4<br />
PROPANE GAS PRESSURE ..............................................................4<br />
STATIC PRESSURE ........................................................................4<br />
WIRING DIAGRAM ..........................................................................4<br />
ILLUSTRATIONS ............................................................................5<br />
REPLACEMENT PARTS LIST & DRAWING ..............................................6<br />
SPECIFICATIONS (W.C. = Water Column)<br />
MODEL 2540 LOW HIGH<br />
BTU Input 25,000 40,000<br />
Duct Static Pressure .10˝ W.C. .10˝ W.C.<br />
12 Volt Amperage (AMPS) 7.2 16.8<br />
Watts 86 202<br />
Power Supply (VOLT DC) 12 12<br />
Recommended Return Air 80 in2 80 in2 MINIMUM RETURN AIR 80 in2 80 in2 DIMENSIONS<br />
WEIGHT<br />
ALL MODEL WIDTH HEIGHT DEPTH<br />
Casing 16-1/2˝ 9-1/8˝ 23 1/2˝ - 26˝ FURNACE 39 lbs<br />
Door 19-1/4˝ 9-1/4˝ 1/4˝ SHIPPING 46 lbs<br />
Recess Bezel 20-9/16˝ 11-1/2˝<br />
VENT 5˝ 5-3/8˝<br />
MINIMUM CLEARANCE TO<br />
FLOORBOARDS, WALLS & SIMILAR COMBUSTIBLE BUILDING MATERIALS<br />
MUST BE PROVIDED THE FULL LENGTH AND WIDTH OF UNIT<br />
HORIZONTAL TOP ----1/2˝ BOTTOM 3/16˝ SIDES ----1˝ REAR --1/2˝<br />
VERTICAL TOP ----1/2˝ BOTTOM ----0˝ SIDES ----1˝ REAR --1/2˝
Spacing of 1/4˝ to ducting within 3 feet of furnace must be provided<br />
unless UL listed wire bound vinyl ducts are used. All ducting material<br />
should be rated for continuous use at 200˚F.<br />
NOTE: Clearances are specifically for plywood or similar building materials<br />
surrounding the furnace (i.e. furnace should NOT be located<br />
under furniture or in a closet space where clothing or other material<br />
could be located.)<br />
NOTE: Furnace efficiency rating is a thermal rating determined under<br />
continuous operating conditions, independent of any installation.<br />
Efficiency rate is given at 77% minimum, actual efficiency rating<br />
may be higher.<br />
WARNING<br />
CARBON MONOXIDE POISONING<br />
• Furnace must be installed and vented to these instructions.<br />
• Improper installation, adjustment, alteration, service or maintenance<br />
can cause injury or property damage.<br />
• Improper installation location may cause furnace to produce negative<br />
pressure, affecting combustion air or venting of other appliances.<br />
CRITICAL INSTALLATION WARNINGS<br />
• DO NOT install furnace on material that restricts return air, such as<br />
carpeting or any soft material i.e. vinyl.<br />
• DO NOT install furnace where clearance to combustibles cannot be<br />
maintained.<br />
• DO NOT modify furnace in any way.<br />
• Installation must provide accessibility if any repairs are necessary to<br />
the furnace. Failure to meet this requirement will create additional<br />
labor costs that will be the responsibility of the installer.<br />
• DO NOT alter furnace for a positive grounding system.<br />
• DO NOT HI-POT furnace unless electronic ignition system (circuit<br />
board) has been disconnected.<br />
• DO NOT use battery charger to supply power to DC model furnace<br />
even when testing.<br />
• DO NOT use 120 volt AC current with DC models.<br />
• DO NOT use furnace cabinet area as a storage compartment.<br />
• DO NOT vent furnace with venting system serving another appliance.<br />
• DO NOT vent furnace to an outside enclosed porch area.<br />
• DO NOT use for temporary heating of buildings or structures under<br />
construction.<br />
• Protect building materials from degrading from flue gas exhaust.<br />
• Protect furnace electrical components from water.<br />
USA AND CANADA - FOLLOW ALL APPLICABLE STATE AND LOCAL CODES -<br />
IN THE ABSENCE OF LOCAL CODES OR REGULATIONS, REFER TO CURRENT STANDARDS OF:<br />
• Recreation Vehicles ANSI A119.2/NFPA 501C.<br />
• National Fuel Gas Code ANSI Z223.1 and/or CAN/CGA B149<br />
Installation Codes<br />
• Federal <strong>Mobile</strong> Home Construction & Safety Standard, Title 24 CFR,<br />
part 3280, or when this Standard is not applicable, the Standard for<br />
Manufactured Home Installations (Manufactured Home Sites,<br />
Communities and Set-Ups), ANSI A255.1 and/or CAN/CSA-Z240 MH<br />
Series, <strong>Mobile</strong> Homes.<br />
• Ground-National Electrical Code ANSI/NFPA No. 70 and/or CSA C22.1<br />
• Park Trailers ANSI A119.5<br />
NOTE: The direct high voltage spark ignition generates a radio frequency<br />
that could cause interference with other microprocessor based<br />
equipment. Locate equipment at least five feet (5’) from furnace<br />
location. If this distance cannot be maintained, purchase KIT<br />
MPD 37773 (a shielded high voltage lead).<br />
2<br />
WARNING<br />
CARBON MONOXIDE POISONING<br />
• Properly seal vent assembly to prevent carbon monoxide from<br />
entering coach.<br />
• DO NOT draw combustion air from living area. DO NOT vent exhaust<br />
air into the living area or an enclosed porch.<br />
Return air is supplied through openings in furnace casing. All return<br />
air passages must be kept clear for furnace to function properly. Refer<br />
to MINIMUM CLEARANCE TO FLOORBOARDS, WALLS & SIMILAR COMBUSTIBLE BUILDING<br />
MATERIAL. The total unobstructed return air opening size(s) must NOT BE<br />
LESS than specified in SPECIFICATIONS - MINIMUM RETURN AIR. Failure to meet<br />
minimum return air requirements nullifies furnace warranty.<br />
STANDARD FURNACE INSTALLATION<br />
General Installation - LOCATION<br />
• Install furnace through an exterior wall.<br />
• DO NOT install furnace near tilt-out rooms, slide-outs, doors or<br />
other projections that could obstruct furnace exhaust.<br />
• Locate furnace near midpoint of coach for single furnace applications.<br />
• DO NOT install vent in areas where projections or door openings<br />
are within 6˝ of vent tube opening.<br />
• DO NOT install furnace in an area where wires, pipes, or other<br />
objects will interfere with installation or operation of furnace.<br />
• It is not recommended to install furnace on material that restricts<br />
return air, such as carpeting, or soft material such as vinyl.<br />
• DO NOT directly install furnace on carpeting or soft material, install<br />
furnace on cleats, or on a wood or metal panel extending the full<br />
width and depth of furnace plus minimum clearances to combustibles.<br />
• DO NOT use petroleum or citrus type cleaners on plastic parts, as<br />
damage may occur.<br />
• The furnace must always be installed level (front to back, side to<br />
side) to prevent water intrusion into the interior.<br />
WALL CUTOUT OPTIONS HORIZONTAL & VERTICAL<br />
RECOMMENDED WALL THICKNESS 0˝ to 2-1/2˝<br />
DO NOT OVERSIZE HOLE - OVERSIZING CAN RESULT IN WATER LEAKAGE<br />
E<strong>XT</strong>ERIOR WALL CUTOUT (FIG 1 -1A) A B C<br />
HORIZONTAL & VERTICAL 3-1/8˝ 2-3/8˝ 3-1/2˝ dia. hole<br />
VENT INSTALLATION HORIZONTAL & VERTICAL INSTALLATION (FIG 1-1A)<br />
1. Locate vent hole cutout as called out in FIG 1-1A.<br />
2. Drill 3-1/2˝ diameter hole through side wall of coach.<br />
3. Remove vent and vent ring from furnace.<br />
4. Insert furnace from backside of wall. Line up hole in wall with hole<br />
for vent to furnace.<br />
5. Apply sealant to back of vent ring and vent cap base.<br />
6. Install vent assembly with HOT at top for horizontal and on right<br />
side for vertical installation (FIG 1-1A). Slip into combustion air<br />
intake tube. Secure to wall with four (4) screws.<br />
7. Vent assembly must have a minimum of 1-1/4˝ overlap on exhaust<br />
and 1/2˝ minimum on combustion air.<br />
8. Horizontal units - secure to floor with two (2) screws through legs<br />
on back of casing. Vertical units use vertical mounting brackets and<br />
self-tapping screws to hold furnace to floor (tabs on control box can<br />
be used also to secure furnace).<br />
DUCTING HORIZONTAL & VERTICAL (FIG 2-3A)<br />
HORIZONTAL<br />
PROPER DUCT INSTALLATION IS CRITICAL TO THE OPERATION OF THIS FURNACE<br />
CONTINUOUS USE MATERIALS RATING<br />
DUCTS 9˝ IN LENGTH OR MORE 200˚F.<br />
4˝ DUCTS -LESS THAN 9˝ IN LENGTH 250˚F.<br />
METAL BOOTS LESS THAN 9˝ IN LENGTH 250˚F.
Ducting systems can include any combination of discharge openings, as<br />
long as static pressure and minimum discharge area requirements are met.<br />
ALL MODELS - (also see STATIC PRESSURE TEST)<br />
REQUIRED MINIMUM DISCHARGE 48 IN 2<br />
REQUIRED MINIMUM RETURN AIR 80 IN 2<br />
• See MINIMUM CLEARANCE TO FLOORBOARDS, WALLS & SIMILAR COMBUSTIBLE<br />
BUILDING MATERIALS.<br />
• Each 4-inch duct opening provides 12 in 2 of discharge area. Provide<br />
an extra 12 in 2 of non closeable duct discharge area for each<br />
closeable register used.<br />
• Use of 2˝ ducts does not count toward achieving minimum discharge<br />
requirements. Ducting in dead air space with no return air, such as<br />
holding tank areas, does not count toward achieving minimum discharge<br />
requirements.<br />
• Adjust ducting installation to obtain air rise of 100˚F-130˚F.<br />
Flexible Ducting Systems<br />
When designing Flexible Duct Systems:<br />
• avoid sharp bends or crushed ducts<br />
• stretch all ducts and run them directly to outlets, keeping quantity<br />
and angles of bends to a minimum<br />
1. Remove knockout plates from desired outlets.<br />
2. Attach a duct adapter to each opening, by inserting flange over casing,<br />
locking the tab into casing slot and turning adapter 90˚.<br />
3. Attach and secure FOUR-INCH flexible ducts to adapters.<br />
4. Run ducts to desired location within RV, secure to registers.<br />
5. Additional ducting may be needed to maintain correct static pressure.<br />
Floor Hard Ducting Systems<br />
When designing Hard Ducting Systems:<br />
• undersize ducting will cause high temperature limiting<br />
• oversize ducting will cause inadequate air flow from registers<br />
• when hard ducting is 1-1/2˝ in depth, an additional flex duct may be<br />
needed to maintain installation static requirements<br />
• DO NOT install floor registers within 2 feet of return air openings.<br />
OPTIONAL INSTALLATION - BOTTOM DISCHARGE (FIG 4)<br />
1. Remove bottom discharge cover plate. This ducting option must<br />
be connected to a ducting system. FIG 3 (parts breakdown) #40 -<br />
GASKET AND PLENUM PLATE KIT is available when attaching furnace.<br />
2. If cutout is required: FLOOR CUTOUT<br />
BOTTOM DISCHARGE A B C D<br />
HORIZONTAL-WITHOUT DOOR (FIG 4) 18-20 1/2˝ 5-1/2˝ 10-1/2˝ 3/4˝˝<br />
3. Fasten plenum plate (3-E) over floor cutout. If a gasket and<br />
plenum plate are not used, seal furnace to hard duct system making<br />
sure seal is air-tight and continue with STEP 5.<br />
4. Position gasket (3-F) on plenum plate.<br />
5. Set furnace on gasket, make sure gasket remains in position.<br />
6. Additional ducting can be used to maintain correct static pressure.<br />
VERTICAL<br />
There is only one ducting option when using vertical installation.<br />
Option 1 has already been illustrated, the other configuration is using<br />
top two ducts and two ducts off the back of the casing. This is the<br />
only configuration allowed with vertical installation (FIG 3A).<br />
3<br />
PROPANE GAS CONNECTION (FIG. 2)<br />
1. Connect gas line to fitting on top rear of furnace. Be sure all male<br />
pipe threads, other than flare fittings, are treated with a sealing compound<br />
resistant to the action of propane (LP) gas. DO NOT put sealing<br />
compound on flare fittings.<br />
2. A 3/8˝ flared fitting connection is provided at gas control valve inlet<br />
for gas supply connection to furnace. The gas supply line of the furnace<br />
must be of adequate size to provide 11˝ W.C. gas pressure.<br />
This pressure must be maintained under maximum flow conditions<br />
with all gas appliances in operation.<br />
3. Use two wrenches to hold fitting and flare nut when tightening gas<br />
line to fitting. DO NOT twist fittings (FIG. 2).<br />
ELECTRICAL CONNECTION<br />
WARNING<br />
INJURY OR PROPERTY DAMAGE<br />
• Label all wires before disconnecting for servicing. Wiring errors<br />
can cause improper and dangerous operation. Verify proper operation<br />
after servicing.<br />
• Disconnect electrical power before servicing.<br />
Conductor Sizing Table - MAX. 10% VOLTAGE DROP - (12 VDC)<br />
CURRENT DRAW (AMPS)<br />
3 4 5 6 7 8 9 10 15 16<br />
GAGE MAX. LENGTH OF SAE CONDUCTOR (IN FEET) FROM SOURCE TO DEVICE<br />
18 57 43 34 29 25 21 19 17 11 -<br />
16 87 65 52 43 37 33 29 26 17 -<br />
14 52 46 41 28 21<br />
CAUTION<br />
PROPERTY DAMAGE<br />
• This connection is for low-voltage battery or direct current only.<br />
Do not connect to 120- or 240- volts AC.<br />
This furnace is designed for negative ground 12 volts DC only. DO NOT<br />
attempt to alter furnace for a positive ground system or connect the<br />
furnace directly to 120 volts AC. Damage to furnace components will<br />
occur and warranty will be voided.<br />
Use a minimum of 14 GA wire to minimize voltage drop. Furnace must<br />
be installed so electrical components are protected from water. To<br />
make electrical connections see wiring diagram FIG. 4.<br />
1. Route wiring to left side of furnace.<br />
2. Connect red wire to positive side of power supply.<br />
3. Connect yellow wire to grounded side of power supply.<br />
4. Connect blue wire to thermostat using 22-18 GA stranded wire.<br />
5. Connect the green wire to the green thermostat lead using minimum<br />
22-18 GA stranded wire.<br />
See instruction with thermostat for complete wiring directions.<br />
For best furnace performance when power supply is from a converter<br />
equipped with a charging port, wire converter to furnace parallel with<br />
battery. This provides consistent voltage to furnace, increasing component<br />
life, filtering power surges and AC spikes.<br />
Each unit ships with a standard field harness connection with 12˝ wire<br />
leads.<br />
NOTE: All units are supplied with a power switch which when turned off<br />
for servicing will remove power through furnace wiring. Switch must<br />
be in ON position for furnace to operate FIG 2-G.<br />
POWER SUPPLY<br />
<strong>Atwood</strong> <strong>Mobile</strong> <strong>Products</strong> highly recommends the use of an electronic<br />
(solid state) converter with clean, clear power output. This will assure<br />
the life of the electronic controls and motor life could be extended as<br />
much as 500% beyond typical linear converter applications.
THERMOSTAT INSTALLATION (MODEL 2H2C)<br />
FURNACE - MODEL 2540 MUST USE THIS THERMOSTAT<br />
The thermostat is very sensitive. HANDLE WITH CARE AT ALL TIMES.<br />
Locate thermostat 48˝ to 54˝ above floor on an INTERIOR wall. Pick a dry<br />
area where air circulation is good. E<strong>XT</strong>ERIOR wall location must have a<br />
3/4˝ spacer between thermostat and exterior wall.<br />
1. Be sure all electrical power has been disconnected from the air conditioner,<br />
furnace and the power supply.<br />
2. Do not install the thermostat where there are unusual heating conditions:<br />
such as direct sunlight, heat producing appliances (television,<br />
radio, wall lamp, etc.) or a furnace or air conditioner supply register.<br />
3. ATTACHING THE WALL THERMOSTAT. Separate the thermostat body from the<br />
sub-base by gently squeezing the top and bottom. Pull wires through<br />
access hole in base plate. Attach thermostat sub-base to the wall at<br />
the desired mounting location. Mount the sub-base to the wall before<br />
connecting the wires. See instruction provided with thermostat.<br />
SYSTEM CHECKS<br />
WARNING<br />
FIRE OR EXPLOSION<br />
• Never check for leaks with an open flame.<br />
DIAGNOSTIC CHART<br />
A diagnostic LED is located inside the exterior access cover on the outside<br />
edge of the horizontal (2) stage control board. The following<br />
graph defines the codes.<br />
NUMBER OF LED FLASHES DIANOSTIC INFORMATION LOCKOUT<br />
1 Low Input voltage SOFT<br />
2 Ignition Failure SOFT<br />
3 Open High Limit SOFT<br />
4 Stuck Sail Switch HARD<br />
5 Module Fault HARD<br />
+12 VDC<br />
+THERMO<br />
ELECTRONIC<br />
DIGITAL<br />
THERMOSTAT<br />
1 1<br />
2 2<br />
RED<br />
BLUE<br />
-12 VDC<br />
-THERMO<br />
3 3<br />
4 4<br />
5 5<br />
6 6<br />
YELLOW<br />
GREEN<br />
BULK HEAD<br />
CONNECTOR<br />
4<br />
CUSTOMER SUPPLIED WIRE<br />
WHITE<br />
LIMIT<br />
SWITCH<br />
2-STAGE - MODEL 2540<br />
WIRING<br />
RED<br />
RED<br />
WHITE<br />
BLACK<br />
DUAL<br />
CONTROL<br />
6 5 4 3 21<br />
SAIL<br />
SWITCH<br />
YELLOW<br />
ORANGE<br />
BLUE<br />
YELLOW<br />
IGNITION<br />
CONTROL<br />
BROWN<br />
BLACK<br />
4<br />
NOTE: A SOFT lockout is a condition that is timed and will make additional<br />
attempts to correct the problem. A HARD lockout requires reset<br />
of the thermostat or turning the power switch off then back on.<br />
PROPANE GAS PRESSURE TEST<br />
The furnace and any individual shut-off valve must be disconnected<br />
from gas supply piping system during any pressure testing of system<br />
at test pressures of more than 1/2 PSI.<br />
Before furnace is connected piping systems must be tested to be leak<br />
free. The test must maintain air pressure of at least 6˝ of mercury or 3<br />
PSI for at least 10 minutes.<br />
The entire piping system must be maintained within a range of 10-14˝<br />
W.C. when all appliances are in operation. Test gas connections for<br />
leakage with a leak test solution.<br />
STATIC PRESSURE TEST<br />
CASING STATIC PRESSURE TABLE<br />
If duct static pressure cannot be set, casing static pressure should not exceed<br />
the values listed below when taken cold.<br />
DUCTING SYSTEM OPERATING VOLTS FLEXIBLE HARD<br />
DC MODELS 12 0.25˝ W.C. 0.35˝ W.C.<br />
Voltage greater than indicated will cause higher static readings.<br />
Reducing the number of duct turns and stretching ducts will increase<br />
air flow and reduce static pressure. Adding ducts or increasing discharge<br />
system (hard ducting) will also reduce static pressure. NOTE:<br />
Special tool required to take casing static pressures.<br />
Location for Static Pressure Tap for casing is on the back of casing<br />
(top left corner) (FIG 3).<br />
MOTOR<br />
IMPORTANT: If any original wire has to<br />
be replaced, it must be replaced with<br />
type 105˚C or it's equivalent.<br />
HIGH TENSION<br />
RED<br />
VALVE<br />
ELECTRODE<br />
CHASSIS<br />
GROUND<br />
CHASSIS<br />
GROUND
D<br />
Gas Line<br />
(Conduite de gaz)<br />
F<br />
E<br />
2<br />
Casing Static<br />
Check Point<br />
C<br />
3<br />
B<br />
C<br />
4<br />
B<br />
OUTSIDE RV<br />
(E<strong>XT</strong>ERIEUR DU VEHICULE)<br />
G<br />
A<br />
1<br />
A<br />
5<br />
MUST USE<br />
MUST USE<br />
MUST USE<br />
MUST USE<br />
3-A<br />
AVANT DU VEHICULE<br />
1-A
hydro flame TM<br />
8900-III-LD 2 Stage Series<br />
Furnace Model 2540<br />
15 COOL<br />
28<br />
52<br />
OFF HEAT M<br />
FAN<br />
53<br />
20<br />
48<br />
DRAWING # DESCRIPTION<br />
1 Blower Wheel<br />
6 Burner Assembly<br />
8 ON/OFF Switch / Circit Breaker<br />
9 Valve Coil Replacement (DC)<br />
10 Combustion Wheel<br />
15 Dual Thermostat<br />
17 Valve<br />
19 Vent Assembly<br />
20 Electronic Ignition Board<br />
22 Duct Adapters<br />
23 Duct Cover Plate<br />
24 Electrode<br />
26 Adapter Plate Assembly<br />
28 High Tension Lead<br />
32 Limit Switch<br />
35 Motor Gasket<br />
36 Motor<br />
37 Orifice - #49<br />
41 Sail Switch<br />
42 Element Assembly<br />
43 Exhaust Wall Gasket<br />
48 Blower Housing Back<br />
49 Blower Housing<br />
50 Motor/Combustion Wall<br />
52 Control Board Mounting Bracket<br />
1<br />
41<br />
36<br />
35<br />
49<br />
19<br />
50<br />
10<br />
53 Motor Speed Control Board<br />
54 Adapter Plate<br />
55 Burner Access Cover (specify)<br />
56 Extended Manifold<br />
57 Vent Ring<br />
58 Gas Line Gasket<br />
8<br />
N˚ SUR LE SCHÉMA DESCRIPTION<br />
1 Ventilateur<br />
6 Brûleur<br />
8 Interrupteur MARCHE/ARRÊT/Coupecircuit<br />
9 Echange du serpentin de la vanne (CC)<br />
10 Ventilateur d'air de combustion<br />
15 Double thermostat<br />
17 Soupape<br />
19 Assemblage de ventilation<br />
20 Panneau d'allumage électronique<br />
22 Adaptateurs de conduit<br />
23 Couvercle d'ouverture de branchement<br />
de conduit<br />
24 Électrode<br />
26 Plaque adapatatrice de flexibles<br />
28 Fil haute tension<br />
32 Rupteur thermique<br />
35 Joint d'étanchéité du moteur<br />
6<br />
57<br />
42<br />
55<br />
58<br />
32<br />
24<br />
6<br />
56<br />
43<br />
9<br />
17<br />
26<br />
23<br />
36 Moteur<br />
37 Orifice - # 49<br />
41 Interrupteur à abattant<br />
42 Elément de chauffage<br />
43 Joint entre le système d'évacuation et<br />
la paroi<br />
48 Arrière du boîtier du ventilateur<br />
49 Boîtier du ventilateur<br />
50 Paroi moteur/ventilateur d'air de combustion<br />
52 Support de fixation du tableau de commande<br />
53 Panneau de commande de vitesse du<br />
moteur<br />
54 Plaque adaptatrice<br />
55 Burner Access Cover (à spécifier)<br />
56 Distributeur<br />
57 Anneau<br />
58 Joint d’étanchéité du tuyau à gaz<br />
59<br />
37<br />
12<br />
54<br />
22


