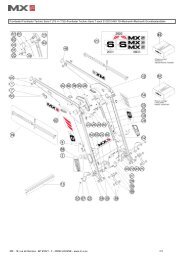
MANUBAL V40-V50-V500-W500-V6000 instructions - MX
MANUBAL V40-V50-V500-W500-V6000 instructions - MX
MANUBAL V40-V50-V500-W500-V6000 instructions - MX

Create successful ePaper yourself
Turn your PDF publications into a flip-book with our unique Google optimized e-Paper software.
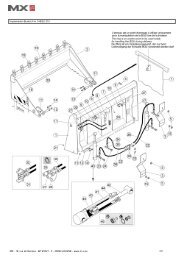
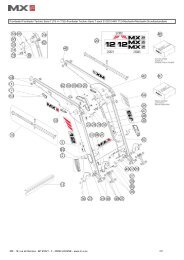
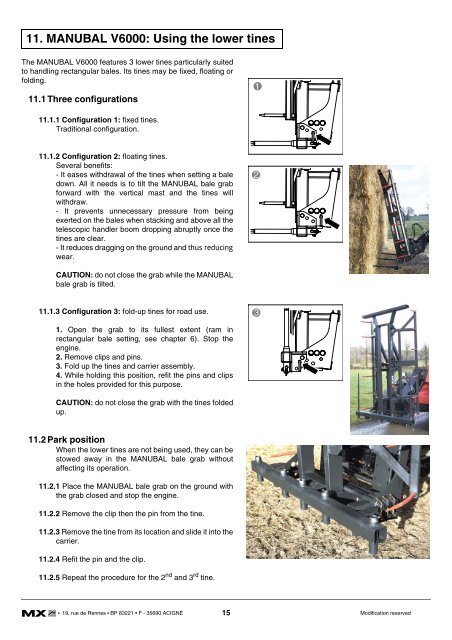
11. <strong>MANUBAL</strong> <strong>V6000</strong>: Using the lower tines<br />
The <strong>MANUBAL</strong> <strong>V6000</strong> features 3 lower tines particularly suited<br />
to handling rectangular bales. Its tines may be fixed, floating or<br />
folding.<br />
11.1 Three configurations<br />
11.1.1 Configuration 1: fixed tines.<br />
Traditional configuration.<br />
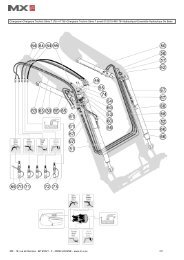
11.1.2 Configuration 2: floating tines.<br />
Several benefits:<br />
- It eases withdrawal of the tines when setting a bale<br />
down. All it needs is to tilt the <strong>MANUBAL</strong> bale grab<br />
forward with the vertical mast and the tines will<br />
withdraw.<br />
- It prevents unnecessary pressure from being<br />
exerted on the bales when stacking and above all the<br />
telescopic handler boom dropping abruptly once the<br />
tines are clear.<br />
- It reduces dragging on the ground and thus reducing<br />
wear.<br />
CAUTION: do not close the grab while the <strong>MANUBAL</strong><br />
bale grab is tilted.<br />
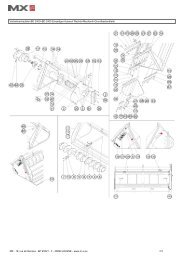
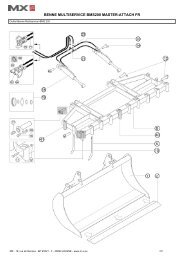
11.1.3 Configuration 3: fold-up tines for road use.<br />
1. Open the grab to its fullest extent (ram in<br />
rectangular bale setting, see chapter 6). Stop the<br />
engine.<br />
2. Remove clips and pins.<br />
3. Fold up the tines and carrier assembly.<br />
4. While holding this position, refit the pins and clips<br />
in the holes provided for this purpose.<br />
CAUTION: do not close the grab with the tines folded<br />
up.<br />
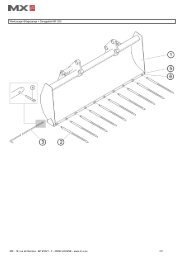
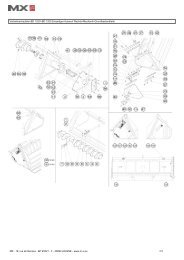
11.2 Park position<br />
When the lower tines are not being used, they can be<br />
stowed away in the <strong>MANUBAL</strong> bale grab without<br />
affecting its operation.<br />
11.2.1 Place the <strong>MANUBAL</strong> bale grab on the ground with<br />
the grab closed and stop the engine.<br />
11.2.2 Remove the clip then the pin from the tine.<br />
11.2.3 Remove the tine from its location and slide it into the<br />
carrier.<br />
11.2.4 Refit the pin and the clip.<br />
11.2.5 Repeat the procedure for the 2 nd and 3 rd tine.<br />
19, rue de Rennes BP 83221 F - 35690 ACIGNÉ<br />
1<br />
2<br />
3<br />
15 Modification reserved