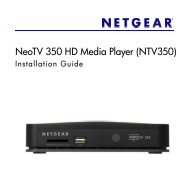
Installation Guide Mini Print Server MODEL PS101 - Netgear
Installation Guide Mini Print Server MODEL PS101 - Netgear
Installation Guide Mini Print Server MODEL PS101 - Netgear

You also want an ePaper? Increase the reach of your titles
YUMPU automatically turns print PDFs into web optimized ePapers that Google loves.
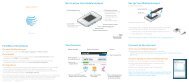
Introduction<br />
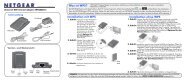
Thank you for purchasing a NETGEAR <strong>PS101</strong><br />
<strong>Mini</strong> <strong>Print</strong> <strong>Server</strong>. With this print server you can<br />
share your printer with all the computers in your<br />
home or office that run Microsoft® Windows®<br />
95 OSR2, 98, 2000, NT 4.x, Me, or XP<br />
operating system.<br />
This installation guide shows you how to connect<br />
the print server to your printer and configure it to<br />
use with your computers. Setup is easy – if you<br />
follow the instructions in this guide, the print server<br />
will soon be up and running for your computers.<br />
If you have problems, there is a troubleshooting section on page 9 to help you. You can get<br />
more detailed troubleshooting information from the Reference Manual on the CD or online at<br />
www.NETGEAR.com in our Support section.<br />
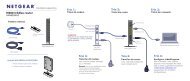
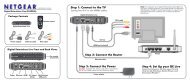
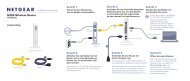
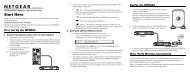
<strong>Installation</strong> Procedure Overview<br />
Estimated time: 30 minutes<br />
1. Unpack the box and verify the contents.<br />
2. Connect the print server to the printer and to the network.<br />
3. Configure the print server to be recognized on the network.<br />
4. Configure each computer to print through the print server.<br />
Note: You only need to go through procedures 1 through 3 once. Repeat procedure<br />
4 for each computer that will share the printer with the print server. It takes less<br />
than 5 minutes to configure and test each computer.<br />
On the <strong>PS101</strong> Resource CD, you will find a Reference Manual containing more detailed<br />
information about installation, troubleshooting and configuration.<br />
1