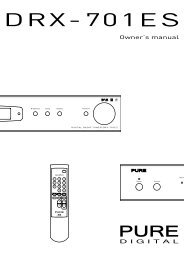
DRX-602ES Owner's manual (English) - Support
DRX-602ES Owner's manual (English) - Support
DRX-602ES Owner's manual (English) - Support
You also want an ePaper? Increase the reach of your titles
YUMPU automatically turns print PDFs into web optimized ePapers that Google loves.
Operating Instructions..........<br />
Bedienungsanleitung............<br />
Consignes d'utilisation.........
Safety instructions<br />
Keep the unit away from heat sources.<br />
Do not use the unit near water.<br />
Avoid objects or liquids getting into the unit.<br />
Unplug the power lead if the unit will not be<br />
used for a long period.<br />
Mains safety<br />
The unit uses a 220-240V AC 50 Hz (Europe)<br />
or 115V AC 60Hz (Canada) power supply.<br />
When replacing the fuse in the<br />
supplied moulded mains plug,<br />
always refit the integral fuse<br />
holder/cover. Always fit a 3 amp<br />
fuse either in the plug or adapter,<br />
or at the distribution board.<br />
Do not attempt to remove any screws or open<br />
the unit. No user serviceable parts are inside.<br />
For your safety, always obey the warning:<br />
CAUTION - RISK OF ELECTRIC SHOCK - DO NOT<br />
OPEN COVER<br />
Copyright<br />
Copyright 2001 by Imagination Technologies Limited. All rights<br />
reserved. No part of this publication may be copied or distributed,<br />
transmitted, transcribed, stored in a retrieval system, or translated into<br />
any human or computer language, in any form or by any means,<br />
electronic, mechanical, magnetic, <strong>manual</strong> or otherwise, or disclosed to<br />
third parties without the express written permission of Imagination<br />
Technologies Limited.<br />
Disclaimer<br />
Imagination Technologies Limited makes no representation or warranties<br />
with respect to the content of this document and specifically disclaims any<br />
implied warranties of merchantability or fitness for any particular purpose.<br />
Further, Imagination Technologies Limited reserves the right to revise this<br />
publication and to make changes in it from time to time without obligation<br />
of Imagination Technologies Limited to notify any person or organization of<br />
such revisions or changes.<br />
Sicherheitsvorschriften<br />
Halten Sie der Radio von Wärmequellen fern.<br />
Betreiben Sie der Radio nicht in unmittelbarer<br />
Wassernähe.<br />
Verhindern Sie jegliches Eindringen von<br />
Flüssigkeit in das Innere der Radio.<br />
Unterbrechen Sie die Stromzufuhr zum Radio,<br />
wenn sie es für längere Zeit nicht nutzen.<br />
Sicherheit im Umgang<br />
mit Netzstrom<br />
DigiTheatre DTS benötigt eine Betriebsspannung<br />
von 220-240 Volt Wechselstrom mit 50 Hz<br />
(Europa) oder 115 Volt Wechselstrom mit 60 Hz<br />
(Kanada).<br />
Versuchen Sie keinesfalls der<br />
Radio zu öffnen. Es befinden sich<br />
keine Teile innerhalb des<br />
Gehäuses, die vom Benutzer<br />
gewartet werden können.<br />
Für Ihre Sicherheit beachten Sie folgendes:<br />
ACHTUNG - GEHÄUSE NICHT ÖFFNEN -<br />
LEBENSGEFÄHRLICHE SPANNUNG.<br />
Copyright<br />
Copyright 2001 Imagination Technologies Limited. Alle Rechte<br />
vorbehalten. Kopien, auch auszugsweise, von diesem Dokument, egal in<br />
welcher Form, bedürfen der schriftlichen Genehmigung von Imagination<br />
Technologies Limited.<br />
Haftungsausschluß<br />
Consignes de Sécurité<br />
Ne pas placer l'unité à proximité d’une source<br />
de chaleur.<br />
Protéger l'unité contre la pluie et l’humidité.<br />
Veiller à ce qu’aucun objet ou liquide ne<br />
pénètre dans l'unité.<br />
Débrancher le câble d’alimentation en cas de<br />
non utilisation prolongée de <strong>DRX</strong>-<strong>602ES</strong>.<br />
Sécurité électrique<br />
L'unité doit être branché sur une tension<br />
secteur de 220-240 V CA 50 Hz (L'Europe) ou<br />
115V CA 60Hz (Canada).<br />
Ne pas tenter d’ouvrir l'unité.<br />
Aucune des pièces se trouvant<br />
à l’intérieur ne peut être<br />
réparée par l’utilisateur.<br />
Respecter la consigne de sécurité suivante:<br />
ATTENTION – RISQUE DE CHOC ÉLECTRIQUE –<br />
NE PAS OUVRIR LE BOÎTIER.<br />
Copyright<br />
Copyright 2001 par Imagination Technologies Limited. Tout droits<br />
réservés. Il est interdit de copier, distribuer, transmettre, transcrire,<br />
traduire et archiver tout ou partie de ce document, sous quelque forme<br />
que ce soit et par tout procédé que se soit, sans l’autorisation écrite<br />
préalable de Imagination Technologies Limited.<br />
Disclaimer<br />
Imagination Technologies Limited übernimmt keine Haftung, bzw.<br />
Cette publication n’implique aucun engagement contractuel de<br />
Gewährleistung,, die über den Inhalt dieses Dokuments hinausgehen und Imagination Technologies Limited concernant la présentation ou les<br />
schließt alle implimierten Gewährleistungsansprüche aus. Desweiteren behält garanties. En particulier, Imagination Technologies Limited refute toute<br />
sich Imagination Technologies Limited das Recht vor, ohne vorherige garantie implicite d’usage ou de valeur marchande, pour quelque but<br />
Ankündigung oder Benachrichtigung einzelner Personen, bei Bedarf que ce soit. En outre, Imagination Technologies limited se réserve le<br />
Änderungen und Ergänzungen an diesem Dokument vorzunehmen. droit de modifier cette publication et d’y opérer des changements<br />
ponctuels, sans avoir l’obligation d’en informer quelque personne ou<br />
organisation que ce soit.<br />
Trademarks<br />
Warenzeichen<br />
Trademarks<br />
VideoLogic, the VideoLogic Logo, Imagination Technologies, and the<br />
Imagination Technologies logo are trademarks or registered trademarks of<br />
Imagination Technologies Limited. All other product names are trademarks<br />
of their respective companies.<br />
VideoLogic, das VideoLogic Logo, Imagination Technologies, und das<br />
Imagination Technologies logo sind Warenzeichen, bzw. eingetragene<br />
Warenzeichen von Imagination Technologies Limited. Alle anderen<br />
gennanten Warenzeichen und Markennamen gehören Ihren jeweiligen<br />
Besitzern.<br />
VideoLogic, le logo VideoLogic, Imagination Technologies et le logo<br />
Imagination Technologies sont des marques et des marques déposées<br />
de Imagination Technologies Limited. Tous les autres noms de produits<br />
sont des marques de leur compagnie respective.<br />
Credits<br />
Impressum<br />
Crédits<br />
This <strong>manual</strong> was written by Bruce Murray and illustrated by Philippa Page. It<br />
is a product of VideoLogic Systems, Imagination Technologies Ltd., Home<br />
Park Estate, Kings Langley, Hertfordshire WD4 8LZ, UK.<br />
Dieses Manual wurde von Bruce Murray erstellt unt Ilustrationen von Philippa<br />
Page. Dies ist ein Produkt von VideoLogic Systems, Imagination Technologies<br />
Limited, Home Park Estate, Kings Langley, Hertfordshire WD4 8 LZ, Groß<br />
Ce manuel a été écrit par Bruce Murray et illustré par Philippa Page.<br />
C’est un produit de VideoLogic Systems, Imagination Technologies<br />
Limited, Home Park Estate, Kings Langley, Hertfordshire WD4 8LZ, United<br />
Edition 1 June 2001<br />
Britannien.<br />
Kingdom.<br />
Erstausgabe Juni 2001<br />
Premier edition Juin 2001
Contents<br />
Introduction ............................................................................... 2<br />
Unpacking ................................................................................. 2<br />
Controls and Connectors ............................................................. 3<br />
Setting up.................................................................................. 4<br />
Using your <strong>DRX</strong>-<strong>602ES</strong> ............................................................... 5<br />
Using the remote control ............................................................. 7<br />
Guide to Digital Radio ................................................................. 8<br />
Troubleshooting ......................................................................... 9<br />
Aerial advice ............................................................................10<br />
Accessories ..............................................................................10<br />
Getting Help .............................................................................10<br />
Technical Specifications ............................................................11<br />
Index .......................................................................................12<br />
1
Introduction<br />
Thank you for choosing the <strong>DRX</strong>-<strong>602ES</strong> Digital Radio Tuner.<br />
This <strong>manual</strong> provides information on setting up your unit, instructions on using it and details of the accessories and support available.<br />
The <strong>DRX</strong>-<strong>602ES</strong> is a dedicated high performance digital radio tuner. Also known as Digital Audio Broadcast (DAB), digital radio provides superb<br />
quality sound, eliminating the hiss, crackle and fade associated with analogue radio broadcasts.<br />
Designed to complement your hi-fi separates system, the <strong>DRX</strong>-<strong>602ES</strong> has a range of input and output sockets for maximum connectivity including:<br />
dual phono for stereo analogue audio output to your amplifier; coaxial and optical S/PDIF digital output (48 kHz) for direct digital recording to<br />
MiniDisc, CD-R or DAT; AM/FM tuner line-level input with auto pass-through to output at power off; optical RDI data output connector<br />
and RF F-connector for your aerial.<br />
If you are new to digital radio, see Guide to Digital Radio for our quick guide.<br />
Unpacking<br />
This section lists the contents of your <strong>DRX</strong>-<strong>602ES</strong> package. After unpacking your box check that you have all of the following items.<br />
Contact us if any items are missing or damaged.<br />
2<br />
One <strong>DRX</strong>-<strong>602ES</strong> Digital Radio Tuner unit One stereo phono to stereo phono cable<br />
Two batteries (AAA size) for the remote control One DAB ribbon indoor aerial<br />
One infrared remote control handset
Controls and Connectors<br />
This section provides information on the controls and connectors available on the front and back panels of your <strong>DRX</strong>-<strong>602ES</strong>.<br />
For information on the remote control, see Using the remote control.<br />
Front Panel<br />
Power on/off button and LED<br />
Stereo LED indicates when stereo service is being received, see Using your <strong>DRX</strong>-<strong>602ES</strong>: Selecting a service<br />
Secondary LED indicates whether secondary services are available, see Using your <strong>DRX</strong>-<strong>602ES</strong>: Selecting a service<br />
Remote LED indicates remote control activity<br />
Remote sensor picks up the infrared signal from the remote<br />
Backlit LCD display<br />
Brightness button changes the display brightness<br />
Info button changes the information mode of the display, see Using your <strong>DRX</strong>-<strong>602ES</strong>: Viewing extra information<br />
Display button changes the main display mode, see Using your <strong>DRX</strong>-<strong>602ES</strong>: Changing the display mode<br />
Autotune button provides one touch tuning, language and tuning zone selection see Using your <strong>DRX</strong>-<strong>602ES</strong>: Tuning<br />
Tuning button selects the digital radio service, see Using your <strong>DRX</strong>-<strong>602ES</strong>: Selecting a service<br />
Rear Panel<br />
AERIAL connector<br />
S/PDIF co-axial and optical digital outputs, see Setting up: Connecting to digital devices<br />
RDI (Receiver Data Interface) socket, see Setting up: Connecting to an external decoder<br />
INPUT loop through input for AM/FM tuner<br />
OUTPUT to amplifier line-level stereo (analogue)<br />
Power lead for connection to wall outlet<br />
3
Setting up<br />
This section provides information on connecting your <strong>DRX</strong>-<strong>602ES</strong> to your hi-fi and connecting your aerial. Connector sockets are provided on the back<br />
panel of your <strong>DRX</strong>-<strong>602ES</strong>. Before connecting other devices to your <strong>DRX</strong>-<strong>602ES</strong>, switch both devices off.<br />
4<br />
Connecting to your amplifier<br />
To get sound from your <strong>DRX</strong>-<strong>602ES</strong> you need to connect it to your speakers via an amplifier. This may be a stand alone<br />
unit or it may be built into your existing hi-fi system or powered speakers.<br />
Connect the OUTPUT sockets to the Tuner-in sockets on the back of your amplifier using the supplied stereo phono cable.<br />
Connecting to an auxiliary source<br />
If you have an existing radio tuner, or other auxiliary device, you can connect it through your <strong>DRX</strong>-<strong>602ES</strong> to reduce<br />
connections to your amplifier. The auxiliary device output will then be passed through the analogue outputs to your<br />
amplifier when your <strong>DRX</strong>-<strong>602ES</strong> is switched off.<br />
Connect the INPUT sockets to the output sockets on the back of your auxiliary device using a stereo phono cable.<br />
Connecting to digital devices<br />
Your <strong>DRX</strong>-<strong>602ES</strong> can provide digital audio output for connection to digital speakers, the digital input on your amplifier or<br />
digital devices such as MiniDiscs, CD-Rs or DAT recorders.<br />
Connect the coaxial S/PDIF or the optical S/PDIF socket to the digital-in socket on your digital device using a suitable<br />
cable. Connecting cables are available from VideoLogic, see Accessories for details.<br />
Connecting to your aerial<br />
You need to connect either the supplied indoor aerial or an external DAB aerial to your <strong>DRX</strong>-<strong>602ES</strong> to receive<br />
digital radio transmissions. For information on the different types of aerials available, see Aerial advice.<br />
For information on how to find out about DAB coverage in your area, see Guide to Digital Radio.<br />
1. Screw the aerial plug onto the F-type AERIAL connector.<br />
2. For the best reception, if using the indoor aerial supplied, attach the aerial horizontally to a wall<br />
using some adhesive tape and extend the arms on the end of the aerial wire vertically<br />
into a ‘T’ shape on its side, as illustrated.<br />
Connecting to an external decoder<br />
The RDI (Receiver Data Interface) optical connector provides access to raw multiplex data. This may be used in the future<br />
to connect to an external decoder or computer for access to extra services. These services may not currently be available<br />
in your area.<br />
Connecting to power supply<br />
Once all audio connections are complete as described above connect the power lead to a wall outlet.
Using your <strong>DRX</strong>-<strong>602ES</strong><br />
This section provides information on using your <strong>DRX</strong>-<strong>602ES</strong> including tuning, selecting a service and altering the displayed information.<br />
Switching on for the first time<br />
Before switching on for the first time, check all connections and ensure that the volume on your amplifier is low.<br />
1. Push and release the Power button to switch the unit on. The blue power LED will light up.<br />
2. Press the Autotune button to enter first time setup mode.<br />
3. Rotate the tuning button to select your tuning zone; UK, Canada or Rest of World and press the Autotune button<br />
again to confirm your selection.<br />
4. Rotate the tuning button to select the language your <strong>DRX</strong>-<strong>602ES</strong> will use for display text. Press the Autotune<br />
button to confirm your selection and start the autotune process.<br />
When autotune is complete you will hear the first service found and its name will be shown on the display. All the<br />
services found are now stored in the unit and setup is complete.<br />
If you want to change any of these settings, follow the instructions given in the sections below.<br />
Selecting a service<br />
Once you have tuned your <strong>DRX</strong>-<strong>602ES</strong> you can use the turn-and-push tuning button to select digital radio services.<br />
1. Rotate the tuning button to see the names of the stored services on the bottom line of the display. Stop when you<br />
find the service to which you want to listen.<br />
2. Push and release the tuning button to confirm your selection. The service name will be displayed on the top line of<br />
the display<br />
If the service you select is in stereo, the Stereo LED will light up. If the service you select has one or more secondary<br />
services available, the Secondary LED will light up. For information on primary and secondary services, see Guide to<br />
Digital Radio. For details on selecting primary or secondary services, see Using the remote control.<br />
If reception is poor, check the signal strength and try repositioning your aerial using the signal strength indicator, see<br />
Using your <strong>DRX</strong>-<strong>602ES</strong>: Viewing extra information.<br />
Changing the display mode<br />
The <strong>DRX</strong>-<strong>602ES</strong> has four display modes which enable you to view different elements of the broadcast data on the<br />
bottom line of the display. Press the Display button and repeat or hold to cycle through the four different display modes.<br />
Dynamic Label Segment Scrolling text accompanying the audio, where available.<br />
Program Type A description of the type of content being broadcast by the service.<br />
Multiplex name The name of the multiplex in which the current service is found.<br />
Technical Information The channel label and centre frequency for the current multiplex.<br />
Changing the display brightness<br />
The <strong>DRX</strong>-<strong>602ES</strong> has four levels of brightness which you can alter to suit the light level in your room.<br />
Press the Brightness button and repeat or hold to cycle through the four brightness levels.<br />
5
6<br />
Viewing extra information<br />
The <strong>DRX</strong>-<strong>602ES</strong> has two information modes. Press the Info button and repeat or hold to view the information modes.<br />
Signal strength Displays the strength of the signal for the current multiplex. Maximum strength is shown by 16 bars.<br />
If sound quality is poor you may be able to increase signal strength by repositioning your aerial.<br />
Mode Displays the mode of the current service, Stereo (ST) or Mono (MN) and the data rate at which the<br />
audio signal is being transmitted. The data rate is set by the broadcaster to suit the type and<br />
quality of material being transmitted.<br />
Changing your tuning zone<br />
Your <strong>DRX</strong>-<strong>602ES</strong> can receive both Band III and L-band DAB transmissions. To speed up the autotune process you can<br />
restrict the frequencies scanned by selecting one of three tuning zones: UK (Part of Band III), Canada (Band III +<br />
Canada L-band) or Rest of World (Band III+Europe L-band). The tuning zone is selected when you first set up the unit.<br />
To change your tuning zone:<br />
1. Press and release the Autotune button three times.<br />
2. Rotate the large tuning button to select the required zone and press the Autotune button again to confirm your<br />
selection. You can now select the display language as described below.<br />
Changing your display language<br />
You can set the display to one of 11 languages. If you are setting your display language directly after setting your tuning<br />
zone go straight to step 2 below.<br />
1. Press and release the Autotune button four times.<br />
2. Rotate the large tuning button to select the required language and press the Autotune button again to confirm<br />
your selection. You can now tune your <strong>DRX</strong>-<strong>602ES</strong> as described below.<br />
Tuning<br />
Tuning the <strong>DRX</strong>-<strong>602ES</strong> is very simple. In most cases you only need to perform this operation once, when you first set up<br />
the unit. If you are tuning directly after setting your display language go straight to step 2 below.<br />
1. Push and release the Autotune button. The display will indicate tuning is underway.<br />
2. If you want to cancel the autotune procedure, push and release the Autotune button a second time during tuning.<br />
When finished, you will; hear the first service found and its name will be shown on the display. All the services<br />
found are now stored in the unit.<br />
If no services are found the display will show NO ENSEMBLES. Check your aerial connection and positioning and try the<br />
tuning process again.<br />
You may want to repeat this process in the future if you change your aerial position or if you want to receive a newly<br />
introduced service.<br />
Switching on and off<br />
We recommend that you switch off your <strong>DRX</strong>-<strong>602ES</strong> when not in use to prevent energy wastage. If you leave the unit<br />
switched off for an extended period (around a month or longer) you may need to re-tune the unit to refresh the<br />
available services.<br />
Push and release the Power button to switch the unit on or off.
Using the remote control<br />
This section provides information on using the remote control. The infrared remote control provides access to the main functions of your <strong>DRX</strong>-<strong>602ES</strong><br />
and also advanced facilities such as presets and dynamic range control. Before using your remote, insert the supplied batteries. Aim the remote<br />
control at the sensor on the display panel on your <strong>DRX</strong>-<strong>602ES</strong>.<br />
Buttons (1-9) and the STORE button enable you to store your favourite radio services for easy access.<br />
To store a service<br />
While listening to the service you want to store.<br />
1. Press the STORE button. The display on your <strong>DRX</strong>-<strong>602ES</strong> shows PRESET_ _?<br />
2. Press the number (from 1 to 99) under which you want to store the preset.<br />
3. Press the SELECT button to confirm your selection.<br />
To recall a previously stored service<br />
Press the numbered button(s) under which you stored the service.<br />
The DRC Dynamic Range Control button enables you to alter the dynamic range of the received audio (dependent on<br />
broadcast material) by making the quieter sounds in a broadcast more audible. This may be useful in noisy<br />
environments or particularly quiet parts of programmes.<br />
Press the DRC button to check whether DRC is available for the current service then press the DRC button again to<br />
toggle DRC on or off. The default setting is off.<br />
The MUTE button is a quick way of reducing the output volume from your <strong>DRX</strong>-<strong>602ES</strong>.<br />
1. Press the MUTE button to mute the sound. The display on your <strong>DRX</strong>-602E shows MUTE.<br />
2. Press any key on the remote control or main unit to return to the previous listening volume.<br />
Press the DISPLAY button and repeat or hold down to cycle through the four display options. This button performs the<br />
same function as the Display button on the main unit. See Using your <strong>DRX</strong>-<strong>602ES</strong>: Changing the display for details.<br />
The INFO button enables you to change the information mode on your <strong>DRX</strong>-<strong>602ES</strong>. This button performs the same<br />
function as the Info button on the main unit, see Using your <strong>DRX</strong>-<strong>602ES</strong>: Viewing extra information for details.<br />
Press the INFO button and repeat or hold to view the two information modes.<br />
The PRI/SEC button enables you to select between the primary and secondary services where secondary services are<br />
available. If a secondary service is available for the current service, the Secondary LED will light up on the front of your<br />
<strong>DRX</strong>-<strong>602ES</strong>. Press the PRI/SEC button and repeat or hold to cycle through the available services. For an explanation<br />
of primary and secondary services, see Guide to Digital Radio.<br />
The and SELECT buttons enable you to cycle through and select services. Together, these buttons perform the<br />
same function as the large tuning button on the main unit, see Using your <strong>DRX</strong>-<strong>602ES</strong>: Selecting a service for details.<br />
1. Press and release or hold the or button to cycle through the stored services.<br />
2. The bottom line of the display on your <strong>DRX</strong>-<strong>602ES</strong> shows the service names.<br />
3. Press the SELECT button to select and listen to the displayed service.<br />
7
Guide to Digital Radio<br />
This section provides a brief guide to digital radio (DAB), explains how the features of your <strong>DRX</strong>-<strong>602ES</strong> provide access to it, and provides some<br />
useful addresses for finding out more.<br />
Your <strong>DRX</strong>-<strong>602ES</strong> enables you to receive and listen to Digital Audio Broadcast (DAB) digital radio programmes. DAB uses digital transmission rather<br />
than traditional analogue transmission, providing near CD-quality audio with virtually interference-free reception. DAB also enables broadcasters to<br />
transmit additional data along with the audio including other audio channels, text and in the future, perhaps computer data and images.<br />
DAB digital radio is broadcast as groups of data called multiplexes or ensembles . Each multiplex can contain a number of services (stations) and<br />
each service contains a primary service and can also contain secondary services as illustrated in the following diagram. Each multiplex is<br />
transmitted at a set frequency and is received by your <strong>DRX</strong>-<strong>602ES</strong> for decoding. Your <strong>DRX</strong>-<strong>602ES</strong> can receive multiplexes broadcast on all DAB<br />
frequencies (Band III and L-Band). The number of multiplexes and radio stations you receive, will vary depending on your location.<br />
With DAB, radio stations have labels (names) which are used to identify them. Instead of needing to know a particular frequency to listen to your<br />
favourite broadcast you can simply select the station name. Secondary services and additional data such as text containing programme or multiplex<br />
information are also easily accessed using your <strong>DRX</strong>-<strong>602ES</strong>.<br />
Useful addresses<br />
The following addresses provide additional useful information about digital radio including coverage, available services and usage tips:<br />
WorldDAB<br />
web: www.worlddab.org<br />
tel: +44 (0)20 7288 4642<br />
fax: +44 (0)20 7288 4643<br />
8<br />
DAB Signal<br />
Multiplex<br />
National DAB<br />
Primary DAB Services<br />
Main higher bandwidth services<br />
e.g music, speech<br />
Secondary DAB Services<br />
Lower bandwidth services<br />
e.g. news, text information, speech
Troubleshooting<br />
This section gives some of the most likely solutions to problems you might have with your <strong>DRX</strong>-<strong>602ES</strong>.<br />
I can’t get any sound<br />
Make sure your <strong>DRX</strong>-<strong>602ES</strong> and amplifier are switched on.<br />
Check that you have connected the <strong>DRX</strong>-<strong>602ES</strong> to your amplifier correctly, see Setting up, and that your amplifier has the correct source selected.<br />
Check that the volume on your amplifier is not too low or that you have selected MUTE on the remote control.<br />
Ensure that you have completed the autotune procedure to find digital radio services.<br />
Remote control not functioning<br />
Check that you have inserted the batteries correctly.<br />
Check that you are not too far away from the main unit (not more than 7 metres recommended) and that the remote sensor is not obscured.<br />
Display says ‘No Service Check Setup’<br />
Check that your aerial is connected and positioned properly. Use the autotune facility to search for services.<br />
I can’t access secondary services<br />
If secondary services are available for the currently selected service the Secondary indicator LED will light up. Use the remote control to select<br />
secondary services, see Using the remote control.<br />
Display says ‘Memory Reset Presets Lost’<br />
This may occur if the unit has been switched off for an extended period of time (longer than a month). Use autotune to refresh your stored services if<br />
necessary. You can then re-enter your presets using the remote control.<br />
Display has gone blank<br />
This may occur if a broadcaster changes a service or removes a service while you are listening to it. Use autotune to restore available services to your<br />
unit, see Using your <strong>DRX</strong>-<strong>602ES</strong>: Tuning.<br />
I’ve lost my remote control<br />
If you lose your remote control you can still use your <strong>DRX</strong>-<strong>602ES</strong> but you will not be able to access your preset stations, switch between primary or<br />
secondary services or use DRC or mute facilities. Contact VideoLogic <strong>Support</strong> to obtain a replacement remote control, see Getting Help.<br />
I can’t hear my FM/AM radio although it is connected<br />
Ensure that your <strong>DRX</strong>-<strong>602ES</strong> is switched off. This enables your FM/AM radio to pass through the analogue outputs to your amplifier.<br />
Ensure that you have connected your FM/AM radio to your <strong>DRX</strong>-<strong>602ES</strong> and your <strong>DRX</strong>-<strong>602ES</strong> to your amplifier correctly, see Setting up.<br />
Ensure that your FM/AM radio and amplifier are switched on and that the FM/AM radio is tuned to a station.<br />
I can’t hear the station I have selected on the display<br />
To hear the station you need to confirm your selection by pressing the large tuning button, see Using your <strong>DRX</strong>-<strong>602ES</strong>; Selecting a service.<br />
I hear a 'burbling' sound on some stations<br />
Although DAB is excellent at providing quality audio from very little signal, the quality can suffer if the signal strength is too low. If that happens, a<br />
‘burbling’ sound can sometimes be heard. Check your aerial connection and position, see Setting up: Connecting to your aerial.<br />
If the problem persists, a signal booster may be the solution - these are available from our on-line store at www.videologic.com<br />
Autotune takes a long time or can’t find a service I know I should receive<br />
Ensure you have selected the relevant tuning zone for your location, this ensures that the correct frequency band is scanned for services, see Using<br />
your <strong>DRX</strong>-<strong>602ES</strong>: Changing your tuning zone.<br />
For the latest troubleshooting information and a list of Frequently Asked Questions (FAQs), visit the <strong>DRX</strong>-<strong>602ES</strong> support section on our website at<br />
www.videologic.com or www.videologic.de.<br />
9
Aerial advice<br />
Your <strong>DRX</strong>-<strong>602ES</strong> is supplied with a T-shaped ribbon dipole aerial. This is an indoor aerial which is designed to give good reception in areas with good<br />
to moderate DAB signal strength. In areas with poor DAB coverage or poor signal strength you may want to consider using a loft mounted or external<br />
aerial. To find out about coverage in your area, see Guide to Digital Radio.<br />
Accessories<br />
VideoLogic supply a range of accessories and complementary products for your <strong>DRX</strong>-<strong>602ES</strong> including external aerials, signal boosters, aerial cable<br />
adapters and amplified speaker sets.<br />
Visit our website at www.videologic.com or www.videologic.de or contact us using the details on the back cover of this <strong>manual</strong> to find out more.<br />
Getting Help<br />
The Troubleshooting section of this <strong>manual</strong>, lists some of the more likely reasons for problems you might have with your <strong>DRX</strong>-<strong>602ES</strong>.<br />
If you still have a problem with your <strong>DRX</strong>-<strong>602ES</strong>, either visit our website at www.videologic.com or www.videologic.de or contact us using the details<br />
on the back cover of this <strong>manual</strong> for the latest support information.<br />
10<br />
Ribbon Aerial Dipole Aerial<br />
4-element Aerial<br />
The following options may help you improve reception in your area and are available from the on-line store on our website, see Accessories.<br />
1. Ribbon Aerial Optimise the position of your ribbon aerial by mounting it as high as possible and extending the arms vertically. Use the Signal<br />
Strength meter to fine tune the aerial placement, see Using your <strong>DRX</strong>-<strong>602ES</strong>: Viewing extra information.<br />
2. TV/FM Aerial If you have an externally mounted TV or FM aerial it may provide a stronger signal than an indoor aerial but as they are not tuned<br />
for the digital radio frequency range and are pointed at your local TV/FM transmitter, reception may be no better. The standard TV or FM RF<br />
connector cannot be plugged into your <strong>DRX</strong>-<strong>602ES</strong> directly, you will need to use an RF to F-type adapter. You may also find that you need to use a<br />
signal booster if you want to use the aerial for both TV or FM and DAB reception.<br />
3. External or loft mounted DAB Aerial Two main types are used. These types of aerials may require professional installation:<br />
Dipole - for use in marginal signal areas, this type is omnidirectional and should increase the strength of all DAB stations being received.<br />
4-element aerial - for use in marginal or poor signal areas, this type is directional and has high gain. Like a TV or FM aerial this type needs to<br />
point at the transmitter. Installation requires someone to move the aerial while you monitor signal strength. If you receive signals from multiple<br />
transmitters you should point your aerial at the one which gives the best signal for the services to which you want to listen.<br />
4. Signal booster This is a signal amplifier which connects into an aerial cable and boosts the strength of the received signal. If your ribbon aerial<br />
works fairly well this may be the easiest and best option.
Technical Specifications<br />
This section lists the technical specifications for the <strong>DRX</strong>-<strong>602ES</strong>.<br />
General Digital radio tuner with full Band III and L-band reception capability, for reception of all UK, Europe and Canada DAB broadcasts.<br />
Fully compliant with ETS 300 401 and capable of decoding all DAB transmission modes 1-4. Analogue stereo output, optical<br />
and coaxial 48 kHz S/PDIF digital output and RDI digital output<br />
Frequency Range Band III (174 - 240 MHz) and L-band (1452-1490 MHz), with autotune feature<br />
Tuner Sensitivity -98 dBm<br />
Integrated DAC 24-bit 96 kHz stereo DAC<br />
Input connectors RF F-connector 75 W for DAB aerial connection (aerial supplied)<br />
(rear panel) Dual phono for external line level audio input (from FM/AM/AUX tuner unit) with auto pass-through to output at power off<br />
Output connectors Dual phono for stereo analogue audio output<br />
(rear panel) Optical Toslink connector for digital S/PDIF output (IEC958 @ 48 kHz)<br />
Coaxial connector for digital S/PDIF output (IEC958 @ 48 kHz)<br />
Optical Toslink connector for digital RDI data output<br />
Controls Power on/off<br />
Rotary selection switch - selects service<br />
Autotune - tunes in unit to broadcast services and enables language and tuning zone selection<br />
Brightness - selects between 4 levels of LCD display brightness<br />
Display - selects between DLS (Dynamic Label Segment) scrolling text, programme type, and service information<br />
Info - switches LCD between display of signal strength indicator and mono/stereo mode plus service’s data rate<br />
LCD Display High visibility STN LCD display with 16 x 2 characters, 4 user-selectable brightness levels and 11 language options<br />
Indicators LED power-on indicator<br />
(front panel) Remote control activity indicator<br />
Stereo service indicator<br />
Secondary service availability indicator<br />
Frequency response 20 Hz to 20 kHz for 48 kHz decode at full data rate<br />
20 Hz to 12 kHz for 24 kHz low sample frequency (LSF) decode<br />
THD (nominal output) Less than 0.005% at 1 kHz<br />
S/N Ratio: 100 dB<br />
Display Languages <strong>English</strong>, German, Swedish, French, Italian, Spanish, Norewegian, Finnish, Danish, Dutch, Portuguese.<br />
Remote control Infrared remote control functions: service select, preset service store/recall, DRC (dynamic range control), mute and primary or<br />
secondary information display<br />
Power supply High-performance low noise internal toroidal transformer power supply. 220-240V AC 50Hz (Europe) or<br />
115V AC 60Hz (Canada)<br />
Approvals CE marked. Compliant with the EMC and Low Voltage Directives (89/336/EEC and 73/23/EEC)<br />
Dimensions 430mm (width) x 59mm (height) x 270mm (depth)<br />
11
Index<br />
A<br />
Accessories 10<br />
Aerial 2<br />
Aerial advice 10<br />
Aerial connector 4<br />
Autotune 5, 6<br />
Autotune button 5, 6<br />
B<br />
Band III 6<br />
Batteries 2<br />
Brightness button 3<br />
C<br />
Cables 2<br />
Changing the display mode 4<br />
Changing your display language 6<br />
Changing your tuning zone 6<br />
Channels 8<br />
Connecting cables<br />
aerial 4<br />
amplifier 4<br />
auxilliary source 4<br />
CD-R 4<br />
DAT 4<br />
digital devices 4<br />
external decoder 4<br />
MiniDisc 4<br />
power 4<br />
RDI 4<br />
S/PDIF 4<br />
Controls and Connectors 3<br />
D<br />
DAB 8<br />
Data rate 6<br />
Dipole aerial 10<br />
Display brightness 5<br />
Display button 7<br />
Display language 6<br />
Display mode 4<br />
DRC 7<br />
DRC button 7<br />
<strong>DRX</strong>-<strong>602ES</strong> 2<br />
Dual band 6<br />
Dynamic Label Segment 4<br />
E<br />
Ensembles 8<br />
External aerial 4<br />
F<br />
Frequency 8<br />
Frequency Range 11<br />
Front Panel 3<br />
G<br />
Getting Help 10<br />
Guide to Digital Radio 8<br />
12<br />
H<br />
Help 10<br />
I<br />
Info button 3, 7<br />
Information button 6<br />
Information mode 6<br />
INPUT sockets 4<br />
Introduction 2<br />
Items 2<br />
L<br />
L-band 6<br />
Language selection 6<br />
LCD Display 3<br />
Leads 2<br />
M<br />
Main unit 2<br />
Memory Reset 9<br />
Multi-element aerial 10<br />
Multiplexes 4, 8<br />
Mute 7<br />
N<br />
New service 6<br />
No Service 9<br />
O<br />
On/Off button 5, 6<br />
OUTPUT sockets 4<br />
P<br />
Phono cable 2<br />
Preset buttons 7<br />
Program Type 4<br />
R<br />
RDI jack 3<br />
RDI socket 4<br />
Rear Panel 3<br />
Remote control 7<br />
Remote sensor 3<br />
Ribbon aerial 10<br />
S<br />
S/PDIF sockets 4<br />
Secondary services 8<br />
Select button 7<br />
Selecting a service 5<br />
Services 8<br />
Setting up 4<br />
Signal strength 6<br />
Specifications 11<br />
Stereo LED 3<br />
Store button 7<br />
Switching on and off 6<br />
Switching on for the first time 5<br />
T<br />
Technical information 4<br />
Technical Specifications 11<br />
Tuning 5, 6<br />
Tuning button 5<br />
Tuning zone 6<br />
U<br />
Unpacking 2<br />
Using your <strong>DRX</strong>-<strong>602ES</strong> 5<br />
W<br />
Website 10
Please return your registration card to your nearest VideoLogic centre.<br />
Schicken Sie Ihre Registrierkarte zum nächsten VideoLogic Center.<br />
Veuillez envoyer la carte d’enregistrement au centre VideoLogic le plus proche.<br />
Canada<br />
VideoLogic Service Center<br />
6980 Corte Santa Fe,<br />
San Diego, CA 92121, USA +44 (0)1923 270188 fax<br />
sales_usa@videologic.com +44 (0)1923 277488 sales<br />
support_usa@videologic.com +44 (0)1923 277477 support & service<br />
Deutschsprachige Länder<br />
VideoLogic GmbH<br />
Max-Planck-Str. 25,<br />
D - 63303 Dreieich, Germany +49 (0)6103 311022 Fax<br />
sales_gmbh@videologic.com +49 (0)6103 934722 Vertrieb<br />
support_gmbh@videologic.com +49 (0)6103 934714 <strong>Support</strong><br />
UK and all other countries<br />
VideoLogic Systems<br />
Imagination Technologies Ltd.,<br />
Home Park Estate,<br />
Kings Langley, Herts WD4 8LZ, UK +44 (0)1923 270188 fax<br />
sales@videologic.com +44 (0)1923 277488 sales<br />
support@videologic.com +44 (0)1923 277477 support & service<br />
www.videologic.com<br />
www.videologic.de<br />
11P79


