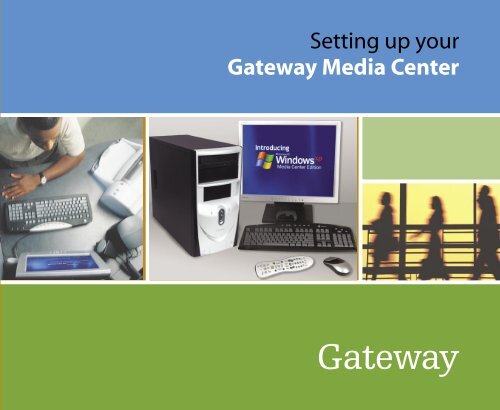
8509338 - Setting up your Gateway Media Center
8509338 - Setting up your Gateway Media Center
8509338 - Setting up your Gateway Media Center

You also want an ePaper? Increase the reach of your titles
YUMPU automatically turns print PDFs into web optimized ePapers that Google loves.
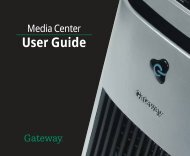
<strong>Setting</strong> <strong>up</strong> <strong>your</strong><br />
<strong>Gateway</strong> <strong>Media</strong> <strong>Center</strong>
2<br />
Notices<br />
© 2003 <strong>Gateway</strong>, Inc. All rights reserved. <strong>Gateway</strong>, <strong>Gateway</strong> Country, the <strong>Gateway</strong> stylized logo,<br />
and the black-and-white spot design are trademarks or registered trademarks of <strong>Gateway</strong>, Inc. in the<br />
United States and other countries. All other brands and product names are trademarks or registered<br />
trademarks of their respective companies.
Planning <strong>your</strong> <strong>Media</strong> <strong>Center</strong> set<strong>up</strong> 4<br />
Getting ready to set <strong>up</strong><br />
<strong>Media</strong> <strong>Center</strong> resources 6<br />
<strong>Setting</strong> <strong>up</strong> <strong>Media</strong> <strong>Center</strong> hardware 8<br />
<strong>Setting</strong> <strong>up</strong> <strong>Media</strong> <strong>Center</strong><br />
optional connections 11<br />
Turning on and setting <strong>up</strong> software 15<br />
Learning about the remote control 17<br />
Using the <strong>Media</strong> <strong>Center</strong> 18<br />
<strong>Media</strong> <strong>Center</strong> FAQs 21<br />
Getting more information 24<br />
Note: Your computer may vary from the following illustrations.<br />
3
Planning <strong>your</strong> <strong>Media</strong> <strong>Center</strong> set<strong>up</strong><br />
4<br />
Locate connections<br />
You’ve probably already decided where you want to set<br />
<strong>up</strong> and use <strong>your</strong> <strong>Media</strong> <strong>Center</strong> computer, but before you<br />
start connecting <strong>Media</strong> <strong>Center</strong> components, take a few<br />
minutes to make sure that all of these connections are<br />
available in the location you’ve selected.<br />
Internet connection — Your computer needs an<br />
Internet connection to <strong>up</strong>date the program guide<br />
and to access the Internet. Make sure that you have<br />
access to a dial-<strong>up</strong> or broadband Internet connection<br />
before starting <strong>your</strong> <strong>Media</strong> <strong>Center</strong> software<br />
set<strong>up</strong>. Contact <strong>your</strong> Internet service provider for<br />
more information about setting <strong>up</strong> <strong>your</strong> Internet<br />
connection.<br />
Video source — Make sure that you have access<br />
to a video source before starting <strong>your</strong> <strong>Media</strong> <strong>Center</strong><br />
set<strong>up</strong>. Your computer receives video input from a<br />
coaxial, composite video, or an S-Video cable. The<br />
video source usually comes from an antenna, a<br />
direct cable TV connection, a cable box, or a satellite<br />
receiver. Cable boxes and satellite receivers are also<br />
called set-top boxes.
Identify <strong>Media</strong> <strong>Center</strong><br />
components<br />
Remove the <strong>Media</strong> <strong>Center</strong> components from the<br />
packaging and lay them out for easy access during the<br />
set<strong>up</strong> process.<br />
Remote Control — Lets you remotely control the<br />
<strong>Media</strong> <strong>Center</strong> Guide, TV, videos, DVDs, music,<br />
pictures, recorded TV programs, volume levels,<br />
and more.<br />
Batteries — Two AA batteries for the wireless<br />
remote control.<br />
Remote sensor (Infrared “IR” receiver) —<br />
Receives and sends signals to and from the remote<br />
control.<br />
Infrared (IR) control cable — Sends input from the<br />
remote sensor to a set-top box to change channels.<br />
FM antenna — Receives FM radio signals.<br />
5
Getting ready to set <strong>up</strong> <strong>Media</strong> <strong>Center</strong> resources<br />
6<br />
Now that you’ve located an Internet connection and a<br />
video source and have identified the <strong>Media</strong> <strong>Center</strong><br />
components, use the step-by-step instructions in this<br />
guide to help set <strong>up</strong> <strong>your</strong> <strong>Media</strong> <strong>Center</strong> computer and<br />
software. Also, use the other documents and information<br />
resources to help you set <strong>up</strong> and use the <strong>Media</strong> <strong>Center</strong><br />
computer and software.<br />
Documentation<br />
Set<strong>up</strong> Poster<br />
The set<strong>up</strong> poster helps you set <strong>up</strong> <strong>your</strong><br />
computer and other devices.<br />
Monitor Guide<br />
The monitor or display device<br />
guide provides information about<br />
using and adjusting <strong>your</strong> display<br />
device settings.<br />
Sound System Set<strong>up</strong> Poster<br />
(Optional) The sound system set<strong>up</strong><br />
poster helps you connect <strong>your</strong> audio<br />
system. If you purchased a sound<br />
system with <strong>your</strong> <strong>Media</strong> <strong>Center</strong><br />
computer, follow the set<strong>up</strong> poster<br />
instructions. If you are connecting <strong>your</strong><br />
<strong>Media</strong> <strong>Center</strong> computer to an existing<br />
sound system, see “Connecting the<br />
<strong>Media</strong> <strong>Center</strong> to an existing home<br />
stereo or home theater” on page 13.<br />
Windows XP <strong>Media</strong> <strong>Center</strong><br />
Edition Guide<br />
The Microsoft Windows<br />
XP <strong>Media</strong> <strong>Center</strong> Edition<br />
guide provides information<br />
about configuring the <strong>Media</strong><br />
<strong>Center</strong> software, tips about<br />
using the <strong>Media</strong> <strong>Center</strong>, and<br />
troubleshooting information.
Windows Update<br />
Computer Guide<br />
Your <strong>Gateway</strong> computer<br />
user’s guide provides<br />
instructions for using <strong>your</strong><br />
<strong>Media</strong> <strong>Center</strong> computer and<br />
troubleshooting information<br />
to solve problems.<br />
Remember to check regularly for Windows <strong>up</strong>dates<br />
to keep the operating system <strong>up</strong>dated with the latest<br />
software releases and security <strong>up</strong>dates.<br />
To start the Windows Update utility, connect to the<br />
Internet, click Start, All Programs, then click Windows<br />
Update. The Windows Update Web site opens. Follow<br />
the on-screen instructions.<br />
Web site<br />
You can get the latest FAQs, information, and tips and<br />
tricks about making the most of <strong>your</strong> <strong>Media</strong> <strong>Center</strong><br />
experience. Go to the Microsoft <strong>Media</strong> <strong>Center</strong> Web<br />
site at microsoft.com/windowsxp/mediacenter/ and the<br />
<strong>Gateway</strong> S<strong>up</strong>port Web site at<br />
s<strong>up</strong>port.gateway.com/windowsxp/mediacenter/.<br />
7
<strong>Setting</strong> <strong>up</strong> <strong>Media</strong> <strong>Center</strong> hardware<br />
8<br />
Now that you’re familiar with the <strong>Media</strong> <strong>Center</strong><br />
components, connect them to <strong>your</strong> <strong>Media</strong> <strong>Center</strong><br />
computer.<br />
Set <strong>up</strong> the computer<br />
• Before<br />
setting <strong>up</strong> the <strong>Media</strong> <strong>Center</strong> hardware,<br />
make sure that you have:<br />
• Set <strong>up</strong> <strong>your</strong> computer<br />
• Set <strong>up</strong> <strong>your</strong> display device<br />
• Set <strong>up</strong> the sound system (optional)<br />
If you use a TV as the <strong>Media</strong> <strong>Center</strong> display<br />
device, instead of a display device provided by<br />
<strong>Gateway</strong>, see Connecting a TV on page 11.<br />
Install the remote<br />
control batteries<br />
• Match<br />
Insert two AA batteries into the remote control.<br />
the + and –<br />
on the batteries<br />
with the +<br />
and – symbols<br />
inside the battery<br />
compartment.<br />
Connect the remote sensor<br />
1 Connect<br />
2 Position<br />
the remote sensor to a USB port on <strong>your</strong><br />
computer.<br />
the sensor so there<br />
is a direct, unobstructed<br />
line-of-sight between the<br />
remote control and the sensor.<br />
The remote control has a range<br />
of 23 feet and a maximum<br />
angle of 22.5-degrees from the<br />
center of the sensor to the<br />
left or right side of<br />
the sensor.
Connect the video and audio source<br />
Your <strong>Media</strong> <strong>Center</strong> computer has connectors for S-Video,<br />
composite video, or coaxial (TV). Select the connector that<br />
<strong>your</strong> video source s<strong>up</strong>ports:<br />
• S-Video or composite video — S-Video signals<br />
provide the sharpest picture. Alternatively, you can use<br />
composite video for a slightly less sharp (but better than<br />
coaxial) video signal. If you use S-Video or composite<br />
video, you also need to connect the audio using RCA<br />
stereo plugs.<br />
• Coaxial (TV) — The video and audio signals are both<br />
carried on one cable. The coaxial cable is the way to<br />
connect a direct cable or an antenna video source to<br />
the <strong>Media</strong> <strong>Center</strong>.<br />
1<br />
2<br />
•<br />
Connect an S-Video or composite video cable<br />
(not included) from a video source (such as<br />
a cable set-top box, a satellite set-top box,<br />
or other video device) to the S-Video In or<br />
Composite Video In port on the back of <strong>your</strong><br />
computer.<br />
Connect an RCA cable (not included) from<br />
the Audio Out jacks on the video device to<br />
the audio In RCA jacks on the back of <strong>your</strong><br />
computer.<br />
- OR -<br />
Connect a coaxial cable (not included)<br />
from a video device (such as a direct cable<br />
connection, a cable set-top box, a satellite<br />
set-top box, or an antenna) to the Coaxial In<br />
(TV) port on the back of <strong>your</strong> computer.<br />
S-Video /<br />
Composite<br />
Video<br />
Coaxial (TV)<br />
The quality of the video coming into the <strong>Media</strong> <strong>Center</strong> computer<br />
determines the quality of the video output to the <strong>Media</strong> <strong>Center</strong> display<br />
device. A direct cable connection, cable set-top box, or satellite set-top<br />
box usually provides a better quality signal than an antenna. Use the<br />
highest quality video source available for best video display results.<br />
The quality of cable used to connect the video source to the <strong>Media</strong><br />
<strong>Center</strong> computer has an affect on the video output quality from the<br />
computer. Use high quality video cables to connect the video source to<br />
the computer.<br />
If the video devices connected to <strong>your</strong> computer are not grounded<br />
correctly, <strong>your</strong> computer could be damaged. For more information<br />
about correct grounding, see <strong>your</strong> <strong>Gateway</strong> computer user’s guide.<br />
OR<br />
9
10<br />
Connect the IR control cable<br />
If <strong>your</strong> <strong>Media</strong> <strong>Center</strong> configuration uses a set-top box<br />
for the video source to the <strong>Media</strong> <strong>Center</strong>, connect the<br />
infrared (IR) control cable to the remote sensor and<br />
attach the IR control to the set-top box IR sensor window.<br />
The IR control cable sends input from the remote sensor<br />
to <strong>your</strong> set-top box to change channels.<br />
1<br />
Plug the IR control cable into the port on the back<br />
of the remote sensor.<br />
2<br />
Locate the IR sensor by shining a flashlight<br />
through the set-top box IR sensor window. Look for<br />
a 1/2 to 3/8 inch metallic rectangle with a 1/8 inch<br />
dark circle in the middle. This is the IR sensor.<br />
3<br />
Remove the adhesive paper from the back of the<br />
IR control.<br />
4Place the sticky side of the IR control on the<br />
set-top box sensor window. Make sure that the<br />
infrared control is placed directly in front of the IR<br />
sensor that you located in Step 2.<br />
The <strong>Media</strong> <strong>Center</strong> IR control cable sends infrared signals to <strong>your</strong><br />
set-top box or satellite receiver. However, some set-top boxes are<br />
set to receive radio frequency (RF) signals from the remote control.<br />
Before using the <strong>Media</strong> <strong>Center</strong> remote control, make sure that the<br />
set-top box is set to accept infrared signals. See <strong>your</strong> set-top box<br />
guide for information about remote settings.
<strong>Setting</strong> <strong>up</strong> <strong>Media</strong> <strong>Center</strong> optional connections<br />
Connecting a TV<br />
You can use a TV as a display device. However, some<br />
older TVs provide a lower quality display than computer<br />
monitors or flat-panel TVs that are optimized for the<br />
<strong>Media</strong> <strong>Center</strong>.<br />
The <strong>Media</strong> <strong>Center</strong> computer provides display outputs<br />
from a VGA (monitor) port or an S-Video port. Select the<br />
highest quality port that <strong>your</strong> TV s<strong>up</strong>ports:<br />
• DVI — Best. Use this if <strong>your</strong> TV has a DVI port.<br />
• VGA — Better. If <strong>your</strong> TV does not have a DVI port<br />
but has a VGA port, use this.<br />
• S-Video — Good. S-Video display quality is usually<br />
good for TV images. The display quality for the <strong>Media</strong><br />
<strong>Center</strong> computer functions, however, is not as good<br />
as DVI or VGA output. S-Video display output is not<br />
optimized for computer video display.<br />
If you did not purchase a display device when you<br />
purchased <strong>your</strong> <strong>Media</strong> <strong>Center</strong> computer and <strong>your</strong> video<br />
display does not provide the image quality that you<br />
expected, contact a <strong>Gateway</strong> sales representative to<br />
help you select a display device that is optimized for <strong>your</strong><br />
<strong>Media</strong> <strong>Center</strong> computer. See “Contacting <strong>Gateway</strong>” on<br />
page 26 for <strong>Gateway</strong> contact information.<br />
By default, if <strong>your</strong> display device was purchased with the <strong>Media</strong> <strong>Center</strong><br />
computer, the computer uses a screen resolution of 1024 x 768 for<br />
computer monitors and 800 x 600 for the <strong>Gateway</strong> 42-inch Plasma TV.<br />
Many TVs cannot display this high resolution and may shift, scramble,<br />
or scroll the picture. For a better picture on a TV display, you may need<br />
to lower the <strong>Media</strong> <strong>Center</strong> screen resolution to 800 x 600 or 640 x 480.<br />
See <strong>your</strong> <strong>Gateway</strong> computer user’s guide for more information about<br />
changing the screen resolution.<br />
Many TVs use interlaced video. Interlaced video displays a video<br />
frame with two passes of alternating scan lines. The TV screen first<br />
displays the video image odd lines one at a time, sequentially from<br />
top to bottom, then it fills in the other half of the video image with the<br />
even lines. Because most TVs use this interlaced method to display the<br />
picture on the screen, a standard interlaced analog television will most<br />
likely flicker when displaying thin lines and small text. An interlaced<br />
video display device will produce a lower quality display, especially<br />
when viewing and using the <strong>Media</strong> <strong>Center</strong> computer functions.<br />
Progressive scan video displays a video frame with one pass of<br />
sequential scan lines. A progressive scan TV displays the entire<br />
picture, drawn sequentially from top to bottom, without the odd/even<br />
interlacing. This results in a fuller, sharper picture, and better display<br />
quality for viewing and using the <strong>Media</strong> <strong>Center</strong> computer functions. The<br />
progressive scan picture is also brighter and easier on <strong>your</strong> eyes.<br />
11
12<br />
1 Connect<br />
a VGA cable (not included), S-Video<br />
cable (not included), or DVI cable (not included)<br />
to the VGA port, S-Video port, or DVI port on the<br />
back of <strong>your</strong> computer.<br />
OR OR<br />
2 Connect<br />
3 Turn<br />
the other end of the cable to the VGA<br />
port, S-Video port, or DVI port on the back of <strong>your</strong><br />
TV.<br />
OR OR<br />
the TV on and select the TV In video source.<br />
For more information about selecting the TV In<br />
video source, see <strong>your</strong> TV’s documentation.
Connecting the <strong>Media</strong> <strong>Center</strong><br />
to an existing home stereo or<br />
home theater<br />
If you purchased a sound system with <strong>your</strong> <strong>Media</strong> <strong>Center</strong><br />
computer, use the set<strong>up</strong> poster and other documentation<br />
that was included with <strong>your</strong> sound system to set it <strong>up</strong>.<br />
If you did not purchase a sound system with <strong>your</strong> <strong>Media</strong><br />
<strong>Center</strong> computer, you can connect the computer to an<br />
existing sound system. Use 1/8” stereo to RCA plug<br />
Y-cables to connect the computer to <strong>your</strong> sound system.<br />
The sound system set<strong>up</strong> varies, depending on <strong>your</strong><br />
sound system’s audio inputs. See <strong>your</strong> sound system’s<br />
user guide for more information about connecting audio<br />
inputs.<br />
Analog<br />
sound<br />
system<br />
Digital<br />
sound<br />
system<br />
Headphone/<br />
analog speakers<br />
(Line out 1) jack.<br />
Connect front<br />
speakers.<br />
Rear out<br />
(Line out 2) jack.<br />
Connect rear<br />
speakers.<br />
Digital/analog<br />
out jack. Connect<br />
center/subwoofer<br />
(LFE) speakers.<br />
Digital/analog<br />
out jack. Connect<br />
digital speakers.<br />
13
14<br />
After you have connected <strong>your</strong> sound system, use the<br />
sound card program to select speaker set<strong>up</strong> options.<br />
1 Click<br />
2 Click<br />
Start, Control Panel, Sounds, Speech,<br />
and Audio Devices, then click Sounds and<br />
Audio Devices. The Sounds and Audio Devices<br />
Properties dialog box opens.<br />
the Volume tab, then click the Advanced<br />
button in the Speaker <strong>Setting</strong>s section. The<br />
Advanced Audio Properties dialog box opens.<br />
3 Click<br />
4 Click<br />
the Speakers tab, click the arrow button<br />
to open the Speaker set<strong>up</strong> list, then click the<br />
speaker set<strong>up</strong> that most closely matches <strong>your</strong><br />
sound system type.<br />
OK to save <strong>your</strong> speaker set<strong>up</strong>.
Turning on and setting <strong>up</strong> software<br />
After the <strong>Media</strong> <strong>Center</strong> components are connected to<br />
<strong>your</strong> computer, you’re ready to turn on the power and<br />
complete the <strong>Media</strong> <strong>Center</strong> set <strong>up</strong>.<br />
1 Press<br />
the power button on the front of the monitor<br />
or TV, then press the power button on the front of<br />
the <strong>Media</strong> <strong>Center</strong> computer. Make sure that <strong>your</strong><br />
sound system (optional) is turned on.<br />
2 Follow<br />
3 Turn<br />
the Windows set<strong>up</strong> screens.<br />
on any peripheral devices, such as printers or<br />
scanners, and follow the on-screen instructions to<br />
complete the device set<strong>up</strong>.<br />
15
16<br />
4 After<br />
The <strong>Media</strong> <strong>Center</strong> set<strong>up</strong> wizard requires Internet access to complete<br />
the <strong>Media</strong> <strong>Center</strong> software configuration. Before starting the<br />
<strong>Media</strong> <strong>Center</strong> set<strong>up</strong> wizard in step 4, make sure that <strong>your</strong> Internet<br />
connection is set <strong>up</strong>. Contact <strong>your</strong> Internet service provider for more<br />
information about setting <strong>up</strong> <strong>your</strong> Internet connection.<br />
Before starting the <strong>Media</strong> <strong>Center</strong> set<strong>up</strong> wizard, check for Windows<br />
Updates to make sure that <strong>Media</strong> <strong>Center</strong> has the most recent<br />
software releases and security <strong>up</strong>dates installed. For more<br />
information, see “Windows Update” on page 7.<br />
you complete the initial Windows set<strong>up</strong>, press<br />
the Start button on the remote to start the<br />
<strong>Media</strong> <strong>Center</strong> set<strong>up</strong> wizard.<br />
5 Follow<br />
the set<strong>up</strong> screens to configure the<br />
<strong>Media</strong> <strong>Center</strong> software for <strong>your</strong> specific<br />
requirements.
Learning about the remote control<br />
The <strong>Media</strong> <strong>Center</strong> remote control lets you take full<br />
control of <strong>your</strong> <strong>Media</strong> <strong>Center</strong> experience. You can quickly<br />
start the <strong>Media</strong> <strong>Center</strong> by pressing the Start button.<br />
Data Entry buttons<br />
Let you enter numbers<br />
and characters from the<br />
remote control.<br />
<strong>Media</strong> <strong>Center</strong> Start button<br />
Starts the <strong>Media</strong> <strong>Center</strong> software.<br />
Shortcut buttons<br />
Give you direct access to<br />
<strong>Media</strong> <strong>Center</strong> features.<br />
Power button<br />
Puts the <strong>Media</strong> <strong>Center</strong> computer in<br />
Standby mode (reduced power).<br />
Transport buttons<br />
Let you control the DVD and CD player.<br />
Guide button<br />
Opens the TV program guide.<br />
Navigation buttons<br />
Let you move the cursor around the program guide and other<br />
<strong>Media</strong> <strong>Center</strong> menus. Press the OK button to make a selection.<br />
More Info button<br />
When watching TV, lets you change the aspect ratio, such as stretch.<br />
When in a pictures folder, lets you access advanced features, such<br />
as rotate, print, red eye, and contrast.<br />
AV Control buttons<br />
Control volume levels, channel<br />
selections, and the DVD menu.<br />
17
Using the <strong>Media</strong> <strong>Center</strong><br />
18<br />
Use the <strong>Media</strong> <strong>Center</strong> remote control to watch TV,<br />
videos, and DVDs, to listen to music, and to view<br />
pictures. Use the <strong>Media</strong> <strong>Center</strong> Guide to view TV<br />
program schedules, search for programs by genre, set<br />
<strong>up</strong> program recordings, and more.<br />
1Press the Start button on the remote control.<br />
The <strong>Media</strong> <strong>Center</strong> software starts.<br />
2 Use<br />
the remote control navigation buttons to select<br />
a <strong>Media</strong> <strong>Center</strong> menu option, then press OK.<br />
- OR -<br />
Press one of the menu shortcut buttons on the<br />
remote control to select a <strong>Media</strong> <strong>Center</strong> menu.
Manually <strong>up</strong>dating the <strong>Media</strong><br />
<strong>Center</strong> Program Guide<br />
When you use the <strong>Media</strong> <strong>Center</strong> set<strong>up</strong> wizard, the<br />
<strong>Media</strong> <strong>Center</strong> Program Guide is set <strong>up</strong> to download<br />
program information from <strong>your</strong> cable or satellite service<br />
provider. However, on occasion, you may need to <strong>up</strong>date<br />
the Program Guide manually to refresh the program<br />
listings.<br />
1 Before<br />
2 Press<br />
starting the <strong>Media</strong> <strong>Center</strong>, make sure that<br />
you connect to the Internet.<br />
The <strong>Media</strong> <strong>Center</strong> requires Internet access to <strong>up</strong>date the <strong>Media</strong><br />
<strong>Center</strong> Program Guide. Make sure that you connect to <strong>your</strong> Internet<br />
connection before continuing the manual Program Guide <strong>up</strong>date<br />
instructions.<br />
the Start button, on the remote control.<br />
The <strong>Media</strong> <strong>Center</strong> software starts.<br />
3 Navigate<br />
4 Navigate<br />
5 Navigate<br />
6 Navigate<br />
7 Select<br />
to <strong>Setting</strong>s, then press OK. The<br />
<strong>Setting</strong>s menu opens.<br />
to TV, then press OK.<br />
to Guide, then press OK.<br />
to Get guide data, then press OK. The<br />
Guide Data dialog box opens.<br />
Yes, then press OK. The <strong>Media</strong> <strong>Center</strong><br />
downloads Program Guide <strong>up</strong>dates.<br />
19
20<br />
Burning recorded shows to DVD<br />
with Nero Express<br />
After you have recorded a program, you may want<br />
to save the program to a DVD for viewing on another<br />
computer that has a DVD player. Use Nero Express to<br />
copy the recorded program to a DVD.<br />
1 Insert<br />
2If 3<br />
TV programs that have been recorded with the <strong>Media</strong> <strong>Center</strong> can be<br />
recorded to DVD and replayed on another <strong>Media</strong> <strong>Center</strong> computer<br />
or on a non-<strong>Media</strong> <strong>Center</strong> computer that has a DVD player and<br />
DVD decoder software (such as WinDVD). The non-<strong>Media</strong> <strong>Center</strong><br />
computer must also have Windows XP with Service Pack (SP) 1,<br />
Windows <strong>Media</strong> Player 9, and the Windows patch Q810243 Update.<br />
Your <strong>Gateway</strong> <strong>Media</strong> <strong>Center</strong> PC may also include software that<br />
allows you to create video DVDs or video CDs that you can play on<br />
<strong>your</strong> home DVD player. See <strong>your</strong> <strong>Gateway</strong> <strong>Media</strong> <strong>Center</strong> for more<br />
information.<br />
a blank, writable DVD-R disc into <strong>your</strong><br />
recordable DVD drive. You cannot use a DVD-RAM<br />
disc with Nero Express.<br />
a CD Drive dialog box opens, click Cancel.<br />
Click Start,<br />
All Programs,<br />
Burn a CD or<br />
Data DVD, Nero<br />
Programs,<br />
then click Nero<br />
Express. Nero<br />
Express opens.<br />
4<br />
5<br />
Click the Add button to open the Select Files and<br />
Folders dialog box, then click the drive or folder<br />
where the files you want to add to the writable<br />
DVD are located. The TV program recordings<br />
are usually located in the \Shared Documents\<br />
Recorded TV folder. If you do not see the folder<br />
you want, browse through the folders in the<br />
Location pane.<br />
Move <strong>your</strong> pointer over Data, then click Data Disc.<br />
The Disc Content window opens.<br />
6<br />
Click the file you want to record (hold down the<br />
CTRL or SHIFT key when you click to select<br />
multiple files) in the Select Files and Folders dialog<br />
box, then click Add.<br />
7 Click Next, then click Burn.<br />
8<br />
After you have added all of <strong>your</strong> files, click<br />
Finished. The Disc Content window opens.<br />
Reinstalling <strong>Media</strong> <strong>Center</strong><br />
If you reinstall Windows XP <strong>Media</strong> <strong>Center</strong>, make sure<br />
that you install the DVD player software located on the<br />
Intervideo DVD Software CD before running the <strong>Media</strong><br />
<strong>Center</strong> set<strong>up</strong> wizard. For more information, see <strong>your</strong><br />
<strong>Gateway</strong> computer user’s guide.
<strong>Media</strong> <strong>Center</strong> FAQs<br />
Following are <strong>Media</strong> <strong>Center</strong> Frequently Asked Questions<br />
(FAQs). To view other <strong>Media</strong> <strong>Center</strong> FAQs that are not<br />
covered in this section, go to the <strong>Gateway</strong> s<strong>up</strong>port Web<br />
Site at<br />
s<strong>up</strong>port.gateway.com/windowsxp/mediacenter/faqs/.<br />
Q: Why does the <strong>Media</strong> <strong>Center</strong> video display look bad on<br />
my TV?<br />
A: Many factors, such as the display type, quality of the<br />
video source, type of connection used, quality of video<br />
cables, display device screen resolution, size of TV, age<br />
of the TV, or the type of TV (interlaced or progressive<br />
scan), can affect the video quality substantially:<br />
• Display type — The <strong>Media</strong> <strong>Center</strong> is best viewed<br />
on display devices that were offered with the <strong>Media</strong><br />
<strong>Center</strong> computer when you purchased it from<br />
<strong>Gateway</strong>. Other types of display devices, including<br />
retail TVs, may provide lower quality video. If you did<br />
not order a display device when you purchased <strong>your</strong><br />
<strong>Media</strong> <strong>Center</strong> computer, a progressive scan display<br />
device with a VGA input is the best choice.<br />
• Quality of video source — The quality of the video<br />
signal coming into the <strong>Media</strong> <strong>Center</strong> computer has<br />
an affect on the video quality. The video displayed<br />
from <strong>Media</strong> <strong>Center</strong> is only as good as the source<br />
video signal. Cable, digital cable, and satellite usually<br />
provide better quality than an antenna.<br />
• Type of connection used — You can connect<br />
the <strong>Media</strong> <strong>Center</strong> computer video output to a TV.<br />
However, the connection type has an affect on the<br />
video quality. The <strong>Media</strong> <strong>Center</strong> has two video<br />
outputs:<br />
VGA — If <strong>your</strong> TV includes a VGA port, connect the<br />
VGA cable from the <strong>Media</strong> <strong>Center</strong> computer’s VGA<br />
(monitor) port to the TV’s VGA In port for the best<br />
quality. Many TVs do not have a VGA port.<br />
S-Video — If <strong>your</strong> TV does not have a VGA port,<br />
but includes an S-Video port, connect the S-Video<br />
cable from the <strong>Media</strong> <strong>Center</strong> computer’s S-Video<br />
Out port to the TV’s S-Video In port. S-Video display<br />
quality is usually good for TV images. The display<br />
quality for the <strong>Media</strong> <strong>Center</strong> computer functions,<br />
however, is not as good as VGA output. S-Video<br />
display output is not optimized for computer<br />
video display.<br />
• Quality of video cables — Poor quality cables<br />
or the incorrect type of video cables can cause<br />
problems and affect the video quality. <strong>Gateway</strong><br />
recommends using high quality video cables that can<br />
be purchased from the <strong>Gateway</strong> Accessory Store.<br />
Note: Cable connections must be correctly<br />
connected for optimal video quality. A poor cable<br />
connection can lower video quality.<br />
21
22<br />
• Screen resolution — By default, if <strong>your</strong> display<br />
device was purchased with the <strong>Media</strong> <strong>Center</strong><br />
computer, the computer uses a screen resolution<br />
of 1024 x 768 for computer monitors and 800 x 600<br />
for the <strong>Gateway</strong> 42-inch Plasma TV. Many TVs<br />
cannot display this high resolution and may shift,<br />
scramble, or scroll the picture. For a better picture<br />
on a TV display, you may need to lower the <strong>Media</strong><br />
<strong>Center</strong> screen resolution to 800 x 600 or 640 x 480.<br />
See <strong>your</strong> <strong>Gateway</strong> computer user’s guide for more<br />
information about changing the screen resolution.<br />
• Size of display device — Small computer monitors<br />
for standard computer applications are generally<br />
not optimized for motion video playback. Although<br />
they offer excellent resolutions and refresh rates,<br />
they are designed to make static white backgrounds<br />
with black text look readable. Some small display<br />
devices do not make colorful motion video look its<br />
best. Generally, video will look better on a larger<br />
display device.<br />
• Age of the TV — Newer TVs usually have more<br />
advanced features, produce a better quality picture,<br />
and s<strong>up</strong>port higher screen resolutions. The <strong>Media</strong><br />
<strong>Center</strong> video display will likely be better on a newer<br />
model TV.<br />
• Type of TV (interlaced or progressive scan)<br />
Many TVs use interlaced video. Interlaced video<br />
displays a video frame with two passes of alternating<br />
scan lines. The TV screen first displays the video<br />
image odd lines one at a time, sequentially from top<br />
to bottom, then it fills in the other half of the video<br />
image with the even lines. Because most TVs use<br />
this interlaced method to display the picture on the<br />
screen, a standard interlaced analog TV will most<br />
likely flicker when displaying thin lines and small<br />
text. An interlaced video display device will produce<br />
a lower quality display, especially when viewing and<br />
using the <strong>Media</strong> <strong>Center</strong> computer functions.<br />
Progressive scan video displays a video frame with<br />
one pass of sequential scan lines. A progressive<br />
scan TV displays the entire picture, drawn<br />
sequentially from top to bottom, without the odd/even<br />
interlacing. This results in a fuller, sharper picture and<br />
better display quality for viewing and using the <strong>Media</strong><br />
<strong>Center</strong> computer functions. The progressive scan<br />
picture is also brighter and easier on <strong>your</strong> eyes.<br />
Q: How do I configure my <strong>Media</strong> <strong>Center</strong> to output to<br />
a TV?<br />
A: Your <strong>Media</strong> <strong>Center</strong> computer detects whether you<br />
are using a DVI, VGA, or an S-Video display device and<br />
automatically changes the display settings for the type<br />
of display device you are using. For more information,<br />
review the FAQ topic at:<br />
s<strong>up</strong>port.gateway.com/windowsxp/mediacenter/faqs/
Q: What display settings can I change to get better TV or<br />
DVD image quality?<br />
A: Adjust the display device brightness, contrast, hue,<br />
and saturation. For more information review the FAQ<br />
topic at:<br />
s<strong>up</strong>port.gateway.com/windowsxp/mediacenter/faqs/<br />
Q: Can I burn programs that were recorded with my<br />
<strong>Media</strong> <strong>Center</strong> computer to a DVD?<br />
A: Yes. <strong>Media</strong> <strong>Center</strong> saves recorded programs in the<br />
.DVR-MS format. You can burn a .DVR-MS file to a DVD<br />
with DVD recording (burning) software, such as Nero<br />
Express.<br />
Q: Can I play recorded programs on other computers?<br />
A: Yes, a .DVR-MS file recorded to DVD can be replayed<br />
on another <strong>Media</strong> <strong>Center</strong> computer or on a non-<strong>Media</strong><br />
<strong>Center</strong> computer that has a DVD player and DVD<br />
decoder software (such as WinDVD). The non-<strong>Media</strong><br />
<strong>Center</strong> computer must also have Windows XP with<br />
Service Pack (SP) 1, Windows <strong>Media</strong> Player 9, and the<br />
Windows patch Q810243 Update.<br />
Q: Can I play recorded programs on my home DVD<br />
player?<br />
A: No. DVDs recorded with DVD recording software<br />
cannot be played on a home DVD player.<br />
Q: Why do I get this “Download Error” message when the<br />
<strong>Media</strong> <strong>Center</strong> tries to <strong>up</strong>date the Program Guide?<br />
A: You must be connected to the Internet to <strong>up</strong>date the<br />
Program Guide. Make sure that <strong>your</strong> Internet account is<br />
set <strong>up</strong> and connected to the <strong>Media</strong> <strong>Center</strong> computer. For<br />
information about manually <strong>up</strong>dating the Program Guide,<br />
see “Manually <strong>up</strong>dating the <strong>Media</strong> <strong>Center</strong> Program<br />
Guide” on page 19.<br />
23
Getting more information<br />
24<br />
The <strong>Media</strong> <strong>Center</strong> is easy to use when you follow the on-screen menus. However, if you need additional help or<br />
information about using the <strong>Media</strong> <strong>Center</strong> features, help is available at <strong>your</strong> fingertips.<br />
1 In<br />
the <strong>Media</strong> <strong>Center</strong> window, move the mouse to<br />
activate the <strong>Media</strong> <strong>Center</strong> tool bar. The tool bar<br />
appears at the top of the window.<br />
2 Click<br />
the Help icon to view or search for<br />
information in the <strong>Media</strong> <strong>Center</strong> online help.
Using Help and S<strong>up</strong>port<br />
Your <strong>Media</strong> <strong>Center</strong> computer also includes Help<br />
and S<strong>up</strong>port, an easily accessible collection of help<br />
information, troubleshooters, and automated s<strong>up</strong>port.<br />
Use Help and S<strong>up</strong>port to answer questions about<br />
Windows and to help you quickly discover and use the<br />
many features of <strong>your</strong> <strong>Gateway</strong> <strong>Media</strong> <strong>Center</strong> computer.<br />
1<br />
To start Help and S<strong>up</strong>port, click Start, then click<br />
Help and S<strong>up</strong>port. Help and S<strong>up</strong>port opens.<br />
2 Click<br />
a topic link.<br />
- OR -<br />
Type a word or phrase (keyword) in the Search box<br />
located at the top of any Help and S<strong>up</strong>port screen,<br />
then click the arrow button to start the search.<br />
The search results appear below the search box.<br />
25
26<br />
Contacting <strong>Gateway</strong><br />
You can access the following services through <strong>your</strong> telephone to get answers to <strong>your</strong> questions:<br />
Resource Service description How to reach<br />
Fax on demand<br />
s<strong>up</strong>port<br />
<strong>Gateway</strong>’s fee-based<br />
software tutorial<br />
service<br />
<strong>Gateway</strong> Technical<br />
S<strong>up</strong>port<br />
Sales, accounting,<br />
and warranty<br />
Order a catalog of documents on common<br />
problems, then order documents by document<br />
numbers. The documents will be faxed to you.<br />
Get tutorial assistance for software issues<br />
billed by the minute.<br />
Talk to a <strong>Gateway</strong> Technical S<strong>up</strong>port<br />
representative about a non-tutorial technical<br />
s<strong>up</strong>port question.<br />
TDD Technical S<strong>up</strong>port (for hearing impaired)<br />
is available:<br />
Weekdays 6:00 a.m. - 8:00 p.m. Central Time<br />
Weekends 6:00 a.m. - 5:00 p.m. Central Time<br />
Get information about available systems,<br />
pricing, orders, billing statements, warranty<br />
service, or other non-technical issues.<br />
800-846-4526 (US)<br />
877-709-2951 (Canada)<br />
800-229-1103 (charged to <strong>your</strong> credit card)<br />
900-555-4695 (charged to <strong>your</strong> telephone bill)<br />
800-846-2301 (US)<br />
800-846-3609 (Canada and Puerto Rico)<br />
605-232-2191 (all other countries)<br />
800-846-1778 (TDD)<br />
800-846-2000 (US)<br />
888-888-2037 (Canada)
MAN MEDIA CENTER SETUP GDE R2 9/03