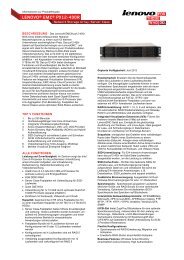
IBM ThinkVision™ L170 Monitor - Lenovo
IBM ThinkVision™ L170 Monitor - Lenovo
IBM ThinkVision™ L170 Monitor - Lenovo

You also want an ePaper? Increase the reach of your titles
YUMPU automatically turns print PDFs into web optimized ePapers that Google loves.
<strong>IBM</strong> ThinkVision <strong>L170</strong> <strong>Monitor</strong><br />
User's Guide<br />
English<br />
<strong>L170</strong>
First Edition (April/2004)<br />
Note: For important information, refer to the <strong>Monitor</strong> Safety and Warranty manual that comes with<br />
this monitor.
Contents<br />
Safety (Read first) . . . . . . . . . . . . . . . . . . . . . . . . . . . . . . . . . . . . . . . . . . . . . . . . . . . . . . . . . 2<br />
Setting up the monitor . . . . . . . . . . . . . . . . . . . . . . . . . . . . . . . . . . . . . . . . . . . . . . . . . . . . . 3<br />
Product Description . . . . . . . . . . . . . . . . . . . . . . . . . . . . . . . . . . . . . . . . . . . . . . . . . . . . 3<br />
Handling Instructions . . . . . . . . . . . . . . . . . . . . . . . . . . . . . . . . . . . . . . . . . . . . . . . . . . . 3<br />
Workplace Preparation . . . . . . . . . . . . . . . . . . . . . . . . . . . . . . . . . . . . . . . . . . . . . . . . . 4<br />
Adjusting the <strong>Monitor</strong> Position . . . . . . . . . . . . . . . . . . . . . . . . . . . . . . . . . . . . . . . . . . . . 4<br />
Working Practices . . . . . . . . . . . . . . . . . . . . . . . . . . . . . . . . . . . . . . . . . . . . . . . . . . . . . 4<br />
Caring for your <strong>Monitor</strong>. . . . . . . . . . . . . . . . . . . . . . . . . . . . . . . . . . . . . . . . . . . . . . . . . . 5<br />
Connecting your <strong>Monitor</strong> . . . . . . . . . . . . . . . . . . . . . . . . . . . . . . . . . . . . . . . . . . . . . . . . 6<br />
Switching on your <strong>Monitor</strong> . . . . . . . . . . . . . . . . . . . . . . . . . . . . . . . . . . . . . . . . . . . . . . . 7<br />
Device Driver Installation . . . . . . . . . . . . . . . . . . . . . . . . . . . . . . . . . . . . . . . . . . . . . . . . . . . 8<br />
Windows 95/98 . . . . . . . . . . . . . . . . . . . . . . . . . . . . . . . . . . . . . . . . . . . . . . . . . . . . . . . 8<br />
Windows 2000/Me . . . . . . . . . . . . . . . . . . . . . . . . . . . . . . . . . . . . . . . . . . . . . . . . . . . . 9<br />
Windows XP . . . . . . . . . . . . . . . . . . . . . . . . . . . . . . . . . . . . . . . . . . . . . . . . . . . . . . . . 10<br />
Auto Setup . . . . . . . . . . . . . . . . . . . . . . . . . . . . . . . . . . . . . . . . . . . . . . . . . . . . . . . . . . . . . 11<br />
Auto Setup . . . . . . . . . . . . . . . . . . . . . . . . . . . . . . . . . . . . . . . . . . . . . . . . . . . . . . . . . 11<br />
Auto Setup for DOS . . . . . . . . . . . . . . . . . . . . . . . . . . . . . . . . . . . . . . . . . . . . . . . . . . 11<br />
Auto Setup for Windows95, Windows98, Windows 2000, Windows NT,<br />
Windows Me or Windows XP . . . . . . . . . . . . . . . . . . . . . . . . . . . . . . . . . . . . . . . . . . . . 13<br />
Manual Setup . . . . . . . . . . . . . . . . . . . . . . . . . . . . . . . . . . . . . . . . . . . . . . . . . . . . . . . . . . . 14<br />
Adjusting Your LCD <strong>Monitor</strong> . . . . . . . . . . . . . . . . . . . . . . . . . . . . . . . . . . . . . . . . . . . . . . . 15<br />
User controls . . . . . . . . . . . . . . . . . . . . . . . . . . . . . . . . . . . . . . . . . . . . . . . . . . . . . . . . 15<br />
On-screen display (OSD) controls . . . . . . . . . . . . . . . . . . . . . . . . . . . . . . . . . . . . . . . . 17<br />
Further Information . . . . . . . . . . . . . . . . . . . . . . . . . . . . . . . . . . . . . . . . . . . . . . . . . . . . . . 20<br />
Display modes . . . . . . . . . . . . . . . . . . . . . . . . . . . . . . . . . . . . . . . . . . . . . . . . . . . . . . . 21<br />
Power Management . . . . . . . . . . . . . . . . . . . . . . . . . . . . . . . . . . . . . . . . . . . . . . . . . . 22<br />
Product Disposal . . . . . . . . . . . . . . . . . . . . . . . . . . . . . . . . . . . . . . . . . . . . . . . . . . . . . 22<br />
Troubleshooting . . . . . . . . . . . . . . . . . . . . . . . . . . . . . . . . . . . . . . . . . . . . . . . . . . . . . . . . . 23<br />
Further Help . . . . . . . . . . . . . . . . . . . . . . . . . . . . . . . . . . . . . . . . . . . . . . . . . . . . . . . . 26<br />
Specifications . . . . . . . . . . . . . . . . . . . . . . . . . . . . . . . . . . . . . . . . . . . . . . . . . . . . . . . . . . . 27<br />
Service Information . . . . . . . . . . . . . . . . . . . . . . . . . . . . . . . . . . . . . . . . . . . . . . . . . . . . . . 28<br />
Notices and Trademarks. . . . . . . . . . . . . . . . . . . . . . . . . . . . . . . . . . . . . . . . . . . . . . . . . . . 29<br />
1<br />
DEUTSCH FRANÇAIS ENGLISH<br />
ESPAÑOL<br />
ITALIANO<br />
JAPANESE<br />
COMPL & WARR
2<br />
í í í
Setting up the monitor<br />
Product Description<br />
Handling Instructions<br />
Do not support the monitor<br />
within the screen area. The<br />
Liquid Crystal Display is<br />
glass and can be damaged<br />
by rough handling or<br />
excessive pressure.<br />
The <strong>IBM</strong> ThinkVision <strong>L170</strong> <strong>Monitor</strong> works with a computer<br />
with a suitable on-board sub-system or Video Adapter card that can support<br />
SXGA 1280 x 1024, XGA 1024 x 768, SVGA 800 x 600, or VGA 640 x 480 at<br />
60 Hz.<br />
The product package should include the following items:<br />
• User's Guide and Installation CD<br />
• <strong>Monitor</strong> Safety and Warranty Information Manual<br />
• <strong>IBM</strong> ThinkVision <strong>L170</strong> <strong>Monitor</strong> Setup Guide<br />
• Power Cord<br />
• <strong>IBM</strong> ThinkVision <strong>L170</strong> <strong>Monitor</strong><br />
• Analog Interface Cable - Attached to <strong>Monitor</strong><br />
1. Lift the monitor by placing your hands where indicated below.<br />
2. Before using your monitor for the first time, remove the clear protective<br />
film from the front of the screen.<br />
3<br />
DEUTSCH FRANÇAIS ENGLISH<br />
ESPAÑOL<br />
ITALIANO<br />
JAPANESE<br />
COMPL & WARR
Workplace Preparation<br />
This section gives advice on<br />
what you should consider<br />
before you set up your monitor.<br />
4<br />
Height<br />
Position the monitor so that the top of the screen is slightly below your eye<br />
level when you sit at your workstation.<br />
Orientation<br />
Adjusting the <strong>Monitor</strong> Position<br />
Working Practices<br />
This section gives<br />
advice on how you can<br />
work comfortably and reduce<br />
fatigue.<br />
Choose a position that gives the least reflection from lights and windows,<br />
usually at a right angle to any windows. Position the monitor directly in front of<br />
you so that you do not have to twist your body to use it. Tilt the monitor to a<br />
comfortable viewing angle.<br />
You can tilt the screen backward and forward as shown below.<br />
Rest<br />
Take regular breaks. Vary your posture, stand up and stretch occasionally as<br />
prolonged use of computer workstations can be tiring.
Back<br />
Sit back in your chair and use the backrest.<br />
Hands<br />
Adjust the seat height so that your forearms are approximately horizontal and<br />
your wrists are straight when using the keyboard. Your upper arms should be<br />
relaxed with your elbows near your body.<br />
Use a light touch on the keyboard, keeping your hands and fingers relaxed.<br />
Allow a space in front of the keyboard to rest your wrists when not typing.<br />
Consider using a wristpad.<br />
Eyesight<br />
Caring for your <strong>Monitor</strong><br />
Working with monitors, in common with any prolonged close work, can be<br />
visually demanding. Look away from the screen periodically and have your<br />
eyesight checked regularly.<br />
Screen settings<br />
Set the screen brightness and contrast to a comfortable level. You may have<br />
to adjust this as the lighting changes during the day. Many application<br />
programs let you select color combinations which can help you to view in<br />
comfort. See the User controls section on page 15 for more information.<br />
Be sure to turn off the power before you perform any maintenance on the<br />
monitor. Clean your monitor as follows:<br />
• Gently wipe the device covers and the screen with a soft cloth.<br />
• Remove finger marks and grease with a damp cloth and mild detergent;<br />
do not use solvents or abrasives.<br />
• Never use flammable cleaning material to clean your <strong>IBM</strong> monitor or any<br />
other electrical apparatus.<br />
5<br />
DEUTSCH FRANÇAIS ENGLISH<br />
ESPAÑOL<br />
ITALIANO<br />
JAPANESE<br />
COMPL & WARR
Switching on your <strong>Monitor</strong><br />
1. Switch on the power source and your computer.<br />
2. Switch on your monitor by pushing and releasing the power switch<br />
marked .<br />
(To switch off your monitor, push and release the power switch again.)<br />
3. To update or install device drivers, follow the instructions in the Device<br />
Driver Installation section on page 8.<br />
4. To optimise the displayed image, run Auto Setup by following the<br />
instructions in the Auto Setup section on page 11.<br />
7<br />
DEUTSCH FRANÇAIS ENGLISH<br />
ESPAÑOL<br />
ITALIANO<br />
JAPANESE<br />
COMPL & WARR
Device Driver Installation<br />
Driver installation for Windows 95 or Windows 98<br />
This section must be<br />
completed before<br />
continuing with the<br />
Windows 95 or Windows 98<br />
Auto Setup on page 13<br />
On LCD monitors, unlike<br />
CRTs, a faster refresh rate<br />
does not improve display quality.<br />
<strong>IBM</strong> recommends using either<br />
1280 x 1024 at a refresh rate of<br />
60Hz or 640 x 480 at a refresh<br />
rate of 60Hz.<br />
8<br />
To use the Plug and Play feature in Microsoft ® Windows ® 95 or Windows 98,<br />
files should be loaded from the <strong>IBM</strong> <strong>Monitor</strong> CD.<br />
1. Turn off the computer and all attached devices.<br />
2. Ensure that the monitor is connected correctly.<br />
3. Turn on the monitor and then the system unit. Allow the system to boot<br />
into Windows 95 or Windows 98.<br />
Your computer’s Plug and Play code may warn you that your system<br />
hardware has changed. This means that it has detected your new<br />
monitor for the first time.<br />
4. Open the DISPLAY PROPERTIES window by clicking START, SETTINGS,<br />
CONTROL PANEL and then double - clicking on the DISPLAY icon.<br />
5. Click the SETTINGS tab.<br />
• In case of Windows 95 :<br />
6. 1. Click the CHANGE DISPLAY TYPE button.<br />
2. Click the CHANGE MONITOR TYPE button.<br />
• In case of Windows 98 :<br />
6. 1. Click the ADVANCED button.<br />
2. Click the MONITOR tab.<br />
3. Open the UPGRADE DEVICE DRIVER WIZARD window by clicking<br />
on CHANGE button and then select the NEXT button.<br />
4. Click the “Display a list of the known drivers for this device so that<br />
I can choose a specific driver” and then select the NEXT button.<br />
7. Insert the Setup CD into the CD driver: and click the HAVE DISK button.<br />
8. Click OK.<br />
9. Ensure that the CD drive letter is selected.<br />
10. Choose <strong>IBM</strong> ThinkVision <strong>L170</strong> monitor and Click OK. The<br />
files will be copied from the CD to your hard disk drive.<br />
11. Close all open windows and remove the CD.<br />
12. Restart the system.<br />
The system will automatically select the maximum refresh rate and<br />
corresponding Color Matching Profiles.
Driver Installation for Windows 2000 or Windows Me<br />
This section must be<br />
completed before<br />
continuing with the<br />
Windows 2000, Windows<br />
Me Auto Setup on page 13<br />
On LCD monitors, unlike<br />
CRTs, a faster refresh rate<br />
does not improve display quality.<br />
<strong>IBM</strong> recommends using either<br />
1280 x 1024 at a refresh rate of<br />
60Hz or 640 x 480 at a refresh<br />
rate of 60Hz.<br />
To use the Plug and Play feature in Microsoft ® Windows ® 2000 or Microsoft<br />
Windows Millennium Edition(Me) files should be loaded from the <strong>IBM</strong><br />
<strong>Monitor</strong> CD.<br />
1. Turn off the computer and all attached devices.<br />
2. Ensure that the monitor is connected correctly.<br />
3. Turn on the monitor and then the system unit. Allow the system to boot<br />
into Windows 2000 or Windows Me.<br />
4. Open the DISPLAY PROPERTIES window by clicking START, SETTINGS,<br />
CONTROL PANEL and then double-clicking the DISPLAY icon.<br />
5. Click the SETTINGS tab.<br />
6. Click the ADVANCED button.<br />
7. Click the MONITOR tab.<br />
8. Click the PROPERTIES button.<br />
9. Click the DRIVER tab.<br />
10. Open the UPGRADE DEVICE DRIVER WIZARD window by clicking on<br />
UPDATE DRIVER and then Click the NEXT button.<br />
11. Select the “Display a list of the known drivers for this device so that I can<br />
choose a specific driver” and then Click the NEXT button.<br />
12. Insert the Setup CD into the CD drive : and click the HAVE DISK button.<br />
13. Click OK.<br />
14. Ensure that the CD drive letter is selected.<br />
15. Choose <strong>IBM</strong> ThinkVision <strong>L170</strong> monitor and Click OK. The<br />
files will be copied from the CD to your hard disk drive.<br />
16. Close all open windows and remove the CD.<br />
17. Restart the system.<br />
The system will automatically select the maximum refresh rate and<br />
corresponding Color Matching Profiles.<br />
9<br />
DEUTSCH FRANÇAIS ENGLISH<br />
ESPAÑOL<br />
ITALIANO<br />
JAPANESE<br />
COMPL & WARR
Driver Installation for Windows XP<br />
This section must be<br />
completed before<br />
continuing with the<br />
Windows XP Auto Setup<br />
on page 13<br />
On LCD monitors, unlike<br />
CRTs, a faster refresh rate<br />
does not improve display quality.<br />
<strong>IBM</strong> recommends using either<br />
1280 x 1024 at a refresh rate of<br />
60Hz or 640 x 480 at a refresh<br />
rate of 60Hz.<br />
10<br />
To use the Plug and Play feature in Microsoft ® Windows ® XP files should be<br />
loaded from the <strong>IBM</strong> <strong>Monitor</strong> CD.<br />
1. Turn off the computer and all attached devices.<br />
2. Ensure that the monitor is connected correctly.<br />
3. Turn on the monitor and then the system unit. Allow the system to boot<br />
into Windows XP.<br />
4. Open the DISPLAY PROPERTIES window by clicking START, SETTINGS,<br />
CONTROL PANEL and then double-clicking the DISPLAY icon.<br />
5. Click the SETTINGS tab.<br />
6. Click the ADVANCED button.<br />
7. Click the MONITOR tab.<br />
8. Click the PROPERTIES button.<br />
9. Click the DRIVER tab.<br />
10. Open the Hardware Update Wizard window by clicking on UPDATE<br />
DRIVER and then Click the NEXT button.<br />
11. Select the “Install from a list or Specific location(Advanced)” and then<br />
Click the NEXT button.<br />
12. Insert the Setup CD into the CD drive : and click the HAVE DISK button.<br />
13. Click OK.<br />
14. Ensure that the CD drive letter is selected.<br />
15. Choose <strong>IBM</strong> ThinkVision <strong>L170</strong> monitor and Click OK. The<br />
files will be copied from the CD to your hard disk drive.<br />
16. Close all open windows and remove the CD.<br />
17. Restart the system.<br />
The system will automatically select the maximum refresh rate and<br />
corresponding Color Matching Profiles.
Auto Setup<br />
Auto Setup<br />
The Setup Utility<br />
included on the installation<br />
CD is for displaying dot patterns.<br />
They do not replace or modify the<br />
display driver.<br />
The Auto Setup instructions<br />
require the monitor to be warmed<br />
up for 15 minutes. This is not<br />
required for normal operation.<br />
By pressing the Auto key, you will<br />
have direct access to Auto<br />
Adjustment.<br />
The AUTO SETUP process<br />
only applies to the current<br />
screen mode. When a new mode<br />
is selected, repeat this section to<br />
reset the monitor.<br />
When you first use your monitor you must perform Auto Setup. This<br />
procedure sets up your monitor to process the video signals from your<br />
computer without image discoloration or smearing. After you perform Auto<br />
Setup, the settings are stored and used each time you turn on the monitor.<br />
To optimise the displayed image a set-up utility is provided on the CD.<br />
Operation of the utility is dependent on the operating system on your<br />
computer. For correct operation locate the operating system on your<br />
computer from the table below and follow the appropriate instructions. You<br />
can choose to run AUTO SETUP for each operating system that you use. This<br />
means that if you sometimes use your monitor while running any version of<br />
Windows and sometimes also use it from within DOS (not a DOS window),<br />
you must run AUTO SETUP for both Windows and DOS. You can run versions of<br />
AUTO SETUP in any order.<br />
Operating System Corresponding Auto Setup procedure<br />
DOS Auto Setup for DOS on page 12<br />
Windows 95, WIndows 98,<br />
Windows 2000,<br />
Microsoft Windows NT ® ,<br />
Windows Me or Windows XP<br />
Before you begin AUTO SETUP for your computer:<br />
Auto Setup for Windows 95, Windows 98,<br />
Windows NT, Windows 2000, Windows Me or<br />
Windows XP on page 13<br />
1. Make sure the computer’s video mode is set in the range of the<br />
supported screen resolution shown in the Table on page 21.<br />
You should perform AUTO SETUP for each screen mode you use.<br />
11<br />
DEUTSCH FRANÇAIS ENGLISH<br />
ESPAÑOL<br />
ITALIANO<br />
JAPANESE<br />
COMPL & WARR
Auto Setup for DOS<br />
If the monitor is in standby<br />
mode (STANDBY ON), it<br />
may automatically turn off while<br />
you are waiting for it to warm up. If<br />
this happens, switch off the<br />
monitor and switch it on again<br />
after a few seconds.<br />
If you are using PC-DOS/V,<br />
change to U.S. mode by<br />
typing ‘CHEV US’ and pressing<br />
ENTER at the command prompt.<br />
The size and diversity of the<br />
dot pattern varies with the<br />
screen resolution.<br />
12<br />
To set up the monitor automatically in DOS, do the following:<br />
1. Turn on the monitor first; then turn on the computer.<br />
If the message CHECK SIGNAL CABLE is displayed, or if nothing is<br />
displayed, check:<br />
• that the video interface cable is connected properly.<br />
• the correct video adapter card is installed.<br />
• the correct supported display mode is selected for your computer.<br />
2. Wait approximately 15 minutes, until the monitor warms up.<br />
3. Insert the User’s Guide and Installation Files CD into the computer CD-<br />
ROM drive.<br />
4. Display the command prompt screen of the DOS full-screen display.<br />
5. Type d:\ (change the drive letter to match your CD-ROM drive if it is not<br />
drive D).<br />
6. Type TESTPATD and press ENTER.<br />
7. Select from the screen the number for the color or text mode you want to<br />
set up.<br />
8. Select from the screen the number for the video mode you want to set<br />
up. You can repeat this process for as many of the color and video<br />
modes as you need.<br />
9. When the dot pattern appears, press the Image Setup ( ) button at<br />
10.<br />
the bottom of the monitor. This activates the AUTO SETUP procedure,<br />
which will optimize the display settings with the provided dot-patterns.<br />
The screen will momentarily turn black while auto adjustment proceeds.<br />
When finished, the Auto Adjustment menu disappears and the screen<br />
returns to a normal display.<br />
11. Press the ESCAPE key to exit the test pattern program.<br />
12. Type Exit at the command prompt to return to Windows.<br />
If you use other operating systems, perform the appropriate Auto Setup for<br />
those systems using instructions given in "Auto Setup for Windows 95, Windows<br />
98, Windows NT, Windows 2000, Windows Me or Windows XP on page 13.
Auto Setup for Windows 95, Windows 98, Windows NT, Windows 2000,<br />
Windows Me or Windows XP<br />
If the monitor is in standby<br />
mode (STANDBY ON), it<br />
may automatically turn off while<br />
you are waiting for it to warm up.<br />
The size and diversity of the<br />
dot pattern varies with the<br />
screen resolution.<br />
To set up the monitor automatically in Windows 95, Windows 98,<br />
Windows NT, Windows 2000, Windows Me, or Windows XP, do the following:<br />
1. Turn on the monitor first; then the computer.<br />
If the message CHECK SIGNAL CABLE is displayed, or if nothing is<br />
displayed, check:<br />
• that the video interface cable is connected properly.<br />
• the correct video adapter card is installed.<br />
• the correct supported display mode is selected for your computer.<br />
2. Wait approximately 15 minutes, until the monitor warms up.<br />
3. Drag the icon bar and tool bar, if they are displayed, to the bottom of the<br />
screen.<br />
4. Insert the User's Guide and Installation CD into the computer CD-<br />
ROM drive.<br />
5. Check the operating system installed on your computer and follow the<br />
instructions from the table below.<br />
Operating system installation steps<br />
Operating System Step1 Step2 Step3<br />
Windows 95,<br />
Windows 98,<br />
Windows 2000,<br />
Windows NT,<br />
Windows Me or<br />
Windows XP<br />
Select<br />
START<br />
Select<br />
RUN<br />
Type D:\TESTPAT (change<br />
the drive letter to match your<br />
CD-ROM drive if it is not drive<br />
D) and press ENTER<br />
6. When the test pattern appears, press the Image Setup ( ) button at<br />
7.<br />
the bottom of the monitor. This activates the AUTO SETUP procedure,<br />
which will optimize the display settings with the provided test patterns.<br />
The screen will momentarily turn black while auto adjustment proceeds.<br />
When finished, the Auto Adjustment menu disappears and the screen<br />
returns to a normal display.<br />
8. Press the ESC key to return to Windows.<br />
You have completed the monitor setup for Windows. If you are using the DOS<br />
operating system, go to Auto Setup for DOS on page 12.<br />
13<br />
DEUTSCH FRANÇAIS ENGLISH<br />
ESPAÑOL<br />
ITALIANO<br />
JAPANESE<br />
COMPL & WARR
Manual Setup<br />
If the monitor is in standby<br />
mode (STANDBY ON), it<br />
might automatically turn off while<br />
you are waiting for it to warm up.<br />
14<br />
Normally, you can complete the setup procedure using AUTO SETUP; however,<br />
if your screen image is still distorted after you perform AUTO SETUP or the<br />
Installation CD does not run on your system, perform MANUAL SETUP.<br />
1. Have your monitor turned on for about 15 minutes, until the monitor<br />
warms up.<br />
2. Display the image you most frequently use on the screen then go to<br />
windows shut down mode.<br />
3. Press the OSD Enter button at the bottom of the monitor to display<br />
the initial OSD menu.<br />
4. Use the or button to select the Image Setup icon and press<br />
the OSD Enter button to access.<br />
5.<br />
6.<br />
Use the or button to select Clock and Phase to adjustment.<br />
(a) "Clock" (pixel frequency) controls the number of pixels scanned<br />
by one horizontal sweep.<br />
If the frequency is not correct, the screen shows vertical stripes<br />
and the picture does not have the correct width.<br />
(b) "Phase" adjust the phase of the pixel clock signal. With a wrong<br />
phase adjustment the picture has horizontal disturbances in<br />
light picture.<br />
Use a select ( or ) button to manually adjust to correct and execute<br />
save go to up menu then press the Exit ( ) button to leave OSD menu.<br />
You have completed monitor setup.
Adjusting Your LCD <strong>Monitor</strong><br />
User controls<br />
Thinkvision<br />
User control features<br />
• Dirct access controls<br />
When OSD is not displayed,<br />
Icon Control<br />
Image Setup Activates automatic image adjustment.<br />
Brightness<br />
• Main OSD menu<br />
When OSD is displayed,<br />
Exit<br />
Left Arrow<br />
Description<br />
Directly accesses to Brightness on the OSD main<br />
menu.<br />
OSD Enter Displays the OSD main menu.<br />
Power Switch Switches the monitor on and off.<br />
Icon Control Description<br />
Right Arrow<br />
OSD Enter<br />
Exits from menus and sub-menus Exits the<br />
OSD.<br />
Moves the cursor to highlight icons and<br />
other options.<br />
Moves the cursor to highlight icons and<br />
other options.<br />
Enters menus and sub-menus and selects<br />
the highlighted option.<br />
15<br />
DEUTSC H FRANÇA IS<br />
ENG LISH<br />
ESPAÑOL<br />
ITALIANO<br />
JAPANESE<br />
COMPL WARR &
The image is already<br />
optimized for many display<br />
modes; however the user controls<br />
can be used to adjust the image to<br />
your liking.<br />
16<br />
Operation<br />
• Press the OSD Enter button to display the main OSD menu.<br />
• Use the Arrow buttons to move among the icons. Select an icon and press<br />
OSD Enter to access that function. If there is a sub-menu, you can move<br />
between options using the Arrow buttons, then press OSD Enter to select<br />
that function. Use the Arrow buttons to make adjustments. Press the<br />
button to save.<br />
• Press the Exit ( ) button to move backwards through the sub-menus<br />
and exit from the OSD.<br />
• Press and hold the Enter ( ) button for 10 seconds to lock the OSD.<br />
This will prevent accidental adjustments to the OSD. Press and hold the<br />
Enter ( ) button for 10 seconds to unlock the OSD and allow adjustments<br />
to the OSD.
On-screen display (OSD) controls<br />
The LCD monitor needs<br />
time to become thermally<br />
stable the first time you turn it on<br />
each day. Thus, to achieve more<br />
accurate adjustments for<br />
parameters, allow the LCD<br />
monitor to warm up (be On) for at<br />
least 15 minutes before making<br />
any screen adjustments.<br />
OSD Icon on<br />
Main Menu<br />
Brightness/<br />
Contrast<br />
Image Position<br />
The settings adjustable with the user controls are viewed through the On-<br />
Screen Display (OSD). Press the OSD Enter button ( ) to activate the<br />
OSD.<br />
Initial appearance of OSD<br />
OSD functions<br />
Br i ght nes s / Cont r as t<br />
Exi t OK<br />
Submenu Description Controls and Adjustments<br />
Brightness<br />
Contrast<br />
Horizontal Position<br />
Vertical Position<br />
Adjusts brightness.<br />
Adjusts contrast.<br />
Moves the screen left or right.<br />
Moves the screen up or down.<br />
17<br />
DEUTSCH FRANÇAIS ENGLISH<br />
ESPAÑOL<br />
ITALIANO<br />
JAPANESE<br />
COMPL & WARR
18<br />
OSD Icon on<br />
Main Menu<br />
Image Setup Automatic<br />
Image<br />
Properties<br />
Manual<br />
• Clock<br />
• Phase<br />
Color<br />
1. Preset Mode<br />
• 6500K<br />
• 7200K<br />
• 9300K<br />
2. Custom<br />
• Red<br />
• Green<br />
• Blue<br />
Options Information<br />
Submenu Description Controls and Adjustments<br />
Language<br />
Activates automatic image adjustment.<br />
Use the or button to adjust away the interference. If satisfactory results<br />
are not obtained using the Phase adjustment, use the Clock adjustment and then<br />
use Phase again.<br />
Adjusts intensity of red, green and blue.<br />
6500K adjusts the screen more red.<br />
7200K adjusts the screen to the default color settings.<br />
9300K adjusts the screen more blue.<br />
Increases or decreases 'red'.<br />
Increases or decreases 'green'.<br />
Increases or decreases 'blue'.<br />
Shows resolution, refresh rate, and product details.<br />
Note: This screen does not allow any changes to the settings.<br />
The language chosen affects only the<br />
language of the OSD.<br />
It has no effect on any software running<br />
on the computer.<br />
Select one of the 5 languages<br />
(English, French, Italian, German<br />
and Spanish) to use for the OSD.
OSD Icon on<br />
Main Menu<br />
(Continued)<br />
Options Menu Position<br />
Submenu Description Controls and Adjustments<br />
Adjusts menu location on the screen.<br />
1. Default Returns the menu position to the default settings.<br />
2. Custom<br />
• Horizontal Changes the horizontal position of OSD.<br />
• Vertical Changes the vertical position of OSD.<br />
Factory Reset<br />
• Cancel<br />
• Reset<br />
Accessibility<br />
• Button repeat<br />
rate<br />
• Menu time out<br />
Resets monitor to the origital settings.<br />
Does not make the adjustment.<br />
Resets the settings.<br />
Changes button repeat rate and menu time out setting.<br />
Selects or button repeating rate. Off - increases by 1 each time the<br />
button is pressed.<br />
Default - increases continuously<br />
while the button is pressed.<br />
Slow - increases by 1 every 2<br />
seconds while the button is pressed.<br />
Sets the length of time the OSD will<br />
remain active after the last time a button is<br />
pressed.<br />
Use the or button to select<br />
time from 5 to 60 seconds.<br />
19<br />
DEUTSCH FRANÇAIS ENGLISH<br />
ESPAÑOL<br />
ITALIANO<br />
JAPANESE<br />
COMPL & WARR
Further Information<br />
Display modes<br />
20<br />
The display mode the monitor uses is controlled by the computer. Therefore,<br />
refer to your computer documentation for details on how to change display<br />
modes.<br />
The image size, position and shape might change when the display mode<br />
changes. This is normal and the image can be readjusted using AUTO SETUP<br />
and the monitor controls.<br />
Unlike CRT monitors, which require a high refresh rate to minimize flicker,<br />
TFT technology is inherently flicker-free. If possible, configure your computer<br />
for 1280 × 1024 addressability at 60Hz vertical refresh rate.<br />
For the display modes listed on the next page, the screen image has been<br />
optimized during manufacture.
For image problems, you<br />
may want to run AUTO<br />
Setup again before consulting this<br />
section. In most cases, AUTO<br />
SETUP can fix the problems. See<br />
Auto Setup for DOS on page 12<br />
for details.<br />
Factory Set Display Modes<br />
Addressability Refresh Rate<br />
† Recommended<br />
640 × 400 70 Hz<br />
640 × 480 60 Hz<br />
640 × 480 67 Hz<br />
640 × 480<br />
640 × 480 75 Hz<br />
720 × 400 70 Hz<br />
800 × 600 56 Hz<br />
800 × 600 60 Hz<br />
800 × 600 72 Hz<br />
800 × 600 75 Hz<br />
832 × 624 75 Hz<br />
1024 × 768 60 Hz<br />
1024 x 768 72 Hz<br />
1024 x 768 75 Hz<br />
1152 x 864<br />
72 Hz<br />
1024 x 768 70 Hz<br />
75 Hz<br />
1280 x 1024 60 Hz<br />
1280 x 1024 75 Hz<br />
Note: VESA timings are as detailed in the VESA “Display <strong>Monitor</strong> Timing<br />
Specification”. Version 1.0, Revision 0.8, dated 09/17/98.<br />
21<br />
DEUTSCH FRANÇAIS ENGLISH<br />
ESPAÑOL<br />
ITALIANO<br />
JAPANESE<br />
COMPL & WARR
Power Management<br />
If your computer has<br />
previously been used<br />
with a CRT monitor and is<br />
currently configured to a<br />
display mode outside the<br />
range that the Flat Panel<br />
monitor can display, you<br />
may need to re-attach the<br />
CRT monitor temporarily<br />
until you have re-configured<br />
the computer, preferably to<br />
1280 x 1024 at 60Hz.<br />
Product Disposal<br />
22<br />
To benefit from power management, the monitor must be used in conjunction<br />
with a computer that implements the Video Electronics Standards Association<br />
(VESA) Display Power Management Signalling (DPMS) Standard.<br />
The power management feature is invoked when the computer recognizes<br />
that you have not used your mouse or keyboard for a user-definable period.<br />
There are several states as described in the table below.<br />
As an ENERGY STAR ® Partner, <strong>IBM</strong> has determined that this product meets the<br />
ENERGY STAR ® guidelines for energy efficiency.<br />
For optimal performance, switch off your monitor at the end of each working<br />
day, or whenever you expect to leave it unused for long periods during the<br />
day.<br />
State<br />
On<br />
DPMS<br />
Standby<br />
DPMS<br />
Suspend<br />
DPMS Off<br />
Power<br />
Indicator<br />
Screen<br />
Steady green Normal<br />
Amber<br />
Amber<br />
Amber<br />
Blank<br />
Blank<br />
Blank<br />
Restoring<br />
Operation<br />
Press a key or<br />
move the mouse.<br />
Press a key or<br />
move the mouse. *<br />
Press a key or<br />
move the mouse. *<br />
* There may be a slight delay before the picture reappears.<br />
Compliance<br />
ENERGY STAR ®<br />
ENERGY STAR ®<br />
ENERGY STAR ®<br />
The fluorescent lamp in the liquid crystal display contains a small amount of<br />
mercury. Dispose of it as required by local ordinances and regulations.
Troubleshooting<br />
If you have a problem setting up or using your monitor, you might be able to<br />
solve it yourself. Before calling your retailer or <strong>IBM</strong>, try the suggested actions<br />
that are appropriate to your problem.<br />
Problem<br />
Computer does<br />
not boot after<br />
the graphics<br />
adapter is<br />
installed<br />
The screen<br />
image is<br />
garbled or<br />
unusable<br />
(rolling screen<br />
images,<br />
overlapping<br />
screen images<br />
or a blank<br />
screen)<br />
Screen is blank<br />
and power<br />
indicator is off<br />
Possible<br />
Cause<br />
There is<br />
another<br />
graphics<br />
adapter in the<br />
computer<br />
The display<br />
driver is trying<br />
to use a<br />
setting your<br />
monitor does<br />
not support<br />
No power to<br />
monitor<br />
Suggested Action Reference<br />
Remove the other<br />
graphics adapter plugged<br />
into one of the expansion<br />
slot.<br />
If the card is built-in to<br />
the motherboard, check<br />
your system manual for<br />
instructions on how to<br />
disable the built-in adapter.<br />
Select the correct<br />
monitor.<br />
Ensure that the<br />
electrical outlet and the<br />
monitor are both switched<br />
on.<br />
Check that the power<br />
cord is firmly plugged into<br />
the electrical outlet and the<br />
power supply unit.<br />
If the power cord plug<br />
has a removable fuse,<br />
replace it.<br />
Try another power<br />
cord.<br />
Try another electrical<br />
outlet.<br />
Connecting<br />
your <strong>Monitor</strong><br />
section on<br />
page 6<br />
Connecting<br />
your <strong>Monitor</strong><br />
section on<br />
page 6<br />
Connecting<br />
your <strong>Monitor</strong><br />
section on<br />
page 6<br />
23<br />
DEUTSCH FRANÇAIS ENGLISH<br />
ESPAÑOL<br />
ITALIANO<br />
JAPANESE<br />
COMPL & WARR
24<br />
Problem<br />
Screen is blank<br />
and power<br />
indicator is<br />
steady green<br />
Screen is blank<br />
and power<br />
indicator is<br />
blinking green.<br />
Image appears<br />
to be smeared<br />
Image appears<br />
to be<br />
discolored<br />
Possible<br />
Cause<br />
Brightness<br />
and Contrast<br />
may be too<br />
low<br />
The monitor is<br />
in the Power<br />
Management<br />
Standby state<br />
The monitor is<br />
not receiving<br />
a video signal<br />
The monitor is<br />
in the Power<br />
Management<br />
Suspend or<br />
Off state<br />
Display mode<br />
of the<br />
computer is<br />
outside the<br />
range of the<br />
monitor<br />
There are<br />
noises in the<br />
video signal<br />
The Color<br />
setting may<br />
be incorrect<br />
Suggested Action Reference<br />
Adjust brightness and<br />
contrast.<br />
Press any key on the<br />
keyboard or move the<br />
mouse to restore<br />
operation.<br />
Check the Power<br />
Management software on<br />
your computer<br />
Check that the signal<br />
cable is firmly connected to<br />
the computer.<br />
Check that no pins are<br />
bent in the signal cable<br />
connector.<br />
Press any key on the<br />
keyboard or move the<br />
mouse to restore<br />
operation.<br />
Check the Power<br />
Management software on<br />
your computer.<br />
Reconfigure the<br />
computer to use a<br />
supported display mode.<br />
Select Image Setup<br />
menu in the OSD. Then<br />
select MANUAL to adjust<br />
Phase/Clock settings.<br />
Adjust the Color<br />
settings.<br />
User<br />
controls<br />
section on<br />
page 15<br />
Power<br />
Management<br />
section on<br />
page 22<br />
Connecting<br />
your <strong>Monitor</strong><br />
section on<br />
page 6<br />
Power<br />
Management<br />
section on<br />
page 22<br />
Further<br />
Information<br />
section on<br />
page 20<br />
User<br />
Controls<br />
setion on page<br />
17<br />
User<br />
Controls<br />
setion on page<br />
17
Problem<br />
A few dots are<br />
missing,<br />
discolored, or<br />
inappropriately<br />
lighted.<br />
Possible<br />
Cause<br />
Suggested Action Reference<br />
A small number of missing, discolored, or<br />
lighted dots may be present on the screen,<br />
which is an intrinsic characteristic of the TFT<br />
LCD technology and is not an LCD defect.<br />
25<br />
DEUTSCH FRANÇAIS ENGLISH<br />
ESPAÑOL<br />
ITALIANO<br />
JAPANESE<br />
COMPL & WARR
Further Help<br />
If possible, stay by your<br />
computer. Your Technical<br />
Support Representative may wish<br />
to go through the problem with<br />
you during the call.<br />
More help, late-breaking<br />
news and details of the latest<br />
accessories for these products<br />
may be found on the worldwide<br />
web at:<br />
http://www.pc.ibm.com/us/<br />
accessories<br />
26<br />
If you are unable to correct the problem yourself, you may seek further help<br />
as follows:<br />
Call the <strong>IBM</strong> Support Center.<br />
In the US call 1-800-426-7378<br />
In Canada (Toronto Only) call 416-383-3344<br />
In Canada (all others) call 1-800-565-3344<br />
In other countries contact your dealer, retailer, or other <strong>IBM</strong> authorized<br />
Servicer.<br />
Before calling, please have available as much of the following information as<br />
possible:<br />
1. Model and serial number from the label on your monitor.<br />
2. Purchase receipt.<br />
3. Description of problem.<br />
4. Computer type and model.<br />
5. System configuration (hardware fitted, etc.).<br />
6. System BIOS version number.<br />
7. Operating System and version number.<br />
8. Display driver version number.<br />
9. Video Adapter Type.
Specifications<br />
Power consumption figures<br />
are for the monitor and the<br />
power supply combined.<br />
This color monitor (Type-model 6734-AC1) uses a 17-inch TFT LCD<br />
Dimensions Height:<br />
Depth:<br />
Width:<br />
Weight Unpackaged:<br />
Packaged:<br />
409.5 mm (16.1 in.)<br />
222.0 mm (8.7 in.)<br />
399.8 mm (15.7 in.)<br />
6.6 Kg (14.52 lb)<br />
8.4 Kg (18.48 lb)<br />
Tilt Tilt: –4° / + 41°<br />
Image Viewable Image Size:<br />
Maximum Height:<br />
Maximum Width:<br />
Pixel Pitch:<br />
Power Input Supply Voltage:<br />
Max Supply Current:<br />
Power<br />
Consumption<br />
Normal Operation:<br />
DPMS Stand-by:<br />
DPMS Suspend:<br />
DPMS off:<br />
Video Input Input Signal:<br />
Horiz. Addressability:<br />
Vert. Addressability:<br />
Clock Frequency:<br />
Communications VESA DDC: 2 B<br />
Supported Display<br />
Modes<br />
Environment Temperature:<br />
Operating:<br />
Storage:<br />
Shipping:<br />
Humidity:<br />
Operating:<br />
Storage:<br />
Shipping:<br />
VESA Standard modes between<br />
Horiz. Frequency:<br />
Vert. Frequency:<br />
431.80 mm (17.0 in.)<br />
270.34 mm (10.6 in.)<br />
337.92 mm (13.3 in.)<br />
0.264 mm (.010 in.) (H)<br />
× 0.264 mm (.010 in.) (V)<br />
100 - 240 V ac, 60/50 ± 3 Hz<br />
1.5 A at 120 V ac<br />
< 45 W<br />
< 2 W<br />
< 2 W<br />
< 1 W<br />
Analog Direct Drive, 75 ohm 0.7 V<br />
1280 pixels (max)<br />
1024 lines (max)<br />
135 MHz<br />
30 kHz - 80 kHz<br />
55 Hz - 75 Hz<br />
10 to 35° C (5 to 95° F)<br />
- 20 to 60° C (-4 to 140° F)<br />
- 20 to 60° C (-4 to 140° F)<br />
10 to 80%<br />
5 to 95%<br />
5 to 95%<br />
27<br />
DEUTSCH FRANÇAIS ENGLISH<br />
ESPAÑOL<br />
ITALIANO<br />
JAPANESE<br />
COMPL & WARR
Service Information<br />
28<br />
The following parts are for use by <strong>IBM</strong> service, or <strong>IBM</strong> authorized dealers, to support<br />
the customer warranty. Parts are for service use only.<br />
P/N Description<br />
73P3824 FRU <strong>Monitor</strong><br />
31P9562<br />
FRU Stand<br />
31P9564 FRU Video Cable<br />
73P3825 User's Guide CD<br />
73P3826 Setup Guide<br />
Model Type 6734-AC1<br />
Color<br />
BB<br />
BB<br />
BB<br />
MTM<br />
6734-AC1<br />
6734-<br />
***<br />
6734-***<br />
6734-AC1<br />
6734-AC1<br />
Geography<br />
WW<br />
WW<br />
WW<br />
WW<br />
WW
Notices and Trademarks<br />
This section contains information on notices and trademarks.<br />
Notices<br />
<strong>IBM</strong> may not offer the products, services, or features discussed in this document in all<br />
countries. Consult your local <strong>IBM</strong> representative for information on the products and services<br />
currently available in your area. Any reference to an <strong>IBM</strong> product, program, or service is not<br />
intended to state or imply that only that <strong>IBM</strong> product, program, or service may be used. Any<br />
functionally equivalent product, program, or service that does not infringe any <strong>IBM</strong> intellectual<br />
property right may be used instead. However, it is the user’s responsibility to evaluate and<br />
verify the operation of any non-<strong>IBM</strong> product, program, or service.<br />
<strong>IBM</strong> may have patents or pending patent applications covering subject matter described in this<br />
document. The furnishing of this document does not give you any license to these patents. You<br />
can send license inquiries, in writing, to:<br />
<strong>IBM</strong> Director of Licensing<br />
<strong>IBM</strong> Corporation<br />
North Castle Drive<br />
Armonk, NY 10504-1785<br />
U.S.A.<br />
The following paragraph does not apply to the United Kingdom or any country where<br />
such provisions are inconsistent with local law: INTERNATIONAL BUSINESS MACHINES<br />
CORPORATION PROVIDES THIS PUBLICATION “AS IS” WITHOUT WARRANTY OF ANY<br />
KIND, EITHER EXPRESS OR IMPLIED, INCLUDING, BUT NOT LIMITED TO, THE IMPLIED<br />
WARRANTIES OF NON-INFRINGEMENT, MERCHANTABILITY OR FITNESS FOR A<br />
PARTICULAR PURPOSE. Some states do not allow disclaimer of express or implied<br />
warranties in certain transactions, therefore, this statement may not apply to you.<br />
This information could include technical inaccuracies or typographical errors. Changes are<br />
periodically made to the information herein; these changes will be incorporated in new editions<br />
of the publication. <strong>IBM</strong> may make improvements and/or changes in the product(s) and/or the<br />
program(s) described in this publication at any time without notice.<br />
<strong>IBM</strong> may use or distribute any of the information you supply in any way it believes appropriate<br />
without incurring any obligation to you.<br />
Any references in this publication to non-<strong>IBM</strong> Web sites are provided for convenience only and<br />
do not in any manner serve as an endorsement of those Web sites. The materials at those<br />
Web sites are not part of the materials for this <strong>IBM</strong> product, and use of those Web sites is at<br />
your own risk.<br />
29<br />
DEUTSCH FRANÇAIS ENGLISH<br />
ESPAÑOL<br />
ITALIANO<br />
JAPANESE<br />
COMPL & WARR
30<br />
Trademarks<br />
The following terms, used in this publication, are trademarks or service marks<br />
of the <strong>IBM</strong> Corporation in the United States, other countries, or both:<br />
ENERGY STAR ® is a U.S. Govt. registered trademark.<br />
Microsoft ® Windows ® , and Windows NT are trademarks of Microsoft<br />
Corporation in the United States, other countries, or both.<br />
Other company, product, and service names may be trademarks or service<br />
marks of others.<br />
© Copyright International Business Machines Corporation 2004. All<br />
rights reserved.