

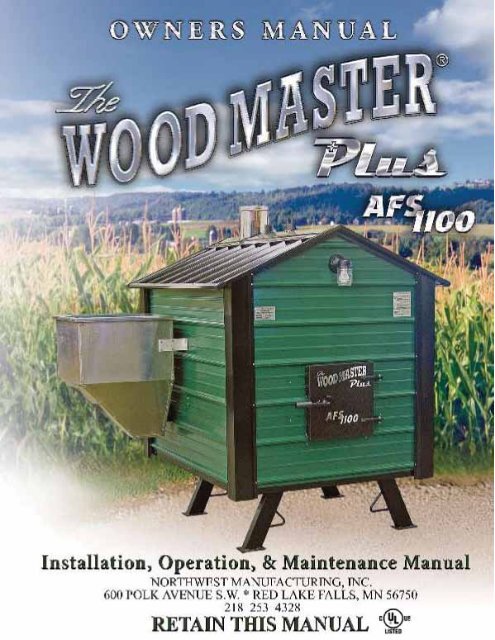
AFS 1100 Manual - Grain Burning Stoves by Prairie Fire Grain Energy
AFS 1100 Manual - Grain Burning Stoves by Prairie Fire Grain Energy
AFS 1100 Manual - Grain Burning Stoves by Prairie Fire Grain Energy

You also want an ePaper? Increase the reach of your titles
YUMPU automatically turns print PDFs into web optimized ePapers that Google loves.
Dear Customer,<br />
We at Northwest Mfg., Inc. would like to thank you for purchasing the<br />
WoodMaster Plus heating system.<br />
It is our goal to build the highest quality product at a competitive price,<br />
and maintain total customer satisfaction.<br />
This manual is a guide for installing, operating, and maintaining your<br />
new WoodMaster Plus.<br />
Follow and observe all safety and warning instructions.<br />
The Staff ,<br />
WoodMaster Furnaces
Contents<br />
TABLE OF CONTENTS<br />
Contents . . . . . . . . . . . . . . . . . . . . . . . . . . . . . . . . . . . . . . . . . . . . 3<br />
Safety . . . . . . . . . . . . . . . . . . . . . . . . . . . . . . . . . . . . . . . . . . . . . . . . 4<br />
Features . . . . . . . . . . . . . . . . . . . . . . . . . . . . . . . . . . . . . . . . . . . . . 5<br />
Installation . . . . . . . . . . . . . . . . . . . . . . . . . . . . . . . . . . . . . . . . . . . 6<br />
The Furnace . . . . . . . . . . . . . . . . . . . . . . . . . . . . . . . . . . . . . . 6<br />
Chimney Specifications . . . . . . . . . . . . . . . . . . . . . . 6<br />
Block or Pad Supports . . . . . . . . . . . . . . . . . . . . . . . . . 6<br />
Trench . . . . . . . . . . . . . . . . . . . . . . . . . . . . . . . . . . . . . . 6<br />
Mounting the Pump. . . . . . . . . . . . . . . . . . . . . . . . . . . . 7<br />
Hooking Up Water Lines . . . . . . . . . . . . . . . . . . . . . . . 7<br />
Wiring the Pump . . . . . . . . . . . . . . . . . . . . . . . . . . . . . . 7<br />
The Home . . . . . . . . . . . . . . . . . . . . . . . . . . . . . . . . . . . . . . . . 8<br />
Domestic Hot Water . . . . . . . . . . . . . . . . . . . . . . . . . 8<br />
Existing Forced Air . . . . . . . . . . . . . . . . . . . . . . . . . . 8<br />
Existing Hot Water Heat . . . . . . . . . . . . . . . . . . . . . . . 9<br />
Inline Filter and Fill Valve . . . . . . . . . . . . . . . . . . . . . . 9<br />
Operation . . . . . . . . . . . . . . . . . . . . . . . . . . . . . . . . . . . . . . . . . . . . 10<br />
Filling with Water . . . . . . . . . . . . . . . . . . . . . . . . . . . . . . . . . . 10<br />
Bleeding the System . . . . . . . . . . . . . . . . . . . . . . . . . . . . . . . 10<br />
<strong>AFS</strong> <strong>1100</strong> Startup Procedure . . . . . . . . . . . . . . . . . . . . . . . 10<br />
Timer Dial Identification. . . . . . . . . . . . . . . . . . . . . . . . . . . 10<br />
BTU Per Hour -- Timer Settings . . . . . . . . . . . . . . . . . . . . 11<br />
WoodMaster Plus Digital Aqua Stat Settings . . . . . . . . 11<br />
Boiler Treatment . . . . . . . . . . . . . . . . . . . . . . . . . . . . . . . . . . 11<br />
Maintenance Schedule . . . . . . . . . . . . . . . . . . . . . . . . . . . . 11<br />
Reference . . . . . . . . . . . . . . . . . . . . . . . . . . . . . . . . . . . . . . . . . . . . 12<br />
Trouble Shooting . . . . . . . . . . . . . . . . . . . . . . . . . . . . . . . . . . 12<br />
<strong>AFS</strong> <strong>1100</strong> Electronic Temperature Control (ETC) . . . . . 13<br />
ETC System Specifications . . . . . . . . . . . . . . . . . . . . . . . . 14<br />
Wiring Diagrams . . . . . . . . . . . . . . . . . . . . . . . . . . . . . . . . . . . 16<br />
Warranty & Owner’s Registration Cards (tearouts) . . . . . . 19<br />
Page 3
Pre-Installation Precautions<br />
Page 4<br />
IMPORTANT SAFETY<br />
INSTRUCTIONS<br />
READ ALL INSTRUCTIONS<br />
BEFORE INSTALLATION<br />
CAUTION All installation and operations must follow STATE and LOCAL CODES for<br />
wiring, plumbing, and fi ring of this unit. These CODES may diff er from this<br />
manual. Installation must be performed <strong>by</strong> a Qualifi ed Installer.<br />
CAUTION<br />
Read and follow these directions carefully. Retain this manual for as long as<br />
you own your WoodMaster Plus.<br />
CAUTION All WoodMaster Plus models operate at atmospheric pressure. DO NOT<br />
obstruct, block, or plug in any way the overfl ow vent pipe which is located<br />
directly behind the chimney on top of the furnace.<br />
CAUTION<br />
Safety<br />
The WoodMaster Plus is designed for outdoor use. We do not recommend<br />
installing in a building.<br />
CAUTION Manufacturer recommends a minimum 25 foot clearance from buildings<br />
or fi re hazards. If placed near a fi re hazard area an approved spark arrester<br />
should be used.<br />
CAUTION<br />
Only responsible adults should operate your furnace. If furnace is not fi red<br />
properly damage could result and the warranty be voided.<br />
CAUTION Never allow small children to play near or tamper with furnace. Always<br />
keep the area around, and in front of fuel door clean and free from combustible<br />
materials.<br />
CAUTION<br />
CAUTION<br />
Do not connect this unit to a chimney fl ue serving another appliance.<br />
Pump must run continuously whenever the WoodMaster Plus is being used.<br />
In case of a runaway or chimney fi re, shut fan switch off , make sure doors are closed, allow<br />
CAUTION<br />
to burn out.
Twin Augers<br />
Inside Front<br />
Swirley<br />
Return Line<br />
Feed Auger Motor<br />
Snap Disc<br />
Feed Line<br />
Twin Auger & Ash<br />
Removal Motor<br />
Rear Door Insulation<br />
Feed Auger<br />
<strong>Fire</strong> Pot<br />
Face Plate<br />
Ash Removal<br />
Auger<br />
Chimney Box<br />
FRONT VIEW<br />
BACK PANEL<br />
Features<br />
6” Chimney<br />
Heat Transfer Tubes<br />
Chimney Box<br />
Insulation<br />
Chimney Box<br />
Door Latch<br />
Fan Switch<br />
Water Level<br />
Light<br />
Light Switch<br />
Primary<br />
Timers<br />
Chimney Box<br />
Return Line<br />
Twin Augers<br />
Feed Auger<br />
Feed Line<br />
Combustion Fan<br />
Ash Pan<br />
Digital<br />
Aquastat<br />
Secondary<br />
Timers<br />
ETC Control<br />
(on right side)<br />
Page 5
Page 6<br />
Installation<br />
THE FURNACE<br />
Chimney Specifi cations<br />
To insure proper insulation, use only Chimney and Chimney Adapter from your local WoodMaster Plus Dealer or Northwest<br />
Mfg., Inc. (Chimney type Class A Insulated).<br />
Block or Pad Supports<br />
Under normal conditions four cement blocks are all that is required to support the furnace. Blocks should be at least 6 inches<br />
wide, 10 inches long, and 3 inches thick. Under very soft conditions a concrete pad may be needed. For Model <strong>AFS</strong> <strong>1100</strong> the<br />
pad should be no less than 5 feet wide, 6 feet long, and 4 to 6 inches thick. Always use a non-combustible base.<br />
CAUTION: Call before you dig.<br />
Trench<br />
The trench must be 24 inches deep and 6 to 12 inches wide. It can be dug with a shovel or a backhoe. Place all the dirt to one<br />
side of the trench to allow room for working on the other side.<br />
Wiring<br />
Place electrical supply in bottom of trench and cover with 6 inches of dirt. Electrical wire rated for underground use (12-2<br />
+ground) can be buried in the same trench as the water lines but must maintain a minimum 24 inch depth. Always follow<br />
state and local codes.<br />
Water Lines<br />
The remaining 18 inches of open trench is where the water lines are placed. Use a one inch water line with a minimum rating<br />
of 100 PSI at 180 degrees and insure that your water line insulation has a minimum R-value of eight in order to maintain<br />
adequate heating effi ciency.<br />
NOTE: If lines travel under a driveway or where heavy equipment travels, the line should be buried two to three feet deep. If<br />
lines travel through a low or wet area, they should be insulated and installed in a water tight piping, (PVC).<br />
NOTE: Leave a minimum of three feet of water line exposed above ground at the furnace to insure adequate length for connection.<br />
NOTE: Before insulating and burying the water lines, label the hot water supply line at both ends. Once the lines are covered<br />
you will be able to easily determine which line is connected to the pump.<br />
NOTE: Use only approved water line insulation sold through your WoodMaster Plus Dealer. Poor insulation will cause major<br />
heat loss.
Mounting the Pump<br />
Attach the 1” x 2” Black Nipple (BN001) and one<br />
half of the Flanges from the 1” Cast Iron Pump<br />
Flange Kit (PF001) to one of the Hot Water Supply<br />
Valves on back of furnace.<br />
Locate one of the Black Rubber Gaskets, and<br />
placing it between the pump and the mounted<br />
fl ange, bolt the pump to the fl ange. Make<br />
sure the arrow on the pump indicating direction<br />
of water fl ow points down.<br />
Bolt the remaining fl ange and gasket to the<br />
bottom of the pump.<br />
Pump<br />
1” Cast Iron Pump Flange<br />
Hooking Up Water Lines<br />
Hot Water Supply<br />
Attach the 1” Pex x 1” MIP (DP002) fi tting to fl ange on bottom<br />
of pump. Then attach the hot water supply 1” Pex Water Line<br />
(DP001) to the fi tting using 1” Pex Crimp Ring (DP007).<br />
Installation<br />
THE FURNACE<br />
Cold Water Return<br />
Attach the 1” Pex x 1” MIP (DP002) fi tting to the Cold Water Return<br />
Valve on the same side of the stove on which the pump was<br />
attached. Then attach the cold water return 1” Pex Water Line<br />
(DP001) to the fi tting using 1” Pex Crimp Ring (DP007).<br />
Wiring The Pump<br />
Remove the cover on the pump. Then using an approved wire, connect the<br />
ground wire to the green ground screw on the pump. Connect the black wire<br />
to the yellow wire on the pump. Finally, connect the remaining two white<br />
wires together and replace the pump cover.<br />
Locate junction box on back of stove and remove the cover. Connect the running<br />
end of the approved wire coming from the pump to the junction.<br />
NOTE: The wires from the pump will have to connect with the main power<br />
wires in the junction box along with the power wires from the ETC System.<br />
1” Pex Crimp x 1” MIP<br />
(DP002)<br />
Hot Water Supply<br />
(On back of furnace)<br />
1” x 2” Black Nipple<br />
1” Cast Iron Pump Flange<br />
Black Rubber Gasket<br />
(Supplied with pump)<br />
Direction of Flow<br />
Indicator Arrow<br />
Black Rubber Gasket<br />
(Supplied with pump)<br />
1” Pex Water Line<br />
(DP001)<br />
Hot Water Supply Valve<br />
Bottom Pump<br />
Flange or Cold Water<br />
Return Valve<br />
1” Pex Crimp Ring<br />
(DP007)<br />
CAUTION: Pump must run<br />
continuously whenever the WoodMaster<br />
Plus is in use, cannot be wired to<br />
thermostats that only runs pump when<br />
building calls for heat.<br />
CAUTION: Disconnect power before<br />
servicing any electrical components.<br />
Page 7
Page 8<br />
Installation<br />
Domestic Hot Water<br />
The Dometsic Hot Water/Flatplate Kit consists of a Water<br />
to Water Heat Transfer unit and the fi ttings needed to<br />
hook it up. The unit goes on top of the domestic hot<br />
water heater and is connected as shown below.<br />
THE HOME<br />
Entering the building with water lines can be done underground or over the sill plate. Once inside the building the typical<br />
hookup would run fi rst to the Domestic Hot Water Supply and next to an existing heating system such as a forced air furnace<br />
or a hot water heating system. Finally before leaving the building a fi ll valve must be installed near enough to a water supply<br />
for fi lling and fl ushing the boiler in the WoodMaster Plus Furnace.<br />
WoodMaster<br />
water out<br />
WoodMaster<br />
water in<br />
Domestic Cold Water In<br />
Out to Domestic<br />
Hot Water Heater<br />
Existing Forced Air<br />
A water to air heat exchanger is inserted in the existing plenum. In most cases<br />
the heat exchanger is placed in a horizontal position, keeping all four sides<br />
level. The air must be forced through the fi nned area of the heat exchanger<br />
evenly. The hot water line coming from the hot-water tube enters the bottom<br />
fi tting of the heat exchanger and exits the top fi tting, which returns to the<br />
furnace. If the plenum is too large or too small, it must be altered to fi t the heat<br />
exchanger properly.<br />
NOTE: The WoodMaster Plus Water to Air Heat Exchanger must be installed<br />
below any existing Off -Peak electric coils already in the plenum.<br />
After installation of the WoodMaster Plus add-on water to air exchanger, the<br />
air fl ow must be increased to fuel furnaces, electric furnaces, and electric/gas<br />
furnaces. Methods of doing this are:<br />
Belt Drive System<br />
Blower pulleys and motor pulleys may be changed but the electric current<br />
fl owing through the motor shall not exceed the nameplate rating. (A blower<br />
motor or larger power may be used.)<br />
Direct Drive System<br />
The motor shall not be changed, however the speed of the motor may be<br />
increased.<br />
CAUTION: When installing heat exchangers DO NOT tamper<br />
with existing controls. Wiring to existing blower can be done<br />
with a line voltage or low voltage thermostat. NOTE: All wiring<br />
must follow state and local codes and should be done <strong>by</strong> a<br />
qualifi ed electrician. Wire thermostats according to directions<br />
provided <strong>by</strong> the manufacturer.<br />
Cold Water Return to<br />
WoodMaster Plus<br />
Hot Water Supply from WoodMaster Plus<br />
(Always put supply in lower port.)<br />
The heat exchanger works on the same principal<br />
as your car heater. Air blows through<br />
the heat exchanger taking the heat from<br />
the water and blowing it into your existing<br />
ductwork.
Installation<br />
Existing Hot Water Heat<br />
A Water to Water Heat Transfer Unit (FP520) is used to connect to an existing hot water boiler system.<br />
Hot Water Supply from<br />
WoodMaster Plus<br />
Cold Water Return to<br />
WoodMaster Plus<br />
Existing Heat<br />
Zone Return<br />
Inline Filter and Fill Valve Assembly<br />
NOTE: Any changes to an existing boiler<br />
should be done <strong>by</strong> a qualifi ed plumber and<br />
follow state and local codes.<br />
The Inline Filter and Fill Valve Assembly (FK001) must be installed in the Cold Water Return<br />
Line before the line exits the building. It should be placed so that a washing machine<br />
hose can be connected between a domestic water supply and the Fill Valve.<br />
Cold Water Return from<br />
Heat Exchanger<br />
WoodMaster Plus Water<br />
to Water Heat Transfer<br />
Unit<br />
Circulating Pump<br />
for Existing Hot<br />
Water Heating<br />
System<br />
Existing Hot<br />
Water Boiler<br />
Cold Water<br />
Return to<br />
WoodMaster Plus<br />
Domestic Water<br />
Supply for fi lling<br />
boiler<br />
Page 9
Filling With Water<br />
Connect washing machine hose between a domestic water supply and the furnace fi ll valve (FK001) which was installed in<br />
the cold water return line at a point just prior to its exiting the building. Make sure that valves not being used on the furnace<br />
are closed and the valves that are being used are open. Begin fi lling and inspect for leaks on all fi ttings. Repair any leaks that<br />
are found.<br />
While fi lling the boiler, close the cold water return valve on the furnace for two or three minutes, and then open the valve.<br />
This will force trapped air out of the hot water supply line. Repeat this process with the hot water supply valve on the furnace<br />
to force air out of the cold water return line. Once both lines have been “bled” continue fi lling until the system is full and<br />
water comes out of the vent pipe.<br />
Page 10<br />
Operation<br />
CAUTION: Feed and return valves that are not being used must<br />
be insulated or removed to prevent freezing and breaking.<br />
CAUTION: Air in the water lines can cause damage to the pump.<br />
Bleeding The System<br />
Routinely pay attention to the water level light. If light is not lit, this indicates water level is low and furnace may need to have<br />
water added. Add water until it over fl ows the vent pipe. Occasionally (monthly) manually inspect the water level in the over<br />
fl ow pipe to be sure that the water level light is working properly.<br />
<strong>AFS</strong> <strong>1100</strong> Startup Procedure<br />
Step 1: Fill hopper with corn.<br />
IMPORTANT NOTE: In case of<br />
Step 2: Turn T1 knob to 10 sec.<br />
extended power outage it is possible to<br />
Step 3: Turn T2 knob to 0 sec.<br />
operate your furnace with a generator.<br />
Step 4: Turn T3 to 30 sec.<br />
Step 5: Turn T4 to 35 min.<br />
Step 6: Turn fan switch on.<br />
Step 7: Press Set button on Wood Master digital aqua stat.<br />
Step 8: Let stove run for about 6 minutes or until a small pile of corn accumulates in fi re pot.<br />
Step 9: Turn T2 to 45 sec.<br />
Step 10: Light corn in fi repot with Matchlight charcoal or large propane torch.<br />
After the corn is burning well, the stove should provide 20,000 BTUH with these settings. For diff erent BTUH output setting,<br />
see below.<br />
Timer Dial Identifi cation<br />
T1 — Heating mode on time setting in seconds.<br />
T2 — Heating mode off time setting in seconds.<br />
T3 — Idle mode on time setting in seconds.<br />
T4 — Idle mode off time setting in minutes.
BTU Per Hour — Timer Settings<br />
Corn Timer — Heat Mode Timer — Idle Mode<br />
Stove Output T1 T2 T3 T4<br />
BTUH Seconds Seconds Seconds Minutes<br />
20,000 10 45 30 35<br />
60,000 15 45 30 35<br />
100,000 20 45 30 35<br />
150,000 20 30 30 35<br />
WoodMaster Plus Digital Aqua Stat Settings<br />
Set Point (SP) 170° F<br />
Spread (HY) 5° F<br />
Low Alarm (ALL) 120° F<br />
Operation<br />
Boiler Treatment<br />
Allow system to burn for 2 hours and then add boiler treatment as follows. Before adding boiler treatment, be sure that the<br />
water temperature is at least 100 degrees or higher. Add the boiler treatment that came with your stove to the vent pipe located<br />
directly behind the chimney. Treatment should be added on an annual basis. If you are interested in testing your boiler<br />
water, contact your local dealer for details.<br />
Maintenance Schedule for the WoodMaster Plus<br />
CLEANING THE FURNACE:<br />
1. Every furnace comes with an ash pan. This should be dumped daily or as needed. It is important to not let it overfi ll,<br />
because it could plug the ash auger and cause problems.<br />
2. On a weekly basis you should scrape down the fi re drum and clean out the chimney box in the back of the furnace. To<br />
do this turn fan switch off , open the chimney box door and remove the swirly’s from the heat transfer tubes. Caution:<br />
These will be hot. Run the steel brush in and out of each tube several times. When this is done, clean out all ash that<br />
is left in the chimney box, put swirly’s back in the heat transfer tubes, and close the door. Be sure the door is latched<br />
properly. Try to keep fan and motors as clean as possible. Refer to page 5 for part locations and names.<br />
3. Annual maintenance should be done in the spring when you shut down the furnace. It is very important to drain and<br />
fl ush your furnace each spring. Refer to Boiler Treatment Procedure section below. You will also need to clean all ash<br />
from the chimney box, heat transfer tubes, fi re box, and fi re pot. A Shop Vac works well for this. To clean the fi re pot,<br />
remove 4 bolts in the front face plate, use your Shop Vac to clean the fl y ash out of the air chamber. Dump your ash box<br />
and blow any visible dust off of the motors, pumps, fans, etc. Apply a light fi lm of oil to all chains. Make sure to cover<br />
the chimney to prevent water from getting into your furnace during the summer.<br />
CAUTION: Warranty does not cover ash corrosion. Neglect to clean your furnace<br />
or cover the chimney when not in use, could void the warranty.<br />
BOILER TREATMENT PROCEDURE: To drain furnace -- open drain valve and let stove empty completely. To fl ush -- leave drain<br />
valve open and close pump valve. Add water to furnace through the return lines. Let fl ush for several minutes. Close drain<br />
valve and open pump valve. Refi ll stove and treat water right away.<br />
Leaving your stove empty exposes the water jacket to oxygen which will shorten the life of your stove. If your system has<br />
anti-freeze, you do not need to drain it. However you should then test your water annually. For water sampling contact your<br />
dealer or the factory. If you have any questions -- please call 1-800-932-3629.<br />
Page 11
If furnace is not heating<br />
Page 12<br />
Reference<br />
TROUBLESHOOTING<br />
1. Make sure back door is closed. When open, the safety switch will not allow the system to run.<br />
2. Check pump. If pump is not running, shut off power supply to pump and inspect.<br />
3. Check water level. If water is low, inspect for leaks in the system.<br />
4. Check chimney for fl y ash build-up. If opening is reduced fi re cannot burn properly.<br />
5. Check Fan Draft and Draft Flapper. Make sure they are operating properly.<br />
6. Check Fan Switch on ETC to be sure it is ON. Fan Switch should only be off while cleaning or<br />
making repairs.<br />
7. If water temperature is reading 119° or lower, push Reset Switch on ETC System to restart Heating<br />
Mode.<br />
8. If the fi re goes out and there is a lot of unburned corn in the <strong>Fire</strong> Pot, you are running the furnace<br />
to hard for the weather conditions.<br />
9. If the fi re goes out and the <strong>Fire</strong> Pot is empty, either the Feed Auger is plugged or the Feed System<br />
is empty (out of fuel).<br />
10. Feed System plugged.<br />
Possible Causes:<br />
1. Ash pan too full (plugged).<br />
2. Chain Drive System failure.<br />
3. Feed Intake plugged or blocked.<br />
` 4. Faulty motor in system.<br />
If none of these suggestions appear to solve<br />
your problem, contact your dealer.
<strong>AFS</strong> <strong>1100</strong> Electronic Temperature Control (ETC)<br />
Function: (Factory Settings below)<br />
• The ETC monitors and controls the <strong>AFS</strong> <strong>1100</strong> water temperature <strong>by</strong> controlling the draft, draft fan, and corn supplied.<br />
• During normal operation (adequate corn supply) the controller will go into idle mode when the water reaches 170° F (Set)<br />
and will go into heating mode when the water falls to 165° F (Set - Hy).<br />
• During shut down (no corn supply) or when the water falls to 120° F (ALL) the controller will go into shut down mode. At<br />
this time the <strong>AFS</strong> <strong>1100</strong> hopper will need to be fi lled with corn and the ETC will need to be reset (see Startup).<br />
Heating Mode: During heating mode the controller will open the draft and run the draft fan continuously. The controller will<br />
also turn on the heating mode timer that controls the amount of corn added to the fi re pot. Heating mode timer setting T1<br />
will control the amount of time corn is added to the fi re pot. Heating mode timer setting T2 will determine the amount of<br />
time until corn is added again.<br />
Idle Mode: During idle mode, the controller will turn on the idle mode timer. Idle mode timer will momentarily open the<br />
draft, turn on the draft fan, and add corn all at the same time. Idle mode timer setting T3 will control the time these will be on<br />
and T4 will determine the amount of time until they are turned on again.<br />
Startup / Reset: (See also <strong>AFS</strong> <strong>1100</strong> Startup Procedure).<br />
• The fi rst time the <strong>AFS</strong> <strong>1100</strong> is powered up or when it has shut down, the controller display will fl ash “LA” (Low Alarm) two<br />
times and then display the water temperature for two seconds and then start over. This is normal and indicates the<br />
system has shut down because the water is at or below 120° F.<br />
• To start up (or reset) your <strong>AFS</strong> <strong>1100</strong>, press the set button one time. The display will indicate “rSt” (reset) and after 1 to 2<br />
seconds the <strong>AFS</strong> <strong>1100</strong> will go into heating mode. The display will continue to fl ash “LA” and the water temperature until<br />
the water temperature reaches 140° F (ALL + 20). After water temperature reaches 140° F, only the water temperature will<br />
be displayed until the water temperature falls to 120° F.<br />
• Note: The fan switch must be in the on position.<br />
• Note: Fan Switch can be shut off when loading or servicing the <strong>AFS</strong> <strong>1100</strong>.<br />
Parameter Description and Factory Settings:<br />
• Set (Set Point) — 170° F<br />
• Hy (Diff erential) — 5°F<br />
• ALL (Low Alarm) — 120° F<br />
Reference<br />
How To:<br />
• View Set Point — Push and immediately release the set<br />
key, display will indicate set point and will return to<br />
water temperature after 5 seconds.<br />
• Change the Set Point — Push and hold the set key until<br />
the set point is displayed, change the value using the up and down arrows, and press the set key. The set point value will<br />
fl ash a few times and then the display will return to water temperature.<br />
• Change Hy or ALL — Push and hold the set and down arrow keys at the same time until HY is displayed. Using the up<br />
and down arrows, select the parameter to be changed (Hy or ALL), push the set key once (value of parameter should be<br />
displayed), use arrows to change value, and push the set key (value should fl ash a few times). After 10-15 seconds the<br />
display will change back to water temperature.<br />
Note: When changing parameters, make sure Set-Hy is at least 20° F above ALL.<br />
Green Float Light: Green light on: Water level O.K.<br />
Green light off : Water level low, add water through vent pipe.<br />
Light Switch: Operates light.<br />
Fan Switch: The fan switch must be on during normal operation, but may be turned off for maintenance.<br />
Page 13
Page 14<br />
Reference<br />
ETC SYSTEM SPECIFICATIONS
Reference<br />
Page 15
Page 16<br />
Reference
Reference<br />
Page 17
Page 18<br />
Reference
WoodMaster Warranty<br />
NORTHWEST MANUFACTURING, INC.<br />
600 Polk Ave. - Red Lake Falls, MN 56750<br />
Toll free (800) 932-3629 or (218) 253-4328<br />
Five Year Warranty on <strong>Fire</strong> Drum and Water Jacket<br />
Northwest Manufacturing, Inc. of Red Lake Falls, MN warrants material and labor on any defects in workmanship on<br />
the <strong>Fire</strong>drum and Water Jacket for a period of 5 years from the purchase date to the original owner only. If there is a leak in your<br />
properly delivered and installed WoodMaster Plus furnace in the fi rst year, WoodMaster will replace the furnace at no cost to<br />
the original owner. (Leak means; a leak in the fi re box or water jacket.) Northwest Manufacturing, Inc. will not be responsible<br />
for environmental conditions we cannot control.<br />
This warranty is limited to defective parts - repair and/or replacement only, and excludes any incidental and consequential<br />
damages connected therewith. Northwest Manufacturing, Inc. is not responsible for replacement of water, water treatment,<br />
antifreeze, costs of transportation, or shipping charges. On sight service work will be off ered to you. Please call Northwest<br />
Manufacturing, Inc. for current non-warranty rates.<br />
Original Manufacturer’s Warranty on Electrical Components - Parts Only<br />
Any electrical components in the stove that are defective during normal usage will be warranted to the original owner<br />
only <strong>by</strong> Northwest Manufacturing, Inc., in compliance with the original manufacturer’s warranty. Parts will be replaced on an<br />
even exchange, excluding labor & freight.<br />
These warranties apply only if the device is installed and operated as defi ned in the Owner’s <strong>Manual</strong>.<br />
Outdoor wood furnaces are not intended to be the only source of heat, therefore a backup system should be in place<br />
to prevent any damage caused <strong>by</strong> lack of heat.<br />
Additional Components Warranty Guidelines<br />
Northwest Manufacturing, Inc. will warranty for a period of one (1) year, any factory defects or breakage of the twin<br />
high temp augers, located in the fi re pot of the furnace itself. These items are a consumable item and in the case of normal<br />
wear are the responsibility of the owner to replace as is necessary.<br />
Northwest Manufacturing, Inc. will warranty all bearings, chains, and sprockets on the WoodMaster Plus for a period<br />
of one (1) year. Parts will be exchanged on an even exchange, excluding labor & freight.<br />
Northwest Manufacturing, Inc. will warranty the fi re pot of the WoodMaster Plus for a period of two (2) years.<br />
WARNING: Northwest Manufacturing will not warranty the inside of fi re drum due to ash corrosion. Rotation of ashes<br />
must be taken care of as displayed on the maintenance list, located on the side of the furnace. The fi re drum must be completely<br />
cleaned of all ashes and creosote a minimum of two (2) times per year, preferably half way through the heating season and<br />
immediately after the heating season. The chimney must be covered when stove is not in use. If antifreeze is not being used,<br />
the water jacket must be drained and fl ushed yearly after each heating season. After the furnace has been drained, immediately<br />
refi ll completely and treat with new boiler treatment.<br />
Damage caused <strong>by</strong> abuse, accidents, improper installation, overheating, corrosion, freezing or negligence will not be<br />
covered under warranty. Damage caused <strong>by</strong> burning fl ammable materials (such as petroleum products) will not be covered<br />
under warranty.<br />
Antifreeze - Only a nontoxic antifreeze is acceptable. Antifreeze will break down over a period of time and therefore should<br />
be tested annually. Always dispose of antifreeze <strong>by</strong> state and local codes. Loss of antifreeze under any condition will not be<br />
covered.<br />
How to fi le a claim - ANY CLAIM UNDER THIS WARRANTY SHOULD BE MADE TO YOUR DEALER.<br />
Customer’s Name ________________________________ Dealer’s Name _____________________________<br />
Customer’s Signature _____________________________ Dealer’s Signature __________________________
Name _________________________________________<br />
Address _______________________________________<br />
_______________________________________________<br />
Phone ________________________________________<br />
Date of Purchase ________________________________<br />
Model No. ______________________________________<br />
Serial No. ______________________________________<br />
(Model and serial numbers are located on the decal on front of stove.)<br />
Dealer’s Name __________________________________<br />
Northwest Manufacturing Inc.<br />
600 Polk Ave. SW<br />
Red Lake Falls, MN 56750<br />
OWNER’S REGISTRATION CARD<br />
Warranty<br />
Installed <strong>by</strong>: Dealer Customer<br />
If customer, was installation explained to you?<br />
Type of Installation:<br />
Purchased:<br />
Northwest Manufacturing Inc.<br />
600 Polk Ave. SW<br />
Red Lake Falls, MN 56750<br />
Yes No<br />
House/Garage Shop/Shed<br />
Greenhouse Kiln<br />
Other ____________________________<br />
With Auger Without Auger<br />
PLACE<br />
POSTAGE<br />
HERE
WoodMaster Warranty<br />
NORTHWEST MANUFACTURING, INC.<br />
600 Polk Ave. - Red Lake Falls, MN 56750<br />
Toll free (800) 932-3629 or (218) 253-4328<br />
Five Year Warranty on <strong>Fire</strong> Drum and Water Jacket<br />
Northwest Manufacturing, Inc. of Red Lake Falls, MN warrants material and labor on any defects in workmanship on<br />
the <strong>Fire</strong>drum and Water Jacket for a period of 5 years from the purchase date to the original owner only. If there is a leak in your<br />
properly delivered and installed WoodMaster Plus furnace in the fi rst year, WoodMaster will replace the furnace at no cost to<br />
the original owner. (Leak means; a leak in the fi re box or water jacket.) Northwest Manufacturing, Inc. will not be responsible<br />
for environmental conditions we cannot control.<br />
This warranty is limited to defective parts - repair and/or replacement only, and excludes any incidental and consequential<br />
damages connected therewith. Northwest Manufacturing, Inc. is not responsible for replacement of water, water treatment,<br />
antifreeze, costs of transportation, or shipping charges. On sight service work will be off ered to you. Please call Northwest<br />
Manufacturing, Inc. for current non-warranty rates.<br />
Original Manufacturer’s Warranty on Electrical Components - Parts Only<br />
Any electrical components in the stove that are defective during normal usage will be warranted to the original owner<br />
only <strong>by</strong> Northwest Manufacturing, Inc., in compliance with the original manufacturer’s warranty. Parts will be replaced on an<br />
even exchange, excluding labor & freight.<br />
These warranties apply only if the device is installed and operated as defi ned in the Owner’s <strong>Manual</strong>.<br />
Outdoor wood furnaces are not intended to be the only source of heat, therefore a backup system should be in place<br />
to prevent any damage caused <strong>by</strong> lack of heat.<br />
Additional Components Warranty Guidelines<br />
Northwest Manufacturing, Inc. will warranty for a period of one (1) year, any factory defects or breakage of the twin<br />
high temp augers, located in the fi re pot of the furnace itself. These items are a consumable item and in the case of normal<br />
wear are the responsibility of the owner to replace as is necessary.<br />
Northwest Manufacturing, Inc. will warranty all bearings, chains, and sprockets on the WoodMaster Plus for a period<br />
of one (1) year. Parts will be exchanged on an even exchange, excluding labor & freight.<br />
Northwest Manufacturing, Inc. will warranty the fi re pot of the WoodMaster Plus for a period of two (2) years.<br />
WARNING: Northwest Manufacturing will not warranty the inside of fi re drum due to ash corrosion. Rotation of ashes<br />
must be taken care of as displayed on the maintenance list, located on the side of the furnace. The fi re drum must be completely<br />
cleaned of all ashes and creosote a minimum of two (2) times per year, preferably half way through the heating season and<br />
immediately after the heating season. The chimney must be covered when stove is not in use. If antifreeze is not being used,<br />
the water jacket must be drained and fl ushed yearly after each heating season. After the furnace has been drained, immediately<br />
refi ll completely and treat with new boiler treatment.<br />
Damage caused <strong>by</strong> abuse, accidents, improper installation, overheating, corrosion, freezing or negligence will not be<br />
covered under warranty. Damage caused <strong>by</strong> burning fl ammable materials (such as petroleum products) will not be covered<br />
under warranty.<br />
Antifreeze - Only a nontoxic antifreeze is acceptable. Antifreeze will break down over a period of time and therefore should<br />
be tested annually. Always dispose of antifreeze <strong>by</strong> state and local codes. Loss of antifreeze under any condition will not be<br />
covered.<br />
How to fi le a claim - ANY CLAIM UNDER THIS WARRANTY SHOULD BE MADE TO YOUR DEALER.<br />
Customer’s Name ________________________________ Dealer’s Name _____________________________<br />
Customer’s Signature _____________________________ Dealer’s Signature __________________________
Warranty<br />
OWNER’S REGISTRATION CARD<br />
Name _________________________________________<br />
Installed <strong>by</strong>: Dealer Customer<br />
Address _______________________________________<br />
If customer, was installation explained to you?<br />
_______________________________________________<br />
Yes No<br />
Phone ________________________________________<br />
Type of Installation:<br />
Date of Purchase ________________________________<br />
Model No. ______________________________________<br />
Serial No. ______________________________________<br />
(Model and serial numbers are located on the decal on front of stove.)<br />
Dealer’s Name __________________________________<br />
Northwest Manufacturing Inc.<br />
600 Polk Ave. SW<br />
Red Lake Falls, MN 56750<br />
Purchased:<br />
Northwest Manufacturing Inc.<br />
600 Polk Ave. SW<br />
Red Lake Falls, MN 56750<br />
House/Garage Shop/Shed<br />
Greenhouse Kiln<br />
Other ____________________________<br />
With Auger Without Auger<br />
PLACE<br />
POSTAGE<br />
HERE
Warranty<br />
WoodMaster Warranty<br />
NORTHWEST MANUFACTURING, INC.<br />
600 Polk Ave. - Red Lake Falls, MN 56750<br />
Toll free (800) 932-3629 or (218) 253-4328<br />
Five Year Warranty on <strong>Fire</strong> Drum and Water Jacket<br />
Northwest Manufacturing, Inc. of Red Lake Falls, MN warrants material and labor on any defects in workmanship on<br />
the <strong>Fire</strong>drum and Water Jacket for a period of 5 years from the purchase date to the original owner only. If there is a leak in your<br />
properly delivered and installed WoodMaster Plus furnace in the fi rst year, WoodMaster will replace the furnace at no cost to<br />
the original owner. (Leak means; a leak in the fi re box or water jacket.) Northwest Manufacturing, Inc. will not be responsible<br />
for environmental conditions we cannot control.<br />
This warranty is limited to defective parts - repair and/or replacement only, and excludes any incidental and consequential<br />
damages connected therewith. Northwest Manufacturing, Inc. is not responsible for replacement of water, water treatment,<br />
antifreeze, costs of transportation, or shipping charges. On sight service work will be off ered to you. Please call Northwest<br />
Manufacturing, Inc. for current non-warranty rates.<br />
Original Manufacturer’s Warranty on Electrical Components - Parts Only<br />
Any electrical components in the stove that are defective during normal usage will be warranted to the original owner<br />
only <strong>by</strong> Northwest Manufacturing, Inc., in compliance with the original manufacturer’s warranty. Parts will be replaced on an<br />
even exchange, excluding labor & freight.<br />
These warranties apply only if the device is installed and operated as defi ned in the Owner’s <strong>Manual</strong>.<br />
Outdoor wood furnaces are not intended to be the only source of heat, therefore a backup system should be in place<br />
to prevent any damage caused <strong>by</strong> lack of heat.<br />
Additional Components Warranty Guidelines<br />
Northwest Manufacturing, Inc. will warranty for a period of one (1) year, any factory defects or breakage of the twin<br />
high temp augers, located in the fi re pot of the furnace itself. These items are a consumable item and in the case of normal<br />
wear are the responsibility of the owner to replace as is necessary.<br />
Northwest Manufacturing, Inc. will warranty all bearings, chains, and sprockets on the WoodMaster Plus for a period<br />
of one (1) year. Parts will be exchanged on an even exchange, excluding labor & freight.<br />
Northwest Manufacturing, Inc. will warranty the fi re pot of the WoodMaster Plus for a period of two (2) years.<br />
WARNING: Northwest Manufacturing will not warranty the inside of fi re drum due to ash corrosion. Rotation of ashes<br />
must be taken care of as displayed on the maintenance list, located on the side of the furnace. The fi re drum must be completely<br />
cleaned of all ashes and creosote a minimum of two (2) times per year, preferably half way through the heating season and<br />
immediately after the heating season. The chimney must be covered when stove is not in use. If antifreeze is not being used,<br />
the water jacket must be drained and fl ushed yearly after each heating season. After the furnace has been drained, immediately<br />
refi ll completely and treat with new boiler treatment.<br />
Damage caused <strong>by</strong> abuse, accidents, improper installation, overheating, corrosion, freezing or negligence will not be<br />
covered under warranty. Damage caused <strong>by</strong> burning fl ammable materials (such as petroleum products) will not be covered<br />
under warranty.<br />
Antifreeze - Only a nontoxic antifreeze is acceptable. Antifreeze will break down over a period of time and therefore should<br />
be tested annually. Always dispose of antifreeze <strong>by</strong> state and local codes. Loss of antifreeze under any condition will not be<br />
covered.<br />
How to fi le a claim - ANY CLAIM UNDER THIS WARRANTY SHOULD BE MADE TO YOUR DEALER.<br />
Customer’s Name ________________________________ Dealer’s Name _____________________________<br />
Customer’s Signature _____________________________ Dealer’s Signature __________________________<br />
Page 23