GPSMAP 4000 Series Owner's Manual - Garmin
GPSMAP 4000 Series Owner's Manual - Garmin
GPSMAP 4000 Series Owner's Manual - Garmin

You also want an ePaper? Increase the reach of your titles
YUMPU automatically turns print PDFs into web optimized ePapers that Google loves.
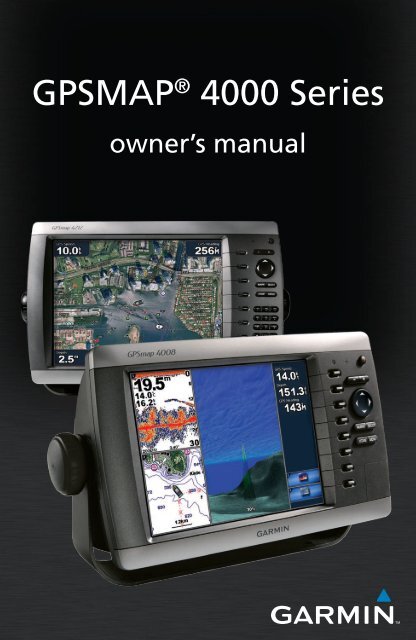
<strong>GPSMAP</strong> ® <strong>4000</strong> <strong>Series</strong><br />
owner’s manual
© 2008 <strong>Garmin</strong> Ltd. or its subsidiaries<br />
<strong>Garmin</strong> International, Inc.<br />
1200 East 151st Street,<br />
Olathe, Kansas 66062, USA<br />
Tel. (913) 397.8200 or (800)<br />
800.1020<br />
Fax (913) 397.8282<br />
<strong>Garmin</strong> (Europe) Ltd.<br />
Liberty House<br />
Hounsdown Business Park,<br />
Southampton, Hampshire, SO40 9RB UK<br />
Tel. +44 (0) 870.8501241 (outside the UK)<br />
0808 2380000 (within the UK)<br />
Fax +44 (0) 870.8501251<br />
<strong>Garmin</strong> Corporation<br />
No. 68, Jangshu 2nd Road,<br />
Shijr, Taipei County, Taiwan<br />
Tel. 886/2.2642.9199<br />
Fax 886/2.2642.9099<br />
All rights reserved. Except as expressly provided herein, no part of this manual may be reproduced, copied, transmitted,<br />
disseminated, downloaded or stored in any storage medium, for any purpose without the express prior written consent of<br />
<strong>Garmin</strong>. <strong>Garmin</strong> hereby grants permission to download a single copy of this manual onto a hard drive or other electronic<br />
storage medium to be viewed and to print one copy of this manual or of any revision hereto, provided that such electronic<br />
or printed copy of this manual must contain the complete text of this copyright notice and provided further that any<br />
unauthorized commercial distribution of this manual or any revision hereto is strictly prohibited.<br />
Information in this document is subject to change without notice. <strong>Garmin</strong> reserves the right to change or improve its<br />
products and to make changes in the content without obligation to notify any person or organization of such changes or<br />
improvements. Visit the <strong>Garmin</strong> Web site (www.garmin.com) for current updates and supplemental information concerning<br />
the use and operation of this and other <strong>Garmin</strong> products.<br />
<strong>Garmin</strong> ® is a trademark of <strong>Garmin</strong> Ltd. or its subsidiaries, registered in the USA and other countries. AutoLocate ® ,<br />
my<strong>Garmin</strong> <strong>GPSMAP</strong> ® , TracBack ® , BlueChart ® , and MapSource ® are trademarks of <strong>Garmin</strong> Ltd. or its subsidiaries. These<br />
trademarks may not be used without the express permission of <strong>Garmin</strong>.<br />
XM Radio is a trademark of XM Satellite Radio Inc.<br />
WARNING: See the Important Safety and Product Information guide in the product box for<br />
product warnings and other important information.<br />
January 2008 Part Number 190-00779-10 Rev. A Printed in Taiwan
Introduction<br />
This manual includes information for the following products:<br />
•<br />
•<br />
•<br />
<strong>GPSMAP</strong> ® 4208<br />
<strong>GPSMAP</strong>® 4210<br />
<strong>GPSMAP</strong> ® 4212<br />
Tips and Shortcuts<br />
•<br />
•<br />
•<br />
•<br />
Press HOME from any screen to return to the Home screen.<br />
Press MENU from any of the main screens to access advanced settings.<br />
IntroductIon<br />
Press and release the Power key to adjust the display settings (Backlight and Color Mode).<br />
Press and hold the Power key to turn the unit on or off.<br />
<strong>Manual</strong> Conventions<br />
In this manual, when you are instructed to select an item, press the SOFT KEY along the right<br />
side of the screen to select each item. Small arrows (>) in the text indicate that you should press<br />
the SOFT KEY for each item in order. For example, if you see “select Charts > Nav Chart,” you<br />
should press the SOFT KEY next to Charts, Then press the SOFT KEY next to Nav Chart.<br />
•<br />
•<br />
•<br />
•<br />
•<br />
•<br />
•<br />
•<br />
•<br />
•<br />
•<br />
•<br />
•<br />
Quick Links<br />
Turning the Unit On or Off: page 2.<br />
Acquiring GPS Satellite Signals: page 2.<br />
Inserting and Removing SD Cards: page 3.<br />
Restoring Factory Settings: page 3.<br />
Using the Navigation Chart: page 5.<br />
Changing the Chart Settings: page 9.<br />
Navigating to a Destination: page 20.<br />
Creating a Waypoint: page 22.<br />
Configuring System Settings: page 31.<br />
Using Radar: page 39.<br />
Using Sonar: page 44.<br />
Using XM: page 48.<br />
Messages and Alarms: page 60.<br />
<strong>GPSMAP</strong> <strong>4000</strong> <strong>Series</strong> Owner’s <strong>Manual</strong> i
IntroductIon<br />
Table of Contents<br />
Introduction ............................................... i<br />
Tips and Shortcuts ........................................ i<br />
<strong>Manual</strong> Conventions ..................................... i<br />
Quick Links ................................................... i<br />
Getting Started ......................................... 1<br />
Unit Overview .............................................. 1<br />
Front and Rear Panels ................................ 1<br />
Power/Backlight ........................................... 2<br />
Acquiring GPS Satellite Signals .................. 2<br />
Inserting and Removing SD Cards .............. 3<br />
Restoring Factory Settings .......................... 3<br />
Understanding the Home Screen ................ 4<br />
Using Charts ............................................ 5<br />
Using the Navigation Chart ......................... 5<br />
Using Mariner’s Eye .................................... 8<br />
Changing the Chart Settings ....................... 9<br />
Using Tracks .............................................. 10<br />
Using BlueChart g2 Vision......................... 12<br />
Using Mariner’s Eye 3D ............................. 13<br />
Using Fish Eye 3D ..................................... 14<br />
Using Fishing Charts ................................. 15<br />
Enabling High Resolution Satellite<br />
Imagery ..................................................... 15<br />
Viewing Aerial Photos ................................ 16<br />
Viewing Current Station Information .......... 17<br />
Detailed Road and POI Data ..................... 17<br />
Using Automatic Guidance ........................ 17<br />
Using Combinations .............................. 18<br />
Where To? .............................................. 20<br />
Navigating to a Destination ....................... 20<br />
Creating and Using Waypoints .................. 22<br />
Creating and Using Routes ....................... 24<br />
Viewing Information .............................. 26<br />
Viewing Tide Station Information ............... 26<br />
Viewing Current Information ...................... 26<br />
Viewing Celestial Information .................... 27<br />
Viewing User Data ..................................... 27<br />
Viewing Information on Other Boats .......... 28<br />
Viewing Gauges ........................................ 29<br />
Viewing Fuel Gauges ................................ 30<br />
Viewing Video ............................................ 30<br />
Configuring the Unit .............................. 31<br />
Configuring System Settings ..................... 31<br />
Changing Units of Measure ....................... 31<br />
Configuring Communications Settings ...... 32<br />
Setting Alarms ........................................... 33<br />
Configuring My Boat .................................. 34<br />
Configuring Other Boats ............................ 35<br />
Configuring XM Audio ................................ 36<br />
Using the Marine Network .................... 37<br />
Viewing Connected <strong>Garmin</strong> Marine<br />
Network Devices ....................................... 38<br />
Using Radar ........................................... 39<br />
Understanding the Cruising Screen .......... 40<br />
Understanding the Radar Overlay<br />
Screen ....................................................... 42<br />
Radar Setup .............................................. 42<br />
Using Sonar ........................................... 44<br />
Understanding the Full Screen .................. 44<br />
Understanding the Split Zoom Screen ...... 44<br />
Understanding the Split Frequency<br />
Screen ....................................................... 45<br />
Understanding the Temp Log .................... 45<br />
Setting Up Sonar ....................................... 46<br />
Advanced Sonar Settings .......................... 46<br />
Using XM WX Weather and Audio ........ 48<br />
Using XM WX Weather.............................. 48<br />
Setting the XM WX Weather Options ........ 48<br />
Viewing Precipitation Information .............. 48<br />
Viewing Forecast Information .................... 51<br />
Viewing Sea Conditions............................. 52<br />
Viewing Fishing Information ...................... 53<br />
Viewing Visibility Information ..................... 54<br />
Viewing Buoy Reports ............................... 54<br />
Using XM Audio ......................................... 55<br />
Appendix ................................................ 57<br />
Specifications ............................................ 57<br />
Initializing Unit Settings ............................. 58<br />
NMEA 0183 and NMEA 2000 .................... 58<br />
Messages and Alarms ............................... 60<br />
Product Registration .................................. 64<br />
Contact <strong>Garmin</strong> ......................................... 64<br />
Declaration of Conformity (DoC) ............... 64<br />
Weather Data Warranty ............................. 64<br />
Software License Agreement .................... 65<br />
XM Satellite Radio Service Agreement ..... 65<br />
Index ....................................................... 66<br />
ii <strong>GPSMAP</strong> <strong>4000</strong> <strong>Series</strong> Owner’s <strong>Manual</strong>
<strong>GPSMAP</strong> <strong>4000</strong> <strong>Series</strong> Owner’s <strong>Manual</strong><br />
Getting Started<br />
GettInG Started<br />
Unit Overview<br />
To turn on your unit for the first time, refer to the Initializing Unit Settings paragraph, page 58.<br />
Front and Rear Panels<br />
NMEA 2000<br />
Network<br />
Automatic backlight sensor<br />
<strong>GPSMAP</strong> 4212 - Front<br />
<strong>GPSMAP</strong> 4212 - Back<br />
Soft keys<br />
POWER<br />
RANGE (+/-)<br />
ROCKER<br />
MARK<br />
SELECT<br />
MENU<br />
HOME<br />
Numeric keypad<br />
(<strong>GPSMAP</strong> 42 0 and 42 2)<br />
SD card slot<br />
Power<br />
NMEA<br />
Video<br />
Started<br />
GettinG
GettinG<br />
Started<br />
GettInG Started<br />
Power/Backlight<br />
To turn the chartplotter on, press and release the Power key. When the Warning screen appears,<br />
press SELECT to open the Home screen.<br />
NOTE: The first time you power on your unit, you must go through a setup sequence. See page 58 for<br />
details.<br />
Warning Screen Home Screen<br />
To turn the chartplotter off, press and hold the Power key.<br />
Adjusting the Backlight<br />
1. While the unit is on, press and release the Power key.<br />
2. Select Backlight.<br />
To allow the unit to automatically adjust the backlight based on ambient light, select Auto.<br />
Adjusting the Color Mode<br />
1. Press and release the POWER key.<br />
2. Select Color Mode.<br />
3. Select Day Colors, Night Colors, or Auto.<br />
To manually adjust the backlight,<br />
either select Up or Down, or use<br />
the ROCKER.<br />
To return to the previous screen,<br />
select Back.<br />
Acquiring GPS Satellite Signals<br />
When you turn the unit on, the GPS receiver must collect satellite data and establish its current<br />
location. When the unit acquires satellite signals, the signal strength bars at the top of the Home<br />
screen are green . When the unit loses satellite signals, the green bars disappear and a<br />
flashing question mark is indicated on the boat icon (on the chart screen).<br />
2 <strong>GPSMAP</strong> <strong>4000</strong> <strong>Series</strong> Owner’s <strong>Manual</strong>
For more information about GPS, visit the <strong>Garmin</strong> Web site at www.garmin.com/aboutGPS.<br />
<strong>GPSMAP</strong> <strong>4000</strong> <strong>Series</strong> Owner’s <strong>Manual</strong><br />
GettInG Started<br />
Inserting and Removing SD Cards<br />
Your unit supports Secure Digital (SD) cards. Insert optional BlueChart ® g2 Vision SD cards to<br />
view high-resolution satellite imagery, and aerial reference photos of ports, harbors, marinas, and<br />
other points of interest. Insert blank SD cards to transfer data such as waypoints, routes, and tracks<br />
to another compatible <strong>Garmin</strong> unit or a computer. The SD card slot is located on the bottom-right<br />
corner of the unit.<br />
To insert the SD card, open the access door and press the SD card in until it clicks. Press the card in<br />
again and release it to eject it from the chartplotter.<br />
Card label<br />
<strong>GPSMAP</strong> 4210 or 4212<br />
Restoring Factory Settings<br />
You can restore your unit to the original factory settings.<br />
CAUTION: This procedure deletes any information you have entered.<br />
Card label<br />
<strong>GPSMAP</strong> 4208<br />
To restore factory settings:<br />
1. From the Home screen, select Configure > System > System Information > Factory Settings<br />
> Reset.<br />
2. Select OK to restore all factory settings or select Cancel.<br />
Viewing System Information<br />
You can view your unit’s software version, basemap version, unit ID number, and your XM weather<br />
Radio ID (if available). You may need this information to update the system software or purchase<br />
additional map data information.<br />
From the Home screen, select Configure > System > System Information.<br />
Using the Simulator Mode<br />
Simulator mode turns the GPS receiver off for use indoors or for practice. The unit does not track<br />
satellites in simulator mode.<br />
CAUTION: Do not try to navigate using simulator mode because the GPS receiver is turned off. Any<br />
satellite signal strength bars shown are only simulations and do not represent the strength of actual<br />
satellite signals.<br />
Started<br />
GettinG
GettinG<br />
Started<br />
GettInG Started<br />
To turn the Simulator Mode on:<br />
From the Home screen select Configure > System > Simulator > On.<br />
Select Setup to set speed, track control (simulated heading), position, simulator time, and<br />
simulator date.<br />
Understanding the Home Screen<br />
Use the Home screen to access all other screens.<br />
•<br />
•<br />
•<br />
•<br />
•<br />
•<br />
•<br />
•<br />
NOTE: Options on this screen vary based on the unit type and optional connected network devices.<br />
Charts—provides Navigation chart, Mariner’s Eye, Mariner’s Eye 3D, Fish Eye 3D, Fishing<br />
Chart, and Radar Overlay (page 5).<br />
NOTE: Mariner’s Eye 3D, Fish Eye 3D, and Fishing Charts are available only if you use a BlueChart<br />
g2 Vision SD card.<br />
Radar—sets up and displays radar (only available if the unit is connected to a radar module)<br />
(page 39).<br />
Sonar—sets up and provides sonar information (only available if the unit is connected to a<br />
<strong>Garmin</strong> sonar module) (page 44).<br />
Weather—sets up and displays various weather parameters, including precipitation, forecast,<br />
fishing, sea conditions, and visibility (only available if the unit is connected to a weather module<br />
and you have an XM subscription) (page 48).<br />
Combinations—sets up the screen to view a chart, sonar, radar, and video in a 2 or 3-field split<br />
screen (page 18).<br />
Where To?—provides navigation features (page 20).<br />
Information—shows information including tides, currents, celestial data, user data, information<br />
about other boats, gauges, and video (page 26).<br />
Configure—allows you to view and edit your unit and system settings (page 31).<br />
4 <strong>GPSMAP</strong> <strong>4000</strong> <strong>Series</strong> Owner’s <strong>Manual</strong>
<strong>GPSMAP</strong> <strong>4000</strong> <strong>Series</strong> Owner’s <strong>Manual</strong><br />
Using Charts<br />
uSInG chartS<br />
The <strong>GPSMAP</strong> <strong>4000</strong> series chartplotters have a basic worldwide imagery map, and built-in detailed<br />
BlueChart g2 offshore cartography for US waters.<br />
•<br />
•<br />
Navigation Chart—displays all relevant navigation data available on your preloaded maps,<br />
including buoys, lights, cables, depth soundings, marinas, and tide stations in an overhead view.<br />
Mariner’s Eye and Mariner’s Eye 3D—displays a view from above and behind your boat for a<br />
visual navigation aid.<br />
Fishing Charts and Fish Eye 3D views are available when using optional Blue Chart® g2 Vision <br />
preprogrammed SD cards (See page 12).<br />
•<br />
•<br />
Fishing Chart—removes navigational data from the chart and enhances bottom contours for<br />
depth recognition.<br />
Fish Eye 3D—provides an underwater view that visually represents the sea floor according to the<br />
chart’s information.<br />
Using the Navigation Chart<br />
Use the navigation chart to plan your course, view map information, and as a navigational aid.<br />
To access a navigation chart, from the Home screen, select Charts > Navigation Chart.<br />
Marine<br />
services<br />
Your boat<br />
Submerged<br />
wreck<br />
Navigation Chart with BlueChart g2 Vision Data<br />
Exposed<br />
wreck<br />
Beacon<br />
Buoy<br />
Zoom scale<br />
Zooming In and Out on the Map<br />
The Range (+/-) keys control the zoom level, indicated by the scale at the bottom of the navigation<br />
chart ( ). The bar under the number represents that distance on the map.<br />
ChartS<br />
USinG
USinG<br />
ChartS<br />
uSInG chartS<br />
Navigation Chart Settings<br />
To access additional settings or options for the navigation chart, press MENU.<br />
Weather—turns the NEXRAD weather overlay on or off. Only available when connected to a<br />
<strong>Garmin</strong> XM network device. See page 48 for more information.<br />
Overlay Numbers—controls how charting numbers appear on the screen. Choose to show or hide<br />
the numbers by category. When set to Auto, the overlay numbers appear only when that category is<br />
active.<br />
•<br />
•<br />
•<br />
•<br />
Cruising: GPS position, GPS heading, GPS speed, and depth. Depth is only available if<br />
connected to a sonar unit.<br />
Navigation: GPS position, distance to destination, arrival (time), bearing (to destination), GPS<br />
heading, and GPS speed. These numbers appear only when navigating to a destination (see<br />
page 20).<br />
Fishing: GPS position, depth, water temperature, and water speed. Depth, temperature, and speed<br />
are only available when connected to a sonar unit.<br />
Sailing: GPS position, waypoint velocity made good (VMG), wind speed, wind direction, water<br />
speed, and depth. Wind speed and direction are only available when connected to an optional<br />
wind sensor. Water speed and depth are only available when connected to a sonar unit. If you<br />
have a wind sensor, setting the sailing overlay numbers to Auto places an indicator around the<br />
boat icon on the Navigation chart to represent wind speed and direction.<br />
Chart Setup—customizes the Navigation chart. See page 9.<br />
Understanding Chart Data<br />
BlueChart g2 and BlueChart g2 Vision charts use graphic symbols to denote map features. Some<br />
common symbols you might see include, but are not limited to, the following:*<br />
Dangerous Rock Exposed Rock Beacon<br />
Pilot Boarding Area Airport/Seaplane Base Buoy<br />
Anchorage Berth Precautionary Area Church<br />
Anchoring Prohibited Radio Report Point<br />
Exposed Wreck Recommended Anchorage<br />
Fishing Harbor Rescue Station<br />
Fishing Prohibited Tide Station<br />
Information Yacht Harbor<br />
Current Station Marine Services<br />
*Some symbols might appear differently on your <strong>Garmin</strong> unit.<br />
Other features common to most charts include depth contour lines (with deep water represented in<br />
white), intertidal zones, spot soundings (as depicted on the original paper chart), navigational aids<br />
and symbols, and obstructions and cable areas.<br />
<strong>GPSMAP</strong> <strong>4000</strong> <strong>Series</strong> Owner’s <strong>Manual</strong>
<strong>GPSMAP</strong> <strong>4000</strong> <strong>Series</strong> Owner’s <strong>Manual</strong><br />
uSInG chartS<br />
Panning the Navigation Chart<br />
Use the ROCKER on your <strong>GPSMAP</strong> <strong>4000</strong> series unit to move the map pointer ( ) away from<br />
your current location and to scroll to other areas on the navigation chart. As you pan past the edge<br />
of the current map display, the screen scrolls forward to provide continuous map coverage. The<br />
position icon ( ) stays at your present location. If the position icon leaves the map when you pan, a<br />
small window appears in the corner so you can keep track of your current position.<br />
As you move the map pointer, its coordinates, distance, and bearing from your current location<br />
appear in the upper-left corner of the map.<br />
To pan the map, press up, down, right, or left on the ROCKER.<br />
Pointer<br />
coordinates<br />
Pointer distance<br />
and bearing<br />
from current<br />
location<br />
Map<br />
pointer<br />
Inset<br />
map<br />
To stop panning, select Stop Panning from the options on the right.<br />
Pan<br />
options<br />
As you pan the map, a list of options appear along the right side. These options change as you move<br />
the map pointer over various objects and charts. To access an option, press the corresponding soft<br />
key:<br />
Review—(Review will not appear if the pointer is not near an object—if the pointer is near only one<br />
object, the name of the object appears.) This allows you to view details of objects in the vicinity of<br />
the pointer. When you select Review, you are presented with a list of all the objects near the pointer.<br />
•<br />
•<br />
•<br />
Navigate To—begin navigation to the pointer location.<br />
Create Waypoint—mark a waypoint at the pointer location.<br />
Information—view tide, current, celestial, or chart information near the pointer location.<br />
ChartS<br />
USinG
USinG<br />
ChartS<br />
uSInG chartS<br />
Accessing Additional Object Information<br />
Use the map pointer ( ) to view information about on-screen map items, waypoints, and charts.<br />
Selected<br />
item<br />
Additional item<br />
information<br />
Viewing Tide Station Information<br />
Tide station information appears on the chart with a detailed icon showing the relevant tide level.<br />
You can view an in-depth graph for a tide station to help predict the tide level at different times or<br />
different days.<br />
Relevant tide<br />
level<br />
Detailed<br />
tide station<br />
information<br />
Use the map pointer ( ) to highlight a tide station icon ( ), and select Review for a detailed<br />
tide graph.<br />
Using Mariner’s Eye<br />
Mariner’s Eye provides a view from above and behind the boat (according to your course), and<br />
provides a visual navigation aid. This view is helpful when navigating tricky shoals, reefs, bridges,<br />
or channels, and is beneficial when trying to identify entry and exit routes in unfamiliar harbors or<br />
anchorages.<br />
<strong>GPSMAP</strong> <strong>4000</strong> <strong>Series</strong> Owner’s <strong>Manual</strong>
To access the Mariner’s Eye screen, from the Home screen, select Charts > Mariner’s Eye.<br />
Mariner’s Eye Navigation Chart<br />
<strong>GPSMAP</strong> <strong>4000</strong> <strong>Series</strong> Owner’s <strong>Manual</strong><br />
uSInG chartS<br />
The RANGE (+) key moves the view closer to your boat and lower to the water, while the RANGE<br />
(-) key moves the view away from the boat. This is temporarily indicated by the scale ( ) at<br />
the bottom of the screen.<br />
Mariner’s Eye Settings<br />
To access additional settings or options from the Mariner’s Eye screen, press MENU.<br />
Rings—toggles the range rings on or off.<br />
Tracks—turns the visible tracklog on or off. The chartplotter continues to record tracks if you turn<br />
this setting off, but they are hidden from view.<br />
Safe Depth—adjusts the depth at which red indicates shallow water. This feature is only available<br />
with an optional BlueChart g2 Vision SD card.<br />
Lane Width—adjusts the width of the course line drawn when navigating. This setting also affects<br />
routes (Route To), but does not affect automatic guidance (Guide To).<br />
Show Radar—If you are connected to a <strong>Garmin</strong> Marine Radar through the <strong>Garmin</strong> Marine<br />
Network, you can overlay radar readings on the Mariner’s Eye screen.<br />
Mariner’s Eye With Radar Information<br />
Overlay Numbers—shows or hides cruising, navigation, fishing, and sailing numbers.<br />
Changing the Chart Settings<br />
To change chart settings, from the Home screen, select Charts > Chart Setup, or press MENU<br />
while viewing the navigation chart and select Chart Setup.<br />
ChartS<br />
USinG
USinG<br />
ChartS<br />
uSInG chartS<br />
Orientation—changes the perspective of the map display:<br />
•<br />
•<br />
•<br />
North Up—sets the top of the map display to a north heading.<br />
Track Up—sets the map display to the current track heading.<br />
Course Up—sets the map so the direction of navigation is always up. The heading line appears<br />
vertically on the screen if shown.<br />
Heading line<br />
Chart border<br />
Heading Line—draws an extension from the bow of the boat in the direction of travel.<br />
•<br />
•<br />
•<br />
Off—turns the heading line off.<br />
Distance—sets the distance to the end of the heading line.<br />
Time—sets the amount of time until you reach the end of the heading line.<br />
Chart Borders—turns chart borders on when using a BlueChart g2 Vision SD card and you want to<br />
see what area the maps cover.<br />
Tracks—turns the visible track log on or off. The chartplotter continues to record tracks if you turn<br />
this setting off, but they are hidden from view.<br />
Inset Map—turns the inset map on or off when panning away. Select Auto to turn the inset map on<br />
only when the boat symbol is no longer visible.<br />
Appearance—customizes how items are shown on the map.<br />
•<br />
•<br />
•<br />
•<br />
•<br />
•<br />
•<br />
Detail—adjusts the amount of detail shown on the map.<br />
0 <strong>GPSMAP</strong> <strong>4000</strong> <strong>Series</strong> Owner’s <strong>Manual</strong><br />
Track<br />
Photos—sets the high resolution satellite images to on, off, land only, or blend (page 15).<br />
Spot Depth—turns on spot soundings and sets a dangerous depth.<br />
Light Sectors—adjusts the drawing of light sectors on the map.<br />
Symbols—sets the navaid symbol set (NOAA or IALA).<br />
Symbol Size—adjusts the size of the symbols shown on the map.<br />
Animated Tides—provides additional tide and current information when a tide or current icon is<br />
selected.<br />
Using Tracks<br />
A track is a recording of your path. The track currently being recorded is the active track. An active<br />
track can be saved.
<strong>GPSMAP</strong> <strong>4000</strong> <strong>Series</strong> Owner’s <strong>Manual</strong><br />
uSInG chartS<br />
To turn the track log on:<br />
From the Navigation chart, select Menu > Chart Setup > Tracks > On. A trailing line on the chart<br />
indicates your track.<br />
To save the active track:<br />
1. From the Home screen, select Information > User Data > Tracks > Save Active Track.<br />
2. Select either the time the current track began (or Midnight, if shown) or Entire Log.<br />
3. To name the track, change the color of the track, or save it as a route, select Edit Track.<br />
To clear the active track:<br />
From the Home screen, select Information > User Data > Tracks > Clear Active Track. The<br />
track memory is cleared; the current track continues to be recorded.<br />
To retrace the active track:<br />
1. From the Home screen, select Information > User Data > Tracks > Follow Active Track.<br />
2. Select either the time the current track began or Entire Log.<br />
3. Follow the colored line on the screen.<br />
To edit or delete a saved track:<br />
1. From the Home screen, select Information > User Data > Tracks > Saved Tracks.<br />
2. Select the track you want to edit or delete.<br />
3. Select Edit Track to change the name or color of the track or select Delete to delete it.<br />
Select Next Page to view the track on the navigation chart.<br />
ChartS<br />
USinG
USinG<br />
ChartS<br />
uSInG chartS<br />
To set active Track Options:<br />
From the Home screen, select Information > User Data > Tracks > Active Track Options.<br />
Record Mode—select Off, Fill, or Wrap.<br />
•<br />
•<br />
•<br />
Off—does not record a track log.<br />
Fill—records a track log until the track memory is full.<br />
Wrap—continuously records the track log, replacing the oldest track data with new data.<br />
Interval—defines the frequency at which the track plot is recorded. Recording more-frequent plots<br />
is more accurate but fills the track log faster.<br />
•<br />
•<br />
Interval—sets whether the interval is determined by distance, time, or resolution. (Select<br />
Change to set the quantity.)<br />
Distance—records the track based on a distance between points.<br />
Time—records the track based on a time interval.<br />
Resolution—records the track plot based on a variance from your course. This setting is<br />
recommended for the most-efficient use of memory. The distance value (Change) is the<br />
maximum error allowed from the true course before recording a track point.<br />
Change—sets the value of the interval.<br />
Color—sets the color of the track plot.<br />
Using BlueChart g2 Vision<br />
Optional BlueChart g2 Vision preprogrammed SD cards allow you to get the most out of your<br />
chartplotter. In addition to detailed marine charting, BlueChart g2 Vision has the following features:<br />
•<br />
•<br />
•<br />
•<br />
•<br />
•<br />
•<br />
•<br />
•<br />
•<br />
Mariner’s Eye 3D—provides a view from above and behind the boat for a three-dimensional<br />
navigation aid. The BlueChart g2 Vision Mariner’s Eye 3D is more detailed than the preloaded<br />
data.<br />
Fish Eye 3D—provides an underwater, three-dimensional view that visually represents the<br />
sea floor according to the information on the chart.<br />
Fishing Charts—displays the chart with enhanced bottom contours and without navigational<br />
data. This chart works well for offshore deep-sea fishing.<br />
High Resolution Satellite Imagery—provides high resolution satellite images for a realistic<br />
view of the land and water on the Navigation chart.<br />
Aerial Photos—displays marinas and other navigationally significant aerial photos to help you<br />
visualize your surroundings.<br />
Detailed Roads and POI data—displays roads, restaurants, and other points of interest (POIs)<br />
along the shore.<br />
Auto Guidance—uses specified boat safe depth and chart data to determine the best course to<br />
your destination.<br />
Using the SD card<br />
You can insert or remove a BlueChart g2 Vision SD card while your <strong>Garmin</strong> GPS unit is on or off.<br />
To insert the SD card, open the access door and press the SD card in until it clicks. Press in again to<br />
eject the SD card.<br />
2 <strong>GPSMAP</strong> <strong>4000</strong> <strong>Series</strong> Owner’s <strong>Manual</strong>
<strong>GPSMAP</strong> <strong>4000</strong> <strong>Series</strong> Owner’s <strong>Manual</strong><br />
uSInG chartS<br />
BlueChart g2 Vision SD cards are not waterproof. When you are not using the card, keep it in the<br />
original packaging for safekeeping and store it away from exposure to sun and rain.<br />
BlueChart g2 Vision SD cards are susceptible to damage from static electricity. In low humidity<br />
environments, you should ground yourself on a large metal object before handling the card.<br />
Card label<br />
<strong>GPSMAP</strong> 4210 or 4212<br />
Card label<br />
<strong>GPSMAP</strong> 4208<br />
NOTE: BlueChart g2 Vision data cannot be transferred from the SD card to your computer for backup<br />
or viewing purposes. You can use the SD card only on BlueChart g2 Vision compatible <strong>Garmin</strong> GPS<br />
units.<br />
Using Mariner’s Eye 3D<br />
A BlueChart g2 Vision SD card offers Mariner’s Eye 3D, which provides a detailed,<br />
three-dimensional view from above and behind the boat (according to your course) and provides a<br />
visual navigation aid. This view is helpful when navigating tricky shoals, reefs, bridges, or channels,<br />
and when trying to identify entry and exit routes in unfamiliar harbors or anchorages.<br />
Mariner’s Eye 3D Navigation Chart<br />
Press the RANGE (+) key to move the view closer to your boat and lower to the water. Press<br />
the RANGE (-) key to move the view away from the boat. This is indicated by the scale ( )<br />
temporarily displayed at the bottom of the screen.<br />
Mariner’s Eye 3D Settings<br />
To access additional settings or options from the Mariner’s Eye 3D screen, press MENU. The<br />
options and additional settings are the same as the Mariner’s Eye screen (page 8), with the exception<br />
of Colors:<br />
ChartS<br />
USinG
USinG<br />
ChartS<br />
uSInG chartS<br />
Colors —selects between Normal (Default), Water Hazard, and All Hazard. The Normal setting<br />
shows the land as seen from the water. The Water Hazard setting indicates shallow water and land<br />
with a color scale. Blue indicates deep water, yellow is shallow water, and red is very shallow. The<br />
Water Hazard setting indicates land in green and brown, and the All Hazard setting shows land as<br />
dark red.<br />
Mariner’s Eye 3D, Normal Colors Mariner’s Eye 3D, Hazard Colors<br />
Using Fish Eye 3D<br />
Using the depth contour lines of the BlueChart g2 Vision cartography, Fish Eye 3D provides an<br />
underwater view of the sea floor or lake bottom. The RANGE keys adjust the view in the same way<br />
as the Mariner’s Eye 3D.<br />
Fish Eye 3D<br />
Fish Eye 3D Settings<br />
To access additional settings or options for the Fish Eye 3D screen, press MENU.<br />
Sonar Cone—turns a cone on or off that shows the area covered by your transducer.<br />
Sonar Data—shows the sonar readings received by your transducer for the best combination of<br />
sonar and mapping.<br />
Tracks—turns the track log on or off.<br />
Overlay Numbers—show or hide cruising, navigation, fishing, sailing, fuel, or XM audio numbers<br />
just as on the navigation chart (page 6).<br />
4 <strong>GPSMAP</strong> <strong>4000</strong> <strong>Series</strong> Owner’s <strong>Manual</strong>
<strong>GPSMAP</strong> <strong>4000</strong> <strong>Series</strong> Owner’s <strong>Manual</strong><br />
uSInG chartS<br />
Using Fishing Charts<br />
Use the fishing chart for a detailed view of the bottom contours and depth soundings on the chart.<br />
Fishing Chart Navigation Chart<br />
The Fishing chart uses detailed bathymetric data on a preprogrammed BlueChart g2 Vision SD card,<br />
and is best for offshore deep-sea fishing.<br />
Enabling High Resolution Satellite Imagery<br />
You can overlay high-resolution satellite images on the land, sea, or both portions of the Navigation<br />
chart when using a preprogrammed BlueChart g2 Vision SD card.<br />
To enable satellite imagery:<br />
1. While viewing the Navigation Chart, press MENU.<br />
2. Select Chart Setup > Appearance > Photos.<br />
3. Select one of the following:<br />
•<br />
•<br />
•<br />
Off—standard chart information is shown on the map.<br />
Land Only—standard chart information is shown on water with photos overlaying the land.<br />
Blend—photos overlay both the water and the land at a specified opacity. The higher you set<br />
the percentage, the more the satellite photos will cover both land and water.<br />
NOTE: When enabled, the high resolution satellite images are only present at lower zoom levels. If you<br />
cannot see the high resolution images in your BlueChart g2 Vision region, either zoom in further using<br />
the RANGE (+) key, or set the detail level higher (see page 10).<br />
ChartS<br />
USinG
USinG<br />
ChartS<br />
uSInG chartS<br />
Photo Overlay Off Land Only Photo Overlay<br />
Blend at 50% Blend at 100%<br />
Viewing Aerial Photos<br />
Preprogrammed BlueChart g2 Vision SD cards contain aerial photographs of many landmarks,<br />
marinas, and harbors. Use these photos to help orient yourself to your surroundings or to help<br />
acquaint yourself with a marina or harbor prior to arrival.<br />
Aerial Photo<br />
NOTE: Use the RANGE (+/-) keys to zoom in and out while viewing the aerial photo on the full<br />
screen.<br />
<strong>GPSMAP</strong> <strong>4000</strong> <strong>Series</strong> Owner’s <strong>Manual</strong>
To access aerial photos from the navigation chart:<br />
Use the ROCKER to highlight a camera icon with the pointer, and select Aerial Photo or<br />
Review.<br />
Viewing Current Station Information<br />
If current stations are available in your g2 Vision region,<br />
they appear on the navigation chart as a highlighted arrow.<br />
This detailed icon shows the current’s speed and direction at<br />
a glance. Select Review or the name of the station to display<br />
a current graph.<br />
<strong>GPSMAP</strong> <strong>4000</strong> <strong>Series</strong> Owner’s <strong>Manual</strong><br />
Overhead<br />
Perspective<br />
Current Station icon<br />
uSInG chartS<br />
Detailed Road and POI Data<br />
BlueChart g2 Vision contains detailed road and POI data, which includes highly detailed coastal<br />
roads and points of interest (POIs) such as restaurants, lodging, local attractions, and more. For<br />
instructions on searching for and navigating to these POIs, see the “Where To?” section on page 20.<br />
Using Automatic Guidance<br />
Automatic Guidance automatically creates and suggests passage based on available BlueChart g2<br />
Vision chart information. See page 34 for instructions on setting up Automatic Guidance for your<br />
boat. See page 25 to use Automatic Guidance.<br />
ChartS<br />
USinG
USinG<br />
CombinationS<br />
uSInG combInatIonS<br />
Using Combinations<br />
Use the Combinations screen to view a combination of different screens at the same time. The<br />
number of options available on the Combinations screen depends on the optional network devices<br />
you have connected to your <strong>GPSMAP</strong> <strong>4000</strong> series unit, and whether you are using an optional<br />
BlueChart g2 Vision SD card. You can choose to combine two or three screens.<br />
Combinations Screen<br />
The Combinations screen shows a list of possible screen combinations. When viewing three<br />
combination screens, one screen is larger than the others. The charts are numbered with a<br />
corresponding button in the lower-right corner. To switch the larger screen, select the icon from the<br />
lower-right corner that represents the screen you want.<br />
Navigation Chart, Radar, and Sonar Combination<br />
Data fields<br />
Focus screen<br />
To access additional settings or options for the Combinations screen, press MENU.<br />
Select to switch focus<br />
screen<br />
<strong>GPSMAP</strong> <strong>4000</strong> <strong>Series</strong> Owner’s <strong>Manual</strong>
<strong>GPSMAP</strong> <strong>4000</strong> <strong>Series</strong> Owner’s <strong>Manual</strong><br />
uSInG combInatIonS<br />
To customize the screen combinations:<br />
1. While viewing the Combinations screen, select MENU > Change Combination, or, from the<br />
Home screen, select Combinations > Unused Combo (if one is available).<br />
Combination<br />
screen<br />
Combination<br />
screen 2<br />
Data bar<br />
Select the number of<br />
combination screens<br />
Change to vertical or<br />
horizontal layout<br />
Toggle the<br />
data bar<br />
Change combination<br />
screen<br />
Change combination<br />
screen 2<br />
2. Select the number of combination screens (1-3), toggle the data bar on or off, and choose the<br />
combination screens to view.<br />
3. Select Done.<br />
NOTE: You can only choose from the options available to your unit. To increase the number of screens<br />
available, use a BlueChart g2 Vision SD card or add network devices.<br />
To add additional data fields:<br />
1. While viewing the Combinations screen, press the soft key corresponding to an unused data<br />
field.<br />
Adding a Data Field<br />
New data field<br />
2. Select the Digital Item to be displayed on the Combinations Screen. Available options vary, based<br />
on the unit and network configuration.<br />
To edit an existing data field:<br />
While viewing the Combinations screen, press a soft key corresponding to a data field. Select the<br />
item to be displayed.<br />
To change the layout to horizontal or vertical:<br />
1. While viewing the Combinations screen, select MENU > Change Combination.<br />
2. Select Layout Ver. or Layout Horiz.<br />
CombinationS<br />
USinG
Where<br />
to?<br />
Where to?<br />
Where To?<br />
Use the Where To? option on the Home screen to search for and navigate to nearby fuel, repairs,<br />
services, waypoints, and routes.<br />
NOTE: You must create waypoints and routes before you can navigate to them.<br />
You can navigate to a destination using one of three methods: Go To, Route To, or Guide To.<br />
•<br />
•<br />
•<br />
Go To—takes you directly to the destination.<br />
Route To—creates a route from your location to a destination, allowing you to add turns to the<br />
route.<br />
Guide To—searches BlueChart g2 Vision chart data to suggest the best path to your destination.<br />
You must be using a BlueChart g2 Vision SD card for this option to appear.<br />
CAUTION: Guide To does not assure obstacle and bottom clearance. For safety, always resolve any<br />
discrepancies or questions before continuing navigation.<br />
Navigating to a Destination<br />
You can navigate to a destination using one of three methods: Go To, Route To, or Guide To.<br />
•<br />
•<br />
•<br />
Go To—takes you directly to the destination.<br />
Route To—creates a route from your location to a destination, allowing you to add turns to the<br />
route.<br />
Guide To—searches BlueChart g2 Vision chart data to suggest the best path to your destination.<br />
You must be using a BlueChart g2 Vision SD card for this option to appear.<br />
CAUTION: Guide To does not ensure obstacle and bottom clearance. For safety, always resolve any<br />
discrepancies or questions before continuing navigation.<br />
To begin navigating:<br />
1. From the Home screen, select Where To?.<br />
2. Select the marine service category to which you want to navigate. The unit shows the list of the<br />
50 nearest locations and the distance to each.<br />
20 <strong>GPSMAP</strong> <strong>4000</strong> <strong>Series</strong> Owner’s <strong>Manual</strong>
Where to?<br />
3. Select the marine service item to which you want to navigate. A screen containing information<br />
about the selected marine service appears.<br />
4. Select Navigate To.<br />
5. Select Go To.<br />
OR<br />
Select Guide To when using a preprogrammed BlueChart g2 Vision card to use Auto Guidance.<br />
6. Follow the colored line on the screen to the destination.<br />
To stop navigating:<br />
From the chart, Select Menu, and then select Stop Navigating.<br />
To search for a destination by name:<br />
1. From the Home screen, select Where To? > Search by Name.<br />
<strong>GPSMAP</strong> <strong>4000</strong> <strong>Series</strong> Owner’s <strong>Manual</strong> 2<br />
Where<br />
to?
Where<br />
to?<br />
Where to?<br />
2. Use the ROCKER or NUMERIC KEYPAD (4210/4212 only) to select characters and spell at least<br />
a portion of the name of your destination.<br />
3. Select Done to view the 50 nearest destinations that contain your search criteria.<br />
4. Select the best location, then select Navigate To > Go To (or Route To).<br />
Creating and Using Waypoints<br />
You can store up to 1,500 waypoints with a user-defined name, symbol, depth, and water<br />
temperature for each waypoint.<br />
To create a new waypoint:<br />
1. From the Home screen, select Charts > Navigation Chart.<br />
2. By pressing the ROCKER, use the map pointer ( ) to select the location you want to designate<br />
as a waypoint.<br />
3. Select Create Waypoint.<br />
4. Select one of the following:<br />
•<br />
•<br />
•<br />
•<br />
Edit Waypoint—designate a specific name, symbol, water depth, water temperature, or<br />
position.<br />
Delete—delete the waypoint.<br />
Navigate To—go to the waypoint.<br />
Back—return to the navigation chart.<br />
22 <strong>GPSMAP</strong> <strong>4000</strong> <strong>Series</strong> Owner’s <strong>Manual</strong>
To mark your current location as a waypoint:<br />
From any screen, press the MARK key.<br />
•<br />
•<br />
•<br />
•<br />
•<br />
Where to?<br />
Edit Waypoint—designates a specific name, symbol, water depth, water temperature, or<br />
position.<br />
Delete—deletes the waypoint.<br />
Man Overboard—designates the current location as a Man Overboard location.<br />
Next Page/Previous Page—switches between waypoint information and the navigation chart.<br />
Back—saves the waypoint and returns to the navigation chart.<br />
NOTE: Selecting Mark only creates a waypoint at your present location.<br />
To mark an MOB (Man Overboard) location:<br />
When you mark a waypoint, you can designate it as an MOB (Man Overboard). This marks the point<br />
and sets a course back to the marked location. When an MOB is active, an MOB waypoint with an<br />
international MOB symbol is created, and the unit is on an active navigation to that point.<br />
1. From any screen, press the MARK key.<br />
2. Select Man Overboard.<br />
To edit an existing waypoint:<br />
1. From the Navigation chart, press the ROCKER and use the map pointer ( ) to highlight the<br />
waypoint on the navigation chart.<br />
OR<br />
From the Home screen, select Information > User Data > Waypoints.<br />
2. Select the waypoint you want to edit.<br />
3. Select Edit Waypoint.<br />
4. Select the waypoint attribute you want to change (Name, Symbol, Depth, Water Temp, or<br />
Position).<br />
To move the waypoint on the navigation chart:<br />
1. Select the waypoint on the navigation chart.<br />
2. Select Review. (The Review button is only shown when more than one waypoint is in the<br />
vicinity.)<br />
3. Select the waypoint you want to edit.<br />
4. Select Edit Waypoint > Position.<br />
5. Select Use Chart or Enter Coordinates.<br />
<strong>GPSMAP</strong> <strong>4000</strong> <strong>Series</strong> Owner’s <strong>Manual</strong> 2<br />
Where<br />
to?
Where<br />
to?<br />
Where to?<br />
6. If entering coordinates, use the ROCKER or NUMERIC KEYPAD (4210/4212 only) to enter the<br />
new coordinates for the waypoint. If using the chart, highlight the new location with the map<br />
pointer ( ), and select Move Waypoint. The waypoint moves to the new location.<br />
To view a list of all waypoints:<br />
From the Home screen, select Information > User Data > Waypoints.<br />
To delete a waypoint or MOB:<br />
1. From the Navigation chart, press the ROCKER and use the map pointer ( ) to highlight the<br />
waypoint on the navigation chart.<br />
OR<br />
From the Home screen, select Information > User Data > Waypoints.<br />
2. Select the waypoint or MOB you want to delete.<br />
3. Select Delete.<br />
Creating and Using Routes<br />
You can create and store up to 20 routes with up to 250 waypoints each.<br />
To create a route from your present location:<br />
1. From the Navigation chart, press the ROCKER and use the map pointer ( ) to choose your<br />
destination.<br />
2. Select Navigate To > Route To.<br />
3. Use the map pointer ( ) to choose where you want to make the last turn.<br />
4. Select Add Turn.<br />
5. To add additional turns, choose where you want to make the turn (working backward from the<br />
destination) and select Add Turn.<br />
24 <strong>GPSMAP</strong> <strong>4000</strong> <strong>Series</strong> Owner’s <strong>Manual</strong>
6. Select Done to finish the route or Cancel Route to delete the route.<br />
To create a route in another location:<br />
1. From the Home screen, select Information > User Data > Routes > New Route.<br />
Where to?<br />
2. By pressing the ROCKER, use the map pointer ( ) to select the initial location you want to start<br />
the new route.<br />
3. Select Add Turn to mark the starting point of the route.<br />
4. Choose the location of the first turn and select Add Turn. Repeat until the route is complete.<br />
5. Select Done when the route is complete.<br />
To create a route using Auto Guidance:<br />
1. From the Navigation chart, select your destination.<br />
2. Select Navigate To > Guide To. Your route is calculated.<br />
NOTE: You can change the auto guidance path to a route by selecting the end of the path and selecting<br />
Navigate To > Route To. The auto guidance path stays on the screen, allowing you to trace it while<br />
creating a route.<br />
To edit a route<br />
1. From the Home screen, select Information > User Data > Routes.<br />
2. Select the route to edit.<br />
3. Select Edit Route. You can edit the route name, turns, or delete the route.<br />
To bypass a waypoint on a route:<br />
1. Create a route as previously described.<br />
2. Select the waypoint that follows the waypoint you are bypassing.<br />
3. Select Navigate To > Go To (or Route To).<br />
<strong>GPSMAP</strong> <strong>4000</strong> <strong>Series</strong> Owner’s <strong>Manual</strong> 2<br />
Where<br />
to?
VieWinG<br />
information<br />
VIeWInG InformatIon<br />
Viewing Information<br />
Use the Information screen to access information about tides, currents, celestial data, user data, other<br />
boats, gauges, and video.<br />
Viewing Tide Station Information<br />
To view tide information from the Home screen, select Information > Tides. Information for the<br />
most-recently viewed tide station is shown.<br />
Select Nearby Stations to view other stations close to your current location. Select Change<br />
Date > <strong>Manual</strong> to view tide information for a different date.<br />
Viewing Current Information<br />
Use the Current Prediction screen to view information for currents.<br />
NOTE: You must use a BlueChart g2 Vision card to view Current Station information.<br />
To view current information from the Home screen, select Information > Currents. Information<br />
for the most-recently viewed current station is shown.<br />
Select Nearby Stations to view other stations close to your current selection. Select Change<br />
Date > <strong>Manual</strong> to view current information for a different date.<br />
Select Show Report to view the Current Report for the selected station.<br />
2 <strong>GPSMAP</strong> <strong>4000</strong> <strong>Series</strong> Owner’s <strong>Manual</strong>
Viewing Celestial Information<br />
Use the Celestial screen to view celestial data for sun and moon rise/set, moon phase, and<br />
approximate sky view location of the sun and moon.<br />
To view celestial information from the Home screen, select Information > Celestial.<br />
Moon position<br />
Sun position<br />
Sky view window<br />
Viewing User Data<br />
To view user data from the Home screen, select Information > User Data.<br />
Waypoints—view a list of all saved waypoints.<br />
Routes—view a list of saved routes.<br />
Tracks—view a list of saved tracks.<br />
Data Transfer—transfer waypoints, routes, and tracks to and from an SD card or network.<br />
Clear User Data—erase all user waypoints, routes, and tracks.<br />
VIeWInG InformatIon<br />
To copy or merge MapSource data to your chartplotter:<br />
1. Insert the SD card into your chartplotter to allow it to place a file on the SD card. This file provides<br />
information to MapSource to format its data. This only needs to be done the first time you copy or<br />
merge MapSource data to your chartplotter from a specific SD card.<br />
2. Check your MapSource version on the PC by clicking Help > About MapSource. If the version<br />
is older than 6.12.2, update to the most current version by clicking Help > Check for Software<br />
Updates or check the <strong>Garmin</strong> Web site at www.garmin.com.<br />
3. Insert the SD card into an SD card reader that is attached to the PC.<br />
4. From within MapSource, click on Transfer > Send to Device.<br />
5. From the Send to Device window, select the drive for the SD card reader and the types of data<br />
you want to copy to your chartplotter.<br />
6. Click Send.<br />
7. Insert the SD card into your chartplotter.<br />
8. From the Home screen on your chartplotter, select Information > User Data > Data Transfer ><br />
Card.<br />
9. Select Replace From Card or Merge From Card to copy or merge the data into your<br />
chartplotter.<br />
To transfer data to or from an SD card:<br />
1. Insert an SD card into the SD card slot on the front of the unit.<br />
<strong>GPSMAP</strong> <strong>4000</strong> <strong>Series</strong> Owner’s <strong>Manual</strong> 2<br />
information<br />
VieWinG
VieWinG<br />
information<br />
VIeWInG InformatIon<br />
2. From the Home screen, select Information > User Data > Data Transfer > Card.<br />
Complete one of the following:<br />
•<br />
•<br />
•<br />
Select Save To Card to save waypoints, routes, and tracks to the SD card.<br />
Select Merge From Card to transfer data from the SD card to the unit and combine it with<br />
existing user data.<br />
Select Replace From Card to overwrite items on your unit.<br />
To transfer data to or from a network:<br />
1. Connect the unit to a <strong>Garmin</strong> Marine Network using the network port on the back of the unit and<br />
a <strong>Garmin</strong> Network cable.<br />
2. From the Home screen, select Information > User Data > Data Transfer > Network.<br />
Complete one of the following:<br />
•<br />
•<br />
Select Clone User Data to transfer waypoints, routes, and tracks to other chartplotters<br />
connected to the network. Existing data will be overwritten on those chartplotters.<br />
Select Merge User Data to transfer data between all the chartplotters connected to the<br />
network. Unique data will be combined with existing data on every chartplotter.<br />
To back up data to a PC:<br />
1. Insert an SD card into the SD card slot on the front of the unit.<br />
2. From the Home screen, select Information > User Data > Data Transfer > Card > Save to<br />
Card.<br />
3. Remove the SD card from the chartplotter and insert it into an SD card reader that is attached to<br />
a PC.<br />
4. From Windows Explorer, open the <strong>Garmin</strong>\UserData folder on the SD card.<br />
5. Copy the UserData.ADM file on the card and paste it to any location on the PC.<br />
To restore backup data to your chartplotter:<br />
1. Copy the UserData.ADM file from the PC to an SD card in a folder named <strong>Garmin</strong>\UserData.<br />
2. Insert the SD card into your chartplotter.<br />
3. From the Home screen on your chartplotter, select Information > User Data > Data Transfer ><br />
Card > Replace From Card.<br />
To delete all waypoints, routes, and tracks:<br />
1. From the Home screen on your chartplotter, select Information > User Data > Clear User Data.<br />
2. Select Waypoints, Routes, Saved Tracks, or All.<br />
3. Select OK or Cancel.<br />
Viewing Information on Other Boats<br />
To view information about other boats from the Home screen, select Information > Other Boats.<br />
NOTE: To view information about other boats, your unit must be connected to an external AIS<br />
(Automatic Identification System) or DSC (Digital Selective Calling) device.<br />
AIS List—displays information about the boats your unit is monitoring. Select AIS List to view the<br />
MMSIs (Maritime Mobile Service Identities) or names (if the boat is broadcasting a name) of nearby<br />
AIS-equipped boats. The AIS list is sorted by range, with the nearest boat at the top of the list.<br />
2 <strong>GPSMAP</strong> <strong>4000</strong> <strong>Series</strong> Owner’s <strong>Manual</strong>
VIeWInG InformatIon<br />
DSC Log—displays a list of all DSC calls, sorted by most recent, sender, or by type (distress calls or<br />
position reports).<br />
•<br />
•<br />
•<br />
•<br />
View By Time—shows the most recent DSC calls received, sorted and listed chronologically by<br />
time and date. Calls with identical time and date information show the same information in the<br />
list.<br />
View By Sender—shows an alphanumerical list of senders.<br />
View By Type—shows the most recent distress calls or position reports, sorted chronologically.<br />
Delete All—deletes all log entries<br />
DSC Call List—displays the 100 most-recent calls. The DSC Call List shows the most recent call<br />
from a boat. If a second call is received from the same boat, it replaces the first call in the Call List.<br />
Directory—displays a list of all DSC entries. You can view by name or by MMSI. You can also add<br />
an entry.<br />
Viewing Gauges<br />
To view analog or digital engine gauges from the Home screen, select Information > Engine.<br />
NOTE: You must be connected to a NMEA 2000 network capable of sensing engine data to view the<br />
gauges. For more information on supported NMEA 2000 PGN information, see the <strong>GPSMAP</strong> <strong>4000</strong>/5000<br />
<strong>Series</strong> Installation Instructions.<br />
To select analog or digital gauges:<br />
1. To view the Gauges from the Home screen, select Information > Engine.<br />
2. To select analog or digital gauges, select Menu from the Engine Gauges screen, and then select<br />
Digital or Analog.<br />
To reset the odometer (located on the speedometer), select Reset Odometer.<br />
NOTE: For more than two engines, you can only use the digital gauges. For one or two engines, you<br />
can switch between analog and digital gauges<br />
<strong>GPSMAP</strong> <strong>4000</strong> <strong>Series</strong> Owner’s <strong>Manual</strong> 2<br />
information<br />
VieWinG
VieWinG<br />
information<br />
VIeWInG InformatIon<br />
Viewing Fuel Gauges<br />
To view fuel gauges from the Home screen, select Information > Fuel. Fuel flow for each engine,<br />
total fuel flow, fuel level in each tank, total fuel remaining, fuel economy, and the range for your<br />
boat are shown.<br />
NOTE: To view fuel information, your unit must be connected to an external fuel sensor, such as the<br />
<strong>Garmin</strong> GFS 10.<br />
To synchronize your fuel gauges with your fuel:<br />
From the Home screen select Information > Fuel > Menu.<br />
Fill Up All Tanks—Select when your tank is full. An estimate of the total fuel is shown. Adjust<br />
if necessary.<br />
Add Fuel To Boat—Select when you have added less than a full tank. An estimate of the fuel<br />
added is shown. Adjust if necessary.<br />
Set Total Fuel Onboard—Select to specify the total fuel in your tanks.<br />
Econ Source—Select to specify the speed source (GPS Speed or Water Speed) for the Fuel<br />
Economy gauge.<br />
Reset Odometer—Select to reset the odometer (located on the speedometer).<br />
Viewing Video<br />
Your unit can display video if you connect to a video source (or sources) using the supplied video<br />
cable. See the <strong>GPSMAP</strong> <strong>4000</strong>/5000 <strong>Series</strong> Installation Instructions for details.<br />
To view video from the Home screen, select Information > Video.<br />
Select Menu to setup the following:<br />
•<br />
•<br />
•<br />
•<br />
•<br />
•<br />
•<br />
•<br />
•<br />
•<br />
•<br />
Source—selects the video device (Video 1 or Video 2) that will display the video. If you have<br />
two video sources and wish to alternate between the two, select Alternate to define the amount<br />
of time each video is displayed.<br />
Aspect—switches between the standard aspect ratio and a stretched aspect ratio. The video<br />
cannot be stretched beyond the dimensions provided by the connected video device. Because of<br />
this, the stretched video may not fill the entire screen of the <strong>GPSMAP</strong> 4212 chartplotter.<br />
Brightness—adjusts the brightness of the video feed up or down. Select Auto to allow the unit to<br />
automatically adjust the brightness.<br />
Saturation—adjusts the color saturation up or down. Select Auto to allow the unit to<br />
automatically adjust the saturation.<br />
Contrast— adjusts the contrast up or down. Select Auto to allow the unit to automatically adjust<br />
the contrast.<br />
Standard—selects the video format used by the source (PAL or NTSC). Select Auto to let the<br />
unit automatically select the source format.<br />
0 <strong>GPSMAP</strong> <strong>4000</strong> <strong>Series</strong> Owner’s <strong>Manual</strong>
<strong>GPSMAP</strong> <strong>4000</strong> <strong>Series</strong> Owner’s <strong>Manual</strong><br />
Configuring the Unit<br />
Use the Configure screen to configure unit settings.<br />
Configuring System Settings<br />
To change general system settings, from the Home screen, select Configure > System.<br />
confIGurInG the unIt<br />
Simulator—turn Simulator Mode On or Off. Select Setup to set Simulator options. (If you set the<br />
unit into a Store Demonstration mode during the initial unit setup, this setting will be named Demo.)<br />
Language—select the on-screen language.<br />
Auto Power Up (<strong>GPSMAP</strong> 4210 only)—turn Auto Power Up On or Off. When On is selected, the<br />
chartplotter will automatically turn on whenever power is applied, unless the chartplotter is turned<br />
off with the Power key before power is lost.<br />
Beeper/Display—set Beeper options, Backlight, and Color Mode.<br />
•<br />
•<br />
•<br />
Beeper—select Beeper to set when the unit makes audible sounds. The settings are Off, Alarms<br />
Only (default), and Key and Alarm (keys and alarms).<br />
Backlight—select Backlight to adjust the intensity of the backlight. Select Auto to allow the<br />
unit to automatically adjust the backlight based on ambient light.<br />
Color Mode—select Color Mode to select Day Colors or Night Colors, or select Auto to allow<br />
the unit to adjust the colors.<br />
GPS—view GPS satellites and set the speed filter to On, Off, or Auto. The speed filter averages the<br />
speed of your boat over a short period of time for smoother speed values.<br />
System Information—view system information, restore factory settings, view the status of<br />
networked devices (page 38), and display the event log. The event log displays a list of system<br />
events. Select the event to view additional information.<br />
Overlay Numbers—view or edit the options for Wind (Apparent Wind or True Wind) and Next<br />
Turn numbers (Distance or Time) for routes.<br />
Changing Units of Measure<br />
To change units of measure from the Home screen, select Configure > Units.<br />
System Units—global setting that defines individual units of measure at the same time. Statute<br />
(mh, ft, ºF), Metric (kh, m, ºC), Nautical (kt, ft, ºF), or Custom. Select Custom to individually<br />
define units of measure for:<br />
•<br />
•<br />
•<br />
Depth—individually sets the units of measure for depth to Feet, Fathoms, or Meters.<br />
Temperature—individually sets units of measure for temperature to Fahrenheit (ºF) or<br />
Celsius (ºC).<br />
NOTE: You must be receiving NMEA Sonar depth data or using a <strong>Garmin</strong> sounder module to view<br />
depth and temperature information.<br />
Distance—individually set the units of measure for distance readings (Miles, Kilometers, or<br />
Nautical Miles).<br />
ConfiGUrinG<br />
the Unit
ConfiGUrinG<br />
the Unit<br />
confIGurInG the unIt<br />
•<br />
•<br />
•<br />
•<br />
Speed—individually set the units of measure for speed readings (Miles Per Hour, Kilometers<br />
Per Hour, or Knots).<br />
Elevation—individually set the units of measure for elevation readings (Feet or Meters).<br />
Volume—individually set the units of measure for volume readings (Liters, US Gallons, or UK<br />
Gallons).<br />
Pressure—individually sets the units of measure for gauge (kPa or psi) and atmospheric<br />
(Millibars or Inches of Mercury) pressure readings.<br />
Heading—sets the reference used in calculating heading information.<br />
•<br />
•<br />
•<br />
•<br />
Auto Mag Var (Automatic Magnetic Variation)—automatically sets the magnetic declination for<br />
your location.<br />
True—sets true north as the heading reference.<br />
Grid—sets grid north as the heading reference (000º).<br />
User Mag Var—allows you to set the magnetic variation value.<br />
Position Format—sets the coordinate system in which a given location reading appears. Do not<br />
change the position format unless you are using a map or chart that specifies a different position<br />
format.<br />
Map Datum—sets coordinate system in which the map is structured. The default setting is WGS 84.<br />
Do not change the map datum unless you are using a map or chart that specifies a different position<br />
format.<br />
Time Format—sets the time format (12 hour, 24 hour, or UTC) for time readings.<br />
Time Zone—sets the time zone displayed for time readings.<br />
Daylight Saving Time—indicates whether you want daylight saving time Off, On, or Auto. The<br />
Auto setting changes turns daylight saving time on or off, depending on the time of year.<br />
Configuring Communications Settings<br />
To change the communications settings, from the Home screen, select<br />
Configure > Communications.<br />
Port Types—select each port’s input/output format (NMEA Std. or NMEA High Speed) to use<br />
when connecting your unit to external NMEA devices, a computer, or other <strong>Garmin</strong> devices.<br />
•<br />
•<br />
NMEA Std.—supports the input or output of standard NMEA 0183 data, DSC, and sonar NMEA<br />
input support for the DPT, MTW, and VHW sentences.<br />
NMEA High Speed—supports the input or output of high speed 0183 data for most AIS<br />
receivers.<br />
NMEA 0183 Setup—enable or disable NMEA 0183 output sentences for sounder, route, system,<br />
and <strong>Garmin</strong> NMEA settings.<br />
To enable or disable NMEA 0183 output sentences:<br />
1. From the Home screen, select Configure > Communications > NMEA 0183 Setup.<br />
2. Select a setting (Sounder, Route, System, or <strong>Garmin</strong>).<br />
3. Select the NMEA 0183 output sentence to turn it on or off.<br />
2 <strong>GPSMAP</strong> <strong>4000</strong> <strong>Series</strong> Owner’s <strong>Manual</strong>
4. Select Off to disable, or select On to enable the 0183 NMEA output sentence.<br />
<strong>GPSMAP</strong> <strong>4000</strong> <strong>Series</strong> Owner’s <strong>Manual</strong><br />
confIGurInG the unIt<br />
Posn. Precision—adjust the number of digits (Two Digits, Three Digits, or Four Digits) to<br />
the right of the decimal point for transmission of NMEA output.<br />
Waypoint IDs—select how the unit outputs waypoint identifiers (Names or Numbers).<br />
Defaults—reset NMEA 0183 settings to their default settings (OK or Cancel).<br />
NMEA 2000 Setup—View and configure the devices connected to the NMEA 2000 network and set<br />
bridging to On, Off, or Auto.<br />
•<br />
•<br />
•<br />
•<br />
•<br />
Device List—lists the NMEA 2000 devices on your network. If the NMEA 2000 device has<br />
configuration options or settings, select the device for a list of options.<br />
Output Bridging—enables or disables the output from <strong>Garmin</strong> sensors or NMEA 0183 devices<br />
to your NMEA 2000 network.<br />
Wireless Devices—Allows wireless devices, such as a remote control or optical mouse to<br />
communicate with the chartplotter.<br />
Preferred Devices—Allows the selection of a preferred device when more than one source is<br />
available for the same function.<br />
Setting Alarms<br />
You can set the unit to sound an audible alarm when certain conditions are met. By default, all<br />
alarms are turned off.<br />
To set an alarm:<br />
1. From the Home screen, select Configure > Alarms.<br />
2. Select an alarm category (Navigation, Engine, System, Sonar, Weather or Fuel). Alarms<br />
include:<br />
•<br />
•<br />
•<br />
•<br />
•<br />
Navigation - Anchor Drag, Arrival, Off Course<br />
System - Clock, Battery, GPS Accuracy<br />
Sonar - Shallow Water, Deep Water, Water Temperature, Fish<br />
Weather (only if XM weather is available) - Marine, Tornado, Severe Storm, Flood, Flash<br />
Flood<br />
Fuel—Total Fuel Onboard<br />
3. Select an alarm.<br />
4. Select On to turn the alarm on, and then use the ROCKER or NUMERIC KEYPAD (<strong>GPSMAP</strong><br />
4210 or 4212 only) to specify alarm information.<br />
Setting Navigation Alarms<br />
To set a navigation alarm from the Home screen, select Configure > Alarms > Navigation.<br />
Anchor Drag—set an alarm to sound when you exceed a specified drift distance.<br />
Arrival—set an alarm to sound when you are within a specified distance or time from a destination<br />
waypoint.<br />
Off Course—set an alarm to sound when you are off course by a specified distance.<br />
ConfiGUrinG<br />
the Unit
ConfiGUrinG<br />
the Unit<br />
confIGurInG the unIt<br />
Setting System Alarms<br />
To set a system alarm, from the Home screen, select Configure > Alarms > System.<br />
Clock—sets an alarm using the system (GPS) clock. The unit must be on for the clock alarm to<br />
work.<br />
Battery—sets an alarm to sound when the battery reaches a user-determined low voltage.<br />
GPS Accuracy—sets an alarm to sound when the GPS location accuracy falls outside the userdetermined<br />
value.<br />
Setting Sonar Alarms<br />
To set a sonar alarm, from the Home screen, select Configure > Alarms > Sonar.<br />
NOTE: You must have an optional sonar module (and a transducer connected to the sounder module)<br />
wired via NMEA 0183 or connected to the <strong>Garmin</strong> Marine Network to receive sonar information.<br />
Shallow Water/Deep Water—sets an alarm to sound when the depth is less than or greater than the<br />
specified value.<br />
Water Temp—sets an alarm to sound when the transducer reports a temperature that is 2° F (1.1° C)<br />
above or below the specified temperature.<br />
Fish—sets an alarm to sound when the unit detects a suspended target of the specified symbols.<br />
— sounds an alarm for all fish sizes<br />
— sounds an alarm for medium and large fish only<br />
— sounds an alarm for large fish only<br />
NOTE: You must have an optional sonar module and a transducer connected via NMEA 0183 or the<br />
<strong>Garmin</strong> Marine Network to receive sonar information.<br />
Setting Weather Alarms<br />
To set a weather alarm from the Home screen, select Configure > Alarms > Weather. Turn the<br />
following alarms on or off: Marine, tornado, severe storm, flood, flash flood.<br />
NOTE: You must have a subscription to XM WX Weather and a GDL 30/30A connected via the <strong>Garmin</strong><br />
Marine Network to view weather information. Refer to page 48 for more information.<br />
Configuring My Boat<br />
To configure settings for your boat - from the Home screen, select Configure > My Boat.<br />
Auto Guidance—sets the Auto Guidance parameters for your boat:<br />
•<br />
•<br />
Safe Depth—sets the minimum depth (chart depth datum) to allow when calculating an auto<br />
guidance path. A safe depth of less than one meter is not allowed when using Auto Guidance.<br />
Safe Height—sets the minimum height (chart height datum) of a bridge that your boat can safely<br />
travel under.<br />
Keel Offset—offsets the surface reading for the depth of a keel, making it possible to measure depth<br />
from the bottom of the keel instead of from the transducer location. Enter a positive number to offset<br />
for a keel. You can enter a negative number to compensate for a large vessel that may draw several<br />
feet of water.<br />
4 <strong>GPSMAP</strong> <strong>4000</strong> <strong>Series</strong> Owner’s <strong>Manual</strong>
To adjust the Keel Offset:<br />
1. From the Home screen, select Configure > My Boat > Keel Offset.<br />
2. Use the select screen keyboard to specify the offset.<br />
3. Select Done to accept the number.<br />
NOTE: Select Cancel to cancel your changes and return to the My Boat screen.<br />
Transducer at Surface<br />
Enter a (+) positive number<br />
to show depth from the<br />
bottom of the keel.<br />
Transducer at Bottom of Keel<br />
Enter a (-) negative<br />
number to show depth<br />
from the surface.<br />
<strong>GPSMAP</strong> <strong>4000</strong> <strong>Series</strong> Owner’s <strong>Manual</strong><br />
Keel Offset<br />
Transducer—selects sonar cone angles and calibrates water speed.<br />
•<br />
•<br />
confIGurInG the unIt<br />
Sonar Cone Angles—when using a transducer other than the standard <strong>Garmin</strong> transducer, you<br />
can set the angle, in degrees, of the sonar cone so that it is accurately depicted on the Fish Eye 3D<br />
screen. Select either 200kHz or 50kHz and use the on-screen keyboard to enter the angle.<br />
NOTE: The Sonar Cone Angles setting does not affect a standard <strong>Garmin</strong> transducer, and should only<br />
be used to match the specifications of a non-standard transducer.<br />
Calibrate Water Speed—calibrates a speed-sensing device. Follow the onscreen directions for<br />
calibration. If you do not have a speed-sensing transducer, this menu does not appear.<br />
NOTE: If the boat is not moving fast enough or the speed sensor is not registering a speed, a “Speed<br />
Too Low” message appears. Select OK and safely increase boat speed. If you get the message again,<br />
stop the boat and make sure the speed-sensor wheel is not stuck. If the wheel turns freely, check the<br />
cable connections. If you continue to get the message, contact <strong>Garmin</strong> Product Support.<br />
Total Fuel Capacity—allows you to set the total fuel capacity of all your engines.<br />
Configuring Other Boats<br />
To configure settings for boats other than your own - from the Home screen, select Configure ><br />
Other Boats.<br />
AIS—turn AIS (Automatic Identification System) on or off. AIS alerts you to area traffic by<br />
providing boat IDs, position, course, and speed for boats equipped with a transponder.<br />
DSC—turn DSC (Digital Selective Calling) on or off.<br />
NOTE: To configure AIS or DSC information for other boats, your unit must be connected to an<br />
external AIS or DSC device.<br />
ConfiGUrinG<br />
the Unit
ConfiGUrinG<br />
the Unit<br />
confIGurInG the unIt<br />
Safe Zone (AIS and MARPA only)—turn a safe zone around your boat on or off. This is used for<br />
collision avoidance, and can be customized.<br />
To customize safe-zone settings:<br />
From the Home screen, select Configure > Other Boats > Safe Zone > Setup.<br />
•<br />
•<br />
•<br />
Ring—show or hide a ring on the Navigation chart showing the safe zone for your boat.<br />
Range—change the measured radius of the safe zone ring to a specified distance from 0.1 to<br />
2.0 nm (or 0.2 to 5.0 km, or 0.1 to 2.0 mi).<br />
Time to (Safe Zone)—sounds an alarm if AIS (Automatic Identification System) or MARPA<br />
(Mini Automatic Radar Plotting Aid ) determines that a target will intersect the Safe Zone<br />
within the defined time interval (ranging from 3 to 24 minutes).<br />
Details—shows or hides the name, speed, and bearing of AIS or MARPA onscreen targets. The<br />
details appear next to the AIS or MARPA target icon.<br />
Configuring XM Audio<br />
To configure XM audio from the Home screen, select Configure > XM Audio.<br />
Channel Guide—selects the specific XM channel within the currently selected category.<br />
Channel Entry—allows you to enter a channel using the screen keyboard.<br />
Save Preset—saves the current XM channel in the Presets list. Press Delete Preset to remove the<br />
current channel from the list. Presets is displayed as a category in the category list.<br />
Category—selects the category of channels that are displayed in the Channel Guide.<br />
Mute—silences the audio.<br />
NOTE: You must connect the optional GDL 30A XM receiver into the <strong>Garmin</strong> Marine Network, and<br />
have a subscription to XM Radio to use XM audio features. For more information, refer to page 53.<br />
<strong>GPSMAP</strong> <strong>4000</strong> <strong>Series</strong> Owner’s <strong>Manual</strong>
<strong>GPSMAP</strong> <strong>4000</strong> <strong>Series</strong> Owner’s <strong>Manual</strong><br />
Using the Marine Network<br />
marIne netWork<br />
The <strong>Garmin</strong> Marine Network allows you to share data from <strong>Garmin</strong> peripheral devices between<br />
<strong>Garmin</strong> chartplotters quickly and easily. You can connect your <strong>GPSMAP</strong> <strong>4000</strong> series chartplotters<br />
as well as the <strong>GPSMAP</strong> 5000 series units and previous <strong>Garmin</strong> Marine Network compatible<br />
chartplotter models (<strong>GPSMAP</strong> 3005/3006/3010) to your network to share data. With the <strong>Garmin</strong><br />
Marine Network, you can:<br />
•<br />
•<br />
•<br />
•<br />
Share GPS data from a GPS 17 or GPS 17x antenna wired to one chartplotter with every<br />
chartplotter connected to the <strong>Garmin</strong> Marine Network.<br />
Share NMEA 0183 data from devices wired to one chartplotter, with every chartplotter connected<br />
to the Marine Network.<br />
NOTE: Both the GPS 17 or GPS 17x and any NMEA 0183 devices must be connected to the same<br />
chartplotter to achieve the best results when sharing data over the <strong>Garmin</strong> Marine Network.<br />
NOTE: If you are using a GSD 21 wired to a <strong>GPSMAP</strong> 3005/3006/3010 chartplotter, the data is shared<br />
with any <strong>GPSMAP</strong> <strong>4000</strong> series chartplotters connected to the network. All GSD 21 settings must be<br />
configured on the <strong>GPSMAP</strong> 3005/3006/3010 chartplotter. A GSD 21 cannot be wired to a <strong>GPSMAP</strong><br />
<strong>4000</strong> series chartplotter.<br />
Share data from <strong>Garmin</strong> Marine Network devices connected to any chartplotter in the Marine<br />
Network or to a GMS 10 Marine Network Port Expander, with every other chartplotter connected<br />
to the Marine Network. These devices include:<br />
•<br />
•<br />
•<br />
GSD 22 digital sounder—provides sonar data when connected to the <strong>Garmin</strong> Marine<br />
Network and an appropriate transducer. Sonar data is shared by all chartplotters on the<br />
network.<br />
GMR 21/41 Radome, GMR 18 Radome, and GMR 404/406 Open Array Radar—provides<br />
radar data when connected to the <strong>Garmin</strong> Marine Network. Radar data is shared by all<br />
chartplotters on the network.<br />
GDL 30/GDL 30A—provides XM WX weather and XM Radio data when connected to the<br />
<strong>Garmin</strong> Marine Network. XM WX weather data is shared by all chartplotters on the network.<br />
Connect the GDL 30A (the GDL 30 unit provides only weather) to the audio input source<br />
on your boat to listen to XM audio. The station can be changed by any chartplotter on the<br />
network.<br />
NOTE: Currently, the XM Satellite service is only available in North America. The GDL 30/30A<br />
functions only when used in North America.<br />
Share BlueChart g2 Vision cartography data from an SD card inserted in one <strong>GPSMAP</strong> <strong>4000</strong> or<br />
<strong>GPSMAP</strong> 5000 series chartplotter with every <strong>GPSMAP</strong> <strong>4000</strong>/5000 series chartplotter connected<br />
to the Marine Network.<br />
NOTE: BlueChart g2 Vision cartography is only compatible with <strong>GPSMAP</strong> <strong>4000</strong> and <strong>GPSMAP</strong> 5000<br />
series chartplotters. Previous <strong>Garmin</strong> Marine Network-compatible chartplotter models (such as the<br />
<strong>GPSMAP</strong> 3010) can be connected to your network, but they cannot share BlueChart g2 Vision data.<br />
Transfer waypoint, route, and track information from one chartplotter connected to the <strong>Garmin</strong><br />
Marine Network to every other chartplotter connected to the network. The data can be cloned<br />
from one chartplotter to every other connected chartplotter, or the data can be merged and shared<br />
with every connected <strong>GPSMAP</strong> <strong>4000</strong> and <strong>GPSMAP</strong> 5000 series chartplotter.<br />
netWork<br />
marine
marine<br />
marIne netWork<br />
To view all connected <strong>Garmin</strong> Marine Network Devices, from the Home screen, select Configure ><br />
System > System Information > Network Devices.<br />
Network Devices<br />
netWork Viewing Connected <strong>Garmin</strong> Marine Network Devices<br />
Aliases<br />
defined<br />
No alias<br />
defined<br />
Each connected device is listed along the right side of the screen. To assign an alias or name to one<br />
of the devices for identification purposes, select the device. Use the ROCKER (or the NUMERIC<br />
KEYPAD on the <strong>GPSMAP</strong> 4210 and 4212) to name the device.<br />
Select Back or press the HOME button to exit.<br />
<strong>GPSMAP</strong> <strong>4000</strong> <strong>Series</strong> Owner’s <strong>Manual</strong>
<strong>GPSMAP</strong> <strong>4000</strong> <strong>Series</strong> Owner’s <strong>Manual</strong><br />
Using Radar<br />
uSInG radar<br />
When you connect your chartplotter to an optional <strong>Garmin</strong> marine radar such as a GMR 404/406 or<br />
a GMR 18/24, you can view more information about your surroundings. The radar connects through<br />
the <strong>Garmin</strong> Marine Network and shares radar data with all networked chartplotters.<br />
The <strong>Garmin</strong> Marine Radar transmits a narrow beam of microwave energy as it rotates in a 360<br />
pattern. When the transmitted energy contacts a target, some of that energy is reflected back to the<br />
radar.<br />
WARNING: The marine radar transmits microwave energy that has the potential to be harmful to<br />
humans and animals. Before beginning radar transmission, verify that the area around the radar is clear.<br />
The radar transmits a beam approximately 12° above and below a line extending horizontally from the<br />
center of the radar. Avoid looking directly at the radar, because the eyes are the most susceptible part of<br />
the body.<br />
To turn on the radar:<br />
1. When you power the network on, the radar warms up. A countdown is provided to alert you when<br />
the radar is ready. From the Home screen, select Radar > Cruising.<br />
As a safety feature, the radar enters standby mode after it warms up. This gives you an<br />
opportunity to verify that the area around the scanner is clear before beginning radar<br />
transmission. It is important to remember that the microwave energy transmitted by the scanner<br />
can potentially be dangerous.<br />
2. When the message “Ready to Transmit” appears, press MENU (or press and release the<br />
Power key).<br />
3. On the lower-right portion of the screen, select Transmit Radar. A “Spinning Up” message<br />
appears for a few moments, then the radar begins painting an image.<br />
➊<br />
➋ ➌<br />
To turn off the Radar:<br />
Press MENU (or press and release the Power key) > Go To Standby.<br />
radar<br />
USinG
USinG<br />
radar<br />
uSInG radar<br />
Understanding the Cruising Screen<br />
Use the Cruising screen to view a full-screen image of the gathered radar information. Your position<br />
is in the center of the screen, and the rings provide distance measurements.<br />
Range rings<br />
Heading line<br />
Distance<br />
between rings<br />
Zoom scale<br />
The zoom scale represents the distance from your position (the center) to the outermost ring.<br />
Each ring represents an even division of the zoom scale. For example, if the zoom scale is set at<br />
three miles, each ring represents one mile from the center out. Adjust the zoom scale by using the<br />
RANGE (+/-) keys.<br />
Cruising screen settings<br />
To access additional settings or options for the radar cruising screen, press MENU.<br />
Gain—controls the sensitivity of the radar receiver. The default setting, Auto, adjusts automatically<br />
to provide optimal performance. Select Up or Down to manually adjust the gain; select Auto to<br />
return the gain to the default setting.<br />
•<br />
•<br />
Rain Cltr—adjust the gain for unwanted clutter caused by rain at close ranges. Select Up or<br />
Down to adjust the rain clutter sensitivity.<br />
Sea Cltr—adjust the gain for clutter caused by choppy sea conditions. Select Nxt Prset to cycle<br />
between Rough, Med, Calm, or Off. Select Up or Down to manually adjust the sea clutter<br />
sensitivity.<br />
Guard Zone—defines a safe zone around your boat. An alarm sounds when a detected object enters<br />
this zone. Select On or Off. If the guard zone is on, you can define the boundaries by selecting<br />
Adjust Guard Zone.<br />
•<br />
•<br />
Corner 1 (and Corner 2): Use the ROCKER as indicated by the arrows ( and ) to define<br />
the size of the guard zone. Select Corner 1 or Corner 2 to change the reference point.<br />
Circular: Joins the guard zone to completely encompass the boat. Use Corner 1 or Corner 2 to<br />
adjust the size.<br />
Corner Corner 2 Circular<br />
Nav Features —hides or shows distance, arrival time, and bearing when navigating to a destination.<br />
40 <strong>GPSMAP</strong> <strong>4000</strong> <strong>Series</strong> Owner’s <strong>Manual</strong>
Overlay Numbers—shows or hides cruising, navigation, fishing, sailing, or fuel numbers.<br />
Radar Setup—access advanced radar settings (page 43).<br />
uSInG radar<br />
Targeting on the cruising screen<br />
Use the ROCKER while viewing the cruising screen to begin targeting. A green ring and a green<br />
line appear. The green ring corresponds with the range rings to help define the distance of an object<br />
from your location. The green line corresponds with the heading line to help define the bearing of<br />
an object from your location. As you move the ROCKER, you adjust the point where the green ring<br />
and green line intersect. This point indicates your target. As you move the target over objects on the<br />
radar, target options appear along the right side of the screen.<br />
Target<br />
(intersection)<br />
Heading line<br />
To stop targeting, select Stop Pointing.<br />
Cruising Screen - Targeting<br />
Create Waypoint—marks a waypoint at the targeted object or location.<br />
Target options<br />
Acquire Target—assigns a MARPA (Mini Automatic Radar Plotting Aid) tag to the targeted object.<br />
NOTE: MARPA requires the use of a heading sensor. The heading sensor must output the NMEA 0183<br />
sentence HDM or HDG.<br />
MARPA Target (only appears when you are targeting a tagged MARPA object)—opens the<br />
MARPA target information window. Remove MARPA objects from this window.<br />
MARPA<br />
target lost<br />
MARPA object<br />
targeted<br />
Tracking<br />
MARPA object<br />
Dangerous<br />
MARPA object<br />
MARPA Targeting<br />
Opens MARPA<br />
target information<br />
window<br />
Target options<br />
<strong>GPSMAP</strong> <strong>4000</strong> <strong>Series</strong> Owner’s <strong>Manual</strong> 4<br />
radar<br />
USinG
USinG<br />
radar<br />
uSInG radar<br />
Understanding the Radar Overlay Screen<br />
The radar overlay screen places the radar picture directly onto the navigation chart.<br />
To access the radar overlay screen, from the Home screen select Radar > Radar Overlay.<br />
To access the radar overlay screen:<br />
From the Home screen, select Radar > Radar Overlay.<br />
Radar range<br />
The radar picture appears in orange and overlays the Navigation chart. Use the RANGE (+/-) keys<br />
to zoom in and out. Zooming while panning the map only affects the zoom scale of the map. The<br />
radar range remains the same. Zooming while the map is locked on the boat (not panning) affects the<br />
zoom scale of the map and the radar range.<br />
To access additional settings or options for the radar overlay screen, press MENU.<br />
Gain—controls the sensitivity of the radar receiver. See the cruising screen settings on page 40.<br />
Overlay Numbers—shows or hides cruising, navigation, fishing, sailing, or fuel numbers.<br />
Chart Setup—Sets chart options. See page 9.<br />
Radar Setup—Sets radar options.<br />
Radar Setup<br />
To change radar settings, from the Home screen, select Radar > Radar Setup, or press MENU<br />
while viewing the radar cruising screen or radar overlay screen and select Radar Setup.<br />
Orientation—changes the perspective of the radar display:<br />
•<br />
•<br />
•<br />
Heading Up—sets the radar display to the current track heading.<br />
North Up—sets the top of the radar display to a north heading.<br />
Course Up—sets the radar display so the direction of navigation is always up. The heading line<br />
will appear vertically on the screen if it is shown.<br />
Heading Line—shows or hides a line in the direction of travel.<br />
Rings—shows or hides the radar range rings.<br />
Look-Ahd Spd—shifts your current location toward the bottom of the screen as your speed<br />
increases. Enter your expected top speed for best results.<br />
Timed Xmit—sets and customizes a transmit/standby cycle. Define the transmission time<br />
(Xmit Time) and standby time (Stdby Time) in minutes.<br />
42 <strong>GPSMAP</strong> <strong>4000</strong> <strong>Series</strong> Owner’s <strong>Manual</strong>
Xtalk Reject (Crosstalk)—filters out interference caused by another radar operating in close<br />
proximity.<br />
Advanced—opens a menu of advanced settings:<br />
•<br />
•<br />
•<br />
•<br />
uSInG radar<br />
FTC (fast time constant)— controls unwanted screen clutter caused by rain at a distance. Set to<br />
High, Medium, Low, or Off.<br />
Front of Boat—sets the offset of the front of the boat if you mount the radar at an angle.<br />
Antenna Size (GMR 404/406 only)—selects the size of your antenna. Select 4 Foot if you have<br />
a GMR 404; select 6 foot if you have a GMR 406.<br />
Motor Speed (GMR 404/406 only)—sets the motor speed of your GMR 404/406 radar to<br />
Medium Speed or High Speed. High Speed increases the speed at which the antenna rotates,<br />
which increases the speed at which the screen updates.<br />
<strong>GPSMAP</strong> <strong>4000</strong> <strong>Series</strong> Owner’s <strong>Manual</strong> 4<br />
radar<br />
USinG
USinG<br />
Sonar<br />
uSInG Sonar<br />
Using Sonar<br />
When connected to an optional <strong>Garmin</strong> GSD 22 sounder and a transducer, your chartplotter can be<br />
used as a fishfinder. The sounder module connects through the <strong>Garmin</strong> Marine Network and shares<br />
sonar data with every chartplotter connected to the network.<br />
Understanding the Full Screen<br />
From the Home screen, select Sonar > Full Screen to view a full-screen graph of the transducer’s<br />
sonar readings. The range scale along the right side of the screen shows the depth of detected objects<br />
as the screen scrolls from the right to the left.<br />
From the Home screen, select Sonar > Full Screen.<br />
Depth, temperature,<br />
and water speed<br />
Suspended<br />
target<br />
Bottom<br />
GPS speed and<br />
GPS heading<br />
Transducer<br />
frequency<br />
Range<br />
Understanding the Split Zoom Screen<br />
Use the Split Zoom screen to view the full sonar data from the graph and a zoomed in portion on the<br />
same screen.<br />
From the Home screen, select Sonar > Split Zoom.<br />
Depth, temperature,<br />
and water speed<br />
Zoomed depth<br />
scale<br />
GPS speed and<br />
GPS heading<br />
Zoom level<br />
Transducer frequency<br />
Zoom<br />
window<br />
Range<br />
44 <strong>GPSMAP</strong> <strong>4000</strong> <strong>Series</strong> Owner’s <strong>Manual</strong>
uSInG Sonar<br />
Understanding the Split Frequency Screen<br />
Use the Split Frequency screen (dual frequency transducer only) to view both the 50kHz and<br />
200kHz frequencies on the same screen. A 200kHz frequency graph appears on the left; a 50kHz<br />
frequency graph appears on the right.<br />
From the Home screen, select Sonar > Split Frequency.<br />
Depth, temperature,<br />
and water speed<br />
GPS speed and<br />
GPS heading<br />
Transducer<br />
frequencies<br />
Range<br />
Understanding the Temp Log<br />
If you are using a temperature-capable transducer, the Temp Log screen keeps a graphic log of<br />
temperature readings over time. The current temperature and depth are shown in the top-left corner.<br />
From the Home screen, select Sonar > Temp Log.<br />
Temperature<br />
and depth<br />
Time<br />
elapsed<br />
Temperature<br />
Range<br />
The temperature appears along the right side and the time elapsed appears along the bottom. The<br />
graph scrolls to the left as information is received.<br />
Press MENU to access scale settings. Select Duration to set the time elapsed scale. Select Scale to<br />
set the temperature range scale.<br />
<strong>GPSMAP</strong> <strong>4000</strong> <strong>Series</strong> Owner’s <strong>Manual</strong> 4<br />
Sonar<br />
USinG
USinG<br />
Sonar<br />
uSInG Sonar<br />
Setting Up Sonar<br />
Use the Sonar Setup screen to define and adjust settings universal to all sonar screens.<br />
From the Home screen, select Sonar > Sonar Setup.<br />
Color Scheme—choose white (black, if using night mode colors) or blue. This affects the<br />
background on all sonar screens, but does not change the Temp Log screen.<br />
Fish Symbols—sets how the sonar interprets suspended targets.<br />
The unit does not interpret the sonar return data (default).<br />
Suspended targets appear as symbols. Background sonar information appears, making the<br />
distinction between fish and structure easier.<br />
Suspended targets appear as symbols with background information shown. The target<br />
depth of each symbol is also indicated.<br />
Suspended targets appear as symbols. No background information appears.<br />
Suspended targets appear as symbols with no background information shown. The target<br />
depth of each symbol is indicated.<br />
Scroll Speed—adjusts the rate at which the sonar scrolls from right to left (Ultrascroll, Fast,<br />
Medium, or Slow). If you are using a speed-capable transducer, select Auto to have the scroll speed<br />
automatically adjust to the water speed of your boat.<br />
Surface Noise—shows or hides the sonar returns near the surface of the water. Hide surface noise to<br />
help reduce clutter.<br />
Whiteline—highlights the strongest signal from the bottom to help identify its hardness or softness.<br />
•<br />
•<br />
•<br />
•<br />
Off—(default) Whiteline is disabled.<br />
High—the most sensitive setting. Almost all strong returns are highlighted in white.<br />
Medium—many strong returns are highlighted in white.<br />
Low—the least sensitive setting. Only the strongest returns are highlighted in white.<br />
Overlay Numbers—shows or hides water temperature, water speed (if your transducer is capable),<br />
and navigation. If Auto is selected and the transducer is capable, the data is shown.<br />
Advanced Sonar Settings<br />
To adjust advanced sonar settings, press MENU while viewing a sonar screen.<br />
Range—adjusts the range of the depth scale on the right side of the screen. Select Auto or, to adjust<br />
manually, Up or Down.<br />
Gain—controls the sensitivity of the sonar receiver. Select Auto or, to adjust manually, select Up or<br />
Down. To see more detail, increase the gain. If the screen is cluttered, decrease the gain.<br />
Frequency—selects how the frequencies appear on screen (200kHz, 50kHz, or Dual) when using a<br />
dual frequency transducer.<br />
Zoom—zooms in to a section of the Full screen. The zoom is off (No Zoom) by default. Three other<br />
options are available:<br />
•<br />
2x Zoom—twice the magnification. Select Up, Down, or Auto to set the depth range of the<br />
4 <strong>GPSMAP</strong> <strong>4000</strong> <strong>Series</strong> Owner’s <strong>Manual</strong>
•<br />
•<br />
magnified area.<br />
uSInG Sonar<br />
4x Zoom—four times the magnification. Select Up, Down, or Auto to set the depth range of the<br />
magnified area.<br />
Bottom Lock—locks the zoom window to the bottom. Select Up, Down, or Auto to set the<br />
depth range of the magnified area.<br />
Depth Line—quickly reference a specific depth (On or Off). When On is selected, press up or<br />
down on the ROCKER to set the depth of the reference line.<br />
A-Scope—creates a vertical flasher along the right side of the screen (On or Off).<br />
Sonar Setup—opens the Sonar Setup screen. See page 46.<br />
<strong>GPSMAP</strong> <strong>4000</strong> <strong>Series</strong> Owner’s <strong>Manual</strong> 4<br />
Sonar<br />
USinG
USinG Xm<br />
uSInG Xm<br />
Using XM WX Weather and Audio<br />
In order to use XM Weather, you must have a <strong>Garmin</strong> GDL 30 or 30A XM receiver and an activated<br />
XM weather subscription. To use XM Audio, you must have the <strong>Garmin</strong> GDL 30A XM receiver<br />
and an XM Audio subscription. To connect the XM antenna and receiver and for subscription<br />
instructions, refer to the GDL 30/30A Marine Weather Satellite Receiver Installation Instructions.<br />
If you do not have a receiver and a subscription to XM WX Weather, the weather features described<br />
in this section work only when the unit is in Simulator Mode.<br />
Using XM WX Weather<br />
The GDL 30/30A receives XM WX Weather data and shows it on your unit’s Navigation chart and<br />
other screens throughout the unit. The weather data for each feature comes from reputable weather<br />
data centers such as the National Weather Service and the Hydrometerological Prediction Center.<br />
(See the XM WX Satellite Weather Web site at http://weather.xmradio.com/weather for more<br />
information.)<br />
NOTE: Any weather feature can change in appearance or interpretation if the source that provides the<br />
information changes.<br />
XM WX Weather data is broadcast at set rates. For example, NEXRAD (NEXt Generation Weather<br />
RADar) data is broadcast at five minute intervals. When the <strong>Garmin</strong> unit is turned on or when a new<br />
feature is selected, the GDL 30/30A has to receive new data before it can be shown.<br />
NOTE: You might experience a delay before weather data or a new feature appears on the map.<br />
Setting the XM WX Weather Options<br />
To configure the weather settings from the Home screen, select Weather > Weather Setup. From<br />
this menu, you can turn the NEXRAD Loop on or off and hide or show the weather Legend.<br />
Viewing Precipitation Information<br />
Precipitation shows NEXRAD radar, storm cells, lighting strikes, and hurricane warnings. To view<br />
precipitation from the Home screen, select Weather > Precipitation.<br />
Viewing NEXRAD Radar Information<br />
NEXRAD shows precipitation from very light rain and snow up to strong thunderstorms in varying<br />
shades and colors. On the <strong>GPSMAP</strong> <strong>4000</strong> series unit, you can view NEXRAD information as an<br />
image of the latest update, or as an animated loop of the latest updates. To animate the NEXRAD<br />
loop, from the Home screen, select Weather > Weather Setup > NEXRAD Loop > On.<br />
In the lower-left corner of the screen is a Time Stamp. The Time Stamp displays the elapsed time<br />
since the National Weather Service last updated the information.<br />
4 <strong>GPSMAP</strong> <strong>4000</strong> <strong>Series</strong> Owner’s <strong>Manual</strong>
uSInG Xm<br />
To view the weather legend from the Home screen, select Weather > Weather Setup > Legend ><br />
Show. NEXRAD is shown independently or with a variety of other weather information.<br />
To turn cloud cover on or off, select Menu > Cloud Cover > Hide or Show.<br />
Understanding Storm Cell Information<br />
The storm cells show storms as well as the storm’s projected path in the immediate future.<br />
The direction of the red cone indicates the projected path of the storm cell. The red bars that appear<br />
in the cone indicate where the storm will most likely be in the future. Each bar represents 15<br />
minutes.<br />
Understanding Lightning Information<br />
Lightning strikes are represented by lightning bolt icons. Lightning appears on the map if strikes<br />
were detected within the last seven minutes. The ground-based lightning detection network only<br />
detects cloud-to-ground lightning.<br />
<strong>GPSMAP</strong> <strong>4000</strong> <strong>Series</strong> Owner’s <strong>Manual</strong> 4<br />
USinG Xm
USinG Xm<br />
uSInG Xm<br />
Understanding Hurricane Information<br />
The Hurricanes feature shows the current position of a hurricane, tropical storm, or tropical<br />
depression, as well as its projected path (indicated by a red line). The darkened dots that appear<br />
along the red line display the projected locations received from the National Hurricane Center. The<br />
center provides four forecasts at 12-hour intervals (12 Hrs, 24 Hrs, 36 Hrs, and 48 Hrs), as well as<br />
the current conditions (Now).<br />
Understanding Marine Warnings<br />
When a Marine Warning is issued, the area for the warning is highlighted in red. To view<br />
information about the warning, select the warning area. The light blue lines on the chart indicate<br />
marine weather warning zones.<br />
0 <strong>GPSMAP</strong> <strong>4000</strong> <strong>Series</strong> Owner’s <strong>Manual</strong>
<strong>GPSMAP</strong> <strong>4000</strong> <strong>Series</strong> Owner’s <strong>Manual</strong><br />
uSInG Xm<br />
Understanding County Warnings<br />
When the National Weather Service issues a weather warning for a county, the county is highlighted<br />
with the color corresponding to the warning. To view information about the warning, select the<br />
county.<br />
Tornado Warning<br />
Severe Thunderstorm Warning<br />
Flood Warning<br />
Flash Flood Warning<br />
Viewing Forecast Information<br />
Forecasts show the weather conditions including fronts and precipitation. To view the forecast for<br />
another time period, select Next Forecast. The forecasted weather for the next 12 hours is shown.<br />
Continue to select Next Forecast to view forecasts for the next 24, 36, and 48 hours. To view<br />
forecast information for another location, press the ROCKER and use the map pointer ( ) until<br />
the desired location appears.<br />
Understanding Fronts<br />
The Fronts show lines indicating the leading edge of an air mass. This feature also shows pressure<br />
centers. Pressure centers are represented by a large Red “L” for low pressure centers or a large Blue<br />
“H” for high pressure centers. Pressure centers represent an area where pressure is measured to be<br />
either the highest or lowest relative to the surrounding area.<br />
Cold Front<br />
Warm Front<br />
Stationary Front<br />
Occluded Front<br />
Trough<br />
Indicates a Low Pressure Center. A Low Pressure Center is an area where the measured<br />
pressure is lowest relative to the surrounding area. Moving away from a Low<br />
Pressure Center in any horizontal direction results in increased pressure. Winds flow<br />
counterclockwise around Low Pressure Centers in North America.<br />
Indicates a High Pressure Center. A High Pressure Center is an area where the measured<br />
pressure is highest relative to the surrounding area. Moving away from a High Pressure<br />
Center in any horizontal direction results in decreased pressure. Winds flow clockwise<br />
around High Pressure Centers in North America.<br />
USinG Xm
USinG Xm<br />
uSInG Xm<br />
Understanding City Forecasts<br />
City forecasts appear as standard weather symbols. The forecast is viewed in 12-hour increments for<br />
the next 48 hours.<br />
Viewing Sea Conditions<br />
Sea Conditions provide surface conditions including winds, wave height, wave period, and wave<br />
direction.<br />
Understanding Surface Winds<br />
Wind barbs indicate from which direction the wind is coming. The wind barb is a circle with a tail.<br />
Wind speed is indicated by the different combination of flags that are attached to the tail.<br />
Calm<br />
5 knots<br />
10 knots<br />
Wind Direction<br />
15 knots<br />
20 knots<br />
50 knots<br />
Understanding Wave Height<br />
The Wave Height feature shows wave heights. The wave heights for an area are shown in color<br />
intensities.<br />
Understanding Wave Period<br />
The Wave Period feature provides the time (in seconds) between successive waves.<br />
2 <strong>GPSMAP</strong> <strong>4000</strong> <strong>Series</strong> Owner’s <strong>Manual</strong>
Understanding Wave Direction<br />
The Wave Direction feature shows the direction in which a wave is moving, as indicated by the<br />
direction of the red arrow.<br />
Viewing Fishing Information<br />
The Fishing view contains current water temperature, surface pressure conditions, and fishing<br />
forecasts.<br />
<strong>GPSMAP</strong> <strong>4000</strong> <strong>Series</strong> Owner’s <strong>Manual</strong><br />
uSInG Xm<br />
Understanding Surface Pressure<br />
This feature shows pressure isobars and pressure centers. The isobars connect points of equal<br />
pressure. Pressure readings can help determine weather and wind conditions in an area. High<br />
pressure areas are generally associated with fair weather. Low pressure areas are generally associated<br />
with clouds and the chance of precipitation. Isobars packed closely together show a strong pressure<br />
gradient. Strong pressure gradients are associated with areas of stronger winds.<br />
Pressure units are shown in Millibars (mb), Inches of Mercury (in), and Hectopascals (hPa).<br />
Understanding Water Temperature Data<br />
The Water Temperature feature indicates the water’s surface temperature, as indicated by the legend<br />
on the left of the screen. The temperature breaks are indicated by isotherm lines.<br />
USinG Xm
USinG Xm<br />
uSInG Xm<br />
Viewing Fish Forecasting<br />
To view areas that contain optimal weather conditions for specific species of fish, from the Home<br />
screen select Weather > Fishing > Menu > Fish Species. Select a species of fish. Shaded areas<br />
indicate optimal fishing areas.<br />
Viewing Visibility Information<br />
To view visibility information from the Home screen select Weather > Visibility. Visibility is the<br />
forecast maximum horizontal distance that can be seen at the surface, as indicated by the legend<br />
on the left of the screen. Contour lines on the Visibility feature show the forecasted change in<br />
surface visibility. To view the forecasted visibility for another time period, select Next Forecast.<br />
The forecasted visibility for the next 12 hours is shown. Continue to select Next Forecast to view<br />
forecasts for the next 24 and 36 hours.<br />
Viewing Buoy Reports<br />
Report readings are taken from buoys and coastal observation stations. These readings are used<br />
to determine air temperature, dew point, water temperature, tide, wave height and period, wind<br />
direction and speed, visibility, and barometric pressure.<br />
4 <strong>GPSMAP</strong> <strong>4000</strong> <strong>Series</strong> Owner’s <strong>Manual</strong>
To view a buoy report, select a buoy on the screen. Select Buoy.<br />
<strong>GPSMAP</strong> <strong>4000</strong> <strong>Series</strong> Owner’s <strong>Manual</strong><br />
uSInG Xm<br />
Using XM Audio<br />
When a GDL 30A is connected to the <strong>Garmin</strong> Marine Network and to the audio input of your boat,<br />
you can listen to XM Audio channels.<br />
To display the XM Audio interface while navigating:<br />
From the Navigation screen, select Menu > Overlay Numbers > XM Audio > Auto.<br />
USinG Xm
USinG Xm<br />
uSInG Xm<br />
To use the XM Audio Guide:<br />
While the XM audio interface is displayed on the Navigation chart, press the bottom soft key.<br />
Channel Guide—selects the specific XM channel within the currently selected category.<br />
Channel Entry—allows you to enter a channel using the screen keyboard.<br />
Save Preset—saves the current XM channel in the Presets list. Press Delete Preset to remove the<br />
current channel from the list. Presets is displayed as a category in the category list.<br />
Category—selects the category of channels that are displayed in the Channel Guide.<br />
Mute—silences the audio.<br />
<strong>GPSMAP</strong> <strong>4000</strong> <strong>Series</strong> Owner’s <strong>Manual</strong>
<strong>GPSMAP</strong> <strong>4000</strong> <strong>Series</strong> Owner’s <strong>Manual</strong><br />
Appendix<br />
Specifications<br />
Physical Specifications<br />
Size: <strong>GPSMAP</strong> 4208: 7 in. H × 11¼ in. W × 4⅛ in. D (176.9 × 284.4 × 106 mm)<br />
<strong>GPSMAP</strong> 4210: 8⅞ in. H × 13⅜ in. W × 4⅛ in. D (226.9 × 340.4 × 105.1 mm)<br />
<strong>GPSMAP</strong> 4212: 9½ in. H × 14¾ in. W × 4⅛ in. D (240.5 × 375 × 105.1 mm)<br />
Weight: <strong>GPSMAP</strong> 4208: 5 lb., 15 oz. (2.7 kg)<br />
<strong>GPSMAP</strong> 4210: 7 lb., 11 oz. (3.5 kg)<br />
<strong>GPSMAP</strong> 4212: 9 lb., 15 oz. (4.5 kg)<br />
Display: <strong>GPSMAP</strong> 4208: 5⅛ in. H × 6⅞ in. W (131.4 × 174 mm)<br />
<strong>GPSMAP</strong> 4210: 6⅜ in. H × 8⅜ in. W (161.4 × 214.2 mm)<br />
<strong>GPSMAP</strong> 4212: 7¼ in. H × 9⅝ in. W (184.3 × 245.8 mm)<br />
Case: Fully Gasketed, high-impact plastic and aluminum alloy, waterproof to IEC 529-IPX-7<br />
Temp. Range: 5° to 131°F (-15° to 55°C)<br />
Compass Safe Distance: <strong>GPSMAP</strong> 4208: 31½ in. (800 mm)<br />
<strong>GPSMAP</strong> 4210/4212: 39⅜ in. (1 m)<br />
GPS Performance<br />
Receiver: Differential-ready 12 parallel channel WAAS-capable receiver<br />
Acquisition Times:<br />
Warm: 15 seconds<br />
Cold: 45 seconds<br />
AutoLocate: 2 minutes<br />
Update Rate: 1/second, continuous<br />
GPS Accuracy:<br />
Position:
appendiX<br />
appendIX<br />
Initializing Unit Settings<br />
The first time you turn your unit on, you must configure a series of initial settings. These settings<br />
must also be configured when restoring factory settings (page 3).<br />
NOTE: All of these settings can be configured later from the Configure screen.<br />
The initial settings are as follows:<br />
•<br />
•<br />
•<br />
•<br />
•<br />
•<br />
•<br />
•<br />
Language—select the language that will be shown on your screen.<br />
Welcome—select OK.<br />
Position Format—Specify the coordinate system to use for location readings.<br />
Time Format—Specify whether you want the time displayed in a 12-hour, 24-hour, or UTC<br />
(Universal Time Code) format.<br />
Time Zone—Select your time zone.<br />
Units—Specify units for onscreen measurements as Statute, Metric, or Nautical.<br />
Minimum Safe Depth—Specify the minimum safe depth for your boat. Refer to your boat<br />
specifications for more information.<br />
Minimum Overhead Clearance— Specify the minimum overhead clearance for your boat.<br />
Refer to your boat specifications for more information.<br />
NMEA 0183 and NMEA 2000<br />
A <strong>GPSMAP</strong> <strong>4000</strong> series chartplotter can accept data from both NMEA 0183 compliant devices and<br />
certain NMEA 2000 devices connected to an existing NMEA 2000 network on your boat.<br />
NMEA 0183<br />
The NMEA 0183 data cable included with <strong>GPSMAP</strong> <strong>4000</strong> series chartplotters supports the NMEA<br />
0183 standard, which is used to wire various NMEA 0183-compliant devices, such as VHF radios,<br />
NMEA instruments, autopilots, wind sensors, and heading sensors.<br />
The <strong>GPSMAP</strong> <strong>4000</strong> series chartplotter can receive data from up to four NMEA 0183-compliant<br />
devices and send GPS data to up to six NMEA 0183-compliant devices.<br />
To wire the <strong>GPSMAP</strong> <strong>4000</strong> series unit to optional NMEA 0183-compliant devices, see the <strong>GPSMAP</strong><br />
<strong>4000</strong>/5000 <strong>Series</strong> Installation Instructions.<br />
<strong>GPSMAP</strong> <strong>4000</strong> <strong>Series</strong> Owner’s <strong>Manual</strong>
Approved NMEA 0183 sentences:<br />
GPBWC, GPRMC, GPGGA, GPGSA, GPGSV, GPGLL, GPBOD, GPRMB, GPRTE, GPVTG,<br />
GPWPL, GPXTE, and <strong>Garmin</strong> proprietary sentences PGRME, PGRMM, and PGRMZ.<br />
This unit also includes support for the WPL sentence, DSC, and sonar NMEA 0183 input with<br />
support for the DPT (depth) or DBT, MTW (water temp), and VHW (water temp, speed, and<br />
heading) sentences.<br />
NOTE: To configure how the unit sees these NMEA 0183 sentences, see page 32.<br />
<strong>GPSMAP</strong> <strong>4000</strong> <strong>Series</strong> Owner’s <strong>Manual</strong><br />
appendIX<br />
NMEA 2000<br />
<strong>GPSMAP</strong> <strong>4000</strong> series chartplotters are NMEA 2000 certified, and can receive data from a NMEA<br />
2000 network installed on the boat to show specific information on the Information screen, such as<br />
depth, speed, water temperature, wind speed/direction, and engine data.<br />
To connect a <strong>GPSMAP</strong> <strong>4000</strong> series chartplotter to an existing NMEA 2000 network and to see<br />
a list of supported NMEA 2000 PGN numbers, see the <strong>GPSMAP</strong> <strong>4000</strong>/5000 <strong>Series</strong> Installation<br />
Instructions.<br />
All <strong>GPSMAP</strong> <strong>4000</strong> series units are NMEA 2000 certified.<br />
appendiX
appendiX<br />
appendIX<br />
Messages and Alarms<br />
AIS: Dangerous Target—an AIS target currently presents a collision threat.<br />
Alarm Clock— the alarm clock alarm has sounded.<br />
Anchor Drag Alarm—boat has drifted out of the user-set distance range.<br />
Antenna Input is Shorted —there is a short in the wiring to the GPS 17 antenna.<br />
Approaching Waypoint —boat is a specified alarm distance from the destination waypoint.<br />
Arrival Alarm —arriving at destination waypoint.<br />
Auto-guidance unable to calculate route—(BlueChart g2 Vision) auto-guidance cannot calculate<br />
the route.<br />
Auto-guidance unable to calculate route. Ending position not within safe depth—<br />
(BlueChart g2 Vision) auto-guidance cannot calculate the route; choose an end point within the<br />
specified safe depth.<br />
Auto-guidance unable to calculate route. Starting position not within safe depth—<br />
(BlueChart g2 Vision) auto-guidance cannot calculate the route; travel to water within the specified<br />
safe depth.<br />
Auto-guidance unable to calculate route, please shorten route—(BlueChart g2 Vision) autoguidance<br />
cannot calculate the route, choose closer end point.<br />
Battery Alarm—user-set battery alarm has sounded.<br />
Boat is not Moving Fast Enough to Calibrate—(speed sensor) appears during water speed<br />
calibration. Check speed wheel for blockage and calibrate again. If wheel is clear, calibrate again<br />
and increase speed.<br />
Can’t Read User Card—cannot read card when attempting a user data transfer.<br />
Can’t Read Voltages That High, Limited To Top Of Range—entering a battery alarm voltage<br />
higher than the unit can read.<br />
Can’t Read Voltages That Low, Limited To Bottom Of Range—entering a battery alarm voltage<br />
lower than the unit can read.<br />
Can’t Unlock Maps—maps are locked and cannot be used on this unit.<br />
Can’t Write User Card— cannot write card when attempting a user data transfer.<br />
Cartography Service Incompatible. Software Update Required—a software update is needed.<br />
Contact product support for assistance updating your unit software.<br />
Check XM Antenna—XM antenna not connected. Check connectivity.<br />
Cooling Fan Voltage Too High—the unit’s cooling fan voltage is higher than expected. Contact<br />
product support.<br />
Cooling Fan Voltage Too Low—the unit’s cooling fan voltage is lower than expected. Contact<br />
product support.<br />
Database Error—general database error. Contact product support.<br />
Deep Water Alarm—(sonar) boat has entered user-defined value for deep water.<br />
Directory Item With This MMSI Already Exists—MMSI unit already in directory.<br />
0 <strong>GPSMAP</strong> <strong>4000</strong> <strong>Series</strong> Owner’s <strong>Manual</strong>
Directory Memory is Full Can’t Create Entry—DSC directory is full, no more entries can be<br />
created.<br />
Distress Call Received from —distress call has been received by the DSC module.<br />
Drift Alarm—boat has moved a user-defined distance.<br />
MARPA: Dangerous Target—(radar) a MARPA target has become dangerous.<br />
<strong>GPSMAP</strong> <strong>4000</strong> <strong>Series</strong> Owner’s <strong>Manual</strong><br />
appendIX<br />
DSC Position Report Received From —a position report has been received by the DSC<br />
module.<br />
Entering Target Water Temperature—(temperature sensor/transducer) the water temperature is<br />
inside the user-defined target temperature zone.<br />
Flash Flood Warning Alarm—(XM WX weather) there is a flash flood warning in effect.<br />
Flood Warning Alarm—(XM WX weather) there is a flood warning effective.<br />
GPS Accuracy Alarm—the GPS accuracy has fallen outside the user-set value.<br />
GPS Antenna Has Lost Its Stored Settings—The GPS antenna’s memory has been cleared<br />
somehow. Contact product support.<br />
GPS Service Incompatible. Software Update Required—a GPS service software update is<br />
needed. Contact product support for assistance updating your unit software.<br />
GPS Service Lost—the unit has lost communications with the remote GPS unit. Check the network<br />
and the antenna wiring.<br />
Incompatible Device, Software Update Required—an incompatible device is attached that<br />
requires a software update. Contact product support for assistance updating your network.<br />
Invalid Date—an invalid date was entered.<br />
Invalid Device Instance. Enter a number between (0 - 252)—invalid NMEA 2000 Device<br />
instance.<br />
Invalid Entry. Default value selected.—an invalid entry was entered.<br />
Invalid MMSI—an invalid DSC MMSI was entered.<br />
Invalid System Instance. Enter a number between (0 - 15)—invalid NMEA 2000 System<br />
instance.<br />
Leaving Target Water Temperature—(temperature sensor/transducer) the water temperature is<br />
outside the user-defined target temperature zone.<br />
Lost Heading Sensor Connection— (radar/NMEA) the unit has lost communications with the<br />
heading sensor. Check wiring.<br />
Lost Remote GPS Connection—lost connection to the remote GPS. Check the network and the<br />
antenna wiring.<br />
Lost Satellite Reception—the unit has lost satellite reception. Make sure you have a clear view of<br />
the sky.<br />
Low Fuel Alarm—(NMEA 2000) low fuel reported by the NMEA 2000 network.<br />
Map Format Is Not Supported—a map format on a preprogrammed SD card is not supported.<br />
Marine Weather Warning—(XM WX weather) there is a weather warning in effect.<br />
appendiX
appendiX<br />
appendIX<br />
MARPA: Target Lost—(radar) unable to track a marpa target any longer.<br />
MDB Waypoint Memory is Full, Can’t Create Waypoint—MDB waypoint memory is full. Erase<br />
existing MDB waypoints to make room.<br />
NMEA Depth Is Below Transducer—(sonar) the NMEA depth input is using the DBT sentence<br />
which does not include keel offset.<br />
No DGPS Position—unit lost differential GPS reception (WAAS). Make sure you have a clear view<br />
of the sky.<br />
No Proximity Waypoints Found—no proximity waypoints found while attempting a user data<br />
transfer.<br />
No Routes Found—no routes found while attempting a user data transfer.<br />
No Tracks Found—no tracks found while attempting a user data transfer.<br />
No User Waypoints Found—no user waypoints found while attempting a user data transfer.<br />
No XM Signal—(XM WX weather) no XM satellite signal detected. Make sure you have a clear<br />
view of the sky.<br />
Not All Maps Fit, Some Maps Will Not Be Drawn—there are more maps present on the SD card<br />
than what the unit can support. Some of the maps on the card will not be drawn or used to find map<br />
features.<br />
Off Course Alarm—the boat has left the user-defined course.<br />
Proximity Alarm—the boat has come close to a user-defined proximity point.<br />
Proximity Alarm Memory is Full—the proximity waypoint memory is full. Erase existing<br />
proximity waypoints to make room.<br />
Proximity Overlaps Another Proximity Waypoint—a proximity point is overlapping another<br />
proximity waypoint.<br />
Radar Guard Zone Alarm—(radar) an object has been detected in the user-defined radar guard<br />
zone.<br />
Radar Needs Repair Error Code—(radar) the radar needs repair. An error code will be listed to<br />
help diagnose the error.<br />
Radar Service Incompatible. Software Update Required—a radar software update is needed.<br />
Contact product support for assistance updating your network.<br />
Radar Service Lost—(radar) the unit has lost communications with the remote radar unit. Check<br />
the network and the radar wiring.<br />
Route Already Exists—the named route already exists. Choose another name.<br />
Route is Full—the individual route is full, no more waypoints can be added.<br />
Route Memory is Full, Can’t Create Route—the unit’s Route memory as a whole is full, no more<br />
routes can be created. Erase existing routes to make room.<br />
Route Truncated—some points on the end of the route have been discarded.<br />
Severe Storm Warning—(XM WX weather) there is a severe storm warning in effect.<br />
Shallow Water Alarm—(sonar) the boat has entered the user-defined shallow water depth.<br />
2 <strong>GPSMAP</strong> <strong>4000</strong> <strong>Series</strong> Owner’s <strong>Manual</strong>
Simulating Operation—the unit is in simulator mode.<br />
<strong>GPSMAP</strong> <strong>4000</strong> <strong>Series</strong> Owner’s <strong>Manual</strong><br />
appendIX<br />
Sonar Failed, Unit Needs Repair—there has been a sonar failure and the unit needs to be sent in<br />
for repair. Contact product support.<br />
Sonar Service Incompatible. Software Update Required—a software update is needed. Contact<br />
product support for assistance updating your network.<br />
Sonar Service Lost—(sonar) the unit has lost communications with the remote sonar unit. Check<br />
the network and the sonar wiring.<br />
Tide Alarm—tide has reached user-specified tide alarm range.<br />
Tornado Warning Alarm—(XM WX weather) a tornado warning is in effect.<br />
Track Already Exists—the named track already exists. Choose another name.<br />
Track Log Full—there is no longer any space in the active track log storage.<br />
Track Memory is Full, Can’t Create Track—the saved track memory is full.<br />
Track Truncated—some points on the end of the track have been discarded.<br />
Transducer Disconnected, Sonar Turned Off—the transducer has been disconnected. Sonar has<br />
been turned off. Check transducer wiring.<br />
Transfer Complete—user data transfer is complete.<br />
Unknown bridge height within calculated auto-guidance route—(BlueChart g2 Vision) there is<br />
an unknown bridge height within auto-guidance route.<br />
User Card Not Found—user data card transfer. Make sure an SD card is fully inserted.<br />
Warning: Auto-guidance route starting position moved due to safe depth settings—<br />
(BlueChart g2 Vision) auto-guidance has calculated the route, but the starting point has been moved<br />
to deeper water.<br />
Warning: Auto-guidance route ending position moved due to safe depth settings—<br />
(BlueChart g2 Vision) auto-guidance has calculated the route, but the end point has been moved to<br />
deeper water.<br />
Water Speed Sensor is not Working—the water speed sensor is not working properly. Check the<br />
wheel for obstructions and check wiring.<br />
Water Temperature Alarm—(temperature sensor/transducer) the water temperature has entered or<br />
left the user-defined water temperature alarm zone.<br />
Waypoint Already Exists—the named waypoint already exists. Choose another name.<br />
Waypoint Memory is Full, Can’t Create Waypoint—the User Waypoint memory is full. Erase<br />
existing waypoints to make room.<br />
Weather Service Incompatible. Software Update Required—an XM WX weather software<br />
update is needed. Contact product support for assistance updating your network.<br />
Weather Service Lost—(XM WX weather) the weather service is no longer communicating. Make<br />
sure you have a strong XM signal. Check the network and the XM wiring.<br />
XM Service Incompatible. Software Update Required—an XM service software update is<br />
needed. Contact product support for assistance updating your network.<br />
appendiX
appendiX<br />
appendIX<br />
Product Registration<br />
Help us better support you by completing our online registration today! Connect to our Web site at<br />
http://my.garmin.com. Keep the original sales receipt, or a photocopy, in a safe place.<br />
Contact <strong>Garmin</strong><br />
Contact <strong>Garmin</strong> if you have any questions while using your chartplotter. In the USA contact <strong>Garmin</strong><br />
Product Support by phone: (913) 397-8200 or (800) 800-1020, or go to www.garmin.com/support/.<br />
In Europe, contact <strong>Garmin</strong> (Europe) Ltd. at +44 (0) 870.8501241 (outside the UK) or 0808 2380000<br />
(within the UK)<br />
Declaration of Conformity (DoC)<br />
Hereby, <strong>Garmin</strong>, declares that this unit is in compliance with the essential requirements and other<br />
relevant provisions of Directive 1999/5/EC.<br />
To view the full Declaration of Conformity, see the <strong>Garmin</strong> Web site for your <strong>Garmin</strong><br />
product: www.garmin.com/products/. Click <strong>Manual</strong>s, and then select the Declaration<br />
of Conformity link.<br />
Weather Data Warranty<br />
THE WEATHER DATA SOFTWARE PRODUCT IS PROVIDED “AS IS.” ALL OTHER WARRANTIES, EXPRESSED<br />
OR IMPLIED, INCLUDING ANY WARRANTY OF MERCHANTABILITY OR FITNESS FOR A PARTICULAR<br />
PURPOSE OR OF NON-INFRINGEMENT ARE HEREBY EXCLUDED.<br />
User Safety<br />
If you use XM Services it is your responsibility to exercise prudent discretion and observe all safety measures required<br />
by law and your own common sense. You assume the entire risk related to your use of the Services. XM and <strong>Garmin</strong><br />
assume no responsibility for accidents resulting from or associated with use of the Services. Your Radio Service includes<br />
traffic and weather information, and you acknowledge that such information is not for “safety for life”, but is merely<br />
supplemental and advisory in nature, and therefore cannot be relied upon as safety-critical in connection with any aircraft,<br />
sea craft or automobile usage. This information is provided “as is” and XM and <strong>Garmin</strong> disclaim any and all warranties,<br />
express and implied, with respect thereto or the transmission or reception thereof. XM and <strong>Garmin</strong> further do not warrant<br />
the accuracy, reliability, completeness or timeliness of the traffic and weather information disclosed on the Radio Service.<br />
In no event will XM and <strong>Garmin</strong>, their data suppliers, service providers, marketing/distribution, software or Internet<br />
partners or hardware manufacturers be liable to you or to any third party for any direct, indirect, incidental, consequential,<br />
special, exemplary or punitive damages or lost profits resulting from use of or interruptions in the transmission or reception<br />
of the Services.<br />
LIMITS ON OUR RESPONSIBILITY<br />
a) DISCLAIMERS.<br />
EXCEPT AS EXPRESSLY PROVIDED HEREIN, WE MAKE NO WARRANTY OR REPRESENTATION, EITHER<br />
EXPRESS OR IMPLIED, REGARDING THE RADIO SERVICE. YOUR USE OF THE SERVICE IS AT YOUR SOLE<br />
RISK. THE CONTENT AND FUNCTIONALITY OF THE SERVICE IS PROVIDED “AS IS” WITHOUT ANY<br />
WARRANTY OF ANY KIND, EXPRESS OR IMPLIED. ALL SUCH WARRANTIES OR REPRESENTATIONS<br />
(INCLUDING, WITHOUT LIMITATION, THE IMPLIED WARRANTIES OF MERCHANTABILITY, FITNESS FOR A<br />
PARTICULAR PURPOSE, TITLE AND NON-INFRINGEMENT) ARE HEREBY DISCLAIMED.<br />
b) LIMITATIONS OF LIABILITY.<br />
WE ARE NOT RESPONSIBLE FOR ANY SPECIAL, INCIDENTAL, OR CONSEQUENTIAL DAMAGES OR LOSSES<br />
RELATING TO THE USE OF THE RADIO SERVICE, WHETHER BASED ON NEGLIGENCE OR OTHERWISE.<br />
OUR TOTAL LIABILITY TO YOU AND ANY OTHER PERSONS RECEIVING OUR SERVICES, REGARDLESS<br />
OF THE CAUSE, WILL IN NO EVENT EXCEED THE AMOUNTS THAT YOU HAVE PAID TO US FOR THE<br />
SERVICE THAT YOU RECEIVED DURING THE SIX (6) MONTH PERIOD IMMEDIATELY PRIOR TO THE<br />
SPECIFIC EVENT THAT GAVE RISE TO THE APPLICABLE DAMAGE OR LOSS. THIS ALLOCATION OF RISK IS<br />
REFLECTED IN OUR PRICES. YOU MAY HAVE GREATER RIGHTS THAN DESCRIBED ABOVE UNDER YOUR<br />
STATE’S LAWS<br />
4 <strong>GPSMAP</strong> <strong>4000</strong> <strong>Series</strong> Owner’s <strong>Manual</strong>
This product was developed using DAFIF , a product of the National Geospatial-Intelligence Agency.<br />
<strong>GPSMAP</strong> <strong>4000</strong> <strong>Series</strong> Owner’s <strong>Manual</strong><br />
appendIX<br />
This product has not been endorsed or otherwise approved by the National Geospatial-Intelligence Agency, or the United<br />
States Department of Defense (10 U.S.C. 425).<br />
a. Under 10 U.S.C. 456, no civil action may be brought against the United States on the basis of the content of a<br />
navigational aid prepared or disseminated by either the former Defense Mapping Agency (DMA), National Imagery and<br />
Mapping Agency (NIMA), or the National Geospatial-Intelligence Agency (NGA).<br />
b. The DAFIF product is provided “as is,” and no warranty, express or implied, including, but not limited to the implied<br />
warranties of merchantability and fitness for particular purpose or arising by statute or otherwise in law or from a course of<br />
dealing or usage in trade, is made by NGA as to the accuracy and functioning of the product.<br />
c. Neither NGA nor its personnel will be liable for any claims, losses, or damages arising from or connected with the use of<br />
this product. The user agrees to hold harmless the United States National Geospatial-Intelligence Agency. The user’s sole<br />
and exclusive remedy is to stop using the DAFIF product.<br />
Software License Agreement<br />
BY USING THE UNIT, YOU AGREE TO BE BOUND BY THE TERMS AND CONDITIONS OF THE FOLLOWING<br />
SOFTWARE LICENSE AGREEMENT. PLEASE READ THIS AGREEMENT CAREFULLY.<br />
<strong>Garmin</strong> grants you a limited license to use the software embedded in this device (the “Software”) in binary executable<br />
form in the normal operation of the product. Title, ownership rights, and intellectual property rights in and to the Software<br />
remain in <strong>Garmin</strong>.<br />
You acknowledge that the Software is the property of <strong>Garmin</strong> and is protected under the United States of America<br />
copyright laws and international copyright treaties. You further acknowledge that the structure, organization, and code of<br />
the Software are valuable trade secrets of <strong>Garmin</strong> and that the Software in source code form remains a valuable trade secret<br />
of <strong>Garmin</strong>. You agree not to decompile, disassemble, modify, reverse assemble, reverse engineer, or reduce to human<br />
readable form the Software or any part thereof or create any derivative works based on the Software. You agree not to<br />
export or re-export the Software to any country in violation of the export control laws of the United States of America.<br />
XM Satellite Radio Service Agreement<br />
XM Satellite Radio Inc.<br />
Hardware and required monthly subscription sold separately. Subscription fee is consumer only. Other fees and taxes,<br />
including a one-time activation fee may apply. All programming fees and weather data subject to change. XM WX weather<br />
data displays and individual product availability vary by hardware equipment. Reception of the XM signal may vary<br />
depending on location. Subscriptions subject to Customer Agreement included with the XM Welcome Kit and available at<br />
xmradio.com. Available only in the 48 contiguous United States. XM WX is a trademark of XM Satellite Radio Inc.<br />
appendiX
IndeX<br />
Index<br />
A<br />
a-scope 47<br />
additional object information 8<br />
aerial photos 12, 16<br />
AIS 28, 35<br />
alarms 33<br />
battery 34<br />
deep water 34<br />
fish 34<br />
messages 60<br />
water temp 34<br />
antenna size 43<br />
auto guidance 12, 34<br />
auto mag var 32<br />
automatic guidance 17<br />
B<br />
backing up data 28<br />
backlight<br />
adjusting 2<br />
backlight sensor 1<br />
beeper 31<br />
BlueChart g2 Vision 12<br />
bottom lock 47<br />
bridging 33<br />
buoy reports 54<br />
C<br />
calibrate water speed 35<br />
caring for the unit 64<br />
category (XM) 36, 56<br />
celestial information 27<br />
channel entry (XM) 36, 56<br />
channel guide (XM) 36, 56<br />
chart data 6<br />
charts 4, 5<br />
additional object information 8<br />
borders 10<br />
fish eye 3D 5, 12<br />
fishing 5, 12<br />
mariner’s eye 5, 12<br />
navigation 5<br />
panning 7<br />
settings 9<br />
using 5<br />
zooming 5<br />
clear user data 28<br />
colors 14<br />
color mode 2<br />
color scheme 46<br />
combinations 4, 18<br />
communications settings 32<br />
configure 4, 31<br />
my boat 34<br />
other boats 35<br />
XM audio 36<br />
course up 10, 42<br />
create waypoint 7<br />
creating routes 24<br />
cruising<br />
chart setting 6<br />
cruising screen (radar) 40<br />
current station 17, 26<br />
D<br />
data<br />
clear user data 28<br />
transfer 27<br />
user 27<br />
declaration of conformity 64<br />
delete all 28<br />
delete a waypoint 24, 28<br />
depth 31<br />
depth line 47<br />
device list 33<br />
directory 29<br />
DSC 28, 35<br />
E<br />
edit a route 25<br />
edit existing waypoint 23<br />
event log 31<br />
F<br />
factory settings 3<br />
fish eye 3D 5, 14<br />
settings 14<br />
fishing<br />
chart setting 6<br />
fishing charts 15<br />
fish symbols 46<br />
front of boat 43<br />
fronts (weather) 51<br />
FTC 43<br />
fuel gauges 30<br />
full screen 44<br />
G<br />
gain<br />
sonar 46<br />
gauges 29<br />
fuel 30<br />
go to 20<br />
GPS satellite signals 2, 31<br />
grid north 32<br />
guard zone 40<br />
guide to 20<br />
H<br />
heading 32, 42<br />
heading line 10<br />
high-resolution satellite imagery 15<br />
high pressure center 51<br />
home screen i, 4<br />
hurricanes 50<br />
I<br />
information 4, 7<br />
AIS 28<br />
DSC 28<br />
information screen 26<br />
other boats 28<br />
initializing the unit 58<br />
inset map 10<br />
isobars 53<br />
K<br />
keel offset 34<br />
L<br />
lane width 9<br />
language 31<br />
limited warranty 65<br />
look-ahd spd 42<br />
low pressure center 51<br />
M<br />
man overboard 23<br />
map datum 32<br />
marine network 37<br />
mariner’s eye 5, 8<br />
settings 9<br />
mariner’s eye 3D 13<br />
colors 14<br />
marine warnings 50<br />
mark current location 23<br />
mark key 1<br />
MARPA 41<br />
menu key 1<br />
messages 60<br />
motor speed 43<br />
move a waypoint 23<br />
mute 56<br />
my boat 34<br />
N<br />
National Weather Service 51<br />
navigate to 7, 20<br />
navigation chart 5<br />
nearby stations 26<br />
network 37<br />
viewing connected devices 38<br />
NEXRAD 48<br />
NMEA<br />
0183 58<br />
2000 59<br />
NMEA 0183 32, 64<br />
NMEA 2000 33, 57<br />
north up 10, 42<br />
numbers 6, 9, 14<br />
numeric keypad 1<br />
O<br />
object information 8<br />
orientation 10, 42<br />
<strong>GPSMAP</strong> <strong>4000</strong> <strong>Series</strong> Owner’s <strong>Manual</strong>
other boats 28, 35<br />
overlay numbers 6, 9, 14, 31, 40,<br />
41, 46<br />
P<br />
panning the navigation chart 7<br />
photos 16<br />
POI data 17<br />
position 32<br />
position icon 7<br />
Power key 1<br />
Precipitation Information 48<br />
precipitation information 48<br />
preferred devices 33<br />
pressure center 51<br />
pressure gradient 53<br />
pressure isobars 53<br />
pressure unit settings 32<br />
product registration 64<br />
R<br />
radar 4, 39<br />
overlay screen 42<br />
setup 41, 42<br />
range 46<br />
Range keys 1<br />
range rings 9<br />
review 7<br />
rings 9, 42<br />
roads 17<br />
Rocker 1<br />
routes<br />
creating 24<br />
deleting all 28<br />
editing 25<br />
route to 20<br />
S<br />
safe depth 9, 14, 34<br />
safe height 34<br />
safety feature 39<br />
safe zone 36<br />
sailing<br />
chart setting 6<br />
satellite signals 2<br />
save preset (XM) 36, 56<br />
scroll speed 46<br />
SD cards<br />
inserting and removing 3<br />
sea conditions 52<br />
search for a destination by name 21<br />
<strong>GPSMAP</strong> <strong>4000</strong> <strong>Series</strong> Owner’s <strong>Manual</strong><br />
settings<br />
alarms 33<br />
chart 9<br />
combinations 19<br />
communications 32<br />
fish eye 3D 14<br />
initializing 58<br />
mariner’s eye 9<br />
mariner’s eye 3D 13<br />
navigation chart 6<br />
radar 41, 42<br />
sonar 46<br />
sonar (advanced) 46<br />
system 31<br />
XM audio 56<br />
XM weather 48<br />
show radar 9<br />
simulator mode 3<br />
soft key i<br />
software license agreement 65<br />
sonar 4, 44<br />
a-scope 47<br />
color scheme 46<br />
depth line 47<br />
fish symbols 46<br />
full screen 44<br />
gain 46<br />
range 46<br />
scroll speed 46<br />
split frequency screen 45<br />
split zoom screen 44<br />
surface noise 46<br />
temp log 45<br />
whiteline 46<br />
sonar cone 14, 35<br />
sonar data 14<br />
specifications 57<br />
speed filter 31<br />
split frequency screen 45<br />
split zoom screen 44<br />
stop navigating 21<br />
storm cell information 49<br />
sun and moon 27<br />
surface noise 46<br />
surface winds 52<br />
system settings 3, 31<br />
T<br />
targeting (radar) 41<br />
temperature 31<br />
temp log 45<br />
tide station 8, 26<br />
time 32<br />
timed xmit 42<br />
time zone 32<br />
tracks 9, 10, 14<br />
deleting all 28<br />
track up 10<br />
transducer<br />
configuring 35<br />
transfer data 27<br />
transmit radar 39<br />
tropical depression 50<br />
tropical storm 50<br />
true north 32<br />
turn the unit off 2<br />
U<br />
units of measure 31<br />
user data 27<br />
user mag var 32<br />
V<br />
video 30<br />
view<br />
system information 3<br />
visibility 54<br />
VMG 6<br />
W<br />
water<br />
speed (calibrate) 35<br />
temperature 53<br />
wave<br />
height 52<br />
waypoint 22<br />
create new 22<br />
delete 24<br />
edit existing 23<br />
man overboard 23<br />
mark current location 23<br />
moving 23<br />
waypoints<br />
deleting 23<br />
weather 4<br />
fronts 51<br />
where to? 4, 20<br />
whiteline 46<br />
wind<br />
speed 6<br />
wireless devices 33<br />
X<br />
XM 48<br />
audio 36<br />
weather 48<br />
XM audio 55<br />
xtalk reject 43<br />
Z<br />
zoom 5, 46<br />
IndeX
For the latest free software updates (excluding map data) throughout the life of your<br />
<strong>Garmin</strong> products, visit the <strong>Garmin</strong> Web site at www.garmin.com.<br />
© 2008 <strong>Garmin</strong> Ltd. or its subsidiaries<br />
<strong>Garmin</strong> International, Inc.<br />
1200 East 151 st Street, Olathe, Kansas 66062, USA<br />
<strong>Garmin</strong> (Europe) Ltd.<br />
Liberty House, Hounsdown Business Park, Southampton, Hampshire, SO40 9RB UK<br />
<strong>Garmin</strong> Corporation<br />
No. 68, Jangshu 2 nd Road, Shijr, Taipei County, Taiwan<br />
www.garmin.com<br />
Part Number 190-00779-10 Rev. A