Digital Trail Camera - Tasco
Digital Trail Camera - Tasco Digital Trail Camera - Tasco
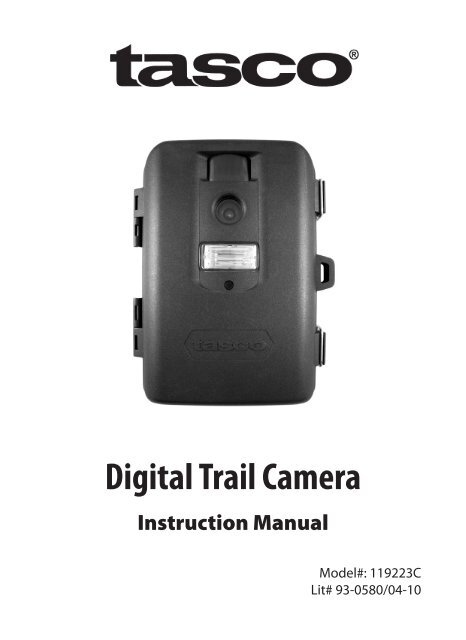
Digital Trail Camera Instruction Manual Model#: 119223C Lit# 93-0580/04-10
- Page 2 and 3: IMPORTANT NOTE Congratulations on y
- Page 4 and 5: 4 INTRODUCTION Congratulations on y
- Page 6 and 7: 6 LCD Display Power Button Battery
- Page 8 and 9: CAMERA SETuP (continued) • Again
- Page 10 and 11: CAMERA OPERATION Once your camera h
- Page 12 and 13: 12 VIEWING THE PHOTOS and VIDEOS Af
- Page 14 and 15: 14 Technical Specifications Model N
- Page 16 and 17: Troubleshooting / FAQ Still Photo a
- Page 18 and 19: 18 TWO-YEAR LIMITED WARRANTY Your T
- Page 20: For further questions or additional
<strong>Digital</strong> <strong>Trail</strong> <strong>Camera</strong><br />
Instruction Manual<br />
Model#: 119223C<br />
Lit# 93-0580/04-10
IMPORTANT NOTE<br />
Congratulations on your purchase of one of the best trail cameras on the<br />
market! <strong>Tasco</strong> is very proud of this little unit and we are sure you will be<br />
pleased with it as well. We appreciate your business and want to earn<br />
your trust. Please refer to the notes below and the instructions in this<br />
manual to ensure that you are completely satisfied with this product.<br />
If your <strong>Tasco</strong> <strong>Trail</strong> Cam does not seem to be functioning properly<br />
or if you are having photo/video quality issues, please check the<br />
Troubleshooting/FAQ section on pages 15-17.<br />
Problems are often due to something simple that was overlooked, or<br />
require only changing one setting to solve.<br />
If your problem continues after trying the solutions in the<br />
Troubleshooting/FAQ section, please call <strong>Tasco</strong> Customer Service at<br />
(800) 423-3537. In Canada, call (800) 361-5702.<br />
<strong>Tasco</strong> recommends using 4 Energizer® Alkaline “C” Cell batteries in<br />
this <strong>Trail</strong> Cam to obtain maximum battery life.<br />
<strong>Tasco</strong> recommends using SanDisk® SD and SDHC Cards<br />
(up to 8GB capacity) in this <strong>Trail</strong> Cam.
Page Index<br />
Introduction 4<br />
Parts and Controls 5<br />
<strong>Camera</strong> Setup 7<br />
Setting the Year, Date & Time 7<br />
Setting <strong>Camera</strong>/Video Mode and Resolution 8<br />
Formatting SD Cards 8<br />
Exiting the Setup Menu 9<br />
<strong>Camera</strong> Operation 10<br />
Mount the <strong>Camera</strong> 10<br />
Test the Coverage Area 10<br />
Secure the <strong>Camera</strong> 11<br />
Viewing the Photos and Videos 12<br />
Glossary 13<br />
Specifications 14<br />
Troubleshooting/FAQ 15<br />
3
4<br />
INTRODUCTION<br />
Congratulations on your purchase of the <strong>Tasco</strong> 119223C digital trail<br />
camera. This trail camera is designed to record the activity of wildlife in<br />
the outdoors with its still image and movie modes and weatherproof,<br />
rugged construction.<br />
Main Features:<br />
• 1.3MP digital sensor<br />
• Compact Size (177mm*137mm*52mm)<br />
• Long Battery Life (Up to 90 Days)<br />
• Trigger Time=1.6 second<br />
• LCD Display<br />
• Xenon Flash<br />
• 640*480 at 15 FPS Videos<br />
• Supports up to 8 GB SD Card<br />
• Date, Time & Moon Phase Imprint<br />
• Auto Exposure<br />
• Auto White Balance<br />
• Power Supply: 4 “C” Cell batteries<br />
•<br />
Weatherproof
<strong>Camera</strong><br />
Lens<br />
PIR<br />
Indicator<br />
Parts and Controls Guide<br />
Front of <strong>Camera</strong><br />
PIR Motion<br />
Sensor<br />
Padlock<br />
Hole<br />
Xenon<br />
Flash<br />
5
6<br />
LCD<br />
Display<br />
Power<br />
Button<br />
Battery<br />
Compartment<br />
Parts and Controls Guide<br />
Control Panel<br />
(Front Opened)<br />
Control Panel Detail<br />
SD Card<br />
Slot<br />
USB Port
CAMERA SETUP<br />
Open the Cam by pulling out on the two latches on the right side. Install<br />
4 “C” cell batteries (flat base of all batteries contacting springs), and insert<br />
an SD card (not included, use any capacity from 16MB to 8GB. Do not<br />
substitute MMC cards.) in the slot to the right of the 5 buttons as indicated<br />
on the slot cover (upside down, with the notched corner of the card on<br />
the left and metal contacts of the card facing the back of the slot). Press<br />
the card down until you hear it click into place. If the Cam is turned on<br />
without a card in place, it may not turn off-reset it by pulling one of the<br />
batteries out partway, insert a new or empty SD card, and put the battery<br />
back in place. Only remove or insert cards with power off.<br />
6<br />
Setup Icons- Display Guide<br />
1. Date<br />
2. Time<br />
3. 4 Digit Display<br />
4. Still Photo Mode /<br />
Resolution<br />
5. Video Mode<br />
6. SD Card<br />
1. Setting the Date, Year and Time<br />
If you are using the camera for the first time, you should set the date and<br />
time so your photos will be “stamped” correctly.<br />
Set Date and Year<br />
• Briefly press the MENU button-the first two digits of the year will<br />
flash, prompting you to enter the year.<br />
• Use the UP/DOWN buttons to set the current year (2010-2030), then<br />
press OK. Set the month the same way, and press OK again.<br />
• Set the month the same way, and press OK again. The display will<br />
then change to let you set the day, with only the last two digits<br />
blinking.<br />
7
CAMERA SETuP (continued)<br />
• Again use the UP/DOWN buttons to change the day if necessary<br />
and press OK.<br />
• To set the time, use UP/DOWN to set the hour and minute. The time<br />
display uses the 24 hr standard, so 2:00 PM is indicated as “1400”,<br />
etc.<br />
Note: The Date & Time setting will normally be retained for a few minutes<br />
when the batteries are removed from the camera. However, you may need<br />
to reset the Date & Time after replacing the batteries, if they have been<br />
removed for a longer period of time.<br />
2. Setting <strong>Camera</strong>/Video Mode and Resolution<br />
This item allows you to select whether the camera takes still photos<br />
(and select high or low resolution), or shoots video clips when the PIR is<br />
triggered (Photo or Video Mode).<br />
•<br />
•<br />
•<br />
•<br />
8<br />
After the date and time have been set, press OK. You will see the<br />
camera icon and the word “Lo” will blink.<br />
By pressing UP/DOWN, the camera will cycle between Lo resolution<br />
still photo, Hi resolution still photo, and movie (video) modes.<br />
Choose the mode that you want and press OK.<br />
The “Lo” setting will allow you to take lower resolution (1.3MP)<br />
images and therefore accumulate more images on your card while<br />
the “HI” setting will give you high resolution (3.0MP via software<br />
interpolation) images of better quality but fewer images can be<br />
stored to the card.<br />
In Movie mode a 14 second AVI file will be recorded to the SD Card<br />
each time the camera is triggered. The movie length is preset and<br />
cannot be changed. There are no additional settings or options for<br />
Video Mode.<br />
3. Formatting SD Cards<br />
• Pressing OK again after the resolution options will go to the Format<br />
screen next. Formatting is recommended before you re-use an old<br />
SD card, and is a quick way to erase all of the photos/videos after
•<br />
•<br />
•<br />
•<br />
CAMERA SETuP (continued)<br />
you’ve saved any you wish to keep.<br />
The display will read “FoNo”, with “No” and the SD card icon<br />
blinking. Press OK when “No” is flashing if you don’t want to format<br />
the card.<br />
To format the card, press either UP/DOWN button and the “Fo”<br />
portion will blink. Press OK and the display will change to “Y N” with<br />
the SD card icon blinking.<br />
“N” (NO) is the default, so pressing OK will cancel the formatting,<br />
then pressing and holding MENU will exit menu mode.<br />
If you are certain that you want to format the card and DELETE all<br />
data and images on the card, then press either UP/DOWN button to<br />
select “Y” (YES). With “Y” flashing, press OK- the display will briefly<br />
change to “SdFr”.<br />
Exiting the Setup Menu<br />
Press and hold MENU to exit Menu mode at any time once you have<br />
finished changing any of the menu item settings or using one of the<br />
menu options.<br />
In normal operating mode, the display will only show the still photo or<br />
movie clip icon in the lower left corner, an SD card icon on the lower right,<br />
and one or more digits that indicate how many photo or movie files have<br />
been stored on the card.<br />
9
CAMERA OPERATION<br />
Once your camera has been setup, you are ready to begin using it to<br />
capture photos of wildlife activity in the area you choose to locate it. Just<br />
follow these steps:<br />
1. Mount the <strong>Camera</strong><br />
It is recommended that you mount the camera about 4 or 5 feet (1.2~1.5<br />
meters) off the ground, with the camera pointed at a slight downward<br />
angle. It’s best to avoid mounting the camera facing east or west as the<br />
rising and setting of the sun could produce false triggers and overexposed<br />
images. Clear branches and other debris away from the front of the<br />
camera so as not to block the camera lens or PIR sensor.<br />
To mount the camera in place, insert the strap through the strap slots on<br />
the rear housing. Wrap the strap around the mounting surface. Aim the<br />
camera at the area you wish to observe. Secure the strap and tighten the<br />
buckle in order to secure the camera.<br />
Make sure that both door latches are securely locked in place, to ensure<br />
proper weather resistance.<br />
2. Test the <strong>Camera</strong><br />
To test the camera operation, power on the camera and wave your hand<br />
in front of the lens and PIR (passive infrared/motion) detector, while<br />
looking at the LCD display. As long as events are being detected, a new<br />
still photo or movie clip (as set in the menu) will be recorded every 30<br />
seconds, indicated on the display by “SnAP”, then “SLP” (Sleep).<br />
Note: in Video Mode, the display will stay on “SnAP” for the duration of each<br />
video clip.<br />
The red LED lamp (PIR Indicator) on the front of the camera can help you<br />
determine how large an area is covered, as it will flash anytime an “event”<br />
is detected while the camera is in MENU mode. To check the coverage<br />
10
CAMERA OPERATION (continued)<br />
area, press the MENU button, then step away from the camera. Move<br />
straight back from the camera to find the length (depth) of the sensor<br />
detection zone, and move left or right to check the width (edges) of the<br />
detection zone (note that it becomes wider as you move farther back-see<br />
below). When you no longer see the red PIR indicator flash as you move<br />
around, you are past the limits of the coverage area. Reposition the<br />
camera if necessary. When you finish testing the camera, press and hold<br />
MENU to exit Menu mode.<br />
3. Set the <strong>Camera</strong><br />
Make sure the camera’s power is turned on, and make sure a new or<br />
empty SD card has been inserted, then leave the area-there is a 30 second<br />
delay after power on before the first photo is taken. Batteries typically last<br />
90 days or more, depending on how often the Cam is activated by events,<br />
how often the flash fires, ambient temperature, etc.<br />
4. Secure the <strong>Camera</strong><br />
A standard padlock may be used in the camera’s lock hole to secure it and<br />
prevent theft.<br />
11
12<br />
VIEWING THE PHOTOS and VIDEOS<br />
After your camera has been operating for awhile, you will of course want<br />
to review the photos and/or videos it has been capturing. This can be<br />
done by either of two methods, according to your preference or the<br />
availability of accessory equipment:<br />
using an SD Card Reader<br />
Make sure the power is off, and remove the SD card by pushing down<br />
lightly on the top edge of the card-it will pop up for removal.<br />
Insert it into an SD card reader (available at most computer, photo, or<br />
electronics dealers) connected via USB to your PC or Mac to view, copy,<br />
or delete the photos (standard JPG files) and movies (AVI files) inside the<br />
“DCIM/100MEDIA” folder on the card. Double click on an individual file to<br />
see it, or open the files using the photo software of your choice.<br />
Connect the <strong>Camera</strong> to PC directly<br />
Press POWER to turn on the camera, then press the MENU button.<br />
Connect your camera to your PC with a compatible USB cable. The PC will<br />
recognize the camera as an external storage device, using the “USB Mass<br />
Storage” standard (no driver installation necessary-not compatible with<br />
Windows 98 or earlier). The PC will display a new disk symbol under “My<br />
Computer” or in Windows Explorer, and you will see a dialog window on<br />
your desktop with several options to view, move, or copy the photo and<br />
video files that are stored on the SD card.
GLOSSARY<br />
PIR (Passive Infrared Sensor): Senses motion like a typical security motion<br />
detector. Requires infrared energy (heat) in addition to motion to trigger<br />
the sensor to help limit detection to live animals (rather than leaves, etc).<br />
Xenon Flash: This is a standard electronic flash tube, which fires<br />
automatically in low light conditions to provide adequate illumination.<br />
Battery Life: Time that camera will function in the field. Dependent on<br />
ambient temperature, number of images taken and number of times the<br />
flash fires. When the battery voltage drops below 4.5v, the flash stops<br />
firing. When battery voltage is below 3.5v, the camera stops working.<br />
FULL: When memory capacity (SD Card) is full, the LCD display indicates<br />
“FuLL”<br />
Mass Storage: Connect the USB cable to a computer, press the “MENU”<br />
button, and the computer can access the contents of the SD card. The<br />
camera is automatically recognized as an “external drive”, without the<br />
need to install special drivers. (Win 98 and older operating systems are<br />
not supported. Mac OS9 and OSX are also compatible-the camera will<br />
appear on your desktop as an external storage device or “disk”).<br />
13
14<br />
Technical Specifications<br />
Model Number 119223C<br />
Image Sensor Type 1/3 Inch CMOS<br />
Effective Resolution 1.3 Megapixels<br />
Effective Focal Length 4.4 mm<br />
Lens Aperture f/2.0<br />
Display Monochrome LCD<br />
PIR Sensor Yes<br />
Trigger Speed 1.6 second<br />
Max Flash Distance 16 feet (5 meters)<br />
Storage SD Card up to 8 GB Capacity<br />
PIR Indicator Yes (Setup mode only)<br />
Selectable Image Resolution 1.3MP, 3.0MP<br />
Video Resolution<br />
File Format (Image/Video) JPEG/AVI<br />
Date Time Imprint Yes<br />
Moon Phase Imprint Yes<br />
Exposure Auto<br />
White Balance Mode Auto<br />
Movie: AVI 640 x 480 pixels @ 15 fps (15<br />
seconds).<br />
Power Supply 4 “C” Cell batteries (alkaline or NiMh)<br />
Water Resistant Yes
Troubleshooting / FAQ<br />
Battery life is shorter than expected<br />
1. Battery life will vary with operating temperature and the number<br />
of images taken over time. Typically, the <strong>Trail</strong> Cam will be able to<br />
capture several images before the batteries die.<br />
2. Check to make sure you have used new alkaline batteries. <strong>Tasco</strong><br />
recommends using 4 Energizer® Alkaline “C” Cell batteries in<br />
this <strong>Trail</strong> Cam to obtain maximum battery life.<br />
3. Make sure that the Power Button was switched to the “On”<br />
position, and that the camera was not left in setup mode.<br />
4. Make sure that you are using a good quality name brand SD card<br />
in your camera. <strong>Tasco</strong> recommends SanDisk® brand SD Cards<br />
up to 8GB. Our experience indicates that poor quality SD cards<br />
can sometimes reduce your <strong>Trail</strong> Cam battery life.<br />
<strong>Camera</strong> stops taking images or won’t take images<br />
1. Please make sure that the SD card is not full. If the card is full, the<br />
camera will stop taking images.<br />
2. Check the batteries to make sure that they are new alkaline “C”<br />
Cell batteries. See note above about short battery life.<br />
3. Make sure that the camera Power Button is switched “On” .<br />
4. Make sure that you are using a good quality SD card in your<br />
camera. <strong>Tasco</strong> recommends SanDisk® SD Cards up to 8GB.<br />
5. If the SD card has its write protect switch in the lock position, the<br />
camera will not take images.<br />
6. In some cases, other devices may change the formatting of the<br />
SD card so that it will not work properly with the <strong>Trail</strong> Cam.<br />
<strong>Camera</strong> won’t power up<br />
1. Make sure that you have installed all 4 batteries in the battery<br />
compartment. <strong>Tasco</strong> recommends using 4 Energizer® Alkaline<br />
“C” Cell batteries in this <strong>Trail</strong> Cam.<br />
2. Make sure that the batteries are installed correctly, observing<br />
proper polarity. Always place the negative (flat) end of each<br />
battery in contact with the spring side of its slot inside the<br />
camera.<br />
15
Troubleshooting / FAQ<br />
Still Photo and/or Video Quality Problems<br />
1. Night photos appear too dark<br />
a. Try using a set of new batteries. The flash will stop operating<br />
near the end of the battery life.<br />
b. You will get the best results when the subject is within the<br />
ideal flash range, no farther than about 16’ (5m) from the camera.<br />
Subjects may appear too dark at greater distances.<br />
2. Daytime photos or videos appear too dark<br />
a. Make sure that the camera is not aimed at the sun or other<br />
light sources during the day, as this may cause the auto exposure<br />
to produce darker results.<br />
3. Night photos appear too bright<br />
a. You will get the best results when the subject is within the ideal<br />
flash range, no closer than 10’ (3m) from the camera. Subjects<br />
may appear too light at closer distances.<br />
4. Daytime photos or videos appear too bright<br />
a. Make sure that the camera is not aimed at the sun or other<br />
light sources during the day.<br />
5. Photos with streaked subject<br />
a. In some cases with low lighting conditions and fast moving<br />
subjects, the HI resolution setting may not perform as well as the<br />
LO setting.<br />
b. If you have multiple images where fast moving subjects<br />
produce streaks on the photo, try the LO setting instead.<br />
6. Red , green or blue color cast<br />
a. Under certain lighting conditions, the sensor can become<br />
confused resulting in poor color images.<br />
b. If this is seen on a consistent basis, then the sensor may need<br />
servicing. Please contact <strong>Tasco</strong> customer service.<br />
7. Short video clips—not recording to the length set<br />
a. Check to make sure that the SD card is not full.<br />
b. Make sure that the camera has good batteries in it. Near the<br />
end of the battery life, the camera may choose to record shorter<br />
video clips to conserve power.<br />
16
Troubleshooting / FAQ<br />
Photos Do Not Capture Subject of Interest<br />
1. Try to set your camera up in an area where there is not a heat<br />
source in the camera’s line of sight.<br />
2. In some cases, setting the camera near water will make the<br />
camera take images with no subject in them. Try aiming the<br />
camera over ground.<br />
3. Try to avoid setting the camera up on small trees that are prone<br />
to being moved by strong winds.<br />
4. Remove any limbs which are right in front of the camera lens.<br />
PIR Sensor LED Flashes/Doesn’t Flash<br />
1. When the camera is in the “Setup” mode, the PIR Indicator LED on<br />
the front of the camera will flash when it senses motion. This is<br />
for setup purposes only and will help the user aim the camera.<br />
2. During use, the LED will not flash when the camera takes an<br />
image. This is to help keep the camera hidden from game.<br />
<strong>Camera</strong> won’t retain settings<br />
1. Make sure that you have been saving the changes to any parameter<br />
settings that you made while in Setup mode, by pressing “OK”<br />
after changing the setting. If you don’t save your new setting after<br />
changing it, the camera will continue to use the original default<br />
setting for that parameter.<br />
17
18<br />
TWO-YEAR LIMITED WARRANTY<br />
Your <strong>Tasco</strong> ® product is warranted to be free of defects in materials and workmanship for<br />
two years after the date of purchase. In the event of a defect under this warranty, we will,<br />
at our option, repair or replace the product, provided that you return the product postage<br />
prepaid. This warranty does not cover damages caused by misuse, improper handling,<br />
installation, or maintenance provided by someone other than a <strong>Tasco</strong> Authorized Service<br />
Department.<br />
Any return made under this warranty must be accompanied by the items listed below:<br />
1) A check/money order in the amount of $10.00 to cover the cost of postage and handling<br />
2) Name and address for product return<br />
3) An explanation of the defect<br />
4) Proof of Date Purchased<br />
5) Product should be well packed in a sturdy outside shipping carton, to prevent damage in transit,<br />
with return postage prepaid to the address listed below:<br />
IN U.S.A. Send To: IN CANADA Send To:<br />
<strong>Tasco</strong> <strong>Tasco</strong><br />
Attn.: Repairs Attn.: Repairs<br />
8500 Marshall Drive 25A East Pearce Street, Unit 1<br />
Lenexa, Kansas 66214 Richmond Hill, Ontario L4B 2M9<br />
For products purchased outside the United States or Canada please contact your local<br />
dealer for applicable warranty information. In Europe you may also contact <strong>Tasco</strong> at:<br />
<strong>Tasco</strong> Germany GmbH<br />
European Service Centre<br />
Mathias-Brüggen-Str. 80<br />
D-50827 Köln<br />
GERMANY<br />
Tel: +49 221 995568-0<br />
Fax: +49 221 995568-20<br />
This warranty gives you specific legal rights.<br />
You may have other rights which vary from country to country.<br />
©2010 B.O.P..<br />
Specifications and designs are subject to change without any notice<br />
or obligation on the part of the manufacturer.
FCC Compliance Statement:<br />
This equipment has been tested and found to comply with the limits for a<br />
Class B digital device, pursuant to part 15 of the FCC Rules. These limits are<br />
designed to provide reasonable protection against harmful interference<br />
in a residential installation.<br />
Operation is subject to the following two conditions: (1) This device<br />
may not cause harmful interference, and (2) this device must accept any<br />
interference received, including interference that may cause undesired<br />
operation.<br />
This equipment generates, uses and can radiate radio frequency energy<br />
and, if not installed and used in accordance with the instructions, may<br />
cause harmful interference to radio communications. However, there is<br />
no guarantee that interference will not occur in a particular installation.<br />
If this equipment does cause harmful interference to radio or television<br />
reception, which can be determined by turning the equipment off and<br />
on, the user is encouraged to try to correct the interference by one or<br />
more of the following measures:<br />
· Reorient or relocate the receiving antenna.<br />
· Increase the separation between the equipment and receiver.<br />
· Connect the equipment into an outlet on a circuit different from<br />
that to which the receiver is connected.<br />
· Consult the dealer or an experienced radio/TV technician for help.<br />
The device does not contain any user-serviceable parts. Repairs should<br />
only be made by an Authorized <strong>Tasco</strong> repair center. Unauthorized repairs<br />
or modifications could result in permanent damage to the equipment,<br />
and will void your warranty and your authority to operate this device<br />
under Part 15 regulations.<br />
The shielded interface cable which is provided must be used with the<br />
equipment in order to comply with the limits for a digital device pursuant<br />
to Subpart B of Part 15 of FCC Rules.<br />
19
For further questions or additional information please contact:<br />
<strong>Tasco</strong><br />
9200 Cody, Overland Park, Kansas 66214<br />
(800) 423-3537 • www.<strong>Tasco</strong>.com<br />
©2010 B.O.P.


