Select Radiator Series Installation Guide - Myson
Select Radiator Series Installation Guide - Myson
Select Radiator Series Installation Guide - Myson

Create successful ePaper yourself
Turn your PDF publications into a flip-book with our unique Google optimized e-Paper software.
<strong>Select</strong> <strong>Radiator</strong> <strong>Series</strong><br />
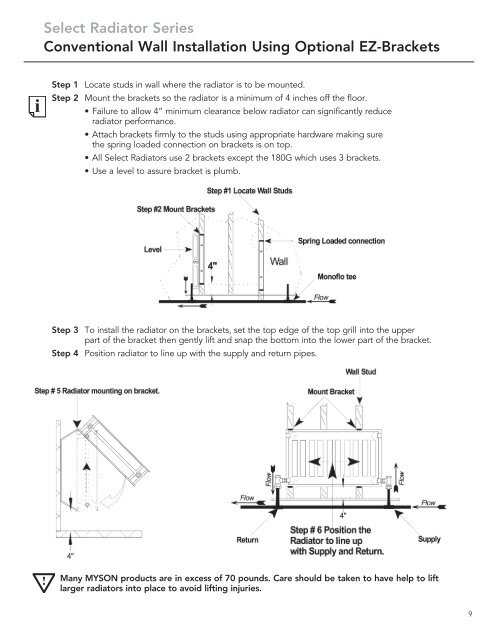
Conventional Wall <strong>Installation</strong> Using Optional EZ-Brackets<br />
Step 1 Locate studs in wall where the radiator is to be mounted.<br />
Step 2 Mount the brackets so the radiator is a minimum of 4 inches off the floor.<br />
Failure to allow 4” minimum clearance below radiator can significantly reduce<br />
radiator performance.<br />
Attach brackets firmly to the studs using appropriate hardware making sure<br />
the spring loaded connection on brackets is on top.<br />
All <strong>Select</strong> <strong>Radiator</strong>s use 2 brackets except the 180G which uses 3 brackets.<br />
Use a level to assure bracket is plumb.<br />
Step 3 To install the radiator on the brackets, set the top edge of the top grill into the upper<br />
part of the bracket then gently lift and snap the bottom into the lower part of the bracket.<br />
Step 4 Position radiator to line up with the supply and return pipes.<br />
Many MYSON products are in excess of 70 pounds. Care should be taken to have help to lift<br />
larger radiators into place to avoid lifting injuries.<br />
9