Extra Features For Canon Powershot Cameras User Quick ... - Wikia
Extra Features For Canon Powershot Cameras User Quick ... - Wikia
Extra Features For Canon Powershot Cameras User Quick ... - Wikia

Create successful ePaper yourself
Turn your PDF publications into a flip-book with our unique Google optimized e-Paper software.
54<br />
From ultimA's notes, 22 /August /2010 (edited) –<br />
“The functionality of “Lock Edge overlay” has changed, and has been renamed - “Panorama mode”.<br />
Previously its greatest use was to enable loading a saved overlay to your camera. But the loading code<br />
has been changed so that locking the overlay before loading a stored one is not necessary anymore.<br />
“Panorama mode” now means “Stay in Frozen mode while locked, while capturing new overlays on a<br />
full shutter press”. This means that while the lock is on and the overlay is “Frozen”, normal behavior is<br />
not restored if taking a new picture. The camera will instead update the edge overlay and stay in Frozen<br />
mode. This allows easily taking large panorama pictures, a feature that was missing previously!<br />
Also, there is a new menu item, "Filter edges", to optionally enable pre-filtering on the viewport data<br />
instead of postfiltering the Edge overlay results as previously. This results in a much nicer image, as you<br />
will see, This filtering option produces less false-edges and makes the edge detection usable in even very<br />
noisy environments. "Filter edges" is used as an option (can be enabled or disabled) to avoid the extra<br />
overhead required, which on some cameras might slow Edge overlay operation.<br />
If you are in Frozen mode, when the overlay is displayed (for example during half-press) the message<br />
"Frozen" is on the screen. If this text is displayed, it is in Frozen mode, and you are able to save the<br />
overlay. In Frozen mode the edge overlay does not get updated during half-press, it is only being<br />
displayed. You have to be in Frozen mode to save. Just take a shot and the overlay will be in memory<br />
after that - even when not displayed on the screen, as long as you are in Frozen mode, then you can save<br />
the image, this is a small behavioral change, it seems more logical and more consistent”<br />
To move an overlay - with a loaded overlay first switch to mode, then press a Directional button -<br />
to move the overlay continuously until you release the button, or click the button to move in<br />
steps.<br />
It would be advisable to make a log of the saved edge overlays, keeping a description together with the<br />
file number and date of the file, to keep track of them over time, perhaps adding GPS information as well.<br />
When using new Edge overlay for the first time, start with a fresh CCHDK.CFG configuration file, just<br />
go to the old one and delete it. There are new configs. with the new Edge overlay which might cause<br />
some conflicts. Disable Edge overlay when using the <strong>Canon</strong> Panorama Stitch Assist mode.<br />
! ! ----------------------------------------------------------------------------------------------<br />
Curves notes<br />
Custom Curves<br />
Enables the use of custom "curve" profiles to adjust the exposure of RAW and JPEG images.<br />
Please read this long thread - Custom processing for JPEG (Tone curve, CA ...) :-<br />
http://chdk.setepontos.com/index.php/topic,932.0.html , at the CHDK <strong>For</strong>um, for its full functions and<br />
use. As well as downloading a custom-curve editor (for PC) to create your own profiles. <strong>For</strong> those of you<br />
new to curve adjustments to exposures there's a nice little overview to what they do and how they might<br />
affect an image in this Curve Anthology:<br />
http://www.curvemeister.com/support/curvemeister2/help/Articles/CurveMoves.htm<br />
Difference between CV and CVF curves: CV curves are the standard RGB curves. CVF curves are<br />
special versions of the curves which intends to avoid color shift side effect of the RGB curves. They are<br />
an approximation of the luminance curves. Except the SYSCURVES.CVF file, it is recommended to put<br />
the curves files in the \curves directory.<br />
! ! ----------------------------------------------------------------------------------------------<br />
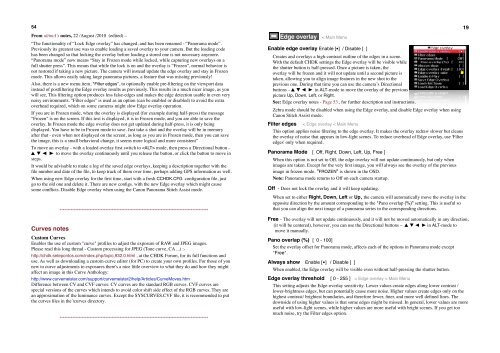
Edge overlay < Main Menu<br />
Enable edge overlay Enable [•] / Disable [ ]<br />
Creates and overlays a high-contrast outline of the edges in a scene.<br />
With the default CHDK settings the Edge overlay will be visible while<br />
the shutter button is half-pressed. Once a picture is taken, the<br />
overlay will be frozen and it will not update until a second picture is<br />
taken, allowing you to align image features in the new shot to the<br />
previous one. During that time you can use the camera’s Directional<br />
buttons – in ALT-mode to move the overlay of the previous<br />
picture Up, Down, Left, or Right.<br />
See: Edge overlay notes - Page 53., for further description and instructions.<br />
Zebra mode should be disabled when using the Edge overlay, and disable Edge overlay when using<br />
<strong>Canon</strong> Stitch Assist mode.<br />
Filter edges! < Edge overlay < Main Menu<br />
! ! ! ! ! ! ! ! !<br />
This option applies noise filtering to the edge overlay. It makes the overlay redraw slower but cleans<br />
the overlay of noise that appears in low-light scenes. To reduce overhead of Edge overlay, use 'Filter<br />
edges' only when required.<br />
Panorama Mode [ Off, Right, Down, Left, Up, Free ]<br />
When this option is not set to Off, the edge overlay will not update continuously, but only when<br />
images are taken. Except for the very first image, you will always see the overlay of the previous<br />
image in frozen mode. "FROZEN" is shown in the OSD.<br />
Note: Panorama mode returns to Off on each camera startup.<br />
Off - Does not lock the overlay and it will keep updating.<br />
When set to either Right, Down, Left or Up, the camera will automatically move the overlay in the<br />
opposite direction by the amount corresponding to the "Pano overlap (%)" setting. This is useful so<br />
that you can align the next image of a panorama series in the corresponding directions.<br />
Free - The overlay will not update continuously, and it will not be moved automatically in any direction,<br />
(it will be centered), however, you can use the Directional buttons – in ALT-mode to<br />
move it manually.<br />
Pano overlap (%) [ 0 - 100]<br />
Set the overlay offset for Panorama mode, affects each of the options in Panorama mode except<br />
"Free".<br />
Always show Enable [•] / Disable [ ]<br />
When enabled, the Edge overlay will be visible even without half-pressing the shutter button.<br />
Edge overlay threshold [ 0 - 255 ] < Edge overlay < Main Menu<br />
This setting adjusts the Edge-overlay sensitivity. Lower values create edges along lower contrast /<br />
lower-brightness edges, but can potentially cause more noise. Higher values create edges only on the<br />
highest contrast/ brightest boundaries, and therefore fewer, finer, and more well defined lines. The<br />
downside of using higher values is that some edges might be missed. In general, lower values are more<br />
useful with low-light scenes, while higher values are more useful with bright scenes. If you get too<br />
much noise, try the Filter edges option.<br />
19