
Create successful ePaper yourself
Turn your PDF publications into a flip-book with our unique Google optimized e-Paper software.
d <strong>—</strong> <strong>premier</strong><br />
USER MANUAL
Congratulations!<br />
You’ve just acquired the most ambitious and innovative product in the world of hi-fi,<br />
the D-Premier amplifier with hybrid technology . The D-Premier will provide you with the<br />
most amazing listening experiences. Share them, discover new music, more than ever your pleasure<br />
is the driving force behind our innovation.<br />
<strong>Devialet</strong> strives to reach exellence with simplicity of use in mind.This manual contains all the<br />
information you need to setup and use your D-Premier.You will find additional information on<br />
our website www.devialet.com. Should you wish to share your opinion or comments, do not<br />
hesitate to contact us.<br />
To benefit from our product upgrades and support, please register your D-Premier online<br />
via our website www.devialet.com.<br />
Enjoy!<br />
USER MANUAL<br />
USER MANUAL <strong>—</strong> 01
What’s included in your d-<strong>premier</strong> package<br />
• D-PREMIER<br />
• REMOTE DEVICE (BATTERIES INCLUDED)<br />
• POWER CABLE<br />
• USER MANUAL<br />
• WARRANTY BOOK<br />
• MICROFIBER WIPE<br />
• TEMPLATE FOR VERTICAL MOUNTING<br />
• HEX KEY (TO CHANGE BATTERIES IN THE REMOTE DEVICE)<br />
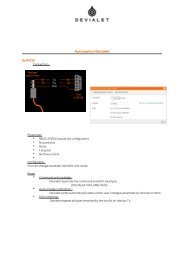
SOURCE<br />
BASS<br />
INVERT<br />
USER MANUAL <strong>—</strong> 02
D-Premier set-up<br />
D-Premier can be placed horizontally, or mounted on the wall in a vertical position.<br />
To mount it vertically, use the template provided. It indicates the positioning of fixing points<br />
on the wall, the type of screws as well as assembly instructions. The slots beneath the unit’s feet<br />
are designed to lock the D-Premier in place using appropriate screws.<br />
The screen will automatically rotate when D-Premier is vertically mounted.<br />
Do not cover the D-Premier to ensure proper cooling.<br />
USER MANUAL <strong>—</strong> 03
Connecting sources & speakers<br />
Remove the protective film from the D-Premier top panel.<br />
Connect your sources and speakers. Then connect the D-Premier to the AC power supply<br />
using the mains cord provided. Note that earth is required.<br />
We recommend the use of the digital inputs (for a CD-player for instance).<br />
E<br />
A B C D F G H I J K L M<br />
N O P Q R<br />
All the connecting ports are located at the rear of the amplifier, recessed under the rear panel.<br />
To remove the rear panel, slide it horizontally.<br />
To replace the panel, carefully position it in the guides and push firmly.<br />
USER MANUAL <strong>—</strong> 04
A<br />
B C<br />
D<br />
E F<br />
G<br />
H<br />
I<br />
J K<br />
L<br />
M<br />
N O<br />
P<br />
Q<br />
R<br />
SD CARD / SET-UP<br />
SD CARD SLOT <strong>—</strong> FOR THE CONFIGURATION OF THE AMPLIFIER<br />
OPTICAL 1 & 2 TOSLINK®<br />
OPTICAL INPUTS <strong>—</strong> FOR CD, DVD, COMPUTER OR PORTABLE DIGITAL PLAYERS…<br />
LINE 2 / PHONO (MC/MM) *<br />
INPUTS RIGHT (R) AND LEFT (L) FOR TURNTABLE (MM)<br />
LINE 1 *<br />
INPUTS RIGHT (R) AND LEFT (L) FOR CD, DVD, COMPUTER, …<br />
DIGITAL 2 *<br />
S/PDIF DIGITAL INPUT FOR CD, DVD, COMPUTER, …<br />
DIGITAL 1 *<br />
S/PDIF DIGITAL INPUT FOR CD, DVD, COMPUTER, …<br />
AES/EBU<br />
XLR DIGITAL INPUT FOR PROFESSIONAL SOURCES<br />
RIGHT SPEAKER & LEFT SPEAKER<br />
UNIVERSAL LOUDSPEAKER OUTPUT TERMINALS<br />
RS-232<br />
INPUT FOR HOME AUTOMATION (JACK 3,5MM)<br />
MAINS 100-120/220-240V<br />
POWER SUPPLY (EARTH REQUIRED)<br />
HDMI IN & OUT<br />
HDMI 1.3 INPUT & OUTPUT FOR HD FORMATS, SACD, BLU-RAY PLAYERS, HD TV…<br />
GROUND FOR PHONO<br />
RADIO AERIAL<br />
TRIGGER IN/OUT<br />
FOR CHAINED COMPONENTS (JACK 3,5MM)<br />
* CONFIGURABLE INPUTS VIA SD CARD (see p. 08)<br />
USER MANUAL <strong>—</strong> 05
Getting started & instructions<br />
To turn on your D-Premier, press the main power button on the front panel .<br />
Hold the remote device about 30cm from the amplifier and turn the main volume dial<br />
to activate it. In everyday use, the main button on the front panel of the D-Premier<br />
or the button 1 on the remote device allows you to:<br />
- turn on the unit or activate sleep mode: short press<br />
- turn off the unit: press and hold the button<br />
1<br />
2<br />
3<br />
1<br />
2<br />
3 4<br />
POWER ON/SLEEP MODE CONTROL<br />
VOLUME CONTROL<br />
SOURCE SELECTION<br />
Warning<br />
D-Premier reproduces sounds with extreme linearity, i.e. without distortion even at high volume level.<br />
Therefore you might be tempted to use it at unusually high levels. Take care of your ears and control<br />
your listening levels during prolonged periods.<br />
4<br />
5<br />
USER MANUAL <strong>—</strong> 06<br />
AUDIO SIGNAL PHASE INVERSION<br />
ON/OFF<br />
SUBWOOFER OUTPUT (IF CONFIGURED)<br />
2<br />
5
D-Premier control screen<br />
The control screen indicates by default the volume level (from -97,5dB to +30dB)<br />
as well as the source selected.<br />
Successive tapping on the button 3 allows you to change the desired source.<br />
The analogue sources always appear in black. The connected digital sources appear in black or,<br />
in orange when there are no signals.<br />
BUTTON 3 BUTTON 3<br />
DIAL<br />
dB<br />
2<br />
BUTTON 5 BUTTON 4<br />
(IF CONFIGURED)<br />
USER MANUAL <strong>—</strong> 07<br />
BUTTON<br />
3<br />
BY DEFAULT VALUE+<br />
MUST BE MAINTAINED
Customise your D-Premier<br />
The included SD card allows you to customise or configure the inputs (phono settings,<br />
subwoofer activation,multiamplification, etc.) as well as upgrading the software.<br />
Turn off the amplifier, eject the SD card located<br />
at the rear of the amplifier.<br />
USER MANUAL <strong>—</strong> 08<br />
Insert the SD card in your computer.<br />
Go to our website www.devialet.com and follow<br />
the instructions under the ‘Customising<br />
D-Premier’ section.
Once your upgrade or new settings are saved,<br />
insert your SD card back into the D-Premier.<br />
Turn on the unit, the screen will indicate that<br />
the new settings are loading, this process is<br />
automatic and may take a few minutes to<br />
complete.<br />
When the operation is processed, you may turn<br />
on the newly configured unit.<br />
USER MANUAL <strong>—</strong> 09
Changing batteries on your D-Premier’s remote device<br />
D-Premier’s remote operates with tow AAA batteries LR03 1,5V (provided with the product);<br />
life span is about 2 years (please recycle your used batteries).<br />
The battery compartment is located at the back of the remote.<br />
To access the batteries, unscrew the back panel using the hex key provided.<br />
Insert the new batteries and replace the back panel.<br />
Then get started again (see p.06)<br />
USER MANUAL <strong>—</strong> 10
Technical specifications<br />
d-<strong>premier</strong><br />
<strong>—</strong> MAXIMUM POWER: 2x240W<br />
- SPEAKER IMPEDANCE RANGE: 8 TO 2<br />
<strong>—</strong> 600W SWITCHED-MODE POWER SUPPLY<br />
<strong>—</strong> D/A CONVERTER T.I. PCM 1792 192kHz/24 bits<br />
<strong>—</strong> COLOR SCREEN<br />
<strong>—</strong> INTERNAL IR SENSOR<br />
<strong>—</strong> THD+N AT FULL POWER: 0.001%<br />
<strong>—</strong> IMD SMTPE: 0.001%<br />
<strong>—</strong> SNR: 130 dB UNWEIGHTED<br />
<strong>—</strong> THERMAL DISTORTION: UNMEASURABLE<br />
<strong>—</strong> OUTPUT IMPEDANCE 85%<br />
<strong>—</strong> MAXIMUM POWER CONSUMPTION: 600W <strong>—</strong> SLEEP MODE POWER CONSUMPTION: