CFAST – Consolidated Model of Fire Growth and Smoke Transport ...
CFAST – Consolidated Model of Fire Growth and Smoke Transport ...
CFAST – Consolidated Model of Fire Growth and Smoke Transport ...

Create successful ePaper yourself
Turn your PDF publications into a flip-book with our unique Google optimized e-Paper software.
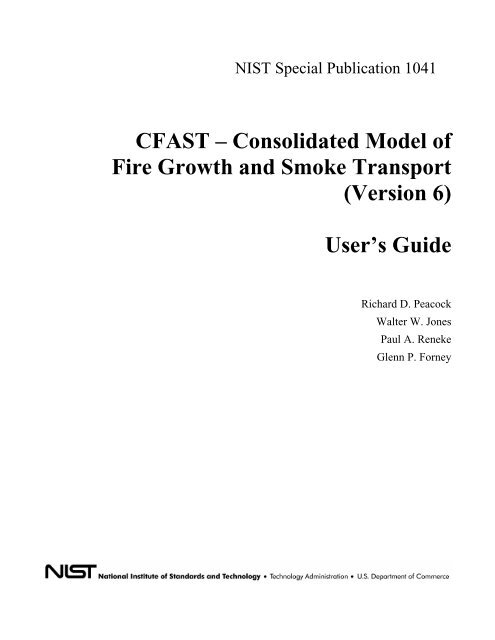
NIST Special Publication 1041<br />
<strong>CFAST</strong> <strong>–</strong> <strong>Consolidated</strong> <strong>Model</strong> <strong>of</strong><br />
<strong>Fire</strong> <strong>Growth</strong> <strong>and</strong> <strong>Smoke</strong> <strong>Transport</strong><br />
(Version 6)<br />
User’s Guide<br />
Richard D. Peacock<br />
Walter W. Jones<br />
Paul A. Reneke<br />
Glenn P. Forney
NIST Special Publication 1041<br />
<strong>CFAST</strong> <strong>–</strong> <strong>Consolidated</strong> <strong>Model</strong> <strong>of</strong> <strong>Fire</strong><br />
<strong>Growth</strong> <strong>and</strong> <strong>Smoke</strong> <strong>Transport</strong><br />
(Version 6)<br />
User’s Guide<br />
Richard D. Peacock<br />
Walter W. Jones<br />
Paul A. Reneke<br />
Glenn P. Forney<br />
<strong>Fire</strong> Research Division<br />
Building <strong>and</strong> <strong>Fire</strong> Research Laboratory<br />
August 2005<br />
U.S. Department <strong>of</strong> Commerce<br />
Carlos M. Gutierrez, Secretary<br />
Technology Administration<br />
Phillip J. Bond, Under Secretary for Technology<br />
National Institute <strong>of</strong> St<strong>and</strong>ards <strong>and</strong> Technology<br />
Hratch G. Semerjian, Acting Director
Certain commercial entities, equipment, or materials may be identified in this<br />
document in order to describe an experimental procedure or concept adequately. Such<br />
identification is not intended to imply recommendation or endorsement by the<br />
National Institute <strong>of</strong> St<strong>and</strong>ards <strong>and</strong> Technology, nor is it intended to imply that the<br />
entities, materials, or equipment are necessarily the best available for the purpose.<br />
National Institute <strong>of</strong> St<strong>and</strong>ards <strong>and</strong> Technology Special Publication 1041<br />
Natl. Inst. St<strong>and</strong>. Technol. Spec. Publ. 1041, 109 pages (August 2005)<br />
CODEN: NSPUE2<br />
U.S. GOVERNMENT PRINTING OFFICE<br />
WASHINGTON: 2005<br />
_________________________________________<br />
For sale by the Superintendent <strong>of</strong> Documents, U.S. Government Printing Office<br />
Internet: bookstore.gpo.gov — Phone: (202) 512-1800 — Fax: (202) 512-2250<br />
Mail: Stop SSOP, Washington, DC 20402-0001
Contents<br />
Chapter 1 Introduction 1<br />
Background........................................................................................................1<br />
Chapter 2 Getting Started 3<br />
Installation from the <strong>CFAST</strong> Web Site..............................................................3<br />
Computer Hardware Requirements....................................................................4<br />
Computer Operating System <strong>and</strong> S<strong>of</strong>tware Requirements ................................4<br />
Verifying Correct Installation <strong>and</strong> Operation ....................................................4<br />
Chapter 3 Running <strong>CFAST</strong> 6<br />
Creating a <strong>CFAST</strong> Input Data File ....................................................................6<br />
File Naming <strong>and</strong> Location ...............................................................................10<br />
Starting a <strong>CFAST</strong> Calculation .........................................................................11<br />
Running <strong>CFAST</strong> from CEdit ...............................................................11<br />
Running <strong>CFAST</strong> from a Comm<strong>and</strong> Prompt ........................................12<br />
Chapter 4 Setting up the Input File for <strong>CFAST</strong> 14<br />
Overview..........................................................................................................14<br />
Simulation Environment ..................................................................................16<br />
Naming the Calculation, the Title Input ..............................................16<br />
Setting Time Limits <strong>and</strong> Output Options.............................................17<br />
Ambient Conditions.............................................................................18<br />
Compartment Geometry...................................................................................20<br />
Defining Compartment Size <strong>and</strong> Position............................................22<br />
<strong>Model</strong>ing the Compartment as a Tall Shaft or Long Corridor.............23<br />
Thermal Properties <strong>of</strong> Boundaries .......................................................25<br />
Compartment Connections...............................................................................26<br />
Defining Horizontal Natural Flow Connections (Doors, Windows) ...27<br />
Defining Vertical Natural Flow Connections (Ceiling or Floor Holes,<br />
Hatches) ...............................................................................................30<br />
Defining Mechanical Ventilation Connections....................................32<br />
Prescribing <strong>Fire</strong>s ..............................................................................................35<br />
Defining <strong>Fire</strong> Objects...........................................................................38<br />
Associating <strong>Fire</strong> Objects with One or More Instances <strong>of</strong> the <strong>Fire</strong> in the<br />
Compartments <strong>of</strong> the Simulation .........................................................41<br />
Special Features ...............................................................................................44<br />
Sprinklers <strong>and</strong> Detectors......................................................................44<br />
User’s Guide Version 6 Contents • v
Defining Targets ..................................................................................45<br />
Defining Compartment Area................................................................47<br />
Inter-compartment Heat Transfer (Conduction) ..................................48<br />
The Ceiling Jet <strong>–</strong> An Additional Zone.................................................50<br />
Scenario <strong>and</strong> S<strong>of</strong>tware Limits..........................................................................51<br />
Chapter 5 Output 52<br />
Overview..........................................................................................................52<br />
Detailed Outputs ..............................................................................................53<br />
Output for Initialization .......................................................................53<br />
Output for Main Output Variables.......................................................59<br />
Output for Wall Surface <strong>and</strong> Targets...................................................60<br />
Output for Gas Species ........................................................................61<br />
Output for Vent Flows .........................................................................62<br />
Spreadsheet Output ..........................................................................................63<br />
Primary Output Variables (project.n.csv) ............................................63<br />
Species Output (project.s.csv)..............................................................64<br />
Vent Flow (project.f.csv) .....................................................................64<br />
Temperatures <strong>and</strong> flux (project.w.csv) ................................................65<br />
Error Messages.................................................................................................65<br />
References 69<br />
vi • Chapter 1 Introduction User’s Guide Version 6
Acknowledgement<br />
The <strong>CFAST</strong> model has been under development for more than 20 years. The primary developers are<br />
Walter Jones, Richard Peacock, Glenn Forney, Rebecca Portier, Paul Reneke, John Hoover, <strong>and</strong><br />
John Klote.<br />
There have been contributions through research <strong>and</strong> published papers at Worcester Polytechnic<br />
Institute, University <strong>of</strong> California at Berkeley, VTT <strong>of</strong> Finl<strong>and</strong> <strong>and</strong> CITCM <strong>of</strong> France. An important<br />
guide to development <strong>of</strong> the model has been from many people around the world who have provided<br />
ideas, suggestions, comments, detailed questions, opinions on what should happen in particular<br />
scenarios, what physics <strong>and</strong> chemistry are needed <strong>and</strong> what types <strong>of</strong> problems must be addressed by<br />
such a model in order to be useful for real world applications.<br />
In addition to support by NIST, at least two outside organizations have provided support for the<br />
development <strong>of</strong> the model, its documentation, <strong>and</strong> validation. At the U.S. Navy, Naval Research<br />
Laboratory, Jean Bailey, John Hoover, <strong>and</strong> Pat Tatem provided support for model development,<br />
including the vertical flow <strong>and</strong> corridor flow algorithms. The U.S. Nuclear Regulatory Commission<br />
(NRC) has supported experiments to validate <strong>CFAST</strong> as part <strong>of</strong> an international collaboration to<br />
study the application <strong>of</strong> fire models to nuclear power plants. NRC has also partially funded the<br />
development <strong>of</strong> the Windows version <strong>of</strong> <strong>CFAST</strong>, the documentation described in this document <strong>and</strong><br />
the evaluation <strong>of</strong> the model per ASTM E1355.<br />
User’s Guide Version 6 Acknowledgement • vii
Disclaimer<br />
This s<strong>of</strong>tware was developed at the National Institute <strong>of</strong> St<strong>and</strong>ards <strong>and</strong> Technology by employees <strong>of</strong><br />
the Federal Government in the course <strong>of</strong> their <strong>of</strong>ficial duties. Pursuant to Title 17 Section 105 <strong>of</strong> the<br />
United States Code this s<strong>of</strong>tware is not subject to copyright protection within the United States <strong>and</strong><br />
is in the public domain. The s<strong>of</strong>tware is an experimental system. NIST assumes no responsibility<br />
whatsoever for its use by any party. This s<strong>of</strong>tware is provided "as is." You accept the s<strong>of</strong>tware “as<br />
is” <strong>and</strong> acknowledge that NIST makes no warranty <strong>of</strong> any kind, express, implied or statutory,<br />
including, without limitation, the implied warranty <strong>of</strong> merchantability, fitness for a particular<br />
purpose, non-infringement <strong>and</strong> data accuracy. NIST does not represent or warrant that the operation<br />
<strong>of</strong> the s<strong>of</strong>tware will be uninterrupted or error-free, or that any defects will be corrected. NIST does<br />
not warrant or make any representations regarding the use <strong>of</strong> the s<strong>of</strong>tware or the results there<strong>of</strong>,<br />
including but not limited to the correctness, accuracy, reliability, or usefulness <strong>of</strong> the s<strong>of</strong>tware. You<br />
may freely use, copy or distribute this s<strong>of</strong>tware.<br />
Users are warned that <strong>CFAST</strong> is intended for use only by those competent in the field <strong>of</strong> fire safety<br />
<strong>and</strong> is intended only to supplement the informed judgment <strong>of</strong> the qualified user. The s<strong>of</strong>tware<br />
package is a computer model which may or may not have predictive value when applied to a specific<br />
set <strong>of</strong> factual circumstances. Lack <strong>of</strong> accurate predictions by the model could lead to erroneous<br />
conclusions with regard to fire safety. All results should be evaluated by an informed user.<br />
Intent <strong>and</strong> Use<br />
The algorithms, procedures, <strong>and</strong> computer programs described in this report constitute a<br />
methodology for predicting some <strong>of</strong> the consequences resulting from a prescribed fire. They have<br />
been compiled from the best knowledge <strong>and</strong> underst<strong>and</strong>ing currently available, but have important<br />
limitations that must be understood <strong>and</strong> considered by the user. The program is intended for use by<br />
persons competent in the field <strong>of</strong> fire safety <strong>and</strong> with some familiarity with personal computers. It is<br />
intended as an aid in the fire safety decision-making process.<br />
User’s Guide Version 6 Disclaimer • ix
Chapter 1 Introduction<br />
Background<br />
<strong>CFAST</strong> is a two-zone fire model used to calculate the evolving distribution <strong>of</strong> smoke, fire<br />
gases <strong>and</strong> temperature throughout compartments <strong>of</strong> a building during a fire. These can range<br />
from very small containment vessels, on the order <strong>of</strong> 1 m 3 to large spaces on the order <strong>of</strong><br />
1000 m 3 . This guide describes how to obtain the model, verify its correct installation, create<br />
input data in an appropriate form, <strong>and</strong> analyze <strong>of</strong> the output <strong>of</strong> a simulation.<br />
The modeling equations used in <strong>CFAST</strong> take the mathematical form <strong>of</strong> an initial value<br />
problem for a system <strong>of</strong> ordinary differential equations (ODEs). These equations are derived<br />
using the conservation <strong>of</strong> mass, the conservation <strong>of</strong> energy (equivalently the first law <strong>of</strong><br />
thermodynamics), the ideal gas law <strong>and</strong> relations for density <strong>and</strong> internal energy. These<br />
equations predict as functions <strong>of</strong> time quantities such as pressure, layer height <strong>and</strong><br />
temperatures given the accumulation <strong>of</strong> mass <strong>and</strong> enthalpy in the two layers. The <strong>CFAST</strong><br />
model then consists <strong>of</strong> a set <strong>of</strong> ODEs to compute the environment in each compartment <strong>and</strong> a<br />
collection <strong>of</strong> algorithms to compute the mass <strong>and</strong> enthalpy source terms required by the<br />
ODEs. The formulation <strong>of</strong> the equations, their solution, <strong>and</strong> discussion <strong>of</strong> validation <strong>and</strong><br />
verification <strong>of</strong> the code are presented in a companion document 1 ..<br />
All <strong>of</strong> the data to run the model is contained in a primary data file, together with databases<br />
for objects, thermophysical properties <strong>of</strong> boundaries, <strong>and</strong> sample prescribed fire<br />
descriptions 2 . These files contain information about the building geometry (compartment<br />
sizes, materials <strong>of</strong> construction, <strong>and</strong> material properties), connections between compartments<br />
(horizontal flow openings such as doors, windows, vertical flow openings in floors <strong>and</strong><br />
ceilings, <strong>and</strong> mechanical ventilation connections), fire properties (fire size <strong>and</strong> species<br />
production rates as a function <strong>of</strong> time), <strong>and</strong> specifications for detectors, sprinklers, <strong>and</strong><br />
targets (position, size, heat transfer characteristics, <strong>and</strong> flow characteristics for sprinklers).<br />
Materials are defined by their thermal conductivity, specific heat, density, thickness, <strong>and</strong><br />
burning behavior. Throughout the discussion on the model inputs, notes are included to<br />
provide additional insight on the model’s operation.<br />
The outputs <strong>of</strong> <strong>CFAST</strong> are the sensible variables that are needed for assessing the<br />
environment in a building subjected to a fire. These include temperatures <strong>of</strong> the upper <strong>and</strong><br />
lower gas layers within each compartment, the ceiling/wall/floor temperatures within each<br />
User’s Guide Version 6 Chapter 1 Introduction • 1
compartment, the visible smoke <strong>and</strong> gas species concentrations within each layer, target<br />
temperatures <strong>and</strong> sprinkler activation time.<br />
Many <strong>of</strong> the outputs from the <strong>CFAST</strong> model are relatively insensitive to uncertainty in the<br />
inputs for a broad range <strong>of</strong> scenarios. However, the more precisely the scenario is defined,<br />
the more accurate the results will be. Not surprisingly, the heat release rate is the most<br />
important variable, because it provides the driving force for fire-driven flows. Other variables<br />
related to compartment geometry such as compartment height or vent sizes, while important<br />
for the model results, are typically more easily defined for specific design scenarios than fire<br />
related inputs.<br />
The first public release <strong>of</strong> <strong>CFAST</strong> was version 1.0 in June <strong>of</strong> 1990. This version was<br />
restructured from FAST 3 to incorporate the "lessons learned" from the zone model CCFM 4 ,<br />
namely that modifications <strong>and</strong> additions to the model are easier <strong>and</strong> more robust if the<br />
components such as the physical routines are separated from the solver code used by the<br />
model. Version 2 was released as a component <strong>of</strong> Hazard 1.2 in 1994 5 . The first <strong>of</strong> the 3.x<br />
series was released in 1995 <strong>and</strong> included a vertical flame spread algorithm, ceiling jets <strong>and</strong><br />
non-uniform heat loss to the ceiling, spot targets, <strong>and</strong> heating <strong>and</strong> burning <strong>of</strong> multiple objects<br />
in addition to multiple prescribed fires. Ignition was assigned based on a critical heat flux, a<br />
critical temperature, or a critical time input by the user. As <strong>CFAST</strong> evolved over the next five<br />
years, version 3 included smoke <strong>and</strong> heat detectors, suppression through heat release<br />
reduction, better characterization <strong>of</strong> flow through doors <strong>and</strong> windows, vertical heat<br />
conduction through ceiling/floor boundaries, <strong>and</strong> non-rectangular compartments. In 2000,<br />
version 4 was released <strong>and</strong> included horizontal heat conduction through walls, <strong>and</strong> horizontal<br />
smoke flow in corridors. Version 5 improved the combustion chemistry. Version 6 includes<br />
a new user interface written for Windows <strong>and</strong> revisions to the input file <strong>and</strong> model. The<br />
current version is 6.0<br />
2 • Chapter 1 Introduction User’s Guide Version 6
Chapter 2 Getting Started<br />
Installation from the <strong>CFAST</strong> Web Site<br />
<strong>CFAST</strong> is documented by two publications, this user’s guide <strong>and</strong> a technical reference<br />
guide 1 . The technical reference guide describes the underlying physical principles, provides a<br />
comparison with other models, includes an evaluation <strong>of</strong> the model following the guidelines<br />
<strong>of</strong> ASTM E1355 6 . This user’s guide describes how to use the model <strong>and</strong> applies to version 6<br />
<strong>and</strong> later. All the documentation is available on the web site.<br />
All <strong>of</strong> the files associated with <strong>CFAST</strong> can be obtained at:<br />
http://fire.nist.gov/cfast<br />
Information about new versions, bug fixes, <strong>and</strong> documentation for the model <strong>and</strong> s<strong>of</strong>tware<br />
are available on this web site. The <strong>CFAST</strong> distribution consists <strong>of</strong> a self-extracting set-up<br />
program for Windows-based<br />
PCs.<br />
After downloading the set-up<br />
program to a PC, doubleclicking<br />
on the file’s icon<br />
walks the user through a<br />
series <strong>of</strong> steps for installation<br />
<strong>of</strong> the program. The most<br />
important part <strong>of</strong> the<br />
installation is the creation <strong>of</strong><br />
a directory (called<br />
c:\nist\cfast6 by default) in<br />
which the <strong>CFAST</strong><br />
executable files, sample<br />
cases, <strong>and</strong> supplemental data<br />
files are installed.<br />
User’s Guide Version 6 Chapter 2 Getting Started • 3
Computer Hardware Requirements<br />
<strong>CFAST</strong> requires a relatively fast processor <strong>and</strong> a sufficient amount <strong>of</strong> r<strong>and</strong>om-access<br />
memory (RAM) for complex cases. The processor should be at least as fast as a 1 GHz<br />
Pentium III, with more than 256 MB <strong>of</strong> memory for complex cases. Typical calculation times<br />
for a 2 compartment scenario can range from a few seconds to multiple hours, depending on<br />
the details <strong>of</strong> the scenario. Plus, a large hard drive is needed to store the output <strong>of</strong><br />
calculations. It is not uncommon for a single calculation to generate output files as large as 1<br />
GB.<br />
Computer Operating System <strong>and</strong> S<strong>of</strong>tware<br />
Requirements<br />
<strong>CFAST</strong> <strong>and</strong> the input editor CEdit run under Micros<strong>of</strong>t Windows. The latest version has been<br />
tested <strong>and</strong> runs on both Windows 2000 <strong>and</strong> Windows XP.<br />
Verifying Correct Installation <strong>and</strong> Operation<br />
Sample input files are provided with the program for new users who are encouraged to first<br />
run the sample calculations before attempting to create an input file. To run the model,<br />
browse to the location <strong>of</strong> the <strong>CFAST</strong> input files (default location is c:\nist\cfast6\data, <strong>and</strong><br />
double click on the file named st<strong>and</strong>ard.in. This should open the file in the <strong>CFAST</strong> input<br />
editor, CEdit. The simple test case can be run from the program menu by selecting “Run!”<br />
<strong>and</strong> then “<strong>Model</strong> Simulation, <strong>CFAST</strong>”<br />
This runs a very simple test case <strong>and</strong> it should be completed quickly. Additional details on<br />
running <strong>CFAST</strong> are included in the next chapter. To verify that the installation has been done<br />
correctly, the output <strong>of</strong> the model should appear as follows.<br />
4 • Chapter 2 Getting Started User’s Guide Version 6
This case checks several attributes <strong>of</strong> the installation including the presence <strong>of</strong> the database<br />
files (see auxiliary files in the section on building input files). Additional explanation <strong>of</strong> the<br />
results <strong>of</strong> this run is described in Chapter 5.<br />
User’s Guide Version 6 Chapter 2 Getting Started • 5
Chapter 3 Running <strong>CFAST</strong><br />
Running <strong>CFAST</strong> is relatively simple. All <strong>of</strong> the parameters that describe a given fire scenario<br />
are entered into a text file that is referred to as the "data" or "input" file. In this document, the<br />
data file is designated as filename.in, where "filename" st<strong>and</strong>s for any character string that<br />
helps to identify the simulation. All <strong>of</strong> the output files associated with the calculation would<br />
typically have this common prefix. In addition to the input file, there are <strong>of</strong>ten several<br />
external files containing input parameters for the simulation. These files are referred to as<br />
"database" files, which contain parameters describing common materials <strong>and</strong> fuels.<br />
The <strong>CFAST</strong> distribution includes a Windows-based input editor called CEdit that allows the<br />
user to enter details <strong>of</strong> a simulation in a st<strong>and</strong>ard Windows format, save the data file to disk,<br />
<strong>and</strong> run the simulation with <strong>CFAST</strong> from within the program. Typically, all simulations<br />
would be developed <strong>and</strong> run from within CEdit. For numerous, similar or lengthy<br />
simulations, the fire model <strong>CFAST</strong> can be run from a comm<strong>and</strong> prompt window.<br />
It is suggested that a new user start with an existing data file, run it as is, <strong>and</strong> then make the<br />
appropriate changes to the input file for the desired scenario. By running a sample case, the<br />
user becomes familiar with the procedure <strong>and</strong> ensures that his/her computer is up to the task<br />
before embarking on learning how to create new input files.<br />
Creating a <strong>CFAST</strong> Input Data File<br />
All <strong>of</strong> the data to run the model is contained in an input data file. Also needed are databases<br />
for objects, thermophysical properties <strong>of</strong> boundaries, <strong>and</strong> sample prescribed fire descriptions<br />
provided with the model. These files contain information about the building geometry<br />
(compartment sizes, materials <strong>of</strong> construction, <strong>and</strong> material properties), connections between<br />
compartments (horizontal flow openings such as doors, windows), vertical flow openings in<br />
floors <strong>and</strong> ceilings, <strong>and</strong> mechanical ventilation connections), fire properties (fire size <strong>and</strong><br />
species production rates as a function <strong>of</strong> time), <strong>and</strong> specifications for detectors, sprinklers,<br />
<strong>and</strong> targets (position, size, heat transfer characteristics, <strong>and</strong> flow characteristics for<br />
sprinklers). Materials are defined by their thermal conductivity, specific heat, density,<br />
thickness, <strong>and</strong> burning behavior (heat release rate, ignition properties, <strong>and</strong> species yields).<br />
The input data file provides the program with parameters to describe the scenario under<br />
consideration. The parameters are organized into groups <strong>of</strong> related variables. Each line <strong>of</strong> the<br />
6 • Chapter 3 Running <strong>CFAST</strong> User’s Guide Version 6
input data file contains inputs related to a single group <strong>and</strong> begins with a keyword that<br />
identifies the input. For example, compartment geometry is described by a set <strong>of</strong> lines<br />
(keyword COMPA) that define the width, depth, <strong>and</strong> height <strong>of</strong> each compartment. A<br />
description <strong>of</strong> the input parameters can be found in Chapter 4.<br />
Typically, the input data file will be created with the input editor, CEdit, included with the<br />
<strong>CFAST</strong> distribution. A shortcut to the input editor is placed on the start menu during<br />
installation. To run, select Start, Program Files, <strong>and</strong> <strong>CFAST</strong>. Details <strong>of</strong> the program <strong>and</strong> its<br />
inputs are described in chapter 4.<br />
The program includes a number <strong>of</strong> menu items for<br />
ancillary functions. In addition to the normal file<br />
menu items to open <strong>and</strong> save input data files or to<br />
exit the program, a “Run!” menu is included to<br />
execute or view the current simulation. Menu items<br />
include the following:<br />
• Create Geometry File: used to create a geometry file for visualization with the<br />
program smokeview. The input data file is saved, if necessary, <strong>and</strong> <strong>CFAST</strong> is run<br />
with an option to only run through initialization. The resulting geometry can be<br />
viewed with the “Simulation Visualization, <strong>Smoke</strong>view” menu item, below.<br />
User’s Guide Version 6 Chapter 3 Running <strong>CFAST</strong> • 7
• <strong>Model</strong> Simulation, <strong>CFAST</strong>: runs the current input data file specification with the<br />
fire model <strong>CFAST</strong>. The input data file is saved, if necessary, <strong>and</strong> <strong>CFAST</strong> is run<br />
to completion. Additional details are described below in the section on starting a<br />
<strong>CFAST</strong> calculation. In order to visualize the results <strong>of</strong> the simulation with the<br />
program smokeview, the <strong>Smoke</strong>view Output Interval must be set to a non-zero<br />
value on the simulation Environment page. This is described in more detail in<br />
chapter 4.<br />
• Simulation Visualization, <strong>Smoke</strong>view: runs the program smokeview with the<br />
previously defined smokeview geometry file. This allows the user to see the<br />
compartment geometry <strong>and</strong> connections or view the results <strong>of</strong> the simulation<br />
visually. Additional details on the use <strong>of</strong> smokeview are included in the user’s<br />
guide for smokeview 7 .<br />
Two additional menu items can be selected to control details <strong>of</strong> the model simulation using<br />
<strong>CFAST</strong>.<br />
• Show <strong>CFAST</strong> Window: If checked, this menu item allows the user to see the<br />
windows comm<strong>and</strong> prompt that is used to execute the <strong>CFAST</strong> model when the<br />
<strong>Model</strong> Simulation, <strong>CFAST</strong> menu item is used. By default, this is not checked.<br />
Normally, this can be left unchecked. For troubleshooting, this can be selected to<br />
see additional details <strong>of</strong> the calculation as it progresses.<br />
8 • Chapter 3 Running <strong>CFAST</strong> User’s Guide Version 6
• Detailed Output File: If checked, this menu item directs the <strong>CFAST</strong> model to<br />
produce a detailed text output file. Details <strong>of</strong> the output are included in chapter 5.<br />
The “Tools” menu allows the user to view or change the<br />
database <strong>of</strong> material thermophysical properties used by<br />
the model <strong>and</strong> to select desired engineering units used in<br />
the input editor CEdit. Menu items include the following.<br />
• Edit Thermal Properties: Heat transfer through compartment surfaces, to<br />
secondary fire objects, or other targets that may be specified depends on userspecified<br />
thermal properties for the materials. These may be view or changed by<br />
the user as desired. It is important to note that these are global parameters that are<br />
not tied to any particular simulation. Thus, if values are changed, the changed<br />
values will affect all future simulations or repeated runs <strong>of</strong> earlier simulations.<br />
Materials properties include thermal conductivity, specific heat, density,<br />
thickness, <strong>and</strong> emissivity. Materials included in the database provided with the<br />
program are textbook values <strong>of</strong> common building <strong>and</strong> furnishing materials.<br />
In addition, a series <strong>of</strong> constants that define the absorption <strong>of</strong> HCl on<br />
compartment surfaces can be specified. Values for gypsum wallboard are<br />
included in the database supplied with the program.<br />
• Select Engineering Units: The <strong>CFAST</strong> model uses input values <strong>and</strong> provides<br />
output in S.I. units. Within the input editor, CEdit, the user may select engineering<br />
User’s Guide Version 6 Chapter 3 Running <strong>CFAST</strong> • 9
units <strong>of</strong> choice for input <strong>and</strong> output. These values are saved in the windows<br />
registry <strong>and</strong> may be changed at any time.<br />
File Naming <strong>and</strong> Location<br />
The View menu allows the user to view <strong>and</strong> / or print the input data<br />
file, output file (if the simulation has been run <strong>and</strong> a text output file<br />
generated) <strong>and</strong> the log file <strong>of</strong> the simulation.<br />
The Help menu accesses the online version <strong>of</strong> this user’s guide, the<br />
<strong>CFAST</strong> web site, or an about dialog box that displays the user license<br />
<strong>and</strong> version <strong>of</strong> the program.<br />
By default, the <strong>CFAST</strong> installation places all program files in the directory c:\NIST\<strong>CFAST</strong>6<br />
<strong>and</strong> sample input data files in the directory c:\NIST\<strong>CFAST</strong>6\DATA. While these locations<br />
can be changed during installation, the documentation in this user’s guide assumes these<br />
locations. File naming conventions in <strong>CFAST</strong> limit the length <strong>of</strong> file names to the DOS<br />
st<strong>and</strong>ard <strong>of</strong> 8 characters plus a three character extension such as st<strong>and</strong>ard.in. By default, all<br />
input data files are assumed to be located in the data directory at c:\NIST\<strong>CFAST</strong>6\DATA<br />
<strong>and</strong> all output files are written to this directory as well.<br />
In addition, there are several files that <strong>CFAST</strong> uses to communicate with its environment.<br />
They include 1) an input data file, required for every simulation, 2) the thermal properties<br />
database, 3) additional secondary fire source objects, 4) a binary data file containing all<br />
calculated values from the simulation, <strong>and</strong> 6) a series <strong>of</strong> spreadsheet files <strong>of</strong> important output<br />
variables. Documentation <strong>of</strong> the input data file is included as chapter 4 <strong>of</strong> this user’s guide.<br />
10 • Chapter 3 Running <strong>CFAST</strong> User’s Guide Version 6
The format <strong>of</strong> the configuration file, thermal database, <strong>and</strong> object databases are detailed in<br />
the appendices. Specification <strong>of</strong> the history <strong>and</strong> restart file is included in chapter 4.<br />
In <strong>CFAST</strong>, simulations are arranged as projects with all the files associated with a single<br />
simulation sharing a common base file name. For a simulation with a base file name <strong>of</strong><br />
“project”, the built-in naming conventions would identify the files <strong>of</strong> the simulation as<br />
follows:<br />
• input: project.in<br />
• text output file: project.out<br />
• spreadsheet output files: (Normal output) project.n.csv, (Species output)<br />
project.s.csv, (Flow output) project.f.csv, (Wall surface temperatures, targets <strong>and</strong><br />
sprinklers) project.w.csv<br />
• smokeview geometry file: project.smv<br />
• smokeview plot file: project.plt<br />
• binary output file: project.hi<br />
Starting a <strong>CFAST</strong> Calculation<br />
Running <strong>CFAST</strong> from CEdit<br />
Typically, model simulations are run directly from the input editor, CEdit. To run the model,<br />
either open an existing input data file from the program menus with “File”, “Open,” or create<br />
a new input data file within CEdit. The model is run by selecting “Run!” <strong>and</strong> then “<strong>Model</strong><br />
Simulation, <strong>CFAST</strong>.”<br />
User’s Guide Version 6 Chapter 3 Running <strong>CFAST</strong> • 11
This opens a window that shows the progress <strong>of</strong> the simulation, with information on the<br />
environment in each compartment <strong>of</strong> the simulation. Several buttons are also available as<br />
follows:<br />
The close button is disabled while the model is running. Once the simulation is<br />
complete (stopped by the user with the stop button), the close button closes the window <strong>and</strong><br />
returns to the main input editor.<br />
The stop button halts execution <strong>of</strong> the simulation, but leaves the simulation<br />
window on the screen. The stop button is available only when the simulation is in progress.<br />
Normally, model outputs are displayed <strong>and</strong> updated only at any <strong>of</strong> the time<br />
intervals specified on the environment page. For complex calculations, there may be a<br />
significant time period between display updates. The update button allows the user to see the<br />
current state <strong>of</strong> the calculation at any time. The update button is only available when the<br />
simulation is in progress.<br />
Running <strong>CFAST</strong> from a Comm<strong>and</strong> Prompt<br />
The model <strong>CFAST</strong> can also be run from a Windows comm<strong>and</strong> prompt. <strong>CFAST</strong> can now be<br />
run from any folder, <strong>and</strong> refer to a data file in any other folder. The fires <strong>and</strong> thermophysical<br />
properties have to be in either the data folder, or the executable folder. The data folder is<br />
checked first <strong>and</strong> then the executable folder.<br />
[drive1:\][folder1\]cfast [drive2:\][folder2\]project<br />
12 • Chapter 3 Running <strong>CFAST</strong> User’s Guide Version 6
The project name will have extensions appended as needed (see below). For example, to run<br />
a test case when the cfast executable is located in c:\nist\cfast6 <strong>and</strong> the input data file is<br />
located in c:\data, the following comm<strong>and</strong> could be used:<br />
c:\nist\cfast6\cfast c:\data\testfire0
Chapter 4 Setting up the Input<br />
File for <strong>CFAST</strong><br />
Overview<br />
<strong>CFAST</strong> is a computer program that uses an input file <strong>and</strong> generates one or more output files.<br />
The first step in performing a calculation is to generate a text input file that provides the<br />
program with all <strong>of</strong> the necessary information to describe the scenario under consideration.<br />
The most important inputs determine the geometry <strong>of</strong> the compartments in the scenario <strong>and</strong><br />
the connections between these compartments. Next, the fire, detection, <strong>and</strong> suppression<br />
characteristics <strong>of</strong> the scenario are defined. Finally, there are a number <strong>of</strong> parameters that<br />
customize the output from the model. Each line <strong>of</strong> the file contains a keyword label that<br />
identifies the input, followed by a number <strong>of</strong> numerical or text inputs corresponding to the<br />
particular input keyword. A simple input file is shown below. This example is used in the<br />
discussion <strong>of</strong> the output in Chapter 5.<br />
VERSN,6,Cable tray fire -- base case<br />
TIMES,1800,120,0,0,30<br />
EAMB,293.15,101300,0<br />
TAMB,293.15,101300,0,50<br />
LIMO2,10<br />
WIND,0,10,0.16<br />
COMPA,Compartment 1,9.1,5,4.6,0,0,0,GLASSFB3,CONCRETE,CONCRETE<br />
HVENT,1,2,1,1,2.4,0,1,0,0,1,1<br />
OBJECT,bunsen,1,4.55,2.5,0,1,1,0,0,0,1<br />
OBJECT,Wood_Wall,1,4.55,2.5,0,1,1,0,0,0,1<br />
TARGET,1,2.2,1.88,2.34,0,0,1,CONCRETE,IMPLICIT,PDE<br />
All <strong>of</strong> the inputs to the model are discussed in this chapter. Following the discussion that<br />
details each input, their engineering units <strong>and</strong> default values, notes are included that provided<br />
additional guidance or frequently addressed problems that may be encountered by the user.<br />
These notes take the form <strong>of</strong> a bulleted list such as:<br />
14 • Chapter 4 Setting up the Input File for <strong>CFAST</strong> User’s Guide Version 6
• The inputs may be integers (a simulation time <strong>of</strong> 1800 s), real numbers (a mass<br />
loss rate <strong>of</strong> 0.0082 kg/s), or text (a floor material <strong>of</strong> CONCRETE), as appropriate.<br />
The input file is a comma-separated ASCII text file <strong>and</strong> may be edited with a<br />
spreadsheet program or any text editor. It is possible to use a word processor but it<br />
is important to save the file in ASCII text format <strong>and</strong> not in a word processing<br />
format. It is worthy to note that some word processors will save punctuation <strong>and</strong><br />
other characters incorrectly for the simple ASCII text file used by <strong>CFAST</strong>. It is<br />
recommended that the input files be created with the input editor, CEdit, provided<br />
as part <strong>of</strong> the <strong>CFAST</strong> distribution. In addition to checking the input data for<br />
errors, it includes recommended limits for input values to assist in appropriate use<br />
<strong>of</strong> the model.<br />
• Each line <strong>of</strong> input consists <strong>of</strong> a label followed by one or more alphanumeric<br />
parameters associated with that input label, separated by commas. The label must<br />
always begin in the first space <strong>of</strong> the line <strong>and</strong> be in capital letters. Following the<br />
label, the values may start in any column, <strong>and</strong> all values must be separated by a<br />
comma. Values may contain decimal points if needed or desired. They are not<br />
required.<br />
• Inputs are in st<strong>and</strong>ard SI units. The maximum line length is 1024 characters, so<br />
all data for each keyword must fit in this number <strong>of</strong> characters.<br />
The installation program creates a shortcut to the input editor on the Windows start menu<br />
labeled “<strong>CFAST</strong>” that points to the input editor. Once started, the user is presented with a<br />
series <strong>of</strong> tabbed-pages for the various inputs in a <strong>CFAST</strong> input data file.<br />
These tabbed-pages organize the inputs for <strong>CFAST</strong> simulations into several categories:<br />
• Simulation Environment includes simulation time, specification <strong>of</strong> model<br />
outputs, <strong>and</strong> ambient conditions. Also included on the page are a constantly<br />
updated list <strong>of</strong> errors, warnings, <strong>and</strong> messages about the input file specification or<br />
model simulation.<br />
• Compartment Geometry defines the size, construction characteristics, <strong>and</strong><br />
position <strong>of</strong> the compartments in a simulation.<br />
• Horizontal Flow Vents, Vertical Flow Vents, <strong>and</strong> Mechanical Flow Vents<br />
allows the user to connect compartments with doors <strong>and</strong> windows, ceiling <strong>and</strong><br />
floor vents, or forced air ventilation systems.<br />
• <strong>Fire</strong>s include user specification <strong>of</strong> the initial fire source <strong>and</strong> any additional<br />
burning objects in one or more <strong>of</strong> the compartments <strong>of</strong> the simulation.<br />
• Detection / Suppression defines any heat alarms <strong>and</strong> sprinklers in the<br />
compartments <strong>of</strong> the simulation.<br />
User’s Guide Version 6 Chapter 4 Setting up the Input File for <strong>CFAST</strong> • 15
• Targets provide the ability calculate the temperature <strong>and</strong> net heat flux to objects<br />
placed <strong>and</strong> oriented arbitrarily in the structure.<br />
• Surface Connections allows for more detailed description <strong>of</strong> the connections<br />
between compartments in the simulation to better simulate the transfer <strong>of</strong> heat<br />
from compartment to compartment in the simulation.<br />
Each <strong>of</strong> these tabbed-pages is described in more detail below. In addition, a series <strong>of</strong> menus<br />
allow the user to open <strong>and</strong> save files; run the simulation, or access help <strong>and</strong> program<br />
information.<br />
Simulation Environment<br />
The Simulation Environment page defines the initial conditions <strong>and</strong> simulation time for the<br />
<strong>CFAST</strong> input file.<br />
Naming the Calculation, the Title Input<br />
The first thing to do when setting up an input file is to give the simulation a title. The first<br />
line in the <strong>CFAST</strong> input data file must be the <strong>CFAST</strong> version identification along with an<br />
optional short title for the simulation. This is a required input. The title comm<strong>and</strong> is the line<br />
that <strong>CFAST</strong> keys on to determine whether it has a correct data file.<br />
16 • Chapter 4 Setting up the Input File for <strong>CFAST</strong> User’s Guide Version 6
Title: The title is optional <strong>and</strong> may consist <strong>of</strong> letters, numbers, <strong>and</strong>/or symbols <strong>and</strong> may be<br />
up to 50 characters. It permits the user to label each run.<br />
Setting Time Limits <strong>and</strong> Output Options<br />
A TIMES line specifies the length <strong>of</strong> time over which the simulation takes place <strong>and</strong> how<br />
<strong>of</strong>ten output will be generated. This is a required input. There are one to four entries in this<br />
line<br />
Simulation Time (default units: s, default value, 900 s): The length <strong>of</strong> time over which the<br />
simulation takes place. This is a required input which should be entered even if all<br />
other fields are not included. The maximum value for this input is 86400 s (1 day).<br />
Text Output Interval (default units: s, default value, 50 s): The print interval is the time<br />
interval between each printing <strong>of</strong> the output values. If omitted or less than or equal to<br />
zero, no output values will occur.<br />
Binary Output Interval (default units: s, default value: no output): <strong>CFAST</strong> can store all <strong>of</strong><br />
the results <strong>of</strong> the model simulation in a binary-formatted file which can be saved for<br />
later analysis or output using utility programs that come with the <strong>CFAST</strong> s<strong>of</strong>tware.<br />
This input defines the time interval between outputs <strong>of</strong> the model results in binary<br />
format.<br />
Spreadsheet Output Interval (default units: s, default value, 10 s): <strong>CFAST</strong> can output a<br />
subset <strong>of</strong> the results <strong>of</strong> the model simulation in a comma-delimited alphanumeric<br />
format which can be read by most spreadsheet s<strong>of</strong>tware. This is designed to be<br />
imported into a spreadsheet for further analysis or graphing <strong>of</strong> the results <strong>of</strong> the<br />
simulation. This input defines the time interval between outputs <strong>of</strong> the model results<br />
in a spreadsheet-compatible format. A value greater than zero must be used if the<br />
spreadsheet file is to be used.<br />
User’s Guide Version 6 Chapter 4 Setting up the Input File for <strong>CFAST</strong> • 17
<strong>Smoke</strong>view Output Interval (default units: s, default value: 10 s): <strong>CFAST</strong> can output a<br />
subset <strong>of</strong> the results in a format compatible with the visualization program<br />
smokeview. This input defines the time interval between outputs <strong>of</strong> the model results<br />
in a smokeview-compatible format. A value greater than zero must be used if the<br />
spreadsheet output is desired.<br />
In addition to the input data file created specifically for a <strong>CFAST</strong> simulation, there are a<br />
number files that <strong>CFAST</strong> uses to define default values <strong>and</strong> other input information, <strong>and</strong> to<br />
output the results <strong>of</strong> the simulation for later analysis. They include 1) a thermal properties<br />
file, 2) files <strong>of</strong> predefined fire objects, 3) a binary history file, <strong>and</strong> 4) a spreadsheetcompatible<br />
output file.<br />
The thermal properties file contains material properties for compartment surfaces, target<br />
objects that may be placed in compartments in the simulation to monitor surface temperature<br />
<strong>and</strong> heat flux to the objects, <strong>and</strong> fire objects, in addition to the main fire in the simulation that<br />
may ignite based on their surface temperature or incident flux onto the surface <strong>of</strong> the object.<br />
The predefined fire objects files contain definitions for a number <strong>of</strong> reference fires from the<br />
literature or developed by the user that may be included in a simulation. The thermal<br />
properties <strong>and</strong> fire objects files may be modified by the user. Details <strong>of</strong> the files are included<br />
in the appendices. There are default files included in the <strong>CFAST</strong> distribution.<br />
Thermal Properties File: The name specifies a file from which the program reads data for<br />
names specified in the compartment, target, <strong>and</strong> object fire specifications. The default<br />
name is thermal.csv which is included with the <strong>CFAST</strong> distribution. The format <strong>of</strong><br />
this file is detailed in the appendix.<br />
Ambient Conditions<br />
Ambient conditions define the environment at which the scenario begins. This allows the<br />
user to specify the temperature, pressure, <strong>and</strong> station elevation <strong>of</strong> the ambient atmosphere, as<br />
well as the absolute wind pressure to which the structure is subjected. Pressure interior to a<br />
structure is calculated simply as a lapse rate (related to the height above sea level) based on<br />
the NOAA/NASA tables 8 . This modification is applied to the vents which connect to the<br />
exterior ambient. The calculated pressure change is modified by the wind coefficient for<br />
each vent. This coefficient, which can vary from -1.0 to +1.0, nominally from -0.8 to +0.8,<br />
determines whether the vent is facing away from or into the wind. The pressure change is<br />
multiplied by the vent wind coefficient <strong>and</strong> added to the external ambient for each vent<br />
which is connected to the outside. There is an ambient for the interior <strong>and</strong> for the exterior <strong>of</strong><br />
the structure. Three keywords define the ambient conditions: TAMB for the interior <strong>of</strong> the<br />
structure, EAMB for the exterior <strong>of</strong> the structure is EAMB, <strong>and</strong> WIND for the wind<br />
information.<br />
18 • Chapter 4 Setting up the Input File for <strong>CFAST</strong> User’s Guide Version 6
Ambient Temperature (default units: K, default value: 293.15 K): Initial ambient<br />
temperature inside (for TAMB) or outside (For EAMB) the structure at the station<br />
elevation.<br />
Ambient Pressure (default units: Pa, default value: 101300 Pa): Initial values for ambient<br />
atmospheric pressure inside (for TAMB) <strong>and</strong> outside (for EAMB) the structure at the<br />
station elevation. Default value is st<strong>and</strong>ard atmospheric pressure at sea level (0 m<br />
elevation) <strong>of</strong> 101.3 kPa. Input units are in Pa. These values define st<strong>and</strong>ard conditions<br />
as defined in St<strong>and</strong>ard Atmosphere as noted in the H<strong>and</strong>book <strong>of</strong> Chemistry <strong>and</strong><br />
Physics 9 . There is a set <strong>of</strong> numerical approximations in the <strong>CFAST</strong> code which<br />
duplicate the pressure/temperature/altitude relationships in the h<strong>and</strong>book.<br />
Elevation (defaults units: m, default value: 0 m): The height where the ambient pressure <strong>and</strong><br />
temperature were specified. This is the reference datum for calculating the density <strong>of</strong><br />
the atmosphere as well as the temperature <strong>and</strong> pressure inside <strong>and</strong> outside <strong>of</strong> the<br />
structure as a function <strong>of</strong> height.<br />
Relative humidity (default units % RH, default value: 50 %): The initial relative humidity in<br />
the system, only specified for the interior with the TAMB comm<strong>and</strong>. This is<br />
converted to kilograms <strong>of</strong> water per cubic meter.<br />
The wind speed, scale height, <strong>and</strong> power law are used to calculate the wind coefficient for<br />
each vent connected to the outside. The wind velocity is specified at some reference height.<br />
The power law then provides a lapse rate for the wind speed. An assumption is that the wind<br />
speed is zero at the surface. The formula used to calculate the wind speed at the height <strong>of</strong><br />
any vent is show below. The wind is applied to each external opening as a change in<br />
pressure outside <strong>of</strong> the vent.<br />
Wind Speed (default units: m/s, default value 0 m/s): Wind speed at the reference elevation.<br />
User’s Guide Version 6 Chapter 4 Setting up the Input File for <strong>CFAST</strong> • 19
Scale Height: (default units: m, default value: 0 m)): Reference height at which the reference<br />
wind speed is measured.<br />
Power Law Coefficient (default units: dimensionless, default value 0.16): The power law<br />
used to calculate the wind speed as a function <strong>of</strong> height. Default value is 0.16. Using<br />
the notation that VW, is the wind speed at the reference height HW, <strong>and</strong> PW is the<br />
2<br />
power law, the exterior pressure is modified by δ P = CW<br />
ρV<br />
<strong>and</strong> ( ) W P<br />
V = VW<br />
H i HW<br />
where Hi is the position <strong>of</strong> the vent 1 .<br />
• In order to see the effect <strong>of</strong> wind, the corresponding parameter for the ventilation<br />
keyword must be specified. The default for the wind vector is 0, which turns <strong>of</strong>f<br />
wind effects. Please see the HVENT comm<strong>and</strong>, below.<br />
• The choice for station elevation, temperature <strong>and</strong> pressure must be consistent.<br />
Outside <strong>of</strong> that limitation, the choice is arbitrary. It is <strong>of</strong>ten convenient to choose<br />
the base <strong>of</strong> a structure to be at zero height <strong>and</strong> then reference the height <strong>of</strong> the<br />
structure with respect to that height. The temperature <strong>and</strong> pressure must then be<br />
measured at that position. Another possible choice would be the pressure <strong>and</strong><br />
temperature at sea level, with the structure elevations then given with respect to<br />
mean sea level. This is also acceptable, but somewhat more tedious in specifying<br />
the construction <strong>of</strong> a structure. Either <strong>of</strong> these choices works though, so long as<br />
they are consistent. Usually, the station elevation is set to zero <strong>and</strong> the pressure to<br />
ambient. The effect <strong>of</strong> changing these values is small for small changes. There<br />
will be an effect for places at altitude such as Denver, Colorado, but even there<br />
the effect is not pronounced. Note that the equations implemented in the model<br />
are not designed to h<strong>and</strong>le negative elevations <strong>and</strong> altitudes. It is suggested that<br />
the defaults be used.<br />
• These three parameters are optional. If they are not included in the input file,<br />
default values are used.<br />
Compartment Geometry<br />
20 • Chapter 4 Setting up the Input File for <strong>CFAST</strong> User’s Guide Version 6
The Compartment Geometry page defines the size, position, materials <strong>of</strong> construction, <strong>and</strong><br />
flow characteristics for the compartments in the simulation. Initially, only the simulation<br />
environment page <strong>and</strong> the “Add” button on the compartment geometry page is enabled; all<br />
other pages are not available to the user for detailed inputs until a compartment has been<br />
added to the simulation.<br />
Most <strong>of</strong> the tabbed pages in the program are <strong>of</strong> similar design, with a summary <strong>of</strong> the defined<br />
items in table form at the top <strong>of</strong> the page, a series <strong>of</strong> buttons to add, remove, or modify the<br />
item highlighted in the summary table, <strong>and</strong> a number <strong>of</strong> individual inputs below which<br />
details all <strong>of</strong> the inputs for the item selected in the summary table. The buttons included on<br />
the compartment geometry page are as follows:<br />
Use the Add button to create a new compartment with default values for all<br />
entries.<br />
Use the Duplicate button to create a copy <strong>of</strong> the compartment currently selected<br />
in the summary table at the top <strong>of</strong> the page. The new compartment is added to the end<br />
<strong>of</strong> the list with the named changed to indicate it is a copy <strong>of</strong> the selected item.<br />
Use the Move Up <strong>and</strong> Move Down buttons to change the order <strong>of</strong> the<br />
list <strong>of</strong> compartments in the summary table. This simply changes the automatically<br />
assigned compartment numbers for the compartments. Compartments can be ordered<br />
as desired.<br />
User’s Guide Version 6 Chapter 4 Setting up the Input File for <strong>CFAST</strong> • 21
Use the Remove button to delete the selected compartment from the list <strong>of</strong><br />
compartments in the summary table. Other compartments are renumbered once the<br />
compartment is deleted.<br />
Compartment Name: Compartments are identified by a unique alphanumeric name. This<br />
may be a simple as a single character or number, or a description <strong>of</strong> the compartment.<br />
Defining Compartment Size <strong>and</strong> Position<br />
In order to model a fire scenario, the size <strong>and</strong> elevation <strong>of</strong> each compartment in the structure<br />
must be specified. For a compartment, the width, depth, compartment height <strong>and</strong> height <strong>of</strong><br />
the floor <strong>of</strong> the compartment provide this specification. The maximum number <strong>of</strong><br />
compartments for version 6 is thirty. The usual assumption is that compartments are<br />
rectangular parallelepipeds. However, the <strong>CFAST</strong> model can accommodate odd shapes as<br />
equivalent floor area parallelepipeds or with a cross-sectional area that varies with height.<br />
At least one compartment must be specified in the input file. There are no defaults for<br />
compartment size. There are defaults for absolute positioning (0,0,0). The fully mixed (single<br />
zone) <strong>and</strong> corridor models are turned <strong>of</strong>f by default.<br />
Compartments in <strong>CFAST</strong> are most<br />
typically defined by a width, depth, <strong>and</strong><br />
height. If desired, the user can prescribe<br />
the cross-sectional area <strong>of</strong> the compartment<br />
as a function <strong>of</strong> height from floor to ceiling<br />
for other shapes. The absolute position <strong>of</strong><br />
the compartment with respect to a single<br />
structure reference point can be defined to<br />
ease visualization or to allow exact<br />
placement <strong>of</strong> vents <strong>and</strong> surfaces relative to<br />
other compartments in a detailed<br />
calculation. This specification is important<br />
for utilizing the corridor flow algorithm<br />
with the HALL comm<strong>and</strong> <strong>and</strong> for positioning the compartments for visualization in<br />
SMOKEVIEW.<br />
The relevant <strong>CFAST</strong> keywords are COMPA to define the compartment size <strong>and</strong> materials,<br />
HALL or ONEZ to define flow characteristics in the compartment, <strong>and</strong> ROOMA / ROOMH<br />
22 • Chapter 4 Setting up the Input File for <strong>CFAST</strong> User’s Guide Version 6
to define a variable cross-sectional area for the compartment. The COMPA comm<strong>and</strong> is<br />
required for each compartment as a basic definition for the compartment, even if there are<br />
subsequent modifications by the HALL, ONEZ, ROOMA, or ROOMH keywords which<br />
follow. Details <strong>of</strong> the <strong>CFAST</strong> keywords are included in the appendix.<br />
Width: specifies the width <strong>of</strong> the compartment as measured on the X axis from the origin<br />
(0,0,0) <strong>of</strong> the compartment.<br />
Depth: specifies the depth <strong>of</strong> the compartment as measured on the Y axis from the origin<br />
(0,0,0) <strong>of</strong> the compartment.<br />
Height: specifies the height <strong>of</strong> the compartment as measured on the Z axis from the origin<br />
(0,0,0) <strong>of</strong> the compartment.<br />
Absolute Width Position: specifies the<br />
absolute x coordinate <strong>of</strong> the lower,<br />
left, front corner <strong>of</strong> the room.<br />
Absolute Depth Position: specifies the<br />
absolute y coordinate <strong>of</strong> the lower,<br />
left, front corner <strong>of</strong> the room.<br />
Absolute Floor Height: specifies the<br />
height <strong>of</strong> the floor <strong>of</strong> each<br />
compartment with respect to station<br />
elevation specified by the internal<br />
ambient conditions reference height<br />
parameter. The reference point<br />
must be the same for all elevations in the input data. For example, the two rooms in<br />
the example would be located at (0,0,0) <strong>and</strong> (0,2,2.3).<br />
<strong>Model</strong>ing the Compartment as a Tall Shaft or Long Corridor<br />
For tall compartments or those removed from the room <strong>of</strong> fire origin, the compartment may<br />
be modeled as a single, well-mixed zone rather than the default two-zone assumption. A<br />
single zone approximation is appropriate for smoke flow far from a fire source, where the<br />
two-zone layer stratification is less pronounced than in compartments near the fire. This is<br />
used in situations where the stratification does not occur. Examples are elevators, shafts,<br />
complex stairwells, <strong>and</strong> compartments far from the fire.<br />
User’s Guide Version 6 Chapter 4 Setting up the Input File for <strong>CFAST</strong> • 23
For long hallways or corridors, there can be a significant delay time for the initial hot gas<br />
layer to travel along the ceiling to the far end <strong>of</strong> the compartment. By estimating the time<br />
required for a ceiling jet to travel in a corridor <strong>and</strong> the temperature distribution along the<br />
corridor, <strong>CFAST</strong> can delay flow into compartments connected to corridors until the ceiling<br />
jet has passed the connections to these compartments.<br />
50 % Decay Velocity: ceiling jet velocity at the distance from the reference point where the<br />
temperature falls <strong>of</strong>f by 50 %. Default velocity <strong>and</strong> depth are calculated by the<br />
program based on the vent size, flow <strong>and</strong> layer thickness in the horizontal vent from<br />
which flow first enters the hallway, <strong>and</strong> on the width <strong>of</strong> the hallway 1 .<br />
50 % Decay Depth: ceiling jet depth at the distance from the reference point where the<br />
temperature falls <strong>of</strong>f by 50 %.<br />
50 % Decay Distance: distance from the reference point where the temperature falls <strong>of</strong>f by<br />
50 %.<br />
• Since the algorithm depends on the flow into the hallway to determine default<br />
ceiling jet velocity <strong>and</strong> depth, the main fire compartment should not be specified<br />
as a hallway. In the main fire compartment, a stable layer will build before flow<br />
into the compartment through horizontal vents.<br />
• The zone model concept best applies for an enclosure in which the width <strong>and</strong><br />
length are not too different. If the horizontal dimensions <strong>of</strong> the room differ too<br />
much (i.e., the room looks like a corridor), the flow pattern in the room may<br />
become asymmetrical. If the enclosure is too shallow, the temperature may have<br />
significant radial differences. The width <strong>of</strong> the plume may at some height become<br />
equal to the width <strong>of</strong> the room <strong>and</strong> the model assumptions may fail in a tall <strong>and</strong><br />
narrow enclosure. Therefore, the user should recognize approximate limits on the<br />
ratio <strong>of</strong> the length (L), width (W), <strong>and</strong> height (H) <strong>of</strong> the compartment.<br />
• If the aspect ratio (length/width) is greater than about 10, the corridor flow<br />
algorithm should be used. This provides the appropriate filling time. Similarly, for<br />
tall shafts (elevators <strong>and</strong> stairways), a single zone approximation is more<br />
appropriate <strong>and</strong> the shaft option should be used. It was found experimentally that<br />
the mixing between a plume <strong>and</strong> lower layer due to the interaction with the walls<br />
<strong>of</strong> the shaft caused complete mixing. This is the flip side <strong>of</strong> the corridor problem<br />
<strong>and</strong> occurs at a ratio <strong>of</strong> the height to characteristic floor length <strong>of</strong> about 10. The<br />
following quantitative limits are recommended:<br />
Group Acceptable Special<br />
consideration<br />
required<br />
Corridor flow<br />
or shaft<br />
algorithm<br />
(L/W) max L/W
Thermal Properties <strong>of</strong> Boundaries<br />
To calculate heat loss through the ceiling, walls, <strong>and</strong> floor <strong>of</strong> a compartment, the properties<br />
<strong>of</strong> the bounding surfaces must be known. This includes the thermophysical properties <strong>of</strong> the<br />
surfaces <strong>and</strong> the arrangement <strong>of</strong> adjacent compartments if calculation <strong>of</strong> intercompartment<br />
heat transfer is to be calculated.<br />
The thermophysical properties <strong>of</strong> the surfaces which define compartments are described by<br />
specifying the thermal conductivity, specific heat, emissivity, density, <strong>and</strong> thickness <strong>of</strong> the<br />
enclosing surfaces for each material <strong>and</strong> then assigning the material to the ceiling, walls, <strong>and</strong><br />
floor <strong>of</strong> a compartment. Currently, thermal properties for materials are read from a thermal<br />
data file unique to <strong>CFAST</strong>. The thermophysical properties are specified at one condition <strong>of</strong><br />
temperature, humidity, etc. There can be as many as three layers per boundary, but they are<br />
specified in the thermal database itself. (See the explanation in the section on auxiliary files<br />
for additional details.)<br />
The default name for the thermal properties database is thermal.csv. Another name can be<br />
used using the keyword THRMF in the input data file for the scenario <strong>of</strong> interest. This<br />
thermal data file is also used for targets <strong>and</strong> other objects<br />
The bounding surfaces are the ceilings, walls <strong>and</strong> floors that define a compartment. These are<br />
referred to as thermophysical boundaries, since each participates in conduction <strong>and</strong> radiation<br />
as well as defining the compartments, unless these phenomena are explicitly turned <strong>of</strong>f.<br />
Ceiling Material (default value: Gypsum Board): material name from the thermal properties<br />
data file used for the ceiling surface <strong>of</strong> the compartment.<br />
Wall Material (default value: Gypsum Board): material name from the thermal properties<br />
data file used for the wall surfaces <strong>of</strong> the compartment.<br />
Floor Material (default value: Off): material name from the thermal properties data file used<br />
for the floor surface <strong>of</strong> the compartment.<br />
• If the thermophysical properties <strong>of</strong> the enclosing surfaces are not included,<br />
<strong>CFAST</strong> will treat them as adiabatic (no heat transfer).<br />
• If a name is used which is not in the database, the model should stop with an error<br />
message. The keyword in the data file simply gives a name (such as CONCRETE)<br />
User’s Guide Version 6 Chapter 4 Setting up the Input File for <strong>CFAST</strong> • 25
which refers to the properties for that material in the thermal data file (see section<br />
4.2.3 <strong>and</strong> Appendix A for details on the thermophysical database).<br />
• Since most <strong>of</strong> the heat conduction is through the ceiling, <strong>and</strong> since the conduction<br />
calculation takes a significant fraction <strong>of</strong> the computation time, it is recommended<br />
that initial calculations be made using the ceiling only. Adding the walls<br />
generally has a small effect on the results, <strong>and</strong> the floor contribution is usually<br />
negligible. Clearly, there are cases where the above generalization does not hold,<br />
but it may prove to be a useful screening technique. A caveat in including floor<br />
properties is that the set <strong>of</strong> equations describing heat transfer becomes difficult to<br />
solve once the thermal wave from the compartments reaches the unexposed side<br />
<strong>of</strong> a floor. The back surfaces <strong>of</strong> compartments are assumed to be exposed to<br />
ambient conditions unless specifically specified (see the section on Intercompartment<br />
Heat Transfer (Conduction)) to specify heat transfer connections<br />
between compartments).<br />
Compartment Connections<br />
Flow through vents can be natural flow through doors, windows, or openings in ceilings <strong>and</strong><br />
floors; or forced flow in a mechanical ventilation system. Natural flow comes in two<br />
varieties. The first is referred to as horizontal flow. It is the flow which is normally thought<br />
<strong>of</strong> in discussing fires. It encompasses flow through doors, windows <strong>and</strong> so on. The other is<br />
vertical flow <strong>and</strong> can occur if there is a hole in the ceiling or floor <strong>of</strong> a compartment. This<br />
latter phenomena is useful in some scenarios such as in a ship where openings in floors <strong>and</strong><br />
ceilings through scuttles are common <strong>and</strong> in buildings with manual or automatic heat <strong>and</strong><br />
smoke venting.<br />
Flow through normal vents is governed by the pressure difference across a vent. There are<br />
two situations which give rise to flow through vents. The first is flow <strong>of</strong> air or smoke driven<br />
from a compartment by buoyancy. The second type <strong>of</strong> flow is due to expansion which is<br />
particularly important when conditions in the fire environment are changing rapidly. Rather<br />
than depending entirely on density differences between the two gases, the flow is forced by<br />
volumetric expansion.<br />
In addition to natural flow, forced flow from mechanical ventilation can affect a fire as well.<br />
More important than affecting the fire, however, is the dispersal <strong>of</strong> the smoke <strong>and</strong> toxic gases<br />
from the fire to adjacent spaces, if ventilation continues to operate after a fire starts.<br />
Atmospheric pressure is about 100 000 Pa. <strong>Fire</strong>s produce pressure changes from 1 Pa to 1000<br />
Pa <strong>and</strong> mechanical ventilation systems typically involve pressure differentials <strong>of</strong> about 1 Pa<br />
to 100 Pa. In order to address pressure-induced flow, pressure differences <strong>of</strong> about 0.1 Pa<br />
out <strong>of</strong> 100 000 Pa for the overall problem or 10 -4 Pa for adjacent compartments must be<br />
tracked.<br />
The keywords which describe the various flow regimes are:<br />
• Windows <strong>and</strong> doors (horizontal flow through vertical vents): HVENT, specifies<br />
vent which connect compartments horizontally<br />
26 • Chapter 4 Setting up the Input File for <strong>CFAST</strong> User’s Guide Version 6
• Holes in a ceiling/floor (vertical flow through horizontal vents: VVENT, specifies<br />
a vent which connects compartments vertically<br />
• HVAC specification: MVENT specifies a vent which connects compartments<br />
with a forced flow<br />
For all three types <strong>of</strong> vents the size <strong>of</strong> the vent opening (expressed as a fraction <strong>of</strong> the<br />
original opening) may be changed:<br />
• EVENT change the opening fraction <strong>of</strong> the specified vent at a chosen time.<br />
Each <strong>of</strong> these comm<strong>and</strong>s is discussed in the sections that follow.<br />
Defining Horizontal Natural Flow Connections (Doors, Windows)<br />
Horizontal flow connections may include doors between compartments or to the outdoors as<br />
well as windows in the compartments. These specifications do not necessarily correspond to<br />
physically connecting the walls between specified compartments. Rather, lack <strong>of</strong> an opening<br />
simply prevents flow between the compartments. Horizontal flow connections may also be<br />
used to account for leakage between compartments or to the outdoors.<br />
Horizontal connections can only be created between compartments that physically overlap in<br />
elevation at some point. These may include doors between compartments or windows in the<br />
compartments (between compartments or to the outdoors). Openings to the outside are<br />
included as openings to a compartment with a number one greater than the number <strong>of</strong><br />
compartments described in the geometry section. The relevant <strong>CFAST</strong> keyword is HVENT.<br />
Details <strong>of</strong> the <strong>CFAST</strong> keywords are included in the appendix.<br />
User’s Guide Version 6 Chapter 4 Setting up the Input File for <strong>CFAST</strong> • 27
Most <strong>of</strong> the tabbed pages in the program are <strong>of</strong> similar design, with a summary <strong>of</strong> the defined<br />
items in table form at the top <strong>of</strong> the page, a series <strong>of</strong> buttons to add, remove, or modify the<br />
item highlighted in the summary table, <strong>and</strong> a number <strong>of</strong> individual inputs below which<br />
details all <strong>of</strong> the inputs for the item selected in the summary table. The buttons included on<br />
the horizontal flow vents page are as follows.<br />
Use the Add button to create a new horizontal flow vent with default values for<br />
all entries.<br />
Use the Duplicate button to create a copy <strong>of</strong> the horizontal flow vent currently<br />
selected in the summary table at the top <strong>of</strong> the page. The new vent is added to the end<br />
<strong>of</strong> the list with the named changed to indicate it is a copy <strong>of</strong> the selected item.<br />
Use the Move Up <strong>and</strong> Move Down buttons to change the order <strong>of</strong> the<br />
list <strong>of</strong> horizontal flow vents in the summary table. This simply changes the<br />
automatically assigned vent numbers for the vents. Vents can be ordered as desired.<br />
Use the Remove button to delete the selected horizontal flow vent from the list <strong>of</strong><br />
horizontal flow vents in the summary table. Other vents are renumbered once the<br />
compartment is deleted.<br />
28 • Chapter 4 Setting up the Input File for <strong>CFAST</strong> User’s Guide Version 6
First Compartment: First <strong>of</strong> the two compartments to be connected by a horizontal flow<br />
vent. Compartments are numbered automatically by the input editor <strong>and</strong> by the<br />
model in the order they are read from the input data file <strong>and</strong>/or the order they appear<br />
in the summary table on the compartment geometry page. Compartment numbers<br />
begin with 1, so the first compartment is number 1, the second 2, <strong>and</strong> so forth.<br />
Second Compartment: Second <strong>of</strong> the two compartments to be connected by a horizontal<br />
flow vent. Compartments are numbered automatically by the input editor <strong>and</strong> by the<br />
model in the order they are read from the input data file <strong>and</strong>/or the order they appear<br />
in the summary table on the compartment geometry page. Compartment numbers<br />
begin with 1, so the first compartment is number 1, the second 2, <strong>and</strong> so forth.<br />
Vent Number: It is possible to define a total <strong>of</strong> 25 horizontal flow connections between any<br />
pair <strong>of</strong> compartments. A number from 1 to 25 uniquely identifies the connection.<br />
Normally, this number is automatically assigned by the input editor based on the<br />
order they appear in the summary table on the horizontal flow vents page.<br />
Sill (default units: m, default value: none): Sill height is the height <strong>of</strong> the bottom <strong>of</strong> the<br />
opening relative to the floor <strong>of</strong> the compartment selected as the first compartment.<br />
S<strong>of</strong>fit (default units: m, default value: none): Position <strong>of</strong> the top <strong>of</strong> the opening relative to the<br />
floor <strong>of</strong> the compartment selected as the first compartment.<br />
Width (default units: m, default value: none): The width <strong>of</strong> the opening.<br />
Horizontal flow vents may be opened or closed during the fire. The relevant <strong>CFAST</strong><br />
keyword is EVENT. The initial format <strong>of</strong> EVENT is similar to HVENT specifying the<br />
connecting compartments <strong>and</strong> vent number. Each EVENT line in the input file details the<br />
open/close time dependent characteristics for one horizontal flow vent by specifying a<br />
fractional value <strong>and</strong> a time. The default is 1.0 which is a fully open vent. A value <strong>of</strong> 0.5<br />
would specify a vent which is halfway open.<br />
Initial Opening Fraction: Flow through horizontal vents is calculated based on the area <strong>of</strong><br />
the vent. Normally, the vent is fully open. If desired, the user may specify a fraction<br />
between 0 <strong>and</strong> 1 that allows the vent to be partially or fully closed at the beginning <strong>of</strong><br />
the simulation. In the model calculation, the vent width is multiplied by this fraction.<br />
The opening fraction may be changed at any time in the simulation through the use <strong>of</strong><br />
the EVENT comm<strong>and</strong>.<br />
Change Opening Fraction At Time: Time during the simulation at which to change the<br />
opening fraction.<br />
Final Opening Fraction: for horizontal flow vents, the fraction specifies the fractional width<br />
opening <strong>of</strong> the vent. Fractional values must be between 0 <strong>and</strong> 1.<br />
Wind: The wind coefficient is the cosine <strong>of</strong> the angle between the wind vector <strong>and</strong> the vent<br />
opening. This applies only to vents which connect to the outside. The range <strong>of</strong><br />
values is -1.0 to 1.0 with a default value <strong>of</strong> zero. In the input editor, this is specified<br />
as the angle between the face <strong>of</strong> the vent <strong>and</strong> the wind direction.<br />
User’s Guide Version 6 Chapter 4 Setting up the Input File for <strong>CFAST</strong> • 29
There are also two parameters which are used to locate the compartments relative to each<br />
other. These are used to incorporate additional three dimensional information <strong>of</strong> the relative<br />
location <strong>of</strong> the vents with respect to each other. In the compartment view <strong>of</strong> <strong>CFAST</strong>, the<br />
orientation is that the rotation/translation point <strong>of</strong> the compartment is the back/bottom/left. In<br />
this view, both parameters would be with respect to the left h<strong>and</strong> side <strong>of</strong> the respective<br />
compartments. This allows the corridor filling model to incorporate a delay time for filling<br />
based on the separation between the vents. These parameters are needed only if the HALL<br />
comm<strong>and</strong> is used.<br />
First Compartment Offset: Horizontal distance between the centerline <strong>of</strong> this vent <strong>and</strong> the<br />
reference point in the first compartment.<br />
Second Compartment Offset: Horizontal distance between the centerline <strong>of</strong> this vent <strong>and</strong><br />
the reference point in the second compartment.<br />
• The s<strong>of</strong>fit <strong>and</strong> sill specifications are with respect to the first compartment<br />
specified <strong>and</strong> is not necessarily symmetric since the elevation <strong>of</strong> the second<br />
compartment may be different than the first. Reversing the order <strong>of</strong> the<br />
compartment designations does make a difference.<br />
Defining Vertical Natural Flow Connections (Ceiling or Floor Holes,<br />
Hatches)<br />
This section <strong>of</strong> the input data file describes these vertical flow openings. Examples <strong>of</strong> these<br />
openings are scuddles in a ship, or a hole in the ro<strong>of</strong> <strong>of</strong> a residence. Combined buoyancy- <strong>and</strong><br />
pressure-driven (i.e., forced) flow through a vertical flow vent is possible when the connected<br />
spaces adjacent to the vent are filled with gases <strong>of</strong> different density in an unstable<br />
configuration, with the density <strong>of</strong> the top space larger than that <strong>of</strong> the bottom space. With a<br />
moderate cross-vent pressure difference, the instability leads to a bi-directional flow between<br />
the two spaces. For relatively large cross-vent pressure difference the flow through the vent<br />
is unidirectional, from the high- to the low-pressure space.<br />
Connections can exist between compartments or between a compartment <strong>and</strong> the outdoors.<br />
Openings to the outside are included as openings to a compartment with a number one<br />
greater than the number <strong>of</strong> compartments defined in the scenario. These connections are<br />
described by the VVENT keyword. Each VVENT line in the input file describes one vertical<br />
vent. There are four parameters which include each <strong>of</strong> the connected compartments, the<br />
shape <strong>of</strong> the opening, <strong>and</strong> the effective area <strong>of</strong> the vent.<br />
30 • Chapter 4 Setting up the Input File for <strong>CFAST</strong> User’s Guide Version 6
Most <strong>of</strong> the tabbed pages in the program are <strong>of</strong> similar design, with a summary <strong>of</strong> the defined<br />
items in table form at the top <strong>of</strong> the page, a series <strong>of</strong> buttons to add, remove, or modify the<br />
item highlighted in the summary table, <strong>and</strong> a number <strong>of</strong> individual inputs below which<br />
details all <strong>of</strong> the inputs for the item selected in the summary table. The buttons included on<br />
the vertical flow vents page are as follows.<br />
Use the Add button to create a new vertical flow vent with default values for all<br />
entries.<br />
Use the Duplicate button to create a copy <strong>of</strong> the vertical flow vent currently<br />
selected in the summary table at the top <strong>of</strong> the page. The new vent is added to the end<br />
<strong>of</strong> the list with the named changed to indicate it is a copy <strong>of</strong> the selected item.<br />
Use the Remove button to delete the selected vertical flow vent from the list <strong>of</strong><br />
vertical flow vents in the summary table. Other vents are renumbered once the<br />
compartment is deleted.<br />
Top Compartment: The top or first <strong>of</strong> the two compartments to be connected by a vertical<br />
flow vent. The vent is through the floor <strong>of</strong> this compartment. Compartments are<br />
numbered automatically by the input editor <strong>and</strong> by the model in the order that they<br />
User’s Guide Version 6 Chapter 4 Setting up the Input File for <strong>CFAST</strong> • 31
are read from the input data file <strong>and</strong>/or the order they appear in the summary table on<br />
the compartment geometry page. Compartment numbers begin with 1, so the first<br />
compartment is number 1, the second 2, <strong>and</strong> so forth.<br />
Bottom Compartment: The bottom or second <strong>of</strong> the two compartments to be connected by a<br />
horizontal flow vent. The vent is through the ceiling <strong>of</strong> this compartment.<br />
Compartments are numbered automatically by the input editor <strong>and</strong> by the model in<br />
the order they are read from the input data file <strong>and</strong>/or the order they appear in the<br />
summary table on the compartment geometry page. Compartment numbers begin<br />
with 1, so the first compartment is number 1, the second 2, <strong>and</strong> so forth.<br />
Cross-sectional Area (default units: m 2 , default value: none): specifies the cross-sectional<br />
area <strong>of</strong> the vent connecting the two compartments.<br />
Shape: The shape factor is 1 for circular openings <strong>and</strong> 2 for square openings.<br />
Initial Opening Fraction: Flow through vertical vents is calculated based on the area <strong>of</strong> the<br />
vent. Normally, the vent is fully open. If desired, the user may specify a fraction<br />
between 0 <strong>and</strong> 1 that allows the vent to be partially or fully closed at the beginning <strong>of</strong><br />
the simulation. In the model calculation, the vent area is multiplied by this fraction.<br />
The opening fraction may be changed at any time in the simulation through the use <strong>of</strong><br />
the EVENT comm<strong>and</strong>.<br />
Change Opening Fraction At Time (default units: s, default value: none): Time during the<br />
simulation at which to change the opening fraction.<br />
Final Opening Fraction: for vertical flow vents, the fraction specifies the fractional crosssectional<br />
area <strong>of</strong> the vent. Fractional values must be between 0 <strong>and</strong> 1.<br />
• Although obvious, note that the top or first compartment must be the<br />
compartment on top <strong>of</strong> the bottom or second compartment.<br />
• Vertical connections can only be created between compartments that could be<br />
physically stacked based on specified floor <strong>and</strong> ceiling elevations for the<br />
compartments. Some overlap between the absolute floor height <strong>of</strong> one<br />
compartment <strong>and</strong> the absolute ceiling height <strong>of</strong> another compartment is allowed.<br />
However, whether the compartments are stacked or overlap somewhat, the<br />
ceiling/floor absolute elevations must be within 0.01 m <strong>of</strong> each other. The check<br />
is not done when the connection is to the outside.<br />
Defining Mechanical Ventilation Connections<br />
Fan-duct systems are commonly used in buildings for heating, ventilation, air conditioning,<br />
pressurization, <strong>and</strong> exhaust. Generally, systems that maintain comfortable conditions have<br />
either one or two fans. Residences <strong>of</strong>ten have a systems with a single fan. Further<br />
information about these systems is presented in Klote <strong>and</strong> Milke 10 <strong>and</strong> the American Society<br />
<strong>of</strong> Heating, Refrigerating <strong>and</strong> Air Conditioning Engineers 11 .<br />
32 • Chapter 4 Setting up the Input File for <strong>CFAST</strong> User’s Guide Version 6
The model for mechanical ventilation used in <strong>CFAST</strong> is based on the theory <strong>of</strong> networks <strong>and</strong><br />
is based on the model developed by Klote 12 This is a simplified form <strong>of</strong> Kirch<strong>of</strong>f's law<br />
which says that flow into a node must be balanced by flow out <strong>of</strong> the node. The equations<br />
used describe the relationship between the pressure drop across a duct, the resistance <strong>of</strong> a<br />
duct, <strong>and</strong> the mass flow. The pressure can be changed by conditions in a compartment, or a<br />
fan in line in the duct system. Resistance arises from the finite size <strong>of</strong> ducts, roughness on<br />
duct surfaces, bends <strong>and</strong> joints. In <strong>CFAST</strong>, default values are used for the duct properties,<br />
<strong>and</strong> thus mechanical ventilation connections are simply described by the connections to the<br />
two compartments <strong>and</strong> a fan whose throughput is a constant volumetric flow up to a userspecified<br />
pressure drop across the fan, dropping to zero at high backwards pressure on the<br />
fan.<br />
Most <strong>of</strong> the tabbed pages in the program are <strong>of</strong> similar design, with a summary <strong>of</strong> the defined<br />
items in table form at the top <strong>of</strong> the page, a series <strong>of</strong> buttons to add, remove, or modify the<br />
item highlighted in the summary table, <strong>and</strong> a number <strong>of</strong> individual inputs below which<br />
details all <strong>of</strong> the inputs for the item selected in the summary table. The buttons included on<br />
the mechanical flow vents page are as follows.<br />
Use the Add button to create a new mechanical flow vent with default values for<br />
all entries.<br />
User’s Guide Version 6 Chapter 4 Setting up the Input File for <strong>CFAST</strong> • 33
Use the Duplicate button to create a copy <strong>of</strong> the mechanical flow vent currently<br />
selected in the summary table at the top <strong>of</strong> the page. The new vent is added to the end<br />
<strong>of</strong> the list with the named changed to indicate it is a copy <strong>of</strong> the selected item.<br />
Use the Remove button to delete the selected mechanical flow vent from the list<br />
<strong>of</strong> mechanical flow vents in the summary table. Other vents are renumbered once the<br />
compartment is deleted.<br />
From Compartment: The first compartment to which the mechanical ventilation system<br />
diffuser is connected. Fan flow is from this compartment. Compartments are<br />
numbered automatically by the input editor <strong>and</strong> by the model in the order they are<br />
read from the input data file <strong>and</strong>/or the order they appear in the summary table on the<br />
compartment geometry page. Compartment numbers begin with 1, so the first<br />
compartment is number 1, the second 2, <strong>and</strong> so forth.<br />
From Compartment Area (default units: m 2 , default value: none): Cross-sectional area <strong>of</strong><br />
the opening into the compartment. The area will be truncated if the midpoint (height)<br />
is set such that the height plus or minus the effective length is above the compartment<br />
ceiling or below the floor.<br />
From Compartment Height (default units: m, default value: none): Height <strong>of</strong> the duct<br />
opening above the floor <strong>of</strong> the compartment measured from the midpoint <strong>of</strong> the<br />
register.<br />
From Compartment Orientation: The orientation <strong>of</strong> the diffuser relative to the floor <strong>of</strong> the<br />
compartment. A horizontal diffuser implies vertical flow through the ceiling or floor<br />
<strong>of</strong> the compartment. A vertical diffuser implies horizontal flow through a wall <strong>of</strong> the<br />
compartment.<br />
To Compartment: The bottom or second <strong>of</strong> the two compartments to be connected by a<br />
horizontal flow vent. The vent is through the ceiling <strong>of</strong> this compartment.<br />
Compartments are numbered automatically by the input editor <strong>and</strong> by the model in<br />
the order they are read from the input data file <strong>and</strong>/or the order they appear in the<br />
summary table on the compartment geometry page. Compartment numbers begin<br />
with 1, so the first compartment is number 1, the second 2, <strong>and</strong> so forth.<br />
To Compartment Area (default units: m 2 , default value: none): Cross-sectional area <strong>of</strong> the<br />
opening into the compartment. The area will be truncated if the midpoint (height) is<br />
set such that the height plus or minus the effective length is above the compartment<br />
ceiling or below the floor.<br />
To Compartment Height (default units: m, default value: none): Height <strong>of</strong> the duct opening<br />
above the floor <strong>of</strong> the compartment measured from the midpoint <strong>of</strong> the register.<br />
To Compartment Orientation: The orientation <strong>of</strong> the diffuser relative to the floor <strong>of</strong> the<br />
compartment. A horizontal diffuser implies vertical flow through the ceiling or floor<br />
<strong>of</strong> the compartment. A vertical diffuser implies horizontal flow through a wall <strong>of</strong> the<br />
compartment.<br />
34 • Chapter 4 Setting up the Input File for <strong>CFAST</strong> User’s Guide Version 6
Flow Rate (default units: m 3 /s, default value: none): Constant flow rate <strong>of</strong> the forced-air flow<br />
from the first compartment to the second compartment.<br />
Begin Drop Off Pressure (default units: Pa, default value: 200 Pa): The description <strong>of</strong> the<br />
fan includes a drop <strong>of</strong>f in flow beginning at a pressure specified by the user. Above<br />
this pressure drop, the flow gradually drops to zero flow.<br />
Zero Flow Pressure (default units: Pa, default value: 300 Pa): Specifies the pressure above<br />
which the flow through the mechanical ventilation connection is zero.<br />
Initial Opening Fraction: Flow through mechanical vents is calculated based on the area <strong>of</strong><br />
the vent. Normally, the vent is fully open. If desired, the user may specify a fraction<br />
between 0 <strong>and</strong> 1 that allows the vent to be partially or fully closed at the beginning <strong>of</strong><br />
the simulation. In the model calculation, the fan flow rate is multiplied by this<br />
fraction. The opening fraction may be changed at any time in the simulation through<br />
the use <strong>of</strong> the EVENT comm<strong>and</strong>.<br />
Change Opening Fraction At Time (default units: s, default value: none): Time during the<br />
simulation at which to change the opening fraction.<br />
Final Opening Fraction: for mechanical flow vents, the fraction specifies the fractional fan<br />
flow rate for the vent. Fractional values must be between 0 <strong>and</strong> 1.<br />
• <strong>CFAST</strong> does not include provisions for reverse flow through a fan. Calibrations<br />
for backward flow are not provided by fan manufacturers <strong>and</strong> the equations<br />
incorporated in <strong>CFAST</strong> do not allow for such flow. The problem is simply that in<br />
this flow regime, the fan has stalled, <strong>and</strong> will soon fail.<br />
Prescribing <strong>Fire</strong>s<br />
A simulated fire in <strong>CFAST</strong> is implemented as a source <strong>of</strong> fuel mass which is released at a<br />
prescribed rate (the pyrolysis rate). Energy is released by the fuel <strong>and</strong> combustion products<br />
are created as it burns. The model incorporates two distinct types <strong>of</strong> fires: heat source <strong>and</strong><br />
constrained. In the heat source specification, the fire simply energy at a rate prescribed by<br />
the user; no calculation or tracking <strong>of</strong> products <strong>of</strong> combustion is included. In the constrained<br />
fire, species production is calculated based on production yields prescribed by the user. In<br />
addition, for the constrained fire, the pyrolysis rate <strong>and</strong> resulting energy <strong>and</strong> species<br />
generation may be limited by the oxygen available for combustion. When sufficient oxygen<br />
is available for combustion, the heat release rate for the constrained fire is the same as for the<br />
unconstrained fire.<br />
The model can simulate multiple fires in one or more compartments <strong>of</strong> the building. These<br />
fires are treated as totally separate entities, with no interaction <strong>of</strong> the plumes. These fires are<br />
generally referred to as “objects” <strong>and</strong> can be ignited at a prescribed time, temperature or heat<br />
flux.<br />
<strong>CFAST</strong> does not include a pyrolysis model to predict fire growth. Rather, pyrolysis rates for<br />
each fire are prescribed by the user. While this approach does not directly account for<br />
User’s Guide Version 6 Chapter 4 Setting up the Input File for <strong>CFAST</strong> • 35
increased pyrolysis due to radiative feedback from the flame or compartment, in theory these<br />
effects could be prescribed by the user as described in this section. In an actual fire, this is an<br />
important consideration, <strong>and</strong> the specification used should consider the experimental<br />
conditions as closely as possible.<br />
Unconstrained <strong>Fire</strong><br />
An unconstrained fire releases energy based on the pyrolysis rate <strong>of</strong> the fuel. This type <strong>of</strong> fire<br />
is applicable to fuels for which there is always sufficient oxygen in the fuel for combustion to<br />
take place <strong>and</strong> when the concentrations <strong>of</strong> products <strong>of</strong> combustion are not <strong>of</strong> interest.<br />
Constrained <strong>Fire</strong><br />
A constrained fire releases energy based on the pyrolysis <strong>of</strong> fuel, but may be constrained by<br />
the oxygen available for combustion depending on the compartment conditions. Complete<br />
burning will take place only where there is sufficient oxygen. When insufficient oxygen is<br />
entrained into the fire plume, unburned fuel will be transported from zone to zone until there<br />
is sufficient oxygen <strong>and</strong> a high enough temperature to support combustion. In general,<br />
<strong>CFAST</strong> uses a simple definition <strong>of</strong> a combustion reaction that includes major products <strong>of</strong><br />
combustion for hydrocarbon fuels:<br />
Cn H oO<br />
p N qClr<br />
+ m<br />
+ m<br />
6<br />
HCN<br />
1<br />
( O + 3.<br />
76N<br />
)<br />
→ m CO<br />
+ 3.<br />
76m<br />
N + soot + ( total unburned<br />
1<br />
2<br />
2<br />
2<br />
+ m CO + m H O + m HCl<br />
hydrocarbo ns)<br />
+ heat<br />
where the coefficients m1, m2, etc. represent appropriate molar ratios for a stoichiometric<br />
balance <strong>of</strong> the equation. For complete combustion <strong>of</strong> the simplest hydrocarbon fuel, methane<br />
reacts with oxygen to form carbon dioxide <strong>and</strong> water. The only input required is the pyrolysis<br />
rate <strong>and</strong> the heat <strong>of</strong> combustion. For fuels that contain oxygen, nitrogen, or chlorine, the<br />
reaction becomes more complex. In this case, production yields for the species are prescribed<br />
by the user. Stoichiometry is used to insure conservation <strong>of</strong> mass <strong>and</strong> elements in the<br />
reaction. The species which are calculated are oxygen, carbon dioxide, carbon monoxide,<br />
water, total unburned hydrocarbons (tuhc), <strong>and</strong> soot. Gaseous nitrogen is included, but only<br />
acts as a diluent. Production <strong>of</strong> hydrogen cyanide <strong>and</strong> hydrogen chloride are tracked solely<br />
based on user prescribed yields.<br />
The heat release rate for a constrained fire may be reduced below its prescribed value based<br />
upon the oxygen available for combustion. For the constrained fire, the burning rate may be<br />
less than the pyrolysis rate <strong>and</strong> cannot be simplified as in the case <strong>of</strong> the unconstrained fire.<br />
As fuel <strong>and</strong> oxygen are consumed, heat is released <strong>and</strong> various products <strong>of</strong> combustion are<br />
formed.<br />
Constraint on the <strong>Fire</strong> by Limiting Combustion by Available Oxygen (LOI)<br />
For a constrained fire, the heat release rate is limited by available oxygen. This limit is<br />
applied in three places: The first is burning in the portion <strong>of</strong> the plume which is in the lower<br />
layer <strong>of</strong> the room <strong>of</strong> fire origin; the second is the portion <strong>of</strong> the plume in the upper layer, also<br />
in the room <strong>of</strong> origin; the third is in the vent flow which entrains air from a lower layer into<br />
an upper layer in an adjacent compartment. The unburned hydrocarbons are tracked in this<br />
36 • Chapter 4 Setting up the Input File for <strong>CFAST</strong> User’s Guide Version 6<br />
2<br />
2<br />
3<br />
4<br />
2<br />
5
model. Combustion <strong>of</strong> CO to CO2 is not included in the model. Actual combustion chemistry<br />
is not considered in <strong>CFAST</strong> due to the complexities associated with detailed kinetics <strong>and</strong><br />
transport.<br />
Visibility<br />
There are two calculations involving radiation in this model. One is for energy balance <strong>and</strong> is<br />
based on broadb<strong>and</strong> radiation absorption. The amount <strong>of</strong> radiation absorbed in sensitive to<br />
the species present, specifically water vapor, soot <strong>and</strong> carbon dioxide.<br />
The other is for visibility <strong>of</strong> egress signs. This calculation is based solely on the soot<br />
concentration <strong>and</strong> is reported as optical depth (per meter). The conversion factor is based on<br />
the recent work by Mulholl<strong>and</strong> <strong>and</strong> Croarkin 13 . The value for converting mass density in<br />
kg/m 3 to optical depth is 3817 m 2 /kg. The value reported is intended specifically for<br />
assessing the visibility <strong>of</strong> egress signs, based on the work <strong>of</strong> Jin 14 . It is not applicable to the<br />
far blue or red regions <strong>of</strong> the spectrum <strong>and</strong> so should not be used for assessing optical<br />
detection <strong>of</strong> fires through smoke.<br />
Since chemical species are tracked only for a constrained fire, the optical depth for an<br />
unconstrained fire is fixed at 0.5 m -1 for the upper layer <strong>and</strong> 0.05 m -1 for the lower layer.<br />
Most <strong>of</strong> the tabbed pages in the program are <strong>of</strong> similar design, with a summary <strong>of</strong> the defined<br />
items in table form at the top <strong>of</strong> the page, a series <strong>of</strong> buttons to add, remove, or modify the<br />
item highlighted in the summary table, <strong>and</strong> a number <strong>of</strong> individual inputs below which<br />
User’s Guide Version 6 Chapter 4 Setting up the Input File for <strong>CFAST</strong> • 37
details all <strong>of</strong> the inputs for the item selected in the summary table. The buttons included on<br />
the fires page are as follows.<br />
Use the Add button to create a new fire with default values for all entries.<br />
Use the Duplicate button to create a copy <strong>of</strong> the fire currently selected in the<br />
summary table at the top <strong>of</strong> the page. The new fire is added to the end <strong>of</strong> the list with<br />
the named changed to indicate it is a copy <strong>of</strong> the selected item.<br />
Use the Remove button to delete the selected fire from the list <strong>of</strong> mechanical<br />
flow vents in the summary table. Other vents are renumbered once the compartment<br />
is deleted.<br />
Defining <strong>Fire</strong> Objects<br />
<strong>Fire</strong>s in <strong>CFAST</strong> are defined as a series <strong>of</strong> individual fire objects which are then placed as<br />
desired in compartments in a simulation.<br />
Each fire object defines the time dependent variables <strong>of</strong> the fire are described by the mass<br />
loss rate, rate <strong>of</strong> heat release, fuel height, <strong>and</strong> fuel area inputs. Species production rates are<br />
specified in a manner similar to the fire, entering the rates as a series <strong>of</strong> points with respect to<br />
time. The species which are followed by <strong>CFAST</strong> are: carbon dioxide, carbon monoxide,<br />
hydrogen cyanide, hydrogen chloride, nitrogen, oxygen, soot, total unburned hydrocarbons<br />
<strong>and</strong> water. There is a separate calculation <strong>of</strong> the concentration-time product Ct.<br />
Each fire object is defined in a separate comma-separated spreadsheet file with an extension<br />
<strong>of</strong> “.o”. As many fire objects as desired may be defined by the user. One special fire object is<br />
named “mainfire.o” as is assumed to be a main fire source for the scenario, if included. The<br />
only difference between the main fire <strong>and</strong> other object fire is that the main fire is assumed to<br />
ignite at a user specified time. Other fire objects can ignite based on time, temperature or<br />
heat flux conditions.<br />
Use the New button to create a new fire object with default values for all entries.<br />
No time-dependent values are included in the new fire.<br />
38 • Chapter 4 Setting up the Input File for <strong>CFAST</strong> User’s Guide Version 6
Use the Duplicate button to create a copy <strong>of</strong> the fire object currently selected in<br />
the summary table at the top <strong>of</strong> the page. The new fire object is added to the list with<br />
the named changed to indicate it is a copy <strong>of</strong> the selected item.<br />
<strong>Fire</strong> Object Name: The name from the collection <strong>of</strong> fire objects for the desired object. This<br />
corresponds to the name <strong>of</strong> the fire object file, without the extension. Specifying a<br />
name not found in the database causes <strong>CFAST</strong> to stop with an appropriate error<br />
message.<br />
Material (default value: none): material name from the thermal properties data file used for<br />
the object. The material properties are used to calculate heat transfer into the object<br />
from its surroundings.<br />
Length (default units: m, default value: none): specifies the length <strong>of</strong> the object. The choice<br />
<strong>of</strong> dimension to be designated as length, width, or thickness is arbitrary. Heat flux to<br />
the object surface is assumed to be incident to the surface defined by the length <strong>and</strong><br />
width dimensions.<br />
Width (default units: m, default value: none): specifies the width <strong>of</strong> the object.<br />
Thickness (default units: m, default value: none): specifies the thickness <strong>of</strong> the object.<br />
Molar Mass (default units kg/mol, default value: 0.016 kg/mol) This is the conversion factor<br />
from mass density to molecular density for “Total Unburned Hydrocarbon,” the fuel<br />
vapor. It is used only for conversion to parts-per-million <strong>and</strong> has no effect on the<br />
model itself.<br />
Total Mass (default units: kg, default value: 10 000 kg): Total mass <strong>of</strong> the object.<br />
Heat <strong>of</strong> Combustion (default units: J/kg, default value: 50 000 000 J/kg): The energy<br />
released per kilogram <strong>of</strong> mass burned.<br />
Heat <strong>of</strong> Gasification (default units: J/kg, default value: none): The sum <strong>of</strong> the sensible <strong>and</strong><br />
latent heat required to vaporize a unit mass <strong>of</strong> material.<br />
Volatilization Temperature (default units: K, default value: ambient): The temperature <strong>of</strong><br />
the vapor as it is emitted from a fuel source. Typically, the initial fuel temperature is<br />
the same as the ambient temperature specified on the ambient conditions window.<br />
This may not be true if significant conductive or radiative heat transfer affects the<br />
fuel. This affects the enthalpy since temperatures below the lower layer ambient<br />
cause the plume to cool. The effect is not large, but it is noticeable.<br />
Ignition Temperature (default units: K, default value: volatilization temperature plus<br />
100 K): The lower temperature limit on the burning <strong>of</strong> fuel in a gas layer. Since<br />
<strong>CFAST</strong> does not support a combustion kinetics model, this is the algorithm used for<br />
fires out <strong>of</strong> vents.<br />
Radiative Fraction: The fraction <strong>of</strong> the energy produced in combustion that is radiated from<br />
the fire <strong>and</strong> plume. Within <strong>CFAST</strong>, the radiative fraction defaults to 0.30 15 ; i.e., 30 %<br />
<strong>of</strong> the fire’s energy is released via radiation. For other fuels, the work <strong>of</strong> Tewarson 16 ,<br />
McCaffrey 17 , or Koseki 18 is available for reference. The typical range for the<br />
radiative fraction is from about 0.05 to 0.4.<br />
User’s Guide Version 6 Chapter 4 Setting up the Input File for <strong>CFAST</strong> • 39
All <strong>of</strong> the time dependent variables depend on a predefined time line. The time input<br />
specifies a sequence <strong>of</strong> time points that define the timing <strong>of</strong> the fire. An entry indicates a<br />
point on the time-line when the mass loss rate, fuel height <strong>and</strong> other time dependent values<br />
are specified for the fire. This time is independent <strong>of</strong> the simulation time which is specified<br />
by the TIMES line. If the simulation time is longer than the total duration <strong>of</strong> the fire, the final<br />
values specified for the fire (mass loss rate, fuel height, fuel area, <strong>and</strong> species) are continued<br />
until the end <strong>of</strong> the simulation.<br />
The units for species (HCR, etc.) are kilograms per kilogram. However, the meaning is<br />
different for fuel properties <strong>and</strong> species production rates. The input for CT is the kilograms <strong>of</strong><br />
"toxic" combustion products produced per kilogram <strong>of</strong> fuel pyrolyzed. Input for HCR is the<br />
mass ratio <strong>of</strong> hydrogen to carbon ratio in the fuel. Input for O2 is the mass ratio <strong>of</strong> oxygen to<br />
carbon as it becomes available from the fuel. Input the ratio <strong>of</strong> the mass <strong>of</strong> carbon to carbon<br />
dioxide produced by the oxidation <strong>of</strong> the fuel for OD. The input for CO is the ratio <strong>of</strong> the<br />
mass <strong>of</strong> carbon monoxide to carbon dioxide produced by the oxidation <strong>of</strong> the fuel.<br />
Time (default units: s, default values: none): specify a sequence <strong>of</strong> time points that define the<br />
timing <strong>of</strong> the main fire. An entry indicates a point on the time-line when the mass<br />
loss rate, fuel height <strong>and</strong> other time dependent values are specified for the fire.<br />
Pyrolysis Rate (Mdot) (default units: kg/s, default values: none): Pyrolysis rate <strong>of</strong> the fire as<br />
a series <strong>of</strong> time points consistent with the time specification.<br />
Heat Release Rate (QDot) (default units: W, default values: none): Heat release rate <strong>of</strong> the<br />
fire as a series <strong>of</strong> time points consistent with the time specification.<br />
<strong>Fire</strong> Height (default units: m, default values: none): Time-based values for height <strong>of</strong> the base<br />
<strong>of</strong> the fire. Actual height <strong>of</strong> the base <strong>of</strong> the fire is the sum <strong>of</strong> the value specified by<br />
MAINF for the main fire or OBJFL for object fires <strong>and</strong> this height specification for a<br />
particular time in the fire development.<br />
Area <strong>of</strong> the Base <strong>of</strong> the <strong>Fire</strong> (default units: m 2 , default values: none): Cross-sectional area <strong>of</strong><br />
the base <strong>of</strong> the fire.<br />
CO/CO2 (default units: kg/kg, default values: none): species yields ratios <strong>of</strong> carbon<br />
monoxide to carbon dioxide produced in the pyrolysis <strong>of</strong> the fuel.<br />
H/C (default units: kg/kg, default values: none): the hydrogen component <strong>of</strong> the pyrolyzed<br />
fuel. This is the ratio <strong>of</strong> hydrogen to carbon produced in the pyrolysis <strong>of</strong> the fuel.<br />
O/C (default units: kg/kg, default values: none): Oxygen component <strong>of</strong> the pyrolyzed fuel.<br />
O2 is the ratio <strong>of</strong> oxygen to carbon produced in the pyrolysis <strong>of</strong> the fuel. The O2<br />
input thus represents excess oxygen available from the fuel for combustion. For<br />
normal fuels, this input should be set to zero.<br />
HCN (default units: kg/kg, default values: none): Yield <strong>of</strong> hydrogen cyanide per mass <strong>of</strong> fuel<br />
produced in the pyrolysis <strong>of</strong> the fuel.<br />
HCl (default units: kg/kg, default values: none): Yield <strong>of</strong> hydrogen chloride per mass <strong>of</strong> fuel<br />
produced in the pyrolysis <strong>of</strong> the fuel.<br />
40 • Chapter 4 Setting up the Input File for <strong>CFAST</strong> User’s Guide Version 6
Ct (default units: kg/kg, default values: none): Yield <strong>of</strong> a fictitious toxic species per mass <strong>of</strong><br />
fuel produced in the pyrolysis <strong>of</strong> the fuel. For “normally toxic” materials, this takes a<br />
value <strong>of</strong> 1 <strong>and</strong> is typically changed by an order <strong>of</strong> magnitude for particularly toxic or<br />
non-toxic materials. It is not part <strong>of</strong> the mass balance for the fuel <strong>and</strong> system, but it<br />
just carried along as a transported species in flow through the structure. Ct is used as<br />
a measure <strong>of</strong> toxicity <strong>of</strong> a material. Typically the integrated Ct versus time product is<br />
calculated. For normal materials, a concentration-time product <strong>of</strong> 900 mg min/m 3 is<br />
an indication <strong>of</strong> incapacitation.<br />
• With the three parameters, heat <strong>of</strong> combustion (HOC), the pyrolysis <strong>and</strong> heat<br />
release rate are over specified. The model uses the last two <strong>of</strong> the three to obtain<br />
the HOC parameter.<br />
• By default, the fire is placed in the center <strong>of</strong> the compartment on the floor. If<br />
values for any <strong>of</strong> the three variables are invalid (i.e., less than zero or greater than<br />
the compartment dimension in the appropriate direction), the location for that<br />
direction defaults to the center <strong>of</strong> the appropriate direction.<br />
• In the input editor, time-dependent data are entered in a simple spreadsheet.<br />
Normal windows copy (Ctrl-C), cut (Ctrl-X), <strong>and</strong> paste (Ctrl-V) keyboard<br />
shortcuts are available for data editing. In addition, Alt-Ins will insert a complete<br />
row above the currently-selected row in the spreadsheet <strong>and</strong> Alt-Del will delete<br />
the current row in the spreadsheet.<br />
Associating <strong>Fire</strong> Objects with One or More Instances <strong>of</strong> the <strong>Fire</strong> in<br />
the Compartments <strong>of</strong> the Simulation<br />
<strong>Fire</strong> objects are placed in defined positions within a compartment <strong>of</strong> a simulation <strong>and</strong><br />
oriented with a normal vector to the surface <strong>of</strong> the object. Ignition <strong>of</strong> an object may be at a<br />
specified time, a specified net incident heat flux on the surface <strong>of</strong> the object, or at a specified<br />
surface temperature <strong>of</strong> the object. The relevant <strong>CFAST</strong> keywords are MAINF for a simple<br />
point-source fire, OBJECT for a complex fire object, <strong>and</strong> HEATF for a heat source.<br />
The OBJECT keyword allows the specification <strong>of</strong> additional objects to be burned in the fire<br />
scenario. Positioning <strong>of</strong> the object within a compartment is specified in the same manner as<br />
for the main fire.<br />
Compartment <strong>of</strong> <strong>Fire</strong> Origin: specifies the compartment that contains the main fire for the<br />
simulation. Any compartment defined is valid.<br />
User’s Guide Version 6 Chapter 4 Setting up the Input File for <strong>CFAST</strong> • 41
Type: constrained or heat source. For a constrained fire, species are tracked <strong>and</strong> heat release<br />
rate is limited by the oxygen available for combustion. For a heat source, the fire is a<br />
source <strong>of</strong> heat only, no mass is released, <strong>and</strong> species concentrations are not calculated<br />
by the model.<br />
Width (X) Position (default units: m, default value: compartment width / 2): Position <strong>of</strong> the<br />
center <strong>of</strong> the base <strong>of</strong> the fire measured in the x direction from the front lower left<br />
corner <strong>of</strong> the compartment origin (0,0,0) in the compartment <strong>of</strong> fire origin.<br />
Depth (Y) Position (default units: m, default value: compartment depth / 2): Position <strong>of</strong> the<br />
center <strong>of</strong> the base <strong>of</strong> the fire measured in the y direction from the front lower left<br />
corner <strong>of</strong> the compartment origin (0,0,0) in the compartment <strong>of</strong> fire origin.<br />
Height (Z) Position (default units: m, default value: 0 m): Position <strong>of</strong> the center <strong>of</strong> the base<br />
<strong>of</strong> the fire measured in the z direction from the front lower left corner <strong>of</strong> the<br />
compartment origin (0,0,0) in the compartment <strong>of</strong> fire origin. Actual height <strong>of</strong> the<br />
base <strong>of</strong> the fire is the sum <strong>of</strong> the value specified by FPOS <strong>and</strong> by FHIGH for a<br />
particular time in the fire development.<br />
Normal Vector X Component: specifies a vector <strong>of</strong> unit length perpendicular to the<br />
exposed surface <strong>of</strong> the object. (Depth) component is in the direction from the rear<br />
wall <strong>of</strong> the object compartment. Default value is a horizontal, upward facing object,<br />
unit vector = (0,0,1)<br />
Normal Vector Y Component: specifies a vector <strong>of</strong> unit length perpendicular to the<br />
exposed surface <strong>of</strong> the object. (Breadth) component is in the direction from the left<br />
wall <strong>of</strong> the object compartment. Default value is a horizontal, upward facing object,<br />
unit vector = (0,0,1)<br />
Normal Vector Z Component: specifies a vector <strong>of</strong> unit length perpendicular to the<br />
exposed surface <strong>of</strong> the object. (Breadth) component is in the direction from the floor<br />
<strong>of</strong> the object compartment. Default value is a horizontal, upward facing object, unit<br />
vector = (0,0,1)<br />
Plume Type: specifies the algorithm used to calculate entrainment <strong>of</strong> air into the plume. At<br />
present, only a plume based on the work <strong>of</strong> McCaffrey is allowed.<br />
Ignition Criterion Type: The type <strong>of</strong> ignition condition specified by the Ignition Criterion<br />
Value. Acceptable values are 1 for time, 2 for object surface temperature, <strong>and</strong> 3 for<br />
incident flux to object surface.<br />
Ignition Criterion Value: The numerical value at which ignition will occur. If it is less than<br />
or equal to zero, the default is taken. For constrained <strong>and</strong> heat source fires, the default<br />
is <strong>and</strong> ignition at time <strong>of</strong> zero.<br />
• Object fires are used to include additional burning objects in a simulation. For<br />
additional details, see the <strong>CFAST</strong> technical reference guide 1 ,or Babrauskas <strong>and</strong><br />
Grayson 19 .<br />
42 • Chapter 4 Setting up the Input File for <strong>CFAST</strong> User’s Guide Version 6
Calculating Normal Vectors<br />
The general equations for determining the normal vectors in the x, y, <strong>and</strong> z directions are:<br />
Normal vector in the x direction, x = x / (x 2 + y 2 + z 2 ) .5<br />
Normal vector in the y direction, y = y / (x 2 + y 2 + z 2 ) .5<br />
Normal vector in the z direction, z = z / (x 2 + y 2 + z 2 ) .5<br />
The simplest way to calculate the unit vector is to draw an imaginary line at right angles (i.e.,<br />
90 o angle) from the exposed surface <strong>of</strong> the target <strong>and</strong> to extend this imaginary line until it hits<br />
the walls, floor or ceiling <strong>of</strong> the compartment in which it is located. This imaginary line is<br />
actually a vector that starts at the surface <strong>of</strong> the exposed target <strong>and</strong> terminates on a wall,<br />
floor, or ceiling. Once the start point <strong>and</strong> the end point <strong>of</strong> a vector are known, the unit vector<br />
for this imaginary line may be calculated as follows:<br />
x = (xend - xstart) / ((xend - xstart) 2 +(yend - ystart) 2 +(zend - zstart) 2 ) 0.5<br />
y = (yend - ystart) / ((xend - xstart) 2 +(yend - ystart) 2 +(zend - zstart) 2 ) 0.5<br />
z = (zend - zstart) / ((xend - xstart) 2 +(yend - ystart) 2 +(zend - zstart) 2 ) 0.5<br />
As an example, assume the following scenario:<br />
• A square shaped target object is located in the middle <strong>of</strong> the floor <strong>of</strong> a<br />
compartment.<br />
• The target is constructed from no-combustible materials except the top.<br />
• The square shaped material is 1 m in depth, 1 m in breadth, <strong>and</strong> 1 m high.<br />
• The reference point (0,0,0) in the compartment is the lower left h<strong>and</strong> side <strong>of</strong> the<br />
rear wall.<br />
• The compartment is 3 meters in the x direction (i.e., the distance from the rear<br />
wall to the front wall <strong>of</strong> the compartment), 4 meters in the y direction (i.e., the<br />
distance from the left wall to the right wall <strong>of</strong> the compartment), <strong>and</strong> 5 meters in<br />
the z direction (i.e., the distance from the floor to the ceiling <strong>of</strong> the compartment).<br />
Since the only side <strong>of</strong> the target that is combustible is the top surface <strong>of</strong> the target object, an<br />
imaginary line is draw perpendicular (i.e., at a 90 o angle) from the top surface <strong>of</strong> the target<br />
object <strong>and</strong> extended until it reaches the outer boundary <strong>of</strong> the compartment. In this case,<br />
since the top <strong>of</strong> the target object is facing the ceiling, the imaginary line would run straight<br />
up to the ceiling, running parallel to the four walls <strong>of</strong> the compartment, <strong>and</strong> terminating at the<br />
ceiling at the point (1.5 m, 2 m, 5 m). Since the vector starts at point (1.5-m, 2-m, 1-m) <strong>and</strong><br />
terminates at (1.5-m, 2-m, 5-m), the unit vectors can be calculated as follows:<br />
x = (xend - xstart) / ((xend - xstart) 2 +(yend - ystart) 2 +(zend - zstart) 2 ) .5<br />
= (1.5 <strong>–</strong> 1.5) / ((1.5 -1.5) 2 + (2 <strong>–</strong> 2) 2 + (5 - 1) 2 ) .5 = 0<br />
y = (yend - ystart) / ((xend - xstart) 2 +(yend - ystart) 2 +(zend - zstart) 2 ) .5<br />
= (2- 2) / ((1.5 -1.5) 2 + (2 <strong>–</strong> 2) 2 + (5 - 1) 2 ) .5 = 0<br />
z = (zend - zstart) / ((xend - xstart) 2 +(yend - ystart) 2 +(zend - zstart) 2 ) .5<br />
User’s Guide Version 6 Chapter 4 Setting up the Input File for <strong>CFAST</strong> • 43
= (5 - 1) / ((1.5 -1.5) 2 + (2 <strong>–</strong> 2) 2 + (5 - 1) 2 ) .5 = 1<br />
In this case, the unit vector is in the + Z direction.<br />
Special Features<br />
Sprinklers <strong>and</strong> Detectors<br />
Sprinklers <strong>and</strong> detectors are both considered detection devices by the <strong>CFAST</strong> model <strong>and</strong> are<br />
h<strong>and</strong>led using the same input keywords. Detection is based upon heat transfer to the<br />
detector. <strong>Fire</strong> suppression by a user-specified water spray begins once the associated<br />
detection device is activated. A maximum <strong>of</strong> 20 sprinklers or detectors can be included for<br />
any input file <strong>and</strong> model run. These can be in one compartment or scattered throughout the<br />
structure. The DETEC keyword is used for both detectors <strong>and</strong> sprinklers. The first three<br />
parameters are required. The next three have defaults. The last three must be specified if this<br />
is a heat detector or sprinkler.<br />
Type: type <strong>of</strong> detector, use 1 for smoke detector <strong>and</strong> 2 for heat detector or sprinkler.<br />
Compartment the compartment in which the detector or sprinkler is located.<br />
44 • Chapter 4 Setting up the Input File for <strong>CFAST</strong> User’s Guide Version 6
Activation Temperature: the temperature at or above which the detector link activates.<br />
Width (X) Position (default units: m, default value: none): position <strong>of</strong> the object as a<br />
distance from the left wall <strong>of</strong> the compartment (X direction).<br />
Depth (Y) Position (default units: m, default value: none): position <strong>of</strong> the detector or<br />
sprinkler as a distance from the front wall <strong>of</strong> the compartment (Y direction).<br />
Height (Z) Position (default units: m, default value: none): position <strong>of</strong> the object as a<br />
distance from the floor <strong>of</strong> the compartment (Z direction).<br />
RTI (default units: (m · s) 1/2 , default value: none): the Response Time Index (RTI) for the<br />
sprinkler or detection device.<br />
Spray Density (default units: m/s, default value: none): the amount <strong>of</strong> water dispersed by a<br />
water spray-sprinkler. The units for spray density are length/time. These units are<br />
derived by dividing the volumetric rate <strong>of</strong> water flow by the area protected by the<br />
water spray. The suppression calculation is based upon an experimental correlation by<br />
Evans 20 , <strong>and</strong> depends upon the RTI, activation temperature, <strong>and</strong> spray density to<br />
determine the behavior <strong>of</strong> the sprinkler.<br />
• Often, the activation <strong>of</strong> smoke alarms is simulated with a temperature-based<br />
criterion. Davis <strong>and</strong> Notarianni 21 studied the activation <strong>of</strong> heat <strong>and</strong> smoke alarms<br />
in small <strong>and</strong> large compartments. They conclude that a temperature rise <strong>of</strong><br />
approximately 5 ̊C corresponded to activation <strong>of</strong> ionization alarms for a range <strong>of</strong><br />
fire sources <strong>and</strong> ceiling heights..<br />
• Several cautions should be observed when using estimates <strong>of</strong> sprinkler<br />
suppression within the model: 1) the first sprinkler activated controls the effect <strong>of</strong><br />
the sprinkler on the heat release rate <strong>of</strong> the fire. Subsequent sprinklers which may<br />
activate have no additional effect on the fire simulation. 2) The fire suppression<br />
algorithm assumes the effect <strong>of</strong> the sprinkler is solely to reduce the heat release<br />
rate <strong>of</strong> the fire. Any effects <strong>of</strong> the sprinkler spray on gas temperatures or mixing<br />
within the compartment are ignored. 3) The sprinkler always reduces the heat<br />
release rate <strong>of</strong> the fire. The ability <strong>of</strong> a fire to overwhelm an under-designed<br />
sprinkler is not modeled. 4) Since the dynamics <strong>of</strong> the sprinkler <strong>and</strong> direct effects<br />
<strong>of</strong> the spray on gas temperatures <strong>and</strong> velocities are not modeled, calculated times<br />
<strong>of</strong> activation <strong>of</strong> secondary sprinklers <strong>and</strong> / or detectors after the first sprinkler is<br />
activated should be not be modeled since the impact <strong>of</strong> the first sprinkler on the<br />
activation <strong>of</strong> additional sprinklers is not included in the <strong>CFAST</strong> model.<br />
Defining Targets<br />
<strong>CFAST</strong> can track <strong>and</strong> report calculations <strong>of</strong> the net heat flux striking arbitrarily positioned<br />
<strong>and</strong> oriented targets <strong>and</strong> the temperature <strong>of</strong> these targets. The relevant keyword used to<br />
specify targets is TARGE.<br />
User’s Guide Version 6 Chapter 4 Setting up the Input File for <strong>CFAST</strong> • 45
In addition to any user-defined targets, there are always two targets that are automatically<br />
placed in any compartment containing a fire. Both are included for reporting purposes. The<br />
first is an “ambient target” <strong>and</strong> is intended to represent the net flux to a human body. This is<br />
used for the flux in the hazard calculation for tenability. The assumption is that the target will<br />
remain at ambient temperature, which is a surrogate for body temperature. The second<br />
determines the net flux to a horizontal target on the floor whose temperature is assumed to be<br />
the same as the floor surface. The calculation can be used to estimate the ignition <strong>of</strong><br />
combustibles on the floor as a surrogate for estimating time to flashover, typically taken to be<br />
20 kW/m 2 . Thus if one <strong>of</strong> the target keywords is used, it will be in addition to these two<br />
predefined targets.<br />
For all targets, heat flux is calculated to the surface specified by the user (with the normal<br />
vector). Conduction into the target is assumed to occur only from this surface.<br />
Compartment: The compartment in which the target is located.<br />
Width (X) Position: Position <strong>of</strong> the target as a distance from the left wall <strong>of</strong> the target<br />
compartment (X direction).<br />
Depth (Y) Position: Position <strong>of</strong> the target as a distance from the front wall <strong>of</strong> the target<br />
compartment (Y direction).<br />
46 • Chapter 4 Setting up the Input File for <strong>CFAST</strong> User’s Guide Version 6
Height (Z) Position: Height <strong>of</strong> the target above the floor (Z direction).<br />
Normal Vector X Component: specifies a vector <strong>of</strong> unit length perpendicular to the<br />
exposed surface <strong>of</strong> the target. (Width) component in the direction from the left wall <strong>of</strong><br />
the target compartment. A value <strong>of</strong> 1 defines a vertical target facing into the<br />
compartment, unit vector = (1,0,0).<br />
Normal Vector Y Component: specifies a vector <strong>of</strong> unit length perpendicular to the<br />
exposed surface <strong>of</strong> the target. (Depth) component in the direction from the front wall<br />
<strong>of</strong> the target compartment. A value <strong>of</strong> 1 defines a vertical target facing to the right,<br />
unit vector = (0,1,0).<br />
Normal Vector Z Component: specifies a vector <strong>of</strong> unit length perpendicular to the<br />
exposed surface <strong>of</strong> the target. (Height) component in the direction from the floor <strong>of</strong><br />
the target compartment. Default value is a horizontal, upward facing target, unit<br />
vector = (0,0,1).<br />
Material: Used to specify the wall material <strong>of</strong> the target. Any material from the thermal<br />
database used to represent wall materials may be used here. Since the transient heat<br />
conduction problem is not solved now for the target this parameter is not used.<br />
Solution Method: Optional parameter that indicates the solution method. STEADY for<br />
steady state solution, EXPLICIT for explicit solution, IMPLICIT for implicit<br />
solution.<br />
Material Solution Type: If METHOD is not STEADY, this parameter further indicates the<br />
equation type to be either ODE or PDE. For thermally thin materials, use ODE; for<br />
thermally thick materials, use PDE<br />
• The TARGE keyword performs a heat transfer calculation between the<br />
compartment <strong>and</strong> the target. The steady state option assumes that the target<br />
material reacts instantly to changing conditions <strong>and</strong> computes the target<br />
temperature that would result in a balance <strong>of</strong> incoming <strong>and</strong> outgoing heat (i.e., a<br />
steady state). If a transient target temperature is modeled, then one can either<br />
assume that there is a temperature variation within the target or assume that the<br />
target is “thin” <strong>and</strong> can be modeled using only one temperature. If the target is<br />
assumed to be thin then the ODE option should be used set since this is how the<br />
equations are solved. If the target is assumed to be thick then the PDE option<br />
should set. Finally, if one <strong>of</strong> the two transient options are set (ODE or PDE), the<br />
numerical solution can be solved using an explicit or an implicit method.<br />
Typically, the implicit method will work in all cases. The explicit method is<br />
recommended only when the implicit method fails to come to a solution.<br />
Defining Compartment Area<br />
The Compartment Geometry page includes two additional entries that may be used for<br />
defining compartment properties for spaces which are not rectangular in area. Values are<br />
entered in a spreadsheet. The <strong>CFAST</strong> keywords ROOMA <strong>and</strong> ROOMH keywords allow the<br />
user to define non-rectangular rooms by specifying cross-sectional area as a function <strong>of</strong><br />
User’s Guide Version 6 Chapter 4 Setting up the Input File for <strong>CFAST</strong> • 47
height. One set <strong>of</strong> values is included for each compartment that has a variable cross-sectional<br />
area.<br />
Height Value(s) (default units: m, default values: none): Values <strong>of</strong> height for the<br />
corresponding cross-sectional area values measured from the floor <strong>of</strong> the<br />
compartment. The values for the compartment correspond to cross-sectional area<br />
values included for the same compartment on the ROOMA comm<strong>and</strong>.<br />
Area Value(s) (default units m 2 , default values: none): Values <strong>of</strong> cross-sectional area <strong>of</strong> the<br />
compartment as a function <strong>of</strong> height measured from the floor <strong>of</strong> the compartment.<br />
The values for the compartment correspond to height values included for the same<br />
compartment on the ROOMH comm<strong>and</strong>.<br />
Inter-compartment Heat Transfer (Conduction)<br />
The Surface Connections page allows the user to define heat transfer between compartments<br />
in a simulation. These may define vertical conduction through floors or ceilings or<br />
horizontal conduction through connecting wall surfaces.<br />
There are two keywords that define physical connections which affect heat conduction<br />
between compartments. They are:<br />
• VHEAT <strong>–</strong> ceiling/floor heat conduction (vertical heat flow)<br />
• HHEAT <strong>–</strong> heat transfer between connected compartment walls (horizontal heat<br />
flow)<br />
Energy can be transferred from compartment to compartment through solid boundaries<br />
(walls, ceilings <strong>and</strong> floors) by means <strong>of</strong> conduction. The heat transfer between connected<br />
compartments is modeled by merging the connected surfaces for the ceiling <strong>and</strong> floor<br />
compartments or for the connected horizontal compartments. The heat conduction problem<br />
is solved for the merged walls using a temperature boundary condition for both the near <strong>and</strong><br />
far wall. As before, temperatures are determined by the solver so that the heat flux striking<br />
the wall surface (both interior <strong>and</strong> exterior) is consistent with the temperature gradient at that<br />
surface. This option is implemented with the VHEAT (for vertical heat transfer) <strong>and</strong> the<br />
HHEAT (for horizontal heat transfer) keywords.<br />
48 • Chapter 4 Setting up the Input File for <strong>CFAST</strong> User’s Guide Version 6
• Vertical Heat Transfer: Heat transfer between the ceiling <strong>and</strong> floor <strong>of</strong> specified<br />
compartments is included with the VHEAT keyword. Ceiling to floor heat<br />
transfer occurs between interior compartments <strong>of</strong> the structure or between an<br />
interior compartment <strong>and</strong> the outdoors. The model checks to make sure that the<br />
ceiling <strong>and</strong> floor are reasonably contiguous (within 0.01 m). The assumption is<br />
made that this is true for the entire ceiling <strong>and</strong> floor.<br />
• Horizontal Heat Transfer: Horizontal conduction between specified<br />
compartments is included with the HHEAT keyword. Conduction through<br />
vertical partitions (walls) occurs between interior compartments <strong>of</strong> the structure or<br />
between an interior compartment <strong>and</strong> the outdoors.<br />
First Compartment: First <strong>of</strong> the connected compartments. Order <strong>of</strong> the inputs is not<br />
important.<br />
Second Compartment: Second <strong>of</strong> the connected compartments. Order <strong>of</strong> the inputs is not<br />
important.<br />
User’s Guide Version 6 Chapter 4 Setting up the Input File for <strong>CFAST</strong> • 49
Fraction: Specifies the fraction <strong>of</strong> the vertical surface areas <strong>of</strong> the compartments which are<br />
connected can be specified. The fraction specifies the fraction <strong>of</strong> the vertical surface<br />
area connecting the first <strong>and</strong> second compartment pair.<br />
As an example, four cases were simulated by modeling all wall surfaces in a test case with<br />
gypsum <strong>and</strong> steel <strong>and</strong> by turning on <strong>and</strong> <strong>of</strong>f the horizontal heat transfer option. The following<br />
table summarizes the results for these four cases. Each table entry gives the Upper room 1<br />
temperature, upper room 2 temperature, upper wall temperature in room 1 <strong>and</strong> upper wall<br />
temperature in room 2.<br />
HHEAT Off HHEAT Off<br />
Steel walls 1106/528.3/374.9/319 1118/535.3/399.6/340.2<br />
Gypsum walls 1147/545.4/462.9/338 1148/545.8/464.1/339.3<br />
The results are as one would expect. For each wall material turning HHEAT on leads to<br />
warmer calculated temperatures since the outside environment (where heat goes when<br />
HHEAT is <strong>of</strong>f) is cooler than the adjoining room. The temperature differences are greater for<br />
steel than for gypsum since steel conducts heat more effectively.<br />
The Ceiling Jet <strong>–</strong> An Additional Zone<br />
Typically, zone models incorporate two zones in each compartment, one for the upper layer<br />
<strong>and</strong> one for the lower layer. A plume from a fire then pumps energy from the fire <strong>and</strong> lower<br />
layer into the upper layer. However, it has been observed that the heat loss from the upper<br />
layer to the ceiling <strong>and</strong> walls is higher than this paradigm would indicate. The cause is that a<br />
plume does not truly mix with the upper layer initially as indicated in the figure<br />
This leads to higher convective heat transfer than the mixed model would indicate. <strong>CFAST</strong><br />
has incorporated a model <strong>of</strong> this additional heat loss based on the work <strong>of</strong> Cooper . Heat loss<br />
by this mechanism to the ceiling is well established, the loss to walls is somewhat more<br />
uncertain due to the uncertainty <strong>of</strong> how far the plume descends below the ceiling.<br />
To include ceiling jet effects in the calculation <strong>of</strong> the surface temperature <strong>of</strong><br />
the ceiling, wall, or both surfaces, the CJET keyword is used. In the input editor, CEdit, this<br />
is included on the fires page. The ceiling jet calculation can be used for the ceiling, walls, or<br />
all surfaces. At present, this keyword effects only the calculation <strong>of</strong> the convective heating<br />
boundary condition for the conduction routines. If a particular surface is on, the ceiling jet<br />
algorithm is used to determine the convective heating <strong>of</strong> the surface. If the ceiling jet is <strong>of</strong>f,<br />
the bulk temperature <strong>of</strong> the upper layer determines the convective heating.<br />
• Using this option affects all fires <strong>and</strong> it is suggested that this option be turned on<br />
<strong>and</strong> set to “CEILING.”<br />
50 • Chapter 4 Setting up the Input File for <strong>CFAST</strong> User’s Guide Version 6
Scenario <strong>and</strong> S<strong>of</strong>tware Limits<br />
<strong>CFAST</strong> is intended for use with a wide variety <strong>of</strong> fire scenarios. A number <strong>of</strong> limits to the<br />
inputs in the s<strong>of</strong>tware implementation <strong>of</strong> the model are noted below.<br />
Maximum simulation time in seconds 86 400<br />
Maximum number <strong>of</strong> compartments 30<br />
Maximum number <strong>of</strong> fires which can be included in a single test case (including the main fire) 31<br />
Maximum number <strong>of</strong> fire definitions which can be included in a single fire database file 30<br />
Maximum number <strong>of</strong> data points for a single main or secondary object fire 21<br />
Maximum number <strong>of</strong> material thermal property definitions which can be included in a single thermal<br />
database file<br />
Maximum number <strong>of</strong> slabs in a single surface material in the thermal database file 3<br />
Total number <strong>of</strong> ducts in all mechanical ventilation systems which can be included in a single test case 60<br />
Maximum total number <strong>of</strong> connections between compartments <strong>and</strong> mechanical ventilation systems which<br />
can be included in a single test case<br />
Maximum number <strong>of</strong> independent mechanical ventilation systems which can be included in a single test<br />
case<br />
Maximum number <strong>of</strong> targets which can be included in a single test case. In addition, the <strong>CFAST</strong> model<br />
includes a target on the floor <strong>of</strong> each compartment in the simulation <strong>and</strong> one for each object fire in<br />
simulation.<br />
Maximum number <strong>of</strong> data points in a history or spreadsheet file 900<br />
User’s Guide Version 6 Chapter 4 Setting up the Input File for <strong>CFAST</strong> • 51<br />
125<br />
62<br />
15<br />
90
Chapter 5 Output<br />
Overview<br />
The output <strong>of</strong> <strong>CFAST</strong> are the sensible variables that are needed for assessing the<br />
environment in a building subjected to a fire. These include temperatures <strong>of</strong> the upper <strong>and</strong><br />
lower gas layers within each compartment, the ceiling/wall/floor temperatures within each<br />
compartment, the visible smoke <strong>and</strong> gas species concentrations within each layer, target<br />
temperatures <strong>and</strong> sprinkler activation time. The amount <strong>of</strong> information can be very large,<br />
especially for complex geometries <strong>and</strong> long simulations.<br />
The default output to the console is called the compact form, <strong>and</strong> shows the basic information<br />
about a scenario, including layer temperatures <strong>and</strong> the size <strong>of</strong> fires. Default text output<br />
provides a simple overview for the user to make sure the case runs as expected.<br />
The compact output for each compartment is listed across the screen <strong>and</strong> the compartments<br />
are listed down the screen starting with compartment one <strong>and</strong> ending with the outside. The<br />
example below shows the initial <strong>and</strong> final conditions for a calculation:<br />
52 • Chapter 5 Output User’s Guide Version 6
Time = 0.0 seconds.<br />
Compartment Upper Lower Inter. Pyrol <strong>Fire</strong><br />
Temp. Temp. Height Rate Size<br />
(K) (K) (m) (kg/s) (W)<br />
-----------------------------------------------------------------<br />
1 300.0 300.0 2.3 1.400E-03 2.530E+04<br />
2 300.0 300.0 2.3 0.000 0.000<br />
Outside 0.000<br />
Time = 200.0 seconds.<br />
Compartment Upper Lower Inter. Pyrol <strong>Fire</strong><br />
Temp. Temp. Height Rate Size<br />
(K) (K) (m) (kg/s) (W)<br />
-----------------------------------------------------------------<br />
1 1252. 475.1 0.63 0.278 4.831+06<br />
2 828.7 325.4 1.0 0.000 0.000<br />
Outside 1.609E+03<br />
The first column contains the compartment number. On each row with its compartment<br />
number from left to right is the upper layer temperature, lower layer temperature, the height<br />
<strong>of</strong> the interface between the two layers, the total pyrolysis rate, <strong>and</strong> finally the total fire size.<br />
The only value given for the outside is the total heat release rate <strong>of</strong> fires venting to the<br />
outside.<br />
Detailed Outputs<br />
The following sections describe each <strong>of</strong> the outputs from the model. Each section refers to a<br />
specific part <strong>of</strong> the print out <strong>and</strong> appears in the order the output appears. A description <strong>of</strong><br />
each option follows.<br />
Output for Initialization<br />
This option prints the initial conditions to the output before the actual run starts. This merely<br />
mimics the inputs specified by the user in the input data file The initial conditions brake<br />
down into seven sections. Each is described below with the section name. The following<br />
explanation uses the output from the case STANDARD.DAT which is captured using the<br />
program report. STANDARD.DAT is included in the distribution. Please note, there are not<br />
mechanical ventilation or horizontal vents in STANDARD.DAT, so below the section saying<br />
there are no mechanical ventilation connections, there is an annotated section from additional<br />
data files, TESTVVENT.DAT, TESTHVAC.DAT <strong>and</strong> TESTSPEC.DAT.<br />
Overview: The overview gives a general description <strong>of</strong> the case. The output is fairly self<br />
explanatory. Doors, ..." is the total number <strong>of</strong> horizontal natural flow vent connections in all<br />
compartments <strong>of</strong> the simulation. "Ceil. Vents, ..." gives the total number <strong>of</strong> vertical natural<br />
flow vent connections in all compartments <strong>of</strong> the simulation. The last header on the line<br />
"MV Connections" has the total number mechanical flow connections to all compartments in<br />
the simulation. Times in these outputs come from the TIMES input. All times are in s.<br />
OVERVIEW<br />
User’s Guide Version 6 Chapter 5 Output • 53
Compartments Doors, ... Ceil. Vents, ... MV Connects<br />
1 1 0 0<br />
Simulation Print History Restart<br />
Time Interval Interval Interval<br />
(s) (s) (s) (s)<br />
1800 10 10 0<br />
Ceiling jet is on for all<br />
History file is STANDARD.HI<br />
Ambient Conditions: This section, like the overview section, needs little elaboration. It gives<br />
the starting atmospheric conditions for the simulation both for outside <strong>and</strong> inside the<br />
structure. Data for these outputs come from the TAMB <strong>and</strong> EAMB inputs. Temperatures are<br />
in K, pressure in Pa, elevations in m, <strong>and</strong> wind speed in m/s. Wind Power is the<br />
dimensionless power law coefficient from the WIND input.<br />
AMBIENT CONDITIONS<br />
Interior Interior Exterior Exterior Station Wind Wind Wind<br />
Temperature Pressure Temperature Pressure Elevation Speed Ref. Height Power<br />
(K) (Pa) (K) (Pa) (m) (m/s) (m)<br />
300. 101300. 300. 101300. 0.00 0.0 10.0 0.16<br />
Compartments: The compartments section gives a summary <strong>of</strong> the geometry for the<br />
simulation. A simple table summarizes the geometry with compartments running down the<br />
page in numerical order. The various dimensions for each compartment are on the row with<br />
its compartment number. Two columns need explanation. The second to last column<br />
"Ceiling Height" gives the height <strong>of</strong> the ceiling relative to the station height in the Ambient<br />
Conditions section. Similarly the "Floor Height" refers to the height <strong>of</strong> the floor above the<br />
station height.<br />
COMPARTMENTS<br />
Compartment Width Depth Height Area Volume Ceiling Floor<br />
Height Height<br />
(m) (m) (m) (m^2) (m^3) (m) (m)<br />
---------------------------------------------------------------------------------<br />
1 9.10 5.00 4.60 45.50 209.30 4.60 0.00<br />
• Values for width, depth, height, <strong>and</strong> floor height come directly from the WIDTH,<br />
DEPTH, HEIGH, <strong>and</strong> HI/F specifications in the input data file.<br />
• Area is calculated as width x depth in m 2 .<br />
• Volume is calculated as width x depth x height in m 3 .<br />
• Floor height is the absolute elevation <strong>of</strong> the ceiling <strong>of</strong> the compartment <strong>and</strong> is just<br />
station elevation (from the ambient conditions section) + compartment height in<br />
m.<br />
54 • Chapter 5 Output User’s Guide Version 6
Vent Connections: Vent connections further divides into three distinct parts. Each part has<br />
its own sub heading. A description <strong>of</strong> each follows.<br />
Horizontal Natural Ventilation is the first table in the vent connections sections. Each row in<br />
the table characterizes one vent. The first two columns contain the two compartments<br />
connected by the vent. Each vent is ordered first by the lower number <strong>of</strong> the two<br />
compartments <strong>and</strong> then the numeric order <strong>of</strong> the second compartment. The third column<br />
gives the vent number. Column four is the width <strong>of</strong> the vent. The next two columns report<br />
the sill <strong>and</strong> s<strong>of</strong>fit height for the vent relative to the floor <strong>of</strong> the first compartment. The<br />
seventh <strong>and</strong> eighth columns have a second listing <strong>of</strong> the sill <strong>and</strong> s<strong>of</strong>fit height, this time<br />
relative to the station height. Area <strong>of</strong> the vent is in the last column.<br />
VENT CONNECTIONS<br />
Horizontal Natural Flow Connections (Doors, Windows, ...)<br />
From To Vent Width Sill S<strong>of</strong>fit Abs. Abs. Area<br />
Compartment Compartment Number Height Height Sill S<strong>of</strong>fit<br />
(m) (m) (m) (m) (m) (m^2)<br />
---------------------------------------------------------------------------------------------------<br />
1 Outside 1 2.40 0.00 1.00 0.00 1.00 2.40<br />
• From compartment, to compartment, vent number, width, sill height, <strong>and</strong> s<strong>of</strong>fit<br />
height all come directly from the HVENT specifications in the input data file.<br />
• Absolute sill height <strong>and</strong> absolute s<strong>of</strong>fit height is the station elevation +<br />
compartment floor height + sill height. Absolute s<strong>of</strong>fit height <strong>and</strong> absolute s<strong>of</strong>fit<br />
height is the station elevation + compartment floor height + s<strong>of</strong>fit height<br />
Vertical Natural Ventilation prints out in a similarly simple table. Again each vent is one<br />
row <strong>of</strong> the table. The first column is the upper compartment. The upper compartment is the<br />
compartment where the vent opens into the floor. The second column is the lower<br />
compartment where the vent is in the ceiling. The third column describes the shape <strong>of</strong> the<br />
vent, which can be either round or square. The fourth column gives the area <strong>of</strong> the vent. The<br />
last two columns are the height <strong>of</strong> the vent, relative to the floor <strong>of</strong> the lower room <strong>and</strong><br />
relative to the station height respectively.<br />
This is the output from STANDARD.DAT<br />
There are no vertical natural flow connections<br />
There are no mechanical flow connections<br />
This is an alternate example that includes a vertical flow connection from<br />
TESTVVENT.DAT<br />
User’s Guide Version 6 Chapter 5 Output • 55
Vertical Natural Flow Connections (Ceiling, ...)<br />
Top Bottom Shape Area Relative Absolute<br />
Compartment Compartment Height Height<br />
(m^2) (m) (m)<br />
----------------------------------------------------------------------<br />
2 1 Round 0.10 2.30 2.30<br />
which shows a circular hole in the ceiling <strong>of</strong> area 0.1 m 2 .<br />
• Top compartment, bottom compartment, shape, <strong>and</strong> area come from the VVENT<br />
specifications in the input data file.<br />
• Relative height is the height <strong>of</strong> the vent above the floor <strong>of</strong> the bottom<br />
compartment <strong>and</strong> absolute height is the height <strong>of</strong> the vent above the station<br />
elevation.<br />
Mechanical Flow Connections uses two tables. The first table lists all the connections to<br />
compartments <strong>and</strong> ducts. Each row is either a connection or duct. The first column tells to<br />
which system the duct or connection belongs. A system is a set <strong>of</strong> continuously linked<br />
connections, ducts <strong>and</strong> fans. The example contains only one system. If a second system had<br />
been part <strong>of</strong> the file, a line would have been skipped before starting into the second system.<br />
The second <strong>and</strong> fourth columns give both ends <strong>of</strong> either the connection or duct. The words<br />
"comp" or "node" proceeds the numbers in these two columns. "Comp" means a<br />
compartment number. Rows with a compartment number in either the "from" or "to"<br />
columns are connections to compartments, which are basically vents. The rest <strong>of</strong> the rows<br />
define ducts. The third <strong>and</strong> fifth columns give the elevations <strong>of</strong> the proceeding columns.<br />
The sixth column is the length which only applies to ducts. Connections do not have a length<br />
so the column is left blank. Next comes the cross sectional area. The last column tells the<br />
absolute roughness. This value is the resistance the duct provides to the flow <strong>of</strong> air. Like the<br />
length, this value only has meaning for a duct so it is blank for a connection. Air flows both<br />
ways though connections <strong>and</strong> ducts. The headers "from" <strong>and</strong> "to" say nothing about the<br />
direction <strong>of</strong> air flow. The headers only provide a convenient way <strong>of</strong> listing both ends <strong>of</strong> a<br />
duct or connection.<br />
Mechanical Flow Connections (Fans, Ducts, ...)<br />
Connections <strong>and</strong> Ducts<br />
System From From To To Length Area Rough<br />
Elev. Elev.<br />
(m) (m) (m) (m^2) (mm)<br />
--------------------------------------------------------------------------------------<br />
1 Comp 1 2.10 Node 1 2.10 0.12<br />
Node 1 2.10 Node 2 0.00 2.30 0.08 0.00<br />
The second table lists the fans. The first five columns in the fan table appear almost the same<br />
as the connections <strong>and</strong> ducts table. The table lists, in order, the number <strong>of</strong> the system the fan<br />
is a part, the "from" node <strong>and</strong> its height, the "to" node <strong>and</strong> its height. A fan actually draws air<br />
from the first or "from" node <strong>and</strong> pushes it to the second or "to" node. In the second table,<br />
the headers give the direction <strong>of</strong> the flow <strong>of</strong> air. The sixth column is the fan number as<br />
defined in CEdit. The next two columns are the minimum <strong>and</strong> maximum pressures at which<br />
56 • Chapter 5 Output User’s Guide Version 6
the fan curve is defined. The rest <strong>of</strong> the row is made up <strong>of</strong> the two to five fan curve<br />
coefficients in the input file.<br />
Fans<br />
System From From To To Fan Minimum Maximum Fan Curve<br />
Elev. Elev. Number<br />
(m) (m) (Pa) (Pa)<br />
----------------------------------------------------------------------------------------------------<br />
1 Node 2 0.00 Node 3 2.10 1 0.00 300.00 0.14 -<br />
4.33E-04<br />
Node 3 2.10 Outside 2.10 0.12<br />
Thermal Properties The thermal properties section brakes into two parts. The first part is a<br />
table that lists the material for each surface <strong>of</strong> each compartment. The compartments appear<br />
as rows down the page in numerical order. From left to right next to the compartment<br />
number comes the material for the ceiling, wall <strong>and</strong> floor. The second part lists the entries in<br />
the thermal data base. The first line gives the database file used. Next comes a listing <strong>of</strong><br />
each material used. In addition to materials for compartment surfaces, any materials specified<br />
for targets are also listed. For each listing <strong>of</strong> a material, the name is followed by the<br />
conductivity, specific heat, density, thickness <strong>and</strong> emissivity. Additionally, the HCl<br />
constants used to calculate the HCl deposition for the surface are displayed.<br />
THERMAL PROPERTIES<br />
Compartment Ceiling Wall Floor<br />
----------------------------------------------------------------------<br />
1 GLASSFB3 CONCRETE CONCRETE<br />
Thermal data base used: THERMAL.CSV<br />
Name Conductivity Specific heat Density Thickness Emissivity HCL B's (1->5)<br />
GLASSFB3 3.600E-02 795. 105. 1.300E-02 0.900 0.00E+00 0.00E+00 0.00E+00…<br />
CONCRETE 1.75 1.000E+03 2.200E+03 0.150 0.940 0.00E+00 0.00E+00 0.00E+00…<br />
PLYWOOD 0.120 1.215E+03 545. 1.300E-02 0.900 0.00E+00 0.00E+00 0.00E+00…<br />
• Material choices <strong>of</strong> the ceiling, walls, <strong>and</strong> floors come from the CEILI, WALLS,<br />
<strong>and</strong> FLOOR specifications in the input data file.<br />
• Materials properties for the chosen materials come from the specified thermal<br />
properties file.<br />
• Units for thermal properties are st<strong>and</strong>ard S.I. units. For thermal conductivity,<br />
W/m K; for specific heat, J/kg K; for density, kg/m 3 ; for thickness, m; emissivity<br />
is dimensionless.<br />
Targets: The entry for targets shows the orientation <strong>of</strong> additional targets specified in the data<br />
file. Note that the first two are always present. The third one is the target specified in the data<br />
file. Each target is numbered based on the order <strong>of</strong> the target specifications in the input data<br />
file. The compartment number, position <strong>of</strong> the target within the compartment, direction <strong>of</strong><br />
the front face <strong>of</strong> the target object expressed as a normal unit vector to the surface, <strong>and</strong> object<br />
material.<br />
User’s Guide Version 6 Chapter 5 Output • 57
TARGETS<br />
Target Compartment Position (x, y, z) Direction (x, y, z) Material<br />
----------------------------------------------------------------------------------<br />
1 1 2.20 1.88 2.34 0.00 0.00 1.00 CONCRETE<br />
2 1 2.15 1.65 0.00 -1.00 0.00 0.00 PLYWOOD<br />
3 1 2.50 4.55 0.00 0.00 0.00 1.00 CONCRETE Floor,<br />
compartment 1<br />
• All <strong>of</strong> the inputs for targets come from the TARGE comm<strong>and</strong> in the input data<br />
file. Direction is specified as a unit vector as described in the section on target<br />
input.<br />
• Units for position <strong>and</strong> direction are all in m.<br />
<strong>Fire</strong>s: The fire section lists all the information about the main fire <strong>and</strong> any object fires that<br />
might exist. All the information for each fire is listed separately. If there is a main fire, it<br />
comes first. Each fire listing has the same form. First is the name <strong>of</strong> the fire followed by a<br />
list <strong>of</strong> general information. Listed left to right is the compartment the fire is in, the type <strong>of</strong><br />
fire, the x, y, z position, the relative humidity, the lower oxygen limit, <strong>and</strong> finally the<br />
pyrolysis temperature. A table <strong>of</strong> time history curves for the fire follows. The table contains<br />
all the time history curves for the fire. Each row on the table is a specific time given in the<br />
left most column. The rest <strong>of</strong> the columns give the values at that particular time. The<br />
column headers are keywords used in the datafile. The keyword meanings are: fmass is<br />
pyrolysis rate; hcomb is heat <strong>of</strong> combustion; fqdot is heat release rate; fhigh is height <strong>of</strong> fire;<br />
C/CO2 is carbon to carbon dioxide ratio; CO/CO2 is the carbon monoxide to carbon dioxide<br />
ratio; H/C is the hydrogen to carbon ratio; O/C is the oxygen to carbon ratio; HCN is the<br />
hydrogen cyanide production rate; <strong>and</strong> HCl is the hydrogen chloride production rate.<br />
FIRES<br />
Name: Main <strong>Fire</strong><br />
Compartment <strong>Fire</strong> Type Position (x,y,z) Relative Lower O2 Pyrolysis<br />
Humidity Limit Temperature<br />
1 Constrained 3.00 5.70 0.00 50.0 12.00 300.<br />
Time Fmass Hcomb Fqdot Fhigh C/CO2 CO/CO2 H/C O/C HCN HCL<br />
(s) (kg/s) (J/kg) (W) (m) (kg/kg) (kg/kg) (kg/kg) (kg/kg) (kg/kg) (kg/kg)<br />
--------------------------------------------------------------------------------------------------------------<br />
0. 0.0 2.41E+07 0.0 0.0 0.0 0.0 0.16 0.0 0.0 0.0<br />
60. 8.30E-03 2.41E+07 2.00E+05 0.0 0.0 0.0 0.16 0.0 0.0 0.0<br />
120. 1.45E-02 2.41E+07 3.50E+05 0.0 0.0 0.0 0.16 0.0 0.0 0.0<br />
180. 1.41E-02 2.41E+07 3.40E+05 0.0 0.0 0.0 0.16 0.0 0.0 0.0<br />
240. 8.30E-03 2.41E+07 2.00E+05 0.0 0.0 0.0 0.16 0.0 0.0 0.0<br />
300. 6.22E-03 2.41E+07 1.50E+05 0.0 0.0 0.0 0.16 0.0 0.0 0.0<br />
360. 4.15E-03 2.41E+07 1.00E+05 0.0 0.0 0.0 0.16 0.0 0.0 0.0<br />
420. 4.15E-03 2.41E+07 1.00E+05 0.0 0.0 0.0 0.16 0.0 0.0 0.0<br />
480. 3.32E-03 2.41E+07 8.00E+04 0.0 0.0 0.0 0.16 0.0 0.0 0.0<br />
540. 3.11E-03 2.41E+07 7.50E+04 0.0 0.0 0.0 0.16 0.0 0.0 0.0<br />
1800. 4.15E-03 2.41E+07 1.00E+05 0.0 0.0 0.0 0.16 0.0 0.0 0.0<br />
Name: WARDROBE Referenced as object # 1<br />
Compartment <strong>Fire</strong> Type Position (x,y,z) Relative Lower O2 Pyrolysis<br />
Humidity Limit Temperature<br />
1 Constrained 2.15 1.65 0.00 50.0 12.00 300.<br />
58 • Chapter 5 Output User’s Guide Version 6
Time Fmass Hcomb Fqdot Fhigh C/CO2 CO/CO2 H/C O/C HCN HCL<br />
(s) (kg/s) (J/kg) (W) (m) (kg/kg) (kg/kg) (kg/kg) (kg/kg) (kg/kg) (kg/kg)<br />
--------------------------------------------------------------------------------------------------------------<br />
0. 0.0 1.59E+06 0.0 0.0 0.0 0.0 0.33 0.0 0.0 0.0<br />
70. 3.14E-02 1.59E+06 5.00E+04 0.0 1.60E-02 0.23 0.33 0.0 0.0 0.0<br />
100. 8.17E-02 1.59E+06 1.30E+05 0.0 1.90E-02 0.13 0.33 0.0 0.0 0.0<br />
140. 0.33 1.59E+06 5.30E+05 0.0 4.00E-03 9.00E-03 0.33 0.0 0.0 0.0<br />
190. 1.57E-02 1.59E+06 2.50E+04 0.0 0.0 1.60E-02 0.33 0.0 0.0 0.0<br />
200. 3.77E-02 1.59E+06 6.00E+04 0.0 0.0 3.10E-02 0.33 0.0 0.0 0.0<br />
340. 1.57E-02 1.59E+06 2.50E+04 0.0 0.0 6.30E-02 0.33 0.0 0.0 0.0<br />
1170. 3.10E-03 1.61E+06 5.00E+03 0.0 0.0 0.0 0.33 0.0 0.0 0.0<br />
• All <strong>of</strong> the inputs for the main fire come from the fire specifications in the input<br />
data file. Data for the object fire comes from the object data file included with the<br />
<strong>CFAST</strong> s<strong>of</strong>tware.<br />
• Units for most values are included in the output. <strong>Fire</strong> position is in m, relative<br />
humidity is in %, lower oxygen limit is in volume percent, <strong>and</strong> pyrolysis<br />
temperature is in K.<br />
Output for Main Output Variables<br />
An exp<strong>and</strong>ed version <strong>of</strong> the compact default output called the normal print out can be<br />
obtained using the /f option. When requested, the normal print out is the first information<br />
printed at each interval. The first part <strong>of</strong> the print out looks similar to the default print out. It<br />
is laid out along the same lines, with the calculated values for each compartment listed left to<br />
right <strong>and</strong> compartments listed down. The left most column has the compartment. The next<br />
three columns also give the same values as the default output. They are upper layer temperature,<br />
lower layer temperature <strong>and</strong> interface height. The output changes at this point. The fifth<br />
column gives the upper layer volume. In the sixth, in parenthesis, is the percent <strong>of</strong> the total<br />
compartment volume the upper layer takes up. The pressure difference from ambient follows<br />
in the seventh column. The rest <strong>of</strong> the columns are the temperature <strong>of</strong> the bounding surfaces<br />
in K.<br />
Time = 1800.0 seconds.<br />
Compartment Upper Lower Inter. Upper Upper Lower Pressure Ambient Floor<br />
Temp. Temp. Height Vol. Absorb Absorb Target Target<br />
(K) (K) (m) (m^3) (m^-1) (m^-1) (Pa) (W/m^2) (W/m^2)<br />
----------------------------------------------------------------------------------------------------------------<br />
1 377.0 303.8 0.7236 1.76E+02( 84%) 1.000E-02 1.000E-02 -9.483E-02 437. 335.<br />
The second table <strong>of</strong> the normal print out has information about the fires. In essence it is two<br />
tables joined. The first part lists information by fire. It starts with the main fire, if there is<br />
one, <strong>and</strong> then the object fires down the page. The fires are listed in the second column<br />
followed by the plume flow rate, the pyrolysis rate <strong>and</strong> the fire size. The next three columns<br />
are then skipped. The next column with information is the amount <strong>of</strong> heat given <strong>of</strong>f by each<br />
fire convectively, followed by the amount <strong>of</strong> heat given <strong>of</strong>f radiantly. The second part starts<br />
after all the fires have been individually listed. It gives the totals for all fires in each<br />
User’s Guide Version 6 Chapter 5 Output • 59
compartment. The first column has the compartment number. The compartments start at one<br />
<strong>and</strong> are listed down the page in order. The third to fifth columns are the same as the first part<br />
except the values are totals for the compartment <strong>and</strong> not just for one fire. The sixth column<br />
has the total heat release rate that occurs in the upper layer. The next column has the same<br />
total in the lower layer. The eighth column has the total size <strong>of</strong> vent fires in the<br />
compartment. The last two columns <strong>of</strong> the table gives the convective <strong>and</strong> radiative parts <strong>of</strong><br />
the fire heat release.<br />
<strong>Fire</strong>s<br />
Compartment <strong>Fire</strong> Plume Pyrol <strong>Fire</strong> Flame <strong>Fire</strong> in <strong>Fire</strong> in Vent Convec. Radiat.<br />
Flow Rate Size Height Upper Lower <strong>Fire</strong><br />
(kg/s) (kg/s) (W) (m) (W) (W) (W) (W) (W)<br />
------------------------------------------------------------------------------------------------------------------<br />
Main 0.291 4.149E-03 9.998E+04 1.11 6.999E+04 3.000E+04<br />
WARDROBE 5.026E-02 3.100E-03 4.988E+03 0.120 3.492E+03 1.496E+03<br />
1 0.341 7.249E-03 1.050E+05 0.00 1.050E+05 0.00<br />
• Flame height is calculated from the work <strong>of</strong> Heskestad 22 Valid for a wide range <strong>of</strong><br />
hydrocarbon <strong>and</strong> gaseous fuels, the correlation is given by<br />
1. 02 0.<br />
23 f Q<br />
H + − =<br />
where H is the average flame height <strong>and</strong> Qf is the fire size. The mean flame height is defined<br />
as the distance from the fuel source to the top <strong>of</strong> the visible flame where the intermittency is<br />
0.5. A flame intermittency <strong>of</strong> 0.5 means that the visible flame is above the mean 50 % <strong>of</strong> the<br />
time <strong>and</strong> below the mean 50 % <strong>of</strong> the time.<br />
Output for Wall Surface <strong>and</strong> Targets<br />
The /f option provides two tables displaying information about wall surface or target<br />
temperatures <strong>and</strong> fluxes, <strong>and</strong> heat detectors or sprinklers. The left most column specifies the<br />
compartment number; followed by four columns providing the temperatures <strong>of</strong> the bounding<br />
surfaces <strong>of</strong> the compartment in contact with the ceiling, upper wall surface (in contact with<br />
the upper layer gases), lower wall surface (in contact with the lower layer gases), <strong>and</strong> floor,<br />
in that order. Next comes information about targets in the compartment, with each target<br />
listed on a separate line. Information in the columns includes the surface temperature <strong>of</strong> the<br />
target, net heat flux to the target, <strong>and</strong> the percentage <strong>of</strong> that net flux that is due to radiation<br />
from the fire, radiation from compartment surfaces, radiation from the gas layers, <strong>and</strong><br />
convection from the gas surrounding the target. <strong>CFAST</strong> includes one target in the center <strong>of</strong><br />
the floor for all compartments. Information on additional targets specified by the user in the<br />
input data file are also included, in the order specified in the input file.<br />
60 • Chapter 5 Output User’s Guide Version 6<br />
2 / 5
Surfaces <strong>and</strong> Targets<br />
Compartment Ceiling Up wall Low wall Floor Target Target Flux To <strong>Fire</strong> Surface Gas<br />
Temp. Temp. Temp. Temp. Temp. Target Rad. Rad. Rad. Convect.<br />
(K) (K) (K) (K) (K) (W/m^2) (%) (%) (%) (%)<br />
---------------------------------------------------------------------------------------------------------------------------<br />
1 339.2 312.3 306.3 310.8 Floor 311. 863.4 0.0 27.9 74.7 -2.6<br />
1 320. 1318. 0.0 7.7 71.7 20.6<br />
2 367. 647.8 0.0 25.9 120.5 -46.4<br />
The second table provides information about heat detectors <strong>and</strong> sprinklers included in the<br />
input data file. For each output time, the output includes the sensor temperature, whether the<br />
sensor temperature has exceeded its specified activation temperature, <strong>and</strong> the temperature<br />
<strong>and</strong> velocity <strong>of</strong> the gas adjacent to the sensor. For sensors placed near the ceiling <strong>of</strong> a<br />
compartment with a fire, the temperature <strong>and</strong> velocity are those <strong>of</strong> the ceiling jet; for other<br />
compartments, it is the upper layer temperature <strong>and</strong> a default velocity <strong>of</strong> 0.1 m/s.<br />
Sensors<br />
Sensor <strong>Smoke</strong><br />
Number Compartment Type Temp (K) Activated Temp (K) Vel (M/S)<br />
----------------------------------------------------------------------------<br />
1 1 HEAT 3.149E+02 YES 3.136E+02 4.152E-01<br />
• Temperatures are all in K, fluxes in w/m 2 , <strong>and</strong> velocities in m/s.<br />
• In all cases, the flux to/from a target is net radiation or net convection. That is, it<br />
is the incoming minus the outgoing. So while a target or object is heating, the flux<br />
will be positive, <strong>and</strong> once it starts to cool, the flux will be negative.<br />
• Values for radiation from fires (fire rad.), radiation from surfaces (surface rad.),<br />
radiation from the gas layers (gas rad.), <strong>and</strong> convection from surfaces (convect)<br />
are expressed as a percentage <strong>of</strong> the net flux to target (flux to target). Positive<br />
values indicate heat gains by the target <strong>and</strong> negative values indicate heat losses.<br />
Output for Gas Species<br />
The /f option has two tables displaying information about the amounts <strong>of</strong> species in each<br />
layer. The species information follows the normal print out. The first table gives species<br />
concentrations for the upper layers <strong>of</strong> all the compartments <strong>and</strong> the second reports the same<br />
for the lower layers <strong>of</strong> all the compartments. Again the compartments are listed down the<br />
page <strong>and</strong> the information across the page. The species are each given in one <strong>of</strong> several<br />
different terms. Below each header is the units for the given value. Most <strong>of</strong> the headers are<br />
simply the chemical formula for the species being tracked. However, a couple are not<br />
obvious. "TUHC" is the total unburned hydrocarbons or the pyrolyzed fuel that hasn't<br />
burned yet. "OD" is the obscuration density, which is a measure <strong>of</strong> the amount <strong>of</strong> smoke.<br />
The last four columns, "HCl c", "HCl f", "HCl uw" <strong>and</strong> "HCl lw", are the amount <strong>of</strong> HCl<br />
deposition on the ceiling, floor, upper wall <strong>and</strong> lower wall respectively.<br />
User’s Guide Version 6 Chapter 5 Output • 61
Time = 1800.0 seconds.<br />
Upper Layer Species<br />
Compartment N2 O2 CO2 CO HCN HCL TUHC H2O OD CT<br />
(%) (%) (ppm) (ppm) (ppm) (%) (%) (%) (1/m) (g-min/m3)<br />
-------------------------------------------------------------------------------------------------------------------<br />
1 77.5 18.1 1.24 777. 568. 415. 0.00 2.55 7.26 353.<br />
Lower Layer Species<br />
Compartment N2 O2 CO2 CO HCN HCL TUHC H2O OD CT<br />
(%) (%) (%) (ppm) (ppm) (ppm) (%) (%) (1/m) (g-min/m3)<br />
-------------------------------------------------------------------------------------------------------------------<br />
1 79.3 20.7 7.209E-08 4.531E-05 3.312E-05 2.417E-05 0.00 7.677E-07 4.830E-07 0.860<br />
• The report by species for nitrogen, oxygen, hydrogen chloride <strong>and</strong> the total<br />
unburned hydrocarbons (fuel vapor in the layer) are percent by volume. Carbon<br />
dioxide, carbon monoxide <strong>and</strong> hydrogen cyanide are in parts per million, which is<br />
also a volume fraction. Optical depth per meter is a measure <strong>of</strong> the visibility in<br />
the smoke. This is covered in detail in the comment on visibility in the section on<br />
fires <strong>and</strong> species specification. The concentration-time (CT) calculation is an<br />
integration <strong>of</strong> the species input for type CT (See section for the input <strong>of</strong> CT) <strong>and</strong><br />
is intended to represent a relative dose <strong>of</strong> toxic gas species 23<br />
Output for Vent Flows<br />
Information about hallway <strong>and</strong> vent flow is obtained by using this option. It includes two<br />
sections, one with information about hallway flow specified with the HALL comm<strong>and</strong>, <strong>and</strong> a<br />
larger section detailing mass flow through horizontal, vertical, <strong>and</strong> mechanical vents. For<br />
hallway flow, the output begins with the compartment specified as a hallway in the input data<br />
file, followed by the time at which gas began to flow into the hallway through the vent that<br />
connects the hallway to the main fire compartment. Following the start time are the average<br />
gas velocity, the layer depth <strong>of</strong> the initial flow down the corridor, <strong>and</strong> the distance from the<br />
end <strong>of</strong> the corridor that the hot layer is estimated to have reached.<br />
Hall Flow<br />
Compartment Start Time Velocity Depth Distance<br />
(s) (m/s) (m) (m)<br />
----------------------------------------------------------------<br />
3 2.59 1.69 0.573 32.3<br />
The section for vent flow is titled "Flow Through Vents (kg/s)." Because flow is always<br />
given in positive values, each vent is listed twice. Once for flow going from compartment A<br />
to compartment B <strong>and</strong> a second time for flow from B to A. As the example below shows, the<br />
first column lists the compartment. The second column specifies the vent, including the type<br />
<strong>of</strong> vent (an “H” in this column st<strong>and</strong>s for horizontal flow, such as through a doorway or<br />
window; a “V” here would mean vertical flow, such as through an opening in the ceiling, <strong>and</strong><br />
an “M” st<strong>and</strong>s for a mechanical ventilation connection) <strong>and</strong> the compartment from which the<br />
flow comes. Up to six additional columns detail the flow at this vent. Flow into <strong>and</strong> out <strong>of</strong> the<br />
compartment through the vent in the upper <strong>and</strong> lower layers are included, along with mixing<br />
between layers at the vent into the upper layer <strong>and</strong> into the lower layer.<br />
62 • Chapter 5 Output User’s Guide Version 6
Flow Through Vents (kg/s)<br />
To Through Upper Layer Lower Layer Mixing Mixing<br />
Compartment Vent Inflow Outflow Inflow Outflow To Upper To Lower<br />
--------------------------------------------------------------------------------------------------------<br />
1 H Outside #1 0.344 0.401 6.416E-02<br />
Outside H Comp 1 #1 0.344 6.416E-02 0.401<br />
• The mass balance is the sum <strong>of</strong> the flow in minus the flow out. (Note that this is<br />
an extended run to achieve results close to steady state.) For any compartment,<br />
this is just (“Upper Layer Inflow” + “Lower Layer Inflow” + “Pyrol Rate”) <strong>–</strong><br />
((Upper Layer Outflow + Lower Layer Outflow) with the inflow <strong>and</strong> outflow<br />
summed for each vent. Note that the mixing flows are ignored since they are just<br />
exchanged between layers in the same compartment. For the above example, the<br />
mass balance is:<br />
(0.0 + 0.401 + 7.2x10 -3 ) kg/s <strong>–</strong> (0.344 + 6.4x10 -2 ) kg/s = -0.002 kg/s<br />
where the pyrolysis rate (from the”normal” output) is 7.2x10⁻³ kg/s. The result is about<br />
the right magnitude (about 0.5% <strong>of</strong> the mass flow into or out <strong>of</strong> the vent) for net mass<br />
loss. The mass loss should still be slightly negative since the compartment continues to<br />
heat.<br />
Spreadsheet Output<br />
A very important note for interpreting the spreadsheet output. These files capture a snap shot<br />
<strong>of</strong> the modeling data at an instant <strong>of</strong> time. This instance is determined by the fourth entry on<br />
the TIMES line <strong>of</strong> the data file. HOWEVER, there are events which can occur in between<br />
these reporting periods. Examples are the ignition <strong>of</strong> objects <strong>and</strong> the activation <strong>of</strong> detectors or<br />
sprinklers. These are NOT reported in these output files.<br />
Primary Output Variables (project.n.csv)<br />
There are two sets <strong>of</strong> information. The first is the compartment information such as layer<br />
temperature. This is output by compartment <strong>and</strong> there are seven entries for each<br />
compartment:<br />
'Upper Layer Temp', 'Lower Layer Temp', 'Layer Height', 'Volume', 'Pressure', 'Ambient<br />
Target', 'Floor Target'/<br />
The second section is for fires. There are five entries per fire. This information is displayed<br />
for each fire (0 to numobjl)<br />
'Plume flow', 'Pyrolysis rate', '<strong>Fire</strong> Size', 'Flame Height', 'Convective flow'<br />
User’s Guide Version 6 Chapter 5 Output • 63
The units <strong>of</strong> flow are kg/s, fire size in Watts, temperatures in Kelvin, pressure in Pascals <strong>and</strong><br />
flux in W/m 2 .<br />
Species Output (project.s.csv)<br />
At present, the eight species, oxygen (O2), carbon dioxide (CO2), carbon monoxide (CO),<br />
hydrogen cyanide (HCN), hydrogen chloride (HCL), water vapor (H2O), optical depth (OD),<br />
<strong>and</strong> concentration-time dose (CT) are listed. This set <strong>of</strong> eight is enumerated for each<br />
compartment, <strong>and</strong> are done sequentially by compartment.<br />
There will be N-1 (number <strong>of</strong> interior compartments) instances <strong>of</strong><br />
Time C1 C1 ...<br />
Upper Lower ...<br />
O2 O2 ... for each species in order (see above)<br />
The units are O2 in %, CO2 in %, CO in ppm, HCN in ppm, HCL in ppm, H2O in %, OD in<br />
1/m, CT in g-min/m 3 .<br />
Vent Flow (project.f.csv)<br />
First is the horizontal flow through vertical vents such as windows <strong>and</strong> doors. There are two<br />
types <strong>of</strong> output, first to <strong>and</strong> from the outside, <strong>and</strong> second for interior compartments. The flow<br />
is broken down to flow in <strong>and</strong> out <strong>of</strong> the compartments. For flow to <strong>and</strong> from the outside<br />
(compartment N) there are two entries. For interior compartments, there are additional entries<br />
for entrainment into the upper <strong>and</strong> lower layers. Please see the technical reference guide for a<br />
detailed description <strong>of</strong> these flow fields.<br />
Second is the vertical flow through horizontal vents. There are two entries for each<br />
compartment, showing the total flow into or out <strong>of</strong> the compartment.<br />
Third is the mechanical ventilation. Once again, there will be an entry for each<br />
node/compartment pair, showing the total flow into or out <strong>of</strong> the compartment through this<br />
node.<br />
An example <strong>of</strong> horizontal flow for two compartments is<br />
‘Time’, ‘Inflow from 2 to 1', ‘Outflow to 2 from 1', ‘Mixing to Upper 1 ( 2 )’, ‘Mixing to Lower 1 ( 2 )’<br />
<strong>and</strong> for vertical flow<br />
V Outflow from 1 to Out,V Inflow from 1 to Out<br />
64 • Chapter 5 Output User’s Guide Version 6
<strong>and</strong> for mechanical ventilation<br />
‘MV Inflow to 1', ‘MV Outflow from 1'<br />
Temperatures <strong>and</strong> flux (project.w.csv)<br />
This spreadsheet provides information on surface <strong>and</strong> target temperatures <strong>and</strong> flux, <strong>and</strong><br />
reports on the current state <strong>of</strong> detectors <strong>and</strong> sprinklers (as a sub-set <strong>of</strong> detectors). Flux is<br />
reported in Watts/m2, <strong>and</strong> temperature in Kelvin. Activation <strong>of</strong> a detector is binary (yes or<br />
no). Velocity is in m/s.<br />
The first line in the spreadsheet is the compartment name or detector number, followed by<br />
the second line which is the measure being reported.<br />
‘Time’ ‘burn_room’ ‘burn_room’ ‘burn_room’ ‘burn_room’ ‘burn_room’ ...<br />
‘ceiling’ ‘upper wall’ ‘lower wall’ ‘floor’ ‘flux to target’ ‘total fire rad.’ ‘surface rad.’ ‘gas rad.’ <strong>and</strong> ‘conv. flux’<br />
Following the compartment <strong>and</strong> target information is the detector output. The decoding for<br />
the type is 1 for a smoke detector, 2 for heat detector <strong>and</strong> 3 for other. In the activation<br />
column, 1 is yes <strong>and</strong> 2 is no. There will be a set <strong>of</strong> 10 columns for each compartment<br />
following this format.<br />
Error Messages<br />
In some (hopefully rare) cases, a simulation will fail to complete. In those cases, an error<br />
message provides guidance to the user on possible reasons for the failure. The message will<br />
contain an error number which provides a reference to additional information from the table<br />
below. Most <strong>of</strong>ten, these errors result from improper information in the input data files.<br />
During initialization <strong>of</strong> the program for a simulation, <strong>CFAST</strong> may stop with an error message<br />
if the simulation cannot be initialized due to a missing or incorrect file specification. The<br />
error codes are as follows:<br />
• 100 program called with no arguments (no input file)<br />
• 101 code for a free burning fire should not be reachable<br />
• 102 project file does not exist<br />
• 103 total file name length including path is more than 256 characters<br />
• 104 one <strong>of</strong> the output files is not accessible (for example, if a cfast case with this<br />
name is already running)<br />
User’s Guide Version 6 Chapter 5 Output • 65
• 105 error writing to an output file (openoutputfiles)<br />
• 106 a system fault has occurred. Applies to all open/close pairs once the model is<br />
running<br />
• 107 incompatible options<br />
• 108 not used<br />
• 109 cannot find/open a file<br />
• 110 error in h<strong>and</strong>ling the status input/output<br />
Error codes from 1 to 99 are from the routine which parses the input <strong>and</strong> will be reported in<br />
the .log file. The first set indicates a comm<strong>and</strong> with the wrong number <strong>of</strong> arguments. These<br />
errors indicate an error in a particular input comm<strong>and</strong> as follows:<br />
• Code 1, TIMES comm<strong>and</strong><br />
• Code 2, TAMB comm<strong>and</strong><br />
• Code 3, EAMB comm<strong>and</strong><br />
• Code 4, LIMO2 comm<strong>and</strong><br />
• Code 5, THERMAL or OBJECT comm<strong>and</strong>s<br />
• Code 7, MAINF comm<strong>and</strong><br />
• Code 8, COMPA comm<strong>and</strong><br />
• 10, HVENT comm<strong>and</strong><br />
• 11, EVENT comm<strong>and</strong><br />
• 12, MVENT comm<strong>and</strong><br />
• 23, VVENT comm<strong>and</strong><br />
• 24, WIND comm<strong>and</strong><br />
• 25, INTER comm<strong>and</strong><br />
• 26, MVOPN comm<strong>and</strong><br />
• 28, MVDCT comm<strong>and</strong><br />
• 29, MVFAN comm<strong>and</strong><br />
• 32, OBJECT comm<strong>and</strong><br />
• 34, CJET <strong>and</strong> DETEC comm<strong>and</strong><br />
• 35, STPMAX comm<strong>and</strong><br />
• 37, VHEAT comm<strong>and</strong><br />
• 39, ONEZ comm<strong>and</strong><br />
• 41, TARGE comm<strong>and</strong><br />
66 • Chapter 5 Output User’s Guide Version 6
• 46, HALL comm<strong>and</strong><br />
• 47, ROOMA comm<strong>and</strong><br />
• 51, ROOMH comm<strong>and</strong><br />
• 55, DTCHE comm<strong>and</strong><br />
• 56, SETP comm<strong>and</strong><br />
• 58, HHEAT comm<strong>and</strong><br />
• 65, HEATF comm<strong>and</strong><br />
The second set <strong>of</strong> errors related to parsing the input indicate specific errors with a comm<strong>and</strong><br />
as follows:<br />
Error<br />
Code<br />
<strong>CFAST</strong><br />
Comm<strong>and</strong><br />
Error<br />
9 compa Compartment out <strong>of</strong> range<br />
26 inter Not a defined compartment<br />
27 mvopn Specified node number too large for this system<br />
30 mvfan Fan curve has incorrect specification<br />
31 Exceeded allowed number <strong>of</strong> fans<br />
33 object Object must be assigned to an existing compartment<br />
35 detect Invalid DETECTOR specification<br />
36 A referenced compartment is not yet defined<br />
38 vheat VHEAT has specified a non-existent compartment<br />
42 target Too many targets are being defined<br />
43 The compartment specified by TARGET does not exist<br />
44 Invalid TARGET METHOD<br />
45 Invalid equation type specified in TARGET<br />
49 rooma Compartment specified by ROOMA does not exist<br />
52 roomh Compartment specified by ROOMH is not defined<br />
53 ROOMH error on data line<br />
54 Data on the ROOMA (or H) line must be positive<br />
57 setp Trying to reset the SETP parameters<br />
61 hheat HHEAT specification error in compartment pairs<br />
62 Error in fraction for HHEAT<br />
63 <strong>Fire</strong> type out <strong>of</strong> range<br />
64 mainf The fire must be assigned to an existing compartment<br />
66 heatf The heat source must be assigned to an existing compartment<br />
67 mvent Compartment has not been defined<br />
68 Exceed one <strong>of</strong> the array bounds, ierror=68 (external), 69 (internal) <strong>and</strong> 70 (fan)<br />
71 event Undefined vent type<br />
User’s Guide Version 6 Chapter 5 Output • 67
Error<br />
Code<br />
<strong>CFAST</strong><br />
Comm<strong>and</strong><br />
Error<br />
72 inter Specification for interface height is outside <strong>of</strong> allowable range<br />
73 inter Compartments must be defined in pairs<br />
74 setp The requested “SETP” comm<strong>and</strong> does not exists<br />
75 Incorrect file reference<br />
76 Cannot read the parameter file<br />
77 Unsupported parameter<br />
Errors from 200 to 299 are errors which occur during data initialization as follows:<br />
Error<br />
Code<br />
<strong>CFAST</strong><br />
Comm<strong>and</strong><br />
Error<br />
200 inputmainfire cannot find the mainfire.o file in either the data or executable directory<br />
201 inputobject (read the object databases), too many targets being defined<br />
202 inputtpp (read the thermophysical database) cannot find the thermophysical properties<br />
file<br />
203 exceeded size <strong>of</strong> thermophysical properties data structure<br />
204 data format in the thermophysical data file is not correct<br />
205 initwall name is not defined in the thermophysical database<br />
206 readinputfile Incorrect <strong>CFAST</strong> version specified in input data file<br />
207 readcsvfile exceed array bounds for input (nrow)<br />
208 inputobject exceed array bounds for object fire (nv)<br />
209 inputmainfire exceed array bounds for object fire (nv)<br />
210 inputobject object name requested does not match the name in the object file<br />
211 spreadsheetnor<br />
mal<br />
exceed number <strong>of</strong> entries in normal output (maxhead)<br />
212 hvinit fan not properly defined (mvent comm<strong>and</strong>)<br />
213 inittarg target points to a non-existent compartment<br />
214 target center out <strong>of</strong> range (outside compartment)<br />
215 inputobject cannot find the object file in either the data or executable directory<br />
216 normal vector cannot be zero<br />
Errors 400 <strong>and</strong> above are failures while the model is running. In particular, 610 through 685<br />
are failures when IDID
References<br />
1<br />
Jones, W.W., Peacock, R.D., Forney, G.P., <strong>and</strong> Reneke, P.A., “<strong>CFAST</strong> <strong>–</strong> <strong>Consolidated</strong> <strong>Model</strong> <strong>of</strong><br />
<strong>Fire</strong> <strong>Growth</strong> <strong>and</strong> <strong>Smoke</strong> <strong>Transport</strong> (Version 5), Technical Reference Guide,” National Institute <strong>of</strong><br />
St<strong>and</strong>ards <strong>and</strong> Technology, Spec. Pub. 1030 (2004).<br />
2<br />
Gross, D., “Data Sources for Parameters Used for Predictive <strong>Model</strong>ing <strong>of</strong> <strong>Fire</strong> <strong>Growth</strong> <strong>and</strong> <strong>Smoke</strong><br />
Spread,” National Institute <strong>of</strong> St<strong>and</strong>ards <strong>and</strong> Technology, NISTIR 85-3223 (1985).<br />
3<br />
Jones, W.W. <strong>and</strong> Peacock, R.D., “Technical Reference Guide for FAST Version 18,” National<br />
Institute <strong>of</strong> St<strong>and</strong>ards <strong>and</strong> Technology, TN 1262 (1989).<br />
4<br />
Cooper L.Y. <strong>and</strong> Forney, G. P., “The <strong>Consolidated</strong> Compartment <strong>Fire</strong> <strong>Model</strong> (CCFM) computer<br />
application CCFM-VENTS <strong>–</strong> part I: Physical reference guide,” National Institute <strong>of</strong> St<strong>and</strong>ards <strong>and</strong><br />
Technology, NISTIR 4342 (1990).<br />
5<br />
Peacock, R. D., Jones, W. W., Forney, G. P., Portier, R. W., Reneke, P. A., Bukowski, R. W., <strong>and</strong><br />
Klote, J. H., “Update Guide for HAZARD I Version 1.2,” National Institute <strong>of</strong> St<strong>and</strong>ards <strong>and</strong><br />
Technology, NISTIR 5410 (1994).<br />
6<br />
ASTM St<strong>and</strong>ard Guide for Evaluating the Predictive Capability <strong>of</strong> Deterministic <strong>Fire</strong> <strong>Model</strong>s,<br />
ASTM E1355-04, West Conshohocken, PA (2004).<br />
7<br />
Forney, G.P. <strong>and</strong> McGrattan, K.B., “User's Guide for <strong>Smoke</strong>view Version 4: A Tool for<br />
Visualizing <strong>Fire</strong> Dynamics Simulation Data.” Natl. Inst. St<strong>and</strong>. Technol., Spec. Pub. 1017 (2004).<br />
8<br />
U.S. St<strong>and</strong>ard Atmosphere, 1976, U.S. Government Printing Office, Washington, D.C., 1976.<br />
9<br />
The CRC H<strong>and</strong>book <strong>of</strong> Chemistry <strong>and</strong> Physics, David Lide, Editor, CRC Press, Boca Raton<br />
(1994).<br />
10<br />
Klote, J.K. <strong>and</strong> Milke, J.A., Design <strong>of</strong> <strong>Smoke</strong> Management Systems, American Society <strong>of</strong><br />
Heating, Refrigerating <strong>and</strong> Air-conditioning Engineers, Atlanta, GA (1992).<br />
11<br />
ASHRAE H<strong>and</strong>book HVAC Systems <strong>and</strong> Equipment, American Society <strong>of</strong> Heating, Refrigerating<br />
<strong>and</strong> Air-Conditioning Engineers, Atlanta, GA (1992).<br />
12<br />
Klote, J. H., A Computer <strong>Model</strong> <strong>of</strong> <strong>Smoke</strong> Movement by Air Conditioning Systems, NBSIR 87-<br />
3657 (1987).<br />
User’s Guide Version 6 References • 69
13 G. W. Mulholl<strong>and</strong> <strong>and</strong> C. Croarkin, Specific Extinction Coefficient <strong>of</strong> Flame Generated <strong>Smoke</strong>,<br />
<strong>Fire</strong> <strong>and</strong> Materials 24, 227 (2000).<br />
14<br />
Jin, T. , “Evaluation <strong>of</strong> <strong>Fire</strong> Exit Signs in <strong>Smoke</strong>,” Systems Approach to <strong>Fire</strong> Safety in Buildings.<br />
Volume 2. Session 3. Active Systems Performance <strong>and</strong> Criteria: <strong>Smoke</strong> Control, Detection,<br />
Sprinklers. Session 4. Passive Systems Performance <strong>and</strong> Criteria: Combustibles, <strong>Fire</strong> Resistance.<br />
August 29-30, 1979, Tsukuba, Japan, III/73-78 pp, 1979.<br />
15<br />
Drysdale, D., “An Introduction to <strong>Fire</strong> Dynamics,” John Wiley <strong>and</strong> Sons, New York, (1985).<br />
16<br />
Tewarson, A., “Combustion <strong>of</strong> Methanol in a Horizontal Pool Configuration,” Factory Mutual<br />
Research Corp., Norwood, MA, Report No. RC78-TP-55 (1978).<br />
17<br />
McCaffrey, B.J., “Entrainment <strong>and</strong> Heat Flux <strong>of</strong> Buoyant Diffusion Flames,” National Bureau <strong>of</strong><br />
St<strong>and</strong>ards (U. S.), NBS IR 82-2473 (1982).<br />
18<br />
Koseki, H., “Combustion Properties <strong>of</strong> Large Liquid Pool <strong>Fire</strong>s,” <strong>Fire</strong> Technology 25, 241 (1989).<br />
19<br />
Babrauskas, V. <strong>and</strong> Grayson, S. J., “Heat Release in <strong>Fire</strong>s” Elsevier Applied Science, London<br />
(1992).<br />
20 Evans, D. D., “Sprinkler <strong>Fire</strong> Suppression Algorithm for HAZARD,” Natl. Inst. St<strong>and</strong>. Technol.,<br />
NISTIR 5254 (1993).<br />
21 Davis, W. D. And Notarianni, K. A., “NASA <strong>Fire</strong> Detector Study,” Natl. Inst. St<strong>and</strong>. Technol.,<br />
NISTIR 5798 (1996).<br />
22 Heskestad, G., "<strong>Fire</strong> Plumes, Flame Height, <strong>and</strong> Air Entrainment" in The SFPE H<strong>and</strong>book <strong>of</strong> <strong>Fire</strong><br />
Protection Engineering, 3rd Ed., National <strong>Fire</strong> Protection Association (2002).<br />
23 Peacock, R. D., Jones, W. W., Bukowski, R. W., <strong>and</strong> Forney, C. L., “Technical Reference Guide<br />
for the HAZARD I <strong>Fire</strong> Hazard Assessment Method, Version 1.1,” Natl. Inst. St<strong>and</strong>. Technol.,<br />
H<strong>and</strong>book 146 (1991).<br />
70 • References User’s Guide Version 6
Appendix A <strong>CFAST</strong> Keywords<br />
CJET<br />
All key words are case sensitive <strong>and</strong> all parameters are required. There are no defaults. If a<br />
parameter is missing, the model will terminate with an appropriate stop code.<br />
CJET Ceiling_Jet_Flag<br />
This directive tells the model to calculate the effects <strong>of</strong> a ceiling jet in all compartments<br />
containing a fire. The possible flags are OFF, CEILING, WALL, or ALL.<br />
Example:<br />
CJET,CEILING<br />
COMPA<br />
OFF - not calculate ceiling jets effect<br />
CEILING - include calculations for ceiling surfaces only<br />
WALL - to include calculations for wall surfaces only (not recommended)<br />
ALL - to include calculations for both ceiling <strong>and</strong> wall surfaces<br />
COMPA Name Width Depth Internal_height Absolute_x_position Absolute_y_position<br />
Floor_Height Ceiling_Material Floor_Material_Name Wall_Material_Name<br />
The compartments are numbered internally as they are read in. The other key words which<br />
User’s Guide Version 6 Appendix A <strong>CFAST</strong> Keywords • A-1
efer to compartment numbers then refer to these ordinals. Compartments must be defined<br />
before they are referenced by other comm<strong>and</strong>s.<br />
Example:<br />
DETEC<br />
COMPA,hallway,9.1,5.0,4.6,0.,0.,0.,CONCRETE,CONCRETE,CONCRETE<br />
DETEC Type Compartment Activation_Temperature Depth Width Height RTI Suppression<br />
Spray_Density<br />
The DETEC keyword is used for both detectors <strong>and</strong> sprinklers. Sprinklers <strong>and</strong> detectors are<br />
both considered detection devices <strong>and</strong> are h<strong>and</strong>led using the same input keywords. Detection<br />
is based upon heat transfer to the detector. <strong>Fire</strong> suppression by a user-specified water spray<br />
begins once the associated detection device is activated.<br />
For the type <strong>of</strong> detector, use 1 for smoke detector <strong>and</strong> 2 for heat detector or sprinklers. If<br />
suppression is set to a value <strong>of</strong> 1, a sprinkler will quench the fire with the specified spray<br />
density <strong>of</strong> water. If turned <strong>of</strong>f (a value <strong>of</strong> 0), the device is h<strong>and</strong>led as a heat or smoke detector<br />
only <strong>–</strong> values entered for activation temperature, RTI, <strong>and</strong> spray density are ignored.<br />
The spray density is the amount <strong>of</strong> water dispersed by a water sprinkler. The units for spray<br />
density are length/time. These units are derived by dividing the volumetric rate <strong>of</strong> water flow<br />
by the area protected by the water spray. The suppression calculation is based upon an<br />
experimental correlation by Evans, <strong>and</strong> depends upon the RTI, activation temperature, <strong>and</strong><br />
spray density to determine the behavior <strong>of</strong> the sprinkler.<br />
Example:<br />
DTCHE<br />
DETECT,2,1,344.2,1.5,1.5,2.29,98,1,7.00E-05<br />
DTCHE Minimum_Time Count<br />
A-2 • Appendix A <strong>CFAST</strong> Keywords User’s Guide Version 6
The purpose <strong>of</strong> DTCHE is to prevent excessive computation with a very small time step. This<br />
<strong>of</strong>ten appears to users as a stalling condition, when it is simply the set <strong>of</strong> equations has<br />
reached a point that requires a very small increment in time for the solver to converge. A<br />
negative entry on DTCHECK turns <strong>of</strong>f the time step checking algorithm.<br />
Example:<br />
DTCHECK,1.E-9,100<br />
EAMB <strong>and</strong> TAMB<br />
EAMB <strong>and</strong> TAMB Ambient_Temperature Ambient_Pressure Station_Elevation<br />
Relative_Hunidity.<br />
This key word is to set the ambient condition, TAMB for the internal <strong>and</strong> EAMB for outside<br />
the building. For the internal ambient, relative humidity sets the initial water concentration in<br />
the ambient air. For the external ambient, it sets the water content for air flowing into<br />
compartments through vents connecting to the exterior. Temperatures are in Kelvin, pressure<br />
in Pascals, <strong>and</strong> relative humidity in percent.<br />
Example:<br />
EVENT<br />
EAMB,300,101300,0,<br />
TAMB,300,101300,0,5<br />
EVENT TYPE First_Compartment Second_Compartment Vent_Number Time<br />
Final_Fraction. The “H” indicates a horizontal flow event that changes the vent opening.<br />
Final_Fraction is the percent <strong>of</strong> the full opening width expressed as a fraction.<br />
Used to open or close a vent. This replaces CVENT <strong>and</strong> applies to all vents for vertical flow<br />
(V), horizontal flow (H) <strong>and</strong> mechanical flow (M). The intent is to allow these events to be<br />
triggered by time, temperature or flux as is done with detectors. However, at the moment,<br />
time is the only option.<br />
User’s Guide Version 6 Appendix A <strong>CFAST</strong> Keywords • A-3
HALL<br />
The form for EVENT is<br />
EVENT H First_Compartment Second_Compartment Vent_Number Time Final_Fraction Decay_time<br />
EVENT V First_Compartment Second_Compartment V_ID Time Final_Fraction Decay_time<br />
EVENT M First_Compartment Second_compartment MVENT_ID Time Final_Fraction Decay_time<br />
Decay time is the time the event takes to happen <strong>and</strong> the units are seconds.<br />
Example:<br />
EVENT,H,1,2,1,10.,0.3,1<br />
HALL Compartment Velocity Depth Decay_Distance<br />
This comm<strong>and</strong> invokes the corridor flow algorithm. For long hallways or corridors, there can<br />
be a significant delay time for the initial hot gas layer to travel along the ceiling to the far end<br />
<strong>of</strong> the compartment. By estimating the time required for a ceiling jet to travel in a corridor<br />
<strong>and</strong> the temperature distribution along the corridor, <strong>CFAST</strong> can delay flow into<br />
compartments connected to corridors until the ceiling jet has passed the connections to these<br />
compartments.<br />
If the aspect ratio <strong>of</strong> a compartment (length/width) is greater than about 10, this algorithm<br />
should be used.<br />
Example:<br />
HEATF<br />
HALL 3 0.15 0.1 16.7<br />
For each <strong>of</strong> the Velocity, Depth <strong>and</strong> Decay, using a value <strong>of</strong> (-1) will bypass this setting. This<br />
is so that, for example, the decay distance can be set while using default values for velocity<br />
<strong>and</strong> depth.<br />
HEATF ROOM POS(3) PLUME HRR<br />
A-4 • Appendix A <strong>CFAST</strong> Keywords User’s Guide Version 6
HHEAT First_Compartment Number_<strong>of</strong>_Parts N pairs <strong>of</strong> {Second_Compartment, Fraction}<br />
Used to allow heat conduction between pairs <strong>of</strong> compartments which have a contiguous<br />
vertical partition between them. There are two forms <strong>of</strong> this comm<strong>and</strong>. The first uses only a<br />
compartment number. In this case, the conduction connection<br />
The first form is to use only a compartment number. In this case, <strong>CFAST</strong> will calculate the<br />
conductive heat transfer to all compartments connected to this compartment by horizontal<br />
convective flow. The second form specifies the compartments to be connected <strong>and</strong> what<br />
fraction <strong>of</strong> the compartment is connected to an adjacent compartment. This latter is<br />
particularly useful for rooms which are connected to adjacent rooms as well as hallways. The<br />
user <strong>of</strong> the model is responsible for the consistency <strong>of</strong> these pairings. The model does not<br />
check to insure that the specified compartment pairs are located next to one another.<br />
Example:<br />
HVENT<br />
HHEAT,1,1,2,0.5<br />
specifies that compartment one has one connection to compartment two <strong>and</strong> the fraction <strong>of</strong><br />
wall surface through which heat is transferred is ½ <strong>of</strong> the wall surface <strong>of</strong> compartment one.<br />
HVENT First_Compartment Second_Compartment Vent_Number Width S<strong>of</strong>fit Sill<br />
Wind_Coefficient First_Compartment_Offset Second_Compartment_Offset FACE<br />
Initial_Opening_Fraction.<br />
Vent which allows horizontal flow <strong>of</strong> gases, through vents such as doors <strong>and</strong> windows.<br />
Compartment <strong>of</strong>fsets are triplets from the compartment origin. FACE is an integer from 1 to<br />
4 counterclockwise from the origin defining which wall face to place the vent on when<br />
visualizing with <strong>Smoke</strong>view. It doesn't affect the dynamics <strong>of</strong> the calculation, just the way it<br />
looks. The size <strong>of</strong> the opening can be modified by EVENT. This changes the<br />
Opening_Fraction from the initial value (set above) to some other value. Typical use is to<br />
start with the door open (Initial_Opening_Fraction = 1) <strong>and</strong> use EVENT to close the door<br />
(Final_Fraction = 0).<br />
Example:<br />
HVENT,1,2,1,2.4,1.0,0.,0.,0.,0.,1,0.9<br />
User’s Guide Version 6 Appendix A <strong>CFAST</strong> Keywords • A-5
INTER<br />
LIMO2<br />
INTER Initial_Interface_Height_1 Initial_Interface_Height_2 ... Initial_Interface_Height_N<br />
This is used to set the initial interface height below the top <strong>of</strong> the compartment. A great deal<br />
<strong>of</strong> care is needed to use this, as the model has only rudimentary checks for the limits imposed<br />
(for example, the initial value must specify a height not greater than the compartment height.<br />
This does change the nature <strong>of</strong> a zone in the context <strong>of</strong> a zone model.<br />
Example:<br />
INTER 2 1.2 3 2.0<br />
LIMO2 Lower_Oxygen_Limit<br />
This is the limiting oxygen index for gaseous combustion. In version 5 <strong>and</strong> earlier, it was on<br />
the CHEMIE line. It is global <strong>and</strong> applies to gaseous combustion in all plumes. Please read<br />
the technical reference manual for the meaning <strong>and</strong> implication <strong>of</strong> setting this parameter.<br />
Example:<br />
LIMO2,6<br />
MAINF<br />
would set the lowest limit for gaseous combustion to 6%<br />
MAINF ROOM POS(3) PLUME<br />
A simple fire. The key word refers to the mainfire.o file. POS is the three dimensional<br />
A-6 • Appendix A <strong>CFAST</strong> Keywords User’s Guide Version 6
position vector, relative to the front, lower, left corner <strong>of</strong> the compartment.<br />
Example:<br />
MVENT<br />
MAINF,2,.1,.1,.1,1<br />
MVENT From_Compartment To_Compartment ID_Number From_Opening_Orientation<br />
From_Center_Height From_Opening_Area To_OpeningOrientation To_Center_Height<br />
To_Opening_Area Flow Begin_Drop<strong>of</strong>f_Pressure Zero_Flow_Pressure initial_fraction<br />
This replaces the more complex mechanical ventilation comm<strong>and</strong>s with a constant flow fan<br />
connection. The original comm<strong>and</strong>s MVOPN MVFAN MVDCT <strong>and</strong> INELV are not<br />
supported in this version. The comm<strong>and</strong> specifies a pair <strong>of</strong> openings connected by a constant<br />
volume flow fan. The fan flow can be modified with the EVENT key word.<br />
Example:<br />
MVENT,5,7,1,V,0.50,1.00,H,2.40,1.10,2.00,200.,300.,1.0<br />
OBJECT<br />
OBJECT NAME ROOM POS (3) PLUME IGNITION_TYPE IGNITION_CRITERION<br />
NORMAL (3)<br />
This key word places a fire (designated objects for version 6) into a compartment. The<br />
NAME on the object line should match the name in the file. While the main fire (MAINF)<br />
places a very simple fire in a compartment, mimicking a s<strong>and</strong> burner, OBJECTs are intended<br />
to simulate real burning items <strong>and</strong> must have attributes such as an orientation. The format for<br />
the fire objects is shown in “V6 <strong>Fire</strong> Format.xls.” A position vector <strong>of</strong> (-1,-1,-1) puts the<br />
object in the center <strong>of</strong> the compartment on the floor. A pointing vector <strong>of</strong> (0,0,1) is facing<br />
upward.<br />
Example:<br />
User’s Guide Version 6 Appendix A <strong>CFAST</strong> Keywords • A-7
ONEZ<br />
OBJECT,WARDROBE,1,-1,-1,0.,1,0,0.00,-1,-1,-1<br />
ONEZ Compartment<br />
For tall compartments or those removed from the room <strong>of</strong> fire origin, the compartment may<br />
be modeled as a single, well-mixed zone rather than the default two-zone assumption. A<br />
single zone approximation is appropriate for smoke flow far from a fire source where the<br />
two-zone layer stratification is less pronounced than in compartments near the fire. This is<br />
used in situations where the stratification does not occur. Examples are elevators, shafts,<br />
complex stairwells, <strong>and</strong> compartments far from the fire.<br />
Example:<br />
ONEZ,2<br />
ROOMA <strong>and</strong> ROOMH<br />
ROOMA <strong>and</strong> ROOMH Compartment Number_<strong>of</strong>_values Area(or Height)<br />
These key words allow the user to define non-rectangular rooms by specifying crosssectional<br />
area as a function <strong>of</strong> height. One set <strong>of</strong> values is included for each compartment that<br />
has a variable cross-sectional area. The format in both cases is the key followed by an index<br />
<strong>of</strong> the number <strong>of</strong> values. These key words must be used in pairs.<br />
Example:<br />
ROOMA 1 3 10.0 5.0 3.0<br />
ROOMH 1 3 0.0 1.0 2.0<br />
specifies that compartment 1 has a cross-sectional area <strong>of</strong> 10 m 2 , 5 m 2 <strong>and</strong> 3 m 2 at elevations<br />
0.0 m, 1.0 m <strong>and</strong> 2.0 m respectively.<br />
A-8 • Appendix A <strong>CFAST</strong> Keywords User’s Guide Version 6
THRMF<br />
THRMF Thermophysical_Properties_File<br />
By default, thermophysical properties are obtained from the thermal.csv which is located in<br />
the directory where the model executables reside. This allows for another file to be used.<br />
Example:<br />
THRMF,NEWTHERMALFILE<br />
STPMAX<br />
STPMAX Maximum_Time_Step<br />
This specifies the largest time step that the model will take. The default value is one second.<br />
In most cases, the numerical routines adjust the time step appropriately; however, for long<br />
simulation times <strong>and</strong> slowly varying conditions, a larger value is appropriate. In cases where<br />
the fire height <strong>and</strong> vent s<strong>of</strong>fits interact, the time step may need to be smaller.<br />
Example:<br />
STPMAX,0.2<br />
TARGE<br />
TARGE Compartment Depth Breadth Height Normal_Depth Normal_Breadth<br />
Normal_Height) Material Method Equation_Type<br />
<strong>CFAST</strong> can track <strong>and</strong> report calculations <strong>of</strong> the net heat flux striking arbitrarily positioned<br />
<strong>and</strong> oriented targets <strong>and</strong> the temperature <strong>of</strong> these targets. A non-zero normal vector must be<br />
specified as must a material from the thermophysical database. Method can be one <strong>of</strong><br />
STEADY for steady state solution, XPLICIT for explicit solution, <strong>and</strong> MPLICIT for an<br />
implicit solution.<br />
User’s Guide Version 6 Appendix A <strong>CFAST</strong> Keywords • A-9
TIMES<br />
Example:<br />
TARGE,1,2.20,1.88,2.34,0.00,0.00,1.00,CONCRETE,IMPLICIT,PDE<br />
TIMES Simulation_Time Print_Interval History_Interval Nornal_Output_Interval<br />
Wall<strong>and</strong>Target_Output_Interval Vent_Flow_Output_Interval Species_Output_Interval.<br />
Example:<br />
VERSN<br />
TIMES,360,-120,130,140,150,<br />
Printed output will be on the screen or in a file named project.out. The binary history output<br />
(for use with the DLL package) will be in project.hi. The four spreadsheet listings are in<br />
project.{n.csv, w.csv, f.csv <strong>and</strong> s.csv}. Please see Appendix ??? for a discussion <strong>of</strong> the<br />
format <strong>of</strong> each <strong>of</strong> these files.<br />
VERSN,version number, Title<br />
The header is $$CF$$ <strong>and</strong> is case sensitive. The major version number from the file must<br />
match the major version number kept internally (6 at the moment).<br />
Example<br />
VHEAT<br />
VERSN,6,"Simple test <strong>of</strong> the object file input"<br />
VHEAT First_Compartment Second_Compartment<br />
A-10 • Appendix A <strong>CFAST</strong> Keywords User’s Guide Version 6
Heat transfer between the ceiling <strong>and</strong> floor <strong>of</strong> specified compartments can be incorporated<br />
with the VHEAT key word. Ceiling to floor heat transfer occurs between interior<br />
compartments <strong>of</strong> the structure or between an interior compartment <strong>and</strong> the outdoors. The<br />
model checks to make sure that the ceiling <strong>and</strong> floor are reasonably contiguous (within 0.01<br />
m), <strong>and</strong> the assumption is made that this is true for the entire ceiling <strong>and</strong> floor.<br />
Example:<br />
VHEAT,1,2<br />
VVENT<br />
WIND<br />
The floor properties <strong>of</strong> the top compartment (1 in this case) <strong>and</strong> the ceiling properties <strong>of</strong> the<br />
bottom compartment (2 in this case) must be defined by COMPA <strong>and</strong> included in the<br />
thermophysical file.<br />
VVENT from_compartment to_compartment area shape initial_fraction<br />
Combined buoyancy <strong>and</strong> pressure driven (i.e., forced) flow through a horizontal vent<br />
(vertical flow) is possible when the connected spaces are filled with gases <strong>of</strong> different density<br />
in an unstable configuration, with the density <strong>of</strong> the top space larger than that <strong>of</strong> the bottom<br />
space. This type <strong>of</strong> flow is inherently different from horizontal flow (vertical vent) in that<br />
there is not layer to layer mixing from inverted plumes. This key word describes those<br />
horizontal openings between the compartments through which this type <strong>of</strong> flow occurs. Each<br />
VVENT line in the input file describes one horizontal vent. There are four parameters, the<br />
connected compartments, the shape <strong>of</strong> the opening, <strong>and</strong> the effective area <strong>of</strong> the vent.<br />
Example:<br />
VVENT,1,2,4.0,2,0.9<br />
WIND Wind_Speed Scale_Height Power_Law_Coefficient<br />
User’s Guide Version 6 Appendix A <strong>CFAST</strong> Keywords • A-11
The wind speed, scale height, <strong>and</strong> power law are used to calculate the wind coefficient for<br />
each vent connected to the outside. The wind velocity is specified at some reference height.<br />
The power law then provides a lapse rate for the wind speed. An assumption is that the wind<br />
speed is zero at the surface. This is the same format as in version 5. Please see the technical<br />
reference guide on the formula used in this calculation.<br />
Example:<br />
WIND,3.,10.,0.16<br />
A-12 • Appendix A <strong>CFAST</strong> Keywords User’s Guide Version 6