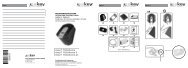
ekey home integra Montageanleitung - Gueller.ch
ekey home integra Montageanleitung - Gueller.ch
ekey home integra Montageanleitung - Gueller.ch

You also want an ePaper? Increase the reach of your titles
YUMPU automatically turns print PDFs into web optimized ePapers that Google loves.
MONTAGEANLEITUNG<br />
Zusatz zur Bedienungsanleitung<br />
MOUNTING INSTRUCTIONS<br />
Add-on to the operating instructions<br />
Gehäusevariante <strong>integra</strong><br />
<strong>integra</strong> case type<br />
Zutrittsystem mit Fingerscan<br />
Fingerscan Access Control System
Figure 1<br />
LIEFERUMFANG / SCOPE OF DELIVERY<br />
<strong>ekey</strong> ® TOCA<strong>home</strong> pc <strong>integra</strong><br />
ZUBEHÖR / ACCESSORIES<br />
2
Figure 2<br />
Deuts<strong>ch</strong> English<br />
1 Außeneinheit <strong>integra</strong> (AE) Integra scanner<br />
2 Dekorelement Edelstahl-Look Stainless steel look design element<br />
3 Inneneinheit (IE) Control panel<br />
4 Huts<strong>ch</strong>iene Control panel mounting rail (DIN-Rail)<br />
5 Kabel mit RJ45 Stecker (Länge 8m) Cable with RJ45 plug (length 8m)<br />
6 Steckernetzteil Power adapter<br />
7 S<strong>ch</strong>raubenset Screws and plugs<br />
8 Bedienungs- und <strong>Montageanleitung</strong> Operation and installation manual<br />
9 -optional- <strong>ekey</strong> ® Converter USB -optional- <strong>ekey</strong> ® USB converter<br />
10 -optional- USB Kabel -optional- USB Cable<br />
11 -optional- CD-ROM f. <strong>ekey</strong> ® TOCA <strong>home</strong> pc -optional- CD-ROM for <strong>ekey</strong> ® TOCA<strong>home</strong> pc<br />
12 -optional- Dekorelement Edelstahl-Look -optional- Stainless steel look design element<br />
13 -optional- Dekorelement Gold-Look -optional- Gold look design element<br />
14 -optional- Dekorelement Weiß-Look -optional- White look design element<br />
15 -optional- Kabel 12m steckbar -optional- 12m pluggable cable<br />
Bei der Montage zu bea<strong>ch</strong>ten!<br />
Please consider when mounting!<br />
Montagehöhe<br />
Mounting height<br />
Unterkante 1550mm oder höher<br />
Lower edge 1550mm or higher<br />
3
Figure 3<br />
Maßzei<strong>ch</strong>nung / Dimensions<br />
4<br />
Fingerführung<br />
Finger swiping<br />
Montagedübel abtrennbar<br />
Deta<strong>ch</strong>able mounting pins<br />
RJ 45 Bu<strong>ch</strong>se<br />
RJ 45 connector
Figure 4<br />
Montage / Mounting<br />
Ecke oder Radius 5mm (an allen 4 Ecken)<br />
5mm angle or radius (at all 4 angles)<br />
Kabelabgang/<br />
Connector outlet<br />
Variante 1 (Montagedübel)<br />
Type 1 (mounting pin)<br />
Variante 2 (S<strong>ch</strong>rauben)<br />
Type 2 (screws)<br />
* empfohlene Fräsmaße (können je na<strong>ch</strong> Werkstoff variieren)<br />
* recommended milling dimensions (depending on the material)<br />
5
Figure 5<br />
6<br />
Montagehöhe mind. 1550mm<br />
Mounting height min. 1550mm<br />
Bea<strong>ch</strong>ten Sie bitte bei beiden Montagemögli<strong>ch</strong>keiten,<br />
dass auf beiden Seiten der<br />
Außeneinheit <strong>integra</strong> etwa eine handbreite<br />
Platz bleiben sollte, um so eine problemlose<br />
Funktion des Gerätes mit allen<br />
Fingern si<strong>ch</strong>erzustellen.<br />
Please leave about 10cm room on both<br />
sides of the <strong>integra</strong> scanner to guarantee<br />
a proper use of the device with any finger<br />
(refers to both mounting possibilities).
Figure 6<br />
Konverter / Converter<br />
Außeneinheit <strong>integra</strong><br />
/ <strong>integra</strong> scanner<br />
Grün / Green<br />
Gelb / Yellow<br />
Inneneinheit / Control Panel<br />
Trafo<br />
Türöffner/<br />
Door opener<br />
Kabel Klemme auf IE Funktion<br />
Grün 1 RS 485<br />
Gelb 2 RS 485<br />
Braun 3 Versorgung AE<br />
Weiß 4 Versorgung AE<br />
Cable Control panel clamp Function<br />
Green 1 RS 485<br />
Yellow 2 RS 485<br />
Brown 3 Scanner supply<br />
White 4 Scanner supply<br />
(optional ist au<strong>ch</strong> ein steckbarer Kabelübergang erhätli<strong>ch</strong>)<br />
(a pluggable cable crossover is available optionally)<br />
Braun / Brown<br />
Weiß / White<br />
7
Deuts<strong>ch</strong><br />
Einbau des Dekorelements<br />
Demontage des Dekorelements<br />
8<br />
Um das Dekorelement zu montieren,<br />
nehmen Sie dieses seitli<strong>ch</strong> mit zwei<br />
Finger und setzen es in den unteren<br />
Rand des Gehäuses ein, so das die<br />
unteren Befestigungslas<strong>ch</strong>en in die<br />
dafür vorgesehenen Ausnehmungen<br />
einhacken.<br />
Ans<strong>ch</strong>ließend üben Sie lei<strong>ch</strong>t Druck<br />
auf die obere Kante des Dekorelements<br />
aus, um es so lei<strong>ch</strong>t<br />
dur<strong>ch</strong>zubiegen. S<strong>ch</strong>ieben Sie dann<br />
die Befestigungslas<strong>ch</strong>en in die<br />
Ausnehmungen am oberen Rand,<br />
indem Sie das Dekorelement<br />
langsam loslassen.<br />
Zum Abnehmen des Dekorelements<br />
verwenden Sie einen fla<strong>ch</strong>en<br />
Gegenstand (fla<strong>ch</strong>er S<strong>ch</strong>raubendreher<br />
o.ä.) und heben das<br />
Dekorelement vorsi<strong>ch</strong>tig aus dem<br />
Rahmen, indem Sie am unteren<br />
oder oberen Gehäuserand zwis<strong>ch</strong>en<br />
das Dekorelement und dem Kunststoffrand<br />
ansetzen.
Deuts<strong>ch</strong><br />
1 INSTALLATION<br />
1.1 MONTAGE DER AUSSENEINHEIT (AE)<br />
Die Außeneinheit <strong>ekey</strong> ® TOCA<strong>home</strong> <strong>integra</strong> kann auf Zwei Arten montiert werden.<br />
Einbau mit Montagedübel:<br />
Beim Einbau in ein Türblatt ist eine Ausnehmung lt. Abbildung 4 herzustellen. Es ist dabei<br />
auf den Kabelabgang zu a<strong>ch</strong>ten, hierfür ist eine Dur<strong>ch</strong>gangsbohrung bzw. ein Kabelkanal<br />
vorzusehen (bohren bzw. fräsen). Installieren sie das Kabel in das Türblatt so, dass<br />
jenes Ende mit dem bereits vorkonfektionierten Stecker (RJ45) in die Ausnehmung für<br />
die AE ragt. Das zweite Ende wird dur<strong>ch</strong> das Türblatt und später dann dur<strong>ch</strong> den<br />
Türrahmen bis zur Einbauposition der Inneneinheit verlegt. Stecken Sie ans<strong>ch</strong>ließend die<br />
Außeneinheit <strong>integra</strong> an und s<strong>ch</strong>ieben/versenken sie diese dann in die ausgefräste<br />
Öffnung. Die beiden Dübel der AE müssen in die dafür vorgesehenen Lö<strong>ch</strong>er rei<strong>ch</strong>en, um<br />
mit den mitgelieferten S<strong>ch</strong>rauben festges<strong>ch</strong>raubt zu werden. Beim Festziehen der<br />
S<strong>ch</strong>rauben sollten sie die AE lei<strong>ch</strong>t gegen das Türblatt drücken, um so einen bündigen<br />
Sitz im Türblatt si<strong>ch</strong>erzustellen. Montieren sie das mitgelieferte Dekorplätt<strong>ch</strong>en erst na<strong>ch</strong><br />
vollständiger Inbetriebnahme.<br />
Einbau ohne Montagedübel:<br />
Für den Einbau ohne Montagedübel (z.B. in einen Türrahmen) müssen die am Gehäuse<br />
angebra<strong>ch</strong>ten Dübel abges<strong>ch</strong>nitten werden.<br />
Fräsen Sie eine Ausnehmung lt. Abbildung 4 aus dem Rahmen aus und bohren Sie 2<br />
Lö<strong>ch</strong>er für die Befestigungss<strong>ch</strong>rauben (Dur<strong>ch</strong>messer ca. 2mm). Ziehen Sie das Kabel von<br />
der Ausnehmung für die AE bis zur Montageposition der IE. Das Kabelende mit dem RJ45<br />
Stecker muss si<strong>ch</strong> an der Einbauposition der AE befinden. Stecken Sie den RJ45 Stecker<br />
an die AE an und platzieren Sie diese in die Ausnehmung. S<strong>ch</strong>rauben Sie dann die AE mit<br />
den mitgelieferten S<strong>ch</strong>rauben an. A<strong>ch</strong>ten Sie darauf, dass Sie die S<strong>ch</strong>rauben ni<strong>ch</strong>t zu fest<br />
anziehen und so unter Umständen das Gehäuse bes<strong>ch</strong>ädigen. Montieren sie das<br />
mitgelieferte Dekorplätt<strong>ch</strong>en erst na<strong>ch</strong> vollständiger Inbetriebnahme.<br />
Bea<strong>ch</strong>ten Sie bitte bei beiden Montagemögli<strong>ch</strong>keiten, dass auf beiden Seiten der<br />
Außeneinheit <strong>integra</strong> etwa eine handbreite Platz bleiben sollte, um so eine<br />
problemlose Funktion des Gerätes mit allen Fingern si<strong>ch</strong>erzustellen.<br />
1.2 MONTAGE DER INNENEINHEIT (IE)<br />
Montieren Sie zuerst die Huts<strong>ch</strong>iene mittels den mitgelieferte Dübeln und S<strong>ch</strong>rauben.<br />
S<strong>ch</strong>nappen Sie ans<strong>ch</strong>ließend die Inneneinheit auf die Huts<strong>ch</strong>iene auf.<br />
Die Inneneinheit ist so zu montieren, dass diese vor fremden Zugriff (Manipulationsgefahr)<br />
ges<strong>ch</strong>ützt ist.<br />
9
Deuts<strong>ch</strong><br />
1.3 ELEKTRISCHER ANSCHLUSS (Abbildung 6)<br />
Die Inneneinheit muss mit Spannung versorgt werden. Die Versorgungsspannung hierfür<br />
muss zwis<strong>ch</strong>en 9VAC (We<strong>ch</strong>selspannung) und 12VDC sein. Bitte verwenden Sie hierfür<br />
die Ans<strong>ch</strong>lussklemmen „9VAC-in“ und benutzen Sie entweder das mitgelieferte<br />
Steckernetzteil oder ein anderes ausrei<strong>ch</strong>end leistungsfähiges Netzteil. Es darf jedo<strong>ch</strong> die<br />
Spannung von 9VAC und 12VDC ni<strong>ch</strong>t übers<strong>ch</strong>reiten. Bei Verwendung eines<br />
Klingeltrafos zerstören Sie das Gerät. Dies führt zu Garantieverlust.<br />
Die Innen- und die Außeneinheit müssen mit dem mitgelieferten vorkonfektionierten<br />
Kabel verbunden werden. Hierzu stecken Sie den RJ45 Stecker an der AE an. Das zweite<br />
Ende des Kabel kann auf die gewüns<strong>ch</strong>ten Länge gekürzt werden. Manteln Sie das Kabel<br />
ca. 100mm ab, ans<strong>ch</strong>ließend müssen Sie die 4 Adern abisolieren und lt. Abbildung 6 an<br />
die Klemmen ans<strong>ch</strong>ließen.<br />
Auf der IE stehen 1 Relais (3 Relais in der Variante <strong>ekey</strong> ® TOCA<strong>home</strong> 3 <strong>integra</strong> und<br />
<strong>ekey</strong> ® TOCA<strong>home</strong> PC <strong>integra</strong>) zum Ansteuern von externen Geräten zur Verfügung. Die<br />
Programmierung erfolgt über das Programmiermenü (siehe Bedienungsanleitung). Das<br />
Relais verfügt über einen We<strong>ch</strong>selkontakt, der frei benutzbar ist - die maximale<br />
S<strong>ch</strong>altleistung beträgt 250VAC 5A. Jeder Türvers<strong>ch</strong>luss muss ausnahmslos an eine<br />
separate Spannungsversorgung anges<strong>ch</strong>lossen sein (ni<strong>ch</strong>t das mitgelieferte<br />
Steckernetzteil verwenden!).<br />
Das Verbindungskabel zwis<strong>ch</strong>en Innen- und Außeneinheit ist getrennt von der<br />
Hauselektroinstallation zu verlegen, da dieses Signale im Niederspannungsberei<strong>ch</strong> führt,<br />
die dur<strong>ch</strong> bena<strong>ch</strong>barte stromführende Kabel gestört werden können.<br />
Die Ans<strong>ch</strong>lüsse sind ni<strong>ch</strong>t verpolungsges<strong>ch</strong>ützt.<br />
ACHTUNG:<br />
Der elektris<strong>ch</strong>e Ans<strong>ch</strong>luss darf auss<strong>ch</strong>ließli<strong>ch</strong> von Fa<strong>ch</strong>personal dur<strong>ch</strong>geführt werden.<br />
10
English<br />
Installation of the design element<br />
Installing the design element is<br />
done by snapping it over the <strong>integra</strong><br />
fingerprint scanner as follows:<br />
Using two fingers, grab the design<br />
element on the sides from the<br />
middle. Align and insert the design<br />
element bottom two not<strong>ch</strong>es in the<br />
scanner two bottom holes. While the<br />
bottom edge of the design element<br />
is in this position, apply little<br />
pressure on the top face towards<br />
the scanner forming a little curve<br />
(avoid bending the plate).<br />
While in this position, try to align<br />
the not<strong>ch</strong>es on the top edge of the<br />
design element into the scanner<br />
two top holes. Once seated release<br />
your fingers and design element is<br />
in place.<br />
Removing the design element from the <strong>integra</strong> scanner<br />
In order to deta<strong>ch</strong> the design<br />
element, use a flat object (flat<br />
screwdriver or the like) and lift the<br />
design element out of the frame<br />
carefully, by placing the flat object<br />
in-between the upper or the lower<br />
edge of the plastic housing and the<br />
design element.<br />
11
English<br />
2 INSTALLATION<br />
2.1 MOUNTING OF THE SCANNER<br />
The <strong>integra</strong> scanner can be installed in two different ways.<br />
Installation with mounting pins:<br />
When mounting the scanner into a door it is necessary to mill an adequate space (refer<br />
to figure 4). Allow easy seating of the scanner while the RJ-45 cable is connected to the<br />
scanner. This is a<strong>ch</strong>ieved by drilling an extra not<strong>ch</strong> for the cable with the RJ-45 tip. This<br />
extra not<strong>ch</strong> has to be inside the door (not visible from outside) in the bottom of the<br />
opening where the scanner will be seated.<br />
The cable has to be laid inside the door and extend through the door all the way out to<br />
the control panel. You might want to consider using electrified hinges to extend the cable<br />
through the door to the door frame.<br />
Now connect the <strong>integra</strong> scanner with the cable and place it inside the not<strong>ch</strong>. The two<br />
pins of the <strong>integra</strong> scanner have to rea<strong>ch</strong> the designated holes, in order to be tightened<br />
with the provided screws. While tightening the screws, please press the <strong>integra</strong> scanner<br />
lightly against the door blade, in order to guarantee a fixed hold of the <strong>integra</strong> scanner.<br />
Mount the provided design element only after you have finished to install the whole<br />
system.<br />
Installation without mounting pins:<br />
In order to install the scanner without mounting pins (e.g. in a door frame) the pins have<br />
to be cut off the case (refer to figure 3).<br />
Make an opening in the frame (refer to figure 4) and drill two holes for the mounting<br />
screws (diameter 2mm). Pull the cable from the cut for the external unit up to the<br />
mounting position of the control panel. Please assure that the end of the cable with the<br />
RJ45 Plug is on the mounting position for the scanner. Now insert the RJ45 plug to the<br />
<strong>integra</strong> scanner and place it to the designated cut. Once properly seated, screw the<br />
scanner to the wall with the provided screws. Please pay attention while tightening the<br />
screws not to over tighten them, as the housing could be damaged from over-tightening.<br />
Mount the provided design element only after you have finished to install the whole<br />
system.<br />
Please leave about 10cm room on both sides of the <strong>integra</strong> scanner to<br />
guarantee a proper use of the device with any finger (refers to both mounting<br />
possibilities).<br />
12
English<br />
2.2 INSTALLATION OF THE CONTROL PANEL<br />
First fix the top hat rail with the provided pins and screws. Afterwards slide the control<br />
panel onto the top hat rail.<br />
Please mount the control panel in a place, to whi<strong>ch</strong> an unauthorised person cannot have<br />
access, in order to prevent any damage by manipulation on the unit.<br />
2.3 ELECTRICAL CONNECTION (SEE FIGURE 6)<br />
The control panel has to be connected to the electricity. The supply voltage for the units<br />
is 9VAC (alternating voltage) or 12VDC. For this purpose please use the "9VAC-in" spring<br />
clips and use either the provided energy supply or a sufficiently powerful power supply.<br />
Please pay attention not to exceed 9VAC or 12VDC. The use of a bell transformer will<br />
destroy the device. This will result in a loss of warranty.<br />
The control panel and scanner must be connected to ea<strong>ch</strong> other with the provided<br />
preassembled wire. For this please connect the RJ45 plug to the scanner. The second<br />
ending can be shortened to the desired length. Shield the cable approximately at<br />
100mm, isolate the 4 wires and connect them according to the installation s<strong>ch</strong>eme<br />
(figure 6) to the spring clips 3 and 4.<br />
There is 1 relay (3 relays for the <strong>ekey</strong> ® TOCA<strong>home</strong> 3 <strong>integra</strong> and <strong>ekey</strong> ® TOCA<strong>home</strong> pc<br />
<strong>integra</strong> options) available for control of external devices. The programming menu is used<br />
for programming (see section 4). The relay is equipped with a <strong>ch</strong>ange-over contact that<br />
can be used at your own discretion and has a maximum swit<strong>ch</strong>ing capacity of 250VAC<br />
5A. Ea<strong>ch</strong> door lock, without exception, must be connected to a separate power supply<br />
(do not use the provided energy supply plug).<br />
The cable between the scanner and control panel must be connected separately from the<br />
electrical house installation because of signals in the low voltage range that can be<br />
interrupted by neighbouring current-carrying cables.<br />
The connections are not protected against reverse polarity.<br />
ATTENTION:<br />
The electrical unit should be installed by a qualified te<strong>ch</strong>nician.<br />
13
Notizen/Notes<br />
_______________________________________________________________________<br />
_______________________________________________________________________<br />
_______________________________________________________________________<br />
_______________________________________________________________________<br />
_______________________________________________________________________<br />
_______________________________________________________________________<br />
_______________________________________________________________________<br />
_______________________________________________________________________<br />
_______________________________________________________________________<br />
_______________________________________________________________________<br />
_______________________________________________________________________<br />
_______________________________________________________________________<br />
_______________________________________________________________________<br />
_______________________________________________________________________<br />
_______________________________________________________________________<br />
_______________________________________________________________________<br />
_______________________________________________________________________<br />
_______________________________________________________________________<br />
_______________________________________________________________________<br />
_______________________________________________________________________<br />
_______________________________________________________________________<br />
_______________________________________________________________________<br />
_______________________________________________________________________<br />
_______________________________________________________________________<br />
14
Notizen/Notes<br />
_______________________________________________________________________<br />
_______________________________________________________________________<br />
_______________________________________________________________________<br />
_______________________________________________________________________<br />
_______________________________________________________________________<br />
_______________________________________________________________________<br />
_______________________________________________________________________<br />
_______________________________________________________________________<br />
_______________________________________________________________________<br />
_______________________________________________________________________<br />
_______________________________________________________________________<br />
_______________________________________________________________________<br />
_______________________________________________________________________<br />
_______________________________________________________________________<br />
_______________________________________________________________________<br />
_______________________________________________________________________<br />
_______________________________________________________________________<br />
_______________________________________________________________________<br />
_______________________________________________________________________<br />
_______________________________________________________________________<br />
_______________________________________________________________________<br />
_______________________________________________________________________<br />
_______________________________________________________________________<br />
_______________________________________________________________________<br />
15
16<br />
<strong>ekey</strong> biometric systems GmbH<br />
Lunzerstraße 64<br />
A- 4030 Linz<br />
www.<strong>ekey</strong>.net<br />
Optis<strong>ch</strong>e und te<strong>ch</strong>nis<strong>ch</strong>e Änderungen, Satz- und Druckfehler vorbehalten 800662/0719<br />
Subject to optical and te<strong>ch</strong>nical modifications, any liability for misprints excluded