B6 Twins Manual.eps - Imaxrc
B6 Twins Manual.eps - Imaxrc
B6 Twins Manual.eps - Imaxrc

Create successful ePaper yourself
Turn your PDF publications into a flip-book with our unique Google optimized e-Paper software.
6<br />
<strong>Twins</strong><br />
All specifications and figures are subject to change without notice.<br />
Printed in China ©2010<br />
b6<br />
<strong>Twins</strong><br />
Instruction <strong>Manual</strong><br />
Professional Intelligent Balance Charger
WARNING AND ERROR INFORMATION<br />
The voltage is higher than which is set. Please check the number of<br />
cells in the battery pack.<br />
Voltage of one cell in the battery pack is too low, please check the<br />
voltage of each cell.<br />
Voltage of one cell in the battery pack is too low, please check the<br />
voltage of each cell.<br />
Wrong connection of the connector detected; please check the<br />
connector and cable.<br />
The internal temperature is too high, please cool down.<br />
The processor cannot control the feeding current, please repair it.<br />
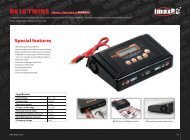
SPECIAL FEATURES<br />
SPECIAL FEATURES<br />
Optimized Operating software<br />
<strong>B6</strong> <strong>Twins</strong> features the so-called AUTO function that set the feeding current during the process of<br />
charging or discharging. Especially for Lithium atteries, it can prevent the overcharging which<br />
may lead to an explosion due to the user's fault. It can disconnect the circuit automatically and<br />
alarm once detecting any malfunction. All the programs of this product were controlled through<br />
two way linkage and communication, to achieve the maximum safety and minimize the trouble.<br />
All the settings can be configured by users!<br />
Internal independent lithium battery balancer<br />
<strong>B6</strong> <strong>Twins</strong> employs an individual-cell-voltage balancer. It isn't necessary to connect an external<br />
balancer for balance charging.<br />
Balancing individual cells battery discharging<br />
During the process of discharging, <strong>B6</strong> <strong>Twins</strong> can monitor and balance each cell of the battery<br />
individually. Error message will be indicated and the process will be ended automatically if<br />
the voltage of any single one cell is abnormal.<br />
Adaptable to various types of lithium batteries.<br />
<strong>B6</strong> <strong>Twins</strong> is adaptable to various types of Lithium batteries, such as LiIon, LiPo and the new<br />
LiFe series of batteries.<br />
Fast and storage mode of lithium batteries.<br />
Purposes to charge Lithium battery varies, 'fast' charge reduce the duration of charging,<br />
whereas 'store' state can control the final voltage of your battery, so as to store for a long time<br />
and protect useful time of the battery.
SPECIAL FEATURES<br />
Maximum safety<br />
Delta-peak sensitivity: The automatic charge termination program based on the principle of the<br />
Delta-peak voltage detection. When the battery's voltage exceeds the threshold, the process<br />
will be terminated automatically.<br />
Automatic charging current limit<br />
You can set up the upper limit of the charging current when charging your NiCd or NiMH battery;<br />
it is useful for the NiMH battery of low impedance and capacity in the 'AUTO' charging mode.<br />
Capacity limit<br />
The charging capacity is always calculated as the charging current multiplied by time. If the<br />
charging capacity exceeds the limit, the process will be terminated automatically when you set<br />
the maximum value.<br />
Temperature threshold*<br />
The battery's internal chemical reaction will cause the temperature of the battery to rise. If the<br />
temperature limit is reached, the process will be terminated.<br />
*This function is available by connecting optional temperature probe, which is not included in our package.<br />
Processing time limit<br />
You can also limit the maximum process time to avoid any possible defect.<br />
Input power monitoring<br />
To protect the car battery used as DC input power from being damaged, its voltage ke<strong>eps</strong> being<br />
Monitored. If it drops below the lower limit, the process will be ended automatically.<br />
Date store/load<br />
The maximum five batteries' date can be stored for user's convenience. You can keep the date<br />
pertaining to program setting of the battery of continuous charging or discharging. Users can<br />
call out these date at anytime without any special program setting.<br />
WARNING AND ERROR INFORMATION<br />
WARNING AND ERROR INFORMATION<br />
<strong>B6</strong> <strong>Twins</strong> incorporates a variety of functions for the systems to varify processes and the state of<br />
the electronics. In case of an error the screen will display the cause of error and emit an audible<br />
sound.<br />
Incorrect polarity connected.<br />
Battery connection is interrupted.<br />
Short-circuit of the output termination.<br />
Erroneous selection of voltage of Lithium pack, please check the voltage<br />
of the battery pack.<br />
The voltage of the battery pack has been selected incorrectly!<br />
The charger has malfunctioned for some reason. Seek professional<br />
advice.<br />
The voltage is lower than which is set. Please check the number of cells<br />
in the batter pack.
AC input power port<br />
(AC 100-240V, 50/60HZ)<br />
Input power cable<br />
11-18V DC<br />
.Scroll through the Main Menu<br />
.Stop any charge processes<br />
LCD screen<br />
Alter values<br />
See the status of individual<br />
cells in balance charge mode<br />
Output charge lead<br />
4mm banana plug<br />
Balance lead sockets<br />
JST-XH port<br />
.Resume or start charge processes<br />
.Confirm an action<br />
LOAD DATA PROGRAM<br />
VIRIOUS INFORMATION IN THE PROGRAM<br />
LOAD DATA PROGRAM<br />
This program is to load the data stored at the 'save data' program. Press START/ENTER key<br />
to make the data field blink and press INC or DEC for more than 3 seconds load the data.<br />
Choose the data number you want to call back. The data you want to<br />
call back will displayed.<br />
Loading the data.<br />
You can inquire various information on the LCD screen during the charging and discharging<br />
process. Press DEC key, the charger will display users' setting. You can press INC key to<br />
monitor voltage of each cell while the battery is connected with each port of the charger.
DATA STORAGE PROGRAM LITHUM POLYMER BALANCE CHARGE PROGRAM CONNECTION DIAGRAM<br />
DATA STORAGE PROGRAM<br />
For your convenience, <strong>B6</strong> <strong>Twins</strong> has a date storage and load program. It can store five<br />
battery date representing the respective specifications of batteries. You can call back the data<br />
when charging or discharging without setting up the program again. Press START/ENTER key<br />
to make it blink, and use INC or DEC to set up the parameter.<br />
Setting of the parameter in the screen will not affect the charge and<br />
discharge process. They just present the specification of the battery.<br />
The example is NiMH battery pack, including 12 cells, the capacity is<br />
3000mAh.<br />
Set up the charge current in the manual mode, or current limit in the<br />
auto mode. Press INC and DEC key simultaneously to make the<br />
current field blink to switch charge mode.<br />
Set up the discharge current and final voltage.<br />
Set up the charge/discharge sequence and cycle number.<br />
Saving the data<br />
LITHUM POLYMER BALANCE CHARGE PROGRAM<br />
CONNECTION DIAGRAM<br />
This diagram shows the correct way to connect your battery to the <strong>B6</strong> <strong>Twins</strong> charger while in<br />
the Balance charge program mode only.<br />
WARNING:<br />
Failure to connect will damage this charger. The right approach is as follows:<br />
*The main battery leads must be connected along with the balance lead connector as shown before charging<br />
your battery.<br />
WARNING:<br />
If using crocodile clips shown in above diagram, make sure they are unable to touch<br />
Together!
WARNING AND SAFETY NOTES<br />
WARNING AND SAFETY NOTES CHARGING OF THE Pb BATTERY<br />
These warnings and safety notes are particularly important. Please follow the instructions<br />
For maximum safety; Otherwise the charger and the battery can be damaged or at worst it<br />
can cause a fire.<br />
Never leave the charger unattended when it is connected to its power supply. If any<br />
malfunction is found, TERMINATE THE PROCESS AT ONCE and refer to the operation<br />
manual.<br />
Keep the charger well away from dust, damp, rain, heat, direct sunshine and vibration.<br />
Never drop it.<br />
The allowable input voltage is 11-18V DC<br />
This charger and the battery should be put on a heat-resistant, noninflammable and<br />
nonconductive surface. Never place them on a car seat, carpet or similar. Keep all the<br />
inflammable volatile materials away from operating area.<br />
Make sure you know the specifications of the battery to be charged or discharged to<br />
ensure it meets the requirements of this charger. If the program is set up incorrectly,<br />
the battery and charger may be damaged. It can cause fire or explosion due to<br />
overcharging. This warranty is not valid for any damage or subsequent damage<br />
arising as a result of misuse of failure to observe the procedures outlined in this<br />
manual.<br />
DISCHARGING OF THE Pb BATTERY<br />
CHARGING OF THE Pb BATTERY<br />
Set up the charge current on the left and nominal voltage on the right.<br />
Range of current is 0.1-5.0A, the voltage should match the battery<br />
being charged. Press START/ENTER key for more than 3 seconds to<br />
start charging.<br />
The screen displays the real-time discharging status. Press<br />
START/ENTER key to alter discharge current. Press START/ENTER<br />
key again to store the parameter value you set. Press BATT<br />
TYPE/STOP key to end the program.<br />
Set up the charge current on the left and nominal voltage on the right.<br />
Range of discharge current is 0.1-5.0A, the voltage should match the<br />
battery being charged. Press START/ENTER key for more than 3<br />
seconds to start charging.<br />
The screen displays the real-time discharging status. Press<br />
START/ENTER key to alter discharge current. Press START/ENTER<br />
key again to store the parameter value you set. Press BATT<br />
TYPE/STOP key to end the program.
CHARGE/DISCHARGE AND DISCHARGE/CHARGE CYCLE OF NiCd/NiMH BATTERY<br />
CHARGE/DISCHARGE AND DISCHARGE/CHARGE CYCLE OF NiCd/NiMH BATTERY<br />
Pb(LEAD-SULPHURIC ACID) BATTERY<br />
You can set up sequence on the left and the number of cycles on the<br />
right. You can balance, refresh and break-in the battery with this<br />
function. You can set a temporary cool-off procedure in the user's<br />
setting. Range of the cycle number is 1-5.<br />
Press BATT TYPE/STOP key to stop program, you can press<br />
START/ENTER key to alter charge current. The sound indicates the<br />
end of program.<br />
When it approaches to the end, you can see the capacity of the<br />
battery being charged or discharged. You can press INC or DEC key<br />
to display result of each cycle.<br />
This program is only suitable for charging Pb (lead-acid) battery with nominal voltage from 2 to<br />
20V. Pb (lead-acid) battery is completely different from NiCd/NiMH battery. These batteries can<br />
only deliver current lower in comparison to their capacity. The same restriction applies to the<br />
charging process. Consequently, the optimum charge current can only be 1/10 of the capacity.<br />
Pb battery can not be used for fast-charging, please follow the instructions provided by the<br />
battery manufacturer.<br />
You can press START/ENTER key to make it blink and alter the value of parameters using INC<br />
or DEC key, press START/ENTER key to store the value.<br />
WARNING AND SAFETY NOTES<br />
NiCd/NiMH Voltage level: 1.2V/cell<br />
Allowable fast charge current: 1C-2C(depends on the performance of cell)<br />
Discharge voltage cut off level: 0.85V/cell(NiCd), 1.0V/cell(NiMH)<br />
Li-ion Voltage Level: 3.6V/cell<br />
Max. charge voltage: 4.1V/cell<br />
Allowable fast charge current: 1C or less<br />
Min. discharge voltage cut off level: 2.5V/cell or higher<br />
LiPo Voltage level: 3.7V/cell<br />
Max. charge voltage: 4.2V/cell<br />
Allowable fast charge current: 1C or less<br />
Discharge voltage cut off level: 3.0V/cell or higher<br />
LiFe Voltage level: 3.3V/cell<br />
Max. charge voltage: 3.6V/cell<br />
Allowable fast charge current: 4C or less<br />
Discharge voltage cut off level: 2.0V/cell or higher<br />
Pb Voltage level: 2.0V/cell<br />
(Lead-acid) Max. charge voltage: 2.46V/cell<br />
Allowable fast charge current: 0.4C or less<br />
Discharge voltage cut off level: 1.75V/cell or higher
WARNING AND SAFETY NOTES<br />
To avoid short circuit between the charge lead always connect the charge cable to the<br />
charger first, then connect the battery. Reverse the sequence when disconnecting.<br />
Do not connect more than one battery pack to this charger at any one time.<br />
Never attempt to charger or discharger the following types of batteries.<br />
A battery pack which consists of different types of cells (including Different<br />
manufacturers)<br />
A battery that is already fully charged or just slightly discharged.<br />
Non-rechargeable batteries (Explosion hazard).<br />
Batteries that require a different charge technique from NiCd, NiMh, LiPo<br />
or Gel cell(Pb, Lead acid).<br />
A faulty or damaged battery.<br />
A battery fitted with an integral charge circuit or a protection circuit.<br />
Batteries installed in a device or which are electrically linked to other<br />
components.<br />
Batteries that are not expressly stated by the manufacturer to be suitable<br />
for the currents the charger delivers during the charge process.<br />
DISCHARGE OF NiCd/NiMH BATTERY<br />
DISCHARGE OF NiCd/NiMH BATTERY<br />
The screen shows the real-time status. Press BATT TYPE/STOP key to end the program. The<br />
sound will emitted to indicates the end of program.<br />
Set charge current on the left and the final voltage on the right. Range<br />
of the charge current is 0.1-1.0A; range of final voltage is 0.1-25.0V.<br />
Press START/ENTER key for more than 3 seconds to start the<br />
program.<br />
The screen indicates the discharging state. You can press<br />
START/ENTER key to alter discharge current. Press START/ENTER<br />
again to store the value. Press BATT TYPE/STOP key to stop<br />
discharging. The emitted sound alerts the end of discharging.
VOLTAGE BALANCING AND MONITORING IN THE DISCHARGE PROCESS<br />
VOLTAGE BALANCING AND MONITORING IN THE DISCHARGE PROCESS<br />
The processor monitors voltage of each cell when the battery packs are during its 'storage' and<br />
'discharging' process. The achieve this feature, plug each battery to the charger individually. If<br />
voltage of any cell is abnormal, <strong>B6</strong> <strong>Twins</strong> will show error massage and terminate the program<br />
forcibly. So if there is battery damage or disconnection, you can see the error message and<br />
press INC to know which cell is damaged.<br />
DISCHARGE OF NiCd/NiMH BATTERY<br />
The processor detects voltage of one cell is too low.<br />
The 4th cell was damaged. The value of voltage may be zero if<br />
disconnection occurs.<br />
This program is for charging and discharging of NiCd/NiMH batteries<br />
associated with R/C models applications. You can press START/ENTER<br />
key to make it blink and then INC or DEC to change the parameter<br />
value. Press START/ENTER key to store the value.<br />
This program charge the battery using the current you set up. In the<br />
'auto' state, you should set up the upper limit of the charge current to<br />
avoid damage by excessive feeding current. Some batteries of low<br />
resistance and capacity can lead to higher current in the 'auto' charging<br />
mode. But in the manual mode, it will charge with the current you set.<br />
You can make it blink in the current field and press INC and DEC at the<br />
same time to switch mode.<br />
WARNING AND SAFETY NOTES<br />
Please bear in mind the following points before commencing charging:<br />
charging:<br />
Did you select the appropriate program suitable for the type of battery you<br />
are charging?<br />
Did you set up adequate current for charging or discharging?<br />
Have you checked the battery voltage? Lithium battery packs can be wired in<br />
parallel and in series, i.e. a 2 cells pack can be 3.7V (in parallel) or 7.4V (in<br />
series).<br />
Have you checked that all connections are firm and secure? Make sure there<br />
are no intermittent contacts at any points in the circuit.<br />
During charge process, a specific quantity of electrical energy is fed into the battery. The<br />
charge quantity is calculated by multiplying charge current by charge time. The<br />
maximum permissible charge current varies depending on the battery type or its<br />
performance, and can be found in the information by the battery manufacturer. Only<br />
batteries that are expressly stated to be capable of quick-charge are allowed to be<br />
charged at rates higher than the standard charge current.<br />
Connect the battery to the terminal of the charger: red is positive and black is negative.<br />
Due to The difference between resistance of cable and connector, the charger cannot<br />
detect Resistance of the battery pack, the essential requirement for the charger to work<br />
properly is that the charge lead should be of adequate conductor cross-section, and high<br />
quality connectors which are normally gold-plated should be fitted to both ends.
WARNING AND SAFETY NOTES<br />
Always refer to the manual by the battery manufacturer pertaining to charging methods, recommended<br />
charging current and charging time. Especially, the Lithium battery should be charged according the<br />
charging instruction provided by the manufacturer strictly.<br />
Attention should be paid to the connection of Lithium battery expecially.<br />
Do not attempt to disassemble the battery pack arbitrarily.<br />
Please get highlighted that Lithium battery packs can be wired in parallel and in series. In the parallel<br />
connection, the battery's capacity is calculated by multiplying single battery's capacity by the number of<br />
cells with total voltage stay the same. The voltage's imbalance may cause fire or explosion. Lithium<br />
battery is recommended to charge in series.<br />
Discharging:<br />
The main purpose of discharging is to clean residual capacity of the battery, or to reduce the battery'<br />
voltage to a defined level. The same attention should be paid to the discharging process as charging.<br />
The final discharge voltage should be set up correctly to avoid deep-discharging. Lithium battery can<br />
not be discharged to lower than the minimum voltage, or it will cause a rapid loss of capacity or a total<br />
failure. Generally, Lithium battery doesn't need to be discharged. Please pay attention to the minimum<br />
voltage of Lithium battery to protect the battery.<br />
Some rechargeable batteries have a memory effect. If they are partly used and echarged before the<br />
whole charge is accomplished, they remember this and will only use that part of their capacity next<br />
time. This is 'memory effect' It is said that NiCd and NiMH batteries are suffering from memory effect.<br />
NiCd has more memory effect than NiMH.<br />
Lithium batteries are recommended to be discharged partially rather than fully discharged. Frequent full<br />
discharging should be avoided if possible. Instead, charge the battery more often or use a battery of<br />
larger capacity. Full capacity cannot be used until it has been subjected to 10 or more charge cycles.<br />
The cyclic process of charge and discharge will optimize the capacity of battery pack.<br />
DISCHARGE OF LITHIUM BATTERY<br />
STORAGE CONTROL OF LITHIUM BATTERY<br />
At this screen, you can set up the current and voltage of the<br />
battery pack. Charging and discharging will make the batteries<br />
come to the voltage level of 'storage' state.<br />
This screen shows the real-time status charging. Press BATT<br />
TYPE/STOP key once to stop the charge process.<br />
The value of discharge current on the left cannot exceed 1C, and<br />
the value on the right cannot be under the voltage recommended<br />
by the manufacturer to avoid deep discharging. Press<br />
STAR/ENTER for more than 3 seconds to start charging.<br />
This shows the real-time status of discharging, you can press<br />
BATT.TYPE/STOP key to stop discharging.
FAST CHARGING OF LITHIUM BATTERY<br />
FAST CHARGING OF LITHIUM BATTERY<br />
STORAGE CONTROL OF LITHIUM BATTERY<br />
Charging current will become lower when it progress to the end of<br />
charging. A specific CV process will be reduced to end the charging<br />
process earlier. In fact, the charging current will goes to 1/5 when<br />
the charging process comes to 1/10. Charging capacity will be a<br />
little smaller than normal charging, but charging time will be<br />
shortened accordingly.<br />
You can set up the charging current and voltage of the battery pack.<br />
Press START/ENTTER key to display voltage confirmation. Then<br />
press START/ENTER key again to confirm and begin to charge.<br />
This screen shows the real-time status of 'fast charging'. Press<br />
BATT TYPE/STOP key once to stop the charge process.<br />
This function is for charging/discharging batteries which are not used at once. This program is<br />
designed for charging or discharging of batteries of specific original state. They are classified by<br />
types: 3.75V LiIon, 3.85V LiPo and 3.3V LiFe. The program will begin to discharge if the original<br />
state of the battery exceeds the voltage level of storage.<br />
Program flow chart<br />
WARNING AND SAFETY NOTES
WARNING AND SAFETY NOTES<br />
As default this charger will be set to typical user setting when it is connected a 12V<br />
battery for the first time. The screen displays the following information in sequence and<br />
the user can charge the parameter on each screen.<br />
If you need to alter the parameter value in the program, press 'Start/Enter' key to make it<br />
blink then change the value with 'INC' or 'DEC' key. The value will be stored by pressing<br />
'Start/Enter' key once.<br />
CHARGING OF LITHIUM BATTERY<br />
The value on the left side of the second lines sets the charge<br />
current. The value on the right side of the second lines sets the<br />
battery pack's voltage. After setting current and voltage, press<br />
STAR/ENTER for more than 3 seconds to start the process.<br />
This displays the number of cells you set up and the processor<br />
detects. 'R' shows the number of cells detected by the charger and<br />
'S' is the number of cells set by you at the previous screen. If both<br />
numbers are identical you can start charging by press<br />
START/ENTER button. If not, press BATT TYPE/STOP button to go<br />
back to previous screen to carefully check the number of cells of<br />
the battery pack before going ahead.<br />
This screen shows the real-time status during charge process.<br />
Press BATT TPE/STOP key once to stop the charge process.<br />
INDIVIDUAL CELL CONNECTION DIAGRAM(PIN-ASSIGNMENT OF 8-PIN)
CHARGING OF LITHIUM BATTERY<br />
CHARGING OF LITHIUM BATTERY<br />
CHARGING LITHIUM BATTERY IN THE BALANCE MODE<br />
The left side of the first line shows the type of battery you choose.<br />
The value on the left of the second line of the charger is current<br />
user set. After setting the current and voltage, press<br />
START/ENTER key for more than 3 seconds to start the<br />
process. (charge current: .1-5.0A, voltage: 1-5V).<br />
This displays the number of cells you set up and the processor<br />
detects. 'R' shows the number of cells detected by the charger<br />
and 'S' is the number of sells set by you and the previous screen.<br />
If both numbers are identical you can start charging by press<br />
START/ENTER button. If not, press BATT TYPE/STOP button to<br />
go back to previous screen to carefully check the number of cells<br />
of the battery pack before going ahead.<br />
This screen show the real-time status during charge process.<br />
Press BATT TYPE/STOP key once to stop the charge process.<br />
This function is for balancing the voltage of Lithium-polymer battery cells while charging. In the<br />
balance mode, the battery needs to have a balance lead to connect to the individual port at the<br />
right side of the charger. And you need to connect the battery's output plug to the output of<br />
charger.<br />
Charging in this mode is different from the normal modes, because the built-in processor<br />
monitors voltage of individual cell and control input current fed into each cell to normalize the<br />
voltage.<br />
WARNING AND SAFETY NOTES<br />
The screen shows the nominal voltage of Lithium battery. There are<br />
three kinds of Lithium battery: LiFe(3.3V),LiIo(3.6V) or LiPo(3.7V). This<br />
information is of critical importance that you have to check the battery<br />
carefully to make sure it is set up correctly. If it is different from correct<br />
value, explosion can occur during charge process.<br />
To avoid from erroneous setting by users, <strong>B6</strong> <strong>Twins</strong> detects the cell<br />
count of Lithium battery automatically at the beginning of charge or<br />
discharge process. But battery that is deep-discharged can't be<br />
detected correctly. To avoid this error, the time term can be set to verify<br />
the cell count by the processor. Normally, 15 seconds are enough to<br />
detect the cell count correctly. You need to extend the time term limit for<br />
the battery of large capacity. But the charge or discharge process may<br />
come to an end within the time term because of the time limit decided by<br />
the wrong count if you set too long time limit for the battery of small<br />
capacity. This may cause fatal error. You have to extend the time term if<br />
the processor detect the cell count incorrectly at the beginning of charge<br />
or discharge process. Otherwise, default value is recommended to use.<br />
This shows the trigger voltage for automatical charge termination of<br />
NiMH and NiCd battery. The valid value ranges from 5 to 20 mV per cell.<br />
Setting the trigger voltage higher brings a danger of overcharging;<br />
whereas setting it lower brings a possibility of premature termination.<br />
Please refer to the technical specification of the battery. (NiCd default:<br />
12mV, NiMH defalt: 7mV)
WARNING AND SAFETY NOTES<br />
There is a 3-pin port on the left of the charger used as USB interface of temperature sensor port. If the<br />
screen displays temperature, you can use the optional temperature probe to connect to the surface of<br />
the battery. If it is set as the USB port, you can connect the charger to your PC through the optional<br />
USB cable to monitor the charging process through optional software.<br />
The maximum temperature of the battery can be set during the charge process. The process will be<br />
terminated automatically to protect battery once the temperature of battery reaches this value. This<br />
feature is accomplished through temperature probe (optional).<br />
The battery becomes warm after cycles of charge/discharge process. The<br />
program will insert a time delay after each charge/discharge process to allow the<br />
battery enough time to cool down before beginning next cycle of charge/discharge<br />
process. The valid value ranges from 1to 60 minutes.<br />
When the charge process starts, the integrated safety timer starts to run<br />
simultaneously. If error detected or the termination circuit can not detect whether<br />
the battery is fully charged or not. This unit is programmed to prevent overcharging.<br />
Please refer to the below statement to calculate the timer you set.<br />
The program provides maximum capacity protection function. If the Deltapeak<br />
voltage can not be detected or the safety timer times out, the charge<br />
process will stop automatically, when the battery reaches the user-set<br />
maximum charge capacity.<br />
The beep to confirm users' operation sounds every time a button is pressed.<br />
The beep tor melody sounds at various times during operation to confirm<br />
different mode change. These functions can be switched on or off.<br />
This function monitors the voltage of the input battery used to power this charger.<br />
If the voltage is lower than user-set value, the program will end forcibly to protect<br />
the input battery.<br />
SAFE TIMER CALCULATION<br />
SAFE TIMER CALCULATION<br />
When charging NiCd or NiMH batteries, divide the capacity by current, then divide the result by<br />
11.9, set this number of minutes as the value for safetl timer setting. If the charger stopped at<br />
this time threshold, about 140% of the capacity will have been fed into the battery.<br />
For example:<br />
Capacity Current Safety time<br />
2000mAh 2.0A (2000/2.0=1000)/11.9=84 minutes<br />
3300mAh 3.0A (3300/3.0=1100)/11.9=92 minutes<br />
1000mAh 1.2A (1000/1.2=833)/11.9=70 minutes<br />
Lithium (LiIo/LiPo/LiFe) program<br />
The program is only suitable for charging/discharging Lithium-polymer batteries with a nominal<br />
voltage of 3.3/3.6/3.7/cell. Different batteries have different charge technique. There are two<br />
methods termed as constant voltage and constant current. The charge current varies according<br />
to battery capacity and specification. The final voltage is very important; it should precisely<br />
match the voltage of the battery: LiPo is 3.6V, LiIon is 4.1V and LiFe is 3.6V. the current and<br />
voltage of the battery should be correctly set.<br />
When you want to change the values of parameters, please press START/ENTER key to make it<br />
blink and then use DES or INC to change the value. Then press START/ENTER key again to<br />
store the value.