

INTRODUCTION TO SCILAB
INTRODUCTION TO SCILAB
INTRODUCTION TO SCILAB

Create successful ePaper yourself
Turn your PDF publications into a flip-book with our unique Google optimized e-Paper software.
Consortium sCilab<br />
<strong>INTRODUCTION</strong> <strong>TO</strong> <strong>SCILAB</strong><br />
Domaine de Voluceau - Rocquencourt - B.P. 105 - 78153 Le Chesnay Cedex France<br />
www.scilab.org
This document has been written by Michaël Baudin from the Scilab Consortium.<br />
© November 2010 The Scilab Consortium - Digiteo. All rights reserved.
November 2010<br />
Abstract<br />
In this document, we make an overview of Scilab features so that we can<br />
get familiar with this environment. The goal is to present the core of skills<br />
necessary to start with Scilab. In the first part, we present how to get and<br />
install this software on our computer. We also present how to get some help<br />
with the provided in-line documentation and also thanks to web resources and<br />
forums. In the remaining sections, we present the Scilab language, especially<br />
its structured programming features. We present an important feature of<br />
Scilab, that is the management of real matrices and overview the linear algebra<br />
library. The definition of functions and the elementary management of input<br />
and output variables is presented. We present Scilab’s graphical features and<br />
show how to create a 2D plot, how to configure the title and the legend and<br />
how to export that plot into a vectorial or bitmap format.<br />
Contents<br />
1 Overview 5<br />
1.1 Introduction . . . . . . . . . . . . . . . . . . . . . . . . . . . . . . . . 5<br />
1.2 Overview of Scilab . . . . . . . . . . . . . . . . . . . . . . . . . . . . 5<br />
1.3 How to get and install Scilab . . . . . . . . . . . . . . . . . . . . . . . 6<br />
1.3.1 Installing Scilab under Windows . . . . . . . . . . . . . . . . . 7<br />
1.3.2 Installing Scilab under Linux . . . . . . . . . . . . . . . . . . 7<br />
1.3.3 Installing Scilab under Mac OS . . . . . . . . . . . . . . . . . 8<br />
1.4 How to get help . . . . . . . . . . . . . . . . . . . . . . . . . . . . . . 8<br />
1.5 Mailing lists, wiki and bug reports . . . . . . . . . . . . . . . . . . . . 9<br />
1.6 Getting help from Scilab demonstrations and macros . . . . . . . . . 10<br />
1.7 Exercises . . . . . . . . . . . . . . . . . . . . . . . . . . . . . . . . . . 11<br />
2 Getting started 11<br />
2.1 The console . . . . . . . . . . . . . . . . . . . . . . . . . . . . . . . . 11<br />
2.2 The editor . . . . . . . . . . . . . . . . . . . . . . . . . . . . . . . . . 12<br />
2.3 Docking . . . . . . . . . . . . . . . . . . . . . . . . . . . . . . . . . . 14<br />
2.4 Using exec . . . . . . . . . . . . . . . . . . . . . . . . . . . . . . . . 16<br />
2.5 Batch processing . . . . . . . . . . . . . . . . . . . . . . . . . . . . . 17<br />
2.6 Exercises . . . . . . . . . . . . . . . . . . . . . . . . . . . . . . . . . . 19<br />
1
3 Basic elements of the language 20<br />
3.1 Creating real variables . . . . . . . . . . . . . . . . . . . . . . . . . . 20<br />
3.2 Variable names . . . . . . . . . . . . . . . . . . . . . . . . . . . . . . 21<br />
3.3 Comments and continuation lines . . . . . . . . . . . . . . . . . . . . 22<br />
3.4 Elementary mathematical functions . . . . . . . . . . . . . . . . . . . 22<br />
3.5 Pre-defined mathematical variables . . . . . . . . . . . . . . . . . . . 22<br />
3.6 Booleans . . . . . . . . . . . . . . . . . . . . . . . . . . . . . . . . . . 23<br />
3.7 Complex numbers . . . . . . . . . . . . . . . . . . . . . . . . . . . . . 24<br />
3.8 Integers . . . . . . . . . . . . . . . . . . . . . . . . . . . . . . . . . . 25<br />
3.8.1 Overview of integers . . . . . . . . . . . . . . . . . . . . . . . 25<br />
3.8.2 Conversions between integers . . . . . . . . . . . . . . . . . . 26<br />
3.8.3 Circular integers and portability issues . . . . . . . . . . . . . 27<br />
3.9 Floating point integers . . . . . . . . . . . . . . . . . . . . . . . . . . 28<br />
3.10 The ans variable . . . . . . . . . . . . . . . . . . . . . . . . . . . . . 29<br />
3.11 Strings . . . . . . . . . . . . . . . . . . . . . . . . . . . . . . . . . . . 29<br />
3.12 Dynamic type of variables . . . . . . . . . . . . . . . . . . . . . . . . 30<br />
3.13 Exercises . . . . . . . . . . . . . . . . . . . . . . . . . . . . . . . . . . 30<br />
4 Matrices 31<br />
4.1 Overview . . . . . . . . . . . . . . . . . . . . . . . . . . . . . . . . . 31<br />
4.2 Create a matrix of real values . . . . . . . . . . . . . . . . . . . . . . 32<br />
4.3 The empty matrix [] . . . . . . . . . . . . . . . . . . . . . . . . . . . 33<br />
4.4 Query matrices . . . . . . . . . . . . . . . . . . . . . . . . . . . . . . 33<br />
4.5 Accessing the elements of a matrix . . . . . . . . . . . . . . . . . . . 34<br />
4.6 The colon ”:” operator . . . . . . . . . . . . . . . . . . . . . . . . . . 35<br />
4.7 The eye matrix . . . . . . . . . . . . . . . . . . . . . . . . . . . . . . 38<br />
4.8 Matrices are dynamic . . . . . . . . . . . . . . . . . . . . . . . . . . . 39<br />
4.9 The dollar ”$” operator . . . . . . . . . . . . . . . . . . . . . . . . . . 39<br />
4.10 Low-level operations . . . . . . . . . . . . . . . . . . . . . . . . . . . 40<br />
4.11 Elementwise operations . . . . . . . . . . . . . . . . . . . . . . . . . . 41<br />
4.12 Conjugate transpose and non-conjugate transpose . . . . . . . . . . . 42<br />
4.13 Multiplication of two vectors . . . . . . . . . . . . . . . . . . . . . . . 43<br />
4.14 Comparing two real matrices . . . . . . . . . . . . . . . . . . . . . . . 44<br />
4.15 Issues with floating point integers . . . . . . . . . . . . . . . . . . . . 45<br />
4.16 More on elementary functions . . . . . . . . . . . . . . . . . . . . . . 46<br />
4.17 Higher-level linear algebra features . . . . . . . . . . . . . . . . . . . 48<br />
4.18 Exercises . . . . . . . . . . . . . . . . . . . . . . . . . . . . . . . . . . 48<br />
5 Looping and branching 49<br />
5.1 The if statement . . . . . . . . . . . . . . . . . . . . . . . . . . . . . 49<br />
5.2 The select statement . . . . . . . . . . . . . . . . . . . . . . . . . . 50<br />
5.3 The for statement . . . . . . . . . . . . . . . . . . . . . . . . . . . . 52<br />
5.4 The while statement . . . . . . . . . . . . . . . . . . . . . . . . . . . 53<br />
5.5 The break and continue statements . . . . . . . . . . . . . . . . . . 54<br />
2
6 Functions 55<br />
6.1 Overview . . . . . . . . . . . . . . . . . . . . . . . . . . . . . . . . . 55<br />
6.2 Defining a function . . . . . . . . . . . . . . . . . . . . . . . . . . . . 57<br />
6.3 Function libraries . . . . . . . . . . . . . . . . . . . . . . . . . . . . . 59<br />
6.4 Managing output arguments . . . . . . . . . . . . . . . . . . . . . . . 61<br />
6.5 Levels in the call stack . . . . . . . . . . . . . . . . . . . . . . . . . . 62<br />
6.6 The return statement . . . . . . . . . . . . . . . . . . . . . . . . . . 63<br />
6.7 Debugging functions with pause . . . . . . . . . . . . . . . . . . . . . 64<br />
7 Plotting 66<br />
7.1 Overview . . . . . . . . . . . . . . . . . . . . . . . . . . . . . . . . . 66<br />
7.2 2D plot . . . . . . . . . . . . . . . . . . . . . . . . . . . . . . . . . . 66<br />
7.3 Contour plots . . . . . . . . . . . . . . . . . . . . . . . . . . . . . . . 68<br />
7.4 Titles, axes and legends . . . . . . . . . . . . . . . . . . . . . . . . . 71<br />
7.5 Export . . . . . . . . . . . . . . . . . . . . . . . . . . . . . . . . . . . 73<br />
8 Notes and references 74<br />
9 Acknowledgments 75<br />
10 Answers to exercises 76<br />
10.1 Answers for section 1.7 . . . . . . . . . . . . . . . . . . . . . . . . . . 76<br />
10.2 Answers for section 2.6 . . . . . . . . . . . . . . . . . . . . . . . . . . 76<br />
10.3 Answers for section 3.13 . . . . . . . . . . . . . . . . . . . . . . . . . 79<br />
10.4 Answers for section 4.18 . . . . . . . . . . . . . . . . . . . . . . . . . 82<br />
References 83<br />
Index 84<br />
3
Copyright c○ 2008-2010 - Consortium Scilab - Digiteo - Michael Baudin<br />
This file must be used under the terms of the Creative Commons Attribution-<br />
ShareAlike 3.0 Unported License:<br />
http://creativecommons.org/licenses/by-sa/3.0<br />
4
1 Overview<br />
In this section, we present an overview of Scilab. The first subsection introduces the<br />
open source project associated with the creation of this document. Then we present<br />
the software, licence and scientific aspects of Scilab. In the third subsection, we<br />
describe the methods to download and install Scilab on Windows, GNU/Linux and<br />
Mac operating systems. In the remaining subsections, we describe various sources of<br />
information needed when we have to get some help from Scilab or from other users.<br />
We describe the built-in help pages and analyse the mailing lists and wiki which are<br />
available online. Finally, we take a moment to look at the demonstrations which are<br />
provided with Scilab.<br />
1.1 Introduction<br />
This document is an open-source project. The L ATEX sources are available on the<br />
Scilab Forge:<br />
http://forge.scilab.org/index.php/p/docintrotoscilab/<br />
The L ATEX sources are provided under the terms of the Creative Commons Attribution-<br />
ShareAlike 3.0 Unported License:<br />
http://creativecommons.org/licenses/by-sa/3.0<br />
The Scilab scripts are provided on the Forge, inside the project, under the scripts<br />
sub-directory. The scripts are available under the CeCiLL licence:<br />
http://www.cecill.info/licences/Licence_CeCILL_V2-en.txt<br />
1.2 Overview of Scilab<br />
Scilab is a programming language associated with a rich collection of numerical<br />
algorithms covering many aspects of scientific computing problems.<br />
From the software point of view, Scilab is an interpreted language. This generally<br />
allows to get faster development processes, because the user directly accesses a<br />
high-level language, with a rich set of features provided by the library. The Scilab<br />
language is meant to be extended so that user-defined data types can be defined<br />
with possibly overloaded operations. Scilab users can develop their own modules<br />
so that they can solve their particular problems. The Scilab language allows to<br />
dynamically compile and link other languages such as Fortran and C: this way,<br />
external libraries can be used as if they were a part of Scilab built-in features.<br />
Scilab also interfaces LabVIEW, a platform and development environment for a<br />
visual programming language from National Instruments.<br />
From the license point of view, Scilab is a free software in the sense that the user<br />
does not pay for it and Scilab is an open source software, provided under the Cecill<br />
license [2]. The software is distributed with source code, so that the user has an<br />
access to Scilab’s most internal aspects. Most of the time, the user downloads and<br />
installs a binary version of Scilab, since the Scilab consortium provides Windows,<br />
5
Linux and Mac OS executable versions. Online help is provided in many local<br />
languages.<br />
From the scientific point of view, Scilab comes with many features. At the very<br />
beginning of Scilab, features were focused on linear algebra. But, rapidly, the number<br />
of features extended to cover many areas of scientific computing. The following is a<br />
short list of its capabilities:<br />
• Linear algebra, sparse matrices,<br />
• Polynomials and rational functions,<br />
• Interpolation, approximation,<br />
• Linear, quadratic and non linear optimization,<br />
• Ordinary Differential Equation solver and Differential Algebraic Equations<br />
solver,<br />
• Classic and robust control, Linear Matrix Inequality optimization,<br />
• Differentiable and non-differentiable optimization,<br />
• Signal processing,<br />
• Statistics.<br />
Scilab provides many graphics features, including a set of plotting functions,<br />
which allow to create 2D and 3D plots as well as user interfaces. The Xcos environment<br />
provides a hybrid dynamic systems modeler and simulator.<br />
1.3 How to get and install Scilab<br />
Whatever your platform is (i.e. Windows, Linux or Mac), Scilab binaries can be<br />
downloaded directly from the Scilab homepage<br />
or from the Download area<br />
http://www.scilab.org<br />
http://www.scilab.org/download<br />
Scilab binaries are provided for both 32 and 64-bit platforms so that they match<br />
the target installation machine.<br />
Scilab can also be downloaded in source form, so that you can compile Scilab by<br />
yourself and produce your own binary. Compiling Scilab and generating a binary is<br />
especially interesting when we want to understand or debug an existing feature, or<br />
when we want to add a new feature. To compile Scilab, some prerequisites binary<br />
files are necessary, which are also provided in the Download center. Moreover, a<br />
Fortran and a C compiler are required. Compiling Scilab is a process which will not<br />
be detailed further in this document, because this chapter is mainly devoted to the<br />
external behavior of Scilab.<br />
6
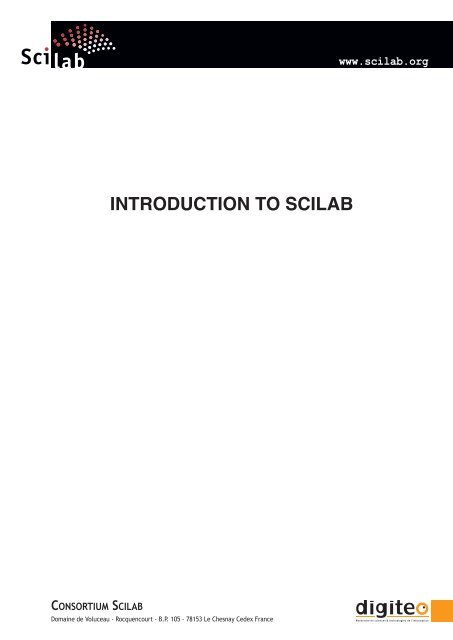
Figure 1: Scilab console under Windows.<br />
1.3.1 Installing Scilab under Windows<br />
Scilab is distributed as a Windows binary and an installer is provided so that the<br />
installation is really easy. The Scilab console is presented in figure 1. Several comments<br />
may be made about this installation process.<br />
On Windows, if your machine is based on an Intel processor, the Intel Math<br />
Kernel Library (MKL) [7] enables Scilab to perform faster numerical computations.<br />
1.3.2 Installing Scilab under Linux<br />
Under Linux, the binary versions are available from Scilab website as .tar.gz files.<br />
There is no need for an installation program with Scilab under Linux: simply unzip<br />
the file in one target directory. Once done, the binary file is located in /scilab-<br />
5.x.x/bin/scilab. When this script is executed, the console immediately appears and<br />
looks exactly the same as on Windows.<br />
Notice that Scilab is also distributed with the packaging system available with<br />
Linux distributions based on Debian (for example, Ubuntu). This installation<br />
method is extremely simple and efficient. Nevertheless, it has one little drawback:<br />
the version of Scilab packaged for your Linux distribution may not be up-to-date.<br />
This is because there is some delay (from several weeks to several months) between<br />
the availability of an up-to-date version of Scilab under Linux and its release in<br />
Linux distributions.<br />
For now, Scilab comes on Linux with a binary linear algebra library which guarantees<br />
portability. Under Linux, Scilab does not come with a binary version of<br />
ATLAS [1], so that linear algebra is a little slower for that platform, compared to<br />
Windows.<br />
7
1.3.3 Installing Scilab under Mac OS<br />
Under Mac OS, the binary versions are available from Scilab website as a .dmg file.<br />
This binary works for Mac OS versions starting from version 10.5. It uses the Mac<br />
OS installer, which provides a classical installation process. Scilab is not available<br />
on Power PC systems.<br />
Scilab version 5.2 for Mac OS comes with a Tcl / Tk library which is disabled for<br />
technical reasons. As a consequence, there are some small limitations on the use of<br />
Scilab on this platform. For example, the Scilab / Tcl interface (TclSci), the graphic<br />
editor and the variable editor are not working. These features will be rewritten in<br />
Java in future versions of Scilab and these limitations will disappear.<br />
Still, using Scilab on a Mac OS system is easy, and uses the shorcuts which<br />
are familiar to the users of this platform. For example, the console and the editor<br />
use the Cmd key (Apple key) which is found on Mac keyboards. Moreover, there<br />
is no right-click on this platform. Instead, Scilab is sensitive to the Control-Click<br />
keyboard event.<br />
For now, Scilab comes on Mac OS with a linear algebra library which is optimized<br />
and guarantees portability. Under Mac OS, Scilab does not come with a binary<br />
version of ATLAS [1], so that linear algebra is a little slower for that platform.<br />
1.4 How to get help<br />
The most simple way to get the online help integrated to Scilab is to use the function<br />
help. Figure 2 presents the Scilab help window. To use this function, simply type<br />
”help” in the console and press the key, as in the following session.<br />
help<br />
Suppose that you want some help about the optim function. You may try to<br />
browse the integrated help, find the optimization section and then click on the optim<br />
item to display its help.<br />
Another possibility is to use the function help, followed by the name of the<br />
function, for which help is required, as in the following session.<br />
help optim<br />
Scilab automatically opens the associated entry in the help.<br />
We can also use the help provided on the Scilab web site<br />
http://www.scilab.org/product/man<br />
This page always contains the help for the up-to-date version of Scilab. By using<br />
the ”search” feature of my web browser, I can most of the time quickly find the<br />
help page I need. With that method, I can see the help pages for several Scilab<br />
commands at the same time (for example the commands derivative and optim,<br />
so that I can provide the cost function suitable for optimization with optim by<br />
computing derivatives with derivative).<br />
A list of commercial books, free books, online tutorials and articles is presented<br />
on the Scilab homepage:<br />
http://www.scilab.org/publications<br />
8
Figure 2: Scilab help window.<br />
1.5 Mailing lists, wiki and bug reports<br />
The mailing list users@lists.scilab.org is designed for all Scilab usage questions. To<br />
subscribe to this mailing list, send an e-mail to users-subscribe@lists.scilab.org. The<br />
mailing list dev@lists.scilab.org focuses on the development of Scilab, be it the development<br />
of Scilab core or of complicated modules which interacts deeply with Scilab<br />
core. To subscribe to this mailing list, send an e-mail to dev-subscribe@lists.scilab.org.<br />
These mailing lists are archived at:<br />
and:<br />
http://dir.gmane.org/gmane.comp.mathematics.scilab.user<br />
http://dir.gmane.org/gmane.comp.mathematics.scilab.devel<br />
Therefore, before asking a question, users should consider looking in the archive<br />
if the same question or subject has already been answered.<br />
A question posted on the mailing list may be related to a very specific technical<br />
point, so that it requires an answer which is not general enough to be public. The<br />
address scilab.support@scilab.org is designed for this purpose. Developers of the<br />
Scilab team provide accurate answers via this communication channel.<br />
The Scilab wiki is a public tool for reading and publishing general information<br />
about Scilab:<br />
http://wiki.scilab.org<br />
9
Figure 3: Scilab demos window.<br />
It is used both by Scilab users and developers to publish information about Scilab.<br />
From a developer’s point of view, it contains step-by-step instructions to compile<br />
Scilab from the sources, dependencies of various versions of Scilab, instructions to<br />
use Scilab source code repository, etc...<br />
The Scilab Bugzilla http://bugzilla.scilab.org allows to submit a report each time<br />
we find a new bug. It may happen that this bug has already been discovered by<br />
someone else. This is why it is advised to search the bug database for existing related<br />
problems before reporting a new bug. If the bug is not reported yet, it is a very<br />
good thing to report it, along with a test script. This test script should remain as<br />
simple as possible, which allows to reproduce the problem and identify the source<br />
of the issue.<br />
An efficient way of getting up-to-date information is to use RSS feeds. The RSS<br />
feed associated with the Scilab website is<br />
http://www.scilab.org/en/rss_en.xml<br />
This channel regularly delivers press releases and general announces.<br />
1.6 Getting help from Scilab demonstrations and macros<br />
The Scilab consortium maintains a collection of demonstration scripts, which are<br />
available from the console, in the menu ? > Scilab Demonstrations. Figure 3<br />
presents the demonstration window. Some demonstrations are graphic, while some<br />
others are interactive, which means that the user must type on the key to<br />
go on to the next step of the demo.<br />
The associated demonstrations scripts are located in the Scilab directory, inside<br />
each module. For example, the demonstration associated with the optimization<br />
module is located in the file<br />
\scilab-5.2.0\modules\optimization\demos\datafit\datafit.dem.sce<br />
Of course, the exact path of the file depends on your particular installation and your<br />
operating system.<br />
10
Analyzing the content of these demonstration files is often an efficient solution<br />
for solving common problems and to understand particular features.<br />
Another method to find some help is to analyze the source code of Scilab itself<br />
(Scilab is indeed open-source!). For example, the derivative function is located in<br />
\scilab-5.2.0\modules\optimization\macros\derivative.sci<br />
Most of the time, Scilab macros are very well written, taking care of all possible<br />
combinations of input and output arguments and many possible values of the input<br />
arguments. Often, difficult numerical problems are solved in these scripts so that<br />
they provide a deep source of inspiration for developing your own scripts.<br />
1.7 Exercises<br />
Exercise 1.1 (Installing Scilab) Install the current version of Scilab on your system: at the<br />
time where this document is written, this is Scilab v5.2. It is instructive to install an older version<br />
of Scilab, in order to compare current behavior against the older one. Install Scilab 4.1.2 and see<br />
the differences.<br />
Exercise 1.2 (Inline help: derivative) The derivative function allows to compute the numerical<br />
derivative of a function. The purpose of this exercise is to find the corresponding help page,<br />
by various means. In the inline help, find the entry corresponding to the derivative function.<br />
Find the corresponding entry in the online help. Use the console to find the help.<br />
Exercise 1.3 (Asking a question on the forum) You probably already have one or more<br />
questions. Post your question on the users’ mailing list users@lists.scilab.org.<br />
2 Getting started<br />
In this section, we make our first steps with Scilab and present some simple tasks<br />
we can perform with the interpreter.<br />
There are several ways of using Scilab and the following paragraphs present three<br />
methods:<br />
• using the console in the interactive mode,<br />
• using the exec function against a file,<br />
• using batch processing.<br />
2.1 The console<br />
The first way is to use Scilab interactively, by typing commands in the console,<br />
analyzing the results and continuing this process until the final result is computed.<br />
This document is designed so that the Scilab examples which are printed here can<br />
be copied into the console. The goal is that the reader can experiment by himself<br />
Scilab behavior. This is indeed a good way of understanding the behavior of the<br />
program and, most of the time, it allows a quick and smooth way of performing the<br />
desired computation.<br />
In the following example, the function disp is used in the interactive mode to<br />
print out the string ”Hello World!”.<br />
11
-->s=" Hello World !"<br />
s =<br />
Hello World !<br />
--> disp (s)<br />
Hello World !<br />
Figure 4: The completion in the console.<br />
In the previous session, we did not type the characters ”-->” which is the prompt,<br />
and which is managed by Scilab. We only type the statement s="Hello World!"<br />
with our keyboard and then hit the key. Scilab answer is s = and Hello<br />
World!. Then we type disp(s) and Scilab answer is Hello World!.<br />
When we edit a command, we can use the keyboard, as with a regular editor.<br />
We can use the left ← and right → arrows in order to move the cursor on the line<br />
and use the and keys in order to fix errors in the text.<br />
In order to get access to previously executed commands, use the up arrow ↑ key.<br />
This allows to browse the previous commands by using the up ↑ and down ↓ arrow<br />
keys.<br />
The key provides a very convenient completion feature. In the following<br />
session, we type the statement disp in the console.<br />
--> disp<br />
Then we can type on the key, which makes a list appear in the console,<br />
as presented in figure 4. Scilab displays a listbox, where items correspond to all<br />
functions which begin with the letters ”disp”. We can then use the up and down<br />
arrow keys to select the function we want.<br />
The auto-completion works with functions, variables, files and graphic handles<br />
and makes the development of scripts easier and faster.<br />
2.2 The editor<br />
Scilab version 5.2 provides a new editor which allows to edit scripts easily. Figure 5<br />
presents the editor during the editing of the previous ”Hello World!” example.<br />
12
Figure 5: The editor.<br />
The editor can be accessed from the menu of the console, under the Applications<br />
> Editor menu, or from the console, as presented in the following session.<br />
--> editor ()<br />
This editor allows to manage several files at the same time, as presented in<br />
figure 5, where we edit five files at the same time.<br />
There are many features which are worth to mention in this editor. The most<br />
commonly used features are under the Execute menu.<br />
• Load into Scilab allows to execute the statements in the current file, as if we<br />
did a copy and paste. This implies that the statements which do not end with<br />
the semicolon ”;” character will produce an output in the console.<br />
• Evaluate Selection allows to execute the statements which are currently selected.<br />
• Execute File Into Scilab allows to execute the file, as if we used the exec<br />
function. The results which are produced in the console are only those which<br />
are associated with printing functions, such as disp for example.<br />
We can also select a few lines in the script, right click (or Cmd+Click under Mac),<br />
and get the context menu which is presented in figure 6.<br />
The Edit menu provides a very interesting feature, commonly known as a ”pretty<br />
printer” in most languages. This is the Edit > Correct Indentation feature, which<br />
13
Figure 6: Context menu in the editor.<br />
automatically indents the current selection. This feature is extremelly convenient,<br />
as it allows to format algorithms, so that the if, for and other structured blocks<br />
are easy to analyze.<br />
The editor provides a fast access to the inline help. Indeed, assume that we have<br />
selected the disp statement, as presented in figure 7. When we right-click in the<br />
editor, we get the context menu, where the Help about ”disp” entry allows to open<br />
the help page associated with the disp function.<br />
2.3 Docking<br />
The graphics in Scilab version 5 has been updated so that many components are<br />
now based on Java. This has a number of advantages, including the possibility to<br />
manage docking windows.<br />
The docking system uses Flexdock [10], an open-source project providing a Swing<br />
docking framework. Assume that we have both the console and the editor opened<br />
in our environment, as presented in figure 8. It might be annoying to manage two<br />
windows, because one may hide the other, so that we constantly have to move them<br />
around in order to actually see what happens.<br />
The Flexdock system allows to drag and drop the editor into the console, so that<br />
we finally have only one window, with several sub-windows. All Scilab windows are<br />
dockable, including the console, the editor, the help and the plotting windows. In<br />
figure 9, we present a situation where we have docked four windows into the console<br />
window.<br />
In order to dock one window into another window, we must drag and drop the<br />
14
Figure 7: Context help in the editor.<br />
Drag from here<br />
and drop into<br />
the console<br />
Figure 8: The title bar in the source window. In order to dock the editor into the<br />
console, drag and drop the title bar of the editor into the console.<br />
15
Click here<br />
to un-dock<br />
Click here to<br />
close the dock<br />
Figure 9: Actions in the title bar of the docking window. The round arrow in the<br />
title bar of the window allows to undock the window. The cross allows to close the<br />
window.<br />
source window into the target window. To do this, we left-click on the title bar of the<br />
docking window, as indicated in figure 8. Before releasing the click, let us move the<br />
mouse over the target window and notice that a window, surrounded by dotted lines<br />
is displayed. This ”phantom” window indicates the location of the future docked<br />
window. We can choose this location, which can be on the top, the bottom, the<br />
left or the right of the target window. Once we have chosen the target location, we<br />
release the click, which finally moves the source window into the target window, as<br />
in figure 9.<br />
We can also release the source window over the target window, which creates<br />
tabs, as in figure 10.<br />
2.4 Using exec<br />
When several commands are to be executed, it may be more convenient to write<br />
these statements into a file with Scilab editor. To execute the commands located in<br />
such a file, the exec function can be used, followed by the name of the script. This<br />
file generally has the extension .sce or .sci, depending on its content:<br />
• files having the .sci extension contain Scilab functions and executing them<br />
loads the functions into Scilab environment (but does not execute them),<br />
• files having the .sce extension contain both Scilab functions and executable<br />
statements.<br />
16
The tabs of<br />
the dock<br />
Figure 10: Docking tabs.<br />
Executing a .sce file has generally an effect such as computing several variables and<br />
displaying the results in the console, creating 2D plots, reading or writing into a file,<br />
etc...<br />
Assume that the content of the file myscript.sce is the following.<br />
disp("Hello World !")<br />
In the Scilab console, we can use the exec function to execute the content of this<br />
script.<br />
--> exec (" myscript . sce ")<br />
--> disp (" Hello World !")<br />
Hello World !<br />
In practical situations, such as debugging a complicated algorithm, the interactive<br />
mode is used most of the time with a sequence of calls to the exec and disp<br />
functions.<br />
2.5 Batch processing<br />
Another way of using Scilab is from the command line. Several command line<br />
options are available and are presented in figure 11. Whatever the operating system<br />
is, binaries are located in the directory scilab-5.2.0/bin. Command line options<br />
must be appended to the binary for the specific platform, as described below. The<br />
-nw option allows to disable the display of the console. The -nwni option allows<br />
to launch the non-graphics mode: in this mode, the console is not displayed and<br />
plotting functions are disabled (using them will generate an error).<br />
17
-e instruction execute the Scilab instruction given in instruction<br />
-f file execute the Scilab script given in the file<br />
-l lang setup the user language<br />
’fr’ for french and ’en’ for english (default is ’en’)<br />
-mem N set the initial stacksize<br />
-ns if this option is present, the startup file scilab.start is not executed<br />
-nb if this option is present, then Scilab welcome banner is not displayed<br />
-nouserstartup don’t execute user startup files SCIHOME/.scilab<br />
or SCIHOME/scilab.ini<br />
-nw start Scilab as command line with advanced features (e.g., graphics)<br />
-nwni start Scilab as command line without advanced features<br />
-version print product version and exit<br />
Figure 11: Scilab command line options.<br />
• Under Windows, two binary executable are provided. The first executable is<br />
WScilex.exe, the usual, graphics, interactive console. This executable corresponds<br />
to the icon which is available on the desktop after the installation<br />
of Scilab. The second executable is Scilex.exe, the non-graphics console.<br />
With the Scilex.exe executable, the Java-based console is not loaded and<br />
the Windows terminal is directly used. The Scilex.exe program is sensitive<br />
to the -nw and -nwni options.<br />
• Under Linux, the scilab script provides options which allow to configure its<br />
behavior. By default, the graphics mode is launched. The scilab script is<br />
sensitive to the -nw and -nwni options. There are two extra executables on<br />
Linux: scilab-cli and scilab-adv-cli. The scilab-adv-cli executable is<br />
equivalent to the -nw option, while the scilab-cli is equivalent to the -nwni<br />
option[8].<br />
• Under Mac OS, the behavior is similar to the Linux platform.<br />
In the following Windows session, we launch the Scilex.exe program with the<br />
-nwni option. Then we run the plot function in order to check that this function<br />
is not available in the non-graphics mode.<br />
D:\ Programs \ scilab -5.2.0\ bin > Scilex . exe -nwni<br />
___________________________________________<br />
scilab -5.2.0<br />
Consortium Scilab ( DIGITEO )<br />
Copyright (c) 1989 -2009 ( INRIA )<br />
Copyright (c) 1989 -2007 ( ENPC )<br />
___________________________________________<br />
Startup execution :<br />
loading initial environment<br />
--> plot ()<br />
!-- error 4<br />
Undefined variable : plot<br />
18
The most useful command line option is the -f option, which allows to execute<br />
the commands from a given file, a method generally called batch processing. Assume<br />
that the content of the file myscript2.sce is the following, where the quit function<br />
is used to exit from Scilab.<br />
disp (" Hello World !")<br />
quit ()<br />
The default behavior of Scilab is to wait for new user input: this is why the quit<br />
command is used, so that the session terminates. To execute the demonstration<br />
under Windows, we created the directory ”C:\scripts” and wrote the statements in<br />
the file C:\scripts\myscript2.sce. The following session, executed from the MS<br />
Windows terminal, shows how to use the -f option to execute the previous script.<br />
Notice that we used the absolute path of the Scilex.exe executable.<br />
C:\ scripts >D:\ Programs \ scilab -5.2.0\ bin \ Scilex . exe -f myscript2 . sce<br />
___________________________________________<br />
scilab -5.2.0<br />
Consortium Scilab ( DIGITEO )<br />
Copyright (c) 1989 -2009 ( INRIA )<br />
Copyright (c) 1989 -2007 ( ENPC )<br />
___________________________________________<br />
Startup execution :<br />
loading initial environment<br />
Hello World !<br />
C:\ scripts ><br />
Any line which begins with the two slash characters ”//” is considered by Scilab<br />
as a comment and is ignored. To check that Scilab stays by default in interactive<br />
mode, we comment out the quit statement with the ”//” syntax, as in the following<br />
script.<br />
disp (" Hello World !")<br />
// quit ()<br />
If we type the ”scilex -f myscript2.sce” command in the terminal, Scilab<br />
will now wait for user input, as expected. To exit, we interactively type the quit()<br />
statement in the terminal.<br />
2.6 Exercises<br />
Exercise 2.1 (The console) Type the following statement in the console.<br />
atoms<br />
Now type on the key. What happens? Now type the ”I” letter, and type again on .<br />
What happens?<br />
Exercise 2.2 (Using exec) When we develop a Scilab, script we often use the exec function<br />
in combination with the ls function, which displays the list of files and directories in the current<br />
directory. We can also use the pwd, which displays the current directory. The SCI variable contains<br />
the name of the directory of the current Scilab installation. We use it very often to execute the<br />
scripts which are provided in Scilab. Type the following statements in the console and see what<br />
happens.<br />
pwd<br />
SCI<br />
ls(SCI +"/ modules ")<br />
19
ls(SCI +"/ modules / graphics / demos ")<br />
exec ( SCI +"/ modules / graphics / demos /2 d_3d_plots / contourf . dem . sce ")<br />
exec ( SCI +"/ modules / graphics / demos /2 d_3d_plots / contourf . dem . sce ");<br />
3 Basic elements of the language<br />
Scilab is an interpreted language, which means that it allows to manipulate variables<br />
in a very dynamic way. In this section, we present the basic features of the language,<br />
that is, we show how to create a real variable, and what elementary mathematical<br />
functions can be applied to a real variable. If Scilab provided only these features,<br />
it would only be a super desktop calculator. Fortunately, it is a lot more and this<br />
is the subject of the remaining sections, where we will show how to manage other<br />
types of variables, that is booleans, complex numbers, integers and strings.<br />
It seems strange at first, but it is worth to state it right from the start: in<br />
Scilab, everything is a matrix. To be more accurate, we should write: all real,<br />
complex, boolean, integer, string and polynomial variables are matrices. Lists and<br />
other complex data structures (such as tlists and mlists) are not matrices (but can<br />
contain matrices). These complex data structures will not be presented in this<br />
document.<br />
This is why we could begin by presenting matrices. Still, we choose to present<br />
basic data types first, because Scilab matrices are in fact a special organization of<br />
these basic building blocks.<br />
In Scilab, we can manage real and complex numbers. This always leads to some<br />
confusion if the context is not clear enough. In the following, when we write real<br />
variable, we will refer to a variable which content is not complex. Complex variables<br />
will be covered in section 3.7 as a special case of real variables. In most cases, real<br />
variables and complex variables behave in a very similar way, although some extra<br />
care must be taken when complex data is to be processed. Because it would make<br />
the presentation cumbersome, we simplify most of the discussions by considering<br />
only real variables, taking extra care with complex variables only when needed.<br />
3.1 Creating real variables<br />
In this section, we create real variables and perform simple operations with them.<br />
Scilab is an interpreted language, which implies that there is no need to declare<br />
a variable before using it. Variables are created at the moment where they are first<br />
set.<br />
In the following example, we create and set the real variable x to 1 and perform<br />
a multiplication on this variable. In Scilab, the ”=” operator means that we want<br />
to set the variable on the left hand side to the value associated with the right hand<br />
side (it is not the comparison operator, which syntax is associated with the ”==”<br />
operator).<br />
-->x=1<br />
x =<br />
1.<br />
-->x = x * 2<br />
20
x =<br />
2.<br />
+ addition<br />
- subtraction<br />
∗ multiplication<br />
/ right division, i.e. x/y = xy −1<br />
\ left division, i.e. x\y = x −1 y<br />
ˆ power, i.e. x y<br />
∗∗ power (same as ˆ)<br />
’ transpose conjugate<br />
Figure 12: Scilab elementary mathematical operators.<br />
The value of the variable is displayed each time a statement is executed. That<br />
behavior can be suppressed if the line ends with the semicolon ”;” character, as in<br />
the following example.<br />
-->y =1;<br />
-->y=y *2;<br />
All the common algebraic operators presented in figure 12 are available in Scilab.<br />
Notice that the power operator is represented by the hat ”ˆ” character so that computing<br />
x 2 in Scilab is performed by the ”xˆ2” expression or equivalently by the ”x**2”<br />
expression. The single quote ”’ ” operator will be presented in more depth in section<br />
3.7, which presents complex numbers. It will be reviewed again in section 4.12,<br />
which deals with the conjugate transpose of a matrix.<br />
3.2 Variable names<br />
Variable names may be as long as the user wants, but only the first 24 characters<br />
are taken into account in Scilab. For consistency, we should consider only variable<br />
names which are not made of more than 24 characters. All ASCII letters from ”a”<br />
to ”z”, from ”A” to ”Z” and digits from ”0” to ”9” are allowed, with the additional<br />
characters ”%”, ”_”, ”#”, ”!”, ”$”, ”?”. Notice though that variable names, whose first<br />
letter is ”%”, have a special meaning in Scilab, as we will see in section 3.5, which<br />
presents the pre-defined mathematical variables.<br />
Scilab is case sensitive, which means that upper and lower case letters are considered<br />
to be different by Scilab. In the following script, we define the two variables<br />
A and a and check that these two variables are considered to be different by Scilab.<br />
-->A = 2<br />
A =<br />
2.<br />
-->a = 1<br />
a =<br />
1.<br />
-->A<br />
A =<br />
2.<br />
21
-->a<br />
a =<br />
1.<br />
3.3 Comments and continuation lines<br />
Any line which begins with two slashes ”//” is considered by Scilab as a comment<br />
and is ignored. There is no possibility to comment out a block of lines, such as with<br />
the ”/* ... */” comments in the C language.<br />
When an executable statement is too long to be written on a single line, the<br />
second and subsequent lines are called continuation lines. In Scilab, any line which<br />
ends with two dots is considered to be the start of a new continuation line. In the<br />
following session, we give examples of Scilab comments and continuation lines.<br />
-->// This is my comment .<br />
-->x =1..<br />
- - >+2..<br />
- - >+3..<br />
-->+4<br />
x =<br />
10.<br />
3.4 Elementary mathematical functions<br />
Tables 13 and 14 present a list of elementary mathematical functions. Most of these<br />
functions take one input argument and return one output argument. These functions<br />
are vectorized in the sense that their input and output arguments are matrices. This<br />
allows to compute data with higher performance, without any loop.<br />
In the following example, we use the cos and sin functions and check the equality<br />
cos(x) 2 + sin(x) 2 = 1.<br />
-->x = cos (2)<br />
x =<br />
- 0.4161468<br />
-->y = sin (2)<br />
y =<br />
0.9092974<br />
-->x ^2+ y^2<br />
ans =<br />
1.<br />
3.5 Pre-defined mathematical variables<br />
In Scilab, several mathematical variables are pre-defined variables, whose names begin<br />
with a percent ”%” character. The variables which have a mathematical meaning<br />
are summarized in figure 15.<br />
In the following example, we use the variable %pi to check the mathematical<br />
equality cos(x) 2 + sin(x) 2 = 1.<br />
22
acos acosd acosh acoshm acosm acot acotd acoth<br />
acsc acscd acsch asec asecd asech asin asind<br />
asinh asinhm asinm atan atand atanh atanhm atanm<br />
cos cosd cosh coshm cosm cotd cotg coth<br />
cothm csc cscd csch sec secd sech sin<br />
sinc sind sinh sinhm sinm tan tand tanh<br />
tanhm tanm<br />
Figure 13: Scilab elementary mathematical functions: trigonometry.<br />
exp expm log log10 log1p log2 logm max<br />
maxi min mini modulo pmodulo sign signm sqrt<br />
sqrtm<br />
Figure 14: Scilab elementary mathematical functions: other functions.<br />
-->c= cos ( %pi )<br />
c =<br />
- 1.<br />
-->s= sin ( %pi )<br />
s =<br />
1.225D -16<br />
-->c ^2+ s^2<br />
ans =<br />
1.<br />
The fact that the computed value of sin(π) is not exactly equal to 0 is a consequence<br />
of the fact that Scilab stores the real numbers with floating point numbers,<br />
that is, with limited precision.<br />
3.6 Booleans<br />
Boolean variables can store true or false values. In Scilab, true is written with %t<br />
or %T and false is written with %f or %F. Figure 16 presents the several comparison<br />
operators which are available in Scilab. These operators return boolean values and<br />
take as input arguments all basic data types (i.e. real and complex numbers, integers<br />
and strings). The comparison operators are reviewed in section 4.14, where the<br />
emphasis is made on comparison of matrices.<br />
In the following example, we perform some algebraic computations with Scilab<br />
booleans.<br />
%i the imaginary number i<br />
%e Euler’s constant e<br />
%pi the mathematical constant π<br />
Figure 15: Pre-defined mathematical variables.<br />
23
a&b logical and<br />
a|b logical or<br />
∼a logical not<br />
a==b true if the two expressions are equal<br />
a∼=b or ab true if the two expressions are different<br />
ab true if a is greater than b<br />
a=b true if a is greater or equal to b<br />
Figure 16: Comparison operators.<br />
real real part<br />
imag imaginary part<br />
imult multiplication by i, the imaginary unitary<br />
isreal returns true if the variable has no complex entry<br />
Figure 17: Scilab complex numbers elementary functions.<br />
-->a=%T<br />
a =<br />
T<br />
-->b = ( 0 == 1 )<br />
b =<br />
F<br />
-->a&b<br />
ans =<br />
F<br />
3.7 Complex numbers<br />
Scilab provides complex numbers, which are stored as pairs of floating point numbers.<br />
The pre-defined variable %i represents the mathematical imaginary number i which<br />
satisfies i 2 = −1. All elementary functions previously presented before, such as sin<br />
for example, are overloaded for complex numbers. This means that, if their input<br />
argument is a complex number, the output is a complex number. Figure 17 presents<br />
functions which allow to manage complex numbers.<br />
In the following example, we set the variable x to 1 + i, and perform several<br />
basic operations on it, such as retrieving its real and imaginary parts. Notice how<br />
the single quote operator, denoted by ”’ ”, is used to compute the conjugate of a<br />
complex number.<br />
-->x= 1+ %i<br />
x =<br />
1. + i<br />
--> isreal (x)<br />
ans =<br />
F<br />
24
-->x’<br />
ans =<br />
1. - i<br />
-->y=1 - %i<br />
y =<br />
1. - i<br />
--> real (y)<br />
ans =<br />
1.<br />
--> imag (y)<br />
ans =<br />
- 1.<br />
int8 int16 int32<br />
uint8 uint16 uint32<br />
Figure 18: Scilab integer data types.<br />
We finally check that the equality (1+i)(1−i) = 1−i 2 = 2 is verified by Scilab.<br />
-->x*y<br />
ans =<br />
2.<br />
3.8 Integers<br />
We can create various types of integer variables with Scilab. The functions which<br />
allow to create such integers are presented in figure 18.<br />
In this section, we first review the basic features of integers, which are associated<br />
with a particular range of values. Then we analyze the conversion between integers.<br />
In the final section, we consider the behaviour of integers at the boundaries and<br />
focus on portability issues.<br />
3.8.1 Overview of integers<br />
There is a direct link between the number of bits used to store an integer and<br />
the range of values that the integer can manage. The range of an integer variable<br />
depends on the number of its bits.<br />
• An n-bit signed integer takes its values from the range [−2 n−1 , 2 n−1 − 1].<br />
• An n-bit unsigned integer takes its values from the range [0, 2 n − 1].<br />
For example, an 8-bit signed integer, as created by the int8 function, can store<br />
values in the range [−2 7 , 2 7 − 1], which simplifies to [−128, 127]. The map from the<br />
type of integer to the corresponding range of values is presented in figure 19.<br />
In the following session, we check that an unsigned 32-bit integer has values<br />
inside the range [0, 2 32 − 1], which simplifies to [0, 4294967295].<br />
--> format (25)<br />
-->n =32<br />
25
y=int8(x) a 8-bit signed integer in [−2 7 , 2 7 − 1] = [−128, 127]<br />
y=uint8(x) a 8-bit unsigned integer in [0, 2 8 − 1] = [0, 255]<br />
y=int16(x) a 16-bit signed integer in [−2 15 , 2 15 − 1] = [−32768, 32767]<br />
y=uint16(x) a 16-bit unsigned integer in [0, 2 16 − 1] = [0, 65535]<br />
y=int32(x) a 32-bit signed integer in [−2 31 , 2 31 − 1] = [−2147483648, 2147483647]<br />
y=uint32(x) a 32-bit unsigned integer in [0, 2 32 − 1] = [0, 4294967295]<br />
n =<br />
32.<br />
-->2^n - 1<br />
ans =<br />
4294967295.<br />
-->i = uint32 (0)<br />
i =<br />
0<br />
-->j=i -1<br />
j =<br />
4294967295<br />
-->k = j+1<br />
k =<br />
0<br />
Figure 19: Scilab integer functions.<br />
iconvert conversion to integer representation<br />
inttype type of integers<br />
Figure 20: Scilab integer conversion functions.<br />
3.8.2 Conversions between integers<br />
There are functions which allow to convert to and from integer data types. These<br />
functions are presented in figure 20.<br />
The inttype function allows to inquire about the type of an integer variable.<br />
Depending on the type, the function returns a corresponding value, as summarised<br />
in table 21.<br />
inttype(x) Type<br />
1 8-bit signed integer<br />
2 16-bit signed integer<br />
4 32-bit signed integer<br />
11 8-bit unsigned integer<br />
12 16-bit unsigned integer<br />
14 32-bit unsigned integer<br />
Figure 21: Types of integers returned by the inttype function.<br />
26
When two integers are added, the types of the operands are analyzed: the resulting<br />
integer type is the larger, so that the result can be stored. In the following<br />
script, we create an 8-bit integer i (which is associated with inttype=1) and a<br />
16-bit integer j (which is associated with inttype=2). The result is stored in k, a<br />
16-bit signed integer.<br />
-->i= int8 (1)<br />
i =<br />
1<br />
--> inttype (i)<br />
ans =<br />
1.<br />
-->j= int16 (2)<br />
j =<br />
2<br />
--> inttype (j)<br />
ans =<br />
2.<br />
-->k=i+j<br />
k =<br />
3<br />
--> inttype (k)<br />
ans =<br />
2.<br />
3.8.3 Circular integers and portability issues<br />
The behaviour of integers at the range boundaries deserves a particular analysis,<br />
since it is different from software to software. In Scilab, the behaviour is circular,<br />
that is, if an integer at the upper limit is incremented, the next value is at the lower<br />
limit. An example of circular behaviour is given in the following session, where<br />
--> uint8 (0+( -4:4))<br />
ans =<br />
252 253 254 255 0 1 2 3 4<br />
--> uint8 (2^8+( -4:4))<br />
ans =<br />
252 253 254 255 0 1 2 3 4<br />
--> int8 (2^7+( -4:4))<br />
ans =<br />
124 125 126 127 -128 -127 -126 -125 -124<br />
This is in contrast with other mathematical packages, such as Octave or Matlab.<br />
In these packages, if an integer is at the upper limit, the next integer stays at the<br />
upper limit. In the following Octave session, we execute the same computations as<br />
previously.<br />
octave -3.2.4. exe :1 > uint8 (0+( -4:4))<br />
ans =<br />
0 0 0 0 0 1 2 3 4<br />
octave -3.2.4. exe :5 > uint8 (2^8+( -4:4))<br />
ans =<br />
252 253 254 255 255 255 255 255 255<br />
octave -3.2.4. exe :2 > int8 (2^7+( -4:4))<br />
ans =<br />
27
124 125 126 127 127 127 127 127 127<br />
The Scilab circular way allows for a greater flexibility in the processing of integers,<br />
since it allows to write algorithms with fewer if statements. But these algorithms<br />
must be checked, particularly if they involve the boundaries. Moreover, translating<br />
a script from another computation system into Scilab may lead to different results.<br />
3.9 Floating point integers<br />
In Scilab, the default numerical variable is the double, that is the 64-bit floating point<br />
number. This is true even if we write what is mathematically an integer. In [9],<br />
Cleve Moler call this number a ”flint”, a short for floating point integer. In practice,<br />
we can safely store integers in the interval [−2 52 , 2 52 ] into doubles. We emphasize<br />
that, provided that all input, intermediate and output integer values are strictly<br />
inside the [−2 52 , 2 52 ] interval, the integer computations are exact. For example, in<br />
the following example, we perform the exact addition of two large integers which<br />
remain in the ”safe” interval.<br />
--> format (25)<br />
-->a= 2^40 - 12<br />
a =<br />
1099511627764.<br />
-->b= 2^45 + 3<br />
b =<br />
35184372088835.<br />
-->c = a + b<br />
c =<br />
36283883716599.<br />
Instead, when we perform computations outside this interval, we may have unexpected<br />
results. For example, in the following session, we see that additions involving<br />
terms slightly greater than 2 53 produce only even values.<br />
--> format (25)<br />
- - >(2^53 + (1:10)) ’<br />
ans =<br />
9007199254740992.<br />
9007199254740994.<br />
9007199254740996.<br />
9007199254740996.<br />
9007199254740996.<br />
9007199254740998.<br />
9007199254741000.<br />
9007199254741000.<br />
9007199254741000.<br />
9007199254741002.<br />
In the following session, we compute 2 52 using the floating point integer 2 in the<br />
first case, and using the 16-bit integer 2 in the second case. In the first case, no<br />
overflow occurs, even if the number is at the limit of 64-bit floating point numbers.<br />
In the second case, the result is completely wrong, because the number 2 52 cannot<br />
be represented as a 16-bit integer.<br />
- - >2^52<br />
28
ans =<br />
4503599627370496.<br />
--> uint16 (2^52)<br />
ans =<br />
0<br />
In section 4.15, we analyze the issues which arise when indexes involved to access<br />
the elements of a matrix are doubles.<br />
3.10 The ans variable<br />
Whenever we make a computation and do not store the result into an output variable,<br />
the result is stored in the default ans variable. Once it is defined, we can use this<br />
variable as any other Scilab variable.<br />
In the following session, we compute exp(3) so that the result is stored in the<br />
ans variable. Then we use its content as a regular variable.<br />
-->exp (3)<br />
ans =<br />
20.08553692318766792368<br />
-->t = log ( ans )<br />
t =<br />
3.<br />
In general, the ans variable should be used only in an interactive session, in<br />
order to progress in the computation without defining a new variable. For example,<br />
we may have forgotten to store the result of an interesting computation and do not<br />
want to recompute the result. This might be the case after a long sequence of trials<br />
and errors, where we experimented several ways to get the result without taking<br />
care of actually storing the result. In this interactive case, using ans may allow to<br />
save some human (or machine) time. Instead, if we are developping a script used in<br />
a non-interactive way, it is a bad practice to rely on the ans variable and we should<br />
store the results in regular variables.<br />
3.11 Strings<br />
Strings can be stored in variables, provided that they are delimited by double quotes<br />
”" ”. The concatenation operation is available from the ”+” operator. In the following<br />
Scilab session, we define two strings and then concatenate them with the ”+”<br />
operator.<br />
-->x = " foo "<br />
x =<br />
foo<br />
-->y=" bar "<br />
y =<br />
bar<br />
-->x+y<br />
ans =<br />
foobar<br />
They are many functions which allow to process strings, including regular expressions.<br />
We will not give further details about this topic in this document.<br />
29
3.12 Dynamic type of variables<br />
When we create and manage variables, Scilab allows to change the type of a variable<br />
dynamically. This means that we can create a real value, and then put a string<br />
variable in it, as presented in the following session.<br />
-->x=1<br />
x =<br />
1.<br />
-->x+1<br />
ans =<br />
2.<br />
-->x=" foo "<br />
x =<br />
foo<br />
-->x+" bar "<br />
ans =<br />
foobar<br />
We emphasize here that Scilab is not a typed language, that is, we do not have<br />
to declare the type of a variable before setting its content. Moreover, the type of a<br />
variable can change during the life of the variable.<br />
3.13 Exercises<br />
Exercise 3.1 (Precedence of operators) What are the results of the following computations<br />
(think about it before trying in Scilab) ?<br />
2 * 3 + 4<br />
2 + 3 * 4<br />
2 / 3 + 4<br />
2 + 3 / 4<br />
Exercise 3.2 (Parentheses) What are the results of the following computations (think about it<br />
before trying in Scilab) ?<br />
2 * (3 + 4)<br />
(2 + 3) * 4<br />
(2 + 3) / 4<br />
3 / (2 + 4)<br />
Exercise 3.3 (Exponents) What are the results of the following computations (think about it<br />
before trying in Scilab) ?<br />
1.23456789 d10<br />
1.23456789 e10<br />
1.23456789 e -5<br />
Exercise 3.4 (Functions) What are the results of the following computations (think about it<br />
before trying in Scilab) ?<br />
sqrt (4)<br />
sqrt (9)<br />
sqrt ( -1)<br />
sqrt ( -2)<br />
exp (1)<br />
log ( exp (2))<br />
exp ( log (2))<br />
30
10^2<br />
log10 (10^2)<br />
10^ log10 (2)<br />
sign (2)<br />
sign ( -2)<br />
sign (0)<br />
Exercise 3.5 (Trigonometry) What are the results of the following computations (think about<br />
it before trying in Scilab) ?<br />
cos (0)<br />
sin (0)<br />
cos ( %pi )<br />
sin ( %pi )<br />
cos ( %pi /4) - sin ( %pi /4)<br />
4 Matrices<br />
In the Scilab language, matrices play a central role. In this section, we introduce<br />
Scilab matrices and present how to create and query matrices. We also analyze how<br />
to access the elements of a matrix, either element by element, or by higher-level<br />
operations.<br />
4.1 Overview<br />
In Scilab, the basic data type is the matrix, which is defined by:<br />
• the number of rows,<br />
• the number of columns,<br />
• the type of data.<br />
The data type can be real, integer, boolean, string and polynomial. When two<br />
matrices have the same number of rows and columns, we say that the two matrices<br />
have the same shape.<br />
In Scilab, vectors are a particular case of matrices, where the number of rows (or<br />
the number of columns) is equal to 1. Simple scalar variables do not exist in Scilab:<br />
a scalar variable is a matrix with 1 row and 1 column. This is why in this chapter,<br />
when we analyze the behavior of Scilab matrices, there is the same behavior for row<br />
or column vectors (i.e. n×1 or 1×n matrices) as well as scalars (i.e. 1×1 matrices).<br />
It is fair to say that Scilab was designed mainly for matrices of real variables.<br />
This allows to perform linear algebra operations with a high-level language.<br />
By design, Scilab was created to be able to perform matrix operations as fast<br />
as possible. The building block for this feature is that Scilab matrices are stored<br />
in an internal data structure which can be managed at the interpreter level. Most<br />
basic linear algebra operations, such as addition, substraction, transpose or dot<br />
product are performed by a compiled, optimized, source code. These operations are<br />
performed with the common operators ”+”, ”-”, ”*” and the single quote ”’ ”, so<br />
that, at the Scilab level, the source code is both simple and fast.<br />
31
With these high-level operators, most matrix algorithms do not require to use<br />
loops. In fact, a Scilab script which performs the same operations with loops is<br />
typically from 10 to 100 times slower. This feature of Scilab is known as the vectorization.<br />
In order to get a fast implementation of a given algorithm, the Scilab<br />
developer should always use high-level operations, so that each statement processes<br />
a matrix (or a vector) instead of a scalar.<br />
More complex tasks of linear algebra, such as the resolution of systems of linear<br />
equations Ax = b, various decompositions (for example Gauss partial pivotal<br />
P A = LU), eigenvalue/eigenvector computations, are also performed by compiled<br />
and optimized source codes. These operations are performed by common operators<br />
like the slash ”/” or backslash ”\” or with functions like spec, which computes<br />
eigenvalues and eigenvectors.<br />
4.2 Create a matrix of real values<br />
There is a simple and efficient syntax to create a matrix with given values. The<br />
following is the list of symbols used to define a matrix:<br />
• square brackets ”[” and ”]” mark the beginning and the end of the matrix,<br />
• commas ”,” separate the values in different columns,<br />
• semicolons ”;” separate the values of different rows.<br />
The following syntax can be used to define a matrix, where blank spaces are optional<br />
(but make the line easier to read) and ”...” denotes intermediate values:<br />
A = [a11 , a12 , ... , a1n ; a21 , a22 , ... , a2n ; ...; an1 , an2 , ... , ann ].<br />
In the following example, we create a 2 × 3 matrix of real values.<br />
-->A = [1 , 2 , 3 ; 4 , 5 , 6]<br />
A =<br />
1. 2. 3.<br />
4. 5. 6.<br />
A simpler syntax is available, which does not require to use the comma and semicolon<br />
characters. When creating a matrix, the blank space separates the columns while<br />
the new line separates the rows, as in the following syntax:<br />
A = [ a11 a12 ... a1n<br />
a21 a22 ... a2n<br />
...<br />
an1 an2 ... ann ]<br />
This allows to lighten considerably the management of matrices, as in the following<br />
session.<br />
-->A = [1 2 3<br />
-->4 5 6]<br />
A =<br />
1. 2. 3.<br />
4. 5. 6.<br />
32
eye identity matrix<br />
linspace linearly spaced vector<br />
ones matrix made of ones<br />
zeros matrix made of zeros<br />
testmatrix generate some particular matrices<br />
grand random number generator<br />
rand random number generator<br />
Figure 22: Functions which generate matrices.<br />
The previous syntax for matrices is useful in the situations where matrices are<br />
to be written into data files, because it simplifies the human reading (and checking)<br />
of the values in the file, and simplifies the reading of the matrix in Scilab.<br />
Several Scilab commands allow to create matrices from a given size, i.e. from a<br />
given number of rows and columns. These functions are presented in figure 22. The<br />
most commonly used are eye, zeros and ones. These commands take two input<br />
arguments, the number of rows and columns of the matrix to generate.<br />
-->A = ones (2 ,3)<br />
A =<br />
1. 1. 1.<br />
1. 1. 1.<br />
4.3 The empty matrix []<br />
An empty matrix can be created by using empty square brackets, as in the following<br />
session, where we create a 0 × 0 matrix.<br />
-->A =[]<br />
A =<br />
[]<br />
This syntax allows to delete the content of a matrix, so that the associated<br />
memory is freed.<br />
-->A = ones (100 ,100);<br />
-->A = []<br />
A =<br />
[]<br />
4.4 Query matrices<br />
The functions in figure 23 allow to query or update a matrix.<br />
The size function returns the two output arguments nr and nc, which are the<br />
number of rows and the number of columns.<br />
-->A = ones (2 ,3)<br />
A =<br />
1. 1. 1.<br />
1. 1. 1.<br />
-->[nr ,nc ]= size (A)<br />
33
size size of objects<br />
matrix reshape a vector or a matrix to a different size matrix<br />
resize_matrix create a new matrix with a different size<br />
nc =<br />
3.<br />
nr =<br />
2.<br />
Figure 23: Functions which query or modify matrices.<br />
The size function is of important practical value when we design a function,<br />
since the processing that we must perform on a given matrix may depend on its<br />
shape. For example, to compute the norm of a given matrix, different algorithms<br />
may be used depending on if the matrix is a column vector with size nr × 1 and<br />
nr > 0, a row vector with size 1 × nc and nc > 0, or a general matrix with size<br />
nr × nc and nr, nc > 1.<br />
The size function has also the following syntax<br />
nr = size ( A , sel )<br />
which allows to get only the number of rows or the number of columns and where<br />
sel can have the following values<br />
• sel=1 or sel="r", returns the number of rows,<br />
• sel=2 or sel="c", returns the number of columns.<br />
• sel="*", returns the total number of elements, that is, the number of columns<br />
times the number of rows.<br />
In the following session, we use the size function in order to compute the total<br />
number of elements of a matrix.<br />
-->A = ones (2 ,3)<br />
A =<br />
1. 1. 1.<br />
1. 1. 1.<br />
--> size (A,"*")<br />
ans =<br />
6.<br />
4.5 Accessing the elements of a matrix<br />
There are several methods to access the elements of a matrix A:<br />
• the whole matrix, with the A syntax,<br />
• element by element with the A(i,j) syntax,<br />
• a range of index values with the colon ”:” operator.<br />
34
The colon operator will be reviewed in the next section.<br />
To make a global access to all the elements of the matrix, the simple variable<br />
name, for example A, can be used. All elementary algebra operations are available<br />
for matrices, such as the addition with ”+”, subtraction with ”-”, provided that the<br />
two matrices have the same size. In the following script, we add all the elements of<br />
two matrices.<br />
-->A = ones (2 ,3)<br />
A =<br />
1. 1. 1.<br />
1. 1. 1.<br />
-->B = 2 * ones (2 ,3)<br />
B =<br />
2. 2. 2.<br />
2. 2. 2.<br />
-->A+B<br />
ans =<br />
3. 3. 3.<br />
3. 3. 3.<br />
One element of a matrix can be accessed directly with the A(i,j) syntax, provided<br />
that i and j are valid index values.<br />
We emphasize that, by default, the first index of a matrix is 1. This contrasts<br />
with other languages, such as the C language for instance, where the first index is<br />
0. For example, assume that A is an nr × nc matrix, where nr is the number of rows<br />
and nc is the number of columns. Therefore, the value A(i,j) has a sense only if<br />
the index values i and j satisfy 1 ≤ i ≤ nr and 1 ≤ j ≤ nc. If the index values are<br />
not valid, an error is generated, as in the following session.<br />
-->A = ones (2 ,3)<br />
A =<br />
1. 1. 1.<br />
1. 1. 1.<br />
-->A (1 ,1)<br />
ans =<br />
1.<br />
-->A (12 ,1)<br />
!-- error 21<br />
Invalid index .<br />
-->A (0 ,1)<br />
!-- error 21<br />
Invalid index .<br />
Direct access to matrix elements with the A(i,j) syntax should be used only<br />
when no other higher-level Scilab commands can be used. Indeed, Scilab provides<br />
many features which allow to produce simpler and faster computations, based on<br />
vectorization. One of these features is the colon ”:”operator, which is very important<br />
in practical situations.<br />
4.6 The colon ”:” operator<br />
The simplest syntax of the colon operator is the following:<br />
v = i:j<br />
35
where i is the starting index and j is the ending index with i ≤ j. This creates<br />
the vector v = (i, i + 1, . . . , j). In the following session, we create a vector of index<br />
values from 2 to 4 in one statement.<br />
-->v = 2:4<br />
v =<br />
2. 3. 4.<br />
The complete syntax allows to configure the increment used when generating the<br />
index values, i.e. the step. The complete syntax for the colon operator is<br />
v = i:s:j<br />
where i is the starting index, j is the ending index and s is the step. This command<br />
creates the vector v = (i, i + s, i + 2s, . . . , i + ns) where n is the greatest integer<br />
such that i + ns ≤ j. If s divides j − i, then the last index in the vector of index<br />
values is j. In other cases, we have i + ns < j. While in most situations, the step s<br />
is positive, it might also be negative.<br />
In the following session, we create a vector of increasing index values from 3 to<br />
10 with a step equal to 2.<br />
-->v = 3:2:10<br />
v =<br />
3. 5. 7. 9.<br />
Notice that the last value in the vector v is i + ns = 9, which is smaller than j = 10.<br />
In the following session, we present two examples where the step is negative. In<br />
the first case, the colon operator generates decreasing index values from 10 to 4. In<br />
the second example, the colon operator generates an empty matrix because there<br />
are no values lower than 3 and greater than 10 at the same time.<br />
-->v = 10: -2:3<br />
v =<br />
10. 8. 6. 4.<br />
-->v = 3: -2:10<br />
v =<br />
[]<br />
With a vector of index values, we can access the elements of a matrix in a given<br />
range, as with the following simplified syntax<br />
A(i:j,k:l)<br />
where i,j,k,l are starting and ending index values. The complete syntax is<br />
A(i:s:j,k:t:l), where s and t are the steps.<br />
For example, suppose that A is a 4 × 5 matrix, and that we want to access the<br />
elements ai,j for i = 1, 2 and j = 3, 4. With the Scilab language, this can be done<br />
in just one statement, by using the syntax A(1:2,3:4), as showed in the following<br />
session.<br />
-->A = testmatrix (" hilb " ,5)<br />
A =<br />
25. - 300. 1050. - 1400. 630.<br />
- 300. 4800. - 18900. 26880. - 12600.<br />
1050. - 18900. 79380. - 117600. 56700.<br />
- 1400. 26880. - 117600. 179200. - 88200.<br />
36
A the whole matrix<br />
A(:,:) the whole matrix<br />
A(i:j,k) the elements at rows from i to j, at column k<br />
A(i,j:k) the elements at row i, at columns from j to k<br />
A(i,:) the row i<br />
A(:,j) the column j<br />
Figure 24: Access to a matrix with the colon ”:” operator.<br />
630. - 12600. 56700. - 88200. 44100.<br />
-->A (1:2 ,3:4)<br />
ans =<br />
1050. - 1400.<br />
- 18900. 26880.<br />
In some circumstances, it may happen that the index values are the result of a<br />
computation. For example, the algorithm may be based on a loop where the index<br />
values are updated regularly. In these cases, the syntax<br />
A(vi ,vj),<br />
where vi,vj are vectors of index values, can be used to designate the elements of<br />
A whose subscripts are the elements of vi and vj. That syntax is illustrated in the<br />
following example.<br />
-->A = testmatrix (" hilb " ,5)<br />
A =<br />
25. - 300. 1050. - 1400. 630.<br />
- 300. 4800. - 18900. 26880. - 12600.<br />
1050. - 18900. 79380. - 117600. 56700.<br />
- 1400. 26880. - 117600. 179200. - 88200.<br />
630. - 12600. 56700. - 88200. 44100.<br />
-->vi =1:2<br />
vi =<br />
1. 2.<br />
-->vj =3:4<br />
vj =<br />
3. 4.<br />
-->A(vi ,vj)<br />
ans =<br />
1050. - 1400.<br />
- 18900. 26880.<br />
-->vi=vi +1<br />
vi =<br />
2. 3.<br />
-->vj=vj +1<br />
vj =<br />
4. 5.<br />
-->A(vi ,vj)<br />
ans =<br />
26880. - 12600.<br />
- 117600. 56700.<br />
37
There are many variations on this syntax, and figure 24 presents some of the<br />
possible combinations.<br />
For example, in the following session, we use the colon operator in order to<br />
interchange two rows of the matrix A.<br />
-->A = testmatrix (" hilb " ,3)<br />
A =<br />
9. - 36. 30.<br />
- 36. 192. - 180.<br />
30. - 180. 180.<br />
-->A ([1 2] ,:) = A ([2 1] ,:)<br />
A =<br />
- 36. 192. - 180.<br />
9. - 36. 30.<br />
30. - 180. 180.<br />
We could also interchange the columns of the matrix A with the statement A(:,[3<br />
1 2]).<br />
In this section we have analyzed several practical use of the colon operator.<br />
Indeed, this operator is used in many scripts where performance matters, since it<br />
allows to access many elements of a matrix in just one statement. This is associated<br />
with the vectorization of scripts, a subject which is central to the Scilab language<br />
and is reviewed throughout this document.<br />
4.7 The eye matrix<br />
The eye function allows to create the identity matrix with the size which depends on<br />
the context. Its name has been chosen in place of I in order to avoid the confusion<br />
with an index or with the imaginary number.<br />
In the following session, we add 3 to the diagonal elements of the matrix A.<br />
-->A = ones (3 ,3)<br />
A =<br />
1. 1. 1.<br />
1. 1. 1.<br />
1. 1. 1.<br />
-->B = A + 3* eye ()<br />
B =<br />
4. 1. 1.<br />
1. 4. 1.<br />
1. 1. 4.<br />
In the following session, we define an identity matrix B with the eye function depending<br />
on the size of a given matrix A.<br />
-->A = ones (2 ,2)<br />
A =<br />
1. 1.<br />
1. 1.<br />
-->B = eye (A)<br />
B =<br />
1. 0.<br />
0. 1.<br />
38
Finally, we can use the eye(m,n) syntax in order to create an identity matrix with<br />
m rows and n columns.<br />
4.8 Matrices are dynamic<br />
The size of a matrix can grow or reduce dynamically. This allows to adapt the size<br />
of the matrix to the data it contains.<br />
Consider the following session where we define a 2 × 3 matrix.<br />
-->A = [1 2 3; 4 5 6]<br />
A =<br />
1. 2. 3.<br />
4. 5. 6.<br />
In the following session, we insert the value 7 at the indices (3, 1). This creates the<br />
third row in the matrix, sets the A(3, 1) entry to 7 and fills the other values of the<br />
newly created row with zeros.<br />
-->A (3 ,1) = 7<br />
A =<br />
1. 2. 3.<br />
4. 5. 6.<br />
7. 0. 0.<br />
The previous example showed that matrices can grow. In the following session, we<br />
see that we can also reduce the size of a matrix. This is done by using the empty<br />
matrix ”[]” operator in order to delete the third column.<br />
-->A (: ,3) = []<br />
A =<br />
1. 2.<br />
4. 5.<br />
7. 0.<br />
We can also change the shape of the matrix with the matrix function. The matrix<br />
function allows to reshape a source matrix into a target matrix with a different size.<br />
The transformation is performed column by column, by stacking the elements of the<br />
source matrix. In the following session, we reshape the matrix A, which has 3×2 = 6<br />
elements into a row vector with 6 columns.<br />
-->B = matrix (A ,1 ,6)<br />
B =<br />
1. 4. 7. 2. 5. 0.<br />
4.9 The dollar ”$” operator<br />
Usually, we make use of indices to make reference from the start of a matrix. By<br />
opposition, the dollar ”$” operator allows to reference elements from the end of<br />
the matrix. The ”$” operator signifies ”the index corresponding to the last” row or<br />
column, depending on the context. This syntax is associated with an algebra, so that<br />
the index $-i corresponds to the index ℓ−i, where ℓ is the number of corresponding<br />
rows or columns. Various uses of the dollar operator are presented in figure 25.<br />
In the following example, we consider a 3 × 3 matrix and we access the element<br />
A(2,1) = A(nr-1,nc-2) = A($-1,$-2) because nr = 3 and nc = 3.<br />
39
A(i,$) the element at row i, at column nc<br />
A($,j) the element at row nr, at column j<br />
A($-i,$-j) the element at row nr − i, at column nc − j<br />
Figure 25: Access to a matrix with the dollar ”$” operator. The ”$” operator signifies<br />
”the last index”.<br />
-->A= testmatrix (" hilb " ,3)<br />
A =<br />
9. - 36. 30.<br />
- 36. 192. - 180.<br />
30. - 180. 180.<br />
-->A($ -1 ,$ -2)<br />
ans =<br />
- 36.<br />
The dollar ”$”operator allows to add elements dynamically at the end of matrices.<br />
In the following session, we add a row at the end of the Hilbert matrix.<br />
-->A($ +1 ,:) = [1 2 3]<br />
A =<br />
9. - 36. 30.<br />
- 36. 192. - 180.<br />
30. - 180. 180.<br />
1. 2. 3.<br />
The ”$” operator is used most of the time in the context of the ”$+1” statement,<br />
which allows to add at the end of a matrix. This can be convenient, since it avoids<br />
the need of updating the number of rows or columns continuously although it should<br />
be used with care, only in the situations where the number of rows or columns cannot<br />
be known in advance. The reason is that the interpreter has to internally re-allocate<br />
memory for the entire matrix and to copy the old values to the new destination.<br />
This can lead to performance penalties and this is why we should be warned against<br />
bad uses of this operator. All in all, the only good use of the ”$+1” statement is<br />
when we do not know in advance the final number of rows or columns.<br />
4.10 Low-level operations<br />
All common algebra operators, such as ”+”, ”-”, ”*” and ”/”, are available with real<br />
matrices. In the next sections, we focus on the exact signification of these operators,<br />
so that many sources of confusion are avoided.<br />
The rules for the ”+”and ”-”operators are directly applied from the usual algebra.<br />
In the following session, we add two 2 × 2 matrices.<br />
-->A = [1 2<br />
-->3 4]<br />
A =<br />
1. 2.<br />
3. 4.<br />
-->B =[5 6<br />
-->7 8]<br />
B =<br />
40
5. 6.<br />
7. 8.<br />
-->A+B<br />
ans =<br />
6. 8.<br />
10. 12.<br />
When we perform an addition of two matrices, if one operand is a 1 × 1 matrix<br />
(i.e., a scalar), the value of this scalar is added to each element of the second matrix.<br />
This feature is shown in the following session.<br />
-->A = [1 2<br />
-->3 4]<br />
A =<br />
1. 2.<br />
3. 4.<br />
-->A + 1<br />
ans =<br />
2. 3.<br />
4. 5.<br />
The addition is possible only if the two matrices are conformable to addition. In<br />
the following session, we try to add a 2 × 3 matrix with a 2 × 2 matrix and check<br />
that this is not possible.<br />
-->A = [1 2<br />
-->3 4]<br />
A =<br />
1. 2.<br />
3. 4.<br />
-->B = [1 2 3<br />
-->4 5 6]<br />
B =<br />
1. 2. 3.<br />
4. 5. 6.<br />
-->A+B<br />
!-- error 8<br />
Inconsistent addition .<br />
Elementary operators which are available for matrices are presented in figure 26.<br />
The Scilab language provides two division operators, that is,the right division ”/”<br />
and the left division ”\”. The right division is so that X = A/B = AB −1 is the<br />
solution of XB = A. The left division is so that X = A\B = A −1 B is the solution<br />
of AX = B. The left division A\B computes the solution of the associated least<br />
square problem if A is not a square matrix.<br />
Figure 26 separates the operators which treat the matrices as a whole and the<br />
elementwise operators, which are presented in the next section.<br />
4.11 Elementwise operations<br />
If a dot ”.” is written before an operator, it is associated with an elementwise<br />
operator, i.e. the operation is performed element-by-element. For example, with<br />
the usual multiplication operator ”*”, the content of the matrix C=A*B is cij =<br />
41
+ addition .+ elementwise addition<br />
- subtraction .- elementwise subtraction<br />
∗ multiplication .∗ elementwise multiplication<br />
/ right division ./ elementwise right division<br />
\ left division .\ elementwise left division<br />
ˆ or ∗∗ power, i.e. x y .ˆ elementwise power<br />
’ transpose and conjugate .’ transpose (but not conjugate)<br />
Figure 26: Matrix operators and elementwise operators.<br />
�<br />
k=1,n aikbkj. With the elementwise multiplication ”.*” operator, the content of the<br />
matrix C=A.*B is cij = aijbij.<br />
In the following session, two matrices are multiplied with the ”*” operator and<br />
then with the elementwise ”.*” operator, so that we can check that the results are<br />
different.<br />
-->A = ones (2 ,2)<br />
A =<br />
1. 1.<br />
1. 1.<br />
-->B = 2 * ones (2 ,2)<br />
B =<br />
2. 2.<br />
2. 2.<br />
-->A*B<br />
ans =<br />
4. 4.<br />
4. 4.<br />
-->A.*B<br />
ans =<br />
2. 2.<br />
2. 2.<br />
4.12 Conjugate transpose and non-conjugate transpose<br />
There might be some confusion when the elementwise single quote ”.’ ” and the<br />
regular single quote ”’ ” operators are used without a careful knowledge of their exact<br />
definitions. With a matrix of doubles containing real values, the single quote ”’<br />
” operator only transposes the matrix. Instead, when a matrix of doubles containing<br />
complex values is used, the single quote ”’ ” operator transposes and conjugates the<br />
matrix. Hence, the operation A=Z’ produces a matrix with entries Ajk = Xkj − iYkj,<br />
where i is the imaginary number such that i 2 = −1 and X and Y are the real and<br />
imaginary parts of the matrix Z. The elementwise single quote ”.’ ” always transposes<br />
without conjugating the matrix, be it real or complex. Hence, the operation<br />
A=Z.’ produces a matrix with entries Ajk = Xkj + iYkj.<br />
In the following session, an unsymetric matrix of doubles containing complex<br />
values is used, so that the difference between the two operators is obvious.<br />
-->A = [1 2;3 4] + %i * [5 6;7 8]<br />
A =<br />
42
1. + 5.i 2. + 6.i<br />
3. + 7.i 4. + 8.i<br />
-->A’<br />
ans =<br />
1. - 5.i 3. - 7.i<br />
2. - 6.i 4. - 8.i<br />
-->A.’<br />
ans =<br />
1. + 5.i 3. + 7.i<br />
2. + 6.i 4. + 8.i<br />
In the following session, we define an unsymetric matrix of doubles containing real<br />
values and see that the results of the ”’ ” and ”.’ ” are the same in this particular<br />
case.<br />
-->B = [1 2;3 4]<br />
B =<br />
1. 2.<br />
3. 4.<br />
-->B’<br />
ans =<br />
1. 3.<br />
2. 4.<br />
-->B.’<br />
ans =<br />
1. 3.<br />
2. 4.<br />
Many bugs are created due to this confusion, so that it is mandatory to ask<br />
yourself the following question: what happens if my matrix is complex? If the<br />
answer is ”I want to transpose only”, then the elementwise quote ”.’ ” operator is<br />
to be used.<br />
4.13 Multiplication of two vectors<br />
Let u ∈ R n be a column vector and v T ∈ R n be a column vector. The matrix<br />
A = uv T has entries Aij = uivj. In the following Scilab session, we multiply the<br />
column vector u by the row vector v and store the result in the variable A.<br />
-->u = [1<br />
-->2<br />
-->3]<br />
u =<br />
1.<br />
2.<br />
3.<br />
-->v = [4 5 6]<br />
v =<br />
4. 5. 6.<br />
-->u*v<br />
ans =<br />
4. 5. 6.<br />
8. 10. 12.<br />
12. 15. 18.<br />
43
and(A,"r") rowwise ”and”<br />
and(A,"c") columnwise ”and”<br />
or(A,"r") rowwise ”or”<br />
or(A,"c") columnwise ”or”<br />
Figure 27: Special comparison operators for matrices. The usual operators ”A = [1 2 7<br />
-->6 9 8]<br />
A =<br />
1. 2. 7.<br />
6. 9. 8.<br />
-->A >3<br />
ans =<br />
F F T<br />
T T T<br />
-->B =[4 5 6<br />
-->7 8 9]<br />
B =<br />
4. 5. 6.<br />
7. 8. 9.<br />
-->A>B<br />
44
ans =<br />
F F T<br />
F T F<br />
-->or(A>B,"r")<br />
ans =<br />
F T T<br />
4.15 Issues with floating point integers<br />
In this section, we analyze the problems which might arise when we use integers<br />
which are stored as floating point numbers. If used without caution, these numbers<br />
can lead to disastrous results, as we are going to see.<br />
Assume that the matrix A is a square 2×2 matrix. In order to access the element<br />
(2,1) of this matrix, we can use a constant index, such as A(2,1), which is safe.<br />
Moreover, we can access the element (2,1) by using floating point values, as in the<br />
following session.<br />
-->A = testmatrix (" hilb " ,2)<br />
A =<br />
4. - 6.<br />
- 6. 12.<br />
Now, in order to access the element of the matrix, we can use variables i and j<br />
and use the statement A(i,j), as in the following session.<br />
-->i = 2<br />
i =<br />
2.<br />
-->j = 1<br />
j =<br />
1.<br />
-->A(i,j)<br />
ans =<br />
- 6.<br />
In the previous session, we emphasize that the variables i and j are doubles. This<br />
is why the following statement is valid.<br />
-->A( 2 , [1.0 1.1 1.5 1.9] )<br />
ans =<br />
- 6. - 6. - 6. - 6.<br />
The previous session shows that the floating point values 1.0, 1.1, 1.5 and 1.9 are<br />
all converted to the integer 1, as if the int function had been used to convert the<br />
floating point number into an integer. Indeed, the int function returns the floating<br />
point number storing the integer part of the given floating point number: in some<br />
sense, it rounds towards zero. For example, int(1.0), int(1.1), int(1.5) and<br />
int(1.9) all returns 1 while int(-1.0), int(-1.1), int(-1.5) and int(-1.9) all<br />
returns -1.<br />
Notice that the rounding behavior can be explained by the int function, and not<br />
by the floor function. This can be seen when we consider negative integer values,<br />
where the returned values of the two functions are not the same. Indeed, assume<br />
that the matrix A is a 4 × 4 matrix, as created by A = testmatrix("hilb",4) for<br />
45
example. The triu function returns the upper triangle part of the input matrix.<br />
The statements triu(A,-1), triu(A,int(-1.5)) and triu(A,-1.5) produce the<br />
same result. Instead, the statement triu(A,floor(-1.5)) produces the same result<br />
as triu(A,-2).<br />
This system allows to have a language which is both simple and efficient. But it<br />
may also have unfortunate consequences, sometimes leading to unexpected results.<br />
For example, consider the following session.<br />
--> ones (1 ,1)<br />
ans =<br />
1.<br />
--> ones (1 ,(1 -0.9)*10)<br />
ans =<br />
[]<br />
If the computations were performed in exact arithmetic, the result of (1 − 0.9) ∗ 10<br />
should be equal to 1, leading to a 1×1 matrix. Instead, the statement ones(1,(1-0.9)*10)<br />
creates an empty matrix, because the value returned by the int function is equal to<br />
zero, as presented in the following session.<br />
-->int ((1 -0.9)*10)<br />
ans =<br />
0.<br />
Indeed, the decimal number 0.9 cannot be exactly represented as a double precision<br />
floating point number. This leads to a rounding, so that the floating point representation<br />
of 1-0.9 is slightly smaller than 0.1. When the multiplication (1-0.9)*10 is<br />
performed, the floating point result is therefore slightly smaller than 1, as presented<br />
in the following session.<br />
--> format (25)<br />
- - >1 -0.9<br />
ans =<br />
0.0999999999999999777955<br />
- - >(1 -0.9)*10<br />
ans =<br />
0.9999999999999997779554<br />
Then the floating point number 0.999999999999999 is considered as the integer zero,<br />
which makes the ones function return an empty matrix. The origin of this issue is<br />
therefore the use of the floating point number 0.1, which should not have been used<br />
without caution to perform integer arithmetic with floating point numbers.<br />
4.16 More on elementary functions<br />
In this section, we analyse several elementary functions, especially degree-based<br />
trigonometry functions, logarithm functions and matrix-based elementary functions.<br />
Trigonometry functions such as sin and cos are provided with the classical<br />
input argument in radian. But some other trigonometry functions, such as the<br />
cosd function for example, are taking an input argument in degree. This means<br />
that, in the mathematical sense tand(x) = tan(xπ/180). These functions can be<br />
easily identified because their name ends with the letter ”d”, e.g. cosd, sind among<br />
others. The key advantage for the degree-based elementary functions is that they<br />
46
provide exact results when their argument has special mathematical values, such as<br />
multiples of 90 ◦ . Indeed, the implementation of the degree-based functions is based<br />
on an argument reduction which is exact for integer values. This allows to get exact<br />
floating point results for particular cases.<br />
In the following session, we compute sin(π) and sind(180), which are mathematically<br />
equal, but are associated with different floating point results.<br />
-->sin ( %pi )<br />
ans =<br />
1.225D -16<br />
--> sind (180)<br />
ans =<br />
0.<br />
The fact that sin(π) is not exactly zero is associated with the limited precision of<br />
floating point numbers. Indeed, the argument π is stored in memory with a limited<br />
number of significant digits, which leads to rounding. Instead, the argument 180 is<br />
represented exactly as a floating point number, because it is a small integer. Hence,<br />
the value of sind(180) is computed by the sind function as sin(0). Once again,<br />
the number zero is exactly represented by a floating point number. Moreover, the sin<br />
function is represented in the [−π/2, π/2] interval by a polynomial of the form p(x) =<br />
x+x 3 q(x 2 ) where q is a low degree polynomial. Hence, we get sind(180)=sin(0)=0,<br />
which is the exact result.<br />
The log function computes the natural logarithm of the input argument, that is,<br />
the inverse of the function exp= e x , where e is Euler’s constant. In order to compute<br />
the logarithm function for other bases, we can use the functions log10 and log2,<br />
associated with bases 10 and 2 respectively. In the following session, we compute<br />
the values of the log, log10 and log2 functions for some specific values of x.<br />
-->x = [ exp (1) exp (2) 1 10 2^1 2^10]<br />
x =<br />
2.7182818 7.3890561 1. 10. 2. 1024.<br />
-->[x’ log (x ’) log10 (x ’) log2 (x ’)]<br />
ans =<br />
2.7182818 1. 0.4342945 1.442695<br />
7.3890561 2. 0.8685890 2.8853901<br />
1. 0. 0. 0.<br />
10. 2.3025851 1. 3.3219281<br />
2. 0.6931472 0.30103 1.<br />
1024. 6.9314718 3.0103 10.<br />
The first column in the previous table contains various values of x. The column<br />
number 2 contains various values of log(x), while the columns 3 and 4 contains<br />
various values of log10(x) and log2(x).<br />
Most functions are elementwise, that is, given an input matrix, apply the same<br />
function for each entry of the matrix. Still, some functions have a special meaning<br />
with respect to linear algebra. For example, the matrix exponential of a function<br />
is defined by e X = �<br />
k=0,∞<br />
1<br />
k! Xk , where X is a square n × n matrix. In order to<br />
compute the exponential of a matrix, we can use the expm function. Obviously,<br />
the elementwise exponential function exp does not returns the same result. More<br />
generally, the functions which have a special meaning with respect to matrices have<br />
a name which ends with the letter ”m”, e.g. expm, sinm, among others. In the<br />
47
chol Cholesky factorization<br />
companion companion matrix<br />
cond condition number<br />
det determinant<br />
inv matrix inverse<br />
linsolve linear equation solver<br />
lsq linear least square problems<br />
lu LU factors of Gaussian elimination<br />
qr QR decomposition<br />
rcond inverse condition number<br />
spec eigenvalues<br />
svd singular value decomposition<br />
testmatrix a collection of test matrices<br />
trace trace<br />
Figure 28: Some common functions for linear algebra.<br />
following session, we define a 2 × 2 matrix containing specific multples of π/2 and<br />
use the sin and sinm functions.<br />
-->A = [ %pi /2 %pi ; 2* %pi 3* %pi /2]<br />
A =<br />
1.5707963 3.1415927<br />
6.2831853 4.712389<br />
-->sin (A)<br />
ans =<br />
1. 1.225D -16<br />
- 2.449D -16 - 1.<br />
--> sinm (A)<br />
ans =<br />
- 0.3333333 0.6666667<br />
1.3333333 0.3333333<br />
4.17 Higher-level linear algebra features<br />
In this section, we briefly introduce higher-level linear algebra features of Scilab.<br />
Scilab has a complete linear algebra library, which is able to manage both dense<br />
and sparse matrices. A complete book on linear algebra would be required to make<br />
a description of the algorithms provided by Scilab in this field, and this is obviously<br />
out of the scope of this document. Figure 28 presents a list of the most common<br />
linear algebra functions.<br />
4.18 Exercises<br />
Exercise 4.1 (Plus one) Create the vector (x1 + 1, x2 + 1, x3 + 1, x4 + 1) with the following x.<br />
x = 1:4;<br />
Exercise 4.2 (Vectorized multiplication) Create the vector (x1y1, x2y2, x3y3, x4y4) with the<br />
following x and y.<br />
48
x = 1:4;<br />
y = 5:8;<br />
�<br />
1<br />
Exercise 4.3 (Vectorized invert) Create the vector<br />
x = 1:4;<br />
�<br />
x1<br />
Exercise 4.4 (Vectorized division) Create the vector y1<br />
y.<br />
x = 12*(6:9);<br />
y = 1:4;<br />
x1<br />
�<br />
1 1 1 , , , with the following x.<br />
x2 x3 x4<br />
, x2<br />
y2<br />
, x3<br />
y3<br />
�<br />
x4<br />
, with the following x and<br />
y4<br />
Exercise 4.5 (Vectorized squaring) Create the vector � x2 1, x2 2, x2 3, x2 �<br />
4 with x = 1, 2, 3, 4.<br />
Exercise 4.6 (Vectorized sinus) Create the vector (sin(x1), sin(x2), . . . , sin(x10)) with x is a<br />
vector of 10 values linearly chosen in the interval [0, π].<br />
Exercise 4.7 (Vectorized function) Compute the y = f(x) values of the function f defined by<br />
the equation<br />
f(x) = log 10 (r/10 x + 10 x ) (1)<br />
with r = 2.220.10 −16 and x a vector of 100 values linearly chosen in the interval [−16, 0].<br />
5 Looping and branching<br />
In this section, we describe how to make conditional statements, that is, we present<br />
the if statement. We present the select statement, which allows to create more<br />
complex selections. We present Scilab loops, that is, we present the for and while<br />
statements. We finally present two main tools to manage loops, that is, the break<br />
and continue statements.<br />
5.1 The if statement<br />
The if statement allows to perform a statement if a condition is satisfied. The<br />
if uses a boolean variable to perform its choice: if the boolean is true, then the<br />
statement is executed. A condition is closed when the end keyword is met. In the<br />
following script, we display the string ”Hello!” if the condition %t, which is always<br />
true, is satisfied.<br />
if ( %t ) then<br />
disp (" Hello !")<br />
end<br />
The previous script produces:<br />
Hello !<br />
If the condition is not satisfied, the else statement allows to perform an alternative<br />
statement, as in the following script.<br />
if ( %f ) then<br />
disp (" Hello !")<br />
else<br />
disp (" Goodbye !")<br />
end<br />
49
The previous script produces:<br />
Goodbye !<br />
In order to get a boolean, any comparison operator can be used, e.g. ”==”, ”>”,<br />
etc... or any function which returns a boolean. In the following session, we use the<br />
”==” operator to display the message ”Hello !”.<br />
i = 2<br />
if ( i == 2 ) then<br />
disp (" Hello !")<br />
else<br />
disp (" Goodbye !")<br />
end<br />
It is important not to use the ”=” operator in the condition, i.e. we must not use<br />
the statement if ( i = 2 ) then. It is an error, since the ”=” operator allows to<br />
set a variable: it is different from the comparison operator ”==”. In case of an error,<br />
Scilab warns us that something wrong happened.<br />
-->i = 2<br />
i =<br />
2.<br />
-->if ( i = 2 ) then<br />
Warning : obsolete use of ’=’ instead of ’== ’.<br />
!<br />
--> disp (" Hello !")<br />
Hello !<br />
--> else<br />
--> disp (" Goodbye !")<br />
-->end<br />
When we have to combine several conditions, the elseif statement is helpful.<br />
In the following script, we combine several elseif statements in order to manage<br />
various values of the integer i.<br />
i = 2<br />
if ( i == 1 ) then<br />
disp (" Hello !")<br />
elseif ( i == 2 ) then<br />
disp (" Goodbye !")<br />
elseif ( i == 3 ) then<br />
disp (" Tchao !")<br />
else<br />
disp ("Au Revoir !")<br />
end<br />
We can use as many elseif statements that we need, and this allows to create<br />
as complicated branches as required. But if there are many elseif statements<br />
required, most of the time that implies that a select statement should be used<br />
instead.<br />
5.2 The select statement<br />
The select statement allows to combine several branches in a clear and simple<br />
way. Depending on the value of a variable, it allows to perform the statement<br />
50
corresponding to the case keyword. There can be as many branches as required.<br />
In the following script, we want to display a string which corresponds to the<br />
given integer i.<br />
i = 2<br />
select i<br />
case 1<br />
disp (" One ")<br />
case 2<br />
disp (" Two ")<br />
case 3<br />
disp (" Three ")<br />
else<br />
disp (" Other ")<br />
end<br />
The previous script prints out ”Two”, as expected.<br />
The else branch is used if all the previous case conditions are false.<br />
The else statement is optional, but is considered a good programming practice.<br />
Indeed, even if the programmer thinks that the associated case cannot happen,<br />
there may still exist a bug in the logic, so that all the conditions are false while they<br />
should not. In this case, if the else statement does not interrupt the execution, the<br />
remaining statements in the script will be executed. This can lead to unexpected<br />
results. In the worst scenario, the script still works but with inconsistent results.<br />
Debugging such scripts is extremely difficult and may lead to a massive loss of time.<br />
Therefore, the else statement should be included in most select sequences. In<br />
order to manage these unexpected events, we often combine a select statement<br />
with the error function.<br />
The error function generates an error associated with the given message. When<br />
an error is generated, the execution is interrupted and the interpreter quits all the<br />
functions. The call stack is therefore cleared and the script stops.<br />
In the following script, we display a message depending on the the value of the<br />
positive variable i. If that variable is negative, we generate an error.<br />
i = -5;<br />
select i<br />
case 1<br />
disp (" One ")<br />
case 2<br />
disp (" Two ")<br />
case 3<br />
disp (" Three ")<br />
else<br />
error ( " Unexpected value of the parameter i" )<br />
end<br />
The previous script produces the following output.<br />
-->i = -5;<br />
--> select i<br />
--> case 1<br />
--> disp (" One ")<br />
--> case 2<br />
--> disp (" Two ")<br />
51
--> case 3<br />
--> disp (" Three ")<br />
--> else<br />
--> error ( " Unexpected value of the parameter i" )<br />
Unexpected value of the parameter i<br />
In practice, when we see a select statement without the corresponding else,<br />
we may wonder if the developer wrote this on purpose or based on the assumption<br />
that it will never happen. Most of the time, this assumption can be discussed.<br />
5.3 The for statement<br />
The for statement allows to perform loops, i.e. allows to perform a given action<br />
several times. Most of the time, a loop is performed over integer values, which go<br />
from a starting to an ending index value. We will see, at the end of this section,<br />
that the for statement is in fact much more general, as it allows to loop through<br />
the values of a matrix.<br />
In the following Scilab script, we display the value of i, from 1 to 5.<br />
for i = 1 : 5<br />
disp (i)<br />
end<br />
The previous script produces the following output.<br />
1.<br />
2.<br />
3.<br />
4.<br />
5.<br />
In the previous example, the loop is performed over a matrix of floating point<br />
numbers containing integer values. Indeed, we used the colon ”:” operator in order<br />
to produce the vector of index values [1 2 3 4 5]. The following session shows<br />
that the statement 1:5 produces all the required integer values into a row vector.<br />
-->i = 1:5<br />
i =<br />
1. 2. 3. 4. 5.<br />
We emphasize that, in the previous loop, the matrix 1:5 is a matrix of doubles.<br />
Therefore, the variable i is also a double. This point will be reviewed later in this<br />
section, when we will consider the general form of for loops.<br />
We can use a more complete form of the colon operator in order to display the<br />
odd integers from 1 to 5. In order to do this, we set the step of the colon operator<br />
to 2. This is performed by the following Scilab script.<br />
for i = 1 : 2 : 5<br />
disp (i)<br />
end<br />
The previous script produces the following output.<br />
1.<br />
3.<br />
5.<br />
52
The colon operator can be used to perform backward loops. In the following<br />
script, we display the numbers from 5 to 1.<br />
for i = 5 : - 1 : 1<br />
disp (i)<br />
end<br />
The previous script produces the following output.<br />
5.<br />
4.<br />
3.<br />
2.<br />
1.<br />
Indeed, the statement 5:-1:1 produces all the required integers.<br />
-->i = 5: -1:1<br />
i =<br />
5. 4. 3. 2. 1.<br />
The for statement is much more general than what we have previously used in<br />
this section. Indeed, it allows to browse through the values of many data types,<br />
including row matrices and lists. When we perform a for loop over the elements of<br />
a matrix, this matrix may be a matrix of doubles, strings, integers or polynomials.<br />
In the following example, we perform a for loop over the double values of a row<br />
matrix containing (1.5, e, π).<br />
v = [1.5 exp (1) %pi ];<br />
for x = v<br />
disp (x)<br />
end<br />
The previous script produces the following output.<br />
1.5<br />
2.7182818<br />
3.1415927<br />
We emphasize now an important point about the for statement. Anytime we<br />
use a for loop, we must ask ourselves if a vectorized statement could perform the<br />
same computation. There can be a 10 to 100 performance factor between vectorized<br />
statements and a for loop. Vectorization enables to perform fast computations,<br />
even in an interpreted environment like Scilab. This is why the for loop should<br />
be used only when there is no other way to perform the same computation with<br />
vectorized functions.<br />
5.4 The while statement<br />
The while statement allows to perform a loop while a boolean expression is true.<br />
At the beginning of the loop, if the expression is true, the statements in the body<br />
of the loop are executed. When the expression becomes false (an event which must<br />
occur at certain time), the loop is ended.<br />
In the following script, we compute the sum of the numbers i from 1 to 10 with<br />
a while statement.<br />
53
s = 0<br />
i = 1<br />
while ( i sum (1:10)<br />
ans =<br />
55.<br />
The while statement has the same performance issue as the for statement. This<br />
is why vectorized statements should be considered first, before attempting to design<br />
an algorithm based on a while loop.<br />
5.5 The break and continue statements<br />
The break statement allows to interrupt a loop. Usually, we use this statement in<br />
loops where, once some condition is satisfied, the loops should not be continued.<br />
In the following example, we use the break statement in order to compute the<br />
sum of the integers from 1 to 10. When the variable i is greater than 10, the loop<br />
is interrupted.<br />
s = 0<br />
i = 1<br />
while ( %t )<br />
if ( i > 10 ) then<br />
break<br />
end<br />
s = s + i<br />
i = i + 1<br />
end<br />
At the end of the algorithm, the values of the variables i and s are:<br />
s =<br />
55.<br />
i =<br />
11.<br />
The continue statement allows to go on to the next loop, so that the statements<br />
in the body of the loop are not executed this time. When the continue statement<br />
is executed, Scilab skips the other statements and goes directly to the while or for<br />
statement and evaluates the next loop.<br />
54
In the following example, we compute the sum s = 1 + 3 + 5 + 7 + 9 = 25. The<br />
modulo(i,2) function returns 0 if the number i is even. In this situation, the script<br />
goes on to the next loop.<br />
s = 0<br />
i = 0<br />
while ( i< 10 )<br />
i = i + 1<br />
if ( modulo ( i , 2 ) == 0 ) then<br />
continue<br />
end<br />
s = s + i<br />
end<br />
If the previous script is executed, the final values of the variables i and s are:<br />
-->s<br />
s =<br />
25.<br />
-->i<br />
i =<br />
10.<br />
As an example of vectorized computation, the previous algorithm can be performed<br />
in one function call only. Indeed, the following script uses the sum function,<br />
combined with the colon operator ”:” and produces same the result.<br />
s = sum (1:2:10);<br />
The previous script has two main advantages over the while-based algorithm.<br />
1. The computation makes use of a higher-level language, which is easier to understand<br />
for human beings.<br />
2. With large matrices, the sum-based computation will be much faster than the<br />
while-based algorithm.<br />
This is why a careful analysis must be done before developing an algorithm based<br />
on a while loop.<br />
6 Functions<br />
In this section, we present Scilab functions. We analyze the way to define a new<br />
function and the method to load it into Scilab. We present how to create and load<br />
a library, which is a collection of functions. We also present how to manage input<br />
and output arguments. Finally, we present how to debug a function using the pause<br />
statement.<br />
6.1 Overview<br />
Gathering various steps into a reusable function is one of the most common tasks of<br />
a Scilab developer. The most simple calling sequence of a function is the following:<br />
outvar = myfunction ( invar )<br />
55
where the following list presents the various variables used in the syntax:<br />
• myfunction is the name of the function,<br />
• invar is the name of the input arguments,<br />
• outvar is the name of the output arguments.<br />
The values of the input arguments are not modified by the function, while the values<br />
of the output arguments are actually modified by the function.<br />
We have in fact already met several functions in this document. The sin function,<br />
in the y=sin(x) statement, takes the input argument x and returns the result in the<br />
output argument y. In Scilab vocabulary, the input arguments are called the right<br />
hand side and the output arguments are called the left hand side.<br />
Functions can have an arbitrary number of input and output arguments so that<br />
the complete syntax for a function which has a fixed number of arguments is the<br />
following:<br />
[o1 , ... , on] = myfunction ( i1 , ... , in )<br />
The input and output arguments are separated by commas ”,”. Notice that the input<br />
arguments are surrounded by opening and closing parentheses, while the output<br />
arguments are surrounded by opening and closing square brackets.<br />
In the following Scilab session, we show how to compute the LU decomposition<br />
of the Hilbert matrix. The following session shows how to create a matrix with the<br />
testmatrix function, which takes two input arguments, and returns one matrix.<br />
Then, we use the lu function, which takes one input argument and returns two or<br />
three arguments depending on the provided output variables. If the third argument<br />
P is provided, the permutation matrix is returned.<br />
-->A = testmatrix (" hilb " ,2)<br />
A =<br />
4. - 6.<br />
- 6. 12.<br />
-->[L,U] = lu(A)<br />
U =<br />
- 6. 12.<br />
0. 2.<br />
L =<br />
- 0.6666667 1.<br />
1. 0.<br />
-->[L,U,P] = lu(A)<br />
P =<br />
0. 1.<br />
1. 0.<br />
U =<br />
- 6. 12.<br />
0. 2.<br />
L =<br />
1. 0.<br />
- 0.6666667 1.<br />
Notice that the behavior of the lu function actually changes when three output<br />
arguments are provided: the two rows of the matrix L have been swapped. More<br />
56
function opens a function definition<br />
endfunction closes a function definition<br />
argn number of input/output arguments in a function call<br />
varargin variable numbers of arguments in an input argument list<br />
varargout variable numbers of arguments in an output argument list<br />
fun2string generates ASCII definition of a scilab function<br />
get_function_path get source file path of a library function<br />
getd getting all functions defined in a directory<br />
head_comments display Scilab function header comments<br />
listfunctions properties of all functions in the workspace<br />
macrovar variables of function<br />
Figure 29: Scilab functions to manage functions.<br />
specifically, when two output arguments are provided, the decomposition A = LU is<br />
provided (the statement A-L*U allows to check this). When three output arguments<br />
are provided, permutations are performed so that the decomposition P A = LU is<br />
provided (the statement P*A-L*U can be used to check this). In fact, when two<br />
output arguments are provided, the permutations are applied on the L matrix. This<br />
means that the lu function knows how many input and output arguments are provided<br />
to it, and changes its algorithm accordingly. We will not present in this<br />
document how to provide this feature, i.e. a variable number of input or output<br />
arguments. But we must keep in mind that this is possible in the Scilab language.<br />
The commands provided by Scilab to manage functions are presented in figure 29.<br />
In the next sections, we will present some of the most commonly used commands.<br />
6.2 Defining a function<br />
To define a new function, we use the function and endfunction Scilab keywords.<br />
In the following example, we define the function myfunction, which takes the input<br />
argument x, mutiplies it by 2, and returns the value in the output argument y.<br />
function y = myfunction ( x )<br />
y = 2 * x<br />
endfunction<br />
The statement function y = myfunction ( x ) is the header of the function<br />
while the body of the function is made of the statement y = 2 * x. The body of a<br />
function may contain one, two or more statements.<br />
There are at least three possibilities to define the previous function in Scilab.<br />
• The first solution is to type the script directly into the console in an interactive<br />
mode. Notice that, once the ”function y = myfunction ( x )” statement<br />
has been written and the enter key is typed in, Scilab creates a new line in<br />
the console, waiting for the body of the function. When the ”endfunction”<br />
statement is typed in the console, Scilab returns back to its normal edition<br />
mode.<br />
57
• Another solution is available when the source code of the function is provided<br />
in a file. This is the most common case, since functions are generally quite<br />
long and complicated. We can simply copy and paste the function definition<br />
into the console. When the function definition is short (typically, a dozen lines<br />
of source code), this way is very convenient. With the editor, this is very easy,<br />
thanks to the Load into Scilab feature.<br />
• We can also use the exec function. Let us consider a Windows system where<br />
the previous function is written in the file ”C:\myscripts\examples-functions.sce”.<br />
The following session gives an example of the use of exec to load the previous<br />
function.<br />
--> exec ("C:\ myscripts \ examples - functions . sce ")<br />
--> function y = myfunction ( x )<br />
--> y = 2 * x<br />
--> endfunction<br />
The exec function executes the content of the file as if it were written interactively<br />
in the console and displays the various Scilab statements, line after line.<br />
The file may contain a lot of source code so that the output may be very long<br />
and useless. In these situations, we add the semicolon caracter ”;” at the end<br />
of the line. This is what is performed by the Execute file into Scilab feature<br />
of the editor.<br />
--> exec ("C:\ myscripts \ examples - functions . sce " );<br />
Once a function is defined, it can be used as if it was any other Scilab function.<br />
--> exec ("C:\ myscripts \ examples - functions . sce ");<br />
-->y = myfunction ( 3 )<br />
y =<br />
6.<br />
Notice that the previous function sets the value of the output argument y, with<br />
the statement y=2*x. This is mandatory. In order to see it, we define in the following<br />
script a function which sets the variable z, but not the output argument y.<br />
function y = myfunction ( x )<br />
z = 2 * x<br />
endfunction<br />
In the following session, we try to use our function with the input argument x=1.<br />
--> myfunction ( 1 )<br />
!-- error 4<br />
Undefined variable : y<br />
at line 4 of function myfunction called by :<br />
myfunction ( 1 )<br />
Indeed, the interpreter tells us that the output variable y has not been defined.<br />
When we make a computation, we often need more than one function in order<br />
to perform all the steps of the algorithm. For example, consider the situation where<br />
we need to optimize a system. In this case, we might use an algorithm provided<br />
by Scilab, say optim for example. First, we define the cost function which is to be<br />
optimized, according to the format expected by optim. Second, we define a driver,<br />
58
which calls the optim function with the required arguments. At least two functions<br />
are used in this simple scheme. In practice, a complete computation often requires<br />
a dozen of functions, or more. In this case, we may collect our functions in a library<br />
and this is the topic of the next section.<br />
6.3 Function libraries<br />
A function library is a collection of functions defined in the Scilab language and<br />
stored in a set of files.<br />
When a set of functions is simple and does not contain any help or any source<br />
code in a compiled language like C/C++ or Fortran, a library is a very efficient<br />
way to proceed. Instead, when we design a Scilab component with unit tests, help<br />
pages and demonstration scripts, we develop a module. Developing a module is both<br />
easy and efficient, but requires a more advanced knowledge of Scilab. Moreover,<br />
modules are based on function libraries, so that understanding the former allows to<br />
master the latter. Modules will not be described in this document. Still, in many<br />
practical situations, function libraries allow to efficiently manage simple collections<br />
of functions and this is why we describe this system here.<br />
In this section, we describe a very simple library and show how to load it automatically<br />
at Scilab startup.<br />
Let us make a short outline of the process of creating and using a library. We<br />
assume that we are given a set of .sci files containing functions.<br />
1. We create a binary version of the scripts containing the functions. The genlib<br />
function generates binary versions of the scripts, as well as additional indexing<br />
files.<br />
2. We load the library into Scilab. The lib function allows to load a library<br />
stored in a particular directory.<br />
Before analyzing an example, let us consider some general rules which must be<br />
followed when we design a function library. These rules will then be reviewed in the<br />
next example.<br />
The file names containing function definitions should end with the .sci extension.<br />
This is not mandatory, but helps in identifying the Scilab scripts on a hard<br />
drive.<br />
Several functions may be stored in each .sci file, but only the first one will be<br />
available from outside the file. Indeed, the first function of the file is considered to be<br />
the only public function, while the other functions are (implicitly) private functions.<br />
The name of the .sci file must be the same as the name of the first function in<br />
the file. For example, if the function is to be named myfun, then the file containing<br />
this function must be myfun.sci. This is mandatory in order to make the genlib<br />
function work properly.<br />
The functions which allow to manage libraries are presented in figure 30.<br />
We shall now give a small example of a particular library and give some details<br />
about how to actually proceed.<br />
Assume that we use a Windows system and that the samplelib directory contains<br />
two files:<br />
59
genlib build library from functions in a given directory<br />
lib library definition<br />
Figure 30: Scilab commands to manage functions.<br />
• C:/samplelib/function1.sci:<br />
function y = function1 ( x )<br />
y = 1 * function1_support ( x )<br />
endfunction<br />
function y = function1_support ( x )<br />
y = 3 * x<br />
endfunction<br />
• C:/samplelib/function2.sci:<br />
function y = function2 ( x )<br />
y = 2 * x<br />
endfunction<br />
In the following session, we generate the binary files with the genlib function, which<br />
takes as its first argument a string associated with the library name, and takes as its<br />
second argument the name of the directory containing the files. Notice that only the<br />
functions function1 and function2 are publicly available: the function1_support<br />
function can be used inside the library, but cannot be used outside.<br />
--> genlib (" mylibrary ","C:/ samplelib ")<br />
--> mylibrary<br />
mylibrary =<br />
Functions files location : C:\ samplelib \.<br />
function1 function2<br />
The genlib function generates the following files in the directory ”C:/samplelib”:<br />
• function1.bin: the binary version of the function1.sci script,<br />
• function2.bin: the binary version of the function2.sci script,<br />
• lib: a binary version of the library,<br />
• names: a text file containing the list of functions in the library.<br />
The binary files *.bin and the lib file are cross-platform in the sense that they<br />
work equally well under Windows, Linux or Mac.<br />
Once the genlib function has been executed, the two functions are immediately<br />
available, as detailed in the following example.<br />
--> function1 (3)<br />
ans =<br />
9.<br />
--> function2 (3)<br />
ans =<br />
6.<br />
60
In practical situations, though, we would not generate the library everytime it is<br />
needed. Once the library is ready, we would like to load the library directly. This<br />
is done with the lib function, which takes as its first argument the name of the<br />
directory containing the library and returns the library, as in the following session.<br />
--> mylibrary = lib ("C:\ samplelib \")<br />
ans =<br />
Functions files location : C:\ samplelib \.<br />
function1 function2<br />
If there are many libraries, it might be inconvenient to load manually all libraries<br />
at startup. In practice, the lib statement can be written once for all, in Scilab<br />
startup file, so that the library is immediately available at startup. The startup<br />
directory associated with a particular Scilab installation is stored in the variable<br />
SCIHOME, as presented in the following session, for example on Windows.<br />
--> SCIHOME<br />
SCIHOME =<br />
C:\ Users \ username \ AppData \ Roaming \ Scilab \ scilab -5.2.0<br />
In the directory associated with the SCIHOME variable, the startup file is .scilab.<br />
The startup file is automatically read by Scilab at startup. It must be a regular Scilab<br />
script (it can contain valid comments). To make our library available at startup, we<br />
simply write the following lines in our .scilab file.<br />
// Load my favorite library .<br />
mylibrary = lib ("C:/ samplelib /")<br />
With this startup file, the functions defined in the library are available directly<br />
at Scilab startup.<br />
6.4 Managing output arguments<br />
In this section, we present the various ways to manage output arguments. A function<br />
may have zero or more input and/or output arguments. In the most simple case,<br />
the number of input and output arguments is pre-defined and using such a function<br />
is easy. But, as we are going to see, even such a simple function can be called in<br />
various ways.<br />
Assume that the function simplef is defined with 2 input arguments and 2<br />
output arguments, as following.<br />
function [y1 , y2] = simplef ( x1 , x2 )<br />
y1 = 2 * x1<br />
y2 = 3 * x2<br />
endfunction<br />
In fact, the number of output arguments of such a function can be 0, 1 or 2.<br />
When there is no output argument, the value of the first output argument in stored<br />
in the ans variable. We may also set the variable y1 only. Finally, we may use all<br />
the output arguments, as expected. The following session presents all these calling<br />
sequences.<br />
--> simplef ( 1 , 2 )<br />
ans =<br />
2.<br />
61
whereami display current instruction calling tree<br />
where get current instruction calling tree<br />
Figure 31: Scilab commands associated with the call stack.<br />
-->y1 = simplef ( 1 , 2 )<br />
y1 =<br />
2.<br />
-->[y1 ,y2] = simplef ( 1 , 2 )<br />
y2 =<br />
6.<br />
y1 =<br />
2.<br />
We have seen that the most basic way of defining functions already allows to<br />
manage a variable number of output arguments. There is an even more flexible way<br />
of managing a variable number of input and output arguments, based on the argn,<br />
varargin and varargout variables. This more advanced topic will not be detailed<br />
in this document.<br />
6.5 Levels in the call stack<br />
Obviously, function calls can be nested, i.e. a function f can call a function g, which<br />
in turn calls a function h and so forth. When Scilab starts, the variables which are<br />
defined are at the global scope. When we are in a function which is called from the<br />
global scope, we are one level down in the call stack. When nested function calls<br />
occur, the current level in the call stack is equal to the number of previously nested<br />
calls. The functions presented in figure 31 allows to inquire about the state of the<br />
call stack.<br />
In the following session, we define 3 functions which are calling one another and<br />
we use the function whereami to display the current instruction calling tree.<br />
function y = fmain ( x )<br />
y = 2 * flevel1 ( x )<br />
endfunction<br />
function y = flevel1 ( x )<br />
y = 2 * flevel2 ( x )<br />
endfunction<br />
function y = flevel2 ( x )<br />
y = 2 * x<br />
whereami ()<br />
endfunction<br />
When we call the function fmain, the following output is produced. As we can<br />
see, the 3 levels in the call stack are displayed, associated with the corresponding<br />
function.<br />
--> fmain (1)<br />
whereami called at line 3 of macro flevel2<br />
flevel2 called at line 2 of macro flevel1<br />
flevel1 called at line 2 of macro fmain<br />
ans =<br />
62
8.<br />
In the previous example, the various calling levels are the following:<br />
• level 0 : the global level,<br />
• level -1 : the body of the fmain function,<br />
• level -2 : the body of the flevel1 function,<br />
• level -3 : the body of the flevel2 function.<br />
These calling levels are displayed in the prompt of the console when we interactively<br />
debug a function with the pause statement or with breakpoints.<br />
6.6 The return statement<br />
Inside the body of a function, the return statement allows to immediately return,<br />
i.e. it immediately quits the current function. This statement can be used in cases<br />
where the remaining of the algorithm is not necessary.<br />
The following function computes the sum of integers from istart to iend. In<br />
regular situations, it uses the sum function to perform its job. But if the istart<br />
variable is negative or if the istart mysum ( 1 , 5 )<br />
ans =<br />
15.<br />
--> mysum ( -1 , 5 )<br />
ans =<br />
0.<br />
--> mysum ( 2 , 1 )<br />
ans =<br />
0.<br />
Some developers state that using several return statements in a function is<br />
generally a bad practice. Indeed, we must take into account the increased difficulty<br />
of debugging such a function, because the algorithm may suddenly quit the body of<br />
the function. The user may get confused about what exactly caused the function to<br />
return.<br />
63
pause wait for interactive user input<br />
resume resume execution and copy some local variables<br />
abort interrupt evaluation<br />
Figure 32: Scilab functions to debug manually a function.<br />
This is why, in practice, the return statement should be used with care, and<br />
certainly not in every function. The rule to follow is that the function should return<br />
only at its very last line. Still, in particular situations, using return can actually<br />
greatly simplify the algorithm, while avoiding return would require writing a lot of<br />
unnecessary source code.<br />
6.7 Debugging functions with pause<br />
In this section, we present simple debugging methods which allow to fix most simple<br />
bugs in a convenient and efficient way. More specifically, we present the pause,<br />
resume and abort statements, which are presented in figure 32.<br />
A Scilab session usually consists in the definition of new algorithms by the creation<br />
of new functions. It often happens that a syntax error or an error in the<br />
algorithm produces a wrong result.<br />
Consider the problem computation of the sum of then integers from istart to<br />
iend. Again, this simple example is chosen for demonstration purposes, since the<br />
sum function performs it directly.<br />
The following function mysum contains a bug: the second argument ”foo” passed<br />
to the sum function has no meaning in this context.<br />
function y = mysum ( istart , iend )<br />
y = sum ( iend : istart , " foo " )<br />
endfunction<br />
The following session shows what happens when we use the mysum function.<br />
--> mysum ( 1 , 10 )<br />
!-- error 44<br />
Wrong argument 2.<br />
at line 2 of function mysum called by :<br />
mysum ( 1 , 10 )<br />
In order to interactively find the problem, we place a pause statement inside the<br />
body of the function.<br />
function y = mysum ( istart , iend )<br />
pause<br />
y = sum ( iend : istart , " foo " )<br />
endfunction<br />
We now call the function mysum again with the same input arguments.<br />
--> mysum ( 1 , 10 )<br />
Type ’resume ’ or ’abort ’ to return to standard level prompt .<br />
-1-><br />
64
We are now interactively located in the body of the mysum function. The prompt<br />
”-1->” indicates that the current call stack is at level -1. We can check the value of<br />
the variables istart and iend by simply typing their names in the console.<br />
-1-> istart<br />
istart =<br />
1.<br />
-1-> iend<br />
iend =<br />
10.<br />
In order to progress in our function, we can copy and paste the statements and see<br />
what happens interactively, as in the following session.<br />
-1->y = sum ( iend : istart , " foo " )<br />
y = sum ( iend : istart , " foo " )<br />
!-- error 44<br />
Wrong argument 2.<br />
We can see that the call to the sum function does not behave how we might expect.<br />
The ”foo” input argument is definitely a bug: we remove it.<br />
-1->y = sum ( iend : istart )<br />
y =<br />
0.<br />
After the first revision, the call to the sum function is now syntactically correct. But<br />
the result is still wrong, since the expected result in this case is 55. We see that<br />
the istart and iend variables have been swapped. We correct the function call and<br />
check that the fixed version behaves as expected<br />
-1->y = sum ( istart : iend )<br />
y =<br />
55.<br />
The result is now correct. In order to get back to the zero level, we now use the<br />
abort statement, which interrupts the sequence and immediately returns to the<br />
global level.<br />
-1-> abort<br />
--><br />
The ”-->” prompt confirms that we are now back at the zero level in the call stack.<br />
We fix the function definition, which becomes:<br />
function y = mysum ( istart , iend )<br />
pause<br />
y = sum ( istart : iend )<br />
endfunction<br />
In order to check our bugfix, we call the function again.<br />
--> mysum ( 1 , 10 )<br />
Type ’resume ’ or ’abort ’ to return to standard level prompt .<br />
-1-><br />
We are now confident about our code, so that we use the resume statement, which<br />
lets Scilab execute the code as usual.<br />
65
--> mysum ( 1 , 10 )<br />
-1-> resume<br />
ans =<br />
55.<br />
The result is correct. All we have to do is to remove the pause statement from the<br />
function definition.<br />
function y = mysum ( istart , iend )<br />
y = sum ( istart : iend )<br />
endfunction<br />
In this section, we have seen that, used in combination, the pause, resume and<br />
abort statements are a very effective way to interactively debug a function. In fact,<br />
our example is very simple and the method we presented may appear to be too<br />
simple to be convenient. This is not the case. In practice, the pause statement has<br />
proven to be a very fast way to find and fix bugs, even in very complex situations.<br />
7 Plotting<br />
Producing plots and graphics is a very common task for analysing data and creating<br />
reports. Scilab offers many ways to create and customize various types of plots and<br />
charts. In this section, we present how to create 2D plots and contour plots. Then<br />
we customize the title and the legend of our graphics. We finally export the plots<br />
so that we can use it in a report.<br />
7.1 Overview<br />
Scilab can produce many types of 2D and 3D plots. It can create x-y plots with<br />
the plot function, contour plots with the contour function, 3D plots with the surf<br />
function, histograms with the histplot function and many other types of plots.<br />
The most commonly used plot functions are presented in figure 33.<br />
In order to get an example of a 3D plot, we can simply type the statement surf()<br />
in the Scilab console.<br />
--> surf ()<br />
During the creation of a plot, we use several functions in order to create the data<br />
or to configure the plot. The functions which are presented in figure 34 will be used<br />
in the examples of this section.<br />
7.2 2D plot<br />
In this section, we present how to produce a simple x-y plot. We emphasize the use<br />
of vectorized functions, which allow to produce matrices of data in one function call.<br />
We begin by defining the function which is to be plotted. The function myquadratic<br />
squares the input argument x with the ”ˆ” operator.<br />
function f = myquadratic ( x )<br />
f = x^2<br />
endfunction<br />
66
plot 2D plot<br />
surf 3D plot<br />
contour contour plot<br />
pie pie chart<br />
histplot histogram<br />
bar bar chart<br />
barh horizontal bar chart<br />
hist3d 3D histogram<br />
polarplot plot polar coordinates<br />
Matplot 2D plot of a matrix using colors<br />
Sgrayplot smooth 2D plot of a surface using colors<br />
grayplot 2D plot of a surface using colors<br />
Figure 33: Scilab plot functions<br />
linspace linearly spaced vector<br />
feval evaluates a function on a grid<br />
legend configure the legend of the current plot<br />
title configure the title of the current plot<br />
xtitle configure the title and the legends of the current plot<br />
Figure 34: Scilab functions used when creating a plot.<br />
We can use the linspace function in order to produce 50 values in the interval<br />
[1, 10].<br />
xdata = linspace ( 1 , 10 , 50 );<br />
The xdata variable now contains a row vector with 50 entries, where the first value<br />
is equal to 1 and the last value is equal to 10. We can pass it to the myquadratic<br />
function and get the function value at the given points.<br />
ydata = myquadratic ( xdata );<br />
This produces the row vector ydata, which contains 50 entries. We finally use the<br />
plot function so that the data is displayed as a x-y plot.<br />
plot ( xdata , ydata )<br />
Figure 35 presents the associated x-y plot.<br />
Notice that we could have produced the same plot without generating the intermediate<br />
array ydata. Indeed, the second input argument of the plot function can<br />
be a function, as in the following session.<br />
plot ( xdata , myquadratic )<br />
When the number of points to manage is large, using directly the function allow to<br />
save significant amount of memory space, since it avoids to generate the intermediate<br />
vector ydata.<br />
67
100<br />
7.3 Contour plots<br />
90<br />
80<br />
70<br />
60<br />
50<br />
40<br />
30<br />
20<br />
10<br />
0<br />
1 2 3 4 5 6 7 8 9 10<br />
Figure 35: A simple x-y plot.<br />
In this section, we present the contour plots of a multivariate function and make<br />
use of the contour function. This type of graphics is often used in the context of<br />
numerical optimization as they allow to draw functions of two variables in a way<br />
that makes apparent the location of the optimum.<br />
Assume that we are given function f with n variables f(x) = f(x1, . . . , xn) and<br />
x ∈ R n . For a given α ∈ R, the equation<br />
f(x) = α, (2)<br />
defines a surface in the (n + 1)-dimensional space R n+1 .<br />
When n = 2, the points z = f(x1, x2) represent a surface in the three-dimensional<br />
space (x1, x2, z) ∈ R 3 . This allows to draw contour plots of the cost function, as<br />
we are going to see. For n > 3, though, these plots are not available. One possible<br />
solution in this case is to select two significant parameters and to draw a contour<br />
plot with these parameters varying (only).<br />
The Scilab function contour allows to plot contours of a function f. The contour<br />
function has the following syntax<br />
where<br />
contour (x,y,z,nz)<br />
• x (resp. y) is a row vector of x (resp. y) values with size n1 (resp. n2),<br />
• z is a real matrix of size (n1,n2), containing the values of the function or a<br />
Scilab function which defines the surface z=f(x,y),<br />
• nz the level values or the number of levels.<br />
68
1.0<br />
0.8<br />
0.6<br />
0.4<br />
0.2<br />
0.0<br />
-0.2<br />
-0.4<br />
-0.6<br />
1.64<br />
1.45<br />
1.27<br />
1.45<br />
1.27<br />
1.09 1.09<br />
-0.8<br />
-1.0<br />
1.09<br />
1.27<br />
1.45<br />
1.64<br />
1.82<br />
-1.0 -0.8 -0.6<br />
-0.4<br />
-0.2<br />
0.0<br />
0.2<br />
0.4<br />
0.545 0.727<br />
0.364<br />
0.6<br />
1.09<br />
1.27<br />
1.45<br />
Figure 36: Contour plot of the function f(x1, x2) = x 2 1 + x 2 2.<br />
In the following Scilab session, we use a simple form of the contour function,<br />
where the function myquadratic is passed as an input argument. The myquadratic<br />
function takes two input arguments x1 and x2 and returns f(x1, x2) = x 2 1 + x 2 2.<br />
The linspace function is used to generate vectors of data so that the function is<br />
analyzed in the range [−1, 1] 2 .<br />
function f = myquadratic2arg ( x1 , x2 )<br />
f = x1 **2 + x2 **2;<br />
endfunction<br />
xdata = linspace ( -1 , 1 , 100 );<br />
ydata = linspace ( -1 , 1 , 100 );<br />
contour ( xdata , ydata , myquadratic2arg , 10)<br />
This produces the contour plot presented in figure 36.<br />
In practice, it may happen that our function has the header z = myfunction<br />
( x ), where the input variable x is a row vector. The problem is that there is only<br />
one single input argument, instead of the two arguments required by the contour<br />
function. There are two possibilities to solve this little problem:<br />
• provide the data to the contour function by making two nested loops,<br />
• provide the data to the contour function by using feval,<br />
• define a new function which calls the first one.<br />
These three solutions are presented in this section. The first goal is to let the reader<br />
choose the method which best fits the situation. The second goal is to show that<br />
performances issues can be avoided if a consistent use of the functions provided by<br />
Scilab is done.<br />
In the following Scilab naive session, we define the quadratic function myquadratic1arg,<br />
which takes one vector as its single input argument. Then we perform two nested<br />
69<br />
0.182<br />
0.8<br />
1.0
1.0<br />
0.8<br />
0.6<br />
0.4<br />
0.2<br />
0.0<br />
-0.2<br />
-0.4<br />
-0.6<br />
-0.8<br />
-1.0<br />
-1.0<br />
-0.8<br />
-0.6<br />
-0.4<br />
-0.2<br />
0.0<br />
0.2<br />
0.1 0.3 0.5<br />
Figure 37: Contour plot of the function f(x1, x2) = x 2 1+x 2 2 – The levels are explicitly<br />
configured.<br />
loops to compute the zdata matrix, which contains the z values. The z values are<br />
computed for all the combinations of points (x(i), y(j)) ∈ R 2 , for i = 1, 2, . . . , nx<br />
and j = 1, 2, . . . , ny, where nx and ny are the number of points in the x and y coordinates.<br />
In the end, we call the contour function, with the list of required levels<br />
(instead of the previous number of levels). This allows to get exactly the levels we<br />
want, instead of letting Scilab compute the levels automatically.<br />
function f = myquadratic1arg ( x )<br />
f = x (1)**2 + x (2)**2;<br />
endfunction<br />
xdata = linspace ( -1 , 1 , 100 );<br />
ydata = linspace ( -1 , 1 , 100 );<br />
// Caution ! Two nested loop , this is bad .<br />
for i = 1: length ( xdata )<br />
for j = 1: length ( ydata )<br />
x = [ xdata (i) ydata (j )]. ’;<br />
zdata ( i , j ) = myquadratic1arg ( x );<br />
end<br />
end<br />
contour ( xdata , ydata , zdata , [0.1 0.3 0.5 0.7])<br />
The contour plot is presented in figure 37.<br />
The previous script perfectly works. Still, it is not efficient because it uses two<br />
nested loops and this is to avoid in Scilab for performance reasons. Another issue is<br />
that we had to store the zdata matrix, which might consume a lot of memory space<br />
when the number of points is large. This is why this method is to avoid, since it is<br />
a bad use of the features provided by Scilab.<br />
In the following script, we use the feval function, which evaluates a function<br />
on a grid of values and returns the computed data. The generated grid is made<br />
of all the combinations of points (x(i), y(j)) ∈ R 2 . We assume here that there<br />
70<br />
0.4<br />
0.6<br />
0.8<br />
0.7<br />
1.0
is no possibility to modify the function myquadratic1arg, which takes one input<br />
argument. Therefore, we create an intermediate function myquadratic3, which takes<br />
2 input arguments. Once done, we pass the myquadratic3 argument to the feval<br />
function and generate the zdata matrix.<br />
function f = myquadratic1arg ( x )<br />
f = x (1)**2 + x (2)**2;<br />
endfunction<br />
function f = myquadratic3 ( x1 , x2 )<br />
f = myquadratic1arg ( [x1 x2] )<br />
endfunction<br />
xdata = linspace ( -1 , 1 , 100 );<br />
ydata = linspace ( -1 , 1 , 100 );<br />
zdata = feval ( xdata , ydata , myquadratic3 );<br />
contour ( xdata , ydata , zdata , [0.1 0.3 0.5 0.7])<br />
The previous script produces, of course, exactly the same plot as previously. This<br />
method is also to avoid when possible, since it requires to store the zdata matrix,<br />
which has size 100 × 100.<br />
Finally, there is a third way of creating the plot. In the following Scilab session,<br />
we use the same intermediate function myquadratic3 as previously, but we pass it<br />
directly to the contour function.<br />
function f = myquadratic1arg ( x )<br />
f = x (1)**2 + x (2)**2;<br />
endfunction<br />
function f = myquadratic3 ( x1 , x2 )<br />
f = myquadratic1arg ( [x1 x2] )<br />
endfunction<br />
xdata = linspace ( -1 , 1 , 100 );<br />
ydata = linspace ( -1 , 1 , 100 );<br />
contour ( xdata , ydata , myquadratic3 , [0.1 0.3 0.5 0.7])<br />
The previous script produces, of course, exactly the same plot as previously. The<br />
major advantage is that we did not produce the zdata matrix.<br />
We have briefly outlined how to produce simple 2D plots. We are now interested<br />
in the configuration of the plot, so that the titles, axis and legends corresponds to<br />
our data.<br />
7.4 Titles, axes and legends<br />
In this section, we present the Scilab graphics features which allow to configure the<br />
title, axes and legends of an x-y plot.<br />
In the following example, we define a quadratic function and plot it with the<br />
plot function.<br />
function f = myquadratic ( x )<br />
f = x .^2<br />
endfunction<br />
xdata = linspace ( 1 , 10 , 50 );<br />
ydata = myquadratic ( xdata );<br />
plot ( xdata , ydata )<br />
We have now the plot which is presented in figure 35.<br />
71
Y axis<br />
100<br />
90<br />
80<br />
70<br />
60<br />
50<br />
40<br />
30<br />
20<br />
10<br />
0<br />
1<br />
2<br />
3<br />
4<br />
My title<br />
5 6 7 8 9 10<br />
X axis<br />
Figure 38: The x-y plot of a quadratic function – This is the same plot as in figure 35,<br />
with title and x-y axes configured.<br />
Scilab graphics system is based on graphics handles. The graphics handles provide<br />
an object-oriented access to the fields of a graphics entity. The graphics layout<br />
is decomposed into sub-objects such as the line associated with the curve, the x and<br />
y axes, the title, the legends, and so forth. Each object can be in turn decomposed<br />
into other objects if required. Each graphics object is associated with a collection<br />
of properties, such as the width or color of the line of the curve, for example. These<br />
properties can be queried and configured simply by getting or setting their values,<br />
like any other Scilab variables. Managing handles is easy and very efficient.<br />
But most basic plot configurations can be done by simple function calls and, in<br />
this section, we will focus in these basic features.<br />
In the following script, we use the title function in order to configure the title<br />
of our plot.<br />
title ( "My title " );<br />
We may want to configure the axes of our plot as well. For this purpose, we use<br />
the xtitle function in the following script.<br />
xtitle ( "My title " , "X axis " , "Y axis " );<br />
Figure 38 presents the produced plot.<br />
It may happen that we want to compare two sets of data in the same 2D plot,<br />
that is, one set of x data and two sets of y data. In the following script, we define<br />
the two functions f(x) = x 2 and f(x) = 2x 2 and plot the data on the same x-y plot.<br />
We additionally use the ”+-” and ”o-” options of the plot function, so that we can<br />
distinguish the two curves f(x) = x 2 and f(x) = 2x 2 .<br />
function f = myquadratic ( x )<br />
f = x^2<br />
endfunction<br />
function f = myquadratic2 ( x )<br />
72
Y axis<br />
200<br />
180<br />
160<br />
140<br />
120<br />
100<br />
80<br />
60<br />
40<br />
20<br />
0<br />
1<br />
2<br />
3<br />
4<br />
My title<br />
x^2<br />
2x^2<br />
5 6 7 8 9 10<br />
X axis<br />
Figure 39: The x-y plot of two quadratic functions – We have configured the legend<br />
so that we can distinguish the two functions f(x) = x 2 and f(x) = 2x 2 .<br />
f = 2 * x^2<br />
endfunction<br />
xdata = linspace ( 1 , 10 , 50 );<br />
ydata = myquadratic ( xdata );<br />
plot ( xdata , ydata , "+-" )<br />
ydata2 = myquadratic2 ( xdata );<br />
plot ( xdata , ydata2 , "o-" )<br />
xtitle ( "My title " , "X axis " , "Y axis " );<br />
Moreover, we must configure a legend so that we can know what curve is associated<br />
with f(x) = x 2 and what curve is associated with f(x) = 2x 2 . For this<br />
purpose, we use the legend function in order to print the legend associated with<br />
each curve.<br />
legend ( "x^2" , "2x^2" );<br />
Figure 39 presents the produced x-y plot.<br />
We now know how to create a graphics plot and how to configure it. If the plot<br />
is sufficiently interesting, it may be worth to put it into a report. To do so, we can<br />
export the plot into a file, which is the subject of the next section.<br />
7.5 Export<br />
In this section, we present ways of exporting plots into files, either interactively or<br />
automatically with Scilab functions.<br />
Scilab can export any graphics into the vectorial and bitmap formats presented<br />
in figure 40. Once a plot is produced, we can export its content into a file, by using<br />
interactively the File > Export to... menu of the graphics window. We can then set<br />
the name of the file and its type.<br />
73
Vectorial<br />
xs2png export into PNG<br />
xs2pdf export into PDF<br />
xs2svg export into SVG<br />
xs2eps export into Encapsulated Postscript<br />
xs2ps export into Postscript<br />
xs2emf export into EMF (only for Windows)<br />
Bitmap<br />
xs2fig export into FIG<br />
xs2gif export into GIF<br />
xs2jpg export into JPG<br />
xs2bmp export into BMP<br />
xs2ppm export into PPM<br />
Figure 40: Export functions.<br />
We can alternatively use the xs2* functions, presented in figure 40. All these<br />
functions are based on the same calling sequence:<br />
xs2png ( window_number , filename )<br />
where window_number is the number of the graphics window and filename is the<br />
name of the file to export. For example, the following session exports the plot which<br />
is in the graphics window number 0, which is the default graphics window, into the<br />
file foo.png.<br />
xs2png ( 0 , " foo . png " )<br />
If we want to produce higher quality documents, the vectorial formats are to be<br />
prefered. For example, L ATEX documents may use Scilab plots exported into PDF<br />
files to improve their readability, whatever the size of the document.<br />
8 Notes and references<br />
There are a number of topics which have not been presented in this document. We<br />
hope that the current document is a good starting point for using Scilab so that<br />
learning about these specific topics should not be a problem. We have already mentioned<br />
a number of other sources of documentation for this purpose at the begining<br />
of this document.<br />
French readers may be interested by [5], where a good introduction is given about<br />
how to create and interface to an existing library, how to use Scilab to compute the<br />
solution of an Ordinary Differential Equation, how to use Scicos and many other<br />
subjects. The same content is presented in English in [3]. English readers should be<br />
interested by [4], which gives a deeper overview of Scicos. These books are of great<br />
interest, but are rather obsolete since they were written mainly for older version of<br />
Scilab.<br />
Further reading may be obtained from the Scilab web cite [6], in the documentation<br />
section.<br />
74
9 Acknowledgments<br />
I would like to thank Claude Gomez, Vincent Couvert, Allan Cornet and Serge<br />
Steer who let me share their comments about this document. I am also grateful to<br />
Julie Paul and Sylvestre Ledru who helped me during the writing of this document.<br />
Thanks are also expressed to Artem Glebov for proofreading this document.<br />
75
10 Answers to exercises<br />
10.1 Answers for section 1.7<br />
Answer to Exercise 1.1 (Installing Scilab) Let us install the current version of Scilab on your<br />
system: at the time where this document is written, this is Scilab v5.2. Installing Scilab is very<br />
easy, since binaries are provided. Figure 41 present the early steps required to install Scilab v5.1.1<br />
under Windows.<br />
Answer to Exercise 1.2 (Inline help: derivative ) The derivative function allows to compute<br />
the numerical derivative of a function. The purpose of this exercise is to find the corresponding<br />
help page, by various means. We open the help browser from the console, in the ? > Help Browser<br />
menu. We now select the search pane on the left, and type derivative, then press the <br />
key. All the pages containing the word derivative are displayed. The first one is the help page we<br />
are searching for. We can also use the help provided on Scilab web site<br />
http://www.scilab.org/product/man<br />
We use the find tool of our favorite web browser and search for the word derivative. We successively<br />
find the functions: diff, bsplin3val, derivative, derivat and dlgamma. The searched page is<br />
the following:<br />
http://www.scilab.org/product/man/derivative.html<br />
We finally use the console to find the help.<br />
help derivative<br />
Figure 42 presents the help page for the derivative.<br />
10.2 Answers for section 2.6<br />
Answer to Exercise 2.1 (The console) Type the following statement in the console.<br />
atoms<br />
Now type on the key. What happens? We see that all functions which name begins with<br />
the letters ”atoms” are displayed, as presented in figure 43. Now type the ”I” letter, and type again<br />
on . What happens ? We see that all functions which name begins with the letters ”atomsI”<br />
are displayed, as presented in figure 44.<br />
Answer to Exercise 2.2 (Using exec) The SCI variable contains the name of the directory<br />
of the current Scilab installation. The statement SCI+"/modules" creates a string which is the<br />
concatenation of the Scilab directory name and the ”/modules” string, as shown in the following<br />
session.<br />
-->SCI +"/ modules "<br />
ans =<br />
C:/ PROGRA ~1/ <strong>SCILAB</strong> ~1.0 - B/ modules<br />
Therefore, when we perform the ls(SCI+"/modules") statement, Scilab displays the list of files in<br />
the modules subdirectory of Scilab.<br />
-->ls(SCI +"/ modules ")<br />
ans =<br />
! xpad !<br />
! !<br />
! xcos !<br />
! !<br />
! windows_tools !<br />
! !<br />
[...]<br />
76
Figure 41: First steps during the installation of Scilab v5.1.1 under Windows.<br />
77
Figure 42: Help page for the derivative function.<br />
Figure 43: Using the completion to browse the A<strong>TO</strong>MS functions.<br />
Figure 44: Using the completion to browse the A<strong>TO</strong>MS functions.<br />
78
Figure 45: The demo contourf.dem.sce.<br />
Executing the demonstration script contourf.dem.sce produces the graphic presented in figure 45.<br />
The difference between the two statements<br />
exec ( SCI +"/ modules / graphics / demos /2 d_3d_plots / contourf . dem . sce ")<br />
exec ( SCI +"/ modules / graphics / demos /2 d_3d_plots / contourf . dem . sce ");<br />
is that the second ends with a semicolon ”;”. We use this operator so that Scilab does not display<br />
the content of the file when the script is executed, which is convenient when the script contains<br />
many lines.<br />
10.3 Answers for section 3.13<br />
Answer to Exercise 3.1 (Precedence of operators) The order of the operations when they are<br />
applied to a mathematical expression is called the precedence. For example, when the expression<br />
2 × 3 + 4, it is equivalent to the expression (2 × 3) + 4. The following session shows that the<br />
precedence of Scilab operators is the same as the usual mathematical operators.<br />
-->2 * 3 + 4<br />
ans =<br />
10.<br />
-->2 + 3 * 4<br />
ans =<br />
14.<br />
-->2 / 3 + 4<br />
ans =<br />
4.6666667<br />
-->2 + 3 / 4<br />
ans =<br />
2.75<br />
Answer to Exercise 3.2 (Parentheses) When the precedence of the operators does not allow<br />
to compute the result we want, parentheses can be used to force the order of the operations. In<br />
Scilab, we can use the usual round brackets ”(” and ”)”.<br />
79
-->2 * (3 + 4)<br />
ans =<br />
14.<br />
-->(2 + 3) * 4<br />
ans =<br />
20.<br />
-->(2 + 3) / 4<br />
ans =<br />
1.25<br />
-->3 / (2 + 4)<br />
ans =<br />
0.5<br />
Answer to Exercise 3.3 (Exponents) When we want to define constants with exponents, as<br />
the constant 1.23456789 × 10 10 , we use the ”d” letter to define the exponent, as in the following<br />
session.<br />
- - >1.23456789 d10<br />
ans =<br />
1.235 D +10<br />
We can alternatively use the ”e” letter, as in the following session which computes the constants<br />
1.23456789 × 10 10 and 1.23456789 × 10 −5 .<br />
- - >1.23456789 e10<br />
ans =<br />
1.235 D +10<br />
- - >1.23456789e -5<br />
ans =<br />
0.0000123<br />
Answer to Exercise 3.4 (Functions) The sqrt behaves exactly as mathematically expected for<br />
positive arguments.<br />
--> sqrt (4)<br />
ans =<br />
2.<br />
--> sqrt (9)<br />
ans =<br />
3.<br />
For negative arguments x, Scilab returns y as the complex solution of the equation x 2 = y.<br />
--> sqrt ( -1)<br />
ans =<br />
i<br />
--> sqrt ( -2)<br />
ans =<br />
1.4142136 i<br />
The exp function is the exponential function, where the base e is Euler’s constant. The log is the<br />
natural logarithm, which is the inverse function of the exponential function.<br />
-->exp (1)<br />
ans =<br />
2.7182818<br />
-->log ( exp (2))<br />
ans =<br />
80
2.<br />
-->exp ( log (2))<br />
ans =<br />
2.<br />
The log10 function is the base-10 logarithm. Notice that if x is an integer, then log 10(x) is the<br />
number of decimal digits of x.<br />
- - >10^2<br />
ans =<br />
100.<br />
--> log10 (10^2)<br />
ans =<br />
2.<br />
- - >10^ log10 (2)<br />
ans =<br />
2.<br />
The sign function returns the sign of its argument, and returns zero when x is zero.<br />
--> sign (2)<br />
ans =<br />
1.<br />
--> sign ( -2)<br />
ans =<br />
- 1.<br />
--> sign (0)<br />
ans =<br />
0.<br />
Answer to Exercise 3.5 (Trigonometry) The following session is a sample use of the cos and<br />
sin functions.<br />
-->cos (0)<br />
ans =<br />
1.<br />
-->sin (0)<br />
ans =<br />
0.<br />
Because of the limited precision of floating point numbers, the result of a trigonometry function<br />
(as any other function) is subject to rounding. In the following session, the mathematical identity<br />
sin(π) = 0 is approximated at best, given the machine precision associated with double variables.<br />
-->cos ( %pi )<br />
ans =<br />
- 1.<br />
-->sin ( %pi )<br />
ans =<br />
1.225D -16<br />
-->cos ( %pi /4) - sin ( %pi /4)<br />
ans =<br />
1.110D -16<br />
81
10.4 Answers for section 4.18<br />
Answer to Exercise 4.1 (Plus one) Let us create the vector (x1 + 1, x2 + 1, x3 + 1, x4 + 1)<br />
with the following x. The following session performs the computation and uses the usual addition<br />
operator ”+”. In this case, the scalar 1 is added to each element of the vector x.<br />
-->x = 1:4;<br />
-->y = x + 1<br />
y =<br />
2. 3. 4. 5.<br />
Answer to Exercise 4.2 (Vectorized multiplication) Let us create the vector (x1y1, x2y2, x3y3, x4y4)<br />
with the following x and y. The following session performs the computation and uses the elementwise<br />
multiplication operation ”.*”.<br />
-->x = 1:4;<br />
-->y = 5:8;<br />
-->z = x .* y<br />
z =<br />
5. 12. 21. 32.<br />
�<br />
1<br />
Answer to Exercise 4.3 (Vectorized invert) Let us create the vector x1<br />
following session performs the computation and uses the elementwise division operation ”./”.<br />
-->x = 1:4;<br />
-->y = 1 ./ x<br />
y =<br />
1. 0.5 0.3333333 0.25<br />
�<br />
1 1 1 , , , x2 x3 x4<br />
. The<br />
The following session does not compute what we want, but, instead, compute the solution y of the<br />
equation xy = 1.<br />
-->y = 1 / x // This is not what we want here !<br />
y =<br />
0.0333333<br />
0.0666667<br />
0.1<br />
0.1333333<br />
�<br />
x1 x2 x3<br />
Answer to Exercise 4.4 (Vectorized division) Let us create the vector , , y1 y2 y3<br />
following session performs the computation and uses the elementwise division operation ”./”.<br />
-->x = 12*(6:9);<br />
-->y = 1:4;<br />
-->z = x ./ y<br />
z =<br />
72. 42. 32. 27.<br />
�<br />
x4<br />
, . The<br />
y4<br />
Answer to Exercise 4.5 (Vectorized squaring) Let us create the vector � x2 1, x2 2, x2 3, x2 �<br />
4 with<br />
x = 1, 2, 3, 4. The following session performs the computation and uses the elementwise squaring<br />
operation ”.ˆ”.<br />
-->x = 1:4;<br />
-->y = x .^2<br />
y =<br />
1. 4. 9. 16.<br />
82
Answer to Exercise 4.6 (Vectorized sinus) Let us create the vector (sin(x1), sin(x2), . . . , sin(x10))<br />
with x ∈ [0, π]. The following session performs the computation and uses the linspace function.<br />
-->x = linspace (0 , %pi ,10);<br />
-->y = sin (x)<br />
y =<br />
column 1 to 6<br />
0. 0.3420201 0.6427876 0.8660254 0.9848078 0.9848078<br />
column 7 to 10<br />
0.8660254 0.6427876 0.3420201 1.225D -16<br />
Answer to Exercise 4.7 (Vectorized function) Let us compute the y = f(x) values of the<br />
function f defined by the equation<br />
f(x) = log 10 (r/10 x + 10 x ) (3)<br />
with r = 2.220.10 −16 for x ∈ [−16, 0]. The following session performs the computation and uses<br />
the elementwise division ”./” operator.<br />
r = 2.220D -16;<br />
x = linspace ( -16 ,0 ,10);<br />
y = log10 (r ./10.^ x + 10.^ x);<br />
This function appears in the computation of the optimal step to be used in a numerical derivative.<br />
It shows that the optimal step to use with a forward order one finite difference is equal to<br />
h=sqrt(%eps).<br />
References<br />
[1] Atlas - automatically tuned linear algebra software. http://math-atlas.<br />
sourceforge.net.<br />
[2] Cecill and free software. http://www.cecill.info.<br />
[3] C Bunks, J.-P. Chancelier, F. Delebecque, C. Gomez, M. Goursat,<br />
R. Nikoukhah, and S. Steer. Engineering and Scientific Computing With Scilab.<br />
Birkhauser Boston, 1999.<br />
[4] Stephen L. Campbell, Jean-Philippe Chancelier, and Ramine Nikoukhah. Modeling<br />
and Simulation in Scilab/Scicos. Springer, 2006.<br />
[5] J.-P. Chancelier, F. Delebecque, C. Gomez, M. Goursat, R. Nikoukhah, and<br />
S. Steer. Introduction à Scilab, Deuxième Édition. Springer, 2007.<br />
[6] The Scilab Consortium. Scilab. http://www.scilab.org.<br />
[7] Intel. Intel math kernel library. http://software.intel.com/en-us/<br />
intel-mkl/.<br />
[8] Sylvestre Ledru. Different execution modes of scilab. http://wiki.scilab.<br />
org/Different_execution_modes_of_Scilab.<br />
83
[9] Cleve Moler. Numerical computing with matlab.<br />
[10] Flexdock project. Flexdock project home. https://flexdock.dev.java.net/.<br />
84
Index<br />
ˆ, 20<br />
’, 39<br />
.’, 39<br />
.., 21<br />
//, 21<br />
:, 33<br />
;, 20<br />
SCIHOME, 58<br />
contour, 65<br />
disp, 11<br />
exec, 55<br />
feval, 67<br />
function, 52, 54<br />
genlib, 56<br />
help, 7<br />
lib, 56<br />
linspace, 64<br />
plot, 63, 64<br />
size, 30<br />
testmatrix, 33<br />
title, 69<br />
xtitle, 69<br />
SCIHOME, 18<br />
%i, 23<br />
%pi, 22<br />
ans, 26<br />
batch, 18<br />
boolean, 23<br />
colon (:) operator, 33<br />
comment, 18, 21<br />
complex number, 23<br />
conjugate, 39<br />
console, 11<br />
continuation line, 21<br />
docking, 14<br />
dot, 21<br />
elementary functions, 21<br />
elementwise, 39<br />
Flexdock, 14<br />
flint, 25<br />
85<br />
function<br />
library, 56<br />
hat, 20<br />
integer, 24<br />
Intel, 6<br />
left hand side, 53<br />
library, 56<br />
Linux, 7<br />
Mac OS, 7<br />
matrix, 28<br />
MKL, 6<br />
module, 56<br />
prompt, 11<br />
quote (’) operator, 39<br />
right hand side, 53<br />
semicolon, 20<br />
shape, 28<br />
string, 26<br />
transpose, 39<br />
variable name, 20<br />
Windows, 6

