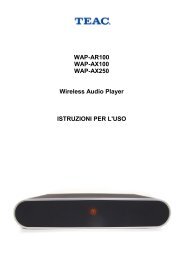
WAP-8500 instruction manual - TEAC Europe GmbH
WAP-8500 instruction manual - TEAC Europe GmbH
WAP-8500 instruction manual - TEAC Europe GmbH

You also want an ePaper? Increase the reach of your titles
YUMPU automatically turns print PDFs into web optimized ePapers that Google loves.
<strong>WAP</strong>-8200<br />
INSTRUCTION MANUAL
Copyright Notices<br />
Copyright (c) 2009 by <strong>TEAC</strong> <strong>Europe</strong> <strong>GmbH</strong> – All Rights Reserved.<br />
The Product “<strong>TEAC</strong> <strong>WAP</strong>-8200“ (hereinafter referred to as the "Product") includes Open-<br />
Source software packages. These Open-Source software packages are subject to specific<br />
licenses, disclaimers and notices, which are reproduced on the CD-ROM provided with the<br />
Product (see “Licenses.txt”). Please refer to those licenses, disclaimers and notices for your<br />
exact rights hereunder as well as to the following Open-Source Notices.<br />
The source code of Open-Source software packages is available for download under<br />
http://www.wap-opensource.teac.de .<br />
Additionally <strong>TEAC</strong> offers to provide the source code of the Open-Source software packages<br />
to you on CD-ROM for a fee for the physical act of transferring a copy, such as the cost of the<br />
media and shipping, upon written request to <strong>TEAC</strong> <strong>Europe</strong> <strong>GmbH</strong>, code “Source-Code”,<br />
Bahnstraße 12, 65205 Wiesbaden, Germany. This offer is valid for a period of three years<br />
from the distribution of this product by <strong>TEAC</strong>.<br />
Open-Source Notices<br />
Part of this product’s software (this program) is free software: you can redistribute it and/or<br />
modify it under the terms of the respective GNU General Public License or GNU Lesser<br />
General Public License as published by the Free Software Foundation, either version 2 (or<br />
2.1 respectively) of the License, or (at your option) any later version.<br />
This program is distributed in the hope that it will be useful, but WITHOUT ANY WARRANTY;<br />
without even the implied warranty of MERCHANTABILITY or FITNESS FOR A PARTICULAR<br />
PURPOSE. See the respective GNU General Public License or GNU Lesser General Public<br />
License for more details.<br />
You should have received a copy of the GNU General Public License and the GNU Lesser<br />
General Public License along with this program. If not, see http://www.gnu.org/licenses/ .<br />
Portions of this product’s software are copyright © 2006-May-12 The FreeType Project<br />
www.freetype.org . All rights reserved.<br />
Portions of this product’s software are available under the Mozilla Public License 1.1 (MPL<br />
1.1). Any modification or contribution to such portions of this software are available in Source<br />
Code form under the terms of the Mozilla Public License 1.1 via the internet under <strong>TEAC</strong>’s<br />
website as mentioned above.<br />
Portions of this product’s software are subject to the following disclaimer:<br />
THIS SOFTWARE IS PROVIDED BY THE COPYRIGHT HOLDERS AND CONTRIBUTORS<br />
"AS IS" AND ANY EXPRESS OR IMPLIED WARRANTIES, INCLUDING, BUT NOT LIMITED<br />
TO, THE IMPLIED WARRANTIES OF MERCHANTABILITY AND FITNESS FOR A<br />
PARTICULAR PURPOSE ARE DISCLAIMED. IN NO EVENT SHALL THE COPYRIGHT<br />
HOLDER OR CONTRIBUTORS BE LIABLE FOR ANY DIRECT, INDIRECT, INCIDENTAL,<br />
SPECIAL, EXEMPLARY, OR CONSEQUENTIAL DAMAGES (INCLUDING, BUT NOT<br />
LIMITED TO, PROCUREMENT OF SUBSTITUTE GOODS OR SERVICES; LOSS OF USE,<br />
DATA, OR PROFITS; OR BUSINESS INTERRUPTION) HOWEVER CAUSED AND ON ANY<br />
THEORY OF LIABILITY, WHETHER IN CONTRACT, STRICT LIABILITY, OR TORT<br />
(INCLUDING NEGLIGENCE OR OTHERWISE) ARISING IN ANY WAY OUT OF THE USE<br />
OF THIS SOFTWARE, EVEN IF ADVISED OF THE POSSIBILITY OF SUCH DAMAGE.<br />
2
Index<br />
<strong>WAP</strong>-8200<br />
INSTRUCTION MANUAL<br />
Copyright Notices.......................................................................................................2<br />
After unpacking..........................................................................................................4<br />
Controls and connectors............................................................................................4<br />
Assembly ..................................................................................................................6<br />
BRC stand usage and battery charge........................................................................7<br />
Pairing the BRC and SMR ........................................................................................8<br />
Operation...................................................................................................................9<br />
Audio playback.........................................................................................................10<br />
USB Audiomanager.................................................................................................12<br />
Direkt-/Playlist toggle function .................................................................................13<br />
Special functions......................................................................................................14<br />
Multiroom-operation: select the SMR for control......................................................14<br />
Settings....................................................................................................................15<br />
Language: ...............................................................................................................15<br />
Sleep / power saving: ..............................................................................................15<br />
Autostart: .................................................................................................................15<br />
Maintenance............................................................................................................16<br />
Name.......................................................................................................................16<br />
Upgrade: .................................................................................................................16<br />
Reset.......................................................................................................................17<br />
Backup.....................................................................................................................17<br />
BRC root settings menu...........................................................................................18<br />
Troubleshooting.......................................................................................................19<br />
Advice on location, care and safety.........................................................................20<br />
Specifications:..........................................................................................................22<br />
CE – Declaration of conformity ...............................................................................23<br />
Notes on WEEE.......................................................................................................23<br />
3
Dear User,<br />
we are pleased that you have chosen a wireless media player from<br />
<strong>TEAC</strong> media systems and congratulate you on this choice.<br />
With your <strong>TEAC</strong> media systems <strong>WAP</strong>-8200 you have acquired a modern piece of<br />
wireless audio technology that is in equal measure attractive and of high quality. We<br />
are sure that this product will provide useful service and a lot of fun over the coming<br />
years.<br />
... your <strong>TEAC</strong> media systems team!<br />
After unpacking<br />
After unpacking you should first check that the contents are complete. In addition to<br />
this printed <strong>manual</strong> there should be:<br />
● The <strong>WAP</strong>-8200 streaming media receiver (SMR in this <strong>manual</strong>)<br />
● The <strong>WAP</strong>-8200 bidirectional remote control (BRC in this <strong>manual</strong>)<br />
● A power supply for SMR with DC connector.<br />
● A power supply for BRC with DC connector.<br />
● The charging stand for the BRC.<br />
● One audio connection cable with mini phone plug and RCA plugs<br />
● The installation CD. You will find latest firmware, <strong>instruction</strong> <strong>manual</strong> in PDF<br />
format and a PC background picture to decorate your PC desktop.<br />
Controls and connectors<br />
Bidirectional Remote Control (BRC):<br />
1 = Touchscreen LC-Display 4 = Volume increase (+)<br />
2 = Standby/Muting 5 = Battery connectors (bottom side)<br />
3 = Volume lowering (-) 6 = Battery cabinet (backside)<br />
4
Streaming Media Receiver (SMR):<br />
A = DC connector for power supply<br />
B = Left channel Line output (RCA)<br />
C = Right channel Line output (RCA)<br />
D = S/PDIF optical digital output<br />
E = Headphones output (Mini Phono)<br />
F = USB connector 2<br />
G = USB connector 1<br />
H = Power switch<br />
I = LED USB device connected<br />
J = LED power (blue)/ Standby (red)<br />
K = LED BRC connection<br />
5
Assembly<br />
Basic assembly of this system is very easy to do.<br />
Please connect all components only when they are switched off.<br />
● Connect the SMR from backside audio outputs to your audio system by the<br />
supplied audio cable - or connect your headphone to the appropriate<br />
outputs at the left side of the SMR.<br />
● Connect the SMR to the SMR power supply (DC connector).<br />
● Connect the BRC charger stand to the BRC power supply (DC connector).<br />
● Before connections, check your mains power system to be appropriate to<br />
the <strong>WAP</strong>-8200 power supply.<br />
● Connect the power adaptors to mains supply.<br />
● Switch on the main power switch (J) at the right side of the SMR.<br />
● Switch on the BRC by short press the Power button (2).<br />
● By another push on the Power button (2), the whole <strong>WAP</strong>-8200 system<br />
(BRC and SMR) is switched into standby.<br />
Switching standby on/off as well as volume and all other control functions of your<br />
<strong>WAP</strong>-8200 system can be done by the buttons of the BRC. The LC display in the<br />
BRC does not only display the received commands but it can also receive contents<br />
from SMR such as music track playback data, cover pictures etc, all displayed in the<br />
remote control right in your hand!<br />
Thanks to the touchscreen, display contents of <strong>WAP</strong>-8200 can be selected or you<br />
can scroll in the lists by a simple touch of your fingertips.<br />
There are few separate keys at the top of the control just for On/Standby (long push<br />
>2 sec), Muting (short push) and volume control.<br />
When the BRC is off a long pushj on the “volume +” button provides you access to<br />
the BRC base settings, such as pairing between BRC and SMR.<br />
Please read the related chapters to setup your <strong>WAP</strong>-8200 correctly for best<br />
performance with all sources.<br />
Tip: please visit www.teac.de to check for new firmware for your <strong>WAP</strong>-8200. New<br />
firmware contains latest corrections and often it adds essential new features into<br />
your device!<br />
-- We do recommend, always to update for the latest firmware! --<br />
<strong>TEAC</strong> is always active to offer you the best possible features for your <strong>WAP</strong>8200!<br />
6
BRC stand usage and battery charge<br />
The BRC contains a powerful rechargable Lithium Ion battery, which allows many<br />
hours of wireless operation for the <strong>WAP</strong>-8200 system, due to high battery capacity<br />
and the integrated power saving management of the BRC.<br />
Before first wireless BRC usage, the battery requires recharging.<br />
Connect the BRC power supply to the backside connector of the stand.<br />
The BRC can be operated while placed in the stand.<br />
Note: Charging control even works when the BRC is switched to Standby!<br />
The charging progress you can control by the flashing battery symbol in the display<br />
headline: Red = battery low, Yellow = medium charge, Green = fully charged. When<br />
the battery is fully charged, flashing of the battery symbol stops. In case of green<br />
and not flashing battery symbol, charging procedure is switched off. If you keep the<br />
BRC on the stand with power supply connected, even uninterrupted display and<br />
SMR connection will not discharge the battery.<br />
Note: If you aim for not using your <strong>WAP</strong>-8200 for longer time, disconnect the BRC<br />
from charger and disconnect it from mains, to avoid unexpected discharge of the<br />
battery. Also disconnect the power supply of the SMR.<br />
Under normal usage conditions after full charge, the BRC might be operated for<br />
several days before recharging will be required. In case of extensive usage (display<br />
all time active) the BRC can be operated apprx. 8 hours. But uninterrupted usage is<br />
not usual without power supply. If you aim for continous display and instand access<br />
all time, you can connect the BRC to power supply (operate the BRC on the stand).<br />
Li-Ion battery replacement:<br />
● The Battery compartment is placed at the back of the BRC cabinet.<br />
● The battery cover slider can be unlocked by slight pushing the cover at the<br />
dotted area and shifting down for apprx. 5mm. After unlocking, the cover<br />
can easily be removed.<br />
● Please pull out the small battery connector carefully, replace the battery and<br />
plug-in the small battery plug again.<br />
● Then lay the battery cover back on the opening and let it slide-in until you<br />
recognize it was locked again.<br />
● The BRC now is ready to use.<br />
7
Pairing the BRC and SMR<br />
The data interchange between BRC and SMR of the <strong>WAP</strong>-8200 is realized by a<br />
data radio transmission system. Benefits of the radio transmission are the definite<br />
identification between the connected partners and the transmission by radio signals,<br />
which do not require visible connection between transmitter and receiver. BRC and<br />
SMR can both transmit and receive data. You may even control your <strong>WAP</strong>-8200<br />
from a neighbour room, if you placed your speakers there.<br />
For the first steps, a start wizard shall assist<br />
you:<br />
After first power on, the BRC shows an<br />
“attention” window. This window offers a<br />
choice to use another SMR („√“) or keep<br />
the present SMR device („X“). Touch on<br />
„X“ to use the present SMR as paired by<br />
the factory defaults.<br />
Next, the system will ask by a screen with<br />
flags for your preferred operation language<br />
for the screens. Select the language by<br />
simple pushing on the country flag.<br />
Now the system shall reboot and welcome<br />
you in your preferred language.<br />
Then you will be back to the main menu which displays the name of the selected<br />
SMR device at the head of the menu list.<br />
If the above settings do not fully meet your system, yo can leave the wizard by the<br />
„HOME“ button and call the „Settings“ menu by pushing on the tools symbol, to do<br />
your settings <strong>manual</strong>ly.<br />
Note: In case you have more than one <strong>WAP</strong> device in your environment, the<br />
wireless radio control system ensures only the one paired SMR is controlled by the<br />
paired BRC at a time!<br />
8
Operation<br />
The main screen contains several areas:<br />
options- and status area (headline) – functions area (center)<br />
● Options keys<br />
– these three buttons change their function dependant from actual<br />
screen. In main screen:<br />
Settings: settings for display and upgrading.<br />
Multiroom: Directly opens the device list for selecting the SMR device to control.<br />
Playback functions: Stop/Play/+Playlist depending the actual playback.<br />
● Status indications – show up various system informations:<br />
Name of the currently controlled SMR unit<br />
Time – a touch on the time indication brings up the calendar screen!<br />
Battery status (charging=flashing, low=red, medium=yellow, full=green)<br />
● Functions area – main functions:<br />
USB Storage 1 / 2: to browse USB disk content and choose tracks to listen.<br />
9
Audio playback<br />
When searching through the lists during<br />
playback, light touching the button “BACK“<br />
(top left corner) brings you back to the<br />
previous screen.<br />
The scroll bar offers quick scrolling up/down<br />
in the list. The scroll arrows move the<br />
scrollbar up/down.<br />
Select the desired contents by simply<br />
touching it.<br />
When you play a track, the playback screen<br />
appears.<br />
The options buttons in the playscreen (top left area) enable/disable playback options<br />
such as REPEAT and RANDOM/SHUFFLE.<br />
A touch on the time display opens the calendar screen.<br />
A touch on the cover picture opens the actual playlist. Here you will find further<br />
editing options. Please read chapter Playlists for more informations.<br />
The play buttons at the bottom of the playback screen enable to “STOP“ playback, a<br />
short touch on the PLAY button toggles “Play/Pause“ function, a long touch on the<br />
PLAY button toggles between the playmodes DIRECT/PLAYLIST(+), also you will<br />
find fast forward and fast rewind buttons for the actual track as well as Skip<br />
back/forward buttons which offer track skip and additional quick track preview<br />
beside the cover picture.<br />
10
Note: in case you switched to another screen during audio playback, the playback<br />
screen returns after 20 seconds, when there was no more touch of any functions.<br />
Cover pictures: <strong>WAP</strong>-8200 supports cover display for each audiofile with ID3 tag.<br />
To achieve cover display, you can import a cover picture into each audio file, using<br />
your PC. This and more ID3 tasks can be proceeded comfortably by a wellknown<br />
freeware software, such as MP3tag (Win), ID3X (MAC) or EasyTAG (Linux).<br />
Attention: there are some programs which support audiofiles and related cover<br />
pictures, like WMP, iTunes or Amarok, but they have an incompatible solution based<br />
on an internal directory where they store cover pictures separate from audiofiles, but<br />
not in the audiofile's ID3 tags. These pictures do not appear if you open the audiofile<br />
by other applications or <strong>WAP</strong>-8200.<br />
If you want to have the cover pictures available for your <strong>WAP</strong>-8200 and also for your<br />
portable audio devices forever, simply import the cover pictures into the ID3 tags.<br />
11
USB Audiomanager<br />
USB disk content browsing and tracks playback.<br />
The USB Audiomanager integrated in <strong>WAP</strong>-8200 offers comparable comfort to an<br />
audioserver, for precisely sorted access to your USB audio data by the ID3 contents<br />
stored in your audio files.<br />
Note: USB input has disk insertion auto-detection. Please wait until you find the<br />
USB icon in the BRC screen headline disk before using this function.<br />
In case of missing ID3 entries in your audio files, the USB Audiomanager is using<br />
the file names.<br />
When you play a track, the playback screen appears.<br />
Tip: for the utmost comfortable use of your audio data through the USB<br />
Audiomanager, we recommend to utilize an ID3 tagging software on your PC to<br />
organize your data. With the ID3 tagger, you can easily – and often in one step even<br />
for complete albums – add trackname, album, artist, genre and cover pictures etc.<br />
for the usage of these informations by audioserver and USB Audiomanager.<br />
12
Note: depending from USP storage capacity, the first parsing of the audio tracks<br />
might take from few seconds (< 1 GB) up to more than one hour (multiple of<br />
hundreds of GB). During the initial parsing, the ID3 tags of all audiofiles will be read<br />
and then stored in a database, which will be stored then into a special directory on<br />
the USB storage. In case you addedor removed files, a “RESCAN“rescan will be<br />
required, which searches for changes in the directories to add them to the database.<br />
If a complete new parsing of all files is required, you can delete ort rename the<br />
MediaDB directory on your USB storage device. If there is no MediaDB, the initial<br />
parsing procedure will proceed.<br />
Direkt-/Playlist toggle function<br />
This item toggles the function mode between “direct playback” and “playback from<br />
playlist”.<br />
The selection of tracks for playback is explained above (sections 6.1 and 6.2). The<br />
reaction upon the selection depends on the currently activated playback mode:<br />
● Direct playback: instantly playback the selected track.<br />
● Playlist playback: the “play“ screen symbol shows an additional “+”<br />
marking. Audio tracks selected are not played instantly but will be appended<br />
to the internal actual playlist and playback once the previously appended<br />
tracks in this playlist had been played.<br />
● To append a complete album to your playlist: touch on the album name<br />
entry for more than 2 seconds. You will be prompted to append it.<br />
● To view the playlist: in playback screen touch on the cover picture. Now you<br />
see your current playlist. You can scroll in your playlist by the scrollbar and<br />
the UP/DOWN buttons.<br />
● To edit in the playlist: select from<br />
the editing options in the top right<br />
area of the playlist screen. There<br />
are following edit functions:<br />
1. Create NEW Playlist.<br />
2. Erase the highlighted track from<br />
actual playlist.<br />
3. Move the track in the playlist<br />
up/down to another position.<br />
4. Backup the playlist to USB<br />
storage.<br />
● Another touch of the cover picture<br />
will return to playback screen.<br />
Note: The USB storage has to be attached to your <strong>WAP</strong>-8200 SMR before storing<br />
the playlist!<br />
<strong>WAP</strong>-8200 automatically creates a playlist name for you. You can change the<br />
playlist name with your USB storage connected to your PC (to read the playlist<br />
contents, you may open the playlist by a simple text editor software).<br />
13
Special functions<br />
Multiroom-operation: select the SMR for control<br />
The <strong>WAP</strong> system can operate with various SMR devices controlled through one<br />
BRC! By this multiroom feature, you only need to use one BRC – e.g. while you<br />
walk in your house – to control a number of SMR devices in different rooms.<br />
The menu for selecting the SMR for control you can reach by the Multiroom button<br />
in the main screen. This is the quick way for multiroom selection. The actually<br />
selected SMR is displayed on top position of the SMR device list.<br />
Precondition for any change between SMR devices is their existence in the SMR<br />
device list. When there are already various SMR devices avaiable, touch on the<br />
desired SMR name to activate the connection.<br />
The BRC then releases control of the current SMR device – playback of the current<br />
device continues! – and changes over to control the new selected SMR.<br />
Note: just one BRC can be connected to a SMR station at a time!<br />
Attention: in case the new selected SMR device you aim for control is out of<br />
reception area of your BRC, there will be a warning window.<br />
In case you walk away from your currently<br />
connected SMR, leaving the reception<br />
area of the connection between BRC and<br />
SMR for longer time, the above mentioned<br />
warning window can appear, too.<br />
If you just have one SMR in your setup,<br />
please move the BRC to another position<br />
closer to your SMR device to recover the<br />
control connection.<br />
This warning screen enables you to select<br />
another SMR („√“) or to reconnect to<br />
current SMR („X“) for control.<br />
In case you like to employ further SMR<br />
devices into your device list, read more in chapter 9. BRC root settings.<br />
Note: The allowable distance between BRC and SMR dependas on your local<br />
conditions. In typical home environment it is possible to reach 15 meters distance<br />
with some walls between BRC and SMR. But this is not to be guaranteed due to<br />
very different wall/ceiling materials. Outside the house, the operational distance can<br />
be multiplied.<br />
SMR device name: <strong>WAP</strong> allows to rename the SMR devices upon demand<br />
individually, e.g. you can input „Livingroom“ for easier identification. In the settings<br />
menu under Maintenance, you will find the “Name“ function to edit the name of the<br />
actually connected SMR device.<br />
14
Settings<br />
Provide all system settings:<br />
Language:<br />
here you can select your preferred display<br />
language. In the language select screen<br />
touch on the preferred country flag<br />
representing the language. After you<br />
selected a new language, the system will<br />
reboot to enable all text entries in that<br />
language.<br />
Sleep / power saving:<br />
Set the BRC power saving function and select system sleep.<br />
Touch on “BASE” to set the system sleep countdown timer. Select between Off- and<br />
30-60-90 minutes. You can set Sleep function also in the calendar screen by the top<br />
right button.<br />
Touch on “REMOTE” to set the BRC energy saving timer. Select between Off- and<br />
1-2-3-5-10 minutes. After the selected time, the BRC will switch off the LCD<br />
backlight and connection to SMR to save battery power. Instantly when you push<br />
any of the BRC top side buttons, the LCD backlight is activated and the digital radio<br />
connection to the SMR will be established again. Thanks to the BRC energy saving<br />
function, your BRC can operate over days before recharging is required.<br />
Autostart:<br />
here you can chose a start position, where you always like to start operation of your<br />
<strong>WAP</strong>-8200 after power-on.<br />
15
Maintenance<br />
The Maintenance menu shows the device name and the actual firmware<br />
informations of your System.<br />
In the Maintenance menu you can rename<br />
the SMR, update the system's firmware, reset<br />
the system to factory defaults and backup<br />
your settings including all entries of My<br />
Favorites list to your USB storage device.<br />
Name<br />
Let your system have a useful name, for clear<br />
identification in a multiroom environment.<br />
Upgrade:<br />
firmware (F/W) upgrade of SMR and BRC.<br />
● Download the new firmware from<br />
www.teac.de<br />
● Copy the new firmware file from PC to your USB storage device.<br />
● Plug the USB storage to a SMR USB port. Wait until the USB device is<br />
recognized by <strong>WAP</strong>-8200, the green dot appears on the USB symbol.<br />
● Switch to Settings-Maintenance-Upgrade. The USB files list appears.<br />
● Scroll to the firmware file and select it from list by touching on the file name.<br />
Now the system will check if this file is OK to upgrade and then bring up a<br />
warning message.<br />
● Touch on “YES” if you are sure to upgrade. Now the <strong>WAP</strong>-8200 system will<br />
start upgrade procedure.<br />
ATTENTION: During the firmware upgrade, there must be no interruption of the<br />
power supply! The USB device from which the firmware is downloaded must not<br />
be disconnected during the whole firmware upgrade procedure!<br />
After the progress bar goes to 100%, system will reboot.<br />
16
Reset<br />
With this entry, <strong>WAP</strong>-8200 can be reset to the factory defaults. You will be prompted<br />
to confirm to reset the system, for security reasons.<br />
Attention: all Settings will be erased by the reset!<br />
Tip: before reset, proceed a USB backup of your settings.<br />
Note: After the reset, the startup wizard will be available to guide you through the<br />
basic settings.<br />
Backup<br />
With this item, you can backup all settings of your <strong>WAP</strong>-8200 in a file onto your<br />
USB storage device and load back into your system if required.<br />
This is a comfort feature e.g. to copy identical settings to a number of SMR devices.<br />
Note: for this function, a USB device with free memory, connected to <strong>WAP</strong>-8200, is<br />
required!<br />
17
BRC root settings menu<br />
touch the Multiroom button on main screen for more than 2 seconds. Then, the<br />
BRC root settings menu will show up.<br />
During standby of the BRC you can also reach for the BRC root settings by long<br />
push on the volume + button.<br />
In this menu, you will find functions (from left to right) for device informations,<br />
touchscreen calibration, search for and pair with SMR devices, set the LCD<br />
brightness automatic/<strong>manual</strong>ly, select/erase in the SMR device list and exit from<br />
BRC root settings menu..<br />
Almost all informations shown in your BRC's display are transmitted from SMR<br />
device to BRC, just before displaying, are contents that are controlled by the SMR.<br />
Just the changing from one SMR device to another cannot be controlled by a SMR,<br />
the BRC shall manage this – internally - on her own.<br />
The options under the entry “Pairing – SMR Root“ mean, it will alter the internal<br />
settings in the BRC. By those options, nothing is changed in the SMR.<br />
The actually control function is displayed at the screen center area.<br />
Pair: to add one or further SMR devices into the SMR device list.<br />
Place your BRC close to your SMR (< 1m). Touch the “Pair“ magnifier icon to start<br />
the pairing procedure. BRC and SMR communicate to find a suitable connection.<br />
The procedure takes apprx one minute.<br />
In case the BRC found more than one <strong>WAP</strong>-8200 SMR device, select your <strong>WAP</strong>-<br />
8200 SMR in the list and touch on the entry to confirm it.<br />
Switch Device: here you can - same as the multiroom SMR list you reach from<br />
main menu – select the desired SMR device for control.<br />
Exit: leave the BRC root settings menu by a touch on the exit icon.<br />
18
Troubleshooting<br />
Often after time spent troubleshooting, the problem is traced to something as simple<br />
as a loose connection. Check the following before proceeding to the problemspecific<br />
solutions.<br />
COMMON PROBLEMS AND SOLUTIONS<br />
● Use some other electrical device to confirm that the electrical outlet is<br />
working.<br />
● Ensure the <strong>WAP</strong>-8200 is turned on.<br />
● Ensure all connecters are securely attached.<br />
● Ensure attached devices are turned on.<br />
TIPS FOR TROUBLESHOOTING<br />
In each problem-specific section, try the steps in the order suggested. This may help<br />
you to solve the problem more quickly. Try to pin point the problem and thus avoid<br />
replacing non-defective parts. Keep a record of the steps you take when<br />
troubleshooting: The information may be useful when calling for technical support or<br />
for passing on to service personnel.<br />
PROBLEM: THE <strong>WAP</strong>-8200 DOES NOT RESPOND TO THE BRC<br />
● Short press any button and check the BRC connection indicator of the SMR.<br />
● To recover from power save mode and for certain functions, the <strong>WAP</strong>-8200<br />
takes a few seconds to respond.<br />
● There could be a reception shadow at the BRC position. Try pressing the<br />
button again at other position, followed by few seconds pause.<br />
PROBLEM: THE <strong>WAP</strong>-8200 CAN NOT PLAY MEDIA CLIPS<br />
● Make sure the files are supported by <strong>WAP</strong>-8200. <strong>WAP</strong>-8200 supports MP3,<br />
WMA, OGG, FLAC and WAV formats.<br />
PROBLEM: THE <strong>WAP</strong>-8200 CAN NOT PLAY PLAYLISTS<br />
● Make sure the playlist format is supported. <strong>WAP</strong>-8200 only supports M3U,<br />
ExtendedM3U, ASX, WAX, PLS, WPL..<br />
PROBLEM: THE <strong>WAP</strong>-8200 CAN NOT PLAY SONGS WITH DRM (DIGITAL<br />
RIGHTS MANAGEMENT) PROTECTION<br />
● DRM tracks can not playback.<br />
PROBLEM: THERE IS NO SOUND<br />
● Adjust the volume on the BRC.<br />
● Confirm the volume is not muted.<br />
● Use headphones to check sound output.<br />
PROBLEM: THE TITLE OF THE SONG IS ILLEGIBLE<br />
● <strong>WAP</strong>-8200 does not support all language encodings. <strong>WAP</strong>-8200 currently<br />
supports character set by UTF-8. Other characters are not supported yet.<br />
19
Advice on location, care and safety<br />
● To connect your <strong>WAP</strong>-8200 with power supply system, please make sure to<br />
have a socket close to your sound-system.<br />
● If the <strong>WAP</strong>-8200 is not in use for a longer period of time, be sure that the<br />
power source is disconnected from your system.<br />
● Do not use alcohol, benzene, thinner or acids to clean the cabinet.<br />
● Do not place your <strong>WAP</strong>-8200 near radiators, airconditioning or radiocontrolled<br />
systems.<br />
● Avoid leaving the <strong>WAP</strong>-8200 in permanent strain such as direct sunlight,<br />
extreme moist or dryness, exeptional cold or heat, mechanical vibrations or<br />
shock.<br />
● Do not touch the player with bare hands if the built-in battery is leaking. In<br />
this case, contact service center for help since the liquid may remain in the<br />
player. If your body or clothes has been contacted with the battery liquid,<br />
wash it off thoroughly with water. Also, if some of liquid gets into your eyes,<br />
do not rub your eyes but immediately wash them with clean water, and<br />
consult a doctor.<br />
● Never use the player while driving a car or using other vehicles to avoid<br />
traffic accidents. This is also content of the law of some countries. Even<br />
while walking it may be dangerous especially when crossing the street.<br />
● Hearing experts' advice against the constant use of personal stereos played<br />
at high volume. Constant exposure to high volumes can lead to hearing<br />
loss. If you should experience ringing in the ears or hearing loss,<br />
discontinue use and seek medical advice.<br />
● Never disconnect the player from PC during downloading, uploading and<br />
formatting to avoid failures and losses of data.<br />
● Only use batteries, charging adapters, and accessories which were<br />
approved from <strong>TEAC</strong> for using it with a certain device model. Using other<br />
types of equipment may void the approval for use, and/or warranty claims.<br />
Furthermore there may be dangerous implications. Please ask in case your<br />
vendor for approved accessories.<br />
● Supplied or connected to units cabling is subject to wearout. Especially<br />
carrying it in trouser pockets or other insufficient carrying cases, bending it,<br />
strong pulling, or buckling it, may lead to premature failure and to damages.<br />
Please ensure correct handling and keep the cabling carefully furled in<br />
cases which will void stresses to it. Whenever cables are disconnected<br />
never pull the cable. Pull the plug instead.<br />
● The supplied batteries are subject to wearout. Their capacity and therefore<br />
their life time depend on the number of charge/decharge cycles. And even<br />
without using them there is a deterioration of capacity. Changes in<br />
temperature like high or low temperatures, mechanical stress (like dropping<br />
down) or other environmental influences may reduce the capacity of the<br />
batteries. So use batteries within the limits of the specification only and take<br />
20
them out of the device, if it is not used for a longer period of time or run<br />
from wall outlet.<br />
● Prior to take batteries out of the unit, you have to switch off the device and<br />
disconnect it from the charging adapter. Check charging adapters for their<br />
model number prior using it for charging the device.<br />
● Avoid losses of data by regularly making backups of your data.<br />
● Do not open the cabinet, contact qualified personnel only.<br />
● For service staff: Never open cabinet, when speaker system is connected to<br />
230 V AC power supply system.<br />
● CAUTION !! Power ON / OFF switch does not separate mains power!<br />
● Deliberate harm to the equipment is not covered by the guarantee.<br />
● Please contact your dealer in case of technical problems.<br />
21
Specifications:<br />
● Wireless audio player with bidirectional data radio display remote control<br />
● Colour LC touchscreen for function and track informations (ID3 tags, album<br />
cover, file name etc.)<br />
● On/Standby, volume and all functions controlled via remote control<br />
● Rechargeable Lithium-Ion battery included, user-replacable<br />
● 2 USB storage device connectors<br />
● Supports FAT32 and NTFS file systems<br />
● USB Audiomanager with integrated database for quick USB access<br />
● Line out, headphones out, S/PDIF digital optical out 44.1/48 kHz<br />
● Gapless playback of seamless continuing track contents<br />
● Playlist management: create/store/edit own playlists, use foreign playlists<br />
via USB storage<br />
● Multiroom function: control numerous streaming media receivers by one<br />
remote control<br />
● Frequency range: 20 - 20.000 Hz, S/N > 95 dB<br />
● Mains power: 110-230 Volt ~ 50/60 Hz, standby consumption apprx. 5 W<br />
(230V)<br />
● Dimensions: 149 x 120 x 27 mm Streaming Media Receiver (SMR)<br />
112 x 76 x 18 mm Bidirectional Remote Control (BRC)<br />
● Provided <strong>instruction</strong> <strong>manual</strong> on CD<br />
● System requirements: USB storage device.<br />
22
CE – Declaration of conformity<br />
We herewith declare, the <strong>TEAC</strong> media systems <strong>WAP</strong>-8200 wireless audio player<br />
complies with the following norms or normative documents:<br />
EMC directive 1999/5/EC<br />
EN 300 440-1 V1.3.1 (2001-09), EN 300 440-2 V1.1.2 (2004-07)<br />
EN 301 489-3 V1.4.1 (2002-08), Class 3, EN 55022:2006, class B,<br />
AS/NZS CISPR 22: 2006, class B, EN 61000-3-2:2000+A1:2001+2006, class A,<br />
EN 61000-3-3:1995+A1:2001+A2:2005, EN 61000-4-2:1995+A1:1998+A2:2001<br />
EN 61000-4-3:1996+A1:1998+A2:2001/2006,<br />
EN 61000-4-4:1995+A1:2000+A2:2001/2004,<br />
EN 61000-4-5:1995+A1:2001/2006, EN 61000-4-6:1996+A1:2001/2007<br />
EN 61000-4-11:1994+A1:2001/2004<br />
LVD directive 2006/95/EC<br />
IEC 60950-1:2001<br />
EN 60950-1:2001 + A11:2004/2006<br />
This statement is based on the test reports of an EMV - laboratory.<br />
All texts and illustrations were produced with greatest care. <strong>TEAC</strong> MEDIA<br />
SYSTEMS cannot however accept any legal or other responsibility for any<br />
remaining incorrect information and its consequences.<br />
Changes in specifications and features may be made without notice or obligation<br />
Company and product names provided herein are trademarks of their respective<br />
companies.ve owners. Contents, designs and specifications may change without<br />
notice.<br />
In case there is audible noise, possibly caused be strong radio waves (e.g. by<br />
mobile phones) we recommend to turn down the volume control of the unit.<br />
If you have special questions to the product and cannot find a solution in this<br />
introduction, you can look for more informations at our homepage Thank you!<br />
Notes on WEEE<br />
www.teac.de<br />
The device may not be disposed of w ith household rubbish. This appliance is<br />
labelled in accordance w ith <strong>Europe</strong>an Directive 2002/96/EG concerning used<br />
electrical and electronic appliances (w aste electrical and electronic equipment -<br />
WEEE). The guideline determines the framew ork for the return and recycling of<br />
used appliances as applicable throughout the EU. To return your used device,<br />
please use the return and collection systems available to you.<br />
23