VCES-HRV-IOM-1 - HRV600i, HRV700i ... - Venmar CES Inc.
VCES-HRV-IOM-1 - HRV600i, HRV700i ... - Venmar CES Inc. VCES-HRV-IOM-1 - HRV600i, HRV700i ... - Venmar CES Inc.
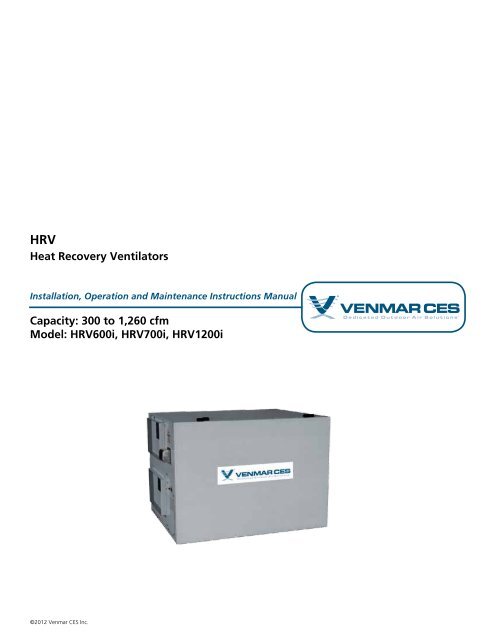
HRV Heat Recovery Ventilators Installation, Operation and Maintenance Instructions Manual Capacity: 300 to 1,260 cfm Model: HRV600i, HRV700i, HRV1200i ©2012 Venmar CES Inc.
- Page 2 and 3: Table of Contents Nomenclature.....
- Page 4 and 5: Warning, Caution and Important note
- Page 6 and 7: Locate exhaust grilles and supply d
- Page 8 and 9: Xtra.Wall.Control Dehumidistat to e
- Page 10 and 11: System operation Check Verification
- Page 12 and 13: Notes: Dimensions in [ ] are millim
- Page 14 and 15: Notes: Dimensions in [ ] are millim
- Page 16 and 17: Notes: Dimensions in [ ] are millim
- Page 18 and 19: Appendix D: Drain Connections Min.
- Page 20 and 21: occupied timer/Sensor Connection Oc
- Page 22 and 23: Appendix G: Make-up Heat Requiremen
- Page 24: info@venmarces.com www.venmarces.co
<strong>HRV</strong><br />
Heat Recovery Ventilators<br />
Installation, Operation and Maintenance Instructions Manual<br />
Capacity: 300 to 1,260 cfm<br />
Model: <strong>HRV</strong>600i, <strong>HRV</strong>700i, <strong>HRV</strong>1200i<br />
©2012 <strong>Venmar</strong> <strong>CES</strong> <strong>Inc</strong>.
Table of Contents<br />
Nomenclature......................................................................................................................................................................3<br />
Safety.Considerations..........................................................................................................................................................4<br />
Installation...........................................................................................................................................................................4<br />
Inspection.......................................................................................................................................................................4<br />
Mounting.Location.Requirements................................................................................................................................4<br />
Mounting.Options.........................................................................................................................................................5<br />
Ductwork........................................................................................................................................................................5<br />
Internal.Grilles.and.Diffusers........................................................................................................................................6<br />
Drains.............................................................................................................................................................................6<br />
Electrical.Connections...................................................................................................................................................6<br />
Controls................................................................................................................................................................................6<br />
General.Information......................................................................................................................................................6<br />
Sequence.of.Operation.................................................................................................................................................7<br />
Frost.Control..................................................................................................................................................................7<br />
Airflow.Measurement.and.Balancing.................................................................................................................................8<br />
Flow.Station.Positions...................................................................................................................................................8<br />
Balancing.Procedure......................................................................................................................................................8<br />
System.Service......................................................................................................................................................................9<br />
Bi-monthly.Maintenance...............................................................................................................................................9<br />
Annual.Maintenance.....................................................................................................................................................9<br />
Appendix.A:.Mounting.Diagrams.....................................................................................................................................11<br />
Appendix.B:.Unit.Dimensions...........................................................................................................................................12<br />
Appendix.C:.Flow.Station.Positions..................................................................................................................................17<br />
Appendix.D:.Drain.Connections........................................................................................................................................18<br />
Appendix.E:.Terminal.Control.Diagrams..........................................................................................................................19<br />
Appendix.F:.Electrical.Connection.Diagrams...................................................................................................................21<br />
Appendix.G:.Make-up.Heat.Requirements......................................................................................................................22<br />
Appendix.H:.Troubleshooting...........................................................................................................................................23<br />
Manufacturer reserves the right to discontinue or change specifications or designs without notice or obligation.<br />
vces-HRv-iom-1 – HRv600i, HRv700i, HRv1200i 2
<strong>HRV</strong>600i Nomenclature (300–750 cfm)<br />
1. FROST CONTROL<br />
D – Recirc defrost 1<br />
E – Exhaust only<br />
N – Non-defrost<br />
2. ENERGY RECOVERY<br />
P – Poly core<br />
A – Aluminum core<br />
H – HM core<br />
3. EXTERNAL FINISH<br />
W – White prepaint package<br />
Note:<br />
1 The recirculation defrost damper module is factory installed.<br />
<strong>HRV</strong>700i Nomenclature (300–800 cfm)<br />
1. FROST CONTROL<br />
D – Recirc defrost<br />
N – Non-defrost<br />
<strong>HRV</strong>1200i Nomenclature (700–1,250 cfm)<br />
1. FROST CONTROL<br />
D – Recirc defrost 1<br />
E – Exhaust only<br />
N – Non-defrost<br />
2. ENERGY RECOVERY<br />
P – Poly core<br />
A – Aluminum core<br />
H – HM core<br />
3. EXTERNAL FINISH<br />
W – White prepaint package<br />
C – Corrosion resistance package<br />
Note:<br />
1 The recirculation defrost damper module is factory installed.<br />
Nomenclature<br />
1 2 3 4<br />
1 2<br />
1 2 3 4<br />
©<strong>Venmar</strong> <strong>CES</strong> <strong>Inc</strong>. 2012. All rights reserved throughout the world.<br />
6. LOW SPEED<br />
L – Reduced low speed<br />
N – Normal low speed<br />
5. AC<strong>CES</strong>S DOOR<br />
S – Standard door<br />
R – Reverse door<br />
(right hand flow)<br />
4. MEF FILTRATION<br />
M – MEF supply filtration<br />
X – No MEF supply filtration<br />
vces-HRv-iom-1 – HRv600i, HRv700i, HRv1200i 3<br />
5 6<br />
5 6<br />
2. EXTERNAL FINISH<br />
C – Corrosion resistant package<br />
6. LOW SPEED<br />
L – Reduced low speed<br />
N – Normal low speed<br />
5. AC<strong>CES</strong>S DOOR<br />
S – Standard door<br />
R – Reverse door<br />
(right hand flow)<br />
4. MEF FILTRATION<br />
M – MEF supply filtration<br />
X – No MEF supply filtration<br />
Illustrations cover the general appearance of <strong>Venmar</strong> <strong>CES</strong> products at the time of publication and <strong>Venmar</strong> <strong>CES</strong> reserves the<br />
right to make changes in design and construction at any time without notice.
Warning, Caution and Important notes appear throughout<br />
this manual in specific and appropriate locations to<br />
alert Installing Contractors and maintenance or service<br />
personnel of potential safety hazards, possible equipment<br />
damage or to alert personnel of special procedures or instructions<br />
that must be followed as outlined below.<br />
! WaRnIng<br />
Identifies an instruction which, if not followed, might cause<br />
serious personal injuries including possibility of death.<br />
CautIon<br />
Identifies an instruction which, if not followed, might severely<br />
damage the unit, its components, the assembly or<br />
final installation.<br />
IMpoRtant<br />
Indicates supplementary information needed to fully<br />
complete an instruction or installation.<br />
Inspect the exterior of the unit for shipping damage by ensuring<br />
that there is no damage to the door, door latches,<br />
door hinges, damper, duct collars, cabinet, etc. Inspect the<br />
interior of the unit for damage by ensuring that the fan<br />
motors and housings, heat exchanger, insulation, dampers,<br />
actuators and drain pans are all intact.<br />
When determining an installation location, the unit must<br />
be mounted in a heated area to prevent condensate drain<br />
lines from freezing. The mounting location should be away<br />
from occupied areas to provide quiet operation. The area<br />
should also be easily accessible for maintenance.<br />
IMpoRtant<br />
These Heat Recovery Ventilators have minimum clearance<br />
requirements when mounting. See Appendix B for<br />
specific clearance requirements. Mounting options must<br />
allow 6” [152 mm] clearance in front of control cover for<br />
access.<br />
Safety Considerations<br />
Installation<br />
Inspection<br />
Mounting.Location.Requirements<br />
Hazards may exist within this equipment because it contains<br />
electrical and powerful moving components. Only<br />
qualified service personnel should install or service this<br />
equipment. Untrained personnel can perform basic maintenance<br />
such as maintaining filters. Observe precautions<br />
marked in the literature and on labels attached to the unit.<br />
Follow all safety codes.<br />
! WaRnIng<br />
Disconnect the main power switch to the unit before performing<br />
service or maintenance. Electric shock can cause<br />
personal injury.<br />
If transportation damage is found, file a claim immediately<br />
with the transportation agency. Remove all packaging,<br />
tape, etc. from the cabinet.<br />
A mounting location close to an exterior partition will<br />
minimize the length of insulated duct. The unit should be<br />
close to a drain and 120 volt, 60 Hz power supply. The<br />
unit should be mounted away from hot chimneys, electrical<br />
panels and other hazards. The area should also be easily<br />
accessible for maintenance.<br />
vces-HRv-iom-1 – HRv600i, HRv700i, HRv1200i 4
There are several options for hanging or floor mounting<br />
the unit.<br />
IMpoRtant<br />
In all cases, the unit must be level. Consult local building<br />
code for restrictions in your area regarding installation.<br />
Hang the unit with the reinforced rubber straps provided<br />
as shown in Appendix A. Check with local building codes<br />
regarding the use of rubber straps in commercial buildings.<br />
Attach the straps to the unit with two #8 screws provided.<br />
Then attach the other end of the strap to the ceiling<br />
joists, trusses, custom frame, etc.<br />
The unit can also be hung with 3/8” [10 mm] threaded<br />
rod and U-channels or angles (not supplied) as shown in<br />
Appendix A.<br />
The supply and exhaust duct connections on the unit are<br />
as follows:<br />
Table 1: Supply and Exhaust Duct Connection Sizes<br />
unit Duct Size<br />
600 CFM or 700 CFM 14” x 8” [356 x 203 mm]<br />
1,200 CFM 20” x 8” [508 x 203 mm]<br />
IMpoRtant<br />
Duct sizes are for connection purposes only. Ducts should<br />
be sized to keep noise and pressure drop to a minimum.<br />
The supply and exhaust ducts connected to outside, as<br />
well as any ducts passing through an unconditioned space,<br />
must have a minimum insulation value of R5. In addition,<br />
a continuous integral vapor barrier over the duct insulation<br />
must be used.<br />
Air balancing dampers are recommended for both supply<br />
and exhaust ducts to allow for adjustment of airflow. Also,<br />
flexible canvas connectors should be installed close to the<br />
unit in the supply duct to the building and the exhaust<br />
duct from the building to reduce noise transmission from<br />
the unit to the building (see Appendix C).<br />
All ports on the 600 and 1,200 cfm units have 1” [25 mm]<br />
flanges to facilitate the installation of the ductwork. Please<br />
note that the outdoor air opening port has a frost control<br />
Mounting.Options<br />
Ductwork<br />
When installing the unit, keep in mind that access to the<br />
control panel may be required. Supply and exhaust ducts<br />
to outside may have 1” to 2” [25 to 51 mm] of insulation<br />
on them. Rubber vibration isolation may be required and is<br />
recommended for quiet operation.<br />
The unit can also be mounted on a metal or wooden<br />
curb (not supplied) bolted to the floor as shown in Appendix<br />
A. Space must be left under the unit to allow<br />
connection of drain lines. A gradual slope is required for<br />
the condensate water to drain by gravity (minimum ¼”<br />
per foot) [6 mm per 305 mm]. If this is not possible, a<br />
pump should be used. If attachment of the unit to the<br />
curb is required, ensure that screws, bolts and mounting<br />
hardware do not interfere with moving parts or that the<br />
integrity of the cabinet insulation is not affected.<br />
damper incorporated with it. Ensure that any mechanical<br />
fasteners used to connect the duct do not interfere with<br />
the operation of the damper. Screws can be installed on<br />
the side of the cabinet rather than the flange for this port<br />
only. For port locations see Appendix B.<br />
All ports on the 700 cfm unit have 2” [51 mm] flanges to<br />
facilitate the installation of the ductwork. Please note the<br />
outdoor air opening connection is factory set to be the left<br />
side upper port. It is possible to reverse the operation of<br />
the frost control damper in order to use the port on top of<br />
the cabinet for outdoor air opening connection.<br />
To change the outdoor air opening from the side to the<br />
top use the following directions. For port locations see Appendix<br />
B.<br />
Remove the cover of the damper motor with a flat screw<br />
driver. Reverse the orange and red wires by moving the orange<br />
from Terminal #2 to Terminal #3 and moving the red<br />
wire from Terminal #3 to Terminal #2. The end result, in<br />
order to have the outdoor air opening connection to the<br />
top port, will be: #1 – white, #2 – red, #3 – orange.<br />
vces-HRv-iom-1 – HRv600i, HRv700i, HRv1200i 5
Locate exhaust grilles and supply diffusers to provide effective<br />
ventilation and avoid short circuiting of airflows.<br />
Adjustable dampers should be provided at every grille and<br />
diffuser location to make balancing of the system possible.<br />
A proper selection of style and size of grilles and diffusers<br />
is required to minimize pressure drop. The velocity of the<br />
airflow should not exceed 400 feet per minute [2 meters<br />
per second] for normal applications.<br />
The drain fittings provided with the unit will accept a ¾”<br />
[19 mm] NPT coupler (supplied by others). The drain line<br />
for the unit must be fabricated on site and connected to<br />
the building main. A loop in the hose or trap in the copper<br />
or plastic pipe must be provided to prevent sewer gases<br />
from entering the unit when connecting to a drain as illustrated<br />
in Appendix D.<br />
power<br />
A terminal block and strain relief bushing or a junction box<br />
is provided for line voltage to make the necessary power<br />
connections.<br />
The electrical requirements are as follows:<br />
Table 2: Electrical Requirements<br />
600 CfM 700 CfM 1,200 CfM<br />
Voltage 120V 120V 120V<br />
MCa 9.5 6.6 14.3<br />
Mop 12.0 9.0 20.0<br />
fan Interlock Switch (ff)<br />
External fan control can be achieved by connecting an<br />
external fan source (G) through dry contacts (FF). These<br />
contacts are closed on a call for ventilation or frost control.<br />
Speed Selection (600 cfm/1,200 cfm only)<br />
There are three speed settings available with the controls,<br />
only two of which can be functional at any one time. The<br />
units are factory set to use the low and high speed taps<br />
Internal.Grilles.and.Diffusers<br />
Drains<br />
Electrical.Connections<br />
Controls<br />
General.Information<br />
The duct system should be designed according to the high<br />
speed flow rate of the unit. In order to keep the noise and<br />
pressure drop to a minimum, a maximum air velocity of<br />
1,100 feet per minute [5.6 meters second] should be used<br />
in calculations in duct design. The duct runs should be<br />
kept as short as possible with the minimum amount of elbows<br />
and transitions. The manufacturer recommends the<br />
use of smooth radius elbows or square elbows with turning<br />
vanes to achieve maximum performance.<br />
IMpoRtant<br />
Consult local building code for plumbing requirements<br />
in your area. If copper pipe is to be used, ensure not to<br />
solder to the ¾” [19 mm] coupler while it is attached to<br />
the plastic drain fitting as deformation may occur. Ensure<br />
adequate slope is present to allow good drainage (minimum<br />
¼” per foot [6 mm per 305 mm]).<br />
Control Box access for Low Speed Setting<br />
(600 cfm/1,200 cfm only)<br />
Disconnect power to the unit. Remove the four screws<br />
securing the cover plate as shown in Appendix F. Lift off<br />
the control cover plate and switch the red wire as shown<br />
in Appendix F.<br />
on the blower motors. If necessary, the medium speed<br />
tap can be used instead of the low speed tap. See Appendix<br />
F for instructions on how to make this change. Units<br />
without the remote wall control option can be shut off by<br />
opening the contact between Low-Com or High-Com as<br />
shown in Appendix E, Terminal Label.<br />
vces-HRv-iom-1 – HRv600i, HRv700i, HRv1200i 6
Before start-up, check the unit for obstructive packaging,<br />
objects near or in blowers, dampers, heat exchangers, etc.<br />
Once installation is complete, check all modes of operation<br />
to ensure that the unit is working properly. Close the<br />
doors and check for operation on Low, Com and High.<br />
Use a wall control or the dry contact switching to run fan<br />
speeds as shown in Appendix E, Wall Control Connection.<br />
The 700 cfm unit is two-speed. Low speed can be initiated<br />
by creating a closure across Low-Com or high speed can<br />
be initiated by creating a closure across High-Com.<br />
unit Check points<br />
• Power connected, no ventilation call – Both fans<br />
are off, frost control damper (if equipped) closes off<br />
fresh air from outside.<br />
• Power connected, low speed call – Both fans on low<br />
speed, internal frost control damper (if equipped)<br />
opens fresh air from outside. If equipped with recir-<br />
The unit functions are controlled by integrated controls in<br />
the unit which may include exhaust only defrost or recirculation<br />
defrost. During cold outdoor air temperatures, frost<br />
control cycles will remove frost from the heat exchanger to<br />
maintain continuous operation.<br />
Exhaust only Defrost (optional)<br />
Frost removal occurs when the supply blower de-energizes,<br />
the outside air damper and the heat exchanger<br />
damper close and the exhaust fan continues to draw only<br />
warm room air through the flat plate heat exchanger to<br />
maintain ventilation. This process removes the build-up of<br />
ice in the heat exchanger. Frost control is initiated at an<br />
outdoor air temperature of 23°F [−5°C]. The defrost/ventilation<br />
cycle is time based.<br />
! WaRnIng<br />
A negative building pressure may develop during the exhaust<br />
only frost control cycle with possible backdrafting<br />
of fumes from combustion equipment.<br />
Recirculation Defrost (optional)<br />
The recirculation frost control cycle is electronically controlled<br />
in response to the outside air temperature. On a<br />
call for defrost, the outside air damper closes, the exhaust<br />
fan is de-energized and the supply fan circulates warm<br />
air through the flat plate heat exchanger to remove the<br />
build-up of ice. For the <strong>HRV</strong>700i, it is possible to extend<br />
the frost control times during very cold weather by removing<br />
the jumper JU1-F on the circuit board. Frost control is<br />
Sequence.of.Operation<br />
Frost.Control<br />
culation module, the internal frost control damper<br />
closes recirculation opening.<br />
• Power connected, high speed call – Both fans on<br />
high speed, frost control damper opens fresh air<br />
from outside. If equipped with recirculation module,<br />
the internal frost control damper closes recirculation<br />
opening.<br />
• Power connected, occupied timer/sensor connection<br />
open (unoccupied mode) – Both fans are off,<br />
frost control damper closes fresh air from outside. If<br />
equipped with recirculation module, the internal frost<br />
control damper opens recirculation opening.<br />
• Power connected, FF control contacts close during<br />
unit ventilation or frost control cycle.<br />
initiated at an outdoor air temperature of 23°F [−5°C]. The<br />
defrost/ventilation cycle is time based.<br />
Table 3: Recirculation and Exhaust Only Defrost<br />
<strong>HRV</strong> type of<br />
Stage<br />
Model Defrost<br />
Initiate<br />
temperature<br />
Ventilation time<br />
(Minutes) Defrost<br />
time/Run time<br />
Standard Extended<br />
Remote Wall Control (optional)<br />
Remote mounted wall control options are solid state controls<br />
that can be used to control the ventilators from a<br />
remote location. The connection from the ventilator to the<br />
control is low voltage and requires a four conductor (24<br />
gauge minimum) LVT cable. Models are available with a<br />
dehumidistat control and speed switching. The following<br />
three options are available:<br />
Standard.Wall.Control<br />
Dehumidistat to engage high speed exchange. Slide switch<br />
operation supporting continuous low exchange and continuous<br />
high exchange.<br />
vces-HRv-iom-1 – HRv600i, HRv700i, HRv1200i 7<br />
600i<br />
1200i<br />
700i<br />
1<br />
2<br />
3<br />
1<br />
2<br />
3<br />
R/E<br />
R/E<br />
R/E<br />
R<br />
R<br />
R<br />
23ºF<br />
5ºF<br />
−21ºF<br />
23ºF<br />
5ºF<br />
−21ºF<br />
−5ºC<br />
−15ºC<br />
−30ºC<br />
−5ºC<br />
−15ºC<br />
−30ºC<br />
12/60<br />
12/24<br />
12/12<br />
6/60<br />
6/32<br />
6/19<br />
N/A<br />
N/A<br />
N/A<br />
10/28<br />
10/28<br />
10/15
Xtra.Wall.Control<br />
Dehumidistat to engage high speed exchange. Electronic<br />
push button operation supporting intermittent (standby)<br />
ventilation, continuous low exchange, continuous high<br />
exchange, maintenance indicator light and exchange indicator<br />
light.<br />
Aqua.Air.Wall.Control<br />
Ideal for pool dehumidification. Dehumidistat to engage<br />
high speed exchange. Electronic push button operation<br />
supporting intermittent (standby) ventilation, continuous<br />
low exchange, continuous high exchange, maintenance<br />
indicator light and exchange indicator light.<br />
Airflow Measurement and Balancing<br />
Once installation is complete, the supply and exhaust airflows<br />
should be balanced to ensure proper operation and<br />
a good quality installation. A well designed duct system<br />
with properly sized duct runs and equal static pressure<br />
losses of both the supply and exhaust will aid in balancing<br />
the unit. However, it will be necessary to take flow<br />
Whether flow stations are permanently installed or used<br />
temporarily, the position they are placed in is very important<br />
to ensure accuracy as shown in Appendix C. The best<br />
locations for mounting the FMS is in the long straight sections<br />
of ducting where airflow has stabilized across the<br />
area of the duct. This position will provide the most accurate<br />
measurements.<br />
The next best location for the FMS is immediately before<br />
or after a 90 degree elbow and 12” [305 mm] from any<br />
damper. In straight sections of pipe, the FMS should be<br />
installed at least 30” [762 mm] from any fan outlet. This<br />
applies to the supply air opening connection on the heat<br />
recovery ventilator and the exhaust air opening connection.<br />
Before proceeding with balancing, all windows, overhead<br />
doors and walk-in doors should be closed and exhaust systems<br />
should be turned off.<br />
The connections between the flow stations and the ducts<br />
must be sealed with tape. Mount the magnehelic gauge in<br />
a convenient location where it is level and will not vibrate<br />
or be bumped. Zero the gauge. Measure the exhaust air<br />
first as it is often the lowest due to a longer duct system.<br />
With the fan speed at maximum, connect the hoses from<br />
the FMS to the magnehelic gauge. If the needle falls<br />
Flow.Station.Positions<br />
Balancing.Procedure<br />
measurements with the proper equipment to ensure a<br />
balanced system. Magnehelic gauges and flow measuring<br />
stations (FMS) are available for 14” x 8” [356 x 203 mm]<br />
or 20” x 8” [508 x 203 mm] rectangular duct and a range<br />
of round duct sizes. Please ask your supplier for more information.<br />
With airflow measuring stations permanently installed,<br />
balancing is done by measuring airflow on one side of the<br />
heat recovery ventilator and then the other. Adjustments<br />
can then be made to the damper to equalize airflows.<br />
When using the temporary method, an FMS is installed in<br />
one air duct of the heat recovery ventilator and the flow<br />
recorded. The FMS is then relocated to the other air duct<br />
and the airflow is recorded again. Dampers can then be<br />
adjusted to equalize airflow. This procedure should be repeated<br />
to ensure that the unit is balanced properly.<br />
below zero, reverse the hose connections. Ensure that the<br />
damper is wide open. Take a reading from the magnehelic<br />
gauge and record it. Remove the FMS and place it in the<br />
supply duct. This process is not necessary if the FMS is to<br />
be permanently mounted.<br />
Repeat the procedure. If the reading is higher in the supply<br />
duct, adjust the damper until the reading is the same.<br />
If the reading is lower, return the FMS to the exhaust duct<br />
and adjust the damper to obtain the same reading as the<br />
supply duct.<br />
vces-HRv-iom-1 – HRv600i, HRv700i, HRv1200i 8
! WaRnIng<br />
Disconnect power before maintaining the unit.<br />
Bi-monthly maintenance should include:<br />
air filters<br />
The standard foam filters are washable. Under normal<br />
conditions it is recommended that they be cleaned every<br />
two months. More frequent cleaning may be required<br />
under extremely dirty operating conditions. Use a vacuum<br />
cleaner to remove the heaviest portion of accumulated<br />
dirt, then wash with warm water.<br />
A medium efficiency filter for the supply airstream is available<br />
from your supplier. This filter is disposable and should<br />
be replaced when it becomes dirty.<br />
MEF filter (optional)<br />
Figure 1: Filters – 600 cfm and 1,200 cfm<br />
Annual maintenance should include:<br />
air filters<br />
Vacuum and wash standard foam filters. Replace medium<br />
efficiency filter if present.<br />
Drain pans and Interior of unit<br />
Wash the foil faced insulation surfaces and wipe the drain<br />
pans with a soft cloth and mild cleaning solution. Check<br />
the drain fittings to ensure they are draining freely.<br />
flat plate Heat Exchanger<br />
! WaRnIng<br />
Hot water and strong cleaning agents could damage the<br />
heat exchanger. Ensure the heat exchanger is returned to<br />
the unit in the correct orientation. Failure to do so may<br />
result in damage to the exchanger. Follow instructions on<br />
the label.<br />
The flat plate heat exchanger must be handled with care.<br />
Remove the flat plate heat exchangers by sliding them out<br />
System Service<br />
Bi-monthly.Maintenance<br />
Washable foam filter<br />
Annual.Maintenance<br />
Drain pans and Interior of unit<br />
With the filters removed from the unit, the foil faced insulation<br />
surfaces and drain pans should be wiped clean with<br />
a soft cloth and mild cleaning solution. Ensure that the<br />
drain fittings are free from dirt and draining freely.<br />
Washable<br />
foam filter<br />
Figure 2: Filters – 700 cfm<br />
Washable foam filter or<br />
MEF filter (optional)<br />
from the tracks holding them in place. In order to ensure<br />
maximum efficiency of the partitions, it is recommended<br />
that the heat exchanger be cleaned once a year following<br />
the season of most intense use. For polypropylene and aluminum<br />
media, allow the heat exchanger to soak for three<br />
hours in warm water and mild soap. Rinse under a heavy<br />
stream of water. For HM heat exchangers, use a vacuum<br />
cleaner or low pressure air. It is not recommended to use<br />
solvents or detergents as these may damage the media<br />
or structure of the heat exchanger. When replacing the<br />
flat plate heat exchanger sections, ensure they are of the<br />
proper vertical orientation. Failure to do so may result in<br />
low airflow on the exhaust airstream due to system pressure<br />
trapping or holding condensate in the flutes.<br />
fans<br />
Blower wheels and fan housing should be checked for<br />
dirt buildup. If they appear dirty, it may be necessary to<br />
remove the blower assembly and then vacuum the dust<br />
out through the fan mouth. See Figure 3 and Figure 4 for<br />
instructions on removing the blower assembly.<br />
vces-HRv-iom-1 – HRv600i, HRv700i, HRv1200i 9
System operation Check<br />
Verification of all control modes should be checked to ensure<br />
proper operation. Refer to Sequence of Operation.<br />
testing and Replacement of the Damper<br />
actuator<br />
Check damper operation by switching between Low-Com<br />
or High-Com on the dry contact terminal or by switching<br />
through the modes on the optional remote wall control.<br />
If the damper does not respond in one or both directions,<br />
check all connections.<br />
700.cfm.Only<br />
Check for 24 volt output between the white/red and the<br />
white/orange wires at the damper motor. If 24 volts can<br />
be measured at the damper motor, the problem is either<br />
in the connections, the frost control relay or the main circuit<br />
board.<br />
600.and.1,200.cfm.Only<br />
CautIon<br />
120 VAC.<br />
With the unit powered but off, check for 120 volt output<br />
across the white/black wires. If 120 volt can be measured<br />
at the motor, replace the motor. If 120 volt cannot be<br />
measured at the motor, check for 120 volts across pins<br />
J1-9 and J1-1 at the printed circuit board.<br />
Main Circuit Board Replacement<br />
The main circuit board must be replaced if an electronic<br />
problem arises. For example, the unit suddenly stops, the<br />
unit stays in frost control mode all the time or if control<br />
functions are not working properly.<br />
Ensure that power is reaching the board. Test the blower<br />
motors and damper actuators for operation when directly<br />
connected to the appropriate power voltage. If the motor<br />
and damper actuators function normally, replace the main<br />
circuit board.<br />
Motor and Blower Removal and Installation<br />
Disconnect power from the unit. To determine if the fan<br />
motor is burned out, disconnect the four-wire service<br />
connector between the motor and cabinet. Connect the<br />
motor directly to a 120 volt power source with an electrical<br />
cable as follows:<br />
Table 4: Motor Connections<br />
Red + White Low speed<br />
Blue + White Medium speed<br />
Black + White High speed<br />
If the motor functions normally, there is a problem with<br />
the wiring connections or the main circuit board. Check all<br />
wiring and replace main circuit board if necessary.<br />
If the blower does not run, it must be replaced. To replace<br />
the motor, remove the flat plate heat exchanger from the<br />
unit. Disconnect the four-wire service connector from the<br />
unit. Remove the fasteners holding the motor assembly<br />
in place. Lift the assembly up and out, using one hand<br />
under the motor and one hand to steady it. Remove the<br />
assembly carefully from the unit to avoid damage to the<br />
insulation, shelf, etc. Install the repaired motor assembly<br />
by following these instructions in reverse.<br />
Remove these<br />
two screws<br />
Locking plate<br />
Capacitor<br />
Figure 3: Blower assembly removal – 600 cfm and 1,200 cfm<br />
Figure 4: Blower assembly removal – 700 cfm<br />
Thumbscrew<br />
Service<br />
connector<br />
vces-HRv-iom-1 – HRv600i, HRv700i, HRv1200i 10
Reinforced<br />
rubber strap<br />
Appendix A: Mounting Diagrams<br />
Recirculation<br />
module<br />
Recirculation<br />
module<br />
Bolt to floor<br />
Space must be left to allow connection of<br />
drain lines with adequate slope for drainage<br />
Figure A1: Mounting – 600 cfm and 1,200 cfm<br />
Dry contacts<br />
Figure A2: Mounting – 700 cfm<br />
U channel<br />
(supplied by others)<br />
Rubber vibration isolator<br />
(supplied by others)<br />
Wooden curb (supplied by others)<br />
3/8” [10 mm]<br />
threaded rod<br />
(supplied by others)<br />
Cabinet mounted<br />
U channel<br />
Rubber vibration<br />
isolator<br />
Note: Diagrams show standard unit configuration.<br />
For units with the reversed door option, the door<br />
will be located here.<br />
Dry contacts<br />
3/8” [10 mm]<br />
threaded rod<br />
(supplied by others)<br />
Bolt to floor<br />
Wooden curb<br />
(supplied by others)<br />
Space must be left to allow<br />
connection of drain lines with<br />
adequate slope for drainage<br />
vces-HRv-iom-1 – HRv600i, HRv700i, HRv1200i 11
Notes: Dimensions in [ ] are millimeters.<br />
Center of gravity<br />
Direction of airflow<br />
B<br />
A<br />
12.005”<br />
[305]<br />
HM Core<br />
Kg<br />
19<br />
12<br />
25<br />
16<br />
72<br />
LBS<br />
41<br />
27<br />
56<br />
35<br />
159<br />
PTS<br />
A<br />
B<br />
C<br />
D<br />
Total<br />
Aluminum Core<br />
PTS LBS Kg<br />
A 40 18<br />
B 26 12<br />
C 55 25<br />
D 34 15<br />
Total 155 70<br />
Kg<br />
17<br />
11<br />
24<br />
15<br />
67<br />
<strong>HRV</strong>600i<br />
Poly Core<br />
PTS LBS<br />
A 38<br />
B 25<br />
C 52<br />
D 33<br />
Total 148<br />
Connection Table<br />
Connection Sizes<br />
Line voltage in 14 gauge wire nut<br />
Condensate drain fitting (2x) 3/4” MPT<br />
C D<br />
13.375”<br />
[340]<br />
Appendix B: Unit Dimensions<br />
TOP VIEW<br />
28.005”<br />
[711]<br />
23.500”<br />
[597]<br />
34.000”<br />
[864]<br />
5.859" [149]<br />
A Line voltage<br />
6.500”<br />
[165]<br />
14.000”<br />
[356]<br />
Strap mounting<br />
location<br />
2.750”<br />
[70]<br />
Figure B1: Unit dimensions – 600 cfm (with exhaust only defrost)<br />
A<br />
B<br />
14.000”<br />
[356]<br />
4.000”<br />
[102]<br />
4.028”<br />
[102]<br />
8.000”<br />
[203]<br />
Exhaust air<br />
Exhaust air<br />
opening<br />
8.000”<br />
[203]<br />
Outdoor air<br />
opening<br />
Outdoor air<br />
24.500”<br />
[622]<br />
4.000” [102]<br />
8.000”<br />
[203]<br />
4.000”<br />
[102]<br />
Supply air<br />
Low voltage<br />
terminal strips<br />
8.000”<br />
[203]<br />
Return air<br />
opening<br />
Return air<br />
Supply air<br />
opening<br />
vces-HRv-iom-1 – HRv600i, HRv700i, HRv1200i 12<br />
3.535” [90]<br />
Control box<br />
access<br />
14.103”<br />
[358]<br />
7.705”<br />
[196]<br />
5.125”<br />
[130]<br />
19.207”<br />
[488]<br />
10.005”<br />
[254]<br />
B Condensate drain<br />
Note: For units with the reversed door option, interior<br />
components will appear as a mirror image of the above diagram.<br />
Reversed<br />
door option<br />
RIGHT VIEW<br />
FRONT VIEW<br />
LEFT VIEW<br />
Note: This model has a damper located on the outdoor intake connection. This damper will close during a frost control cycle or when the unit is placed in the ‘Off‘ position with power maintained to the unit. This damper is not designed as a<br />
backdraft damper and will remain open if power is disconnected from the unit for any reason.<br />
Note: A minimum of 15.000” [381] clearance from any obstruction is required for<br />
removal of heat recovery cores, fans, etc.<br />
The access door can be removed from the cabinet with only 2.000” [51] of clearance.<br />
Note: A minimum of 12.000” [305] clearance from any<br />
obstruction is required for removal of the control box.<br />
Access door<br />
Control plate<br />
Heat recovery core<br />
Reversed<br />
door option<br />
15.000”<br />
[381]<br />
12.000”<br />
[305]<br />
RIGHT VIEW<br />
FRONT VIEW
Note: Dimensions in [ ] are millimeters.<br />
600i (with recirculation defrost)<br />
Poly Core 197 LBS [90 kg]<br />
Aluminum Core 204 LBS [93 kg]<br />
HM Core 208 LBS [95 kg]<br />
Connection Table<br />
Connection Sizes<br />
A Line voltage in 14 gauge wire nut<br />
B Condensate drain fitting (2x) ¾” MPT<br />
28.120”<br />
[714]<br />
49.550”<br />
[1,259]<br />
7.100”<br />
[180]<br />
14.000”<br />
[356]<br />
2.750”<br />
[70]<br />
Strap mounting<br />
location<br />
14.000”<br />
[356]<br />
4.000” [102]<br />
1.750”<br />
[44]<br />
34.000”<br />
[864]<br />
Line voltage in<br />
A<br />
8.000”<br />
[203]<br />
Outdoor air<br />
opening<br />
Outdoor air<br />
Exhaust air<br />
8.000”<br />
[203]<br />
Exhaust air<br />
opening<br />
4.000”<br />
[102]<br />
Dry contacts<br />
4.000”<br />
24.500” [102]<br />
[622]<br />
8.000”<br />
[203]<br />
Return air<br />
opening<br />
Return air<br />
Supply air<br />
8.000”<br />
[203]<br />
Supply air<br />
opening<br />
3.530”<br />
[90]<br />
1.750”<br />
[44]<br />
For recirc defrost only<br />
19.207”<br />
[488]<br />
Control box<br />
14.100”<br />
[358]<br />
Access door<br />
5.125”<br />
[130]<br />
Reversed door option<br />
Condensate drain<br />
B<br />
Note:<br />
For units with the reversed door option, interior components will appear<br />
as a mirror image of the above diagram.<br />
Figure B2: Unit dimensions – 600 cfm (with recirculation defrost)<br />
vces-HRv-iom-1 – HRv600i, HRv700i, HRv1200i 13<br />
RIGHT VIEW<br />
FRONT VIEW<br />
LEFT VIEW<br />
Note: A minimum of 15.000” [381] clearance from any obstruction is required for removal<br />
of heat recovery cores, fans, etc.<br />
The access door can be removed from cabinet with only 2.000” [51] of clearance.<br />
Note: A minimum of 12.000” [305] clearance from any obstruction<br />
is required for removal of the control box.<br />
Access<br />
door<br />
Control panel<br />
Heat<br />
recovery core<br />
15.000”<br />
[381]<br />
12.000”<br />
[305]<br />
Reversed<br />
door option<br />
RIGHT VIEW<br />
FRONT VIEW
Notes: Dimensions in [ ] are millimeters.<br />
Center of gravity<br />
Direction of airflow<br />
B<br />
A<br />
HM Core<br />
20.620”<br />
[524]<br />
Kg<br />
27<br />
20<br />
27<br />
20<br />
94<br />
LBS<br />
59<br />
43<br />
59<br />
43<br />
204<br />
PTS<br />
A<br />
B<br />
C<br />
D<br />
Total<br />
Aluminum Core<br />
PTS LBS Kg<br />
A 57 26<br />
B 41 19<br />
C 57 26<br />
D 41 19<br />
Total 196 90<br />
Kg<br />
25<br />
18<br />
25<br />
18<br />
86<br />
<strong>HRV</strong>1200i<br />
Poly Core<br />
PTS LBS<br />
A 54<br />
B 39<br />
C 54<br />
D 39<br />
Total 186<br />
Connection Table<br />
Connection Sizes<br />
Line voltage in 14 gauge wire nut<br />
Condensate drain fitting (2x) ¾” MPT<br />
C D<br />
14.250”<br />
[362]<br />
9.878”<br />
[251]<br />
20.000”<br />
[508]<br />
11.000”<br />
[279]<br />
41.206”<br />
[1,047]<br />
40.326”<br />
[1,024]<br />
Figure B3: Unit dimensions – 1,200 cfm (with exhaust only defrost)<br />
A<br />
B<br />
TOP VIEW<br />
5.715”<br />
[145]<br />
Strap mount<br />
location<br />
34.000”<br />
[864]<br />
20.000”<br />
[508]<br />
10.000”<br />
[254]<br />
Line voltage in<br />
A<br />
8.000”<br />
[203]<br />
Outdoor<br />
air opening<br />
2.750”<br />
[70]<br />
Exhaust air<br />
8.000”<br />
[203]<br />
Outdoor air<br />
4.028”<br />
[102]<br />
Exhaust air<br />
opening<br />
24.500”<br />
[622]<br />
vces-HRv-iom-1 – HRv600i, HRv700i, HRv1200i 14<br />
4.000”<br />
[102]<br />
8.000”<br />
[203]<br />
Return<br />
air opening<br />
4.000”<br />
[102]<br />
Supply air<br />
Low voltage<br />
terminal strips<br />
Return air<br />
Supply air<br />
opening<br />
20.000”<br />
[508]<br />
Access door<br />
B Condensate drain<br />
19.207”<br />
5.125”<br />
[488]<br />
[130]<br />
Note: For units with the reversed door option, interior components<br />
will appear as a mirror image of the above diagram.<br />
Control box<br />
access<br />
11.325”<br />
[288]<br />
Reversed<br />
door option<br />
RIGHT VIEW<br />
FRONT VIEW<br />
LEFT VIEW<br />
Note: This model has a damper located on the outdoor intake connection. This damper will close during a frost control cycle or when the unit is placed in the ‘Off’ position with power maintained to the unit. This damper is not designed as a backdraft damper and<br />
will remain open if power is disconnected from the unit for any reason.<br />
Note: A minimum of 15.000” [381] clearance from any obstruction<br />
is required for removal of heat recovery cores, fans, etc.<br />
The access door can be removed from the cabinet with only 2.000” [51] of clearance.<br />
NOTE: A minimum of 12.000” [305] clearance from any obstruction<br />
is required for removal of the control box.<br />
Access<br />
door<br />
Control cover<br />
Heat recovery<br />
core<br />
15.000”<br />
[381]<br />
12.000”<br />
[305]<br />
Reversed<br />
door option<br />
RIGHT VIEW<br />
FRONT VIEW
Note: Dimensions in [ ] are millimeters<br />
1200i (with recirculation defrost)<br />
Poly Core 247 LBS [112 kg]<br />
Aluminum Core 257 LBS [117 kg]<br />
HM Core 264 LBS [120 kg]<br />
Connection Table<br />
Connection Sizes<br />
A Line voltage in 14 gauge wire nut<br />
B Condensate drain fitting (2x) ¾” MPT<br />
41.240”<br />
[1,047]<br />
10.000”<br />
[254]<br />
20.000”<br />
[508]<br />
49.550”<br />
[1,259]<br />
20.000”<br />
[508]<br />
10.000”<br />
[254]<br />
Strap mounting<br />
location<br />
2.750”<br />
[70]<br />
A Line voltage in<br />
1.750”<br />
[44]<br />
Dry contacts<br />
8.000”<br />
[203]<br />
8.000”<br />
[203]<br />
Outdoor air<br />
opening<br />
Exhaust air<br />
opening<br />
4.000”<br />
[102]<br />
4.000”<br />
[102]<br />
24.500”<br />
[622]<br />
8.000”<br />
[203]<br />
8.000”<br />
[203]<br />
Return air<br />
opening<br />
Supply air<br />
opening<br />
3.530”<br />
[90]<br />
1.750”<br />
[44]<br />
For recirc defrost only<br />
5.125”<br />
[130]<br />
19.207”<br />
[488]<br />
Control box<br />
20.000”<br />
[508]<br />
Access door<br />
B Condensate drain<br />
Figure B4: Unit dimensions – 1,200 cfm (with recirculation defrost)<br />
Reversed door<br />
option<br />
Note: For units with the reversed door option, interior components<br />
will appear as a mirror image of the above diagram.<br />
vces-HRv-iom-1 – HRv600i, HRv700i, HRv1200i 15<br />
RIGHT VIEW<br />
FRONT VIEW<br />
LEFT VIEW<br />
Note: A minimum of 15.000” [381] clearance from any obstruction is required for removal<br />
of heat recovery cores, fans, etc.<br />
The access door can be removed from cabinet with only 2.000” [51] of clearance.<br />
Note: A minimum of 12.000” [305] clearance<br />
from any obstruction is required for removal<br />
of the control box.<br />
Access<br />
door<br />
Control cover<br />
Heat<br />
recovery<br />
core<br />
15.000”<br />
[381]<br />
12.000”<br />
[305]<br />
Reversed door option<br />
RIGHT VIEW<br />
FRONT VIEW
Notes: Dimensions in [ ] are millimeters.<br />
Center of gravity<br />
Direction of airflow<br />
A B<br />
Kg<br />
15<br />
30<br />
16<br />
34<br />
95<br />
<strong>HRV</strong>700i<br />
LBS<br />
34<br />
67<br />
36<br />
74<br />
211<br />
PTS<br />
A<br />
B<br />
C<br />
D<br />
Total<br />
10.000”<br />
[254]<br />
C D<br />
22.500”<br />
[572]<br />
Connection Table<br />
Connection Sizes<br />
Line voltage in 14 gauge wire nut<br />
Condensate drain fitting (2x) ¾” MPT<br />
TOP VIEW<br />
A<br />
B<br />
47.000”<br />
[1,194]<br />
Figure B5: Unit dimensions – 700 cfm<br />
20.750”<br />
[527]<br />
8.000”<br />
[203]<br />
1.875”<br />
[48]<br />
2.000”<br />
[51]<br />
Defrost air<br />
opening<br />
3.625”<br />
[92]<br />
2.000”<br />
[51]<br />
14.000”<br />
[356]<br />
1.875”<br />
[48]<br />
3.750”<br />
[95]<br />
8.000”<br />
[203]<br />
Exhaust<br />
air opening<br />
Exhaust<br />
air<br />
Outdoor air<br />
Outdoor<br />
air opening<br />
8.000”<br />
[203]<br />
10.750”<br />
[273]<br />
Line voltage in<br />
A<br />
37.000”<br />
[940]<br />
2.000”<br />
[51]<br />
12.250”<br />
[311]<br />
40.500”<br />
[1,029]<br />
2.157”<br />
[55]<br />
8.000”<br />
[203]<br />
Supply<br />
air opening<br />
Supply<br />
air<br />
12.104”<br />
[307]<br />
Return air<br />
Return<br />
air opening<br />
8.000”<br />
[203]<br />
7.500” [191]<br />
vces-HRv-iom-1 – HRv600i, HRv700i, HRv1200i 16<br />
Condensate drain<br />
B<br />
10.605”<br />
[269]<br />
Low voltage<br />
terminal strips<br />
24.736”<br />
[628]<br />
31.080”<br />
[789]<br />
15.250”<br />
[387]<br />
Note: A minimum of 12.000” [305] clearance from any obstruction is<br />
required for power hook-up, low voltage remote connection and control panel access.<br />
51.000”<br />
[1,295]<br />
RIGHT VIEW<br />
FRONT VIEW<br />
LEFT VIEW<br />
Note: A minimum of 21.000” [533] clearance from any obstruction<br />
is required for removal of heat recovery cores, fans and control box access.<br />
The access door can be removed from cabinet with only 2.000” [51] of clearance.<br />
Note: Air is drawn in to the defrost air opening on top of the unit for recirculation defrost from the space or room in which the unit is mounted.<br />
If this air is not suitable for supply air or if a negative pressure is created and is not acceptable, then the defrost air opening should be ducted<br />
to a branch from the return air duct or from a suitable space.<br />
21.000”<br />
[533]<br />
Heat recovery core<br />
Access door<br />
RIGHT VIEW
Min. 12”<br />
[305 mm]<br />
Appendix C: Flow Station Positions<br />
Balancing damper<br />
Min. 30”<br />
[762 mm]<br />
Flow measuring station (FMS)<br />
Canvas vibration isolator<br />
Figure C1: Flow station position – 600 cfm and 1,200 cfm<br />
Min. 12”<br />
[304 mm]<br />
Flow measuring<br />
station (FMS)<br />
Canvas virbration isolator<br />
Figure C2: Flow station position – 700 cfm<br />
Dry contacts<br />
Reverse door option<br />
Min. 12”<br />
[304 mm]<br />
Min. 12”<br />
[305 mm]<br />
Min. 8” [203 mm]<br />
Min. 12”<br />
[304 mm]<br />
Canvas vibration isolator (optional)<br />
Fresh air<br />
from outside<br />
Exhaust air<br />
from building<br />
Balancing damper<br />
(not supplied)<br />
vces-HRv-iom-1 – HRv600i, HRv700i, HRv1200i 17
Appendix D: Drain Connections<br />
Min. 3”<br />
[76 mm]<br />
Min. 1”<br />
[25 mm]<br />
To drain<br />
Figure D1: Drain connections – 600 cfm and 1,200 cfm<br />
Min..1”<br />
[25.mm]<br />
To.drain<br />
Min..3”<br />
[76.mm]<br />
¾” NPT<br />
coupler<br />
Water trap<br />
Plastic hose<br />
Min. 3”<br />
[76 mm]<br />
Min. 1”<br />
[25 mm]<br />
Note: All hose, pipe and couplers to be supplied by others.<br />
¾”.NPT<br />
coupler<br />
Water.trap<br />
Plastic.hose<br />
Min..3”<br />
[76.mm]<br />
Min..1”<br />
[25.mm]<br />
Plastic.drain.fitting<br />
To.drain<br />
Copper.or<br />
plastic.pipe<br />
note:.All.hose,.pipe.and.couplers.to.be.supplied.by.others.<br />
Figure D2: Drain connections – 700 cfm<br />
Plastic drain fitting<br />
To drain<br />
Copper or<br />
plastic pipe<br />
vces-HRv-iom-1 – HRv600i, HRv700i, HRv1200i 18
terminal Label<br />
Appendix E: Terminal Control Diagrams<br />
A low voltage remote control wiring interface is provided<br />
on the unit. The connections for the low voltage remote<br />
wiring are located on two terminals adjacent to the exhaust<br />
fan outlet (or adjacent to the supply fan outlet on<br />
the 700 cfm unit). All field installed wiring must be low<br />
voltage Class II.<br />
Remote.Wall.Control<br />
Optional wall control requires a four-wire LVT 24 gauge<br />
(or equivalent). This remote wall control runs on 12 VDC.<br />
Low.Voltage.Controls<br />
All other terminals are dry contacts.<br />
Low voltage terminal control consists of the following:<br />
Wall.Control<br />
Four-wire LVT 24 gauge minimum.<br />
Occupied.(Night.Setback).Timer/Sensor<br />
24 VAC, needs dry contact.<br />
Low-Com-High<br />
Remote fan switching requires a single pole, double throw<br />
switch (SPDT).<br />
Fan.Interlock.switch.(FF)<br />
Dry contact closes on ventilation or frost control. Used to<br />
control external fan source (G).<br />
1<br />
2<br />
3<br />
4<br />
5<br />
6<br />
7<br />
8<br />
9<br />
10<br />
BLACK<br />
RED<br />
WALL CONTROL<br />
OCCUPIED<br />
TIMER/<br />
SENSOR<br />
Figure E1: Terminal label<br />
F<br />
F<br />
LOW<br />
COMMON<br />
HIGH<br />
CLASS 2 VOLTAGE<br />
GREEN<br />
YELLOW<br />
NOTE:<br />
Connections are all dry<br />
contacts except wall control<br />
and 24 VAC power supply.<br />
Use of 24 VAC circuit<br />
requires isolating contacts<br />
(ex. thermostat) to prevent<br />
interconnection of Class 2<br />
outputs.<br />
1<br />
2<br />
3<br />
4<br />
5<br />
6<br />
7<br />
8<br />
9<br />
10<br />
Wall Control Connection<br />
Three types of remote wall controls are available:<br />
1. Standard wall control with fan switch and dehumidistat<br />
control.<br />
2. Xtra wall control with fan mode selection, dehumidistat<br />
control and maintenance indicator.<br />
3. Aqua Air wall control with fan mode selection, dehumidistat<br />
control and high speed recirculation mode.<br />
4. The remote wall controls work with the integrated<br />
electronic controls within the unit to control ventilation<br />
sequences. Each wall control has different features<br />
and requires four-wire connection to the unit<br />
as shown below. Without the wall control, fans can<br />
be operated with a remote fan switch as shown in<br />
Remote Fan Control.<br />
IMpoRtant<br />
An occupied timer or sensor device cannot be used with<br />
the Xtra wall control.<br />
vces-HRv-iom-1 – HRv600i, HRv700i, HRv1200i 19<br />
JUMPER<br />
1<br />
2<br />
3<br />
4<br />
5<br />
6<br />
7<br />
8<br />
9<br />
10<br />
BLACK<br />
RED<br />
WALL CONTROL<br />
OCCUPIED<br />
TIMER/<br />
SENSOR<br />
F<br />
F<br />
LOW<br />
COMMON<br />
HIGH<br />
CLASS 2 VOLTAGE<br />
GREEN<br />
YELLOW<br />
NOTE:<br />
Connections are all dry<br />
contacts except wall control<br />
and 24 VAC power supply.<br />
Use of 24 VAC circuit<br />
requires isolating contacts<br />
(ex. thermostat) to prevent<br />
interconnection of Class 2<br />
outputs.<br />
Figure E2: Wall control connection<br />
1<br />
2<br />
3<br />
4<br />
5<br />
6<br />
7<br />
8<br />
9<br />
10<br />
WALL<br />
CONTROL
occupied timer/Sensor Connection<br />
Occupancy control is achieved by connection to the terminal<br />
interface shown below. These terminals require a dry<br />
contact which could be provided by a number of types of<br />
controls such as a timer, light sensor, occupancy sensor,<br />
Building Management System or other. The unit will not<br />
operate unless these contacts are closed!<br />
The illustration below shows a factory installed jumper and<br />
programmable timer option.<br />
IMpoRtant<br />
An occupied timer or sensor device cannot be used with<br />
the Xtra wall control.<br />
JUMPER<br />
1<br />
2<br />
3<br />
4<br />
5<br />
6<br />
7<br />
8<br />
9<br />
10<br />
JUMPER<br />
(factory installed)<br />
BLACK<br />
RED<br />
OCCUPIED<br />
TIMER/<br />
SENSOR<br />
F<br />
F<br />
WALL CONTROL<br />
LOW<br />
COMMON<br />
HIGH<br />
CLASS 2 VOLTAGE<br />
GREEN<br />
YELLOW<br />
NOTE:<br />
Connections are all dry<br />
contacts except wall control<br />
and 24 VAC power supply.<br />
Use of 24 VAC circuit<br />
requires isolating contacts<br />
(ex. thermostat) to prevent<br />
interconnection of Class 2<br />
outputs.<br />
1<br />
2<br />
3<br />
4<br />
5<br />
6<br />
7<br />
8<br />
9<br />
10<br />
NSB Timer<br />
1 2 3 4 5<br />
24 (+) VAC<br />
24 (−) VAC<br />
Figure E3: Occupied timer/sensor connection<br />
M<br />
1<br />
2<br />
3<br />
4<br />
5<br />
6<br />
7<br />
8<br />
9<br />
10<br />
WALL CONTROL<br />
BLACK<br />
GREEN<br />
RED<br />
OCCUPIED<br />
TIMER/<br />
SENSOR<br />
F<br />
F<br />
OCC. CONTROL<br />
(field installed)<br />
LOW<br />
COMMON<br />
HIGH<br />
YELLOW<br />
CLASS 2 VOLTAGE<br />
NOTE:<br />
Connections are all dry<br />
contacts except wall control<br />
and 24 VAC power supply.<br />
Use of 24 VAC circuit<br />
requires isolating contacts<br />
(ex. thermostat) to prevent<br />
interconnection of Class 2<br />
outputs.<br />
1<br />
2<br />
3<br />
4<br />
5<br />
6<br />
7<br />
8<br />
9<br />
10<br />
Remote fan Control<br />
Remote fan control can be achieved by connecting dry<br />
contact controls to the terminal interface at terminals labeled:<br />
Low-Com-High. These controls could be the following:<br />
SPDT switch, dehumidistat, CO2 sensor, light sensor,<br />
timer, Building Management System, etc. The illustration<br />
below represents a switch connected to the unit.<br />
vces-HRv-iom-1 – HRv600i, HRv700i, HRv1200i 20<br />
JUMPER<br />
1<br />
2<br />
3<br />
4<br />
5<br />
6<br />
7<br />
8<br />
9<br />
10<br />
BLACK<br />
RED<br />
WALL CONTROL<br />
OCCUPIED<br />
TIMER/<br />
SENSOR<br />
F<br />
F<br />
LOW<br />
COMMON<br />
HIGH<br />
CLASS 2 VOLTAGE<br />
GREEN<br />
YELLOW<br />
NOTE:<br />
Connections are all dry<br />
contacts except wall control<br />
and 24 VAC power supply.<br />
Use of 24 VAC circuit<br />
requires isolating contacts<br />
(ex. thermostat) to prevent<br />
interconnection of Class 2<br />
outputs.<br />
Figure E4: Remote fan control<br />
1<br />
2<br />
3<br />
4<br />
5<br />
6<br />
7<br />
8<br />
9<br />
10<br />
REMOTE FAN SWITCH<br />
LOW HIGH
Appendix F: Electrical Connection Diagrams<br />
Figure F1: Control box assembly – 600 cfm and 1,200 cfm<br />
FU1015<br />
5A-600i<br />
8A-1200i<br />
PJ2003<br />
PJ2014<br />
PJ1007<br />
PJ1001A<br />
XF1015<br />
415VA<br />
600i<br />
1 2<br />
3 4<br />
5 6<br />
CR1023<br />
PJ2011<br />
PJ1001<br />
FILTRAN<br />
CR1024 CR1026<br />
A B<br />
1<br />
0<br />
1<br />
0<br />
UCB1021<br />
CR1029<br />
NC NO<br />
4<br />
8<br />
2<br />
6<br />
COM<br />
XF1015<br />
855VA<br />
1200i<br />
<strong>HRV</strong> cabinet<br />
Control cover plate<br />
Figure F2: Low speed setting wire connections – 600 cfm and 1,200 cfm<br />
4<br />
8<br />
2<br />
6<br />
Remote control access plate<br />
Remote wiring terminal block<br />
Control box<br />
Note: Low speed motor selection may be<br />
replaced by medium speed. To make<br />
this change, replace the low speed<br />
wires (red) on relay CR1024 with the<br />
medium speed wires (blue).<br />
Note: Autotransformers (if equipped) are<br />
mounted on the back of the control box.<br />
vces-HRv-iom-1 – HRv600i, HRv700i, HRv1200i 21
Appendix G: Make-up Heat Requirements<br />
Although the 600 cfm, 700 cfm and 1,200 cfm models<br />
have good efficiencies, the supply air could be colder<br />
than the ambient room air. It is possible to eliminate the<br />
discomfort associated with this temperature difference by<br />
installing an electric duct heater. This will temper the air<br />
before it is distributed throughout the building. The table<br />
below gives the heating requirements at different temperatures<br />
and airflows.<br />
IMpoRtant<br />
The data does not reflect a reduction in effectiveness due<br />
to frosting. Based on the standard air at: 1.2 Kg/m 3 and<br />
Cp = 1.0 KJ/Kg°C 13.35 lb/ft 3 and Cp = 0.24 Btu/lbm°F.<br />
Table G1: Make-up Heat Requirements – 600 and 700 cfm Unit<br />
outdoor air outdoor air outdoor air outdoor air outdoor air<br />
−40°f [−40°C] −22°f [−30°C] −4°f [−20°C] 14°f [−10°C] 32°f [0°C]<br />
Desired air Desired air Desired air Desired air Desired air<br />
Supply Supply<br />
temperature temperature temperature temperature temperature<br />
air air<br />
55°f 68°f 73°f 55°f 68°f 73°f 55°f 68°f 73°f 55°f 68°f 73°f 55°f 68°f 73°f<br />
(CfM) (L/s)<br />
[13°C] [20°C] [23°C] [13°C] [20°C] [23°C] [13°C] [20°C] [23°C] [13°C] [20°C] [23°C] [13°C] [20°C] [23°C]<br />
700 330 7.4 10.4 11.5 5.6 8.6 9.7 3.9 6.8 8.0 2.1 5.1 6.2 0.3 3.3 4.4<br />
650 307 6.6 9.4 10.5 5.0 7.8 8.9 3.4 6.2 7.3 1.8 4.6 5.6 0.2 3.0 4.0<br />
600 283 5.9 8.5 9.4 4.5 7.0 8.0 3.0 5.6 6.5 1.6 4.1 5.1 0.1 2.7 3.7<br />
550 259 5.2 7.6 8.5 3.9 6.3 7.2 2.6 5.0 5.9 1.3 3.7 4.6 0.1 2.4 3.3<br />
500 236 4.0 6.1 7.0 3.0 5.1 5.9 1.9 4.0 4.9 0.9 3.0 3.8 — 1.9 2.7<br />
450 212 3.0 4.9 5.6 2.1 4.0 4.8 1.3 3.2 3.9 0.4 2.3 3.1 — 1.5 2.2<br />
400 189 2.2 3.9 4.6 1.5 3.2 3.9 0.9 2.5 3.2 0.2 1.9 2.5 — 1.2 1.8<br />
Table G2: Make-up Heat Requirements – 1,200 cfm Unit<br />
outdoor air outdoor air outdoor air outdoor air outdoor air<br />
−40°f [−40°C] −22°f [−30°C] −4°f [−20°C] 14°f [−10°C] 32°f [0°C]<br />
Desired air Desired air Desired air Desired air Desired air<br />
Supply Supply<br />
temperature temperature temperature temperature temperature<br />
air air<br />
55°f 68°f 73°f 55°f 68°f 73°f 55°f 68°f 73°f 55°f 68°f 73°f 55°f 68°f 73°f<br />
(CfM) (L/s)<br />
[13°C] [20°C] [23°C] [13°C] [20°C] [23°C] [13°C] [20°C] [23°C] [13°C] [20°C] [23°C] [13°C] [20°C] [23°C]<br />
1,250 590 14.6 19.9 21.9 11.2 16.5 18.5 7.8 13.1 15.2 4.4 9.7 11.8 1.0 6.3 8.4<br />
1,200 566 13.5 18.6 20.6 10.4 15.5 17.4 7.2 12.3 14.3 4.0 9.1 11.1 0.8 5.9 7.9<br />
1,150 542 12.6 17.4 19.3 9.6 14.5 16.4 6.6 11.5 13.4 3.6 8.5 10.4 0.7 5.5 7.4<br />
1,100 675 11.2 15.9 17.7 8.5 13.2 15.0 5.8 10.5 12.3 3.1 7.7 9.6 0.4 5.0 6.8<br />
1,050 495 10.7 15.2 16.9 8.1 12.6 14.3 5.5 10.0 11.7 2.9 7.4 9.1 0.4 4.8 6.5<br />
1,000 472 9.9 14.1 15.7 7.4 11.7 13.3 5.0 9.3 10.9 2.6 6.9 8.5 0.2 4.4 6.1<br />
900 425 8.5 12.4 13.8 6.4 10.2 11.7 4.3 8.1 9.6 2.2 6.0 7.5 0.1 3.9 5.4<br />
800 377 7.0 10.4 11.7 5.2 8.6 9.9 3.4 6.8 8.2 1.7 5.0 6.4 — 3.3 4.6<br />
700 330 5.0 8.1 9.3 3.7 6.7 7.9 2.3 5.3 6.5 0.9 3.9 5.1 — 2.5 3.7<br />
vces-HRv-iom-1 – HRv600i, HRv700i, HRv1200i 22
Appendix H: Troubleshooting<br />
Table H1: <strong>HRV</strong>600i, 700i and 1200i Troubleshooting<br />
Symptoms possible Causes Solutions<br />
Over ventilation – speed setting too high. Adjust speed setting.<br />
Inside air is too dry.<br />
Dehumidistat setting too low.<br />
Set dehumidistat control in a higher position<br />
(if applicable).<br />
Adjust dehumidistat control knob to a lower<br />
Improper adjustment of dehumidistat control.<br />
Persistent condensation on windows,<br />
setting.<br />
walls, ceilings, etc.<br />
Improper ventilation rate. Install a dehumisistat (option).<br />
Window frame is too cold or leaky. Repair window frame.<br />
Unit stops functioning. Electrical supply interrupted. Check the unit circuit breaker.<br />
Air from supply diffusers too cold.<br />
Imbalance of supply and exhaust air.<br />
Check filters and heat exchangers for blockage.<br />
Check balance of airflows.<br />
Outdoor temperature very cold. Install electric duct heater if necessary.<br />
Unit makes annoying noise. Blower wheel out of alignment.<br />
Remove the motor/blower assembly and<br />
adjust blower wheel.<br />
Heat exchanger freezing up.<br />
Imbalance of supply and exhaust air.<br />
Frost control damper not functioning.<br />
Check filters and heat exchangers for blockage.<br />
Check balance of airflows.<br />
Check for operation of both frost control<br />
damper actuators.<br />
Heat exchanger flutes are positioned in the<br />
Low exhaust airflow in winter season.<br />
exhaust airstream.<br />
Remove flat plate heat exchanger sections<br />
and re-position the flute side of the heat<br />
exchanger into the supply airstream.<br />
vces-HRv-iom-1 – HRv600i, HRv700i, HRv1200i 23
info@venmarces.com<br />
www.venmarces.com<br />
<strong>Venmar</strong> <strong>CES</strong> <strong>Inc</strong>. has a policy of continuous improvement and reserves<br />
the right to change design and specifications without notice.<br />
©2012 <strong>Venmar</strong> <strong>CES</strong> <strong>Inc</strong>.<br />
<strong>V<strong>CES</strong></strong>-<strong>HRV</strong>-<strong>IOM</strong>-1 (PN 206815)<br />
August 2012


