
You also want an ePaper? Increase the reach of your titles
YUMPU automatically turns print PDFs into web optimized ePapers that Google loves.
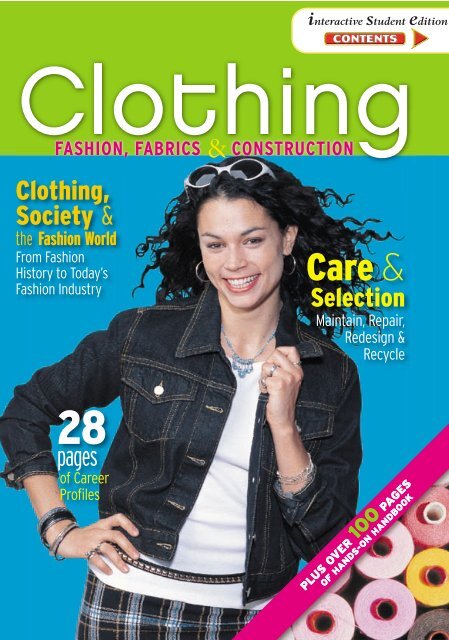
Clothing,<br />
Society &<br />
the Fashi<strong>on</strong> World<br />
From Fashi<strong>on</strong><br />
History to Today’s<br />
Fashi<strong>on</strong> Industry<br />
28<br />
pages<br />
of <str<strong>on</strong>g>Care</str<strong>on</strong>g>er<br />
Profiles<br />
interactive student editi<strong>on</strong><br />
<str<strong>on</strong>g>Care</str<strong>on</strong>g> &<br />
Selecti<strong>on</strong><br />
Maintain, Repair,<br />
Redesign &<br />
Recycle<br />
OF OF HANDS-ON HANDS-ON HANDBOOK<br />
HANDBOOK<br />
PLUS PLUS OVER OVER 100 PAGES PAGES
Katherine M. Chimini<br />
Central High School<br />
Bridgeport, C<strong>on</strong>necticut<br />
Denise S. Geller, CFCS<br />
SWAC Schools<br />
Fort Wayne, Indiana<br />
Michelle Elledge<br />
Niles North High School<br />
Skokie, Illinois<br />
Marsha Grothusen<br />
Oreg<strong>on</strong> Trail Junior High School<br />
Olathe, Kansas<br />
Jane Eastman Halladay<br />
Johns<strong>on</strong> City High School<br />
Johns<strong>on</strong> City, New York<br />
DeAnn Hebert<br />
Des Moines Public Schools<br />
Des Moines, Iowa<br />
CONTRIBUTING WRITER<br />
Anne Marie Soto<br />
Fashi<strong>on</strong> and Sewing Specialist<br />
AMS Associates<br />
Teaneck, New Jersey<br />
TEACHER REVIEWERS<br />
Deborah L. Hopper<br />
Principal C<strong>on</strong>sultant<br />
<str<strong>on</strong>g>Care</str<strong>on</strong>g>er Development and Preparati<strong>on</strong><br />
Springfield, Illinois<br />
Beth King<br />
Holland Christian High School<br />
Holland, Michigan<br />
Jacqueline Merkers<strong>on</strong><br />
Hialeah High School<br />
Hialeah, Florida<br />
Shann<strong>on</strong> Rasmussen<br />
Logan High School<br />
Logan, Utah<br />
Susan C. Teelin<br />
Camden Central School District<br />
Camden, New York<br />
Linda Zabek<br />
Fr<strong>on</strong>tier Regi<strong>on</strong>al School<br />
South Deerfield, Massachusetts<br />
CONTRIBUTING WRITER AND REVIEWERS • 3
4 • CONTENTS IN BRIEF<br />
CONTENTS IN BRIEF<br />
Unit 1: Clothing and Society<br />
Chapter 1: Influences <strong>on</strong> Clothing...................................................................24<br />
Chapter 2: Cultures and Customs....................................................................36<br />
Chapter 3: Clothing and Families ....................................................................50<br />
Chapter 4: Clothing and Self-Expressi<strong>on</strong> ........................................................60<br />
Unit 2: The Fashi<strong>on</strong> World<br />
Chapter 5: Fashi<strong>on</strong> History ..............................................................................78<br />
Chapter 6: Fashi<strong>on</strong> Styles .................................................................................96<br />
Chapter 7: Fashi<strong>on</strong> Designers ........................................................................116<br />
Chapter 8: The Fashi<strong>on</strong> Industry...................................................................134<br />
Unit 3: Color and Design<br />
Chapter 9: Understanding Color ...................................................................156<br />
Chapter 10: Understanding Design .................................................................172<br />
Unit 4: Fibers and Fabrics<br />
Chapter 11: Textile Fibers.................................................................................196<br />
Chapter 12: Fabric C<strong>on</strong>structi<strong>on</strong>.....................................................................214<br />
Chapter 13: Fabric Finishes..............................................................................234
Unit 5: Clothing <str<strong>on</strong>g>Care</str<strong>on</strong>g><br />
Chapter 14: Clothing <str<strong>on</strong>g>Care</str<strong>on</strong>g> Basics ....................................................................250<br />
Chapter 15: Laundry and Dry Cleaning..........................................................266<br />
Chapter 16: Redesign, Repair, and Recycle......................................................282<br />
Unit 6: Clothing Selecti<strong>on</strong><br />
Chapter 17: Exploring Opti<strong>on</strong>s........................................................................302<br />
Chapter 18: Accessing Informati<strong>on</strong> .................................................................318<br />
Chapter 19: Evaluating Selecti<strong>on</strong>s ...................................................................332<br />
Chapter 20: C<strong>on</strong>sumer Resp<strong>on</strong>sibilities ..........................................................344<br />
Chapter 21: Selecting Clothes for Others........................................................358<br />
Unit 7: The Workplace<br />
Chapter 22: <str<strong>on</strong>g>Care</str<strong>on</strong>g>er Preparati<strong>on</strong>.......................................................................378<br />
Chapter 23: Success <strong>on</strong> the Job ........................................................................390<br />
Chapter 24: Fashi<strong>on</strong> Entrepreneurs.................................................................404<br />
Chapter 25: Global Marketplace ......................................................................418<br />
Sewing and Serging Handbook<br />
Part 1: Patterns, Fabrics, and Noti<strong>on</strong>s ..............................................................438<br />
Part 2: Machines and Equipment .....................................................................454<br />
Part 3: Getting Ready to Sew ............................................................................480<br />
Part 4: Basic C<strong>on</strong>structi<strong>on</strong> ................................................................................500<br />
Part 5: Special Sewing Techniques....................................................................546<br />
CONTENTS IN BRIEF • 5
CONTENTS<br />
6 • CONTENTS<br />
Unit 1: Clothing and Society.......................22<br />
Chapter 1: Influences <strong>on</strong> Clothing....................................24<br />
Choosing What to Wear ........................................................................25<br />
Other Influences ....................................................................................27<br />
A Changing Society ...............................................................................29<br />
Looking Ahead.......................................................................................32<br />
Technology Trends: Bey<strong>on</strong>d Basic Clothing Functi<strong>on</strong>s ................32<br />
How To…Make Decisi<strong>on</strong>s ....................................................................33<br />
Chapter 2: Cultures and Customs ...................................36<br />
Clothing Reflects Cultures ....................................................................37<br />
Clothing as Symbols..............................................................................39<br />
Clothing Customs..................................................................................42<br />
How To…Select Business Casual Attire ........................................45<br />
Technology Trends: On-Line Fashi<strong>on</strong> Informati<strong>on</strong>.........................47<br />
Chapter 3: Clothing and Families ....................................50<br />
Family Clothing Needs..........................................................................51<br />
Clothing Management ..........................................................................53<br />
Technology Trends: Transferring Photos to Fabric .......................55<br />
How To…Jazz Up Your Home...........................................................56
Chapter 4: Clothing and Self-Expressi<strong>on</strong> ........................60<br />
Creating Impressi<strong>on</strong>s.............................................................................61<br />
Technology Trends: Using the Internet Wisely ..............................63<br />
What Clothing Communicates.............................................................64<br />
Developing Your Pers<strong>on</strong>al Style ............................................................67<br />
How To…Add Embellishments ..........................................................69<br />
Fashi<strong>on</strong> Promoti<strong>on</strong> <str<strong>on</strong>g>Care</str<strong>on</strong>g>ers ..................................................72<br />
Unit 2: The Fashi<strong>on</strong> World..........................76<br />
Chapter 5: Fashi<strong>on</strong> History .............................................78<br />
The Earliest Clothing ............................................................................79<br />
The Evoluti<strong>on</strong> of Fashi<strong>on</strong>......................................................................82<br />
Influences <strong>on</strong> Fashi<strong>on</strong> History..............................................................85<br />
Technology Trends: Early Inventi<strong>on</strong>s ...............................................87<br />
How To…Preserve Textiles ................................................................89<br />
Fashi<strong>on</strong>s of the Twentieth Century ......................................................90<br />
Chapter 6: Fashi<strong>on</strong> Styles................................................96<br />
What Is Fashi<strong>on</strong>?....................................................................................97<br />
How To…Write Fashi<strong>on</strong> Copy............................................................98<br />
Fashi<strong>on</strong> Features ..................................................................................103<br />
Garment Styles.....................................................................................107<br />
Technology Trends: Latest Fashi<strong>on</strong> News.......................................113<br />
CONTENTS • 7
8 • CONTENTS<br />
Chapter 7: Fashi<strong>on</strong> Designers .........................................116<br />
The Role of Fashi<strong>on</strong> Designers ...........................................................117<br />
The Design Process..............................................................................119<br />
How To…Create a Design Sketch ...................................................120<br />
Designer Collecti<strong>on</strong>s ...........................................................................122<br />
Technology Trends: Apparel Design with CAD..............................123<br />
Chapter 8: The Fashi<strong>on</strong> Industry....................................134<br />
The Textile Industry ............................................................................135<br />
How To…Explore Fashi<strong>on</strong> <str<strong>on</strong>g>Care</str<strong>on</strong>g>ers..................................................137<br />
The Apparel Industry ..........................................................................138<br />
Technology Trends: Quick Resp<strong>on</strong>se................................................141<br />
Fashi<strong>on</strong> Merchandising .......................................................................143<br />
Fashi<strong>on</strong> Promoti<strong>on</strong>..............................................................................145<br />
Apparel Producti<strong>on</strong> <str<strong>on</strong>g>Care</str<strong>on</strong>g>ers ..............................................150<br />
Unit 3: Color and Design ..........................154<br />
Chapter 9: Understanding Color ....................................156<br />
Color and Clothing .............................................................................157<br />
The Impact of Color............................................................................157<br />
The Language of Color........................................................................160<br />
Technology Trends: Correcting Color Blindness...........................163<br />
Creating a Color Scheme ....................................................................164<br />
Selecting Colors for You......................................................................165<br />
How To…Choose Your Colors...........................................................167
Chapter 10: Understanding Design.................................172<br />
Shape and Size .....................................................................................173<br />
The Elements of Design ......................................................................175<br />
How To…Create Design Illusi<strong>on</strong>s....................................................178<br />
Technology Trends: Fabrics by Computer......................................183<br />
The Principles of Design.....................................................................184<br />
Individuality.........................................................................................187<br />
Design <str<strong>on</strong>g>Care</str<strong>on</strong>g>ers....................................................................190<br />
Unit 4: Fibers and Fabrics ........................194<br />
Chapter 11: Textile Fibers...............................................196<br />
What Are Fibers?..................................................................................197<br />
Fiber Names .........................................................................................197<br />
Fiber Characteristics............................................................................198<br />
Natural Fibers ......................................................................................199<br />
Manufactured Fibers ...........................................................................203<br />
Technology Trends: Microfibers ......................................................205<br />
Identifying Fibers.................................................................................210<br />
How To…Identify Fibers.....................................................................211<br />
CONTENTS • 9
10 • CONTENTS<br />
Chapter 12: Fabric C<strong>on</strong>structi<strong>on</strong> ....................................214<br />
Yarns .....................................................................................................215<br />
How To…Evaluate Fabric Characteristics....................................218<br />
Fabric Characteristics..........................................................................219<br />
Woven Fabrics......................................................................................219<br />
Technology Trends: Smart Fabrics.................................................220<br />
Knit Fabrics..........................................................................................224<br />
Other Fabric C<strong>on</strong>structi<strong>on</strong>s................................................................226<br />
Chapter 13: Fabric Finishes...........................................234<br />
Finishing Process .................................................................................235<br />
Color and Design Finishes..................................................................235<br />
How To…Create Printed Fabric......................................................238<br />
Texture and Performance Finishes .....................................................239<br />
Technology Trends: High-Performance Finishes..........................241<br />
Textile Producti<strong>on</strong> <str<strong>on</strong>g>Care</str<strong>on</strong>g>ers.................................................244
Unit 5: Clothing <str<strong>on</strong>g>Care</str<strong>on</strong>g>...............................248<br />
Chapter 14: Clothing <str<strong>on</strong>g>Care</str<strong>on</strong>g> Basics ..................................250<br />
Routine <str<strong>on</strong>g>Care</str<strong>on</strong>g> ........................................................................................251<br />
Understanding <str<strong>on</strong>g>Care</str<strong>on</strong>g> Labels.................................................................258<br />
Technology Trends: Color Loss in Fabrics ....................................259<br />
Storing Clothes ....................................................................................260<br />
How To…Create Clothing Space ....................................................262<br />
Chapter 15: Laundry and Dry Cleaning ..........................266<br />
Laundry Products and Equipment.....................................................267<br />
Laundering Clothes .............................................................................272<br />
Drying Clothes.....................................................................................275<br />
Ir<strong>on</strong>ing Clothes....................................................................................276<br />
How To…Provide Sun Protecti<strong>on</strong>...................................................277<br />
Dry-Cleaning Clothes .........................................................................278<br />
Technology Trends: Dry Cleaning at Home...................................279<br />
Chapter 16: Redesign, Repair, and Recycle....................282<br />
Redesigning Clothes ............................................................................283<br />
Repairing Clothes ................................................................................287<br />
How To…Make Simple Repairs.......................................................288<br />
Recycling Clothes.................................................................................290<br />
Technology Trends: From Plastic Bottles to Parkas..................292<br />
Fashi<strong>on</strong> Services <str<strong>on</strong>g>Care</str<strong>on</strong>g>ers ....................................................296<br />
CONTENTS • 11
12 • CONTENTS<br />
Unit 6: Clothing Selecti<strong>on</strong> .......................300<br />
Chapter 17: Exploring Opti<strong>on</strong>s.......................................302<br />
Evaluating Your Wardrobe ..................................................................303<br />
How To…Make a Wardrobe Chart..................................................304<br />
Identifying Your Resources .................................................................307<br />
Ways to Expand Your Wardrobe.........................................................308<br />
Technology Trends: On-Line Shopping ...........................................314<br />
Chapter 18: Accessing Informati<strong>on</strong> ................................318<br />
Sources of Informati<strong>on</strong> .......................................................................319<br />
Technology Trends: On-Line Sewing Informati<strong>on</strong>........................323<br />
How To…Place an Internet or Catalog Order ............................324<br />
Using Informati<strong>on</strong> Effectively.............................................................327<br />
Chapter 19: Evaluating Selecti<strong>on</strong>s.................................332<br />
Finding the Correct Size......................................................................333<br />
Evaluating Fit .......................................................................................335<br />
How To…Check a Garment’s Fit....................................................336<br />
Technology Trends: A Customized Fit ...........................................337<br />
Evaluating Quality ...............................................................................338<br />
Evaluating <str<strong>on</strong>g>Care</str<strong>on</strong>g>....................................................................................339<br />
Evaluating Price ...................................................................................340<br />
Making a Final Decisi<strong>on</strong> .....................................................................341
Chapter 20: C<strong>on</strong>sumer Resp<strong>on</strong>sibilities ........................344<br />
The Resp<strong>on</strong>sible C<strong>on</strong>sumer ................................................................345<br />
Technology Trends: Preventing Shoplifting and Theft ..............346<br />
Paying for Purchases............................................................................347<br />
Exchanges and Returns .......................................................................351<br />
C<strong>on</strong>sumer Protecti<strong>on</strong> ..........................................................................352<br />
How To…Complain Effectively .......................................................354<br />
Chapter 21: Selecting Clothes for Others......................358<br />
Shopping for Family and Friends.......................................................359<br />
Choosing Clothes for Children...........................................................361<br />
Selecting Maternity Wear ....................................................................364<br />
Technology Trends: Embroidery Designs and<br />
Copyright Laws................................................................................364<br />
Choosing Clothes for Older Adults ....................................................366<br />
Selecting Clothes for People with Disabilities ...................................367<br />
How To…Customize Garments .......................................................369<br />
Fashi<strong>on</strong> Merchandising <str<strong>on</strong>g>Care</str<strong>on</strong>g>ers ........................................372<br />
Unit 7: The Workplace..............................376<br />
Chapter 22: <str<strong>on</strong>g>Care</str<strong>on</strong>g>er Preparati<strong>on</strong>....................................378<br />
Knowing Yourself.................................................................................379<br />
Researching <str<strong>on</strong>g>Care</str<strong>on</strong>g>er Paths ....................................................................381<br />
Looking for a Job.................................................................................382<br />
Technology Trends: Job Search Via the Internet .......................383<br />
Applying for a Job ...............................................................................384<br />
How To…Dress for a Job Interview..............................................386<br />
CONTENTS • 13
Chapter 23: Success <strong>on</strong> the Job ...................................390<br />
Ingredients for Success ........................................................................391<br />
Technology Trends: Technology Skills in the Workplace...........392<br />
14 • CONTENTS<br />
How To…Be a Team Member ..........................................................395<br />
Traveling the <str<strong>on</strong>g>Care</str<strong>on</strong>g>er Path....................................................................398<br />
Balancing Work and Pers<strong>on</strong>al Life......................................................400<br />
Chapter 24: Fashi<strong>on</strong> Entrepreneurs ..............................404<br />
Qualities of the Successful Entrepreneur ...........................................405<br />
Opportunities for Entrepreneurs........................................................406<br />
How To…Use E-Mail ..........................................................................407<br />
Technology Trends: Erg<strong>on</strong>omics in the Sewing Room...............409<br />
Resp<strong>on</strong>sibilities of Entrepreneurs.......................................................411<br />
Developing a Business Plan ................................................................415<br />
Chapter 25: Global Marketplace ....................................418<br />
Global Issues ........................................................................................419<br />
Fashi<strong>on</strong> Industry Trends .....................................................................424<br />
Technology Trends: Electr<strong>on</strong>ic Data Interchange.......................425<br />
How To…Pack for Travel....................................................................429<br />
Communicati<strong>on</strong> and Educati<strong>on</strong> <str<strong>on</strong>g>Care</str<strong>on</strong>g>ers ...........................432
SEWING AND SERGING<br />
HANDBOOK CONTENTS<br />
PART 1: PATTERNS, FABRICS, AND NOTIONS.....438<br />
Less<strong>on</strong> 1: Selecting a Pattern .........................................439<br />
Less<strong>on</strong> 2: Selecting Fabric..............................................445<br />
Less<strong>on</strong> 3: Selecting Noti<strong>on</strong>s...........................................447<br />
PART 2: MACHINES AND EQUIPMENT ................454<br />
Less<strong>on</strong> 4: Using a Sewing Machine ...............................455<br />
Less<strong>on</strong> 5: Using a Serger ................................................465<br />
Less<strong>on</strong> 6: Identifying Sewing Equipment .....................472<br />
PART 3: GETTING READY TO SEW......................480<br />
Less<strong>on</strong> 7: Understanding Patterns.................................481<br />
Less<strong>on</strong> 8: Adjusting a Pattern........................................486<br />
Less<strong>on</strong> 9: Preparing Fabric ............................................490<br />
Less<strong>on</strong> 10: Laying Out a Pattern .....................................492<br />
Less<strong>on</strong> 11: Cutting and Marking Fabric.........................495<br />
SEWING AND SERGING HANDBOOK CONTENTS • 15
PART 4: BASIC CONSTRUCTION...................500<br />
Less<strong>on</strong> 12: Stitching by Machine ....................................501<br />
Less<strong>on</strong> 13: Stitching by Hand..........................................506<br />
Less<strong>on</strong> 14: Pressing Fabric...............................................511<br />
Less<strong>on</strong> 15: Making Darts.................................................514<br />
Less<strong>on</strong> 16: Gathering and Easing Fabric ........................516<br />
Less<strong>on</strong> 17: Sewing Plain Seams.......................................519<br />
Less<strong>on</strong> 18: Applying Facings ...........................................524<br />
Less<strong>on</strong> 19: Making Casings .............................................527<br />
Less<strong>on</strong> 20: Applying Fasteners ........................................530<br />
Less<strong>on</strong> 21: Putting in Zippers .........................................535<br />
Less<strong>on</strong> 22: Putting in Hems ............................................537<br />
Less<strong>on</strong> 23: Checking the Fit ............................................543<br />
16 • SEWING AND SERGING HANDBOOK CONTENTS
PART 5: SPECIAL SEWING TECHNIQUES ............546<br />
Less<strong>on</strong> 24: Sewing Special Seams....................................547<br />
Less<strong>on</strong> 25: Making Tucks and Pleats ..............................551<br />
Less<strong>on</strong> 26: Applying Interfacings....................................553<br />
Less<strong>on</strong> 27: Putting in Linings..........................................555<br />
Less<strong>on</strong> 28: Sewing Collars ...............................................556<br />
Less<strong>on</strong> 29: Sewing Sleeves ...............................................559<br />
Less<strong>on</strong> 30: Sewing Cuffs ..................................................562<br />
Less<strong>on</strong> 31: Sewing Pockets ..............................................566<br />
Less<strong>on</strong> 32: Finishing Waistlines ......................................571<br />
Less<strong>on</strong> 33: Applying Bias Bindings.................................574<br />
Less<strong>on</strong> 34: Adding Ruffles ...............................................579<br />
Less<strong>on</strong> 35: Adding Trims.................................................581<br />
GLOSSARY ...................................................................586<br />
CREDITS ......................................................................594<br />
INDEX ..........................................................................596<br />
SEWING AND SERGING HANDBOOK CONTENTS • 17
<str<strong>on</strong>g>Care</str<strong>on</strong>g>ers<br />
Fashi<strong>on</strong> Promoti<strong>on</strong> <str<strong>on</strong>g>Care</str<strong>on</strong>g>ers ..............................................................................72<br />
Apparel Producti<strong>on</strong> <str<strong>on</strong>g>Care</str<strong>on</strong>g>ers ...........................................................................150<br />
Design <str<strong>on</strong>g>Care</str<strong>on</strong>g>ers.................................................................................................190<br />
Textile Producti<strong>on</strong> <str<strong>on</strong>g>Care</str<strong>on</strong>g>ers..............................................................................244<br />
Fashi<strong>on</strong> Services <str<strong>on</strong>g>Care</str<strong>on</strong>g>ers.................................................................................296<br />
Fashi<strong>on</strong> Merchandising <str<strong>on</strong>g>Care</str<strong>on</strong>g>ers .....................................................................372<br />
Communicati<strong>on</strong> and Educati<strong>on</strong> <str<strong>on</strong>g>Care</str<strong>on</strong>g>ers .......................................................432<br />
Technology Trends<br />
Bey<strong>on</strong>d Basic Clothing<br />
Functi<strong>on</strong>s ........................................32<br />
On-Line Fashi<strong>on</strong> Informati<strong>on</strong>.........47<br />
Transferring Photos to Fabric .......55<br />
Using the Internet Wisely ..............63<br />
Early Inventi<strong>on</strong>s................................87<br />
Latest Fashi<strong>on</strong> News .......................113<br />
Apparel Design with CAD..............123<br />
Quick Resp<strong>on</strong>se ................................141<br />
Correcting Color Blindness...........163<br />
Fabrics by Computer ......................183<br />
Microfibers.......................................205<br />
Smart Fabrics .................................220<br />
High-Performance Finishes ..........241<br />
Color Loss in Fabrics.....................259<br />
18 • SPECIAL FEATURES<br />
Dry Cleaning at Home..................279<br />
From Plastic Bottles<br />
to Parkas .....................................292<br />
On-Line Shopping...........................314<br />
On-Line Sewing Informati<strong>on</strong>.......323<br />
A Customized Fit...........................337<br />
Preventing Shoplifting<br />
and Theft.....................................346<br />
Embroidery Designs and<br />
Copyright Laws..........................364<br />
Job Search Via the Internet.......383<br />
Technology Skills in<br />
the Workplace.............................392<br />
Erg<strong>on</strong>omics in the<br />
Sewing Room..............................409<br />
Electr<strong>on</strong>ic Data Interchange ......425
How To…<br />
Make Decisi<strong>on</strong>s ..............................................................................33<br />
Select Business Casual Attire ......................................................45<br />
Jazz Up Your Home.......................................................................56<br />
Add Embellishments ......................................................................69<br />
Preserve Textiles ...........................................................................89<br />
Write Fashi<strong>on</strong> Copy........................................................................98<br />
Create a Design Sketch................................................................120<br />
Explore Fashi<strong>on</strong> <str<strong>on</strong>g>Care</str<strong>on</strong>g>ers...............................................................137<br />
Choose Your Colors ......................................................................167<br />
Create Design Illusi<strong>on</strong>s ................................................................178<br />
Identify Fibers ...............................................................................211<br />
Evaluate Fabric Characteristics ..................................................218<br />
Create Printed Fabric ..................................................................238<br />
Create Clothing Space.................................................................262<br />
Provide Sun Protecti<strong>on</strong>................................................................277<br />
Make Simple Repairs ...................................................................288<br />
Make a Wardrobe Chart ..............................................................304<br />
Place an Internet or Catalog Order ............................................324<br />
Check a Garment’s Fit.................................................................336<br />
Complain Effectively....................................................................354<br />
Customize Garments ...................................................................369<br />
Dress for a Job Interview ...........................................................386<br />
Be a Team Member ......................................................................395<br />
Use E-Mail ....................................................................................407<br />
Pack for Travel.............................................................................429<br />
SPECIAL FEATURES • 19
The Management Process ..................................................................................................................................54<br />
Stages of a Fashi<strong>on</strong> Cycle .................................................................................................................................101<br />
Other Users of Fibers and Fabrics..................................................................................................................136<br />
Computing the Price of a Pair of Pants ........................................................................................................140<br />
Color Effects <strong>on</strong> Size..........................................................................................................................................168<br />
Using Wrist Size to Estimate Body Frame Size............................................................................................173<br />
Informati<strong>on</strong> <strong>on</strong> Natural Fibers.........................................................................................................................199<br />
Informati<strong>on</strong> <strong>on</strong> Manufactured Fibers............................................................................................................206<br />
Trade Names of Manufactured Fibers...........................................................................................................207<br />
Identifying Fibers in the Lab ...........................................................................................................................210<br />
Washing and Rinsing Temperatures...............................................................................................................274<br />
Steps in Wardrobe Planning............................................................................................................................303<br />
Size Categories for Females............................................................................................................................334<br />
Size Categories for Males ................................................................................................................................335<br />
Calculating Cost per Wearing for One Year..................................................................................................341<br />
Advantages and Disadvantages of Using Credit .........................................................................................351<br />
Size Categories for Children ...........................................................................................................................362<br />
<str<strong>on</strong>g>Care</str<strong>on</strong>g>er Clusters....................................................................................................................................................381<br />
Training and Educati<strong>on</strong> Needed for <str<strong>on</strong>g>Care</str<strong>on</strong>g>ers................................................................................................382<br />
Student Organizati<strong>on</strong>s ......................................................................................................................................396<br />
Aspects of Industry...........................................................................................................................................398<br />
Fabric Store Yearly Income and Expenses....................................................................................................414<br />
Business Plan.......................................................................................................................................................415<br />
Choosing Thread, Needle Size, and Stitch Length .....................................................................................458<br />
Stitch-Length C<strong>on</strong>versi<strong>on</strong> .................................................................................................................................461<br />
Correcting Stitching Problems .......................................................................................................................463<br />
Correcting Serging Problems..........................................................................................................................470<br />
20 • SPECIAL FEATURES<br />
Charts
Highlighted Topics<br />
Basic Functi<strong>on</strong>s of Clothing...................26<br />
Neckline Styles ......................................104<br />
Collar Styles...........................................105<br />
Sleeve Styles...........................................106<br />
Dress Styles............................................108<br />
Shirt Styles.............................................109<br />
Skirt Styles.............................................110<br />
Pants Styles............................................111<br />
Jacket and Coat Styles...........................112<br />
Famous Designers.................................126<br />
The Color Spectrum .............................160<br />
The Color Wheel ...................................161<br />
Line Types..............................................175<br />
Basic Clothing Shapes...........................180<br />
Stitching..................................504<br />
Removing Stitches................505<br />
Belt Carrier.............................508<br />
Pressing Seams ......................512<br />
Gathering ..................................517<br />
Serging Plain Seams.............520<br />
Seam Finishes ........................523<br />
Facings .....................................526<br />
Applying Elastic to<br />
Lingerie ................................529<br />
Hems.........................................539<br />
Rolled Hem and<br />
Cover-Stitch Hem...............541<br />
Manufacturing Fibers ...........................204<br />
Fabric Dicti<strong>on</strong>ary..................................228<br />
Stain Removal Methods........................254<br />
What Do Fabric <str<strong>on</strong>g>Care</str<strong>on</strong>g><br />
Symbols Mean? .................................261<br />
Categories of Retail Stores....................312<br />
Writing a Check ....................................348<br />
School-to-Work Skills ...........................380<br />
Pattern Envelope Back..........................442<br />
Taking Your Measurements ..................443<br />
Parts of a Sewing Machine ...................456<br />
Threading the Machine ........................459<br />
Parts of a Serger ....................................465<br />
Pattern Symbols and Lines...................484<br />
Fabric Terms..........................................490<br />
S erging<br />
Techniques<br />
Narrow Rolled Seam .............547<br />
Reinforced Seam....................548<br />
Topstitched Seam..................549<br />
Flatlock Seam ........................550<br />
Tucks ........................................552<br />
Collar ........................................558<br />
Sleeves ......................................561<br />
Curved Patch Pocket............569<br />
Plain Waistband......................572<br />
Attaching Waistbands ..........573<br />
Tubing .......................................578<br />
Ruffles......................................580<br />
Trims.........................................582<br />
SPECIAL FEATURES • 21
UNIT 1<br />
Clothing<br />
and<br />
Society<br />
22 • UNIT 1 Clothing and Society
CHAPTERS<br />
1 Influences <strong>on</strong> Clothing<br />
2 Cultures and Customs<br />
3 Clothing and Families<br />
4 Clothing and Self-Expressi<strong>on</strong><br />
FEATURE<br />
Fashi<strong>on</strong> Promoti<strong>on</strong> <str<strong>on</strong>g>Care</str<strong>on</strong>g>ers<br />
23
CHAPTER 1<br />
Influences <strong>on</strong> Clothing<br />
OBJECTIVES<br />
• Describe the basic<br />
functi<strong>on</strong>s that<br />
clothing fulfills.<br />
• Explain pers<strong>on</strong>al<br />
influences <strong>on</strong><br />
clothing choices.<br />
• Compare the<br />
influence of family<br />
and friends <strong>on</strong><br />
clothing choices.<br />
• Evaluate the<br />
media’s impact <strong>on</strong><br />
clothing.<br />
• Explain how<br />
societal changes<br />
influence clothing.<br />
KEY TERMS<br />
adornment<br />
media<br />
modesty<br />
peer group<br />
society<br />
status<br />
status symbols<br />
values<br />
24 • UNIT 1 Clothing and Society
EXAMINETHISISSUE<br />
A book by its cover. Some people<br />
use clothing as a tool for relating to others.<br />
To them, clothing is a kind of shortcut<br />
that reveals facts about a pers<strong>on</strong>. As<br />
a result, they base the way they treat<br />
some<strong>on</strong>e <strong>on</strong> what that pers<strong>on</strong> is wearing.<br />
Others think that clothes can be misleading.<br />
They believe that looking <strong>on</strong>ly at<br />
what some<strong>on</strong>e is wearing can lead to<br />
wr<strong>on</strong>g c<strong>on</strong>clusi<strong>on</strong>s about the pers<strong>on</strong>.<br />
They c<strong>on</strong>sciously avoid letting clothes<br />
influence the way they treat others.<br />
What do you think?<br />
What do you think clothing reveals<br />
about a pers<strong>on</strong>? Should clothing guide<br />
the way people treat others?<br />
Who decides what clothing you<br />
wear? Do you? “Well, sure,” most teens<br />
might say, “I always decide.” That’s a<br />
reas<strong>on</strong>able answer, but there might be more to it<br />
than you think. As you’ll so<strong>on</strong> see, something as<br />
routine as the weather or as complex as the media<br />
can have impact <strong>on</strong> the clothing decisi<strong>on</strong>s you<br />
make. See Fig. 1-1.<br />
CHOOSING WHAT TO WEAR<br />
What happens when you sleep l<strong>on</strong>ger than<br />
you should <strong>on</strong> a school morning? If you went to<br />
bed knowing what tomorrow’s outfit would be,<br />
the clothing decisi<strong>on</strong> has already been made. If<br />
not, you probably rush to the closet and grab<br />
something.<br />
Whether you quickly choose boots instead of<br />
athletic shoes when getting dressed or carefully<br />
pick an outfit that makes you look your best,<br />
something is behind your decisi<strong>on</strong>s. What might<br />
that be? People choose the clothes they wear for a<br />
number of reas<strong>on</strong>s.<br />
Your Basic Needs<br />
You might not realize it, but the clothing you<br />
choose meets certain basic needs that all people<br />
share. While serving the functi<strong>on</strong>s shown in Fig.<br />
1-2 <strong>on</strong> pages 26-27, clothing meets many needs.<br />
Some are physical—for comfort, protecti<strong>on</strong>, and<br />
safety. Clothing covers the body and protects it<br />
from the weather, harm, and injury.<br />
Other needs are intellectual, emoti<strong>on</strong>al, and<br />
social. Clothes can communicate lots of informati<strong>on</strong><br />
about people and their lives. Clothes can<br />
make you feel attractive and self-c<strong>on</strong>fident.<br />
Clothes can also help you identify with other<br />
people and feel like part of a group.<br />
Your Activities<br />
Clothing choices are linked to how and where<br />
you spend your time. A hiker or shopper chooses<br />
comfortable shoes for walking. Many sports<br />
enthusiasts need protective gear. Bike riders,<br />
skateboarders, and football and hockey players<br />
wear helmets. Soccer players wear shin guards.<br />
Even the people you’ll be with influence what<br />
you wear. Weekend activities with family and<br />
friends may call for either casual or dress-up outfits.<br />
Wearing something similar to your friends<br />
can make you feel more comfortable.<br />
1-1<br />
How do you decide what to wear? Sometimes an<br />
outfit that works for you <strong>on</strong>e day just doesn’t seem right<br />
<strong>on</strong> another. Why is that?<br />
CHAPTER 1 Influences <strong>on</strong> Clothing • 25
A check of the weather guides many clothing<br />
choices. The right garments can insulate your body<br />
against extremely hot or cold temperatures. Many<br />
warm-weather clothes feature light colors that<br />
reflect sunlight and loose styles that allow warm air<br />
from the body to escape. Cold-weather clothing<br />
has multiple layers and heavy or bulky fabrics that<br />
trap warm air from the body, creating an insulating<br />
layer of warmth for outdoor activities.<br />
Your activities often allow you to make choices<br />
about what to wear, but sometimes the decisi<strong>on</strong><br />
isn’t up to you. A school, for example, may set up<br />
rules about what can be worn. On a part-time job<br />
you might have to wear a uniform or clothes of a<br />
certain style and color. Fast-food workers must<br />
26 • UNIT 1 Clothing and Society<br />
Fig. 1-2 • Basic Functi<strong>on</strong>s of Clothing<br />
Throughout history, clothing has fulfilled the<br />
following basic functi<strong>on</strong>s.<br />
Protecti<strong>on</strong>. Clothing insulates from the<br />
cold and keeps the sun from burning and<br />
dehydrating the body in the heat. Special<br />
clothing protects people from harm in<br />
sports and certain occupati<strong>on</strong>s.<br />
C<strong>on</strong>structi<strong>on</strong> workers, firefighters, and<br />
police officers<br />
need special<br />
clothing for<br />
safety. Workers<br />
in hospitals<br />
and restaurants<br />
wear sanitary<br />
clothing<br />
and hair coverings<br />
to prevent<br />
the spread of<br />
germs.<br />
Identificati<strong>on</strong>. Clothing and accessories<br />
can identify people as members of a<br />
group. Uniforms provide instant recogniti<strong>on</strong><br />
of police officers, firefighters, and<br />
members of the military. Uniforms create<br />
a special image for hotel staffs and<br />
airline pers<strong>on</strong>nel. Uniforms also identify<br />
athletic teams, with striped shirts and<br />
shorts in rugby and tight, <strong>on</strong>e-piece singlets<br />
in wrestling.<br />
wear hats or hairnets to prevent hair from falling<br />
into the food they prepare or serve.<br />
Activities are as varied as people. What activities<br />
influence the clothing choices that you make<br />
each day?<br />
Your Pers<strong>on</strong>al Preferences<br />
Every<strong>on</strong>e has likes and dislikes. That’s why<br />
clothes come in many colors, fabrics, and styles.<br />
Clothing likes and dislikes are determined by<br />
your values, beliefs about what’s important,<br />
desirable, or worthwhile. By examining your values,<br />
you can discover your overall attitude toward<br />
clothing. This is your clothing philosophy, and it<br />
affects what you decide to wear.
Fig. 1-2 • Basic Functi<strong>on</strong>s of Clothing (c<strong>on</strong>tinued)<br />
Modesty. Clothing provides modesty, a<br />
belief about the proper way to cover<br />
the body with clothes. Modesty may<br />
vary for the occasi<strong>on</strong>. Bathing suits<br />
and bare feet are<br />
fine for the beach<br />
but not in schools<br />
and offices. Modest<br />
also varies in history.<br />
In Victorian<br />
times, women wore<br />
bathing outfits that<br />
covered them from<br />
elbows to knees.<br />
Adornment. People wear clothing and jewelry to enhance<br />
their appearance and attract attenti<strong>on</strong>. As adornment,<br />
these decorati<strong>on</strong>s express uniqueness and creativity.<br />
Throughout history, people have adorned their bodies<br />
with cosmetics, body paint, and tattoos in additi<strong>on</strong> to<br />
clothing and jewelry.<br />
What do you look for in clothes: comfort,<br />
durability, low cost, easy care, status, the latest<br />
style? As you answer, your values about clothes<br />
become clearer.<br />
People who want comfort choose clothes that<br />
feel good. For durability, they want clothing that<br />
wears well over a l<strong>on</strong>g period of time. Those who<br />
value low cost look for special sales and bargains.<br />
To preserve their free time, some people want<br />
clothing that takes little care. Individuals who<br />
value status select clothes and accessories that<br />
look, or are, expensive or have the name of a<br />
designer or celebrity. If having the latest styles,<br />
colors, and accessories is important, a pers<strong>on</strong><br />
might sacrifice comfort and practicality in order<br />
to wear up-to-date fashi<strong>on</strong>s.<br />
Status. Clothing and accessories<br />
can show a pers<strong>on</strong>’s status, a<br />
positi<strong>on</strong> or rank within a group.<br />
Kings and queens, even now, wear<br />
crowns to set them apart from<br />
subjects. Leaders of marching<br />
bands stand out with tall fur hats.<br />
Members of the military wear<br />
insignias to indicate rank. Deans<br />
of universities wear colorful<br />
scarves or hoods to show status<br />
in the school.<br />
Your likes and dislikes also include how you<br />
feel about your appearance. Do you like to stand<br />
out in a group or blend in? Do you like to be a<br />
trendsetter? Perhaps you prefer a middle-of-theroad<br />
approach. Some people dress in a certain<br />
way so others will notice them. Other people use<br />
their clothing choices as a way to blend in with<br />
the crowd. The more you understand your pers<strong>on</strong>al<br />
preferences, the easier it is to make the best<br />
clothing choices for every occasi<strong>on</strong>.<br />
OTHER INFLUENCES<br />
Some influences <strong>on</strong> clothing decisi<strong>on</strong>s are less<br />
obvious than the <strong>on</strong>es you’ve just read about.<br />
Family, friends, and the media also have impact<br />
<strong>on</strong> fashi<strong>on</strong> choices.<br />
CHAPTER 1 Influences <strong>on</strong> Clothing • 27
Influence of Family<br />
Since the family is such a c<strong>on</strong>stant presence in<br />
most people’s lives, its impact may go unnoticed.<br />
When clothing decisi<strong>on</strong>s are made, however, the<br />
family does make a difference. Where the family<br />
lives and favorite activities influence what is<br />
worn. Families who live in northern climates, for<br />
example, need heavy coats, mittens, and boots for<br />
snowy winter days. Families who enjoy outdoor<br />
activities might need clothing for camping, hiking,<br />
or water sports. See Fig. 1-3.<br />
Influence of Friends<br />
A peer group c<strong>on</strong>sists of people with a similar<br />
background, social status, and age. Your peer group<br />
is your friends and classmates. An adult’s peers are<br />
friends and job associates. A peer group can have a<br />
big influence <strong>on</strong> how people dress and act.<br />
During the teen years, young people usually<br />
have a str<strong>on</strong>g need to be accepted by peers. The<br />
group may decide what clothing is “in,” whether<br />
high-top athletic shoes with untied laces, a baseball<br />
cap turned backwards, or a brand of clothing.<br />
Acceptance hinges <strong>on</strong> wearing the “approved” style.<br />
Following the course set by peers is not necessarily<br />
good or bad. It depends <strong>on</strong> the circumstances.<br />
Problems arise when the group’s idea of<br />
“right” c<strong>on</strong>flicts with the individual’s beliefs as<br />
well as the family’s. In another chapter, you’ll see<br />
that deciding when to go al<strong>on</strong>g with the crowd<br />
can be a measure of your own identity and values.<br />
Impact of the Media<br />
Through the media, messages are communicated<br />
to a large audience. You’ll find the media all<br />
around you. Almost every<strong>on</strong>e watches televisi<strong>on</strong>,<br />
listens to the radio, goes to the movies, or rents<br />
videos. People also read magazines and newspapers,<br />
browse through catalogs, and surf the<br />
Internet. All of these impact clothing choices.<br />
Many product messages are communicated<br />
through the media. When you read a magazine<br />
article <strong>on</strong> the seas<strong>on</strong>’s latest fashi<strong>on</strong> trends, you<br />
get ideas about what to buy and wear.<br />
Advertisements, however, are the main method<br />
used to promote products. When you buy a cer-<br />
28 • UNIT 1 Clothing and Society<br />
1-3<br />
Clothing choices are influenced by the family.<br />
Family activities often influence these choices.<br />
tain jacket brand that you saw advertised, your<br />
decisi<strong>on</strong> has been influenced by the media.<br />
Advertising<br />
If it weren’t for advertisements, how would<br />
you know which stores carry the clothes you want<br />
and how much they cost? Advertising is very useful<br />
to c<strong>on</strong>sumers, but you have to remember that<br />
the main purpose is to sell a product, image, or<br />
idea. Advertising is very powerful because of its<br />
ability to persuade people to buy. An ad for a premium<br />
ice cream talks about the good taste but<br />
doesn’t menti<strong>on</strong> the high fat c<strong>on</strong>tent. A televisi<strong>on</strong><br />
commercial for a luxury car doesn’t menti<strong>on</strong> its<br />
poor gas mileage. An ad for clothing or accessories<br />
shows the item <strong>on</strong> a gorgeous model, with<br />
no informati<strong>on</strong> about the product.<br />
When you see such ads, look for the facts.<br />
Many ads appeal strictly to emoti<strong>on</strong>s. They create<br />
vague but positive feelings for the product. Often,<br />
the goal is to make you think that this item will
make your life—and you—more interesting,<br />
more exciting, more attractive, more popular, and<br />
ultimately happier.<br />
If you read, look, and listen to each ad carefully,<br />
you can separate the facts from the emoti<strong>on</strong>al<br />
appeal. Advertising should be <strong>on</strong>ly <strong>on</strong>e of<br />
the many influences <strong>on</strong> your clothing choices.<br />
Celebrities<br />
Have you heard any<strong>on</strong>e say, “Imitati<strong>on</strong> is the<br />
sincerest form of flattery?” When you admire<br />
some<strong>on</strong>e, it’s easy to allow that pers<strong>on</strong> to influence<br />
the choices you make, often about clothing.<br />
Subc<strong>on</strong>sciously, people think that if they look or<br />
act like a particular pers<strong>on</strong>, some of the admired<br />
characteristics will rub off.<br />
Entertainers, especially <strong>on</strong> stage, screen and<br />
televisi<strong>on</strong>, influence clothing, hairstyles, and<br />
makeup. They may influence fashi<strong>on</strong> through the<br />
styles they wear themselves or the costumes of the<br />
characters they portray. In the 1960s, people<br />
copied the haircuts and the collarless suits worn<br />
by the Beatles. Later, Mad<strong>on</strong>na started a trend by<br />
wearing lingerie as outerwear. In the late 1990s,<br />
people copied the hairstyles and casual, urban<br />
clothing of the leads in the televisi<strong>on</strong> show,<br />
Friends. Today, prom gowns are influenced by the<br />
designer gowns celebrities wear at awards shows,<br />
such as the Academy Awards and the MTV cerem<strong>on</strong>ies.<br />
Many televisi<strong>on</strong> shows and magazines<br />
place special emphasis <strong>on</strong> reporting what the<br />
celebrities are wearing to these special events.<br />
Celebrities from the sports world also inspire<br />
fashi<strong>on</strong> trends. Some famous athletes endorse<br />
brand products. Michael Jordan has d<strong>on</strong>e ads for<br />
Air Jordan® athletic shoes and Tiger Woods for<br />
Nike® sportswear. Other athletes inspire particular<br />
styles, such as the colorful tennis outfits worn<br />
by Serena and Venus Williams. When Lance<br />
Armstr<strong>on</strong>g wore a yellow rubber wristband to<br />
support Livestr<strong>on</strong>g, an organizati<strong>on</strong> that supports<br />
people in managing and surviving cancer, it<br />
became a fashi<strong>on</strong> trend as well as a fund-raiser.<br />
Models, politicians, religious leaders, televisi<strong>on</strong><br />
and film pers<strong>on</strong>alities, and heroes can all<br />
motivate people to copy their styles of clothing.<br />
In the late 1990s, Regis Philbin, the former televisi<strong>on</strong><br />
host of Who Wants to Be a Milli<strong>on</strong>aire,<br />
started a fashi<strong>on</strong> craze or matching shirts and<br />
ties. Aviator sunglasses became popular after the<br />
actor Tom Cruise wore them in the 1986 movie,<br />
Top Gun. Twenty years later, when he wore them<br />
in the movie Missi<strong>on</strong> Impossible 3, they again<br />
became popular.<br />
After the rescue operati<strong>on</strong>s that followed the<br />
destructi<strong>on</strong> of the World Trade Center in New<br />
York City, people wore caps, jackets, and T-shirts<br />
inscribed with FDNY and NYPD, the insignias of<br />
New York’s fire and police departments. What<br />
other heroes and celebrities influence fashi<strong>on</strong><br />
trends?<br />
Status Symbols<br />
Many fashi<strong>on</strong> designers, sports figures, and<br />
other celebrities have their names, initials, or symbols<br />
<strong>on</strong> clothes and accessories. Through exposure<br />
in the media, such items can become status symbols,<br />
which give the wearer a special feeling of<br />
importance or wealth. See Fig. 1-4 <strong>on</strong> page 30.<br />
What status symbols have you noticed <strong>on</strong><br />
clothing? A small alligator adorns LaCoste’s<br />
shirts. An embroidered moose appears <strong>on</strong><br />
Abercrombie and Fitch merchandise. The YSL<br />
initials appear <strong>on</strong> Yves St. Laurent’s accessories.<br />
The Nike® “swoosh” symbol appears <strong>on</strong> sportswear,<br />
as well as caps and shoes. Some expensive<br />
brands of jeans are identified by their distinctive<br />
stitching patterns <strong>on</strong> the back pocket. Many<br />
designers and stores, such as Tommy Hilfiger and<br />
Old Navy, have their names boldly printed <strong>on</strong> Tshirts<br />
and sweatshirts.<br />
For some people, status symbols are important.<br />
By wearing these clothes and accessories,<br />
people try to look special. They may want to show<br />
that they can afford something expensive, or they<br />
just like wearing something that is “in.” As l<strong>on</strong>g as<br />
you understand the reas<strong>on</strong> for status symbols,<br />
and the <strong>on</strong>es you choose fit your budget, these<br />
items may have a place in your wardrobe. If status<br />
symbols mean nothing to you, you can still look<br />
just fine without them.<br />
CHAPTER 1 Influences <strong>on</strong> Clothing • 29
A CHANGING SOCIETY<br />
Society influences what people wear. A society<br />
is a group of individuals who live together in a<br />
particular area, sometimes as a nati<strong>on</strong> or community.<br />
Together, the people share certain traditi<strong>on</strong>s,<br />
instituti<strong>on</strong>s, and interests. The United<br />
States is a society of people who live together<br />
under <strong>on</strong>e form of government. Although many<br />
variati<strong>on</strong>s exist in the way Americans dress, in the<br />
society as a whole there are similarities.<br />
In the U.S., change is inevitable and <strong>on</strong>going.<br />
What happens in <strong>on</strong>e part of the country can<br />
quickly influence other parts. Where clothing is<br />
c<strong>on</strong>cerned, five major trends influence the<br />
choices people make. These trends are introduced<br />
here, but you’ll read more about them later.<br />
More Casual Living<br />
At <strong>on</strong>e time, American society was more formal.<br />
Many clothing rules existed. Hats and gloves<br />
were a regular part of a woman’s wardrobe. Most<br />
men wore business suits. People dressed up when<br />
30 • UNIT 1 Clothing and Society<br />
1-4<br />
Many businesses today allow employees to dress<br />
more casually than in the past. What advantages do<br />
employees have with this practice?<br />
they traveled <strong>on</strong> an airplane, went shopping, or<br />
ate in restaurants. Many restaurants prohibited<br />
women from wearing slacks or pantsuits; men<br />
had to wear jackets and ties. There were other<br />
rules too. For example, women never wore white<br />
shoes before Memorial Day or after Labor Day.<br />
Black was the <strong>on</strong>ly acceptable color to wear for<br />
funerals. Black was never worn for weddings.<br />
Today, most restaurants welcome customers in<br />
casual clothes. While traveling, people dress for<br />
comfort. Wedding guests and even bridesmaids<br />
frequently wear black. Most workplaces permit<br />
employees to wear casual attire. See Fig. 1-4. With<br />
more emphasis <strong>on</strong> leisure time, sports, and exercise,<br />
wardrobes reflect these interests. Women, in<br />
particular, no l<strong>on</strong>ger accept uncomfortable and<br />
c<strong>on</strong>stricting clothes or shoes just to follow the<br />
dictates of fashi<strong>on</strong> designers.<br />
Rapid Communicati<strong>on</strong><br />
Technological changes have brought societies<br />
around the world in close c<strong>on</strong>tact. Societies today<br />
share goods, services, and informati<strong>on</strong> quickly<br />
and easily. Like other news, fashi<strong>on</strong> news transmits<br />
rapidly via computer, televisi<strong>on</strong>, fax, and<br />
videos. The same televisi<strong>on</strong> shows and movies are<br />
seen in many different countries. C<strong>on</strong>certs and<br />
sporting events are telecast live via satellite TV.<br />
The Internet and its commercial <strong>on</strong>-line services,<br />
such as Netscape, America Online (AOL), and<br />
Yahoo, offer new ways to communicate, advertise,<br />
and sell to c<strong>on</strong>sumers.<br />
As a result, similar fashi<strong>on</strong>s are available for<br />
sale at the same time in many parts of the world.<br />
Teens in Japan and the United States can wear the<br />
same style of jeans even though they’re manufactured<br />
in a third country. People around the world<br />
can access the Internet to purchase goods from<br />
almost anywhere.
1-5<br />
Today’s c<strong>on</strong>sumers have many opti<strong>on</strong>s for<br />
shopping ranging from individual boutiques to large<br />
mega-malls. What’s your favorite shopping opti<strong>on</strong>?<br />
Multiple Shopping Opti<strong>on</strong>s<br />
If you like to shop for clothes, you’re living at<br />
the right time, since opportunities are everywhere.<br />
Stores are still a favorite shopping opti<strong>on</strong>.<br />
Although stores are not all the same, their differences<br />
are less obvious than they <strong>on</strong>ce were. Today,<br />
the price at a discount store might be higher than<br />
buying <strong>on</strong> sale somewhere else.<br />
Many stores are c<strong>on</strong>veniently grouped together<br />
in malls. Some are found in small “strip centers,”<br />
where the stores are lined up in a row. Large<br />
indoor malls feature at least two large stores, a<br />
collecti<strong>on</strong> of smaller stores, and a food court.<br />
Mega-malls have over 400 stores, many restaurants,<br />
and even entertainment areas.<br />
People who d<strong>on</strong>’t have the time or desire to go<br />
to a store can order almost anything at home via<br />
computer, fax, or ph<strong>on</strong>e. They can view pictures<br />
of merchandise and place orders through the<br />
Internet. They can order from catalogs by ph<strong>on</strong>e<br />
or <strong>on</strong>-line. No matter where you live, you can<br />
now shop 24 hours a day. See Fig. 1-5.<br />
C<strong>on</strong>sumer Power<br />
While designers drove the fashi<strong>on</strong> world of<br />
yesterday, c<strong>on</strong>sumer influence is felt today. The<br />
time when a designer’s revoluti<strong>on</strong>ary new style<br />
spread rapidly across the country no l<strong>on</strong>ger<br />
exists. Now designers are more likely to focus <strong>on</strong><br />
new colors and fabrics than <strong>on</strong> radical new styles.<br />
They draw inspirati<strong>on</strong> from what people are<br />
already wearing—at parties, clubs, sporting<br />
events, and <strong>on</strong> the street.<br />
As c<strong>on</strong>sumers, people have become more educated.<br />
Their knowledge and skills have grown with<br />
rapid communicati<strong>on</strong>. As a result, c<strong>on</strong>sumers<br />
know what they want, and they want it all: rockbottom<br />
prices, the best quality, good service, and<br />
the least hassle. They shop where these demands<br />
will be met. If a new store or shopping c<strong>on</strong>cept<br />
comes al<strong>on</strong>g, c<strong>on</strong>sumers are willing to give it a try.<br />
Loyalty to a store or brand name is less likely. All<br />
of these changes have made c<strong>on</strong>sumers more<br />
powerful, which makes sellers listen.<br />
Global Marketplace<br />
You might not have traveled around the world,<br />
but it’s possible that something in your closet did.<br />
A well-traveled shirt could have begun its journey<br />
in another country, where some<strong>on</strong>e created a<br />
design. At the same time, a fabric design was in<br />
the works somewhere else. After the fabric was<br />
produced in a third country, it was sent to a<br />
fourth country, where the shirt was manufactured.<br />
The thread, butt<strong>on</strong>s, and trim were<br />
shipped in from other parts of the world. Once<br />
the shirt was assembled, the finished garment was<br />
shipped to a store, where it became yours.<br />
Today, a garment that’s entirely made in <strong>on</strong>e<br />
country is the excepti<strong>on</strong> rather than the rule.<br />
Developing nati<strong>on</strong>s have become key players in<br />
the fashi<strong>on</strong> industry, mostly as sources of materials<br />
and producti<strong>on</strong>. Clothing made around the<br />
world can be sold almost anywhere in the world.<br />
Fashi<strong>on</strong> capitals have also expanded across the<br />
globe. In the 1940s and 1950s, the major highfashi<strong>on</strong><br />
designers were based in Paris. All the<br />
ready-to-wear designers were based in New York<br />
City. In the 1960s and 1970s, L<strong>on</strong>d<strong>on</strong>, Rome, and<br />
CHAPTER 1 Influences <strong>on</strong> Clothing • 31
Technology Trends<br />
>>BEYOND BASIC CLOTHING FUNCTIONS<br />
As technology becomes more sophisticated,<br />
so does the way our clothes functi<strong>on</strong>.<br />
These innovati<strong>on</strong>s by manufacturers<br />
of outdoor gear may so<strong>on</strong> influence the<br />
clothes we wear daily. They include:<br />
Milan also became important fashi<strong>on</strong> capitals.<br />
Today, Tokyo, Germany, Spain, Scandinavia,<br />
Canada, and H<strong>on</strong>g K<strong>on</strong>g have joined the list of<br />
places where the fashi<strong>on</strong> industry thrives. The<br />
marketplace is truly global.<br />
LOOKING AHEAD<br />
While clothes mean little to some and more to<br />
others, there’s no denying that clothing has great<br />
impact. In this course, you’ll see how fashi<strong>on</strong>s<br />
reflect history and how technology has brought<br />
change. You’ll explore the way clothing expresses<br />
culture as well as your own pers<strong>on</strong>ality.<br />
If you like, you can tap your creativity while<br />
you study clothing. You’ll learn about color and<br />
32 • UNIT 1 Clothing and Society<br />
• Removable solar panels that recharge<br />
your cell ph<strong>on</strong>e, iPod, and other small<br />
electr<strong>on</strong>ics after their batteries fail.<br />
• Fabrics that keep you cool thanks to electr<strong>on</strong>ic<br />
filaments woven into the fabric.<br />
• Garments with built-in heaters that run<br />
<strong>on</strong> rechargeable batteries, which keep<br />
you warm and cozy for up to five hours.<br />
• Battery-powered electr<strong>on</strong>ic light panels<br />
that c<strong>on</strong>vert a jacket into a glow-in-thedark<br />
item.<br />
• Fabrics that repel mosquitoes, ticks,<br />
fleas, and other biting insects. Derived<br />
from chrysanthemums, the odorless and<br />
colorless repellant is tightly b<strong>on</strong>ded to<br />
fabrics.<br />
INVESTIGATE<br />
Search the Web for other innovati<strong>on</strong>s in<br />
fabrics and apparel. Which innovati<strong>on</strong>s are<br />
most appealing?<br />
design and how to choose styles that make the<br />
best of your appearance. Perhaps you’ll create<br />
designs of your own.<br />
This course will also give you practical knowledge.<br />
Can you evaluate well-made clothing? Can<br />
you identify different fabrics? Do you know the<br />
best methods of clothing care? Would you like to<br />
sew a garment or accessory? These skills will help<br />
you as a c<strong>on</strong>sumer. Using the process <strong>on</strong> page 33,<br />
you’ll learn to make sound decisi<strong>on</strong>s about clothing<br />
choices and management. As you study each<br />
unit, you’ll also explore career possibilities for<br />
your future. Whatever your interests and goals as<br />
you complete this course, you’ll discover that the<br />
world of fashi<strong>on</strong> is exciting and ever-changing.
How To…<br />
MAKE DECISIONS<br />
To make the best clothing choices, you need good decisi<strong>on</strong>-making skills. The six steps<br />
shown here can guide you through decisi<strong>on</strong>s. Each time you use them, you’ll become better<br />
prepared for future decisi<strong>on</strong>s.<br />
Step 1: State the<br />
situati<strong>on</strong>.<br />
Clearly identify the problem or<br />
situati<strong>on</strong>.<br />
• You need a nice outfit to wear<br />
to a job interview.<br />
Step 2: List various<br />
opti<strong>on</strong>s.<br />
What choices do you have?<br />
• Should you buy something new?<br />
• Could you sew a new garment?<br />
• Should you make do with something you<br />
already own?<br />
• Could you borrow a garment from a relative<br />
or friend?<br />
• What other opti<strong>on</strong>s do you have?<br />
Step 3: Evaluate the opti<strong>on</strong>s.<br />
What are the pros and c<strong>on</strong>s of each opti<strong>on</strong>?<br />
Evaluate all your choices before deciding.<br />
• How much m<strong>on</strong>ey can you spend <strong>on</strong><br />
something new?<br />
• Can you wait for a sale?<br />
• Do you have the skills to sew a garment?<br />
• Will you look presentable without<br />
something new?<br />
• Would a borrowed garment fit well and<br />
look good?<br />
Step 4: C<strong>on</strong>sider<br />
your values.<br />
What is most important<br />
to you? C<strong>on</strong>sider m<strong>on</strong>ey,<br />
time, practicality,<br />
appearance, and<br />
creativity.<br />
Step 5: Select<br />
the best opti<strong>on</strong>.<br />
Based <strong>on</strong> your evaluati<strong>on</strong> of<br />
each opti<strong>on</strong>, which choice is<br />
best? When you’ve made your decisi<strong>on</strong>,<br />
follow through <strong>on</strong> it. The so<strong>on</strong>er you act, the<br />
so<strong>on</strong>er the problem will be solved.<br />
• If this were your decisi<strong>on</strong>, what choice would<br />
you make?<br />
Step 6: Evaluate the results.<br />
Take time to evaluate your decisi<strong>on</strong>. Answer<br />
these questi<strong>on</strong>s: Why did you make the decisi<strong>on</strong><br />
that you did? What important fact helped in<br />
making your decisi<strong>on</strong>? In the l<strong>on</strong>g run, did you<br />
make the right choice?<br />
Exploring Decisi<strong>on</strong>s<br />
What clothing decisi<strong>on</strong> do you have to<br />
make in the near future? Apply the six<br />
steps to make a choice.<br />
CHAPTER 1 Influences <strong>on</strong> Clothing • 33
CHAPTER 1<br />
CHAPTER SUMMARY<br />
• Clothing is often chosen to meet certain<br />
basic functi<strong>on</strong>s and needs.<br />
• People make clothing choices based <strong>on</strong><br />
activities as well as pers<strong>on</strong>al preferences.<br />
• Values, family, and friends influence a pers<strong>on</strong>’s<br />
clothing choices.<br />
• Influences <strong>on</strong> clothing choices reach c<strong>on</strong>sumers<br />
in several ways through the media.<br />
• Rules about clothing have relaxed in the<br />
United States, creating more choices for<br />
c<strong>on</strong>sumers.<br />
• Advances in technology have greatly<br />
increased the variety of clothing available.<br />
• Studying clothes and fashi<strong>on</strong> can help you<br />
make satisfying choices about your<br />
wardrobe, and even your career.<br />
USING KEY TERMS<br />
Create a true-false quiz based <strong>on</strong> the Key<br />
Terms. Exchange quizzes with a classmate<br />
and complete.<br />
34 • UNIT 1 Clothing and Society<br />
Review<br />
RECALLING THE FACTS<br />
1. Describe ways that clothing serves basic<br />
functi<strong>on</strong>s.<br />
2. Give two examples of how clothing offers<br />
protecti<strong>on</strong> from the weather.<br />
3. Why do people want clothing choices<br />
in many different styles, colors, and<br />
fabrics?<br />
4. Give examples of how individual values<br />
can affect clothing choices.<br />
5. How do family and peers affect decisi<strong>on</strong>s<br />
about clothing?<br />
6. Describe a helpful approach when using<br />
the informati<strong>on</strong> in advertisements.<br />
7. Why might a designer jacket worn by a<br />
movie star become popular with some<br />
people?<br />
8. Do all people value status symbols?<br />
Explain.<br />
9. List three situati<strong>on</strong>s in which formal<br />
dress has been replaced by more casual<br />
wear.<br />
10. How have advances in communicati<strong>on</strong><br />
technology affected the fashi<strong>on</strong> world?<br />
11. How have changes in shopping opti<strong>on</strong>s<br />
affected clothes buying?<br />
12. What influence do c<strong>on</strong>sumers have <strong>on</strong><br />
the fashi<strong>on</strong> world today?<br />
13. In what sense might some garments be<br />
called “world travelers”?
and Activities<br />
THINKING CRITICALLY<br />
1. Predict what might happen if people in<br />
certain occupati<strong>on</strong>s no l<strong>on</strong>ger wore uniforms.<br />
Give examples.<br />
2. Would you follow the fashi<strong>on</strong> example set<br />
by a celebrity? Explain.<br />
3. Some people are offended when they<br />
dress up for dinner at a nice restaurant<br />
and other diners are wearing jeans and<br />
casual wear. What is your point of view?<br />
APPLYING KNOWLEDGE<br />
1. Identifying values. In writing, identify<br />
at least five pers<strong>on</strong>al values that you<br />
use when choosing clothes for your<br />
wardrobe.<br />
2. Identifying influences. List five garments<br />
or outfits in your wardrobe. For<br />
each <strong>on</strong>e, explain what influenced you to<br />
buy or wear that item. Choose from the<br />
influences described in the chapter.<br />
3. Fashi<strong>on</strong> inspirati<strong>on</strong>. Work with a few<br />
classmates to identify how celebrities,<br />
movies, and televisi<strong>on</strong> programs inspire<br />
current fashi<strong>on</strong>. Collect magazine photos<br />
and write descripti<strong>on</strong>s for a bulletin<br />
board or poster display that illustrates<br />
this inspirati<strong>on</strong>.<br />
4. Status symbols. As a class, make a list<br />
of clothing items and accessories that<br />
are currently status symbols. Discuss<br />
why each item is c<strong>on</strong>sidered a status<br />
symbol. How many of these items are<br />
more expensive than similar products?<br />
CHAPTER 1<br />
5. Looking ahead. In the last passage of<br />
this chapter, you read about what you’ll<br />
gain from this course. List five topics or<br />
skills to be explored. As a preview of the<br />
course ahead, scan the table of c<strong>on</strong>tents<br />
and identify chapters related to the topics<br />
and skills you listed. Which <strong>on</strong>es will<br />
be most helpful to you?<br />
MAKING>
CHAPTER 2<br />
Cultures and Customs<br />
OBJECTIVES<br />
• Explain how<br />
clothing reflects<br />
cultures.<br />
• Give examples of<br />
clothing symbols.<br />
• Discuss clothing<br />
customs and<br />
expectati<strong>on</strong>s in the<br />
U.S. culture.<br />
• Describe<br />
appropriate outfits<br />
for certain<br />
occasi<strong>on</strong>s.<br />
KEY TERMS<br />
appropriate<br />
culture<br />
customs<br />
dress code<br />
expectati<strong>on</strong>s<br />
heritage<br />
roles<br />
standards<br />
36 • UNIT 1 Clothing and Society
EXAMINETHISISSUE<br />
Adapting to new cultures.<br />
Today, increasing numbers of people<br />
spend time living or working in countries<br />
outside their homeland. Some relocate<br />
permanently. In these situati<strong>on</strong>s the questi<strong>on</strong><br />
of clothing arises. Some people c<strong>on</strong>tinue<br />
to wear the traditi<strong>on</strong>al garments of<br />
their own culture wherever they go. They<br />
feel most comfortable in the clothing they<br />
have always worn and believe that others<br />
should respect that choice. Some prefer<br />
to wear the styles of the culture where<br />
they are living. They want to fit in well and<br />
eliminate potential barriers.<br />
What do you think?<br />
Do people need to adopt a culture’s<br />
clothing styles in order to fit in? Are other<br />
behaviors more important for acceptance?<br />
With every passing year, people<br />
say the world grows smaller. Of course,<br />
that’s not literally true, but what do<br />
they mean? They mean that people now communicate<br />
across c<strong>on</strong>tinents and travel to other lands<br />
with greater ease. Places that <strong>on</strong>ce seemed far<br />
away and remotely different are now more familiar.<br />
As diverse people share ideas and products<br />
around the world, they become closer, which is<br />
changing the way people view other cultures.<br />
CLOTHING REFLECTS<br />
CULTURES<br />
Each society has its own culture, the collected<br />
ideas, skills, beliefs, and instituti<strong>on</strong>s of a society at<br />
a particular time in history. Food, entertainment,<br />
art, religi<strong>on</strong>, politics, and technology—all are elements<br />
of a society’s culture. Cultural differences<br />
are what set <strong>on</strong>e society apart from another.<br />
Every culture has something special and<br />
unique about its clothing. The garments that<br />
people wear—the fabrics, designs, and colors—<br />
tell so much about the way people think and live.<br />
They reveal part of that people’s story, much as<br />
each piece in a puzzle c<strong>on</strong>tributes to the finished<br />
picture. See Fig. 2-1.<br />
Nati<strong>on</strong>al Costumes<br />
Over the centuries, many cultures have developed<br />
their own distinctive clothing style, or<br />
nati<strong>on</strong>al costume. Most nati<strong>on</strong>al costumes had<br />
very practical beginnings.<br />
Ancient Celts in the highlands of Scotland<br />
wove clan blankets with special plaid patterns to<br />
identify each clan. In the sixteenth century, they<br />
started wrapping these plaid blankets around the<br />
body to form a short, belted-<strong>on</strong>, all-purpose garment<br />
called a kilt. The extra fabric was pulled up<br />
over the shoulder from the back and pinned in<br />
2-1<br />
C<strong>on</strong>temporary fashi<strong>on</strong>s can be inspired by tradi-<br />
ti<strong>on</strong>al ethnic garments and fabrics. This garment reflects<br />
the African culture through the style, bright colors, and<br />
interesting pattern.<br />
CHAPTER 2 Cultures and Customs • 37
place. Today Scotsmen still wear plaid kilts for<br />
special occasi<strong>on</strong>s. See Fig. 2-2.<br />
In Middle Eastern countries, where the desert<br />
is very hot during the day and very cold at night,<br />
the turban became a comm<strong>on</strong> clothing item. It<br />
absorbed sweat and also insulated from the cold.<br />
The turban c<strong>on</strong>tinues to serve these practical<br />
functi<strong>on</strong>s in many cultures. See Fig. 2-3.<br />
Over the years, some cultures developed garments<br />
with a similar shape, which was comfortable<br />
and easy to make. The Hawaiian muumuu,<br />
the North African caftan, and the Arabian kibr, a<br />
hooded robe with sleeves, are all loose-fitting garments<br />
that are still worn today.<br />
Some nati<strong>on</strong>al costumes, such as the Indian<br />
sari and Japanese kim<strong>on</strong>o, feature beautiful fabric<br />
designs in colorful silks. Other nati<strong>on</strong>al costumes<br />
have unique forms of ornamentati<strong>on</strong>. Traditi<strong>on</strong>al<br />
Hungarian clothes, for example, are decorated<br />
with leather. Colorful, embroidered designs<br />
2-2<br />
In its original form, the kilt needed no tailoring<br />
and didn’t need to be replaced as often as breeches.<br />
Today the kilt is worn proudly and c<strong>on</strong>sidered the<br />
nati<strong>on</strong>al dress of Scotland.<br />
38 • UNIT 1 Clothing and Society<br />
2-3 Turbans are comm<strong>on</strong> in many parts of the<br />
world, from North Africa, across the Middle East, and<br />
into Central Asia. The narrow cloth that creates a turban<br />
can be as l<strong>on</strong>g as 12 feet.<br />
accent Scandinavian clothing. Native American<br />
garments feature colored beads, arranged in special<br />
patterns and sewn to soft leather. See Fig. 2-4.<br />
In some parts of the world, people still wear<br />
distinctive nati<strong>on</strong>al costumes as part of their<br />
everyday dress. The African tribal robe and<br />
Indian sari, for example, have changed little over<br />
the centuries.<br />
Global Trends<br />
In your school, how similar are the clothes students<br />
wear? How do these styles compare to those<br />
worn across the country? What about teens in<br />
China, Italy, Ghana, Brazil, India, or Australia? If<br />
you could travel the world, you would probably<br />
see many teens dressed like you.<br />
Today, many people wear similar clothing<br />
styles in countries around the world. The Chinese<br />
businessman in Beijing wears the same type of<br />
suit as the American businessman in New York<br />
City. Mass communicati<strong>on</strong> and global distributi<strong>on</strong><br />
of the latest fashi<strong>on</strong>s have produced this<br />
effect.<br />
There are excepti<strong>on</strong>s, however. People who live<br />
in countries with very hot or cold climates may
2-4<br />
Beautiful woven fabrics and designs are typical<br />
of Native American costumes. Handcrafted beads, belts,<br />
and other adornments add to the beauty of the costume.<br />
find greater comfort in their traditi<strong>on</strong>al clothing.<br />
Others, such as those in developing countries,<br />
may not have the means or the desire to wear<br />
Western styles.<br />
In many cultures, nati<strong>on</strong>al costumes are now<br />
worn <strong>on</strong>ly for festive occasi<strong>on</strong>s, such as holidays,<br />
parades, weddings, and dances. Wedding guests in<br />
Germany, Korea, or Mexico may celebrate by wearing<br />
traditi<strong>on</strong>al outfits that have been worn for generati<strong>on</strong>s.<br />
See Fig. 2-5. This is <strong>on</strong>e way for people to<br />
reflect their cultural pride in a modern world.<br />
CLOTHING AS SYMBOLS<br />
Why does a bride in the U.S. traditi<strong>on</strong>ally wear<br />
a white gown? In the American culture, the color<br />
white symbolizes innocence, faith, and purity. By<br />
c<strong>on</strong>trast, brides in China wear red garments<br />
because red symbolizes joy and permanence.<br />
Throughout the cultures of the world, clothing<br />
has many symbolic meanings. Clothing can tell<br />
you about a pers<strong>on</strong>’s heritage, occupati<strong>on</strong>, role,<br />
gender, and values.<br />
Heritage<br />
Every pers<strong>on</strong> has a special heritage, the cultural<br />
background and ethnic traditi<strong>on</strong>s handed<br />
down from ancestors. Heritage defines identity<br />
and produces pride. To celebrate heritage, people<br />
participate in ethnic festivals and holidays, often<br />
wearing colorful costumes. On Chinese New Year,<br />
people d<strong>on</strong> new clothes in “lucky” orange or red,<br />
as brilliant as the fireworks that mark the day. At<br />
the Navajo Nati<strong>on</strong> Fair, Native Americans display<br />
stunning traditi<strong>on</strong>al garments, worn with feathered<br />
headdress, beaded bracelets, and leather<br />
moccasins.<br />
2-5<br />
Nati<strong>on</strong>al costumes worn for special occasi<strong>on</strong>s in<br />
Mexico are bright and colorful. Although the bride at a<br />
Mexican wedding usually wears white, red is a popular<br />
color am<strong>on</strong>g the guests. Colorful flowers in the hair complement<br />
the dress this woman wears.<br />
CHAPTER 2 Cultures and Customs • 39
Many clothing styles have come to symbolize a<br />
particular cultural background. A kim<strong>on</strong>o is<br />
associated with Japan, a sari with India, and<br />
leather lederhosen with Germany. See Fig. 2-6.<br />
Colorful fabrics wrap the heads of African<br />
women. South Americans wear distinctive striped<br />
p<strong>on</strong>chos.<br />
Because the United States is a culturally diverse<br />
society, no single clothing style symbolizes heritage.<br />
Although basic clothing styles were inherited<br />
from Europe, many cultures have c<strong>on</strong>tributed<br />
special items. The mandarin collar<br />
comes from China, for example, and the caftan<br />
2-6<br />
Although the classic Indian sari is made with six<br />
yards of fabric, a nine-yard versi<strong>on</strong> can be draped to form<br />
pants rather than a flowing gown. The graceful, feminine<br />
sari can be made from shimmering silk or gauzy cott<strong>on</strong> in<br />
beautiful pastels. Some have bright floral prints.<br />
40 • UNIT 1 Clothing and Society<br />
2-7<br />
People often wear clothing that symbolizes their<br />
occupati<strong>on</strong>. Even in a different setting, you would proba-<br />
bly know what work these people do. How can you tell?<br />
comes from Africa. Native Americans have c<strong>on</strong>tributed<br />
highly prized turquoise and silver jewelry.<br />
Within the United States, regi<strong>on</strong>al differences<br />
show. A Texan may wear cowboy boots with his<br />
business suit. People in Hawaii and Florida usually<br />
wear brighter colors than those worn in<br />
Minnesota. Can you think of reas<strong>on</strong>s for these<br />
regi<strong>on</strong>al differences in clothing?<br />
Occupati<strong>on</strong><br />
In a courtroom drama <strong>on</strong> televisi<strong>on</strong>, how do<br />
you identify the judge? You probably notice the<br />
traditi<strong>on</strong>al black robe. In the same way, clothing<br />
identifies many professi<strong>on</strong>s. Ministers, priests, and<br />
other clergy members usually wear special robes<br />
or shawls when c<strong>on</strong>ducting religious services.<br />
Uniforms clearly symbolize the police force, fire<br />
department, and military. Many people in service<br />
occupati<strong>on</strong>s, including restaurant workers, delivery<br />
people, and postal workers, also wear special<br />
uniforms for quick identificati<strong>on</strong>.<br />
Clues to professi<strong>on</strong>s are all around you.<br />
Examples are a doctor’s white coat, a priest’s collar,<br />
and a chef’s hat. What other clothing symbols<br />
are linked to careers? See Fig. 2-7.
Roles<br />
For high school graduati<strong>on</strong>, you’ll probably<br />
wear a l<strong>on</strong>g robe and mortarboard hat. These<br />
symbolize your role as a graduate. Clothing identifies<br />
many roles, the different positi<strong>on</strong>s people<br />
have in society.<br />
A bride is distinguished from her attendants by<br />
the wedding gown, veil, and special dresses worn.<br />
A baby’s heirloom gown, passed down through<br />
generati<strong>on</strong>s, symbolizes baptism. Athletes and<br />
members of marching bands wear distinctive<br />
uniforms. Many high school athletes wear special<br />
“letter” jackets that show participati<strong>on</strong> in sports,<br />
as well as positi<strong>on</strong>s and h<strong>on</strong>ors. Roles are easily<br />
identifiable because of the many special garments<br />
that act as symbols.<br />
Gender<br />
For many years in Western society, clothing<br />
symbolized gender. Women wore skirts and men<br />
2-8<br />
In other parts if the world, males may wear<br />
skirts or l<strong>on</strong>g robes just as females do. Designs, colors,<br />
fabrics, and styles have been modified to suit the culture<br />
and the purpose for the garment.<br />
wore pants. Since pants are accepted clothing for<br />
both genders today, slight differences in design<br />
now make distincti<strong>on</strong>s. Compare the butt<strong>on</strong>s <strong>on</strong><br />
men’s and women’s shirts. What difference do<br />
you notice?<br />
In other cultures, clothing styles worn by<br />
males and females have evolved quite differently.<br />
For centuries in some parts of the world, pants<br />
have been worn by both genders. In Lapland,<br />
north of the Arctic Circle, both men and women<br />
wear pants to protect against subzero temperatures.<br />
In Southeast Asia, such as Vietnam and<br />
Thailand, men and women wear pants for work<br />
and leisure activities.<br />
In other parts of the world, males wear skirts<br />
or l<strong>on</strong>g robes just as females do. Men in the South<br />
Pacific wear a wrapped skirt called a sar<strong>on</strong>g. Arab<br />
men wear l<strong>on</strong>g, flowing robes. In many African<br />
societies, males wear colorful, wrapped skirts of<br />
various lengths. Chinese and Japanese men have<br />
worn silk robes for centuries. See Fig. 2-8.<br />
Values<br />
Clothing and accessories can reflect the values<br />
of a culture or specific group. A few examples<br />
show how.<br />
Membership in a particular religious group<br />
might be symbolized by jewelry with crosses,<br />
stars, or other religious symbols. Through darkcolored<br />
clothing in simple styles, the Amish show<br />
regard for their ancestor’s way of living. See Fig.<br />
2-9 <strong>on</strong> page 42. Some Jewish men wear a cap<br />
called a yarmulka (YAH-muh-kuh) at all times;<br />
others wear it <strong>on</strong>ly for special occasi<strong>on</strong>s and religious<br />
services. Followers of Hasidism (HA-suhdih-zum)<br />
stand out from others in the Jewish<br />
community with their l<strong>on</strong>g coats and dark hats.<br />
Seik men, who d<strong>on</strong>’t cut their hair, wrap their<br />
heads in a turban. Many Muslim women wear a<br />
l<strong>on</strong>g, scarf-like cloth, called a hijab, to cover the<br />
hair and frame the face.<br />
Clothing also reflects cultural views of modesty.<br />
In some cultures of the world, wearing very<br />
little clothing is acceptable, perhaps <strong>on</strong>ly a loincloth<br />
for men. In others, women must wear a l<strong>on</strong>g<br />
veil that completely covers them in public. In<br />
CHAPTER 2 Cultures and Customs • 41
2-9<br />
In an Amish or Menn<strong>on</strong>ite household, the mother<br />
usually sews clothing for the family. She makes b<strong>on</strong>nets,<br />
dresses, apr<strong>on</strong>s, and capes, as well as pants and shirts<br />
for the males in the family.<br />
Europe, men of all ages swim in very brief<br />
bathing suits, and some women d<strong>on</strong>’t wear tops.<br />
In the United States, most swimwear is less<br />
revealing. On the other hand, Americans are<br />
more likely to wear shorts in public, while many<br />
Europeans d<strong>on</strong>’t believe that shorts are proper<br />
street attire.<br />
CLOTHING CUSTOMS<br />
Every society has certain customs, l<strong>on</strong>gestablished<br />
practices that regulate social life. See<br />
Fig. 2-10. While some customs cover etiquette,<br />
others relate to clothing. A clothing custom is<br />
2-10<br />
42 • UNIT 1 Clothing and Society<br />
The clothing people choose for a date or to<br />
wear to a restaurant is influenced by the customs in a<br />
society. How would you dress for such occasi<strong>on</strong>s?<br />
born when people adopt a way of dressing for a<br />
specific situati<strong>on</strong>. Wearing shorts to a rock c<strong>on</strong>cert<br />
may be <strong>on</strong>e custom, while wearing dress-up<br />
clothes to a symph<strong>on</strong>y c<strong>on</strong>cert is another.<br />
Knowing the clothing customs in society can<br />
help you make decisi<strong>on</strong>s about what to wear for<br />
different occasi<strong>on</strong>s.<br />
Understanding Expectati<strong>on</strong>s<br />
and Standards<br />
Many people have certain clothing expectati<strong>on</strong>s,<br />
or thoughts about what is reas<strong>on</strong>able or<br />
justified for people to wear. Custom in American<br />
society says that males d<strong>on</strong>’t wear skirts. Business<br />
suits are out of place <strong>on</strong> a c<strong>on</strong>structi<strong>on</strong> site, just<br />
as jeans are out of place in many offices.<br />
Swimsuits bel<strong>on</strong>g <strong>on</strong> the beach, but not in school<br />
classrooms.<br />
Teens often become aware of what others<br />
expect of them. A parent’s ideas about clothing,<br />
hairstyle, and makeup may differ from what the<br />
teen likes. An employer, friend, or team members<br />
may have certain expectati<strong>on</strong>s about how you<br />
should dress. An employer expects a wellgroomed<br />
appearance. See Fig. 2-11. As a team<br />
leader you might be expected to set an example<br />
that shows other members how to dress.
When the majority of people share the same<br />
expectati<strong>on</strong>s in a society, standards form.<br />
Standards are the guidelines and principles that<br />
set forth what’s appropriate, or suitable, to wear.<br />
Standards may be written or unwritten, and they<br />
can change over time.<br />
Dress Codes<br />
On the doors of businesses, you’ve probably<br />
seen signs that warn, “No shirt, no shoes, no service.”<br />
This statement is a simple dress code, a set<br />
of rules that describe acceptable or required<br />
clothing. Most restaurants require customers to<br />
wear shoes and shirts because of health laws. If<br />
you d<strong>on</strong>’t follow these rules, the restaurant can<br />
refuse to serve you.<br />
Many schools and offices have dress codes for<br />
students and employees. A general list of clothing<br />
items tells what may not be worn, such as no torn<br />
jeans, no bared midriffs, no low-cut tops, no hats,<br />
and no T-shirts with inappropriate images or<br />
messages. Most schools have formal dress codes,<br />
which are written. Informal codes are unwritten,<br />
2-11<br />
What does an employer expect c<strong>on</strong>cerning clothing<br />
and appearance? Here, a clean uniform, c<strong>on</strong>fined hair, and<br />
pers<strong>on</strong>al cleanliness are all likely expectati<strong>on</strong>s. Following<br />
them c<strong>on</strong>tributes to job success.<br />
Fashi<strong>on</strong><br />
COLLAR COLORS. In the late<br />
1800s, a starched white collar was part of<br />
the professi<strong>on</strong>al Englishman’s business<br />
attire. Taking a deep breath was difficult in<br />
these high, tight collars, almost ensuring<br />
that the wearer could do no physical labor.<br />
The manual laborer’s shirt typically was<br />
blue, including a loose-fitting collar. To this<br />
day, the term white collar describes professi<strong>on</strong>al<br />
“office” jobs, while blue collar<br />
refers to technical trades.<br />
Facts<br />
but people are still expected to understand and<br />
follow them. When a business has an informal<br />
dress code, an employee can usually determine<br />
what it is by noting how supervisors dress.<br />
Differing Standards<br />
If you’ve ever moved from <strong>on</strong>e part of the<br />
country to another, you may have noticed that<br />
clothing standards differ am<strong>on</strong>g communities<br />
and regi<strong>on</strong>s. Ideas of appropriateness are not<br />
always the same.<br />
In an urban area a man might need to wear<br />
suits and ties more often than some<strong>on</strong>e who lives<br />
in a small community. For women, dresses and<br />
pantsuits may be the standard for social events in<br />
some communities, while casual sportswear can<br />
be worn in others. In resort areas, both men and<br />
women may wear brightly colored casual wear for<br />
all types of activities.<br />
Choosing Appropriate Styles<br />
Matching clothing to the occasi<strong>on</strong> can be to<br />
your advantage. When you need acceptance and<br />
approval, the “right” clothing makes a difference.<br />
It can make you feel comfortable, relaxed, and<br />
self-assured, especially in new situati<strong>on</strong>s. By following<br />
standards in dress, people feel that they fit<br />
in better and the group or community accepts<br />
them.<br />
CHAPTER 2 Cultures and Customs • 43
Job Interviews<br />
On a job interview, a good impressi<strong>on</strong> counts.<br />
The way you dress for an interview sends a message<br />
about the kind of employee you’ll be.<br />
Dress for the interview, not the job. Even if<br />
employees wear jeans, you should wear clothes<br />
suitable for a special dinner out. Dress c<strong>on</strong>servatively—no<br />
extreme outfits, heavy makeup, or<br />
elaborate hairstyles. With flattering colors and<br />
styles, you’ll feel more c<strong>on</strong>fident. Clean and neat<br />
hair, hands, clothes, and shoes create a good<br />
impressi<strong>on</strong>. You’ll find more tips <strong>on</strong> dressing for<br />
a job interview <strong>on</strong> page 386. By following these<br />
guidelines, you can focus the interviewer’s attenti<strong>on</strong><br />
<strong>on</strong> your skills and less <strong>on</strong> your appearance.<br />
See Fig. 2-12.<br />
On the Job<br />
The trend toward casual clothing has spread to<br />
many workplaces. At first, summer Fridays<br />
became casual days. Males didn’t have to wear<br />
business suits and ties to the office <strong>on</strong> Fridays.<br />
Women could wear sportswear and flats instead<br />
of tailored outfits and heels. So<strong>on</strong> magazines,<br />
newspapers, and stores featured casual fashi<strong>on</strong>s<br />
for office wear. More recently, “business casual,”<br />
described <strong>on</strong> page 45, has become acceptable<br />
throughout the year in many offices.<br />
44 • UNIT 1 Clothing and Society<br />
Despite changes, most businesses still have<br />
dress standards. In some companies, employees<br />
wear casual clothes for office work, but traditi<strong>on</strong>al<br />
business attire when meeting clients or giving<br />
presentati<strong>on</strong>s. Typically, employees shouldn’t<br />
look as though they’re headed for a picnic or a<br />
formal dance. A good general rule is to wear<br />
nothing extreme—not too tight, too short, too<br />
low, too thin, too bold, too fancy, or too bright.<br />
Such inappropriate clothing distracts others and<br />
creates wr<strong>on</strong>g impressi<strong>on</strong>s.<br />
Special Occasi<strong>on</strong>s<br />
Weddings, funerals, and religious services have<br />
special clothing expectati<strong>on</strong>s and standards. For<br />
most weddings held in a church, temple, hotel, or<br />
club, guests are expected to wear special-occasi<strong>on</strong><br />
clothes. This means dresses or pantsuits for<br />
women, and jackets and ties for men. For some<br />
cerem<strong>on</strong>ies, l<strong>on</strong>g gowns and tuxedos may be<br />
expected. At funerals, people should dress c<strong>on</strong>servatively<br />
in darker colors and tailored styles.<br />
Wearing dark colors shows respect for the family’s<br />
loss.<br />
Some religi<strong>on</strong>s have special clothing requirements<br />
for their services. For example, a head covering<br />
may be expected. Others may require that<br />
the shoulders be covered. For all religious services,<br />
c<strong>on</strong>servative clothes are a good choice.<br />
When going to a fancy party, males usually<br />
wear a suit and tie, and females wear dressy<br />
clothes. A formal dance may request “black tie.”<br />
2-12<br />
If you were an employer c<strong>on</strong>sidering two<br />
equally qualified candidates, would you hire the<br />
pers<strong>on</strong> who is neat and presentable or the <strong>on</strong>e<br />
who is not? Most employers are influenced by an<br />
interviewee’s appearance. “Putting your best foot<br />
forward” can help you get the job.
How To…<br />
SELECT BUSINESS CASUAL ATTIRE<br />
“Business casual?” the new employee said. “What’s that?” Business casual is a dress<br />
code used to describe appropriate clothing for many workplaces. Most companies define<br />
the code as halfway between traditi<strong>on</strong>al business attire (suits and ties) and casual<br />
clothes (jeans, T-shirts, and athletic wear). Not every workplace interprets “business<br />
casual” in exactly the same way, but the ideas listed here are typical. If no written dress<br />
code exists, ask your employer what to wear, or notice what leading employees wear.<br />
Acceptable “Business Casual”<br />
• Collared shirts<br />
• Sweaters<br />
• Khakis or slacks<br />
• Skirts or casual dresses<br />
(women)<br />
• Laced or slip-<strong>on</strong> shoes<br />
(loafers, flats, low heels)<br />
Unacceptable Business Attire<br />
• Faded, worn, or<br />
ripped jeans<br />
• T-shirts<br />
• Sweatshirts and<br />
pants<br />
• Cropped tops<br />
• Micro-mini skirts<br />
• Blazer or jacket for<br />
presentati<strong>on</strong>s and<br />
c<strong>on</strong>ferences<br />
• Jeans and athletic shoes<br />
(sometimes acceptable if<br />
clean and neat)<br />
• Shorts, cutoffs,<br />
and swim trunks<br />
• Spandex<br />
• Athletic shoes,<br />
clogs, and sandals<br />
• Any item that<br />
isn’t clean and<br />
neat<br />
Exploring Business<br />
Casual<br />
Ask employed adults about business<br />
casual policies. What clothing is worn?<br />
Compare results in class.<br />
CHAPTER 2 Cultures and Customs • 45
This means a tuxedo for men and formal gowns<br />
or fancy dresses for women. See Fig. 2-13. With<br />
the trend toward more casual clothing, some men<br />
are not wearing a tie with a tuxedo or suit.<br />
Instead, they might choose a banded<br />
shirt or a collarless sweater. Highfashi<strong>on</strong><br />
styles are very acceptable<br />
at parties and formal events.<br />
Some fine restaurants require<br />
a jacket for men and<br />
clothing that is not<br />
casual for women.<br />
These requirements<br />
help create a more<br />
formal atmosphere<br />
within the restaurant.<br />
However, strict<br />
dress standards are<br />
2-13<br />
For some special occasi<strong>on</strong>s, a male might wear a<br />
tuxedo. Is that customary for the prom at your school?<br />
What do females wear?<br />
2-14<br />
46 • UNIT 1 Clothing and Society<br />
The students in this classroom are wearing<br />
c<strong>on</strong>venti<strong>on</strong>al clothing styles, as expected in their<br />
school. Unc<strong>on</strong>venti<strong>on</strong>al and inappropriate styles can<br />
cause problems that interfere with learning. What<br />
might some of those problems be?<br />
changing. Now very few restaurants require a tie<br />
and many no l<strong>on</strong>ger require jackets. This reflects<br />
the general trend in society to dress more casually.<br />
Respecting Customs<br />
For some teens, following society’s clothing<br />
customs may not always seem necessary. An individual<br />
style appeals to them, or they want the<br />
look shared by a group of friends. Teens often use<br />
people in movies and music videos as role models,<br />
copying their clothing styles. These performers<br />
wear outfits chosen for theatrical effect, however,<br />
and what works in the entertainment<br />
industry might not work in the real world.<br />
Clothing choices can have negative effects.<br />
What problems might unc<strong>on</strong>venti<strong>on</strong>al clothing<br />
choices cause for a teen at home, school, work, or<br />
elsewhere? For teens and adults, doing what’s<br />
expected makes life go more smoothly. Maturity<br />
shows when people follow certain clothing customs<br />
because they know they need to get al<strong>on</strong>g<br />
well with others. See Fig. 2-14.
Technology Trends<br />
>>ON-LINE FASHION INFORMATION<br />
When you’re looking for fashi<strong>on</strong>s, Web<br />
sites are much more than <strong>on</strong>-line catalogs.<br />
Look what you can find:<br />
• A virtual fitting room. Use a 3-D model<br />
to “try <strong>on</strong>” outfits and see how they look<br />
from different angles before you buy.<br />
Mix and match tops and bottoms to create<br />
various outfits. Spend a few minutes<br />
creating your own pers<strong>on</strong>alized model.<br />
Save the items and outfits to a pers<strong>on</strong>al<br />
profile so you can come back later to<br />
c<strong>on</strong>sider a purchase.<br />
Handling Clothing Mistakes<br />
What can you do if you d<strong>on</strong>’t know what to<br />
wear for a particular occasi<strong>on</strong>? If you know the<br />
standard attire for a similar event, you can feel<br />
safe wearing that. Otherwise, ask some<strong>on</strong>e.<br />
Parents and teachers may know what’s acceptable.<br />
Friends who have been to similar events might<br />
have suggesti<strong>on</strong>s. For a party, you can call the<br />
host or hostess or ask other guests what they plan<br />
to wear. Avoiding extremes—too casual or too<br />
dressy—is a good moderate approach.<br />
• Outfit suggesti<strong>on</strong>s. If you order a top,<br />
the site may suggest other coordinating<br />
items to help complete the outfit.<br />
• Customizing services. After providing<br />
your body measurements, you can select<br />
the style, fabric, and fashi<strong>on</strong> details for a<br />
custom-made shirt, blouse, suit, or<br />
jeans. Be sure to check the cost and read<br />
the return policy before ordering.<br />
• Pers<strong>on</strong>alized products. This variati<strong>on</strong> <strong>on</strong><br />
customized fashi<strong>on</strong>s is popular for<br />
sneakers and flip-flops. You purchase a<br />
standard size, but pick the colors, prints,<br />
and embellishments that you prefer.<br />
• Order memory. By remembering your<br />
last order, the some Web sites suggest<br />
new products that might interest you.<br />
Follow-up e-mail announcements about<br />
similar products and discount offers<br />
may be sent.<br />
INVESTIGATE<br />
Find catalog and store Web sites that<br />
offer the features described here. Which<br />
would be most useful to you? Why?<br />
Suppose you walk into an event and discover<br />
you aren’t dressed right. That can feel awkward. If<br />
you c<strong>on</strong>centrate <strong>on</strong> talking with other people and<br />
getting involved in the activities, the awkward<br />
feelings usually lessen. Can you find humor in the<br />
situati<strong>on</strong>? Maybe you can joke with some<strong>on</strong>e else<br />
who missed the dress “rules.” Every<strong>on</strong>e makes<br />
clothing mistakes <strong>on</strong>ce in a while, but these are<br />
good learning experiences.<br />
CHAPTER 2 Cultures and Customs • 47
CHAPTER 2<br />
CHAPTER SUMMARY<br />
• As an element of culture, clothing often<br />
reflects how people think and live, as well<br />
as their history.<br />
• Different cultures can often be identified<br />
by specific garments.<br />
• Clothing has symbolic meanings related to<br />
heritage, occupati<strong>on</strong>s, roles, gender, and<br />
values.<br />
• A society’s clothing customs, expectati<strong>on</strong>s,<br />
and standards dictate what is c<strong>on</strong>sidered<br />
acceptable to wear in specific situati<strong>on</strong>s.<br />
• Following standards for dress in a society<br />
can be c<strong>on</strong>fusing. Avoiding extremes in<br />
attire is the most successful approach.<br />
USING KEY TERMS<br />
Work with a partner. For each Key Term, take<br />
<strong>on</strong>e minute to create a list of ideas or examples<br />
that describe or relate to that term.<br />
48 • UNIT 1 Clothing and Society<br />
Review<br />
RECALLING THE FACTS<br />
1. In general, how can clothing be a clue to<br />
what a society is like?<br />
2. Describe two nati<strong>on</strong>al costumes.<br />
3. Why is the clothing people wear in many<br />
countries similar today?<br />
4. Is there <strong>on</strong>e clothing style that reflects<br />
the United States culture? Explain.<br />
5. List ways that clothing symbolizes occupati<strong>on</strong>s<br />
and roles.<br />
6. How is clothing as a symbol of gender<br />
similar and different in different<br />
cultures?<br />
7. Describe ways that clothing can reflect a<br />
society’s values.<br />
8. How do clothing customs and dress<br />
codes differ?<br />
9. What results when people in society<br />
share similar clothing expectati<strong>on</strong>s?<br />
10. In general, how do you “dress for the<br />
interview, not the job”?<br />
11. How does “business casual” compare to<br />
traditi<strong>on</strong>al business clothes?<br />
12. Identify appropriate dress for three special<br />
occasi<strong>on</strong>s.<br />
13. What problem related to society’s clothing<br />
standards do some teens face? What<br />
is a wise resp<strong>on</strong>se?<br />
14. How can you minimize the awkwardness<br />
of choosing the wr<strong>on</strong>g clothes for an<br />
occasi<strong>on</strong>?
and Activities<br />
THINKING CRITICALLY<br />
1. Do ethnic differences in clothing ever<br />
cause people to judge others incorrectly?<br />
Explain.<br />
2. Some Asian and African countries are<br />
developing their ec<strong>on</strong>omies through<br />
trade with the West. Many people in<br />
these societies fear that this c<strong>on</strong>tact<br />
causes them to lose ethnic identity. Is<br />
this an unavoidable result of ec<strong>on</strong>omic<br />
improvement? Explain your answer.<br />
3. Why do you think some workplaces have<br />
adopted more casual dress codes?<br />
APPLYING KNOWLEDGE<br />
1. Ethnic costumes. Working with a small<br />
group, look through magazines and<br />
newspapers for illustrati<strong>on</strong>s of people in<br />
ethnic garments. Create a display that<br />
identifies each country or regi<strong>on</strong> and<br />
describes its costume.<br />
2. Sharing clothing heritage. Al<strong>on</strong>g with<br />
other class members, locate ethnic garments<br />
and accessories. Show these to<br />
the class, dem<strong>on</strong>strating how they are<br />
worn and for what purposes.<br />
3. Cultural influences. Fashi<strong>on</strong> designers<br />
are frequently influenced by other cultures.<br />
Look through current magazines<br />
and catalogs for illustrati<strong>on</strong>s of clothes<br />
and fabrics that resemble those from<br />
other countries and cultures. Share your<br />
findings with the class.<br />
4. Costume design. Design a nati<strong>on</strong>al costume<br />
for the United States. Share your<br />
design and explanati<strong>on</strong> with the class.<br />
CHAPTER 2<br />
5. Following the code. Locate the secti<strong>on</strong><br />
<strong>on</strong> student dress in your school handbook.<br />
Compare that descripti<strong>on</strong> to what<br />
students wear. How closely is the code<br />
followed?<br />
6. Appropriate styles. Collect photographs<br />
or make drawings of appropriate and<br />
inappropriate clothing for special occasi<strong>on</strong>s,<br />
such as a job interview, dinner at a<br />
nice restaurant, a wedding. Create a<br />
poster or bulletin board display of “Do’s<br />
and D<strong>on</strong>’ts” for special occasi<strong>on</strong>s.<br />
MAKING>
CHAPTER 3<br />
Clothing and Families<br />
OBJECTIVES<br />
• Explain why<br />
clothing needs<br />
differ am<strong>on</strong>g<br />
families.<br />
• Explain how family<br />
values affect<br />
clothing decisi<strong>on</strong>s.<br />
• Describe tools and<br />
techniques that<br />
help families with<br />
clothing<br />
management.<br />
• Describe ways<br />
families can share<br />
clothing<br />
resp<strong>on</strong>sibilities.<br />
KEY TERMS<br />
budget<br />
compromise<br />
delegate<br />
family life cycle<br />
management process<br />
multiple roles<br />
priorities<br />
resource<br />
50 • UNIT 1 Clothing and Society
EXAMINETHISISSUE<br />
Differing views. Each generati<strong>on</strong><br />
has different—sometimes very different—<br />
views about what is acceptable and<br />
attractive in clothing. This can lead to disagreements<br />
between parents and teens<br />
about what the young pers<strong>on</strong> should<br />
wear. Many teens willingly listen to adult<br />
opini<strong>on</strong>s. They want to preserve family<br />
relati<strong>on</strong>ships and believe that adults will<br />
be reas<strong>on</strong>able if teens are reas<strong>on</strong>able<br />
too. Some teens believe that clothing<br />
decisi<strong>on</strong>s should be theirs al<strong>on</strong>e. They<br />
d<strong>on</strong>’t think pleasing others, even family<br />
members, should be expected.<br />
What do you think?<br />
Which point of view is closer to yours?<br />
How might a teen be affected over time<br />
by taking each point of view?<br />
While spending a week with her<br />
grandparents, a teen and her grandmother<br />
browsed through a trunk in<br />
the attic, looking at all the old clothing and accessories<br />
that had been saved over the years. The<br />
styles, fabrics, and colors were fascinating. The<br />
teen and her grandmother laughed together over<br />
some of the “old-fashi<strong>on</strong>ed” looks and admired<br />
the beauty of other items. The stories her grandmother<br />
told about the items showed the teen how<br />
times and families have changed, and yet how<br />
much is still the same. The clothing had much to<br />
“teach” that day.<br />
FAMILY CLOTHING NEEDS<br />
How do you think family clothing needs have<br />
changed over the years? Some things never<br />
change. Like your family, your grandparents’<br />
families would have needed clothing for protecti<strong>on</strong><br />
from the weather as well as clothing for certain<br />
occasi<strong>on</strong>s. Because society is ever-changing,<br />
however, what your family needs today isn’t the<br />
same as it was years ago.<br />
Even today, clothing needs differ am<strong>on</strong>g families.<br />
That’s because no two families are exactly<br />
alike. What do you think influences the clothing<br />
choices that families make? <strong>Everything</strong> from<br />
where they live, to their activities, to the way they<br />
earn a living has impact. See Fig. 3-1.<br />
Locati<strong>on</strong> and Activities<br />
When <strong>on</strong>e teen’s family moved from the Sun<br />
Belt to a northern state, their clothing needs<br />
changed dramatically. While warm weather<br />
clothes and <strong>on</strong>ly a few sweaters and jackets were<br />
suitable year-round before their move, the family<br />
had to add a winter wardrobe afterwards.<br />
Obviously, families around the country have dif-<br />
3-1<br />
The way a family lives affects their clothing<br />
needs. A special dinner might call for dress-up clothes<br />
in <strong>on</strong>e family, while more casual clothes work well for<br />
another family.<br />
CHAPTER 3 Clothing and Families • 51
ferent clothing needs. What clothing might a<br />
family need for life in a big city? What might they<br />
need for rural life in a small town or <strong>on</strong> a farm?<br />
Often families share activities that call for specific<br />
garments. Families that take regular camping<br />
and fishing trips might invest in clothing for the<br />
outdoors. If they attend cultural events, such as<br />
c<strong>on</strong>certs and plays, they need appropriate garments<br />
to wear. How does time spent at home<br />
reading, playing games, and watching televisi<strong>on</strong><br />
affect their clothing choices?<br />
Many clothing needs in families are individual.<br />
A young dancer in <strong>on</strong>e family needed a leotard<br />
and special shoes. A skier in the family wanted a<br />
parka, hat, and gloves for skiing. Another family<br />
member needed a reflective vest and other garments<br />
for jogging. Looking for ways to satisfy<br />
individual clothing needs can be challenging in a<br />
family.<br />
Multiple Roles<br />
Every family member has multiple roles,<br />
meaning more than <strong>on</strong>e. These roles include a<br />
pers<strong>on</strong>’s place in the family. A teen could be a s<strong>on</strong><br />
or daughter, brother or sister, niece or nephew,<br />
grandchild, and possibly a great-grandchild. See<br />
Fig. 3-2. Roles also include what people do outside<br />
the family. For example, you have roles as a<br />
student and a friend. You could also have a role<br />
<strong>on</strong> a sports team or as a part-time employee.<br />
Others in your family have outside roles related<br />
to work, leisure activities, and community<br />
involvement.<br />
If you had <strong>on</strong>ly <strong>on</strong>e role in life, clothing<br />
decisi<strong>on</strong>s might be easier. The fact is<br />
multiple roles create multiple clothing<br />
needs. A teen who plays team sports<br />
probably couldn’t wear athletic clothes<br />
to an awards banquet. An outfit worn to<br />
school probably wouldn’t work for<br />
3-2<br />
Family members have roles that influ-<br />
ence their clothing needs. What roles are indicated<br />
here? How are they linked to clothing<br />
choices?<br />
52 • UNIT 1 Clothing and Society<br />
weeding the family garden. What roles in your life<br />
affect the clothes you need?<br />
Clothing for work roles is often a high priority<br />
in a family. Depending <strong>on</strong> the occupati<strong>on</strong>, uniforms,<br />
suits, casual clothes, or heavy work clothes<br />
might be purchased. While the pers<strong>on</strong> who works<br />
in a store or office may want variety in clothing<br />
styles, some<strong>on</strong>e who wears a uniform or works at<br />
home is less likely to have this c<strong>on</strong>cern.<br />
Stages of Life<br />
If you peeked into the closets of a family with<br />
young children and compared the c<strong>on</strong>tents to the<br />
closets in their grandparents’ home, you would<br />
find many differences. In part, that’s because the<br />
people are in different stages of life.<br />
Families are often described as going through<br />
stages known as the family life cycle. The standard<br />
stages are the beginning years when a couple<br />
starts out. They have no children at this point.<br />
The parenting stage is next, when children are<br />
born into the family and raised. At the launching<br />
stage, children leave home to go out <strong>on</strong> their own.<br />
The cycle completes with the retirement stage,<br />
when the couple are by themselves again. Of<br />
course, life isn’t quite this simple. Many variati<strong>on</strong>s<br />
take place, but as the cycle shows, a basic<br />
pattern exists.<br />
As explained <strong>on</strong> the next page, clothing needs<br />
change as people move through the stages of family<br />
life. You can probably add to the examples that<br />
show how each stage has its own impact.
Fashi<strong>on</strong><br />
EVERYTHING OLD IS<br />
NEW AGAIN. Some young adults<br />
are raiding their elders’ closets. They’re<br />
borrowing vintage fashi<strong>on</strong>s, those distinctive<br />
styles of decades past, to wear themselves.<br />
Parents might have clothing from<br />
their youth in the 1970s and 1980s. Grandparents<br />
may have saved some favorite<br />
items from the 1950s and 1960s. Some boutiques<br />
and <strong>on</strong>-line retailers specialize in<br />
reproducti<strong>on</strong>s of classic clothes and accessories<br />
of other popular periods, including<br />
the Victorian Age and the Roaring Twenties.<br />
Facts<br />
• Single people and couples with no children.<br />
Fewer family obligati<strong>on</strong>s may mean<br />
more ability to spend m<strong>on</strong>ey <strong>on</strong> clothing.<br />
Sometimes clothing is high priority for these<br />
individuals.<br />
• Families with children. The clothing needs<br />
of children must be balanced with adult needs.<br />
Because young children grow quickly, outgrown<br />
clothing must be replaced regularly.<br />
Children often need special clothing for sports,<br />
scouts, 4-H, hobbies, and similar activities,<br />
which can be costly. Clothing for teens is typically<br />
expensive.<br />
• Empty nest families. As adult children<br />
become self-supporting, the family typically<br />
has more m<strong>on</strong>ey for other expenses.<br />
• Retirement. At this stage a couple may be<br />
able to refocus <strong>on</strong> their own needs. If more<br />
leisure time is available, casual clothing may<br />
replace business clothes. With advanced age<br />
and a fixed income, people typically buy fewer<br />
new garments. An elderly pers<strong>on</strong> may have special<br />
clothing needs, seeking comfortable styles<br />
that make dressing and undressing easier.<br />
Family Values<br />
Every family has its own set of values, which<br />
identify what’s important to them. The adults in<br />
a family take the lead in establishing basic values.<br />
These values then influence the many clothing<br />
decisi<strong>on</strong>s made by the family and its members.<br />
For any decisi<strong>on</strong>, values provide a guide.<br />
Suppose a family is buying new school clothes. As<br />
busy people who want to spend their limited free<br />
time doing something fun, this family chooses<br />
easy-care fabrics that are washable and require no<br />
ir<strong>on</strong>ing. How did values influence their decisi<strong>on</strong>?<br />
Values are apparent in many clothing decisi<strong>on</strong>s.<br />
One family buys clothing <strong>on</strong> sale because<br />
they care about saving m<strong>on</strong>ey. Another chooses<br />
designer labels because they like to look fashi<strong>on</strong>able.<br />
A family that values physical activity might<br />
own more sportswear than a less active family.<br />
Even clothing gifts show values. Is a handknitted<br />
sweater more or less appreciated than a<br />
more expensive <strong>on</strong>e from the store? Will a family<br />
be pleased to receive hand-me-downs for a rapidly<br />
growing baby, or do they want <strong>on</strong>ly new<br />
clothes for the child? When family values are<br />
understood, decisi<strong>on</strong>s are more easily made.<br />
CLOTHING MANAGEMENT<br />
To manage a household, families c<strong>on</strong>sider<br />
everything involved—from repairing the sink to<br />
cooking meals. Clothing care is a large part of the<br />
process. Think about what’s involved: making<br />
decisi<strong>on</strong>s about clothing and budgets; buying<br />
clothes; home laundering; taking items to be<br />
cleaned to the dry cleaner; storing clothes; ir<strong>on</strong>ing;<br />
and repairing clothes. In some households<br />
sewing clothes is another task.<br />
When family members have multiple roles,<br />
managing resp<strong>on</strong>sibilities can be a challenge.<br />
Sharing family resp<strong>on</strong>sibilities is a good way to<br />
make sure that no <strong>on</strong>e is overburdened.<br />
Resentment can build when <strong>on</strong>e family member<br />
has more to do than any<strong>on</strong>e else, and stress is a<br />
comm<strong>on</strong> outcome. A bad mood, anger and frustrati<strong>on</strong>,<br />
and illness are a few signs of stress. To<br />
prevent stress, families need to find ways to manage<br />
resp<strong>on</strong>sibilities effectively.<br />
A useful tool for families to use is the management<br />
process. Just as a business manager plans<br />
how to use resources to achieve goals, family<br />
CHAPTER 3 Clothing and Families • 53
1<br />
2<br />
3<br />
4<br />
STEP<br />
Planning<br />
Organizing<br />
Implementing<br />
Evaluating<br />
members can do the same. Some situati<strong>on</strong>s can<br />
be handled much more effectively when guided<br />
by the basic, four-step process shown in Fig. 3-3.<br />
Setting Clothing Priorities<br />
As part of the management process, a family<br />
sets priorities by ranking the importance of items<br />
or opti<strong>on</strong>s. Suppose each member in a family can<br />
identify a pers<strong>on</strong>al clothing need. If m<strong>on</strong>ey isn’t<br />
available for everything, priorities are set. A<br />
mother’s new coat may be higher <strong>on</strong> the list than<br />
a father’s new suit. A snowsuit for an infant may<br />
be higher priority than a sibling’s athletic shoes.<br />
Values c<strong>on</strong>tribute heavily when prioritizing.<br />
Although each pers<strong>on</strong> has a pers<strong>on</strong>al point of<br />
view, the interest of the entire family can’t be<br />
overlooked. If a new suit could help the father get<br />
a job that pays more, making the suit a high priority<br />
may be the best decisi<strong>on</strong>, even if that disappoints<br />
some<strong>on</strong>e. When families discuss such<br />
decisi<strong>on</strong>s, all members understand the priorities<br />
and goals better.<br />
Identifying Resources<br />
After prioritizing, families need to identify<br />
available resources. A resource is anything used<br />
to reach a goal or manage life. Time, talent, and<br />
m<strong>on</strong>ey are resources. The tools needed for a task,<br />
as well as the people who can teach how to use<br />
tools, are other resources.<br />
How can resources help when prioritizing<br />
clothing needs? The creative family finds many<br />
answers to this questi<strong>on</strong>. Sewing garments or<br />
54 • UNIT 1 Clothing and Society<br />
3-3 • The Management Process<br />
PROCEDURE<br />
Assess the situati<strong>on</strong>, develop a list of tasks,<br />
identify resources, and set priorities.<br />
Develop a schedule and gather needed<br />
resources.<br />
Put the plan into acti<strong>on</strong> and m<strong>on</strong>itor progress.<br />
Evaluate the plan and identify any future<br />
changes.<br />
accessories might save m<strong>on</strong>ey that<br />
could be spent <strong>on</strong> something else.<br />
To have more m<strong>on</strong>ey for clothing,<br />
is a part-time job possible? Could<br />
an item be borrowed? Hunting for<br />
the best prices <strong>on</strong>-line, at a sale, or<br />
at a sec<strong>on</strong>dhand store might<br />
enable the family to buy two or<br />
more items. Sharing items with<br />
family members is a no-cost way<br />
of expanding wardrobes.<br />
Budgeting for Clothes<br />
In most families, income is a limited resource<br />
that must be distributed for many expenses. To<br />
c<strong>on</strong>trol spending and cover all expenses, families<br />
use a spending plan or schedule called a budget.<br />
Budgets can be created for the m<strong>on</strong>th or year and<br />
be written or unwritten. Individuals also use<br />
them to manage pers<strong>on</strong>al expenses, as you can do<br />
with the informati<strong>on</strong> <strong>on</strong> page 56.<br />
Clothing is <strong>on</strong>ly <strong>on</strong>e item covered in a family<br />
budget. Other items are food, housing, transportati<strong>on</strong>,<br />
recreati<strong>on</strong>, medical expenses, and pers<strong>on</strong>al<br />
expenses for each family member. See Fig.<br />
3-4. When itemized, clothing expenses add up.<br />
Costs are not just for outfits; they’re for underwear,<br />
socks, accessories, and shoes too. Cleaning<br />
and repair costs must also be included. <str<strong>on</strong>g>Care</str<strong>on</strong>g>ful<br />
analysis tells the budget creator what percentage<br />
of income can be allotted for clothing.<br />
3-4<br />
A teen could allocate m<strong>on</strong>ey for the categories<br />
shown here, which are a little<br />
different from those<br />
in a family budget.<br />
Although your<br />
budget could<br />
have similar<br />
categories, the<br />
proporti<strong>on</strong>s you<br />
use might not be<br />
the same.
Technology Trends<br />
>>TRANSFERRING PHOTOS TO FABRIC<br />
There was a time when the <strong>on</strong>ly thing<br />
you could do with treasured family photos<br />
was to display them in a frame or put<br />
them in a photo album. Today you can<br />
wear them <strong>on</strong> a T-shirt, incorporate them<br />
into a pillow or quilt, or make a special<br />
wall hanging.<br />
It is easy to transfer photos to fabric,<br />
but it requires a digital photo, a computer,<br />
and an inkjet printer. Some full-service<br />
printing centers will provide this service<br />
for a fee.<br />
Favorite photos from a digital camera, a<br />
photo CD, or e-mail from family and<br />
Sometimes items in other categories take priority<br />
over clothing items. That means limiting clothing<br />
expenses. If the family needs a new car, for example,<br />
less m<strong>on</strong>ey might be spent <strong>on</strong> clothes.<br />
If children and teens receive an allowance, they<br />
may be expected to pay for certain needs.<br />
Accessories, grooming aids, and minor clothing<br />
purchases might be their resp<strong>on</strong>sibility. A major<br />
item, such as a new coat, could be part of the<br />
family budget. Sometimes a teen’s allowance or<br />
earnings cover all clothing expenses.<br />
Budgeting methods are not right or wr<strong>on</strong>g.<br />
Each family determines what works best for<br />
them. Through communicati<strong>on</strong>, family members<br />
become familiar with budget limitati<strong>on</strong>s and<br />
understand their own spending resp<strong>on</strong>sibilities.<br />
friends can be used. Old family photos can<br />
be copied by a scanner and saved as a<br />
digital image in a computer. Image-editing<br />
software can be used to crop the photo,<br />
sharpen the image, change the size, and<br />
even add words or other images.<br />
Photos can be printed directly <strong>on</strong> fabric<br />
or <strong>on</strong> an ir<strong>on</strong>-<strong>on</strong> transfer. Craft stores<br />
carry pre-cut fabrics that have a special<br />
peel-away backing. The backing provides<br />
temporary stability for the fabric to feed<br />
smoothly through the printer. If a photo is<br />
printed <strong>on</strong> special transfer paper, the<br />
paper is then placed face down <strong>on</strong> the fabric<br />
and a hot ir<strong>on</strong> is applied. This transfers<br />
the image, in reverse, <strong>on</strong>to the fabric.<br />
INVESTIGATE<br />
Try printing a photo <strong>on</strong> fabric. For best<br />
results, use cott<strong>on</strong>, linen, or silk fabric.<br />
The image will be sharper and the colors<br />
will last l<strong>on</strong>ger.<br />
Sharing Resp<strong>on</strong>sibilities<br />
Clothing takes time and effort to select, clean,<br />
store, and repair. Families need to manage these<br />
resp<strong>on</strong>sibilities.<br />
In some families, each family member may<br />
shop for his or her own clothes. In other families,<br />
<strong>on</strong>e pers<strong>on</strong> may do the clothes shopping for all<br />
family members. Resp<strong>on</strong>sibilities for clothing<br />
care may be handled by <strong>on</strong>e pers<strong>on</strong> or shared<br />
am<strong>on</strong>g family members.<br />
Can you list the roles and resp<strong>on</strong>sibilities of<br />
each pers<strong>on</strong> in your family? Listing your own is<br />
easy, but you’re likely to overlook items <strong>on</strong> some<strong>on</strong>e<br />
else’s list.<br />
CHAPTER 3 Clothing and Families • 55
How To…<br />
JAZZ UP YOUR HOME<br />
It’s fun and it’s satisfying to sew for your home. Plus it’s an easy way to polish your<br />
sewing skills since so many home dec items have straight seams.<br />
All of the major pattern companies have<br />
“home décor” secti<strong>on</strong>s in their catalogs.<br />
However, you may not need a pattern since<br />
many items begin with simple geometric<br />
shapes, such as squares or rectangles. Look<br />
at some books that focus <strong>on</strong> sewing for the<br />
home. They often include diagrams and<br />
instructi<strong>on</strong>s for the featured projects. Check<br />
for books at the local library.<br />
• Pillows. Pillows are the fastest and easiest<br />
way to enliven a room. Designer pillows are<br />
expensive to buy, but ec<strong>on</strong>omical to make<br />
since most pillows take less than a yard of<br />
fabric. Look for fabric inspirati<strong>on</strong> <strong>on</strong> the<br />
remnant table in your favorite fabric store.<br />
Pillows are a good place to try out a new<br />
skill, such as quilting or beading.<br />
56 • UNIT 1 Clothing and Society<br />
• Window treatments. Window treatments<br />
can be very simple or very elaborate. If you<br />
are a new sewer, start with straight curtains<br />
or a simple gathered valance across the top<br />
of the window.<br />
• Duvet covers. These are removable covers<br />
that can quickly change the look of your<br />
comforter. It also is easier to wash a cover<br />
than to launder a bulky comforter.<br />
• Beds skirts. What better way to hide stuff<br />
under the bed than with an attractive bed<br />
skirt? Most purchased bed skirts are simple,<br />
gathered styles in plain fabrics. You can<br />
make <strong>on</strong>e that is gathered or pleated, has a<br />
c<strong>on</strong>trasting border or fancy trim, or<br />
matches the pillows or curtains in your<br />
room.<br />
• Place mats and napkins. These beginner<br />
projects also make great gifts. Pick a<br />
favorite holiday and stitch up napkins and<br />
place mats in prints that celebrate the day.<br />
Quilt shops carry a wide assortment of suitable<br />
cott<strong>on</strong> prints.<br />
Exploring Home Dec<br />
Projects<br />
Sketch a home dec project that you would<br />
like to make for your room or your home.<br />
Calculate how much fabric you will need<br />
for the project.
Delegating and Scheduling<br />
Sharing family resp<strong>on</strong>sibilities is a good way to<br />
make sure that no <strong>on</strong>e carries too much of the<br />
load. Many families delegate tasks to family<br />
members. To delegate means to assign resp<strong>on</strong>sibility<br />
to another. For example, <strong>on</strong>e pers<strong>on</strong> could<br />
be assigned to do the same task all the time.<br />
Another opti<strong>on</strong> is to rotate resp<strong>on</strong>sibilities <strong>on</strong> a<br />
weekly or m<strong>on</strong>thly basis. In some families, each<br />
pers<strong>on</strong> is resp<strong>on</strong>sible for his or her own clothing.<br />
In other families, <strong>on</strong>e pers<strong>on</strong> does the laundry<br />
and others ir<strong>on</strong> and put away their own things.<br />
Families can experiment to find a method that<br />
works well for them.<br />
Keeping track of resp<strong>on</strong>sibilities is easier with<br />
schedules. A chart showing each pers<strong>on</strong>’s assignment<br />
and when it should be d<strong>on</strong>e keeps the family<br />
<strong>on</strong> track. Many families post charts <strong>on</strong> a bulletin<br />
board or in another visible locati<strong>on</strong>.<br />
The approaches families take to clothing management<br />
differ according to their standards. One<br />
family might want garments carefully folded or<br />
hung out of sight after use. Another might not<br />
mind that a jacket is draped over the back of a<br />
chair for a while.<br />
If roles change, standards may change. Suppose<br />
a stay-at-home mother has always d<strong>on</strong>e the family<br />
laundry. If she becomes employed outside the<br />
home, other family members make her life easier<br />
by taking <strong>on</strong> laundering resp<strong>on</strong>sibilities.<br />
To make the sharing of resp<strong>on</strong>sibilities work,<br />
each family member needs to participate, making<br />
sure duties are fulfilled. See Fig. 3-5. Family b<strong>on</strong>ds<br />
grow str<strong>on</strong>ger when people can be trusted to do<br />
their part and are thoughtful of others.<br />
Settling Disagreements<br />
Sometimes disagreements occur over priorities<br />
and resp<strong>on</strong>sibilities. Understanding other<br />
points of view takes effort. It can be hard to<br />
accept that a sibling’s outfit could be more<br />
important than the <strong>on</strong>e you need. Sometimes it<br />
may seem as though you’ve been given more<br />
resp<strong>on</strong>sibilities than others. Unfortunately, such<br />
decisi<strong>on</strong>s d<strong>on</strong>’t always seem fair. Since unfairness<br />
is part of life, however, it’s usually better to go<br />
al<strong>on</strong>g, and maybe the next time the advantage<br />
will swing in the other directi<strong>on</strong>.<br />
To help resolve disagreements, families can turn<br />
to a helpful tool called compromise. Through<br />
compromise, each pers<strong>on</strong> gives up something in<br />
order to get something else in return. One teen<br />
said, “I can wait a few m<strong>on</strong>ths for my new jacket,<br />
especially since I’ll be able to get the <strong>on</strong>e I really<br />
want.” Another teen said, “I’ll do the laundry this<br />
m<strong>on</strong>th so my sister can practice for her recital.<br />
She told me she’d do it for me next m<strong>on</strong>th.” Both<br />
comments show compromise.<br />
At times, compromise isn’t obvious. A parent<br />
might decide, “What I need can wait for a while.”<br />
Other family members d<strong>on</strong>’t always know that<br />
such sacrifices were made.<br />
Compromise isn’t an opti<strong>on</strong> in every situati<strong>on</strong>.<br />
An adult may have the final say, sometimes for<br />
reas<strong>on</strong>s that aren’t clear to others. Children and<br />
teens who learn to be understanding earn the<br />
respect of family members.<br />
3-5<br />
Family members share resp<strong>on</strong>sibilities to<br />
distribute the burden. That can mean taking care of<br />
your own clothes and helping others as well.<br />
57
CHAPTER 3<br />
CHAPTER SUMMARY<br />
• A family’s clothing needs depend <strong>on</strong> where<br />
they live, what they do, and the roles of<br />
family members.<br />
• Clothing needs change as a family moves<br />
through the family life cycle.<br />
• Clothing decisi<strong>on</strong>s made within a family<br />
are based <strong>on</strong> each family’s set of values.<br />
• Setting priorities and identifying resources<br />
are part of the management process.<br />
• A budget is a valuable tool for seeing how<br />
clothing needs fit in with a family’s other<br />
expenses.<br />
• Each family needs to agree <strong>on</strong> how clothing<br />
care tasks are assigned.<br />
• Tasks are often shared in a family, based <strong>on</strong><br />
each member’s roles and resp<strong>on</strong>sibilities.<br />
USING KEY TERMS<br />
For each Key Term, write <strong>on</strong>e statement that<br />
describes how the term relates to your study<br />
of clothing. Write a sec<strong>on</strong>d statement showing<br />
how the term relates to a different field.<br />
58 • UNIT 1 Clothing and Society<br />
Review<br />
RECALLING THE FACTS<br />
1. In what ways do locati<strong>on</strong> and activities<br />
affect clothing needs in a family?<br />
2. How do roles affect a family’s clothing<br />
needs?<br />
3. Why is the family life cycle a factor in a<br />
family’s clothing needs?<br />
4. How are family values useful when making<br />
clothing decisi<strong>on</strong>s?<br />
5. List clothing resp<strong>on</strong>sibilities that a family<br />
must manage.<br />
6. Describe the management process.<br />
7. Why is creativity useful when identifying<br />
resources?<br />
8. What clothing-related expenses need to<br />
be included in a useful budget?<br />
9. Suppose some<strong>on</strong>e asks, “What is the<br />
best way to set up a family budget?”<br />
How do you answer?<br />
10. How is delegati<strong>on</strong> useful for meeting<br />
family clothing resp<strong>on</strong>sibilities?<br />
11. Is compromise the soluti<strong>on</strong> to every family<br />
problem? Explain.<br />
12. Why is willingness to “go the extra mile”<br />
a valued trait for family management?
and Activities<br />
THINKING CRITICALLY<br />
1. Should teens who buy clothes with<br />
m<strong>on</strong>ey earned from a job have more say<br />
in clothing choices than teens whose<br />
spending m<strong>on</strong>ey comes from an<br />
allowance? Why or why not?<br />
2. Should teens in a family be role models<br />
for younger family members in the way<br />
they dress? Explain.<br />
APPLYING KNOWLEDGE<br />
1. Comparing clothing. Ask adults of your<br />
parents’ generati<strong>on</strong> to describe the<br />
clothing they wore as teens. Ask them to<br />
share photos, if possible. What did their<br />
parents think of the fashi<strong>on</strong>s? Do these<br />
adults feel that clothing styles today are<br />
significantly different from those of their<br />
own teen years? If so, in what ways?<br />
Discuss their resp<strong>on</strong>ses in class.<br />
2. Interpreting family values. The following<br />
are some values a family might have:<br />
(a) spending time together; (b) c<strong>on</strong>cern<br />
for the envir<strong>on</strong>ment; (c) saving m<strong>on</strong>ey.<br />
For each value, explain in writing how<br />
the family’s clothing choices might be<br />
affected by that value. Include specific<br />
examples.<br />
3. Delegating duties. Create a schedule<br />
that shows how a ficti<strong>on</strong>al family might<br />
share clothing resp<strong>on</strong>sibilities. Include at<br />
least <strong>on</strong>e teen in the family. What tasks<br />
must be included? Who will do them and<br />
when?<br />
CHAPTER 3<br />
4. Borrowed clothes. A teen borrows<br />
clothes from a sibling without asking,<br />
often returning them dirty or damaged,<br />
and sometimes even forgets to return<br />
them. Write a scenario describing what<br />
the sibling could do to correct this<br />
situati<strong>on</strong> effectively.<br />
5. Creating c<strong>on</strong>sensus. Plan and present a<br />
skit between a teen and a parent about<br />
a clothing-related disagreement. Present<br />
both points of view and include a resoluti<strong>on</strong>.<br />
Discuss whether the situati<strong>on</strong> was<br />
resolved effectively.<br />
MAKING>
CHAPTER 4<br />
Clothing and Self-Expressi<strong>on</strong><br />
OBJECTIVES<br />
• Evaluate the<br />
importance of first<br />
impressi<strong>on</strong>s.<br />
• Describe how<br />
pers<strong>on</strong>ality<br />
can be expressed<br />
through clothing.<br />
• Compare the<br />
effects of<br />
c<strong>on</strong>formity and<br />
individuality <strong>on</strong><br />
clothing choices.<br />
• Explain how<br />
pers<strong>on</strong>al style<br />
develops.<br />
KEY TERMS<br />
body language<br />
c<strong>on</strong>formity<br />
impressi<strong>on</strong><br />
individuality<br />
n<strong>on</strong>verbal messages<br />
peer pressure<br />
pers<strong>on</strong>ality<br />
self-c<strong>on</strong>cept<br />
stereotype<br />
verbal messages<br />
60 • UNIT 1 Clothing and Society
EXAMINETHISISSUE<br />
Clothing and Behavior. People<br />
sometimes w<strong>on</strong>der whether clothing<br />
affects a pers<strong>on</strong>’s behavior. Some say it<br />
does, and some say it doesn’t. For example,<br />
does wearing clothing that is very<br />
casual mean that less work gets d<strong>on</strong>e in<br />
an office? Does wearing clothing similar<br />
to that worn by gangs make a pers<strong>on</strong><br />
adopt the characteristics of a gang member?<br />
Are students more studious if they<br />
wear school uniforms? Are they more<br />
respectful? Do immodest clothes affect<br />
behavior?<br />
What do you think?<br />
After thinking about each of the situati<strong>on</strong>s<br />
described, what impact would you<br />
say clothing has <strong>on</strong> behavior?<br />
Clothing is a tool used for selfexpressi<strong>on</strong>.<br />
It can send messages about a<br />
pers<strong>on</strong>, sometimes accurate and sometimes<br />
not. You can use clothing to express your<br />
pers<strong>on</strong>ality, emoti<strong>on</strong>s, and individual style.<br />
CREATING IMPRESSIONS<br />
Suppose you were a costume designer for theater<br />
producti<strong>on</strong>s. For a comedic melodrama<br />
about the Old West, you’re designing costumes<br />
for a hero, a heroine, and a villain. The director<br />
wants the audience to be able to distinguish these<br />
characters easily from the rest. How would you<br />
create the desired effects through costuming?<br />
Just as clothing creates an impressi<strong>on</strong> <strong>on</strong> the<br />
stage, it does the same for people in everyday life.<br />
An impressi<strong>on</strong> is an image that forms in the<br />
minds of others.<br />
When you walk into a room or are introduced<br />
to some<strong>on</strong>e, you create an impressi<strong>on</strong>. Judgments<br />
are often made quickly. A first impressi<strong>on</strong>, usually<br />
formed within a minute or two, can be remarkably<br />
powerful. It sometimes determines whether<br />
a pers<strong>on</strong> gets a chance to make a sec<strong>on</strong>d impressi<strong>on</strong>.<br />
See Fig. 4-1.<br />
How can people form impressi<strong>on</strong>s so quickly?<br />
They interpret what they see and hear rapidly and<br />
with little thought. Visual and verbal clues link to<br />
assumpti<strong>on</strong>s that may or may not be true.<br />
Clothing offers clues, but people usually take in<br />
more. Words, behavior, and physical appearance<br />
add to a first impressi<strong>on</strong>.<br />
Appearance<br />
Often people notice what a pers<strong>on</strong> is wearing<br />
before they see the face or hear the voice. The<br />
style, color, fit, and neatness of clothing influence<br />
opini<strong>on</strong>s. An impressi<strong>on</strong>, however, is based <strong>on</strong> a<br />
combinati<strong>on</strong> of clothes, grooming, and general<br />
health.<br />
Good grooming gives the finishing touch to a<br />
pleasing appearance. To do a checkup, look at<br />
your hair, skin, hands, and teeth. Does your hair<br />
shine from being washed and brushed regularly?<br />
4-1<br />
Do you think a positive first impressi<strong>on</strong> is more<br />
valuable in some situati<strong>on</strong>s than others? If so, when<br />
might that be?<br />
CHAPTER 4 Clothing and Self-Expressi<strong>on</strong> • 61
4-2<br />
Hair looks good when it’s clean and shiny. What<br />
else c<strong>on</strong>tributes to a positive appearance?<br />
Is your skin clean and healthy-looking? Are your<br />
hands clean and your nails trimmed neatly? Have<br />
you brushed your teeth? Is your breath fresh?<br />
Your skin, hair, hands, and mouth all need daily<br />
attenti<strong>on</strong> to look your best. See Fig. 4-2.<br />
Good general health is best promoted with<br />
proper eating habits and exercise. Paying attenti<strong>on</strong><br />
to these has an impact <strong>on</strong> appearance too.<br />
Behavior<br />
Have you heard the saying “Acti<strong>on</strong>s speak<br />
louder than words”? A pers<strong>on</strong>’s behavior, especially<br />
toward others, speaks loud and clear.<br />
Suppose a waiter drops a plate full of food in a<br />
restaurant. One coworker yells at the waiter; a<br />
sec<strong>on</strong>d coworker helps pick up the mess. What<br />
impressi<strong>on</strong> does the behavior of each employee<br />
make <strong>on</strong> the customers?<br />
The way a pers<strong>on</strong> behaves toward others shows<br />
much about the pers<strong>on</strong>. Politeness gives <strong>on</strong>e<br />
impressi<strong>on</strong>, while rudeness sends another. Manners<br />
usually have a str<strong>on</strong>g influence <strong>on</strong> whether<br />
an impressi<strong>on</strong> is favorable or unfavorable.<br />
Behavior is c<strong>on</strong>veyed through verbal and n<strong>on</strong>verbal<br />
messages. Verbal messages, communicati<strong>on</strong><br />
with words, are easy to observe. The t<strong>on</strong>e of<br />
voice and the specific words spoken quickly add<br />
62 • UNIT 1 Clothing and Society<br />
to an impressi<strong>on</strong>. N<strong>on</strong>verbal messages, or communicati<strong>on</strong><br />
without words, are also noticeable.<br />
Body Language<br />
People send n<strong>on</strong>verbal messages with body<br />
language. This c<strong>on</strong>sists of eye c<strong>on</strong>tact, facial<br />
expressi<strong>on</strong>s, posture, arm and leg positi<strong>on</strong>s, and<br />
even distance from others. Many feelings and<br />
attitudes are expressed, c<strong>on</strong>sciously or subc<strong>on</strong>sciously,<br />
through body language. If you’ve<br />
watched a mime perform, you’ve seen a dramatic<br />
example of how a pers<strong>on</strong> can communicate with<br />
<strong>on</strong>ly the face and body rather than words.<br />
By noticing body language, people form opini<strong>on</strong>s.<br />
The following observati<strong>on</strong>s are comm<strong>on</strong>:<br />
• Eye c<strong>on</strong>tact. Looking directly at another<br />
pers<strong>on</strong> shows interest, warmth, and selfc<strong>on</strong>fidence.<br />
Averting the eyes shows disinterest,<br />
shyness, or nervousness.<br />
• Facial expressi<strong>on</strong>. The face has many muscles<br />
that c<strong>on</strong>trol expressi<strong>on</strong>s. Much of what goes <strong>on</strong><br />
in a pers<strong>on</strong>’s mind finds expressi<strong>on</strong> in the face.<br />
See Fig. 4-3.<br />
• Posture. A straight, comfortable posture<br />
shows self-assurance and a positive attitude.<br />
Sloping shoulders and slumping posture give a<br />
negative appearance.<br />
4-3<br />
Raised eyebrows show surprise; frowns show dis-<br />
appointment. A smile suggests happiness or friendliness,<br />
and a down-turned mouth seems sad. What do the facial<br />
expressi<strong>on</strong>s say here?
Technology Trends<br />
>>USING THE INTERNET WISELY<br />
The Internet is the ultimate shopping<br />
mall. In it, you can find almost any color,<br />
style, or fabric to suit your pers<strong>on</strong>al taste.<br />
In a real mall, you have to be <strong>on</strong> the<br />
alert for pickpockets who are after your<br />
wallet or thieves who want to steal your<br />
purchases. On the Internet, you need to<br />
protect yourself against intruders who<br />
want to steal your pers<strong>on</strong>al informati<strong>on</strong> or<br />
plant a virus that crashes your computer.<br />
Protect your computer with three<br />
important comp<strong>on</strong>ents—and keep them<br />
up-to-date:<br />
• Arm and leg positi<strong>on</strong>s. Open and relaxed<br />
positi<strong>on</strong>s of the arms and hands dem<strong>on</strong>strate<br />
receptiveness and friendliness. Closed and<br />
clenched positi<strong>on</strong>s show anger, discomfort,<br />
and nervousness. Legs planted squarely or<br />
comfortably relaxed show that the pers<strong>on</strong> is<br />
secure in the situati<strong>on</strong>. Tapping the fingers or a<br />
foot probably means that the pers<strong>on</strong> is nervous,<br />
bored, or impatient with what’s going <strong>on</strong>.<br />
• Distance. How far a pers<strong>on</strong> sits or stands<br />
from another can indicate feelings. Every<strong>on</strong>e is<br />
surrounded by “pers<strong>on</strong>al space.” Coming too<br />
• Anti-virus software. This type of software<br />
protects your computer against<br />
viruses that slow it down or make it difficult<br />
to open certain programs. Some<br />
viruses can crash your hard drive, which<br />
may cause you to lose everything stored<br />
<strong>on</strong> your computer.<br />
• Anti-spyware programs. Spyware programs<br />
have “bugs” that get into your<br />
computer as you visit various Web sites<br />
or when you install some free software.<br />
These bugs track your <strong>on</strong>-line activities<br />
and capture sensitive informati<strong>on</strong>,<br />
including your passwords.<br />
• Firewall. A firewall acts as a shield to<br />
protect you from intruders who try to<br />
gain access to the informati<strong>on</strong> in your<br />
computer. It also checks your outbound<br />
transacti<strong>on</strong>s to make sure they haven’t<br />
been invaded by spyware.<br />
INVESTIGATE<br />
Research how to protect against various<br />
types of scams, such as “phishing” and<br />
identity theft, <strong>on</strong> the Internet.<br />
close to an individual and invading that space<br />
may make the pers<strong>on</strong> feel uncomfortable.<br />
Close friends usually stand <strong>on</strong>ly 6 to 8 inches<br />
(15 to 20 cm) apart. Other people stand farther<br />
apart but may slowly move closer together to<br />
show friendliness.<br />
Accuracy of First Impressi<strong>on</strong>s<br />
No matter who they are, people are judged by<br />
first impressi<strong>on</strong>s. What first impressi<strong>on</strong>s have you<br />
formed lately about different people you’ve met?<br />
First impressi<strong>on</strong>s affect your judgment of others,<br />
just as your own appearance and behavior<br />
affect what others think about you. Unfortunately,<br />
CHAPTER 4 Clothing and Self-Expressi<strong>on</strong> • 63
4-4<br />
Clothing choices often reveal something about<br />
pers<strong>on</strong>ality. Is that true of this teen? What about you?<br />
first impressi<strong>on</strong>s can be misleading. Suppose a<br />
new student sits next to you at lunch. Her eyes are<br />
red and puffy. She sniffs often, and barely touches<br />
her food. She seems upset. You’re about to ask if<br />
you can do anything to help when she sighs and<br />
says, “I just can’t shake this cold.”<br />
What impressi<strong>on</strong> might you make about some<strong>on</strong>e<br />
who is wearing a soiled sweatshirt, baggy<br />
pants, and dirty shoes? Perhaps the pers<strong>on</strong> has a<br />
smudged face and messed-up hair. Is the pers<strong>on</strong><br />
really sloppy and unkempt, or has he just finished<br />
washing a car? Perhaps he has just returned from<br />
a five-mile run. In all fairness, you should stop<br />
and evaluate your impressi<strong>on</strong> of another pers<strong>on</strong><br />
before you make a quick judgment.<br />
Another risk of judging too quickly is forming<br />
an incorrect impressi<strong>on</strong> through stereotyping. A<br />
stereotype is a simplified and standardized image<br />
64 • UNIT 1 Clothing and Society<br />
of a pers<strong>on</strong> or group. A stereotype tries to<br />
sum up another pers<strong>on</strong>’s entire character<br />
based <strong>on</strong> a few obvious traits, such as race,<br />
age, size, or gender. People are also stereotyped<br />
by the way they look and the type of<br />
clothes they wear. An unusual hairstyle, for<br />
example, may make people think that a teen<br />
is a rebel. A letter sweater or jacket makes<br />
some people think the wearer excels at<br />
sports. These are two examples of stereotyping<br />
through appearance. What other examples<br />
come to mind?<br />
Judging <strong>on</strong> appearance may be a natural<br />
first reacti<strong>on</strong>. However, a thoughtful pers<strong>on</strong><br />
looks past differences in clothes and focuses<br />
instead <strong>on</strong> the pers<strong>on</strong> who wears them.<br />
WHAT CLOTHING<br />
COMMUNICATES<br />
Why do people pay attenti<strong>on</strong> to the messages<br />
sent by clothing? They tend to focus<br />
<strong>on</strong> clothes because, unlike height and eye<br />
color, clothing is a choice. Wearing an inappropriate<br />
outfit to a job interview, for example,<br />
reflects <strong>on</strong> the pers<strong>on</strong> who decided to<br />
wear it. It calls attenti<strong>on</strong> to that pers<strong>on</strong>’s judgment.<br />
It makes the interviewer w<strong>on</strong>der about qualities<br />
like attitude, awareness, and sensibility.<br />
By learning what clothing communicates, you<br />
can become more aware of how others might<br />
react to the clothing you choose to wear. You’ll be<br />
better able to send the messages about yourself<br />
that you truly want to send.<br />
What can clothing c<strong>on</strong>vey? Clothing tells people<br />
about your pers<strong>on</strong>ality. It can c<strong>on</strong>nect you<br />
with a group of people or set you apart in some<br />
way.<br />
Pers<strong>on</strong>ality<br />
When Clark Kent ducked into a ph<strong>on</strong>e booth<br />
to become Superman, he traded his business suit<br />
for a cape, mask, belt, and boots. This change of<br />
clothing symbolized his pers<strong>on</strong>ality change from<br />
mild-mannered reporter to super hero.<br />
Pers<strong>on</strong>ality is an individual’s unique combinati<strong>on</strong><br />
of mental, emoti<strong>on</strong>al, and social qualities.
4-5 Self-c<strong>on</strong>cept is more visible than<br />
you might think. How does it show here?<br />
You express your pers<strong>on</strong>ality through your attitudes,<br />
emoti<strong>on</strong>s, and behavior. Are you outgoing<br />
and talkative, or quiet and shy? Are you self-c<strong>on</strong>fident<br />
or unsure of yourself? Do you like to be<br />
unique in your clothing selecti<strong>on</strong>s? The answers<br />
to these questi<strong>on</strong>s reveal your pers<strong>on</strong>ality.<br />
Your pers<strong>on</strong>ality influences the clothing styles<br />
you prefer. In turn, your clothing choices can<br />
reflect your changing moods and self-image. You<br />
can deliberately express your pers<strong>on</strong>ality through<br />
the clothes you wear. See Fig. 4-4.<br />
Emoti<strong>on</strong>s<br />
Have you ever w<strong>on</strong>dered why you d<strong>on</strong>’t feel like<br />
wearing a particular item of clothing at certain<br />
times? Maybe it doesn’t match your mood.<br />
Emoti<strong>on</strong>s can affect clothing choices. If you’re<br />
happy and cheerful, you may reach for bright,<br />
bold colors. If you’re feeling down, you may subc<strong>on</strong>sciously<br />
select dark colors. You may even<br />
choose a favorite article of clothing that gives you<br />
a sense of comfort and security.<br />
Clothing is also useful for communicating<br />
emoti<strong>on</strong>s. Wearing clothes that you like can<br />
inspire self-c<strong>on</strong>fidence and communicate that<br />
assurance to others. If you’re nervous about presenting<br />
an oral report to the class, for example,<br />
choose an outfit that makes you feel good.<br />
Wearing a favorite outfit can do much to boost<br />
your c<strong>on</strong>fidence.<br />
Self-C<strong>on</strong>cept<br />
Have you ever looked at a photo or video of<br />
yourself and said, “That doesn’t look like me”?<br />
What you saw didn’t fit the image you have of<br />
yourself—your self-c<strong>on</strong>cept. Thoughts about<br />
who you are and what you’re like can be positive,<br />
negative, or somewhere in between.<br />
Self-c<strong>on</strong>cept can actually influence how a pers<strong>on</strong><br />
looks. If you see yourself as friendly and<br />
cheerful, that’s how you’ll act. See Fig. 4-5. You<br />
project positive feelings. A warm, friendly smile<br />
and a ready handshake suggest a positive selfc<strong>on</strong>cept.<br />
People with a positive self-c<strong>on</strong>cept often<br />
have a sense of pride in appearance that influ-<br />
CHAPTER 4 Clothing and Self-Expressi<strong>on</strong> • 65
66<br />
ences what clothing they decide to wear and how<br />
they take care of it. They want to look presentable.<br />
A negative self-c<strong>on</strong>cept can be projected<br />
too—through mannerisms as well as clothing.<br />
Looking presentable may not feel like a worthy<br />
goal to some<strong>on</strong>e with a negative self-c<strong>on</strong>cept.<br />
You may w<strong>on</strong>der what image you project. To<br />
find out how others see you, notice their reacti<strong>on</strong>s<br />
to you. Ask a close friend and a relative how<br />
they see you. Could you present a more positive<br />
image? Making positive changes can actually<br />
improve self-c<strong>on</strong>cept. Because appearance is an<br />
important part of image, especially in the teen<br />
years, flattering clothes c<strong>on</strong>tribute to a positive<br />
self-c<strong>on</strong>cept. During this course, you’ll learn how<br />
to select colors, fabrics, and styles that will help<br />
you make the best of your appearance—and<br />
boost your self-c<strong>on</strong>cept.<br />
C<strong>on</strong>formity<br />
To feel good about themselves, most people<br />
want approval from others. For teens this feeling<br />
can be str<strong>on</strong>g. They identify with peers and want<br />
to wear what others in their group wear. Through<br />
c<strong>on</strong>formity, a teen goes al<strong>on</strong>g with certain standards,<br />
attitudes, or practices followed by the<br />
group. C<strong>on</strong>formity brings a sense of identity,<br />
4-6<br />
Many teens like the feelings of security and<br />
bel<strong>on</strong>ging that come when they wear similar clothing.<br />
bel<strong>on</strong>ging, and security. The teen feels accepted as<br />
part of the group. See Fig. 4-6.<br />
Within a peer group, appearance may be regulated<br />
by written or unwritten rules. Specific clothing<br />
styles, brands, and colors may be approved or<br />
disapproved. Usually there is an “in” way of dressing.<br />
Certain accessories may be important to the<br />
group, which identifies the “right” shoes, boots,<br />
belts, hats, or backpacks to own.<br />
Peer Pressure<br />
Sometimes members of a peer group are<br />
expected, and even pressured, to dress in the<br />
approved way. The peer group’s push to c<strong>on</strong>form<br />
is called peer pressure. Clothing that doesn’t fit<br />
the group’s standards may be criticized. The pers<strong>on</strong><br />
may be talked about, laughed at, or teased.<br />
Some peer pressure is gentle and used to help<br />
members develop a sense of bel<strong>on</strong>ging and<br />
togetherness. Group members can benefit from<br />
such positive peer pressure. For example, c<strong>on</strong>forming<br />
to school and community customs can<br />
bolster a teen’s self-c<strong>on</strong>fidence. It can help a new<br />
employee fit in with coworkers and feel more at<br />
ease <strong>on</strong> the job.<br />
Peer pressure can be str<strong>on</strong>g and cruel, however,<br />
forcing people to c<strong>on</strong>form or be excluded from<br />
the group. To resist negative peer pressure, you<br />
need c<strong>on</strong>fidence that comes from a clear understanding<br />
of your own self-c<strong>on</strong>cept and values.<br />
When imposing a dress code, a peer group can<br />
be highly critical, sometimes<br />
thoughtlessly so, of any<strong>on</strong>e<br />
who fails to meet the code.<br />
Name-calling, labeling, and<br />
exclusi<strong>on</strong> from the group and<br />
its activities can follow.<br />
Such behavior often<br />
reflects a lack of<br />
self-c<strong>on</strong>fidence.<br />
People who<br />
are insecure<br />
or unhappy<br />
with their own<br />
identity may<br />
feel threatened
y some<strong>on</strong>e who doesn’t follow the peer group’s<br />
standards. Undermining the other pers<strong>on</strong>’s identity<br />
helps reassure them of their own.<br />
Handling Peer Disapproval<br />
Almost every<strong>on</strong>e experiences peer disapproval<br />
at some time, and clothing is an obvious target.<br />
Understanding the source of criticism and its<br />
motivati<strong>on</strong> reveals how to handle it. Is it the<br />
opini<strong>on</strong> of a friend who has your best interests at<br />
heart, or does it come from some<strong>on</strong>e you barely<br />
know? Does it c<strong>on</strong>cern the appropriateness of<br />
your outfit, or is it about your appearance? For<br />
example, “The saying <strong>on</strong> that T-shirt will hurt a<br />
lot of people” deserves more c<strong>on</strong>siderati<strong>on</strong> than<br />
“No <strong>on</strong>e wears that color anymore.”<br />
If a remark was intended to be helpful, try to<br />
accept it that way. If it was meant as a joke, laugh it<br />
off. If it was designed to be cruel, c<strong>on</strong>sider the reas<strong>on</strong>s<br />
for such destructive behavior, and<br />
walk away.<br />
Keep the same advice in mind when<br />
you’re tempted to comment <strong>on</strong> some<strong>on</strong>e’s<br />
outfit. Ask yourself: Are my views wanted<br />
and helpful? What is the worst that could<br />
happen if I say nothing?<br />
Even if your opini<strong>on</strong> is specifically<br />
requested, be sensitive to another’s feelings.<br />
If some<strong>on</strong>e asks, “What do you think of<br />
this sweater?” you might comment that it<br />
fits well or has an interesting pattern. You<br />
d<strong>on</strong>’t need to menti<strong>on</strong> that the hot orange<br />
color is painful to look at.<br />
Individuality<br />
Almost every<strong>on</strong>e has a str<strong>on</strong>g desire to<br />
be part of a group. On the other hand, people<br />
feel the need to be original in some way.<br />
As a teen’s self-c<strong>on</strong>fidence grows, the need<br />
to express individuality increases.<br />
Individuality is the total combinati<strong>on</strong> of<br />
characteristics that set <strong>on</strong>e pers<strong>on</strong> apart<br />
from another. See Fig. 4-7. Clothing styles,<br />
4-7<br />
Clothes offer teens a way to express their<br />
pers<strong>on</strong>al styles. What’s your style?<br />
colors, and accessories c<strong>on</strong>tribute to individuality<br />
when they are different from the norm.<br />
Expressing individuality can start a trend when<br />
others want to dress the same way.<br />
The desire to express individuality can c<strong>on</strong>flict<br />
with the desire to c<strong>on</strong>form. Wanting to satisfy<br />
both impulses can be c<strong>on</strong>fusing. You may want to<br />
dress like your peers in order to bel<strong>on</strong>g. At the<br />
same time, you may want your clothes to represent<br />
you, not everybody else.<br />
If you have a c<strong>on</strong>flict between individuality<br />
and c<strong>on</strong>formity, the middle ground provides a<br />
good comfort z<strong>on</strong>e. If every<strong>on</strong>e in your group<br />
wears jeans of a certain style or brand, you could<br />
go ahead and wear them too. Then show individuality<br />
by completing your outfit with a unique<br />
shirt or sweater that suits you. As you do this<br />
more often, you may find that your peers are less<br />
c<strong>on</strong>cerned with what you wear than you thought.<br />
CHAPTER 4 Clothing and Self-Expressi<strong>on</strong> • 67
DEVELOPING YOUR<br />
PERSONAL STYLE<br />
“Try this <strong>on</strong>! It looks just like you!” Have you<br />
ever been shopping with friends who said this to<br />
you? What did they mean? Your friends were trying<br />
to say they know something about you. They<br />
have some definite ideas about the kind of clothes<br />
that match your pers<strong>on</strong>ality. Did you agree with<br />
their selecti<strong>on</strong>, or were you amazed that they<br />
picked out something you didn’t like at all?<br />
As you decide what clothing to buy and wear,<br />
your own pers<strong>on</strong>al style evolves. Some people<br />
have a str<strong>on</strong>g desire to dress exactly like a friend<br />
or some<strong>on</strong>e they admire. When people imitate<br />
others by wearing the same hair and clothing<br />
styles, they become a “copy.” They lose their own<br />
distinctiveness.<br />
Putting too much emphasis <strong>on</strong> appearance is<br />
usually a mistake. Time, effort, and m<strong>on</strong>ey spent<br />
to look “just right” take away from other interests<br />
and activities. On the other hand, showing no<br />
interest in appearance and clothes causes problems.<br />
Always looking sloppy or wearing the same<br />
clothes everywhere can interfere with relati<strong>on</strong>ships.<br />
Either too much or too little c<strong>on</strong>cern with<br />
clothes may limit experiences in life.<br />
Choices and C<strong>on</strong>sequences<br />
Every decisi<strong>on</strong> has c<strong>on</strong>sequences, even decisi<strong>on</strong>s<br />
about clothing. Decisi<strong>on</strong>s that are thoughtfully<br />
made are likely to bring satisfying results.<br />
Poor decisi<strong>on</strong>s, however, lead to c<strong>on</strong>flicts, disapproval,<br />
and missed opportunities. What difficulties<br />
might result from the following clothing<br />
decisi<strong>on</strong>s made by a teen?<br />
• Regularly wears clothes disapproved by parents.<br />
• “Lives” in jeans and T-shirts without owning<br />
any dressy clothes.<br />
• Wears the same colors and styles worn by gangs.<br />
• Buys <strong>on</strong>ly trendy fashi<strong>on</strong>s.<br />
The c<strong>on</strong>sequences of these clothing choices<br />
can be simple or serious. Pers<strong>on</strong>al safety could<br />
even be at stake. What c<strong>on</strong>sequences might come<br />
from the clothing decisi<strong>on</strong>s you make?<br />
68 • UNIT 1 Clothing and Society<br />
Searching for the “Real” You<br />
The teen years are a time to look inward and<br />
evaluate who you are and who you want to be. As<br />
part of this explorati<strong>on</strong>, some teens experiment<br />
with clothes by trying new styles, colors, and fabrics.<br />
One teen wore <strong>on</strong>ly black and white clothing<br />
for a while. Another experimented with hair<br />
color. Still another decided to change her “look”<br />
every few m<strong>on</strong>ths.<br />
Explorati<strong>on</strong> allows you to learn more about<br />
yourself—how you look, how you want to look,<br />
and how others see you. You will discover what<br />
you like and what is best for you. See Fig. 4-8. By<br />
the time you reach adulthood, you’ll probably<br />
have a clearer image of yourself.<br />
4-8<br />
Wearing clothes that are bold and trendy<br />
or traditi<strong>on</strong>al is a matter of choice. Are you trendy<br />
or traditi<strong>on</strong>al?
How To…<br />
ADD EMBELLISHMENTS<br />
You can use your sewing and crafting skills to add your own pers<strong>on</strong>al stamp to the<br />
clothes you buy.<br />
• Does a hem need shortening? Serge al<strong>on</strong>g<br />
the new hemline, using a rolled-hem stitch<br />
and decorative thread.<br />
• Add sparkle with rhinest<strong>on</strong>es and a hot-fix<br />
tool. These special rhinest<strong>on</strong>es have glue<br />
<strong>on</strong> the back. Use the hot-fix tool to melt<br />
the glue and apply the rhinest<strong>on</strong>es.<br />
• M<strong>on</strong>gram a collar, a cuff, or a pocket. Use a<br />
computerized embroidery machine or purchase<br />
ir<strong>on</strong>-<strong>on</strong> letters.<br />
• Perk up a plain skirt or shirt by adding<br />
patch pockets decorated with rickrack,<br />
ribb<strong>on</strong>, or other trim.<br />
• Jazz up your jeans with<br />
machine embroidery.<br />
• Use fabric paints to<br />
stamp, stencil, or<br />
sp<strong>on</strong>ge a design <strong>on</strong> a<br />
tote bag, sneakers, or<br />
item of clothing.<br />
Exploring Embellishments<br />
Try embellishing a clothing or accessory item. Show the<br />
results of your creativity to the class.<br />
• Add jewels, beads, pearls, butt<strong>on</strong>s, or<br />
charms. Sew them <strong>on</strong> or use glue that is<br />
made expecially for attaching embellishments<br />
to fabric.<br />
• Add sparkle and interest to your projects<br />
with metallic foil. The foil is applied using<br />
paper-backed fusible web and an ir<strong>on</strong>. Cut<br />
the fusible web into the desired shape.<br />
Apply it to you fabric, peel off the paper<br />
backing, and ir<strong>on</strong> the foil in place over the<br />
fusible web. Let the project cool, and then<br />
peel off the foil. The part of the foil that<br />
adheres to the fusible web will now be permanently<br />
attached to your fabric.<br />
CHAPTER 4 Clothing and Self-Expressi<strong>on</strong> • 69
CHAPTER 4<br />
CHAPTER SUMMARY<br />
• All aspects of a pers<strong>on</strong>’s appearance and<br />
behavior combine to create an impressi<strong>on</strong><br />
<strong>on</strong> others.<br />
• First impressi<strong>on</strong>s are often misleading and<br />
should not be the basis for judgments<br />
about a pers<strong>on</strong>.<br />
• Clothing can communicate an individual’s<br />
pers<strong>on</strong>ality, emoti<strong>on</strong>s, and self-c<strong>on</strong>cept.<br />
• Handling pressure to c<strong>on</strong>form, especially<br />
from peers, takes a clear self-c<strong>on</strong>cept and<br />
sense of values.<br />
• People develop a pers<strong>on</strong>al style to satisfy<br />
the need to express their individuality.<br />
• Clothing decisi<strong>on</strong>s carry c<strong>on</strong>sequences,<br />
which mature people c<strong>on</strong>sider when choosing<br />
how to dress.<br />
USING KEY TERMS<br />
Choose <strong>on</strong>e Key Term and try to communicate<br />
it n<strong>on</strong>verbally. You might dem<strong>on</strong>strate the<br />
term, draw a carto<strong>on</strong>, or find pictures that<br />
illustrate it. Have classmates identify the term.<br />
70 • UNIT 1 Clothing and Society<br />
Review<br />
RECALLING THE FACTS<br />
1. Explain how people form impressi<strong>on</strong>s of<br />
others.<br />
2. Is a flattering outfit enough to create a<br />
pleasing appearance? Why or why not?<br />
3. What body language might show that a<br />
pers<strong>on</strong> is worried about something?<br />
4. What is a stereotype? What problem<br />
does it cause?<br />
5. Why is it worthwhile to know what clothing<br />
communicates to others?<br />
6. How can clothing choices relate to<br />
emoti<strong>on</strong>s?<br />
7. How can self-c<strong>on</strong>cept affect pers<strong>on</strong>al<br />
appearance?<br />
8. A friend says, “I finally found these<br />
shoes at the third store I tried. They cost<br />
a lot and the style’s not my favorite, but I<br />
had to have them.” What might have<br />
caused your friend’s acti<strong>on</strong>s?<br />
9. If some<strong>on</strong>e criticizes your clothes, how<br />
should you resp<strong>on</strong>d?<br />
10. Describe <strong>on</strong>e way to meet both the need<br />
for c<strong>on</strong>formity and individuality in clothing<br />
choices.<br />
11. What difficulties do some teens have in<br />
trying to develop a pers<strong>on</strong>al style?<br />
12. What problems may come from making<br />
clothing decisi<strong>on</strong>s without thinking about<br />
c<strong>on</strong>sequences?<br />
13. Why do teens often experiment with different<br />
clothing styles and looks?
and Activities<br />
THINKING CRITICALLY<br />
1. What do you focus <strong>on</strong> when forming<br />
impressi<strong>on</strong>s of other people? Evaluate<br />
your fairness and accuracy.<br />
2. What type of clothing might threaten a<br />
teen’s safety? Why?<br />
APPLYING KNOWLEDGE<br />
1. First impressi<strong>on</strong>s. From a magazine or<br />
newspaper, cut out three pictures of<br />
people. Write your impressi<strong>on</strong> of each<br />
pers<strong>on</strong> based <strong>on</strong> the clothing worn.<br />
Exchange pictures with a friend or classmate<br />
and repeat the activity. Compare<br />
descripti<strong>on</strong>s. What does this activity suggest<br />
about first impressi<strong>on</strong>s?<br />
2. Fashi<strong>on</strong> expressi<strong>on</strong>s. Hold a fashi<strong>on</strong><br />
expressi<strong>on</strong>s day. Bring or wear a garment<br />
that you think shows your pers<strong>on</strong>ality<br />
well or that indicates an emoti<strong>on</strong><br />
you sometimes have. Describe for the<br />
class how this garment is a tool for selfexpressi<strong>on</strong>.<br />
3. Self-image. On a piece of paper, write a<br />
self-portrait. Explain how you see yourself,<br />
including your appearance, voice,<br />
talents, interests, social skills, and<br />
emoti<strong>on</strong>al traits. How do your clothing<br />
choices reflect how you view yourself?<br />
Then ask two people who know you well<br />
to write their own descripti<strong>on</strong> of you.<br />
Compare the three views. What might<br />
explain any differences?<br />
CHAPTER 4<br />
4. Peer pressure. Suppose a good friend of<br />
yours associates with a group of peers<br />
who wear clothing that often c<strong>on</strong>flicts<br />
with your school’s dress code. Your<br />
friend wants you to be part of the group,<br />
but you d<strong>on</strong>’t want trouble. You also<br />
d<strong>on</strong>’t want to lose a friendship. Describe<br />
in writing what you would do.<br />
MAKING>
<str<strong>on</strong>g>Care</str<strong>on</strong>g>ers<br />
Fashi<strong>on</strong> Promoti<strong>on</strong><br />
As many shoppers have said, “This looks<br />
too good to resist—I’ll take it.” In the world<br />
of fashi<strong>on</strong> promoti<strong>on</strong>, these words are music<br />
to the ears, and cash in the bank. When<br />
some<strong>on</strong>e decides to buy a garment, the professi<strong>on</strong>als<br />
who promote the product are largely<br />
resp<strong>on</strong>sible. That includes people who work in marketing,<br />
advertising, and public relati<strong>on</strong>s.<br />
In the competitive field of fashi<strong>on</strong>, eye-catching<br />
images, catchy phrases, and creative techniques can<br />
mean the difference between selling and not selling.<br />
Where have you seen examples of fashi<strong>on</strong> promoti<strong>on</strong>?<br />
In magazines, newspapers, and brochures? On a<br />
fashi<strong>on</strong> Web site? At a mall fashi<strong>on</strong> show? Some<strong>on</strong>e<br />
has to plan and carry out all these efforts.<br />
Fashi<strong>on</strong> promoti<strong>on</strong> starts with careful research<br />
into what c<strong>on</strong>sumers want and at what price. To c<strong>on</strong>vince<br />
the public that they “must” have certain clothes,<br />
a team might develop a special campaign. In <strong>on</strong>e<br />
career, a pers<strong>on</strong> might study sales figures. Some<strong>on</strong>e<br />
might travel far and wide to persuade<br />
retailers to carry a line of clothing. If<br />
anything can be d<strong>on</strong>e to sway the c<strong>on</strong>sumer<br />
to choose <strong>on</strong>e product over<br />
another, some<strong>on</strong>e in fashi<strong>on</strong> promoti<strong>on</strong><br />
is probably doing it.<br />
A catalog that is carefully written<br />
and has eye appeal helps sell<br />
clothing. These copywriters must<br />
be accurate but creative when<br />
describing merchandise.<br />
72 • UNIT 1 Clothing and Society<br />
IS THIS FIELD FOR YOU?<br />
Understanding fashi<strong>on</strong> is useful but not essential to<br />
start a fashi<strong>on</strong> promoti<strong>on</strong> career. These statements<br />
are better indicators that a pers<strong>on</strong> might fit well in<br />
the field.<br />
• I have plenty of physical and mental energy.<br />
• I have c<strong>on</strong>fidence in my ideas.<br />
• I’m not upset by changes in plans or routine.<br />
• I enjoy travel.<br />
• I’m not afraid to take risks.<br />
• I enjoy working with different people.<br />
• I respect other people’s views and c<strong>on</strong>cerns.<br />
• I can argue my side of an issue persuasively.<br />
• I can predict people’s expectati<strong>on</strong>s and reacti<strong>on</strong>s<br />
in a given situati<strong>on</strong>.
Educati<strong>on</strong> and Training<br />
Specialized training after high school is an advantage<br />
in fashi<strong>on</strong> promoti<strong>on</strong>. What you need varies<br />
with the career. Basic computer skills are expected in<br />
almost every area since record keeping is comm<strong>on</strong>. As<br />
the fashi<strong>on</strong> trade c<strong>on</strong>tinues to expand around the<br />
world, foreign language skills are valued. A market<br />
researcher may have a master’s degree in business<br />
administrati<strong>on</strong>, with a good grounding in math and<br />
statistics. A bachelor’s degree in graphic arts or journalism<br />
could launch an advertising career. For models,<br />
courses in dance and public speaking teach grace<br />
and poise.<br />
Some firms hire new graduates, who go through a<br />
formal training program. Others offer internships,<br />
where classroom studies are rounded out with work<br />
experience. Newer workers train under older <strong>on</strong>es<br />
and learn from their experience. To encourage<br />
advancement, employers may sp<strong>on</strong>sor c<strong>on</strong>tinuing<br />
educati<strong>on</strong> programs that build job skills. Paying to<br />
send a sales manager to an internati<strong>on</strong>al marketing<br />
seminar, for example, can increase both the<br />
employee’s and the company’s earnings.<br />
Possible <str<strong>on</strong>g>Care</str<strong>on</strong>g>er Paths<br />
<str<strong>on</strong>g>Care</str<strong>on</strong>g>er paths in fashi<strong>on</strong> promoti<strong>on</strong> are as varied as<br />
the starting points. In public relati<strong>on</strong>s, a research<br />
assistant could become a public relati<strong>on</strong>s specialist,<br />
then a manager, and finally a vice president. A copywriter<br />
might rise through the advertising ranks to<br />
copy chief, then creative director, and ultimately<br />
advertising manager. Using modeling as a steppingst<strong>on</strong>e,<br />
a model might become a fashi<strong>on</strong> editor.<br />
Because similar skills are needed for some jobs in<br />
fashi<strong>on</strong> promoti<strong>on</strong>, moving between careers is possible.<br />
With a gift for expressi<strong>on</strong>, a copywriter in the<br />
advertising department could become a speechwriter<br />
in public relati<strong>on</strong>s.<br />
Sales representatives need good com-<br />
municati<strong>on</strong> skills, whether selling fabrics<br />
to a store or handbags to a boutique.<br />
THE SKILLS YOU NEED<br />
A c<strong>on</strong>fident, outgoing pers<strong>on</strong>ality is needed<br />
for fashi<strong>on</strong> promoti<strong>on</strong>. In additi<strong>on</strong> to genuinely<br />
enjoying the company of others, successful<br />
people should have the following<br />
skills:<br />
• Communicati<strong>on</strong><br />
• Organizati<strong>on</strong><br />
• Management<br />
• Analytical thinking<br />
• Creativity<br />
• Enthusiasm<br />
UNIT 1 Clothing and Society • 73
Choosing a Fashi<strong>on</strong><br />
Promoti<strong>on</strong> <str<strong>on</strong>g>Care</str<strong>on</strong>g>er<br />
ART/CREATIVE DIRECTOR | COPYWRITER | DISPLAY DESIGNER<br />
| FASHION MODEL | FASHION PROMOTION SPECIALIST | GRAPHIC<br />
DESIGNER | MARKET ANALYST | PUBLIC RELATIONS SPECIALIST<br />
| SALES REPRESENTATIVE<br />
Market Analyst __<br />
As a teen, do you pay more attenti<strong>on</strong> to magazine<br />
or radio ads? Market analysts want to know. To<br />
make sound decisi<strong>on</strong>s, businesses need the informati<strong>on</strong><br />
that analysts gather. Market analysts<br />
develop and interpret opini<strong>on</strong> polls. They study c<strong>on</strong>sumer<br />
needs and attitudes, using teleph<strong>on</strong>e surveys,<br />
in-store interviews, “mystery shoppers,” and<br />
discussi<strong>on</strong>s with selected “focus groups.”<br />
Marketing analysts look at past sales patterns<br />
to make predicti<strong>on</strong>s for the future. With the informati<strong>on</strong><br />
they provide, a company can pinpoint how<br />
many shirts to ship to a particular part of the country.<br />
They may even determine whether a designer’s<br />
new line will be profitable for the company.<br />
Public Relati<strong>on</strong>s<br />
Specialist _____<br />
How does a shoe company become involved<br />
in sp<strong>on</strong>soring a road race? How does a fashi<strong>on</strong><br />
reporter learn about a designer’s new collecti<strong>on</strong>?<br />
Often, a public relati<strong>on</strong>s (PR) specialist is<br />
at work.<br />
PR specialists get the word out to c<strong>on</strong>sumers<br />
and the media. They invite reporters to press<br />
c<strong>on</strong>ferences, plan promoti<strong>on</strong>al events, and<br />
arrange factory tours. They also coordinate<br />
with marketing and advertising pers<strong>on</strong>nel to<br />
announce and organize grand opening events.<br />
74 • UNIT 1 Clothing and Society<br />
Sales<br />
Representative __<br />
Without sales representatives, the fashi<strong>on</strong><br />
world couldn’t survive. Using their persuasive<br />
skills, sales reps c<strong>on</strong>vince people to buy. A textile<br />
mill’s rep might sell stain-resistant fabric to<br />
a uniform manufacturer. In turn, the manufacturer’s<br />
rep offers the stain-resistant uniforms to<br />
a restaurant chain’s buyer.<br />
Knowing a product well makes selling easier.<br />
Sales reps build loyalty by advising clients <strong>on</strong><br />
how to reduce costs and increase sales.<br />
They report to the employer, <strong>on</strong> market c<strong>on</strong>diti<strong>on</strong>s,<br />
buyers’ c<strong>on</strong>cerns, and competitors’ activities.<br />
Travel, between towns or across oceans, is part of<br />
selling.<br />
As part of their work, public<br />
relati<strong>on</strong>s specialists set up<br />
and manage events. They prepare<br />
promoti<strong>on</strong>al materials<br />
that include press releases<br />
and pamphlets.
Fashi<strong>on</strong> Model ___<br />
Not all fashi<strong>on</strong> models walk <strong>on</strong> high-fashi<strong>on</strong> runways<br />
or appear <strong>on</strong> magazine covers. Some are simply<br />
the feet in a shoe ad or the unknown model in a<br />
clothing catalog. Most models sign with agencies<br />
that send them to auditi<strong>on</strong>s, or “go-sees,” in<br />
search of jobs. The job often means striking poses<br />
for hours under hot studio lights, while remaining<br />
patient, poised, and enthusiastic. Job insecurity<br />
and c<strong>on</strong>stant attenti<strong>on</strong> to appearance can add<br />
stress.<br />
Building a reputati<strong>on</strong> as reliable and cooperative<br />
leads some models to success. Only a few, however,<br />
earn the pay-offs of travel, fame, and fortune. The<br />
right “look,” combined with initiative, perseverance,<br />
and luck, makes the difference.<br />
Models with an eye for design may become c<strong>on</strong>sultants<br />
to leading designers or develop their own<br />
line of clothing. Since work is uneven and popularity<br />
can fade, smart models plan for a sec<strong>on</strong>d career<br />
and invest wisely. CAREER APPLICATIONS<br />
Graphic Designer _<br />
In the fashi<strong>on</strong> industry, a picture may be worth<br />
more than a thousand words. Graphic designers are<br />
in demand wherever illustrati<strong>on</strong>s are needed to add<br />
color and interest. Working with art directors,<br />
graphic designers develop company Web sites, magazine<br />
ads, promoti<strong>on</strong>al pamphlets, and clothing catalogs.<br />
With input from market analysts and fashi<strong>on</strong><br />
designers, they create logos that appear <strong>on</strong> different<br />
clothing lines.<br />
Graphic designers also c<strong>on</strong>tribute behind the<br />
scenes. Sales reports, which are often used to<br />
attract investors, are more effective with a design<br />
that adds life to pages of statistics. A bold, trendy<br />
design in company newsletters and other public<br />
relati<strong>on</strong>s literature reflects well in a business<br />
where “image is everything.”<br />
Models work in many<br />
areas of fashi<strong>on</strong> promoti<strong>on</strong>.<br />
Some<strong>on</strong>e with<br />
an interest in modeling<br />
could start by finding<br />
opportunities to model<br />
at local fashi<strong>on</strong> shows.<br />
1. Market Research. Develop a twenty-item<br />
questi<strong>on</strong>naire designed to gather data about<br />
color preferences in clothing. Distribute copies<br />
of your survey to a certain group, such as classmates<br />
or older adults. Analyze resp<strong>on</strong>ses and<br />
record them in a chart or table. How might such<br />
informati<strong>on</strong> be used in the fashi<strong>on</strong> industry?<br />
2. FCCLA. Select a career in fashi<strong>on</strong> promoti<strong>on</strong>.<br />
Plan an Applied Technology Project that studies<br />
and dem<strong>on</strong>strates how computers are used in<br />
the career. What tasks are d<strong>on</strong>e? What software<br />
is needed? How does it operate? Include a software<br />
dem<strong>on</strong>strati<strong>on</strong> as part of the project.<br />
3. Professi<strong>on</strong>alism. You’re a copywriter for an<br />
ad agency. You’ve been directed to write copy<br />
for a fashi<strong>on</strong> campaign, but you’re worried that<br />
the campaign might offend some c<strong>on</strong>sumers. The<br />
campaign idea originated with the director of the<br />
agency. How will you handle the situati<strong>on</strong>?<br />
UNIT 1 Clothing and Society • 75
UNIT 2<br />
The<br />
Fashi<strong>on</strong><br />
World<br />
76 • UNIT 2 The Fashi<strong>on</strong> World
FEATURE<br />
CHAPTERS<br />
5 Fashi<strong>on</strong> History<br />
6 Fashi<strong>on</strong> Styles<br />
7 Fashi<strong>on</strong> Designers<br />
8 The Fashi<strong>on</strong> Industry<br />
Apparel Producti<strong>on</strong> <str<strong>on</strong>g>Care</str<strong>on</strong>g>ers<br />
77
CHAPTER 5<br />
Fashi<strong>on</strong> History<br />
OBJECTIVES<br />
• Explain how the<br />
first clothes and<br />
fabrics were made<br />
and worn.<br />
• Describe the<br />
evoluti<strong>on</strong> of<br />
fashi<strong>on</strong>s from<br />
early civilizati<strong>on</strong>s<br />
to the nineteenth<br />
century.<br />
• Discuss factors<br />
that influenced<br />
fashi<strong>on</strong> history.<br />
• Give examples of<br />
clothing styles in<br />
the twentieth<br />
century.<br />
KEY TERMS<br />
barter<br />
cellulose<br />
Industrial Revoluti<strong>on</strong><br />
ready-to-wear<br />
sumptuary laws<br />
sweatshops<br />
technology<br />
78 • UNIT 2 The Fashi<strong>on</strong> World
EXAMINETHISISSUE<br />
Changing fashi<strong>on</strong>s. A century ago<br />
the fabric in a bathing suit covered all but<br />
the head and arms. This modest look<br />
eventually gave way to designs that were<br />
more comfortable in the heat and less<br />
restrictive for swimming. Swimsuit designs<br />
today are quite varied and less modest<br />
than early versi<strong>on</strong>s. As you read this<br />
chapter, you’ll see how many fashi<strong>on</strong>s<br />
have changed with the times—sometimes<br />
amidst c<strong>on</strong>troversy.<br />
What do you think?<br />
Think about the fashi<strong>on</strong>s that teens<br />
wear now. What has inspired them? Could<br />
they have been worn early in the twentieth<br />
century? Are any c<strong>on</strong>troversial today?<br />
When you slip <strong>on</strong> a favorite pair<br />
of blue jeans, do you stop to think that<br />
a coal miner born 150 years ago appreciated<br />
the same sturdy, riveted denim c<strong>on</strong>structi<strong>on</strong>?<br />
When you put <strong>on</strong> running shoes, do you<br />
realize that a Brit<strong>on</strong> sheepherder laced his boots<br />
in the same crisscross pattern 1500 years ago?<br />
Throughout history, garment styles have reappeared.<br />
They may look the same or they may be<br />
changed slightly to reflect new needs and new<br />
technology.<br />
THE EARLIEST CLOTHING<br />
Thousands of years ago, people learned to<br />
make clothing from natural resources as protecti<strong>on</strong><br />
from weather. Animal skins and hair, plants,<br />
grasses, and tree bark were some of the materials<br />
used. Because ancient people left visual records,<br />
people today know what early clothes were like.<br />
Drawings in caves and ancient Egyptian tombs<br />
provide records. Surviving sculptures of the<br />
Greeks and Romans also show clothing styles of<br />
the times.<br />
The First Clothes and Fabrics<br />
The earliest clothing was very simple in c<strong>on</strong>structi<strong>on</strong><br />
and design. Looking for food and shelter<br />
left little time to decorate clothes.<br />
In northern Europe, where cold weather<br />
stretches from early fall to late spring, cave dwellers<br />
dressed in animal skins. For comfort these may<br />
have been worn hair side in. See Fig. 5-1.<br />
In Africa, the South Pacific, and parts of Asia,<br />
people needed protecti<strong>on</strong> from the sun and rain.<br />
They laced grasses together to form woven fabric,<br />
probably used at first for mats and baskets rather<br />
than clothing. Parts of plants, such as the bark of<br />
trees, were soaked and treated until soft enough<br />
for cloth. Fragments of textiles dating back to<br />
about 7500 B.C. have been unearthed in southern<br />
Turkey.<br />
As early as 5000 B.C., people in Egypt made<br />
linen cloth from flax plants that grew al<strong>on</strong>g the<br />
5-1<br />
Early people stitched animal skins together to<br />
make garments. After rubbing the skins with st<strong>on</strong>es or<br />
beating them with sticks to soften them, they punched<br />
holes in the leather. Using sinews, string-like tend<strong>on</strong>s<br />
from animals, and special tools made from b<strong>on</strong>es, they<br />
laced the holes.<br />
CHAPTER 5 Fashi<strong>on</strong> History • 79
Nile River. A few thousand years later, inhabitants<br />
of present-day India and Pakistan, and possibly<br />
the Americas, produced fabric made of cott<strong>on</strong>. At<br />
about the same time in China, silkworms were<br />
raised for their silken coco<strong>on</strong>s.<br />
Fashi<strong>on</strong>s of Early Civilizati<strong>on</strong>s<br />
As civilizati<strong>on</strong>s developed, people learned to<br />
raise animals and grow crops.<br />
While refining the arts of spinning, weaving,<br />
and dyeing, they began to cut fabric into garments.<br />
The earliest, simplest garment was a rectangle<br />
of fabric wrapped or draped about the<br />
body. This was the most c<strong>on</strong>venient way to make<br />
a garment. A rectangle of fabric was easy to wash<br />
and could be smoothed out to dry.<br />
Ancient Egypt<br />
The Egyptian civilizati<strong>on</strong> has flourished in<br />
northern Africa’s Nile River valley for thousands<br />
of years. Early garments, made from lightweight<br />
linen and cott<strong>on</strong>, were well suited to the hot climate.<br />
Drawings, mummy cases, and actual fabrics<br />
discovered in the tombs of Egyptian pharaohs<br />
5-2<br />
In ancient Greece a himati<strong>on</strong> was often worn<br />
over a chit<strong>on</strong>. The himati<strong>on</strong>, a rectangular piece of fabric,<br />
was draped with an end over <strong>on</strong>e shoulder and the other<br />
end over the opposite arm.<br />
80 • UNIT 2 The Fashi<strong>on</strong> World<br />
reveal the fashi<strong>on</strong>s of the day. Men wore kneelength<br />
skirts tied in fr<strong>on</strong>t. A sleeved, shirt-like<br />
garment completed the outfit. Women wore l<strong>on</strong>g,<br />
straight dresses that tied behind the neck or at the<br />
shoulder. Some had short sleeves. A short shawl<br />
was often tied around the shoulders. Both men<br />
and women wore wide collars made of beads or<br />
semiprecious st<strong>on</strong>es.<br />
Minoan C<strong>on</strong>tributi<strong>on</strong><br />
The Minoan civilizati<strong>on</strong> was distanced from<br />
the Egyptians by the Mediterranean Sea—and<br />
about 3000 years. Minoan society reached its<br />
peak around 1700 B.C. <strong>on</strong> the island of Crete.<br />
The women wore some of the first recorded<br />
examples of fitted garments. Their full skirts were<br />
stretched into a bell shape, possibly over hoops<br />
made of wood or rushes. Jackets were short and<br />
formfitting, with elbow-length sleeves. The colorful<br />
fabrics featured geometric designs or nature<br />
prints. Small hats were popular.<br />
Ancient Greece<br />
If you’ve ever seen pictures of centuries-old<br />
Greek vases and life-size statues, you’re familiar<br />
with the clothing of ancient Greece. Detailed<br />
descripti<strong>on</strong>s have been found in carefully written<br />
accounts. The Greeks fashi<strong>on</strong>ed their garments<br />
by elaborately wrapping, draping, and pinning<br />
l<strong>on</strong>g, rectangular pieces of fabric, which took<br />
dozens of square feet of fabric.<br />
Both men and women wore a garment called a<br />
chit<strong>on</strong> (KY-tun). It c<strong>on</strong>sisted of two fabric rectangles<br />
joined at the shoulders and held in place<br />
by jeweled pins. The fabric was folded to fall in<br />
pleats from the shoulders to the hem. Sometimes<br />
a himati<strong>on</strong> (hih-MA-tee-ahn) was worn as a<br />
cloak, as shown in Fig. 5-2.<br />
Early Greek garments were woolen. With the<br />
c<strong>on</strong>quests of Alexander the Great around 330<br />
B.C., linen and silk became available to wealthier<br />
classes. A very fine himati<strong>on</strong> might have a colorful<br />
design of red, purple, yellow, and blue.<br />
Roman Empire<br />
As Roman rule spread from present-day Italy<br />
into Greece, many elements of Greek culture,
5-3<br />
Because the Roman toga was made from a l<strong>on</strong>g<br />
piece of fabric, the wearer frequently needed help with<br />
wrapping the garment.<br />
including clothing styles, were adopted. The Greek<br />
himati<strong>on</strong> became the basis for the Roman toga.<br />
The l<strong>on</strong>g piece of toga fabric was cut into a rectangle<br />
or semicircle. It was then wrapped around<br />
the body, always exposing the right arm and usually<br />
covering the left arm. See Fig. 5-3. Different<br />
colors identified various occupati<strong>on</strong>s and class<br />
ranks. Only the emperor could wear a purple<br />
toga.<br />
A tunic was worn underneath the toga. It fell<br />
over the shoulders and down the arms, forming<br />
sleeves. Many men wore gold rings and bracelets.<br />
Women wore a stola, a l<strong>on</strong>g, belted robe similar<br />
to the Greek chit<strong>on</strong>. Over the stola a wrap<br />
called a palla was worn. This Roman copy of the<br />
Greek himati<strong>on</strong> was worn in much the same<br />
manner. Jewelry included necklaces, brooches,<br />
earrings, and gold wedding rings.<br />
China and Japan<br />
In ancient times, China was a regi<strong>on</strong> of many<br />
different nati<strong>on</strong>s. In 221 B.C., the Qin dynasty<br />
unified most of China. Gradually, clothing styles<br />
became similar throughout the country. Women<br />
wore a coat and a l<strong>on</strong>g skirt; men wore a l<strong>on</strong>g<br />
robe. Later <strong>on</strong>, both genders began to wear<br />
trousers.<br />
Both the coat and robe were simple shapes<br />
with straight lines. A comm<strong>on</strong> style featured a<br />
high, narrow collar and fastened diag<strong>on</strong>ally from<br />
the center of the neckline to just under the right<br />
arm and down the right side of the body. In the<br />
winter, these garments were padded with cott<strong>on</strong><br />
or silk for warmth. Although the shapes were<br />
simple, the garments often featured very elaborate<br />
silk embroidery. Some designs symbolized<br />
beliefs and customs; others provided informati<strong>on</strong><br />
about the wearer’s status.<br />
In the Manchu regi<strong>on</strong> of China, women wore a<br />
slim, fitted dress called a che<strong>on</strong>gsam (CHAWNGsahm).<br />
This high-collared dress, which butt<strong>on</strong>ed<br />
<strong>on</strong> the right side and had l<strong>on</strong>g side slits, is still<br />
popular today.<br />
As far back as the fourth century in Japan, the<br />
kim<strong>on</strong>o (kuh-MOH-noh) was the standard dress<br />
for both men and women. See Fig. 5-4. The first<br />
kim<strong>on</strong>os were made from <strong>on</strong>e piece of linen and<br />
5-4<br />
The kim<strong>on</strong>o is a traditi<strong>on</strong>al garment style in<br />
Japan. It is still worn today for special occasi<strong>on</strong>s.<br />
CHAPTER 5 Fashi<strong>on</strong> History • 81
wrapped to fit the body. Later, two-piece kim<strong>on</strong>os<br />
made from silk were comm<strong>on</strong>. By the 700s, the<br />
kim<strong>on</strong>o included various inner and outer layers,<br />
as well as a wide decorative sash, called an obi<br />
(OH-bee). The rank of the wearer and the formality<br />
of the occasi<strong>on</strong> were indicated by the fabric,<br />
the colors, and the arrangement of the layers.<br />
THE EVOLUTION OF<br />
FASHION<br />
Many years ago, fashi<strong>on</strong> changed very slowly.<br />
People often wore the same clothing style for life.<br />
A particular style could c<strong>on</strong>tinue past a lifetime.<br />
An outfit for special occasi<strong>on</strong>s was often handed<br />
down from <strong>on</strong>e generati<strong>on</strong> to another.<br />
Until the fourteenth century, European clothes<br />
were loose-fitting and draped. People from different<br />
cultures wore similar clothes. Around 1350,<br />
people started wearing more fitted styles. From<br />
then <strong>on</strong>, regi<strong>on</strong>al differences in garments began<br />
to develop in Europe. Eventually, European settlers<br />
in America influenced the clothing styles<br />
worn in the United States and Canada.<br />
5-5<br />
These garments are representative of the cloth-<br />
ing worn during the Middle Ages.<br />
82 • UNIT 2 The Fashi<strong>on</strong> World<br />
In Africa and Asia, societies were not str<strong>on</strong>gly<br />
influenced by Europe. As a result, clothing styles in<br />
these countries reflected their own unique cultures.<br />
Middle Ages<br />
The Middle Ages spanned from about 400 to<br />
1400 and marked gradual change in clothing<br />
styles. See Fig. 5-5. These developments are<br />
recorded in paintings, religious statues, and illustrated<br />
manuscripts of the times.<br />
Early in the medieval period, men wore simple<br />
wool or linen tunics and l<strong>on</strong>g stockings. Women<br />
wore tunics over l<strong>on</strong>g gowns. Goatskin and<br />
sheepskin outer garments provided protecti<strong>on</strong> in<br />
cold weather.<br />
As a prosperous middle class developed, distinguishing<br />
a rich comm<strong>on</strong>er from a rich noblepers<strong>on</strong><br />
was difficult. Men wore knee-length pants<br />
called breeches; women’s gowns had a fitted<br />
bodice, a very full skirt, and l<strong>on</strong>g, full sleeves.<br />
Garments of both men and women were trimmed<br />
with embroidery and decorative edgings.<br />
Because the established nobility felt threatened<br />
when the middle class imitated upper-class clothing<br />
tastes, sumptuary laws were created. These<br />
regulati<strong>on</strong>s c<strong>on</strong>trolled what each social class<br />
could wear. Only the wealthy could enjoy silk garments<br />
trimmed with ermine fur and real silver<br />
accents. Peasant clothes were limited to certain<br />
colors and fabrics. Punishment for dressing above<br />
<strong>on</strong>e’s social class included fines, impris<strong>on</strong>ment,<br />
and death.<br />
Renaissance Splendor<br />
During the Renaissance, clothing styles in Italy,<br />
France, and Spain featured elaborate designs,<br />
beautiful fabrics, and elegant decorati<strong>on</strong>s. See<br />
Fig. 5-6. The explorati<strong>on</strong> of the New World in the<br />
fifteenth and sixteenth centuries brought great<br />
wealth to Europe. Gold threads were woven into<br />
fabrics. Jewels, lace, and furs decorated garments.<br />
The wealthier classes set the standard for fashi<strong>on</strong>,<br />
a trend still seen today. The upper classes<br />
favored bright colors and large prints, elaborately<br />
layered. Men wore a tight-fitting shirt called a
5-6<br />
Renaissance clothing was very elaborate.<br />
Wealthier classes set the standards for these elegant<br />
fashi<strong>on</strong>s.<br />
doublet under a sleeveless, skirted garment called<br />
a jerkin. A short gown with very full sleeves<br />
topped these garments. L<strong>on</strong>g stockings and<br />
puffed breeches completed the outfit.<br />
Women’s dresses featured a fitted bodice and<br />
very wide skirt. A metal, wood, or whaleb<strong>on</strong>e<br />
frame, called a farthingale, held the skirt out from<br />
the body. Skirts were sometimes split to show off<br />
fancy petticoats.<br />
Both men and women wore ruffs—stiff,<br />
pleated collars that framed the face—and shoes<br />
trimmed with buckles and bows. Slashing, in<br />
which an upper garment was slit and a lower <strong>on</strong>e<br />
pulled through in small puffs, was popular.<br />
The Seventeenth Century<br />
During the reign of Louis XIV in the seventeenth<br />
century, France became the world’s fashi<strong>on</strong><br />
leader. The Royal court at Versailles set the<br />
style. Lace became an important decorati<strong>on</strong> <strong>on</strong><br />
men’s garments. Breeches were trimmed with lace<br />
at the hem. Shirts with l<strong>on</strong>g, full sleeves were<br />
embroidered or trimmed with little ribb<strong>on</strong> bows.<br />
A cravat (kruh-VAT), or lace-edged piece of<br />
linen, circled the neck and tied in a knot or bow.<br />
Near the end of the century powdered wigs<br />
became popular. See Fig. 5-7.<br />
During this time, women discarded hoops and<br />
frames to let their gowns fall naturally from the<br />
waist to the hem. Stiff ruffs gave way to standing<br />
lace collars and then lace-trimmed bodices.<br />
Necklines became lower, and hairstyles became<br />
higher. Beauty marks were applied to the face.<br />
The Eighteenth Century<br />
Fig. 5-8 <strong>on</strong> page 84 shows styles of the eighteenth<br />
century. In the early 1700s, fashi<strong>on</strong>s for<br />
both men and women in France were very elegant,<br />
with laces, ribb<strong>on</strong>s, and colorful silks.<br />
Madame de Pompadour influenced fashi<strong>on</strong> by<br />
5-7<br />
In seventeenth-century France, powdered wigs<br />
became fashi<strong>on</strong>able. Lace was comm<strong>on</strong> <strong>on</strong> both men’s<br />
and women’s garments.<br />
CHAPTER 5 Fashi<strong>on</strong> History • 83
trimming her gowns with bows, edging her neckline<br />
with lace, and wearing a frilled neckband. Her<br />
hairstyle, lifted and combed straight back, is<br />
known as the pompadour.<br />
Men wore a suit coat with a fitted waist and<br />
flared hem, the forerunner of today’s suit coat. As<br />
the century progressed, the coat became thighlength<br />
and had less lace trimming. Shirts with<br />
narrow turned-over collars were worn under the<br />
coat. Wigs became less popular.<br />
In the late eighteenth century, people were<br />
very interested in Greek sculpture. As the French<br />
Revoluti<strong>on</strong> began, French comm<strong>on</strong>ers rebelled<br />
against the extravagances of the wealthy. Many<br />
women started wearing loose, flowing muslin<br />
dresses based <strong>on</strong> classical Greek garments. These<br />
dresses were very different from the wide skirts,<br />
rich fabrics, and elaborate trims worn by royalty.<br />
Because these soft dresses had no room for pockets,<br />
women began to carry purses. Hairstyles featured<br />
soft, ringlet curls.<br />
In America the 1700s brought col<strong>on</strong>izati<strong>on</strong>,<br />
followed by the Revoluti<strong>on</strong>ary War. As Europeans<br />
settled in America, they brought their fashi<strong>on</strong><br />
styles with them.<br />
The Nineteenth Century<br />
After the French Revoluti<strong>on</strong> (1789-1799),<br />
France changed from a m<strong>on</strong>archy to a democracy.<br />
Dressing like royalty and upper classes was<br />
frowned <strong>on</strong> throughout Europe. Social change and<br />
84 • UNIT 2 The Fashi<strong>on</strong> World<br />
5-8<br />
shown here.<br />
Typical fashi<strong>on</strong>s of the eighteenth century are<br />
the rise of the middle class meant that many people<br />
could afford to buy new clothes more often.<br />
Men’s fashi<strong>on</strong>s of this period included the cutaway<br />
jacket, which evolved into the tailcoat, then<br />
shortened to the knee-length frock coat by midcentury.<br />
G<strong>on</strong>e were bright colors and lace trims.<br />
Men in Europe and the United States began wearing<br />
trousers, ending a 200-year traditi<strong>on</strong> of knee<br />
breeches. An important trend began mid-century<br />
with the matching of the coat, vest, and trousers.<br />
Previously, each garment was a different color.<br />
Women’s fashi<strong>on</strong>s in Europe and the United<br />
States in the early 1800s featured a raised waistline<br />
inspired by Empress Josephine, wife of<br />
Napole<strong>on</strong>. This dress style came to be known as<br />
empire (AHM-pihr).<br />
Gradually, dresses became fuller and more<br />
elaborate. Stiff petticoats (fancy underskirts with<br />
ruffled or lace edges), crinolines (full, stiff underskirts),<br />
or hoops supported the skirts. Some
Fashi<strong>on</strong><br />
HAIR CARE IN 1800. In days<br />
when hair sal<strong>on</strong>s and blow dryers were<br />
unknown, a cap was a basic item in a<br />
woman’s wardrobe. Women living in the<br />
United States around 1800 tucked their<br />
l<strong>on</strong>g hair under a simple head covering as<br />
protecti<strong>on</strong> against dirt and dust. That way<br />
they could wash their hair less often. A<br />
more stylish hat was worn over the cap for<br />
social outings.<br />
Facts<br />
dresses had leg-of-mutt<strong>on</strong> sleeves (full at the top<br />
and narrow at the bottom). Necklines widened<br />
until the shoulders were bared. Tightly laced<br />
corsets were essential undergarments.<br />
In the Victorian society of the late 1800s,<br />
clothes were designed more for appearance than<br />
practicality. This reflected the idea that women<br />
were fragile, delicate creatures. By the 1870s, full<br />
skirts gave way to back bustles (fullness <strong>on</strong> the<br />
back of a skirt). The overskirt was pulled up and<br />
attached at the bustle to expose the l<strong>on</strong>g underskirt.<br />
Dresses had high necklines and l<strong>on</strong>g, fitted<br />
or leg-of-mutt<strong>on</strong> sleeves.<br />
In the 1890s, young women who worked in<br />
factories and offices began to wear simple skirts<br />
and tailored white blouses, called shirtwaists. The<br />
style was called the Gibs<strong>on</strong> girl look, named after<br />
illustrati<strong>on</strong>s drawn by Charles Dana Gibs<strong>on</strong>, an<br />
American artist. This and other fashi<strong>on</strong>s of the<br />
nineteenth century are shown in Fig. 5-9.<br />
INFLUENCES ON FASHION<br />
HISTORY<br />
Throughout history, trade, politics, religi<strong>on</strong>,<br />
and technology have influenced fashi<strong>on</strong>. Each has<br />
brought distinctive changes.<br />
Trade<br />
As societies traded goods with each other, they<br />
also exchanged ideas that influenced their clothing.<br />
Sailors and merchants brought back fabrics<br />
and trimmings to their own countries. Soldiers<br />
5-9<br />
How do these fashi<strong>on</strong>s<br />
of the nineteenth century differ<br />
from those of the preceding<br />
century?<br />
returning from foreign wars told how others lived<br />
and dressed. Missi<strong>on</strong>aries taught their European<br />
clothing customs to others. The twelfth-century<br />
Crusaders opened trade routes to Western<br />
Europe, the Middle East, and the Orient.<br />
CHAPTER 5 Fashi<strong>on</strong> History • 85
5-10<br />
Queen Victoria reigned in England from 1837 to<br />
1901. She influenced the time in many ways, so much so<br />
that the era became known as Victorian England.<br />
The exchange of fashi<strong>on</strong>s was quickened by the<br />
practice of barter, trading without m<strong>on</strong>ey. Goods<br />
were exchanged, al<strong>on</strong>g with ideas and techniques.<br />
A thirteenth-century Spanish merchant might at<br />
first import silks and damasks. As demand for<br />
these fineries grew, a textile manufacturer would<br />
learn how the fabrics were made in order to produce<br />
them in Europe.<br />
Politics and Power<br />
For many centuries, kings, queens, and lesser<br />
nobility set the style. They could afford the luxurious<br />
fashi<strong>on</strong>s made by tailors and dressmakers.<br />
The vast majority of people wore <strong>on</strong>ly what they<br />
could make themselves. Thus, fashi<strong>on</strong> trends<br />
spread slowly.<br />
The most dominant nati<strong>on</strong>s spread their influence<br />
to others. During the Renaissance, when<br />
Spain and Portugal were at the height of power,<br />
86 • UNIT 2 The Fashi<strong>on</strong> World<br />
their fashi<strong>on</strong>s influenced styles throughout<br />
Europe. Since the reign of the powerful and<br />
extravagant Louis XIV, France has been a fashi<strong>on</strong><br />
leader.<br />
With the emergence of the middle class, royalty<br />
and wives of political leaders became fashi<strong>on</strong> leaders.<br />
England’s Queen Victoria popularized fullskirted<br />
dresses supported by hoops and petticoats.<br />
See Fig. 5-10. France’s Empress Eugénie introduced<br />
the bolero jacket, felt hat, and Scottish tartan.<br />
Meanwhile, Asian and African societies were<br />
thriving. European traders returned from Asia<br />
with beautiful silk fabrics. The styles of ancient<br />
Egypt were fashi<strong>on</strong>able after Napole<strong>on</strong>’s campaigns<br />
in Northern Africa.<br />
Religi<strong>on</strong><br />
Clothing can be a statement of religious<br />
beliefs. The sixteenth century Reformati<strong>on</strong> movement<br />
in Germany, Switzerland, Holland, and<br />
England encouraged dark colors, simple styles,<br />
and little decorati<strong>on</strong>. This was in sharp c<strong>on</strong>trast<br />
to the splendor of the Renaissance in France,<br />
Spain, and Italy.<br />
The English Puritans believed in humility and<br />
simplicity in life. They chose very plain clothing<br />
styles to show that they didn’t c<strong>on</strong>form to worldly<br />
standards.<br />
Technology<br />
From the first stitches that pieced together animal<br />
skins, people have used technology to change<br />
and improve fabrics and clothing. Technology,<br />
which uses scientific knowledge to develop something<br />
new, has had great influence <strong>on</strong> fashi<strong>on</strong>.<br />
For most of human history, making clothes<br />
was labor intensive. See Fig. 5-11 <strong>on</strong> page 88.<br />
Materials were limited to natural fibers. New<br />
clothes were time-c<strong>on</strong>suming to make and<br />
expensive to buy, so most people used a garment<br />
until it wore out. The Industrial Revoluti<strong>on</strong><br />
would change all that.<br />
The Industrial Revoluti<strong>on</strong><br />
Around 1760 Scottish inventor James Watt<br />
developed the steam engine and began what is
Technology Trends<br />
>>EARLY INVENTIONS<br />
Throughout fashi<strong>on</strong> history, inventi<strong>on</strong>s<br />
have revoluti<strong>on</strong>ized the producti<strong>on</strong> of<br />
yarns, fabrics, and garments.<br />
• Flying shuttle. Invented in 1733 by John<br />
Kay, an Englishman, the flying shuttle<br />
could be released from a box <strong>on</strong> <strong>on</strong>e side<br />
of the loom and “fly” across the loom to<br />
a box <strong>on</strong> the other side.<br />
• Spinning jenny. Developed in 1767 by<br />
Englishman James Hargreaves, this tool<br />
was named in h<strong>on</strong>or of his wife. The spinning<br />
jenny had eight spindles so eight<br />
yarns could be spun at the same time.<br />
• Cott<strong>on</strong> gin. This inventi<strong>on</strong> of Eli Whitney<br />
in 1793 separated cott<strong>on</strong> fibers from the<br />
seeds. As a result, much more cott<strong>on</strong><br />
fabric could be produced.<br />
known as the Industrial Revoluti<strong>on</strong>—the rapid<br />
changes that resulted from the inventi<strong>on</strong> of<br />
power-driven machines. People could weave fabric<br />
and sew garments a hundred times faster than<br />
working by hand. Well-made clothing cost less to<br />
manufacture and buy, and people could buy<br />
clothes from catalogs and stores.<br />
The Industrial Revoluti<strong>on</strong> also influenced<br />
clothing styles. Earlier, an English gentleman’s<br />
• Spinning mule. Invented in 1797 by<br />
Englishman Samuel Crompt<strong>on</strong>, this<br />
machine could produce as much yarn as<br />
200 hand spinners.<br />
• Sewing machine. In 1845 Elias Howe,<br />
from Bost<strong>on</strong>, devised a practical sewing<br />
machine with a lockstitch similar to<br />
today’s home machines. The Singer<br />
Sewing Machine Company added the<br />
first electric motor to sewing machines<br />
in 1889.<br />
• Paper pattern. A Massachussetts tailor,<br />
Ebenezer Butterick, developed a paper<br />
pattern that his wife used to make his<br />
shirts. By 1865 the Buttericks had<br />
moved to New York City and were selling<br />
paper patterns by mail to customers all<br />
over the world. In 1870 James McCall, a<br />
tailor and author of a system for drafting<br />
patterns, began to manufacture<br />
dress patterns in New York City.<br />
INVESTIGATE<br />
Learn more about these and other similar<br />
inventi<strong>on</strong>s that revoluti<strong>on</strong>ized the clothing<br />
industry. Report your findings to the<br />
class.<br />
clothes were as elaborate as those of an English<br />
lady. Both wore light colors and delicate fabrics.<br />
Machinery in the new factories, however, created<br />
dark and dirty smoke. As a result, middle-class<br />
businessmen began to wear darker colors and<br />
sturdier fabrics.<br />
Development of Factories<br />
The first factories in the United States were<br />
built in New England after 1790. Most were<br />
CHAPTER 5 Fashi<strong>on</strong> History • 87
located in such seaport cities as Bost<strong>on</strong> and New<br />
York. Others were near railroad lines and rivers.<br />
Many were textile mills—dark, noisy, dirty,<br />
unpleasant, and overcrowded places to work.<br />
Cott<strong>on</strong> was shipped from the South to the<br />
northern mills for spinning and weaving into fabric.<br />
The first loom for weaving silk was set up in a<br />
factory in Paters<strong>on</strong>, New Jersey, in 1842. Paters<strong>on</strong><br />
remained the silk center of the world until the<br />
early 1930s.<br />
At first, garment manufacturers employed<br />
women who lived close to the textile mills to sew<br />
garments at home. So<strong>on</strong> factories were established<br />
to make garments. These dark, airless,<br />
uncomfortable, and unhealthful places to work<br />
were sometimes called sweatshops. Most workers<br />
were women and children. See Fig. 5-12.<br />
After the Civil War, people started to build textile<br />
mills in the South to be closer to the cott<strong>on</strong><br />
fields. Then, finished fabrics were shipped to fac-<br />
5-11<br />
Before the Industrial Revoluti<strong>on</strong> and the rise of<br />
factories, fabrics were hand woven <strong>on</strong> small looms, and<br />
garments were sewn by hand. Both processes were timec<strong>on</strong>suming.<br />
88 • UNIT 2 The Fashi<strong>on</strong> World<br />
5-12<br />
to work.<br />
Early garment factories were unpleasant places<br />
tories in the North to be made into garments.<br />
Today, the majority of textile mills in the United<br />
States are still located in the South.<br />
Growth of Ready-to-Wear<br />
The first men’s clothing factory specialized in<br />
making sailor’s uniforms. Sailors, miners, and<br />
pi<strong>on</strong>eers needed simple, durable clothing. They<br />
didn’t want to wait for a tailor to make a garment.<br />
People working in factories were becoming a new<br />
middle class and had more m<strong>on</strong>ey to spend <strong>on</strong><br />
clothing. The market for men’s ready-to-wear<br />
grew very quickly. Ready-to-wear describes clothing<br />
made in advance for sale to any purchaser.<br />
Women’s ready-to-wear grew more slowly.<br />
Fashi<strong>on</strong>s for women changed frequently and were<br />
more difficult to sew. The first ready-to-wear<br />
items for women were simple capes and shawls.<br />
Then, garments that wouldn’t go out of fashi<strong>on</strong><br />
quickly, such as petticoats and underwear, began<br />
to be manufactured.<br />
Shirtwaists, worn in the 1890s by women in<br />
factories and offices, were easy to manufacture in<br />
varied sizes. So<strong>on</strong> many clothing styles were<br />
being manufactured for women. By 1900, New<br />
York City had about 475 shirtwaist factories that<br />
employed over 18,000 workers.<br />
The growth of ready-to-wear created the<br />
growth of large stores. When clothing was still<br />
made at home, people bought their fabric, thread,
How To…<br />
PRESERVE TEXTILES<br />
What do you do with an expensive wedding gown that was worn <strong>on</strong>ly <strong>on</strong>ce? Many brides<br />
save their gown as a sentimental heirloom. Christening gowns, special uniforms, quilts,<br />
and antique linens can also be saved. Some dry cleaners will clean and pack an item in a<br />
special storage c<strong>on</strong>tainer. Make arrangements to inspect the item after cleaning but<br />
before storing. If you want to preserve an item yourself, follow these steps:<br />
1. Clean and repair the item, since<br />
dust, dirt, and stains can damage<br />
fabric over time. Some items<br />
need dry cleaning. Washable<br />
items shouldn’t be<br />
starched or ir<strong>on</strong>ed.<br />
2. Wrap the item in clean,<br />
white, cott<strong>on</strong> cloth, such<br />
as an old sheet or<br />
pillowcase, clean muslin,<br />
or special acid-free<br />
tissue paper. No direct<br />
c<strong>on</strong>tact with wood, cardboard,<br />
regular tissue<br />
paper, or other wrapping<br />
paper should be made,<br />
as these materials c<strong>on</strong>tain<br />
acid that damages<br />
textiles.<br />
3. If folding is needed, pad<br />
folds with clean muslin<br />
or acid-free tissue<br />
paper to prevent fibers<br />
from breaking al<strong>on</strong>g<br />
the folds. As another<br />
opti<strong>on</strong>, loosely roll the<br />
item around an acidfree<br />
cardboard tube or<br />
<strong>on</strong>e that has been<br />
wrapped first with<br />
muslin or white cloth.<br />
4. Store the item flat, if<br />
possible, in an acid-free box<br />
or as the top layer in a<br />
dresser drawer or storage<br />
trunk. Choose a locati<strong>on</strong> with<br />
good air circulati<strong>on</strong> away from<br />
heat, humidity, and sunlight.<br />
Avoid hot attics and damp<br />
basements. Never use airtight<br />
plastic bags or c<strong>on</strong>tainers,<br />
which trap moisture that<br />
causes mold and mildew.<br />
Sturdy items can be hung <strong>on</strong><br />
well-padded hangers with<br />
several layers of polyester<br />
fiberfill. Wrap the entire item<br />
with clean, unbleached muslin.<br />
Once a year examine and<br />
rewrap with fresh materials.<br />
Exploring Textile<br />
Preservati<strong>on</strong><br />
Bring a textile to class and dem<strong>on</strong>strate<br />
the proper preservati<strong>on</strong> storage technique.<br />
If possible, preserve an item that<br />
you want to save.<br />
CHAPTER 5 Fashi<strong>on</strong> History • 89
and ribb<strong>on</strong> at dry-goods stores. As stores began to<br />
sell clothing made in the factories, the stores carried<br />
more merchandise. All shirts were sold in<br />
<strong>on</strong>e area, all trousers in another, and so <strong>on</strong>. By<br />
1850, the department store was born. Special<br />
marketing techniques, such as “sales” and “specials,”<br />
were first used by a large store in Bost<strong>on</strong>.<br />
The method spread quickly. Catalog and mailorder<br />
selling became a popular way to reach people<br />
in rural areas.<br />
Inventi<strong>on</strong> of New Fibers<br />
In 1889, a French chemist created quite a sensati<strong>on</strong><br />
at the Paris Exhibiti<strong>on</strong> with fabrics made<br />
of artificial silk. These were the first fabrics not<br />
made of natural fibers.<br />
For many years, researchers had experimented<br />
with dissolving the fibrous inner bark of mulberry<br />
trees. This produced cellulose, the main<br />
comp<strong>on</strong>ent of such plants as cott<strong>on</strong> and flax.<br />
Creating fibers from the dissolved bark proved<br />
difficult, however. Finally researchers tried forcing<br />
the soluti<strong>on</strong> through fine holes, as a silkworm<br />
does to make silk. This technique produced l<strong>on</strong>g,<br />
threadlike fibers.<br />
In 1910 this new textile fiber was introduced to<br />
the United States; in 1924 it was given a name:<br />
ray<strong>on</strong>. Through technology many new fibers and<br />
fabrics have been developed, making a huge<br />
impact <strong>on</strong> fashi<strong>on</strong>s in the twentieth century.<br />
FASHIONS OF THE<br />
TWENTIETH CENTURY<br />
During the last century, fashi<strong>on</strong> has changed<br />
far more quickly than in the past. Clothing styles<br />
have reflected the changing roles and interests of<br />
men and women.<br />
1900 to 1950<br />
At the turn of the century, times were changing.<br />
By 1912, petticoats were aband<strong>on</strong>ed for l<strong>on</strong>g,<br />
straight skirts. During World War I, more women<br />
worked in shops, offices, and factories, so more<br />
practical clothing developed. Looser garments,<br />
such as sweaters and middy blouses with sailor<br />
collars, became popular.<br />
90 • UNIT 2 The Fashi<strong>on</strong> World<br />
5-14<br />
1930s<br />
5-13<br />
The look<br />
of the 1920s was<br />
marked by a<br />
straight silhouette,<br />
dropped<br />
waist, and<br />
shorter skirt<br />
length. Hair was<br />
bobbed and covered<br />
by a domed<br />
hat called a<br />
cloche.<br />
Garments of the<br />
After World War I, people’s excitement showed<br />
in their fashi<strong>on</strong>s. The “flapper dress” of the 1920s<br />
was straight and short, adorned with fringe or<br />
flounces, and worn with a l<strong>on</strong>g string of beads.<br />
See Fig. 5-13. By the 1930s, women became active<br />
in sports. They began wearing wide trousers and
5-15<br />
During the<br />
1940s, garments for<br />
both men (top left)<br />
and women (top right)<br />
featured padded<br />
shoulders.<br />
5-16<br />
Garments of<br />
the 1950s included<br />
these styles.<br />
above-the-knee shorts to participate in these<br />
events. Evening gowns were l<strong>on</strong>g, formfitting,<br />
and often cut <strong>on</strong> the bias. See Fig. 5-14.<br />
By comparis<strong>on</strong>, men’s clothing went almost<br />
unchanged in this same period. Both single- and<br />
double-breasted suits were popular. By 1940,<br />
both men and women wore tailored suits with<br />
broad, padded shoulders. See Fig. 5-15.<br />
During World War II, a shortage of fabric<br />
occurred because so many textiles were used for<br />
military uniforms and equipment. Women’s<br />
skirts became slimmer and shorter, due to fabric<br />
rati<strong>on</strong>ing. Nyl<strong>on</strong> stockings were almost impossible<br />
to get, so women wore cott<strong>on</strong> stockings. Slacks<br />
and jumpsuits became the standard work clothes<br />
for women as they replaced men in factories.<br />
After World War II, styles changed radically.<br />
People were tired of the clothes they had worn<br />
during the war. Fabric was easily available again.<br />
Christian Dior, a French designer, introduced the<br />
“New Look” for women. Almost overnight,<br />
women started to wear dresses and suits with very<br />
full, l<strong>on</strong>g skirts.<br />
The 1950s<br />
The 1950s saw fashi<strong>on</strong>s influenced by designers,<br />
movies, and televisi<strong>on</strong> shows. See Fig. 5-16.<br />
Dior introduced the A-line silhouette for women.<br />
Full skirts were worn with crinolines and paired<br />
with sweater sets. Pants were rolled up or cropped<br />
for casual wear.<br />
Men’s fashi<strong>on</strong>s featured the gray flannel business<br />
suit—single-breasted and loosely fitted, with<br />
narrow lapels and natural shoulders. It was worn<br />
with a butt<strong>on</strong>-down oxford shirt and a narrow,<br />
striped tie for the Ivy League look. Dress shirts<br />
could be pale blue or yellow, instead of <strong>on</strong>ly white.<br />
The T-shirt came out from under the dress<br />
shirt, influenced by actors Marl<strong>on</strong> Brando and<br />
James Dean. This former undershirt was now<br />
worn <strong>on</strong> its own with blue jeans. Leather jackets<br />
and the pompadour hairstyle of Elvis Presley<br />
became popular with young men. Young women<br />
wore a man’s shirt over a pair of cuffed jeans.<br />
Saddle shoes or white bucks completed the look.<br />
The 1960s<br />
In the 1960s, the influence of fashi<strong>on</strong> designers<br />
declined. They were replaced by cultural events,<br />
such as the Beatles, Woodstock, and rock c<strong>on</strong>certs.<br />
First Lady Jacqueline Kennedy became an<br />
important fashi<strong>on</strong> leader for women, popularizing<br />
the Chanel suit and pillbox hat.<br />
Many young men started wearing colorful fabrics<br />
and jewelry. So<strong>on</strong> men of all ages wore mul-<br />
CHAPTER 5 Fashi<strong>on</strong> History • 91
5-17 During the 1960s, females wore<br />
short skirts and males wore jackets with<br />
wide lapels.<br />
ticolored, striped or checked shirts with their<br />
business suits. Jacket lapels widened and pants<br />
were flared or bell-bottomed. Men grew l<strong>on</strong>g<br />
sideburns, mustaches, or beards to go with l<strong>on</strong>ger<br />
hair lengths.<br />
Women’s fashi<strong>on</strong>s focused <strong>on</strong> the miniskirt,<br />
which kept rising throughout the decade.<br />
See Fig. 5-17. Pantyhose were introduced, and<br />
boots became the “in” accessory. Sleeveless, A-line<br />
dresses were worn year round.<br />
African-Americans rediscovered traditi<strong>on</strong>al<br />
African garments made of kente cloth. Afro hairstyles<br />
and cornrow braids were widely worn by<br />
both men and women. The 1960s also saw the<br />
hippie look for males and females. Jeans and<br />
shirts were decorated with patches, paint, and<br />
embroidery.<br />
The 1970s<br />
By 1970, the midi- and maxi-length skirts were<br />
introduced. These l<strong>on</strong>ger lengths flopped as<br />
92 • UNIT 2 The Fashi<strong>on</strong> World<br />
5-18<br />
Pantsuits for women and the<br />
unisex look were both part of the<br />
fashi<strong>on</strong> scene in the 1970s.<br />
women refused to be dictated to by designers.<br />
Instead, women turned more and more to<br />
pantsuits, which slowly gained acceptance for all<br />
occasi<strong>on</strong>s. See Fig. 5-18.<br />
The unisex look was very popular throughout<br />
the 1970s. Men and women wore the same styles<br />
in the same fabrics and colors. Women wore<br />
pantsuits, styled like menswear, with a tailored<br />
shirt and necktie, to the office.<br />
The two-piece, polyester leisure suit gained<br />
popularity with men. It c<strong>on</strong>sisted of slacks and a<br />
jacket with a large collar and topstitching. A<br />
bright floral shirt was usually worn without a tie.<br />
The shirt collar rolled over the jacket collar for a<br />
casual look.<br />
Jeans became very fashi<strong>on</strong>able. T-shirts had slogans<br />
printed <strong>on</strong> the fr<strong>on</strong>t. Hip hugger pants were<br />
worn. The layered look featured several pieces of<br />
clothing worn <strong>on</strong>e <strong>on</strong> top of the other. Such<br />
movies as Grease, Annie Hall, and Saturday Night<br />
Fever created popular looks.
The 1980s<br />
Women’s clothes in the 1980s featured broad,<br />
padded shoulders. Skirt lengths ranged from l<strong>on</strong>g<br />
to short; pants legs could be wide or narrow.<br />
An increase in female executives created the<br />
need for women’s business suits that were equal<br />
to men’s in quality and design. The result was the<br />
power suit—a tailored jacket and medium-length<br />
skirt worn over a tailored blouse.<br />
Designer jeans became a status symbol. Warmup<br />
suits were worn for jogging and for streetwear.<br />
The standard outfit for young people c<strong>on</strong>sisted of<br />
jeans, a shirt or sweater, and athletic shoes. Styles<br />
were influenced by entertainers, including<br />
Mad<strong>on</strong>na, Prince, and Michael Jacks<strong>on</strong>.<br />
Fashi<strong>on</strong> trends emerged from around the<br />
world. Italian designers c<strong>on</strong>tributed superbly tailored<br />
suits. Japan offered uniquely layered<br />
designs. England’s Princess Diana set trends with<br />
her haircut and clothing. Televisi<strong>on</strong> began to<br />
influence fashi<strong>on</strong>. Dallas popularized elegant<br />
clothing, especially for women. For men, Miami<br />
Vice popularized leisurewear that featured blazers<br />
over T-shirts, linen pants, pastel colors, and<br />
loafers without socks.<br />
The 1990s<br />
In this decade, fashi<strong>on</strong>s for both men and<br />
women became more natural in shape. Styles<br />
ranged from baggy pants to tight leggings and<br />
from oversized shirts to skinny tops. No l<strong>on</strong>ger<br />
did <strong>on</strong>e style dominate.<br />
Styles from past decades re-emerged.<br />
C<strong>on</strong>sumers were attracted to updated versi<strong>on</strong>s of<br />
the fitted jackets from the 1950s, sheath dresses<br />
from the 1960s, and wrap dresses and hip hugger<br />
pants from the 1970s. See Fig. 5-19.<br />
Casual business attire created a new clothing<br />
category for men. Many companies permitted<br />
men to wear khakis or slacks with a shirt and no<br />
tie to the office.<br />
Leisurewear c<strong>on</strong>sisted of jeans, leather jackets,<br />
and work shoes—often worn with a baseball cap.<br />
The hip-hop style, with baggy pants and a T-shirt,<br />
appealed to many young people.<br />
5-19<br />
Updated versi<strong>on</strong>s of styles from past decades<br />
caught c<strong>on</strong>sumer attenti<strong>on</strong> in the 1990s and bey<strong>on</strong>d.<br />
The 2000s and Bey<strong>on</strong>d<br />
In the early part of the decade, the trend c<strong>on</strong>tinued<br />
toward more casual clothing. Both males<br />
and females dressed less formally for school,<br />
work, travel, parties, and recreati<strong>on</strong>. People<br />
wanted comfortable clothes that could be worn at<br />
work and at home.<br />
Jeans were a staple in most wardrobes, regardless<br />
of the pers<strong>on</strong>’s age. Slashed jeans, jeans with<br />
distressed finishes, and bared midriffs became<br />
popular with many young people.<br />
Toward the middle of the decade, people began<br />
mixing formal and casual styles. For example, the<br />
boxy, tweed cardigan suit jackets—originally created<br />
by the French designer Coco Chanel in<br />
1925—became popular again. This time they were<br />
worn with jeans or an unmatched skirt. Other<br />
items from previous decades, such as tiered skirts,<br />
soft dresses, and cropped pants were revived.<br />
New styles are always <strong>on</strong> the horiz<strong>on</strong>. What<br />
trends do you think will mark the next decade?<br />
CHAPTER 5 Fashi<strong>on</strong> History • 93
CHAPTER 5<br />
CHAPTER SUMMARY<br />
• Earliest garments were woven or sewn<br />
from native plants and animals to protect<br />
against the local climate.<br />
• Ancient Greeks and Romans formed<br />
garments by draping or wrapping fabric.<br />
• From the 1500s to the 1700s, the elaborate<br />
styles and rich fabrics of the wealthy<br />
classes and nobility were fashi<strong>on</strong>able.<br />
• Garments changed gradually between the<br />
Renaissance and the French Revoluti<strong>on</strong>.<br />
• Fashi<strong>on</strong>s have been influenced by trade,<br />
politics, and other societal forces, including<br />
the Industrial Revoluti<strong>on</strong>.<br />
• Throughout the twentieth century, fashi<strong>on</strong>s<br />
have grown more casual, with many<br />
reflecting pers<strong>on</strong>al tastes.<br />
USING KEY TERMS<br />
Write the Key Terms <strong>on</strong> a sheet of paper. Then<br />
explain how each <strong>on</strong>e influenced the history<br />
of fashi<strong>on</strong>. Include specific examples.<br />
94 • UNIT 2 The Fashi<strong>on</strong> World<br />
Review<br />
RECALLING THE FACTS<br />
1. From what materials did the earliest<br />
human beings make their clothing?<br />
2. Describe two ways that the Romans<br />
adapted Greek styles.<br />
3. Why did the upper classes of the Middle<br />
Ages pass sumptuary laws?<br />
4. Describe a comm<strong>on</strong> garment of Japanese<br />
men and women in the 700s.<br />
5. How did women’s dresses change<br />
between the fifteenth and the seventeenth<br />
centuries?<br />
6. How did dress reflect people’s feelings<br />
during and after the French Revoluti<strong>on</strong>?<br />
7. How can trade influence clothing and<br />
fashi<strong>on</strong>?<br />
8. How did the Industrial Revoluti<strong>on</strong> affect<br />
the fashi<strong>on</strong> and clothing industry?<br />
9. How did the rise of ready-to-wear change<br />
the way people bought clothes?<br />
10. Briefly, how did women’s fashi<strong>on</strong>s change<br />
between 1900 and 1930?<br />
11. C<strong>on</strong>trast the styles favored by young<br />
men and businessmen in the 1950s.<br />
12. Describe four major developments in<br />
fashi<strong>on</strong> in the 1960s.<br />
13. Describe three fashi<strong>on</strong> trends of the<br />
1970s.<br />
14. Give examples of the casual fashi<strong>on</strong>s of<br />
the 1980s and 1990s.
CHAPTER 1<br />
and Activities<br />
THINKING CRITICALLY<br />
1. How were fashi<strong>on</strong>s of ancient Greece and<br />
Rome similar to those in China and<br />
Japan at that time? How were they<br />
different?<br />
2. Why do you think most of today’s garments<br />
are fitted rather than draped?<br />
3. Compare the types of clothes that were<br />
fashi<strong>on</strong>able during the Renaissance with<br />
those of today. Why do you think they<br />
are so different?<br />
APPLYING KNOWLEDGE<br />
1. Draped designs. With another classmate,<br />
design a draped or wrapped garment<br />
using a square or rectangular piece of<br />
fabric. Dem<strong>on</strong>strate and model your<br />
design.<br />
2. History parade. Imagine that the historical<br />
society has asked your class to plan a<br />
fashi<strong>on</strong> show, “Through the Ages.” Work<br />
with classmates to plan the fashi<strong>on</strong>s and<br />
write the script.<br />
3. More fashi<strong>on</strong>s. Research fashi<strong>on</strong>s of a<br />
time or place not discussed in the chapter.<br />
What, for example, was the Baroque<br />
style of dress? The Regency? When and<br />
why was the Amalia dress popular?<br />
4. Fashi<strong>on</strong> PowerPoint ® . Create a<br />
PowerPoint presentati<strong>on</strong> of fashi<strong>on</strong>s<br />
from <strong>on</strong>e decade of the 20th century.<br />
Show your presentati<strong>on</strong> to the class.<br />
5. Fashi<strong>on</strong> favorites. People often find the<br />
fashi<strong>on</strong>s of a certain era or locati<strong>on</strong><br />
appealing. If you had lived at a time or<br />
place when fashi<strong>on</strong>s were quite different,<br />
which would you choose? Write an essay<br />
describing your fashi<strong>on</strong> favorite and why<br />
you chose it.<br />
MAKING>
CHAPTER 6<br />
Fashi<strong>on</strong> Styles<br />
OBJECTIVES<br />
• Define fashi<strong>on</strong><br />
terms, including<br />
style, classic, fad,<br />
avant-garde, retro,<br />
and vintage.<br />
• Describe a fashi<strong>on</strong><br />
cycle.<br />
• Explain fashi<strong>on</strong><br />
swings.<br />
• Distinguish<br />
between styles of<br />
necklines, collars,<br />
and sleeves.<br />
• Identify styles of<br />
dresses, shirts,<br />
skirts, pants,<br />
jackets, and coats.<br />
KEY TERMS<br />
avant-garde<br />
classics<br />
cowl<br />
fad<br />
fashi<strong>on</strong><br />
fashi<strong>on</strong> cycle<br />
kim<strong>on</strong>o sleeve<br />
raglan sleeve<br />
retro<br />
set-in sleeve<br />
style<br />
vintage<br />
96 • UNIT 2 The Fashi<strong>on</strong> World
EXAMINETHISISSUE<br />
Changing fashi<strong>on</strong>s. As you probably<br />
already know, fashi<strong>on</strong> styles come<br />
and go. “Just when I get used to something<br />
new and start to wear it,” <strong>on</strong>e pers<strong>on</strong><br />
said, “it’s out-of-date.” In c<strong>on</strong>trast,<br />
many people love the quick fashi<strong>on</strong><br />
changes. They look forward to wearing<br />
something different and d<strong>on</strong>’t mind<br />
spending m<strong>on</strong>ey <strong>on</strong> the latest fashi<strong>on</strong>s.<br />
What do you think?<br />
Do you like the pace of change in fashi<strong>on</strong>s,<br />
or would you like it to be slower?<br />
Why do you think people have different<br />
opini<strong>on</strong>s <strong>on</strong> this questi<strong>on</strong>?<br />
Never before have so many clothing<br />
choices been available to you. Surprisingly,<br />
a small number of basic garment<br />
styles are the springboards for hundreds of variati<strong>on</strong>s<br />
today. Styles you see in stores and magazines<br />
have colors, patterns, textures, and unique<br />
features added to the basics. Whether you like<br />
jeans and a T-shirt or feathers and glitter, most<br />
garments embody the styles you’ll read about in<br />
this chapter.<br />
WHAT IS FASHION?<br />
Fashi<strong>on</strong> is the particular style that is popular<br />
at a given time. Anything that’s “in” is part of current<br />
fashi<strong>on</strong>. Fashi<strong>on</strong> usually means clothes, but<br />
there are fashi<strong>on</strong>s in hairstyles, home decorati<strong>on</strong>,<br />
and even foods. See Fig. 6-1. While few people ate<br />
yogurt years ago, this dairy item has become quite<br />
a “fashi<strong>on</strong>able” food choice today.<br />
Fashi<strong>on</strong> Terms<br />
When thinking about fashi<strong>on</strong>, some interesting<br />
questi<strong>on</strong>s come to mind. Why does an outfit<br />
you couldn’t wait to buy last year look old to you<br />
now? Why do the clothes in pictures of your parents<br />
as teens look old-fashi<strong>on</strong>ed, yet some of the<br />
clothes your grandparents wore seem more<br />
attractive? Why do some fashi<strong>on</strong>s last much<br />
l<strong>on</strong>ger than others? To answer these questi<strong>on</strong>s,<br />
you need to understand some basic fashi<strong>on</strong><br />
terms.<br />
Style<br />
When her friend admired a dress in a store<br />
window, <strong>on</strong>e teen commented, “That style would<br />
look great <strong>on</strong> you!” Style refers to the characteristics<br />
that distinguish <strong>on</strong>e particular item of<br />
clothing from another. Jeans are a specific style of<br />
pants. Straight, A-line, and circular are all skirt<br />
styles. Set-in, raglan, and kim<strong>on</strong>o are all styles of<br />
sleeves.<br />
In this chapter, you’ll learn to recognize these<br />
and many other garment styles. Some styles may<br />
6-1<br />
Hairstyles and hair accessories are subject to<br />
fashi<strong>on</strong> too. Who knows? This interesting style of the past<br />
could be back in fashi<strong>on</strong> someday.<br />
CHAPTER 6 Fashi<strong>on</strong> Styles • 97
How To…<br />
WRITE FASHION COPY<br />
“I like to write, but I’ve never written about fashi<strong>on</strong>s before,” a high school student said<br />
when talking about his latest assignment. In preparing to write the script for a student<br />
fashi<strong>on</strong> show, he w<strong>on</strong>dered just what the task would take.<br />
Whether writing a script or producing ads,<br />
catalog copy, press releases, or reports, fashi<strong>on</strong><br />
writers focus <strong>on</strong> “what’s new” in fashi<strong>on</strong>.<br />
They describe fashi<strong>on</strong>s, sometimes evaluate<br />
them, and often motivate c<strong>on</strong>sumers to buy.<br />
With a good fashi<strong>on</strong> vocabulary, a writer can<br />
accurately describe styles, fabrics, colors, and<br />
details. Descriptive words add flair and drama<br />
to the message. When copy space is limited,<br />
the writing must be creative, simple, and<br />
brief.<br />
Persuasive copy must appeal and c<strong>on</strong>vince.<br />
First, it catches the reader’s attenti<strong>on</strong> with a<br />
statement or perhaps a questi<strong>on</strong>. Next, it<br />
answers the reader’s questi<strong>on</strong>, “What’s in it<br />
for me?” Finally, it motivates the reader to<br />
resp<strong>on</strong>d.<br />
Here are some tips for writing effective fashi<strong>on</strong><br />
copy.<br />
• Become familiar with the product, the<br />
designer or manufacturer, the store, and the<br />
targeted customer. The more a writer knows,<br />
the more effective the writing.<br />
• Understand the purpose or objective to<br />
express it clearly.<br />
Exploring Fashi<strong>on</strong><br />
Writing<br />
Try your hand at fashi<strong>on</strong> writing. Choose<br />
a fashi<strong>on</strong> style that’s new. Then write a<br />
fashi<strong>on</strong> magazine article that introduces<br />
the look to the public.<br />
98 • UNIT 2 The Fashi<strong>on</strong> World<br />
• Use familiar words in creative and clever<br />
ways.<br />
• D<strong>on</strong>’t overuse “in” words, current idioms, or<br />
catchy phrases.<br />
• Be h<strong>on</strong>est. Write copy that’s believable and<br />
credible.<br />
• Avoid too much copy. Most readers want<br />
just the facts, not a l<strong>on</strong>g dissertati<strong>on</strong>.<br />
• Create interest and excitement. Make the<br />
copy come alive.
6-2<br />
Some styles are c<strong>on</strong>sidered classics. Why do<br />
you think people are often willing to spend more for a<br />
classic?<br />
be very fashi<strong>on</strong>able today. Others may be outdated<br />
this year, but “in” the next. Such is the everchanging<br />
world of fashi<strong>on</strong>.<br />
Classic<br />
Certain styles stay in fashi<strong>on</strong> for a l<strong>on</strong>g time.<br />
These are known as classics. Styles that become<br />
classics are usually simpler and less innovative<br />
than others.<br />
The navy blue blazer jacket is a classic. See Fig.<br />
6-2. Although the blazer may feature narrow<br />
lapels with metal butt<strong>on</strong>s <strong>on</strong>e year and wide<br />
lapels with navy butt<strong>on</strong>s a year later, the basic<br />
blazer style never dies.<br />
Many other styles have also become classics.<br />
Blue jeans and the tailored shirt are both classics.<br />
Other examples are polo shirts, turtleneck<br />
sweaters, cardigan sweaters, sweatshirts, trench<br />
coats, and tuxedos. Classic accessories are the<br />
pearl necklace, loafer shoes, and clutch purse.<br />
These styles have been around for years. Do you<br />
have clothing that would be c<strong>on</strong>sidered classic?<br />
Fad<br />
Some fashi<strong>on</strong>s are “here today and g<strong>on</strong>e<br />
tomorrow.” A fashi<strong>on</strong> that is very popular for<br />
<strong>on</strong>ly a short time is called a fad. A color, such as<br />
mauve or chartreuse, can be a fad. Such accessories<br />
as rhinest<strong>on</strong>e jewelry and platform shoes<br />
can be too. See Fig. 6-3. Fads in clothing are comm<strong>on</strong>.<br />
Short miniskirts, cropped tops, slashed<br />
jeans, and low-slung, baggy pants are examples.<br />
Fad items are often less expensive than others.<br />
For example, “pop-it” plastic necklaces and cinch<br />
belts were fads in the 1950s. White go-go boots<br />
and Nehru jackets, named for India’s prime minister,<br />
swept in and out of fashi<strong>on</strong> in the 1960s.<br />
Hot pants and leisure suits were worn in the<br />
1970s. The 1980s saw fluorescent socks, leg<br />
warmers, and pouf skirts. In the 1990s, people of<br />
all ages wore boxer shorts as outerwear.<br />
During the 2000s, young people often mixed<br />
dressy and casual items in the same outfit.<br />
6-3<br />
Fads d<strong>on</strong>’t last l<strong>on</strong>g, but sometimes they reap-<br />
pear as a new, revised versi<strong>on</strong> of an old idea. Although<br />
these shoes are from the past, do they look familiar?<br />
CHAPTER 6 Fashi<strong>on</strong> Styles • 99
6-4<br />
Part of the fun of wearing authentic retro<br />
clothes comes with finding them. Where else might<br />
you find such garments?<br />
Examples include untucked shirts with tailored<br />
blazers, sheepskin boots with summer<br />
dresses, and flip-flops with almost any type of<br />
outfit.<br />
Sometimes a fad returns when discovered by<br />
another generati<strong>on</strong>. Platform shoes, headbands,<br />
and ribb<strong>on</strong> belts go in and out of fashi<strong>on</strong>. Mood<br />
rings, popular with young people in the 1970s,<br />
came back again in the 1990s. Large plaids, flower<br />
prints, and tie-dye prints from the 1970s reappeared<br />
in the late 1990s. Charm bracelets and<br />
pencil skirts from the 1950s were rediscovered in<br />
the 2000s.<br />
Many fads, such as wearing slashed jeans or<br />
untied shoelaces, are popular mainly with teens.<br />
100 • UNIT 2 The Fashi<strong>on</strong> World<br />
Fads help teens express two important needs: to<br />
feel a sense of bel<strong>on</strong>ging am<strong>on</strong>g peers and to<br />
express individuality. You can probably point out<br />
current fads that serve these purposes for teens.<br />
Avant-Garde<br />
In the clothing industry avant-garde (ahvahn-GARD)<br />
is a French expressi<strong>on</strong> that means<br />
ahead of fashi<strong>on</strong>. Clothes described this way are<br />
daring and unc<strong>on</strong>venti<strong>on</strong>al. Because they’re “far<br />
out,” they d<strong>on</strong>’t appeal to most people. Certain<br />
avant-garde features, however, may become generally<br />
accepted after a few years.<br />
Some people choose clothing, hair, and<br />
makeup styles that are avant-garde. These styles<br />
call attenti<strong>on</strong> to the wearer. Cut-out clothing,<br />
green or orange hair, and black lipstick are examples<br />
of avant-garde looks.<br />
Retro and Vintage<br />
Like the line from a s<strong>on</strong>g, “<strong>Everything</strong> old is<br />
new again,” an old-fashi<strong>on</strong>ed look can be revived.<br />
The term retro refers to styles of an earlier time<br />
that come back into fashi<strong>on</strong>. Clothing styles from<br />
the 1950s, 1960s, 1970s, and 1980s can be seen in<br />
recent fashi<strong>on</strong>s. Examples include Capri pants,<br />
wrap dresses, wide leather belts, tube dresses, and<br />
ballet flats.<br />
Some people prefer wearing original clothes,<br />
not updated versi<strong>on</strong>s. This type of clothing is<br />
referred to as vintage. Thrift shops and attics are<br />
popular sources for vintage garments. See Fig. 6-4.<br />
Vintage garments are not necessarily inexpensive.<br />
In recent years, vintage evening gowns worth<br />
many thousands of dollars are worn by celebrities<br />
at red-carpet award events.<br />
T-shirts that were created for a particular event<br />
or performance, such as a music festival, c<strong>on</strong>cert<br />
tour, or sporting event, can be purchased in many<br />
places, including the Internet. If they were made<br />
at the time of the event, they are vintage T-shirts.<br />
If they are made from the original designs, but<br />
produced some time after the original event, they<br />
are retro T-shirts. Be sure to read the product<br />
informati<strong>on</strong> and ask questi<strong>on</strong>s so that you know<br />
what you are buying.
Increasing<br />
interest and<br />
sales<br />
6-5<br />
Fashi<strong>on</strong> Cycles<br />
Every fashi<strong>on</strong> has a fashi<strong>on</strong> cycle as it is introduced,<br />
grows, matures, and declines. See Fig. 6-5.<br />
Some fashi<strong>on</strong> cycles are very short-lived, such as<br />
those for fads. Others take a l<strong>on</strong>g time before<br />
their popularity declines. Classics, for example,<br />
have very l<strong>on</strong>g fashi<strong>on</strong> cycles. Recognizing the<br />
different stages of a fashi<strong>on</strong> cycle is important to<br />
both store buyers and c<strong>on</strong>sumers.<br />
• Introducti<strong>on</strong> stage. A fashi<strong>on</strong> is born when<br />
it’s worn for the first time. Models, celebrities,<br />
and others who like to wear the latest designs<br />
introduce the garment to the public. Most new<br />
fashi<strong>on</strong>s are introduced in small quantities at<br />
higher prices.<br />
• Growth stage. As interest in a fashi<strong>on</strong> builds<br />
and people gradually accept it, variati<strong>on</strong>s are<br />
sold at lower prices.<br />
• Maturity stage. When many people wear a<br />
fashi<strong>on</strong>, it reaches the peak of its popularity.<br />
The style is produced in large quantities at<br />
prices that most c<strong>on</strong>sumers can afford.<br />
Stages of a Fashi<strong>on</strong> Cycle<br />
Introducti<strong>on</strong><br />
Growth<br />
Time<br />
Maturity<br />
Decline<br />
Decreasing<br />
interest and<br />
sales<br />
A style moves through stages from the time it is introduced until c<strong>on</strong>-<br />
sumer interest in the style ends. The time lapse for this cycle is not the same for<br />
every style.<br />
• Decline stage. Eventually, people tire of a<br />
particular style. Although they may c<strong>on</strong>tinue<br />
to wear it, sales rapidly decline. Remaining<br />
items are reduced in price. The style starts to<br />
look old-fashi<strong>on</strong>ed. Usually the decline stage is<br />
shorter than the introducti<strong>on</strong> stage.<br />
Fashi<strong>on</strong> Swings<br />
Although basic styles of clothes and accessories<br />
remain the same, certain details change according<br />
to fashi<strong>on</strong>. Skirt lengths go up or down, and jackets<br />
become l<strong>on</strong>ger or shorter. Sometimes jacket<br />
lapels are wide; other times they’re narrow. Rather<br />
than introducing a brand new fashi<strong>on</strong>, many<br />
designers change styling details from seas<strong>on</strong> to<br />
seas<strong>on</strong> to create “fresh” looks.<br />
Few examples dem<strong>on</strong>strate fashi<strong>on</strong> swings better<br />
than the yo-yo acti<strong>on</strong> of skirt lengths. Until<br />
World War I, floor length was fashi<strong>on</strong>able for<br />
every woman and every occasi<strong>on</strong>. During the<br />
1920s, hems rose to the knees. In the 1930s, they<br />
fell to the calf. With fabric in short supply during<br />
CHAPTER 6 Fashi<strong>on</strong> Styles • 101
6-6 Skirts and pants can be almost any length, depending <strong>on</strong> fashi<strong>on</strong> and pers<strong>on</strong>al preference. Which lengths are<br />
currently fashi<strong>on</strong>able?<br />
World War II, knee length returned. In the 1960s,<br />
a variety of fashi<strong>on</strong> lengths were introduced—<br />
mini, midi (midcalf), and maxi. Since then, many<br />
different lengths c<strong>on</strong>tinue to be popular at the<br />
same time.<br />
Like skirts, pant lengths have been through<br />
fashi<strong>on</strong> swings. See Fig. 6-6. Even when fashi<strong>on</strong><br />
brings back a particular length, the name for the<br />
style may be different. For example, in the 1990s,<br />
the cropped pants of earlier times came back into<br />
fashi<strong>on</strong>. Over the years, these pants, which fall<br />
between the knee and ankle, have been called<br />
clam diggers, Capri pants, toreador pants, and<br />
pedal pushers. The name could be something else<br />
the next time around. See Fig. 6-7.<br />
102 • UNIT 2 The Fashi<strong>on</strong> World<br />
Mini<br />
Short<br />
Above the Knee<br />
Knee Length<br />
Below the Knee<br />
Calf<br />
Tea Length<br />
Maxi<br />
Ankle<br />
Evening<br />
Floor<br />
Bikini<br />
Short Shorts<br />
Shorts<br />
Bermuda Shorts<br />
Pedal Pushers<br />
Gaucho Pants<br />
Cropped Pants<br />
Classic Length<br />
Fashi<strong>on</strong> details in trousers and pants also<br />
swing back and forth. Trouser tops are sometimes<br />
tight across the hips. At other times they have<br />
pleats for added fullness. The width of pant legs<br />
can change from wide to medium to narrow, and<br />
then back again. Sometimes trouser legs have<br />
cuffs and sometimes they’re plain.<br />
Men’s neckties are another good example of<br />
fashi<strong>on</strong> swings. In the 1940s, very wide ties balanced<br />
the wide lapels <strong>on</strong> double-breasted suits.<br />
When Ivy League suits were stylish in the 1960s,<br />
ties became very skinny, and diag<strong>on</strong>al stripes<br />
were popular. As suits with wider lapels came<br />
back again in the mid-1970s, ties got wider too.<br />
See Fig. 6-8. In the 1980s, they narrowed to a<br />
medium width, with stripes, tiny prints, and dark
colors. Later, in the early 1990s, wider ties<br />
returned, with more color. Fabrics featured flowers,<br />
carto<strong>on</strong> characters, and other bold designs.<br />
By the late 1990s, solid-color ties, often the same<br />
color as the shirt, were worn. These changes usually<br />
happen gradually, although a new “look” may<br />
suddenly become popular.<br />
6-7<br />
Pants that fall between the knee and ankle have<br />
been in and out of fashi<strong>on</strong> over the years. What else have<br />
cropped pants been called?<br />
6-8<br />
Fashi<strong>on</strong>s change for many reas<strong>on</strong>s. Designers<br />
want to create something new, manufacturers want to<br />
sell something new, and people want to wear something<br />
new. Why do you think the cycle of change is faster today<br />
than it used to be?<br />
FASHION FEATURES<br />
Not every fashi<strong>on</strong> detail is used by designers<br />
every seas<strong>on</strong>. A certain type of collar may appear<br />
<strong>on</strong> many garments <strong>on</strong>e year; the next year<br />
another style is popular. Garment features—<br />
necklines, collars, and sleeves—can be combined<br />
to create many different looks. Some combinati<strong>on</strong>s,<br />
however, are more pleasing and practical<br />
than others.<br />
Neckline Styles<br />
The neckline is the area around the neck and<br />
shoulders. Before the twentieth century, garments<br />
CHAPTER 6 Fashi<strong>on</strong> Styles • 103
Jewel/Round Scoop U-Neck V-Neck Square Crew<br />
Boat/Bateau Cowl Sweetheart Keyhole Halter Off-the-Shoulder<br />
6-9<br />
Neckline Styles<br />
from the same period all had similar necklines.<br />
Today many different types appear in a seas<strong>on</strong>.<br />
You’re likely to see those described here and in<br />
Fig. 6-9.<br />
• Jewel. This high, rounded neckline is so<br />
named because it provides a good background<br />
for a necklace or pin.<br />
• Crew. Also high and round, the crew neckline<br />
is finished with a knit band. This style was<br />
originally <strong>on</strong> sweaters worn by rowing crews.<br />
• Cowl. The cowl is a softly draped neckline <strong>on</strong><br />
a dress or blouse. Because it’s cut <strong>on</strong> the bias,<br />
which is the diag<strong>on</strong>al grain of the fabric, soft<br />
folds form. Cowl, which means softly draped,<br />
was originally the term for a hooded robe<br />
worn by m<strong>on</strong>ks.<br />
• Bateau. This neckline resembles the outline<br />
of a l<strong>on</strong>g, low boat resting <strong>on</strong> the water. Bateau<br />
is the French word for boat.<br />
104 • UNIT 2 The Fashi<strong>on</strong> World<br />
• Sweetheart. This neckline is moderately low in<br />
fr<strong>on</strong>t and forms a point, similar to a heart shape.<br />
• Halter. With this neckline, a drawstring or<br />
band holds a sleeveless garment fr<strong>on</strong>t in place<br />
at the neck. The shoulders and back are bare.<br />
Collar Styles<br />
A collar is a separate piece of fabric attached to<br />
the neckline. It can be small or large, soft or stiff,<br />
stand up or fold over. Although most collars are<br />
sewn <strong>on</strong>to the garment, some are detachable.<br />
Removable collars change a garment’s look and<br />
can be cleaned separately. They can be held in<br />
place with butt<strong>on</strong>s, snaps, hook-and-loop fasteners,<br />
or basting stitches. p 556<br />
Classic collar styles include the shirt, butt<strong>on</strong>down,<br />
c<strong>on</strong>vertible, notched, and shawl collar. See<br />
Fig. 6-10. Some collars are joined to a lapel, the<br />
fr<strong>on</strong>t part of a shirt or jacket that is folded back
<strong>on</strong> the chest. The notched collar forms a point<br />
where the collar and lapel meet. In c<strong>on</strong>trast, the<br />
shawl collar joins the lapel in a c<strong>on</strong>tinuous line.<br />
Some curiously named collars are explained below.<br />
• Peter Pan. The Peter Pan collar is small and<br />
flat, with rounded corners. The name is taken<br />
from the play Peter Pan, written in 1904 by<br />
James M. Barrie. The costumes in the play had<br />
this collar style.<br />
• Sailor, or middy. This collar was copied from<br />
those <strong>on</strong> a sailor’s uniform. A middy, or midshipman,<br />
is a student at a naval academy.<br />
• Mandarin. The stand-up style of a mandarin<br />
collar is seen in the traditi<strong>on</strong>al dress worn in<br />
China. The term mandarin is the name of the<br />
dialect spoken in many parts of China, including<br />
Beijing.<br />
6-10<br />
Collar Styles<br />
• Tuxedo. This collar has turned-down points<br />
and is usually worn with a bow tie and tuxedo<br />
jacket, named after Tuxedo Park, NY.<br />
• Chelsea. The chelsea collar first became popular<br />
in the Chelsea secti<strong>on</strong> of L<strong>on</strong>d<strong>on</strong>.<br />
• Puritan. Named for the Puritans of the sixteenth<br />
century, this collar imitates the style<br />
they wore.<br />
• Ruff. A small, stand-up ruffle identifies the<br />
ruff collar. It’s less frilly than the stiff white<br />
ruffs worn by men and women at the turn of<br />
the seventeenth century.<br />
• Jabot. This is a small, standing collar with a<br />
lacy, ruffled, or pleated trimming attached at<br />
the fr<strong>on</strong>t. The trimming is called a jabot<br />
(zha-BOH).<br />
Shirt Butt<strong>on</strong>-Down C<strong>on</strong>vertible Notched Shawl<br />
Pointed Flat<br />
Peter<br />
Pan<br />
Puritan<br />
Turtleneck<br />
Ruff<br />
Mandarin Jabot<br />
Tuxedo<br />
Band<br />
Bow<br />
Tie<br />
Wing<br />
Sailor (Fr<strong>on</strong>t) Sailor (Back)<br />
Chelsea<br />
CHAPTER 6 Fashi<strong>on</strong> Styles • 105
6-11<br />
Sleeve Styles<br />
Sleeve Styles<br />
The sleeve has come a l<strong>on</strong>g way from its beginning<br />
as an overhang of material draped about the<br />
shoulders. Sleeves today range from a tiny cap to<br />
a full, flounced attachment. See Fig. 6-11. There<br />
are three basic sleeve styles. p 559<br />
• Set-in. The set-in sleeve is joined to the garment<br />
by an armhole seam that circles the arm<br />
near the shoulder.<br />
• Raglan. A fr<strong>on</strong>t and back diag<strong>on</strong>al seam that<br />
extends from the neckline to the underarm<br />
identifies the raglan sleeve.<br />
106 • UNIT 2 The Fashi<strong>on</strong> World<br />
Set-In Raglan Kim<strong>on</strong>o Dolman<br />
Sleeveless Cap Short Roll-Up Three-Quarter L<strong>on</strong>g<br />
Butterfly Puff Petal Cowl Bishop<br />
• Kim<strong>on</strong>o. A kim<strong>on</strong>o sleeve is cut in <strong>on</strong>e piece<br />
that includes the garment fr<strong>on</strong>t and back. It is<br />
then sewn together al<strong>on</strong>g the outer arm and<br />
the underarm.<br />
All other sleeves are variati<strong>on</strong>s of the three<br />
basic styles. Some interesting types include the<br />
following:<br />
• Dolman. A variati<strong>on</strong> of the kim<strong>on</strong>o sleeve,<br />
this type is narrow at the wrist and wide at the<br />
underarm.<br />
• Puff, or baby doll. As a type of set-in sleeve,<br />
this style is popular for babies’ and children’s<br />
clothes.
6-11<br />
Angel Bell Leg of Mutt<strong>on</strong> Juliette Peasant<br />
Cuff Shirt Cuff French Cuff Ruffle Circular Flounce<br />
Sleeve Styles (C<strong>on</strong>tinued)<br />
• Leg of mutt<strong>on</strong>. This set-in sleeve was very fashi<strong>on</strong>able<br />
in the Victorian era. The name comes<br />
from its resemblance to a cooked leg of lamb.<br />
GARMENT STYLES<br />
Imagine a teen putting <strong>on</strong> her robe to go out<br />
for a special dinner. L<strong>on</strong>g ago a female might have<br />
d<strong>on</strong>e just that, because what people call a dress<br />
today was <strong>on</strong>ce called a robe. History shows that<br />
many garments have changed in name as well as<br />
style over the years.<br />
From medieval times until the eighteenth century,<br />
most dresses were actually separate skirts<br />
and bodices. Persian and Anglo-Sax<strong>on</strong> men have<br />
worn pants since ancient times. The term pants<br />
wasn’t used, however, until the late 1800s, when it<br />
meant outer garments worn by men and boys.<br />
The word coat comes from the English word<br />
cloak. This large piece of fabric was wrapped<br />
around the body over other clothing for warmth.<br />
Jacket is a modern form of the Old French jaquette,<br />
or “little coat.” Today a jacket is typically<br />
an outer layer of clothing of more or less hip<br />
length. It may also be worn under a coat.<br />
Some garment styles today are described by<br />
names that link to the past. Other c<strong>on</strong>necti<strong>on</strong>s are<br />
made to the garment’s shape. Once learned, the<br />
names give you a way to distinguish <strong>on</strong>e garment<br />
from another.<br />
Dress Styles<br />
Dress styles can be divided into those that have<br />
a waistline or horiz<strong>on</strong>tal seam and those that lack<br />
<strong>on</strong>e. See Fig. 6-12 <strong>on</strong> page 108. Classic styles without<br />
waistlines are described here.<br />
• Sheath. This dress is close fitting and shaped<br />
by darts.<br />
• Shift, or chemise. A loose-fitting dress, this<br />
<strong>on</strong>e became popular in the 1920s.<br />
CHAPTER 6 Fashi<strong>on</strong> Styles • 107
6-12<br />
Dress Styles<br />
• A-line. Due to the shape that flares out to the<br />
hemline, this dress is called an A-line. It was<br />
introduced by Christian Dior in 1955.<br />
• Princess. The vertical seams give the closefitting,<br />
flared princess dress its shape.<br />
108 • UNIT 2 The Fashi<strong>on</strong> World<br />
Sheath Shift or<br />
Chemise<br />
A-line Tent<br />
Empire High Waist Dropped Waist Blous<strong>on</strong><br />
Princess Shirtwaist Coatdress<br />
Asymmetrical<br />
Closing<br />
Other dress styles have a bodice and skirt<br />
joined at, above, or below the natural waistline.<br />
These styles include the empire, high-waist,<br />
dropped waist, blous<strong>on</strong>, and shirtwaist. A twopiece<br />
dress c<strong>on</strong>sists of a separate, matching skirt<br />
and top.
Shirt Styles<br />
The term shirt usually refers to a top that is<br />
more tailored than a blouse. Many styles are<br />
made to fit both women and men. Some popular<br />
shirt and blouse styles are described below and<br />
shown in Fig. 6-13.<br />
• Dress. The dress shirt is a traditi<strong>on</strong>al man’s<br />
shirt that is worn with a suit and necktie.<br />
• Sport. Sport shirts are more casual and usually<br />
worn without a tie.<br />
• Polo. This knit shirt is similar to those worn<br />
by polo players in the 1920s.<br />
• Hawaiian, or aloha. This sport shirt is made<br />
of floral fabric in tropical colors.<br />
6-13<br />
Shirt Styles<br />
• Henley. Crew teams that competed in the<br />
Henley rowing regatta in England wore collarless<br />
shirts that inspired the name of this style.<br />
• Tuxedo. Tuxedo shirts have a pleated fr<strong>on</strong>t<br />
and a small wing or banded collar.<br />
• Tank top. This shirt resembles a man’s undershirt.<br />
The name comes from the bathing suit<br />
that was worn in the first indoor pools, which<br />
were originally called tanks.<br />
• Tunic. Inspired by the ancient Roman garment,<br />
the tunic is a loose-fitting top that is hip<br />
length or l<strong>on</strong>ger.<br />
Dress Sport Polo Western<br />
T-Shirt Tank Fitted Hawaiian<br />
Tunic<br />
Tuxedo Camisole Henley<br />
CHAPTER 6 Fashi<strong>on</strong> Styles • 109
6-14<br />
Skirt Styles<br />
Skirt Styles<br />
A skirt is a separate piece of clothing that can<br />
be worn with any top. See Fig. 6-14. Skirts can be<br />
straight, flared, or full. Darts, seams, pleats, and<br />
gathers create the shapes. Straight skirts often<br />
have a slit or pleat in the back seam to allow for<br />
movement. Variati<strong>on</strong>s of basic skirt shapes<br />
include the following:<br />
• Dirndl. This straight skirt has extra fullness<br />
gathered at the waistline.<br />
• Gored. Shaped secti<strong>on</strong>s called gores form this<br />
skirt. It fits at the waistline and flares at the hem.<br />
Four-gore and six-gore skirts are most comm<strong>on</strong>,<br />
but a twenty-four-gore skirt is possible.<br />
110 • UNIT 2 The Fashi<strong>on</strong> World<br />
Straight A-Line Yoke<br />
4-Gore<br />
Dirndl Gathered<br />
6-Gore Knife-Pleated<br />
Single<br />
Fr<strong>on</strong>t Pleat<br />
Stitched Box Pleats<br />
Wrap Flared Circular<br />
• Wrap. This skirt wraps around the body and<br />
fastens with butt<strong>on</strong>s or ties. A kilt, the traditi<strong>on</strong>al<br />
attire for men in Scotland, is a pleated<br />
wrap skirt.<br />
Pants Styles<br />
Pants styles vary in length as well as width. See<br />
Fig. 6-15. They can be short or l<strong>on</strong>g, full or fitted.<br />
Fashi<strong>on</strong> dictates which are most popular and how<br />
they are worn. The waistline usually falls at the<br />
natural waistline but can be higher or lower.<br />
Pants that begin at the hip, rather than the waist,<br />
are called hip huggers. The following are comm<strong>on</strong><br />
pants styles:
• Straight. Straight pants are the same width<br />
from knee to hem.<br />
• Tapered. Tapered pants are narrower at the<br />
hem than at the knee.<br />
• Flared. Flared pants are wider at the hem<br />
than at the knee. Bell-bottoms form a wide<br />
flare from the knee down.<br />
• Bermuda shorts. Named for the island of<br />
Bermuda, these above-the-knee pants are<br />
worn there as men’s streetwear.<br />
6-15<br />
Pants Styles<br />
Flared Straight Tapered<br />
Leggings<br />
Culottes<br />
• Culottes. These pants are cut to resemble a<br />
skirt.<br />
• Palazzo. Also called pajama pants, these<br />
flowing pants are l<strong>on</strong>g, wide culottes.<br />
• Leggings. Leggings are close-fitting, knitted<br />
pants.<br />
• Warm-ups. These knit pants have an elastic<br />
or drawstring waist and ribbing or elastic at<br />
the ankles.<br />
• Jumpsuit. The jumpsuit is a <strong>on</strong>e-piece garment<br />
that combines pants with a bodice.<br />
Bermuda<br />
Shorts<br />
Jeans Warm-Up Palazzo/Full Jumpsuit<br />
Short<br />
Shorts<br />
CHAPTER 6 Fashi<strong>on</strong> Styles • 111
6-16<br />
Jacket and Coat Styles<br />
Jacket and Coat Styles<br />
Jackets and coats can be either single- or<br />
double-breasted. A single-breasted garment has<br />
<strong>on</strong>e row of butt<strong>on</strong>s down the center-fr<strong>on</strong>t opening.<br />
A double-breasted garment has a wider fr<strong>on</strong>t<br />
overlap and two rows of butt<strong>on</strong>s. Am<strong>on</strong>g the<br />
styles you’ll see are those described here and illustrated<br />
in Fig. 6-16.<br />
112 • UNIT 2 The Fashi<strong>on</strong> World<br />
Blazer Double-Breasted Boxy Fitted Vest<br />
Tuxedo Cardigan Bolero Chanel Safari<br />
Bomber/<br />
Varsity<br />
Windbreaker Parka Pea<br />
P<strong>on</strong>cho<br />
Trench Polo Chesterfield Wrap Cape<br />
• Blazer. This classic, solid-color jacket may be<br />
single- or double-breasted. When first worn in<br />
England in the 1890s, it was single-breasted<br />
and deep red or red-and-white striped.<br />
• Cardigan. A collarless jacket or sweater, this<br />
garment butt<strong>on</strong>s down the fr<strong>on</strong>t. It’s named<br />
for the 7th Earl of Cardigan, who added its<br />
extra layer of warmth to his military uniform<br />
in 1854.
Technology Trends<br />
>>LATEST FASHION NEWS<br />
How can people learn about the latest<br />
fashi<strong>on</strong>s? Until recently, <strong>on</strong>ly those who<br />
were invited to the designer fashi<strong>on</strong><br />
shows got the first look at the latest<br />
styles. Every<strong>on</strong>e else had to wait days or<br />
even m<strong>on</strong>ths until photographs of the collecti<strong>on</strong>s<br />
appeared in newspapers and fashi<strong>on</strong><br />
magazines.<br />
Today, with the help of technology, the<br />
latest styles can be seen immediately<br />
after the shows.<br />
• On-line fashi<strong>on</strong> shows. Through Web<br />
sites and <strong>on</strong>-line fashi<strong>on</strong> magazines,<br />
c<strong>on</strong>sumers can download pictures from<br />
a fashi<strong>on</strong> show that has just taken place<br />
• Bolero. This short jacket is styled after those<br />
worn by Spanish bullfighters.<br />
• Tuxedo. A tuxedo jacket is a semiformal garment<br />
with a satin collar. It’s named for the<br />
country club in Tuxedo Park, New York, where<br />
it was first worn.<br />
• Chesterfield. The 6th Earl of Chesterfield, a<br />
fashi<strong>on</strong> leader in the mid-1800s, wore this coat<br />
in another part of the world. Some Web<br />
sites also feature videos of the fashi<strong>on</strong><br />
shows and interviews with designers.<br />
• Look books. Many designers and manufacturers<br />
publish special <strong>on</strong>-line albums<br />
of photographs of their newest fashi<strong>on</strong>s.<br />
These types of collecti<strong>on</strong>s are called<br />
look books. Some look books let you<br />
zoom in <strong>on</strong> the photographs so that you<br />
can see garment details. Magazines may<br />
also include look books <strong>on</strong> their Web<br />
sites that have themes, such as “nautical<br />
fashi<strong>on</strong>s” or “casual elegance.”<br />
• Televisi<strong>on</strong> coverage. Televisi<strong>on</strong> networks<br />
that specialize in lifestyle and<br />
fashi<strong>on</strong> programs send camera crews<br />
and reporters to record the fashi<strong>on</strong><br />
shows. The recordings, al<strong>on</strong>g with interviews<br />
with the designers, are broadcast<br />
almost immediately to viewers around<br />
the world.<br />
INVESTIGATE<br />
Visit an <strong>on</strong>-line fashi<strong>on</strong> show or look book.<br />
After viewing the newest fashi<strong>on</strong>s, report<br />
<strong>on</strong> the garment styles featured for the<br />
coming seas<strong>on</strong>. If possible, use illustrati<strong>on</strong>s<br />
to enhance your report.<br />
style that was named for him. The style usually<br />
has a black velvet collar.<br />
• Trench. This all-purpose coat is made of<br />
water-repellent fabric. It is so named because<br />
British military officers wore it in the trenches<br />
during World War I.<br />
• Pea. The pea coat was copied from the hiplength<br />
coats worn by sailors.<br />
CHAPTER 6 Fashi<strong>on</strong> Styles • 113
CHAPTER 6<br />
CHAPTER SUMMARY<br />
• A garment is identified by its style and by<br />
its variati<strong>on</strong> of that style.<br />
• A style may be described as classic, avantgarde,<br />
retro, or a fad.<br />
• Fashi<strong>on</strong> cycles occur as styles become<br />
more popular after being introduced and<br />
later decline in popularity.<br />
• Fashi<strong>on</strong> swings occur when style details<br />
change back and forth.<br />
• A garment’s style is determined by its<br />
features, including neckline, collar, and<br />
sleeves.<br />
• Different style names are given to dresses,<br />
skirts, shirts, pants, and coats and jackets.<br />
USING KEY TERMS<br />
Give a specific fashi<strong>on</strong> example that illustrates<br />
each Key Term. Your examples might be<br />
garments you’ve seen in magazines, <strong>on</strong>es that<br />
other people wear, or <strong>on</strong>es you own. Describe<br />
how each example fits the definiti<strong>on</strong> of the<br />
term.<br />
114 • UNIT 2 The Fashi<strong>on</strong> World<br />
Review<br />
RECALLING THE FACTS<br />
1. What is meant by the term style?<br />
2. Does a classic style ever change?<br />
Explain.<br />
3. Why might fads be especially appealing<br />
to teens?<br />
4. How is a fad different from an avantgarde<br />
style?<br />
5. Compare and c<strong>on</strong>trast the retro and<br />
vintage looks.<br />
6. What are the stages of a fashi<strong>on</strong> cycle?<br />
Give an example of a recent fashi<strong>on</strong><br />
cycle.<br />
7. Describe two examples of fashi<strong>on</strong> swings.<br />
8. How does a crew neckline differ from a<br />
bateau?<br />
9. How are mandarin and ruff collars similar<br />
and different?<br />
10. How is a set-in sleeve different from a<br />
dolman?<br />
11. Why would a Hawaiian shirt look out of<br />
place at a formal dinner?<br />
12. A catalog describes a skirt as gored.<br />
What does that mean?<br />
13. List these pants styles from most full to<br />
least full: tapered, palazzo, leggings.<br />
14. Compare the collars found <strong>on</strong> a chesterfield<br />
coat, a tuxedo jacket, and a cardigan<br />
sweater.
and Activities<br />
THINKING CRITICALLY<br />
1. Can a pers<strong>on</strong> have both a need to bel<strong>on</strong>g<br />
and a need for individuality? How can<br />
fads address these emoti<strong>on</strong>al needs?<br />
2. Why do you think some styles are more<br />
classic than others?<br />
3. Compare waistlines in various dress<br />
styles. What effects do they create and<br />
why?<br />
4. Why do you think the decline stage of a<br />
fashi<strong>on</strong> cycle is typically shorter than<br />
the introducti<strong>on</strong> stage?<br />
APPLYING KNOWLEDGE<br />
1. Garment styles. Go through your own<br />
wardrobe and list the styles you see.<br />
What neckline, collar, and sleeve styles<br />
can you identify?<br />
2. Garment lengths. Review the illustrati<strong>on</strong><br />
<strong>on</strong> page 102, which compares different<br />
garment lengths. Names for specific<br />
lengths can change periodically. List<br />
which terms are unfamiliar to you, if any.<br />
In a sec<strong>on</strong>d column, list the fashi<strong>on</strong> name<br />
by which you know each length.<br />
3. Today’s trends. Look through magazines<br />
and catalogs for pictures of garments<br />
that are currently in fashi<strong>on</strong>. Arrange the<br />
illustrati<strong>on</strong>s <strong>on</strong> posters as a display of<br />
today’s trends. Label the styles shown.<br />
As a class, discuss which styles may<br />
become classics and which maybe fads.<br />
CHAPTER 6<br />
4. Historical styles. Many of the styles in<br />
this chapter may not make you think of<br />
the historical <strong>on</strong>es you saw in Chapter 5.<br />
That’s because historical fashi<strong>on</strong>s combined<br />
styles and details in special ways.<br />
Select six photos in Chapter 5 and identify<br />
the styles used in each garment. In<br />
writing, explain how each garment differs<br />
from today’s use of similar styles.<br />
MAKING>
CHAPTER 7<br />
Fashi<strong>on</strong> Designers<br />
OBJECTIVES<br />
• Explain the role of<br />
fashi<strong>on</strong> designers<br />
in the apparel<br />
industry.<br />
• Identify the names<br />
and achievements<br />
of famous fashi<strong>on</strong><br />
designers.<br />
• Describe the<br />
design process.<br />
• Compare couture<br />
and pret-a-porter<br />
collecti<strong>on</strong>s.<br />
KEY TERMS<br />
atelier<br />
collecti<strong>on</strong><br />
computer-aided<br />
design (CAD)<br />
couture<br />
couturiers<br />
croquis<br />
draping<br />
haute couture<br />
knock-offs<br />
licensing<br />
pret-a-porter<br />
royalty<br />
sloper<br />
116 • UNIT 2 The Fashi<strong>on</strong> World
EXAMINETHISISSUE<br />
Designer or not. Wearing a garment<br />
with a designer label is appealing to<br />
some people. They like the stylish look<br />
and the sense of prestige. Some people<br />
will pay more for designer clothes even if<br />
it means owning fewer items. Other people<br />
care little about designer labels. They<br />
find styles they like in other clothing and<br />
prefer to save m<strong>on</strong>ey by buying clothes<br />
that cost less.<br />
What do you think?<br />
Is wearing a designer fashi<strong>on</strong> important<br />
to you? Would you pay extra for a<br />
designer label? Compare ideas with your<br />
classmates to see what people think.<br />
Many people believe fashi<strong>on</strong><br />
designers lead very glamorous lives,<br />
surrounded by beautiful people, gorgeous<br />
fabrics, and wealthy customers. For most<br />
designers, this isn’t true. Although the career has<br />
many rewards, designers work very hard, and<br />
most lead a less exotic life than you might<br />
imagine.<br />
THE ROLE OF FASHION<br />
DESIGNERS<br />
Fashi<strong>on</strong> designers produce designs for clothing<br />
that will be sold in a particular market. They use<br />
design principles, fabrics, and c<strong>on</strong>structi<strong>on</strong> techniques<br />
to transform their ideas to reality.<br />
Designers work at different levels within the<br />
fashi<strong>on</strong> industry. Some have gained nati<strong>on</strong>al and<br />
world recogniti<strong>on</strong>, while others create designs,<br />
but without acclaim. Many provide support as<br />
they assist higher-level designers or work with<br />
existing designs.<br />
Specializati<strong>on</strong> is comm<strong>on</strong> in the design world.<br />
Those who create designs might c<strong>on</strong>centrate <strong>on</strong><br />
<strong>on</strong>ly <strong>on</strong>e type of garment, such as swimwear, lingerie,<br />
bridal gowns, maternity, or children’s<br />
clothes. Some specialize in jewelry, shoes, or other<br />
accessories. See Fig. 7-1. Other designers work in<br />
such fashi<strong>on</strong>-related fields as cosmetics and fragrances<br />
and home furnishings.<br />
To be successful, fashi<strong>on</strong> designers must be<br />
aware of their target market—those who are<br />
likely to buy their designs. After all, if no <strong>on</strong>e buys<br />
the clothing, a designer will so<strong>on</strong> be out of work.<br />
High-Fashi<strong>on</strong> Designers<br />
When you walk through a clothing department,<br />
the names of certain designers are apparent.<br />
High-fashi<strong>on</strong>, or “name,” designers create<br />
garments that carry their name when sold. These<br />
designers are very influential in establishing the<br />
fashi<strong>on</strong>able looks for each seas<strong>on</strong>. How many of<br />
the name designers <strong>on</strong> pages 126-131 do you<br />
recognize?<br />
Some high-fashi<strong>on</strong> designers own their own<br />
firm or are financed by partners. Others, such as<br />
Ralph Lauren and D<strong>on</strong>na Karan, are publicly<br />
7-1<br />
Designers create more than just clothing fash-<br />
i<strong>on</strong>s. Home furnishings and such accessories as eyeglasses<br />
also begin with design.<br />
CHAPTER 7 Fashi<strong>on</strong> Designers • 117
7-2<br />
Oscar de la Renta, a high-fashi<strong>on</strong> designer, is<br />
known for elegant, feminine evening wear made of<br />
luxurious fabrics.<br />
owned companies listed <strong>on</strong> the stock exchange.<br />
The companies of high-fashi<strong>on</strong> designers are typically<br />
called fashi<strong>on</strong> houses.<br />
Famous designers may be known for a special<br />
style or look. See Fig. 7-2. Coco Chanel created a<br />
boxy jacket in the 1920s that became a fashi<strong>on</strong><br />
classic. Her Chanel look is still copied today.<br />
Ralph Lauren’s designs have classic elegance.<br />
The fine tailoring of Giorgio Armani, the casual,<br />
street-smart style of Tommy Hilfiger, and the<br />
elegant evening gowns of Vera Wang are also<br />
recognized.<br />
At least twice a year, and sometimes three or<br />
four, designers turn out a collecti<strong>on</strong>. A collecti<strong>on</strong><br />
is the group of clothes designed and produced for<br />
a specific seas<strong>on</strong>. It may have 50 to 70 items.<br />
Some designers have collecti<strong>on</strong>s for different<br />
customers, such as men’s apparel and women’s<br />
apparel. Different collecti<strong>on</strong>s may also be developed<br />
for different price ranges, using names like<br />
designer, better, and moderate.<br />
Top designers are resp<strong>on</strong>sible for most of the<br />
fashi<strong>on</strong> company’s creative decisi<strong>on</strong>s. They search<br />
for new ideas, design garments, choose fabrics<br />
and colors, and establish an image. Business management<br />
is often part of the job as they set prices,<br />
118 • UNIT 2 The Fashi<strong>on</strong> World<br />
meet with buyers and clients, and promote the<br />
fashi<strong>on</strong>s. They also approve the licenses of other<br />
products that are manufactured and sold under<br />
the designer’s name. The fashi<strong>on</strong> industry looks<br />
to name designers to develop new trends that will<br />
inspire every<strong>on</strong>e to buy new clothes.<br />
Apparel Industry Designers<br />
Most designers in the fashi<strong>on</strong> industry d<strong>on</strong>’t<br />
have name recogniti<strong>on</strong>. They work for garment<br />
manufacturers that produce clothing for a particular<br />
brand or store label. See Fig. 7-3.<br />
Like high-fashi<strong>on</strong> designers, many designers<br />
who work for manufacturers also create original<br />
designs. They must develop the clothing collecti<strong>on</strong>s<br />
that their company will produce.<br />
The industry also employs designers called<br />
stylists. These people adapt designs created by<br />
others, often high-fashi<strong>on</strong> designs. By modifying<br />
designs, stylists enable manufacturers to produce<br />
less expensive versi<strong>on</strong>s. The copies are called<br />
knock-offs. To reduce costs, the stylist selects a<br />
less-expensive fabric and changes some details.<br />
Whether working <strong>on</strong> an original design or<br />
adapting <strong>on</strong>e, designers in the industry must<br />
understand garment c<strong>on</strong>structi<strong>on</strong>, the manufacturing<br />
process, and their firm’s producti<strong>on</strong> capability.<br />
They may work closely with buyers of<br />
major stores to produce fashi<strong>on</strong>s that will sell.<br />
7-3<br />
Much of the clothing people buy has been<br />
designed by professi<strong>on</strong>als who d<strong>on</strong>’t have name<br />
recogniti<strong>on</strong>.
7-4 Designers might like to draw <strong>on</strong>ly what they like<br />
themselves, but they have to keep customers in mind.<br />
Designs that d<strong>on</strong>’t sell can be costly.<br />
The Business of Designing<br />
When you see a runway model wearing a<br />
designer’s latest creati<strong>on</strong>s, it’s easy to forget that<br />
fashi<strong>on</strong> is a complicated business. Designers create<br />
hundreds of styles each seas<strong>on</strong>, yet many never<br />
make it to the stores. Manufacturers and store<br />
buyers select <strong>on</strong>ly the styles they think will be successful.<br />
Styles that d<strong>on</strong>’t sell reduce the profit for<br />
every<strong>on</strong>e, from designer to seller. According to a<br />
saying in the garment industry, “a designer is <strong>on</strong>ly<br />
as good as the last collecti<strong>on</strong>.” The customer<br />
makes the final decisi<strong>on</strong>. See Fig. 7-4.<br />
In the business of fashi<strong>on</strong>, success <strong>on</strong>ce<br />
depended <strong>on</strong> high prices. Now an inexpensive<br />
garment may be just as fashi<strong>on</strong>able as an expensive<br />
<strong>on</strong>e. Upper income c<strong>on</strong>sumers may buy lowcost<br />
garments too. Those <strong>on</strong> a tight budget may<br />
splurge <strong>on</strong> a costly item. C<strong>on</strong>sumers also combine<br />
items to create a fashi<strong>on</strong>able outfit regardless<br />
of each item’s price. For example, an inexpensive<br />
cott<strong>on</strong> T-shirt could be worn with an expensive<br />
leather skirt, or an expensive silk blouse with an<br />
inexpensive pair of jeans. Today’s fashi<strong>on</strong>s are<br />
available in all price ranges.<br />
THE DESIGN PROCESS<br />
Turning out many designs under the pressure<br />
of deadlines is typical in the design field. Before a<br />
design can even be started, however, a designer<br />
needs an idea. Once that challenge has been met,<br />
the actual design steps can begin.<br />
Finding Inspirati<strong>on</strong><br />
Designers are c<strong>on</strong>stantly <strong>on</strong> the lookout for<br />
something new. They need fresh ideas <strong>on</strong> a regular<br />
basis. Have you ever w<strong>on</strong>dered why different<br />
designers come up with similar ideas at the same<br />
time? In this world of rapid communicati<strong>on</strong>,<br />
whatever inspires <strong>on</strong>e can also inspire another.<br />
Fashi<strong>on</strong> ideas come from art exhibits, theater<br />
producti<strong>on</strong>s, movies, newspapers, magazines, and<br />
travel. See Fig. 7-5. Historical clothing and textile<br />
collecti<strong>on</strong>s are another resource. Sometimes ethnic<br />
clothing and street fashi<strong>on</strong>s provide inspirati<strong>on</strong>.<br />
7-5<br />
Art has l<strong>on</strong>g inspired fashi<strong>on</strong> designers. The<br />
Winged Victory of Samothrace, a Greek statue housed<br />
in the Louvre, is just <strong>on</strong>e example.<br />
CHAPTER 7 Fashi<strong>on</strong> Designers • 119
How To…<br />
CREATE A DESIGN SKETCH<br />
Do you like to draw? If so, you might like to try your hand at doing a<br />
fashi<strong>on</strong> sketch. To get started, use the basic procedure described here.<br />
2<br />
Then divide the line<br />
into eight equal<br />
segments, using<br />
light horiz<strong>on</strong>tal<br />
lines. Note how the<br />
parts of a figure fit<br />
within those eight<br />
segments. For<br />
example, the top<br />
segment shows the<br />
correct height for<br />
the head. Next,<br />
draw the figure over<br />
the lines you’ve<br />
prepared.<br />
120 • UNIT 2 The Fashi<strong>on</strong> World<br />
1<br />
A good drawing c<strong>on</strong>trols<br />
proporti<strong>on</strong>. First, draw a<br />
light vertical line down<br />
the center of your paper,<br />
making it the height you<br />
want the figure to be.<br />
4<br />
Finally, choose<br />
a pose for your<br />
fashi<strong>on</strong> figure<br />
and add an<br />
original design.<br />
3<br />
Exploring Fashi<strong>on</strong><br />
Drawing<br />
Once you’re<br />
able to draw<br />
a figure with<br />
correct proporti<strong>on</strong>s,<br />
practice<br />
drawing figures<br />
in different<br />
poses.<br />
Create a fashi<strong>on</strong> design of your own.<br />
To improve your skills, find more informati<strong>on</strong><br />
<strong>on</strong> fashi<strong>on</strong> drawing.
New fabric textures, patterns, and prints also<br />
give ideas. Special trims and fasteners can become<br />
the focus of a new design. New fibers and fabric<br />
finishes offer fresh thoughts about styling, comfort,<br />
and performance.<br />
Designers also notice how people live. Seeing<br />
more casual ways of living, a designer might focus<br />
<strong>on</strong> khaki pants, denim jeans, flannel shirts, and<br />
barn jackets. Another designer might create mixand-match<br />
separates that can be worn for school,<br />
work, and leisure activities. The latest hi-tech fabrics<br />
could be used in sportswear, activewear, and<br />
rainwear.<br />
Sketching Designs<br />
With an idea in mind, the designer makes a<br />
sketch. Most garment sketches are very rough,<br />
with little detail. Some may be drawn <strong>on</strong> a body<br />
silhouette; others are sketched flat like a technical<br />
drawing. Color may be added by using colored<br />
markers or pencils.<br />
A preliminary design sketch is called a croquis<br />
(kro-KEY). As the garment is developed, the croquis<br />
is revised to include all the garment’s details,<br />
including yokes, pockets, collars, belts, and fasteners.<br />
It may even include c<strong>on</strong>structi<strong>on</strong> notes.<br />
Computer-aided design (CAD) software programs<br />
often take the place of hand sketching<br />
today. These systems create a three-dimensi<strong>on</strong>al<br />
drawing directly <strong>on</strong> the computer screen, as<br />
described <strong>on</strong> page 123.<br />
Draping<br />
Some designers prefer working with fabric to<br />
create a design rather than sketching. They begin<br />
by draping the fabric <strong>on</strong> a dress form. The process<br />
of draping means arranging fabric into graceful<br />
folds and attractive lines. Some high-fashi<strong>on</strong><br />
designers drape their creati<strong>on</strong>s <strong>on</strong> a live model.<br />
The draping process allows the designer to see<br />
the actual silhouette, proporti<strong>on</strong>, and details of a<br />
design. It shows whether a certain print, plaid, or<br />
striped fabric will be suitable. The fabric can be<br />
rearranged many times until the desired result is<br />
achieved. Although draping allows room for cre-<br />
Fashi<strong>on</strong><br />
FASHION THEORIES.<br />
Centuries ago royalty set fashi<strong>on</strong> trends<br />
for the middle class to copy. High-fashi<strong>on</strong><br />
designers often set trends today. When<br />
manufacturers produce inexpensive versi<strong>on</strong>s<br />
of designs, the styles move from high<br />
fashi<strong>on</strong> to mass fashi<strong>on</strong>. This is called the<br />
“trickle down” theory of fashi<strong>on</strong>. Designers<br />
are subject to influence too. When celebrities<br />
in movies, music videos, televisi<strong>on</strong><br />
shows, and even sporting events impact<br />
what high-fashi<strong>on</strong> designers create, this is<br />
called the “trickle up” theory of fashi<strong>on</strong>.<br />
Facts<br />
ativity, it usually takes much more time than<br />
sketching or designing <strong>on</strong> a computer.<br />
Some ready-to-wear designers work with<br />
muslin, a coarse, cott<strong>on</strong> fabric, instead of the<br />
fashi<strong>on</strong> fabric. Although muslin may not have the<br />
same hand or drape, it’s inexpensive.<br />
Selecting Fabrics and Trims<br />
When selecting fabrics, designers c<strong>on</strong>sider the<br />
particular silhouette and details of a design. They<br />
also pay attenti<strong>on</strong> to fabric costs so the retail price<br />
of the garment will be affordable for customers.<br />
Some high-fashi<strong>on</strong> designers work with fabric<br />
mills to develop fabrics for their exclusive use.<br />
A swatch of the intended fabric is attached to<br />
each design sketch or detailed drawing. If the<br />
design has trim, a trim swatch is also included.<br />
Making Sample Garments<br />
The next step is developing a pattern for the<br />
sample garment. At this point, the designer usually<br />
works with a pers<strong>on</strong> who makes patterns. A<br />
preliminary pattern is usually made with a<br />
sloper. This basic pattern fits a certain body<br />
shape and has been used successfully in the past.<br />
If the new design is completely different from<br />
previous designs, a new sloper is created.<br />
CHAPTER 7 Fashi<strong>on</strong> Designers • 121
7-6<br />
A sample garment must be made and refined<br />
before the design is ready to be included in a collecti<strong>on</strong>.<br />
Once made, the preliminary pattern is used to<br />
cut out a sample garment. At this stage, the trial<br />
garment may be made from a piece of the actual<br />
fabric or from muslin. Then the fabric pieces are<br />
sewn together by a sample maker and tried out<br />
<strong>on</strong> a model. The garment may be revised many<br />
times until the designer is satisfied that it can go<br />
into the collecti<strong>on</strong>. See Fig. 7-6.<br />
DESIGNER COLLECTIONS<br />
At <strong>on</strong>e time, each garment was designed<br />
specifically for the client who would wear it.<br />
These became truly <strong>on</strong>e-of-a-kind designs. When<br />
a designer presents a collecti<strong>on</strong> today, individual<br />
clients or retail buyers can order the clothes.<br />
Some designers create both couture and readyto-wear<br />
collecti<strong>on</strong>s, others <strong>on</strong>ly ready-to-wear.<br />
Couture<br />
Couture (koo-TOOR), the French word for<br />
dressmaking, is the designing, making, and selling<br />
122 • UNIT 2 The Fashi<strong>on</strong> World<br />
of high-fashi<strong>on</strong> clothing. The dressmaking industry<br />
that creates the most fashi<strong>on</strong>able, expensive,<br />
and exclusive designer clothing is called haute<br />
couture (oht koo-TOOR). The word haute, which<br />
is French for “high,” means high class or fancy.<br />
Designers create their haute couture collecti<strong>on</strong>s<br />
for fashi<strong>on</strong>-c<strong>on</strong>scious customers. The<br />
clothes are original designs that can cost thousands<br />
of dollars. Many c<strong>on</strong>structi<strong>on</strong> techniques<br />
are still d<strong>on</strong>e by hand in the designer’s workroom,<br />
or atelier (a-tul-YAY). The fabrics are the<br />
finest available. They are often <strong>on</strong>e-of-a-kind fabrics<br />
created exclusively for the designer. The garments<br />
are custom-made to fit each client’s measurements<br />
exactly. Very few people today can<br />
afford true haute-couture fashi<strong>on</strong>s.<br />
History of Haute Couture<br />
Haute couture began in Paris several hundred<br />
years ago. In the 1770s, the French dressmaker<br />
Rose Bertin started sending what became known<br />
as “fashi<strong>on</strong> babies” to L<strong>on</strong>d<strong>on</strong>. These dolls were<br />
dressed in detailed copies of Queen Marie<br />
7-7<br />
Charles Worth established the House of Worth,<br />
which existed for almost a century. He may have been the<br />
first dressmaker to label his designs.
Technology Trends<br />
>>APPAREL DESIGN WITH CAD<br />
Computer-aided design (CAD) systems<br />
are rapidly replacing the hand-sketching<br />
process. Designers work with a digital, or<br />
<strong>on</strong>-screen, three-dimensi<strong>on</strong>al, dress form<br />
that corresp<strong>on</strong>ds to the master pattern<br />
size. New designs are sketched directly<br />
<strong>on</strong>to the dress form. To make adjustments<br />
<strong>on</strong> the fr<strong>on</strong>t, back, and sides of the garment,<br />
the designer simply “turns the<br />
dress form around.”<br />
Antoinette’s latest clothes. Dressmakers in L<strong>on</strong>d<strong>on</strong><br />
used the dolls to duplicate the style, fabric, and<br />
c<strong>on</strong>structi<strong>on</strong> techniques of the original garments.<br />
Other couturiers (koo-TOOR-ee-ays), or<br />
designers who make fashi<strong>on</strong>able, custom-made<br />
clothes, copied this idea. They began to send dolls<br />
to potential customers around the world. Early<br />
American dressmakers studied the dolls to copy<br />
the original French designs and learn French c<strong>on</strong>structi<strong>on</strong><br />
techniques. This practice c<strong>on</strong>tinued<br />
until newspapers and fashi<strong>on</strong> magazines became<br />
an important method of fashi<strong>on</strong> communicati<strong>on</strong>.<br />
Charles Worth was a young Englishman who<br />
started his design career in L<strong>on</strong>d<strong>on</strong>. See Fig. 7-7.<br />
Changes take <strong>on</strong>ly minutes to make,<br />
and experimenting with different collars<br />
and necklines is quick and easy. The<br />
designer can also try different colors and<br />
fabrics. After a design is finalized, the<br />
computer c<strong>on</strong>verts it into flat pattern<br />
pieces. Seam allowances and other details<br />
are added. Then the computer figures how<br />
much fabric is needed and what the producti<strong>on</strong><br />
cost will be.<br />
CAD makes the design process more<br />
cost-efficient in many ways. Because the<br />
computer stores old designs, updating a<br />
garment for the new seas<strong>on</strong> doesn’t necessarily<br />
mean starting from scratch.<br />
INVESTIGATE<br />
Use the Internet to further investigate<br />
the latest types of and features in CAD<br />
fashi<strong>on</strong>-design software. Then use CAD<br />
software to create a fashi<strong>on</strong> design of<br />
your own.<br />
In 1845, he went to Paris to work for a firm that<br />
specialized in fabrics and shawls. Thirteen years<br />
later he opened his own highly successful fashi<strong>on</strong><br />
house. He had many wealthy and prominent<br />
clients, including Empress Eugenie and the court<br />
of France’s Sec<strong>on</strong>d Empire. Worth was the first<br />
designer to present gowns <strong>on</strong> live models. He was<br />
the first to sell sample gowns to be copied in the<br />
United States. He was the first designer to market<br />
a perfume under his own name. Because of these<br />
and other innovati<strong>on</strong>s, Worth is c<strong>on</strong>sidered the<br />
father of haute couture.<br />
Until World War II, everything that was significant<br />
in fashi<strong>on</strong> started in Paris. During World War<br />
CHAPTER 7 Fashi<strong>on</strong> Designers • 123
7-8<br />
High-fashi<strong>on</strong> collecti<strong>on</strong>s are introduced twice a<br />
year at elaborate runway shows.<br />
II, many of the Paris fashi<strong>on</strong> houses had to close.<br />
Retailers and fashi<strong>on</strong>-c<strong>on</strong>scious customers in the<br />
United States began to pay more attenti<strong>on</strong> to talented<br />
American designers. These included Claire<br />
McCardell, Norman Norell, and Charles James.<br />
After the war, such French designers as Coco<br />
Chanel, Christian Dior, and Cristobal Balenciaga<br />
helped Paris regain its place of importance.<br />
Today, fashi<strong>on</strong> designers in the United States,<br />
Italy, England, and Japan have also established<br />
couture houses. As a result, many cities are now<br />
influential in the fashi<strong>on</strong> industry.<br />
Fashi<strong>on</strong> Shows<br />
Twice a year, high-fashi<strong>on</strong> designers and couture<br />
houses present their collecti<strong>on</strong>s with fashi<strong>on</strong><br />
shows. They are held in July for the fall-winter<br />
collecti<strong>on</strong>s and in January for the spring-summer<br />
collecti<strong>on</strong>s. Retailers, the fashi<strong>on</strong> press, celebrities,<br />
and wealthy private clients attend these byinvitati<strong>on</strong>-<strong>on</strong>ly<br />
events. The major events take<br />
124 • UNIT 2 The Fashi<strong>on</strong> World<br />
place in Paris, New York, and Milan. Collecti<strong>on</strong>s<br />
are also shown in L<strong>on</strong>d<strong>on</strong>, Tokyo, M<strong>on</strong>treal, and<br />
other major cities. See Fig. 7-8.<br />
These shows are very elaborate events where<br />
the designer can be as imaginative as possible.<br />
Some of the clothes <strong>on</strong> the runway are purely fantasy.<br />
The designer aims to attract attenti<strong>on</strong> and<br />
get the fashi<strong>on</strong> press to write about the collecti<strong>on</strong>.<br />
The major goal, however, is to get orders from<br />
retail buyers and private clients for garments in<br />
the shows.<br />
Designer Ready-to-Wear<br />
At <strong>on</strong>e time, every<strong>on</strong>e in the fashi<strong>on</strong> world<br />
eagerly awaited the Paris collecti<strong>on</strong>s. American<br />
manufacturers sent representatives overseas to<br />
attend the fashi<strong>on</strong> shows. Then the representatives<br />
rushed back to America and copied the<br />
designer originals. Ready-to-wear copies were<br />
7-9<br />
Top designers also produce collecti<strong>on</strong>s that sell<br />
for less than their original designs. These collecti<strong>on</strong>s help<br />
them compete with the many garment manufacturers<br />
who sell knock-offs and designs of their own.
mass-produced in factories and shipped to stores<br />
as so<strong>on</strong> as possible.<br />
In time, talented American designers began to<br />
produce expensive, ready-to-wear clothes with a<br />
distinctly American point of view. Many fashi<strong>on</strong><br />
leaders began to appear in clothes by American<br />
designers. The Paris fashi<strong>on</strong> houses so<strong>on</strong> realized<br />
they would need to find other ways to make<br />
m<strong>on</strong>ey, so they decided to do the same thing the<br />
Americans were doing. They created their own<br />
ready-to-wear collecti<strong>on</strong>s. See Fig. 7-9.<br />
Today the French couture houses present two<br />
pret-a-porter (PRET-a-por-TAY), or deluxe<br />
ready-to-wear, collecti<strong>on</strong>s per year. These clothes<br />
are more practical and not quite as expensive as<br />
the couture collecti<strong>on</strong>s. The fabrics may not be<br />
quite as unique. There is very little, if any, hand<br />
sewing. The pret-a-porter collecti<strong>on</strong>s, as well as<br />
other business ventures, including fragrances and<br />
accessories, earn m<strong>on</strong>ey for the couture houses.<br />
Today many European couture designers sell<br />
their pret-a-porter clothes in major department<br />
stores in the United States and other countries.<br />
Some have opened their own boutique stores in<br />
New York City and other cities. These specialty<br />
stores carry the latest ready-to-wear collecti<strong>on</strong>s of<br />
the designers.<br />
Top designers in New York, Milan, and other<br />
cities also hold showings of their ready-to-wear<br />
collecti<strong>on</strong>s. These may be held in hotels, museums,<br />
tents, or the individual designer’s showroom.<br />
Large design or industrial groups sp<strong>on</strong>sor<br />
many of these showings. They may last for a week<br />
or more. Retail buyers place their orders, and the<br />
press reports the new fashi<strong>on</strong> directi<strong>on</strong>s of each<br />
designer. Videos of these showings are broadcast<br />
around the world. Every<strong>on</strong>e gets to see the clothes<br />
as they looked <strong>on</strong> the runway, with the makeup,<br />
hairstyles, and accessories that give them the look<br />
the designer intended. Clothes and accessories by<br />
top American designers are sold in Paris, L<strong>on</strong>d<strong>on</strong>,<br />
Rome, and other cities around the world.<br />
Licensing<br />
In the fashi<strong>on</strong> world, licensing means giving<br />
legal permissi<strong>on</strong> to use your name to promote a<br />
7-10<br />
Many designers, such as Karl Lagerfeld, market<br />
more than just fashi<strong>on</strong>s. Perfume is another product<br />
sometimes linked to designer names.<br />
product. In return, the pers<strong>on</strong> is paid a fee and a<br />
percentage of the profits, called a royalty. The<br />
licensee is the manufacturer who buys the rights<br />
to the name. The licensor is the pers<strong>on</strong> or company<br />
who sells the name. Comm<strong>on</strong> licensors<br />
include fashi<strong>on</strong> designers, celebrities, sports figures,<br />
and carto<strong>on</strong> or other ficti<strong>on</strong>al characters.<br />
Fashi<strong>on</strong> designers have licensed their names to<br />
everything from perfume to automobiles. See Fig.<br />
7-10. Beauty products, accessories, and home furnishings<br />
are particularly popular. In some cases,<br />
the designer makes suggesti<strong>on</strong>s about the product<br />
and approves designs d<strong>on</strong>e by some<strong>on</strong>e else.<br />
This is often some<strong>on</strong>e who technically understands<br />
the final product better than the designer.<br />
In other cases, the designer is resp<strong>on</strong>sible for the<br />
actual product design.<br />
Licensing of moderately priced items has<br />
enabled many more customers to buy designer<br />
products. It has also become a major source of<br />
profit for fashi<strong>on</strong> designers and couture houses<br />
all over the world.<br />
CHAPTER 7 Fashi<strong>on</strong> Designers • 125
FAMOUS<br />
DESIGNERS<br />
FASHION ICONS<br />
ADOLFO (American designer, 1929-). Born in Cuba;<br />
known for elegant knit suits inspired by Chanel’s<br />
famous tweed suits; Nancy Reagan, as first<br />
lady, was often photographed in Adolfo’s<br />
clothes.<br />
CRISTOBAL BALENCIAGA (French couturier, 1895-<br />
1972). Born and raised in Spain; a major influence<br />
from the end of World War II until he<br />
retired in 1968; trained many other<br />
designers, including Givenchy and<br />
Courrèges. Innovati<strong>on</strong>s included<br />
narrow rolled collars, evening<br />
gowns with a slight train,<br />
patterned hosiery in heavier<br />
fibers, and coco<strong>on</strong> coats.<br />
Fashi<strong>on</strong>s now designed by Nicholas<br />
Ghesquière.<br />
GEOFFREY BEENE (American designer,<br />
1927-2004). Designed beautiful, couturequality<br />
clothes and licensed many<br />
products, including shoes, eyewear, home<br />
furnishings, and perfume.<br />
BILL BLASS (American designer, 1922-<br />
2002). Known for classic sportswear in<br />
menswear fabrics, elegant mixtures of<br />
fabrics, and glamorous evening<br />
clothes; licensed many products,<br />
including automobiles and chocolates;<br />
received Coty Hall of Fame Award in 1970.<br />
Clothes are still being produced under the Bill<br />
Blass label.<br />
CALLOT SOEURS (French couture house, 1895-1935).<br />
Fashi<strong>on</strong> house founded by three sisters and<br />
c<strong>on</strong>sidered <strong>on</strong>e of the greatest dressmaking<br />
establishments of its time; famous for delicate lace<br />
blouses, richly embroidered floral patterns, and the<br />
use of chiff<strong>on</strong>, georgette, and organdy.<br />
126 • UNIT 2 Clothes and Fashi<strong>on</strong><br />
PIERRE CARDIN (French designer, 1922-). Born in Italy and<br />
worked for Schiaparelli and Dior before opening his own<br />
couture house in 1950; first Paris couturier to sell his<br />
own ready-to-wear; <strong>on</strong>ce held over 500 licenses;<br />
now designs accessories and furniture and owns the<br />
Maxims de Paris restaurants.<br />
BONNIE CASHIN (American designer, 1915-2000).<br />
One of the first American designers not<br />
influenced by Paris couturiers; known<br />
for comfortable country and<br />
traveling clothes, such as<br />
hooded jersey dresses,<br />
p<strong>on</strong>chos, and poplin raincoats;<br />
also designed costumes for the<br />
theater, ballet, and movies.<br />
GABRIELLE “COCO” CHANEL (French<br />
couturier, 1883-1971). Perhaps the most famous of<br />
all French couturiers; her many c<strong>on</strong>tributi<strong>on</strong>s<br />
include slacks for women, the classic “little black<br />
dress,” and suits with boxy, collarless jackets<br />
trimmed in braid. The House of Chanel c<strong>on</strong>tinues<br />
today under the directi<strong>on</strong> of Karl Lagerfeld.<br />
ANDRÉ COURRÈGES (French designer, 1923-).<br />
Called the “space age designer” because of his<br />
forward-looking designs made of all white<br />
fabrics and accessorized with white tights and<br />
white boots; introduced the mini skirt and<br />
industrial zippers in jumpsuits and other<br />
clothing.<br />
The simple elegance of<br />
the classic Chanel suit<br />
revoluti<strong>on</strong>ized women’s<br />
fashi<strong>on</strong>s.
CHRISTIAN DIOR (French couturier, 1905-1957). In 1947, he<br />
introduced “The New Look,” which featured a closely<br />
fitted bodice and l<strong>on</strong>g, full skirt; created inner<br />
c<strong>on</strong>structi<strong>on</strong> methods to shape dresses in an A, H, or Y<br />
silhouette. After Dior’s death, Yves Saint-Laurent headed<br />
the house of Dior; today John Galliano heads it.<br />
PERRY ELLIS (American designer, 1940-1986). Known for<br />
young, adventurous clothes, natural fibers, neutral colors,<br />
and hand-knitted sweaters for men and<br />
women. The Council of Fashi<strong>on</strong><br />
Designers of America established the<br />
“Perry” award in his memory to h<strong>on</strong>or<br />
new design talent.<br />
MARIANO FORTUNY (Italian designer, 1871-<br />
1949). Known for l<strong>on</strong>g, delicate, pleated<br />
gowns inspired by Greek statues; his<br />
unique pleating technique remains a mystery.<br />
RUDI GERNREICH (American designer, 1922-1985).<br />
Famous in the 1960s for daring clothes, such as<br />
topless swimsuits and see-through blouses, as<br />
well as knit minidresses and knee-high<br />
leggings worn with tunic tops.<br />
HUBERT DE GIVENCHY (French designer, 1927-).<br />
Known for simple, elegant designs and for<br />
dressing the late movie actress, Audrey<br />
Hepburn; his many licensing agreements<br />
include hosiery, eyewear, sportswear, and<br />
home furnishings; now retired; creative<br />
resp<strong>on</strong>sibilities at Givenchy are shared by<br />
British designer Ozwald Boateng and<br />
Italian designer Riccardo Tisci.<br />
ALIX GRÈS (French designer, 1903-1993).<br />
First desire was to be a sculptor; known<br />
for draped and molded jersey dresses;<br />
business closed during World War II, but<br />
reopened after the war and c<strong>on</strong>tinued<br />
until the mid 1980s.<br />
GUCCIO GUCCI (Italian designer 1881-1953). In<br />
1921, opened a small workshop in Florence<br />
that handcrafted luggage and saddlery, and eventually<br />
handbags; became a pi<strong>on</strong>eer of Italian design. Gucci<br />
Group, a luxury goods company, produces and distributes<br />
the brands of many designers.<br />
HALSTON (American designer, 1932-1990). Known in the<br />
1970s for his Ultrasuede® dresses and suits; popular<br />
designer for many celebrities, including Elizabeth Taylor<br />
and Liza Minnelli.<br />
EDITH HEAD (American designer, 1899-<br />
1981). Costume designer who w<strong>on</strong> eight<br />
Oscars; designed movie wardrobes for<br />
such screen stars as Grace Kelly, Mae<br />
West, Paul Newman, Robert Redford, and<br />
Elizabeth Taylor.<br />
CHARLES JAMES (American couturier, 1906-<br />
1978). Raised in Chicago, but operated<br />
dressmaking sal<strong>on</strong>s in L<strong>on</strong>d<strong>on</strong> and Paris;<br />
also ran a custom-order business;<br />
c<strong>on</strong>sidered an equal by top Paris<br />
couturiers.<br />
ANN KLEIN (American designer, 1923-<br />
1974). Revoluti<strong>on</strong>ized junior-size<br />
clothes, giving them an adult look;<br />
pi<strong>on</strong>eered sportswear as uniquely<br />
suited to the American woman.<br />
CLAIRE McCARDELL (American<br />
designer, 1906-1958). C<strong>on</strong>sidered the<br />
top all-American designer in the<br />
1940s and 1950s; specialized in<br />
practical clothes made of sturdy<br />
fabrics, such as denim, gingham,<br />
and wool jersey; introduced<br />
bareback summer dresses, bolero<br />
jackets over halter dresses, and<br />
ballet slippers as streetwear.<br />
NORMAN NORELL (American<br />
designer, 1900-1972). Sometimes<br />
called “the American Balenciaga”<br />
for the precise tailoring and<br />
timeless elegance of his clothes.<br />
He was the first designer<br />
elected to the Coty Hall of Fame,<br />
and was founder and president<br />
of the Council of Fashi<strong>on</strong> Designers of<br />
America (CFDA).<br />
A classic example from the 1960s, actress<br />
Audrey Hepburn models this Givenchy<br />
evening coat.<br />
CHAPTER 7 Fashi<strong>on</strong> Designers • 127
FAMOUS<br />
DESIGNERS<br />
PAUL POIROT (French designer, 1880-1944). C<strong>on</strong>sidered the<br />
father of the French fashi<strong>on</strong> industry and <strong>on</strong>e of the<br />
greatest designers of all time; banished the corset and<br />
introduced the hobble skirt, turbans, and kim<strong>on</strong>o tunics in<br />
the early 1900s; many French artists designed his fabrics.<br />
EMILIO PUCCI (Italian designer, 1914-1992). Was a member<br />
of Italy’s Olympic ski team; fashi<strong>on</strong> career began when a<br />
photographer noticed his ski clothes; known for<br />
lightweight jersey dresses in bold geometric prints;<br />
company that bears his name offers modern designs in<br />
prints from the Pucci archives.<br />
MARY QUANT (English designer, 1934-). In the mid 1950s,<br />
L<strong>on</strong>d<strong>on</strong> was the center of the fashi<strong>on</strong> world and Quant<br />
was its most important designer; credited with starting<br />
the Mod look featuring miniskirts, hip-hugger pants,<br />
body stockings, and hot pants.<br />
YVES SAINT LAURENT (French designer,<br />
1936-). Worked for Christian Dior and,<br />
after Dior’s death, became head of the<br />
House of Dior at age twenty-<strong>on</strong>e.<br />
Important fashi<strong>on</strong> looks include the<br />
trapeze dress, pea jackets, M<strong>on</strong>drian<br />
dresses, and the safari look; opened a<br />
series of prêt-a-porter boutiques called<br />
Rive Gauche; his many licenses are<br />
often identified by the initials YSL;<br />
retired in 2002, but the label has<br />
c<strong>on</strong>tinued under the directi<strong>on</strong> of<br />
various designers.<br />
ELSA SCHIAPARELLI (French<br />
couturier, 1890-1973). C<strong>on</strong>sidered <strong>on</strong>e<br />
of the most creative and<br />
unc<strong>on</strong>venti<strong>on</strong>al couturiers of the<br />
1930s and 1940s; introduced the<br />
color “shocking pink”; first to<br />
design fitted sweaters with<br />
collars and bows knitted into<br />
the design and to use zippers<br />
and fabrics made of<br />
manufactured fibers.<br />
128 • UNIT 2 Clothes and Fashi<strong>on</strong><br />
WILLI SMITH (African-American designer, 1948-1987).<br />
African-American designer who started his own firm,<br />
WilliWear, Ltd., at age twenty-eight; designed youthful<br />
clothes for men and women in a style he described as<br />
“real clothes.”<br />
MADELEINE VIONNET (French couturier, 1876-1975).<br />
C<strong>on</strong>sidered <strong>on</strong>e of the three greatest couturiers, al<strong>on</strong>g<br />
with Chanel and Balenciaga, of the 20th<br />
century; famous for bias-cut dresses,<br />
handkerchief hems, cowl and halter<br />
necklines, and art deco embroideries.<br />
LOUIS VUITTON (French designer, 1821-1892).<br />
Began manufacturing trunks in Paris in 1854;<br />
known for its designer luggage pattern: a<br />
beige-<strong>on</strong>-chestnut m<strong>on</strong>ogram “LV.” Company<br />
is <strong>on</strong>e of the world’s most famous<br />
makers of luxury goods; fashi<strong>on</strong><br />
designer is Marc Jacobs.<br />
CHARLES FREDERICK WORTH<br />
(French couturier, 1826-1895).<br />
Known as the father of haute<br />
couture; in 1858 opened his own<br />
fashi<strong>on</strong> house, which remained<br />
the most important fashi<strong>on</strong><br />
house in Paris for 50 years;<br />
dressed many famous women,<br />
including Empress Eugenie of<br />
France and Empress Elizabeth of<br />
Austria; his perfume, Je<br />
Reviens, is still sold today.<br />
In 1965, Yves Saint<br />
Laurent created the<br />
“M<strong>on</strong>drian Dress” based<br />
<strong>on</strong> the abstract and<br />
geometric designs of<br />
artist Piet M<strong>on</strong>drian.
MODERN MASTERS<br />
GIORGIO ARMANI (Italian designer, 1936-). Known for<br />
unc<strong>on</strong>structed jackets, finely tailored menswear, and<br />
women’s suits with menswear details; credited with<br />
reintroducing linen to menswear and women’s wear.<br />
LIDA BADAY (Canadian designer, 1957-). Started as a<br />
patternmaker before founding own label; best known for<br />
her use of wool jersey in classic, comfortable styles.<br />
MANOLO BLAHNIK (British designer, 1943-). Born in the<br />
Canary Islands; his shoe designs are known for their high<br />
heels, elegant lines, and extravagant details.<br />
STEPHEN BURROWS (American designer, 1945-). First<br />
African-American to obtain internati<strong>on</strong>al status as a star<br />
designer; in 1973, <strong>on</strong>e of six American designers invited to<br />
Paris to show their collecti<strong>on</strong>s with French couture<br />
designers; known for “lettuce hems,” flowing chiff<strong>on</strong>s,<br />
and soft jersey; made a major fashi<strong>on</strong> comeback in 2002.<br />
OSCAR DE LA RENTA (American designer, 1932-). Born in<br />
the Dominican Republic; apprenticed with Balenciaga;<br />
known for elegant, feminine daywear and “for<br />
evening” wear that features luxurious fabrics,<br />
such as taffeta, organza, and tulle; licenses<br />
many products, including fragrances.<br />
DOMENICO DOLCE (1958-) and STEFANO<br />
GABBANA (1962-) (Italian designers). Joined<br />
forces in Milan in 1982; their clothes are<br />
often described as modern-romantic,<br />
with many historical references<br />
and pieces designed to be worn<br />
in different ways.<br />
JOHN GALLIANO (British<br />
designer, 1960-). Born in<br />
Gibraltar and grew up in<br />
L<strong>on</strong>d<strong>on</strong> where he launched<br />
his own label; creates<br />
delicate, bias-cut gowns<br />
and superbly tailored suits;<br />
became chief designer at<br />
Givenchy in 1995 and<br />
moved to House of Dior in<br />
1996.<br />
JEAN-PAUL GAULTIER (French designer, 1952-). Began as<br />
an assistant to Pierre Cardin; designs unusual,<br />
c<strong>on</strong>troversial, and expensive ready-to-wear clothing for a<br />
younger market.<br />
NICOLAS GHESQUIÈRE (French designer, 1971-). His designs<br />
blend street style and historical reverence; signature<br />
silhouette is skinny pants and blous<strong>on</strong> jacket; creative<br />
director for the house of Balenciaga.<br />
KEVAN HALL (African-American designer, 1958-). Awardwinning<br />
designer, born in Detroit; has designed gowns for<br />
such celebrities as Meg Ryan, Natalie Cole, Renee<br />
Zellweger, and Vivica A. Fox; former design and creative<br />
director for the House of Halst<strong>on</strong>; in 2001 launched his<br />
own Kevan Hall Couture collecti<strong>on</strong>.<br />
CAROLINE HERRERA (American designer, 1939-). Born in<br />
Venezuela; moved to the U.S. in 1980; designs dresses,<br />
ball gowns, and wedding gowns; has her own fragrances.<br />
TOMMY HILFIGER (American designer, 1951-). Owned ten<br />
specialty stores by age twenty-six; known for his All-<br />
American casual look; has licenses in apparel,<br />
accessories, and home fashi<strong>on</strong>s.<br />
MARC JACOBS (American designer, 1960-). While a<br />
designer at Perry Ellis, he introduced the “grunge”<br />
look; has been with Louis Vuitt<strong>on</strong>, the French luggage<br />
firm, designing ready-to-wear and accessories<br />
collecti<strong>on</strong>s since 1997.<br />
BETSEY JOHNSON (American designer,<br />
1942-). Designs funky, youthful fashi<strong>on</strong>s<br />
that have a sense of humor; her<br />
fashi<strong>on</strong> shows end with a cartwheel<br />
by Betsey.<br />
NORMA KAMALI (American, 1945-).<br />
Early successes included clothing<br />
made from silk parachutes,<br />
“sleeping bag” coats, and<br />
swimwear; inspired by 1940s<br />
styles.<br />
Tommy Hilfiger’s casual<br />
look is popular with teens<br />
and adults alike.<br />
CHAPTER 7 Fashi<strong>on</strong> Designers • 129
FAMOUS<br />
DESIGNERS<br />
DONNA KARAN (American designer, 1948-). Has own design<br />
firm and specializes in simple, well-made sportswear; first<br />
designer to popularize the bodysuit; has many licensed<br />
products, including shoes, jewelry,<br />
hosiery, and eyewear.<br />
REI KAWAKUBO (Japanese designer,<br />
1945-). Born and educated in Japan;<br />
known as a trend-setting, French ready-to-wear designer;<br />
garments are a happy combinati<strong>on</strong> of textures and<br />
patterns, usually based <strong>on</strong> traditi<strong>on</strong>al Japanese clothing.<br />
CALVIN KLEIN (American designer, 1942-). Famous for<br />
creating Calvin Klein jeans; designs simple, sophisticated<br />
sportswear with architectural lines; uses natural fabrics,<br />
mostly in earth t<strong>on</strong>es.<br />
MICHAEL KORS (American designer, 1959-). Creates<br />
evening gowns and designer sportswear, first designing<br />
individual pieces and then combining them into outfits;<br />
regularly appears as a judge <strong>on</strong> “Project Runway.”<br />
CHRISTIAN LACROIX (French designer, 1951-). Opened his<br />
own couture and ready-to-wear business in 1987;<br />
introduced dresses with fitted tops and short bubble<br />
skirts for a special evening look; also designs costumes<br />
for the ballet and the opera.<br />
KARL LAGERFELD (French designer,<br />
1939-). Born in Germany; designs<br />
garments for three companies——his<br />
own label, Chanel, and furs for<br />
Fendi of Italy. Photographs own<br />
collecti<strong>on</strong>.<br />
RALPH LAUREN (American designer,<br />
1939-). Famous for his Polo<br />
collecti<strong>on</strong> of menswear; also<br />
designs women’s wear, children’s<br />
clothes, home furnishings,<br />
accessories, and cosmetics;<br />
designs have been influenced by<br />
the American West and an idealized<br />
versi<strong>on</strong> of traditi<strong>on</strong>al English<br />
apparel.<br />
130 • UNIT 2 Clothes and Fashi<strong>on</strong><br />
STELLA McCARTNEY (English designer, 1972-). Began<br />
working for designer Christian Lacroix at age 15; was<br />
chief designer at Chloe, the French couture house; her<br />
own line blends frilly elements with<br />
rocker accents.<br />
ALEXANDER MCQUEEN (English<br />
designer, 1969-). Has a str<strong>on</strong>g tailoring<br />
background that is reflected in his beautifully crafted and<br />
inventive but often outrageous designs; was chief<br />
designer at Givenchy; now has own line as part of the<br />
Gucci Group.<br />
ARTHUR MENDONÇA (Canadian designer, 1976) Designs<br />
both men’s and women’s wear; known for vibrant colors,<br />
luxurious fabrics, and expert tailoring.<br />
NICOLE MILLER (American, 1952-). Gained attenti<strong>on</strong> with<br />
men’s ties, then boxer shorts and menswear linings in<br />
bold, graphic prints; now designs women’s clothes,<br />
accessories, and home furnishings.<br />
MISSONI (Italian designers, ROSITA, 1931-, OTTAVIO, 1921-).<br />
Husband and wife team known for simple knit garments<br />
designed by Rosita that were made in startling geometric<br />
and abstract patterns created by Ottavio; retired in 1997;<br />
daughter Angela is now head designer for Miss<strong>on</strong>i.<br />
ISSEY MIYAKI (Japanese designer,<br />
1938-). Worked as an assistant to<br />
Givenchy and Geoffrey Beene;<br />
design business is based in Tokyo<br />
but also shows in Paris; basic<br />
philosophy is to create garments<br />
from “<strong>on</strong>e piece of cloth;”<br />
creates innovative fabrics for his<br />
designs.<br />
D<strong>on</strong>na Karan’s DKNY<br />
signature collecti<strong>on</strong> is<br />
a popular department<br />
in many stores.
ISAAC MIZRAHI (American designer,<br />
1961-). Worked with Perry Ellis and<br />
Calvin Klein before starting own<br />
business at age twenty-six; creates<br />
young, inventive clothes in unexpected<br />
colors and fabrics; designs a special<br />
line of sportswear, accessories, and<br />
home furnishings for Target.<br />
CLAUDE MONTANA (French designer, 1949-) Recognized for<br />
leather and wool fashi<strong>on</strong>s, as well as bold, welldefined<br />
silhouettes and razor-sharp tailoring for<br />
men and women.<br />
ZAC POSEN (American designer, 1980-).<br />
Designs timelessly nostalgic clothes<br />
with details that mirror the mastery<br />
of Christian Dior and Madame<br />
Vi<strong>on</strong>net, as well as limited-editi<strong>on</strong><br />
jeans; a favorite designer of young<br />
Hollywood celebrities.<br />
MIUCCIA PRADA (Italian designer,<br />
1950-). Granddaughter of founder<br />
of family firm that originally produced<br />
high-quality leather goods; first ready-towear<br />
collecti<strong>on</strong> was in 1989; known for<br />
luxurious, minimalist clothes for men and<br />
women.<br />
TRACY REESE (American designer, 1964-). African-American<br />
designer known for bright colors, unusual prints, and<br />
intricate patterns; her whimsical and breezy designs are<br />
ultra-feminine and vintage-inspired.<br />
PROENZA SCHOULER (American designers, LAZARO<br />
HERNANDEZ, 1979-; JACK McCOLLOUGH, 1979-). Met in<br />
design school and partnered <strong>on</strong> a successful senior<br />
project, calling it by their mothers’<br />
maiden names, that launched their<br />
business; create edgy, youthful designs<br />
with sleek and minimal silhouettes; w<strong>on</strong> the<br />
Perry Award for new talent in 2003.<br />
ANGEL SÁNCHEZ (Venezuelan designer).<br />
Originally trained as an architect, he began<br />
his fashi<strong>on</strong> career in Caracas and opened a<br />
New York showroom in 1995; makes<br />
structural, yet flowing, clothes, particularly<br />
bridal wear.<br />
The super-stylish<br />
Mizrahi bags add<br />
pizzazz to any outfit.<br />
The Prada name<br />
is linked to an<br />
innovative line of<br />
clothing and<br />
accessories.<br />
The Versace empire started with a<br />
small boutique in Milan, Italy.<br />
ANNA SUI (American designer, 1955-).<br />
Designs moderately priced,<br />
unc<strong>on</strong>venti<strong>on</strong>al, adventurous clothes for<br />
young customers.<br />
EMANUEL UNGARO (French designer, 1933-).<br />
Born in France to Italian parents; worked<br />
for Balenciaga and Courrèges; early designs were<br />
structured and ultramodern; known today for soft, bodyc<strong>on</strong>scious<br />
designs, as well as shoes, handbags, and<br />
perfume.<br />
VALENTINO (Italian designer, 1932-). Shows couture<br />
collecti<strong>on</strong> in Paris, but company<br />
headquarters are in Milan; many of his<br />
clothes and accessories have his<br />
signature initial V marked in the seams<br />
or incorporated into the design; his<br />
wedding gowns and evening clothes are<br />
favored by celebrities.<br />
VERSACE (Italian designers, GIANNI,<br />
1946-1997; DONATELLA, 1955-). Gianni<br />
built a fashi<strong>on</strong> empire creating<br />
sophisticated and elegant designs for<br />
women’s wear; up<strong>on</strong> her brother’s death,<br />
D<strong>on</strong>atella became head of design and<br />
c<strong>on</strong>tinues to produce collecti<strong>on</strong>s.<br />
DIANE VON FURSTENBERG (American designer, 1946-).<br />
Born in Brussels, educated in Europe, and moved to New<br />
York in 1969; her knit jersey wrap dress was a “uniform”<br />
for career women in the 1970s; operates a design studio<br />
and is a popular designer <strong>on</strong> the QVC shopping network.<br />
VERA WANG (American designer, 1949-). Childhood figureskating<br />
champi<strong>on</strong> who designed costumes for the 1994<br />
Winter Olympics; famous for expensive bridal<br />
gowns and evening dresses, as well as<br />
perfume.<br />
MICHAEL WESETLEY (American designer,<br />
19??-). African-American designer of<br />
menswear; known for dramatic colors and<br />
detailed textures, eye-popping ties and<br />
smartly tailored suits. Collecti<strong>on</strong> boasts a<br />
Made in USA label.<br />
CHAPTER 7 Fashi<strong>on</strong> Designers • 131
CHAPTER 7<br />
CHAPTER SUMMARY<br />
• Designers use their understanding of<br />
design, fabric, and c<strong>on</strong>structi<strong>on</strong> to create<br />
new fashi<strong>on</strong>s.<br />
• High-fashi<strong>on</strong> designers assume complete<br />
c<strong>on</strong>trol for producing some of the most<br />
creative and expensive clothing in the<br />
industry.<br />
• After inspirati<strong>on</strong> from many sources,<br />
designers perfect their ideas through<br />
sketches, draping, and sample garments.<br />
• Haute couture fashi<strong>on</strong>s are most expensive.<br />
Ready-to-wear and pret-a-porter collecti<strong>on</strong>s<br />
are moderately priced.<br />
USING KEY TERMS<br />
Write ten fill-in-the-blank statements that<br />
use at least ten Key Terms in the blanks.<br />
Exchange papers with a classmate and fill in<br />
the blanks. When completed, return the<br />
papers for checking. Discuss any difficulties<br />
either of you had with the statements.<br />
132 • UNIT 2 The Fashi<strong>on</strong> World<br />
Review<br />
RECALLING THE FACTS<br />
1. What are some of the resp<strong>on</strong>sibilities of<br />
a high-fashi<strong>on</strong> designer?<br />
2. How do stylists c<strong>on</strong>tribute to the clothing<br />
industry?<br />
3. Is it good business sense for a store<br />
buyer to choose garments from a variety<br />
of price ranges? Why or why not?<br />
4. Summarize the design process in five<br />
steps.<br />
5. List at least six sources of inspirati<strong>on</strong> for<br />
new fashi<strong>on</strong> designs.<br />
6. Why does a designer sketch a croquis?<br />
7. What are some advantages and disadvantages<br />
of draping?<br />
8. What role did fashi<strong>on</strong> babies play in the<br />
history of haute couture?<br />
9. What current fashi<strong>on</strong> business practices<br />
were pi<strong>on</strong>eered by Charles Worth?<br />
10. Describe a fashi<strong>on</strong> show that presents<br />
high-fashi<strong>on</strong> designs.<br />
11. What gave rise to pret-a-porter fashi<strong>on</strong>s?<br />
12. How do pret-a-porter fashi<strong>on</strong>s compare<br />
with haute couture designs?<br />
13. How does licensing affect designers and<br />
c<strong>on</strong>sumers?<br />
14. Compare the designs of Oscar de la Renta<br />
and Calvin Klein.
and Activities<br />
THINKING CRITICALLY<br />
1. From a designer’s point of view, what are<br />
some advantages and disadvantages<br />
of a stylist creating knock-offs of a<br />
collecti<strong>on</strong>?<br />
2. Which do you think is more important for<br />
a fashi<strong>on</strong> house today: couture collecti<strong>on</strong>s,<br />
ready-to-wear collecti<strong>on</strong>s, or<br />
licensing agreements? Explain your<br />
answer.<br />
3. Do you think a designer’s style can be<br />
translated into such items as home furnishings,<br />
perfume, and makeup? Explain.<br />
APPLYING KNOWLEDGE<br />
1. Adapting designs. Look through highfashi<strong>on</strong><br />
magazines for a style that is not<br />
worn by most people. Suggest ways that<br />
the look could be modified to have<br />
greater appeal.<br />
2. New designs for teens. If you were a<br />
designer, where would you look for inspirati<strong>on</strong><br />
when creating new fashi<strong>on</strong>s for<br />
teens today? Write an explanati<strong>on</strong> of<br />
your ideas.<br />
3. Knockoffs. Locate an illustrati<strong>on</strong> of a<br />
high-fashi<strong>on</strong> garment shown in a<br />
designer’s recent collecti<strong>on</strong> or worn by a<br />
celebrity. Then locate a similar design in<br />
a catalog or store ad. In writing, compare<br />
the two garments for style, fabric, and<br />
price.<br />
CHAPTER 7<br />
4. Licensing. Using the Internet, magazines,<br />
newspapers, and visits to stores,<br />
list fashi<strong>on</strong>s and related products that<br />
are promoted by designers, celebrities,<br />
and sports figures. Share the results in<br />
class. How do you explain the length of<br />
the lists?<br />
5. Designer fashi<strong>on</strong>s. Develop a<br />
PowerPoint ® presentati<strong>on</strong> of fashi<strong>on</strong>s<br />
created by <strong>on</strong>e of the designers listed <strong>on</strong><br />
pages 126–131. Share your presentati<strong>on</strong><br />
with the class.<br />
MAKING>
CHAPTER 8<br />
The Fashi<strong>on</strong> Industry<br />
OBJECTIVES<br />
• List ways that<br />
fibers and fabrics<br />
are used other<br />
than in clothing.<br />
• Explain how the<br />
textile industry<br />
operates.<br />
• Describe the<br />
manufacturing<br />
process for<br />
clothing.<br />
• Explain what’s<br />
involved in fashi<strong>on</strong><br />
merchandising.<br />
• Describe promoti<strong>on</strong><br />
methods used by<br />
designers,<br />
manufacturers, and<br />
retailers.<br />
KEY TERMS<br />
assembly line<br />
chain<br />
c<strong>on</strong>tractors<br />
c<strong>on</strong>verters<br />
copy<br />
fashi<strong>on</strong> merchandising<br />
fashi<strong>on</strong> promoti<strong>on</strong><br />
forecasting services<br />
line<br />
market week<br />
marketing<br />
mass-produced<br />
retail<br />
wholesale<br />
134 • UNIT 2 The Fashi<strong>on</strong> World
EXAMINETHISISSUE<br />
Garment producti<strong>on</strong>. Typically,<br />
textiles are woven in a prosperous country<br />
that has the technology to do this step<br />
quickly and inexpensively. The materials<br />
may then be exported for assembly in a<br />
country where workers’ wages and other<br />
business costs are lower. Completed garments<br />
are returned to the country of origin<br />
or shipped elsewhere for sale. To critics,<br />
this practice is unfair to workers in<br />
both countries. To supporters, it’s just<br />
good business sense.<br />
What do you think?<br />
What arguments might be made for<br />
and against this practice? Which arguments<br />
seem str<strong>on</strong>ger to you?<br />
DID YOU KNOW THAT THE UNITED STATES<br />
produces enough fabric to stretch to the<br />
mo<strong>on</strong> and back 23 times? Creating that<br />
much fabric is easier than it <strong>on</strong>ce was. Because of<br />
today’s technology, procedures that used to take<br />
several m<strong>on</strong>ths can now be d<strong>on</strong>e in minutes.<br />
Textile producti<strong>on</strong>, of course, is just <strong>on</strong>e part<br />
of the huge fashi<strong>on</strong> industry. The road<br />
from fibers, to fabrics, to garments, to<br />
stores takes many steps and milli<strong>on</strong>s<br />
of employees, as you’ll so<strong>on</strong> see.<br />
THE TEXTILE 27% for home<br />
INDUSTRY<br />
furnishings<br />
Fiber and fabric producers<br />
make up the textile industry. This<br />
industry, <strong>on</strong>e of the oldest and largest<br />
in America, provides fiber and fabric for<br />
many purposes.<br />
Uses of Fibers and Fabrics<br />
The largest percentage of the textiles manufactured<br />
in the United States—almost 40 percent—<br />
goes into clothing. The remaining fibers are used<br />
for home furnishings and other uses. See Fig. 8-1.<br />
While clothing is an obvious use of fibers and<br />
fabrics, others might surprise you. Did you know<br />
that a felt-tip pen has a nyl<strong>on</strong> point? Were you<br />
aware that the covering <strong>on</strong> a tea bag is a textile<br />
product? Fibers and fabrics are also found in luggage,<br />
flags, and ropes. Fig. 8-2 <strong>on</strong> page 136 gives<br />
examples of the many uses of fibers and fabrics.<br />
From Fiber to Fabric<br />
In the textile industry, fiber producers begin<br />
the process that creates fabric. Farmers grow<br />
plants that provide cott<strong>on</strong> fibers. Ranchers raise<br />
sheep that provide fleece for wool. Scientists work<br />
for chemical companies that develop and manufacture<br />
fibers. All of these fibers are eventually<br />
spun into yarns and then made into fabrics by<br />
textile mills.<br />
After buying the finished fabrics, manufacturers<br />
create many different products. Apparel manufacturers<br />
cut and sew fabric into garments.<br />
Fabric stores buy textiles to sell to home sewers.<br />
8-1<br />
Percentages of Fiber Used for Different Purposes<br />
38% for apparel<br />
23% for industrial<br />
and other products<br />
4% for export<br />
8% for floor<br />
coverings<br />
CHAPTER 8 The Fashi<strong>on</strong> Industry • 135
8-2 • Other Uses of Fibers and Fabrics<br />
HOME DECORATION<br />
Curtains<br />
Draperies<br />
Slipcovers<br />
Upholstery<br />
Disposable<br />
surgical<br />
gowns<br />
Disposable<br />
masks<br />
Artificial football<br />
turf<br />
Tennis racket<br />
strings<br />
Filters<br />
Polishing<br />
cloths<br />
Tires<br />
Vehicle seat<br />
belts<br />
Vehicle wall<br />
coverings<br />
Rugs<br />
Carpets<br />
Table linens<br />
Disposable<br />
sheets<br />
Backpacks<br />
Tents<br />
Sails<br />
Fishing lines<br />
Vehicle seat<br />
covers<br />
Vehicle<br />
flooring<br />
Spacesuits<br />
MEDICINE<br />
RECREATION<br />
Lampshades<br />
Sheets<br />
Pillowcases<br />
Disposable<br />
bandages<br />
Fiber Companies<br />
The backb<strong>on</strong>e of the textile industry is<br />
research and development. These departments<br />
develop new fibers and the equipment for making<br />
them. Through testing, they evaluate a new<br />
fiber’s strength, dyeability, and reacti<strong>on</strong> to special<br />
finishes.<br />
Many fibers, including nyl<strong>on</strong> and polyester, are<br />
created from chemicals. They are produced by<br />
such chemical companies as DuP<strong>on</strong>t and Hoechst<br />
Celanese, which sell their fibers to textile mills.<br />
Textile Mills<br />
Textile mills spin fibers into yarns and c<strong>on</strong>vert<br />
them into fabric. See Fig. 8-3. Some of the largest<br />
are Burlingt<strong>on</strong> Industries, C<strong>on</strong>e Mills Corporati<strong>on</strong>,<br />
Dan River, Malden Mills, Milliken & Company,<br />
and Springs Industries. Mills produce woven and<br />
136 • UNIT 2 The Fashi<strong>on</strong> World<br />
Carb<strong>on</strong>-fiber,<br />
reinforced<br />
plastics in<br />
fishing rods,<br />
golf clubs,<br />
ski poles<br />
INDUSTRY<br />
C<strong>on</strong>veyor belts Buildings with<br />
fabric<br />
“skins”<br />
TRANSPORTATION<br />
Spacecraft<br />
interiors<br />
Booster<br />
rockets<br />
Blankets<br />
Bedspreads<br />
Towels<br />
Lining for artificial<br />
hearts<br />
Carb<strong>on</strong>-fiber,<br />
reinforced<br />
plastics in<br />
hulls of sailboats,<br />
canoes<br />
Napped surface<br />
<strong>on</strong> paint<br />
rollers<br />
Space shuttle<br />
heat shield<br />
knitted fabrics in many types and weights. Some<br />
produce <strong>on</strong>ly woven fabrics, while others make<br />
<strong>on</strong>ly knits. Some large mills manufacture both.<br />
The design department of a textile mill works<br />
closely with the research department to develop<br />
new weaves, patterns, prints, and colors. New fabrics<br />
created by fabric designers often inspire new<br />
clothing styles. These designers are working today<br />
<strong>on</strong> fabrics that will appear in the stores in <strong>on</strong>e or<br />
two years.<br />
Once fabrics are dyed or printed with a design,<br />
additi<strong>on</strong>al treatments give the fabrics special<br />
qualities. For example, <strong>on</strong>e finish makes a fabric<br />
repel water. Brushing creates a fuzzy surface <strong>on</strong><br />
another fabric.<br />
Through quality c<strong>on</strong>trol, finished fabrics are<br />
inspected and tested to be sure they meet specific<br />
standards of quality and performance. Apparel<br />
manufacturers, retailers, and independent labs<br />
also do testing.<br />
How do you think different companies produce<br />
clothing and home furnishings in coordinating<br />
colors each seas<strong>on</strong>? Many fabric mills and<br />
manufacturers work with forecasting services.<br />
These services predict color, fabric, and fashi<strong>on</strong><br />
trends two or more years in advance. They<br />
8-3<br />
textile mills.<br />
Fibers are transformed to yarns and fabric in
How To…<br />
EXPLORE FASHION CAREERS<br />
The outfit you see in a store window has come a l<strong>on</strong>g way from fiber to fashi<strong>on</strong>. People in<br />
design, producti<strong>on</strong>, retailing, marketing, and promoti<strong>on</strong> all made c<strong>on</strong>tributi<strong>on</strong>s. Would you<br />
like to be part of the process? At the end of each unit in this text, you’ll find fashi<strong>on</strong><br />
career informati<strong>on</strong>. Using the suggesti<strong>on</strong>s <strong>on</strong> this page, you can investigate careers to<br />
see whether there’s a good match for you in the fashi<strong>on</strong> world.<br />
Step 1: Identify <str<strong>on</strong>g>Care</str<strong>on</strong>g>er Goals<br />
<str<strong>on</strong>g>Care</str<strong>on</strong>g>ers impact the way people live. Do you<br />
want to live where you do now, or are you<br />
willing to move? Would you work nights<br />
and weekends? Do you want to travel?<br />
Which of these sounds appealing: a<br />
formal or casual workplace; a<br />
relaxed or hectic pace; parttime<br />
or full-time work? Find<br />
out how the careers you’re<br />
c<strong>on</strong>sidering would meet<br />
your expectati<strong>on</strong>s.<br />
Step 2: Evaluate Pers<strong>on</strong>al<br />
Qualities and Skills<br />
You’ll get more enjoyment and<br />
success from a career that fits<br />
your qualities and skills. In the<br />
fashi<strong>on</strong> industry, some careers<br />
take creativity and originality<br />
while others take an interest<br />
in research, science, manufacturing,<br />
or business. In all<br />
fields, dependability, flexibility,<br />
and a positive attitude are valued.<br />
Do you get al<strong>on</strong>g well with<br />
others? Do you like to write,<br />
sew, sketch, take photos, or use<br />
a computer? Compare your qualities<br />
and skills with those<br />
needed in fashi<strong>on</strong> careers.<br />
Step 3: Research <str<strong>on</strong>g>Care</str<strong>on</strong>g>er Paths<br />
The directi<strong>on</strong> a career takes as you change<br />
positi<strong>on</strong>s is called a career path. By gaining<br />
experience and taking <strong>on</strong> more resp<strong>on</strong>sibility,<br />
you can advance to higher positi<strong>on</strong>s. That’s<br />
called moving up <strong>on</strong> the career ladder. If you<br />
apply experience in <strong>on</strong>e field to a new field,<br />
your career path takes a different directi<strong>on</strong>.<br />
Find out what educati<strong>on</strong>, training,<br />
and experience are needed for<br />
paths in the careers you’re exploring.<br />
Step 4: Explore Job Possibilities<br />
The more you know about a career, the<br />
easier it is to evaluate it. You could work<br />
part-time as a sales associate to learn<br />
about retailing. You might sample a<br />
career by taking an entry-level positi<strong>on</strong>.<br />
You can talk to people who work in certain<br />
careers. What opportunities are<br />
there in your area to learn about<br />
careers that interest you?<br />
Exploring Fashi<strong>on</strong><br />
<str<strong>on</strong>g>Care</str<strong>on</strong>g>ers<br />
Investigate a fashi<strong>on</strong> career, writing a<br />
resp<strong>on</strong>se for each step described here.<br />
CHAPTER 8 The Fashi<strong>on</strong> Industry • 137
develop special reports, color cards, and fabric<br />
swatches for their clients. Forecasting enables<br />
companies to produce matching items.<br />
Textile C<strong>on</strong>verters<br />
Textile c<strong>on</strong>verters are companies or individuals<br />
who serve as middle agents between textile<br />
mills and apparel manufacturers. C<strong>on</strong>verters buy<br />
unfinished fabrics, called greige (GRAY) goods,<br />
from the mills and have them dyed, printed, and<br />
finished to meet the specificati<strong>on</strong>s of designers<br />
and manufacturers. They have more flexibility<br />
than large mills to fulfill orders <strong>on</strong> short notice.<br />
Today’s Locati<strong>on</strong>s<br />
For years, the southeastern United States has<br />
been the center of textile manufacturing, as well<br />
as research and development. However, many<br />
textile manufacturers have opened facilities in<br />
countries, such as China, India, and Mexico,<br />
where wages and manufacturing costs are lower.<br />
Many sales and marketing offices are located in<br />
New York City. There, mills and c<strong>on</strong>verters have<br />
showrooms where apparel designers and manufacturers<br />
can see fabric samples. Showrooms are<br />
also located in Los Angeles, Dallas, Atlanta,<br />
Chicago, M<strong>on</strong>treal, and Tor<strong>on</strong>to.<br />
THE APPAREL INDUSTRY<br />
The shirt with the “in” style, the special clothes<br />
for playing sports, and even the gloves you wear in<br />
winter are all products of the apparel industry. See<br />
Fig. 8-4. This important segment of the fashi<strong>on</strong><br />
industry accounts for more companies, employees,<br />
and sales volume than any other segment.<br />
The apparel industry is also known as the garment<br />
industry or the rag trade. This fast-paced<br />
field is very complex. Since ideas about what is<br />
fashi<strong>on</strong>able change from seas<strong>on</strong> to seas<strong>on</strong>, they<br />
are hard to predict. Although some companies<br />
have been in business for many years, others go in<br />
and out of business almost overnight. Ready-towear<br />
manufacturers can make a large profit <strong>on</strong>e<br />
seas<strong>on</strong> with a “hot” line that sells well. They can<br />
lose heavily next seas<strong>on</strong> if they guess incorrectly<br />
about what will sell.<br />
138 • UNIT 2 The Fashi<strong>on</strong> World<br />
From Fabrics to Garments<br />
Apparel manufacturers buy fabrics from textile<br />
mills and c<strong>on</strong>verters, design and produce a<br />
clothing collecti<strong>on</strong>, or line, and sell the finished<br />
garments to stores. Some companies do all the<br />
producti<strong>on</strong> themselves; others hire different<br />
companies to do various steps. The factories<br />
where clothes are made are located in many cities<br />
and countries.<br />
Almost all of today’s clothes are massproduced.<br />
This means that many garments are<br />
made at the same time, with machines doing<br />
most of the work. Hems are usually machinemade.<br />
Even butt<strong>on</strong>s can be sewn <strong>on</strong> by machine.<br />
As a result, garments can be made faster and<br />
cheaper than ever before. See Fig. 8-5.<br />
Types of Manufacturers<br />
Apparel is divided into three main categories:<br />
women’s wear, menswear, and children’s wear.<br />
Women’s wear receives the most publicity, has the<br />
greatest designer recogniti<strong>on</strong>, and is the most<br />
competitive segment of the fashi<strong>on</strong> industry.<br />
8-4<br />
Because of the huge apparel industry, you can<br />
choose from many garments when shopping.
8-5<br />
When garments are mass-produced, workers<br />
often specialize in certain tasks.<br />
Each category is further subdivided into garment<br />
types. Women’s wear, for example, includes<br />
dresses, blouses, sportswear, outerwear, eveningwear,<br />
bridal, maternity wear, and intimate<br />
apparel.<br />
Small manufacturers usually specialize in <strong>on</strong>e<br />
or two garment types in a certain price range.<br />
Large firms may produce apparel under many<br />
different labels in several price ranges. Most manufacturers<br />
of accessories and home furnishings<br />
also specialize in <strong>on</strong>e or two areas.<br />
Garment Manufacturers<br />
Manufacturers handle all phases of a garment’s<br />
producti<strong>on</strong>—from design, to producti<strong>on</strong>, to<br />
shipping. See Fig. 8-6. Most produce two lines of<br />
clothing per year. These lines are designed at least<br />
six m<strong>on</strong>ths ahead of a seas<strong>on</strong>. Clothes shown to<br />
store buyers and the press in the spring will be in<br />
the stores in the fall. Clothes shown in the fall will<br />
be available in the stores the following spring.<br />
C<strong>on</strong>tractors<br />
Although some manufacturers do all producti<strong>on</strong><br />
in their own factories, many hire c<strong>on</strong>tractors.<br />
These are companies that specialize in<br />
sewing certain garments for a specific price. They<br />
may be located in the United States or in other<br />
countries, such as India or Korea. C<strong>on</strong>tractors<br />
produce the garment according to the manufacturer’s<br />
designs and specificati<strong>on</strong>s.<br />
Accessories Manufacturers<br />
Accessories include shoes, hosiery, jewelry,<br />
watches, scarves, neckties, gloves, hats, belts,<br />
handbags, and small leather goods. Many companies<br />
specialize in manufacturing <strong>on</strong>ly <strong>on</strong>e type of<br />
accessory. Others manufacture several types.<br />
Many name designers have licensing agreements<br />
with manufacturers for accessories that complete<br />
the designer’s fashi<strong>on</strong> look.<br />
Although the manufacturing of accessories has<br />
many of the same steps as garments, producti<strong>on</strong><br />
techniques are specialized. Shoes are formed <strong>on</strong> a<br />
foot-shaped mold, called a last. St<strong>on</strong>es are inserted<br />
into jewelry. Hosiery is knitted to the shape of the<br />
legs and feet. Felt hats are shaped, ties are lined,<br />
and handbags may have detachable straps.<br />
The Manufacturing Process<br />
The steps for manufacturing ready-to-wear<br />
are very similar to those used by home sewers. As<br />
described here, they begin with design and end<br />
with distributi<strong>on</strong>.<br />
8-6<br />
Have you ever received the wr<strong>on</strong>g item in a ship-<br />
ment? If so, you can appreciate careful packaging.<br />
CHAPTER 8 The Fashi<strong>on</strong> Industry • 139
8-7<br />
The manufacturing process begins with design-<br />
ing the line to be produced.<br />
1. Designing the line. The fashi<strong>on</strong> designer or<br />
design department plans the line. For each<br />
item, they determine the design,<br />
select the colors and fabrics, and<br />
add the details. See Fig. 8-7. As<br />
you saw in Chapter 7, stylists create<br />
less expensive versi<strong>on</strong>s of<br />
designer fashi<strong>on</strong>s. For this reas<strong>on</strong>,<br />
two manufacturers might<br />
produce garments with similar<br />
styles but different prices. Most<br />
countries, except for France,<br />
have no laws against line-for-line<br />
copies.<br />
2. Making samples. To check the<br />
styling, appearance, and fit of<br />
each design, a sample garment<br />
is made. The sample may be<br />
changed and reworked many<br />
times until the design and marketing<br />
departments believe the<br />
design will sell. Specificati<strong>on</strong>s<br />
are written for each garment.<br />
140 • UNIT 2 The Fashi<strong>on</strong> World<br />
3. Establishing costs. The wholesale price of<br />
each item must be figured. This is what stores<br />
pay to manufacturers when buying goods to<br />
sell. The wholesale price is determined by<br />
adding all expenses for fabric, lining, trims,<br />
fasteners, labor, packaging, and shipping.<br />
Then additi<strong>on</strong>al business expenses, such as<br />
rent and advertising, are added. The cost for<br />
each and every comp<strong>on</strong>ent must be established<br />
since the slightest error could result in<br />
losses instead of profits. Some manufacturers<br />
double their costs to arrive at the wholesale<br />
price. See Fig. 8-8.<br />
4. Taking orders. Sales representatives show<br />
sample garments to store buyers in the manufacturer’s<br />
showrooms. Items that are<br />
ordered go into producti<strong>on</strong>.<br />
5. Ordering materials. All fabrics, trims, and<br />
fasteners are ordered from vendors, or suppliers.<br />
Large manufacturers buy fabrics directly<br />
from major textile mills. Smaller companies,<br />
unable to order in large quantities, are usually<br />
restricted to smaller fabric suppliers.<br />
8-8 • Computing the Price of a Pair of Pants<br />
MANUFACTURING QUANTITY UNIT COST PER TOTALS<br />
EXPENSES NEEDED COST PANTS<br />
Material<br />
Fabric 1.6 yds. $2.50/yd $4.00<br />
Interfacing<br />
Trims and Supplies<br />
.2 yd. $ .55/yd. $ .11 $4.11<br />
Butt<strong>on</strong>s 2 $2.00/gross $ .03<br />
Zipper<br />
Labor (Computed for<br />
1 $ .15 $ .15 $ .18<br />
all processes)<br />
Other Packaging; tags;<br />
$5.10 $5.10<br />
shipping; etc. $ .60 $ .60<br />
Total Cost to Manufacture $9.99<br />
Wholesale Price for Retailers (often doubles manufacturing<br />
cost)<br />
$19.99<br />
Retail Price for C<strong>on</strong>sumers (often doubles wholesale cost) $39.99
Technology Trends<br />
>>QUICK RESPONSE<br />
Have you ever w<strong>on</strong>dered how the bar<br />
code <strong>on</strong> a price tag works? The widths and<br />
lengths of the lines and spaces indicate<br />
numbers and letters that identify a specific<br />
product. When a bar code is scanned,<br />
a computerized database with product<br />
informati<strong>on</strong> is accessed. The user gets<br />
informati<strong>on</strong> about the product. If a sale<br />
is made, records adjust immediately.<br />
Bar code technology is <strong>on</strong>e tool used<br />
by a management system called Quick<br />
Resp<strong>on</strong>se (QR). With this system, fiber<br />
producers, fabric mills, apparel manufacturers,<br />
and retailers link electr<strong>on</strong>ically to<br />
do business faster and more efficiently.<br />
QR has many advantages for businesses.<br />
6. Creating producti<strong>on</strong> patterns. The master<br />
pattern must be “graded” up and down into<br />
other sizes. The manufacturer’s sample size 8,<br />
for example, will be produced in sizes 4 to 16.<br />
Today, most garment manufacturers use<br />
computers for pattern grading.<br />
7. Creating layouts. Developing a layout is like<br />
doing a giant jigsaw puzzle. All the pattern<br />
pieces must fit <strong>on</strong>to the smallest amount of<br />
fabric possible to minimize costs. When a<br />
• Increases speed of design and producti<strong>on</strong><br />
with computer-aided design (CAD)<br />
and computer-aided manufacturing<br />
(CAM) systems.<br />
• Increases efficiency by allowing companies<br />
to reorder and communicate<br />
electr<strong>on</strong>ically.<br />
• Accurately tracks sales and inventory<br />
to avoid overstocking goods.<br />
• Reduces amount of time that goods<br />
spend in transit or warehouses.<br />
• Decreases time needed to restock<br />
merchandise, avoiding out-of-stock<br />
items.<br />
Ultimately, QR saves time at all stages,<br />
from fiber manufacture to retail sales.<br />
Retail reorders are smaller and more frequent.<br />
Even though inventories are lower,<br />
fewer items are out of stock. Best of all,<br />
producers, manufacturers, and retailers<br />
enjoy greater profits.<br />
INVESTIGATE<br />
Use the Internet and other resources to<br />
learn more about how QR works.<br />
manufacturer produces thousands of garments,<br />
a financial savings of just a few fabric<br />
inches per garment can be substantial. A<br />
marker, a l<strong>on</strong>g piece of paper with outlines of<br />
all pattern pieces <strong>on</strong> the layout, is created.<br />
Both the layout and marker can be created by<br />
computer. p 492<br />
8. Cutting fabric. Special machines stack as<br />
many as 500 layers of fabric sixty feet l<strong>on</strong>g, so<br />
many garments can be cut out at the same<br />
CHAPTER 8 The Fashi<strong>on</strong> Industry • 141
8-9<br />
Heavy-duty sewing machines designed for spe-<br />
cialized tasks are used in manufacturing garments.<br />
time. The marker is placed across the top as a<br />
guide for the cutting knives. Some companies<br />
have a computer-aided manufacturing<br />
(CAM) system that does the layout and cutting<br />
automatically. The fabric pieces are then<br />
sorted by sizes, tied into bundles, and sent to<br />
sewing operators located <strong>on</strong> the premises or<br />
in c<strong>on</strong>tractor’s shops.<br />
9. Assembling garments. On an assembly line,<br />
each worker specializes in a certain task and<br />
then passes bundles of items to the next<br />
worker. On a shirt, for example, <strong>on</strong>e pers<strong>on</strong><br />
may stitch the sleeve, another may attach the<br />
collar, and another may sew the<br />
butt<strong>on</strong>holes. Specialized industrial<br />
sewing machines are designed for<br />
each task. See Fig. 8-9. Some<br />
machines, especially those used for<br />
inexpensive apparel, are automated.<br />
Garment pieces may be<br />
moved by a c<strong>on</strong>veyor system from<br />
<strong>on</strong>e workstati<strong>on</strong> to the next. At the<br />
8-10 The poor working c<strong>on</strong>diti<strong>on</strong>s in early<br />
sweatshops led to uni<strong>on</strong>izati<strong>on</strong>.<br />
142 • UNIT 2 The Fashi<strong>on</strong> World<br />
end of the assembly line, the garment is completed.<br />
Today, <strong>on</strong>ly very expensive garments<br />
are assembled by <strong>on</strong>e individual.<br />
10. Finishing garments. Butt<strong>on</strong>s, snaps, hooks<br />
and eyes, shoulder pads, beading, and other<br />
ornaments are attached by hand or specialized<br />
machines. After threads are trimmed,<br />
each garment is pressed, butt<strong>on</strong>ed, and folded<br />
or hung <strong>on</strong> a hanger.<br />
11. Inspecti<strong>on</strong>. Finished garments are inspected.<br />
Otherwise, stores return merchandise, which<br />
affects the firm’s profits. Some manufacturers<br />
check all items; others do spot checks. Many<br />
manufacturers check quality throughout<br />
producti<strong>on</strong> instead of just at the end. This is<br />
called Quality Assurance, or QA. Fabrics are<br />
scanned, either visually or by computerized<br />
equipment, for flaws or color variati<strong>on</strong>s when<br />
they arrive from textile mills. Cutting is<br />
checked for sizing and pattern matching.<br />
Stitching is checked for stitch type, stitch<br />
length, and seam finish. Such comp<strong>on</strong>ents as<br />
thread, butt<strong>on</strong>s, and zippers are also checked<br />
for quality.<br />
12. Distributi<strong>on</strong>. After attaching sales tickets,<br />
bar codes, and hangtags, the finished garments<br />
are shipped to stores by truck, rail, or<br />
air. If a style is successful, reorders are filled.<br />
Items that are not reordered are pulled from<br />
the line.
Meanwhile the designer or design team is busy<br />
creating the next collecti<strong>on</strong>, and the entire<br />
process begins again.<br />
The Role of Uni<strong>on</strong>s<br />
At <strong>on</strong>e time, the average garment worker<br />
labored 10 to 12 hours per day, six days per week.<br />
The wages were so low that workers often took<br />
extra work home to do at night and <strong>on</strong> Sundays.<br />
C<strong>on</strong>diti<strong>on</strong>s in the first garment factories were so<br />
bad that workers began to organize into uni<strong>on</strong>s.<br />
See Fig. 8-10.<br />
Labor uni<strong>on</strong>s formed to obtain better working<br />
c<strong>on</strong>diti<strong>on</strong>s, better pay, and such benefits as medical<br />
insurance, sick pay, and vacati<strong>on</strong> pay for<br />
workers. As a result, garment workers in the<br />
United States are am<strong>on</strong>g the best paid in the<br />
world. Their wages allow them to maintain an<br />
average standard of living. Many manufacturers,<br />
however, have garments made in other countries<br />
where the cost of labor is lower.<br />
The Uni<strong>on</strong> of Needletrades, Industrial, and<br />
Textile Employees (UNITE) was formed in July<br />
1995, when the Internati<strong>on</strong>al Ladies’ Garment<br />
Workers’ Uni<strong>on</strong> (ILGWU) and the Amalgamated<br />
Clothing Workers of America (ACWA) merged.<br />
In July 2004, UNITE and the Hotel Employees<br />
and Restaurant Employees Internati<strong>on</strong>al Uni<strong>on</strong><br />
(HERE) merged, forming UNITE HERE. Major<br />
employers of uni<strong>on</strong> workers in the apparel<br />
industry are Levi Strauss, Liz Claiborne, Brooks<br />
Brothers, and Hartmarx.<br />
Fashi<strong>on</strong> Centers<br />
The “heart” of the garment industry is in New<br />
York City, where most major manufacturers have<br />
offices. Known in the trade as Seventh Avenue,<br />
the garment district includes over 4,500 showrooms<br />
and factories.<br />
The most hectic times in the garment district<br />
are when store buyers come for market week to<br />
purchase merchandise. These are the primary<br />
times when designers and manufacturers introduce<br />
their new lines. New York City hosts five market<br />
weeks and many trade promoti<strong>on</strong>s each year.<br />
8-11<br />
Apparel marts are located in several major U.S.<br />
cities. Buyers can visit manufacturers’ showrooms and<br />
place orders.<br />
Until the early 1990s, most companies manufactured<br />
goods in New York City. Today producti<strong>on</strong><br />
has shifted to cities and towns throughout<br />
the United States, primarily in the South, and to<br />
many foreign countries.<br />
Los Angeles has become the headquarters for<br />
the garment industry <strong>on</strong> the West Coast, specializing<br />
in sportswear. Chicago, Dallas, and Atlanta<br />
have large apparel marts, where manufacturers<br />
have showrooms and sales offices. See Fig. 8-11.<br />
Some manufacturers also have regi<strong>on</strong>al showrooms<br />
in Miami, San Francisco, Seattle, and<br />
Canada. To help promote their fashi<strong>on</strong> industries,<br />
cities hold special fashi<strong>on</strong> fairs and exhibiti<strong>on</strong>s.<br />
Some focus <strong>on</strong> sportswear, menswear, or<br />
children’s wear. Others promote such specialties<br />
as knits, silks, tweeds, beading, and leather goods.<br />
FASHION MERCHANDISING<br />
After apparel manufacturers produce goods,<br />
they sell the items to retail stores who sell them to<br />
you, the customer. Retail means the sale of goods<br />
in small quantities to c<strong>on</strong>sumers.<br />
Fashi<strong>on</strong> retailers sell clothes and accessories.<br />
They decide what styles, fabrics, colors, and sizes<br />
to sell and at what prices. Another look at Fig. 8-8<br />
CHAPTER 8 The Fashi<strong>on</strong> Industry • 143
8-12<br />
Retailers do all they can to c<strong>on</strong>vince you to buy.<br />
What techniques do you think are most effective?<br />
<strong>on</strong> page 140 will show you how retail cost is<br />
determined. Retailers display, advertise, promote,<br />
and sell the items, choosing techniques they hope<br />
will entice people to buy. All of this is called fashi<strong>on</strong><br />
merchandising, a critical and exciting comp<strong>on</strong>ent<br />
of the fashi<strong>on</strong> industry. See Fig. 8-12.<br />
Retail Stores<br />
The success of designers and manufacturers<br />
ultimately rests in the hands of fashi<strong>on</strong> retailers.<br />
Retailers range from small, <strong>on</strong>e-owner stores to<br />
large corporati<strong>on</strong>s with hundreds of stores. One<br />
way to classify them is by type, such as department<br />
store, specialty store, off-price retailer, discount<br />
store, and outlet. See pages 312–313 for more<br />
informati<strong>on</strong> about categories of retail stores.<br />
Another way to classify retailers is by their<br />
positi<strong>on</strong> in the fashi<strong>on</strong> field.<br />
144 • UNIT 2 The Fashi<strong>on</strong> World<br />
• Fashi<strong>on</strong> leaders. Such stores as Neiman<br />
Marcus, Nordstrom, and Saks Fifth Avenue<br />
feature newly introduced styles that are usually<br />
expensive.<br />
• Traditi<strong>on</strong>al retailers. Macy’s, Bloomingdale’s,<br />
and JC Penney are examples of stores that offer<br />
many fashi<strong>on</strong>s at moderate prices.<br />
• Mass merchants. Such stores as Target and<br />
Kohl’s carry widely accepted styles at moderate<br />
to lower prices. At the lower-price end are<br />
stores, like Wal-Mart and Kmart.<br />
Today many stores are part of a chain, a large<br />
retail company with stores in many cities and<br />
towns all over the country. Chains have headquarters,<br />
a central office where all merchandising<br />
decisi<strong>on</strong>s are made. All stores in a chain carry<br />
similar items, have similar prices, and look very<br />
much alike. Popular chains are Macy’s, Target, JC<br />
Penney, Sears, The Gap, Old Navy, Banana<br />
Republic, Urban Outfitters, and Wal-Mart.<br />
Direct Retailers<br />
Many companies reach customers in ways that<br />
bypass the need to go into a store. This is called<br />
direct retailing. Many stores regularly send out<br />
catalogs to promote new fashi<strong>on</strong>s and sales. They<br />
also send similar informati<strong>on</strong> via e-mail to their<br />
customers. Some items that are offered in catalogs<br />
or <strong>on</strong> Web sites may not be available in the<br />
stores. Some retailers sell almost entirely through<br />
catalogs or Web sites. Others may not even have a<br />
physical store. Customers can order by mail,<br />
ph<strong>on</strong>e, fax, or over the Internet. See page 324 for<br />
informati<strong>on</strong> <strong>on</strong> ordering from a catalog or <strong>on</strong>-line.<br />
Two other methods of direct retailing are cable<br />
televisi<strong>on</strong> and at-home selling. The advantages and<br />
disadvantages of these are covered in Chapter 17.<br />
Retail Operati<strong>on</strong>s<br />
Both large and small retailers have an organizati<strong>on</strong>al<br />
structure, ranging from sales associates and<br />
stock clerks to buyers and merchandise managers.<br />
Large stores need a number of employees with different<br />
resp<strong>on</strong>sibilities, while small stores typically<br />
manage with <strong>on</strong>e pers<strong>on</strong> doing several jobs.
Sales associates sell merchandise to customers,<br />
while stock clerks work behind the scene. Buyers<br />
purchase all merchandise. They must decide what<br />
styles, fabrics, colors, and sizes will sell best.<br />
Buyers for large chains work with managers of<br />
individual stores to finalize selecti<strong>on</strong>s.<br />
Merchandise managers oversee the operati<strong>on</strong><br />
of several departments within a store. At the top<br />
is the store’s general merchandise manager who<br />
determines the dollar allocati<strong>on</strong>s for each divisi<strong>on</strong><br />
and oversees the store’s fashi<strong>on</strong> image.<br />
Every store has a fashi<strong>on</strong> image that it presents<br />
to customers. The fashi<strong>on</strong> office gathers informati<strong>on</strong><br />
about upcoming trends and shares that<br />
knowledge with every<strong>on</strong>e in the store’s organizati<strong>on</strong>.<br />
This helps buyers make purchasing decisi<strong>on</strong>s<br />
and helps the advertising and display<br />
departments reflect the store’s fashi<strong>on</strong> image.<br />
FASHION PROMOTION<br />
In the competitive world of fashi<strong>on</strong>, people are<br />
always looking for ways to promote sales. Clever<br />
words and illustrati<strong>on</strong>s make an advertisement<br />
stand out from all others. Eye-catching window<br />
displays make people stop and notice. In-store<br />
displays and fashi<strong>on</strong> shows attract attenti<strong>on</strong>.<br />
Catalogs and Web sites bring merchandise informati<strong>on</strong><br />
into customers’ homes. Fashi<strong>on</strong> promoti<strong>on</strong><br />
includes all these efforts to inform people<br />
about what’s new in fashi<strong>on</strong> and to c<strong>on</strong>vince<br />
them to buy.<br />
Marketing<br />
How do designers, manufacturers, and retailers<br />
decide how to promote products? Marketing<br />
research and analysis can help.<br />
Marketing is c<strong>on</strong>cerned with developing, promoting,<br />
and selling products. People who work in<br />
marketing c<strong>on</strong>duct surveys that focus <strong>on</strong> c<strong>on</strong>sumer<br />
needs and attitudes. They want answers to<br />
many questi<strong>on</strong>s. How much will customers pay?<br />
What colors will sell best? What fibers and fabrics<br />
are most desired? Should a garment be washable?<br />
How many items can be sold?<br />
A careful analysis of surveys and past sales can<br />
help predict what will sell in the future. This informati<strong>on</strong><br />
is used to develop new products, organize<br />
producti<strong>on</strong> and shipping schedules, and develop<br />
advertising campaigns. Marketing and forecasting<br />
are important for a company’s success.<br />
Promoti<strong>on</strong> Methods<br />
To promote a product or service, marketers<br />
have many resources. Some promoti<strong>on</strong>s are<br />
directed toward retail buyers, others toward c<strong>on</strong>sumers.<br />
See Fig. 8-13.<br />
• Advertising. Advertising appears in newspapers,<br />
magazines, and direct mail pieces and <strong>on</strong><br />
radio, televisi<strong>on</strong>, the Internet, and outdoor<br />
billboards. Some companies have an in-house<br />
advertising department; others hire an outside<br />
advertising agency. Most ads feature fashi<strong>on</strong><br />
photographs or illustrati<strong>on</strong>s, often drawn in a<br />
stylized manner. Advertising copy, the words<br />
and sentences used, helps communicate the<br />
fashi<strong>on</strong> message.<br />
Most of a store’s promoti<strong>on</strong>al budget typically<br />
goes for advertising—primarily in newspapers—to<br />
announce a sale or highlight new<br />
8-13<br />
Professi<strong>on</strong>als often work together to decide how<br />
to promote a fashi<strong>on</strong> line.<br />
CHAPTER 8 The Fashi<strong>on</strong> Industry • 145
merchandise. Large retailers also develop<br />
direct mail pieces to reach potential customers.<br />
These include special catalogs, coup<strong>on</strong>s, and<br />
inserts in m<strong>on</strong>thly bills.<br />
Designers, manufacturers, and textile mills<br />
advertise in trade publicati<strong>on</strong>s to reach store<br />
buyers and in magazines and <strong>on</strong> televisi<strong>on</strong> to<br />
appeal to c<strong>on</strong>sumers. They may announce a<br />
new fiber or fabric, promote a designer’s collecti<strong>on</strong>,<br />
or “sell” their image. They also do<br />
cooperative advertising with retailers by helping<br />
to pay for store ads that feature their name<br />
or product.<br />
• Publicity. While advertising is costly, publicity<br />
is usually free. Some large companies have<br />
their own public relati<strong>on</strong>s (PR) department to<br />
handle publicity. Others hire outside PR firms.<br />
PR people distribute kits with informati<strong>on</strong><br />
about products and store events or photos of a<br />
designer’s collecti<strong>on</strong> to fashi<strong>on</strong> editors and<br />
writers. Any resulting newspaper articles and<br />
magazine photo displays appear without charge.<br />
Many clothing and jewelry designers are<br />
willing to lend their products to celebrities for<br />
special events, such as movie openings and<br />
awards cerem<strong>on</strong>ies. Photographs of these<br />
celebrities wearing the designer items often<br />
appear in magazines, newspapers, televisi<strong>on</strong><br />
shows, and <strong>on</strong> the Internet. The goal is to get as<br />
much publicity as possible through various<br />
news media. The goal is to get as much publicity<br />
as possible through various news media.<br />
• Visual displays. Displays in store windows<br />
and within stores are forms of fashi<strong>on</strong> promoti<strong>on</strong>.<br />
See Fig. 8-14. Eye-catching displays<br />
encourage customers to buy not just the garment<br />
but the accessories too. Mannequins,<br />
props, color, and lighting transform a display<br />
into an exciting message. Many stores also display<br />
merchandise in attractive and creative<br />
ways <strong>on</strong> tables and shelves.<br />
• Special events. “Spring in January,” “Vive la<br />
France!” and many other special themes attract<br />
customers to stores. Fashi<strong>on</strong> shows and instore<br />
dem<strong>on</strong>strati<strong>on</strong>s may be part of these<br />
events. Both designers and manufacturers hold<br />
146 • UNIT 2 The Fashi<strong>on</strong> World<br />
fashi<strong>on</strong> shows to promote their collecti<strong>on</strong>s.<br />
Formal runway shows are held for buyers during<br />
market weeks; traveling trunk shows present<br />
lines to store customers and sales associates.<br />
• Fashi<strong>on</strong> publicati<strong>on</strong>s. Fashi<strong>on</strong> magazines—including<br />
Vogue, Glamour, Seventeen,<br />
Elle, Eb<strong>on</strong>y, GQ, and Details—carry articles<br />
and ads for readers to enjoy. Some magazines<br />
research fashi<strong>on</strong> trends as a service to advertisers.<br />
These reports predict the styles, colors, and<br />
fabrics that people will wear the next seas<strong>on</strong>.<br />
Fashi<strong>on</strong> magazines also use their Web sites to<br />
give readers additi<strong>on</strong>al fashi<strong>on</strong> informati<strong>on</strong>,<br />
such as “behind the scenes” interviews and<br />
photos with designers and stylists that were<br />
not included in the publicati<strong>on</strong>s.<br />
Newspapers also publish a variety of fashi<strong>on</strong><br />
articles <strong>on</strong> designer collecti<strong>on</strong>s, accessories,<br />
grooming tips, and clothing care. There are also<br />
Internet sites that report <strong>on</strong> fashi<strong>on</strong> trends and<br />
show photos of designer collecti<strong>on</strong>s.<br />
• Trade publicati<strong>on</strong>s. A trade publicati<strong>on</strong> is a<br />
magazine, newspaper, newsletter, or book<br />
devoted to a specific industry. The most influ-<br />
8-14<br />
A visual display in a store window catches the<br />
eye and draws people in to buy.
ential fashi<strong>on</strong> trade publicati<strong>on</strong> is Women’s<br />
Wear Daily, called WWD by many. It covers all<br />
aspects of the industry—from fibers and fabrics,<br />
to apparel and accessories, to fashi<strong>on</strong><br />
trends and business notices. People interested<br />
in textiles and menswear read the Daily News<br />
Record, known as DNR. Both newspapers are<br />
published by Fairchild Publicati<strong>on</strong>s, based in<br />
New York City.<br />
Trade Associati<strong>on</strong>s<br />
Trade associati<strong>on</strong>s are organizati<strong>on</strong>s of manufacturers,<br />
designers, retailers, and other people<br />
involved in a particular industry. In the United<br />
States, many trade associati<strong>on</strong>s help spread informati<strong>on</strong><br />
about the fashi<strong>on</strong> industry.<br />
• American Apparel & Footwear Associati<strong>on</strong><br />
(AAFA). As the trade associati<strong>on</strong> for<br />
apparel, footwear, and other sewn products<br />
companies, AAFA prepares press releases and<br />
publicati<strong>on</strong>s for members, c<strong>on</strong>sumers, and the<br />
media. It also sp<strong>on</strong>sors trade shows and industry<br />
awards.<br />
• The Fashi<strong>on</strong> Associati<strong>on</strong> (TFA). TFA is<br />
the public-relati<strong>on</strong>s arm of the apparel industry,<br />
representing hundreds of design, textile,<br />
manufacturing, and retail firms. It provides<br />
reports <strong>on</strong> fashi<strong>on</strong> trends, markets, businesses<br />
to members and the media.<br />
• Nati<strong>on</strong>al Retail Federati<strong>on</strong>. This associati<strong>on</strong><br />
represents major department stores and<br />
specialty chains, sp<strong>on</strong>sors meetings <strong>on</strong> retailing<br />
c<strong>on</strong>cerns, and publishes Stores trade magazine.<br />
• Council of Fashi<strong>on</strong> Designers of<br />
America (CFDA). CFDA is the trade associati<strong>on</strong><br />
of America’s foremost fashi<strong>on</strong> and accessory<br />
designers. It hosts the annual CFDA<br />
Fashi<strong>on</strong> Awards which recognize designers<br />
who have made special c<strong>on</strong>tributi<strong>on</strong>s to the<br />
fashi<strong>on</strong> industry. It sp<strong>on</strong>sors scholarship and<br />
professi<strong>on</strong>al development programs and raises<br />
funds for charitable causes. See Fig. 8-15.<br />
• Nati<strong>on</strong>al Associati<strong>on</strong> of Men’s Sportswear<br />
Buyers (NAMSB). This associati<strong>on</strong><br />
promotes all categories of menswear. Trade<br />
shows during market weeks involve over 1,000<br />
menswear lines.<br />
• The Fashi<strong>on</strong> Group. This professi<strong>on</strong>al organizati<strong>on</strong><br />
of women executives in fashi<strong>on</strong> and<br />
related fields puts together special reports <strong>on</strong><br />
American ready-to-wear collecti<strong>on</strong>s and<br />
European pret-a-porter and couture collecti<strong>on</strong>s.<br />
It also h<strong>on</strong>ors people who have made important<br />
c<strong>on</strong>tributi<strong>on</strong>s to the fashi<strong>on</strong> industry.<br />
• Fédérati<strong>on</strong> Française de la Couture.<br />
Al<strong>on</strong>g with its branch, Chambre Syndicale, this<br />
associati<strong>on</strong> represents many French couture<br />
houses.<br />
Other trade associati<strong>on</strong>s promote the fiber and<br />
textile industries. These include the American<br />
Fibers Manufacturers Associati<strong>on</strong> (AFMA),<br />
Cott<strong>on</strong> Incorporated, Nati<strong>on</strong>al Cott<strong>on</strong> Council,<br />
Wool Bureau, American Textile Manufacturers<br />
Institute (ATMI), and Leather Industries. The<br />
accessories and home furnishings fields also have<br />
many trade associati<strong>on</strong>s.<br />
8-15<br />
The CFDA offered support<br />
after the September 11, 2001, tragedy<br />
at the World Trade Center. Here Ralph<br />
Lauren, D<strong>on</strong>na Karan, and model<br />
Carolyn Murphy wear a limited editi<strong>on</strong><br />
T-shirt sold to raise funds.<br />
CHAPTER 8 The Fashi<strong>on</strong> Industry • 147
CHAPTER 8<br />
CHAPTER SUMMARY<br />
• The textile industry supplies fabric for<br />
many home and commercial uses besides<br />
garment making.<br />
• Textiles begin as fibers, which are spun<br />
into yarns and woven or knitted into fabrics<br />
at textile mills.<br />
• Apparel manufacturers buy textiles, design<br />
and create garments, and sell them to<br />
retail stores.<br />
• Fashi<strong>on</strong> merchandising and promoti<strong>on</strong><br />
include all the activities and businesses<br />
involved in presenting clothes to c<strong>on</strong>sumers<br />
and encouraging them to buy.<br />
• Manufacturers and retailers use various<br />
methods to promote their fashi<strong>on</strong>s.<br />
USING KEY TERMS<br />
For each Key Term, tell whether it is most<br />
closely related to the manufacturing, wholesale,<br />
or retail end of the fashi<strong>on</strong> industry.<br />
Explain the link in each case.<br />
148 • UNIT 2 The Fashi<strong>on</strong> World<br />
Review<br />
RECALLING THE FACTS<br />
1. Name four industries besides the garment<br />
trade that rely <strong>on</strong> textiles.<br />
2. Describe what happens as fibers are<br />
transformed to fabric in textile mills.<br />
3. Where in the United States are the centers<br />
of textile manufacturing, sales, and<br />
marketing?<br />
4. How are c<strong>on</strong>verters and c<strong>on</strong>tractors similar<br />
and different?<br />
5. What types of specializati<strong>on</strong> are found<br />
am<strong>on</strong>g apparel manufacturers?<br />
6. How are sample garments used to make<br />
and sell clothing?<br />
7. In what steps of the manufacturing<br />
process is mass producti<strong>on</strong> used?<br />
8. How have uni<strong>on</strong>s affected the garment<br />
industry in the United States?<br />
9. Where are the fashi<strong>on</strong> centers of the garment<br />
industry?<br />
10. Describe two types of direct retailing.<br />
11. How does the fashi<strong>on</strong> office influence a<br />
retailer’s operati<strong>on</strong>s?<br />
12. What role does marketing play in the<br />
garment industry?<br />
13. Describe <strong>on</strong>e way that a public relati<strong>on</strong>s<br />
department gains “free advertising.”<br />
14. What informati<strong>on</strong> is found in fashi<strong>on</strong><br />
and trade publicati<strong>on</strong>s?<br />
15. Identify four services that trade associati<strong>on</strong>s<br />
provide for members.
and Activities<br />
THINKING CRITICALLY<br />
1. You’ve read that segments of the fashi<strong>on</strong><br />
industry are centered in different parts<br />
of the United States. What do you think<br />
is the reas<strong>on</strong> for the locati<strong>on</strong> of each<br />
center?<br />
2. Why is a reliable forecasting service so<br />
important to a manufacturer’s success?<br />
3. What are the advantages and disadvantages<br />
of producing garments <strong>on</strong> an<br />
assembly line?<br />
APPLYING KNOWLEDGE<br />
1. Textile uses. In writing, complete a paragraph<br />
that begins with this opener:<br />
“Textiles are used for more than just<br />
apparel. My life would be different without<br />
other textile uses because . . .”<br />
2. Manufacturing process. In writing or <strong>on</strong><br />
a poster, describe the process of creating<br />
a garment, from design to distributi<strong>on</strong>.<br />
3. Manufacturing careers. Choose six<br />
steps in the apparel manufacturing<br />
process. In writing, describe a specific<br />
career involved in each step. Include<br />
career titles.<br />
4. Uni<strong>on</strong>s. Research some aspect of uni<strong>on</strong>s,<br />
their role, or their operati<strong>on</strong>. Possible<br />
topics include historical events, important<br />
figures, and impact <strong>on</strong> legislati<strong>on</strong>.<br />
Present a report to the class.<br />
CHAPTER 8<br />
5. <str<strong>on</strong>g>Care</str<strong>on</strong>g>ers in the industry. Interview<br />
some<strong>on</strong>e who works in an area of the<br />
textile or apparel industries. Ask about<br />
job resp<strong>on</strong>sibilities, likes and dislikes,<br />
educati<strong>on</strong>al background, and experiences.<br />
Report what you learned.<br />
MAKING>
<str<strong>on</strong>g>Care</str<strong>on</strong>g>ers<br />
Apparel Producti<strong>on</strong><br />
In the pocket of a garment,have you<br />
ever found a small sticker that read “Inspected by<br />
79”? What does that mean? Actually, number<br />
“79” is probably <strong>on</strong>e of a small army of apparel<br />
producti<strong>on</strong> workers who take a garment from an<br />
idea to something wearable.<br />
In the most modern apparel producti<strong>on</strong> envir<strong>on</strong>ments<br />
today, overhead c<strong>on</strong>veyors and other automated<br />
systems carry partially assembled garments<br />
between workstati<strong>on</strong>s. Computer-operated robots<br />
pick finished garments off the assembly line and<br />
arrange them for packing and shipping. Telecommunicati<strong>on</strong><br />
systems, such as bar code tracking,<br />
allow clothing manufacturers to quickly produce<br />
the garments most in demand.<br />
With modular apparel manufacturing, machine<br />
operators work in groups, or modules. They specialize<br />
in <strong>on</strong>e task but learn to run other machines as<br />
well. A good understanding of the producti<strong>on</strong><br />
process allows workers to create efficient<br />
schedules and meet quality goals. For<br />
higher productivity, they earn higher pay.<br />
While technology and new methods are<br />
taking hold, manual work and assembly<br />
lines are still comm<strong>on</strong> in apparel producti<strong>on</strong>,<br />
especially with small manufacturers.<br />
Computerizati<strong>on</strong> and teamwork, however,<br />
are gaining importance as effective ways to<br />
lower producti<strong>on</strong> costs and improve quality.<br />
In apparel producti<strong>on</strong> many workers handle the<br />
same task at the same time. They may specialize<br />
in <strong>on</strong>e operati<strong>on</strong> but learn others as well.<br />
150 • UNIT 2 The Fashi<strong>on</strong> World<br />
IS THIS FIELD FOR YOU?<br />
What type of pers<strong>on</strong> is suited for work in apparel<br />
producti<strong>on</strong>? The statements below profile a successful<br />
worker.<br />
• I pay attenti<strong>on</strong> to detail.<br />
• I appreciate the way parts of a process fit<br />
together.<br />
• I take pride in doing quality work.<br />
• I’m c<strong>on</strong>fident about giving my input <strong>on</strong> a project.<br />
• I enjoy learning new skills.<br />
• I believe that even small tasks are important.<br />
• I have a talent for helping people work well as a<br />
group.
Educati<strong>on</strong> and Training<br />
<str<strong>on</strong>g>Care</str<strong>on</strong>g>ers in apparel producti<strong>on</strong> have traditi<strong>on</strong>ally<br />
started with <strong>on</strong>-the-job training after high school.<br />
With further educati<strong>on</strong> from a community college or<br />
technical school, however, workers can advance more<br />
quickly. Since the industry uses computerized<br />
machinery, basic computer skills in data entry and<br />
word processing help workers stay current. Courses<br />
in communicati<strong>on</strong>, management, and even psychology<br />
are well used by workers where apparel producti<strong>on</strong><br />
is modular.<br />
Specialized training is an advantage. Particularly<br />
useful is a two-year, associate-of-science degree in<br />
apparel producti<strong>on</strong>. Studies include fabric behavior<br />
and c<strong>on</strong>structi<strong>on</strong>, the workings of mass producti<strong>on</strong><br />
equipment, and the basics of design. Certificates of<br />
proficiency in such areas as electr<strong>on</strong>ic grading and<br />
marking are also available.<br />
Possible <str<strong>on</strong>g>Care</str<strong>on</strong>g>er Paths<br />
Combined with higher educati<strong>on</strong>, apparel producti<strong>on</strong><br />
careers can be a starting point for other careers.<br />
By studying design, a patternmaker might become<br />
an assistant designer and eventually head designer.<br />
Courses in management and producti<strong>on</strong> principles<br />
can lead a line worker to a supervisory positi<strong>on</strong>. A<br />
supervisor, in turn, might advance to producti<strong>on</strong><br />
manager. A hand sewer could combine work experience<br />
with courses in small business operati<strong>on</strong> to start<br />
a custom tailoring service. Retailers and dry cleaners<br />
also need experienced, knowledgeable people to alter<br />
or mend clothing.<br />
The sewing machines used <strong>on</strong> the floor of<br />
a garment-making facility are state of the<br />
art. They quickly adjust stitch type and<br />
stitch length for any change in fabric.<br />
THE SKILLS YOU NEED<br />
With changes in the producti<strong>on</strong> workplace,<br />
interpers<strong>on</strong>al skills are becoming as important<br />
as manual skills. A combinati<strong>on</strong> of skills,<br />
which includes the following, is most helpful:<br />
• Hand-eye coordinati<strong>on</strong><br />
• Mental c<strong>on</strong>centrati<strong>on</strong><br />
• Communicati<strong>on</strong><br />
• Teamwork<br />
• Flexibility<br />
• Computer<br />
UNIT 2 The Fashi<strong>on</strong> World • 151
Choosing an Apparel<br />
Producti<strong>on</strong> <str<strong>on</strong>g>Care</str<strong>on</strong>g>er<br />
INSPECTOR | MACHINE MANUFACTURER REPRESENTATIVE | PATTERNMAKER<br />
| SAMPLE MAKER | SENIOR MILL ASSISTANT | SEWING MACHINE OPERATOR<br />
| SHIPPING AND RECEIVING CLERK | SUPERVISOR | PRODUCTION MANAGER<br />
Patternmaker __<br />
Whether you buy or make a shirt, it starts in the<br />
same way—with a pattern. A patternmaker translates<br />
the approved sample garment into a paper<br />
pattern. Patternmakers may work in the sample<br />
room of a fashi<strong>on</strong> house or in a clothing manufacturer’s<br />
product engineering department.<br />
With a process called grading, the patternmaker<br />
increases and decreases the size of all pattern<br />
pieces to corresp<strong>on</strong>d to garment sizes. Each garment<br />
manufacturer has its own standard measurements<br />
for different sizes. Formerly d<strong>on</strong>e by hand,<br />
grading has been simplified by using a computer<br />
and digitizer tablet, a device that electr<strong>on</strong>ically<br />
records dimensi<strong>on</strong>s in a graphics program.<br />
Sewing Machine<br />
Operator _____<br />
Professi<strong>on</strong>al sewing machine operators account<br />
for almost half of all workers in apparel producti<strong>on</strong>.<br />
Mass-producing a garment takes operati<strong>on</strong>s that<br />
can’t be d<strong>on</strong>e <strong>on</strong> <strong>on</strong>e machine. Instead, each operator<br />
uses a customized machine, programmed to perform<br />
a specific functi<strong>on</strong>. One embroiders, another<br />
attaches collars, and a third finishes butt<strong>on</strong>holes.<br />
Operators are expected to take full advantage of<br />
a machine’s capabilities—in other words, they have<br />
to keep up. Because of the trend toward work modules,<br />
sewers often learn to use multiple machines. In<br />
teams, they take an active role in problem solving.<br />
152 • UNIT 2 The Fashi<strong>on</strong> World<br />
Inspector _____<br />
The job of inspector, or quality c<strong>on</strong>troller, is vital<br />
today. While automati<strong>on</strong> has taken over some<br />
inspecti<strong>on</strong> duties, in the garment trade the trained<br />
human eye is highly valued.<br />
The inspector whose number you find <strong>on</strong> a piece<br />
of clothing checks finished garments for secure<br />
stitching, correct colors, and correct sizes. An earlier<br />
inspecti<strong>on</strong> might mark a flaw in uncut fabric,<br />
alerting the cutter to avoid that spot. Another<br />
inspector may correct an error in a partly completed<br />
article or return it to a worker for repairs.<br />
Inspector-worker teams get more involved in preventing<br />
and spotting errors <strong>on</strong> assembly lines.<br />
As part of apparel producti<strong>on</strong>,<br />
a sample cutter cuts<br />
fabric to make a prototype<br />
of the garment that will be<br />
produced.
When sewing a garment, you need to<br />
press seams and ir<strong>on</strong> the completed<br />
garment. Certain workers in industrial<br />
apparel producti<strong>on</strong> also have these<br />
resp<strong>on</strong>sibilities.<br />
Supervisor ____<br />
Any issue affecting smooth producti<strong>on</strong> during<br />
apparel assembly is probably a supervisor’s c<strong>on</strong>cern.<br />
Are the machines working safely? If not, have<br />
repairs been arranged? Are employees satisfied<br />
with schedules? Are excellent workers rewarded<br />
and less productive <strong>on</strong>es advised <strong>on</strong> better work<br />
habits? With resp<strong>on</strong>sibilities like these, supervisors<br />
often put in more than 40 hours a week. They may<br />
work rotating shifts to get to know all workers.<br />
As workers’ roles have changed, so has the<br />
supervisor’s job. Supervisors today are less likely<br />
to tell workers to increase producti<strong>on</strong> to meet management<br />
demands. They are more likely to ask for<br />
suggesti<strong>on</strong>s <strong>on</strong> improving a module’s productivity,<br />
help carry out changes, and evaluate results.<br />
Shipping and<br />
Receiving Clerks _<br />
Shipping clerks assemble and pack orders for<br />
shipping. Some drive forklifts that take packages to<br />
the shipping dock. Using computerized shipping or<br />
manifest systems, clerks create labels and paperwork<br />
for routing merchandise. They make sure<br />
records are forwarded to other departments.<br />
Receiving clerks perform similar duties. They<br />
compare an order against the invoice and check<br />
c<strong>on</strong>tents for damage. After notifying other departments<br />
of receipts, they route the goods to appropriate<br />
areas. They may also schedule deliveries and<br />
deal with lost or damaged shipments.<br />
In a small company clerks may perform both<br />
shipping and receiving tasks. Hand-held scanners<br />
and computers are used for record keeping.<br />
CAREER APPLICATIONS<br />
1. <str<strong>on</strong>g>Care</str<strong>on</strong>g>er Preparati<strong>on</strong>. Choose an apparel<br />
producti<strong>on</strong> job that sounds interesting. Review<br />
the job duties and recommended training and<br />
educati<strong>on</strong>. Then list three acti<strong>on</strong>s you could take<br />
now to help prepare for this job.<br />
2. FCCLA. With a few classmates, plan an Interpers<strong>on</strong>al<br />
Communicati<strong>on</strong>s Project. Research and<br />
present the qualities needed for successful<br />
teamwork. Include a skit that dem<strong>on</strong>strates<br />
problems apparel producti<strong>on</strong> employees could<br />
have as they work together in a module and how<br />
they might solve the problems. A possible problem<br />
would be an uncooperative team member<br />
who slows the module down.<br />
3. Professi<strong>on</strong>alism. Locate definiti<strong>on</strong>s of the<br />
word professi<strong>on</strong>alism. C<strong>on</strong>sult individuals, dicti<strong>on</strong>aries,<br />
and industry groups, which often post<br />
a code of ethics <strong>on</strong> Web sites. Based <strong>on</strong> your<br />
investigati<strong>on</strong>, explain in writing how workers in<br />
producti<strong>on</strong> jobs can practice professi<strong>on</strong>alism,<br />
regardless of their job title.<br />
UNIT 2 The Fashi<strong>on</strong> World • 153
UNIT 3<br />
Color<br />
and<br />
Design<br />
154
CHAPTERS<br />
9 Understanding Color<br />
10 Understanding Design<br />
FEATURE<br />
Design <str<strong>on</strong>g>Care</str<strong>on</strong>g>ers<br />
155
CHAPTER 9<br />
Understanding Color<br />
OBJECTIVES<br />
• Describe the<br />
impact of color.<br />
• Identify primary,<br />
sec<strong>on</strong>dary, and<br />
intermediate colors<br />
<strong>on</strong> the color wheel.<br />
• Describe color<br />
schemes that work<br />
well together.<br />
• Choose colors<br />
that are flattering<br />
to you.<br />
KEY TERMS<br />
color scheme<br />
complementary color<br />
hues<br />
intensity<br />
intermediate color<br />
pigments<br />
primary color<br />
sec<strong>on</strong>dary color<br />
shade<br />
tint<br />
value<br />
156 • UNIT 3 Color and Design
EXAMINETHISISSUE<br />
Some colors warn of danger,<br />
and some colors are a danger.<br />
In areas where gang violence is comm<strong>on</strong>,<br />
wearing colors that mark the wearer as a<br />
gang member, even if unintenti<strong>on</strong>al, can<br />
bring serious c<strong>on</strong>sequences. Some<br />
schools have banned certain color combinati<strong>on</strong>s<br />
<strong>on</strong> clothing to c<strong>on</strong>trol violence<br />
by students who bel<strong>on</strong>g to gangs.<br />
What do you think?<br />
Should public schools forbid students<br />
from wearing a color or colors associated<br />
with a gang? Explain your point of view.<br />
How many colors do you think people<br />
can see? You might be surprised to learn<br />
that the human eye sees as many as six to<br />
seven milli<strong>on</strong> colors. Is it any w<strong>on</strong>der that color<br />
has such high impact?<br />
All the colors around you make life more interesting.<br />
Meals are more tempting with colorful<br />
foods and dishes. Theater, televisi<strong>on</strong>, and computer<br />
screens entertain with colorful images.<br />
Homes and offices blend colors to create special<br />
effects. Colors can provide beauty, attract attenti<strong>on</strong>,<br />
and even affect a pers<strong>on</strong>’s mood.<br />
COLOR AND CLOTHING<br />
What’s the first thing you notice about the<br />
clothing in a store display? For many people, it’s<br />
the color. As <strong>on</strong>e of several elements of design,<br />
color is often noticed first. The other elements—<br />
line, shape, space, and texture—have impact, but<br />
nothing like color.<br />
Learning about color is useful in many ways,<br />
especially when making the clothing decisi<strong>on</strong>s<br />
that shape your wardrobe. With an understanding<br />
of color, you can choose clothes that help you<br />
look your best. If you want to draw attenti<strong>on</strong> to<br />
or away from certain areas of your body, color<br />
can help. Color can emphasize a special feature,<br />
such as the color of your eyes. Color can also create<br />
illusi<strong>on</strong>s in height and size. The better you<br />
understand color, the easier it will be to use this<br />
design element to your advantage when sewing a<br />
garment, buying clothes, or putting an outfit<br />
together. See Fig. 9-1.<br />
THE IMPACT OF COLOR<br />
Before you work with color, think about how it<br />
can work for you. Colors have many impacts.<br />
They act as symbols and communicate feelings.<br />
Some colors suggest coolness, while others<br />
9-1<br />
By learning about color, you can choose clothing<br />
colors that help you look your best.<br />
CHAPTER 9 Understanding Color • 157
appear hot. Some fade into the background, while<br />
others stand out. Optical tricks can even cause<br />
colors to vibrate. As Fig. 9-2 shows, colors also<br />
send special messages.<br />
Colors as Symbols<br />
A traffic light at an intersecti<strong>on</strong> sends a message<br />
without words. The light’s colors—red, yellow,<br />
and green—are symbols of stop, cauti<strong>on</strong>,<br />
and go. Any<strong>on</strong>e who doesn’t understand the message<br />
can get into serious trouble.<br />
Certain colors symbolize special holidays.<br />
Stores are decorated with red for Valentine’s Day<br />
and green for St. Patrick’s Day. Rust, gold, and<br />
other harvest colors carry the Thanksgiving<br />
theme. Red and green are associated with<br />
Christmas; blue and white with Chanukah; and<br />
black, red, and green with Kwanzaa.<br />
Colors are also associated with cerem<strong>on</strong>ies and<br />
celebrati<strong>on</strong>s. In the American culture, baptismal<br />
outfits, first communi<strong>on</strong> dresses, and bridal<br />
gowns are traditi<strong>on</strong>ally white. Mourners at funerals<br />
usually wear black. Decorati<strong>on</strong>s at a baby<br />
shower may be pastel pink and blue.<br />
Colors can represent groups and countries,<br />
from high school athletic teams to the flags of<br />
9-2<br />
Colors can send<br />
messages and act as<br />
symbols. What messages<br />
are c<strong>on</strong>veyed here?<br />
158 • UNIT 3 Color and Design<br />
nati<strong>on</strong>s. Red, white, and blue make Americans<br />
think of the United States; to a Parisian, they are<br />
the colors of France. Red and white are the colors<br />
of both the Canadian and the Japanese flags.<br />
What are your school’s colors? What are the colors<br />
of your favorite college or professi<strong>on</strong>al team?<br />
Even in language, colors represent something<br />
more than their literal meaning. Suppose you’re<br />
looking over your finances. You may feel blue if<br />
you’re in the red, because you’re in debt. If you’re<br />
in the black, <strong>on</strong> the other hand, others may be<br />
green with envy. Can you think of other comm<strong>on</strong><br />
phrases that use colors?<br />
Colors and Temperature<br />
In a similar way, colors suggest temperatures<br />
by their associati<strong>on</strong>s with nature. Red, orange,<br />
and yellow look like fire and the sun. These are<br />
c<strong>on</strong>sidered warm colors. Blue is the color of deep<br />
waters, clear skies, and the sparkle of snow. Green<br />
recalls grassy lawns and shade trees. Violet is seen<br />
in the shadows of a cool evening. Such colors are<br />
said to be cool colors.
Fashi<strong>on</strong><br />
COLORS OF DISTINCTION.<br />
“Basic black” is c<strong>on</strong>sidered a classic in fashi<strong>on</strong><br />
colors, but it has a rival in the color purple—specifically,<br />
Tyrian purple. Before synthetic<br />
dyes were developed, purple dye was<br />
extracted from the shells of sea snails living<br />
in the Mediterranean and Aegean Seas.<br />
Thousands of the tiny animals were needed,<br />
making purple garments too costly for all<br />
but the wealthiest people—usually the nobility.<br />
To this day, the color is associated with<br />
royalty, power, and prestige.<br />
Facts<br />
These associati<strong>on</strong>s often make people seek<br />
cool, crisp colors <strong>on</strong> a hot day. Many spring and<br />
summer clothes are offered in blues, blue-greens,<br />
and greens. In fall, colors turn more to warm colors—red,<br />
orange, gold, and brown. These colors<br />
may make people feel warmer <strong>on</strong> a cold morning.<br />
The associati<strong>on</strong> between color and temperature<br />
is sometimes practical as well as psychological.<br />
White and light-colored clothes are a more<br />
comfortable choice in hot weather because they<br />
reflect the sunlight. Since black and dark colors<br />
absorb light, they are worn more often in colder<br />
weather.<br />
Colors and Movement<br />
The next time you’re grocery shopping, scan<br />
the shelves of the cereal aisle. While all the cereal<br />
boxes compete for your attenti<strong>on</strong>, the <strong>on</strong>es that<br />
use bright red, yellow, or orange probably stand<br />
out the most. In the competitive world of cereal<br />
selling, manufacturers know that warm colors are<br />
noticeable. They tend to advance or move toward<br />
you. Cool colors, <strong>on</strong> the other hand, tend to<br />
recede or move away from you. See Fig. 9-3.<br />
This is why warm colors are used to attract<br />
attenti<strong>on</strong>. Red flags and yellow traffic signs are<br />
easy to see. At a road c<strong>on</strong>structi<strong>on</strong> site, the signs,<br />
traffic c<strong>on</strong>es, and safety vests worn by the c<strong>on</strong>-<br />
structi<strong>on</strong> crew are bright orange. A red or yellow<br />
fire engine is more visible than a white or green<br />
<strong>on</strong>e.<br />
The same is true with clothing. Compare two<br />
outfits in the same style, <strong>on</strong>e bright red and the<br />
other dark brown. Which would stand out more?<br />
Colors and Mood<br />
Imagine waking <strong>on</strong> a rainy day after a m<strong>on</strong>thl<strong>on</strong>g<br />
heat wave. You might say, “I feel like wearing<br />
my dark blue sweater.” Then after a week of rainy<br />
weather, you might reach for your bright yellow<br />
sweatshirt.<br />
Both resp<strong>on</strong>ses show color’s ability to influence<br />
your mood. Blues, greens, and violets have a<br />
subduing effect. They give a sense of calm and<br />
relaxati<strong>on</strong>, like the relief of a cooling rain. Reds,<br />
oranges, and yellows express excitement and<br />
stimulate acti<strong>on</strong>. They encourage you to be<br />
cheerful, which you may need after a week without<br />
sunshine.<br />
These feelings and qualities are important<br />
when planning a home or business, as well as a<br />
wardrobe. The bright, cheerful colors in a restaurant<br />
invite you to order the deluxe meal. In the<br />
doctor’s office and hospital, shades of blue and<br />
green evoke feelings of restfulness.<br />
Some colors inspire c<strong>on</strong>fidence by implying<br />
solidity and level-headedness. Think of the steelgray<br />
business suit of a lawyer or investment broker,<br />
for example. On the other hand, what colors<br />
would you pick for a children’s entertainer?<br />
9-3<br />
When you glance quickly at the two circles,<br />
which <strong>on</strong>e seems larger? The yellow <strong>on</strong>e appears to<br />
“jump out,” giving the illusi<strong>on</strong> of greater size. Both circles<br />
are actually the same size. Since warm colors tend to<br />
advance and cool colors tend to recede, you see the circles<br />
differently.<br />
CHAPTER 9 Understanding Color • 159
9-4<br />
Sun<br />
Ray of Light<br />
Sunlight c<strong>on</strong>tains energy waves that have different lengths and colors. As light passes through a glass prism, the<br />
waves bend and produce a band of blended colors, called a spectrum. Red rays are <strong>on</strong> <strong>on</strong>e side of the spectrum. These rays<br />
are the l<strong>on</strong>gest and they bend the least. The shortest rays bend the most, creating violet <strong>on</strong> the other side of the spectrum.<br />
In between are waves that produce the other colors shown in the drawing.<br />
THE LANGUAGE OF COLOR<br />
Have you ever owned a box of cray<strong>on</strong>s that<br />
offered more colors than you knew existed, with<br />
names that were just as imaginative? A cray<strong>on</strong><br />
might be cherry, ruby, or flame. A more precise<br />
way to describe colors is with the specific names<br />
that identify them, such as red, green, and blue.<br />
These are called hues.<br />
What Is Color?<br />
Color has amazing versatility, but where does<br />
it actually come from? Without light, you wouldn’t<br />
see the various hues. Sir Isaac Newt<strong>on</strong> determined<br />
this fact in the mid-1600s when he showed<br />
that light is the source of all color. By passing sunlight<br />
through a prism, he produced a rainbow of<br />
colors from the bending light rays. See Fig. 9-4.<br />
All objects c<strong>on</strong>tain pigments, substances that<br />
absorb some light rays and reflect others. When<br />
light strikes an object, you see <strong>on</strong>ly the colors that<br />
160 • UNIT 3 Color and Design<br />
The Color Spectrum<br />
Light<br />
Rays<br />
Prism<br />
reflect, or bounce back, to your eyes. See Fig. 9-5.<br />
When light rays are absorbed, those colors are not<br />
seen.<br />
9-5<br />
When light strikes a green leaf, the green wave-<br />
length is reflected, so that’s the color you see. What<br />
happens to the wavelengths for all other colors?<br />
Rays of Light<br />
Green<br />
Sun<br />
Red<br />
Orange<br />
Yellow<br />
Green<br />
Blue<br />
Indigo<br />
Violet
The Color Wheel<br />
To work with color, you need a system that<br />
organizes hues into a logical pattern. Such a system<br />
can help you manage the many possible color<br />
combinati<strong>on</strong>s and determine how colors work<br />
together. The color wheel is a system that places<br />
colors around a circle. Positi<strong>on</strong>s <strong>on</strong> the wheel show<br />
how the colors relate to each other. See Fig. 9-6.<br />
• Primary colors. Red, yellow, and blue are<br />
the three primary colors, the basic colors from<br />
which all other colors are made. These three<br />
colors are equally spaced from each other <strong>on</strong><br />
the wheel.<br />
• Sec<strong>on</strong>dary colors. Combining equal<br />
amounts of two primary colors creates a sec<strong>on</strong>dary<br />
color. These three colors appear<br />
halfway between the three primary colors. Blue<br />
and yellow make green. Blue and red make<br />
violet, which is often called purple. What<br />
sec<strong>on</strong>dary color is made from red and<br />
yellow?<br />
• Intermediate colors. If you<br />
combine a primary color<br />
with a neighboring sec<strong>on</strong>dary<br />
color, an intermediate<br />
color is created.<br />
Blue and green combine<br />
to make bluegreen.<br />
Red combines<br />
with orange to make<br />
red-orange. What are<br />
the other intermediate<br />
colors <strong>on</strong> the<br />
color wheel?<br />
• Complementary colors. Colors that are<br />
directly opposite each other <strong>on</strong> the color wheel<br />
are called complementary colors. They<br />
include some unexpected pairings. Many people<br />
think of blue and red as complementary,<br />
but the actual complement of blue is orange.<br />
What is red’s complement?<br />
9-6<br />
The color wheel shows the colors from which all<br />
others are made. The colors are arranged in a specific<br />
order with yellow at the top. Which are the primary, sec<strong>on</strong>dary,<br />
and complementary colors <strong>on</strong> the wheel?<br />
CHAPTER 9 Understanding Color • 161
Color Variati<strong>on</strong>s<br />
On a color wheel, the colors are very bright<br />
and vivid. Most colors that you see around you,<br />
however, are lighter, darker, or softer than the<br />
hues <strong>on</strong> the color wheel. These variati<strong>on</strong>s differ in<br />
two ways—value and intensity.<br />
Value<br />
Adding white or black to a color changes its<br />
value. This describes the lightness or darkness of<br />
a color. Adding white lightens a color, and adding<br />
black darkens a color.<br />
A color that is lightened by adding white is<br />
called a tint. The pastels of pink, mint green, and<br />
baby blue are tints. A color that is darkened by the<br />
additi<strong>on</strong> of black is called a shade. Navy blue is a<br />
shade of blue; brown is a shade of orange.<br />
Every color has a wide range of value, from<br />
very light to very dark. See Fig. 9-7. Red, for<br />
example, can go from a very pale pink to a dark<br />
burgundy. How would you describe the value<br />
range of the color blue?<br />
Intensity<br />
Intensity is the brightness or dullness of a<br />
color. Bright colors are deep and vivid. Because<br />
9-7<br />
Tints are made<br />
by adding white to a<br />
color. Shades are colors<br />
darkened with black.<br />
Color values can range<br />
from very light to very<br />
dark, depending <strong>on</strong> how<br />
much white and black are<br />
used.<br />
162 • UNIT 3 Color and Design<br />
Tints<br />
they c<strong>on</strong>tain the most color pigment, they are<br />
very color intense. Jewel t<strong>on</strong>es, such as emerald<br />
green and ruby red, are examples of highintensity<br />
colors. See Fig. 9-8.<br />
Dull colors, despite the term, are not necessarily<br />
boring or drab. Colors like dusty rose and<br />
khaki green are softer, muted, or subdued. You<br />
can reduce the intensity of a color by adding gray<br />
or its complementary color. Adding gray to yellow,<br />
for example, creates beige.<br />
Like pure colors, tints and shades can also have<br />
different intensities. The pink of a rose petal can<br />
be very soft and pale, while pink nail polish may<br />
be fluorescent bright.<br />
9-8 Have you ever heard that some colors in a room<br />
or an outfit are “tiring” to look at? That’s what happens<br />
when colors of equal brightness are used together. Look<br />
at this shape and the words within for several sec<strong>on</strong>ds.<br />
As both colors fight for<br />
attenti<strong>on</strong>, your eyes<br />
VIBRATION<br />
strain to focus <strong>on</strong> the<br />
HARD TO READ<br />
words. The image<br />
almost seems to vibrate.<br />
Color Values<br />
Red<br />
Green<br />
Shades<br />
Blue<br />
+ White + Black
Neutral Colors<br />
You may w<strong>on</strong>der why black and white are not<br />
<strong>on</strong> the color wheel. In technical terms, they are<br />
not true colors because they d<strong>on</strong>’t have color pigment.<br />
You see them because of what happens to<br />
light. When all light rays are absorbed by a surface,<br />
you see the surface as black. When all light<br />
rays are reflected from a surface, you see white.<br />
Black and white are called neutral colors. Gray,<br />
a combinati<strong>on</strong> of black and white, is also a neu-<br />
tral. Sometimes tints and shades of beige are c<strong>on</strong>sidered<br />
neutrals, but they aren’t true neutrals<br />
because they have a yellow or green base.<br />
Neutral colors are very useful. You’ve already<br />
seen how they can change the value and intensity<br />
of a color. Adding white to orange produces a<br />
peach tint. Adding gray to orange softens the<br />
intensity to buff.<br />
Technology Trends<br />
>>CORRECTING COLOR BLINDNESS<br />
“I thought you wanted to buy a blue<br />
shirt,” <strong>on</strong>e teen said to his friend. “This is<br />
blue,” the friend replied. “Well, it looks<br />
green to me,” the first teen resp<strong>on</strong>ded.<br />
Obviously, not every<strong>on</strong>e sees color the<br />
same way.<br />
Some people have a deficiency in the<br />
retina of the eye that affects the way<br />
they see color. This c<strong>on</strong>diti<strong>on</strong> is called<br />
color blindness. A pers<strong>on</strong> with this c<strong>on</strong>diti<strong>on</strong><br />
sees some colors but often has trouble<br />
distinguishing certain <strong>on</strong>es. Red-green<br />
color blindness is the most comm<strong>on</strong> form,<br />
and blue-yellow is less comm<strong>on</strong>. About<br />
nine percent of humans, usually males,<br />
experience some type of color blindness.<br />
Although color blindness can’t be<br />
cured, a new eyeglass lens helps. The lens<br />
is coated with a color filter that changes<br />
light waves as they enter the eye.<br />
Different coatings match different types<br />
of color blindness. Soft c<strong>on</strong>tact lenses are<br />
now available that help boost color c<strong>on</strong>trast.<br />
The red-tinted c<strong>on</strong>tact lens is worn<br />
over just <strong>on</strong>e eye, enabling a pers<strong>on</strong> to<br />
distinguish between color—particularly red<br />
and green—that would look the same to<br />
the color-blind pers<strong>on</strong>.<br />
Another innovati<strong>on</strong> is a computer filter<br />
that allows those with normal visi<strong>on</strong> to<br />
view images as though they were colorblind.<br />
Architects, interior designers, engineers,<br />
and graphics professi<strong>on</strong>als who<br />
work <strong>on</strong> projects for people who are colorblind<br />
find this useful.<br />
INVESTIGATE<br />
Find and take a test for color blindness.<br />
You may be able to locate <strong>on</strong>e <strong>on</strong> the<br />
Internet. How might a color-blind pers<strong>on</strong><br />
benefit by knowing of the c<strong>on</strong>diti<strong>on</strong>?<br />
CHAPTER 9 Understanding Color • 163
CREATING A COLOR<br />
SCHEME<br />
Suppose a young family member puts <strong>on</strong> an<br />
orange and blue shirt with a pair of dark red<br />
pants. You might decide to suggest a color combinati<strong>on</strong><br />
that is more pleasing to the eye.<br />
Knowing what colors work well together takes<br />
an understanding of color and the differences<br />
between the many values and intensities. To make<br />
it easier, experts have identified several color<br />
schemes that can be used as guidelines. A color<br />
scheme is a plan for using a color or a combinati<strong>on</strong><br />
of colors—to decorate a room or put<br />
together an outfit.<br />
M<strong>on</strong>ochromatic<br />
“M<strong>on</strong>o” is a prefix meaning <strong>on</strong>e. “Chromatic”<br />
refers to color. Thus, a m<strong>on</strong>ochromatic color<br />
scheme uses the values and intensities of just <strong>on</strong>e<br />
color. See Fig. 9-9.<br />
In a m<strong>on</strong>ochromatic color scheme, you can<br />
choose values that c<strong>on</strong>trast greatly or very little.<br />
For example, wearing a pale blue shirt with navy<br />
blue slacks creates str<strong>on</strong>g c<strong>on</strong>trast between the<br />
upper and lower halves of the body. The same<br />
slacks paired with a darker, indigo blue shirt have<br />
little c<strong>on</strong>trast, creating a more c<strong>on</strong>tinuous look.<br />
9-9<br />
Color Scheme<br />
M<strong>on</strong>ochromatic<br />
Green<br />
Analogous<br />
An analogous (uh-NAL-uh-gus) color scheme<br />
uses two or more colors that are next to each<br />
other <strong>on</strong> the color wheel. See Fig. 9-10. Yellow,<br />
yellow-orange, and orange are analogous. A bluegreen<br />
shirt with blue shorts is an outfit based <strong>on</strong><br />
analogous hues.<br />
When using an analogous color scheme,<br />
remember that colors blend better if they are<br />
164 • UNIT 3 Color and Design<br />
close in value and intensity. Red and red-violet<br />
are more harm<strong>on</strong>ious than pink and red-violet.<br />
Pink would mix better with pink-lavender. What<br />
other combinati<strong>on</strong>s do you like?<br />
Green<br />
Blue-green<br />
9-10<br />
Blue<br />
Analogous Color Scheme<br />
Complementary<br />
A complementary color scheme combines<br />
direct opposites <strong>on</strong> the color wheel. See Fig. 9-11.<br />
Examples are red and green, and orange and blue.<br />
When complementary colors of equal intensity<br />
are used together, a very bold color scheme<br />
results. Each color emphasizes the other. Wearing<br />
an outfit of two bright complements will certainly<br />
attract notice.<br />
A softer effect can be obtained by using different<br />
values and intensities. Try pairing pink with<br />
forest green, instead of pure red with pure green.<br />
Choose a rust and navy plaid, instead of orange<br />
and blue.<br />
Another method is to use <strong>on</strong>e of the complementary<br />
colors as an accent. A yellow blouse with<br />
violet trim or a red tie with a narrow green stripe<br />
is eye-catching but not overwhelming.<br />
9-11<br />
Green<br />
Complementary Color Scheme<br />
Red
Split-Complementary<br />
One color used with the two colors <strong>on</strong> each<br />
side of its direct complement makes up a splitcomplementary<br />
color scheme. See Fig. 9-12. This<br />
combinati<strong>on</strong> is more comm<strong>on</strong> and easier to wear<br />
than a complementary color scheme. The effect is<br />
not as bold.<br />
You often find a split-complementary scheme<br />
in a plaid or print fabric. A blue-and-green plaid<br />
accented with a stripe of red-orange uses this<br />
color scheme.<br />
Yellow<br />
Blue-violet<br />
9-12<br />
Red-violet<br />
Split-Complementary Color Scheme<br />
Triadic<br />
Three colors that are equally distant from each<br />
other <strong>on</strong> the color wheel create a triadic color<br />
scheme. See Fig. 9-13. The primary colors of red,<br />
yellow, and blue make up <strong>on</strong>e example. Orange,<br />
violet, and green create another example. As you<br />
can imagine, with this much c<strong>on</strong>trast in hues, a<br />
triad of high-intensity colors would be very bold.<br />
A combinati<strong>on</strong> of softer, muted colors would be<br />
easier to wear.<br />
Green Orange<br />
9-13<br />
Violet<br />
Triadic Color Scheme<br />
Accented Neutral<br />
Since neutrals have no hue, they combine well<br />
with any color. Matching white, black, or gray<br />
with a smaller amount of a color results in an<br />
accented neutral color scheme. The accent color<br />
brightens up the neutral color. A gray suit might<br />
be accented with a yellow tie or scarf, or a blue<br />
handkerchief.<br />
An accented neutral scheme is often used to<br />
create a focal point, or point of interest. The eye<br />
is drawn to the accent color, making that area<br />
more noticeable.<br />
SELECTING COLORS FOR<br />
YOU<br />
Of the many hues in the color spectrum, which<br />
<strong>on</strong>es look best <strong>on</strong> you? Should you choose the<br />
warm reds, oranges, and yellows or the cool blues,<br />
blue-violets, and greens? Some color experts say<br />
that every<strong>on</strong>e can wear every color, as l<strong>on</strong>g as it<br />
has the right value and intensity.<br />
It’s always best to evaluate colors in natural<br />
light, because other types of light can alter the<br />
way they appear. Incandescent light may add a<br />
touch of yellow, while fluorescent light adds blue.<br />
Some light bulbs are “soft pink,” adding a subtle<br />
pink t<strong>on</strong>e. Natural sunlight, though, reflects an<br />
object’s true colors.<br />
When selecting colors for your wardrobe, c<strong>on</strong>sider<br />
your pers<strong>on</strong>al coloring, your body shape,<br />
and your height. The right values and intensities<br />
of a color will complement these features. See Fig.<br />
9-14.<br />
9-14<br />
A color’s intensity changes when placed against<br />
different backgrounds. How does this explain why colors<br />
look different <strong>on</strong> people? What happens when you put different<br />
garments together in an outfit?<br />
CHAPTER 9 Understanding Color • 165
Pers<strong>on</strong>al Coloring<br />
Your pers<strong>on</strong>al coloring c<strong>on</strong>sists of the color of<br />
your skin, hair, and eyes. See Fig. 9-15. Some of<br />
these colorings can change. Sunshine causes some<br />
skins to tan and hair to lighten. Hair color may<br />
darken as a pers<strong>on</strong> grows older, until a certain<br />
point where it may start to go gray. Many people<br />
change their hair color, sometimes with striking<br />
effects.<br />
Skin T<strong>on</strong>es<br />
Skin t<strong>on</strong>es vary widely, from cream, to h<strong>on</strong>ey,<br />
to olive, to eb<strong>on</strong>y. All t<strong>on</strong>es, however, have either<br />
yellow or blue undert<strong>on</strong>es, subtle traces of color<br />
seen through the skin. To determine the color of<br />
your undert<strong>on</strong>e, look at the skin <strong>on</strong> the inside of<br />
your wrist. If possible, compare it with other people’s<br />
to see the difference between warm and cool<br />
undert<strong>on</strong>es. Skin with a more yellow, gold, or<br />
peach cast has warm undert<strong>on</strong>es. A blue or pink<br />
trace indicates cool undert<strong>on</strong>es.<br />
166 • UNIT 3 Color and Design<br />
9-15<br />
colors stand out.<br />
The colors you wear can make your hair and eye<br />
Analyzing Colors<br />
To find out which colors look best <strong>on</strong> you,<br />
compare various colors to your pers<strong>on</strong>al coloring.<br />
Stand at a mirror and hold colors underneath<br />
your chin. You can use clothing, pieces of fabric,<br />
or even colored paper. Remember to use natural<br />
daylight rather than artificial lighting if possible.<br />
Have <strong>on</strong>e or more friends or relatives help with<br />
your evaluati<strong>on</strong>.<br />
As you hold up a color, watch for changes in<br />
your eyes and face. A good color accents your eyes<br />
or hair and seems to give them sparkle. Your<br />
complexi<strong>on</strong> looks healthy and glowing. Your face<br />
appears softer; any laugh lines or circles under<br />
your eyes are diminished. In c<strong>on</strong>trast, another<br />
color may make your face appear hard and sad,<br />
and your eyes lackluster. You and others will<br />
notice the difference.<br />
If you have a light complexi<strong>on</strong>, does your face<br />
look more red or yellow with certain colors? If<br />
you have darker skin, how do different colors<br />
impact your skin t<strong>on</strong>e? Overall, does the color<br />
enhance or overpower you?<br />
As you c<strong>on</strong>tinue your analysis, you may need<br />
to switch back and forth am<strong>on</strong>g colors to compare<br />
the effects. Try to discover whether some<br />
colors are more flattering than others. Do you<br />
look better in cool or warm colors, in brighter or<br />
softer hues? Do you look best in a clear red, bluered,<br />
or orange-red? Is your best green an olive<br />
green, a blue-green, or a true green? Is pure white<br />
or ivory more attractive <strong>on</strong> you? Some people use<br />
the seas<strong>on</strong>al approach to selecting colors, as<br />
shown <strong>on</strong> page 167.
How To…<br />
CHOOSE YOUR COLORS<br />
How can you decide what colors look best <strong>on</strong> you? One color analysis system is based <strong>on</strong><br />
the four seas<strong>on</strong>s, as shown below. Skin, hair, and eye color link a pers<strong>on</strong> with a seas<strong>on</strong>,<br />
which has a set of corresp<strong>on</strong>ding colors. Note how a hue changes slightly for each<br />
seas<strong>on</strong>. Green is true green for winter, blue-green for summer, yellow-green for spring,<br />
and earthy green for autumn.<br />
Exploring Seas<strong>on</strong>al Colors<br />
Work with a partner to determine what seas<strong>on</strong> applies to each of you. Use the<br />
informati<strong>on</strong> <strong>on</strong> skin, hair, and eye color to decide. Then find the colors that<br />
work best for you, using colored paper, fabric swatches, or actual garments.<br />
CHAPTER 9 Understanding Color • 167
Remember that your goal in choosing colors is<br />
to achieve a look of good health. If a color makes<br />
you look pale or harsh, it’s not a good color for<br />
you, no matter how trendy it may be. See Fig. 9-16.<br />
Body Shape<br />
If you looked at a white cube and a black cube<br />
of identical size, which <strong>on</strong>e would appear larger?<br />
WHAT DO YOU WANT<br />
TO DO?<br />
Increase size or draw<br />
attenti<strong>on</strong> to an area<br />
Decrease size or take<br />
attenti<strong>on</strong> away from an<br />
area<br />
168 • UNIT 3 Color and Design<br />
9-16<br />
A color that looks good <strong>on</strong> <strong>on</strong>e pers<strong>on</strong> may be<br />
less effective <strong>on</strong> some<strong>on</strong>e else. How would you evaluate<br />
these color choices in clothing?<br />
9-17 • Color Effects <strong>on</strong> Size<br />
USE THESE . . .<br />
HUES<br />
Warm hues, such as<br />
reds, oranges, and<br />
yellows<br />
Cool hues, such as<br />
blues, blue-greens, and<br />
blue-purples<br />
The white <strong>on</strong>e would, but why? All the light that<br />
reflects from the white object makes it look larger.<br />
On the other hand, the black cube absorbs all<br />
light, making the cube look smaller.<br />
In the same way, colors can create illusi<strong>on</strong>s that<br />
change how you look. The right color or combinati<strong>on</strong><br />
of colors can help you look larger or<br />
smaller, taller or shorter.<br />
Suppose you want to make your shoulders<br />
appear broader. Would you wear a dark green<br />
shirt or a bright red <strong>on</strong>e? To de-emphasize the<br />
hips, would a pair of light yellow or blue-gray<br />
pants be more effective?<br />
Guided by what you know about the effects of<br />
different colors, you can probably figure the better<br />
choices. You know that warm colors seem to<br />
advance, bright colors draw attenti<strong>on</strong>, and light<br />
colors add size. Thus, the bright, warm hue of the<br />
red shirt would emphasize the shoulders better<br />
than the dark, cool green.<br />
To minimize an area, you need the opposite<br />
effect. Hips would be less noticed in a receding,<br />
cool blue-gray than in yellow. Fig. 9-17 suggests<br />
how colors can be used for different effects <strong>on</strong><br />
size.<br />
USE THESE . . .<br />
VALUES<br />
Light, high values; light<br />
tints; str<strong>on</strong>g c<strong>on</strong>trasts<br />
in value<br />
Low, middle values;<br />
dark shades; weak or<br />
no c<strong>on</strong>trasts in value<br />
USE THESE . . .<br />
INTENSITIES<br />
High intensities: pure,<br />
str<strong>on</strong>g, brilliant, saturated<br />
with color<br />
Low intensities: weak<br />
or grayed colors
Height<br />
An unbroken block of color gives the illusi<strong>on</strong><br />
of added height. Dressing from neckline to hem<br />
in a single color or in clothes that are close in<br />
value and intensity helps make you look taller.<br />
See Fig. 9-18.<br />
On the other hand, broken blocks of color<br />
detract from height. Wearing sharply c<strong>on</strong>trasting<br />
items, either in hue, value, or intensity, makes you<br />
look shorter. You might combine a light blue<br />
sweater with navy pants or a shamrock green<br />
shirt with tan pants.<br />
Emphasis<br />
Color can also be used to emphasize certain<br />
areas and diminish others. A scarf or collar that<br />
c<strong>on</strong>trasts with the shirt draws attenti<strong>on</strong> toward<br />
the face and away from the body. To minimize a<br />
waistline, choose a belt that matches the dress or<br />
pants. Wearing a belt in a bright, c<strong>on</strong>trasting<br />
color will make it the center of attenti<strong>on</strong>.<br />
9-18<br />
Your Favorite Colors<br />
In <strong>on</strong>e clothing class, students completed a<br />
color analysis. Later some<strong>on</strong>e said, “I never<br />
knew blue was my best color, but it’s always been<br />
my favorite. I’ve got lots of blue clothes.” People<br />
with an eye for color often choose what looks<br />
good <strong>on</strong> them—without even trying. The mirror<br />
tells them that some hues look better than<br />
others. Compliments from friends and family<br />
also reinforce the noti<strong>on</strong> that certain colors are<br />
more flattering.<br />
Does that mean you shouldn’t wear other colors?<br />
Not necessarily. You can wear the “right” colors<br />
when you want to look your best, or just use<br />
them as accents. You can keep your special colors<br />
in mind as you shop, but you d<strong>on</strong>’t have to skip<br />
over a good buy just because the color isn’t <strong>on</strong><br />
your list. Wearing colors simply because you like<br />
them puts your pers<strong>on</strong>ality <strong>on</strong> center stage, and<br />
that can be fun.<br />
Colors can make you look taller or shorter. They<br />
also affect how size is seen. What illusi<strong>on</strong>s do these out-<br />
fits create?<br />
CHAPTER 9 Understanding Color • 169
CHAPTER 9<br />
CHAPTER SUMMARY<br />
• Colors can be used as symbols to communicate<br />
messages.<br />
• Colors can draw or deflect attenti<strong>on</strong> by<br />
suggesting temperature and movement.<br />
• The three primary colors—red, yellow, and<br />
blue—are used to make all others, including<br />
sec<strong>on</strong>dary and intermediate colors.<br />
• Adding black or white creates variati<strong>on</strong>s of<br />
colors <strong>on</strong> the color wheel.<br />
• Colors can be used in color schemes to<br />
create different visual effects.<br />
• The best colors for you are those that<br />
enhance your natural coloring.<br />
• You can use color to help accent or minimize<br />
physical features.<br />
USING KEY TERMS<br />
Cut out two attractive outfits from a magazine<br />
or catalog and glue them to a large piece<br />
of paper. Label each with the color scheme<br />
used. Use other Key Terms to label and<br />
describe the colors included in the outfits.<br />
170 • UNIT 3 Color and Design<br />
Review<br />
RECALLING THE FACTS<br />
1. Why is it valuable to understand the<br />
impact of color?<br />
2. Give four examples of how colors are<br />
used as symbols.<br />
3. Why are some colors called “warm” and<br />
others “cool”? Give examples.<br />
4. Which color would be better for a<br />
library’s walls, mint green or deep gold?<br />
Why?<br />
5. How do pigments determine an object’s<br />
apparent color?<br />
6. How are sec<strong>on</strong>dary colors related to primary<br />
colors?<br />
7. How do you find the complement of a<br />
color <strong>on</strong> the color wheel?<br />
8. How is a tint of blue related to a shade<br />
of blue?<br />
9. How can colors be varied in a m<strong>on</strong>ochromatic<br />
color scheme?<br />
10. Give two tips for creating a pleasing<br />
complementary color scheme.<br />
11. How are neutrals useful in creating colors?<br />
In creating color schemes?<br />
12. Describe how a color that looks good <strong>on</strong><br />
you affects your appearance.<br />
13. Which colors are better for minimizing<br />
features, shades or tints? Why?
and Activities<br />
THINKING CRITICALLY<br />
1. The symbolism of colors varies am<strong>on</strong>g<br />
different cultures. People in India wear<br />
white to mourn the dead; in the United<br />
States, the traditi<strong>on</strong>al choice is black.<br />
How do you think such differences arise?<br />
2. One teen thought the colors in a dress<br />
were flattering when she tried it <strong>on</strong> in<br />
the store’s fitting room. When she modeled<br />
it at home, however, she didn’t like<br />
the colors. What do you think happened?<br />
3. Lime green clothes may be “in” <strong>on</strong>e year<br />
and “out” the next. Why do you think<br />
such color trends occur?<br />
4. Of the color schemes described in the<br />
chapter, which do you think would be<br />
easiest to use when coordinating an outfit?<br />
Which would be most difficult? Why?<br />
APPLYING KNOWLEDGE<br />
1. Color schemes. Choose <strong>on</strong>e of the color<br />
schemes described in the book. Starting<br />
with a skirt, pants, or dress, create an<br />
outfit of three pieces or more that is<br />
based <strong>on</strong> that color scheme. Write a<br />
descripti<strong>on</strong> of your outfit, identifying the<br />
scheme and the colors selected.<br />
2. Skin t<strong>on</strong>es. Evaluate your skin t<strong>on</strong>e for<br />
either blue or yellow undert<strong>on</strong>es. Cut a 2inch<br />
(5-cm) circle from a sheet of white<br />
paper and place it over the skin of your<br />
lower inner arm. Compare with classmates.<br />
Are your undert<strong>on</strong>es cool (blue) or<br />
warm (yellow)? In writing, explain how<br />
you can use this dem<strong>on</strong>strati<strong>on</strong> to guide<br />
you in choosing colors for your wardrobe.<br />
CHAPTER 9<br />
3. Accents. Experiment with complementary<br />
and neutral accents, using large and<br />
small fabric samples. Which colors combine<br />
for pleasingly dramatic effects?<br />
How might these combinati<strong>on</strong>s be worn?<br />
Share your findings in class.<br />
4. Pers<strong>on</strong>al colors. Follow the directi<strong>on</strong>s <strong>on</strong><br />
page 167 to determine the most flattering<br />
colors for you.<br />
MAKING>
CHAPTER 10<br />
Understanding Design<br />
OBJECTIVES<br />
• Describe ways to<br />
determine body<br />
shape and size.<br />
• Define the<br />
elements of design.<br />
• Define the<br />
principles of<br />
design.<br />
• Dem<strong>on</strong>strate the<br />
use of design<br />
elements and<br />
principles in<br />
choosing and<br />
creating fashi<strong>on</strong>s.<br />
KEY TERMS<br />
asymmetrical balance<br />
balance<br />
emphasis<br />
harm<strong>on</strong>y<br />
line<br />
proporti<strong>on</strong><br />
rhythm<br />
shape<br />
silhouette<br />
space<br />
symmetrical balance<br />
texture<br />
172 • UNIT 3 Color and Design
EXAMINETHISISSUE<br />
Impact of appearance. By choosing<br />
appropriate designs in clothing, people<br />
can make the most of their appearance.<br />
For job interviews and other special<br />
occasi<strong>on</strong>s, they can look their best and<br />
feel more comfortable.<br />
Not every<strong>on</strong>e believes that people<br />
should have to choose fashi<strong>on</strong> designs<br />
that help them look good. They believe<br />
people should be accepted as they are<br />
and judged by inner qualities rather than<br />
how they look.<br />
What do you think?<br />
Think about this issue as you read the<br />
chapter. Which view do you support? Use<br />
examples to explain your viewpoint.<br />
The professi<strong>on</strong>al fashi<strong>on</strong> designer<br />
uses design knowledge to create clothes<br />
that people want to buy. Other people can<br />
use this knowledge too. After<br />
learning about design, many<br />
people discover how to<br />
choose clothes and put<br />
together outfits that help<br />
them look their best.<br />
The garments that you<br />
prefer to wear—your<br />
favorites—probably<br />
10-1 A special garment<br />
can make you feel<br />
good about the way you<br />
look. Why is it sometimes<br />
difficult for people to tell<br />
what looks good <strong>on</strong><br />
them?<br />
have designs that suit you well, making you feel<br />
good about your appearance. To expand the list<br />
of favorites in your closet, the study of design in<br />
this chapter may be just what you need.<br />
Using design knowledge to your advantage is<br />
not about changing what you are. People need to<br />
become comfortable with their own appearance,<br />
recognizing that physical qualities al<strong>on</strong>e d<strong>on</strong>’t<br />
make a pers<strong>on</strong>. If learning to use design to make<br />
the best of appearances makes some<strong>on</strong>e feel more<br />
comfortable, however, then the ideas are worth<br />
exploring. While a new outfit can’t change physical<br />
characteristics, the right design can bring out<br />
the best in any<strong>on</strong>e. See Fig. 10-1.<br />
SHAPE AND SIZE<br />
To choose clothing that emphasizes their best<br />
features, people need to keep body height, shape,<br />
and size in mind. They can use three methods to<br />
determine these.<br />
• Frame. Two people of the same height and<br />
weight may look very different because of their<br />
frame. Body frame, the skeletal structure of the<br />
b<strong>on</strong>es, is usually described as small, medium,<br />
or large. A pers<strong>on</strong> with a large frame typically<br />
looks bigger than some<strong>on</strong>e with a small frame.<br />
As Fig. 10-2 shows, wrist size can be used to<br />
estimate frame size.<br />
10-2 Measure around the wrist with a tape measure<br />
and compare to chart.<br />
Using Wrist Size to Estimate Body Frame Size<br />
HEIGHT<br />
Females<br />
under 5'2"<br />
Females<br />
5'2" to 5'5"<br />
Females<br />
over 5'5"<br />
Males over<br />
5'5"<br />
WRIST SIZE<br />
FOR SMALL<br />
FRAME<br />
Less than 5.5"<br />
Less than 6"<br />
Less than<br />
6.25"<br />
5.5" to 6.5"<br />
WRIST SIZE<br />
FOR MEDIUM<br />
FRAME<br />
5.5" to 5.75"<br />
6" to 6.25"<br />
6.25" to 6.5"<br />
6.5" to 7.5"<br />
WRIST SIZE<br />
FOR LARGE<br />
FRAME<br />
Over 5.75"<br />
Over 6.25"<br />
Over 6.5"<br />
Over 7.5"<br />
CHAPTER 10 Understanding Design • 173
Comparing Areas of the Body<br />
174 • UNIT 3 Color and Design<br />
UPPER BODY<br />
WAISTLINE<br />
LOWER BODY<br />
10-3<br />
How areas of the body relate to each other in<br />
size influences appearance. Who appears to be taller,<br />
some<strong>on</strong>e with a high waistline or a lower <strong>on</strong>e?<br />
• Size ratios. Comparing areas of the body is<br />
another way to look at stature. In Fig. 10-3 you<br />
see how the waist divides the upper and lower<br />
porti<strong>on</strong>s of the body. Two people of equal<br />
height may not have the same size ratio<br />
between these two areas. While <strong>on</strong>e pers<strong>on</strong><br />
may have a l<strong>on</strong>g upper body and short legs,<br />
another may have a short upper body and l<strong>on</strong>g<br />
legs. People of the same height can also have<br />
arms of different lengths. One pers<strong>on</strong>’s arm<br />
length may be l<strong>on</strong>ger in comparis<strong>on</strong> to total<br />
height.<br />
• Geometric shape. A comm<strong>on</strong> way<br />
to think about body shape is geometrically,<br />
as shown by the basic body<br />
shapes below. Of course, with so many<br />
different heights and sizes possible,<br />
these shapes can have many variati<strong>on</strong>s<br />
am<strong>on</strong>g people.<br />
Triangle: narrow shoulders<br />
and wide hips.<br />
Inverted triangle: wide<br />
shoulders and small hips.<br />
Rectangle: about the same<br />
width at shoulders, waist, and<br />
hips.<br />
Hour-glass: about the same<br />
at chest and hips and smaller<br />
at the waist.<br />
Whatever your body height, shape,<br />
and size may be, clothing can change<br />
your appearance with design illusi<strong>on</strong>s. As<br />
you’ve learned, illusi<strong>on</strong>s make things<br />
appear different than they actually are. A<br />
pers<strong>on</strong> who wants to look thinner in the<br />
thighs can choose a clothing design that<br />
helps create that illusi<strong>on</strong>. Some<strong>on</strong>e who wants to<br />
look more broad-shouldered can also use illusi<strong>on</strong>s<br />
to gain that appearance.<br />
As you study design in this chapter, you’ll<br />
relate the informati<strong>on</strong> to clothing and discover<br />
ways to create a number of illusi<strong>on</strong>s. Some of<br />
them may be ideas you’d like to try as you add to<br />
your wardrobe.<br />
Your study of design will be twofold. First,<br />
you’ll become familiar with the elements of<br />
design. Then you’ll learn how a few general principles<br />
guide the use of these elements. For years,<br />
designers have used the elements and principles<br />
of design, listed in Fig. 10-4, to create appealing<br />
fabric patterns and garment designs. So<strong>on</strong> you’ll<br />
be able to use them, too, as you put together outfits<br />
that you’ll feel good about wearing.
10-4<br />
THE ELEMENTS OF DESIGN<br />
When you look for new clothes, are some<br />
designs more appealing? While an outfit with a<br />
very simple design might attract <strong>on</strong>e pers<strong>on</strong>’s<br />
attenti<strong>on</strong>, some<strong>on</strong>e else may like a more elaborate<br />
look. What may surprise you is that all designs,<br />
from simple to complex, come from <strong>on</strong>ly a few<br />
basic design elements.<br />
Whether an artist, architect, or fashi<strong>on</strong><br />
designer, the pers<strong>on</strong> who studies design in any<br />
part of the world uses the same basic tools, called<br />
the elements of design. These are color, line,<br />
shape, space, and texture. Color was covered in<br />
the last chapter, and the other design elements are<br />
discussed here. All of these elements can be used<br />
individually and in combinati<strong>on</strong> to create different<br />
visual effects, whether in a fabric pattern, a<br />
painting, a home’s décor, or an item of clothing.<br />
See Fig. 10-5.<br />
10-5<br />
LINE<br />
SHAPE<br />
SPACE<br />
TEXTURE<br />
COLOR<br />
What is good design?<br />
+<br />
BALANCE<br />
PROPORTION<br />
EMPHASIS<br />
RHYTHM<br />
HARMONY<br />
With just a few basic design elements, an endless<br />
number of design possibilities exist. How are lines handled<br />
in these designs?<br />
Understanding Line<br />
A line is a series of points c<strong>on</strong>nected to form a<br />
narrow path. How many basic line types do you<br />
see around you? Straight and curved are the main<br />
<strong>on</strong>es. A zigzag line is a variati<strong>on</strong> made by combining<br />
straight lines. By putting different lines<br />
together, many patterns can be formed.<br />
Whether curved, straight, or a variati<strong>on</strong>, a line<br />
takes <strong>on</strong>e of three basic directi<strong>on</strong>s. Vertical lines<br />
go up and down, horiz<strong>on</strong>tal lines go across, and<br />
diag<strong>on</strong>al lines rest at an angle. Eyes tend to follow<br />
lines in the directi<strong>on</strong>s they go. The types of lines<br />
and their directi<strong>on</strong>s are shown in Fig. 10-6.<br />
10-6<br />
= Good<br />
Design<br />
Line Types<br />
STRAIGHT CURVED ZIGZAG<br />
Line Directi<strong>on</strong>s<br />
VERTICAL HORIZONTAL DIAGONAL<br />
A line is defined by its path and length. The eye<br />
tends to follow both of these, sending an impressi<strong>on</strong> to<br />
the brain.<br />
CHAPTER 10 Understanding Design • 175
10-7<br />
Designers use<br />
lines to create different<br />
effects. How would you<br />
describe the effects of<br />
line in each of these<br />
garments?<br />
Line is the most essential element of design<br />
because it divides areas into shapes and spaces.<br />
How Designers Use Lines<br />
Clothing designers use lines for different<br />
effects, as you can see in Fig. 10-7. Straight lines,<br />
which provide a crisp, formal look, often appear<br />
in classic or c<strong>on</strong>servative designs. Business suits<br />
comm<strong>on</strong>ly have clean, straight lines at the shoulders,<br />
sleeves, pockets, cuffs, and hems. Straight<br />
lines are seen in striped and plaid patterns.<br />
Curved lines, which can be circular or waved,<br />
give a feeling of movement to a design. By adding<br />
softness and roundness to a garment, curved lines<br />
are often used to create a casual image. A westernstyle<br />
shirt with a curved seam across the chest<br />
and back has a more casual look than a tailored<br />
shirt. Curved lines can be found in necklines,<br />
lapels, ruffles, and scalloped edges.<br />
With zigzag lines, a very different effect occurs.<br />
The eye must c<strong>on</strong>stantly change directi<strong>on</strong> to follow<br />
such lines, which builds a feeling of excitement<br />
or drama. If overd<strong>on</strong>e, the feeling can<br />
become chaotic. You might see zigzag patterns in<br />
a sweater or in the design of a garment’s trim.<br />
Lines and Illusi<strong>on</strong><br />
In fashi<strong>on</strong> design, illusi<strong>on</strong>s can’t make people<br />
disappear, but they can create a bit of visual<br />
“magic.” The illusi<strong>on</strong> of line can emphasize or<br />
minimize porti<strong>on</strong>s of a pers<strong>on</strong>’s body. Lines and<br />
their directi<strong>on</strong> may even help camouflage a body<br />
feature that you want to be less noticeable.<br />
176 • UNIT 3 Color and Design<br />
• Vertical lines. Vertical lines lead the eyes up<br />
and down, giving the illusi<strong>on</strong> of more height<br />
and less width. Therefore, you can use vertical<br />
lines to create a taller, thinner look. To do this,<br />
choose lines that are l<strong>on</strong>g and unbroken.<br />
Notice this effect in Fig. 10-8. Vertical lines give<br />
a feeling of strength, dignity, and formality.<br />
Narrow panels, raised collars, and V necklines<br />
emphasize the vertical look. Where else might<br />
you see vertical lines?<br />
• Horiz<strong>on</strong>tal lines. As they explore horiz<strong>on</strong>tal<br />
lines, the eyes move from side to side, giving<br />
10-8<br />
Vertical<br />
lines go up and<br />
down. How many<br />
examples of vertical<br />
lines can you find in<br />
these garments?
the illusi<strong>on</strong> of width rather than height. See<br />
Fig. 10-9. Therefore, using horiz<strong>on</strong>tal lines in<br />
particular locati<strong>on</strong>s gives that area a shorter or<br />
wider look. For example, with the right use of<br />
horiz<strong>on</strong>tal lines, you can add width to shoulders,<br />
chest, or hips. Broad collars, full sleeves,<br />
and large pockets give a widening effect,<br />
although more subtle than an obvious horiz<strong>on</strong>tal<br />
stripe. Two-piece outfits and c<strong>on</strong>trasting<br />
belts divide body length with a horiz<strong>on</strong>tal<br />
line. Horiz<strong>on</strong>tal lines tend to create a feeling of<br />
stability and restfulness.<br />
• Diag<strong>on</strong>al lines. In Fig. 10-10, the slanted<br />
lines add movement and excitement to the<br />
clothing. The extent of the effect from diag<strong>on</strong>al<br />
lines depends partly up<strong>on</strong> whether the<br />
lines slant more vertically or horiz<strong>on</strong>tally.<br />
Zigzag diag<strong>on</strong>al lines create the most excitement.<br />
Due to their dramatic impact, diag<strong>on</strong>al<br />
lines are often chosen for high-fashi<strong>on</strong><br />
clothes and sportswear.<br />
10-9<br />
Horiz<strong>on</strong>tal lines go across. How does the effect<br />
of the stripes <strong>on</strong> these garments compare to the effect of<br />
the stripes in Fig. 10-8?<br />
10-10<br />
Line directi<strong>on</strong>s<br />
can be compared to the<br />
human body when standing,<br />
sleeping, and running. Which<br />
<strong>on</strong>e applies to diag<strong>on</strong>al lines?<br />
How is the comparis<strong>on</strong> more<br />
than just visual?<br />
In looking for a line to follow in a garment, the<br />
eye naturally finds the dominant line, which<br />
might be a center seam, a waistline, a curved<br />
neckline, or a bold stripe. Whatever it is, that line<br />
or combinati<strong>on</strong> of lines has the most influence.<br />
For example, a bold horiz<strong>on</strong>tal stripe across the<br />
hip or waist makes each look larger.<br />
Directi<strong>on</strong> isn’t all that creates illusi<strong>on</strong>. The<br />
thickness of the lines and the amount of space<br />
between them are other c<strong>on</strong>tributors. Widely<br />
spaced vertical stripes may actually give the<br />
impressi<strong>on</strong> of added width. This is because the<br />
eye moves sideways across the lines. Widely<br />
spaced horiz<strong>on</strong>tal stripes have the opposite effect,<br />
causing the eye to move up and down instead of<br />
sideways.<br />
How can you take advantage of line illusi<strong>on</strong>s<br />
when choosing clothes? Look at the illusi<strong>on</strong>s<br />
shown in the illustrati<strong>on</strong> <strong>on</strong> page 178. When you<br />
learn how lines work, you can apply what you<br />
know to clothing choices.<br />
CHAPTER 10 Understanding Design • 177
How To…<br />
CREATE DESIGN ILLUSIONS<br />
Designers use lines to create the effects they want, of length and width, in particular.<br />
Whether you want to add or subtract visual height or width to your own body image,<br />
lines can help. Here’s how.<br />
Which rectangle<br />
looks taller and<br />
thinner? The<br />
vertical line<br />
breaks the space<br />
and leads the eye<br />
up and down,<br />
making the <strong>on</strong>e<br />
<strong>on</strong> the right look<br />
taller. Vertical<br />
lines in a<br />
garment suggest<br />
height and are<br />
slimming.<br />
Which rectangle looks wider?<br />
The horiz<strong>on</strong>tal bar adds width to<br />
the rectangle <strong>on</strong> the right. What<br />
does this tell you about the<br />
effect of stripes in a garment?<br />
178 • UNIT 3 Color and Design<br />
A change in the locati<strong>on</strong> of<br />
lines can change the apparent<br />
size of an area. What would<br />
the effect be if these lines<br />
were <strong>on</strong> a skirt or shirt? Which vertical line is<br />
l<strong>on</strong>ger? Actually,<br />
they’re the same. If<br />
these were dress<br />
styles, which <strong>on</strong>e<br />
would make a pers<strong>on</strong><br />
look shorter?<br />
Which lines make<br />
the rectangle look<br />
thinner? What<br />
fashi<strong>on</strong> styles might<br />
use these lines?<br />
Exploring Illusi<strong>on</strong>s<br />
With a partner, look through magazines,<br />
catalogs, and books to find examples of<br />
garments that show the illusi<strong>on</strong>s<br />
described. Create a poster that illustrates<br />
these links.
Understanding Shape<br />
When you see the shadow of an object <strong>on</strong> the<br />
wall, you’re looking at its shape. Shape is the<br />
outline that forms when <strong>on</strong>e or more lines<br />
come together to enclose an area.<br />
Sometimes this is called a silhouette. see<br />
Fig. 10-11.<br />
As you look at garments, how many<br />
different shapes can you identify? You<br />
may see skirts and pants that are straight<br />
and narrow, yet notice others that flare<br />
with a bell shape. Is <strong>on</strong>e shape more<br />
comm<strong>on</strong> than the others? To pick out a<br />
shape quickly, try squinting which helps<br />
to block out the detail.<br />
Most clothes fit four basic shapes: natural,<br />
tubular, bell, and full. See Fig. 10-12 <strong>on</strong><br />
page 180. When worn, each shape can<br />
make the body shape underneath more or<br />
less noticeable.<br />
• Natural. The natural shape follows<br />
your body’s outline. Clothes of this<br />
shape fit close to the body and emphasize<br />
the natural waistline. This shape is<br />
the most classic and is worn most<br />
easily <strong>on</strong> average body sizes.<br />
• Tubular. The tubular shape is rectangular<br />
with vertical emphasis. The dominant lines<br />
go up and down. The waistline is not usually<br />
defined. A T-shirt dress, straight-leg pants,<br />
and a tailored business suit are examples of<br />
tubular shapes. This shape appears to add<br />
height and thinness to the body.<br />
• Bell. Both diag<strong>on</strong>al and horiz<strong>on</strong>tal lines create<br />
a bell shape. A-line skirts and dresses and<br />
flared pants and jackets are all bell shapes.<br />
This shape can cut height and add c<strong>on</strong>tour to<br />
a figure. Depending <strong>on</strong> where the top and<br />
bottom of the bell hit, the shape can add or<br />
subtract width.<br />
• Full. Full shapes have more horiz<strong>on</strong>tal and<br />
curved lines than other shapes do. Gathered<br />
skirts and dresses, full sleeves, and pants with<br />
wide legs are examples of full shapes. Full<br />
shapes tend to make the body look larger.<br />
10-11<br />
The outer lines of a garment<br />
define its shape. The simple and graceful<br />
lines of this dress make the shape easy to<br />
identify.<br />
Fashi<strong>on</strong> trends influence which<br />
shapes are in style during a fashi<strong>on</strong> seas<strong>on</strong>.<br />
Usually silhouettes change gradually<br />
from year to year, but occasi<strong>on</strong>ally<br />
fashi<strong>on</strong> designers introduce an abrupt<br />
switch to a different shape. Styles may<br />
suddenly swing from full to tubular<br />
when designers, magazines, and<br />
stores promote a new look.<br />
Understanding Space<br />
When a shape is created, another<br />
design element forms. The area<br />
inside that shape is known as space.<br />
As a design element <strong>on</strong> a garment,<br />
space is just as important as the silhouette,<br />
because what goes <strong>on</strong><br />
within the spaces c<strong>on</strong>tributes to the<br />
visual effect of the garment.<br />
Many decisi<strong>on</strong>s are made as space is c<strong>on</strong>sidered<br />
in design. How will the space be divided? What will<br />
the relati<strong>on</strong>ship between spaces be? What will go<br />
in each space? Each answer c<strong>on</strong>tributes to the final<br />
design.<br />
Typically, internal lines, either structural or decorative,<br />
divide the space <strong>on</strong> a garment. In Fig. 10-<br />
13 <strong>on</strong> page 181, these lines turn a shape into something<br />
with visual appeal. As part of a garment’s<br />
structure, seams produce inner spaces. You see this<br />
effect when a seam divides the back of a shirt to<br />
form a yoke. Decorative stitching and trims can<br />
also divide space, as you see in the lace down the<br />
fr<strong>on</strong>t of a blouse.<br />
When lines divide space, the number of lines<br />
and their size and arrangement make a difference.<br />
Too much activity can be tiring. Too little may be<br />
boring.<br />
CHAPTER 10 Understanding Design • 179
10-12<br />
NATURAL<br />
Follows the body’s outline<br />
BELL<br />
Combines vertical and horiz<strong>on</strong>tal lines in bell shape<br />
180 • UNIT 3 Color and Design<br />
10-12 • Basic Clothing Shapes<br />
TUBULAR<br />
Rectangular shape with vertical emphasis<br />
FULL<br />
Wider than other shapes, with more horiz<strong>on</strong>tal and curved lines
Shape is the outline, or silhouette, of a<br />
garment. Space is the area within that shape.<br />
As you read earlier, str<strong>on</strong>g illusi<strong>on</strong>s are possible<br />
with lines. That’s why you’ll want to note<br />
where the structural and decorative lines fall <strong>on</strong><br />
your body when you buy or sew clothes. For<br />
example, pants and skirts with fitted yokes<br />
emphasize the hipline. Usually, the fewer lines<br />
within the space of a garment, the less attenti<strong>on</strong><br />
they attract. By c<strong>on</strong>trast, more lines, especially<br />
bold <strong>on</strong>es, draw attenti<strong>on</strong>.<br />
10-14<br />
10-13 • Structural and Decorative Lines<br />
Structural lines are framed by sewing the<br />
different parts of a garment together. They<br />
include seams, darts, tucks, gathers, pleats,<br />
necklines, armholes, waistlines, and hems.<br />
Decorative lines are created by adding trims,<br />
such as braid, edgings, lace, and butt<strong>on</strong>s, to a<br />
garment.<br />
Understanding Texture<br />
Texture describes the surface characteristics<br />
that determine the look and feel of an object.<br />
Fabric texture results from the fiber, yarn, c<strong>on</strong>structi<strong>on</strong>,<br />
and finish used. Texture determines<br />
how a fabric moves when worn. See Fig. 10-14.<br />
Fabric textures include soft or crisp, smooth or<br />
nubby, and dull or shiny. Heavy work pants might<br />
have a rough texture. Depending <strong>on</strong> the yarn<br />
The term drape describes the way a fabric hangs in folds. Why do fabrics drape differently?<br />
CHAPTER 10 Understanding Design • 181
used, a sweater might feel nubby or smooth. An<br />
evening gown often feels soft and silky. How<br />
would you describe the textures of the clothing<br />
you’re wearing now?<br />
Texture affects the way a garment looks. To test<br />
this idea, imagine that <strong>on</strong>e of your favorite shirts<br />
had been made of fabrics with different textures.<br />
What would the shirt be like if made with a heavy<br />
wool, a crisp cott<strong>on</strong>, a soft nubby knit, or a shiny<br />
satin? Each result would be totally different.<br />
Texture and Illusi<strong>on</strong><br />
Just as color and line create different illusi<strong>on</strong>s,<br />
textures create different impressi<strong>on</strong>s too. By making<br />
careful choices, you can use texture to suggest<br />
a taller, shorter, larger, or smaller look.<br />
• Soft and clingy fabrics. Such soft and<br />
clingy fabrics as jersey and chiff<strong>on</strong> hug the<br />
body and emphasize figure irregularities.<br />
When draped into soft silhouettes, however,<br />
these fabrics can be very flattering to most<br />
body shapes.<br />
• Moderately crisp fabrics. Corduroy,<br />
denim, and other crisp fabrics stand away from<br />
the body just enough to c<strong>on</strong>ceal body shapes.<br />
Some add size.<br />
• Extra-crisp fabrics. Taffeta and vinyl are<br />
fabrics that may create a firm outer shell, making<br />
the body seem larger.<br />
• Smooth fabrics with a dull finish. These<br />
fabrics do not seem to create illusi<strong>on</strong>s about<br />
size and shape. Some examples of smooth fabrics<br />
are flannel, broadcloth, gabardine, and<br />
wool jersey.<br />
• Nubby and bulky fabrics. Fabrics of this<br />
type typically add dimensi<strong>on</strong>, making a pers<strong>on</strong><br />
appear larger; however, they can also hide features.<br />
Such fabrics as wide-wale corduroy,<br />
mohair, and heavy tweeds look best <strong>on</strong> a slim<br />
to average body size of medium to tall height.<br />
• Dull fabrics. When fabrics have a dull texture,<br />
they absorb light and tend to make a figure<br />
look smaller. Flannel, denim, and gingham<br />
all have dull surfaces.<br />
• Shiny fabrics. These fabrics reflect light and<br />
give the impressi<strong>on</strong> of added size. Some shiny<br />
182 • UNIT 3 Color and Design<br />
fabrics are satin, polished cott<strong>on</strong>, nyl<strong>on</strong>, and<br />
vinyl. Sequined and metallic fabrics also have<br />
shiny surfaces.<br />
In additi<strong>on</strong> to illusi<strong>on</strong>, fabric textures create<br />
different moods. Rough, bulky fabrics lend a<br />
casual air. Delicate and glittery fabrics are more<br />
formal. Despite these general principles, designers<br />
often mix textures in a garment, and you may<br />
want to do a little blending within an outfit yourself.<br />
See Fig. 10-15. At <strong>on</strong>e time fashi<strong>on</strong> had<br />
“rules” about mixing different fabrics. Today<br />
many creative combinati<strong>on</strong>s are possible, from<br />
mixing velveteen with tweed to combining denim<br />
with satin.<br />
Understanding Pattern<br />
When the elements of design are brought<br />
together <strong>on</strong> a fabric, a pattern results. Patterns<br />
come in great variety—stripes, plaids, geometrics,<br />
florals, scenics, borders, and more. Patterns<br />
10-15<br />
Texture differences can make an outfit interest-<br />
ing. What different textures are shown here?
can be large or small, even or uneven, light or<br />
dark, spaced or clustered, muted or bold. All of<br />
these affect how a fabric looks <strong>on</strong> you.<br />
As you think about patterns, notice what happens<br />
with those of different sizes and intensity. A<br />
small pattern tends to decrease apparent size,<br />
while a large pattern increases it. Similarly, a bold<br />
pattern adds size, yet a subtle pattern typically<br />
doesn’t. Look at what happens as the pattern size<br />
and boldness increase in Fig. 10-16.<br />
10-16 The size and intensity<br />
of a pattern affects the<br />
way you see it. Which side of<br />
this pattern catches your<br />
eye? Is that side larger?<br />
What does this tell you<br />
about fabric patterns?<br />
Technology Trends<br />
>>FABRICS BY COMPUTER<br />
Imagine having 16 milli<strong>on</strong> colors to<br />
use in a design, all right at your fingertips.<br />
With some advanced CAD programs<br />
(computer-aided design), this huge range<br />
of color opti<strong>on</strong>s is possible. No w<strong>on</strong>der<br />
designers can create so many fabric<br />
patterns.<br />
Just look at all the fabric designs<br />
around you. You may see plaids, stripes,<br />
polka dots, floral prints, geometric patterns,<br />
or simply solid colors in different<br />
textures and hues. Each was created when<br />
a fabric designer arranged color, yarn, and<br />
weaving pattern to suit a plan. All of this<br />
can be d<strong>on</strong>e right <strong>on</strong> a computer.<br />
A fabric designer uses a special pad,<br />
called a tablet, for sketching by computer.<br />
A stylus serves as a pen. The designer<br />
chooses yarns and weaves <strong>on</strong> the com-<br />
puter and experiments with color combinati<strong>on</strong>s.<br />
In order to duplicate an existing<br />
color, the designer can use special equipment<br />
that analyzes the color and identifies<br />
the formula for reproducing it in different<br />
yarns and fabrics.<br />
Once complete, the final design and any<br />
variati<strong>on</strong>s are saved <strong>on</strong> the computer. An<br />
approved fabric design is sent from the<br />
designer’s computer directly to the computer<br />
at the fabric mill.<br />
The computer can also do calculati<strong>on</strong>s<br />
that answer producti<strong>on</strong> questi<strong>on</strong>s. What<br />
will each versi<strong>on</strong> of a fabric cost? How<br />
much yarn and dye will be needed? Once<br />
answers are provided, manufacturers are<br />
prepared to make decisi<strong>on</strong>s and move <strong>on</strong><br />
to producti<strong>on</strong>, where the design becomes<br />
reality.<br />
INVESTIGATE<br />
Locate CAD programs that are used in<br />
fabric design. If possible, use the elements<br />
and principles of design to create a simple<br />
CAD design of your own.<br />
CHAPTER 10 Understanding Design • 183
Other characteristics of a pattern can also create<br />
illusi<strong>on</strong>s. A widely spaced design can make<br />
you seem larger as it draws the eye across the distances<br />
from <strong>on</strong>e part of the pattern to another.<br />
THE PRINCIPLES OF<br />
DESIGN<br />
Have you ever had this experience? You’re getting<br />
ready to go somewhere, and you keep trying<br />
<strong>on</strong> clothes in order to find an outfit that works.<br />
You see the color, line, shape, space, and texture in<br />
the garments, but you just can’t seem to find the<br />
right combinati<strong>on</strong>. You might need some guidelines<br />
to help you make decisi<strong>on</strong>s.<br />
The principles of design are artistic guidelines<br />
for using all the design elements. Fashi<strong>on</strong> designers<br />
use them in designing clothes. You can use<br />
them too when you sew a garment or put an outfit<br />
together. The principles are balance, proporti<strong>on</strong>,<br />
emphasis, rhythm, and harm<strong>on</strong>y.<br />
Understanding Balance<br />
When two children of the same weight sit <strong>on</strong> a<br />
seesaw, what happens? The seesaw will probably<br />
10-17<br />
Here is an example of symmetrical balance in a<br />
garment. What do you think prevents this type of balance<br />
from making a garment look uninteresting?<br />
184 • UNIT 3 Color and Design<br />
balance. With design, the principle of balance is<br />
similar. A design has balance when the spaces <strong>on</strong><br />
both sides of a central line, real or imagined,<br />
appear equal. For example, what you see <strong>on</strong> the<br />
left side of a shirt balances visually with what’s <strong>on</strong><br />
the right side. A balanced design gives a feeling of<br />
stability.<br />
Do the two sides of a shirt have to be identical<br />
to be in balance? Not necessarily. Balance can be<br />
achieved in different ways.<br />
Symmetrical Balance<br />
When the spaces <strong>on</strong> each side of a garment<br />
look just the same, balance is symmetrical. A shirt<br />
with two identical sides divided by a center fr<strong>on</strong>t<br />
closing has symmetrical balance. Notice how<br />
balance is shown in the jacket in Fig. 10-17.<br />
A simple skirt with a center fr<strong>on</strong>t seam that<br />
divides two similar sides is another example of<br />
symmetrical balance. This type of balance usually<br />
gives a formal or tailored look to a garment.<br />
Asymmetrical Balance<br />
Some designers like to add an element of interest<br />
or a sense of excitement to a garment by surprising<br />
the eye with differences. Clothes with an<br />
asymmetrical design d<strong>on</strong>’t look the same <strong>on</strong> each<br />
side of the real or imagined central line. A wrap<br />
skirt has this look because of the vertical or<br />
slanted line that is off-center in the fr<strong>on</strong>t.<br />
Even when the sides of a garment are visually<br />
different, the design can still be in balance. How<br />
can that be? Design elements have varying visual<br />
“weights.” By putting the right combinati<strong>on</strong>s<br />
together, designers achieve what is known as<br />
asymmetrical balance. Balance can make asymmetrical<br />
designs visually pleasing. A warm or<br />
dark color, for example, seems heavier than a cool<br />
or light color. Knowing this, a designer might balance<br />
a large white space with a smaller black<br />
space to produce visual balance. A shirt with a<br />
colorful pocket <strong>on</strong> <strong>on</strong>e side might be balanced<br />
asymmetrically by placing two vertical stripes <strong>on</strong><br />
the other side. Even an accessory, such as a scarf<br />
or pin, can help balance the spaces in a garment.<br />
How was asymmetrical balance achieved in the<br />
garment in Fig. 10-18?
10-18<br />
With asymmetrical design, the sides of a gar-<br />
ment d<strong>on</strong>’t match exactly. How does the designer still<br />
achieve a sense of balance?<br />
Asymmetrical balance has an informal look.<br />
Garments with asymmetry are often more difficult<br />
and more costly to make because both sides<br />
must be handled differently.<br />
Understanding Proporti<strong>on</strong><br />
Proporti<strong>on</strong> describes how separate parts of a<br />
garment relate to each other and to the whole in<br />
size. Proporti<strong>on</strong> is also called scale. Throughout<br />
history people have studied proporti<strong>on</strong>, c<strong>on</strong>cluding<br />
that parts with somewhat unequal sizes look<br />
best together. To visualize this, imagine a floral<br />
arrangement with flowers all the same height.<br />
What might look better?<br />
In fashi<strong>on</strong> design, a 3-to-5 ratio has been comm<strong>on</strong>ly<br />
used. For example, a well-proporti<strong>on</strong>ed<br />
dress in a classic style might have a 3-to-5 ratio<br />
between blouse and skirt lengths. See Fig. 10-19.<br />
This ratio gained favor because it provides a flattering<br />
look that equates to body structure.<br />
Typically, about 3 ⁄8 of a pers<strong>on</strong>’s total height is<br />
above the waist, and 5 ⁄8 is below.<br />
Creativity results in variati<strong>on</strong>s to the traditi<strong>on</strong>al<br />
3-to-5 ratio, as Fig. 10-20 <strong>on</strong> page 186<br />
indicates. Some designs invert the ratio used,<br />
placing the larger porti<strong>on</strong> <strong>on</strong> the top. A l<strong>on</strong>g<br />
jacket over a short skirt is an example.<br />
Clothing looks best when it’s in proporti<strong>on</strong> to<br />
your own size. When following this principle, a<br />
short or small-framed pers<strong>on</strong> might avoid such<br />
large, overpowering details as wide lapels and<br />
collars and huge pockets and bows. Likewise, a<br />
tall or large-framed pers<strong>on</strong> might avoid tiny<br />
details. When the parts d<strong>on</strong>’t relate well to each<br />
other or to your body size, they’re said to be out<br />
of proporti<strong>on</strong>.<br />
10-19<br />
Uneven proporti<strong>on</strong>s, c<strong>on</strong>sidered ideal, were first<br />
used in the art and architecture of early Egypt and<br />
Greece. In this outfit an uneven proporti<strong>on</strong> exists<br />
between the lengths of the top and bottom. How might a<br />
dress with a<br />
natural<br />
waistline<br />
achieve the<br />
same proporti<strong>on</strong>?<br />
3<br />
CHAPTER 10 Understanding Design • 185<br />
5<br />
8
10-20<br />
Designers vary pro-<br />
porti<strong>on</strong>s to create different<br />
looks. Which of these outfits<br />
might be best for a tall pers<strong>on</strong>?<br />
What about some<strong>on</strong>e<br />
who is short? Why?<br />
Understanding<br />
Emphasis<br />
When you look at an outfit,<br />
what catches your eye first? The<br />
focal point of a design, the part<br />
that draws attenti<strong>on</strong>, is known as<br />
emphasis. On a garment, emphasis<br />
may be used for effect—to<br />
make an outfit more interesting or<br />
unique. Emphasis can also be used<br />
to highlight your best features and<br />
draw attenti<strong>on</strong> away from figure problems.<br />
Emphasis can be accomplished with color, line,<br />
texture, design details, trims, and accessories. For<br />
example, a colorful belt emphasizes the waistline.<br />
A c<strong>on</strong>trasting collar draws attenti<strong>on</strong> toward the<br />
face. A bright tie or shiny butt<strong>on</strong>s make a plain<br />
10-21<br />
Where is the emphasis in this outfit?<br />
186 • UNIT 3 Color and Design<br />
outfit more appealing.<br />
When lines cross, attenti<strong>on</strong><br />
goes to that area.<br />
Well-planned emphasis<br />
leads the eye quickly to<br />
the center of interest. See<br />
Fig. 10-21. Poorly planned<br />
emphasis c<strong>on</strong>fuses the eye<br />
so that it doesn’t know<br />
where to focus. What would<br />
happen if wide, c<strong>on</strong>trasting<br />
trim outlined all the edges of an<br />
outfit?<br />
Understanding<br />
Rhythm<br />
When you think of rhythm, you might think of<br />
a regular drumbeat in music. In design, rhythm<br />
is visual, carrying the eye through a regular pattern<br />
produced by design elements. On a garment,<br />
rhythm moves the eye gently from <strong>on</strong>e area of the<br />
garment to another. Rhythm, which ties a design<br />
together, can be achieved in several ways. Three<br />
are described here. See Fig. 10-22.<br />
• Repetiti<strong>on</strong>. A pattern repeats, as with rows<br />
of stripes. A pointed shirt collar repeats the<br />
point of a jacket lapel.<br />
• Radiati<strong>on</strong>. Lines or patterns flow from a<br />
central locati<strong>on</strong>. The gathers in a skirt show<br />
this effect.<br />
• Gradati<strong>on</strong>. A pattern changes gradually, as<br />
in a change of size or color.<br />
Good rhythm is apparent when the lines of an<br />
outfit work well together. For example, a curved<br />
pocket complements the curve of a jacket hem.<br />
Poor rhythm upsets the look of a garment.<br />
Stripes and plaids that d<strong>on</strong>’t match at seam lines,<br />
for example, break rhythm. C<strong>on</strong>flicting lines,<br />
such as curved seams and striped fabric, also<br />
break the rhythm of an outfit.
REPETITION<br />
RADIATION<br />
GRADATION<br />
10-22 How many different rhythms are you likely to<br />
hear in a s<strong>on</strong>g? How many different design rhythms are<br />
you likely to see in a garment? Why?<br />
Understanding Harm<strong>on</strong>y<br />
Harm<strong>on</strong>ious music pleases the ear because all<br />
parts blend well together. Similarly, a design has<br />
visual harm<strong>on</strong>y when design elements complement<br />
each other. The elements relate in a unified<br />
way to c<strong>on</strong>vey a single theme. You can see harm<strong>on</strong>y<br />
in the outfit in Fig. 10-23.<br />
Fashi<strong>on</strong> shows harm<strong>on</strong>y in garment design as<br />
well as in entire outfits. The bride who carefully<br />
puts together a harm<strong>on</strong>ious look for her wedding<br />
day c<strong>on</strong>siders everything from dress, to hair, to<br />
jewelry, to shoes. Besides matching her outfit to<br />
the style of wedding she plans, her choices also<br />
suit her pers<strong>on</strong>ality and physical stature.<br />
When harm<strong>on</strong>y exists, each part looks like it<br />
bel<strong>on</strong>gs. The parts can be varied to prevent a boring<br />
look, but they aren’t just thrown together.<br />
Harm<strong>on</strong>ious looks are usually planned, and the<br />
results are often eye-catching.<br />
INDIVIDUALITY<br />
Just a look around at fashi<strong>on</strong>s will tell you that<br />
the “rules” about design are flexible. Not every<strong>on</strong>e<br />
follows them all the time. Designers often gain<br />
attenti<strong>on</strong> by taking unc<strong>on</strong>venti<strong>on</strong>al approaches<br />
to design. Military boots with a sheer skirt? A<br />
floor-length jacket over pants? Knowing the principles<br />
enables designers to use them selectively<br />
and creatively or to surprise you by apparently<br />
ignoring all the “rules” in coming up with something<br />
quite unusual.<br />
On a pers<strong>on</strong>al level, the outfits you put<br />
together may not all be design masterpieces. Like<br />
some designers, you might enjoy putting outfits<br />
together that express your own individuality in<br />
some unique way. When you want to look your<br />
very best, however, knowing how to use the<br />
design principles can be a real advantage.<br />
10-23 When all the principles of design come together<br />
appropriately in a garment, the result is harm<strong>on</strong>ious. How<br />
would shoes, accessories, and hairstyle affect the harm<strong>on</strong>ious<br />
look of this outfit?<br />
BALANCE<br />
RHYTHM<br />
EMPHASIS<br />
HARMONY<br />
PROPORTION<br />
CHAPTER 10 Understanding Design • 187<br />
3<br />
5
CHAPTER 10<br />
CHAPTER SUMMARY<br />
• Keeping body height, shape, and size in<br />
mind can help you decide what clothing<br />
designs might be best for you.<br />
• The elements of design are color, line,<br />
shape, space, and texture.<br />
• Design elements in fashi<strong>on</strong> can be handled<br />
in ways that create optical illusi<strong>on</strong>s.<br />
• Design illusi<strong>on</strong>s can help emphasize, minimize,<br />
or camouflage body features.<br />
• Most clothes are <strong>on</strong>e of four basic shapes:<br />
natural, tubular, bell, or full.<br />
• The principles of design are balance, proporti<strong>on</strong>,<br />
emphasis, rhythm, and harm<strong>on</strong>y.<br />
• Effective use of design elements is guided<br />
by the principles of design.<br />
USING KEY TERMS<br />
With a partner, plan a presentati<strong>on</strong> <strong>on</strong> two<br />
design elements or principles, as listed in the<br />
Key Terms for this chapter. Include visuals<br />
that show how each element or principle is<br />
used. Label the Key Terms <strong>on</strong> your visuals.<br />
188 • UNIT 3 Color and Design<br />
Review<br />
RECALLING THE FACTS<br />
1. How are body size and shape determined?<br />
2. Define the elements of design discussed<br />
in this chapter.<br />
3. What look or feeling do the two main<br />
types of lines create?<br />
4. What effects are created by a line’s<br />
directi<strong>on</strong>?<br />
5. How would you recognize the four basic<br />
clothing shapes?<br />
6. What’s the difference between structural<br />
lines and decorative lines in a garment?<br />
7. How can texture create different illusi<strong>on</strong>s?<br />
Include three examples.<br />
8. Define the five principles of design.<br />
9. What is the difference between symmetrical<br />
and asymmetrical balance?<br />
10. Why is the 3-to-5 ratio significant in<br />
fashi<strong>on</strong>?<br />
11. Describe three ways to create rhythm in<br />
a design.<br />
12. Compare musical and visual harm<strong>on</strong>y.
CHAPTER 10<br />
and Activities<br />
THINKING CRITICALLY<br />
1. Compare the effects created by the following<br />
fabric textures: clingy, crisp,<br />
smooth, and bulky.<br />
2. According to what you’ve learned about<br />
design, determine which of the following<br />
would be flattering <strong>on</strong> a small pers<strong>on</strong>: a<br />
wide belt; a bow tie; a wide-brimmed hat;<br />
a vertical-striped shirt; a shirt with a<br />
large floral print. Explain your reas<strong>on</strong>ing.<br />
3. Why do you think a carto<strong>on</strong>ist might create<br />
a very thin character with a huge<br />
hat?<br />
APPLYING KNOWLEDGE<br />
1. Effects of lines. Collect illustrati<strong>on</strong>s of<br />
clothes with different line types and<br />
directi<strong>on</strong>s. Use felt-tipped pens to highlight<br />
the dominant lines. Describe the<br />
effect of the lines in each garment to<br />
the class.<br />
2. Illusi<strong>on</strong> soluti<strong>on</strong>s. Make a list of five<br />
problems in body shape and size that<br />
people might want to address with clothing<br />
illusi<strong>on</strong>s. Describe in writing what<br />
you, as a fashi<strong>on</strong> c<strong>on</strong>sultant, would suggest<br />
for each pers<strong>on</strong>. Include drawings<br />
when appropriate.<br />
3. Emphasis. Find an illustrati<strong>on</strong> of a simple<br />
garment. Using felt-tipped pens or<br />
cray<strong>on</strong>s, show how emphasis might be<br />
added to the garment design.<br />
4. Textures and patterns. Collect fabric<br />
swatches with different textures and<br />
design patterns. According to design,<br />
which <strong>on</strong>es would be best for people of<br />
varying heights? In writing, explain the<br />
reas<strong>on</strong>s for your choices.<br />
5. Design in business. Use the elements<br />
and principles of design to create an<br />
effective brochure that a store might use<br />
to promote an upcoming fashi<strong>on</strong> show.<br />
6. Everyday design. Observe how the elements<br />
and principles of design are used<br />
in your school and surroundings.<br />
Describe the effects that you see.<br />
MAKING>
<str<strong>on</strong>g>Care</str<strong>on</strong>g>ers<br />
Design<br />
Throughout the room, students<br />
cluster around a rainbow of shimmering party<br />
dresses, aiming pins into fabric. “Angle the<br />
pins,” the instructor directs. “That will give you<br />
better c<strong>on</strong>trol over the fabric.” After the<br />
instructor dem<strong>on</strong>strates <strong>on</strong> <strong>on</strong>e ice-blue dress, students<br />
remove their pins and restick them, frowning<br />
in c<strong>on</strong>centrati<strong>on</strong>.<br />
The scene is a design school lab, and the students,<br />
aspiring fashi<strong>on</strong> designers. Placing pins just right may<br />
seem tedious, yet this is the grounding that future<br />
designers need. During their training, students will<br />
learn to drape fabric <strong>on</strong> dress forms and fit garments.<br />
They will master working with fabrics of all types,<br />
from slippery silks to heavy denims. As they study<br />
the history of fashi<strong>on</strong>, they’ll see how styles have<br />
changed.<br />
Eventually, as graduates, the students will be ready<br />
to work in the fashi<strong>on</strong> industry. There they will select<br />
fabrics, cut out patterns, and stitch<br />
seams. If dreams come true, they may<br />
someday see their own designs in shops<br />
and stores throughout the country.<br />
Part of a design student’s study involves<br />
making patterns and samples. Here the student<br />
outlines her pattern <strong>on</strong> fabric. Instead<br />
of pins, how is the pattern held in place?<br />
190 • UNIT 3 Color and Design<br />
IS THIS FIELD FOR YOU?<br />
How many of these statements apply to you? If<br />
most do, you might be a budding fashi<strong>on</strong> designer.<br />
• I like to shop for clothing.<br />
• I like to read fashi<strong>on</strong> magazines and articles.<br />
• New fashi<strong>on</strong> designs catch my eye.<br />
• I have str<strong>on</strong>g opini<strong>on</strong>s about clothing styles.<br />
• I notice the colors around me.<br />
• I have a knack for putting outfits together.<br />
• People often compliment me <strong>on</strong> my clothing.<br />
• I enjoy working with fabric.<br />
• I have a talent for sketching.
Educati<strong>on</strong> and Training<br />
Most design students complete a three- or fouryear<br />
program in fashi<strong>on</strong> design, but a two-year<br />
degree is also available. Core classes include sketching,<br />
computer graphics, draping, pattern making, and<br />
sewing skills. Some students explore the specialty of<br />
costume design. Studies also include the social and<br />
psychological importance of clothes and fashi<strong>on</strong>.<br />
Working with established designers is an exciting<br />
feature in some top schools. Senior students might<br />
stage a fashi<strong>on</strong> show that is judged and attended by<br />
professi<strong>on</strong>al designers. This c<strong>on</strong>tact is an advantage<br />
as new graduates start a career. Some schools provide<br />
opportunities for study in foreign countries.<br />
Competiti<strong>on</strong> for admissi<strong>on</strong> to design schools is<br />
stiff. Since directors look for creative portfolios, art<br />
classes are good preparati<strong>on</strong>. A few excepti<strong>on</strong>ally talented<br />
individuals earn internships to fashi<strong>on</strong> houses<br />
<strong>on</strong> their portfolios al<strong>on</strong>e.<br />
Possible <str<strong>on</strong>g>Care</str<strong>on</strong>g>er Paths<br />
“Working your way up” is the typical route for<br />
success in fashi<strong>on</strong> design. An intern may pick up pins<br />
and put away supplies, but experience can lead to<br />
becoming a sketcher, sample maker, or design assistant.<br />
These jobs, which d<strong>on</strong>’t always require additi<strong>on</strong>al<br />
educati<strong>on</strong>, can be satisfying careers in themselves<br />
or steps to other positi<strong>on</strong>s.<br />
Designers who achieve fame and fortune are rare,<br />
but they offer inspirati<strong>on</strong>. As a sales rep for a neckwear<br />
company, Ralph Lauren sold his modest tie collecti<strong>on</strong><br />
to a New York City department store. Today,<br />
his Polo empire includes a vast line of clothing, luggage,<br />
cologne, home decorati<strong>on</strong>s—and ties.<br />
An original, appealing idea is no guarantee of success.<br />
Aspiring designers may work many years before<br />
getting a chance to present original designs. Some sell<br />
clothing in their own boutique, hoping to break into<br />
larger markets and move closer to recogniti<strong>on</strong>.<br />
Today’s fashi<strong>on</strong> designers learn to use such technology<br />
as CAD systems to make designing faster and easier.<br />
THE SKILLS YOU NEED<br />
What skills will help you in the design field?<br />
Whether a first-year fashi<strong>on</strong> design student<br />
or an established professi<strong>on</strong>al, you’ll need<br />
to dem<strong>on</strong>strate the following skills and<br />
qualities:<br />
• A “passi<strong>on</strong> for fashi<strong>on</strong>”<br />
• Communicati<strong>on</strong><br />
• Creativity<br />
• Design knowledge<br />
• Artistic ability<br />
• Sewing skills<br />
• Teamwork<br />
• Str<strong>on</strong>g work ethic<br />
UNIT 3 Color and Design • 191
Choosing a Design <str<strong>on</strong>g>Care</str<strong>on</strong>g>er<br />
ACCESSORIES DESIGNER | APPAREL DESIGNER | APPAREL STYLIST<br />
| DESIGN ASSOCIATE | FABRIC DESIGNER | FABRIC LIBRARIAN<br />
| FABRIC STYLIST | SKETCHER | TEXTILE COLORIST<br />
Apparel Designer _<br />
A line of clothing starts with a designer, who<br />
decides <strong>on</strong> each garment’s style, fabric, and ornamentati<strong>on</strong>.<br />
Inspirati<strong>on</strong> may come from travels, a<br />
movie, an art exhibit, or the work of other designers.<br />
Design success depends <strong>on</strong> having an understanding<br />
of fabrics and styling techniques, as well<br />
as input from other professi<strong>on</strong>als: colorists, market<br />
experts, and, sometimes, a team of assistants.<br />
Many apparel designers specialize in <strong>on</strong>e type of<br />
clothing, such as sportswear, swimwear, lingerie,<br />
bridal gowns, or children’s clothes.<br />
While creativity is a large part of a designer’s<br />
job, so is self-discipline. Developing fresh, new<br />
ideas while working against deadlines can be challenging.<br />
Computer graphics can create a virtual<br />
sample of the finished design faster than an actual<br />
sample can be produced. Computer-aided design<br />
(CAD) skills are essential in today’s market.<br />
Twice a year or more, top designers must produce<br />
a collecti<strong>on</strong> of 50-70 items, then submit it for<br />
critique by reporters, retailers, and the buying public.<br />
Ec<strong>on</strong>omic trends, c<strong>on</strong>stant competiti<strong>on</strong>, and the<br />
unpredictable tastes of fashi<strong>on</strong> experts and shoppers<br />
add to the challenge of a designer’s work.<br />
192 • UNIT 3 Color and Design<br />
Choosing the right colors for garments<br />
is part of an apparel designer’s job. Why<br />
do you think clothing colors change as<br />
new fashi<strong>on</strong> lines are developed?<br />
Apparel Stylist __<br />
That “designer” outfit in the store window may<br />
not be quite what it seems. It could be the work of<br />
an inventive apparel stylist. A stylist creates moderately<br />
priced adaptati<strong>on</strong>s of expensive designer<br />
originals.<br />
Ideally, adaptati<strong>on</strong>s are not simply inexpensive<br />
copies. Rather, the stylist modifies the basic style<br />
to produce clothes that are fashi<strong>on</strong>able, as well as<br />
affordable, to more people. Suppose the original<br />
design includes a lined silk jacket with 12 motherof-pearl<br />
butt<strong>on</strong>s. The stylist’s versi<strong>on</strong> might have a<br />
lined ray<strong>on</strong> jacket with 12 acrylic butt<strong>on</strong>s. Besides<br />
ec<strong>on</strong>omy, an apparel stylist must also think about<br />
how the garment will fit the image of the company<br />
and the overall clothing line.
Technology is also useful when<br />
designing fabrics. Many variati<strong>on</strong>s<br />
can be made until the<br />
design is right.<br />
Design Associate _<br />
Fabric design staffs need people to carry out<br />
daily tasks and manage data. As the design department<br />
creates fabric patterns, design associates<br />
record instructi<strong>on</strong>s that the producti<strong>on</strong> department<br />
will need. Associates store and update electr<strong>on</strong>ic<br />
files in the firm’s fabric pattern library.<br />
As the producti<strong>on</strong> of a new fabric begins, design<br />
associates scan artwork into the computer, translating<br />
images into digital data. They also prepare<br />
the pattern printout, which serves as a sample of<br />
the actual fabric. During the design process, associates<br />
may also help fabric designers by creating different<br />
versi<strong>on</strong>s of a fabric pattern, using computeraided<br />
design (CAD) programs.<br />
Fabric Designer __<br />
Without fabric, an apparel designer wouldn’t get<br />
very far. Fabric designers try to predict what fibers,<br />
textures, and colors will be popular and then design<br />
suitable fabrics. These professi<strong>on</strong>als are not <strong>on</strong>ly<br />
creative artists, but they’re also technical experts<br />
and merchandisers. They may work closely with the<br />
textile company’s research and development (R&D)<br />
department <strong>on</strong> weaves, knits, patterns, prints, and<br />
colors.<br />
While working out their ideas <strong>on</strong> computer, fabric<br />
designers experiment with different yarns, textures,<br />
and color combinati<strong>on</strong>s. Once a design is<br />
approved, they transmit it directly from their computer<br />
to the computer at the fabric mill for producti<strong>on</strong>.<br />
Since new fabrics often inspire clothing<br />
designs, a fabric designer’s work may influence<br />
fashi<strong>on</strong> trends.<br />
CAREER APPLICATIONS<br />
1. Creating adaptati<strong>on</strong>s. Find photographs of<br />
three different high-fashi<strong>on</strong> garments. For each<br />
<strong>on</strong>e, describe in writing what you would do to<br />
create an adaptati<strong>on</strong>. Include references to the<br />
elements and principles of design.<br />
2. FCCLA. Research a fashi<strong>on</strong> design career<br />
that interests you and plan an Illustrated Talk<br />
<strong>on</strong> that career. Include a job descripti<strong>on</strong>; the<br />
skills, pers<strong>on</strong>al qualities, and educati<strong>on</strong> needed;<br />
salary range; and job market outlook. Use<br />
charts, photographs, or other helpful visuals to<br />
clarify your informati<strong>on</strong> and add interest to<br />
your presentati<strong>on</strong>.<br />
3. Professi<strong>on</strong>alism. You’re an assistant<br />
designer who is asked by a head designer to<br />
frame some sketches for a presentati<strong>on</strong>. You<br />
realize that some of the designs are identical to<br />
those d<strong>on</strong>e by another assistant who recently<br />
left the company. What is a professi<strong>on</strong>al<br />
approach to this situati<strong>on</strong>?<br />
UNIT 3 Color and Design • 193
UNIT 4<br />
Fibers<br />
and<br />
Fabrics<br />
194 • UNIT 4 Fibers and Fabrics
CHAPTERS<br />
11 Textile Fibers<br />
12 Fabric C<strong>on</strong>structi<strong>on</strong><br />
13 Fabric Finishes<br />
FEATURE<br />
Textile Producti<strong>on</strong> <str<strong>on</strong>g>Care</str<strong>on</strong>g>ers<br />
195
CHAPTER 11<br />
Textile Fibers<br />
196<br />
OBJECTIVES<br />
• Explain how fibers<br />
are classified.<br />
• Describe the fiber<br />
characteristics<br />
needed for use in<br />
fabrics.<br />
• Explain how<br />
manufactured<br />
fibers are made.<br />
• List the various<br />
fibers and<br />
describe their<br />
characteristics.<br />
KEY TERMS<br />
abrasi<strong>on</strong><br />
absorbent<br />
fiber<br />
generic name<br />
luster<br />
manufactured fibers<br />
microfibers<br />
natural fibers<br />
pill<br />
resilient<br />
tensile strength<br />
trade name
EXAMINETHISISSUE<br />
Fiber preferences. As you read<br />
this chapter, you’ll learn about fibers that<br />
have a natural origin and those that are<br />
manufactured. People often have different<br />
viewpoints when it comes to which fibers<br />
they prefer. One pers<strong>on</strong> may love the natural<br />
feel and look of cott<strong>on</strong>, whereas<br />
some<strong>on</strong>e else is totally happy wearing a<br />
garment made from a soft, stretchy fabric<br />
of manufactured fibers.<br />
What do you think?<br />
When you choose clothes, does fiber<br />
make a difference to you? Why do you<br />
think some people have preferences?<br />
Before you begin this chapter,<br />
unravel a fabric scrap to find a single<br />
thread or yarn. Then untwist the yarn and<br />
pull out <strong>on</strong>e hairlike unit. It will be so fine that<br />
you can scarcely see it. That’s a fiber.<br />
Examine the fiber closely to see its characteristics.<br />
Is it l<strong>on</strong>g or short, straight or crimped? Is it<br />
dull or shiny, smooth or coarse? When you pull<br />
<strong>on</strong> the fiber, does it break easily? Does it spring<br />
back when stretched or stay extended? If you<br />
look through a microscope, you’ll see many<br />
more features of this tiny fiber.<br />
WHAT ARE FIBERS?<br />
A fiber is the basic unit that makes fabric.<br />
It’s similar to a very fine strand of hair. Fibers<br />
are usually grouped and twisted together to<br />
form a c<strong>on</strong>tinuous strand, called a yarn. See<br />
Fig. 11-1. By weaving or knitting yarns<br />
together, different textiles can be made.<br />
To understand them more easily, fibers are<br />
classified, or grouped, according to their<br />
source or origin. Natural fibers come from<br />
natural sources, such as plants and animals.<br />
Scientific experimentati<strong>on</strong> and development have<br />
produced “test tube” fibers, called manufactured<br />
fibers. These are made from such substances as<br />
wood pulp, petroleum, natural gas, air, and water.<br />
In many publicati<strong>on</strong>s and advertisements,<br />
you’ll see manufactured fibers referred to as manmade.<br />
Sometimes the term synthetic is used,<br />
although not all manufactured fibers are produced<br />
from chemicals.<br />
FIBER NAMES<br />
Fibers are also classified by name. Each fiber<br />
has a generic name, which indicates a general<br />
classificati<strong>on</strong> of fibers of similar compositi<strong>on</strong>.<br />
Cott<strong>on</strong>, wool, nyl<strong>on</strong>, ray<strong>on</strong>, and polyester are<br />
examples of generic names. According to the<br />
Textile Fiber Products Identificati<strong>on</strong> Act, a fiber’s<br />
generic name must be listed <strong>on</strong> the label of all<br />
textile products.<br />
Fiber companies also have a trade name for<br />
each manufactured fiber they produce. These<br />
names are registered as trademarks and are protected<br />
by law. No other company can legally use<br />
the same name for the same type of product. For<br />
example, polyester is a generic name for a manufactured<br />
fiber. Its trade name may be Dacr<strong>on</strong> ® ,a<br />
11-1<br />
When fibers are twisted together, they make<br />
yarns. Yarns can be woven or knitted together to make<br />
fabric.<br />
CHAPTER 11 Textile Fibers • 197
DuP<strong>on</strong>t product; Acrilan ® , a Solutia product; or<br />
Fortrel ® , a Wellman product.<br />
FIBER CHARACTERISTICS<br />
How does a manufacturer decide what fibers<br />
to use in a fabric? The characteristics, or properties,<br />
of each fiber suit it to a particular fabric. The<br />
fabric’s appearance and performance depend <strong>on</strong><br />
the following characteristics:<br />
• Strength. Is the fiber str<strong>on</strong>g enough for fabric?<br />
Different fibers have different tensile<br />
strengths, the ability to withstand tensi<strong>on</strong> or<br />
pulling. See Fig. 11-2.<br />
• Durability. Will the fiber resist wear and<br />
decay? With greater durability, you get l<strong>on</strong>ger<br />
wear and use from garments and other items.<br />
• Resiliency. Is the fiber resilient, able to spring<br />
back into shape after crushing or wrinkling?<br />
Resilient fibers in a wool carpet flatten underneath<br />
a piece of heavy furniture but bounce<br />
back into shape by steaming the carpet.<br />
• Elasticity. When the fiber is stretched, does<br />
the original length return? Swimwear, some<br />
198 • UNIT 4 Fibers and Fabrics<br />
11-2<br />
exercise clothing, and other close-fitting garments<br />
need this characteristic.<br />
• Abrasi<strong>on</strong> resistance. Will the fiber resist<br />
abrasi<strong>on</strong>? Abrasi<strong>on</strong> is a worn spot that can<br />
develop when fibers rub against something.<br />
The inside of a collar that rubs the back of<br />
your neck can become abraded. Some fibers<br />
pill, or form tiny balls of fiber <strong>on</strong> the fabric. As<br />
a result, the garment looks less attractive.<br />
• Wrinkle resistance. Do the fibers resist<br />
wrinkling? Polyester is very wrinkle-resistant,<br />
but cott<strong>on</strong> and ray<strong>on</strong> wrinkle easily.<br />
• Shape retenti<strong>on</strong>. Will the fiber keep its<br />
shape after wearing or cleaning? Some fibers<br />
stretch when the garment is worn; others<br />
shrink when exposed to water or heat.<br />
• Luster. How will the fiber affect fabric<br />
appearance? Just as fiber shape and length have<br />
an effect, so does shine. Some fibers have luster,<br />
or sheen, created by the amount of<br />
reflected light. Fibers that reflect larger<br />
amounts of light produce fabrics with high<br />
luster. Luster doesn’t affect a fabric’s performance.<br />
See Fig. 11-3.<br />
• Absorbency. Is the fiber absorbent, or able<br />
to take in moisture? Some fibers, such as cott<strong>on</strong><br />
and wool, are very absorbent. Other fibers,<br />
such as polyester and nyl<strong>on</strong>, are not. That’s<br />
why you can dry yourself faster with a terrycloth<br />
towel of 100-percent cott<strong>on</strong> than with<br />
a cott<strong>on</strong>-and-polyester blend.<br />
• Wicking. Does the fiber draw moisture away<br />
from the body? This ability to pull moisture<br />
through spaces between the yarns is called<br />
wicking. Some athletic wear makes use of this<br />
quality. Since the fabric allows body moisture<br />
to evaporate, a jogging suit with wicking ability<br />
doesn’t feel clammy.<br />
Spacesuits must protect wearers from extreme<br />
temperatures and radiati<strong>on</strong>. The fabrics and fibers in<br />
these garments must be flexible enough for movement,<br />
yet str<strong>on</strong>g enough to withstand hits by particles of dust<br />
and rock traveling at high rates of speed.
11-3<br />
Fabrics that shine, as in ties and scarves, are<br />
said to have luster.<br />
• Washability. Can the fiber be washed or<br />
must it be dry-cleaned? This characteristic<br />
helps determine the care a fabric needs.<br />
NATURAL FIBERS<br />
Natural fibers come from plants and animals.<br />
Cott<strong>on</strong>, flax, and ramie are plant fibers. They are<br />
made from cellulose, a fibrous substance found in<br />
plants. Wool and silk are animal fibers made of<br />
protein. Wool comes from sheep, and silk is spun<br />
by silkworms. Other animal fibers include such<br />
specialty fibers as cashmere and angora. Fig. 11-4<br />
summarizes informati<strong>on</strong> <strong>on</strong> the most widely used<br />
natural fibers.<br />
All natural fibers, except silk, are staple fibers.<br />
These are short fibers measured in inches or centimeters.<br />
Silk is a filament fiber, a l<strong>on</strong>g fiber<br />
measured in yards or meters.<br />
ADVANTAGES DISADVANTAGES CARE USES<br />
Cott<strong>on</strong> Sources: United States, China, India, Egypt<br />
Extremely versatile; str<strong>on</strong>g and<br />
durable; comfortable and soft;<br />
absorbs moisture; doesn’t cling<br />
or pill; dyes easily.<br />
11-4 • Informati<strong>on</strong> <strong>on</strong> Natural Fibers<br />
Not resilient or elastic; wrinkles<br />
unless treated; shrinks in hot<br />
water unless treated; will<br />
mildew; flammable.<br />
Flax Sources: Russia, Poland, the Netherlands, Belgium, France<br />
Str<strong>on</strong>ger than cott<strong>on</strong>; comfortable;<br />
absorbs moisture; durable;<br />
lint-free; dries faster than<br />
cott<strong>on</strong>.<br />
Not resilient; wrinkles easily;<br />
shrinks unless treated; will<br />
mildew; hard-to-remove<br />
creases.<br />
Easily laundered at high<br />
temperature; can be ir<strong>on</strong>ed at<br />
high temperature.<br />
Easily laundered; can be ir<strong>on</strong>ed<br />
at high temperature.<br />
Shirts, sweaters, dresses, jeans,<br />
underwear, socks, diapers.<br />
Towels, sheets, placemats,<br />
napkins, curtains, upholstery.<br />
Blouses, dresses, pants, suits,<br />
handkerchiefs. Towels, tablecloths,<br />
napkins, draperies.<br />
Wool Sources: Australia, New Zealand, South Africa, United States (for apparel);Russia, China, Argentina, Turkey<br />
(for carpets)<br />
Very versatile; provides warmth;<br />
durable; very resilient; resists<br />
wrinkling; absorbs moisture;<br />
resists abrasi<strong>on</strong>; naturally<br />
flame-resistant.<br />
Damaged by moths and other<br />
insects; shrinks and mats; may<br />
pill; absorbs odors.<br />
Silk Sources: China, India, South Korea, Brazil<br />
Natural luster; str<strong>on</strong>g yet lightweight;<br />
smooth; absorbs<br />
moisture.<br />
Weakened by sunlight, perspirati<strong>on</strong>,<br />
high ir<strong>on</strong> temperature; may<br />
yellow with age; may water<br />
spot.<br />
Usually dry-cleaned; sometimes<br />
washable; ir<strong>on</strong> at low<br />
temperature.<br />
Usually dry-cleaned; sometimes<br />
washable; ir<strong>on</strong> at low<br />
temperature.<br />
Coats, suits, slacks, sweaters,<br />
socks. Blankets, rugs, carpets.<br />
Blouses, dresses, lingerie,<br />
scarves, ties, bridal gowns.<br />
Draperies, upholstery.<br />
CHAPTER 11 Textile Fibers • 199
11-5<br />
The Seal of Cott<strong>on</strong> symbol (left) identifies 100-<br />
percent cott<strong>on</strong> products. The Natural Blend symbol<br />
(right) indicates durable-press products c<strong>on</strong>taining a percentage<br />
of cott<strong>on</strong>. These are registered trademarks of<br />
Cott<strong>on</strong> Incorporated.<br />
Cott<strong>on</strong><br />
Cott<strong>on</strong> is the most widely used fiber in the<br />
world. Often it’s combined with other fibers, such<br />
as polyester. You can identify cott<strong>on</strong> by looking<br />
<strong>on</strong> product labels for the seals shown in Fig. 11-5.<br />
Cott<strong>on</strong> comes from the boll, or seed pod, of<br />
the cott<strong>on</strong> plant. After the seedpods are harvested,<br />
the cott<strong>on</strong> fiber is separated from the<br />
seeds and processed. Under a microscope, a cott<strong>on</strong><br />
fiber looks like a twisted ribb<strong>on</strong>. Some cott<strong>on</strong><br />
plants produce seed bolls with fibers as l<strong>on</strong>g as 2<br />
inches (5 cm). These are known as l<strong>on</strong>g staple<br />
fibers and are used for fine-quality, cott<strong>on</strong> fabrics.<br />
See Fig. 11-6.<br />
11-6<br />
200 • UNIT 4 Fibers and Fabrics<br />
People who lived in the areas known today as<br />
Pakistan and northern India probably made the<br />
first cott<strong>on</strong> cloth. In the fourth century B.C., the<br />
armies of Alexander the Great introduced cott<strong>on</strong><br />
to northern Africa. The Nile Valley in Egypt<br />
became a center for raising the cott<strong>on</strong> plant.<br />
Cott<strong>on</strong> was introduced into Europe during the<br />
Crusades. When Spanish c<strong>on</strong>quistadors arrived<br />
in the New World, they found fine cott<strong>on</strong> textiles<br />
in Peru, Mexico, and the southwestern part of<br />
North America.<br />
People like cott<strong>on</strong> because it’s str<strong>on</strong>g,<br />
absorbent, and comfortable to wear, even in hot<br />
weather. It doesn’t cling or pill. Cott<strong>on</strong> can be<br />
washed in high temperatures and with str<strong>on</strong>g<br />
soaps or detergents. It accepts dyes very easily.<br />
On the negative side, cott<strong>on</strong> wrinkles and can<br />
shrink. It mildews easily, is flammable, and isn’t<br />
resilient or elastic. Special finishes give cott<strong>on</strong><br />
fabrics wrinkle resistance, shrinkage c<strong>on</strong>trol,<br />
mildew resistance, and flame retardance.<br />
Flax<br />
The fiber called flax comes from the inside of<br />
the stem of the flax plant. Under a microscope, a<br />
flax fiber looks like a bamboo pole. When flax is<br />
made into fabric, it’s called linen. See Fig. 11-7.<br />
The cott<strong>on</strong> garments you wear began with the cott<strong>on</strong> plant. The cott<strong>on</strong> boll bursts open to expose the fluffy white<br />
cott<strong>on</strong> fibers. The cott<strong>on</strong> is then plucked from the plant by a<br />
mechanical picker and later spun into yarn.
11-7<br />
The stalks of flax plants furnish l<strong>on</strong>g fibers that<br />
are made into linen fabric. The flax fibers can be separated<br />
from each other by soaking the stems in chemically<br />
treated water.<br />
In the ancient world, flax was plentiful al<strong>on</strong>g<br />
the Nile River. The Egyptians wove it into linen<br />
fabric that was light, cool, and easy to launder.<br />
This fabric was particularly suited to their climate.<br />
Pieces of linen have been found in Egyptian<br />
tombs more than 4,000 years old.<br />
Flax is str<strong>on</strong>ger than cott<strong>on</strong> and very<br />
absorbent. It’s lint-free and dries more quickly<br />
than cott<strong>on</strong>. You can wash, bleach, and ir<strong>on</strong> flax<br />
at high temperatures without scorching. This versatile<br />
fabric can be soft and lightweight for a<br />
handkerchief, crisp and smooth for a suit, or<br />
thick and heavy for draperies.<br />
Flax, however, is not very resilient and wrinkles<br />
easily. Thus, linen fabric is often used for<br />
garments with a wrinkled or unpressed look. To<br />
reduce its natural tendency to wrinkle, linen is<br />
often given a wrinkle-resistant finish. The fiber<br />
may shrink and be damaged by mildew.<br />
Wool<br />
Wool comes from the fleece of sheep. Wool<br />
from sheep younger than eight m<strong>on</strong>ths old is<br />
called lamb’s wool. The quality of the wool<br />
depends <strong>on</strong> the breed of sheep and the climate<br />
where the animal was raised. Sheep are sheared<br />
<strong>on</strong>ce or twice a year. See Fig. 11-8.<br />
The Sumerians, who lived in the valley of the<br />
Tigris and Euphrates Rivers, learned to make fine<br />
woolen cloth over 5,000 years ago. They were<br />
great traders, who exported wool to other parts of<br />
the world. The Romans introduced sheep into<br />
Spain in 150 B.C. and crossbred them with the<br />
African ram. This produced merino sheep, which<br />
are valued for their fine wool.<br />
Wool is a comfortable, durable, and versatile<br />
fiber. If you look at a wool fiber through a microscope,<br />
you’ll see a covering of scales. The fiber<br />
also looks wavy and crimped. Wool fibers trap air,<br />
11-8<br />
After sheep are sheared, the fleece is washed<br />
and carded to remove impurities and straighten the<br />
fibers.<br />
CHAPTER 11 Textile Fibers • 201
11-9<br />
Pure New Wool<br />
Certain internati<strong>on</strong>al symbols are used to show<br />
how much wool a fabric c<strong>on</strong>tains. Two are shown here.<br />
Manufacturers who make products that meet the performance<br />
standards set by The Woolmark Company can<br />
use these registered trademark symbols.<br />
which in turn prevents the loss of body heat.<br />
Wearing wool, you feel warm in cold weather.<br />
The overlapping scales help shed raindrops, yet<br />
wool absorbs moisture from the air or body and<br />
still feels dry.<br />
Wool is resilient. The fiber is very springy and<br />
elastic and returns to its original shape and size<br />
after stretching. That’s why wrinkles and creases<br />
hang or steam out easily. Wool wears well and<br />
resists abrasi<strong>on</strong>. It’s naturally flame-resistant, so a<br />
wool blanket can be used to smother a fire.<br />
When heat and moisture are applied to wool,<br />
the scales spread and soften slightly. This is called<br />
felting. If the fabric is rubbed or pressed hard, the<br />
scales interlock and the fabric mats and shrinks.<br />
Traditi<strong>on</strong>ally, most wool fabrics had to be drycleaned<br />
or washed gently by hand in warm water,<br />
but modern-day treatments mean that a number<br />
of wool products and garments can be safely<br />
machine-washed.<br />
Moths, carpet beetles, and other insects can<br />
damage wool by eating holes in the fabric.<br />
Special finishes can be applied to wool for moth<br />
resistance.<br />
All-wool fabrics made from fibers that have<br />
never been used before are labeled “pure new<br />
wool” or “virgin wool.” Fibers can be taken from<br />
existing wool fabrics to produce “recycled wool”<br />
fabric. Wool can also be combined with other<br />
fibers. Fig. 11-9 shows two symbols used <strong>on</strong><br />
product labels to identify how much wool is in<br />
the fabric.<br />
202 • UNIT 4 Fibers and Fabrics<br />
Silk<br />
When silkworms spin their coco<strong>on</strong>s, the silk<br />
fiber forms. See Fig. 11-10. Amazingly, the c<strong>on</strong>tinuous<br />
filament can be as l<strong>on</strong>g as <strong>on</strong>e mile.<br />
Coco<strong>on</strong>s are harvested before the silk moths<br />
emerge. If a moth breaks through the wall of the<br />
coco<strong>on</strong>, the single filament would be broken into<br />
many shorter fibers.<br />
According to ancient written records, silk was<br />
produced in China as far back as 2640 B.C. The<br />
Chinese kept the process of making silk, called<br />
sericulture, a secret for many centuries.<br />
Punishment for revealing this carefully guarded<br />
secret was torture and death. Eventually, the<br />
secret process was smuggled into Japan via Korea.<br />
Later, it was smuggled into Western countries by<br />
m<strong>on</strong>ks, who hid the little silkworms in their bamboo<br />
canes.<br />
Silk feels very soft and smooth. Under a microscope,<br />
the fiber looks like a glass rod with an<br />
irregular surface. The surface texture provides a<br />
superb luster.<br />
Silk is str<strong>on</strong>g, yet comfortable to wear. It has<br />
elasticity, resists wrinkling, is absorbent, and<br />
drapes easily. Silk can be dyed in brilliant colors<br />
and prints.<br />
11-10<br />
Silkworms grow by eating mulberry leaves. When<br />
fully grown, they spin a coco<strong>on</strong>. After two or three weeks,<br />
the coco<strong>on</strong> is unwound by hand or machine to collect the<br />
silk thread.
Silk fabrics range from lightweight sheers to<br />
heavy textures. They are usually dry-cleaned, but<br />
some can be hand-washed. Str<strong>on</strong>g soaps, bleaches,<br />
perspirati<strong>on</strong>, deodorants, and high ir<strong>on</strong>ing temperatures<br />
can weaken or discolor silk fabrics.<br />
Other Natural Fibers<br />
Although the most comm<strong>on</strong> natural fibers are<br />
cott<strong>on</strong>, flax, wool, and silk, you’ll also find other<br />
fibers used for clothing and home furnishings.<br />
Some come from plants, others from animals.<br />
• Ramie. When seen under a microscope, this<br />
fiber, with a natural silk-like luster, is very similar<br />
to flax. It comes from the stems of China<br />
grass, grown primarily in Southeast Asia. One<br />
of the str<strong>on</strong>gest fibers known, ramie is also<br />
very resistant to insects and mildew. Since the<br />
fiber is stiff and brittle, however, and has poor<br />
elasticity and resiliency, it’s usually combined<br />
with other fibers, sometimes cott<strong>on</strong> or flax.<br />
Ramie is used in sweaters, knitted tops, shirts,<br />
placemats, and upholstery.<br />
• Specialty animal fibers. These fibers<br />
include alpaca, camel hair, cashmere, llama,<br />
mohair, and vicuna. Most come from animals<br />
raised in South America, Turkey, China, Tibet,<br />
and other areas of Asia. Because of limited<br />
availability, these fibers are expensive. Their<br />
characteristics are similar to those of sheep’s<br />
wool, but the fibers are usually softer, finer,<br />
and more lustrous. They may be used al<strong>on</strong>e or<br />
with sheep’s wool for sweaters, suits, coats,<br />
shawls, and blankets. See Fig. 11-11. Dry cleaning<br />
is usually recommended.<br />
• Natural rubber. This fiber is made from<br />
latex, a milky liquid that comes from rubber<br />
trees. It’s used to waterproof coats, hats, boots,<br />
gloves, and apr<strong>on</strong>s and can provide elasticity<br />
for waistbands. Rubber also makes a backing<br />
11-11<br />
Sheep’s wool, as from this Shetland sheep,<br />
may be used al<strong>on</strong>e or with other animal fibers to<br />
produce fabrics.<br />
for rugs and recreati<strong>on</strong>al items. Today, the use<br />
of spandex, a manufactured fiber, has many<br />
more advantages than rubber.<br />
MANUFACTURED FIBERS<br />
Although people thought about making artificial<br />
fibers as early as the 1600s, successful<br />
attempts didn’t come until the late 1800s. Today<br />
chemical engineers transform such substances as<br />
wood pulp and petroleum into many different<br />
fibers with specific characteristics. Manufactured<br />
fibers are l<strong>on</strong>g, filament fibers unless they have<br />
been cut into staple lengths. There are two basic<br />
types of manufactured fibers.<br />
• Cellulosic fibers. The four cellulosic fibers<br />
are ray<strong>on</strong>, lyocell, acetate, and triacetate. They<br />
are produced from wood pulp, with a minimum<br />
of chemical steps.<br />
• N<strong>on</strong>cellulosic fibers. All other manufactured<br />
fibers are made from carb<strong>on</strong>, hydrogen,<br />
nitrogen, and oxygen molecules rather than<br />
wood pulp. The molecules are linked together<br />
into l<strong>on</strong>g chains called polymers.<br />
Since 1910, when the first manufactured fiber<br />
was produced in the United States, a total of 26<br />
generic, manufactured fibers have been developed.<br />
Not all are currently produced. Each<br />
generic fiber differs significantly in its chemical<br />
compositi<strong>on</strong>.<br />
CHAPTER 11 Textile Fibers • 203
Making Manufactured Fibers<br />
Fiber manufacturing, shown in Fig. 11-12,<br />
begins with a raw material, such as cellulose—in<br />
the form of wood chips—or chemical polymers.<br />
The material is dissolved in a solvent or melted<br />
with heat to produce a thick, syrupy liquid.<br />
Next, the liquid soluti<strong>on</strong> is extruded, or forced<br />
through a spinneret, a metal plate with tiny holes,<br />
similar to a showerhead. Each hole forms <strong>on</strong>e fiber.<br />
The fibers can be thin or thick, depending <strong>on</strong> hole<br />
size. Different hole shapes, such as round, oval, and<br />
triangular, create different fiber characteristics.<br />
After emerging from the spinneret, the liquid<br />
hardens into a l<strong>on</strong>g filament. Some filaments go<br />
into a chemical bath, where they become solid.<br />
This process is called wet spinning. Others go<br />
into warm air, where the solvent evaporates and<br />
the fibers harden. This process is called dry spinning.<br />
Filaments that have been created by melting<br />
with heat are passed through cool air to harden<br />
them. This process is called melt spinning.<br />
After spinning, the filaments are stretched to<br />
align the molecules and increase strength and<br />
elasticity. Some filaments are twisted into yarns<br />
and stored <strong>on</strong> spools. Others are cut into short<br />
lengths for spinning into yarns later.<br />
Today, fiber research is focused <strong>on</strong> improving<br />
the performance of manufactured fibers. The<br />
changed fibers, or variants, are sometimes called<br />
sec<strong>on</strong>d- and third-generati<strong>on</strong> fibers. Fibers can<br />
be engineered to produce fabrics with specific<br />
qualities, such as elasticity, flame resistance, or a<br />
luxurious feel.<br />
Specific Manufactured Fibers<br />
Many manufactured fibers resemble natural<br />
fibers, but each generic fiber has its own unique<br />
properties. Characteristics are c<strong>on</strong>tinually modified<br />
to improve performance and care. The manufactured<br />
fibers described here are comm<strong>on</strong>ly<br />
used for clothing, furnishings, and household<br />
items. Fig. 11-13 <strong>on</strong> page 206 summarizes the<br />
characteristics, care, and uses of many manufactured<br />
fibers. Fig. 11-14 <strong>on</strong> page 207 lists their<br />
trade names.<br />
204 • UNIT 4 Fibers and Fabrics<br />
Step 1.<br />
Liquify<br />
Cellulose<br />
Step 2. Extrude<br />
Step 3. Harden<br />
Liquid soluti<strong>on</strong><br />
Polymers<br />
Melted with<br />
heat or dissolved<br />
in solvent.<br />
Spinneret<br />
or or<br />
Warm air Cool air Chemical bath<br />
• Dry spinning • Melt spinning • Wet spinning<br />
Acetate, Acrylic,<br />
Modacrylic,<br />
Spandex,<br />
Triacetate<br />
Step 4. Stretch<br />
Step 5. Wind or cut<br />
11-12<br />
Nyl<strong>on</strong>, Olefin,<br />
Polyester<br />
Manufacturing Fibers<br />
Acrylic,<br />
Ray<strong>on</strong>
Technology Trends<br />
>>MICROFIBERS<br />
What is twice as thin as the finest silk<br />
fiber and 100 times finer than a strand of<br />
human hair? The answer is the amazing<br />
microfiber, <strong>on</strong>e of the newest developments<br />
in fiber research. Most microfibers<br />
are made from polyester or nyl<strong>on</strong>, but<br />
some are ray<strong>on</strong> and acrylic. They can be<br />
used al<strong>on</strong>e or blended with other natural<br />
or manufactured fibers.<br />
Ray<strong>on</strong><br />
The first manufactured fiber was ray<strong>on</strong>. This<br />
cellulosic fiber is made primarily from wood<br />
pulp. Ray<strong>on</strong> can be produced in many variati<strong>on</strong>s<br />
for different uses. Ray<strong>on</strong> can be combined with<br />
most other fibers.<br />
Like cott<strong>on</strong> and linen, ray<strong>on</strong> is absorbent and<br />
comfortable to wear. It’s soft, drapes easily, and<br />
When packed together very tightly,<br />
microfibers create yarns with a greater<br />
fiber surface area than those made with<br />
other fibers. Because the yarns are<br />
denser and str<strong>on</strong>ger than others of similar<br />
weight, fabrics are durable. Microfiber fabrics<br />
are also comfortable due to their light<br />
weight and ability to wick away moisture.<br />
Since they resist wrinkles and keep their<br />
shape well, the fabrics take little care.<br />
They look good because of their luxurious,<br />
silk-like hand and drape. Since the fibers<br />
absorb dyes well, fabrics can have deep,<br />
rich colors.<br />
The major drawback of microfibers is<br />
heat sensitivity, so a very low temperature<br />
is needed to press fabrics. With<br />
so many positive qualities, however,<br />
microfiber use is growing rapidly.<br />
INVESTIGATE<br />
C<strong>on</strong>duct your own investigati<strong>on</strong> to see<br />
what microfiber garments are available in<br />
stores. Look for “microfiber” <strong>on</strong> garment<br />
labels. You’ll see something like “100percent<br />
polyester microfiber.” List the<br />
garments you find and the compositi<strong>on</strong> of<br />
the microfibers.<br />
has a nice luster. Ray<strong>on</strong> dyes well and can be<br />
printed with bright designs. Some ray<strong>on</strong> fabrics<br />
are washable, but most must be dry-cleaned.<br />
Ray<strong>on</strong> wrinkles easily and can shrink. It’s also<br />
weak when wet and can be weakened by l<strong>on</strong>g<br />
exposure to light and high temperatures. Special<br />
finishes, however, improve these performance<br />
qualities.<br />
CHAPTER 11 Textile Fibers • 205
FIBER NAME ADVANTAGES DISADVANTAGES CARE USES<br />
Acetate<br />
Acrylic<br />
Elastoester<br />
Lyocell<br />
Modacrylic<br />
Nyl<strong>on</strong><br />
Olefin and<br />
Polyolefin<br />
PLA<br />
Polyester<br />
Ray<strong>on</strong><br />
Spandex<br />
Triacetate<br />
Silklike appearance; soft and<br />
drapable; dries quickly;<br />
resistant to shrinking.<br />
Soft, warm, wool-like; lightweight;<br />
wrinkle-resistant;<br />
resistant to moths.<br />
Excellent stretchability, polyesterlike<br />
qualities, no chlorine<br />
discolorati<strong>on</strong>.<br />
Excepti<strong>on</strong>al strength; lustrous;<br />
soft drape; very<br />
absorbent; resists abrasi<strong>on</strong>.<br />
Soft and warm; resilient;<br />
resists abrasi<strong>on</strong> and flames;<br />
fast drying; moth resistant.<br />
Very str<strong>on</strong>g; resilient; lustrous;<br />
dries quickly.<br />
Unique wicking properties;<br />
very lightweight; str<strong>on</strong>g;<br />
quick drying; resistant to<br />
abrasi<strong>on</strong>, weather, and perspirati<strong>on</strong>.<br />
Cott<strong>on</strong>like appearance;<br />
drapeable; str<strong>on</strong>g; resilient;<br />
high wicking; UV resistance.<br />
Excellent wrinkle resistance;<br />
str<strong>on</strong>g; resistant to abrasi<strong>on</strong>;<br />
dries quickly; blends well<br />
with other fibers; retains<br />
heat-set pleats and creases.<br />
Soft and comfortable; high<br />
moisture absorbency; drapable.<br />
Excellent elasticity and<br />
recovery.<br />
Can be permanently pleated;<br />
wrinkle-resistant; crisp.<br />
206 • UNIT 4 Fibers and Fabrics<br />
11-13 • Informati<strong>on</strong> <strong>on</strong> Manufactured Fibers<br />
May wrinkle; low abrasi<strong>on</strong><br />
resistance; heat-sensitive;<br />
damaged by acet<strong>on</strong>e.<br />
May pill; may accumulate<br />
static electricity; heatsensitive.<br />
N<strong>on</strong>e.<br />
Wrinkles; susceptible to<br />
mildew and silverfish.<br />
Very heat-sensitive; may<br />
accumulate static electricity.<br />
May yellow or gray; heatsensitive;<br />
low moisture<br />
absorbency.<br />
Doesn’t absorb moisture;<br />
heat-sensitive.<br />
Poor colorfastness; low<br />
moisture absorbency.<br />
Absorbs oily stains; low<br />
absorbency of moisture.<br />
May wrinkle or shrink unless<br />
treated; may mildew.<br />
Damaged by chlorine bleach;<br />
damaged by heat.<br />
Heat-sensitive (but not as<br />
much as acetate).<br />
Usually dry-cleaned; ir<strong>on</strong> at<br />
low temperature.<br />
Dry-cleaned or laundered;<br />
ir<strong>on</strong> at low temperature.<br />
Washable; not damaged by<br />
heat when wet.<br />
Washable; ir<strong>on</strong> at low<br />
temperature.<br />
Dry-cleaned or laundered;<br />
ir<strong>on</strong> at very low temperature.<br />
Easily laundered; ir<strong>on</strong> at low<br />
temperature.<br />
Washable; ir<strong>on</strong> at low<br />
temperature.<br />
Washable.<br />
Easily laundered; needs little<br />
or no pressing.<br />
Usually dry-cleaned; sometimes<br />
washable.<br />
Washable.<br />
Easily laundered.<br />
Blouses, dresses, wedding<br />
and party clothes, linings.<br />
Draperies, upholstery.<br />
Wool-like sweaters, pants,<br />
socks, hats, mittens.<br />
Blankets, carpets, upholstery.<br />
Swimwear, activewear, ski<br />
pants, hosiery.<br />
Suits, dresses, jackets, coats.<br />
Specialty papers, medical<br />
dressings, c<strong>on</strong>veyor belts.<br />
Pile fabrics, fake furs,<br />
children’s sleepers, wigs.<br />
Lingerie, pantyhose, swimsuits,<br />
blouses, jackets.<br />
Carpets, tents, car tires.<br />
Activewear, underwear,<br />
socks. Indoor-outdoor carpeting,<br />
upholstery, disposable<br />
diapers.<br />
Active sportswear, shirts,<br />
outerwear, lingerie.<br />
100% or blends for shirts,<br />
pants, suits. Sheets, tablecloths,<br />
fiberfill in parkas and<br />
comforters.<br />
Blouses, shirts, and linen-like<br />
garments. Draperies, upholstery.<br />
Elastics, underwear, swimwear,<br />
active sportswear.<br />
Dresses, skirts, sportswear.
Acetate<br />
Acrylic<br />
FIBER TRADE NAMES FIBER TRADE NAMES<br />
Elastoester<br />
Lyocell<br />
Modacrylic<br />
Nyl<strong>on</strong><br />
Polyester<br />
One of the most widely used manufactured<br />
fibers is polyester. This str<strong>on</strong>g, high-performance<br />
fiber is used al<strong>on</strong>e or blended with many fibers,<br />
especially cott<strong>on</strong>. Both woven and knitted fabrics<br />
of various weights are used for clothing and<br />
home furnishings.<br />
Polyester has excellent resilience and outstanding<br />
wrinkle resistance. It doesn’t stretch or shrink.<br />
It also washes easily, dries quickly, and needs little<br />
or no pressing. Polyester fabrics retain heat-set<br />
creases and pleats better than other fabrics do.<br />
When combined with other fibers, polyester adds<br />
strength and wrinkle resistance. Polyester fiberfill<br />
is warm, lightweight, and remains fluffy when<br />
wet, unlike down.<br />
Polyester is not very absorbent. Thus, 100percent<br />
polyester fabrics may feel hot and<br />
uncomfortable in warm weather. Recent developments<br />
have improved moisture-absorbency<br />
properties.<br />
Some polyester and polyester-blend fabrics<br />
have a tendency to pill. Polyester also attracts and<br />
holds oil-based soil unless the fabric is pretreated<br />
with a soil-releasing agent.<br />
Nyl<strong>on</strong><br />
In 1939 nyl<strong>on</strong> was introduced as a “miracle<br />
fiber” due to its excellent strength, elasticity, and<br />
washability. Made from petroleum chemicals, it<br />
was the first n<strong>on</strong>cellulosic fiber.<br />
11-14 • Trade Names of Manufactured Fibers<br />
Celanese ® , Celstar ® , Chromspun ® , Estr<strong>on</strong> ® ,<br />
MicroSafe ®<br />
BioFresh ® , Cresloft ® , Duraspun ® ,<br />
MicroSupreme ® , Piltrol ® , Weatherbloc ®<br />
REXE ®<br />
Tencel ®<br />
SEF ®<br />
Anso ® , Antr<strong>on</strong> ® , Caprolan ® , Permasoft ® , Silky<br />
Touch ® , Tactel ® , Zeftr<strong>on</strong> ®<br />
Olefin and<br />
Polyolefin<br />
Polyester<br />
PLA<br />
Ray<strong>on</strong><br />
Spandex<br />
Triacetate<br />
Fibril<strong>on</strong> ® , Spectra ® , Thinsolate ® , Tyvek ® ,<br />
Innova ®<br />
Avora ® , Comfortrel ® , Coolmax ® , Dacr<strong>on</strong> ® ,<br />
Fortrel ® , Polarguard ® , Sensura ® , Ultura ®<br />
NatureWorks ®<br />
Bemberg ® , Modal ®<br />
Dorlastan ® , Glospan ® , Lycra ®<br />
Soal<strong>on</strong> ®<br />
Nyl<strong>on</strong> is very str<strong>on</strong>g, lightweight, and lustrous.<br />
It’s resilient, doesn’t stretch or shrink, and can be<br />
blended with many other fibers. Nyl<strong>on</strong> is a very<br />
versatile fiber, with many c<strong>on</strong>sumer and industrial<br />
uses.<br />
Because nyl<strong>on</strong> doesn’t absorb moisture well, it<br />
can feel uncomfortably warm in hot weather and<br />
cool in cold weather. Unless specially treated, it<br />
also collects static electricity.<br />
Nyl<strong>on</strong> is easy to wash, quick drying, and needs<br />
little or no pressing; however, it may yellow or<br />
gray after a period of time. Some nyl<strong>on</strong> fabrics<br />
absorb and hold oil stains. Because of heat sensitivity,<br />
nyl<strong>on</strong> must be ir<strong>on</strong>ed at low temperatures.<br />
Fashi<strong>on</strong><br />
FIRST NYLON IN<br />
FASHION. As commercial producti<strong>on</strong><br />
of nyl<strong>on</strong> began in 1939, a new product took<br />
the fashi<strong>on</strong> world by storm—nyl<strong>on</strong> stockings.<br />
With World War II, however, nyl<strong>on</strong> was<br />
diverted to making parachutes, tents, and<br />
ropes for military use. During the early<br />
1940s, stockings that sold for $1.25 a pair<br />
sold for $10 <strong>on</strong> the black market. Shortly<br />
after the war ended in 1945, thousands of<br />
women rushed to department stores to buy<br />
the stockings that were available again.<br />
Facts<br />
CHAPTER 11 Textile Fibers • 207
Lyocell<br />
Lyocell, the newest generic fiber, is made from<br />
wood pulp. Compared to other cellulosic fibers,<br />
it’s str<strong>on</strong>ger, has better abrasi<strong>on</strong> resistance, and<br />
shrinks less.<br />
Lyocell is breathable, absorbent, and generally<br />
comfortable to wear. Other characteristics are<br />
luster and soft drapability. These make it popular<br />
for garments traditi<strong>on</strong>ally made from silk. See<br />
Fig. 11-15.<br />
Fabrics made from lyocell tend to wrinkle.<br />
Generally, light ir<strong>on</strong>ing or hanging the garment<br />
in a steamy bathroom removes the wrinkles.<br />
These fabrics are also susceptible to damage from<br />
mildew and silverfish, small wingless insects.<br />
Lyocell blends well with other fibers, including<br />
cott<strong>on</strong>, linen, wool, silk, nyl<strong>on</strong>, ray<strong>on</strong>, and polyester.<br />
Expensive garments are more likely to have<br />
lyocell because producti<strong>on</strong> is more costly than for<br />
some other fibers.<br />
11-15<br />
Lyocell is similar to ray<strong>on</strong>, but it’s washable and<br />
wrinkles less. The fiber can be made to look like silk,<br />
suede, and even denim.<br />
208 • UNIT 4 Fibers and Fabrics<br />
11-16<br />
Clothes made of acrylic provide the warmth of<br />
wool but are washable and can be worn by people who<br />
are allergic to wool.<br />
Acrylic and Modacrylic<br />
Acrylic is a soft, resilient fiber that resists wrinkling.<br />
See Fig. 11-16. It has high bulking power<br />
and offers warmth without added weight. It’s<br />
often substituted for wool because it has similar<br />
characteristics but is washable and n<strong>on</strong>allergenic.<br />
Acrylic fibers resist sunlight. Thus, they are<br />
suitable for curtains, draperies, and upholstery.<br />
Some acrylic fabrics, however, pill or collect static<br />
electricity.<br />
Acrylic fabrics can be washed or dry-cleaned,<br />
but they may hold oil-based stains. Because the<br />
fiber is heat-sensitive, fabrics should not be dried<br />
or ir<strong>on</strong>ed at high temperatures.<br />
Modacrylic fibers share many of the characteristics<br />
of acrylic fibers.<br />
Acetate and Triacetate<br />
Since acetate is a cellulosic fiber, some of its<br />
characteristics are similar to those of ray<strong>on</strong>. It’s
absorbent and dries faster than ray<strong>on</strong>. Although<br />
it can be dyed and printed, special dyes must be<br />
used.<br />
Both acetate and triacetate have many similar<br />
properties. Both are drapable and have a silky<br />
appearance and feel. Both are resilient and hold<br />
creases well. They are resistant to shrinking,<br />
moths, and mildew but have a low resistance to<br />
abrasi<strong>on</strong>.<br />
Usually acetate fabrics are dry-cleaned, but<br />
some may be washed, depending <strong>on</strong> care instructi<strong>on</strong>s.<br />
Acetate is heat-sensitive and must be ir<strong>on</strong>ed<br />
at low temperatures. It can also be dissolved by<br />
acet<strong>on</strong>e, which is c<strong>on</strong>tained in nail polishes and<br />
polish removers. Unless treated with an antistatic<br />
finish, acetate fabrics may cling to the body.<br />
By c<strong>on</strong>trast, triacetate can be easily laundered.<br />
It is not as sensitive to heat as acetate. Therefore,<br />
triacetate fabrics can be permanently pleated<br />
when the fibers are heat-set.<br />
Many different fabrics are made from acetate,<br />
including satin, taffeta, and silklike fabrics. It is<br />
frequently blended with other fibers. Triacetate is<br />
11-17<br />
Acetate gives this suit a silky feel and look.<br />
used in light to heavyweight fabrics that usually<br />
have a crisp finish.<br />
Olefin and Polyolefin<br />
Olefin and polyolefin, both a type of olefin<br />
fiber, are str<strong>on</strong>g, very lightweight, and quick drying.<br />
They have good resistance to abrasi<strong>on</strong>, soil,<br />
mildew, sunlight, perspirati<strong>on</strong>, and odors.<br />
Because dyes are added during the fiber-forming<br />
stage, the fabrics are colorfast. They are used for<br />
apparel, home furnishings, and disposable items.<br />
Many outdoor garments and exercise wear are<br />
made from polyolefin and from polypropylene<br />
(pah-lee-PRO-puh-leen), a type of polyolefin.<br />
Since these fibers d<strong>on</strong>'t absorb moisture but wick<br />
perspirati<strong>on</strong> away form the skin, they keep the<br />
body warm and dry in cold or damp weather.<br />
Skiers and runners like the wicking property for<br />
shirts, underwear, and socks.<br />
Olefin fabrics can be laundered. Most stains<br />
can be easily removed by spotting with warm<br />
water and detergent. Because olefin is heat-sensitive,<br />
fabrics should be line-dried or tumble-dried<br />
<strong>on</strong> low heat or no heat. Do not ir<strong>on</strong>.<br />
Spandex and Elastoester<br />
Both spandex and elastoester are elastic fibers<br />
with excellent stretchability and recovery. Even<br />
after repeated stretching, elasticity c<strong>on</strong>tinues.<br />
Spandex replaced rubber in clothing because of<br />
its resistance to sunlight, perspirati<strong>on</strong>, and abrasi<strong>on</strong>.<br />
See Fig. 11-18 <strong>on</strong> page 210. However, spandex<br />
can discolor and lose its stretchability when<br />
exposed to high temperatures during washing or<br />
machine-drying. It also is damaged by chlorine in<br />
bleach and chemicals in swimming pools.<br />
Elastoester is stretchy like spandex but has<br />
polyesterlike qualities. Unlike spandex, it can<br />
withstand high temperatures when wet and does<br />
not discolor when exposed to chlorine.<br />
PLA<br />
PLA fiber was first produced in 2002. The initials<br />
stand for polylactic acid, which is derived<br />
from natural sugars such as corn or sugar beets.<br />
PLA fiber is similar to cott<strong>on</strong> in appearance and<br />
is biodegradable like natural fibers.<br />
CHAPTER 11 Textile Fibers • 209
11-18<br />
FIBER<br />
Cott<strong>on</strong> and<br />
Flax<br />
Wool<br />
Silk<br />
Polyester<br />
and Nyl<strong>on</strong><br />
Ray<strong>on</strong> and<br />
Lyocell<br />
Acrylic<br />
Acetate<br />
210 • UNIT 4 Fibers and Fabrics<br />
Fiber characteristics include excellent drapability,<br />
low moisture absorpti<strong>on</strong>, high wicking, low<br />
flammability, and high resistance to ultra violet<br />
(UV) light. These qualities make the fiber suitable<br />
for both activewear and home furnishings. It can<br />
be used al<strong>on</strong>e or blended with other fibers, such<br />
as cott<strong>on</strong> and polyester.<br />
Aramid<br />
Aramid fibers have excepti<strong>on</strong>al strength and<br />
heat and flame resistance. Even at high temperatures,<br />
these fibers maintain their shape and form.<br />
They are also very resistant to abrasi<strong>on</strong>. With<br />
these qualities, the fiber is often found in the protective<br />
clothing worn by firefighters.<br />
IDENTIFYING FIBERS<br />
To work with fibers, people must be able to<br />
distinguish them. Product developers, retail buyers,<br />
buying offices, and independent labs use fiber<br />
identificati<strong>on</strong> tests to identify fibers and verify the<br />
fiber c<strong>on</strong>tent of products.<br />
Many textile fibers can’t be identified merely<br />
by sight or touch. Instead, testing helps tell <strong>on</strong>e<br />
fiber from another. Some tests are easy; others<br />
require special testing apparatus. You can c<strong>on</strong>duct<br />
some simple tests of your own by following<br />
the directi<strong>on</strong>s <strong>on</strong><br />
page 211 and com-<br />
11-19 • Identifying Fibers in the Lab<br />
paring results to<br />
VISUAL CHEMICAL<br />
BURNING<br />
the characteristics<br />
described in Fig.<br />
Staples<br />
Burn readily to fine gray ash; odor of burning paper.<br />
11-19.<br />
The ability to stretch makes spandex useful. It’s<br />
often combined with other fibers to make garments more<br />
comfortable to wear. The spandex fiber, in general, can<br />
stretch more than 500 percent without breaking.<br />
Staple<br />
Filament or<br />
staple<br />
Filament or<br />
staple<br />
Filament or<br />
staple<br />
Filament or<br />
staple<br />
Filament or<br />
staple<br />
Dissolves in<br />
NaOH<br />
Dissolves in<br />
NaOH<br />
Dissolves in<br />
acet<strong>on</strong>e<br />
Burns briefly to black crushable ash; odor of burning<br />
hair or feathers.<br />
Burns briefly to black crushable ash; odor of burning<br />
hair or feathers.<br />
Melt and burn <strong>on</strong>ly in flame, leaving hard, tan bead;<br />
sweet chemical odor.<br />
Burn readily to fine gray ash; odor of burning paper.<br />
Melts and burns readily, forming hard black bead;<br />
acrid chemical odor.<br />
Melts and burns readily, forming hard black bead;<br />
acrid chemical odor.
How To…<br />
IDENTIFY FIBERS<br />
With a few simple tests in the lab, you can identify fibers. Collect four or more fabric<br />
samples that c<strong>on</strong>tain 100 percent of a given fiber, including manufactured and natural.<br />
Exchange samples (but not fiber identities) with a partner. Then assemble the following:<br />
a magnifying glass or microscope, tweezers, two glass dishes, 5-percent sodium hydroxide<br />
(or bleach), acet<strong>on</strong>e (or nail polish remover), a candle (votive) in a n<strong>on</strong>burnable<br />
holder, tin foil, and a fire extinguisher. Follow the instructi<strong>on</strong>s under “Exploring Fiber<br />
Identificati<strong>on</strong>.”<br />
Visual Observati<strong>on</strong>s: Length of<br />
Fiber<br />
1. Cut or pull a yarn from a fabric sample. You may need to<br />
separate or unwind the yarn to view a fiber<br />
clearly.<br />
2. Using a magnifying glass or microscope,<br />
study a single fiber.<br />
3. Note whether the fiber is a short<br />
staple or a l<strong>on</strong>g filament.<br />
Burning Observati<strong>on</strong>s: Burning<br />
Rate, Odor, and Type of Ash<br />
or Residue<br />
1. Cut or pull a yarn from a fabric sample. D<strong>on</strong>’t use the<br />
same yarn used for chemical testing.<br />
2. Place a candle in a low candleholder <strong>on</strong> a 12-inch square<br />
piece of tinfoil. Light the candle.<br />
3. Holding the yarn with tweezers, move it near the candle’s<br />
flame. Stand back from the flame. Watch to see whether<br />
anything happens to the yarn.<br />
4. Place the end of the yarn in the flame. Watch to see<br />
what happens. Note the burning rate. To<br />
determine odor, fan the vapors<br />
toward you rather than leaning<br />
over the candle.<br />
5. Note the type of ash or<br />
residue that remains.<br />
Chemical Observati<strong>on</strong>s: Reacti<strong>on</strong> to<br />
Sodium Hydroxide and to Acet<strong>on</strong>e<br />
Cauti<strong>on</strong>: Do not splash the chemicals or get them <strong>on</strong> your hands or clothing.<br />
Bleach discolors or dissolves some fabrics. Acet<strong>on</strong>e dissolves acetate<br />
and removes nail polish and acrylic nails. Acet<strong>on</strong>e is highly flammable so<br />
never use near an open flame.<br />
1. Cut or pull two yarns from a fabric sample. Untwist to separate the<br />
fibers.<br />
2. Pour a small amount of sodium hydroxide (NaOH) or bleach into a glass<br />
dish. Repeat with acet<strong>on</strong>e or nail polish remover in another glass dish.<br />
3. Using tweezers, carefully place the fibers from <strong>on</strong>e yarn in the sodium<br />
hydroxide. Place the fibers from the other yarn in the<br />
acet<strong>on</strong>e. Let them soak for five minutes.<br />
4. Check to see whether the fibers<br />
have dissolved.<br />
Exploring Fiber<br />
Identificati<strong>on</strong><br />
Using the fabric samples provided by<br />
your partner and the procedures <strong>on</strong> this<br />
page, make the visual, chemical, and<br />
burning observati<strong>on</strong>s described. Write<br />
down your observati<strong>on</strong>s. What fiber<br />
might each sample c<strong>on</strong>tain?<br />
CHAPTER 11 Textile Fibers • 211
CHAPTER 11<br />
CHAPTER SUMMARY<br />
• Fibers, the basic material of fabrics, are<br />
either natural or manufactured.<br />
• Cott<strong>on</strong>, flax, wool, and silk are the most<br />
widely used natural fibers.<br />
• Manufactured fibers are made by liquefying<br />
cellulose or polymers, then forcing the<br />
liquids through forms to create filaments.<br />
• Each fiber has certain properties, which<br />
affect a fabric’s performance, appearance,<br />
and care.<br />
USING KEY TERMS<br />
On a piece of paper, list these forms of the<br />
Key Terms: abrasi<strong>on</strong> resistant, absorbent, lustrous,<br />
tendency to pill, resilient, and tensile<br />
strength. Beside each term identify natural<br />
and manufactured fibers that have the quality.<br />
Explain what the quality means.<br />
212 • UNIT 4 Fibers and Fabrics<br />
Review<br />
RECALLING THE FACTS<br />
1. How are natural fibers different from<br />
manufactured fibers?<br />
2. You’re told that Lycra ® is a trade name<br />
for spandex. What does that tell you?<br />
3. How are the traits of resiliency and elasticity<br />
similar and different?<br />
4. Why would wicking be an important quality<br />
in a fabric for athletic socks?<br />
5. What qualities might make cott<strong>on</strong> a good<br />
choice for a child’s play clothes? Why?<br />
6. How do the drawbacks of cott<strong>on</strong> compare<br />
with those of flax?<br />
7. How does the wool fiber’s structure<br />
affect its ability to hold heat?<br />
8. What is the difference between lamb’s<br />
wool, virgin wool, and recycled wool?<br />
9. How do cellulosic and n<strong>on</strong>cellulosic<br />
fibers differ from <strong>on</strong>e another?<br />
10. How does a spinneret affect the characteristics<br />
of a manufactured fiber?<br />
11. What qualities make polyester a popular<br />
choice for fabrics?<br />
12. For what natural fibers are lyocell and<br />
acrylic sometimes substituted? Why?<br />
13. Why might olefin fabrics be a good<br />
choice for a road crew worker <strong>on</strong> a cold<br />
morning?<br />
14. On page 206, what disadvantage is comm<strong>on</strong><br />
to most manufactured fibers? How<br />
does this affect their care?
and Activities<br />
THINKING CRITICALLY<br />
1. Why do you think manufactured fibers<br />
have become an important part of the<br />
textile industry?<br />
2. A friend recommends that you should<br />
always look for garments made with<br />
manufactured fibers because they are<br />
scientifically designed to be more<br />
durable. How do you resp<strong>on</strong>d?<br />
APPLYING KNOWLEDGE<br />
1. Fiber usage. In a clothing catalog,<br />
choose three garments of the same type,<br />
such as dresses or men’s shirts. Read<br />
the garment descripti<strong>on</strong>s. List the natural<br />
and manufactured fibers used in each<br />
<strong>on</strong>e. Compare your list with those of<br />
classmates. What can you c<strong>on</strong>clude<br />
about the use of various fibers? About<br />
the use of natural fibers compared to<br />
manufactured?<br />
2. Favorite fibers. Look through clothes in<br />
your own wardrobe. List the fiber c<strong>on</strong>tent,<br />
as found <strong>on</strong> the garments’ care<br />
labels. Which fibers appear most often?<br />
In writing, why you think these fibers are<br />
so comm<strong>on</strong> in your wardrobe.<br />
3. Fiber prices. In a catalog, locate two<br />
similar garments: <strong>on</strong>e made of a natural<br />
fiber and the other made of a comm<strong>on</strong>ly<br />
substituted manufactured fiber—for<br />
example, a silk scarf and a ray<strong>on</strong> scarf, or<br />
wool and acrylic sweaters. Compare the<br />
prices. Compile your findings with those<br />
of classmates. Discuss what you can c<strong>on</strong>clude<br />
about how natural and manufactured<br />
fibers affect the price of fabrics.<br />
CHAPTER 11<br />
4. Fiber comparis<strong>on</strong>. Compare five fabrics<br />
made of different natural and manufactured<br />
fibers. In writing, describe a potential<br />
use for each fabric. Explain why you<br />
think the fiber characteristics of each<br />
fabric make it suitable for the garment<br />
or the home decorating item.<br />
MAKING>
CHAPTER 12<br />
Fabric C<strong>on</strong>structi<strong>on</strong><br />
214<br />
OBJECTIVES<br />
• Explain how yarns<br />
are formed.<br />
• Describe the four<br />
distinguishing<br />
characteristics of<br />
fabrics.<br />
• Compare the<br />
characteristics of<br />
woven and knitted<br />
fabrics.<br />
• Describe other<br />
methods of fabric<br />
c<strong>on</strong>structi<strong>on</strong>.<br />
KEY TERMS<br />
blends<br />
filament yarns<br />
filling yarns<br />
grain<br />
knitting<br />
pile<br />
ply<br />
selvage<br />
spun yarns<br />
texturing<br />
warp yarns<br />
weaving<br />
yarns
EXAMINETHISISSUE<br />
Woven or knitted textiles.<br />
Textile manufacturers today provide a<br />
huge array of woven and knitted fabrics<br />
for designers and home sewers. As you’ll<br />
read in this chapter, these fabrics have<br />
different characteristics. Think about the<br />
various shirts that you have in your<br />
wardrobe. Which <strong>on</strong>es do you like and<br />
wear the most? Besides favorite colors<br />
and styles, which fabrics do you like<br />
best?<br />
What do you think?<br />
Which fabrics appeal more to you—<br />
woven or knitted? Why? Why do you think<br />
some people have the opposite point of<br />
view?<br />
Try this experiment. From a small cott<strong>on</strong><br />
ball, loosen and pull out several fibers.<br />
As you tug <strong>on</strong> them, note their strength.<br />
Now twist them together with your fingers as you<br />
pull. The twisted yarn has become str<strong>on</strong>ger than<br />
the loose fibers. Suppose you had many of these<br />
yarns and you began to interlace them or loop<br />
them together. Skillfully d<strong>on</strong>e, you could produce<br />
something quite useful—fabric.<br />
YARNS<br />
Most fabrics are made from yarns that have<br />
been created from fibers twisted together or laid<br />
side by side. The fibers may be natural, manufactured,<br />
or a combinati<strong>on</strong> of both. Because of the<br />
many yarns available today, you can choose from<br />
fabrics that vary greatly in design, texture, and<br />
performance. See Fig. 12-1.<br />
Types of Yarns<br />
Yarns can be made entirely from <strong>on</strong>e type of<br />
fiber or from different <strong>on</strong>es. By twisting two or<br />
more yarns together, yarns of different textures<br />
and colors can be produced. The varieties are<br />
almost limitless.<br />
Spun Yarns<br />
A yarn made of staple fibers is called a spun<br />
yarn. You’ll recall that staple fibers are short and<br />
measured in inches or centimeters. All natural<br />
fibers, except silk, are staples. Manufactured<br />
fibers can be cut into staple lengths to give fabrics<br />
the appearance of cott<strong>on</strong>, linen, or wool. The staple<br />
fibers are twisted together to form a single<br />
yarn l<strong>on</strong>g enough to make into fabric.<br />
12-1<br />
Fibers are twisted together to make yarns of<br />
many colors and variati<strong>on</strong>s.<br />
CHAPTER 12 Fabric C<strong>on</strong>structi<strong>on</strong> • 215
Spun yarns are fuzzier and more<br />
irregular than filament yarns. The short<br />
ends of the staple fibers create a rough surface <strong>on</strong><br />
the yarns. See Fig. 12-2.<br />
Filament Yarns<br />
A yarn made entirely of filament fibers is<br />
called a filament yarn. Filament fibers are l<strong>on</strong>g,<br />
c<strong>on</strong>tinuous fibers measured in yards or meters.<br />
Silk is a filament. Unless they’ve been cut, manufactured<br />
fibers are also filaments.<br />
Filament yarns are smoother and more lustrous<br />
than spun yarns. A m<strong>on</strong>ofilament yarn has<br />
<strong>on</strong>ly <strong>on</strong>e strand, as seen in nyl<strong>on</strong> sewing thread<br />
and fishing line. When two or more filaments are<br />
combined during the manufacturing process, a<br />
multifilament yarn forms. See Fig. 12-3.<br />
Ply Yarns<br />
Manufacturers usually twist two or more single<br />
yarns together to make a ply yarn. Since ply<br />
tells the number of strands used, you’ll find yarn<br />
that’s two-ply, three-ply, or more. Several ply<br />
yarns twisted together form a cord or cable. See<br />
Fig. 12-4.<br />
12-3<br />
Filament Yarns<br />
M<strong>on</strong>ofilament<br />
yarn<br />
12-2<br />
216 • UNIT 4 Fibers and Fabrics<br />
Spun Yarn<br />
Multifilament<br />
yarn<br />
Single<br />
yarn<br />
Two-ply<br />
yarn<br />
12-4<br />
Ply Yarns<br />
Two-ply<br />
yarn<br />
Cable<br />
To understand ply, look closely at some different<br />
yarns. Knitting and embroidery yarns are<br />
good examples to compare. How many plies does<br />
each yarn have? How tightly are they twisted? The<br />
amount of twist affects the yarn’s appearance,<br />
feel, and behavior.<br />
High-twist yarns are firm, str<strong>on</strong>g, dull in texture,<br />
and relatively fine in size. A twist that’s too<br />
tight, however, can weaken a yarn. Low-twist<br />
yarns are softer, weaker, more lustrous, and less<br />
compact than high-twist yarns.<br />
Novelty Yarns<br />
Some clothing in your wardrobe may have fabric<br />
with unusual textures and colors. These are<br />
made with novelty yarns. See Fig. 12-5. Two or<br />
more yarns that are not alike in type or size are<br />
combined to c<strong>on</strong>struct such yarns. They often<br />
have loops or different thicknesses. Twisting a<br />
thin and shiny filament yarn with a spun yarn<br />
that is thick and fuzzy can create thickness variati<strong>on</strong>s.<br />
Sometimes three yarns are used. One yarn<br />
is the base yarn, another creates the decorative<br />
effect, and a third acts as a tie or binder, as shown<br />
in Fig. 12-6.<br />
Texturing and Blending<br />
Yarns can be treated to create different textures.<br />
If specific characteristics are desired in a
12-5<br />
With novelty yarns, garment<br />
manufacturers are able to produce<br />
clothing that appeals to many different<br />
pers<strong>on</strong>alities.<br />
12-6<br />
Novelty Yarn<br />
yarn, two or more fibers can be blended to obtain<br />
qualities from each fiber. Both of these processes<br />
are described here.<br />
Textured Yarns<br />
Filament yarns made of manufactured fibers<br />
can be permanently set into ripples, waves, zigzags,<br />
or twists. This texturing process uses chemicals,<br />
heat, or special machinery to turn the<br />
straight, rod-like filaments into coiled, looped, or<br />
crimped yarns. Fig. 12-7 shows different shapes of<br />
textured yarns.<br />
Texturing increases the yarns’ bulk, giving a<br />
softer feel to the finished fabric. It also increases<br />
the stretch and recovery of the yarns. Textured<br />
yarns have improved wrinkle resistance and<br />
wash-and-wear properties.<br />
Adding bulk to filament yarns helps overcome<br />
some of the disadvantages of the fiber’s original<br />
characteristics. For example, textured filament<br />
12-7<br />
False<br />
twist<br />
Textured Yarns<br />
Knit<br />
de-knit<br />
Stuffer<br />
box<br />
yarns have more space between the filaments<br />
than regular filament yarns. Thus, fabric made of<br />
textured yarns has more breathability and is more<br />
comfortable to wear. The texturing process also<br />
helps prevent static buildup in the fabric.<br />
Blended Yarns<br />
Just as “two heads are often better than <strong>on</strong>e,”<br />
two fibers can also be better. By combining different<br />
fibers into <strong>on</strong>e yarn, blends are created.<br />
The best qualities of different fibers are brought<br />
together in a new yarn. See Fig. 12-8. A textile mill<br />
might combine just natural fibers, <strong>on</strong>ly manufactured<br />
fibers, or put both types together in <strong>on</strong>e<br />
12-8<br />
Different fibers are often blended together to<br />
form fabric that has the best characteristics of each fiber.<br />
CHAPTER 12 Fabric C<strong>on</strong>structi<strong>on</strong> • 217
How To…<br />
EVALUATE FABRIC CHARACTERISTICS<br />
To find out whether a fabric is right for your purposes, try the tests described here.<br />
• Wrinkle resistance.<br />
Will a garment crease<br />
or wrinkle during wear?<br />
Grab a fistful of fabric<br />
and squeeze for about<br />
20 sec<strong>on</strong>ds. Release<br />
and check for wrinkles.<br />
Shake the fabric<br />
several times or<br />
smooth it with your<br />
hand. Wait about<br />
40 sec<strong>on</strong>ds. Are the<br />
wrinkles disappearing?<br />
• Shape retenti<strong>on</strong>.<br />
Will knitted fabric<br />
keep its shape after<br />
wearing? Stretch a<br />
knitted garment with<br />
your hands, looking<br />
for reas<strong>on</strong>able resistance.<br />
If it stretches<br />
too easily, the shape<br />
may not come back,<br />
as <strong>on</strong> baggy sweater<br />
elbows and knees of<br />
pants.<br />
218 • UNIT 4 Fibers and Fabrics<br />
• Drapability. Does the fabric fall into soft, natural folds,<br />
indicating it drapes well? Hold the fabric between your<br />
hands. Move your hands together while slowly gathering the<br />
fabric. Are the folds sharp and crisp or soft and flowing?<br />
• Air permeability. Will<br />
the fabric allow air to<br />
pass through? Fabrics<br />
that “breathe” have high<br />
air permeability for more<br />
comfort in hot or humid<br />
weather. In cold or windy<br />
weather, fabric needs low<br />
air permeability. Hold the<br />
fabric tightly against<br />
your mouth and exhale.<br />
Evaluate the amount of<br />
pressure needed to blow<br />
air through.<br />
Exploring Fabric Characteristics<br />
C<strong>on</strong>duct <strong>on</strong>e or more tests <strong>on</strong> three fabrics to check the characteristics<br />
of each. Dem<strong>on</strong>strate your findings for the class.<br />
• Strength. Does the<br />
fabric resist tearing?<br />
High tearing strength<br />
is useful in children’s<br />
clothes, work clothes,<br />
and activewear. Make<br />
a scissors cut in the<br />
edge of the fabric (not<br />
a garment). Then try<br />
to tear the fabric by<br />
hand. Does the fabric<br />
tear easily?<br />
• Cover. Does light shine<br />
through the fabric? A<br />
fabric with low cover is<br />
somewhat translucent. A<br />
navy shirt shouldn’t show<br />
through when tucked into<br />
light colored pants. Place<br />
a light colored fabric over<br />
<strong>on</strong>e with a darker color. If<br />
the lighter fabric has adequate<br />
cover, the darker<br />
fabric w<strong>on</strong>’t be visible.
yarn. Which combinati<strong>on</strong> would each of the following<br />
be: wool and silk; nyl<strong>on</strong> and acetate; cott<strong>on</strong><br />
and polyester?<br />
Fibers are usually blended to improve fabric<br />
performance. Why is polyester often combined<br />
with cott<strong>on</strong>? The cott<strong>on</strong> offers comfort, softness,<br />
and absorbency. The polyester adds strength,<br />
wrinkle resistance, shrink resistance, mildew<br />
resistance, and quick drying.<br />
Fibers can also be blended for appearance.<br />
Adding an angora fiber to wool gives more texture<br />
and softness to a sweater. Silk may be<br />
included for shine or luster.<br />
FABRIC CHARACTERISTICS<br />
Fabric characteristics distinguish <strong>on</strong>e fabric<br />
from another. Fig. 12-24, shown <strong>on</strong> pages 228-<br />
231, gives many examples of fabrics with different<br />
qualities. Typical uses are included with the<br />
examples. Examining c<strong>on</strong>structi<strong>on</strong>, texture,<br />
hand, and weight will help you identify the many<br />
fabrics available.<br />
• C<strong>on</strong>structi<strong>on</strong>. Fibers and yarns become fabric<br />
when they are joined by a c<strong>on</strong>structi<strong>on</strong><br />
method. The two most comm<strong>on</strong> methods are<br />
weaving and knitting. Weaving interlaces two<br />
sets of yarns that are at right angles to each<br />
other. Knitting loops yarns together. Other<br />
methods used to make a few fabrics include<br />
interlocking, fusing, b<strong>on</strong>ding, twisting, and<br />
looping. C<strong>on</strong>structi<strong>on</strong> easily identifies some<br />
fabrics. You can recognize terrycloth by its<br />
loops. Velvet has a raised surface, while corduroy<br />
has rows of cut threads. A special weave<br />
produces the shiny look of satin, and felt has<br />
interlocked fibers matted together.<br />
• Texture. How does the surface of a fabric<br />
look and feel to the touch? Smooth, rough,<br />
dull, shiny, nubby, fuzzy, and combinati<strong>on</strong>s of<br />
these all describe a fabric’s texture.<br />
• Hand. How does a fabric react as you handle<br />
it? Is it soft and pliant, firm, stiff, or crisp? You<br />
can learn how a fabric behaves by draping it<br />
over your hands.<br />
• Weight. The yarns and fabric c<strong>on</strong>structi<strong>on</strong><br />
determine the weight of a fabric. Fabrics range<br />
in weight from very light to very heavy.<br />
WOVEN FABRICS<br />
As a child, you may have woven strips of paper<br />
together to create an art project. This same basic<br />
process is used to weave fabric by interlacing<br />
lengthwise and crosswise yarns <strong>on</strong> a loom. The<br />
yarns that run the length of the fabric are called<br />
warp yarns. The crosswise yarns are filling yarns.<br />
They are woven or interlaced into the warp yarns,<br />
following a specific pattern. See Fig. 12-9.<br />
Al<strong>on</strong>g both edges of a woven fabric is a selvage.<br />
This self-edge forms when the filling yarn<br />
turns to go back in the other directi<strong>on</strong>. The selvage<br />
is usually a little stiffer and firmer and w<strong>on</strong>’t<br />
ravel. p 490<br />
The directi<strong>on</strong> that yarns run in a woven fabric<br />
is known as the grain. The warp yarns form the<br />
lengthwise grain. The filling yarns form the cross-<br />
12-9<br />
These terms help in understanding the c<strong>on</strong>struc-<br />
ti<strong>on</strong> and characteristics of woven fabrics. How do the selvages<br />
form when fabric is produced? What makes bias<br />
grain true?<br />
Crosswise grain<br />
Filling yarns<br />
Lengthwise<br />
grain<br />
Warp yarns<br />
Selvages<br />
Selvage<br />
True<br />
bias<br />
grain<br />
Warp<br />
yarns<br />
Filling<br />
yarn<br />
CHAPTER 12 Fabric C<strong>on</strong>structi<strong>on</strong> • 219
Technology Trends<br />
>>SMART FABRICS<br />
Fabrics no l<strong>on</strong>ger simply look good and<br />
offer protecti<strong>on</strong>. With advances in textile<br />
chemistry and nanotechnology, some fabrics<br />
offer functi<strong>on</strong>al qualities that<br />
enhance and protect health.<br />
• Health m<strong>on</strong>itoring. Originally developed<br />
to m<strong>on</strong>itor the vital signs of soldiers in<br />
combat, the SmartShirt System offers<br />
clothing that can sense bodily informati<strong>on</strong>,<br />
such as heart rate, body temperature,<br />
respirati<strong>on</strong>, calories burned, and<br />
more. Useful for athletes or people with<br />
health c<strong>on</strong>diti<strong>on</strong>s such as heart disease,<br />
these T-shirt-type garments record body<br />
informati<strong>on</strong> and can send it to the wearer<br />
or a health care professi<strong>on</strong>al via a cell<br />
ph<strong>on</strong>e or PDA. These wearable computer<br />
systems——that can be knitted, woven, or<br />
fused into fabrics——may greatly impact<br />
the way people live in the future.<br />
• Climate sensitivity. With encapsulati<strong>on</strong><br />
technology, fabrics can help maintain a<br />
220 • UNIT 4 Fibers and Fabrics<br />
pers<strong>on</strong>’s body temperature as the outside<br />
temperature changes. Encapsulati<strong>on</strong><br />
means each fiber or yarn is coated with<br />
a substance that breaks, changes, or<br />
disappears under certain c<strong>on</strong>diti<strong>on</strong>s. For<br />
example, a paraffin coating changes<br />
from solid to liquid and back as body<br />
temperatures heat up or cool down.<br />
Encapsulati<strong>on</strong> provides l<strong>on</strong>g-term protecti<strong>on</strong><br />
that w<strong>on</strong>’t peel off or wash away.<br />
Used for sweaters, gloves, and socks,<br />
these climate-sensitive fabrics save or<br />
give off body heat.<br />
• Bacteria and odor preventi<strong>on</strong>. Fabrics<br />
can help fight bacteria and odors, too.<br />
During manufacturing, bacteria-battling<br />
agents (some include halamides——similar<br />
to chlorine-type disinfectants used in<br />
swimming pools) are introduced into<br />
fibers. The resulting fabrics help protect<br />
against bacteria, fungi, and yeast, as<br />
well as fight odors. They are particularly<br />
useful for active sportswear, intimate<br />
apparel, and hosiery or socks. Other<br />
applicati<strong>on</strong>s exist in healthcare for such<br />
items as uniforms, mattresses, and pillow<br />
coverings. Military and medical<br />
applicati<strong>on</strong>s may include protective<br />
clothing that blocks the penetrati<strong>on</strong> of<br />
deadly bacteria.<br />
INVESTIGATE<br />
Use Internet or print resources to locate<br />
more examples of “smart fabrics” used in<br />
clothing and other fabric items. What<br />
fabric innovati<strong>on</strong>s may impact the functi<strong>on</strong>al<br />
qualities of clothing and household<br />
items in the future?
12-10<br />
Beater or reed<br />
Cloth beam<br />
wise grain. The bias grain runs diag<strong>on</strong>ally across<br />
the fabric. True bias has the greatest amount of<br />
stretch. p 490<br />
The Weaving Process<br />
Fabric can be woven <strong>on</strong> a small hand loom or<br />
a huge computerized loom. Either way, the basic<br />
process is the same. See Fig. 12-10. Warp yarns are<br />
positi<strong>on</strong>ed <strong>on</strong> the loom first. They are attached to<br />
a warp beam at the back of the loom and then<br />
stretched through <strong>on</strong>e or more frames, called<br />
harnesses. Warp yarns are usually str<strong>on</strong>ger than<br />
filling yarns.<br />
The filling yarn is wound <strong>on</strong>to a bobbin, which<br />
is placed in a c<strong>on</strong>tainer called a shuttle. The shuttle<br />
draws the filling yarn over and under the warp<br />
yarns. As the shuttle goes back and forth, the harness<br />
goes up and down to make room for it. This<br />
Warp yarns<br />
Shuttle<br />
Harnesses<br />
Warp beam<br />
This simplified drawing of a loom shows the basic process of weaving, whether <strong>on</strong> a hand or industrial loom. What<br />
allows the filling yarns to pass through?<br />
space is called the shed. One harness goes up, the<br />
shuttle passes through the shed, and the harness<br />
goes back down. Then the filling yarn is pushed<br />
into place at the fr<strong>on</strong>t of the loom by a beater or<br />
reed. As the shuttle comes back through to the<br />
original side, another harness goes up. As these<br />
up-and-down and back-and-forth moti<strong>on</strong>s c<strong>on</strong>tinue,<br />
the finished fabric rolls <strong>on</strong>to the cloth<br />
beam at the fr<strong>on</strong>t of the loom.<br />
High-speed, computerized looms can produce<br />
over 100 yards of fabric per hour. Instead of a<br />
shuttle, these looms use a stream of water or an<br />
air jet to carry the filling yarn across the shed at<br />
very high speeds. The yarn travels as fast as 200<br />
miles per hour. The harnesses and beaters <strong>on</strong><br />
these looms move faster than the eye can follow.<br />
See Fig. 12-11 <strong>on</strong> page 222.<br />
CHAPTER 12 Fabric C<strong>on</strong>structi<strong>on</strong> • 221
12-11<br />
Computerized looms in industry can produce fab-<br />
rics at amazing speeds. They can be programmed to cre-<br />
ate many complex patterns.<br />
Basic Weaves<br />
Think of all the fabrics you’ve seen in clothing<br />
and home furnishings. These are evidence that<br />
woven fabrics come in many variati<strong>on</strong>s. They<br />
range from very lightweight, open-mesh fabrics<br />
to heavy, firm, tightly woven fabrics.<br />
If you examine a woven fabric closely, you can<br />
see the weave that was used. The three basic<br />
weaves are plain, twill, and satin. Almost all<br />
woven fabrics are based <strong>on</strong> these three weaves.<br />
Plain Weave<br />
The plain weave is the simplest of all weaves.<br />
The filling yarns pass over and under each warp<br />
yarn. The yarns alternate in each row to form an<br />
even, balanced weave. Plain-weave fabrics have<br />
222 • UNIT 4 Fibers and Fabrics<br />
12-12<br />
Plain weave<br />
Basket weave<br />
Ribbed weave<br />
As the most comm<strong>on</strong> weave in fabrics, the plain<br />
weave has a firm c<strong>on</strong>structi<strong>on</strong> that wears well. The plain<br />
surface is good for designs. Here you see a plain weave<br />
and two variati<strong>on</strong>s. What makes the ribbed and basket<br />
weaves different?<br />
no right and wr<strong>on</strong>g sides unless they are printed<br />
or finished differently. The yarns can be tightly or<br />
loosely woven.<br />
Some examples of plain weaves are muslin,<br />
voile, broadcloth, percale, taffeta, and crepe.<br />
Plain-weave fabrics are used for shirts, handkerchiefs,<br />
and sheets.<br />
A ribbed weave is a variati<strong>on</strong> of the plain<br />
weave. Using filling yarns that are thicker than the<br />
warp yarns creates the rib. Poplin and faille are<br />
ribbed fabrics.<br />
A basket weave is another plain-weave variati<strong>on</strong>.<br />
Two or more yarns are grouped side by side<br />
in each directi<strong>on</strong> and woven as <strong>on</strong>e. Oxford cloth<br />
is a basket weave. Fig. 12-12 shows a plain weave<br />
and two variati<strong>on</strong>s.<br />
Twill Weave<br />
You can recognize a twill weave by the parallel,<br />
diag<strong>on</strong>al ridges <strong>on</strong> the fabric surface. In a twill<br />
weave, filling yarns pass over and under <strong>on</strong>e or<br />
more warp yarns. Each successive row shifts to<br />
the right or left to give the diag<strong>on</strong>al line, as shown<br />
in Fig. 12-13.
12-14<br />
Twill<br />
12-13<br />
Many fabrics are made<br />
with the satin weave, including<br />
wool, polyester, cott<strong>on</strong>, and linen.<br />
Note how yarns pass over several<br />
other yarns to produce the floats<br />
<strong>on</strong> the top.<br />
Twill weaves create diag-<br />
<strong>on</strong>al lines <strong>on</strong> fabric. Manufacturers<br />
can make these lines stand<br />
out by using plied yarns and<br />
other techniques.<br />
Satin<br />
Twill weaves are firmer, heavier, and more<br />
durable than plain weaves. Denim, chino, and<br />
gabardine are examples of twill weaves. Twill<br />
weaves are often used for str<strong>on</strong>g, sturdy work<br />
clothes.<br />
Satin Weave<br />
A satin weave has yarns that float <strong>on</strong> the surface<br />
to give it a luster or shine. Either the warp or<br />
the filling yarns pass over four to eight yarns at a<br />
time. The l<strong>on</strong>g floats appear <strong>on</strong> the right side of<br />
the fabric. See Fig. 12-14.<br />
The satin weave creates a smooth surface with<br />
lots of sheen. Satin weaves, however, snag easily.<br />
Satin fabrics are used for blouses, eveningwear,<br />
and bed linens.<br />
12-15<br />
A pile weave is produced with three yarns. In<br />
additi<strong>on</strong> to the warp and filling yarns, another yarn is<br />
added. This yarn creates loops <strong>on</strong> the surface. When cut,<br />
they form the pile.<br />
Pile after cutting<br />
Pile yarn<br />
Warp yarns<br />
Filling yarn<br />
Other Weaves<br />
By changing the way the yarns are interlaced,<br />
different textures, patterns, and designs can be<br />
woven in fabric. Examples are pile, leno, jacquard,<br />
and dobby weaves.<br />
• Pile weave. A raised surface of loops or yarn<br />
ends characterizes a pile weave. The weaving<br />
process uses three sets of yarns. See Fig. 12-15.<br />
The extra yarns are brought to the fabric surface<br />
as loops. For terrycloth the loops are left<br />
uncut. They are cut to form corduroy, velvet,<br />
velveteen, and velour. The back of the fabric<br />
can be a plain, twill, or satin weave. The surface<br />
loops of velvet and velveteen can be sculptured<br />
when cut to form a decorative surface texture.<br />
In most corduroy, the pile yarn is woven in a<br />
striped effect to create the rows. The width of<br />
the pile can range from narrow pinwale to<br />
wide-wale corduroy.<br />
• Leno weave. In this weave the warp yarns<br />
cross and twist between the filling yarns, as<br />
shown in Fig. 12-16. Because the filling yarns<br />
cannot shift, the open or sheer fabrics that<br />
result have good stability. Leno weaves are used<br />
to make open-weave curtains and draperies,<br />
thermal blankets, and netting.<br />
• Dobby weave. Small geometric designs are<br />
woven with a dobby attachment <strong>on</strong> the loom.<br />
In order to produce a more complex pattern,<br />
12-16<br />
With a leno weave, the filling yarns are held<br />
tightly in place by the twists in the warp yarns. To keep<br />
the warp yarns from shifting, an adhesive is used when<br />
finishing some fabrics.<br />
CHAPTER 12 Fabric C<strong>on</strong>structi<strong>on</strong> • 223
12-17<br />
Because wales run<br />
the length of knitted fabric,<br />
they are similar to the warp in a woven fabric. What do<br />
the courses in a knit fabric resemble?<br />
the dobby c<strong>on</strong>trols which harnesses are raised<br />
or lowered. Piqué fabrics are an example of a<br />
dobby weave.<br />
• Jacquard weave. The Jacquard weave produces<br />
very elaborate and detailed designs.<br />
Special looms, c<strong>on</strong>trolled by computers, produce<br />
the intricate designs and combinati<strong>on</strong>s of<br />
weaves. Fabrics woven with jacquard designs<br />
include brocade, damask, and tapestry. These<br />
fabrics are used for table linens, draperies, and<br />
upholstery.<br />
KNIT FABRICS<br />
Like woven fabrics, knit fabrics have a lengthwise<br />
and crosswise directi<strong>on</strong>. In a knit, the<br />
lengthwise rows of stitches are called wales. The<br />
crosswise stitches are called courses. See Fig. 12-<br />
17. A knit usually has a greater degree of stretchability<br />
in <strong>on</strong>e directi<strong>on</strong>. Most knits stretch more<br />
in the crosswise directi<strong>on</strong>.<br />
Because of their stretchability, knits move with<br />
the body. As a result, they are comfortable to<br />
wear. Knits are easy to care for and d<strong>on</strong>’t wrinkle<br />
easily. They can be made in various fibers and<br />
weights and with different c<strong>on</strong>structi<strong>on</strong>s.<br />
The Knitting Process<br />
When fabric is knitted, loops of yarn are pulled<br />
through other loops of yarn to create interlocking<br />
rows. One yarn can form the entire fabric or gar-<br />
224 • UNIT 4 Fibers and Fabrics<br />
ment. Varying the stitches, or loops, creates different<br />
textures and patterns.<br />
Knitting machines can duplicate hand-knitting<br />
stitches and patterns. While hand knitting uses<br />
<strong>on</strong>ly two needles, a knitting machine uses many<br />
more. Each wale in a knitted fabric is produced by<br />
its own needle. A 45-inch-wide fabric could have<br />
as many as 675 wales. This means it would take<br />
675 needles to produce the fabric.<br />
Knitting machines are of two types: flat and<br />
circular. Flat knitting machines produce fabric<br />
with two, l<strong>on</strong>g, finished edges, like the selvage<br />
edges <strong>on</strong> a woven fabric. Compared to circular<br />
machines, flat knitting machines can make more<br />
complex fabrics, such as cable knits. They can<br />
also produce more complex shapes. Full-fashi<strong>on</strong><br />
sweaters, which follow the c<strong>on</strong>tour of the body<br />
more closely, are an example. Where narrowing<br />
occurs, as in the shoulder area, a mark results<br />
when stitches transfer to adjacent needles.<br />
Circular knitting machines produce tubes of<br />
knitted fabric. See Fig. 12-18. The diameter of the<br />
12-18<br />
A sweater that you wear may have been pro-<br />
duced <strong>on</strong> a circular knitting machine.
12-19<br />
tube depends <strong>on</strong> the fabric’s end use. A hosiery<br />
machine, for example, has a smaller diameter<br />
than a sweater machine. Some circular machines<br />
knit the complete item, as d<strong>on</strong>e with socks and<br />
pantyhose. A circular machine produces fabric<br />
faster than a flat machine. Circular knits can also<br />
be cut open and used as flat fabric.<br />
Types of Knits<br />
The two basic knits are weft and warp. Weft<br />
knits are made with <strong>on</strong>ly <strong>on</strong>e yarn. Warp knits are<br />
made with several yarns. Both knits have many<br />
variati<strong>on</strong>s.<br />
Weft Knits<br />
When you knit by hand, you’re making a weft<br />
knit. In the industry, weft knits can be made <strong>on</strong><br />
either a flat or circular knitting machine. Most<br />
weft knits have two-way stretch in both the<br />
lengthwise and crosswise directi<strong>on</strong>s; however,<br />
they can get lengthwise “runs” from broken<br />
threads because of their single-yarn c<strong>on</strong>structi<strong>on</strong>.<br />
The following are three, basic, weft-knit fabrics:<br />
• Jersey knits. These are the most comm<strong>on</strong><br />
weft knits, sometimes called plain knits or single<br />
knits. See Fig. 12-19. The fr<strong>on</strong>t and back<br />
have different appearances. The right side has<br />
vertical wales; the wr<strong>on</strong>g side has crosswise<br />
courses. Because single knits are made with<br />
<strong>on</strong>e set of needles, they have a tendency to curl<br />
at the edges. T-shirts, sports shirts, dresses,<br />
Jersey knits, the most comm<strong>on</strong><br />
weft knits, have all loops drawn to <strong>on</strong>e side<br />
of the fabric. These fabrics stretch about<br />
equally in both directi<strong>on</strong>s.<br />
12-20 Purl knits are weft-knit fabrics.<br />
The courses have an alternating pattern<br />
that draws some stitches to the fr<strong>on</strong>t and<br />
some to the back.<br />
sweaters, and pantyhose are made of jerseyknit<br />
fabrics.<br />
• Purl knits. Purl knits are the same <strong>on</strong> both<br />
sides. See Fig. 12-20. They have crosswise<br />
courses like the wr<strong>on</strong>g side of a jersey knit.<br />
Purl knits stretch in both the lengthwise and<br />
crosswise directi<strong>on</strong>s. They are thicker than jersey<br />
knits and lie flat without curling at the<br />
edges. Most purl knits are used for sweaters.<br />
• Rib knits. Vertical ribs, or columns of<br />
stitches, alternate <strong>on</strong> the fr<strong>on</strong>t and back of<br />
these knits. See Fig. 12-21. Rib knits are used as<br />
neck, wrist, and bottom bands <strong>on</strong> sweaters and<br />
jackets. They lie flat and have greater elasticity<br />
in their width than their length.<br />
12-21<br />
Rib knits are weft-knit fabrics. The wales have<br />
an alternating stitch pattern. In this particular example,<br />
the first two wales are the same, but the sec<strong>on</strong>d two are<br />
different.<br />
CHAPTER 12 Fabric C<strong>on</strong>structi<strong>on</strong> • 225
Specialized weft-knit fabrics include imitati<strong>on</strong><br />
furs, knitted terry, and knitted velour. The<br />
two specialized knits described below are quite<br />
comm<strong>on</strong>:<br />
• Interlock knits. These are a variati<strong>on</strong> of rib<br />
knits. Because the columns of wales are<br />
directly behind each other, the fabrics are<br />
smooth and more stable. They d<strong>on</strong>’t stretch<br />
out of shape. Interlock knits are popular for<br />
blouses, dresses, and dressy T-shirts.<br />
• Double knits. Two yarns and two sets of needles<br />
are used to make these knits. The loops are<br />
drawn through from both directi<strong>on</strong>s. Heavier,<br />
firmer, and sturdier than other knits, double<br />
knits w<strong>on</strong>’t run or ravel. They’re used for a<br />
variety of garments.<br />
Warp Knits<br />
Warp knits are made with several yarns <strong>on</strong> flat<br />
knitting machines. The fabric is c<strong>on</strong>structed by<br />
looping the multiple warp yarns so they interlock.<br />
See Fig. 12-22. Thus, each loop is made with<br />
two yarns. The fabric is usually run-resistant.<br />
• Tricot knits. These knits have very fine, vertical<br />
wales <strong>on</strong> the right side and crosswise<br />
courses <strong>on</strong> the back. They are stable, lie flat,<br />
and d<strong>on</strong>’t run or ravel. Tricot knits are used<br />
primarily for lingerie, underwear, loungewear,<br />
and uniforms. Tricot knitting machines can<br />
produce fabric much faster than weaving or<br />
any other type of knitting.<br />
226 • UNIT 4 Fibers and Fabrics<br />
12-22<br />
Warp knits are made with multiple<br />
yarns that interlock. These knits account for<br />
about 25 percent of knit fabrics.<br />
• Raschel knits. An extra yarn can create a<br />
textured or patterned design in these knits.<br />
Fabrics range from lacy knits, to thermal<br />
underwear, to heavy blankets. Raschel knits<br />
with extra spandex yarns are used in swimwear<br />
and foundati<strong>on</strong> garments.<br />
OTHER FABRIC<br />
CONSTRUCTIONS<br />
Some fabrics are c<strong>on</strong>structed with heat and<br />
moisture, adhesives, or b<strong>on</strong>ding agents. Others<br />
are created with special yarns, designs, or layers.<br />
• N<strong>on</strong>woven fabrics. Interlocking fibers with<br />
heat and moisture or with an adhesive substance<br />
produces n<strong>on</strong>woven fabrics. These fabrics<br />
d<strong>on</strong>’t ravel or fray. They are flexible and<br />
have good shape retenti<strong>on</strong>. They may have<br />
weak areas, however, and may tear easily. Most<br />
n<strong>on</strong>woven fabrics are inexpensive to produce.<br />
As perhaps the oldest known textile, felt is<br />
made by applying heat, moisture, and pressure<br />
to wool fibers or a combinati<strong>on</strong> of wool and<br />
other fibers. The process depends <strong>on</strong> the natural<br />
ability of wool fibers to shrink and lock<br />
together to form a mat. Felt is used primarily<br />
for hats, craft projects, and industrial purposes.<br />
Manufactured fibers can be joined or fused<br />
together with an adhesive or b<strong>on</strong>ding agent.<br />
These n<strong>on</strong>woven fabrics are used for sew-in<br />
and fusible interfacings, disposable surgical<br />
gowns, and disposable diapers.<br />
• Laces and nets. Twisting or looping threads<br />
or yarns together produces laces and nets.<br />
Special machines make very intricate lace<br />
designs for garments and home furnishings.
• Stretch fabrics. Both woven and knitted<br />
fabrics can be made with yarns that have<br />
increased stretchability. These stretch fabrics<br />
use textured yarns or yarns that have been<br />
wrapped around an elastic core. Spandex or<br />
rubber can also be used. Stretch fabrics can be<br />
designed to stretch in the warp directi<strong>on</strong>, the<br />
filling directi<strong>on</strong>, or both. Two-way stretch fabrics<br />
are especially suitable for swimsuits, exercise<br />
wear, and active sportswear. See Fig. 12-23.<br />
• B<strong>on</strong>ded fabrics. Fabrics can be b<strong>on</strong>ded to<br />
other fabrics, vinyl, clear films, or rubberized<br />
coatings. The fabric gains more body or a special<br />
surface. To make simulated leather, vinyl is<br />
b<strong>on</strong>ded to a woven or knitted base.<br />
Rubberized coatings can be added to fabrics<br />
for water repellency.<br />
• Laminated fabrics. These fabrics<br />
have a layer of foam between an<br />
outer fabric and a backing fabric.<br />
They give additi<strong>on</strong>al warmth to outerwear.<br />
• Quilted fabrics. These fabrics<br />
c<strong>on</strong>sist of two layers of fabric with a<br />
batting between them. The three layers<br />
of fabric can be held together with<br />
machine stitching in a decorative pattern<br />
or in rows.<br />
Pins<strong>on</strong>ic quilting holds the layers of fabric<br />
together by heat fusi<strong>on</strong> instead of stitching.<br />
This method has no stitching threads that can<br />
break; however, holes can develop in the fabric<br />
at the point of the heat fusi<strong>on</strong>. Pins<strong>on</strong>ic quilting<br />
is used for bedspreads, mattress pads, and<br />
placemats.<br />
• Fleece fabrics. These knitted polyester fabrics<br />
are shrunk and felted to give them a soft,<br />
thick appearance. Fleece fabrics are<br />
lightweight, warm, and comfortable.<br />
They are machine-washable and dry<br />
quickly. Because fleece is a knit fabric,<br />
there is some stretch, especially<br />
<strong>on</strong> the crosswise grain.<br />
Fleece fabrics are popular<br />
for outerwear garments<br />
such as jackets,<br />
coats, and sweatshirts.<br />
Because<br />
fleece fabrics do<br />
not ravel and the<br />
edges do not<br />
need to be finished,<br />
they are also<br />
popular for p<strong>on</strong>chos,<br />
scarves, and blankets.<br />
12-23<br />
Stretch fabrics are the choice of<br />
many athletes because they allow freedom<br />
of movement.<br />
CHAPTER 12 Fabric C<strong>on</strong>structi<strong>on</strong> • 227
FABRIC<br />
DICTIONARY<br />
12-24<br />
228 • UNIT 4 Fibers and Fabrics<br />
� BATISTE<br />
Soft, sheer plain-weave fabric,<br />
usually a cott<strong>on</strong> blend; blouses,<br />
children’s wear, nightwear.<br />
BOILED WOOL �<br />
Wool knit fabric, rubbed and shrunk;<br />
warm and flexible but not<br />
stretchable; jackets.<br />
BROCADE �<br />
Jacquard-woven fabric with an<br />
elaborate design raised slightly<br />
above the firmly woven background;<br />
evening dresses, upholstery.<br />
CALICO �<br />
Lightweight, plain-weave fabric with<br />
a small printed design; sportswear.<br />
� BROADCLOTH<br />
Closely woven, plain-weave fabric of<br />
cott<strong>on</strong>, wool, or silk; shirts,<br />
sportswear, suits, coats.<br />
� BURLAP<br />
Coarse, rough-textured fabric made<br />
of jute; accessories.<br />
� CANVAS<br />
Str<strong>on</strong>g, heavyweight, plain-weave<br />
fabric of cott<strong>on</strong> or manufactured<br />
fibers; sportswear, accessories,<br />
recreati<strong>on</strong>al items.<br />
CHALLIS �<br />
Lightweight, plain-weave fabric with<br />
a slightly fuzzy, soft finish and a<br />
small floral print; blouses, dresses.
� CHAMBRAY<br />
Plain-weave, cott<strong>on</strong> fabric with<br />
colored warp and white filling yarns<br />
that create a pastel color; shirts,<br />
sportswear.<br />
CHARMEUSE �<br />
Lightweight, satin-weave, silk-like<br />
fabric with a shiny surface; dresses,<br />
blouses, pajamas.<br />
� CHENILLE<br />
Fabric made from chenille yarns,<br />
fuzzy yarns with a surface that<br />
resembles a caterpillar; jackets,<br />
bathrobes, slipcovers, blankets.<br />
CHIFFON �<br />
Soft, very sheer, plain-weave fabric<br />
of silk or manufactured fibers; dressy<br />
clothes, scarves.<br />
� CHINO<br />
Sturdy, medium-weight, twill-weave<br />
fabric of cott<strong>on</strong> or cott<strong>on</strong> blends;<br />
pants, sportswear, uniforms.<br />
CHINTZ �<br />
Plain-weave, glazed-cott<strong>on</strong> fabric;<br />
clothing, curtains, slipcovers.<br />
CREPE �<br />
Fabric with a crinkled surface<br />
created by highly twisted yarns or a<br />
special finish; blouses, dresses,<br />
lingerie.<br />
� CORDUROY<br />
Cut-pile fabric of cott<strong>on</strong> or<br />
manufactured fibers, usually with<br />
rows of pile that vary from narrow to<br />
wide; sportswear, suits, upholstery.<br />
� DAMASK<br />
Heavy, firm, Jacquard-woven fabric<br />
with a slightly raised, glossy design<br />
that is the same <strong>on</strong> both sides of<br />
the fabric; tablecloths, napkins,<br />
draperies, upholstery.<br />
DENIM �<br />
Str<strong>on</strong>g, twill-weave fabric of cott<strong>on</strong><br />
or cott<strong>on</strong> blend, with colored warp<br />
and white filling yarns; jeans,<br />
sportswear.<br />
DOUBLE KNIT �<br />
Sturdy, knitted fabric made with two<br />
sets of needles to produce a double<br />
thickness of fabric; sportswear,<br />
dresses, suits.<br />
EYELET �<br />
Embroidered fabric with open-work<br />
patterns; blouses, dresses, curtains.<br />
� DOTTED SWISS<br />
Crisp, sheer fabric with woven dots;<br />
dresses, curtains.<br />
� DUCK<br />
Durable, plain-weave, cott<strong>on</strong> fabric;<br />
sportswear, upholstery.<br />
� FAILLE<br />
Crosswise-ribbed fabric; dresses,<br />
draperies.<br />
FAKE FUR �<br />
Pile fabric, usually of modacrylic<br />
fibers; looks like animal fur; coats,<br />
hats, upholstery, stuffed toys.<br />
CHAPTER 12 Fabric C<strong>on</strong>structi<strong>on</strong> • 229
FABRIC DICTIONARY<br />
� FELT<br />
N<strong>on</strong>woven fabric created by matting<br />
wool or other fibers with moisture,<br />
heat, and pressure; hats, crafts.<br />
FLANNEL �<br />
Soft, napped fabric of cott<strong>on</strong>, wool,<br />
or ray<strong>on</strong>; shirts, dresses,<br />
nightwear, sheets.<br />
� FLEECE<br />
Warm, lightweight fabric with a thick,<br />
soft pile or nap; jackets, sweat suits,<br />
hats.<br />
GABARDINE �<br />
Str<strong>on</strong>g, medium-weight to<br />
heavyweight, twill fabric of wool or<br />
manufactured fibers; sportswear,<br />
suits, coats.<br />
� GINGHAM<br />
Lightweight to medium-weight, plainweave<br />
cott<strong>on</strong> fabric made of dyed<br />
yarns to create plaids, checks, and<br />
stripes; shirts, dresses, curtains.<br />
JERSEY �<br />
Smooth, lightweight knit; matte<br />
jersey has a dull surface; dresses,<br />
shirts, sportswear, underwear.<br />
230 • UNIT 4 Fibers and Fabrics<br />
� LACE<br />
Decorative, open-work fabric; fancy<br />
blouses, dresses, trims, curtains,<br />
tablecloths.<br />
� LAMÉ<br />
Shiny, metallic fabric made from<br />
yarns that are all metal, metal wound<br />
around a core yarn, plastic-coated<br />
metal, or metal-coated plastic;<br />
eveningwear, accessories.<br />
MADRAS �<br />
Plain-weave, cott<strong>on</strong> fabric in plaid,<br />
checks, or stripes with n<strong>on</strong>-colorfast<br />
dyes that bleed for a faded look;<br />
sportswear.<br />
MUSLIN �<br />
Firm, plain-weave, cott<strong>on</strong> fabric in a<br />
variety of weights; dresses, sheets,<br />
draperies.<br />
� MICROFIBER<br />
An extremely fine, drapable<br />
manufactured fiber that is washable,<br />
breathable, and water repellent;<br />
outerwear, upholstery.<br />
� ORGANDY AND ORGANZA<br />
Crisp, sheer, plain-weave fabrics;<br />
organdy is made from cott<strong>on</strong>,<br />
organza from silk or ray<strong>on</strong>; dressy<br />
clothes, curtains.<br />
OXFORD CLOTH �<br />
Medium-weight, basket-weave or<br />
plain-weave fabric with colored warp<br />
and white filling yarns; shirts.<br />
� PERCALE<br />
Firm, smooth, plain-weave fabric of<br />
cott<strong>on</strong> or cott<strong>on</strong>/polyester blend<br />
that is similar to muslin but woven of<br />
finer yarns; shirts, dresses, sheets.
� PIQUÉ. Medium-weight fabric in a<br />
dobby weave with small geometric<br />
designs, such as bird’s-eye and<br />
h<strong>on</strong>eycomb; dresses, children’s wear.<br />
POPLIN �<br />
Medium-weight, finely ribbed fabric<br />
that is slightly heavier than<br />
broadcloth; sportswear, dresses.<br />
� SAILCLOTH<br />
Very str<strong>on</strong>g, durable, cott<strong>on</strong> fabric<br />
originally used for sails; sportswear.<br />
SATEEN AND SATIN �<br />
Smooth, shiny fabrics woven in a<br />
satin weave; sateen is made from<br />
cott<strong>on</strong>, satin from silk or acetate;<br />
blouses, dresses, evening dresses,<br />
draperies.<br />
� SEERSUCKER<br />
Plain-weave cott<strong>on</strong> or cott<strong>on</strong>-blend<br />
fabric with puckered stripes; summer<br />
suits, sportswear.<br />
SHANTUNG �<br />
Plain-weave fabric of silk or<br />
manufactured fibers with a nubbed<br />
surface; dresses, suits, draperies.<br />
� SUEDE CLOTH<br />
Woven or knitted fabric with a napped<br />
finish that looks like suede; coats,<br />
jackets, upholstery.<br />
TAFFETA �<br />
Crisp, plain-weave fabric that has a<br />
sheen and rustles when it moves;<br />
dressy clothes, ribb<strong>on</strong>.<br />
� TERRYCLOTH<br />
Woven or knitted pile fabric with<br />
uncut loops <strong>on</strong> <strong>on</strong>e or both sides;<br />
robes, beachwear, towels.<br />
TRICOT �<br />
Drapable warp knit with fine vertical<br />
wales <strong>on</strong> the fr<strong>on</strong>t and crosswise ribs<br />
<strong>on</strong> the back; shirts, dresses, lingerie.<br />
� TULLE<br />
Fine, lightweight net; bridal veils,<br />
formal gowns.<br />
TWEED �<br />
Sturdy, plain- or twill-weave fabric<br />
with a nubby surface made from wool<br />
or wool-blends; jackets, suits, skirts,<br />
coats, upholstery.<br />
� VELOUR<br />
Soft, woven or knitted fabric with a<br />
thick pile surface; coats, sportswear,<br />
casual wear.<br />
VELVET AND VELVETEEN �<br />
Lustrous, cut-pile fabrics; velvet is<br />
made of silk or manufactured fibers,<br />
velveteen of cott<strong>on</strong>; jackets, dressy<br />
clothes, robes, draperies,<br />
upholstery.<br />
� VINYL<br />
Woven or knitted fabric coated with<br />
vinyl to look like leather or rubber;<br />
coats, rainwear, upholstery.<br />
VOILE �<br />
Soft, very sheer, plain-weave fabric<br />
similar to organdy and batiste;<br />
blouses, dresses, curtains.<br />
CHAPTER 12 Fabric C<strong>on</strong>structi<strong>on</strong> • 231
CHAPTER 12<br />
CHAPTER SUMMARY<br />
• Fibers are spun into yarns, which are interlaced<br />
or looped to create fabric.<br />
• A fabric’s characteristics are affected by<br />
the type and number of yarns used.<br />
• Fabrics are distinguished by their look,<br />
feel, and c<strong>on</strong>structi<strong>on</strong>.<br />
• Weaving and knitting are the two most<br />
comm<strong>on</strong> methods of fabric c<strong>on</strong>structi<strong>on</strong>.<br />
• Woven fabrics are made by interlacing<br />
lengthwise and crosswise yarns.<br />
• Weaving patterns can be varied to produce<br />
different qualities in fabrics.<br />
• Knit fabrics are made by looping yarns into<br />
interlocking rows.<br />
• The type of knit used affects the qualities<br />
of the fabric.<br />
• Other fabrics are formed by joining fibers<br />
and yarns with heat, moisture, adhesives,<br />
or stitching.<br />
USING KEY TERMS<br />
Dem<strong>on</strong>strate five of the Key Terms for the<br />
class, using <strong>on</strong>e or more fabric samples.<br />
Choose fabric samples that can be cut to separate<br />
the yarns as needed.<br />
232 • UNIT 4 Fibers and Fabrics<br />
Review<br />
RECALLING THE FACTS<br />
1. How can you tell a spun yarn from a filament<br />
yarn?<br />
2. Identify four basic types of yarn and<br />
explain how each is formed.<br />
3. How does texturing improve a fabric’s<br />
feel and performance?<br />
4. What is the main advantage of blending<br />
fibers?<br />
5. Describe four characteristics you can<br />
use to identify fabrics.<br />
6. What determines a fabric’s weave?<br />
7. Why is a satin weave a better choice for<br />
a dressy blouse than a hiking shirt?<br />
8. How does a pile weave differ from the<br />
basic weaves?<br />
9. How are courses and wales related to filling<br />
yarns and warp yarns?<br />
10. How does a purl knit differ from a jersey<br />
knit?<br />
11. Why are double knits sturdier than single<br />
knits?<br />
12. Why are warp knits more run-resistant<br />
than weft knits?<br />
13. Identify and describe four ways to make<br />
fabrics other than knitting and weaving.
and Activities<br />
THINKING CRITICALLY<br />
1. Compare knitting and weaving. How are<br />
they similar and different?<br />
2. Draw c<strong>on</strong>clusi<strong>on</strong>s about the use of<br />
“smart” fabrics in everyday life.<br />
APPLYING KNOWLEDGE<br />
1. Fabric profiles. Collect a variety of fabric<br />
swatches. Mount each <strong>on</strong> an index<br />
card. On the back of the card, write the<br />
fabric’s name, fibers, and type of c<strong>on</strong>structi<strong>on</strong>.<br />
Use the cards for a classroom<br />
game of “Name that Fabric” before<br />
adding them to a class bulletin board.<br />
2. Weaving samples. Using paper strips or<br />
pieces of yarn or string, dem<strong>on</strong>strate<br />
how to create different weaves.<br />
3. Stretchability test. Cut different fabric<br />
samples of equal sizes. Include weaves,<br />
knits, and fabrics made with other c<strong>on</strong>structi<strong>on</strong>s.<br />
Test each sample for stretchability,<br />
both lengthwise and crosswise.<br />
Record the results in a bar graph.<br />
4. Shrinkage and wrinkling. Cut three 4by-4-inch<br />
samples of different fabrics.<br />
Soak <strong>on</strong>e swatch of each fabric in hot<br />
water and <strong>on</strong>e swatch in cold water for<br />
several minutes. Dry flat. Soak the third<br />
swatch in warm water and dry in a dryer.<br />
Compare shrinkage and wrinkle resistance<br />
of the samples. In writing, describe<br />
what c<strong>on</strong>clusi<strong>on</strong>s you can make from<br />
your observati<strong>on</strong>s.<br />
CHAPTER 12<br />
5. Choosing fabrics. Refer to the Fabric<br />
Dicti<strong>on</strong>ary <strong>on</strong> pages 228-231. Based <strong>on</strong><br />
those descripti<strong>on</strong>s and <strong>on</strong> what you know<br />
about fibers, explain which clothing fabrics<br />
you would choose for these purposes:<br />
yard work; school; lounging; athletics;<br />
and prom.<br />
6. Fabric costs. Visit a fabric store to compare<br />
costs of different fabrics. Report<br />
your findings to the class. Discuss why<br />
some fabrics are more costly than others.<br />
MAKING>
CHAPTER 13<br />
Fabric Finishes<br />
OBJECTIVES<br />
• Explain the<br />
different dyeing<br />
processes.<br />
• Describe comm<strong>on</strong><br />
printing<br />
techniques.<br />
• Explain how a<br />
fabric’s texture<br />
can be changed.<br />
• Identify finishes<br />
that improve a<br />
fabric’s<br />
performance.<br />
KEY TERMS<br />
colorfast<br />
dyes<br />
finishes<br />
gray goods<br />
nap<br />
printing<br />
234 • UNIT 4 Fibers and Fabrics
EXAMINETHISISSUE<br />
Finishing costs. As you’ll learn in this<br />
chapter, finishes improve the appearance<br />
and performance of many fabrics.<br />
Through technology, fabrics are gaining<br />
some amazing new capabilities. All of<br />
these special treatments c<strong>on</strong>tribute to the<br />
cost of garments and affect their care<br />
needs. Without them, of course, fabrics<br />
wouldn’t be as colorful, comfortable, and<br />
useful.<br />
What do you think?<br />
As you read about finishes, decide<br />
which are most appealing to you. In your<br />
opini<strong>on</strong>, how do the costs compare with<br />
the benefits?<br />
When fabric first comes from the<br />
loom, it looks nothing like the finished<br />
fabric you see in a shirt, jacket, or<br />
towel. Many of the fabrics have no color; they are<br />
gray or off-white. The warp yarns may have been<br />
stiffened to withstand the strain of weaving. The<br />
fabric may be limp, fuzzy, dull, or very shiny. How<br />
then are fabrics transformed into the beautiful,<br />
colorful, and comfortable materials that you want<br />
to buy and wear? The answer is by adding finishes.<br />
FINISHING PROCESSES<br />
Finishes are any special treatments applied to<br />
improve a fabric’s appearance, texture, or performance.<br />
Every fiber and fabric have certain<br />
favorable and unfavorable qualities. Finishes can<br />
be added to reduce the undesirable characteristics<br />
and improve the desirable <strong>on</strong>es.<br />
Some finishes are added to create a specific<br />
design, such as a stripe or print. Other finishes<br />
offer a softer, firmer, or smoother hand. Many<br />
finishes add a specific property or quality to the<br />
fabric, such as wrinkle resistance. See Fig. 13-1.<br />
Fabric finishes may be permanent or temporary.<br />
While a permanent finish lasts throughout the<br />
life of the fabric, a temporary finish may last<br />
through <strong>on</strong>ly <strong>on</strong>e or two cleanings.<br />
COLOR AND DESIGN<br />
FINISHES<br />
When fabric first comes from the loom, the<br />
lack of color gives it the name gray goods. The<br />
fabric must be cleaned to remove any oils, resins,<br />
gums, or soil that would prevent a finish from<br />
penetrating the fabric. Manufacturers then alter<br />
the appearance of gray goods by dyeing or printing<br />
the fabric.<br />
Dyeing Textiles<br />
Dyes are compounds that penetrate and color<br />
fibers. They can color the entire fabric or create<br />
special designs. For centuries, natural dyes were<br />
obtained from plants, insects, shellfish, and minerals.<br />
The first synthetic dye was discovered by<br />
13-1<br />
You can learn about the finish <strong>on</strong> a garment’s<br />
fabric by reading the labels and hangtags.<br />
CHAPTER 13 Fabric Finishes • 235
ARTIFICIAL FINGER. Just as<br />
you run the fabric of a garment through<br />
your fingers to judge its hand, an evaluator<br />
does the same thing in industry. Textile<br />
researchers hope to replace such costly<br />
testing for manufacturers with an artificial<br />
finger. When this device c<strong>on</strong>tacts fabric, it<br />
sends electr<strong>on</strong>ic signals to a computer,<br />
providing informati<strong>on</strong> similar to what a<br />
human finger would feel. More objective<br />
evaluati<strong>on</strong>s may be made this way.<br />
accident in 1856. Then a whole new industry<br />
developed for textiles.<br />
Textile colorists are c<strong>on</strong>tinually seeking better<br />
dyes for different fibers and blends. Today they<br />
use computers to develop exact formulas for dyeing<br />
different fibers a certain color.<br />
Five different methods are used for dyeing. See<br />
Fig. 13-2. With stock dyeing, natural fibers can be<br />
dyed before they’re spun into yarns. This permits<br />
the spinning of tweed and multicolored yarns.<br />
Soluti<strong>on</strong> dyeing is used when manufactured fibers<br />
are produced. Dye is added to the liquid soluti<strong>on</strong><br />
that goes through the spinnerets. The color<br />
becomes a permanent part of the manufactured<br />
fiber. In yarn dyeing, the yarns are dyed before<br />
13-2<br />
this fabric?<br />
236 • UNIT 4 Fibers and Fabrics<br />
Fashi<strong>on</strong><br />
Facts<br />
What dyeing method do you think was used for<br />
13-3<br />
Here, yarns are dyed before they are woven into<br />
fabric. Most dyes are mixed by computer to produce uni-<br />
form colors.<br />
weaving or knitting. See Fig. 13-3. This is used for<br />
plaids, checks, and stripes. In piece dyeing, fabric<br />
is dyed after weaving or knitting. Manufacturers<br />
store undyed fabric and then dye it a specific<br />
color. With garment dyeing, the fabric is cut and<br />
sewn into the finished product. Then the entire<br />
garment or item is dyed.<br />
Colorfastness<br />
Buying a bright green shirt <strong>on</strong>ly to have it fade<br />
to a dull green is disappointing. If the shirt had<br />
been colorfast, however, the fabric color wouldn’t<br />
have changed. Whether washed or exposed to<br />
chlorine or sunlight, a colorfast fabric doesn’t<br />
fade. The fastness of the color depends <strong>on</strong> the<br />
type of dye, the chemical structure of the fiber,<br />
and the method of applicati<strong>on</strong>. See Fig. 13-4.<br />
Most dyes aren’t colorfast to everything. Some<br />
are more affected by washing, dry cleaning, sunlight,<br />
or perspirati<strong>on</strong>. Some dyes may crock, or<br />
rub off <strong>on</strong>to your skin or other clothing.<br />
Always read the label or hangtag for informati<strong>on</strong><br />
about colorfastness. You can’t tell how stable<br />
a color is by looking at the fabric.<br />
Manufacturers select dyes that are most suitable<br />
to the fiber c<strong>on</strong>tent and the intended use of<br />
a fabric. Children’s clothes and sportswear, for<br />
example, need to hold their color through many<br />
washings. For draperies, upholstery, and carpets,
13-4<br />
fastness of dyes.<br />
This textile lab technician is testing the color-<br />
fastness to sunlight is important. Swimwear<br />
needs to be colorfast with exposure to sunlight,<br />
washing, and chlorine.<br />
On the other hand, some fabrics are designed<br />
to fade or bleed. Many buyers like the denim jeans<br />
that are meant to lighten when washed. Madras, a<br />
woven plaid fabric, is supposed to bleed so the<br />
plaid becomes softer and less distinct.<br />
Printing Textiles<br />
What makes a fabric beautiful? For many people<br />
it’s the design. Through printing, color is<br />
transferred to the surface of a fabric to form a pattern.<br />
Fabrics can be printed in a number of ways.<br />
Some printing techniques are very old and still<br />
used by crafts people today. The textile industry,<br />
however, uses high-speed, electr<strong>on</strong>ic machines for<br />
textile printing. See Fig. 13-5. Some specialty fabrics,<br />
such as scarves and evening gowns, may be<br />
printed by hand.<br />
Four of the most comm<strong>on</strong> printing methods<br />
are screen, rotary screen, roller, and heat transfer.<br />
Other methods, which you can try yourself, are<br />
tie-dyeing and painting. See page 238.<br />
• Screen printing. With this method, fabric or<br />
metal mesh screens are stretched <strong>on</strong> frames. A<br />
separate screen is prepared for each color in<br />
the design. Once the design is traced <strong>on</strong>to a<br />
screen, all areas that aren’t part of the color to<br />
be printed are blocked out with a special coating.<br />
The colors are then pressed through the<br />
screens <strong>on</strong>to the fabric, using a squeegee or<br />
roller. Large designs, especially those used <strong>on</strong><br />
fabrics for home furnishings, can be printed<br />
this way.<br />
• Roller printing. A roller printing press c<strong>on</strong>tains<br />
circular rollers, or printing plates, <strong>on</strong>e for<br />
each color in a design. Each roller is chemically<br />
etched with the pattern part for a particular<br />
color, leaving high and low areas <strong>on</strong> the rollers.<br />
The raised secti<strong>on</strong>s of the roller pick up the<br />
desired color. As the fabric passes through the<br />
press and makes c<strong>on</strong>tact with the raised secti<strong>on</strong>s<br />
of each roller, the pattern prints. The different<br />
areas of color combine to form the completed<br />
design.<br />
13-5<br />
Fabric patterns can be designed by computer<br />
and automatically programmed into the printing press.<br />
CHAPTER 13 Fabric Finishes • 237
How To…<br />
CREATE PRINTED FABRIC<br />
Machines print fabric with colors and designs, but you can too. Painting and tie-dying are<br />
popular hand-printing techniques that produce beautiful results. Both can be d<strong>on</strong>e <strong>on</strong> flat<br />
fabric or finished garments.<br />
Painting Fabric<br />
Fabric paints include glitter, glow-in-the-dark, flat, and threedimensi<strong>on</strong>al.<br />
Brush-<strong>on</strong> paints give a soft look. Squeeze-tube paints<br />
provide an outline effect. Marker paints are easy to use. Follow<br />
these guidelines:<br />
• Check paint instructi<strong>on</strong>s for fabric recommendati<strong>on</strong>s. Many<br />
paints work best <strong>on</strong> cott<strong>on</strong>-and-polyester blends.<br />
• Wash the fabric, but d<strong>on</strong>’t use a fabric softener.<br />
• For a work surface, cover a piece of cardboard with a plastic<br />
trash bag or dry cleaner’s bag. Place the covered cardboard inside the garment to prevent paint from seeping through to the reverse side. Hold the<br />
cardboard in place <strong>on</strong> the inside of the garment with masking tape.<br />
• Follow the paint manufacturer’s instructi<strong>on</strong>s for garment care. Waiting at least 48 hours before laundering a newly painted fabric is typical.<br />
Tie-Dye Patterns<br />
Different patterns result from the way you tie fabric.<br />
• Large sunburst pattern. Pull up the center<br />
secti<strong>on</strong> of fabric and space the ties a few inches apart down the<br />
length of the fabric.<br />
• Small designs. Space<br />
the ties evenly around the fabric.<br />
• Special effect. Push<br />
the center of each knot<br />
through to the other side<br />
before tying.<br />
• Wide band. Use<br />
many strings or rubber<br />
bands close together.<br />
238 • UNIT 4 Fibers and Fabrics<br />
Tie-Dyeing Fabric<br />
To tie-dye, fabric is bound with string or rubber bands in certain<br />
places, then dipped into dye. The dye doesn’t penetrate the spots<br />
where the fabric is held tightly together. After dyeing the first<br />
color, the fabric can be retied and dipped in a different color.<br />
Repeating creates more complicated designs. Fabrics made of<br />
100-percent cott<strong>on</strong> work best, but a blend of cott<strong>on</strong> and polyester<br />
can be used successfully.<br />
Exploring Hand-<br />
Printing<br />
Try painting or tie-dying a<br />
T-shirt. Create your own original<br />
design or use an existing <strong>on</strong>e<br />
for inspirati<strong>on</strong>.
• Rotary screen printing. This method combines<br />
the advantages of screen printing and<br />
roller printing. It’s faster than screen printing<br />
and can produce more than 3,500 yards per<br />
hour. The rotary screens, made from metal<br />
foil, are less costly than the copper engraved<br />
rollers used in roller printing.<br />
• Heat-transfer printing. With this method,<br />
designs, insignias, and words are transferred<br />
<strong>on</strong>to fabric. First, a paper pattern for the<br />
design is printed with heat-sensitive dyes. The<br />
design appears in reverse <strong>on</strong> the pattern. When<br />
the pattern is placed face down <strong>on</strong> the fabric<br />
and heat is applied, the design transfers to the<br />
fabric. See Fig. 13-6.<br />
TEXTURE AND<br />
PERFORMANCE FINISHES<br />
A pair of jeans may be comfortable enough to<br />
wear all day l<strong>on</strong>g. A party dress has a sheen that<br />
sparkles in the mo<strong>on</strong>light. A shirt goes right from<br />
the dryer to the hanger, with no need for ir<strong>on</strong>ing.<br />
All of these result from special fabric finishes that<br />
affect both texture and performance, making garments<br />
more enjoyable to wear.<br />
Texture Finishes<br />
Most fabrics have some type of finish that<br />
improves surface texture and hand. Additi<strong>on</strong>al<br />
13-6<br />
Transfer printing uses heat to switch a design<br />
from the paper to the fabric. How does the design <strong>on</strong> the<br />
pattern compare to the finished design?<br />
benefits are improving the comfort and performance<br />
of the fabrics.<br />
• Calendering. Fabric passes between two<br />
heated rollers that smooth the fabric and<br />
improve the luster.<br />
• Glazing. A resin is applied during calendering<br />
to produce a high polish or glaze <strong>on</strong> the surface<br />
of the fabric. Chintz is a glazed fabric.<br />
• Embossing. Fabric is given a raised design <strong>on</strong><br />
the surface when it’s calendered with rollers<br />
engraved with the design.<br />
• Ciré (suh-RAY). A super-glossy finish is<br />
obtained by applying wax or some other substance<br />
before calendering. Ciré nyl<strong>on</strong> is sometimes<br />
used for lightweight jackets.<br />
• Moiré (mwah-RAY). A watered or wavy pattern<br />
is obtained by calendering two layers of<br />
fabric slightly off grain. Moiré fabric is used<br />
for eveningwear.<br />
• Napping. Rotating wire brushes raise the<br />
short fiber ends of staple yarns to create a soft<br />
and fuzzy surface called nap. The nap looks<br />
different when viewed from different directi<strong>on</strong>s.<br />
Flannel is a napped fabric. p 494<br />
• St<strong>on</strong>e washing and acid washing. Pumice<br />
st<strong>on</strong>es, sometimes dampened with an oxidizing<br />
bleach, are added to a mass-producti<strong>on</strong>, laundering<br />
process. They provide the abrasi<strong>on</strong> that<br />
makes denim garments appear worn and partially<br />
faded. The garments also become softer<br />
and more comfortable to wear. See Fig. 13-7.<br />
13-7<br />
washed jeans.<br />
Many people like the look and feel of st<strong>on</strong>e-<br />
CHAPTER 13 Fabric Finishes • 239
• Mercerizati<strong>on</strong>. This finish gives cott<strong>on</strong><br />
added luster, strength, and drapability. It also<br />
improves the fiber’s affinity for dye. Fabrics<br />
and yarns are treated with a caustic soda or lye<br />
soluti<strong>on</strong>. This is <strong>on</strong>e of the few finishes applied<br />
before dyeing.<br />
• Sizing. Starches or resins are added to the<br />
fabric for extra body. Sizing is usually <strong>on</strong>ly a<br />
temporary finish.<br />
Performance Finishes<br />
Sometimes a fabric’s performance results from<br />
the fibers used. For even better performance,<br />
however, many different finishes are applied to<br />
fabrics. Read care labels and follow manufacturer’s<br />
recommendati<strong>on</strong>s so that a fabric’s finish<br />
is not diminished or destroyed.<br />
• Antibacterial or antiseptic. This finish<br />
checks the growth of bacteria and fungi, such<br />
as mold and mildew. Germs that cause odor,<br />
disease, and infecti<strong>on</strong> are reduced or even prevented.<br />
Brand names include Sanitized ® and<br />
Microban ® .<br />
• Antistatic. Some fabrics cling due to static<br />
electricity. By absorbing small amounts of<br />
moisture from the air, this finish reduces the<br />
fabric dryness that causes static electricity.<br />
• Crease-resistant. Comm<strong>on</strong>ly known as<br />
CRF, these resin finishes help fabrics resist<br />
wrinkling. They are most often applied to fabrics<br />
made from fibers that wrinkle easily,<br />
including cott<strong>on</strong>, ray<strong>on</strong>, and flax.<br />
• Durable press. This is a descriptive term for<br />
garments that maintain a pressed appearance<br />
despite repeated washings and wearings.<br />
Through heat setting, resin curing, or an<br />
amm<strong>on</strong>ia process, the fabric fibers are stabilized.<br />
The fabric resists wrinkling during wear,<br />
and the garment maintains its shape, pleats,<br />
and creases. When washed and dried by<br />
machine, the garment needs little or no ir<strong>on</strong>ing.<br />
Any wrinkles tend to flatten or disappear<br />
after the garment hangs for a while. Apparel<br />
made of 100 percent cott<strong>on</strong> and treated by this<br />
process may be described as “wrinkle free,”<br />
“wrinkle-resistant,” or “no ir<strong>on</strong>.”<br />
240 • UNIT 4 Fibers and Fabrics<br />
In advertisements and articles, you may see<br />
the term permanent press used, especially for<br />
cott<strong>on</strong> and polyester blends. Fabric experts<br />
prefer the term durable press. This means that<br />
with proper care, the fabric or garment will<br />
perform as expected. If care instructi<strong>on</strong>s are<br />
not followed, however, some wrinkling may<br />
occur. The word permanent implies that wrinkling<br />
never occurs.<br />
• Flame-resistant and flame-retardant.<br />
These finishes reduce flaming and burning in<br />
fabrics that have been exposed to a flame or<br />
high heat. They are used <strong>on</strong> children’s sleepwear<br />
and other clothing. See Fig. 13-8. Special<br />
care may be needed to maintain the finish.<br />
• Mothproof. To repel moths and other fibereating<br />
insects, this finish is widely used <strong>on</strong><br />
wool fibers. It’s added when fabric is dyed.<br />
• Shrinkage c<strong>on</strong>trol. These finishes d<strong>on</strong>’t<br />
guarantee that no shrinkage will occur. Instead,<br />
shrinkage should be minimal, even after<br />
repeated launderings. The term Sanforized ®<br />
assures that the fabric w<strong>on</strong>’t shrink more than<br />
<strong>on</strong>e percent in washing. Washable wool fabrics<br />
have been treated to prevent shrinkage when<br />
laundered as directed <strong>on</strong> the label. If a fabric is<br />
labeled as preshrunk, a shrinkage process has<br />
been applied. p 490<br />
13-8<br />
Federal law requires flame-retardant fabrics for<br />
children’s sleepwear.
Technology Trends<br />
>>HIGH-PERFORMANCE FINISHES<br />
What’s new in fabric finishes? The latest<br />
developments are fascinating.<br />
• Stain repellency. Hikers and campers<br />
can now wear waterproof jackets and<br />
pants for days without telltale smudges.<br />
Fabrics treated with NanoSphere ® —— a<br />
finish of minuscule silic<strong>on</strong>-based particles——repel<br />
mud, grease, oil, and food<br />
stains. The finish doesn’t change the<br />
feel or breathability of the fabric.<br />
• N<strong>on</strong>stick garments. A Tefl<strong>on</strong> ®<br />
surface <strong>on</strong> fabrics helps repel<br />
dirt and water, making it<br />
useful for outerwear. The finish<br />
forms a molecular b<strong>on</strong>d<br />
with the fiber. Tefl<strong>on</strong> ® yarns<br />
in socks and hosiery reduce<br />
fricti<strong>on</strong> between sock and skin.<br />
• Soil release. Fabrics made from manufactured<br />
fibers or treated with a durable-press finish<br />
often retain soil and oily stains. With soilrelease<br />
finishes, dirt and stains remove more<br />
easily from fabrics. Most are durable through<br />
40 or 50 launderings.<br />
• Water- and stain-repellent. These finishes<br />
help fabrics repel water- and oil-based<br />
stains. The yarns are coated with a chemical<br />
that resists water and other liquids. Drops<br />
remain <strong>on</strong> the fabric surface in a small bead<br />
rather than being absorbed immediately, as<br />
shown <strong>on</strong> page 242. Because the repellent is<br />
applied to the yarns, rather than the whole<br />
fabric, the fabric remains porous so air and<br />
body moisture can pass through. The fabrics,<br />
however, eventually become wet. The repel-<br />
• Speed enhancement. Competitive swimmers<br />
like the neck-to-ankle bodysuits<br />
that improve performance. One specially<br />
designed fabric is a Lycra® spandex blend<br />
that is fed through compressi<strong>on</strong> rollers to<br />
make it thinner and lighter. Heating the<br />
fabric provides a smooth, flat finish.<br />
Finally, the fabric is coated with a waterrepellent<br />
finish that minimizes drag.<br />
• Allergy protecti<strong>on</strong>. Eventually, an antidust-mite<br />
fabric impregnated with a<br />
small amount of a special pesticide<br />
may be available. Potential uses<br />
are sheets, pillowcases, and<br />
quilts.<br />
INVESTIGATE<br />
One manufacturer coats fabric to make<br />
it change color according to your mood.<br />
Find other examples of how finishes are<br />
expanding the functi<strong>on</strong>s of fabric.<br />
lent finish may need renewal when the garment<br />
is dry-cleaned. In additi<strong>on</strong> to clothing,<br />
these finishes are often used <strong>on</strong> table linens<br />
and upholstery fabrics. A widely used repellent<br />
is Scotchguard ® .<br />
• Waterproof. These finishes keep the fabric<br />
and the wearer dry. Waterproof fabrics have<br />
been coated or treated so that no water penetrates.<br />
Since the fabric has been made n<strong>on</strong>porous,<br />
it may be uncomfortable to wear. New,<br />
microporous, waterproof finishes allow body<br />
moisture to escape, while not allowing water to<br />
penetrate. GoreTex ® is a widely used, breathable,<br />
waterproof fabric.<br />
CHAPTER 13 Fabric Finishes • 241
CHAPTER 13<br />
CHAPTER SUMMARY<br />
• Finishes are applied to improve a fabric’s<br />
appearance, texture, and performance.<br />
• Some finishes are permanent and some<br />
are temporary.<br />
• Some finishes add color or designs to<br />
fibers or fabrics.<br />
• Texture finishes change a fabric’s look,<br />
feel, and hand.<br />
• Performance finishes make fabrics easier<br />
to care for and more useful.<br />
• Some finishes can be diminished or<br />
destroyed by improper fabric care.<br />
USING KEY TERMS<br />
Working with a partner, list the Key Terms in a<br />
column <strong>on</strong> a sheet of paper. For each Key<br />
Term, point out ways that it is dem<strong>on</strong>strated<br />
in the fabrics you see around you. Note specific<br />
examples. Which Key Term will have no<br />
examples? Why?<br />
242 • UNIT 4 Fibers and Fabrics<br />
Review<br />
RECALLING THE FACTS<br />
1. What is the difference between a permanent<br />
and a temporary finish?<br />
2. Why are gray goods cleaned before<br />
finishing?<br />
3. Name and describe five dyeing<br />
processes.<br />
4. When is coloring added in stock dyeing?<br />
In piece dyeing?<br />
5. Do colorfast fabrics ever fade? Explain.<br />
6. How are screens used in screen printing?<br />
7. What are the advantages of rotary<br />
screen printing, compared to other<br />
methods?<br />
8. How are glazing and ciré similar and<br />
different?<br />
9. How is a fabric texture changed in<br />
embossing? In napping?<br />
10. Why are fabrics mercerized before<br />
dyeing?<br />
11. What are the benefits of applying a<br />
durable-press finish?<br />
12. What is the difference between waterrepellent<br />
and waterproof?<br />
13. How has technology improved waterproof<br />
finishes?
and Activities<br />
THINKING CRITICALLY<br />
1. Why do you think a temporary finish<br />
might be added to a fabric?<br />
2. What finishes would be most useful for a<br />
pair of sweat socks? Why?<br />
3. Why is it useful to know the type of finishes<br />
applied to a garment when shopping<br />
for clothes?<br />
APPLYING KNOWLEDGE<br />
1. Finishes and care. Bring in examples of<br />
fabric descripti<strong>on</strong>s and care instructi<strong>on</strong>s<br />
from fabric bolts. Share and discuss<br />
these in class. What relati<strong>on</strong>ships can<br />
you see between certain finishes and the<br />
care needs of the fabric?<br />
2. Choosing finishes. Cut a shirt shape<br />
from a large note card or draw <strong>on</strong>e <strong>on</strong><br />
paper. Decide what type of shirt this will<br />
be. Then choose a fiber c<strong>on</strong>tent and finishes<br />
that suit the garment’s use. Explain<br />
your choices to the class.<br />
3. Fabric dyes. Examine the usage directi<strong>on</strong>s<br />
<strong>on</strong> liquid and powder fabric dyes in<br />
a store. What fabrics can and cannot be<br />
dyed successfully? What cauti<strong>on</strong>s are<br />
listed <strong>on</strong> the labels? Summarize your<br />
findings in a written or oral report.<br />
4. Garment finishes. Working with a classmate,<br />
look through catalogs for descripti<strong>on</strong>s<br />
of garments which menti<strong>on</strong> a type<br />
of texture or performance finish.<br />
Summarize your findings in a chart or<br />
create a poster display of actual catalog<br />
descripti<strong>on</strong>s.<br />
CHAPTER 13<br />
5. Water repellency. Collect different types<br />
of outdoor apparel, including sweatshirts,<br />
jackets, windbreakers, and umbrellas.<br />
Using an eyedropper or small measuring<br />
spo<strong>on</strong>, place droplets of water <strong>on</strong> each<br />
item. How does the water behave <strong>on</strong><br />
each article? How l<strong>on</strong>g does it take for<br />
any water to be absorbed? Summarize<br />
your observati<strong>on</strong>s in a short paper.<br />
MAKING>
<str<strong>on</strong>g>Care</str<strong>on</strong>g>ers<br />
Textile Producti<strong>on</strong><br />
Imagine looking in <strong>on</strong> a modern textile<br />
mill. Row after row of colorful c<strong>on</strong>es hold yarns<br />
that twine through the intricate machinery. At<br />
rapid speeds the yarns are drawn into the weaving<br />
or knitting machines, where fabrics in beautiful<br />
patterns swiftly emerge to be used for apparel,<br />
accessories, or home fashi<strong>on</strong>s.<br />
Weaving and knitting are not the <strong>on</strong>ly jobs handled<br />
by textile mills today. Many are vertically integrated,<br />
which means they produce the yarns and<br />
apply the finishes, in additi<strong>on</strong> to manufacturing the<br />
fabrics. Most textile mills in the United States stretch<br />
through the New England states and down into the<br />
Carolinas. Many exist in other countries.<br />
The people who work in textile producti<strong>on</strong> make<br />
up the largest segment of the textile industry. People<br />
typically rotate <strong>on</strong> the various shifts to keep the mill<br />
running around the clock. <str<strong>on</strong>g>Care</str<strong>on</strong>g>ers that cover a wide<br />
range of resp<strong>on</strong>sibilities c<strong>on</strong>tribute to the mill’s operati<strong>on</strong>—everything<br />
from chemists in laboratories to<br />
those who keep the machinery whirring.<br />
Think about all the fabrics you see<br />
around you every day, and you will<br />
realize the scope of textile producti<strong>on</strong>.<br />
In textile mills, machines run at<br />
high speeds turning out fabrics in a<br />
wide array of colors and patterns.<br />
244 • UNIT 4 Fibers and Fabrics<br />
IS THIS FIELD FOR YOU?<br />
Textile producti<strong>on</strong> encompasses a wide range of<br />
careers. If you asked what qualities each pers<strong>on</strong><br />
brings to the job, however, workers in these fields<br />
are apt to agree with the statements below.<br />
• I pay attenti<strong>on</strong> to detail.<br />
• I’m interested in the process by which things<br />
happen.<br />
• I have a str<strong>on</strong>g sense of self-directi<strong>on</strong>.<br />
• I like to take charge of my envir<strong>on</strong>ment.<br />
• I enjoy seeing how my efforts c<strong>on</strong>tribute to a<br />
group’s success.<br />
• I can balance several tasks at <strong>on</strong>ce.
Educati<strong>on</strong> and Training<br />
Although a high-school diploma lands some jobs<br />
in textile producti<strong>on</strong>, employers often look for technical<br />
training or related experience. For a machine<br />
operator, an associate’s degree that focuses <strong>on</strong> computer<br />
skills and electr<strong>on</strong>ics is useful. A textile engineer<br />
prepares with a bachelor’s degree, studying textile<br />
machinery and the effects of mechanical forces<br />
<strong>on</strong> fibers. A textile scientist may have a doctorate in<br />
analytical chemistry and possibly years of teaching<br />
and research experience.<br />
Many firms have management training programs<br />
for new employees, starting with summer internships<br />
for promising college seniors. A course in company<br />
management methods is first. By rotating assignments<br />
in different areas of the plant, a candidate<br />
learns about the jobs and machinery. Seminars with<br />
experienced managers and technicians further prepare<br />
employees for leadership positi<strong>on</strong>s.<br />
Possible <str<strong>on</strong>g>Care</str<strong>on</strong>g>er Paths<br />
In textile producti<strong>on</strong> a pers<strong>on</strong>’s career path can<br />
branch in different directi<strong>on</strong>s. A machine operator<br />
with a two-year degree might advance to line supervisor.<br />
By adding a four-year degree in chemical engineering,<br />
the operator could become a manufacturing<br />
THE SKILLS YOU NEED<br />
Running heavy machinery and running scientific<br />
experiments may seem like vastly different<br />
jobs; however, both are likely to require<br />
the following comm<strong>on</strong> skills:<br />
• Problem solving<br />
• Analytical thinking<br />
• Communicati<strong>on</strong><br />
• Teamwork<br />
• Eye-hand coordinati<strong>on</strong><br />
• Record keeping<br />
• Attenti<strong>on</strong> to detail<br />
producti<strong>on</strong> engineer who supervises an entire range<br />
of producti<strong>on</strong> processes. With sales training, a pers<strong>on</strong><br />
who has line and supervisory experience could take a<br />
different path. By becoming a machinery manufacturer’s<br />
representative, the employee could train line<br />
operators to use new equipment.<br />
Similar paths run through other areas of textile<br />
producti<strong>on</strong>. A chemical engineer may work <strong>on</strong> a new<br />
process for extruding polyester. Some years later that<br />
pers<strong>on</strong> may be the product engineer who oversees<br />
such a project, from research and development, to<br />
patenting, to marketing.<br />
Higher educati<strong>on</strong> increases the<br />
chances for moving a career forward,<br />
since advanced skills transfer more<br />
readily to related fields. A textile<br />
chemist, for example, may leave the<br />
laboratory to work as a county extensi<strong>on</strong><br />
agent who advises c<strong>on</strong>sumers <strong>on</strong><br />
clothing care.<br />
Effective communicati<strong>on</strong> between super-<br />
visors and employees helps keep textile<br />
producti<strong>on</strong> going.<br />
UNIT 4 Fibers and Fabrics • 245
Choosing a Textile<br />
Producti<strong>on</strong> <str<strong>on</strong>g>Care</str<strong>on</strong>g>er<br />
CHEMICAL TECHNICIAN | ENVIRONMENTAL ENGINEER | MACHINE OPERATOR<br />
| PROCESS ENGINEER | PRODUCT DEVELOPMENT MANAGER<br />
| RESEARCH SCIENTIST | TEXTILE CHEMIST<br />
| TEXTILE CONVERTER | YARN TECHNICIAN<br />
Textile Chemist __<br />
By studying the molecular structure of fibers,<br />
textile chemists learn how fibers behave when<br />
woven, dyed, finished, and washed. As part of their<br />
work, chemists perform experiments and write<br />
reports. Textile chemists work for chemical companies,<br />
fiber manufacturers, textile mills, and private<br />
testing labs. They often do research in university<br />
laboratories.<br />
Through research and development, chemists<br />
create manufactured fibers with particular characteristics.<br />
A textile chemist’s work may join with<br />
other branches of science. Examples are the<br />
chemists who develop recyclable fibers and those<br />
who are trying to devise fabrics that deliver medicati<strong>on</strong>s<br />
through the wearer’s skin. Chemists sometimes<br />
serve as c<strong>on</strong>sultants, helping others solve<br />
problems.<br />
246 • UNIT 4 Fibers and Fabrics<br />
Textile C<strong>on</strong>verter _<br />
Textile c<strong>on</strong>verters specialize in applying designs,<br />
textures, and other finishes to fabrics. As the “middlemen”<br />
of the textile industry, they buy unfinished<br />
fabric from textile mills and turn it into fabrics for<br />
apparel and home fashi<strong>on</strong> manufacturers.<br />
Most c<strong>on</strong>verters are small operators who work<br />
quickly to supply last-minute orders. They must<br />
stay up-to-date <strong>on</strong> the latest trends in colors, patterns,<br />
textures, and finishes. By understanding how<br />
the fashi<strong>on</strong> industry operates, they are better able<br />
to anticipate demands. Because they fill smaller<br />
orders than large textile mills, they have a special<br />
role in the global marketplace.<br />
Chemical Technician<br />
Chemical technicians, also called process technicians,<br />
do much of the daily work in the research<br />
lab. They set up and run experiments. For example,<br />
they might test the damaging effects of heat and<br />
light <strong>on</strong> nyl<strong>on</strong>. Technicians record results, interpret<br />
data, and may suggest c<strong>on</strong>clusi<strong>on</strong>s. They keep careful<br />
notes <strong>on</strong> every step and each development.<br />
Greater use of computers and robotics has<br />
changed the technician’s job in recent years. The<br />
technician who skillfully uses the latest mass spectrometer<br />
may suggest and carry out better ways to<br />
use and care for this equipment.<br />
A textile chemist might determine the<br />
best dyeing methods for a certain fiber.
Here, a quality c<strong>on</strong>trol<br />
worker surveys a textile<br />
spinning operati<strong>on</strong>.<br />
Machine Operator<br />
In a textile mill, trained machine operators create<br />
fibers, yarns, and fabrics by extruding, spinning,<br />
weaving, knitting, printing, and dyeing. Using<br />
a computer, each operator oversees multiple<br />
machines, such as padding machines, treating<br />
tanks, dye jigs, and vats. The operator prepares a<br />
specific set of machines for producti<strong>on</strong> and corrects<br />
or reports any problems during a run.<br />
As an example, a loom operator checks and<br />
adjusts the timing <strong>on</strong> each machine. Then, using<br />
sophisticated computer programs, the operator<br />
quickly threads the harnesses with the yarns for<br />
the pattern. The operator keeps the machine supplied<br />
with yarn, stopping to repair any breaks.<br />
Machine operators <strong>on</strong> the producti<strong>on</strong> line show initiative<br />
as they work with others to solve problems<br />
and improve processes.<br />
Envir<strong>on</strong>mental<br />
Engineer _____<br />
Envir<strong>on</strong>mental engineers use knowledge of scientific<br />
and mathematical principles to prevent or<br />
solve envir<strong>on</strong>mental problems caused by building<br />
and running the plant. An engineer might redesign<br />
a textile mill’s steam producti<strong>on</strong> system so it uses<br />
less water from a nearby river. Engineers have<br />
shown denim manufacturers how to recover and<br />
reuse indigo dye. Other engineers have found a way<br />
to capture and pipe methane gas from a landfill to<br />
fuel a mill’s operati<strong>on</strong>s.<br />
Envir<strong>on</strong>mental engineers are a textile company’s<br />
link to outside groups and programs. An engineer<br />
might serve <strong>on</strong> <strong>on</strong>e of the industry’s envir<strong>on</strong>mental<br />
protecti<strong>on</strong> boards or present a plan to reduce the<br />
chemicals released in the factory’s wastewater.<br />
CAREER APPLICATIONS<br />
1. Internships. Research internship opportunities<br />
in the textile producti<strong>on</strong> field. Find out how<br />
people can take advantage of these opportunities,<br />
what preparati<strong>on</strong>s must be made, and<br />
where they fit into a student’s studies. Write a<br />
report of your findings.<br />
2. FCCLA. Research the effects that educati<strong>on</strong><br />
and training have <strong>on</strong> career opti<strong>on</strong>s and<br />
advancement in the textile industry. Present<br />
your findings in an Illustrated Talk.<br />
3. Professi<strong>on</strong>alism. You’re interviewing for an<br />
entry-level job in a textile mill. The interviewer<br />
asks you this questi<strong>on</strong>: “In our company we<br />
look for people who will carry out their work<br />
with a high level of professi<strong>on</strong>alism. What qualities<br />
do you have that show you’re that kind of<br />
pers<strong>on</strong>?” What qualities will you list for the<br />
interviewer and what reas<strong>on</strong>s will you give for<br />
including them?<br />
UNIT 4 Fibers and Fabrics • 247
UNIT 5<br />
Clothing<br />
<str<strong>on</strong>g>Care</str<strong>on</strong>g><br />
248 • UNIT 5 Clothing <str<strong>on</strong>g>Care</str<strong>on</strong>g>
CHAPTERS<br />
14 Clothing <str<strong>on</strong>g>Care</str<strong>on</strong>g> Basics<br />
15 Laundry and Dry Cleaning<br />
16 Redesign, Repair, and Recycle<br />
FEATURE<br />
Fashi<strong>on</strong> Services <str<strong>on</strong>g>Care</str<strong>on</strong>g>ers<br />
249
CHAPTER 14<br />
Clothing <str<strong>on</strong>g>Care</str<strong>on</strong>g> Basics<br />
OBJECTIVES<br />
• Explain how to<br />
care for clothing<br />
<strong>on</strong> a routine basis.<br />
• Choose the best<br />
methods for<br />
removing specific<br />
stains.<br />
• Give examples of<br />
the informati<strong>on</strong> <strong>on</strong><br />
care labels.<br />
• Describe how to<br />
store clothing<br />
effectively.<br />
KEY TERMS<br />
enzymes<br />
fabric care symbols<br />
pressing<br />
pretreating<br />
prewash soil-andstain<br />
remover<br />
tumble dry<br />
250 • UNIT 5 Clothing <str<strong>on</strong>g>Care</str<strong>on</strong>g>
EXAMINETHISISSUE<br />
Learning to be organized. “I’m<br />
not an organized pers<strong>on</strong>; it’s just not me,”<br />
<strong>on</strong>e teen explained. Many people feel the<br />
same way. They d<strong>on</strong>’t mind disorder and<br />
learn to live with it. Other people prefer<br />
order. They like the way it feels and<br />
believe they save time when their life and<br />
possessi<strong>on</strong>s are in order.<br />
What do you think?<br />
What role does order play in your life?<br />
As you read this chapter, you’ll see suggesti<strong>on</strong>s<br />
for an organized approach to<br />
clothing care. Do you think most people<br />
can learn these habits?<br />
You just washed your shirt, but the<br />
stain is still there. You’re getting ready to<br />
go out, but the pants you planned to wear<br />
have a ripped seam. You want your favorite<br />
sweater, but it’s lost somewhere in a cluttered<br />
room. Do any of these situati<strong>on</strong>s sound familiar?<br />
If so, this chapter has some ideas that can help<br />
you.<br />
ROUTINE CARE<br />
Resp<strong>on</strong>sible clothing care brings several benefits.<br />
With a little knowledge and a few good<br />
habits, you can enjoy all the rewards that come<br />
with taking good care of your wardrobe. See Fig.<br />
14-1.<br />
One positive effect is feeling more c<strong>on</strong>fident.<br />
When people know their clothes are clean and<br />
presentable, interacting with others is often easier.<br />
A daily clothing care routine also helps you<br />
make better use of time, while cutting down <strong>on</strong><br />
frustrati<strong>on</strong>. If you’re not doing so already, try setting<br />
aside specific times each week to launder,<br />
hand-wash, ir<strong>on</strong>, and mend. When you do, your<br />
clothes are always in order. A last-minute decisi<strong>on</strong><br />
to go somewhere w<strong>on</strong>’t send you scurrying to<br />
find something to wear. You might even gain a<br />
few extra minutes to sleep in the morning.<br />
Clothing care can also save you m<strong>on</strong>ey. With<br />
improper care, garments d<strong>on</strong>’t last as l<strong>on</strong>g. They<br />
may even be ruined. By following good care practices,<br />
you spend less m<strong>on</strong>ey replacing clothes.<br />
Learning to remove spots and stains yourself<br />
saves <strong>on</strong> cleaning bills.<br />
Examining Garments<br />
To make routine care part of your daily schedule,<br />
take a few sec<strong>on</strong>ds to check your clothes<br />
14-1<br />
What are the benefits of making clothing care<br />
part of your daily routine?<br />
CHAPTER 14 Clothing <str<strong>on</strong>g>Care</str<strong>on</strong>g> Basics • 251
14-2<br />
When dirty clothes d<strong>on</strong>’t have a “home,” they<br />
can easily get tossed in the wr<strong>on</strong>g places. Where could<br />
you store a c<strong>on</strong>tainer like this <strong>on</strong>e?<br />
before putting them away. Does any garment need<br />
to be laundered or dry-cleaned? Soil and stains<br />
show clearly <strong>on</strong> light-colored fabrics, so you can<br />
evaluate them easily. Even though soil is harder to<br />
see <strong>on</strong> dark-colored clothes, those garments also<br />
need regular cleaning. If you allow fabrics to get<br />
too dirty, cleaning them is more difficult.<br />
Clothes that need washing should be placed in<br />
a locati<strong>on</strong> set aside for storing dirty clothes, as<br />
shown in Fig. 14-2. Then the clothes w<strong>on</strong>’t be<br />
overlooked when laundry time comes. Clothes<br />
that are not washable should be taken to a dry<br />
cleaner as so<strong>on</strong> as possible.<br />
Some garments can be worn again. If freshening<br />
is needed, hang a woven garment where the<br />
air can circulate around it. This helps remove<br />
odors picked up by the fabric. A knitted garment,<br />
such as a sweater, can be draped over a chair.<br />
252 • UNIT 5 Clothing <str<strong>on</strong>g>Care</str<strong>on</strong>g><br />
To remove dust, lint, or animal hair, gently<br />
brush the garment. You can use a special clothing<br />
brush, lint brush, or a specially designed roller<br />
with an adhesive surface. See Fig. 14-3.<br />
If your shoes or boots are dirty, wipe away dust<br />
or mud before putting them away. Damp shoes<br />
should air-dry before going in a shoe bag or<br />
closet.<br />
Stain Removal<br />
If you find a stain when checking a garment,<br />
take care of it as so<strong>on</strong> as possible. The l<strong>on</strong>ger a<br />
stain remains <strong>on</strong> fabric, the harder it is to get out.<br />
Be sure to treat stains before laundering a garment.<br />
Hot water and heat can set a stain, making<br />
it difficult to remove later.<br />
14-3<br />
If you d<strong>on</strong>’t have a roller like this <strong>on</strong>e, even a<br />
piece of masking tape can remove lint in an emergency.<br />
What techniques might be more ec<strong>on</strong>omical than a roller<br />
that needs refills?
What takes out <strong>on</strong>e stain w<strong>on</strong>’t necessarily<br />
work <strong>on</strong> another. Ask yourself what caused the<br />
stain and then choose an appropriate stainremoval<br />
procedure. Some techniques are<br />
described in Fig. 14-4 <strong>on</strong> pages 254-255. For stubborn<br />
stains, a procedure may need to be repeated<br />
several times. Basic stain-removal methods are<br />
described below.<br />
• Rinsing. You might get a fresh stain out of<br />
washable fabric by rinsing it immediately in<br />
cold water. See Fig. 14-5.<br />
• Soaking. Many stains can be dissolved or<br />
loosened by soaking the fabric in cold water<br />
for up to 30 minutes. This works well for<br />
water-based stains, such as fruit juice and soft<br />
drinks. Adding laundry detergent to the water<br />
can aid stain removal. Protein-based stains,<br />
such as chocolate, blood, egg, grass, meat juice,<br />
milk, baby formula, and perspirati<strong>on</strong>, are often<br />
more difficult to remove. Adding an enzyme<br />
presoak powder to the water works best for<br />
these types of stains. Enzymes are special proteins<br />
that c<strong>on</strong>trol chemical activity. Some<br />
enzymes break down certain soils so they can<br />
be more readily removed during washing.<br />
Because these products dissolve protein-based<br />
soils, they also attack protein fibers, making<br />
them unsuitable for wool and silk.<br />
• Pretreating. Pretreating is d<strong>on</strong>e just before<br />
laundering in order to give heavy dirt and<br />
stains extra attenti<strong>on</strong>. One method is to apply<br />
liquid laundry detergent or a paste of water<br />
and powder detergent to a stained or heavily<br />
soiled area, such as “ring-around-the-collar”<br />
<strong>on</strong> shirts and blouses. Lightly rub the detergent<br />
into the stain. Another method is to apply<br />
a prewash soil-and-stain remover, which is<br />
effective in dissolving oily, greasy, or heavily<br />
soiled stains. See Fig. 14-6. For best results, follow<br />
the directi<strong>on</strong>s <strong>on</strong> the product label.<br />
Pretreating also helps remove any stains that<br />
remain after soaking.<br />
• Special stain removal products. Some<br />
products are designed to remove certain types of<br />
stains, such as adhesives. Check the product<br />
label for complete directi<strong>on</strong>s.<br />
14-5<br />
An immediate cold rinsing removes many stains<br />
from washable fabrics. Why is the so<strong>on</strong>er, the better?<br />
14-6<br />
Some pretreatment products are sprayed <strong>on</strong> and<br />
others are rubbed <strong>on</strong> with a stain stick. Why should this<br />
be d<strong>on</strong>e before laundering the stained fabric?<br />
CHAPTER 14 Clothing <str<strong>on</strong>g>Care</str<strong>on</strong>g> Basics • 253
Stain<br />
14-4<br />
Removal Methods<br />
BLOOD Soak in cold water as so<strong>on</strong> as possible for 30 minutes or l<strong>on</strong>ger. Pretreat any<br />
remaining stain. Launder. For dried stains apply an enzyme presoak or rub detergent <strong>on</strong><br />
stain. Wash, using bleach if safe for fabric.<br />
254 • UNIT 5 Clothing <str<strong>on</strong>g>Care</str<strong>on</strong>g><br />
CANDLE WAX Harden by placing in freezer or rubbing with ice cube. Scrape off with<br />
dull knife or fingernail. Place between several layers of paper towels and press with<br />
warm ir<strong>on</strong>. Sp<strong>on</strong>ge remaining stain with prewash stain remover or cleaning fluid.<br />
Launder.<br />
CATSUP; TOMATO PRODUCTS Scrape off excess with a dull knife. Soak in cold<br />
water. Pretreat remaining stain. Wash, using bleach if safe for fabric.<br />
CHOCOLATE Scrape off; then soak in cold water. Pretreat any remaining<br />
stain. Wash, using bleach if safe for fabric.<br />
COFFEE; TEA Use an enzyme presoak. Wash in hottest water safe<br />
for fabric.<br />
COSMETICS Rub detergent into area or use a prewash stain<br />
remover. If stain is stubborn, sp<strong>on</strong>ge with cleaning fluid. Launder.<br />
DEODORANT; ANTIPERSPIRANT Pretreat stain and wash in hottest<br />
water safe for fabric. Also see directi<strong>on</strong>s for perspirati<strong>on</strong> stains.<br />
FRUIT; FRUIT JUICE Soak in cold water. Pretreat remaining stain.<br />
Wash, using bleach if safe for fabric.<br />
GRASS Rub detergent into area or use an enzyme presoak. Then wash, using bleach and<br />
hottest water that is safe for fabric.<br />
GRAVY; MEAT JUICE Scrape off excess with a dull knife. Soak in cold water. Pretreat<br />
remaining stain. Wash, using bleach if safe for fabric.
GREASE; OIL Scrape off or blot with paper towels.<br />
Use a prewash stain remover or rub detergent into<br />
area. Launder. If stain remains, sp<strong>on</strong>ge with cleaning<br />
fluid and rinse.<br />
GUM Harden by placing in freezer or rubbing with ice cube. Scrape off with<br />
dull knife or fingernail. Pretreat remaining stain, and wash.<br />
INK Spray with hair spray or sp<strong>on</strong>ge with rubbing alcohol. After a few<br />
minutes, blot with paper towels. Repeat if necessary. Rub detergent<br />
into stain, and wash. Alternative: use a prewash stain remover; then<br />
launder. (Some ballpoint, felt tip, and liquid inks may be impossible to<br />
remove.)<br />
MAYONNAISE; MUSTARD; SALAD DRESSING Pretreat stain and wash in<br />
hottest water safe for fabric. Use chlorine bleach if safe for fabric. If grease stain<br />
remains, soak in warm water with a pretreat product, rinse thoroughly, and relaunder.<br />
MILDEW Pretreat stain, and launder, using chlorine bleach if safe for fabric. Alternative:<br />
soak in an oxygen or all-fabric bleach and hot water; then launder. (Heavily mildewed<br />
fabrics may be permanently damaged.)<br />
MILK; ICE CREAM; BABY FORMULA Soak in warm water. Launder in hottest<br />
water safe for fabric; use appropriate bleach. If stain remains, soak in warm water with<br />
a pretreat product, rinse thoroughly, and relaunder.<br />
NAIL POLISH Place stain face down <strong>on</strong> paper towels. Sp<strong>on</strong>ge with nail polish remover<br />
(do not use acet<strong>on</strong>e <strong>on</strong> acetate fabrics). Rinse thoroughly and launder in hottest<br />
water safe for fabric. (Nail polish may be impossible to remove.)<br />
PAINT Do not let paint dry. For latex paint, rinse in cool water and launder. For oilbased<br />
paint, sp<strong>on</strong>ge with turpentine or mineral spirits and rinse with water.<br />
Launder. (Once paint is dry, it cannot be removed.)<br />
PERFUME Soak in cold water. Pretreat remaining stain. Wash,<br />
using bleach if safe for fabric.<br />
PERSPIRATION Use a prewash stain remover or enzyme<br />
presoak, or sp<strong>on</strong>ge fresh stain with amm<strong>on</strong>ia. For old stain,<br />
sp<strong>on</strong>ge with white vinegar and rinse. Rub detergent into stain<br />
and wash in hottest water safe for fabric.<br />
RUST Wash with a rust remover, following manufacturer’s directi<strong>on</strong>s.<br />
Do not use chlorine bleach, as it will intensify the stain.<br />
SOFT DRINKS Sp<strong>on</strong>ge or soak in cold water. Pretreat any<br />
remaining stain. Launder.<br />
UNKNOWN STAINS Pretreat stain and soak in cold water.<br />
Wash in cold water with detergent. If stain remains, rewash in warm<br />
water. If stain still is not removed, wash again in hot water.<br />
CHAPTER 14 Clothing <str<strong>on</strong>g>Care</str<strong>on</strong>g> Basics • 255
• Bleaching. Some stains may come out when<br />
bleach is added to water for presoaking or<br />
laundering. N<strong>on</strong>chlorine bleach may be used<br />
<strong>on</strong> all fabrics and colors. Chlorine bleach<br />
should not be used <strong>on</strong> wool, silk, leather, spandex,<br />
and n<strong>on</strong>colorfast fabrics. When using<br />
bleach, always follow the manufacturer’s directi<strong>on</strong>s<br />
for amount, water temperature, and<br />
soaking time. See Chapter 15 for more informati<strong>on</strong><br />
about bleach.<br />
• Home dry-cleaning kits. Odors and light<br />
stains can be removed with a special dry-cleaning<br />
kit that is designed to be used in the clothes<br />
dryer. See page 279 for informati<strong>on</strong>.<br />
• Dry cleaning. If you’re worried about<br />
removing a stain from a special garment, the<br />
best soluti<strong>on</strong> may be the professi<strong>on</strong>al attenti<strong>on</strong><br />
of a dry cleaner.<br />
When using stain-removal products, cauti<strong>on</strong> is<br />
essential. Used incorrectly, some products can<br />
make the problem worse and even be dangerous.<br />
Never combine stain-removal products. Chlorine<br />
bleach and amm<strong>on</strong>ia, for example, can produce<br />
noxious (harmful) fumes. Always read the manufacturer’s<br />
directi<strong>on</strong>s <strong>on</strong> any stain-removal product<br />
before using it, and keep the products locked<br />
away from children.<br />
Checking for Repairs<br />
Has a seam ripped or a hem come loose? No<br />
matter how careful you are with clothes, small<br />
repairs can’t be avoided. A quick repair keeps the<br />
rip from lengthening and the entire hem from<br />
falling out. Place garments that need mending<br />
where you w<strong>on</strong>’t forget about them. Then make<br />
the repairs when you have a few spare minutes.<br />
Otherwise, you may not have time to do a repair<br />
when you want to wear a garment. See Fig. 14-7.<br />
Many repairs can be d<strong>on</strong>e quickly with hand<br />
sewing. Restitching a loose butt<strong>on</strong>, snap, or hook<br />
and eye takes <strong>on</strong>ly a few stitches. Re-anchoring a<br />
loose fastener is easier than replacing <strong>on</strong>e that has<br />
fallen off. In Chapter 16 you’ll learn how to make<br />
simple repairs. p 530<br />
256 • UNIT 5 Clothing <str<strong>on</strong>g>Care</str<strong>on</strong>g><br />
Pressing<br />
Suppose you’re getting ready to go somewhere<br />
and the pants you want to wear are slightly wrinkled<br />
from hanging twisted in the closet. What can<br />
you do? You d<strong>on</strong>’t need to ir<strong>on</strong> the whole garment<br />
since a touch-up pressing will work.<br />
In pressing fabric, you raise and lower the ir<strong>on</strong><br />
from <strong>on</strong>e area to the next. This technique quickly<br />
removes a few wrinkles and sharpens creases. The<br />
heat and steam smooth the fabric, so heavy pressure<br />
isn’t needed. See Fig. 14-8.<br />
Press <strong>on</strong> the wr<strong>on</strong>g side of the fabric, whenever<br />
possible, to prevent a shiny mark <strong>on</strong> the right side<br />
of the fabric. If you must press <strong>on</strong> the right side,<br />
always press gently or use a press cloth. Be sure to<br />
use the correct temperature setting for the fabric<br />
and follow safety precauti<strong>on</strong>s. These are<br />
explained in the secti<strong>on</strong> <strong>on</strong> ir<strong>on</strong>ing in Chapter 15.<br />
p 511<br />
14-7<br />
Making simple repairs is easy. If you d<strong>on</strong>’t know<br />
how to make them, who might teach you?
14-8<br />
A garment may need <strong>on</strong>ly a touch-up pressing to<br />
be wearable. What is the technique for pressing?<br />
14-9<br />
Wrinkles can be removed from many garments<br />
with steam. On what fibers and fabrics might steaming<br />
not work?<br />
If a garment is lightly wrinkled, there are other<br />
ways besides pressing to make it look fresh.<br />
Hand-held steamers can eliminate wrinkles while<br />
the garment remains <strong>on</strong> the hanger. See Fig. 14-9.<br />
If you d<strong>on</strong>’t have this device, try hanging the garment<br />
in the bathroom when you take a steamy<br />
shower.<br />
When you’re in a big hurry, what can you do?<br />
Keep a can of wrinkle-remover in the cupboard.<br />
Just spray the garment and smooth out the wrinkles<br />
with your hands. This product works best <strong>on</strong><br />
knits and natural fibers. Both steamers and spray<br />
products add moisture to the garment, so you’ll<br />
have to wait a few minutes for the garment to dry<br />
before wearing.<br />
Putting Clothes Away<br />
One simple way to prevent wrinkles in clothes<br />
is to always put them away. See Fig. 14-10. By<br />
hanging clothes up and folding them neatly, you<br />
avoid extra pressing. You also know where clothes<br />
are when you want them. What if you spent just<br />
five minutes each day hunting for misplaced<br />
clothes? How much time would that cost in a<br />
year?<br />
14-10<br />
When clothes are put away each day, the pile<br />
doesn’t grow to an unmanageable size.<br />
CHAPTER 14 Clothing <str<strong>on</strong>g>Care</str<strong>on</strong>g> Basics • 257
Most woven garments should be hung <strong>on</strong><br />
hangers after emptying the pockets. Close the zipper<br />
or top butt<strong>on</strong> to keep the garment from twisting<br />
or falling from the hanger. For jackets and<br />
clothes that might be creased by a narrow metal<br />
hanger, use wider plastic or wooden hangers like<br />
those in Fig. 14-11. These support the shoulder<br />
area of the garment better. To keep the shape of<br />
stretchable and loosely knitted garments, such as<br />
sweaters, store them flat <strong>on</strong> a shelf or in a drawer.<br />
UNDERSTANDING CARE<br />
LABELS<br />
Look inside any garment and you’ll find a permanently<br />
attached care label. It’s usually stitched<br />
to the center back of the neckline or into a side<br />
seam and must remain readable for the life of the<br />
garment. See Fig. 14-12. The <str<strong>on</strong>g>Care</str<strong>on</strong>g> Labeling Rule<br />
of the Federal Trade Commissi<strong>on</strong> (FTC) regulates<br />
informati<strong>on</strong> <strong>on</strong> these labels. Only a few garments,<br />
such as socks and hosiery, are excepti<strong>on</strong>s.<br />
<str<strong>on</strong>g>Care</str<strong>on</strong>g> Labeling Informati<strong>on</strong><br />
The fiber, fabric c<strong>on</strong>structi<strong>on</strong>, finish, color,<br />
interfacing, lining, and trims determine what care<br />
method is listed <strong>on</strong> a garment label. Although<br />
some manufacturers list more than <strong>on</strong>e safe<br />
method of care, <strong>on</strong>ly <strong>on</strong>e is required. Directi<strong>on</strong>s<br />
for either machine washing, hand washing, or dry<br />
cleaning must be supplied. Any methods listed <strong>on</strong><br />
the label have been checked for safe use. The<br />
manufacturer doesn’t have to menti<strong>on</strong> any other<br />
safe method.<br />
258 • UNIT 5 Clothing <str<strong>on</strong>g>Care</str<strong>on</strong>g><br />
14-11<br />
Some garments need special hangers. Why?<br />
Labels must provide specific informati<strong>on</strong>. For<br />
example, the care label for a washable garment<br />
must include the following: washing method, safe<br />
water temperature, and method and safe temperature<br />
for drying. If chlorine bleach is not safe<br />
to use, a warning must be added. For garments<br />
that need ir<strong>on</strong>ing, the temperature for<br />
ir<strong>on</strong>ing must be included. If no warnings are<br />
given, you d<strong>on</strong>’t need to adjust the care methods<br />
listed <strong>on</strong> the label.<br />
On care labels look for the general informati<strong>on</strong><br />
described below. Some examples are shown in<br />
Fig. 14-13 <strong>on</strong> page 260.<br />
• Washing. “Machine wash” means you can<br />
wash and dry the garment by any method at<br />
any temperature—hot, warm, or cold.<br />
14-12<br />
Check the care label before you buy a garment<br />
and before you clean it. Why is this helpful in both of<br />
these situati<strong>on</strong>s?
Technology Trends<br />
>>COLOR LOSS IN FABRICS<br />
Although the label <strong>on</strong> her new blue<br />
sweatshirt said, “Wash before wear,” <strong>on</strong>e<br />
teen wore it without washing. Later she<br />
found blue stains <strong>on</strong> the white shirt worn<br />
under the sweatshirt. What happened?<br />
Unstable fabric dyes can run, fade, or rub<br />
off, especially bright colors and dark colors,<br />
which have more dye. Here are some comm<strong>on</strong><br />
dye problems and their preventi<strong>on</strong>.<br />
• Color bleeding. Some dyes bleed, or<br />
transfer to other fabrics, during laundering.<br />
After dissolving in the water, the<br />
dye is absorbed by the other fabrics. Hot<br />
water and a l<strong>on</strong>g soaking time increase<br />
the chance of color bleeding. Watch for<br />
care labels that say “wash separately”<br />
or “wash with like colors.” Always wash<br />
dark or brightly colored clothing with<br />
similar colors.<br />
• Crocking. Color from excess dye in new<br />
fabrics may rub off <strong>on</strong>to skin or other<br />
clothes when first worn. This occurs<br />
more where there is moisture, such as<br />
perspirati<strong>on</strong>. <str<strong>on</strong>g>Care</str<strong>on</strong>g> labels that say “wash<br />
before wear” offer warning.<br />
• Fading. Ultraviolet rays from light can<br />
change the chemical structure of dyes,<br />
which results in fading. Although blue,<br />
green, and lavender dyes are particularly<br />
light sensitive, most colors can<br />
fade. Even whites can turn yellow. Hang<br />
garments where they’re protected from<br />
str<strong>on</strong>g light.<br />
• Color loss. Some dyes, especially the<br />
blues in cott<strong>on</strong> denim, come off where<br />
the fabric rubs against other things.<br />
This is why blue jeans often lose color<br />
al<strong>on</strong>g seam lines and garment edges. If<br />
jeans rub against the post inside the<br />
washing machine, streaks may appear<br />
where the color rubs off. Prevent by<br />
turning jeans inside out before washing.<br />
• Chemical damage. Perspirati<strong>on</strong> and<br />
alkaline substances in toiletries can<br />
damage dyes. Spills with lem<strong>on</strong> juice,<br />
bleach, and stain removal products can<br />
remove color. Protect from spills and follow<br />
bleaching directi<strong>on</strong>s carefully. Rinse<br />
immediately after a spill.<br />
INVESTIGATE<br />
Describe a fabric dye mishap you or your<br />
family had. Find informati<strong>on</strong> <strong>on</strong> how the<br />
problem might have been avoided.<br />
CHAPTER 14 Clothing <str<strong>on</strong>g>Care</str<strong>on</strong>g> Basics • 259
14-13<br />
By reading the care label, you’ll know what care<br />
will keep your garment in good c<strong>on</strong>diti<strong>on</strong>. Why is it a good<br />
idea to leave the care label attached to a garment?<br />
Otherwise the label indicates the appropriate<br />
wash cycle, such as delicate or gentle, and<br />
water temperature to use. If no temperature is<br />
menti<strong>on</strong>ed, any temperature is safe. “Wash<br />
separately” means to wash al<strong>on</strong>e or with like<br />
colors. “Hand wash” means to launder <strong>on</strong>ly by<br />
hand in lukewarm water.<br />
• Bleaching. A label might not menti<strong>on</strong><br />
bleach, which means any bleach may be used<br />
when needed. If <strong>on</strong>ly chlorine bleach is harmful,<br />
the label states “no chlorine bleach.” If all<br />
bleaches are harmful, the label must warn “no<br />
bleach.”<br />
• Drying. “Tumble dry” means the garment<br />
can be dried in a tumble dryer at the specified<br />
setting—high, medium, low, or no heat.<br />
Otherwise, the label indicates “line dry” or<br />
“dry flat.”<br />
• Ir<strong>on</strong>ing. If ir<strong>on</strong>ing is needed, even for a<br />
touch-up, the label must say so. If the hottest<br />
setting isn’t safe, the label must indicate “warm<br />
ir<strong>on</strong>” or “cool ir<strong>on</strong>.” A label that states “do not<br />
ir<strong>on</strong>” means that even the coolest setting could<br />
be harmful to the fabric.“Ir<strong>on</strong> damp” means to<br />
dampen the garment before ir<strong>on</strong>ing. If no<br />
260 • UNIT 5 Clothing <str<strong>on</strong>g>Care</str<strong>on</strong>g><br />
ir<strong>on</strong>ing instructi<strong>on</strong> is given, ir<strong>on</strong>ing probably<br />
isn’t needed.<br />
• Dry cleaning. Some fabrics can’t be washed.<br />
If the label says “dry-clean <strong>on</strong>ly,” a garment<br />
may be dry-cleaned by any method, including<br />
a coin-operated machine. Any necessary<br />
warning about solvents or steaming must be<br />
supplied.<br />
Fabric <str<strong>on</strong>g>Care</str<strong>on</strong>g> Symbols<br />
How can different care methods be understood<br />
when garments are sold where different<br />
languages are spoken? In 1997 manufacturers<br />
solved this problem by putting fabric care symbols<br />
<strong>on</strong> care labels. The symbols show proper<br />
care in a visual way. As you can see in Fig. 14-14,<br />
the six basic symbols are wash, bleach, tumble<br />
dry, dry, ir<strong>on</strong>, and dry-clean. Each symbol is tailored<br />
to provide specific informati<strong>on</strong> about temperatures,<br />
methods, and settings. Any warnings<br />
are indicated by a large X across the symbol.<br />
STORING CLOTHES<br />
Whether you have lots or little storage space,<br />
getting organized keeps your clothes neat and<br />
easy to find. See Fig. 14-15. The informati<strong>on</strong> here<br />
and the tips <strong>on</strong> page 262 provide ideas you can<br />
put to use.<br />
14-15<br />
Putting away clothes in an organized manner<br />
may seem time c<strong>on</strong>suming, but it can save you time when<br />
it comes to finding what you want later.
14-14<br />
What Do Fabric <str<strong>on</strong>g>Care</str<strong>on</strong>g> Symbols Mean<br />
WASH<br />
BLEACH<br />
TUMBLE<br />
DRY<br />
DRY<br />
IRON<br />
DRY-CLEAN<br />
Cool/Cold<br />
Temperature<br />
Normal Cycle<br />
Bleach<br />
As Needed<br />
No Heat/<br />
Air<br />
Any Heat/<br />
Normal Cycle<br />
Line<br />
Dry<br />
Low<br />
Heat<br />
Dry-Clean<br />
Warm<br />
Temperature<br />
Permanent<br />
Press Cycle<br />
N<strong>on</strong>chlorine<br />
Bleach As<br />
Needed<br />
Low<br />
Heat<br />
Permanent<br />
Press Cycle<br />
Drip<br />
Dry<br />
Medium<br />
Heat<br />
Hot<br />
Temperature<br />
Delicate/<br />
Gentle Cycle<br />
Medium<br />
Heat<br />
Delicate/<br />
Gentle Cycle<br />
Dry<br />
Flat<br />
High<br />
Heat<br />
Hand<br />
Wash<br />
High<br />
Heat<br />
Dry in<br />
the Shade<br />
Do Not Ir<strong>on</strong><br />
with Steam<br />
Do Not<br />
Wring<br />
Do Not<br />
Wash<br />
Do Not<br />
Bleach<br />
Do Not<br />
Tumble Dry<br />
Do Not Dry<br />
(Used With Do<br />
Not Wash)<br />
Do Not Ir<strong>on</strong><br />
Do Not<br />
Dry-Clean<br />
CHAPTER 14 Clothing <str<strong>on</strong>g>Care</str<strong>on</strong>g> Basics • 261
How To…<br />
CREATE CLOTHING SPACE<br />
Few people think they have enough storage space. How about you? If you’d like more<br />
space, a little creativity might be the answer. Try the ideas described here to get started.<br />
• Shoe bags. Not just for<br />
shoes, these compartmented<br />
bags can hold rolled-up belts,<br />
scarves, socks, and underwear.<br />
They could also hold a<br />
clothes brush or roller, shoe<br />
polish supplies, garment<br />
hangtags, and extra butt<strong>on</strong>s<br />
and yarns that come with<br />
clothes. Shoe bags can hang<br />
<strong>on</strong> the back of a door or <strong>on</strong><br />
the wall. In a deep closet,<br />
they can go behind your<br />
clothes to store off-seas<strong>on</strong><br />
shoes or special-occasi<strong>on</strong><br />
accessories.<br />
• Hooks and hangers. Small<br />
hooks hold belts, necklaces, and<br />
chains. Larger <strong>on</strong>es hold caps, hats,<br />
tote bags, and backpacks. Some<br />
hooks have an adhesive back; others<br />
can be screwed into wood. Mount<br />
hooks <strong>on</strong> the inside of the door or<br />
closet, or screw several into a strip of<br />
wood that mounts <strong>on</strong> the wall. A tie<br />
rack is a special hanger that holds<br />
more than ties. Use it for such small<br />
items as belts, scarves, handbags,<br />
and jewelry.<br />
262 • UNIT 5 Clothing <str<strong>on</strong>g>Care</str<strong>on</strong>g><br />
• Baskets, crates, and boxes. In natural wicker, modern<br />
wire, or colorful plastic, these make attractive and functi<strong>on</strong>al<br />
storage additi<strong>on</strong>s for T-shirts, sweaters, jewelry, hats, and grooming<br />
supplies. Put them <strong>on</strong> a dresser or stack them <strong>on</strong> the floor. Vary the<br />
sizes and shapes—round, oval, or square—to suit your needs. Store<br />
out-of-seas<strong>on</strong> or seldom-worn clothes in low boxes under your bed.<br />
Exploring Clothing Space<br />
Evaluate the storage space that you have.<br />
What type of extra storage do you need?<br />
What would be the best way to create this<br />
storage? Write a descripti<strong>on</strong> of your ideas.
An Organized Closet<br />
Carto<strong>on</strong>ists have often drawn the infamous<br />
overstuffed closet with the door that just w<strong>on</strong>’t<br />
close. You can avoid this problem. First, make<br />
sure unneeded garments are sorted out. Chapter<br />
16 can help with this task.<br />
Then look for ways to arrange clothing efficiently.<br />
A shirt hidden between two jackets could<br />
be lost for weeks. By placing similar items<br />
together, they’re easier to find. Hang garments of<br />
similar length together to create room for shelves<br />
or baskets under the short garments. You can<br />
even suspend a sec<strong>on</strong>d, lower rod from the upper<br />
<strong>on</strong>e to double the hanging space for short items.<br />
Multiple shirt, pants, and skirt hangers also<br />
save space. You can put five or six garments <strong>on</strong><br />
<strong>on</strong>e hanger. Place folded clothes and accessories<br />
in plastic or cardboard boxes <strong>on</strong> the shelf or floor.<br />
Label the boxes for quick identificati<strong>on</strong>.<br />
Drawers and Shelves<br />
To get c<strong>on</strong>trol of drawers, store similar items<br />
together. That is, have specific drawers for socks,<br />
underwear, and T-shirts. Some people place a tray<br />
<strong>on</strong> top of a chest or dresser to hold a watch, jewelry,<br />
and other small items.<br />
Use shelves inside the closet or in the room for<br />
additi<strong>on</strong>al storage. For easy access, stack folded<br />
sweaters and sweatshirts. Line up hats, caps, and<br />
other accessories. Luggage and seldom-used<br />
items can be stored <strong>on</strong> hard-to-reach, top shelves.<br />
Seas<strong>on</strong>al Storage<br />
If you live in a seas<strong>on</strong>al climate, clothing can<br />
be stored when not in use, leaving space for the<br />
clothes you’re using. See Fig. 14-16. Clothing and<br />
accessories should be clean before storing.<br />
Because some stains d<strong>on</strong>’t appear right away, an<br />
item may look clean when it isn’t. Then during<br />
storage, the stain turns brown or yellow and<br />
becomes impossible to remove. Stained and<br />
soiled fabrics attract such insects as moths and<br />
silverfish, which eat holes in fabric. Moths are<br />
particularly f<strong>on</strong>d of oil-based soils <strong>on</strong> wool clothing.<br />
Moth and insect repellents are available. If<br />
you use them, follow the manufacturer’s directi<strong>on</strong>s<br />
carefully.<br />
14-16<br />
Sweaters can be stored off-seas<strong>on</strong> in plastic c<strong>on</strong>-<br />
tainers that slide under the bed.<br />
Store items in large garment bags, boxes, or<br />
chests. For added protecti<strong>on</strong>, seal with tape<br />
before storing. Drape leather or fur items with a<br />
piece of fabric. D<strong>on</strong>’t place them in plastic bags<br />
since they need air circulati<strong>on</strong>.<br />
Find a dry place to store clothing. Dampness<br />
causes mildew, which can stain or damage fabric<br />
and be difficult to remove. <str<strong>on</strong>g>Care</str<strong>on</strong>g>ful attenti<strong>on</strong> to<br />
storage can preserve your clothes for added seas<strong>on</strong>s<br />
of wear.<br />
Fashi<strong>on</strong><br />
MOTH PROTECTION. Moths<br />
are unwelcome guests in any closet. Items<br />
in storage, especially those that are put<br />
away soiled, are particularly pr<strong>on</strong>e to moth<br />
attacks. Some experts cauti<strong>on</strong> against<br />
treating affected garments with moth balls<br />
or insecticide, since some toxic substances<br />
can damage garments as much as the<br />
moths themselves. Laundering, steam or<br />
dry cleaning, and even freezing clothes (for<br />
three days, sealed in a heavy plastic bag)<br />
are effective ways to kill moths and their<br />
larvae.<br />
Facts<br />
CHAPTER 14 Clothing <str<strong>on</strong>g>Care</str<strong>on</strong>g> Basics • 263
CHAPTER 14<br />
CHAPTER SUMMARY<br />
• Caring for garments properly has several<br />
benefits.<br />
• Routine care includes removing stains,<br />
making small repairs, and storing correctly.<br />
• Different types of stains require different<br />
stain-removal techniques.<br />
• A garment’s permanent care label tells you<br />
how to care for it.<br />
• Symbols <strong>on</strong> permanent care labels are a<br />
guide to care.<br />
• Organized clothing storage saves time and<br />
helps keep clothes looking good.<br />
USING KEY TERMS<br />
Write a short paragraph that explains the routine<br />
care of clothing. Include all Key Terms,<br />
used correctly. For a creative approach,<br />
describe the acti<strong>on</strong>s of a fictitious pers<strong>on</strong>. A<br />
possible opener might be: “Eric arrived home,<br />
starving and late as usual after basketball<br />
practice. He dropped a duffle bag stuffed with<br />
school clothes <strong>on</strong> the floor and…”<br />
264 • UNIT 5 Clothing <str<strong>on</strong>g>Care</str<strong>on</strong>g><br />
Review<br />
RECALLING THE FACTS<br />
1. How does giving garments needed care<br />
benefit you?<br />
2. What routine care do clothes need after<br />
wearing?<br />
3. Why should stains be treated quickly?<br />
4. When might freezing clothes be a recommended<br />
stain-removal treatment?<br />
5. For what types of stains might an enzyme<br />
presoak be needed? Give examples.<br />
6. Give some tips for using bleach <strong>on</strong><br />
clothes.<br />
7. How should you treat a stain if you’re<br />
not sure what caused it?<br />
8. Would mixing two stain-removal products<br />
bring better results? Explain.<br />
9. What is the advantage of making small<br />
garment repairs right away?<br />
10. Identify two ways to remove small wrinkles<br />
from garments.<br />
11. What specific informati<strong>on</strong> must a permanent<br />
care label provide?<br />
12. What are your laundering opti<strong>on</strong>s for an<br />
item labeled “machine wash”?<br />
13. Describe an organized closet.<br />
14. Why should clothes be clean and dry<br />
before storing for a seas<strong>on</strong>?
and Activities<br />
THINKING CRITICALLY<br />
1. Some people use home remedies that<br />
d<strong>on</strong>’t involve chemicals to treat stains.<br />
Do you think this is a good idea? Explain<br />
your positi<strong>on</strong>.<br />
2. Why do you think chemical products<br />
should be kept in their original c<strong>on</strong>tainers<br />
instead of transferring them to other<br />
boxes and bottles for storage?<br />
3. At <strong>on</strong>e time, care labels were not<br />
required <strong>on</strong> garments. What do you think<br />
caused the laws to be changed?<br />
APPLYING KNOWLEDGE<br />
1. Stain removal. Research the various<br />
stain removal products available in a<br />
store. Make a chart comparing the purpose<br />
and cost of each product.<br />
2. Color bleeding. Soak red fabric that isn’t<br />
colorfast with white or light-colored fabrics.<br />
Once the red color bleeds, test<br />
whether washing, bleaching, or stainremoval<br />
products can restore the original<br />
color of the other fabrics. Summarize<br />
your findings in a report.<br />
3. Fabric care symbols. C<strong>on</strong>duct a survey<br />
to learn whether friends and family<br />
members can identify fabric care symbols.<br />
Do they use the symbols? Record<br />
their opini<strong>on</strong>s al<strong>on</strong>g with the results of<br />
your survey.<br />
CHAPTER 14<br />
4. An ideal closet. With a partner, design a<br />
closet arrangement that would appeal to<br />
teens. Use catalogs or the Internet to<br />
find helpful storage organizers. Make a<br />
floor plan and drawings to illustrate the<br />
arrangement. Present your design to the<br />
class.<br />
5. Closet organizati<strong>on</strong>. Plan and carry out<br />
a closet reorganizati<strong>on</strong>. The closet could<br />
be yours or another <strong>on</strong>e in your home, or<br />
you could team to work <strong>on</strong> a friend’s<br />
closet. Take before and after photos.<br />
Write a summary of the plan and the<br />
results.<br />
MAKING>
CHAPTER 15<br />
Laundry and Dry Cleaning<br />
OBJECTIVES<br />
• Explain the use of<br />
laundry products<br />
and equipment.<br />
• Describe the<br />
steps involved in<br />
laundering clothes.<br />
• Compare ways of<br />
drying clothes.<br />
• Dem<strong>on</strong>strate how<br />
to ir<strong>on</strong> clothes.<br />
• Explain drycleaning<br />
processes.<br />
KEY TERMS<br />
agitator<br />
detergents<br />
dry cleaning<br />
ir<strong>on</strong>ing<br />
laundering<br />
solvent<br />
266 • UNIT 5 Clothing <str<strong>on</strong>g>Care</str<strong>on</strong>g>
EXAMINETHISISSUE<br />
Easy care. Some people <strong>on</strong>ly purchase<br />
clothing that is “easy care,” with<br />
fabrics that are machine washable,<br />
machine dryable, and require little or no<br />
ir<strong>on</strong>ing. They d<strong>on</strong>’t want to spend their<br />
time hand washing, line drying, and ir<strong>on</strong>ing.<br />
Other people d<strong>on</strong>’t mind the added<br />
time and effort it takes to care for fabrics<br />
that need special attenti<strong>on</strong>. Hand washing<br />
and ir<strong>on</strong>ing d<strong>on</strong>’t bother them because<br />
they like the appearance, feel, and comfort<br />
of these fabrics.<br />
What do you think?<br />
Which profile fits you? Would you spend<br />
extra time caring for fabrics to make them<br />
last l<strong>on</strong>ger or to improve your appearance?<br />
Why do you think people have different<br />
viewpoints <strong>on</strong> clothing care?<br />
Just a few generati<strong>on</strong>s ago, doing the<br />
laundry was nothing like what it is today.<br />
Imagine hand-feeding each garment through a<br />
wringer to squeeze out the water before hanging<br />
everything <strong>on</strong> lines to dry. Although methods have<br />
changed, there is still much to learn today about<br />
keeping clothes clean and in good c<strong>on</strong>diti<strong>on</strong>.<br />
The garment care label is your guide. It tells<br />
you whether to machine-wash, hand-wash, or<br />
dry-clean a garment. This chapter tells you how.<br />
LAUNDRY PRODUCTS AND<br />
EQUIPMENT<br />
In <strong>on</strong>e family, every<strong>on</strong>e is c<strong>on</strong>vinced that the<br />
washing machine eats socks. In another family,<br />
turning white clothes pink or blue happens a little<br />
too often. You may know stories about shrinking<br />
garments, mysterious holes, or stubborn<br />
stains. Whatever the problem, a skillful approach<br />
to handling laundry can help. Begin by learning<br />
how to select and use laundry products and<br />
equipment.<br />
Selecting Laundry Products<br />
When c<strong>on</strong>fr<strong>on</strong>ted by a store aisle full of laundry<br />
products, choosing isn’t easy. If you learn<br />
about products before you shop and then read<br />
labels, decisi<strong>on</strong>s are easier to make.<br />
In using laundry products, be sure to follow<br />
label directi<strong>on</strong>s. You’ll achieve better results and<br />
be safe in the process. Some products, such as<br />
bleach, are harmful if they come in c<strong>on</strong>tact with<br />
eyes and skin. Since swallowing can be hazardous,<br />
always keep laundry products locked away from<br />
children’s reach. See Fig. 15-1.<br />
15-1<br />
Special locking devices <strong>on</strong> cabinets keep laundry<br />
products and other cleaning supplies safely away from<br />
children’s explorati<strong>on</strong>.<br />
CHAPTER 15 Laundry and Dry Cleaning • 267
15-2<br />
Laundry Detergents<br />
Detergents are cleansing agents that remove<br />
soil from fabric and prevent it from returning to<br />
the fabric. They are available as powders, liquids,<br />
and premeasured tablets.<br />
Detergents have essentially replaced soaps for<br />
laundering because they work well in both hard<br />
and soft water. Soap reacts with minerals in hard<br />
water and in the soil <strong>on</strong> clothes to form a white,<br />
powdery curd that stiffens fabric. The soap’s ability<br />
to clean decreases. Since hardness minerals<br />
have less effect <strong>on</strong> detergents, detergents make a<br />
better choice for laundry products.<br />
You’ll find several types of laundry detergents<br />
in stores, so you can choose according to your<br />
need.<br />
• All-purpose detergents. These come in<br />
both liquid and powder form. They are suitable<br />
for all types of laundry, from lightly soiled<br />
shirts to heavily soiled work clothes. Liquid<br />
detergents work especially well <strong>on</strong> greasy or<br />
oily stains.<br />
• Ultra detergents. In general, both liquid<br />
and powder detergents come in this c<strong>on</strong>centrated<br />
form. The packages are smaller, and you<br />
use less product.<br />
• Combinati<strong>on</strong> detergents. Some detergents<br />
combine color-safe bleach or fabric softener<br />
with detergent. Adding bleach improves cleaning<br />
as well as stain removal. Adding a softener<br />
makes fabrics feel softer and reduces static<br />
electricity. These products are available in both<br />
powder and liquid forms.<br />
• Fragrance and dye-free detergents. For<br />
people with certain allergies, these products<br />
are available.<br />
• Light-duty detergents. These detergents<br />
work well for hand- or machine-washing delicate<br />
or lightly soiled fabrics, such as hosiery<br />
and lingerie.<br />
268 • UNIT 5 Clothing <str<strong>on</strong>g>Care</str<strong>on</strong>g><br />
To use a detergent correctly, you’ll need to read<br />
the informati<strong>on</strong> <strong>on</strong> the box. It will tell you how much to<br />
use based <strong>on</strong> the washer and load size.<br />
• HE detergents. New HE (high-efficiency)<br />
washing machines use less water than other<br />
washing machines. They require a special<br />
detergent that is formulated to create fewer<br />
suds. Too much suds can keep clothes from<br />
tumbling and getting clean.<br />
When laundering clothes, use the detergent<br />
amount specified <strong>on</strong> the box or bottle. The manufacturer’s<br />
recommendati<strong>on</strong>s are for an average<br />
load with average soil in water of average hardness.<br />
Use less detergent for small loads, lightly<br />
soiled clothes, low water levels, and soft water. Use<br />
more detergent for big loads, very dirty clothes,<br />
high water levels, and hard water. See Fig. 15-2.<br />
Soil-and-Stain Removers<br />
For removing stains and treating clothes that<br />
are particularly dirty, you can keep appropriate<br />
products <strong>on</strong> hand. Use the guidelines for stain<br />
removal in Chapter 14.<br />
• Prewash soil-and-stain removers. These<br />
are applied to fabric before washing. They are<br />
available in spray, liquid, stick, gel, and aerosol<br />
forms.<br />
• Enzyme presoaks. These come in a powder<br />
form and can be used prior to washing or<br />
added to the wash cycle al<strong>on</strong>g with detergent.
Laundry Bleaches<br />
Bleaches remove stains, whiten and brighten<br />
fabrics, and destroy bacteria. See Fig. 15-3.Ifused<br />
too often or if highly c<strong>on</strong>centrated in water, however,<br />
bleach can weaken fibers. There are two<br />
types of bleach, with and without chlorine.<br />
• Chlorine bleach. Labeled “chlorine” or<br />
“hypochlorite,” chlorine bleach is most effective<br />
for whitening, disinfecting, and deodorizing.<br />
It cannot be used, however, <strong>on</strong> wool, silk,<br />
leather, spandex, and n<strong>on</strong>fast colors.<br />
• N<strong>on</strong>chlorine bleach. Also called oxygen<br />
bleach, this product may be identified as “color<br />
safe” or “safe for all fabrics.” Because it’s mild,<br />
n<strong>on</strong>chlorine bleach can maintain the bright-<br />
15-3<br />
Bleach can turn dingy white clothing brighter<br />
and whiter. Suppose you have a stretchy white top that<br />
looks grayish around the neckline. Would you wash it in<br />
bleach?<br />
ness of both whites and colors but cannot<br />
restore whiteness to gray and dingy fabrics.<br />
Always add bleach to the water while the washing<br />
machine fills. Then add the clothes. This prevents<br />
fabric discolorati<strong>on</strong>s caused by splashing or<br />
pouring the bleach directly <strong>on</strong>to clothes. Some<br />
washing machines have a special bleach dispenser<br />
that automatically dilutes the bleach.<br />
Other Laundry Products<br />
For further help with laundering, other products<br />
are available.<br />
• Fabric softeners. Fabrics feel softer, have<br />
less static electricity, and are fragrant with the<br />
use of fabric softeners. See Fig. 15-4. Liquid<br />
softeners are added to the water during the<br />
final rinse. Pouring directly <strong>on</strong> the clothes<br />
could cause stains. With some washing<br />
machines, the softener goes in a dispenser. Too<br />
much fabric softener can make towels less<br />
absorbent, but you can remove the excess by<br />
washing the towels several times without any<br />
softener.<br />
15-4<br />
Fabric softeners are available for use in the<br />
washer or the dryer, as shown here. What advantages<br />
might each method have?<br />
CHAPTER 15 Laundry and Dry Cleaning • 269
Fabric softeners in the form of n<strong>on</strong>woven<br />
sheets can be placed in the dryer, either with<br />
the clothes or in a holder to avoid direct c<strong>on</strong>tact<br />
with fabrics. The heat of the dryer releases<br />
the fabric softener and scent, which adhere to<br />
the fabrics. Add <strong>on</strong>ly <strong>on</strong>e sheet per load and<br />
d<strong>on</strong>’t reuse.<br />
• Dye-trapping sheets. In the washer, dyetrapping<br />
sheets work like magnets. Any dye<br />
that bleeds from a fabric is absorbed by the<br />
sheet, preventing color transfer from <strong>on</strong>e piece<br />
of clothing to another.<br />
• Starches. These are a type of sizing that gives<br />
body to fabrics and makes ir<strong>on</strong>ing easier. Spray<br />
starch can be applied before ir<strong>on</strong>ing. Dry and<br />
liquid starches should be mixed with water<br />
before using.<br />
15-5<br />
Top-loading<br />
washing machines have been in use for many years. The<br />
moti<strong>on</strong> of the agitator pulls the clothes through the<br />
water, which enables the detergent to work into the<br />
fabric.<br />
270 • UNIT 5 Clothing <str<strong>on</strong>g>Care</str<strong>on</strong>g><br />
• Water softeners. Mineral deposits that prevent<br />
thorough cleaning can be removed from<br />
hard water with water softeners. The powder<br />
form goes in either the wash or rinse cycle. The<br />
liquid form is added <strong>on</strong>ly to the rinse water.<br />
Some families have a water softening system<br />
installed at home to remove many of the minerals<br />
in water.<br />
• Disinfectants. The germicides in these<br />
products destroy bacteria <strong>on</strong> fabric. Available<br />
in liquid form, they may be used when a family<br />
member is ill.<br />
Using Laundry Equipment<br />
What equipment do you need to do laundry? A<br />
washing machine, clothes dryer, ir<strong>on</strong>, and ir<strong>on</strong>ing<br />
board are basic. Families who d<strong>on</strong>’t own a washer<br />
and dryer can use machines in self-service laundries.<br />
Many apartment buildings have laundry<br />
rooms with coin-operated machines for tenant<br />
use <strong>on</strong>ly.<br />
Washers and Dryers<br />
Of the two types of washing machines, the<br />
comm<strong>on</strong> top-loading machine has been around<br />
for years. It has a lid that lifts up and a center post,<br />
called an agitator, which jiggles clothes during the<br />
wash cycle to loosen dirt and get out soil. See Fig.<br />
15-5.<br />
Putting your hands inside an agitator washer<br />
that’s running is dangerous. To prevent this, most<br />
machines stop agitating when the lid is raised.<br />
Some machines even have a safety lock to keep the<br />
door closed until the machine moti<strong>on</strong> stops.<br />
The sec<strong>on</strong>d type of washing machine is fr<strong>on</strong>tloading,<br />
with a door <strong>on</strong> the face of the machine.<br />
No agitator is present. Instead, the washtub rotates<br />
clothes with a tumbling acti<strong>on</strong> similar to a clothes<br />
dryer. See Fig. 15-6. New high-efficiency models of<br />
fr<strong>on</strong>t- and top-loading machines are designed to<br />
use less water, detergent, and energy. These<br />
machines require a high-efficiency (HE) detergent.<br />
Washing machines often have a dispenser that<br />
automatically releases detergent, fabric softener,<br />
or bleach at the right time. With butt<strong>on</strong>s or dials,<br />
you c<strong>on</strong>trol such settings as water temperature,
15-6<br />
Some washing machines load from the fr<strong>on</strong>t. The<br />
newer models use less energy and water than top-loading<br />
machines. How else are they different?<br />
water level, length of washing time, and speed.<br />
Most washing machines offer at least three wash<br />
cycles: regular, wrinkle-free or permanent press,<br />
and gentle. Some models can be programmed for<br />
an extra rinse, which is helpful for family members<br />
who are sensitive to detergent residue. A time-delay<br />
feature allows the washer to start at a later time,<br />
such as at night, when utility rates may be lower.<br />
Clothes dryers have butt<strong>on</strong>s or dials for c<strong>on</strong>trolling<br />
air temperature and drying time. The<br />
most comm<strong>on</strong> drying cycles are regular, wrinklefree<br />
or permanent press (used for durable-press<br />
fabrics), and air fluff. Air fluff is a no-heat cycle<br />
for drying fabrics that can't handle heat, or for<br />
freshening pillows, bedspreads, and draperies.<br />
Some models c<strong>on</strong>tinue to tumble without heat<br />
after drying. This helps prevent wrinkling when<br />
the clothes aren't removed immediately from the<br />
dryer.<br />
After each load, the dryer lint filter should be<br />
cleaned. Lint buildup can increase drying time by<br />
limiting airflow. See Fig. 15-7. The use of fabric<br />
15-7<br />
Even <strong>on</strong>e load that has been dried in a dryer may<br />
produce c<strong>on</strong>siderable lint. The dryer operates more efficiently<br />
and dries clothing faster when you remove lint<br />
after each load. What fabrics do you think would produce<br />
the most lint?<br />
softener sheets can cause the chemicals <strong>on</strong> the<br />
sheets to clog the holes of the lint filter. To test,<br />
drop some water <strong>on</strong> the filter to see if it runs<br />
through the holes. If not, use a soft brush with soap<br />
and water to wash away the buildup. To prevent a<br />
fire hazard, remove any gradual lint buildup in<br />
dryer pipes and vents at the rear of the dryer.<br />
Ir<strong>on</strong>s and Ir<strong>on</strong>ing Boards<br />
To remove wrinkles from garments, you'll need<br />
an ir<strong>on</strong> and ir<strong>on</strong>ing board. Most ir<strong>on</strong>s have a dial<br />
or c<strong>on</strong>trol butt<strong>on</strong> with temperature settings for<br />
different fibers. Cott<strong>on</strong>, linen, wool, and ray<strong>on</strong> are<br />
usually marked. Acetate, nyl<strong>on</strong>, silk, and polyester<br />
might also be marked.<br />
Many ir<strong>on</strong>s can be used either dry or with<br />
steam. Steam helps take out stubborn wrinkles in<br />
fabrics. Some ir<strong>on</strong>s also have a spray butt<strong>on</strong> that<br />
provides extra moisture. Some steam ir<strong>on</strong>s can<br />
be filled with tap water; others take distilled<br />
water. Most should be emptied of all water<br />
before storing.<br />
CHAPTER 15 Laundry and Dry Cleaning • 271
15-8<br />
Some ir<strong>on</strong>s have more settings and features<br />
than others, which affects cost. You’ll want different tem-<br />
perature settings and probably the ability to use steam.<br />
When choosing an ir<strong>on</strong> to buy, also c<strong>on</strong>sider its weight<br />
and the design of the handle for comfortable use.<br />
To avoid burning your hands, ir<strong>on</strong> carefully. See<br />
Fig. 15-8. Keep your face away from the steam.<br />
Always rest the ir<strong>on</strong> upright <strong>on</strong> its heel, not flat <strong>on</strong><br />
its soleplate.<br />
Some ir<strong>on</strong>s have an automatic shut-off feature.<br />
If the ir<strong>on</strong> isn’t used for a certain period of time,<br />
it turns off automatically. This is a safety feature,<br />
not a reas<strong>on</strong> to leave a hot ir<strong>on</strong> unattended. All<br />
ir<strong>on</strong>s should be turned off and unplugged when<br />
not in use.<br />
A sturdy, level ir<strong>on</strong>ing board helps prevent the<br />
ir<strong>on</strong> from falling. You’ll be more comfortable<br />
using a board with an adjustable height. The<br />
board should have a pad and cover that provide a<br />
smooth, clean surface for ir<strong>on</strong>ing. Without them,<br />
the heat of the ir<strong>on</strong> bounces back at you. Most<br />
covers have a silic<strong>on</strong>e finish to prevent scorching<br />
and make them last l<strong>on</strong>ger. When the pad and<br />
cover become worn or damaged, they should be<br />
replaced.<br />
272 • UNIT 5 Clothing <str<strong>on</strong>g>Care</str<strong>on</strong>g><br />
LAUNDERING CLOTHES<br />
Laundering may not seem like fun, but compared<br />
to a bucket and a washboard, it’s not that<br />
bad. Laundering means washing fabric by hand<br />
or machine with a soil-removing product. You<br />
can keep your clothes in good c<strong>on</strong>diti<strong>on</strong> l<strong>on</strong>ger<br />
by following the simple laundering guidelines in<br />
this secti<strong>on</strong>.<br />
Sorting Clothes<br />
Before laundering, resist the temptati<strong>on</strong> to<br />
throw everything together in <strong>on</strong>e load. Some<br />
clothes wash safely together, but others d<strong>on</strong>’t.<br />
Therefore, sort clothes before you begin. Read the<br />
care labels for recommended procedures. Then<br />
you can sort clothes by color, amount of soil, and<br />
fabric type. See Fig. 15-9.<br />
First, separate the clothes by color. To prevent<br />
any bleeding of colored dyes, all dark colors<br />
should be washed together. Many white fabrics,<br />
especially those made from manufactured fibers,<br />
will pick up color, even from colorfast fabrics.<br />
15-9<br />
If you d<strong>on</strong>’t sort clothes before laundering, the<br />
color from <strong>on</strong>e garment could ruin another. Minimally,<br />
your white and light-colored clothing will become dingier.
White fabrics may become dull and gray after<br />
repeated washings with colored garments, so<br />
wash them separately.<br />
Next, c<strong>on</strong>sider the amount of soil <strong>on</strong> the garments.<br />
Heavily soiled work and play clothes<br />
should be washed separately. They need a l<strong>on</strong>ger<br />
wash cycle and can dull lightly soiled items that<br />
pick up extra soil from the wash water.<br />
Finally, c<strong>on</strong>sider the fabrics in the laundry.<br />
Some fabrics, such as white cott<strong>on</strong> socks and<br />
underwear, require hot water and a l<strong>on</strong>g wash<br />
cycle. Washable wools and fabrics with dark colors<br />
need cold water and a short wash cycle to prevent<br />
fading or shrinking. Durable-press fabrics<br />
need special treatment to minimize wrinkling.<br />
Keep delicate fabrics separate so heavier items<br />
d<strong>on</strong>’t cause them to tangle and tear. Fabrics that<br />
create lint, such as terrycloth towels and fuzzy<br />
sweatshirts, shouldn’t be washed with fabrics that<br />
might attract lint, such as corduroy, velveteen,<br />
and durable-press finishes. You can turn lintproducing<br />
fabrics inside out to keep other fabrics<br />
from picking up lint.<br />
After sorting, you may have several stacks:<br />
dark colors, light colors, whites, and towels.<br />
Create a special pile for items to hand-wash.<br />
Pretreating<br />
While sorting clothes, set aside any garments<br />
with stains that need special attenti<strong>on</strong>. Refer to<br />
the stain removal chart <strong>on</strong> pages 254-255.<br />
Pretreat heavy soil <strong>on</strong> collars and cuffs with a<br />
liquid detergent, a paste of powder detergent and<br />
water, or a prewash soil-and-stain remover. Rub<br />
into the stained area; then wait <strong>on</strong>e to five minutes<br />
before laundering.<br />
Soaking fabrics in water for up to 30 minutes<br />
helps to dissolve many stains and remove excess<br />
soil and mud. Adding an enzyme presoak or<br />
15-10<br />
If items in a top-loading machine become<br />
unevenly placed, they can cause the machine to shake,<br />
rattle, and roll during the spin cycle. Open the lid and<br />
redistribute the items. Loading carefully can help prevent<br />
this from happening.<br />
laundry detergent can aid stain removal. Use<br />
warm water for oily stains and cold water for such<br />
protein stains as blood, egg, and grass.<br />
Machine Washing<br />
If you simply throw dirty clothes into the<br />
machine, pick any water temperature, and dump<br />
the detergent <strong>on</strong> top, the outcome may be disappointing.<br />
There’s actually more to laundering,<br />
but over time, the steps become automatic.<br />
Loading the Machine<br />
Before loading the machine, be sure all pockets<br />
are empty. Tissues, lipstick, cray<strong>on</strong>s, and ballpoint<br />
pens can create lint or permanently stain<br />
fabrics. Close zippers and fasten hooks and eyes<br />
to prevent snagging clothes in the wash. Unfold<br />
sheets and towels. Small items can be placed in a<br />
zippered mesh bag to prevent tangling.<br />
Add detergent according to the machine’s<br />
manual and the directi<strong>on</strong>s <strong>on</strong> the box or bottle. If<br />
fabrics allow, you can add bleach and/or fabric<br />
softener.<br />
Avoid overloading the machine. Items must<br />
move freely for good cleaning and rinsing acti<strong>on</strong><br />
and to keep them from wrinkling. For best<br />
results, distribute the fabrics evenly around the<br />
agitator in machines that have <strong>on</strong>e. See Fig. 15-10.<br />
CHAPTER 15 Laundry and Dry Cleaning • 273
FABRIC<br />
Most washable fabrics, including cott<strong>on</strong>s<br />
and linens, but not durable press,<br />
wools, and delicates.<br />
Durable-press fabrics.<br />
Delicate fabrics, including lingerie,<br />
sheer and lacy fabrics, and loose knits.<br />
Hand-washable fabrics, including wools<br />
and embroidery.<br />
Mix small items with large items to provide good<br />
washing acti<strong>on</strong> as the garments rotate in the<br />
machine.<br />
Water Temperature and Level<br />
Depending <strong>on</strong> the fabric, water temperatures<br />
for washing range from varying levels of cold to<br />
hot. Follow the directi<strong>on</strong>s <strong>on</strong> the care label of the<br />
garments to select the proper water temperature.<br />
See Fig. 15-11.<br />
Hot water (120°–140°F; 49°–60°C) cleans fabric<br />
the best and offers sanitizing benefits. Water<br />
that’s too hot, however, can shrink some fabrics.<br />
Warm water (85°–105°F; 29°–41°C) is recommended<br />
for many fabrics, especially those with<br />
manufactured fibers and durable-press finishes.<br />
Cold water (65°–75°F; 18°–24°C) doesn’t have<br />
much cleaning power, but it saves energy and can<br />
be used for delicate fabrics and lightly soiled<br />
clothes.<br />
For most machines, you can adjust the water<br />
level according to the size of the wash load. If<br />
you’re not washing a full load, select a lower level.<br />
Wash Cycle<br />
Before washing, choose the settings you want<br />
for the wash cycle. Basic machines have <strong>on</strong>ly a few<br />
settings, as shown in Fig. 15-12, but some<br />
machines have many.<br />
• Cycle type. Wash cycles are programmed for<br />
different lengths of time, agitati<strong>on</strong> speeds,<br />
274 • UNIT 5 Clothing <str<strong>on</strong>g>Care</str<strong>on</strong>g><br />
15-11 • Washing and Rinsing Temperatures<br />
WASHING TEMPERATURE<br />
Cold or warm for presoaking.<br />
Cold for bright colors, darks, and lightly soiled fabrics.<br />
Warm for colors and moderately soiled fabrics.<br />
Hot for white and heavily soiled fabrics.<br />
Hot for whites and heavily soiled fabrics.<br />
Warm for everything else.<br />
Cold for bright colors.<br />
Warm for everything else.<br />
Cold or warm.<br />
RINSING TEMPERATURE<br />
Cold or warm.<br />
Cold.<br />
Cold or warm.<br />
Cold or warm.<br />
and rinse temperatures. Use the normal (regular)<br />
cycle for sturdy fabrics, such as cott<strong>on</strong>s<br />
and denims, and heavily soiled clothes. The<br />
gentle (delicate) cycle is shorter and has less<br />
moti<strong>on</strong>. Use it for loosely knitted garments,<br />
sheer fabrics, and lingerie. The wrinkle-free<br />
(permanent-press) cycle has a cold rinse to<br />
minimize wrinkling.<br />
• Water level. To save water, select the level<br />
according to the size of the load: mini, small,<br />
medium, or large.<br />
15-12<br />
When using a washing machine, you choose a<br />
water level, water temperature, and wash cycle. What are<br />
the advantages of making the correct choices?
15-13<br />
Hand washing is recommended for woolens, silks,<br />
and other delicate fabrics. Soak the garment, gently<br />
squeeze to clean, and rinse. What are the final steps?<br />
• Water temperature. You may be able to<br />
choose the wash and rinse temperatures: hot,<br />
warm, or cold. A cold rinse helps prevent wrinkles<br />
during spinning. This is useful for easycare<br />
and wrinkle-free fabrics.<br />
Hand Washing<br />
Hand washing is recommended for many<br />
woolens, silks, and other delicate fabrics. Items<br />
that need separate handling might also be handwashed.<br />
See Fig. 15-13. If possible, wash <strong>on</strong>ly <strong>on</strong>e<br />
or two items together at a time. The care label<br />
tells the water temperature to use.<br />
To begin, pretreat any spots and stains. Then<br />
add the laundry product to the water and swish<br />
until dissolved. Place the garment in the water<br />
and gently squeeze to clean. To remove stains, you<br />
can soak the item for 15 minutes or l<strong>on</strong>ger.<br />
Heavily soiled areas may need rubbing between<br />
your fingers to remove soil. D<strong>on</strong>’t scrub or wring<br />
delicate fabrics.<br />
To finish hand washing, rinse the garment in<br />
cool or cold water several times until the water is<br />
clear. Then roll it in an absorbent towel to remove<br />
as much water as possible.<br />
DRYING CLOTHES<br />
Some clothes can be dried by machine. Others<br />
should be hung up or laid flat to air dry. Always<br />
check the care label for drying instructi<strong>on</strong>s.<br />
Machine Drying<br />
Automatic dryers usually have temperature<br />
and cycle settings to select. Again, fabric determines<br />
what you choose. Manufactured fibers,<br />
which are more heat-sensitive, should be tumbledried<br />
at a lower temperature than cott<strong>on</strong> or linen.<br />
Heavier fabrics, such as denim and terrycloth,<br />
take l<strong>on</strong>ger to dry than lightweight fabrics. The<br />
cool-down time at the end of the permanentpress<br />
cycle uses no heat, which reduces wrinkling<br />
of durable-press fabrics.<br />
The air-fluff cycle dries without heat. Since<br />
vinyls, plastics, laminates, and some wools can’t<br />
take heat, air fluff is a good choice for them.<br />
Before putting damp clothes in the dryer,<br />
loosen them by shaking. D<strong>on</strong>’t overload the dryer,<br />
because this slows down drying time, increases<br />
wrinkling, and decreases fluffiness. One washer<br />
load in the dryer at a time is best. Avoid tumbledrying<br />
fabrics that produce lint with other fabrics.<br />
To prevent wrinkles and damage to fabric, try<br />
not to overdry garments. Fewer wrinkles occur if<br />
you fold clothes neatly or hang them <strong>on</strong> hangers<br />
when still warm. Remove and hang durable-press<br />
fabrics as so<strong>on</strong> as the dryer stops. See Fig. 15-14<br />
<strong>on</strong> page 276. Elastic bands in shorts and socks<br />
should feel slightly damp when first taken from<br />
the dryer. All clothes, however, should be completely<br />
dry before putting them away in a closet<br />
or drawer. This prevents mildew from forming.<br />
Line Drying and Flat Drying<br />
If a garment is labeled “line dry” or “dry flat,”<br />
you shouldn’t put it in the dryer. The fabric may<br />
shrink or stretch out of shape.<br />
To line-dry clothes, hang them while still<br />
damp. First, shake out each item and smooth<br />
wrinkles by hand. On an outdoor clothesline,<br />
place clothespins where they w<strong>on</strong>’t leave marks<br />
<strong>on</strong> the garments. If you’re drying clothes indoors,<br />
CHAPTER 15 Laundry and Dry Cleaning • 275
15-14<br />
The durable-press setting <strong>on</strong> a dryer often<br />
buzzes several times before the dryer stops. This gives<br />
you time to remove and hang garments, which prevents<br />
wrinkles and ir<strong>on</strong>ing.<br />
hang them <strong>on</strong> plastic hangers, because wire hangers<br />
may leave rust marks. Hang clothes where the<br />
air can circulate around them. Many people use<br />
the bathroom shower rod. See Fig. 15-15. A<br />
portable drying rack is another c<strong>on</strong>venient way to<br />
line-dry clothes indoors.<br />
For garments that stretch out of shape when<br />
hung to dry, including sweaters and many knit<br />
garments, dry them flat. Remove as much moisture<br />
as possible. To do this, place the garment <strong>on</strong><br />
top of a clean, dry towel and smooth it out. Roll<br />
the garment and towel together. Then press the<br />
roll with your hands to transfer moisture to the<br />
towel. Next, spread a clean, dry towel <strong>on</strong> a large,<br />
flat surface that can withstand moisture. Remove<br />
the garment from the roll and lay it <strong>on</strong> the dry<br />
towel, patting the garment into shape. Leave it<br />
there until thoroughly dry.<br />
276 • UNIT 5 Clothing <str<strong>on</strong>g>Care</str<strong>on</strong>g><br />
Special racks for drying clothes flat can speed<br />
the drying time. These plastic screens are<br />
stretched <strong>on</strong>to a frame supported by short legs.<br />
Air circulates under and over the garment for<br />
faster drying.<br />
IRONING CLOTHES<br />
With heat, moisture, and slight pressure, ir<strong>on</strong>ing<br />
removes wrinkles from clothes. The ir<strong>on</strong><br />
moves back and forth in a gliding moti<strong>on</strong>. To<br />
avoid stretching fabric, always ir<strong>on</strong> in the lengthwise<br />
or crosswise directi<strong>on</strong> of the fabric.<br />
p 511<br />
How much ir<strong>on</strong>ing will you need to do? That<br />
depends <strong>on</strong> the fabrics in your wardrobe. Most<br />
knits and durable-press fabrics, such as polyester/cott<strong>on</strong>,<br />
need little or no ir<strong>on</strong>ing. Fabrics<br />
that wrinkle, such as linen, cott<strong>on</strong>, silk, and<br />
ray<strong>on</strong>, usually need ir<strong>on</strong>ing.<br />
When ir<strong>on</strong>ing, select a temperature that<br />
matches the fiber c<strong>on</strong>tent of your fabric. Cott<strong>on</strong>s<br />
and linens can be pressed at higher temperatures<br />
than manufactured fibers. For blended fabrics,<br />
select the setting for the most heat-sensitive fiber<br />
in the blend. If you’re not sure what setting to use,<br />
15-15<br />
Plastic hangers placed <strong>on</strong> a bathroom shower<br />
curtain rod provide a good way to dry clothes that can’t<br />
go in the dryer. Why do these garments need to hang<br />
without touching each other?
How To…<br />
PROVIDE SUN PROTECTION<br />
Skin cancer is the most comm<strong>on</strong> form of cancer in the United States. Scientific research<br />
has linked sunburn and prol<strong>on</strong>ged exposure to the sun to skin cancer and premature<br />
aging of the skin. Using a str<strong>on</strong>g sunscreen is <strong>on</strong>e way to protect your skin. The clothes<br />
you wear can also play an important role in blocking out the sun’s harmful rays.<br />
To improve a fabric’s ability<br />
to protect you from the<br />
sun you can:<br />
• Buy UPF fabrics. UPF,<br />
or Ultraviolet Protective<br />
Factor, measures the<br />
protecti<strong>on</strong> offered by<br />
certain sun-blocking<br />
fabrics. These fabrics<br />
use a special chemical<br />
technology to reduce<br />
penetrati<strong>on</strong> by harmful<br />
ultraviolet rays. Some of<br />
these fabrics are marketed<br />
with their UPF<br />
rating, which is similar<br />
to the SPF rating <strong>on</strong><br />
sunscreens. A UPF rating<br />
of 15 to 24 provides<br />
“good” UVR protecti<strong>on</strong>.<br />
A UPF of rating of 40 or<br />
more gives “excellent”<br />
UVR protecti<strong>on</strong>.<br />
• Use laundry additives. You can add sun<br />
protecti<strong>on</strong> to your washable garments.<br />
Special products that c<strong>on</strong>tain a UV protectant<br />
can be added to a warm- or hot-water<br />
load of laundry al<strong>on</strong>g with detergent. This<br />
washed-in sun protecti<strong>on</strong> lasts for up to 20<br />
washings.<br />
• Use the right detergents. Washing clothes<br />
with a detergent that c<strong>on</strong>tains whitening<br />
and brightening agents improves the fabric’s<br />
ability to protect you from the sun.<br />
These agents are<br />
deposited <strong>on</strong>to the fabric<br />
and absorb some of<br />
the sun’s UV radiati<strong>on</strong>.<br />
Fabrics that have not<br />
been specially treated<br />
vary in their ability to<br />
protect you from the<br />
sun. Dark colors offer<br />
better protecti<strong>on</strong> than<br />
light colors. Tightly<br />
woven or knitted fabrics<br />
will protect you<br />
better than open<br />
weaves or knits. For<br />
example, a dark T-shirt<br />
has a higher UPF factor<br />
than a white <strong>on</strong>e. A<br />
denim shirt, which is<br />
dark and tightly<br />
woven, has a sun protective<br />
factor many<br />
times higher than the<br />
T-shirts.<br />
Exploring Sun<br />
Protecti<strong>on</strong><br />
Search for Web sites that publish UPF<br />
ratings for articles of clothing that<br />
provide sun protecti<strong>on</strong>. Compare styles,<br />
prices, and other informati<strong>on</strong>.<br />
CHAPTER 15 Laundry and Dry Cleaning • 277
start with a low temperature. Increase the temperature<br />
gradually to keep from damaging the<br />
fabric.<br />
To avoid putting a shine <strong>on</strong> a fabric’s right side,<br />
ir<strong>on</strong> <strong>on</strong> the wr<strong>on</strong>g side. If you must work <strong>on</strong> the<br />
right side, always press gently or use a press cloth.<br />
To use moisture settings, choose dry (no<br />
steam) for fabrics that take a low ir<strong>on</strong> temperature.<br />
These fabrics include the delicate <strong>on</strong>es, such<br />
as acetate, silk, and polyester. Choose the steam<br />
setting for fabrics that need a higher temperature<br />
to remove wrinkles. Linen, cott<strong>on</strong>, and wool are<br />
examples.<br />
When ir<strong>on</strong>ing with steam, wait until the ir<strong>on</strong><br />
has reached the proper temperature. A light may<br />
indicate readiness. D<strong>on</strong>’t overfill the water supply<br />
area. With too much water, the ir<strong>on</strong> may spit and<br />
put spots <strong>on</strong> your clothes. If your ir<strong>on</strong> has a spray<br />
butt<strong>on</strong>, push it when needed to add moisture to<br />
stubborn wrinkles. If your ir<strong>on</strong> doesn’t supply<br />
steam or spray, cover the fabric with a damp press<br />
cloth.<br />
When ir<strong>on</strong>ing several items, start with those<br />
that take a lower temperature. On each garment,<br />
begin with small detail areas. Then ir<strong>on</strong> the major<br />
parts of the garment. Work carefully, ir<strong>on</strong>ing<br />
small secti<strong>on</strong>s at a time, as shown <strong>on</strong> page 277.<br />
DRY-CLEANING CLOTHES<br />
The dry-cleaning process uses special liquids<br />
c<strong>on</strong>taining organic solvents to clean fabrics without<br />
water. A solvent is a substance that dissolves<br />
another substance. Dry cleaning can be d<strong>on</strong>e by a<br />
professi<strong>on</strong>al dry cleaner or in a coin-operated<br />
machine. To dry-clean at home with your own<br />
dryer, follow the guidelines <strong>on</strong> page 279.<br />
Professi<strong>on</strong>al Dry Cleaning<br />
Dry cleaners have special cleaning products for<br />
removing some stains that you can’t. Always<br />
point out any stains—and their cause, if possible—to<br />
the dry cleaner. See Fig. 15-16. Ifyou<br />
know a stained garment will be dry-cleaned,<br />
d<strong>on</strong>’t try to remove the stain yourself. You might<br />
use something that later reacts with the drycleaning<br />
solvents and permanently sets the stain.<br />
278 • UNIT 5 Clothing <str<strong>on</strong>g>Care</str<strong>on</strong>g><br />
Dry-cleaning solvents can damage some butt<strong>on</strong>s<br />
and trims. Discuss this with the dry cleaner.<br />
If the cleaner decides to remove the items, they<br />
will be replaced after cleaning.<br />
When clothing is professi<strong>on</strong>ally dry-cleaned,<br />
items are separated by light or dark colors and by<br />
delicacy of fabric. Separate loads are placed into<br />
machines that resemble an automatic washer.<br />
While the clothes rotate, the solvent releases and<br />
gradually removes the soil. Then the solvent is<br />
spun away, and the clothing is tumbled or airdried<br />
until all traces of the solvent are g<strong>on</strong>e.<br />
Steam pressing takes out wrinkles, smoothes<br />
seams, and restores creases and pleats. Some garments<br />
are placed over form finishers, mannequin-like<br />
forms that allow steam from the<br />
inside to permeate the garment and remove wrinkles.<br />
Special hand ir<strong>on</strong>s and steam presses do<br />
other pressing.<br />
Some professi<strong>on</strong>al dry cleaners do minor<br />
repairs and alterati<strong>on</strong>s. Learning to sew <strong>on</strong> but-<br />
15-16<br />
Knowing what caused a stain helps the dry<br />
cleaner decide what solvents to use for removal. Try to<br />
give that informati<strong>on</strong> if you can.
Technology Trends<br />
>>DRY CLEANING AT HOME<br />
To save <strong>on</strong> dry-cleaning expenses,<br />
many people today buy dry-cleaning kits<br />
to use in home dryers. Each kit includes<br />
several premoistened cloths and a<br />
reusable bag that holds the clothes.<br />
These kits will clean lightly soiled<br />
clothes and freshen and deodorize items.<br />
They work best <strong>on</strong> wool, ray<strong>on</strong>, silk, linen,<br />
and cott<strong>on</strong> knit fabrics and aren’t recommended<br />
for leather, suede, acetate, and<br />
satin. In additi<strong>on</strong> to clothes, they can be<br />
used <strong>on</strong> scarves, gloves, throw pillows,<br />
small blankets, and stuffed animals. Follow<br />
the instructi<strong>on</strong>s carefully at each<br />
step.<br />
Before cleaning, visible stains must be<br />
completely removed. Stain removal materials<br />
come with the kit. Always test for<br />
colorfastness <strong>on</strong> a hidden area of the garment.<br />
For heavy stains and ground-in soil,<br />
professi<strong>on</strong>al dry cleaning is recommended.<br />
t<strong>on</strong>s and alter hems yourself, however, saves the<br />
expense. p 530, p 537<br />
Coin-Operated Dry Cleaning<br />
Coin-operated dry cleaning is faster and costs<br />
less than professi<strong>on</strong>al dry cleaning. Although the<br />
machines remove most soil, the clothes d<strong>on</strong>’t get<br />
special spot removal or pressing.<br />
So items can tumble freely, the bag<br />
should be <strong>on</strong>ly three-fourths full—no more<br />
than four garments. Fasten butt<strong>on</strong>s and<br />
zippers. Garments with perspirati<strong>on</strong><br />
odors should be turned inside out. Place<br />
the premoistened cloth in the bag with<br />
the clothes. Then seal the bag and place<br />
it in the dryer. Tumble dry for 20 minutes<br />
<strong>on</strong> the low or permanent-press setting.<br />
For light freshening, tumble dry for 10<br />
minutes.<br />
As the bag tumbles, the heat-activated<br />
cloth releases biodegradable cleaning and<br />
freshening ingredients that permeate the<br />
fabrics. The c<strong>on</strong>trolled humidity within the<br />
bag helps prevent wrinkling.<br />
While the garments are still warm,<br />
remove them from the dryer. Promptly<br />
shake them out and place <strong>on</strong> hangers.<br />
Pressing may be needed.<br />
INVESTIGATE<br />
Survey three people who have used home<br />
dry-cleaning kits. Prepare a list of questi<strong>on</strong>s<br />
to ask about brands, costs, results,<br />
and suggesti<strong>on</strong>s. Present your c<strong>on</strong>clusi<strong>on</strong>s<br />
to the class.<br />
Some laundries offer a dry-cleaning service.<br />
After clothes are weighed, you pay by the pound.<br />
An attendant puts the clothes in the machine and<br />
hangs them up when d<strong>on</strong>e. If you point out<br />
stains, they will be treated before cleaning.<br />
If clothes are put <strong>on</strong> hangers while still warm,<br />
many wrinkles fall out. Professi<strong>on</strong>al pressing,<br />
however, gives garments a crisper finish.<br />
CHAPTER 15 Laundry and Dry Cleaning • 279
CHAPTER 15<br />
CHAPTER SUMMARY<br />
• Choosing the right laundry products helps<br />
make washing clothes easier and more<br />
effective.<br />
• The fabrics, the type of stains, and washing<br />
machine you use determine which laundry<br />
product you need.<br />
• Adjustable settings <strong>on</strong> washers, dryers,<br />
and other laundry equipment allow you to<br />
tailor their use to your needs.<br />
• Clothes should be sorted for washing by<br />
color, amount of soil, and fabric.<br />
• Clothes can also be washed by hand and<br />
dried <strong>on</strong> a line or rack.<br />
• Dry cleaning may be the best opti<strong>on</strong> for<br />
some garments.<br />
USING KEY TERMS<br />
With a partner, take turns giving <strong>on</strong>e fact<br />
about each Key Term.<br />
280 • UNIT 5 Clothing <str<strong>on</strong>g>Care</str<strong>on</strong>g><br />
Review<br />
RECALLING THE FACTS<br />
1. Why are detergents better than soaps<br />
for laundering?<br />
2. What are two advantages of using an<br />
ultra detergent?<br />
3. Is a high-foaming detergent a better<br />
product? Explain.<br />
4. Describe four other laundering products<br />
beside detergents.<br />
5. Compare the two basic types of washing<br />
machines.<br />
6. Why should lint be removed from a<br />
dryer’s filter, pipe, and vents?<br />
7. Explain how to use an ir<strong>on</strong> safely.<br />
8. What can happen if a white dress shirt is<br />
washed with a pair of jeans that was<br />
worn to weed the garden?<br />
9. To prevent a laundering mishap, what<br />
should you do to a fleecy sweat jacket<br />
with pockets before washing?<br />
10. In what ways can a wash cycle be<br />
adjusted for a particular load of laundry?<br />
11. What steps can you take when machine<br />
drying to help clothes look their best?<br />
12. How can you help garments keep their<br />
shape when drying flat?<br />
13. How is an ir<strong>on</strong> setting different for silk<br />
and cott<strong>on</strong> shirts?<br />
14. How does dry cleaning remove stains<br />
without water?
and Activities<br />
THINKING CRITICALLY<br />
1. A friend believes that when it comes to<br />
laundry detergent, “If some is good, then<br />
more is better.” What do you think of this<br />
reas<strong>on</strong>ing?<br />
2. How would you decide what laundering<br />
methods to use if a garment’s care label<br />
is missing?<br />
3. Suppose some<strong>on</strong>e washes all clothes in<br />
cold water, regardless of care label recommendati<strong>on</strong>s,<br />
in order to save <strong>on</strong><br />
energy bills. Is this pers<strong>on</strong> necessarily<br />
saving m<strong>on</strong>ey? Why or why not?<br />
APPLYING KNOWLEDGE<br />
1. Envir<strong>on</strong>mental impact. Locate a detergent<br />
designed to be envir<strong>on</strong>mentally<br />
safe. Analyze the ingredients. Why is the<br />
product c<strong>on</strong>sidered “earth friendly”?<br />
C<strong>on</strong>duct an experiment to compare the<br />
cleaning ability of this detergent to a<br />
standard brand. Share your findings with<br />
the class.<br />
2. C<strong>on</strong>sumer research. In a c<strong>on</strong>sumer magazine,<br />
find an article that compares different<br />
brands of laundry products or<br />
laundering equipment, such as washing<br />
machines, dryers, or ir<strong>on</strong>s. Study the<br />
researchers’ methods and findings. Based<br />
<strong>on</strong> their results, which product or equipment<br />
brand do you think is the best buy?<br />
Why? Write a report of your c<strong>on</strong>clusi<strong>on</strong>s.<br />
CHAPTER 15<br />
3. Ir<strong>on</strong>ing and pressing. Dem<strong>on</strong>strate the<br />
difference between ir<strong>on</strong>ing and pressing<br />
for the class. Include safety principles.<br />
4. Home dry cleaning. Using a home drycleaning<br />
kit, dem<strong>on</strong>strate its use for the<br />
class.<br />
MAKING>
CHAPTER 16<br />
Redesign, Repair, and Recycle<br />
OBJECTIVES<br />
• Update the<br />
fashi<strong>on</strong> look of<br />
older clothes.<br />
• Adjust garments to<br />
improve the fit.<br />
• Make simple<br />
clothing repairs.<br />
• Find new uses for<br />
clothes and<br />
fabrics.<br />
KEY TERMS<br />
appliqué<br />
c<strong>on</strong>signment shop<br />
patchwork<br />
recycle<br />
redesign<br />
snags<br />
282 • UNIT 5 Clothing <str<strong>on</strong>g>Care</str<strong>on</strong>g>
EXAMINETHISISSUE<br />
Taking time. For many busy people,<br />
taking time to repair and redesign clothes<br />
doesn’t seem worthwhile. Even packing<br />
up old garments and d<strong>on</strong>ating them to a<br />
service agency takes valuable time, they<br />
feel. On the other hand, many others<br />
believe that extending the usefulness of<br />
clothing is a good idea. They want to<br />
make use of items that would otherwise<br />
be discarded.<br />
What do you think?<br />
As you read this chapter, think about<br />
these two points of view. When weighing<br />
time against the benefits of redesigning,<br />
repairing, and recycling, which point of<br />
view fits your thinking? Why?<br />
When a classmate admired her<br />
new skirt, <strong>on</strong>e teen smiled and thought<br />
to herself, “It’s not as new as you think.”<br />
Actually, a family member gave her the slightly<br />
used skirt. The fabric was beautiful—and the style<br />
salvageable with a little creativity. The teen shortened<br />
the skirt, narrowed the flare, and added a<br />
short slit. With a little time—and no expense—she<br />
had a “new” skirt worth admiring.<br />
In a society that’s known for throwing too<br />
much away, extending the use of clothing<br />
can make a difference. While redesigning is<br />
<strong>on</strong>e way to make clothing last, in this<br />
chapter you’ll read about how to repair<br />
and recycle clothing as well. See Fig. 16-1.<br />
16-1<br />
What happens to clothing that becomes worn,<br />
outdated, or simply unwanted? In this chapter you’ll<br />
learn about three ways to make the most of the garments<br />
in your closet.<br />
REDESIGNING CLOTHES<br />
To redesign is to change an existing garment<br />
to make it suitable for more wear. When<br />
redesigning, you can change a garment’s style and<br />
fit as well as its color and trim. Thus, you may be<br />
able to achieve the current fashi<strong>on</strong> look by making<br />
<strong>on</strong>ly minor changes to an outdated garment.<br />
Redesigning is a practical way to get the most<br />
from what you already have. By using your time<br />
and skills, you can expand your wardrobe at little<br />
or no cost. You also have a chance to be creative.<br />
Wearing a <strong>on</strong>e-of-a-kind garment that expresses<br />
your individuality can make you feel proud.<br />
Changing the Style<br />
From year to year, fashi<strong>on</strong>s change. When the<br />
change affects a garment’s shape, redesigning<br />
can rescue the article from looking dated.<br />
How can you redesign older clothes to update<br />
them? You can raise, and sometimes lower, a<br />
hemline. An oversized jacket can be taken in to<br />
look more fitted. Adding a belt at the waist or<br />
hips gives more c<strong>on</strong>trol to a full-cut dress. Wide<br />
pant legs can be straightened and narrowed.<br />
Redesign Repair<br />
Recycle<br />
CHAPTER 16 Redesign, Repair, and Recycle • 283
In seeking a new look for a<br />
garment, you may want a more<br />
significant change. If you like,<br />
you can change the entire<br />
style. L<strong>on</strong>g pants can be<br />
turned into cropped pants<br />
or shorts by changing the<br />
hemline. See Fig. 16-2.<br />
A l<strong>on</strong>g-sleeved shirt can<br />
become a short-sleeved <strong>on</strong>e.<br />
Removing the sleeves <strong>on</strong> a<br />
jacket can create a vest.<br />
Shortening a coat turns it into a<br />
jacket.<br />
Before you begin any redesign<br />
project, work out the steps and soluti<strong>on</strong>s.<br />
Ask yourself these questi<strong>on</strong>s: Where should<br />
I cut off these pant legs to leave enough<br />
fabric for a hem or cuff? If I take out the<br />
sleeves of this jacket, how will I finish the<br />
armholes for a new vest? A well-thought-out plan<br />
brings better results.<br />
Adjusting the Fit<br />
No <strong>on</strong>e likes to wear clothing that’s uncomfortable<br />
or unflattering. Even a small problem,<br />
such as a binding waistband, can leave a garment<br />
hanging in the closet, unwanted and unused.<br />
Minor correcti<strong>on</strong>s can often be made easily,<br />
with just some basic sewing skills. Maybe moving<br />
a hook or butt<strong>on</strong> <strong>on</strong> a tight waistband will give<br />
the added comfort you need. Major problems,<br />
however, are best left to a professi<strong>on</strong>al dressmaker<br />
or tailor, especially <strong>on</strong> certain garments. A prom<br />
dress, for example, might need the attenti<strong>on</strong> of an<br />
expert.<br />
Length Adjustments<br />
Most garments can be shortened; fewer can be<br />
lengthened. Plain hems are simply measured,<br />
refolded, and restitched. Cuffed garments take<br />
extra planning and c<strong>on</strong>structi<strong>on</strong> steps.<br />
To shorten a hem, mark the new hem length<br />
with pins or chalk. Remove the old stitching and<br />
fold up the fabric al<strong>on</strong>g the new hemline. See Fig.<br />
16-3. You may need to trim the hem allowance.<br />
284 • UNIT 5 Clothing <str<strong>on</strong>g>Care</str<strong>on</strong>g><br />
16-2<br />
If jeans become worn at the knees or below,<br />
they could be cut off and hemmed to make shorts.<br />
Most hems should be no wider than 2 to 3<br />
inches (5 to 7.5 cm). A wider hem can add<br />
bulk, looking uneven and obvious. If the<br />
fabric ravels, finish the edge of the hem<br />
allowance with zigzag stitching, pinking, or<br />
seam tape. Attach the hem to the garment by<br />
hand stitching, machine stitching, or fusing.<br />
p 537<br />
Lengthening a hem is a little more involved.<br />
First, check that there is enough fabric to create<br />
the added length. If not, you may be able to<br />
add wide, hem-facing tape <strong>on</strong> the inside of the<br />
garment edge to complete the hem, as was d<strong>on</strong>e<br />
in Fig. 16-4. Unfortunately, the crease of the old<br />
hemline may be impossible to ir<strong>on</strong> out. Check<br />
before you sew. One soluti<strong>on</strong> is to hide the original<br />
hemline with trim or several rows of machine<br />
stitching. This method, however, often looks like<br />
a cover-up rather than part of the garment<br />
design.<br />
Width Adjustments<br />
Altering the width of a garment is usually<br />
more complicated than changing the length.<br />
Minor width adjustments can usually be made at<br />
the side seams, with equal amounts taken in or let<br />
16-3<br />
When you shorten a hem, the crease from the<br />
old hem will be hidden inside the garment.<br />
Old<br />
crease<br />
Shortening a hem
16-4<br />
Lengthening a hem<br />
Hem<br />
facing<br />
tape<br />
When you lengthen a hem, the crease from the<br />
old hem may show <strong>on</strong> the outside of the garment. What<br />
can you do?<br />
out at each side. Be sure to gradually taper the<br />
new seam to meet the old <strong>on</strong>e at an armhole or<br />
waistband.<br />
To take in a garment, or make it smaller, you<br />
stitch the new seam within the garment itself. See<br />
Fig. 16-5. To let out a garment, or make it larger,<br />
you stitch the new seam in the seam allowance,<br />
outside the original seam line. See Fig. 16-6.<br />
Therefore, the seam allowances must be wide<br />
enough to allow for a new seam. For instance, the<br />
seams <strong>on</strong> some ready-to-wear garments are<br />
trimmed and finished to 1 ⁄4 inch (6 mm). With<br />
such a narrow seam allowance, you wouldn’t be<br />
able to make the garment wider.<br />
Adding Accessories and Trims<br />
If you’re bored with an older garment, why not<br />
try a new accessory before discarding the item? A<br />
new belt, scarf, tie, or jewelry piece can produce a<br />
fresh look. Check fashi<strong>on</strong> magazines for the latest<br />
trends. If the natural look is in style, a braided<br />
rope belt can add new appeal to multiple outfits.<br />
For other seas<strong>on</strong>s, a shiny gold belt or a bright red<br />
<strong>on</strong>e may be the important look. A gold or silver<br />
clasp adds a touch of sophisticati<strong>on</strong> to a colorful<br />
scarf. A tie in a dark, subdued print makes a<br />
casual shirt look more formal.<br />
Changing butt<strong>on</strong>s is an easy way to give a garment<br />
a new look. Many ready-to-wear outfits<br />
have inexpensive butt<strong>on</strong>s that fade or discolor<br />
Seam<br />
allowance<br />
16-5<br />
Making a garment<br />
smaller<br />
Garment<br />
To make a garment smaller, you can sew a new<br />
seam <strong>on</strong> the garment side of the old seam.<br />
Seam<br />
allowance<br />
16-6<br />
Making a garment<br />
larger<br />
To make a garment larger, you can sew a new<br />
Garment<br />
seam within the seam allowance. Then take out the old<br />
seam that has been replaced.<br />
after repeated washings or cleanings. Replacing<br />
these butt<strong>on</strong>s can improve a garment’s appearance.<br />
To save m<strong>on</strong>ey, you can even salvage nice<br />
butt<strong>on</strong>s from a worn garment to sew <strong>on</strong> another.<br />
Adding colorful trim is another way to change<br />
the look of a garment. For a romantic mood, you<br />
CHAPTER 16 Redesign, Repair, and Recycle • 285
16-7<br />
Replacing the butt<strong>on</strong>s <strong>on</strong> a garment can create a<br />
new look. How would different butt<strong>on</strong> styles and colors<br />
affect the look of a garment?<br />
could choose delicate lace. Brightly colored rickrack<br />
can create a casual look. Braids and ribb<strong>on</strong>s<br />
range from tailored to dressy. Appliqués, cutout<br />
pieces of fabric applied as a decorati<strong>on</strong>, can be carto<strong>on</strong><br />
characters or intricate designs. Embroidery<br />
can be added as a simple m<strong>on</strong>ogram or as an elegant<br />
finish to a wedding gown. Many moods are<br />
possible.<br />
Trim can also be rhythmic. You might add two<br />
or three rows of trim instead of <strong>on</strong>e, or repeat the<br />
trim at the hem of a sleeve or bottom of a skirt.<br />
An appliqué <strong>on</strong> both patch pockets may look better<br />
than <strong>on</strong>ly <strong>on</strong> <strong>on</strong>e pocket. Experiment by pinning<br />
trim in place before attaching it permanently.<br />
Fig. 16-7 shows how to create a different<br />
effect <strong>on</strong> a garment with butt<strong>on</strong>s.<br />
Changing the Color<br />
Suppose you need a green shirt to wear with<br />
your team at a fund-raising festival, but you d<strong>on</strong>’t<br />
have <strong>on</strong>e and d<strong>on</strong>’t want to spend m<strong>on</strong>ey <strong>on</strong> a<br />
new <strong>on</strong>e. Turning an old shirt from white to<br />
green might be just the answer.<br />
286 • UNIT 5 Clothing <str<strong>on</strong>g>Care</str<strong>on</strong>g><br />
A color change may serve a practical need, but<br />
it can also be planned for other reas<strong>on</strong>s. A change<br />
of color can give a garment a fashi<strong>on</strong> update.<br />
Faded fabric could become brighter. Even a problem<br />
might be covered with the creative use of<br />
color.<br />
Dyeing Fabric<br />
You can change the entire color of a garment<br />
by dyeing the fabric. See Fig. 16-8. Fabric dyes<br />
come in liquid and powder forms.<br />
Before you dye a garment, think carefully<br />
about the change you want to make. Check the<br />
fiber c<strong>on</strong>tent of the fabric, since some fibers dye<br />
better than others. C<strong>on</strong>sider the trims too. You<br />
can go from a light to a dark color easily, but you<br />
must first remove the original color before going<br />
from a dark to a light color. The garment should<br />
be stain-free, as stains will still show after dyeing.<br />
Will your fabric shrink? If so, you will need a<br />
cold-water dye.<br />
By planning your project carefully, you’ll save<br />
disappointment. Read the instructi<strong>on</strong>s <strong>on</strong> the<br />
package carefully and follow them exactly, step by<br />
step. Otherwise the dye may not be permanent,<br />
and the color may fade or bleed when you wash<br />
the garment.<br />
16-8<br />
When dyeing fabric, wear gloves. You’ll also want<br />
to protect your clothing and any surrounding surface<br />
area from splatters.
Painting Fabric<br />
With fabric paints, you can create colorful<br />
designs <strong>on</strong> clothing and accessories. See Fig. 16-9.<br />
A shirt, jacket, jeans, sweatshirt, bag, or child’s<br />
outfit can become a canvas for your creativity.<br />
Even shoes can be decorated.<br />
Some fabric paints come in ready-to-use<br />
tubes. Others are applied with a brush or marker.<br />
The paints have a wide range of colors, including<br />
metallic. Some even create a raised design. Be<br />
sure to choose washable paints.<br />
REPAIRING CLOTHES<br />
According to an old saying, “A stitch in time<br />
saves nine.” In other words, a repair made early<br />
prevents a bigger repair job later. By making simple<br />
repairs as so<strong>on</strong> as possible, you can keep your<br />
clothes in good shape and always ready to wear.<br />
When several garments need small repairs,<br />
why not set aside a little time to fix them all?<br />
Good management means using time effectively.<br />
As l<strong>on</strong>g as you have the tools and noti<strong>on</strong>s out,<br />
doing several repairs at <strong>on</strong>ce makes efficient use<br />
of time.<br />
Restitching Seams<br />
When stitches break, seams rip open and the<br />
garment may become unwearable. Broken<br />
stitches are comm<strong>on</strong>, but easily repaired. You can<br />
fix a seam with machine or small hand stitches, as<br />
16-9<br />
You can use fabric paints to make colorful<br />
designs <strong>on</strong> clothing, accessories, and gift items.<br />
16-10<br />
A hem that is falling out needs repair before it<br />
becomes worse. What tips would you suggest so that the<br />
repair work doesn’t show?<br />
shown <strong>on</strong> page 288. For seams in areas that<br />
receive extra stress, such as the underarm of a<br />
shirt or the crotch seam of pants, sew a double<br />
row of stitching 1 ⁄8 inch (3 mm) apart for added<br />
reinforcement. p 519<br />
Restitching Hems<br />
A hem will sag if the stitches come loose or<br />
catch <strong>on</strong> an object. See Fig. 16-10. Many ready-towear<br />
garments have hems sewn with a chain<br />
stitch that can easily pull out around the entire<br />
garment if a stitch is broken. It <strong>on</strong>ly takes a few<br />
minutes to restitch an opened hem, as shown <strong>on</strong><br />
page 288. p 537<br />
Sometimes the hem in a new garment puckers<br />
or pulls, creating a rumpled look. To smooth the<br />
area, remove the old stitches and restitch the hem.<br />
Replacing Fasteners<br />
Many homes have a butt<strong>on</strong> jar like the <strong>on</strong>e in<br />
Fig. 16-11 <strong>on</strong> page 289 for saving extra butt<strong>on</strong>s<br />
that come with ready-to-wear garments. It makes<br />
replacing a lost butt<strong>on</strong> easier. If an identical butt<strong>on</strong><br />
is not available, you may have to replace it<br />
with <strong>on</strong>e that’s similar. If possible, attach the mis-<br />
CHAPTER 16 Redesign, Repair, and Recycle • 287
How To…<br />
MAKE SIMPLE REPAIRS<br />
Repairing a Hem<br />
Pin the loose hem in place. Using a single<br />
thread, stitch al<strong>on</strong>g the upper edge<br />
with a hemming stitch, blindstitch, or<br />
catchstitch. See page 539 for specific<br />
directi<strong>on</strong>s. Extend the new stitching so<br />
it overlaps with the<br />
old. Keep the<br />
stitches slightly<br />
loose so the fabric<br />
doesn’t pucker. Be<br />
sure the stitches<br />
d<strong>on</strong>’t show <strong>on</strong> the<br />
outside of the garment.<br />
Reattaching a Butt<strong>on</strong><br />
A loose or missing butt<strong>on</strong> can be reattached<br />
with a few simple stitches. Use a<br />
double strand of thread and tie a small<br />
knot at the end.<br />
• Shank butt<strong>on</strong>. Make four or<br />
five small stitches through<br />
the shank and the fabric.<br />
Fasten the thread securely<br />
under the butt<strong>on</strong> with tiny<br />
stitches or a knot.<br />
• Sew-through butt<strong>on</strong>. Place a toothpick,<br />
match, or heavy pin <strong>on</strong> top of the butt<strong>on</strong>.<br />
Stitch up through <strong>on</strong>e hole, over the<br />
object, and down through the sec<strong>on</strong>d<br />
hole; repeat four or five times. Remove<br />
the object and pull the butt<strong>on</strong> to the top<br />
of the thread loops. Wind the thread<br />
tightly around the stitches under the<br />
butt<strong>on</strong> and secure.<br />
288 • UNIT 5 Clothing <str<strong>on</strong>g>Care</str<strong>on</strong>g><br />
Restitching a Seam<br />
To restitch a seam, turn the garment<br />
inside out, align the two sides of the<br />
seam, and pin. If possible, knot the<br />
ends of the broken seam so more<br />
stitches w<strong>on</strong>’t pull out. Using a double<br />
strand of thread for extra strength,<br />
make short backstitches al<strong>on</strong>g the<br />
original seam line. Extend the new<br />
stitches bey<strong>on</strong>d the actual opening so<br />
they overlap the original stitching at<br />
both ends.<br />
If you are unable to<br />
repair the seam from<br />
the inside, use a slip<br />
stitch to attach <strong>on</strong>e<br />
folded edge, such as a<br />
patch pocket, to the garment. To<br />
make a backstitch and slip stitch,<br />
see page 507.<br />
Exploring Repairs<br />
Look through your clothes to find<br />
garments that need simple repairs. Make<br />
two different types of repairs. Ask family<br />
members for something you might repair<br />
if you need additi<strong>on</strong>al items.
matched butt<strong>on</strong> where it will be<br />
less noticeable, as <strong>on</strong> the bottom<br />
of a shirt. If a butt<strong>on</strong> is<br />
already there, you can move it<br />
to the more visible locati<strong>on</strong>.<br />
When a match is essential, you<br />
may have to buy a new set of<br />
butt<strong>on</strong>s for the garment.<br />
Sometimes butt<strong>on</strong>s, snaps,<br />
and hooks and eyes <strong>on</strong> readyto-wear<br />
clothes are loosely attached. A quick<br />
restitching by hand holds them fast. See page 288.<br />
You can also add these fasteners at a neckline,<br />
fr<strong>on</strong>t closing, or waistband to help hold the fabric<br />
together more securely or smoothly.<br />
p 530<br />
Fixing Snags<br />
Knitted or loosely woven fabrics often get<br />
snags, loops of fabric that pull out. If ignored, a<br />
hole can form and grow. Use a small crochet<br />
hook, snag fixer, or needle threader to repair the<br />
snag. Insert the hook through the fabric directly<br />
under the snag. Grasp the snag with the hook and<br />
pull it to the underside of the fabric. See Fig. 16-<br />
12. Smooth any puckers by gently stretching the<br />
fabric in the directi<strong>on</strong> of the pulled thread.<br />
Mending Tears<br />
When a small tear or rip occurs in fabric, a<br />
quick repair can prevent it from becoming larger.<br />
Try to repair the tear before the garment is laundered<br />
to prevent more tearing. A straight tear can<br />
16-12<br />
Most snags are no<br />
l<strong>on</strong>ger visible when<br />
carefully pulled to<br />
the inside of the<br />
garment.<br />
16-11<br />
come from?<br />
Where can so many butt<strong>on</strong>s<br />
be mended with machine<br />
zigzag stitching to hold the<br />
torn edges together. See Fig.<br />
16-13. Begin and end the<br />
stitches about 1 ⁄4 inch (6<br />
mm) bey<strong>on</strong>d the tear. Because the<br />
stitching shows <strong>on</strong> the outside of the garment,<br />
this method is suitable <strong>on</strong>ly for casual or work<br />
clothes. For a more hidden repair, fuse a patch<br />
underneath the torn fabric.<br />
Patching Holes<br />
A patch can be applied with hand or machine<br />
stitching, as shown in Fig. 16-14. Trim away any<br />
frayed threads from around the hole. Cut a patch<br />
of fabric slightly larger than the hole, and pin to<br />
the inside of the garment. Fold in the edges of the<br />
patch and stitch in place. On the outside of the<br />
garment, turn the edges of the hole under and<br />
slip-stitch to the patch. For added strength, top-<br />
16-13<br />
When repairing a tear,<br />
a machine zigzag stitch is<br />
tighter and more even<br />
than <strong>on</strong>e d<strong>on</strong>e by hand.<br />
16-14<br />
When patching,<br />
you may need to trim the<br />
hole to give it a better<br />
shape and edge—even if<br />
this enlarges the hole<br />
just a little.<br />
CHAPTER 16 Redesign, Repair, and Recycle • 289
stitch around the patch <strong>on</strong> the outside of the<br />
garment.<br />
Fusing is another method of patching a hole.<br />
Cut a patch of fabric the exact size of the hole.<br />
Positi<strong>on</strong> the garment wr<strong>on</strong>g side up <strong>on</strong> an ir<strong>on</strong>ing<br />
board. Place the patch, wr<strong>on</strong>g side up, over<br />
the hole. Cover the area with a piece of fusible<br />
web and then a piece of firmly woven fabric. Press<br />
from the wr<strong>on</strong>g side to fuse the patch in place.<br />
Ir<strong>on</strong>-<strong>on</strong> patches or mending tape may also be<br />
used. Press the patch to the fabric according to<br />
package directi<strong>on</strong>s.<br />
Covering Worn Areas<br />
Sometimes just <strong>on</strong>e area of a garment becomes<br />
worn, while the rest stays in good c<strong>on</strong>diti<strong>on</strong>.<br />
You’ve probably seen this happen <strong>on</strong> the elbows<br />
of a sweater, jacket, or heavy shirt. Oval patches<br />
are attractive coverings for these areas. See Fig.<br />
16-15. Topstitch or fuse the patch, using such<br />
c<strong>on</strong>trasting fabric as leather, suede, corduroy, or<br />
flannel.<br />
On sleeves and pant legs, the edges are also subject<br />
to extra wear. To hide frayed spots, apply a row<br />
of trim, fold-over braid, or bias binding to the<br />
worn edge. Patches, pressed or stitched to the<br />
16-15<br />
A patch can match the fabric of the garment or<br />
be in c<strong>on</strong>trast. You can prol<strong>on</strong>g the usefulness of a gar-<br />
290 • UNIT 5 Clothing <str<strong>on</strong>g>Care</str<strong>on</strong>g><br />
ment by applying patches to<br />
worn areas.<br />
inside or outside of a pant leg, can reinforce knees<br />
or cover a hole. Stubborn stains that resist<br />
removal can be hidden under an appliqué or trim.<br />
Making Emergency Repairs<br />
If you’re away from home when you discover a<br />
needed repair, double-face tape or safety pins can<br />
come to your rescue. Just be sure to make the<br />
repair as so<strong>on</strong> as possible—before it becomes a<br />
major <strong>on</strong>e.<br />
RECYCLING CLOTHES<br />
To recycle means to reclaim items for another<br />
use. Just as people recycle aluminum, glass, and<br />
plastic items, clothing can be recycled too. When<br />
you recycle clothing, you find c<strong>on</strong>tinued use for<br />
garments you no l<strong>on</strong>ger want. Whether aluminum<br />
cans or clothing, recycling can be a family<br />
project.<br />
Recycling saves m<strong>on</strong>ey. A family member’s<br />
wardrobe expands at no cost when garments are<br />
passed to others who can use them. One teen,<br />
who managed her own clothing budget, was<br />
happy to inherit a nice sweater from her sister.<br />
After buying a skirt, she had a new two-piece outfit<br />
for the cost of <strong>on</strong>ly <strong>on</strong>e item.<br />
On a larger scale, recycling shows c<strong>on</strong>cern for<br />
the envir<strong>on</strong>ment. First, it helps preserve natural<br />
resources. Fabrics are made from either natural<br />
or manufactured fibers. Recycling helps c<strong>on</strong>serve<br />
the sources of these fibers as well as the energy<br />
used at every step of the manufacturing process.<br />
It also reduces waste by extending the life of a<br />
garment or fabric. The l<strong>on</strong>ger you keep a garment<br />
in use, the l<strong>on</strong>ger you keep it out of a landfill.<br />
In what ways can you recycle clothing? You<br />
might be surprised by the possibilities.<br />
Passing It On<br />
Sometimes a garment that you no l<strong>on</strong>ger need<br />
is just what some<strong>on</strong>e else is looking for. Offer<br />
your unwanted clothing at garage or tag sales,<br />
bazaars, flea markets, and c<strong>on</strong>signment shops. A<br />
c<strong>on</strong>signment shop pays the seller a percentage of<br />
the selling price after the item is sold. These shops<br />
typically want clothing that’s in good c<strong>on</strong>diti<strong>on</strong>.
Fashi<strong>on</strong><br />
PROTECTING THE<br />
ENVIRONMENT. Many people<br />
recycle clothing and other materials out of<br />
respect for the envir<strong>on</strong>ment. Protecting<br />
natural resources is a major c<strong>on</strong>cern of<br />
some clothing makers as well. These companies<br />
strive to produce garments in an<br />
envir<strong>on</strong>mentally resp<strong>on</strong>sible way at each<br />
step of manufacture. They use <strong>on</strong>ly natural<br />
fibers that are organically grown—that is,<br />
without pesticides, herbicides, or synthetic<br />
fertilizers. Designs are printed with n<strong>on</strong>toxic,<br />
water-based inks.<br />
Facts<br />
You can also buy clothing at these outlets for<br />
much less than you would pay for new clothing.<br />
Selling is just <strong>on</strong>e way to find a new owner for<br />
underused clothing. Suppose a friend has always<br />
admired a sweater that you seldom wear anymore.<br />
You might exchange it for a jacket that your<br />
friend no l<strong>on</strong>ger wears. You’ve each added to your<br />
wardrobe without spending anything.<br />
Outgrown, wearable items may be passed<br />
al<strong>on</strong>g to a younger brother, sister, cousin, or<br />
neighbor. Be sensitive to feelings when you do<br />
this. Younger siblings sometimes resent having to<br />
accept used garments, especially when older siblings<br />
get the new <strong>on</strong>es. See Fig. 16-16.<br />
Unwanted but usable clothing can also be<br />
d<strong>on</strong>ated, through charitable groups, to some<strong>on</strong>e<br />
in greater need. Learn what religious groups or<br />
service agencies in your area accept used clothing.<br />
Your clothing c<strong>on</strong>tributi<strong>on</strong> could bring comfort<br />
to a family that has lost its bel<strong>on</strong>gings in a fire,<br />
flood, or other disaster.<br />
Finding Other Uses<br />
Even when a garment can’t be worn in its current<br />
form, its useful life may not be over. Give it a<br />
sec<strong>on</strong>d start with a new purpose, ranging from<br />
accessories, to dress-up clothes, to cleaning<br />
cloths.<br />
16-16<br />
Passing garments al<strong>on</strong>g to a younger sister or<br />
brother is an easy way to recycle clothing that you no<br />
l<strong>on</strong>ger wear. How would you make this a positive experience<br />
for a younger sibling?<br />
Accessories<br />
Be imaginative. What accessories could you<br />
make from an old pair of jeans? How about a<br />
sturdy belt pack made from <strong>on</strong>e of the legs, and a<br />
clutch purse from the other? D<strong>on</strong>’t forget n<strong>on</strong>clothing<br />
accessories, such as a throw pillow for<br />
your bed or a shoe bag to hang <strong>on</strong> your closet<br />
door.<br />
Turn your creative eye to other fabrics in your<br />
home as well. A badly stained tablecloth might be<br />
cut and finished as a set of placemats. Transform<br />
a colorful old beach towel into a beach carryall.<br />
Children’s Clothes<br />
Many garments that are in good c<strong>on</strong>diti<strong>on</strong> can<br />
be “downsized” to make children’s clothes. In fact,<br />
children often like the feel of used fabrics, which<br />
are often softer and more comfortable than new<br />
clothes. It’s the same reas<strong>on</strong> that some people pay<br />
CHAPTER 16 Redesign, Repair, and Recycle • 291
Technology Trends<br />
>>FROM PLASTIC BOTTLES TO PARKAS<br />
Could a garment you wear have <strong>on</strong>ce<br />
been a plastic bottle? It’s possible. Discarded<br />
items that <strong>on</strong>ce crowded landfills<br />
are now being c<strong>on</strong>verted into fashi<strong>on</strong><br />
apparel. For example, 27 recycled water<br />
bottles can make enough fabric for a new<br />
sweater.<br />
• EcoSpun ® . When plastic bottles are<br />
recycled, they can be turned into the<br />
fiber EcoSpun. First, the bottles are<br />
crushed in a process called densifying.<br />
Then they are ground, washed, and<br />
melted into a gooey substance. The polyfibers<br />
extracted from this substance can<br />
be woven into fabrics resembling everything<br />
from wool, to cott<strong>on</strong>, to fleece. The<br />
fibers can also be blended with other<br />
natural or manufactured fibers.<br />
a premium price for prewashed jeans. A corduroy<br />
skirt may have enough material for a child’s<br />
jumper. You can fashi<strong>on</strong> a small quilted robe<br />
from pieces of a larger <strong>on</strong>e.<br />
292 • UNIT 5 Clothing <str<strong>on</strong>g>Care</str<strong>on</strong>g><br />
• Blue jean insulati<strong>on</strong>. Denim scraps, left<br />
over from the manufacture of blue jeans,<br />
are being used—instead of fiberglass—to<br />
create insulati<strong>on</strong> for building walls.<br />
Fiberglass c<strong>on</strong>tains formaldehyde, which<br />
may cause allergies and asthma. Denim<br />
insulati<strong>on</strong> is envir<strong>on</strong>mentally friendly<br />
because it reduces irritati<strong>on</strong> to the nose,<br />
throat, and skin. It also absorbs more<br />
sound and holds more heat than fiberglass<br />
insulati<strong>on</strong>.<br />
• Recycled wool. Wool fibers from wool<br />
products can be shredded back into a<br />
fibrous state for recycling. A wool product<br />
c<strong>on</strong>taining the used fibers must be<br />
labeled as recycled wool. A fabric of 100<br />
percent recycled wool can be as str<strong>on</strong>g<br />
and soft as a comparable product of 100<br />
percent virgin wool.<br />
• Boots and shoes. Some manufacturers<br />
make sturdy hiking boots and canvas<br />
shoes from 17 to 75 percent recycled<br />
materials. Such materials as tires, plastic<br />
bottles, coffee filters, polystyrene cups,<br />
and diapers may be used in the process.<br />
INVESTIGATE<br />
On the Internet, find more informati<strong>on</strong><br />
about EcoSpun or other recycled fibers.<br />
How are these fibers used? What qualities<br />
do they have?<br />
As Fig. 16-17 shows, old clothing can be a<br />
treasure for children who like to play dress-up. A<br />
child’s imaginati<strong>on</strong> takes flight when inspired by<br />
grown-up clothes and props. Old clothes are also<br />
an excellent source of creative costumes for parties<br />
and class plays at school.
16-17<br />
Young children love to dress up in old clothes,<br />
hats, jewelry, and shoes. When kept in a large box or<br />
trunk, they are readily available for creative play.<br />
Patchwork Projects<br />
Have you ever admired a century-old quilt,<br />
meticulously pieced together by hand? That craft<br />
is known as patchwork, sewing together small<br />
fabric shapes to create a new, decorative piece of<br />
fabric. See Fig. 16-18.<br />
Patchwork quilts are still made today, although<br />
many other uses for the technique have been<br />
found. A wall hanging could display<br />
T-shirt emblems from high school<br />
16-18<br />
Patchwork is a<br />
technique you can use in<br />
many creative ways.<br />
sports competiti<strong>on</strong>s. You can also make patchwork<br />
pillows, placemats, tote bags, and stuffed<br />
toys.<br />
Garments and accessories can be created from<br />
patchwork designs. Craft books and magazines<br />
suggest ideas for planning such clothing projects<br />
as vests, jackets, belts, and apr<strong>on</strong>s. You can preserve<br />
an item with sentimental attachment or<br />
make an item with special meaning. For example,<br />
imagine a vest made from old neckties or a<br />
grandmother’s apr<strong>on</strong> made with fabrics d<strong>on</strong>ated<br />
by each grandchild.<br />
Combining available fabrics in a patchwork<br />
design offers a challenge in creativity and<br />
resourcefulness. What kind of pattern could you<br />
devise with colors and prints that blend or c<strong>on</strong>trast?<br />
A few restricti<strong>on</strong>s do limit your creativity.<br />
Since the pieces of fabric will be stitched together,<br />
select fabrics that are firmly woven and require<br />
similar care. Blue denim and a delicate silk print<br />
might look striking in a jacket, but how would the<br />
fabrics wear and launder?<br />
Household Cleaning<br />
Clothing that has exhausted every other use<br />
may have <strong>on</strong>e final destinati<strong>on</strong>: the bag of cleaning<br />
cloths. Every household needs fabric pieces<br />
for dusting and wiping. Larger pieces—old towels,<br />
sheets, and tablecloths—can cover the floor<br />
when painting, sanding, or staining. Flannel is<br />
good for polishing silver and brass.<br />
For cleaning, save absorbent fabrics, such as<br />
100 percent cott<strong>on</strong> or cott<strong>on</strong> blends. Be sure to<br />
remove all butt<strong>on</strong>s and other fasteners, which<br />
could scratch surfaces as you clean. Save these to<br />
use <strong>on</strong> future sewing projects. You may want to<br />
cut off trims, pockets, and bulky seams to make<br />
the cleaning cloth easier to handle.<br />
Finally, fibers can be recycled for use in<br />
padding and paper. Some organizati<strong>on</strong>s collect<br />
old clothing and fabrics for this purpose. Who<br />
knows? This very book may c<strong>on</strong>tain traces of<br />
what was <strong>on</strong>ce a cott<strong>on</strong> shirt. As you can see, recycling<br />
can send the garments you <strong>on</strong>ce wore to<br />
useful, and sometimes surprising, destinati<strong>on</strong>s.<br />
CHAPTER 16 Redesign, Repair, and Recycle • 293
CHAPTER 16<br />
CHAPTER SUMMARY<br />
• You can redesign an outfit in a number of<br />
ways.<br />
• Redesigning a garment takes some time<br />
but extends the life of the garment.<br />
• Simple repairs can make a garment last<br />
l<strong>on</strong>ger.<br />
• It takes <strong>on</strong>ly a few minutes to restitch<br />
hems and seams, change butt<strong>on</strong>s, add<br />
snaps or hooks and eyes, and mend small<br />
holes.<br />
• Recycling reclaims items for other<br />
purposes.<br />
• Just as people recycle cans and bottles,<br />
they can recycle clothing too.<br />
• You can recycle clothing when it’s wearable<br />
and when it’s not.<br />
USING KEY TERMS<br />
One of the Key Terms in this chapter is<br />
“patchwork.” Pi<strong>on</strong>eer<br />
women created patchwork<br />
designs for quilts<br />
that are famous as a<br />
uniquely American<br />
craft. Research the<br />
history of various<br />
patchwork designs,<br />
such as Log Cabin, L<strong>on</strong>e<br />
Star, and Dresden Plate.<br />
Report your findings to<br />
the class.<br />
294 • UNIT 5 Clothing <str<strong>on</strong>g>Care</str<strong>on</strong>g><br />
Review<br />
RECALLING THE FACTS<br />
1. What are three benefits of redesigning<br />
clothes?<br />
2. When redesigning garments, what are<br />
three possible changes to make?<br />
3. Why should a redesign project be well<br />
planned?<br />
4. What must you check about the fabric<br />
before lengthening a hem or letting out a<br />
seam?<br />
5. Why might a pers<strong>on</strong> decide to change<br />
the color of a garment?<br />
6. What are two things you need to know<br />
about a fabric before dyeing it?<br />
7. How could you use trim to create rhythm<br />
in a design?<br />
8. Why should the broken stitches in a<br />
seam be repaired as so<strong>on</strong> as possible?<br />
9. How would you fix a snag in a sweater?<br />
10. Would you repair a tear and a hole with<br />
the same method? Explain.<br />
11. What can you do to hide a worn or frayed<br />
area of a garment?<br />
12. What are three benefits of recycling<br />
clothes?<br />
13. What could you do with wearable clothing<br />
that you no l<strong>on</strong>ger want?
and Activities<br />
THINKING CRITICALLY<br />
1. Do you think attitudes toward wearing<br />
used clothing are changing? If so, how<br />
are they changing and why?<br />
2. Explain the points of view a parent, older<br />
sibling, and younger sibling might have<br />
when clothes are handed down.<br />
3. According to an old saying, “You can’t<br />
get something for nothing.” Explain<br />
whether this chapter supports that<br />
comment.<br />
APPLYING KNOWLEDGE<br />
1. Redesign project. Choose <strong>on</strong>e item from<br />
your wardrobe to redesign for yourself or<br />
for another family member. Explain what<br />
steps or techniques you would use.<br />
2. Creative designing. Create a new look<br />
for an old-but-nice T-shirt by tie-dyeing<br />
the fabric, using fabric paints, or adding<br />
decorative trims.<br />
3. Simple repairs. Practice making the following<br />
simple repairs <strong>on</strong> fabric: restitch a<br />
seam; sew a butt<strong>on</strong>; repair a hem; sew<br />
snaps; mend a small tear; sew a hook<br />
and eye; and patch a hole.<br />
4. Hiding a stain. Your favorite shirt has<br />
marker stains that can’t be removed<br />
near the top two butt<strong>on</strong>holes. The stains<br />
are very visible. What could you do to<br />
salvage the shirt from the rag bag?<br />
Share your ideas with the class.<br />
CHAPTER 16<br />
5. Clothing collecti<strong>on</strong>. Collect old clothing,<br />
accessories, and jewelry for a dress-up<br />
box. D<strong>on</strong>ate it to a child-care center,<br />
nursery school, or preschool program.<br />
6. New uses. Find an old garment that<br />
could be recycled into something usable.<br />
Could an old sweater become a pillow?<br />
Could you dress a doll for a child, using<br />
old fabrics? Carry out your project.<br />
MAKING>
<str<strong>on</strong>g>Care</str<strong>on</strong>g>ers<br />
Fashi<strong>on</strong> Services<br />
Wherever there are busy people, services are<br />
welcomed. Limited time for baking and<br />
cooking sends people to bakeries and<br />
restaurants. When people can’t get the<br />
lawn mowed or the leaves raked, some<strong>on</strong>e<br />
can supply these services. Service providers can clean<br />
the house, paint the kitchen, and even walk the dog.<br />
The fashi<strong>on</strong> industry is no excepti<strong>on</strong> when it<br />
comes to offering services. In the clothing care area,<br />
businesses launder and dry-clean clothing. The pers<strong>on</strong><br />
who doesn’t have the time or skills needed to<br />
shorten a pair of pants or take in a skirt can find people<br />
who will make the alterati<strong>on</strong>s. Such services have<br />
become routinely used over the years.<br />
People who are particularly c<strong>on</strong>cerned about<br />
image in the business world turn to services that can<br />
help them. Wearing the “right” suit can make the difference<br />
between impressing clients and losing them.<br />
Some people make it their job to give advice <strong>on</strong><br />
choosing clothes and even do the<br />
shopping as part of their service.<br />
Work in the service field is varied.<br />
Opportunities are greater in some specialties<br />
than in others. Depending <strong>on</strong><br />
the service provided, income potential<br />
varies. If you’re looking for something<br />
a little different, however, you might<br />
find it here.<br />
Some tailors are self-employed.<br />
Others work for stores that sell garments<br />
and alter them for customers.<br />
296 • UNIT 5 Clothing <str<strong>on</strong>g>Care</str<strong>on</strong>g><br />
IS THIS FIELD FOR YOU?<br />
As with any service career, pers<strong>on</strong>ality affects success<br />
in the fashi<strong>on</strong> services area. Training and skills<br />
vary, but you have an advantage if you fit these<br />
pers<strong>on</strong>al traits.<br />
• I’m self-motivated.<br />
• I’m a good listener.<br />
• I genuinely enjoy helping people.<br />
• I’m sensitive to people’s needs and<br />
circumstances.<br />
• I have c<strong>on</strong>fidence in my own judgment.<br />
• My reputati<strong>on</strong> is very important to me.
Educati<strong>on</strong> and Training<br />
Jobs in fashi<strong>on</strong> services are many and varied, so<br />
the educati<strong>on</strong> and training needed is too. Preparati<strong>on</strong><br />
may come <strong>on</strong> the job, through a combinati<strong>on</strong> of<br />
work experience and technical training, or from<br />
another field entirely.<br />
A solid grounding in fabrics or fashi<strong>on</strong> is recommended.<br />
Such knowledge might be gained through<br />
formal educati<strong>on</strong> or through independent study.<br />
Depending <strong>on</strong> the job, a pers<strong>on</strong> may choose an<br />
educati<strong>on</strong> that stresses either the technical or “artistic”<br />
aspect of clothing. College degrees are not<br />
required for many of the positi<strong>on</strong>s, but educati<strong>on</strong><br />
positi<strong>on</strong>s people to explore different fields in the<br />
future.<br />
Possible <str<strong>on</strong>g>Care</str<strong>on</strong>g>er Paths<br />
As with other fields, training and experience are<br />
keys to traveling a career path in fashi<strong>on</strong><br />
services. For some jobs, the way is less<br />
defined than in producti<strong>on</strong> or merchandising.<br />
A college degree is not required to be a<br />
pers<strong>on</strong>al shopper. You d<strong>on</strong>’t start as an assistant<br />
and work your way up. In this type of<br />
career, your talents and interests determine<br />
your success and satisfacti<strong>on</strong>.<br />
Many service jobs lend themselves to selfemployment.<br />
A large percentage of drycleaning<br />
businesses, for example, are family<br />
or individually owned. For that reas<strong>on</strong>, the<br />
field appeals to people who want to be their<br />
own boss. Running your own business also<br />
requires qualities that have more to do with<br />
pers<strong>on</strong>ality than with formal educati<strong>on</strong>.<br />
A color c<strong>on</strong>sultant offers expert advice and infor-<br />
mati<strong>on</strong> about color choices. The c<strong>on</strong>sultant might<br />
help a client find colors that exactly match historic<br />
costumes or predict what colors might be in<br />
during an upcoming seas<strong>on</strong>.<br />
THE SKILLS YOU NEED<br />
If you’re thinking about a fashi<strong>on</strong> service<br />
career, check the following list of useful<br />
skills:<br />
• Communicati<strong>on</strong><br />
• Organizati<strong>on</strong><br />
• Management<br />
• Self-discipline<br />
• Knowledge of fibers and fabrics<br />
• Sewing skills<br />
• Fashi<strong>on</strong> sense<br />
UNIT 5 Clothing <str<strong>on</strong>g>Care</str<strong>on</strong>g> • 297
Choosing a Fashi<strong>on</strong><br />
Services <str<strong>on</strong>g>Care</str<strong>on</strong>g>er<br />
ALTERATIONIST | CLOTHIER | COLOR CONSULTANT | DRY CLEANER<br />
| LAUNDRY WORKER | PERSONAL SHOPPER | SPECIALIST IN HOME<br />
DECORATIONS | STYLIST | TEXTILE RESTORER | UPHOLSTERER<br />
| WARDROBE CONSULTANT<br />
Dry Cleaner ____<br />
Dry cleaners need special knowledge for their<br />
work. They type garments according to fabric, c<strong>on</strong>structi<strong>on</strong>,<br />
and stain, then choose pretreatments.<br />
Besides using varied machines for cleaning, they<br />
work with spotting guns to remove stains. They<br />
press and shape garments <strong>on</strong> finishing forms and<br />
tables. Some also store and preserve clothes.<br />
Although routine skills may be learned <strong>on</strong> the<br />
job, c<strong>on</strong>tinuing educati<strong>on</strong> and training is helpful.<br />
After self-study courses in dry cleaning, a pers<strong>on</strong><br />
can earn certificati<strong>on</strong> by passing a follow-up exam.<br />
Stylist _______<br />
Like wardrobe c<strong>on</strong>sultants, stylists enhance<br />
images. They choose clothes and accessories for<br />
magazine spreads and fashi<strong>on</strong> shows, music videos<br />
and televisi<strong>on</strong> ads, and celebrities. Besides knowing<br />
fashi<strong>on</strong> trends, stylists can relate garments to a<br />
mood. For example, they choose just the right garments<br />
to match a soft, romantic scene.<br />
Stylists need skills of persuasi<strong>on</strong>. They might<br />
have to c<strong>on</strong>vince a photographer that they can<br />
carry out the proposed scene or c<strong>on</strong>vince a publicist<br />
that their ideas will advance a client’s career.<br />
Top stylists have hectic schedules, filled with l<strong>on</strong>g,<br />
tiring hours, but they are typically well paid.<br />
298 • UNIT 5 Clothing <str<strong>on</strong>g>Care</str<strong>on</strong>g><br />
Wardrobe<br />
C<strong>on</strong>sultant ____<br />
Public figures, including televisi<strong>on</strong> pers<strong>on</strong>alities<br />
and politicians, turn to wardrobe c<strong>on</strong>sultants for<br />
help in projecting a desired image. Working with a<br />
client, a c<strong>on</strong>sultant analyzes the pers<strong>on</strong>’s style and<br />
body type and helps assemble a wardrobe. Teaching<br />
basic clothes-buying strategies, such as mixing and<br />
matching and accessorizing, is part of the service.<br />
Businesses hire wardrobe c<strong>on</strong>sultants to give<br />
seminars for employees. These cover dress-code<br />
and casual-day policies, the messages clothing<br />
sends to customers and superiors, and the ec<strong>on</strong>omic<br />
value of appropriate dress in business.<br />
Some stylists persuade fashi<strong>on</strong> designers<br />
to loan clothes for a celebrity’s<br />
appearance. Here, a stylist prepares<br />
clothing for a photo shoot.
Interior decorators help people plan room<br />
décors. Using expert knowledge of fabrics and<br />
an understanding of their clients, they choose<br />
suitable upholstery and drapery fabrics.<br />
Pers<strong>on</strong>al Shopper _<br />
Pers<strong>on</strong>al shoppers are paid to shop. Some<br />
upscale department stores employ pers<strong>on</strong>al shoppers<br />
as a service to customers. Shoppers find what<br />
customers need and arrange to show the garments.<br />
Since they work <strong>on</strong> commissi<strong>on</strong>, pers<strong>on</strong>al shoppers<br />
must be familiar with the store’s inventory.<br />
When self-employed, pers<strong>on</strong>al shoppers assess a<br />
client’s style, needs, wardrobe, and budget before<br />
buying appropriate clothing and accessories. Some<br />
pers<strong>on</strong>al shoppers give seminars and sell videotapes<br />
that explain their methods. With a background<br />
in fashi<strong>on</strong> merchandising, pers<strong>on</strong>al shoppers<br />
anticipate trends and know where to find upcoming<br />
styles. A basic knowledge of business and a pleasing<br />
pers<strong>on</strong>ality are assets.<br />
Clothier ______<br />
A clothier (CLOTHE-yur) is a dressmaker or tailor<br />
who designs original garments, sews from existing<br />
patterns, and does alterati<strong>on</strong>s and repairs. Some<br />
specialize, as in wedding gowns or costumes. When<br />
working with a client, clothiers help choose a style<br />
and fabric according to taste, budget, body type,<br />
coloring, and occasi<strong>on</strong>.<br />
Clothiers need an eye for design elements and<br />
illusi<strong>on</strong>s. Many use computer-aided design (CAD)<br />
programs for grading, detailing, and printing out<br />
patterns. They work tactfully and patiently with<br />
clients. Some clothiers are self-employed. Some<br />
develop and sell their own CAD software. Others<br />
work for department stores and dry-cleaning<br />
businesses.<br />
CAREER APPLICATIONS<br />
1. Providing a service. Think of a clothing<br />
service you could provide. What about a lunchhour,<br />
small repair service for sewing <strong>on</strong> butt<strong>on</strong>s<br />
or fixing hems,or a color-analysis service? Write<br />
a plan for carrying out the service.<br />
2. FCCLA. Al<strong>on</strong>g with a team, plan an Interpers<strong>on</strong>al<br />
Communicati<strong>on</strong>s Project. Identify typical<br />
communicati<strong>on</strong> problems that a clothing<br />
service provider might experience. An example<br />
is a dry cleaner dealing with a customer whose<br />
garment has been lost. Plan skits that dem<strong>on</strong>strate<br />
the problems and how to react with skillful<br />
communicati<strong>on</strong>.<br />
3. Professi<strong>on</strong>alism. You’re a clothier whose<br />
client requests an outfit in a style that you know<br />
w<strong>on</strong>’t suit the pers<strong>on</strong>’s appearance and a fabric<br />
that doesn’t complement the style. You’re afraid<br />
the client w<strong>on</strong>’t like the garment. As you steer<br />
the client toward something more suitable, the<br />
pers<strong>on</strong> becomes angry. The project is complicated<br />
and will pay well. How will you handle the<br />
situati<strong>on</strong> professi<strong>on</strong>ally?<br />
UNIT 5 Clothing <str<strong>on</strong>g>Care</str<strong>on</strong>g> • 299
UNIT 6<br />
Clothing<br />
Selecti<strong>on</strong><br />
300 • UNIT 6 Clothing Selecti<strong>on</strong>
CHAPTERS<br />
17 Exploring Opti<strong>on</strong>s<br />
18 Accessing Informati<strong>on</strong><br />
19 Evaluating Selecti<strong>on</strong>s<br />
20 C<strong>on</strong>sumer Resp<strong>on</strong>sibilities<br />
21 Selecting Clothes for<br />
Others<br />
FEATURE<br />
Fashi<strong>on</strong> Merchandising<br />
<str<strong>on</strong>g>Care</str<strong>on</strong>g>ers<br />
301
CHAPTER 17<br />
Exploring Opti<strong>on</strong>s<br />
OBJECTIVES<br />
• Evaluate your<br />
wardrobe in order<br />
to identify and<br />
prioritize additi<strong>on</strong>s.<br />
• Identify available<br />
resources for<br />
building a<br />
wardrobe.<br />
• Compare different<br />
ways of expanding<br />
a wardrobe.<br />
• Describe<br />
differences<br />
between<br />
department,<br />
specialty, discount,<br />
and resale stores.<br />
KEY TERMS<br />
boutique<br />
creativity<br />
department store<br />
discount store<br />
ec<strong>on</strong>omical<br />
inventory<br />
off-price retailers<br />
outlet<br />
prioritize<br />
resale store<br />
resourceful<br />
specialty store<br />
versatile<br />
vintage<br />
wardrobe plan<br />
302 • UNIT 6 Clothing Selecti<strong>on</strong>
EXAMINETHISISSUE<br />
Shopping safety. Internet shopping<br />
is comm<strong>on</strong> today. Some people, however,<br />
hesitate to place pers<strong>on</strong>al informati<strong>on</strong>,<br />
especially credit card numbers, where<br />
they see a potential for misuse. Others<br />
are not c<strong>on</strong>cerned because they feel safe<br />
using Internet sites identified as secure,<br />
where data is encoded to make it unavailable<br />
to others <strong>on</strong> the Internet. These<br />
shoppers believe pers<strong>on</strong>al informati<strong>on</strong><br />
may be more vulnerable when distributed<br />
through other shopping methods.<br />
What do you think?<br />
What are your thoughts about shopping<br />
<strong>on</strong>-line? Do you think Internet shopping is<br />
as safe as other methods? Why or why<br />
not?<br />
In a well-known fairy tale, Cinderella<br />
attends the ball because her fairy godmother<br />
and a host of industrious mice make her<br />
wardrobe dreams come true. In real life, no such<br />
magic exists.<br />
Putting a wardrobe together can be both exciting<br />
and challenging. Fortunately, you can create<br />
your own wardrobe magic by using resources<br />
effectively. Take some time to evaluate your<br />
wardrobe and look at all your opti<strong>on</strong>s before<br />
dashing out to shop.<br />
EVALUATING YOUR<br />
WARDROBE<br />
With just five basic steps, you can<br />
evaluate your wardrobe and develop a<br />
plan for building the wardrobe you<br />
want. The steps are listed in Fig. 17-1.<br />
Here’s how to accomplish each step.<br />
Step 1: Take Inventory<br />
Do you know what clothes you own? Are there<br />
some hidden in the back of your closet or deep in<br />
drawers? Just as retailers identify the merchandise<br />
in their stores before reordering, you can take a<br />
clothing inventory before deciding what to<br />
replace in your wardrobe.<br />
An inventory is a list of items <strong>on</strong> hand. To take<br />
inventory of the clothes and accessories you own,<br />
you’ll need a place to list everything. A wardrobe<br />
chart like the <strong>on</strong>e <strong>on</strong> page 304 is a handy tool.<br />
With it, you can collect and organize informati<strong>on</strong><br />
while examining your wardrobe. Begin your chart<br />
by listing the items you own in the first column<br />
and entering a short descripti<strong>on</strong> of each <strong>on</strong>e in<br />
the sec<strong>on</strong>d column.<br />
Step 2: Evaluate Items<br />
As you list items while taking inventory, evaluate<br />
their usefulness and c<strong>on</strong>diti<strong>on</strong>. Ask yourself<br />
how often you wear or use each item. Like most<br />
people, you probably have garments that you<br />
wear often and some that you seldom wear. To<br />
check c<strong>on</strong>diti<strong>on</strong>, note how worn the item is and<br />
what repairs could be made. Write this informati<strong>on</strong><br />
in the third column of your wardrobe chart.<br />
Step 3: Develop an Acti<strong>on</strong> Plan<br />
As you evaluate each item, decide what to do<br />
with it and enter that informati<strong>on</strong> in the fourth<br />
column of the chart. You might choose to keep,<br />
17-1<br />
Steps in Wardrobe Planning<br />
Step 1: Take inventory of clothes and accessories.<br />
Step 2: Evaluate the c<strong>on</strong>diti<strong>on</strong> and usefulness of each item.<br />
Step 3: Develop an acti<strong>on</strong> plan of what to do with each item.<br />
Step 4: C<strong>on</strong>sider what new items to add.<br />
Step 5: Set priorities for a wardrobe plan.<br />
By following these steps, you can evaluate your<br />
wardrobe and plan for future additi<strong>on</strong>s.<br />
CHAPTER 17 Exploring Opti<strong>on</strong>s • 303
How To…<br />
MAKE A WARDROBE CHART<br />
A wardrobe chart provides a handy tool for evaluating the clothing you own and planning<br />
wardrobe additi<strong>on</strong>s. The sample shown here is part of <strong>on</strong>e teen’s chart. Other categories<br />
might include dresses, skirts, pants suits, athletic wear, shorts, T-shirts, sleepwear,<br />
underwear, socks/hosiery, belts, scarves/ties, hats, and jewelry.<br />
Exploring Wardrobe Charts<br />
Create your own wardrobe chart <strong>on</strong> paper or computer. With a computerized<br />
chart, you can easily review and update your wardrobe plan. You could use a<br />
word-processing table or a spreadsheet.<br />
304 • UNIT 6 Clothing Selecti<strong>on</strong><br />
Sample Wardrobe Chart<br />
CLOTHING DESCRIPTION OF EVALUATION OF ACTION PLAN PRIORITY OF<br />
ITEM CONDITION AND ITEMS TO BUY<br />
USEFULNESS OR REPLACE<br />
Coats/Jackets<br />
Dress coat Full length; black Good Keep<br />
Winter jacket<br />
Pants/Slacks<br />
Short length; beige Old; very worn Need to replace 2<br />
Chinos L<strong>on</strong>g; beige New Keep<br />
Jeans Blue denim Old but usable Keep<br />
Cropped pants<br />
Shirts/Blouses<br />
Black twill ____________ New purchase; want<br />
to have<br />
5<br />
Blue denim L<strong>on</strong>g sleeves Worn but like it Keep<br />
Sport shirt Green plaid; Two butt<strong>on</strong>s Repair and use<br />
Sweaters<br />
short sleeves missing<br />
Vest Plaid Never wear; out of D<strong>on</strong>ate; d<strong>on</strong>’t<br />
date replace<br />
Cardigan Red; l<strong>on</strong>g sleeves Shrunk; sleeves too Give away; want to 4<br />
short replace with green <strong>on</strong>e<br />
Shoes/Boots<br />
Loafers Brown Scuffed; soles very<br />
thin<br />
Need to replace 3<br />
Athletic shoes Black ____________ New purchase; need<br />
for basketball<br />
1
17-2<br />
repair, give away, discard, or replace items. See<br />
Fig. 17-2. The following questi<strong>on</strong>s will help you<br />
decide which acti<strong>on</strong> is best:<br />
• Do you like the item’s style and c<strong>on</strong>diti<strong>on</strong>?<br />
If so, it remains in your wardrobe. Mark<br />
it as a “keeper” in the chart.<br />
• Do you seldom or never wear the item?<br />
Some experts say if you haven’t worn a garment<br />
for over a year, you probably d<strong>on</strong>’t need<br />
it. Special-occasi<strong>on</strong> garments might be an<br />
excepti<strong>on</strong>. Before you enter “discard” by an<br />
item, however, think of possible alternatives. If<br />
you just dislike a garment, you might improve<br />
the fit with a simple alterati<strong>on</strong> or change the<br />
style for a new look. To avoid repeating mistakes<br />
when you buy new clothes, always think<br />
about why you d<strong>on</strong>’t wear a garment.<br />
• Can you make any needed repairs?<br />
Replacing a missing butt<strong>on</strong> or fixing a ripped<br />
seam or loose hem could make a garment<br />
wearable. A trip to the shoe repair shop might<br />
Deciding what to do with clothes can be difficult.<br />
Some people can’t part with anything, yet others like to<br />
streamline their closet, keeping <strong>on</strong>ly what they wear.<br />
Which type are you?<br />
save the cost of new shoes. Make note of what<br />
you plan to do. p 530<br />
• Is the item outgrown or too worn for<br />
wear? If you need the item, note in your chart<br />
that it needs to be replaced. Outgrown or<br />
unwanted garments can be passed al<strong>on</strong>g to<br />
others. Perhaps the fabric can be recycled.<br />
Step 4: C<strong>on</strong>sider New<br />
Additi<strong>on</strong>s<br />
In your wardrobe chart, the plan for each item<br />
stands out clearly, but you may notice something<br />
else. Your wardrobe may have some gaps. Would<br />
a new pair of wool slacks allow you to make better<br />
use of a sweater you already own? Could you<br />
make several different outfits if you had a new<br />
black blazer? To help you decide whether an additi<strong>on</strong>al<br />
garment would improve your wardrobe,<br />
think about your needs and wants.<br />
Distinguishing Needs and Wants<br />
To young children, needs and wants are the<br />
same. They “need” a cupcake the same way they<br />
need pencils for school. Teens can distinguish<br />
between needs and wants more clearly. One teen<br />
decided he needed a sturdy pair of shoes for<br />
school and a dressy pair for special occasi<strong>on</strong>s<br />
because these were essential. Since a certain<br />
brand of cross-trainers and a stylish pair of suede<br />
boots weren’t essential, he realized that he <strong>on</strong>ly<br />
wanted them.<br />
As a student, your clothing needs are influenced<br />
by what’s acceptable in school. Many<br />
school dress codes are flexible. Jeans, T-shirts,<br />
pants, skirts, and sweaters are all opti<strong>on</strong>s. Other<br />
schools have dress codes that prohibit specific<br />
clothing styles and accessories. Some schools<br />
require students to wear uniforms.<br />
CHAPTER 17 Exploring Opti<strong>on</strong>s • 305
17-3<br />
A clothing need is something essential that you<br />
must have. A special garment or uniform for a part-time<br />
job fits this descripti<strong>on</strong>.<br />
Students who work part-time may need<br />
appropriate garments. A restaurant, for example,<br />
might provide a uniform or ask that<br />
employees wear shirts or blouses of a certain<br />
style and color. See Fig. 17-3.<br />
Wants arise more from emoti<strong>on</strong>s than<br />
necessity. A desire to impress others or fit in<br />
with peers can make a pers<strong>on</strong> want a particular<br />
garment. Wearing a special garment<br />
makes some people feel attractive, c<strong>on</strong>fident,<br />
slimmer, taller, or shorter. As a status<br />
symbol, a garment makes some people feel<br />
important. One teen may want to wear something<br />
that shows c<strong>on</strong>formity, yet another wants<br />
something that expresses individuality. What<br />
other reas<strong>on</strong>s might inspire wants?<br />
Deciding What to Add<br />
Wardrobe additi<strong>on</strong>s rarely fulfill needs and<br />
wants equally. Buying a new pair of jeans meets a<br />
need if you’ve outgrown the <strong>on</strong>es you wear all the<br />
time. If you choose the same style that your<br />
friends are wearing, you’re also fulfilling a want.<br />
306 • UNIT 6 Clothing Selecti<strong>on</strong><br />
Values help you decide what’s more important.<br />
Should you spend more for designer jeans or buy<br />
a pair of regular jeans <strong>on</strong> sale and use the savings<br />
for something else?<br />
To help you decide whether to buy something<br />
new, think about the questi<strong>on</strong>s below. If you<br />
decide to make an additi<strong>on</strong>, add the item to your<br />
chart.<br />
• How often would you wear the item?<br />
Some people are more willing to spend m<strong>on</strong>ey<br />
<strong>on</strong> a down coat to wear all winter than <strong>on</strong> a<br />
velvet jacket to wear <strong>on</strong>ly a few times.<br />
• Can the item be worn for different occasi<strong>on</strong>s?<br />
Garments are versatile when they can<br />
be worn for more than <strong>on</strong>e activity, perhaps to<br />
school as well as parties. See Fig. 17-4.<br />
• Will the item go with other clothes in<br />
your wardrobe? A teen who owns a blue<br />
blazer, khaki pants, red sweater, and a plaid<br />
skirt might buy a shirt in a solid color that goes<br />
with all of them. The result is more than <strong>on</strong>e<br />
new outfit. Such items make a wardrobe seem<br />
larger.<br />
• Is the item a need or a want? A<br />
wardrobe can include items you want because<br />
they’re fun, unique, or up-to-date. Meeting<br />
clothing needs first, however, is the higher<br />
priority. The best additi<strong>on</strong>s to a<br />
wardrobe are clothes and accessories<br />
that satisfy both needs and<br />
wants.<br />
17-4<br />
A versatile school outfit<br />
like this <strong>on</strong>e might be worn for<br />
other occasi<strong>on</strong>s as well.
Step 5: Set Priorities<br />
The final step in your wardrobe evaluati<strong>on</strong> is<br />
to prioritize, or rank, items so you know which<br />
<strong>on</strong>es to replace or add first. Scan the chart, looking<br />
at the new items you’ve listed and the items<br />
marked for replacement. Those you need the<br />
most should be given the highest priority.<br />
Garments that you can get by without for a while<br />
are lower priority. Those that are least essential<br />
get the lowest priority ranking. Numbers can be<br />
used to indicate priority in the last column of<br />
your chart.<br />
With your chart completed, you have a<br />
wardrobe plan in place. This is a guide for making<br />
future additi<strong>on</strong>s to your wardrobe. By reviewing<br />
the plan every few m<strong>on</strong>ths, you can make<br />
adjustments as your needs and wants change.<br />
IDENTIFYING YOUR<br />
RESOURCES<br />
How can you build the wardrobe you want?<br />
Many people think <strong>on</strong>ly of m<strong>on</strong>ey as a resource,<br />
but there are others as well. Resourceful people<br />
17-5<br />
Some teens find ways to earn m<strong>on</strong>ey in order to<br />
buy new clothes others use their sewing skills to expand<br />
their wardrobes. What other resources can a pers<strong>on</strong> use?<br />
identify all the means and methods they have for<br />
accomplishing goals.<br />
• M<strong>on</strong>ey. A wardrobe plan shows what you<br />
need and want, but your budget affects what<br />
you can do. When m<strong>on</strong>ey is limited, you may<br />
need to adjust your wardrobe plan. You could<br />
take the lowest-priority items out of the plan.<br />
You might want two new shirts, but <strong>on</strong>e will<br />
do. You could earn m<strong>on</strong>ey for clothes from an<br />
after-school, weekend, or summer job. See Fig.<br />
17-5. You can also turn to other resources to<br />
put your plan into acti<strong>on</strong>.<br />
• Skills. Your skills and abilities can help your<br />
m<strong>on</strong>ey go further. Using good c<strong>on</strong>sumer skills,<br />
you recognize bargains when you see them.<br />
Buying clothes <strong>on</strong> sale or at discount stores can<br />
bring added savings. By developing sewing<br />
skills, you can make simple repairs, update<br />
garments, and expand your wardrobe with<br />
new clothes and accessories. You might even<br />
earn m<strong>on</strong>ey by sewing or altering clothes for<br />
others. See Fig. 17-5.<br />
• Creativity. Taking a creative look inside your<br />
closet might have interesting results.<br />
Creativity is the ability to use your imaginati<strong>on</strong><br />
to come up with an original idea or prod-<br />
17-5b<br />
CHAPTER 17 Exploring Opti<strong>on</strong>s • 307
uct. In the last chapter, you learned a number<br />
of ways to redesign garments. These ideas help<br />
expand a wardrobe. You’ll find other ways to<br />
use your creativity for the same purpose later<br />
in this chapter.<br />
• Time. How can time help you with your<br />
wardrobe plan? If you have extra time, you can<br />
shop for bargains, develop sewing skills, or be<br />
creative. If time is limited due to school, work,<br />
or other activities, use your time wisely. When<br />
shopping, decide what you need and where to<br />
find it, instead of traveling from store to store.<br />
If you like to sew, set aside some time during<br />
school vacati<strong>on</strong>s to make new outfits. Save<br />
time by choosing easy-to-sew patterns.<br />
• Other People. As you c<strong>on</strong>sider resources,<br />
d<strong>on</strong>’t overlook people. Siblings, cousins, and<br />
friends may pass al<strong>on</strong>g garments. Coats, jackets,<br />
and prom dresses often go this route. Do<br />
you have relatives who like to knit or sew?<br />
Perhaps they would knit a sweater, make curtains<br />
for your room, or teach you to knit or<br />
sew. A clothing teacher might give advice<br />
about restyling a garment. All of these can be<br />
valuable resources for expanding your<br />
wardrobe.<br />
WAYS TO EXPAND YOUR<br />
WARDROBE<br />
With your resources in mind, your wardrobe<br />
goals may be closer than you think. How can you<br />
put your m<strong>on</strong>ey and time to good use? How can<br />
your skills and creativity help expand your<br />
wardrobe? Can you find ways for people to help<br />
you, and perhaps for you to help them in return?<br />
You might be surprised at the number of ways<br />
you can put your resources to work in order to<br />
build the wardrobe you want.<br />
Using What You Have<br />
A gifted chef can open the refrigerator and<br />
make a delicious meal out of whatever’s inside.<br />
This approach also works in expanding your<br />
wardrobe. Sometimes what you need is right<br />
there in the closet or dresser.<br />
308 • UNIT 6 Clothing Selecti<strong>on</strong><br />
17-6<br />
How many different<br />
outfits can you make from<br />
these garments?<br />
Use your creativity to add “new”<br />
outfits to your wardrobe by thinking<br />
of different ways to wear the clothes you already<br />
own. What’s more, this method is ec<strong>on</strong>omical<br />
because it doesn’t cost anything, which saves<br />
m<strong>on</strong>ey for other uses.<br />
Creating New Combinati<strong>on</strong>s<br />
Sometimes a clothing combinati<strong>on</strong> seems so<br />
right that you never separate the pieces. Why not<br />
try pairing each item with a different garment?<br />
Can you mix and match the garments in two outfits?<br />
A matching skirt and top, or pants and<br />
jacket, d<strong>on</strong>’t always have to be worn together. See<br />
Fig. 17-6.<br />
Experiment with new color mixes as well.<br />
During some seas<strong>on</strong>s, unusual combinati<strong>on</strong>s,<br />
such as purple and red, are very fashi<strong>on</strong>able.<br />
Black pants look good with a bright red sweater,<br />
but how would they look with a dark green or<br />
pale beige sweater, or topped by a gray-and-white<br />
tweed blazer?
17-7<br />
With a little creativity, you can make a garment<br />
you wear <strong>on</strong> M<strong>on</strong>day look quite different when you wear<br />
it later in the week. That puts some “stretch” in your<br />
wardrobe.<br />
Different fabric combinati<strong>on</strong>s also give clothes<br />
a new look. Compare the effects of pairing a corduroy<br />
jacket with denim jeans and the same<br />
jacket with wool slacks. In some seas<strong>on</strong>s, combining<br />
more than <strong>on</strong>e print in an outfit is the fashi<strong>on</strong>.<br />
Checks might be worn with stripes, and<br />
prints with plaids. Patterns and colors must be<br />
carefully matched, however, to create an outfit<br />
that pleases the eye and looks fashi<strong>on</strong>able.<br />
Finding New Uses<br />
When is a tie not a tie? When it’s used as a belt.<br />
Likewise, a denim shirt can become a lightweight<br />
jacket when worn over a T-shirt. With a little<br />
experimentati<strong>on</strong>, you may find new ways to wear<br />
clothes you already own. See Fig. 17-7.<br />
Clothing can be surprisingly versatile. A raincoat<br />
with a zip-out lining might be worn yearround.<br />
A turtleneck typically worn with blue<br />
jeans could also be worn with pants and a sweater<br />
for a dressier look. A vest worn most often under<br />
a jacket might be worn over a dress or shirt. A<br />
sundress might double as a jumper. A change of<br />
accessories could transform an outfit from casual<br />
to dressy.<br />
One simple technique is changing the way you<br />
wear a particular garment. You could tuck pants<br />
into boots, belt a loose-fitting jacket, and layer<br />
tops in a different order. Many up-to-date ideas<br />
can be found in fashi<strong>on</strong> magazines.<br />
Designing New Looks<br />
One teen noticed her sister’s denim jacket in<br />
the garage sale box. It was still in good shape, so<br />
she offered her sister two dollars for it. After the<br />
teen trimmed it with rhinest<strong>on</strong>es, her sister said,<br />
“That looks great. Why didn’t I think of that?”<br />
Two dollars is a small investment for a “new”<br />
denim jacket. With a little creativity, you can<br />
come up with other ideas. Why not decorate gar-<br />
CHAPTER 17 Exploring Opti<strong>on</strong>s • 309
ments with fabric paint or trims? You could paint<br />
or appliqué a design <strong>on</strong> a T-shirt or add sequins<br />
to a top. Trim the hem of jeans with fringe or ribb<strong>on</strong>.<br />
As you read fashi<strong>on</strong> ads and shop for<br />
clothes, look for details that you can duplicate <strong>on</strong><br />
less expensive garments. p 581<br />
Adding accessories to create new looks is<br />
another idea. Flea markets and sec<strong>on</strong>d-hand<br />
stores are good sources for inexpensive accessories.<br />
You can also make them. Braid leather or<br />
decorative cord to make a belt, or sew a canvas<br />
bag instead of buying <strong>on</strong>e. Make hair ornaments<br />
from fabric, ribb<strong>on</strong>s, or braid left over from other<br />
projects. Attractive jewelry can be created from<br />
beads and even modeling clay. Check out the craft<br />
area in a bookstore or library for ideas. Some<br />
craft stores provide free instructi<strong>on</strong>s and offer<br />
classes.<br />
Sharing and Trading<br />
Friends and relatives are good resources for<br />
sharing and trading items. See Fig. 17-8. Sharing<br />
310 • UNIT 6 Clothing Selecti<strong>on</strong><br />
17-8<br />
By sharing or trading garments, you can expand<br />
your wardrobe and save m<strong>on</strong>ey at the same time. What<br />
items would be good possibilities for sharing?<br />
works especially well with special-occasi<strong>on</strong> items.<br />
One mother and daughter shared a small evening<br />
bag rather than each owning <strong>on</strong>e. If you share an<br />
item, take good care of it in order to keep the relati<strong>on</strong>ship<br />
str<strong>on</strong>g.<br />
Trading clothes with a family member or<br />
friend gives each pers<strong>on</strong>’s wardrobe a new additi<strong>on</strong><br />
at no cost. Be sure you can part with a garment,<br />
however, before letting it go.<br />
Sewing<br />
Sewing can show off your creativity, as well as<br />
save m<strong>on</strong>ey. See Fig. 17-9. Any<strong>on</strong>e can learn to<br />
sew. To begin, learn simple skills, such as sewing<br />
butt<strong>on</strong>s or stitching a hem. You’ll save m<strong>on</strong>ey by<br />
making simple repairs that extend the life of garments<br />
you already own. By updating garments<br />
17-9<br />
Sewing skills are useful, whether you make some-<br />
thing new or repair a garment in order to wear it again. In<br />
what other ways can sewing skills be a good resource?
you no l<strong>on</strong>ger wear, you can expand your<br />
wardrobe with little expense. Shortening a hem<br />
or taking in a seam can make a garment fit perfectly.<br />
Adding trims, embroidery, or m<strong>on</strong>ograms<br />
gives a new look to an old garment. p 437<br />
As your skills build, you can try easy-to-sew<br />
projects, such as a T-shirt or shorts. Eventually,<br />
you might make a shirt, jacket, or backpack.<br />
Home sewers can make clothes in just the size,<br />
color, and style they want.<br />
Besides sewing clothes, how about giving<br />
rooms in your home a new look? You can find<br />
many patterns for curtains, pillows, slipcovers,<br />
bedspreads, and table linens. The cost savings<br />
can be huge compared to buying these items<br />
ready-made.<br />
As <strong>on</strong>e more use for your sewing skills, you<br />
could make gifts for family and friends. People<br />
appreciate the time and effort that goes into a<br />
<strong>on</strong>e-of-a-kind gift.<br />
Renting<br />
People often think of renting a car, but what<br />
about clothes? Clothes for special occasi<strong>on</strong>s are<br />
17-10<br />
Stores are filled with so much clothing that nar-<br />
rowing your decisi<strong>on</strong> down to <strong>on</strong>ly a few items can be difficult.<br />
What can you do to prepare yourself for these<br />
shopping decisi<strong>on</strong>s?<br />
routinely rented to save the expense of purchasing.<br />
Caps and gowns are rented for graduati<strong>on</strong>.<br />
Tuxedos can be rented for school dances, weddings,<br />
and other formal events. In some cities,<br />
shops rent formal clothing for females as well as<br />
males. Uniforms and costumes can also be<br />
rented.<br />
If an item, such as a tuxedo, will be worn several<br />
times, figure the total cost for rentals.<br />
Purchasing the garment <strong>on</strong> sale or at a resale store<br />
might be more ec<strong>on</strong>omical.<br />
Buying<br />
Shopping opti<strong>on</strong>s are everywhere today. See<br />
Fig. 17-10. If you like hands-<strong>on</strong> buying, you can<br />
visit a store, mall, or craft fair. For shopping ease,<br />
you can stay at home and order from catalogs, televisi<strong>on</strong>,<br />
or the Internet. Although buying to build<br />
a wardrobe can be costly, some of the most inexpensive<br />
“finds” are discovered at resale stores, flea<br />
markets, and tag sales. Each opti<strong>on</strong> has advantages<br />
and disadvantages.<br />
Stores<br />
Buying in a store gives you a firsthand look at<br />
the merchandise. You can try <strong>on</strong> clothes to see<br />
how they look. Evaluating the style, quality, and<br />
fit is easier than when buying from <strong>on</strong>ly a picture<br />
and descripti<strong>on</strong>.<br />
Stores vary in type of merchandise, special<br />
services, and prices. See Fig. 17-11 <strong>on</strong> pages 312-<br />
313. Some specialize in certain price ranges—low,<br />
medium, or high. Others offer a range of prices<br />
within each category.<br />
If you’ve shopped in different cities, you know<br />
that the same stores can be in many places.<br />
Known as chain stores, these are part of a large<br />
retail company that operates stores in many cities<br />
and towns all over the country. Department<br />
stores, specialty stores, and discount stores can all<br />
be chains. The headquarters or home office is<br />
where all merchandising decisi<strong>on</strong>s are made.<br />
Because chains have so many stores, the same<br />
styles may not be carried in each <strong>on</strong>e. Instead,<br />
chains may buy different merchandise for stores<br />
in certain regi<strong>on</strong>s.<br />
CHAPTER 17 Exploring Opti<strong>on</strong>s • 311
17-11<br />
Categori<br />
of<br />
DEPARTMENT STORES are large stores<br />
with merchandise grouped into areas according to specialty—clothing,<br />
cosmetics, accessories, luggage, housewares,<br />
and sometimes appliances, electr<strong>on</strong>ic equipment,<br />
and furniture. Services may include gift wrapping, delivery,<br />
alterati<strong>on</strong>s, bridal registry, a beauty sal<strong>on</strong>, interior<br />
decorati<strong>on</strong> advice, and fashi<strong>on</strong> c<strong>on</strong>sultati<strong>on</strong>.<br />
Clothing departments are organized by size and<br />
gender (petites, menswear); by fashi<strong>on</strong> and price<br />
categories (designer, budget); and sometimes by designer<br />
collecti<strong>on</strong>s (DKNY, Ralph Lauren, Tommy Hilfiger). In<br />
additi<strong>on</strong> to brand-name items, many department stores<br />
sell products with their own private labels.<br />
Most department stores are part of a large retail<br />
company that operates many stores in cities and<br />
suburban malls. Examples include Macy’s, Bloomingdale’s,<br />
Sears, and JC Penney.<br />
312 • UNIT 6 Clothing Selecti<strong>on</strong><br />
Macy’s began as <strong>on</strong>e small storefr<strong>on</strong>t in the<br />
1800s. Today it is a major department store,<br />
with locati<strong>on</strong>s across the country.<br />
SPECIALTY STORES carry a limited line of<br />
merchandise, such as clothing, accessories, or fabrics.<br />
Some focus <strong>on</strong> a particular group—children, petites, or<br />
large sizes. Others sell a specific category—lingerie,<br />
swimwear, bridal gowns, jewelry, or shoes.<br />
Small specialty stores are typically owned by <strong>on</strong>e or<br />
more people. These provide pers<strong>on</strong>alized service, often<br />
with the owner as manager, buyer, and sales associate. A<br />
specialty store that features very fashi<strong>on</strong>able or unique<br />
designs is called a boutique.<br />
Many specialty stores are part of a chain and may be<br />
located in a city, town, or mall. Some sell <strong>on</strong>ly their own<br />
brand of merchandise. Examples include The Limited, Gap,<br />
Old Navy, Ann Taylor, Banana Republic, Victoria’s Secret,<br />
Payless Shoes, and Jo-Ann Fabric & Crafts.
STORES<br />
DISCOUNT STORES sell merchandise at<br />
prices that may be lower than in department and specialty<br />
stores. Relying <strong>on</strong> self-service and checkout counters,<br />
they have few sales pers<strong>on</strong>nel. Some are chains that<br />
carry brand-name items, as well as private labels.<br />
Mass merchandise discounters obtain lower prices<br />
from manufacturers due to their high sales volume. These<br />
stores emphasize price and value. Some services, such as<br />
gift wrapping and bridal registry, are also offered.<br />
Examples are Target, Kohl’s, and Wal-Mart.<br />
Off-price retailers sell brand-name and designer<br />
merchandise at reduced prices. They buy late in the<br />
fashi<strong>on</strong> seas<strong>on</strong> when manufacturers are eager to sell at<br />
low prices. Designer labels can be found at T.J. Maxx,<br />
Marshall’s, Dress Barn, Syms, and Burlingt<strong>on</strong> Coat Factory.<br />
Some retailers operate their own off-price stores, such as<br />
Saks Off Fifth, Nordstrom Rack, and Ann Taylor Loft.<br />
Outlets sell <strong>on</strong>ly the brands produced by the designer,<br />
manufacturer, or factory that owns the store. The styles<br />
may be the same <strong>on</strong>es you find in other retail stores, or<br />
they may be produced specifically for the outlet. Some<br />
are located in malls that c<strong>on</strong>sist solely of outlet stores;<br />
others are located next to the factory. Items that have<br />
flaws or imperfecti<strong>on</strong>s should be labeled as such.<br />
Discount stores like Target<br />
(left) sell enough merchandise<br />
to offer lower prices. In a thrift<br />
store (right), you might find<br />
unusual items.<br />
RESALE STORES specialize in used or sec<strong>on</strong>dhand<br />
clothing. Prices are less than similar new items, and<br />
all purchases are final. Items can’t be exchanged or<br />
returned. Some stores sell garments that are almost new;<br />
others specialize in vintage fashi<strong>on</strong>s from earlier decades.<br />
Thrift stores are resale stores owned by such<br />
organizati<strong>on</strong>s as charities or groups with religious<br />
affiliati<strong>on</strong>. Clothing is inexpensive and may be in less-than<br />
perfect c<strong>on</strong>diti<strong>on</strong>.<br />
C<strong>on</strong>signment shops usually offer clothes that are in<br />
very good c<strong>on</strong>diti<strong>on</strong>. Although higher priced than in thrift<br />
shops, these clothes cost less than new <strong>on</strong>es. The shop<br />
returns a percentage of the selling price to the seller<br />
after the item is sold.<br />
CHAPTER 17 Exploring Opti<strong>on</strong>s • 313
Technology Trends<br />
>>ON-LINE SHOPPING<br />
When shopping <strong>on</strong>-line, you have access<br />
to a large range of merchandise from<br />
retailers. Some offer more sizes and colors<br />
through their Web sites than are available<br />
in their stores. Some use their Web<br />
sites to test c<strong>on</strong>sumer interest in new<br />
products before making them available in<br />
stores. Sometimes items may be <strong>on</strong> sale<br />
<strong>on</strong>ly through a retailer’s Web site.<br />
Retailers publicize their Web site<br />
addresses in their ads and catalogs. When<br />
you d<strong>on</strong>’t know a Web address or when<br />
you are looking for a retailer who carries a<br />
particular product, a search engine is a<br />
useful tool. On the search engine site,<br />
Catalog and On-line Shopping<br />
Catalog and <strong>on</strong>-line shopping are popular<br />
alternatives to buying items in a store. Many people<br />
like the c<strong>on</strong>venience of ordering from store and<br />
mail-order catalogs or <strong>on</strong>-line from a Web site.<br />
Catalogs picture the items and describe them<br />
in detail, including styles, fabrics, colors, sizes,<br />
and prices. The selecti<strong>on</strong> of products may be<br />
greater than in stores and may include items or<br />
314 • UNIT 6 Clothing Selecti<strong>on</strong><br />
enter a word or phrase that indicates<br />
what you want to find.<br />
When you access a retailer’s Web site,<br />
you usually find an <strong>on</strong>-line catalog. A<br />
symbol or a message may appear to tell<br />
you that the site is secure. This means<br />
that the informati<strong>on</strong> you supply, such as<br />
your name, e-mail address, ph<strong>on</strong>e number,<br />
mailing address, and credit card informati<strong>on</strong>,<br />
is stored in a secure database.<br />
After ordering a product, a return email<br />
c<strong>on</strong>firms your order. You may get a<br />
sec<strong>on</strong>d e-mail message notifying you<br />
when the merchandise has been shipped.<br />
If the retailer uses a delivery service,<br />
such as Fed Ex or UPS, the e-mail message<br />
may include a link that you can use<br />
to track the progress of your shipment.<br />
Many manufacturers also have Web<br />
sites. If you can’t order directly from<br />
these sites, a list of stores or links to<br />
other purchasing sites may be provided.<br />
INVESTIGATE<br />
Visit the Web sites of two or more retailers.<br />
What informati<strong>on</strong> is provided? Compare<br />
the sites for ease of use. Share your findings<br />
with the class.<br />
sizes that are unavailable locally. When ordering<br />
from a catalog, if you d<strong>on</strong>’t receive what you<br />
expected, most items can be returned with no<br />
questi<strong>on</strong>s asked.<br />
When you shop <strong>on</strong>-line, the catalog is <strong>on</strong> your<br />
computer screen. Some Web sites have a feature<br />
that allows you to click <strong>on</strong> a photo and get a<br />
larger image. You may be able to see the item in<br />
greater detail than in a printed catalog.
Catalog shopping has advantages. You can shop<br />
at home any time of the day or night with just a<br />
teleph<strong>on</strong>e and a toll-free number or with a computer<br />
and an Internet c<strong>on</strong>necti<strong>on</strong>. No time and<br />
m<strong>on</strong>ey are spent <strong>on</strong> transportati<strong>on</strong> to stores.<br />
When you order by teleph<strong>on</strong>e, you need a<br />
credit card for payment. When you order <strong>on</strong>-line,<br />
you need a credit card or a PayPal account. PayPal<br />
is a system that lets any<strong>on</strong>e with an e-mail address<br />
make secure payments over the Internet. Through<br />
PayPal, the m<strong>on</strong>ey is charged to your credit card<br />
or deducted from your bank account. Orders can<br />
also be placed by mail and paid with a check or<br />
m<strong>on</strong>ey order.<br />
There are also disadvantages to catalog and <strong>on</strong>line<br />
shopping. You can't examine actual items, and<br />
the colors and details may not be clear. Getting the<br />
proper fit is more difficult when you can't try <strong>on</strong><br />
a garment. The waiting time for delivery can be<br />
several days or several weeks.<br />
Other disadvantages involve extra costs.<br />
Shipping and handling costs are usually added.<br />
Finally, to return or exchange an item, you have to<br />
repackage and mail it. Often you pay the return<br />
shipping cost. Catalog or Internet retailers that<br />
have stores may permit customers to return items<br />
to a local store. See page 324 for more informati<strong>on</strong><br />
<strong>on</strong> ordering from catalogs and <strong>on</strong>-line.<br />
Televisi<strong>on</strong><br />
Certain televisi<strong>on</strong> channels have 24-hour,<br />
home shopping programs that take orders for<br />
17-12<br />
merchandise, including jewelry and designer<br />
apparel. Home Shopping Network (HSN) and<br />
QVC are the largest of these services.<br />
After merchandise is shown and described, a<br />
host usually urges viewers to order by calling a<br />
toll-free number. Customers pay for the items<br />
with a credit card, and the merchandise is sent<br />
within a day or two.<br />
Televisi<strong>on</strong> shopping can be easy and c<strong>on</strong>venient,<br />
but the shows do promote impulse buying.<br />
If you evaluate your wardrobe needs and budget<br />
before ordering, you’ll avoid buying regrets.<br />
At-Home Selling<br />
At-home retailers sell merchandise to individuals<br />
or groups in customers’ homes. Often the<br />
event is designed as a “party” for the hostess and<br />
friends. A sales representative displays or dem<strong>on</strong>strates<br />
such items as clothing, lingerie, jewelry, or<br />
cosmetics. Orders are taken and the items are<br />
delivered later.<br />
Merchandise offered through at-home selling<br />
is usually high quality. It may be higher priced,<br />
however, than similar items in stores. Sometimes<br />
customers feel pressured to order items they may<br />
not need because of the host’s hospitality and the<br />
party atmosphere. If you’re invited to a party<br />
event, set a spending limit before attending.<br />
Fairs and Flea Markets<br />
At indoor and outdoor fairs and flea markets,<br />
people rent booths in a parking lot, field, school,<br />
shopping mall, church, or club. Craft fairs usually<br />
feature handmade clothing and accessories.<br />
Bazaars and flea markets sell used clothing and<br />
accessories or new items that have been purchased<br />
directly from a manufacturer.<br />
One or more families may hold a garage sale or<br />
tag sale. See Fig. 17-12. Just because something is<br />
sold at a low price doesn’t make it a bargain. Take<br />
time to inspect any item before purchasing.<br />
Cash is usually expected at garage or<br />
tag sales, and you can’t return what you buy.<br />
The price, however, may be worthwhile.<br />
CHAPTER 17 Exploring Opti<strong>on</strong>s • 315
CHAPTER 17<br />
CHAPTER SUMMARY<br />
• The first step to building a wardrobe is to<br />
evaluate the usefulness of clothes you currently<br />
own.<br />
• Prioritize clothing needs and wants when<br />
adding garments to your wardrobe.<br />
• C<strong>on</strong>sider all your resources to make the<br />
most of your current wardrobe and of any<br />
items you add to it.<br />
• A wardrobe can be expanded in more ways<br />
than just by buying new clothes.<br />
• You have many opti<strong>on</strong>s for buying clothes.<br />
Each has advantages and disadvantages.<br />
USING KEY TERMS<br />
Create a quiz, based <strong>on</strong> at least ten of the Key<br />
Terms in this chapter. Exchange quizzes with<br />
a partner and complete the quiz written by<br />
the other pers<strong>on</strong>. Return the quizzes. After<br />
checking the answers, discuss any problems<br />
you each had in answering the questi<strong>on</strong>s.<br />
316 • UNIT 6 Clothing Selecti<strong>on</strong><br />
Review<br />
RECALLING THE FACTS<br />
1. Why is an inventory part of wardrobe<br />
evaluati<strong>on</strong>?<br />
2. What do you need to know about a garment<br />
in order to develop an acti<strong>on</strong> plan<br />
for your wardrobe?<br />
3. How can comparing needs and wants<br />
help you decide whether to add a garment<br />
to your wardrobe?<br />
4. How do you prioritize when making a<br />
wardrobe chart?<br />
5. Why are sewing skills a valuable<br />
resource?<br />
6. In what ways can other people be<br />
resources for meeting clothing needs?<br />
7. How might clothing that a pers<strong>on</strong><br />
already owns be used to expand a<br />
wardrobe?<br />
8. When might renting a garment be more<br />
reas<strong>on</strong>able than buying?<br />
9. What are some advantages of buying<br />
clothes from a store rather than a<br />
catalog?<br />
10. What c<strong>on</strong>veniences do catalogs offer?<br />
11. Describe advantages and disadvantages<br />
of shopping at craft fairs and bazaars.<br />
12. Give two reas<strong>on</strong>s why clothing tends to<br />
be more expensive at a boutique than at<br />
a mass merchandise discounter.<br />
13. How are thrift stores and c<strong>on</strong>signment<br />
stores similar and different?
and Activities<br />
THINKING CRITICALLY<br />
1. Which do you like to acquire more,<br />
clothes that you need or clothes that<br />
you want? Why?<br />
2. Trading or sharing clothes doesn’t work<br />
for every<strong>on</strong>e. Why do you think that’s<br />
true?<br />
3. Of the different methods available for<br />
buying clothes, which do you think is<br />
most likely to lead to overspending?<br />
Why?<br />
APPLYING KNOWLEDGE<br />
1. Need or want? Make a quick list of five<br />
to ten clothing items that you’ve thought<br />
about owning. Then determine whether<br />
each is a need or a want. In writing,<br />
describe what c<strong>on</strong>clusi<strong>on</strong>s you can reach<br />
about yourself.<br />
2. Advising a friend. Suppose a friend says<br />
that he or she just can’t let go of old<br />
clothes. <strong>Everything</strong> stays in the closet<br />
year after year whether it’s worn or not.<br />
What would your advice be? Write a list<br />
of reas<strong>on</strong>s you can give to your friend in<br />
order to be c<strong>on</strong>vincing.<br />
3. Wardrobe chart. Make your own<br />
wardrobe chart, using the steps<br />
described in the chapter.<br />
4. Creating uses. List five garments in<br />
your wardrobe. Describe two new ways to<br />
wear each <strong>on</strong>e.<br />
CHAPTER 17<br />
5. Shopping survey. Survey 20 students<br />
about their favorite stores to shop al<strong>on</strong>g<br />
with the reas<strong>on</strong>s for their choices. What<br />
are the most comm<strong>on</strong> reas<strong>on</strong>s? Report<br />
your findings to the class.<br />
6. Rental costs. Research the costs of<br />
tuxedo rentals at different shops in your<br />
area. Compare these costs to the cost of<br />
buying a new or used tuxedo.<br />
MAKING>
CHAPTER 18<br />
Accessing Informati<strong>on</strong><br />
OBJECTIVES<br />
• Distinguish<br />
between<br />
informati<strong>on</strong> ads<br />
and image ads.<br />
• Evaluate<br />
informati<strong>on</strong><br />
provided by<br />
catalogs and<br />
the Internet.<br />
• Analyze<br />
informati<strong>on</strong> printed<br />
<strong>on</strong> labels and<br />
hangtags.<br />
• Explain how<br />
c<strong>on</strong>sumers can<br />
avoid impulse<br />
buying and make<br />
use of comparis<strong>on</strong><br />
shopping.<br />
• Describe the<br />
different types<br />
of store sales.<br />
KEY TERMS<br />
comparis<strong>on</strong> shopping<br />
image ads<br />
impulse buying<br />
informati<strong>on</strong> ads<br />
logo<br />
mandatory<br />
trademark<br />
warranty<br />
318 • UNIT 6 Clothing Selecti<strong>on</strong>
EXAMINETHISISSUE<br />
Shop ‘til you drop. Finding the garment<br />
you want to buy can be difficult.<br />
Shirts, for example, might be found <strong>on</strong><br />
many racks throughout a store. Locating<br />
the style you want in the right size and for<br />
the right price can take plenty of looking.<br />
Often the clothing in departments for<br />
males is less scattered than in departments<br />
for females. For the pers<strong>on</strong> in a<br />
hurry or with less interest in shopping, the<br />
process can be frustrating. For the shopper<br />
who likes to browse and has the time,<br />
shopping can be fun.<br />
What do you think?<br />
How do you feel about shopping? Do<br />
you think it would be easier to evaluate<br />
the purchases you want to make if garments<br />
were arranged differently? What, if<br />
anything, would you change?<br />
While browsing at a store’s shoe<br />
display, <strong>on</strong>e teen noticed a style that<br />
she had seen a well-known singer<br />
wear. After buying the shoes, she later wished she<br />
had spent her m<strong>on</strong>ey <strong>on</strong> something else.<br />
What informati<strong>on</strong> do you use when making<br />
purchases? It pays to gather data about products<br />
and services before you buy. You’re more likely to<br />
choose clothing you need and want and build a<br />
wardrobe that looks good. What’s more, you’ll get<br />
better value for the m<strong>on</strong>ey you have to spend. See<br />
Fig. 18-1.<br />
SOURCES OF INFORMATION<br />
People often talk about informati<strong>on</strong> overload.<br />
That’s because informati<strong>on</strong> is everywhere in<br />
today’s world. When you buy clothing and accessories,<br />
the primary sources of informati<strong>on</strong> available<br />
are advertising, catalogs, the Internet, and<br />
labels and hangtags. You’ll need to sort through the<br />
informati<strong>on</strong> to make careful purchasing decisi<strong>on</strong>s.<br />
Advertising<br />
The purpose of advertising is to sell something.<br />
It might be a product, a service, or an idea.<br />
If you buy, the advertising was successful for the<br />
seller. To use advertising to your own advantage,<br />
be sure you understand its intent.<br />
Informati<strong>on</strong> or Image?<br />
Advertisements fall into <strong>on</strong>e of two general<br />
categories: those that provide informati<strong>on</strong> and<br />
those that promote an image.<br />
• Informati<strong>on</strong> ads. When you observe an<br />
advertisement, ask yourself what you learned.<br />
An informati<strong>on</strong> ad includes many details<br />
about a product. For a shirt, the style and fabric<br />
might be described, as well as the sizes,<br />
price, fiber c<strong>on</strong>tent, care, and brand name. The<br />
ad might tell you where the shirt is sold. By<br />
reading several such ads, you can decide what<br />
to buy without going from store to store. The<br />
more facts supplied, the more useful the ad.<br />
Specifying a fabric as “50-percent cott<strong>on</strong>/50percent<br />
polyester” is more informative than<br />
listing it as just a “cott<strong>on</strong> blend.”<br />
18-1<br />
Gathering informati<strong>on</strong> about products before you<br />
buy helps you make better purchasing decisi<strong>on</strong>s.<br />
CHAPTER 18 Accessing Informati<strong>on</strong> • 319
18-2<br />
If certain sunglasses make the model or<br />
celebrity in an image ad look good, you might feel like<br />
trying them yourself. This is how some ads capture your<br />
interest—and your m<strong>on</strong>ey.<br />
• Image ads. An effective image ad can make a<br />
pair of new white socks seem like a dream<br />
come true. While this is an exaggerati<strong>on</strong>, that’s<br />
the basic aim. Image ads tempt you to buy<br />
items by making you want them. They do this<br />
in many ways: by appealing to emoti<strong>on</strong>s and<br />
fantasies; by suggesting a sense of approval; by<br />
encouraging you to have the “very latest”<br />
items; and by arousing a desire for adventure<br />
or individuality. See Fig. 18-2. Some ads make<br />
a fashi<strong>on</strong> statement or promote a designer or<br />
manufacturer. As the name suggests, image ads<br />
are usually very visual, with most space<br />
devoted to drawings or photographs. Although<br />
the ads are typically short <strong>on</strong> product informati<strong>on</strong>,<br />
they may have ideas for styles, colors,<br />
and fabrics to add to your wardrobe. Some ads<br />
320 • UNIT 6 Clothing Selecti<strong>on</strong><br />
create a mood to associate with the product.<br />
Fragrance and cosmetic manufacturers frequently<br />
use such ads to stir your interest.<br />
Advertising Medias<br />
To spread their message to as many people as<br />
possible, advertisers use different forms of mass<br />
communicati<strong>on</strong>. The print medias, including<br />
magazines, newspapers, and billboards, have been<br />
around for a l<strong>on</strong>g time. See Fig. 18-3. Other forms<br />
are electr<strong>on</strong>ic: radio, televisi<strong>on</strong>, and, most<br />
recently, the Internet.<br />
Each media has its own format and limitati<strong>on</strong>s.<br />
Because of this, the same product may be<br />
advertised differently in different medias.<br />
• Magazines. Some advertisers choose the fullpage,<br />
glossy format offered by magazines. Ads<br />
usually combine informati<strong>on</strong> with a large photograph<br />
or illustrati<strong>on</strong> to create an image for<br />
the product or brand. Ads that appear in<br />
nati<strong>on</strong>al or regi<strong>on</strong>al publicati<strong>on</strong>s may not supply<br />
the product’s price or where to buy it.<br />
18-3<br />
Magazines and newspapers charge fees for<br />
advertisements. If enough people buy because of an ad,<br />
the cost of that ad is worthwhile to the advertiser.
• Newspapers. Except for the special ads in<br />
large Sunday editi<strong>on</strong>s, these ads are usually<br />
black-and-white photos or drawings. Lacking<br />
the “flair” of magazines, they also tend to be<br />
more informative. Since many newspapers are<br />
sold locally, their ads tell where products can<br />
be found and what they cost.<br />
• Promoti<strong>on</strong>al articles. Promoti<strong>on</strong>al articles<br />
often appear in newspapers and magazines. An<br />
article <strong>on</strong> organizing your closet may suggest<br />
using the shoe bag menti<strong>on</strong>ed in a store ad <strong>on</strong><br />
the same page. Although accurate, the informati<strong>on</strong><br />
may also be slanted and incomplete.<br />
• Advertorials. Advertisement editorials are<br />
designed to look like articles but are really paid<br />
ads. If you look carefully, you’ll see the word<br />
“advertisement” printed above or below the<br />
article.<br />
18-4<br />
Advertisers use many types of media to reach<br />
people. What types of media appeal to you most and<br />
might draw you to a product?<br />
• Radio and televisi<strong>on</strong>. Ads <strong>on</strong> radio and<br />
televisi<strong>on</strong>, called commercials, are typically<br />
30 or 60 sec<strong>on</strong>ds l<strong>on</strong>g. Some are as brief as 15<br />
sec<strong>on</strong>ds. These ads are short and splashy,<br />
designed to capture your attenti<strong>on</strong> and fix the<br />
product’s name in your mind. Most are image<br />
ads that give little informati<strong>on</strong>.<br />
• Infomercials. Informati<strong>on</strong> commercials are<br />
lengthy televisi<strong>on</strong> presentati<strong>on</strong>s about a product.<br />
Some follow a talk-show format, complete<br />
with a celebrity host and an “expert guest”<br />
who models or dem<strong>on</strong>strates the item’s use.<br />
Designed to look like a 30-minute televisi<strong>on</strong><br />
show, they are really advertisements. These<br />
shows provide a toll-free number for c<strong>on</strong>venient<br />
ordering.<br />
• The Internet. Advertisers use eye-catching<br />
ads to attract the attenti<strong>on</strong> of computer users.<br />
Animated figures appear <strong>on</strong> the top of a Web<br />
page; pop-up windows intrude over it. These<br />
quickly link you to the seller’s Web site, where<br />
you may find a complete catalog of products.<br />
• Product placement. Many designers provide<br />
evening gowns and accessories for celebrities<br />
to wear to award shows. In return, the<br />
designers' names are menti<strong>on</strong>ed <strong>on</strong> televisi<strong>on</strong><br />
and in magazines. Designers and manufacturers<br />
also receive credit for providing the clothing<br />
for televisi<strong>on</strong> shows. Others pay fees to have<br />
their products used—and subtly noticed—in a<br />
movie or a show.<br />
CHAPTER 18 Accessing Informati<strong>on</strong> • 321
• Billboards. Because they’re found al<strong>on</strong>g<br />
roads and highways, <strong>on</strong> buildings, and <strong>on</strong> the<br />
sides of buses, these ads are seen for <strong>on</strong>ly a<br />
short time. The messages are brief and bold.<br />
• Sales promoti<strong>on</strong>s. These subtle forms of<br />
advertising let c<strong>on</strong>sumers see products in use.<br />
Fashi<strong>on</strong> shows and dem<strong>on</strong>strati<strong>on</strong>s, such as<br />
how to accessorize with scarves, are two popular<br />
examples from the fashi<strong>on</strong> industry.<br />
Advertising in Perspective<br />
Because fashi<strong>on</strong> is an industry, its main purpose<br />
is to stay in business by selling more clothes<br />
and accessories. To do this, fashi<strong>on</strong>s must change<br />
c<strong>on</strong>stantly. Every seas<strong>on</strong> ads describe the newest<br />
and the latest.<br />
A new style may be introduced, last for several<br />
years, and then fade away. The best shopping strategy<br />
is to purchase a style that is near the beginning<br />
of its fashi<strong>on</strong> life, rather than at the end.<br />
Read, look, and listen carefully to what is said<br />
about new fashi<strong>on</strong>s. You’ll so<strong>on</strong> be able to tell the<br />
difference between a fashi<strong>on</strong> that will last and a<br />
fad that will quickly fade from popularity. Look<br />
for the key words used to describe a new style. If<br />
you notice “latest,” “newest,” “hottest,” or “the big<br />
news is . . .,” the style may not be fashi<strong>on</strong>able for<br />
l<strong>on</strong>g. If words like “classic,” “traditi<strong>on</strong>al,” or<br />
322 • UNIT 6 Clothing Selecti<strong>on</strong><br />
18-5<br />
Fashi<strong>on</strong> shows, whether <strong>on</strong> high-fashi<strong>on</strong> run-<br />
ways or at shopping malls and department stores, entice<br />
people to buy. Experts in fashi<strong>on</strong> present the latest<br />
looks in this entertaining format.<br />
“always in fashi<strong>on</strong>” are used, the style probably<br />
isn’t a fad.<br />
Buying an item that is a fad or status symbol<br />
isn’t wr<strong>on</strong>g. You should know what you’re buying,<br />
however, and base your decisi<strong>on</strong> <strong>on</strong> your own<br />
thinking rather than the lure of an advertisement.<br />
Catalogs<br />
As you read in Chapter 17, catalogs are a buying<br />
opti<strong>on</strong> that many people like. Catalogs can<br />
also be a useful informati<strong>on</strong> resource, even when<br />
you’re not ready to make a purchase. See Fig. 18-<br />
6. You can use them to gather ideas about new<br />
styles and colors. Since stores and manufacturers<br />
try to include all relevant facts about a product in<br />
their catalogs, you’ll find details about styles, colors,<br />
and sizes, usually accompanied by color photos.<br />
Ideas about cost will help you plan around a<br />
budget. Recognizing bargains will be easier when<br />
you do shop.<br />
18-6<br />
You can use catalogs even when you d<strong>on</strong>’t plan<br />
to place an order. They have ideas for combining ties and<br />
shirts, choosing shoes to go with outfits, and putting colors<br />
together. How else might they help?
The Internet<br />
The Internet is another informati<strong>on</strong> source to<br />
use before you shop. Many stores and catalog<br />
companies have Web sites <strong>on</strong> which you can<br />
research styles, colors, sizes, and prices before you<br />
shop. Fashi<strong>on</strong> magazines also have Web sites that<br />
show the latest styles and colors of clothing and<br />
accessories. Sometimes they list where the items<br />
can be purchased. These sites also provide helpful<br />
tips <strong>on</strong> coordinating your wardrobe and fashi<strong>on</strong><br />
Internet technology has made it easy to<br />
find patterns and get sewing informati<strong>on</strong>.<br />
• Pattern Company Web Sites. Instead of<br />
going to a fabric store, you can visit a<br />
pattern company’s Web site to select<br />
and order a pattern. You may be able to<br />
find sewing tips and sign up for an e-mail<br />
newsletter. Small pattern businesses<br />
also sell patterns and directi<strong>on</strong>s <strong>on</strong>-line.<br />
Some fill a special niche, such as offering<br />
vintage styles, square dancing outfits,<br />
active sportswear, lingerie, or special<br />
sizes. Visit a search engine and type in<br />
phrases such as “sewing patterns” or<br />
“costume patterns” to see what you can<br />
find.<br />
“do’s and d<strong>on</strong>’ts.” Even the sewing pattern companies<br />
have Web sites <strong>on</strong> which you can view<br />
their catalogs (see below).<br />
Internet informati<strong>on</strong> is useful in other ways<br />
too. For <strong>on</strong>e thing, you can check availability.<br />
With Internet access to sellers, you usually know<br />
immediately whether an item is available in the<br />
style, size, and color you want. Many <strong>on</strong>-line catalogs<br />
also have special secti<strong>on</strong>s that advertise<br />
Technology Trends<br />
>>ON-LINE SEWING INFORMATION<br />
• On-line Sewing Groups. Suppose you<br />
are searching for a special fabric, or you<br />
have a sewing questi<strong>on</strong>. You could join<br />
an <strong>on</strong>-line sewing group for the informati<strong>on</strong>.<br />
When you post a questi<strong>on</strong>, other<br />
sewers share their experiences with you.<br />
Some groups are for sewers of all skill<br />
levels; others focus <strong>on</strong> advanced skills.<br />
Some are dedicated to specific sewingmachine<br />
brands. Others are for special<br />
interests, such as quilting, costumes, or<br />
sewing as a business. To locate sewing<br />
groups, access a search engine and type<br />
in “sewing forums,” “sewing groups,” or<br />
“sewing bulletin boards.”<br />
• On-line Sewing Classes. These classes<br />
include informati<strong>on</strong> that you must<br />
download, as well as Q&A boards where<br />
you can post questi<strong>on</strong>s and the instructor<br />
will post answers. Some offer live<br />
computer chat sessi<strong>on</strong>s with the<br />
instructor at specified times. There is a<br />
fee to take <strong>on</strong>-line classes.<br />
INVESTIGATE<br />
Visit the Web sites of pattern companies<br />
or <strong>on</strong>-line sewing groups. What informati<strong>on</strong><br />
is available?
How To…<br />
PLACE AN INTERNET OR CATALOG ORDER<br />
Shopping from home is easy and c<strong>on</strong>venient. All you need is a computer with Internet<br />
access or a teleph<strong>on</strong>e.<br />
• Find the merchandise you want to order in<br />
the catalog or <strong>on</strong> the Web site. Look for<br />
easy-fitting styles and P-S-M-L-XL size<br />
ranges. Numbered size ranges require a<br />
more accurate fit. Many catalogs have<br />
detailed sizing informati<strong>on</strong>. On some Web<br />
sites, you can enter your measurements to<br />
find what size to order.<br />
• Call the order number provided<br />
for ph<strong>on</strong>e orders.<br />
Many are toll-free. Ask<br />
any questi<strong>on</strong>s you<br />
have about size,<br />
color, fabric, shipping<br />
date, and special<br />
services.<br />
• C<strong>on</strong>sider shipping<br />
charges as part of<br />
the total cost. These<br />
can vary widely am<strong>on</strong>g<br />
companies. Taxes may<br />
be added, depending <strong>on</strong> the<br />
state where you live.<br />
• Provide a credit card number and the expirati<strong>on</strong><br />
date printed <strong>on</strong> the card for both<br />
ph<strong>on</strong>e and <strong>on</strong>-line orders. You may also be<br />
asked to provide the card security code.<br />
This is a three- or four-digit number that is<br />
printed <strong>on</strong> the back of the card.<br />
324 • UNIT 6 Clothing Selecti<strong>on</strong><br />
• Keep a record of your order, including c<strong>on</strong>firmati<strong>on</strong><br />
number, total cost, and order and<br />
ship dates. Many companies will send you a<br />
notice if there will be a delay in shipping<br />
your merchandise. If you are shopping <strong>on</strong>line,<br />
be sure to “bookmark” your order or<br />
add it to your “Favorites” list.<br />
• Read the return policies. Most companies<br />
accept returns for refund or credit, but<br />
d<strong>on</strong>’t refund shipping charges. Some<br />
allow you to return merchandise to <strong>on</strong>e<br />
of their stores, even if you bought it<br />
<strong>on</strong>-line or through a catalog.<br />
Exploring Internet and Catalog Shopping<br />
Read the ordering informati<strong>on</strong> and return policy in a catalog or <strong>on</strong> a Web<br />
site. What additi<strong>on</strong>al costs are added when you order? Does this make<br />
shopping <strong>on</strong>-line or by catalog an advantage or disadvantage? Why?
sale items. If you can’t find something in the<br />
stores, you might find it <strong>on</strong> the Internet. For<br />
example, if a store doesn’t have an athletic shoe in<br />
an unusual size, you might be able to order them<br />
directly through the manufacturer’s Web site. To<br />
review informati<strong>on</strong> <strong>on</strong> e-shopping, see page 314.<br />
Labels and Hangtags<br />
Each garment comes with a miniature owner’s<br />
manual, the labels and hangtags attached for easy<br />
access. These sources of informati<strong>on</strong> easily go<br />
unnoticed unless you realize their usefulness.<br />
Clothing labels are a relatively recent development.<br />
At <strong>on</strong>e time, all clothes were made from<br />
natural fibers. People knew what to expect from<br />
these materials and how to care for them. With<br />
advances in textile chemistry in the 1940s came<br />
new fibers, including names like nyl<strong>on</strong>, polyester,<br />
acrylic, and spandex. People weren’t familiar with<br />
these fabrics or their care. Clothes were marked<br />
and advertised in a way that led many c<strong>on</strong>sumers<br />
to believe they were buying <strong>on</strong>e thing, when they<br />
were actually getting something quite different.<br />
In 1958, C<strong>on</strong>gress approved the Textile Fiber<br />
Products Identificati<strong>on</strong> Act (TFPI). This law protects<br />
c<strong>on</strong>sumers against misinformati<strong>on</strong> <strong>on</strong> the<br />
fiber c<strong>on</strong>tent of textile goods. Similar laws have<br />
been enacted by C<strong>on</strong>gress to cover fur and wool<br />
products.<br />
Mandatory Informati<strong>on</strong><br />
Thanks to the TFPI, every garment sold must<br />
have <strong>on</strong>e or more labels that give the c<strong>on</strong>sumer<br />
Fashi<strong>on</strong><br />
OUCH! Have you noticed any garment<br />
labels scratching the skin <strong>on</strong> the back of<br />
your neck? If so, you’re like many others,<br />
and there’s a reas<strong>on</strong>. As a cost-cutting<br />
measure today, some manufacturers are<br />
using label materials that aren’t as soft<br />
and pliable as they used to be. The labels<br />
are also sliced to size, leaving the edges<br />
sharp. As c<strong>on</strong>sumers call more attenti<strong>on</strong> to<br />
this problem, changes may be made.<br />
Facts<br />
18-7<br />
When you know where the labels are, you’re<br />
more likely to check them for informati<strong>on</strong>. What informa-<br />
ti<strong>on</strong> is <strong>on</strong> this label?<br />
specified informati<strong>on</strong>. This informati<strong>on</strong> is<br />
mandatory, or required by law. The law states that<br />
labels must be attached to garments where they<br />
are easy to find. This is usually the center back of<br />
a garment at the neck or waist, although you may<br />
see labels in the inside, lower-fr<strong>on</strong>t seam of a<br />
jacket or the side seams of lingerie. See Fig. 18-7.<br />
Labels must be attached so they w<strong>on</strong>’t come off<br />
unless removed by the purchaser. They can be<br />
glued, sewn, printed, or stamped <strong>on</strong> the fabric, or<br />
attached to the outside of the garment. If the garment<br />
is sold in a package, the fiber c<strong>on</strong>tent label<br />
can be affixed to the package <strong>on</strong>ly.<br />
A further aid to c<strong>on</strong>sumers is the Permanent<br />
<str<strong>on</strong>g>Care</str<strong>on</strong>g> Labeling Rule of 1972. This law states that<br />
all textile garments sold in the United States must<br />
carry permanent labels that fully describe the<br />
item’s regular care needs.<br />
Today, the following five pieces of mandatory<br />
informati<strong>on</strong> must appear <strong>on</strong> all garment labels:<br />
• Fiber c<strong>on</strong>tent. The fibers must be identified<br />
by their generic names, not their trade names.<br />
• Percentage of fiber c<strong>on</strong>tent by weight.<br />
CHAPTER 18 Accessing Informati<strong>on</strong> • 325
18-8<br />
How might trademark informati<strong>on</strong> <strong>on</strong> product<br />
labels help you make clothing decisi<strong>on</strong>s?<br />
• Identificati<strong>on</strong> of manufacturer. Either the<br />
manufacturer’s name or RN, a registered number<br />
assigned by the Federal Trade Commissi<strong>on</strong>,<br />
must be identified.<br />
• Country of origin. If parts of the garment<br />
were manufactured in another country, or if<br />
the garment was assembled in another country,<br />
the label must state this. If the fabric or<br />
yarn is from another country, this informati<strong>on</strong><br />
must also be included.<br />
• <str<strong>on</strong>g>Care</str<strong>on</strong>g> instructi<strong>on</strong>s. One method of safe care<br />
must be listed.<br />
Voluntary Informati<strong>on</strong><br />
Apparel manufacturers may show other informati<strong>on</strong><br />
<strong>on</strong> a garment’s permanent label or <strong>on</strong><br />
hangtags that are attached with a strip of plastic,<br />
string, or safety pin. See Fig. 18-9. This voluntary<br />
informati<strong>on</strong> may include the following:<br />
• Size. The size may be part of the garment’s<br />
permanent label, printed <strong>on</strong> a small separate<br />
label, or printed <strong>on</strong> a hangtag. While this<br />
informati<strong>on</strong> isn’t required, c<strong>on</strong>sumers and<br />
retailers expect it.<br />
• Brand names or trademarks. Tags and<br />
labels can serve as mini-advertisements for a<br />
brand name or trademark. A trademark is an<br />
identifying mark used by a manufacturer or<br />
326 • UNIT 6 Clothing Selecti<strong>on</strong><br />
retailer to distinguish its products from those<br />
of the competiti<strong>on</strong>. The trademark may be a<br />
word, design, letter, or logo, an identifying<br />
symbol. Not <strong>on</strong>ly manufacturers but also<br />
fibers and finishes may be identified by trademark.<br />
Whoever legally registers a trademark<br />
has exclusive rights to its use. See Fig. 18-8.<br />
• Warranty or guarantee. A warranty is a<br />
pledge or assurance about a product’s quality<br />
or performance. Clothing warranties typically<br />
offer a refund or replacement garment if the<br />
original doesn’t provide normal wear for a specific<br />
period of time. A few organizati<strong>on</strong>s, such<br />
as the Internati<strong>on</strong>al Fabricare Institute, maintain<br />
test laboratories that issue warranties or<br />
seals of approval. These pledges guarantee that<br />
the product will live up to the standards set by<br />
that particular laboratory. Some manufacturers<br />
provide additi<strong>on</strong>al warranties of their own.<br />
• Inventory c<strong>on</strong>trol. Retailers maintain<br />
inventory records by using special codes<br />
printed <strong>on</strong> hangtags. When an item is sold, a<br />
scanner “reads” the informati<strong>on</strong> <strong>on</strong> the tag or<br />
the sales associate enters the code in the register.<br />
This informati<strong>on</strong> goes to the computer,<br />
which records the style, color, size, price, and<br />
manufacturer and tracks how many are sold.<br />
18-9 While you can leave a label in a garment for<br />
occasi<strong>on</strong>al reference, a hangtag is removed before wearing.<br />
Some hangtags even have an extra butt<strong>on</strong> or length<br />
of yarn attached for repairs. Where are hangtags often<br />
located <strong>on</strong> garments?
USING INFORMATION<br />
EFFECTIVELY<br />
Informati<strong>on</strong> about products and services is of<br />
little value if you d<strong>on</strong>’t take advantage of it. Some<br />
people simply forget to use available informati<strong>on</strong>.<br />
Others d<strong>on</strong>’t know how to use it. Both of these<br />
situati<strong>on</strong>s can be overcome.<br />
Impulse Buying<br />
One teen tries to shop with a plan. He goes to<br />
the store to get <strong>on</strong>e or two specific items and<br />
comes home with several extras. “What am I<br />
doing?” he w<strong>on</strong>ders.“My budget can’t handle this.”<br />
Shopping often leads to impulse buying, making<br />
unplanned purchases. See Fig. 18-10. Store<br />
displays are designed to catch attenti<strong>on</strong>. An entire<br />
outfit displayed with accessories tempts you to<br />
buy the whole outfit instead of buying just <strong>on</strong>e<br />
item to coordinate with clothes you already own.<br />
Impulse buying is <strong>on</strong>e reas<strong>on</strong> why some closets<br />
are filled with garments that are rarely worn.<br />
Here are some suggesti<strong>on</strong>s to help you avoid<br />
impulse buying:<br />
• Make a list of the items you plan to buy before<br />
you go shopping.<br />
• Set a limit <strong>on</strong> the amount of m<strong>on</strong>ey you plan<br />
to spend for each item <strong>on</strong> your list.<br />
• If you see something that you would like to<br />
buy and it's not <strong>on</strong> your list, take time to think<br />
about it. You can return to the store later to<br />
purchase it.<br />
Becoming an educated shopper makes it easier<br />
to resist impulse buying. Knowledge tells you<br />
what’s worth owning. It also helps you identify<br />
why you want to buy. If you learn to recognize<br />
impulsive instincts, you can manage them better.<br />
Buying something because it makes you feel<br />
good w<strong>on</strong>’t be a problem as l<strong>on</strong>g as it’s <strong>on</strong>ly occasi<strong>on</strong>al.<br />
Most people enjoy a treat now and then.<br />
You might restrict unplanned purchases to small,<br />
inexpensive items, such as a scarf, belt, lipstick, or<br />
pair of socks, but be careful since these costs can<br />
add up too. When impulsive buying is under c<strong>on</strong>trol,<br />
you can mean it when you tell the sales associate,<br />
“I’m just looking.”<br />
Comparis<strong>on</strong> Shopping<br />
How do you know whether something is a<br />
good buy? With comparis<strong>on</strong> shopping, you look<br />
at the quality, price, and usefulness of similar<br />
items to find the best value for your m<strong>on</strong>ey.<br />
You’re less likely to buy impulsively if you develop<br />
the habit of examining competitive products first.<br />
Comparis<strong>on</strong> shopping begins at home. Read,<br />
watch, and listen to ads. Study mail-order catalogs.<br />
If you have access to the Internet, do a little<br />
research. Later, when you’re in the store, you can<br />
compare the informati<strong>on</strong> you’ve acquired to the<br />
merchandise you find. Do you want to pay drycleaning<br />
bills? Do you like some fibers more than<br />
others? Reading labels and hangtags will help you<br />
decide which garment is the best buy for you.<br />
Buying at Sales<br />
Some people say, “I try not to buy anything<br />
unless it’s <strong>on</strong> sale.” These people see a sale as more<br />
18-10<br />
Impulse buying can be a problem if it happens<br />
too often. Leaving credit cards at home and taking <strong>on</strong>ly<br />
the amount of m<strong>on</strong>ey needed when shopping can help.<br />
CHAPTER 18 Accessing Informati<strong>on</strong> • 327
18-11<br />
Typically, when the number of potential buyers is<br />
lowest, you’re likely to find better prices. A pre-seas<strong>on</strong><br />
sale price may be offered, for example, to lure shoppers.<br />
As more shoppers want and need the seas<strong>on</strong>’s fashi<strong>on</strong>s,<br />
the prices may go up.<br />
than just a way to expand a wardrobe. It’s a challenge<br />
they enjoy. After planning their purchases,<br />
then waiting for sales, they set out to find the best<br />
values. With sales of many types going <strong>on</strong> all the<br />
time, these shoppers have many chances to<br />
sharpen their sales-hunting skills.<br />
Types of Sales<br />
Items go <strong>on</strong> sale for many reas<strong>on</strong>s. Have you<br />
found bargains at any of these?<br />
• Pre-seas<strong>on</strong> sales. These sales feature merchandise<br />
for upcoming seas<strong>on</strong>s well ahead of<br />
time. Back-to-school sales are held in July.<br />
Although the Christmas seas<strong>on</strong> traditi<strong>on</strong>ally<br />
starts the day after Thanksgiving, the sales seas<strong>on</strong><br />
begins just after Halloween. Spring fashi<strong>on</strong>s<br />
often compete with winter clothes for display<br />
space in January. See Fig. 18-11.<br />
• Coup<strong>on</strong> sales. With coup<strong>on</strong> sales, customers<br />
redeem coup<strong>on</strong>s for special discounts. These<br />
coup<strong>on</strong>s are usually mailed to the people <strong>on</strong><br />
the store’s mailing list. Some coup<strong>on</strong>s are<br />
printed in newspapers.<br />
328 • UNIT 6 Clothing Selecti<strong>on</strong><br />
• Preferred customer sales. People who<br />
have charge accounts at a store or who are <strong>on</strong><br />
a special mailing list are alerted to special sales.<br />
Department stores have these sales several<br />
times a year.<br />
• Holiday sales. A traditi<strong>on</strong> for many stores<br />
and shoppers, these sales are held <strong>on</strong> legal holidays,<br />
such as Presidents’ Day. They offer a way<br />
for some people to spend a day away from<br />
work or school. A store may use a sale to “celebrate”<br />
a special day of its own, such as the<br />
founder’s birthday.<br />
• Clearance sales. With clearance sales, stores<br />
move out items that didn’t sell during the seas<strong>on</strong>,<br />
making room for incoming merchandise.<br />
See Fig. 18-12. Merchandise that a store<br />
decides not to carry anymore may be offered<br />
in a “clear out” sale.<br />
• Inventory sales. These occur <strong>on</strong>ce a year<br />
when a store takes inventory. Selling merchandise<br />
before taking inventory leaves fewer items<br />
to be counted. Many stores hold inventory<br />
sales in January, when stock is already low after<br />
Christmas. Stores may also hold the sale after<br />
taking inventory, to reduce an oversupply or<br />
move the last of a merchandise line.<br />
18-12<br />
Planning ahead can be a real m<strong>on</strong>ey saver. If you<br />
can wait until the end of a seas<strong>on</strong> to buy, prices are usually<br />
lower. What happens to the selecti<strong>on</strong>?
18-13<br />
Check for flaws before you buy a garment. A<br />
zipper, for example, might look fine even though it’s<br />
defective. A quick test will tell you whether it operates<br />
smoothly and remains closed as needed.<br />
• Going-out-of business sales. When stores<br />
have lost their lease or g<strong>on</strong>e bankrupt, they<br />
may have a going-out-of-business sale. Usually<br />
all merchandise in the store must be sold.<br />
Check Merchandise<br />
Just because merchandise is <strong>on</strong> sale doesn’t<br />
necessarily mean it’s a bargain. Understanding<br />
what items make it to the sale racks can help you<br />
find a good buy. Clothing sold at a discount price<br />
is usually <strong>on</strong>e of the following three types:<br />
• Overruns. Excess merchandise results when<br />
manufacturers produce more than they can<br />
sell to stores. The merchandise is usually “first<br />
quality,” or c<strong>on</strong>sidered perfect. You’ll frequently<br />
find overruns in discount stores, especially<br />
off-price retailers and factory outlets.<br />
• Irregulars. Garments that d<strong>on</strong>’t pass inspecti<strong>on</strong><br />
due to small imperfecti<strong>on</strong>s are called<br />
irregulars. A pull in the fabric, an uneven color,<br />
or a mislabeled size might be the cause. These<br />
flaws w<strong>on</strong>’t affect the wear of the garment.<br />
Discount and outlet stores sell this merchandise;<br />
department stores may offer irregulars as<br />
part of a special sale.<br />
• Sec<strong>on</strong>ds. Garments with more serious flaws<br />
are sec<strong>on</strong>ds. One sleeve may be l<strong>on</strong>ger than the<br />
other, or the butt<strong>on</strong>holes may be sewn in the<br />
wr<strong>on</strong>g place. It may take some skillful sewing<br />
to repair these garments.<br />
Garments that are known to have flaws may be<br />
sold “as is.” This notati<strong>on</strong> <strong>on</strong> the label means that<br />
you can’t return the garment if you find a flaw<br />
after purchasing. “As is” items may be garments<br />
that were perfect when the store received them<br />
but were damaged while for sale. Before you buy,<br />
look for such problems as a ripped hem, a missing<br />
butt<strong>on</strong>, or a makeup stain.<br />
To be <strong>on</strong> the safe side, check all merchandise<br />
for flaws, whether sale- or regular-priced. See Fig.<br />
18-13. If you find a flaw, can it be mended easily?<br />
Is it minor enough to go unnoticed? The size of<br />
the flaw will determine whether you think the<br />
garment is still a bargain.<br />
Evaluating Sales<br />
If you hate orange, is an orange sweater a bargain<br />
at 50 percent off? Probably not, but for<br />
some<strong>on</strong>e who likes orange, it might be. The<br />
appeal of saving m<strong>on</strong>ey makes some people forget<br />
to evaluate carefully. If an item wouldn’t interest<br />
you at full price, it isn’t a good buy <strong>on</strong> sale.<br />
Before you buy, compare the sale price to the<br />
item’s regular price. Also try to check other sale<br />
prices. Some stores may have better bargains.<br />
Many sales are final. Merchandise marked<br />
“final sale” cannot be returned or exchanged. The<br />
store’s return policy should be posted <strong>on</strong> a sign by<br />
the checkout area or printed <strong>on</strong> the sales receipt.<br />
Stores have time limits <strong>on</strong> how l<strong>on</strong>g you can keep<br />
an item before returning it. Some stores will<br />
refund your m<strong>on</strong>ey, yet others give <strong>on</strong>ly store<br />
credit. Always check the policy before you buy.<br />
One last thought to keep in mind when you<br />
shop the sales is that a bargain isn’t a bargain if<br />
it’s bey<strong>on</strong>d your budget. You’ll be much happier if<br />
you save for your purchases and then stretch<br />
those dollars during a good sale.<br />
CHAPTER 18 Accessing Informati<strong>on</strong> • 329
CHAPTER 18<br />
CHAPTER SUMMARY<br />
• Advertisements appear in many different<br />
medias. Some provide informati<strong>on</strong> about a<br />
product. Others focus <strong>on</strong> promoting an<br />
image for the product.<br />
• Catalogs and Internet sites are useful for<br />
locating items and comparis<strong>on</strong> shopping.<br />
• Mandatory informati<strong>on</strong> <strong>on</strong> labels tells you<br />
the garment’s fiber c<strong>on</strong>tent and care.<br />
• Voluntary informati<strong>on</strong> appears <strong>on</strong> labels<br />
and hangtags.<br />
• Gathering informati<strong>on</strong> about garments<br />
helps you avoid impulse buying and compare<br />
before shopping.<br />
• Learning to evaluate sales can help you<br />
save m<strong>on</strong>ey <strong>on</strong> quality merchandise.<br />
USING KEY TERMS<br />
Using all the Key Terms, arrange them in<br />
pairs. Each pair should share a comm<strong>on</strong> link.<br />
Explain what links the terms in each pair. Does<br />
<strong>on</strong>e pair have <strong>on</strong>ly a weak link at best? Which<br />
pair is that?<br />
330 • UNIT 6 Clothing Selecti<strong>on</strong><br />
Review<br />
RECALLING THE FACTS<br />
1. How do an informati<strong>on</strong> ad and an image<br />
ad differ?<br />
2. If you were a clothing retailer, what five<br />
advertising medias would you choose for<br />
your ads? Why?<br />
3. How can a promoti<strong>on</strong>al article be a form<br />
of advertisement?<br />
4. Describe similarities between billboard<br />
and radio ads.<br />
5. Why do infomercials sometimes surprise<br />
people?<br />
6. Describe a wise approach when using<br />
ads to get fashi<strong>on</strong> informati<strong>on</strong>.<br />
7. How can the Internet be a source of useful<br />
informati<strong>on</strong>?<br />
8. Describe five pieces of mandatory informati<strong>on</strong><br />
<strong>on</strong> clothing labels.<br />
9. Describe five pieces of voluntary informati<strong>on</strong><br />
<strong>on</strong> clothing labels and hangtags.<br />
10. How does informati<strong>on</strong> help prevent<br />
impulsive buying?<br />
11. What is meant by the statement,<br />
“Comparis<strong>on</strong> shopping begins at home”?<br />
12. What are four situati<strong>on</strong>s a store might<br />
use as a reas<strong>on</strong> to have a sale?<br />
13. Does a discounted price mean a garment<br />
is a bargain? Explain.<br />
14. In what way can garment irregulars be<br />
an ec<strong>on</strong>omical buy?<br />
15. Give suggesti<strong>on</strong>s for using sales wisely.
and Activities<br />
THINKING CRITICALLY<br />
1. Why do you think image ads might be<br />
especially effective in selling clothes?<br />
2. How might some people try to meet emoti<strong>on</strong>al<br />
needs through impulse buying?<br />
3. What impact do you think friends have<br />
<strong>on</strong> impulse buying? Where does the final<br />
resp<strong>on</strong>sibility lie? Why?<br />
APPLYING KNOWLEDGE<br />
1. Analyzing ads. Locate five ads in magazines.<br />
Classify each ad as either informati<strong>on</strong><br />
or image. What elements led to your<br />
c<strong>on</strong>clusi<strong>on</strong>? Share your findings with the<br />
class.<br />
2. Labels and hangtags. Examine labels and<br />
hangtags <strong>on</strong> clothing in a store to see how<br />
informati<strong>on</strong> is listed. Using what you’ve<br />
learned, design a label and hangtag of<br />
your own for a garment. Include both<br />
mandatory and voluntary informati<strong>on</strong>.<br />
3. Store methods. As you walk through a<br />
store, notice methods used to encourage<br />
impulse buying. List these and explain<br />
why they work.<br />
4. Comparis<strong>on</strong> shopping. Using three or<br />
more product resources, including catalogs<br />
or the Internet, find informati<strong>on</strong> <strong>on</strong><br />
an item of clothing or an accessory that<br />
you would like to buy. Make a chart that<br />
compares design, quality, and price.<br />
CHAPTER 18<br />
5. Shopping list. Working with a partner,<br />
compile a list called “Top Ten Shopping<br />
Do’s and D<strong>on</strong>’ts,” giving tips <strong>on</strong> shopping<br />
for clothes. Use informati<strong>on</strong> from the<br />
chapter. Then create a brochure, a bulletin<br />
board display, or a short video<br />
about your shopping tips.<br />
MAKING>
CHAPTER 19<br />
Evaluating Selecti<strong>on</strong>s<br />
OBJECTIVES<br />
• Compare different<br />
size categories of<br />
clothing.<br />
• Evaluate the fit<br />
and appearance<br />
of a garment.<br />
• Judge the quality<br />
and workmanship<br />
of clothing.<br />
• Evaluate the care<br />
and price of<br />
clothing selecti<strong>on</strong>s.<br />
• Describe<br />
compromises<br />
and trade-offs.<br />
KEY TERMS<br />
alterati<strong>on</strong>s<br />
compromise<br />
cost per wearing<br />
facing<br />
inseam<br />
overlock seam<br />
quality<br />
seam allowance<br />
seam finish<br />
trade-off<br />
332 • UNIT 6 Clothing Selecti<strong>on</strong>
EXAMINETHISISSUE<br />
Quality versus quantity. When<br />
gathering informati<strong>on</strong> about clothing and<br />
accessories to buy, people make decisi<strong>on</strong>s<br />
about quality. Some choose lower<br />
quality and cost so they can buy more<br />
items. Others choose higher quality even<br />
when it means buying fewer items. They<br />
expect the items to last l<strong>on</strong>ger and look<br />
better.<br />
What do you think?<br />
When it comes to quality versus quantity,<br />
where do you stand? Which would<br />
be more important to you <strong>on</strong> a limited<br />
budget? Why might you change your<br />
approach? Can people get good quality<br />
for a reas<strong>on</strong>able price?<br />
While shopping for clothes, <strong>on</strong>e<br />
teen said to another, “You like it, d<strong>on</strong>’t<br />
you? Then why d<strong>on</strong>’t you buy it?”<br />
“I do like it,” was the reply, “but I can’t just buy<br />
something because I like it. I’ve got to think about<br />
other things too.”<br />
A garment that catches your eye in the store<br />
may seem like a good choice at first glance. Unless<br />
you c<strong>on</strong>sider size, fit, quality, care, and cost, however,<br />
you w<strong>on</strong>’t know for sure.<br />
FINDING THE CORRECT<br />
SIZE<br />
When buying clothes, finding the correct size<br />
is sometimes a challenge. Clothing sizes can look<br />
like parts of an algebra problem. You’ll see 6P,<br />
18H, XS, and XXL, to name a few. Unlike math,<br />
however, <strong>on</strong>e size 12 isn’t always equal to another<br />
size 12. The same size may differ am<strong>on</strong>g brands.<br />
Even within the same brand, sizes aren’t always<br />
c<strong>on</strong>sistent. Why does this happen?<br />
Why Size Can Differ<br />
Suppose you find a shirt you like in a store.<br />
You’re not familiar with the brand, but the price<br />
is lower than you would normally pay and the<br />
shirt comes in your size. Then you try it <strong>on</strong>, but<br />
the sleeves barely reach your wrists. Have you<br />
g<strong>on</strong>e <strong>on</strong> an overnight growth spurt? Was the garment<br />
mismarked? Most likely, neither of these is<br />
what happened.<br />
Each ready-to-wear manufacturer has its own<br />
standard size measurements, influenced by producti<strong>on</strong><br />
costs am<strong>on</strong>g other factors. By cutting a<br />
size-10 garment just a little smaller, the manufacturer<br />
reduces producti<strong>on</strong> costs. Just a 1-inch (2.5cm)<br />
savings per garment can save hundreds of<br />
fabric yards and hundreds of dollars. The manufacturer<br />
can sell the garment at a lower price. This<br />
explains why you may wear a larger size in less<br />
expensive clothes.<br />
Even if you already own several items from a<br />
manufacturer and are satisfied with the way they<br />
fit, size c<strong>on</strong>sistency isn’t guaranteed. One teen<br />
ordered a pair of pants from a catalog. The size<br />
was perfect, so she ordered a sec<strong>on</strong>d pair of the<br />
same style in a different fabric, but that pair did<br />
not fit well at all. When the teen returned the<br />
Fashi<strong>on</strong><br />
VIRTUAL DRESSING<br />
ROOMS. On-line apparel sales are<br />
growing and expected to grow rapidly in<br />
the future. One of the problems for c<strong>on</strong>sumers,<br />
however, has been choosing the<br />
right style and size when ordering. New<br />
software allows buyers to mix and match<br />
items <strong>on</strong> the screen, even rotating outfits<br />
for a 360-degree view. On some Web sites<br />
buyers can see how garments look <strong>on</strong> models<br />
that duplicate their own measurements.<br />
As these techniques improve, merchandisers<br />
hope the number of returns will go<br />
down.<br />
Facts<br />
CHAPTER 19 Evaluating Selecti<strong>on</strong>s • 333
CATEGORIES SIZES* PROPORTIONS<br />
Teen girls 7 to 14 For girls whose figures are beginning to mature<br />
Juniors 3 to 15 For females with a slender, shorter-waisted figure<br />
Misses 4 to 18 For females with a developed figure and average proporti<strong>on</strong>s; 5’5” to<br />
5’9”<br />
Women’s 14 to 26 For females with large proporti<strong>on</strong>s<br />
1X to 4X<br />
Petites 2P to 16P For females under 5’4” with a small body structure<br />
Tall 8T to 18T For females over 5’9”<br />
Extra-Small (XS) or 2 to 4<br />
Petite (P)<br />
Small (S) 6 to 8<br />
Medium (M) 10 to 12<br />
Large (L) 14 to 16<br />
Extra-Large (XL) 18 to 20<br />
* Sizes may vary am<strong>on</strong>g manufacturers.<br />
pants, the sales associate noted that variati<strong>on</strong>s can<br />
occur during producti<strong>on</strong>. A seam might be sewn<br />
slightly wider than usual, for example. Fabric can<br />
make a difference too. A style made with a crisp<br />
fabric might fit differently when made with a<br />
softer fabric.<br />
For all of these reas<strong>on</strong>s, trying <strong>on</strong> a garment<br />
before buying is an advantage. You can save the<br />
time it takes to return the item and find a<br />
replacement.<br />
Size Categories for Females<br />
When you understand how sizes are categorized,<br />
you can choose the right <strong>on</strong>e for you. The<br />
sizes for female clothing represent a combinati<strong>on</strong><br />
of body measurements, proporti<strong>on</strong>s, and height.<br />
See Fig. 19-1. Adult size categories include misses<br />
(even numbered sizes), juniors (odd numbered),<br />
petites, and women’s. Tall sizes are also available.<br />
Special teen departments carry sizes for the<br />
developing preteen and teen figure. Girls’ sizes fit<br />
preteens who have not begun to mature.<br />
Skirts and pants are sold by size or by the waist<br />
measurement. Size 25 pants measure 25 inches<br />
(65 cm) at the waist. Sweaters, T-shirts, and other<br />
334 • UNIT 6 Clothing Selecti<strong>on</strong><br />
19-1 • Size Categories for Females<br />
loose-fitting garments may be sold in these sizes:<br />
petite or extra small, small, medium, large, and<br />
extra large.<br />
Size Categories for Males<br />
Men’s sizes for tailored suits, sport jackets, and<br />
coats include regular, short, and l<strong>on</strong>g. These are<br />
based <strong>on</strong> chest measurement and length. A size-<br />
38 jacket fits a man with a 38-inch (96.5-cm)<br />
chest. A jacket marked 38-short is 2 inches (5 cm)<br />
shorter than the regular size 38. A 38-l<strong>on</strong>g is for a<br />
taller man with l<strong>on</strong>ger arms. Some manufacturers<br />
also offer extra l<strong>on</strong>g, portly, and large sizes. For<br />
young males, sizes include teen boys and boys,<br />
al<strong>on</strong>g with special husky and slim. See Fig. 19-2.<br />
Pants are sized at the waist and inseam. The<br />
inseam is the inside leg measurement, from the<br />
crotch to the hemmed edge of the pants. Pants<br />
labeled 28/31 have a 28-inch (71-cm) waist and a<br />
31-inch (79-cm) inseam. (In some catalogs<br />
women’s pants are also sold by inseam.)<br />
Shirt sizes are based <strong>on</strong> the measurement<br />
around the collar and the sleeve length, such as<br />
14/32 (36/82 cm). To find collar size, measure<br />
around the neck and add 1 ⁄2 inch (1.3 cm). Sleeve<br />
length is the distance from the base of the neck at<br />
the center back, across the shoulder, around the<br />
outside of a slightly bent elbow, to the wrist b<strong>on</strong>e.<br />
p 443<br />
Many shirts, sweaters, and casual jackets are<br />
available in small, medium, large, and extra-large<br />
sizes. Tops and jackets described as having a<br />
“relaxed fit” are larger through the chest and have
CATEGORIES SIZES PROPORTIONS<br />
Teen boys 14 to 20 For boys of average build<br />
Slim Teen Boys 14S to 20S For boys of slender build<br />
Husky Teen Boys 14H to 20H For boys of heavier build<br />
Men’s Regular 34 to 48 For males, proporti<strong>on</strong>ally built, 5’8” to 5’11”<br />
Men’s Short 34S to 48S For males under 5’8”<br />
Men’s L<strong>on</strong>g 38L to 48L For males 6’ to 6’3”<br />
Men’s Extra L<strong>on</strong>g 38XL to 50XL For males 6’4” and over<br />
Men’s Portly 36 to 48 For males with thicker waistlines<br />
Men’s Large 46 to 50+ For larger size males<br />
Small (S) 34 to 36<br />
Medium (M) 38 to 40<br />
Large (L) 42 to 44<br />
Extra-Large (XL) 46 to 48<br />
Extra-Extra-Large (XXL) 50+<br />
wider armholes. In pants, the term means more<br />
room in the thigh and seat areas.<br />
EVALUATING FIT<br />
No matter what size is marked <strong>on</strong> the label,<br />
what really counts is how the garment fits. When<br />
trying <strong>on</strong> clothes, look in a full-length mirror,<br />
observing from both the fr<strong>on</strong>t and back. Check<br />
for wrinkles and bulges that indicate a poor fit.<br />
Many people buy clothes a bit snug, thinking<br />
this provides a slimming effect. Actually, the<br />
opposite is true. Clothing that is too tight draws<br />
attenti<strong>on</strong> to that fact and can add pounds to a<br />
pers<strong>on</strong>’s appearance.<br />
Testing the Fit<br />
Doctors give patients a fitness test to learn<br />
whether they’re physically fit. You can give clothes<br />
a “fitness” test to see how they fit physically. High<br />
marks <strong>on</strong> this test indicate the garment fits well<br />
and will be comfortable to wear. Use the suggesti<strong>on</strong>s<br />
below and the informati<strong>on</strong> <strong>on</strong> page 336 to<br />
judge the fit of a garment. p 443<br />
1. Standing straight‚ check the overall appearance.<br />
Note where and how the seams, hem,<br />
and special design features fall.<br />
19-2 • Size Categories for Males<br />
2. Bend your arms in fr<strong>on</strong>t of you at shoulder<br />
height. Shirts, jackets, dresses, and blouses<br />
should be roomy enough to permit this without<br />
any strain across the shoulder blades.<br />
Sleeves should not ride up or feel uncomfortably<br />
short.<br />
3. Raise your arms straight up over your head.<br />
The armholes should not bind. Jackets and<br />
coats should not feel tight in the shoulders.<br />
Blouses, shirts, and sweaters should stay<br />
tucked in. When you lower your arms, a dress<br />
should fall back in place comfortably, needing<br />
little pulling or tugging to straighten.<br />
4. Sit down. Notice any strain or pull at the hip,<br />
stomach, and thigh areas. Pay attenti<strong>on</strong> to the<br />
waistline of pants and skirts. It should remain<br />
comfortably loose, without gapping at the<br />
center back.<br />
5. Stand up and bend over as if to touch your<br />
toes. You may not plan <strong>on</strong> doing aerobics in<br />
your clothes, but you might have to lean over<br />
to pick up a napkin or tie your shoes. Even<br />
formal party clothes may need to hold up to<br />
active dance moves.<br />
Alterati<strong>on</strong>s<br />
When choosing a garment, you might take<br />
your sec<strong>on</strong>d color choice, but you shouldn’t lower<br />
the standards <strong>on</strong> fit. Sometimes a garment needs<br />
<strong>on</strong>ly simple alterati<strong>on</strong>s to make it fit properly.<br />
Alterati<strong>on</strong>s modify or change a garment in some<br />
CHAPTER 19 Evaluating Selecti<strong>on</strong>s • 335
How To…<br />
CHECK A GARMENT’S FIT<br />
A garment that fits well is more likely to be worn—and it’s more comfortable too. When<br />
you know what to look for, checking the fit of a garment can be easy. Here are some<br />
basic points to remember.<br />
Collar or neckline fits close to the neck, without binding or<br />
gripping.<br />
Armhole seams lie at the edge of shoulder unless designed<br />
otherwise.<br />
Chest and back fit smoothly, with room for movement. Closing<br />
doesn’t pull or gap.<br />
Sleeves are loose enough to raise arm and l<strong>on</strong>g enough to<br />
cover wrist b<strong>on</strong>e when arm is bent.<br />
Butt<strong>on</strong>s and butt<strong>on</strong>holes d<strong>on</strong>’t pull or strain as you move.<br />
Jacket or coat fits comfortably over other garments.<br />
Waistline or waistband feels comfortable, doesn’t pull or bind,<br />
and allows tops to be tucked in.<br />
Hip area skims body smoothly, without pulling or forming extra<br />
folds. Crotch doesn’t wrinkle or bind.<br />
Zipper opens and closes smoothly.<br />
Pleats and gathers hang vertically and unbroken.<br />
Pant legs fall straight from hipline, without<br />
wrinkles.<br />
Hemlines are parallel to the floor, meet<br />
evenly at openings, and are the right<br />
length for body proporti<strong>on</strong>s and current<br />
fashi<strong>on</strong>.<br />
336 • UNIT 6 Clothing Selecti<strong>on</strong><br />
Exploring Garment Fit<br />
With a partner, plan a class dem<strong>on</strong>strati<strong>on</strong> <strong>on</strong><br />
garments that do and d<strong>on</strong>’t fit well. Model<br />
garments that match the points to be made.<br />
You might have <strong>on</strong>e pers<strong>on</strong> act as the model<br />
while the other describes the fit.
Technology Trends<br />
>>A CUSTOMIZED FIT<br />
Getting clothes that fit well can sometimes<br />
be a challenge. Computers are coming<br />
to the rescue——both for the clothes<br />
you buy and the clothes you sew.<br />
In the ready-to-wear industry,<br />
Intellifit System machines can tell you<br />
what brands, styles, and sizes fit your<br />
body. The machine looks like an oversized,<br />
round glass teleph<strong>on</strong>e booth. When you<br />
step inside the booth, low-power radio<br />
waves create a hologram of your body in<br />
about ten sec<strong>on</strong>ds. This informati<strong>on</strong> is fed<br />
to a computer which sorts through the<br />
styles from participating clothing manu-<br />
way. Changing the hem length, taking in a seam,<br />
shortening sleeves, or moving a butt<strong>on</strong> can make<br />
a big difference in a garment’s appearance and<br />
comfort.<br />
Shortening a garment is usually possible. If the<br />
item needs lengthening, however, make sure the<br />
current hem has enough fabric to let the hem<br />
down. If the garment needs to be wider, be sure<br />
the seam allowance is wide enough to accomplish<br />
facturers and prints out what size you<br />
wear for each brand. This technology is<br />
already in use in some malls around the<br />
country. The service is free to customers.<br />
In the pattern industry, at least <strong>on</strong>e<br />
company offers a body-scanning service<br />
that captures your body measurements<br />
and feeds them into a computer. You<br />
select a garment style, and the computer<br />
drafts a pattern based <strong>on</strong> your measurements.<br />
There is a <strong>on</strong>e-time fee for the<br />
body scanning, plus a separate fee for<br />
each pattern ordered.<br />
Pattern-making software is now available<br />
for home use. You begin by entering<br />
your measurements into the program.<br />
Next, you choose a garment from a<br />
selecti<strong>on</strong> of patterns. Finally, you select<br />
the style of sleeves, neckline, collar, etc.,<br />
and the program calculates a custom-fit<br />
pattern that you can print. You must<br />
purchase the software, which can be<br />
expensive. Plus, you need a computer and<br />
a printer.<br />
INVESTIGATE<br />
Search the Internet for other types of<br />
customizati<strong>on</strong> available for clothing.<br />
this. The seam allowance is the extra fabric <strong>on</strong><br />
the inside of the garment between the seam line<br />
and the fabric edge.<br />
Alterati<strong>on</strong>s in tailored garments, such as suits<br />
and trousers, can be more complicated. Jackets<br />
may need adjustments in the outer fabric, shoulder<br />
pads, and lining. Tailored trousers may need<br />
adjustments in the waistband and the seat area.<br />
Usually a skilled clothier does these alterati<strong>on</strong>s best.<br />
CHAPTER 19 Evaluating Selecti<strong>on</strong>s • 337
If the garment requires more than a simple<br />
alterati<strong>on</strong>, it may not be a good buy. Major alterati<strong>on</strong>s<br />
can be expensive and may not achieve the<br />
look you want.<br />
EVALUATING QUALITY<br />
What does “quality” mean in clothing? Is it a<br />
high price? A designer label? Neither of these<br />
guarantees quality, or superior characteristics. In<br />
a garment, quality means two things: good fabric<br />
and good workmanship.<br />
Judging Fabric<br />
From your study of fabrics, you know they can<br />
be evaluated by more than just look and feel. A<br />
fabric has many other qualities besides an appealing<br />
pattern or a silky hand. To judge a fabric’s<br />
quality, try the following tests:<br />
• Examine the fabric for flaws. Is the color<br />
even throughout the garment? If the fabric is a<br />
print, do design elements and colors appear in<br />
the right place? Check for snags or pulls in the<br />
fabric, as well as stains.<br />
• Test wrinkle resistance. Crush a corner of<br />
the garment in your hand. If the fabric wrinkles<br />
easily, the garment will crease easily during<br />
wear.<br />
• Test stretchability. If the fabric is a stretchable<br />
weave or knit, pull to see how much it<br />
gives. Does the original shape return?<br />
• Be sure the fabric is “<strong>on</strong> grain.” This<br />
means the crosswise and lengthwise yarns<br />
meet at right angles. When fabric is finished<br />
<strong>on</strong>-grain and cut <strong>on</strong>-grain, the garment looks<br />
better and wears l<strong>on</strong>ger. Seams hang straight,<br />
without twisting to <strong>on</strong>e side. The hemline<br />
hangs evenly. If a garment is cut off-grain or<br />
the fabric printed off-grain, the lines of a plaid<br />
or a striped design w<strong>on</strong>’t match.<br />
• Evaluate the fabric’s suitability for use.<br />
A delicate lace or chiff<strong>on</strong> would be a poor<br />
choice for a shirt that you plan to wear <strong>on</strong> hiking<br />
trips. Why would poplin or denim be a<br />
much better choice?<br />
338 • UNIT 6 Clothing Selecti<strong>on</strong><br />
Judging Workmanship<br />
Another test of quality is workmanship,<br />
marked by careful sewing and appropriate techniques.<br />
If fabric is loosely woven and frays easily,<br />
for example, the garment should be lined or the<br />
seams should be finished. In garments with quality<br />
workmanship, you’ll notice the following:<br />
• Secure and even stitching. Straight,<br />
unbroken stitching means the seams lie flat<br />
and smooth. Thread color should match fabric<br />
color, unless designed to be c<strong>on</strong>trasting. Avoid<br />
garments sewn with clear nyl<strong>on</strong> thread, which<br />
melts easily when ir<strong>on</strong>ed.<br />
• Matching plaids and stripes. Check for<br />
design c<strong>on</strong>tinuity. Plaids and stripes should<br />
match at the garment’s center and side seams,<br />
and even in smaller areas—the collar, pockets,<br />
and bands.<br />
• Smooth, flat, unpuckered seams. No<br />
ridges should show <strong>on</strong> the outside.<br />
• Properly finished seam allowances.<br />
Check seam allowances for seam finish, if<br />
needed. A seam finish is any method that<br />
stitches or trims seam allowances to prevent<br />
fraying. Many ready-to-wear garments have a<br />
narrow overlock seam, a special combinati<strong>on</strong><br />
of stitches that join the fabric and finish the<br />
seam edges in <strong>on</strong>e operati<strong>on</strong>. This creates a<br />
very narrow seam allowance. See Fig. 19-3.<br />
p 465<br />
19-3<br />
The seam finish can mean the difference<br />
between a seam that unravels and <strong>on</strong>e that doesn’t. Why<br />
is this seam likely to remain intact? Does the type of fabric<br />
affect whether a seam needs to be finished?
• Neatly c<strong>on</strong>structed darts. Darts should<br />
be pressed smooth and flat, with no puckers<br />
and no “dimple” at the tip. They should point<br />
to the fullest part of the body. p 514<br />
• Smooth, flat facings. A facing is fabric that<br />
finishes a raw edge, such as a neckline or armhole.<br />
It is turned to the inside of the garment<br />
and shouldn’t show <strong>on</strong> the outside.<br />
p 524<br />
• Smooth collar curves and sharp corners.<br />
A collar should cover the neckline seam, with<br />
edges lying flat to hide the under collar. The<br />
area should be finished neatly <strong>on</strong> the inside so<br />
you can wear the collar open. p 556<br />
• Properly placed and securely stitched<br />
fasteners. Butt<strong>on</strong>s, snaps, and hooks and<br />
eyes should be firmly attached, with no loose<br />
threads. See Fig. 19-4. Butt<strong>on</strong>holes should be<br />
sewn with tight, even stitches. The butt<strong>on</strong><br />
should slip through easily without popping<br />
back out unexpectedly. Make sure the zipper<br />
opens and closes smoothly, and stitching is<br />
straight and unbroken. p 530<br />
• Secure and even trims. Check for missing<br />
beads or sequins. p 581<br />
• Straight and even hem. The stitches of the<br />
hem shouldn’t pull or pucker the fabric. In<br />
fact, they should be invisible from the right<br />
side of the garment, unless the hem is topstitched.<br />
Inspect the hem allowance <strong>on</strong> the<br />
inside of the garment. It should be an even<br />
width and finished al<strong>on</strong>g the edge if the fabric<br />
ravels. p 537<br />
EVALUATING CARE<br />
For a pers<strong>on</strong> who hates to ir<strong>on</strong>, a shirt that<br />
doesn’t need pressing is probably a better choice<br />
than <strong>on</strong>e that wrinkles easily. The routine care<br />
needs of a garment should be c<strong>on</strong>sidered when<br />
evaluating what to buy. Some fabrics need more<br />
time, work, and m<strong>on</strong>ey to keep them looking<br />
good.<br />
Specific directi<strong>on</strong>s about washing, bleaching,<br />
drying, ir<strong>on</strong>ing, and dry cleaning are included <strong>on</strong><br />
the care label attached to every garment. You can<br />
check the garment hangtag for any fabric finishes<br />
19-4<br />
If a garment is missing a butt<strong>on</strong>, you might not<br />
want to buy it. Finding an exact match as a replacement<br />
may not be easy. Loose butt<strong>on</strong>s <strong>on</strong> a new garment that<br />
you buy should be reinforced to prevent them from falling<br />
off.<br />
that affect care. See Fig. 19-5 <strong>on</strong> page 340. Use the<br />
following questi<strong>on</strong>s to become informed about<br />
garment care needs:<br />
• Washability. How often will the fabric need<br />
washing? Some fabrics, especially light-colored<br />
<strong>on</strong>es, show soil more easily than darker <strong>on</strong>es.<br />
Can the garment be washed by machine or<br />
must it be d<strong>on</strong>e by hand? Not all people have<br />
easy access to a washing machine. Hand washing<br />
is simple, but it takes time and space. Will<br />
you take time to hand-wash a sweater? Do you<br />
have the space to dry several items at <strong>on</strong>ce?<br />
• Dry cleaning. Must the garment be drycleaned?<br />
Over a l<strong>on</strong>g time, dry-cleaning<br />
expenses can add up to more than the garment’s<br />
cost.<br />
• Stain and spot resistance. Will the fabric<br />
resist stains and spots? Some fibers absorb<br />
stains more easily than others. Special fabric<br />
finishes that help repel stains or release them in<br />
the wash make care easier. Coats, jackets, and<br />
children’s clothing often have these treatments.<br />
• Wrinkle resistance. Will you have to press<br />
or ir<strong>on</strong> the garment to remove wrinkles? Fibers<br />
have different characteristics that affect wrinkling.<br />
Polyester is very wrinkle-resistant, but<br />
CHAPTER 19 Evaluating Selecti<strong>on</strong>s • 339
19-5<br />
Check the care label before you buy a garment.<br />
Then you’ll know before you buy whether the item is worth<br />
the cost of dry cleaning or the effort of hand washing.<br />
cott<strong>on</strong> and ray<strong>on</strong> wrinkle easily. Fabric c<strong>on</strong>structi<strong>on</strong><br />
also affects wrinkling. A knitted cott<strong>on</strong><br />
shirt, for example, may emerge unwrinkled<br />
from the dryer, while a woven, cott<strong>on</strong> shirt<br />
needs ir<strong>on</strong>ing. Special finishes, such as durable<br />
press, can improve the wrinkle resistance of<br />
many fabrics.<br />
EVALUATING PRICE<br />
Have you heard the expressi<strong>on</strong> “penny wise<br />
and pound foolish”? It means that scrimping <strong>on</strong><br />
details or small expenses can cost more than it<br />
saves in the l<strong>on</strong>g run. For example, the cheapest<br />
CD player in the store can be quite costly if it<br />
ruins your CDs. The same applies to clothing<br />
when you compare cost and quality.<br />
Cost Versus Quality<br />
If the cost fits your budget, you might be willing<br />
to pay more for a quality garment. When a<br />
manufacturer uses fine fabric to create a well-<br />
340 • UNIT 6 Clothing Selecti<strong>on</strong><br />
made garment, the costs are passed al<strong>on</strong>g to the<br />
c<strong>on</strong>sumer. The price is typically higher than for a<br />
garment made of cheaper materials and inferior<br />
workmanship.<br />
Assuming that a high price means quality,<br />
however, can be a mistake. Prices can be higher<br />
for other reas<strong>on</strong>s. Adding extra trim, for example,<br />
could increase price but have no effect <strong>on</strong> quality.<br />
A designer garment might cost more than a similar<br />
<strong>on</strong>e made by another manufacturer. Two garments<br />
made in different locati<strong>on</strong>s could have the<br />
same quality but different prices if producti<strong>on</strong><br />
costs weren’t the same.<br />
To further complicate the picture, a highpriced<br />
garment could be poor quality, while a<br />
low-priced garment has high quality. Think<br />
about why. A manufacturer who buys fabric in<br />
great quantity might be able to pass al<strong>on</strong>g the savings.<br />
A retailer might mark up the price to get a<br />
greater profit.<br />
What this means is that you need to judge<br />
quality carefully and knowledgeably to get the<br />
best for your m<strong>on</strong>ey.<br />
Cost of <str<strong>on</strong>g>Care</str<strong>on</strong>g><br />
Your financial investment in a garment goes<br />
bey<strong>on</strong>d purchase price. It includes the cost of care<br />
as well. <str<strong>on</strong>g>Care</str<strong>on</strong>g> costs depend <strong>on</strong> how often the garment<br />
must be cleaned and the cost of the cleaning<br />
in terms of time and m<strong>on</strong>ey.<br />
Dry-cleaning costs are generally much higher<br />
than laundry costs. One blouse might be<br />
machine- or hand-washed for a few cents, yet<br />
another blouse costs a few dollars to dry-clean.<br />
M<strong>on</strong>ey isn’t the <strong>on</strong>ly care cost. Time and skills<br />
count too. A durable-press finish may increase a<br />
garment’s price, for example, but save you time in<br />
ir<strong>on</strong>ing.<br />
Which method of care do you prefer? Your<br />
choice depends <strong>on</strong> available resources and how<br />
you prioritize them. Some people prefer <strong>on</strong>ly<br />
machine-washable items. For others, hand washing<br />
is easy and c<strong>on</strong>venient. If time is scarce or<br />
laundry equipment is unavailable, then dry<br />
cleaning may be preferred despite the cost.
Cost Per Wearing<br />
Here’s something you might not have thought<br />
about before. Increasing the number of times you<br />
wear a garment reduces the cost per wearing.<br />
This cost is the sum of a garment’s purchase price<br />
plus the cleaning costs, divided by the number of<br />
wearings. As Fig. 19-6 shows, this handy formula<br />
gives you another way to compare garments<br />
when making selecti<strong>on</strong>s.<br />
MAKING A FINAL DECISION<br />
If you’ve evaluated a garment carefully, you’re<br />
ready to decide whether to buy it. You’ve studied<br />
the fit, quality, care, and cost. Recalling earlier<br />
ideas in this unit, ask other questi<strong>on</strong>s. Does the<br />
garment fit your wardrobe plan? Have you gathered<br />
enough informati<strong>on</strong> to make a sound decisi<strong>on</strong>?<br />
Do you need to compare other prices and<br />
garments? With your mental checklist complete,<br />
you can make a decisi<strong>on</strong>.<br />
Compromises and Trade-Offs<br />
“After thinking about it, I knew I shouldn’t buy<br />
that outfit, but I still wanted it. I felt bad about<br />
putting it back <strong>on</strong> the rack.” This teen’s lament is<br />
19-6<br />
Calculating Cost per Wearing for One Year<br />
comm<strong>on</strong> but wise. Sometimes a purchase isn’t a<br />
good idea. Listening to your sense of reas<strong>on</strong>ing<br />
and logic can save you from buying something<br />
that is too costly or isn’t right for you. To look <strong>on</strong><br />
the bright side, you might try a compromise or<br />
trade-off.<br />
A compromise is a settlement that comes<br />
when you give up something in favor of another<br />
opti<strong>on</strong>. Could you settle for lower quality and<br />
make improvements? A simple change, such as<br />
nicer butt<strong>on</strong>s, might improve the appearance of a<br />
less-expensive garment. Could you make do with<br />
what you have for a while in order to wait for a<br />
sale? Back-to-school clothes might be less expensive<br />
in late fall.<br />
A trade-off exchanges <strong>on</strong>e thing for another.<br />
Could you trade quantity for quality? You might<br />
purchase <strong>on</strong>e well-made jacket rather than two<br />
that cost less and are not as well made. You could<br />
look for shoes that can be worn with many outfits<br />
instead of special <strong>on</strong>es for every outfit. Could you<br />
make a garment instead of buying <strong>on</strong>e? By<br />
sewing, you could make a garment in the exact<br />
style and color you want and save m<strong>on</strong>ey at the<br />
same time.<br />
Calculating the cost per wearing helps you decide what garment to buy. In comparing the jackets, will the jacket<br />
with the highest purchase price be the most costly to wear? Why? What other factors would you weigh in choosing <strong>on</strong>e of<br />
the jackets to buy?<br />
Formula: Purchase Price + Cost of <str<strong>on</strong>g>Care</str<strong>on</strong>g> ÷ Number of Wearings = Cost Per Wearing<br />
PURCHASE CARE ESTIMATED COST ESTIMATED TOTAL COST PER<br />
PRICE NEEDED OF CARE NUMER OF COST WEARING<br />
WEARINGS<br />
Jacket A $40 Wash All washings = $1 40 $41 $1.03<br />
Jacket B $40 Dry Clean $8 � 2 cleanings = $16 40 $56 $1.40<br />
Jacket C $50 Wash All washings = $1 40 $51 $1.28<br />
Jacket D $60 Dry Clean $8 � 2 cleanings = $16 40 $76 $1.90<br />
Jacket E $70 Wash All washings = $1 40 $71 $1.78<br />
CHAPTER 19 Evaluating Selecti<strong>on</strong>s • 341
CHAPTER 19<br />
CHAPTER SUMMARY<br />
• Garment size is determined by style, manufacturer,<br />
and quality, as well as the age<br />
and gender of the intended wearer.<br />
• Examining and trying <strong>on</strong> clothes before<br />
buying can help you evaluate the fit.<br />
• Quality clothing c<strong>on</strong>sists of suitable fabrics<br />
assembled with skillful workmanship.<br />
• C<strong>on</strong>sidering a garment’s care needs can<br />
help you decide whether it will be a good<br />
buy for you.<br />
• When judging price, c<strong>on</strong>sider the garment’s<br />
quality, usefulness, and cost of care.<br />
• Making satisfactory clothing buys often<br />
means making acceptable compromises<br />
and trade-offs.<br />
USING KEY TERMS<br />
For each of the following Key Terms, write a<br />
tip that would help some<strong>on</strong>e when deciding<br />
whether to buy a garment: cost per wearing;<br />
facing; inseam; seam allowance; and seam<br />
finish.<br />
342 • UNIT 6 Clothing Selecti<strong>on</strong><br />
Review<br />
RECALLING THE FACTS<br />
1. Give two reas<strong>on</strong>s why garments of the<br />
same size may fit differently.<br />
2. Two females who are obviously different<br />
in size each buy a size-10 dress. How is<br />
that possible?<br />
3. What measurements are used to size<br />
men’s pants and shirts?<br />
4. What signs might tell you that a jacket<br />
doesn’t fit you well?<br />
5. When might it be reas<strong>on</strong>able to buy a<br />
garment that needs altering in order to<br />
fit well?<br />
6. What is the benefit of body-scanning<br />
technology in relati<strong>on</strong>ship to buying<br />
clothes?<br />
7. Describe a quality fabric.<br />
8. In buying a shirt, what are six c<strong>on</strong>structi<strong>on</strong><br />
features that show quality<br />
workmanship?<br />
9. Why should you c<strong>on</strong>sider care needs<br />
before buying a garment?<br />
10. What four care c<strong>on</strong>siderati<strong>on</strong>s should be<br />
made before buying a garment?<br />
11. Is price a reliable indicator of quality in<br />
clothing? Explain.<br />
12. If you can’t afford the garment you want,<br />
how might a compromise or trade-off<br />
help?
and Activities<br />
THINKING CRITICALLY<br />
1. Do you think sizes should be standardized<br />
throughout the clothing industry?<br />
For example, all size 12 garments would<br />
be the same. Would this be possible?<br />
Why or why not?<br />
2. Why do you think pants for males often<br />
include an inseam measurement, but<br />
pants for females seldom do?<br />
3. What are some advantages of wearing a<br />
garment that fits well?<br />
APPLYING KNOWLEDGE<br />
1. Comparing sizes. Using garment catalogs,<br />
compare sizing charts. What similarities<br />
and differences do you find?<br />
Share your findings with the class.<br />
2. Examples of fit. Look for magazine photos<br />
that illustrate how garments fit.<br />
Create a poster that shows at least six<br />
points made in the chapter about good<br />
fit.<br />
3. Fit versus cost. You’re trying <strong>on</strong> shirts<br />
in a store. One shirt, priced at $30, fits<br />
very well. Another shirt also fits well,<br />
except the sleeves are a couple inches<br />
too l<strong>on</strong>g. It costs $21. Which shirt would<br />
you buy? List the reas<strong>on</strong>s for your<br />
choice.<br />
4. Evaluating quality. Look at several garments<br />
in different price ranges in a<br />
store. Evaluate the fabric and workmanship<br />
<strong>on</strong> each. What differences do you<br />
see? Are the best fabrics and workmanship<br />
always <strong>on</strong> the more expensive garments?<br />
Report your findings.<br />
CHAPTER 19<br />
5. Evaluating care. Survey the class to find<br />
out how many students read care labels<br />
before buying a garment. Why would this<br />
be a good habit to start?<br />
6. Compromises and trade-offs. Using the<br />
informati<strong>on</strong> <strong>on</strong> evaluating fit <strong>on</strong> pages<br />
335–336, discuss which standards are<br />
most important to comfort. Which <strong>on</strong>es<br />
might be improved by alterati<strong>on</strong>s? Which<br />
<strong>on</strong>es should not be compromised?<br />
MAKING>
CHAPTER 20<br />
C<strong>on</strong>sumer Resp<strong>on</strong>sibilities<br />
OBJECTIVES<br />
• Explain the<br />
c<strong>on</strong>sumer’s<br />
resp<strong>on</strong>sibilities<br />
when shopping.<br />
• Compare various<br />
ways to pay for<br />
items.<br />
• Describe how to<br />
make exchanges<br />
and returns.<br />
• Identify c<strong>on</strong>sumer<br />
protecti<strong>on</strong> laws,<br />
regulati<strong>on</strong>s,<br />
agencies, and<br />
organizati<strong>on</strong>s.<br />
KEY TERMS<br />
arbitrati<strong>on</strong><br />
credit card<br />
debit card<br />
finance charge<br />
hidden costs<br />
mediati<strong>on</strong><br />
m<strong>on</strong>ey order<br />
recalled<br />
standards<br />
toxic<br />
344 • UNIT 6 Clothing Selecti<strong>on</strong>
EXAMINETHISISSUE<br />
Safety versus privacy. To combat<br />
the problem of shoplifting, many<br />
stores use video cameras to m<strong>on</strong>itor<br />
shoppers’ activities. Most c<strong>on</strong>sumers support<br />
the retailer’s right to protect merchandise<br />
from theft and damage, and the<br />
courts have upheld the legal right to<br />
videotape people in a public setting.<br />
Some people, however, worry about<br />
whether this infringes <strong>on</strong> a pers<strong>on</strong>’s right<br />
to privacy. They w<strong>on</strong>der what the next<br />
step in “watching” people might be.<br />
What do you think?<br />
How do you feel about stores m<strong>on</strong>itoring<br />
customers?<br />
Suppose you’re driving a car, waiting<br />
to make a left-hand turn against a l<strong>on</strong>g line<br />
of <strong>on</strong>coming traffic. A driver in the line sees<br />
your plight, stops, and moti<strong>on</strong>s you through. You<br />
wave your thanks and travel <strong>on</strong> your way.<br />
The marketplace works <strong>on</strong> a similar basis of<br />
lawfulness, fair play, and courtesy. Buyers and<br />
sellers alike rely <strong>on</strong> rules to keep the process moving<br />
and <strong>on</strong> the kindness of others to make it run<br />
smoothly.<br />
THE RESPONSIBLE<br />
CONSUMER<br />
If you see an outfit <strong>on</strong> a clearance rack because<br />
some<strong>on</strong>e returned it without the belt, is that a<br />
good deal? The m<strong>on</strong>ey you save <strong>on</strong> the outfit may<br />
not be worth the time and effort it takes to find a<br />
new belt. Meanwhile, the retailer raises other<br />
prices to make up for the loss.<br />
One c<strong>on</strong>sumer’s neglect affects many others.<br />
Who pays to clean and repair clothes damaged by<br />
careless shoppers? Who pays for items stolen by<br />
shoplifters and for the higher insurance premi-<br />
ums that can result? Who pays for the extra workers’<br />
hours spent handling returns and exchanges?<br />
Who makes up the difference if these goods are<br />
sold at a loss?<br />
The expenses for customer carelessness, theft,<br />
and returns are included in an item’s hidden<br />
costs. See Fig. 20-1. Storeowners absorb some of<br />
these costs, denying them a fair profit. Others are<br />
passed <strong>on</strong> to buyers in the form of higher prices.<br />
If items are priced bey<strong>on</strong>d your budget, then the<br />
hidden costs limit your choices. If losses drive a<br />
retailer out of business, the costs are very high<br />
indeed.<br />
Since this problem is caused <strong>on</strong>e customer at a<br />
time, it can be solved the same way. Through c<strong>on</strong>siderati<strong>on</strong>,<br />
h<strong>on</strong>esty, and an understanding of<br />
store policies, each shopper helps reduce hidden<br />
costs.<br />
Show C<strong>on</strong>siderati<strong>on</strong><br />
C<strong>on</strong>siderati<strong>on</strong> of others is easy when you’re<br />
having a good time shopping with a friend at the<br />
mall. On the other hand, if you’re tired and frustrated<br />
because you can’t find what you want, you<br />
may be tempted to complain too loudly or slip<br />
ahead of others in line. Treating people rudely,<br />
however, never solves a problem.<br />
To do what’s right, put yourself in the other<br />
pers<strong>on</strong>’s place. Remember that the sales associate<br />
doesn’t set prices or c<strong>on</strong>trol inventory. With a<br />
20-1<br />
Damage to merchandise costs the retailer and<br />
eventually the buyer.<br />
CHAPTER 20 C<strong>on</strong>sumer Resp<strong>on</strong>sibilities • 345
smile and pleasant, polite attitude, you’re likely to<br />
get better service. You might even make a positive<br />
difference for some<strong>on</strong>e who’s having a difficult<br />
day. Remember, too, that other shoppers dislike<br />
l<strong>on</strong>g lines as much as you do and want to shop<br />
without aggravati<strong>on</strong>. People will appreciate your<br />
willingness to wait your turn in line to pay or for<br />
a dressing room, to not block aisles, and to keep<br />
talk and laughter at a reas<strong>on</strong>able volume. A c<strong>on</strong>siderate<br />
shopper understands other points of<br />
view and reacts thoughtfully.<br />
Shoplifting and employee theft are<br />
costly crimes for every<strong>on</strong>e. Storeowners<br />
must raise prices to cover the costs of<br />
goods that “disappear” from their stores.<br />
To help c<strong>on</strong>trol shoplifting and employee<br />
theft, retailers are using sophisticated<br />
systems, called Loss Preventi<strong>on</strong> and<br />
Asset Protecti<strong>on</strong> programs.<br />
• Electr<strong>on</strong>ic article surveillance. These<br />
heavy, plastic, security tags are<br />
attached to garments and other merchandise.<br />
If the tag isn’t removed with<br />
special equipment at the cashier’s desk<br />
when the item is sold, special sensors at<br />
the store’s exits set off an alarm. With<br />
some versi<strong>on</strong>s, a n<strong>on</strong>washable ink<br />
spreads over the garment when the tag<br />
is improperly removed. Another type<br />
Handle Merchandise <str<strong>on</strong>g>Care</str<strong>on</strong>g>fully<br />
Handling clothes and other items with care is<br />
another form of c<strong>on</strong>siderati<strong>on</strong>. A footprint or a<br />
lipstick stain, left while trying <strong>on</strong> a garment,<br />
shows careless disregard for the store. Following a<br />
few guidelines helps prevent accidental damage<br />
when trying <strong>on</strong> clothes.<br />
• Try <strong>on</strong> <strong>on</strong>ly what fits. Broken zippers, lost butt<strong>on</strong>s,<br />
and ripped seams result from trying to<br />
squeeze into garments that are too small.<br />
Technology Trends<br />
>>PREVENTING SHOPLIFTING AND THEFT<br />
346 • UNIT 6 Clothing Selecti<strong>on</strong><br />
beeps and sets off an alarm if tampering<br />
occurs. Some garments have smaller<br />
tags hidden in pockets or seam<br />
allowances and must be deactivated.<br />
• Annunciators. These electr<strong>on</strong>ic devices<br />
alert the sales associates when some<strong>on</strong>e<br />
is entering or leaving the fitting room.<br />
• Weight sensor devices. These electr<strong>on</strong>ic<br />
surveillance devices sound an alarm or<br />
recording when an item is removed or<br />
added to a shelf or rack. Some of the<br />
devices also send an electr<strong>on</strong>ic alarm to<br />
the nearest sales associate.<br />
• Closed-circuit cameras. These cameras<br />
hang from the ceiling, fit into rack lighting,<br />
and hide behind wall panels. “Eye in<br />
the sky” technology has created small<br />
cameras that are barely visible yet powerful<br />
enough to adjust for changes in<br />
lighting c<strong>on</strong>diti<strong>on</strong>s.<br />
INVESTIGATE<br />
Find out what the penalties are for<br />
shoplifting and theft. Report your findings<br />
to the class.
• Pull garments over your head carefully to prevent<br />
makeup stains.<br />
• Take off shoes before stepping into a garment.<br />
The fabric stays clean, and you w<strong>on</strong>’t catch<br />
your shoe in the hem.<br />
• Remove any jewelry that might snag fabric.<br />
• Leave all labels, hangtags, and price tags <strong>on</strong><br />
garments. Replacing them costs the store time<br />
and m<strong>on</strong>ey.<br />
• Keep garments and accessories <strong>on</strong> hangers<br />
before and after trying them <strong>on</strong>. They might<br />
get wrinkled or dirty <strong>on</strong> the fitting room floor.<br />
• Return unwanted items to the sales associate<br />
or checker.<br />
Be H<strong>on</strong>est<br />
Shoplifters cost retailers in North America<br />
over $10 milli<strong>on</strong> in merchandise every day. Some<br />
of these costs are passed <strong>on</strong> to c<strong>on</strong>sumers as<br />
higher prices. Shoplifting and employee theft are<br />
crimes that can result in stiff fines, legal supervisi<strong>on</strong>,<br />
a jail sentence, and a lifetime police record.<br />
Many stores are taking greater steps to combat<br />
these crimes, whether committed by customers<br />
or by employees. Some methods are described <strong>on</strong><br />
page 346.<br />
Understand Store Policies<br />
A retailer doesn’t typically sell l<strong>on</strong>g-sleeved<br />
shirts just as warm weather sets in, yet a storeowner<br />
may have little choice when customers<br />
take weeks to return items. The markdown <strong>on</strong><br />
these “leftovers” is another hidden cost caused by<br />
inc<strong>on</strong>siderate shoppers.<br />
Before buying, learn the store’s policies, usually<br />
posted in the store. If you can’t find them, ask<br />
these questi<strong>on</strong>s: Can you return the item? How<br />
l<strong>on</strong>g after you have bought it? Will you get cash or<br />
store credit?<br />
If you’re not paying with cash, check store policy<br />
for other acceptable payment methods.<br />
Although some stores accept credit and debit<br />
cards, others d<strong>on</strong>’t. Some accept pers<strong>on</strong>al checks.<br />
To help avoid exchanges and returns, check the<br />
fit and quality of an item before you buy. Save the<br />
sales receipt, hangtags, and any warranties that<br />
come with your purchase. See Fig. 20-2. The sales<br />
slip proves where you bought the merchandise and<br />
how much was paid. If you must return the item<br />
for any reas<strong>on</strong>, you’ll need to show the sales slip.<br />
The warranties and hangtags give valuable informati<strong>on</strong><br />
about the performance of your purchase.<br />
PAYING FOR PURCHASES<br />
When you buy something, the methods for<br />
payment allow you to pay now with cash, or later<br />
with credit. The various methods for each have<br />
both advantages and disadvantages.<br />
Making Cash Transacti<strong>on</strong>s<br />
Although the word cash usually means paper<br />
m<strong>on</strong>ey or coins, any payment made at the time of<br />
sale can be called a cash transacti<strong>on</strong>. Paying right<br />
away makes c<strong>on</strong>trolling expenditures easier<br />
because you can’t spend more than you have.<br />
Instead of using actual cash, immediate payment<br />
can also be made with a check, debit card,<br />
or m<strong>on</strong>ey order. Layaway plans are another<br />
opti<strong>on</strong>. C.O.D., which stands for cash <strong>on</strong> delivery,<br />
is seldom used anymore. With this method, people<br />
pay the delivery pers<strong>on</strong> when merchandise<br />
arrives. Many stores and companies no l<strong>on</strong>ger<br />
ship C.O.D. because often no <strong>on</strong>e is home to<br />
make the payment.<br />
Cash<br />
Since all stores take hard currency, or cash, this<br />
is usually the quickest and simplest means of pay-<br />
20-2<br />
If you save store sales receipts, you can<br />
exchange merchandise when necessary.<br />
CHAPTER 20 C<strong>on</strong>sumer Resp<strong>on</strong>sibilities • 347
ment. No extra costs are involved, such as the<br />
financing charge <strong>on</strong> a credit transacti<strong>on</strong>.<br />
With cash, you can spend <strong>on</strong>ly as much m<strong>on</strong>ey<br />
as you’re carrying. As some say,“<strong>on</strong>ce it’s g<strong>on</strong>e, it’s<br />
g<strong>on</strong>e.” Unfortunately, the same expressi<strong>on</strong> applies<br />
to cash that disappears. When carrying sums of<br />
m<strong>on</strong>ey, you risk loss and theft.<br />
Check<br />
A check authorizes a store to withdraw a specified<br />
amount of m<strong>on</strong>ey from your bank account.<br />
Before accepting your check, most stores ask for<br />
proof of who you are. A driver’s license or a credit<br />
card can be used for identificati<strong>on</strong>.<br />
A<br />
Writing a Check<br />
When writing a check, write clearly in ink, as<br />
shown in Fig. 20-3. Be sure to record the check<br />
number, the date of purchase, the name of the<br />
store, and the amount in the check register.<br />
A new twist <strong>on</strong> writing checks is point-of-purchase<br />
check c<strong>on</strong>versi<strong>on</strong>. The cashier runs a blank<br />
check through an electr<strong>on</strong>ic reader. The reader<br />
records the check number and account informati<strong>on</strong>,<br />
which is used to deduct the purchase amount<br />
from the account. The cashier returns the check,<br />
stamped “void,” al<strong>on</strong>g with a copy of the sale and a<br />
receipt to sign, which authorizes the electr<strong>on</strong>ic<br />
debit, a subtracted amount. This deducti<strong>on</strong><br />
appears <strong>on</strong> your m<strong>on</strong>thly bank statement.<br />
20-3<br />
To write a check, fill in items B, C, E, F, and G. H can be entered as a pers<strong>on</strong>al reminder. A is already printed <strong>on</strong> the<br />
check and should not include such pers<strong>on</strong>al informati<strong>on</strong> as a social security number.<br />
H<br />
B Name of pers<strong>on</strong><br />
or company to<br />
receive m<strong>on</strong>ey<br />
D Preprinted number<br />
for record keeping<br />
Preprinted name<br />
and address<br />
of signer<br />
C Today's date<br />
Purpose of<br />
check (opti<strong>on</strong>al)<br />
348 • UNIT 6 Clothing Selecti<strong>on</strong><br />
G<br />
Amount in<br />
words and<br />
numerals<br />
F<br />
Your name<br />
E<br />
Amount<br />
in numerals
Paying by check reduces the need to carry cash.<br />
Extra time might be necessary, however, especially<br />
when a store manager must verify all forms of<br />
identificati<strong>on</strong>. Some stores w<strong>on</strong>’t accept checks.<br />
Checks can also be used to order merchandise<br />
from catalogs. They are much safer than sending<br />
cash through the mail.<br />
Debit Card<br />
When you pay by debit card, m<strong>on</strong>ey is transferred<br />
electr<strong>on</strong>ically from your checking account<br />
to the store’s account via computer. See Fig. 20-4.<br />
The amount is immediately debited from your<br />
account. You receive a printed record of each<br />
deducti<strong>on</strong> so you can make sure the bank records<br />
of your account are accurate.<br />
Debit cards offer the c<strong>on</strong>venience of credit<br />
cards without the added fees, but also without the<br />
safeguards. If your credit card is lost or stolen, for<br />
example, you’re resp<strong>on</strong>sible for no more than $50<br />
20-4<br />
Debit cards, also known as check cards, look like<br />
credit and ATM cards. When you use a debit card, your<br />
m<strong>on</strong>ey is quickly deducted from your bank account. Some<br />
banks issue ATM cards that functi<strong>on</strong> as debit cards too.<br />
of unauthorized charges. With a debit card, you<br />
are resp<strong>on</strong>sible for no more than $50 of unauthorized<br />
charges if you report the card as lost or<br />
stolen within two days of discovery. Liability<br />
increases to $500 if the debit card is reported lost<br />
or stolen within 60 days. If you fail to notify the<br />
bank of loss or theft within 60 days after a bank<br />
statement is sent, you may be resp<strong>on</strong>sible for all<br />
the unauthorized charges.<br />
M<strong>on</strong>ey Order<br />
Like a check, a m<strong>on</strong>ey order is a document<br />
stating that m<strong>on</strong>ey is to be paid to a particular<br />
pers<strong>on</strong> or store named <strong>on</strong> the form. Unlike<br />
checks, m<strong>on</strong>ey orders are bought individually<br />
from a post office or private company, such as a<br />
bank. You pay the face amount plus a service<br />
charge. M<strong>on</strong>ey orders are useful if you want to<br />
make a payment by mail but d<strong>on</strong>’t have a checking<br />
account.<br />
Using Credit<br />
Instead of cash, purchases can also be made<br />
with the credit method. A credit card allows the<br />
cardholder to buy and receive merchandise, but<br />
pay for it later. In effect, you’re renting the m<strong>on</strong>ey<br />
for a certain amount of time and paying a fee for<br />
the service. When you buy <strong>on</strong> credit, the financial<br />
instituti<strong>on</strong> or company that issued the credit card<br />
pays the price to the store for you. Then each<br />
m<strong>on</strong>th you pay back some or all of the debt to the<br />
card issuer.<br />
While credit card offers appear many places<br />
these days, getting a card depends <strong>on</strong> informati<strong>on</strong><br />
collected about an applicant. Some is <strong>on</strong> the<br />
applicati<strong>on</strong> form. Income, existing bank<br />
accounts, and credit history indicate a pers<strong>on</strong>’s<br />
credit risk. You must be age eighteen or older to<br />
get credit in your own name, but some issuers let<br />
younger teens use a parent’s card with parental<br />
permissi<strong>on</strong>. Parents can also buy special cards for<br />
teens, with a spending limit set by the parents.<br />
Types of Credit Cards<br />
The three basic types of credit cards are determined<br />
by who issues them. All can be used in the<br />
CHAPTER 20 C<strong>on</strong>sumer Resp<strong>on</strong>sibilities • 349
20-5<br />
When you make a purchase with a credit card, the<br />
sales associate swipes your card through a reading device.<br />
A teleph<strong>on</strong>e number may be entered for verificati<strong>on</strong>.<br />
same way, although not every store accepts all<br />
cards. See Fig. 20-5. Many credit cards can be<br />
used to obtain cash advances from an automated<br />
teller machine, or ATM.<br />
• Bank cards. These are issued by financial instituti<strong>on</strong>s<br />
and processed through Mastercard®,<br />
Visa®, or Discover® networks.<br />
• Company cards. A store or a catalog may<br />
issue its own card, which can <strong>on</strong>ly be used for<br />
purchases at that company.<br />
• Travel and entertainment cards. These<br />
are issued by such companies as American<br />
Express® and Diner’s Club®.<br />
M<strong>on</strong>thly Statement<br />
A credit card bill comes in a m<strong>on</strong>thly<br />
statement. It shows the amount of your<br />
last bill, any payments made, and any<br />
credits or returns. It lists each purchase<br />
charged to the account since the last<br />
350 • UNIT 6 Clothing Selecti<strong>on</strong><br />
statement, any additi<strong>on</strong>al fees, and the total<br />
amount owed.<br />
The statement shows the minimum payment<br />
amount to make for the m<strong>on</strong>th, usually ten percent<br />
of the total. This amount must be received<br />
by a specific date to be <strong>on</strong> time. The statement<br />
also includes the available line of credit. This is<br />
the maximum amount of m<strong>on</strong>ey that can be<br />
charged by the cardholder. See Fig. 20-6.<br />
To catch possible errors, save receipts and<br />
compare them to each m<strong>on</strong>thly statement. If you<br />
discover an error, you must follow the specific<br />
procedures outlined by the credit card issuer.<br />
Look <strong>on</strong> the credit card or m<strong>on</strong>thly statement for<br />
a toll-free number to call for billing inquiries and<br />
customer service.<br />
You can choose to receive your statement by<br />
mail or <strong>on</strong>-line. With an <strong>on</strong>-line statement, you<br />
will receive an e-mail message telling you that it is<br />
available. When you go to the credit card’s Web<br />
site, for security purposes, you will have to type in<br />
a user ID and a password before you can view and<br />
print your statement.<br />
Finance Charges<br />
A finance charge is a fee added for the use of<br />
credit. If you make <strong>on</strong>ly a partial payment rather<br />
than the full amount owed, a finance charge is<br />
added to the next m<strong>on</strong>thly statement.<br />
20-6<br />
A m<strong>on</strong>thly statement shows what has been billed<br />
to an account and what is owed. What other informati<strong>on</strong><br />
does it c<strong>on</strong>tain?
A finance charge is figured as a percentage of<br />
the m<strong>on</strong>thly bill, typically around 1.5 percent.<br />
This is an annual percentage rate (APR) of 18<br />
percent per year. According to the Truth-in-<br />
Lending Law, the credit card issuer must provide<br />
the annual percentage rate in writing. State law<br />
c<strong>on</strong>trols the maximum rate.<br />
Although you could pay as little as ten dollars<br />
<strong>on</strong> some bills each m<strong>on</strong>th, paying the full amount<br />
means no finance charge will be added. When a<br />
balance is carried over from m<strong>on</strong>th to m<strong>on</strong>th,<br />
finance charges can add up quickly.<br />
Weighing Advantages and<br />
Disadvantages<br />
Credit represents the “buy now, pay later” idea<br />
of budgeting. Unfortunately, “pay later” often<br />
means “pay more.” Used wisely, credit has a number<br />
of advantages, but as Fig. 20-7 shows, it also<br />
has disadvantages. Before using credit, weigh the<br />
pros and c<strong>on</strong>s carefully. Credit is best used <strong>on</strong>ly<br />
when you know you have the resources to pay the<br />
debt before it comes due.<br />
If you choose to use a credit card, remember<br />
that your card and account represent real m<strong>on</strong>ey,<br />
just like cash. Guard the card well. Be sure your<br />
card is returned each time you use it. Keep a record<br />
of your credit card number in a safe place. If your<br />
card is lost or stolen, notify the issuer immediately.<br />
20-7 • Advantages and Disadvantages of Using Credit<br />
ADVANTAGES<br />
Customer can enjoy merchandise, including more expensive items,<br />
while making payments.<br />
Making returns is simplified since the amount is credited to the<br />
account electr<strong>on</strong>ically.<br />
Customer can pay for all purchases <strong>on</strong> the m<strong>on</strong>thly statement with<br />
<strong>on</strong>e check or m<strong>on</strong>ey order.<br />
When ordering <strong>on</strong>-line or by ph<strong>on</strong>e, using a credit card is more<br />
c<strong>on</strong>venient than mailing a check or m<strong>on</strong>ey order.<br />
Customer can shop with little or no cash.<br />
Emergency expenses can be covered.<br />
EXCHANGES AND RETURNS<br />
If something is wr<strong>on</strong>g with a clothing purchase,<br />
you can return it promptly to the store for<br />
exchange, credit, or refund. Any item you buy<br />
should perform properly.<br />
Acting in Good Faith<br />
Resp<strong>on</strong>sible c<strong>on</strong>sumers act in “good faith” by<br />
exchanging or returning merchandise <strong>on</strong>ly for<br />
legitimate reas<strong>on</strong>s. For example, a water-repellent<br />
raincoat shouldn’t leak in a light drizzle; the heel<br />
shouldn’t come off a shoe during the first wearing;<br />
and a shirt shouldn’t fade after <strong>on</strong>e washing.<br />
Receiving a gift that’s the wr<strong>on</strong>g size isn’t the<br />
seller’s fault, but this, too, is a legitimate reas<strong>on</strong><br />
for a return.<br />
A store shouldn’t be expected to exchange or<br />
refund merchandise that has been mishandled.<br />
Did the shirt fade because it was washed in hot<br />
water rather than cold, as the label instructed? If<br />
a sweater labeled “dry-clean <strong>on</strong>ly” shrinks when<br />
washed, this isn’t the store’s fault. C<strong>on</strong>sumers<br />
must accept resp<strong>on</strong>sibility for problems they<br />
cause themselves.<br />
Expectati<strong>on</strong>s about the wear and performance<br />
of a garment should also be reas<strong>on</strong>able. If a new<br />
bathing suit fades after two wearings, returning is<br />
reas<strong>on</strong>able. If it fades after two m<strong>on</strong>ths of frequent<br />
wear, returning isn’t appropriate.<br />
DISADVANTAGES<br />
People are more likely to buy <strong>on</strong> impulse, resulting in unneeded<br />
items and bills that are hard to repay.<br />
Finance charges increase the cost of items and add up quickly.<br />
Extra fees may be added for late payments.<br />
Some credit cards have an annual fee or membership fee of $25 or<br />
more.<br />
Credit card or account numbers can be stolen and used by others.<br />
Late or missed payments can result in a poor credit rating, damaging<br />
a pers<strong>on</strong>’s ability to get credit in the future.<br />
CHAPTER 20 C<strong>on</strong>sumer Resp<strong>on</strong>sibilities • 351
Complaining Effectively<br />
According to the saying, “you catch more flies<br />
with h<strong>on</strong>ey than with vinegar.” Let this be your<br />
guide when you have reas<strong>on</strong> to complain about<br />
an item or service. People are motivated more by<br />
kind words than harsh <strong>on</strong>es.<br />
Try to make it easier for people to help you.<br />
First, go to the right place. Start with the department<br />
where you purchased the merchandise and<br />
talk to a sales associate or department manager.<br />
Some stores have a customer service department<br />
that handles all complaints. If the problem isn’t<br />
solved, ask to see the store manager or owner.<br />
Proceed up the chain of command as far as you<br />
feel the problem merits. See page 354 for more<br />
informati<strong>on</strong> <strong>on</strong> making effective complaints.<br />
If you are persistent and act in good faith, your<br />
problem will usually be resolved. Most stores and<br />
manufacturers want satisfied customers who will<br />
c<strong>on</strong>tinue to purchase merchandise and services.<br />
CONSUMER PROTECTION<br />
You may have heard that rights and resp<strong>on</strong>sibilities<br />
go hand in hand. They certainly do in the<br />
marketplace. A c<strong>on</strong>sumer’s resp<strong>on</strong>sibilities are<br />
balanced by legally protected rights.<br />
352 • UNIT 6 Clothing Selecti<strong>on</strong><br />
Fashi<strong>on</strong><br />
FUTURE EXCHANGES.<br />
Suppose an <strong>on</strong>-line retailer sends you a<br />
blue sweater, size small, instead of the<br />
green <strong>on</strong>e you ordered. In the future, the<br />
exchange may be easier for the retailer.<br />
Textile scientists are experimenting with<br />
“smart” fabrics, changing fibers’ usual circular<br />
shape to square or triangular. With a<br />
type of electr<strong>on</strong>ic sensitivity that alters the<br />
fibers’ reflective quality, the fabric can<br />
change color. Fibers might also be made to<br />
c<strong>on</strong>tract or expand <strong>on</strong> command, thus<br />
changing the size of a garment.<br />
Facts<br />
C<strong>on</strong>sumer Bill of Rights<br />
In the past, c<strong>on</strong>sumer protecti<strong>on</strong> was a pers<strong>on</strong>al<br />
matter—you looked out for yourself. Few<br />
laws protected c<strong>on</strong>sumers from unfair business<br />
practices, before or after a sale.<br />
In 1962 in a special address to C<strong>on</strong>gress,<br />
President John F. Kennedy introduced the landmark<br />
C<strong>on</strong>sumer Bill of Rights. It was created<br />
because of mounting problems that c<strong>on</strong>sumers<br />
were having with goods and services. More legislati<strong>on</strong>,<br />
backed by Presidents Richard Nix<strong>on</strong> and<br />
Gerald Ford, added other c<strong>on</strong>sumer rights. Six<br />
basic rights are now written into law. They are as<br />
follows:<br />
• Right to safety. Protects against manufacturing<br />
and selling goods that are hazardous to<br />
health or property.<br />
• Right to be informed. Requires sellers to<br />
disclose relevant facts and to advertise and<br />
label products truthfully.<br />
• Right to choose. Gives c<strong>on</strong>sumers a variety<br />
of reas<strong>on</strong>ably priced goods and services by<br />
barring businesses from unfairly limiting competiti<strong>on</strong><br />
or c<strong>on</strong>trolling prices.<br />
• Right to be heard. Gives c<strong>on</strong>sumers a voice<br />
in legislati<strong>on</strong> and decisi<strong>on</strong>s that affect them.<br />
• Right to redress. Entitles c<strong>on</strong>sumers to<br />
have problems corrected or receive compensati<strong>on</strong><br />
for damages. See Fig. 20-8.<br />
• Right to c<strong>on</strong>sumer educati<strong>on</strong>. Provides<br />
for ready access to facts needed to make a good<br />
choice, such as safety, pricing, and buying<br />
guidelines.<br />
C<strong>on</strong>sumer Agencies and<br />
Organizati<strong>on</strong>s<br />
C<strong>on</strong>sumers are resp<strong>on</strong>sible for knowing and<br />
acting <strong>on</strong> their rights. They also have help from<br />
government and private groups. Some government<br />
agencies are resp<strong>on</strong>sible for enforcing laws<br />
that affect c<strong>on</strong>sumers. Private organizati<strong>on</strong>s usually<br />
focus <strong>on</strong> certain c<strong>on</strong>sumer issues of interest<br />
to their membership.<br />
• Federal Trade Commissi<strong>on</strong> (FTC). This<br />
federal agency is the marketplace “police.” Its
20-8<br />
Because the C<strong>on</strong>sumer Bill of Rights provides<br />
the right to redress, you can return an unsatisfactory<br />
item to the store. What determines whether you<br />
exchange the item or get your m<strong>on</strong>ey back?<br />
missi<strong>on</strong> is to eliminate unfair or deceptive<br />
business practices and remove threats to<br />
informed choice. The FTC enforces c<strong>on</strong>sumer<br />
protecti<strong>on</strong> laws and promotes c<strong>on</strong>sumer<br />
awareness. It is resp<strong>on</strong>sible for the fiber identificati<strong>on</strong><br />
and care labeling laws.<br />
• C<strong>on</strong>sumer Product Safety Commissi<strong>on</strong><br />
(CPSC). Also a federal agency, the CPSC<br />
guards the public against physical harm related<br />
to c<strong>on</strong>sumer goods, such as flammable fabrics<br />
and hazardous substances. It helps industries<br />
develop voluntary standards, specific models<br />
of quality or performance against which products<br />
are judged, and enforces mandatory safety<br />
standards of its own. The agency also educates<br />
c<strong>on</strong>sumers <strong>on</strong> product safety issues.<br />
• Better Business Bureau (BBB). This is a<br />
private, n<strong>on</strong>profit, voluntary alliance of businesses.<br />
Members agree to follow standards of<br />
ethical behavior to promote public c<strong>on</strong>fidence<br />
in the marketplace. The BBB helps c<strong>on</strong>sumers<br />
settle complaints against member businesses<br />
through mediati<strong>on</strong>, settling a dispute with the<br />
help of a neutral third party. Some cases move<br />
<strong>on</strong> to arbitrati<strong>on</strong>, the settlement of a dispute<br />
by a pers<strong>on</strong> or panel that hears each party and<br />
issues a decisi<strong>on</strong>. The BBB also provides c<strong>on</strong>sumers<br />
with a member’s history regarding<br />
complaints and resoluti<strong>on</strong>s. See Fig. 20-9.<br />
Government Regulati<strong>on</strong>s<br />
Basic c<strong>on</strong>sumer rights are enforced through<br />
volumes of federal, state, and local regulati<strong>on</strong>s.<br />
Some laws specifically relate to the textile and<br />
apparel industries. Others apply to c<strong>on</strong>sumer<br />
transacti<strong>on</strong>s, such as credit use.<br />
• Textile Fiber Products Identificati<strong>on</strong><br />
Act (TFPIA). This legislati<strong>on</strong> specifies that<br />
the generic name of every fiber (unless under<br />
5 percent of total fiber weight), percentage of<br />
each fiber, name or identificati<strong>on</strong> of the manufacturer,<br />
and country of origin must appear<br />
<strong>on</strong> the labels of textile products.<br />
• <str<strong>on</strong>g>Care</str<strong>on</strong>g> Labeling Rule. This ruling regulates<br />
the care informati<strong>on</strong> that must appear <strong>on</strong> the<br />
permanent care labels attached to garments<br />
and other textile products. The latest revisi<strong>on</strong>,<br />
in 1997, authorizes the use of certain symbols<br />
in place of words.<br />
• Wool Products Labeling Act. This law<br />
requires manufacturers to identify the type<br />
20-9<br />
Before you do business with an unfamiliar com-<br />
pany, you can call the Better Business Bureau to find out<br />
whether any complaints have been filed against it.<br />
CHAPTER 20 C<strong>on</strong>sumer Resp<strong>on</strong>sibilities • 353
How To…<br />
COMPLAIN EFFECTIVELY<br />
When you have a problem with something you’ve bought, you may need to take acti<strong>on</strong>.<br />
The so<strong>on</strong>er you take acti<strong>on</strong>, the more likely you are to resolve the problem. If any step<br />
isn’t successful, go <strong>on</strong> to the next.<br />
Step 1: Start with the place of<br />
purchase.<br />
• If you bought the item at a store, take the<br />
item and sales receipt to the place of purchase.<br />
Explain the problem politely and<br />
calmly to the sales associate, manager, or<br />
customer service representative.<br />
• If you ordered <strong>on</strong>-line or by ph<strong>on</strong>e, check the<br />
company’s return policy for instructi<strong>on</strong>s.<br />
This informati<strong>on</strong> may be printed <strong>on</strong> the<br />
packing slip or <strong>on</strong> a separate piece of paper<br />
that came with the item. If not, check the<br />
catalog or the Web site. If the item is defective<br />
or the company made a mistake, c<strong>on</strong>tact<br />
them by ph<strong>on</strong>e or e-mail. Explain the<br />
problem and ask how you can return the<br />
item without paying for shipping.<br />
Step 2: Write a letter.<br />
• Write a letter to the store or company,<br />
addressing the owner, president, or head of<br />
customer service. Describe the item or<br />
service, the problem, and how and when it<br />
occurred. State how you would like to<br />
resolve the problem and include your name<br />
and address. Enclose a copy of the sales<br />
receipt, not the original. If you ordered by<br />
ph<strong>on</strong>e or <strong>on</strong>-line, include your order number.<br />
Send the letter by registered mail so that<br />
you have a record that the company<br />
received it.<br />
• If you paid by credit card, c<strong>on</strong>tact the credit<br />
card company and explain the problem. Your<br />
transacti<strong>on</strong> may be protected by the Fair<br />
354 • UNIT 6 Clothing Selecti<strong>on</strong><br />
Credit Billing Act. Under this law, you have<br />
the right to dispute charges under certain<br />
circumstances. The credit card company<br />
may temporarily withhold payment until the<br />
problem is resolved.<br />
Step 3: Use additi<strong>on</strong>al c<strong>on</strong>sumer<br />
resources.<br />
• C<strong>on</strong>tact the following for help: the manufacturer,<br />
the Better Business Bureau, the<br />
county or state C<strong>on</strong>sumer Protecti<strong>on</strong><br />
Agency, the state Attorney General’s office,<br />
or the c<strong>on</strong>sumer reporter at a local newspaper<br />
or televisi<strong>on</strong> stati<strong>on</strong>.<br />
Exploring Complaining<br />
Effectively<br />
Suppose an item you recently purchased<br />
is unsatisfactory. Write a letter to the<br />
store or company, following the guidelines<br />
in Step 2.
and amount of wool used in a garment, its<br />
country of origin, and whether it’s new or<br />
recycled.<br />
• Fur Products Labeling Act. By law,<br />
apparel manufacturers must indicate the fur<br />
used in a garment, the country of origin, and<br />
whether the fur has been dyed.<br />
• Flammable Fabrics Act. This legislati<strong>on</strong>,<br />
revised in 1971, is still the standard for fabric<br />
safety. It bans the sale of dangerously flammable<br />
fabrics and apparel. The law helped<br />
develop the standards for children’s flameretardant<br />
sleepwear. See Fig. 20-10. Mattresses,<br />
rugs, carpets, and some upholstery fabrics also<br />
have flammability standards.<br />
• Federal Hazardous Substance Act. This<br />
act requires that potential choking hazards,<br />
such as butt<strong>on</strong>s and other decorati<strong>on</strong>s <strong>on</strong> children’s<br />
clothing, pass use and abuse tests. It also<br />
prohibits the use of lead paint <strong>on</strong> children’s<br />
items, including clothing and butt<strong>on</strong>s. Lead is<br />
particularly toxic, or pois<strong>on</strong>ous, to young children,<br />
who tend to put many things in their<br />
mouths.<br />
• C<strong>on</strong>sumer Credit Protecti<strong>on</strong> Act. This<br />
requires creditors to explain all terms of the<br />
credit agreement clearly. It includes the Truth-<br />
20-10<br />
This label shows that these pajamas for a child<br />
are flame-resistant. Thousands of serious burn injuries<br />
have been prevented since laws were established to ban<br />
flammable fabrics in children’s sleepwear.<br />
in-Lending Law, by which creditors must disclose,<br />
in writing, the interest charged <strong>on</strong> the<br />
balance, both as a m<strong>on</strong>thly percentage and an<br />
annual percentage rate (APR). This makes it<br />
easier to shop for credit. Truth in Lending also<br />
limits your liability for charges made if your<br />
credit card is stolen.<br />
• Fair Credit Billing Act. If you have a problem<br />
with a charge <strong>on</strong> your statement or with<br />
an item purchased, this provides recourse. You<br />
must notify the creditor of the problem in<br />
writing within 60 days. The creditor has 30<br />
days to resp<strong>on</strong>d and 90 days to resolve the situati<strong>on</strong>.<br />
You d<strong>on</strong>’t have to pay the disputed<br />
amount until the questi<strong>on</strong> is settled.<br />
Protecting Yourself<br />
Government regulati<strong>on</strong>s and voluntary standards<br />
are valuable protecti<strong>on</strong>s in the marketplace.<br />
Resp<strong>on</strong>sibility for getting a fair deal, however,<br />
rests with c<strong>on</strong>sumers themselves.<br />
Investigating products and companies before<br />
you buy is part of your right to c<strong>on</strong>sumer educati<strong>on</strong>.<br />
Disclosure laws, such as Truth in Lending,<br />
and modern communicati<strong>on</strong>s technology make<br />
exercising this right easier than ever. At the same<br />
time, they demand a more critical approach from<br />
you. For example, how do you know whether an<br />
Internet source is reliable? Is the “whitening”<br />
power claimed for a laundry detergent found<br />
<strong>on</strong>ly in that product?<br />
Regulati<strong>on</strong>s have cut down <strong>on</strong> abuses, but a<br />
clever marketer can find ways around the law. You<br />
may need input from a variety of sources.<br />
C<strong>on</strong>sumer Reports magazine has a reputati<strong>on</strong> for<br />
testing products thoroughly. The FTC Web site<br />
lists defective products that have been recalled,or<br />
ordered returned to the manufacturer for repair<br />
or replacement. A neighbor might give good<br />
advice from pers<strong>on</strong>al experience.<br />
As a c<strong>on</strong>sumer, you have both rights and<br />
resp<strong>on</strong>sibilities. If you use them wisely, you can<br />
enjoy what the marketplace has to offer.<br />
CHAPTER 20 C<strong>on</strong>sumer Resp<strong>on</strong>sibilities • 355
CHAPTER 20<br />
CHAPTER SUMMARY<br />
• Shoppers have a resp<strong>on</strong>sibility to show<br />
c<strong>on</strong>siderati<strong>on</strong>, h<strong>on</strong>esty, and respect for<br />
store policies.<br />
• Purchases may be made with different<br />
types of cash and credit payments. Each<br />
method has advantages and disadvantages.<br />
• When handled correctly, exchanges and<br />
returns can go smoothly for c<strong>on</strong>sumers<br />
and businesses.<br />
• C<strong>on</strong>sumers have certain rights that are<br />
protected by government and private<br />
agencies and are written into law.<br />
• By learning and exercising both their<br />
resp<strong>on</strong>sibilities and rights, c<strong>on</strong>sumers help<br />
ensure a good shopping experience for<br />
themselves and others.<br />
USING KEY TERMS<br />
Most people are familiar with the Key Term<br />
credit card. Debit cards and m<strong>on</strong>ey orders, however,<br />
may be less familiar. Research how these<br />
work and plan a dem<strong>on</strong>strati<strong>on</strong> for the class.<br />
356 • UNIT 6 Clothing Selecti<strong>on</strong><br />
Review<br />
RECALLING THE FACTS<br />
1. Explain how resp<strong>on</strong>sible c<strong>on</strong>sumers<br />
affect clothing prices.<br />
2. Describe five acti<strong>on</strong>s that show care<br />
when trying <strong>on</strong> clothes.<br />
3. Describe three methods businesses use<br />
to deal with theft.<br />
4. Compare the advantages of using cash<br />
with those of using checks.<br />
5. How does a debit card differ from a<br />
credit card?<br />
6. What informati<strong>on</strong> about a credit account<br />
can you learn by reading a m<strong>on</strong>thly<br />
statement?<br />
7. What are three advantages and three<br />
disadvantages of using credit?<br />
8. Give three tips for using credit wisely.<br />
9. How does acting in good faith relate to<br />
c<strong>on</strong>sumer resp<strong>on</strong>sibilities?<br />
10. List the six basic rights guaranteed by<br />
law in the C<strong>on</strong>sumer Bill of Rights.<br />
11. Name and describe three private and<br />
government agencies that help protect<br />
c<strong>on</strong>sumers.<br />
12. Why are the Flammable Fabrics Act and<br />
the Federal Hazardous Substance Act<br />
especially valuable to parents of small<br />
children?<br />
13. How does the Truth-in-Lending Law protect<br />
c<strong>on</strong>sumers?<br />
14. Describe ways that c<strong>on</strong>sumers can help<br />
protect themselves in the marketplace.
and Activities<br />
THINKING CRITICALLY<br />
1. A shoplifter says, “But I <strong>on</strong>ly took <strong>on</strong>e<br />
little item.” Why is this reas<strong>on</strong>ing<br />
flawed?<br />
2. Do you think c<strong>on</strong>sumer protecti<strong>on</strong> is<br />
more necessary in today’s world than it<br />
was in the past? What about protecti<strong>on</strong><br />
for businesses? Explain.<br />
APPLYING KNOWLEDGE<br />
1. Customer reacti<strong>on</strong>s. Write a descripti<strong>on</strong><br />
of a reas<strong>on</strong>able resp<strong>on</strong>se in each of<br />
these situati<strong>on</strong>s: you’ve been waiting in<br />
line and the busy sales associate starts<br />
to wait <strong>on</strong> a pers<strong>on</strong> who just walked up;<br />
while waiting <strong>on</strong> you, the sales associate<br />
takes a ph<strong>on</strong>e call that lasts several minutes;<br />
after leaving a store, you notice<br />
that the sales associate charged you full<br />
price rather than the sale price. Compare<br />
resp<strong>on</strong>ses with class members.<br />
2. Role reversal. Imagine that you have a<br />
part-time job as a sales associate. In<br />
writing, describe ways to show courtesy<br />
and appreciati<strong>on</strong> for customers.<br />
3. Credit terms. Bring and compare informati<strong>on</strong>al<br />
literature from credit card<br />
applicati<strong>on</strong>s. Identify the APR and other<br />
terms and charges. Discuss which offers<br />
are the best.<br />
4. Shoplifting penalties. Research the<br />
penalties for shoplifting in your community,<br />
city, or state. Report your findings<br />
to the class.<br />
CHAPTER 20<br />
5. Product research. Choose an item you<br />
would like to buy. Use c<strong>on</strong>sumer magazines,<br />
catalogs, the Internet, and store<br />
visits to research the item. In writing,<br />
give specific reas<strong>on</strong>s why you would buy<br />
a certain brand and model.<br />
MAKING>
CHAPTER 21<br />
Selecting Clothes for Others<br />
OBJECTIVES<br />
• Explain what to<br />
c<strong>on</strong>sider when<br />
choosing clothes<br />
for family members<br />
and friends.<br />
• Evaluate children’s<br />
clothing for safety,<br />
comfort, and other<br />
factors.<br />
• Describe special<br />
clothing features<br />
for pregnant<br />
women.<br />
• Choose appropriate<br />
clothing gifts for<br />
older adults.<br />
• Suggest clothing<br />
modificati<strong>on</strong>s for<br />
people with<br />
disabilities.<br />
KEY TERMS<br />
adaptive design<br />
disability<br />
maternity clothes<br />
prosthesis<br />
358 • UNIT 6 Clothing Selecti<strong>on</strong>
EXAMINETHISISSUE<br />
Friendship versus fashi<strong>on</strong>.<br />
Friends try to give each other gifts that<br />
are really appreciated, but even a close<br />
friend can misjudge the other’s tastes.<br />
Some people are uncomfortable about<br />
saying that they would like to exchange a<br />
gift they’ve received for something else.<br />
Others are able to find a gracious way to<br />
say they appreciate the thoughtfulness,<br />
but they need a different size or prefer<br />
another style or color.<br />
What do you think?<br />
How should a pers<strong>on</strong> resp<strong>on</strong>d when<br />
receiving a garment that isn’t quite right?<br />
For the sake of the gift giver’s feelings,<br />
should the item be worn anyway or kept<br />
but not worn? What would you do?<br />
Has this ever happened to you?<br />
You give a gift to some<strong>on</strong>e—perhaps a<br />
sweater or scarf that you like enough to<br />
wear yourself—but you never see the pers<strong>on</strong> wear<br />
it. Why did that happen? Maybe the gift was better<br />
suited for you than the receiver.<br />
Shopping for some<strong>on</strong>e else often means putting<br />
aside your own tastes and seeing with the<br />
eyes of the other pers<strong>on</strong>. To choose well, you not<br />
<strong>on</strong>ly think about size but also about the pers<strong>on</strong>’s<br />
individual characteristics.<br />
SHOPPING FOR FAMILY<br />
AND FRIENDS<br />
A grandmother’s birthday, a new baby in the<br />
family, a friend leaving for college—these are just<br />
a few occasi<strong>on</strong>s when a gift of clothing might be<br />
appreciated. Buying a gift certificate is easy, but<br />
taking the time to choose something special is as<br />
much a gift as the garment itself. See Fig. 21-1.<br />
When you choose a gift for some<strong>on</strong>e who has<br />
little time or opportunity to shop, you’re doing a<br />
special favor for the pers<strong>on</strong>. New mothers, for<br />
example, are often too busy and too tired to<br />
spend time shopping. You might enjoy the experience,<br />
however, if you know what to look for.<br />
With some basic informati<strong>on</strong> in mind, you can<br />
choose clothing gifts that you’ll be glad to give,<br />
and your friends and family will be pleased to<br />
receive.<br />
C<strong>on</strong>sider the Needs of Others<br />
Before shopping for a friend or relative, listen<br />
for clues about the pers<strong>on</strong>’s needs and wants. The<br />
remark, “This old belt has about had it,” gives an<br />
obvious gift idea. Listen for such comments as<br />
these: “I w<strong>on</strong>der where Paul got that sweater; I<br />
really like it” or “I need a new denim shirt to<br />
replace my old <strong>on</strong>e.” If you write down gift ideas<br />
as you observe them, you’ll have a reference list<br />
when gift-giving occasi<strong>on</strong>s come al<strong>on</strong>g. Some<br />
people keep such informati<strong>on</strong> <strong>on</strong> index cards,<br />
either filed at home or in their purse or wallet.<br />
21-1<br />
A gift is special when you’ve chosen it carefully.<br />
CHAPTER 21 Selecting Clothes for Others • 359
Interests and Activities<br />
If you d<strong>on</strong>’t get any clues about possible gifts,<br />
focus <strong>on</strong> a pers<strong>on</strong>’s interests. A teen who likes<br />
fashi<strong>on</strong>, for example, might want the latest fad.<br />
C<strong>on</strong>sider hobbies. How about special garden<br />
gloves or a wide-brimmed sun hat for an avid<br />
gardener? An amateur baker or potter might like<br />
a sturdy, washable apr<strong>on</strong>. A sports enthusiast<br />
might need running shorts, a warm-up suit, or<br />
athletic socks.<br />
If you know what activities a pers<strong>on</strong> likes, you<br />
might think of a compatible gift. What gifts<br />
might be good for people who spend time outdoors,<br />
traveling, or at formal events? Think about<br />
occupati<strong>on</strong> too. An employed pers<strong>on</strong> might need<br />
something to wear to work. A stay-at-home parent<br />
might like casual wear.<br />
21-2<br />
If you c<strong>on</strong>sider a pers<strong>on</strong>’s hobbies and interests,<br />
you might think of suitable gift ideas. What gifts might be<br />
enjoyed by some<strong>on</strong>e who likes to garden?<br />
360 • UNIT 6 Clothing Selecti<strong>on</strong><br />
Gifts that match a pers<strong>on</strong>’s interests and activities<br />
are usually the best. Choosing them takes<br />
thought, but the time is well spent. See Fig. 21-2.<br />
Styles and Colors<br />
Tastes in clothing are like tastes in pizza. A<br />
group of friends may agree to order a pizza, but<br />
what kind? Sausage, pepper<strong>on</strong>i, or meatless?<br />
Oni<strong>on</strong>, green pepper, or black olives? Likewise,<br />
choices in clothing differ, even am<strong>on</strong>g close<br />
friends. While some people like the latest fashi<strong>on</strong>s,<br />
others prefer more traditi<strong>on</strong>al styles, and<br />
some create styles of their own. Before choosing<br />
gifts for friends and family, take note of their pers<strong>on</strong>al<br />
style preferences.<br />
Your favorite color may not be the best choice<br />
for some<strong>on</strong>e else. Does the pers<strong>on</strong> you’re buying<br />
for wear bright colors and geometric designs or<br />
subdued prints and solids? On your index card of<br />
gift ideas for individuals, add the colors of their<br />
favorite garments. If you choose something that<br />
coordinates with a pers<strong>on</strong>’s existing wardrobe, it’s<br />
like giving several gifts in <strong>on</strong>e. A plaid scarf might<br />
go with both a blazer and sweater. A pale yellow<br />
shirt could go with a skirt and pants.<br />
On the other hand, a gift that’s just a bit different<br />
can be fun. If you see another side to a friend’s<br />
pers<strong>on</strong>ality, you can help bring it out with the<br />
right gift.<br />
Size<br />
Often the first questi<strong>on</strong> asked by a sales associate<br />
is this: “What size do you need?” In clothing, a<br />
good fit is basic to a good buy. The sizes that<br />
friends and family take are something else to add<br />
to your index cards of gift informati<strong>on</strong>. Update<br />
this informati<strong>on</strong> periodically.<br />
Since sizes may vary am<strong>on</strong>g manufacturers,<br />
developing an eye for size is helpful. Note how a<br />
medium in <strong>on</strong>e clothing line compares to<br />
another, and how both relate to the size of the<br />
pers<strong>on</strong> you’re buying for. Save receipts in case you<br />
choose the wr<strong>on</strong>g size. Many stores supply gift<br />
receipts that can be wrapped with the gift so the<br />
pers<strong>on</strong> can exchange for another size or return<br />
the item if there’s a problem. The price doesn’t<br />
appear <strong>on</strong> the receipt. See Fig. 21-3.
21-3<br />
If you enclose a gift receipt when you give a gift,<br />
the receiver can easily make an exchange. Some stores<br />
tape gift receipts inside the box.<br />
If you’re not sure of a pers<strong>on</strong>’s size, look at<br />
accessories. Scarves, ties, hats, bags, and jewelry<br />
are popular gifts because “<strong>on</strong>e size fits all.”<br />
C<strong>on</strong>sider Your Resources<br />
“Why do I always want to spend too much for<br />
gifts?” <strong>on</strong>e teen w<strong>on</strong>dered. It’s comm<strong>on</strong> for the<br />
heart to say that no gift is too expensive, while the<br />
bank account says otherwise. Fortunately, reas<strong>on</strong>able<br />
people d<strong>on</strong>’t expect you to spend more than<br />
the budget allows. Extravagant gifts are even apt<br />
to make others feel uncomfortable.<br />
Making or sewing a gift instead of buying <strong>on</strong>e<br />
is a good opti<strong>on</strong>. A handcrafted item can be<br />
designed to the pers<strong>on</strong>’s specific tastes or interests.<br />
Even a gift that’s less than professi<strong>on</strong>al earns<br />
appreciati<strong>on</strong> for the time and effort—two invaluable<br />
resources—used to create it.<br />
CHOOSING CLOTHES FOR<br />
CHILDREN<br />
Any<strong>on</strong>e who browses thrift shops and garage<br />
sales knows that they offer many sec<strong>on</strong>dhand<br />
clothes for infants and children. Physical growth,<br />
not fashi<strong>on</strong>, makes parents quickly discard<br />
youngsters’ clothes. In the first year of life, the<br />
human body grows faster than at any other time.<br />
Toddlers, from ages <strong>on</strong>e to three, also have a fast<br />
rate of physical development. The twelve-m<strong>on</strong>thold<br />
child tottering <strong>on</strong> two feet is so<strong>on</strong> running,<br />
climbing, tossing balls, and pedaling a tricycle.<br />
At any age or stage of development, children<br />
have certain clothing needs. See Fig. 21-4. The<br />
most adorable outfit in the store is a poor choice<br />
unless it is the right size and meets standards for<br />
safety, comfort, durability, practicality, ease of<br />
dressing, color, and texture.<br />
Children’s Sizes<br />
Clothing sizes for young children are based <strong>on</strong><br />
weight, height, and body proporti<strong>on</strong>s in different<br />
age groups. The three size categories are shown in<br />
Fig. 21-5 <strong>on</strong> page 362. Note that toddlers’ sizes<br />
include extra room to allow for diapers. Children’s<br />
sizes are designed for young children who are<br />
taller and more slender than toddlers, and no<br />
“diaper allowance” is included.<br />
Choosing the right size for a child can be c<strong>on</strong>fusing.<br />
D<strong>on</strong>’t go by the child’s age. Most children<br />
fit best in sizes that are larger than their actual<br />
21-4<br />
Around age four many children develop an inter-<br />
est in their clothes. When buying for them, you might<br />
first try to find out what they like.<br />
CHAPTER 21 Selecting Clothes for Others • 361
CATEGORY<br />
Infants<br />
Toddlers<br />
Children<br />
AGE RANGE<br />
Newborn to <strong>on</strong>e year<br />
One to three years<br />
Three to six years<br />
* Infants typically wear a size that is larger than their actual age.<br />
age. For example, <strong>on</strong> a baby’s first birthday, the<br />
child may wear an eighteen-m<strong>on</strong>th or twentyfour-m<strong>on</strong>th<br />
size. A two-year-old toddler might<br />
wear a size 3T or even 4T.<br />
Infants outgrow a size very quickly, so most<br />
people try to buy sizes they can grow into. You’ll<br />
need to think about the seas<strong>on</strong> when the garment<br />
will be worn in order to choose a suitable style<br />
and fabric.<br />
Safety<br />
Safety first is the rule for children’s clothing. A<br />
proper fit is basic to safety. Poorly fitting clothes<br />
that hinder movement, such as pants that are too<br />
l<strong>on</strong>g and dangling shoelaces, can cause stumbles<br />
and falls. Shoes that have Velcro fasteners and<br />
n<strong>on</strong>slip soles are safer. If l<strong>on</strong>g drawstrings <strong>on</strong><br />
hoods and flowing scarves catch in strollers, play<br />
equipment, or school-bus doors, they can cause<br />
strangulati<strong>on</strong>. Remove or replace these details<br />
before giving the item as a gift.<br />
Children learn by doing and testing. No<br />
inborn sense tells them not to put loose butt<strong>on</strong>s<br />
or trims in their mouth. Therefore, avoid butt<strong>on</strong>s,<br />
beads, sequins, and other decorati<strong>on</strong>s that are<br />
easily pulled off and swallowed. Adults must<br />
eliminate such potential choking hazards from<br />
the start.<br />
Another essential safety feature is flameretardant<br />
fabrics for children’s sleepwear. The<br />
Flammable Fabrics Act requires that sleepwear,<br />
size twelve m<strong>on</strong>ths and larger, be treated to prevent<br />
the fabric from burning quickly if acciden-<br />
362 • UNIT 6 Clothing Selecti<strong>on</strong><br />
21-5 • Size Categories for Children<br />
SIZES<br />
M<strong>on</strong>ths: 0-3, 6, 9, 12, 18, and 24*<br />
Other sizes: newborn, small, medium, large, extra-large (weight ranges usually<br />
<strong>on</strong> hangtag)<br />
2T, 3T, and 4T<br />
Females: 3, 4, 5, 6, and 6X<br />
Males: 3, 4, 5, 6, and 7<br />
tally ignited. Note that these garments are not<br />
fireproof. Be sure to follow care label instructi<strong>on</strong>s<br />
for laundering to retain the flame-retardant<br />
properties.<br />
Children also need more protecti<strong>on</strong> from<br />
weather than adults do. Small hats, mittens, and<br />
sunglasses make practical gifts. Hats may be a<br />
safer alternative to large hoods that can block a<br />
child’s view. See Fig. 21-6. Talented knitters can<br />
make some of these items themselves.<br />
Comfort<br />
Comfortable clothes encourage a child to move,<br />
play, and explore. Clothing should fit well, yet<br />
allow free movement. Popular choices for infants<br />
21-6<br />
A child’s hat protects sensitive skin while keep-<br />
ing sunshine out of the eyes.
and toddlers are <strong>on</strong>e-piece playsuits and overalls<br />
that fit easily over diapers. Simple dress styles that<br />
hang from the shoulders are also popular.<br />
Look for features that hold clothing in place.<br />
Straps that cross in the back, for example, are less<br />
likely to fall from the shoulders. Shoulder tabs <strong>on</strong><br />
shirts also hold straps.<br />
With their sensitive skin, babies, especially,<br />
need soft clothing. Cott<strong>on</strong> fabrics, which breathe<br />
well, help keep infants dry and comfortable.<br />
Stretchy knits provide freedom of movement<br />
without restricti<strong>on</strong>.<br />
Durability and Practicality<br />
Young children need well-made clothing<br />
suited for active lives. Firmly knitted or tightly<br />
woven fabrics, such as broadcloth, denim, and<br />
corduroy, are sturdy yet comfortable. Reinforcement<br />
at seams, knees of pants, and other points of<br />
wear help extend a garment’s life.<br />
For children, an active life is often messy. Their<br />
clothes encounter dirt, grass, food, formula, and<br />
colored markers. Many children become attached<br />
to a favorite piece of clothing. Every<strong>on</strong>e is happier<br />
when the item can be easily cleaned and quickly<br />
returned to the child.<br />
When buying a child’s garment, check hangtags<br />
and labels for fabric and care informati<strong>on</strong>. Note<br />
sturdy c<strong>on</strong>structi<strong>on</strong> that helps clothes stand up to<br />
repeated washings. If you’re sewing a garment,<br />
read the label <strong>on</strong> the end of the fabric bolt to find<br />
such words as “permanent press,” “soil retardant,”<br />
“stain repellent,” and “shrink resistant.”<br />
For ec<strong>on</strong>omy, clothing that “grows” with the<br />
child is best. Open necks and waists accommodate<br />
a child’s expanding measurements, plus<br />
they’re more comfortable. Adjustable straps and<br />
deep hem allowances are other features that<br />
lengthen an item’s useful life.<br />
Ease of Dressing<br />
Parents like clothing that’s easy to put <strong>on</strong> and<br />
take off, especially when changing a diaper.<br />
Helpful features include the following:<br />
• One-piece designs in stretchy knits.<br />
• Snaps or butt<strong>on</strong>s <strong>on</strong> the shoulder or fr<strong>on</strong>t of<br />
shirts and sweaters.<br />
• Gripper snaps <strong>on</strong> the inside leg seams of<br />
infants’ and toddlers’ pants.<br />
Older toddlers and preschoolers take pride in<br />
dressing themselves and caring for pers<strong>on</strong>al<br />
needs. To promote self-dressing, choose garments<br />
with these features:<br />
• Elastic waistbands.<br />
• Large neck and armhole openings.<br />
• Easy-to-handle closures, such as large butt<strong>on</strong>s<br />
and snaps, zippers with oversized pull tabs,<br />
and Velcro fasteners.<br />
• Openings and fasteners in fr<strong>on</strong>t, rather than in<br />
back.<br />
• Design features that help identify the fr<strong>on</strong>t<br />
from the back, such as a pocket, decorative<br />
stitching, or appliqué.<br />
• Shoes and sneakers with Velcro fasteners.<br />
Color and Texture<br />
Red and yellow are the first two colors a baby<br />
recognizes. This interest in bright colors, especially<br />
primary colors, carries over to a child’s<br />
clothing preferences. Bright, bold colors are stimulating.<br />
They also hide dirt better. A grape juice<br />
spill is less obvious <strong>on</strong> a purple sweatshirt than<br />
<strong>on</strong> a pale, lavender <strong>on</strong>e.<br />
Fashi<strong>on</strong><br />
CHILDREN’S CLOTHES IN<br />
HISTORY. Children’s clothing needs<br />
weren’t always recognized as they are<br />
today. Before the 1900s, children were<br />
dressed like miniature adults. Garments<br />
were simply scaled-down versi<strong>on</strong>s of adult<br />
clothing. Clothing of this time didn’t emphasize<br />
gender differences in children; both<br />
males and females wore dresses until about<br />
age three. Today, the children’s market is a<br />
vast, ec<strong>on</strong>omically important segment of<br />
the garment industry. Some designers have<br />
created entire fashi<strong>on</strong> lines for infants.<br />
Facts<br />
CHAPTER 21 Selecting Clothes for Others • 363
Why do you think young children are so f<strong>on</strong>d<br />
of stuffed animals like teddy bears? These toys are<br />
warm and comforting to cuddle and touch. The<br />
same is true of some clothing. Soft knits, flannel,<br />
corduroy, velveteen, fleece, and terrycloth are all<br />
fabrics that feel pleasant to a child’s touch.<br />
Since children eventually like to choose their<br />
own outfits, look for items that can be worn with<br />
what they already own. They’re more likely to put<br />
coordinating outfits together, which parents will<br />
appreciate.<br />
Computerized embroidery machines can<br />
stitch all types of embroidery designs. You<br />
can embroider Barney <strong>on</strong> a baby blanket<br />
or Elmo <strong>on</strong> pajamas for a child. You can<br />
embroider a m<strong>on</strong>ogram <strong>on</strong> a tote bag for<br />
your mother or a football player <strong>on</strong> a shirt<br />
for your father. All of these designs and<br />
more are available for purchase as software.<br />
When you buy embroidery software, you<br />
are not buying the designs themselves.<br />
You are buying a license to load the<br />
software <strong>on</strong>to a single computer or<br />
embroidery machine. Once loaded, you can<br />
stitch the designs <strong>on</strong> items that are for<br />
SELECTING MATERNITY<br />
WEAR<br />
When golfer Brenda Corrie Keuhn, eight<br />
m<strong>on</strong>ths pregnant, played in the 2001 U.S.<br />
Women’s Open, she couldn’t find clothing suitable<br />
for her c<strong>on</strong>diti<strong>on</strong>. Her most workable<br />
opti<strong>on</strong>, wearing men’s golf shirts, wasn’t very satisfying.<br />
As Brenda described the results, “I will<br />
not be making a fashi<strong>on</strong> statement.”<br />
Technology Trends<br />
>>EMBROIDERY DESIGNS AND COPYRIGHT LAWS<br />
your pers<strong>on</strong>al use or that you are giving<br />
away. You also can make <strong>on</strong>e backup copy<br />
of the disk for your pers<strong>on</strong>al use.<br />
The embroidery-software manufacturer<br />
owns the copyright to the designs. This<br />
means that you can’t duplicate the software<br />
to give a copy to a friend. In most<br />
cases, you can’t stitch the designs <strong>on</strong><br />
items that you plan to sell. Informati<strong>on</strong><br />
included with the embroidery software<br />
describes the copyright restricti<strong>on</strong>s.<br />
Embroidery software can be expensive.<br />
When an Internet site or <strong>on</strong>-line aucti<strong>on</strong><br />
offers these designs at a much lower<br />
price, the software has probably been<br />
copied, which is illegal. The Embroidery<br />
Software Protecti<strong>on</strong> Coaliti<strong>on</strong> m<strong>on</strong>itors<br />
such illegal activity. Both buyers and sellers<br />
have been prosecuted, and penalties<br />
are very serious.<br />
INVESTIGATE<br />
Embroidery designs are usually sold as a<br />
collecti<strong>on</strong> of 20 designs. What types of<br />
designs are available? What is the price<br />
range for a collecti<strong>on</strong>?
While most expectant mothers w<strong>on</strong>’t be in<br />
Keuhn’s positi<strong>on</strong>, they have similar needs in<br />
maternity clothes, those designed for wear by<br />
pregnant women. They want garments that are<br />
comfortable, functi<strong>on</strong>al, and fashi<strong>on</strong>able.<br />
Maternity Wear Features<br />
N<strong>on</strong>restrictive clothing is important throughout<br />
pregnancy. By allowing good blood circulati<strong>on</strong><br />
for the woman and the developing child,<br />
clothing promotes health as well as comfort. For<br />
the first half of pregnancy, a woman can often get<br />
by in any loose-fitting garment. Oversized shirts<br />
and sweaters, wrap skirts, stretch pants, and box<br />
jackets may combine the needed adjustability and<br />
comfort with the desired style.<br />
As pregnancy progresses, the advantages of<br />
specially designed maternity wear are appreciated.<br />
See Fig. 21-7. Maternity clothes are similar to regular<br />
women’s apparel but have features that<br />
accommodate the body’s changing shape. A<br />
woman takes the same size in both types of clothing.<br />
Maternity tops and dresses have pleats, gath-<br />
21-7<br />
At least a few maternity outfits need to be<br />
roomy enough to fit during the last stage of pregnancy.<br />
Not all maternity garments <strong>on</strong> the market are made to fit<br />
for the entire pregnancy.<br />
ers, or extra fullness in the fr<strong>on</strong>t. Pants, shorts, and<br />
skirts have an elasticized panel across the fr<strong>on</strong>t,<br />
al<strong>on</strong>g with an expandable waistband. Maternity<br />
clothes have lower hems in fr<strong>on</strong>t so garments will<br />
hang evenly <strong>on</strong> the expanding body.<br />
Current fashi<strong>on</strong>s influence maternity designs.<br />
Many try to minimize a woman’s expanding<br />
shape. Straight lines, as in tunic tops and leggings,<br />
give a slimming effect. Tops and dresses fit at the<br />
shoulder. Other designs emphasize the pregnancy<br />
with stretch fabrics and fitted bands beneath the<br />
abdomen.<br />
When buying maternity wear, remember that<br />
it will be needed for <strong>on</strong>ly four or five m<strong>on</strong>ths during<br />
the sec<strong>on</strong>d half of pregnancy. Look for styles<br />
and colors to fit the seas<strong>on</strong>s that the garment will<br />
be worn—fall into winter, for example, or spring<br />
into summer.<br />
Ec<strong>on</strong>omical Choices<br />
For those who choose to spend the m<strong>on</strong>ey, the<br />
opti<strong>on</strong>s for maternity clothing are as varied as for<br />
regular styles. Catalogs offer jumpers and pantsuits<br />
as work attire. Maternity athletic wear includes<br />
biking shorts, tennis dresses, and swimsuits.<br />
The high cost of new maternity clothes compared<br />
to their limited use bothers many pregnant<br />
women. Some find quality used garments in<br />
thrift or c<strong>on</strong>signment shops. Others borrow<br />
clothes from relatives or friends. Sewers can find<br />
patterns for maternity fashi<strong>on</strong>s in both dressy<br />
and casual designs.<br />
For added ec<strong>on</strong>omy, look for maternity clothes<br />
that can be restyled after the baby is born. Dresses<br />
that are worn loose during pregnancy might be<br />
belted to create a new look.<br />
CHAPTER 21 Selecting Clothes for Others • 365
CHOOSING CLOTHES FOR<br />
OLDER ADULTS<br />
Think of the best-known people in the world:<br />
political figures, religious leaders, famous<br />
authors, and scientists. Many of these active, vigorous<br />
people are in their sixties or bey<strong>on</strong>d. Even<br />
in retirement, people take new jobs and become<br />
involved in different activities.<br />
The ec<strong>on</strong>omic circumstances of older adults<br />
are quite varied. Those who are financially comfortable<br />
may be better able to buy what they<br />
need than they used to be. They may also have<br />
fewer needs. Those who live <strong>on</strong> fixed incomes,<br />
however, may have basic needs to be met. When<br />
buying gifts, think about specific situati<strong>on</strong>s.<br />
21-8<br />
A new interest can generate new clothing needs.<br />
For the retired traveler or jogger, an office wardrobe may<br />
be aband<strong>on</strong>ed for more casual clothes.<br />
366 • UNIT 6 Clothing Selecti<strong>on</strong><br />
Interests and Hobbies<br />
Older adults who maintain their health and a<br />
positive outlook may want clothes for new activities.<br />
Emerging interests in sports, travel, and volunteer<br />
work might suggest gift ideas for apparel<br />
they never needed before. See Fig. 21-8. A shirt or<br />
apr<strong>on</strong> with a berry print would be fitting for a<br />
home canner. A traveler might appreciate a tie<br />
with an old-world-map design or a vest with<br />
extra pockets. Museum shops, specialty stores,<br />
and craft fairs often have gift ideas.<br />
Tastes and Values<br />
Would you wear a garment designed for a tenyear-old,<br />
even if it fit? Like you, older adults typically<br />
want clothes that match their tastes and values.<br />
You can tell what they like by what they wear,<br />
so choosing similar styles and colors should be<br />
pleasing. Avoiding fads is best unless you’re aware<br />
of a special request. When in doubt, choose an<br />
accessory, such as a simple lapel pin or scarf that<br />
complements an existing outfit.<br />
Older adults especially value a handmade gift.<br />
Such gifts clearly show your regard for the pers<strong>on</strong>,<br />
which is often more meaningful to an older<br />
adult than to some<strong>on</strong>e younger.<br />
Physical Changes<br />
Aging brings c<strong>on</strong>tinual change as people move<br />
from the middle years and <strong>on</strong> into their seventies,<br />
eighties and nineties. See Fig. 21-9. Physical<br />
changes gradually appear. Did you ever notice an<br />
elderly pers<strong>on</strong> wearing a sweater <strong>on</strong> a warm day?<br />
Some people develop circulatory problems as<br />
they grow older. For this reas<strong>on</strong>, lightweight garments<br />
that can be layered make good gifts. A flannel<br />
shirt or cardigan sweater made of an acrylic<br />
blend, for instance, adds warmth with little<br />
weight. Warm slippers are also a good choice.<br />
With changes in pers<strong>on</strong>al coloring come new<br />
possibilities in clothing colors. The bright red<br />
that clashed with strawberry bl<strong>on</strong>d hair may<br />
complement silver hair. Clear colors and pastels<br />
brighten older skin, while brown and yellow<br />
shades tend to exaggerate any skin discolorati<strong>on</strong>.
21-9<br />
Finding clothes that fit well can become more<br />
difficult as people age. Standard sizes and styles d<strong>on</strong>’t<br />
always accommodate the physical changes that occur.<br />
Some elderly people have a rounded back,<br />
thinner arms and legs, or larger waist and hips<br />
than when they were younger. Purchased garments<br />
should be chosen with dimensi<strong>on</strong>s in<br />
mind and may need alterati<strong>on</strong>s for the best fit. If<br />
you’re sewing a garment for an elderly pers<strong>on</strong>,<br />
you may need to adjust some pattern dimensi<strong>on</strong>s.<br />
SELECTING CLOTHES FOR<br />
PEOPLE WITH DISABILITIES<br />
Could you dress yourself with a broken arm or<br />
leg? Would your clothes fit over the cast? When<br />
buying clothes, people with disabilities deal with<br />
similar questi<strong>on</strong>s. A disability is a c<strong>on</strong>diti<strong>on</strong> that<br />
hinders full functi<strong>on</strong>ing. A disability may be present<br />
at birth or acquired through illness or accident.<br />
Some older adults become disabled due to<br />
declining health.<br />
A physical disability restricts the movement or<br />
functi<strong>on</strong> of some part of the body. Such c<strong>on</strong>diti<strong>on</strong>s<br />
as arthritis weaken the physical abilities of<br />
some older people. Slipping <strong>on</strong> and butt<strong>on</strong>ing a<br />
shirt can be a painful, or even impossible, task.<br />
People with disabilities might use a wheelchair,<br />
walker, or crutches. See Fig. 21-10. They may wear<br />
a cast or brace. A lost arm or leg may be replaced<br />
by a prosthesis (prahs-THEE-sus), an artificial<br />
device used to replace a limb.<br />
Comfort and Appearance<br />
People with disabilities appreciate clothing<br />
features that add to comfort and appearance.<br />
Clothing styles and fabrics make a difference.<br />
For wheelchair users, an elasticized waistline,<br />
or n<strong>on</strong>e at all, is preferable. A higher rise in the<br />
back of shorts and slacks keeps the waistline in<br />
place. A lower rise in fr<strong>on</strong>t prevents the fabric<br />
from bunching up and creating a bulky look.<br />
Lightweight fabrics are preferable to heavy<br />
<strong>on</strong>es for wear in a wheelchair. These fabrics<br />
reduce bulk and can be layered if needed for<br />
warmth. Stretch and knitted fabrics offer added<br />
comfort, but clingy fabrics tend to emphasize<br />
braces and prostheses. Scratchy fabrics that irritate<br />
the skin are particularly troublesome to<br />
wheelchair users.<br />
21-10<br />
A disability can make getting dressed difficult.<br />
What clothing features would be best for some<strong>on</strong>e who<br />
uses a walker?<br />
CHAPTER 21 Selecting Clothes for Others • 367
Use of a walker or crutches makes it difficult to<br />
keep a blouse or shirt tucked in. L<strong>on</strong>g shirttails<br />
are <strong>on</strong>e soluti<strong>on</strong>. To eliminate the problem<br />
entirely, choose tunics, overblouses, sweaters, and<br />
other tops that look stylish over pants. When<br />
buying skirts and dresses, look for hems that are<br />
specially weighted to keep them from catching in<br />
a brace or prosthesis. This feature is also found in<br />
capes and p<strong>on</strong>chos, which are c<strong>on</strong>venient styles of<br />
outerwear for wheelchair users.<br />
Ease of Use<br />
Like all people, those managing with disabilities<br />
want to be self-sufficient. Clothes with appropriate<br />
fabrics are <strong>on</strong>e answer. For minimal care,<br />
choose washable fabrics that require little or no<br />
ir<strong>on</strong>ing. Since doing laundry can be challenging,<br />
clothes made with bright, colorful prints that<br />
d<strong>on</strong>’t show stains as easily as solids are a good<br />
choice. Because crutches and braces often rub<br />
against a garment, the fabric should be sturdy<br />
enough to handle the strain. Wheelchair users put<br />
c<strong>on</strong>tinual stress <strong>on</strong> the knees and seat of pants.<br />
These areas should be of sturdy c<strong>on</strong>structi<strong>on</strong>.<br />
Clothing that is easy to put <strong>on</strong> and take off also<br />
promotes self-sufficiency. See Fig. 21-11. Look for<br />
styles that fasten in fr<strong>on</strong>t, not in back. Raglan<br />
sleeves, wrap skirts, and pants with an elastic<br />
waistline are good choices. Clothes that are <strong>on</strong>e<br />
size larger can provide added comfort and ease of<br />
dressing.<br />
Manufacturers are beginning to resp<strong>on</strong>d to a<br />
growing market am<strong>on</strong>g people with disabilities.<br />
Some have created clothing lines that use adaptive<br />
design, which reduces the effort needed to put <strong>on</strong><br />
and take off garments and promotes independence.<br />
Adaptive features include the following:<br />
• Velcro closures “camouflaged” by butt<strong>on</strong>s<br />
that have been sewn <strong>on</strong>to butt<strong>on</strong>holes.<br />
• Pockets <strong>on</strong> shirtsleeves or at the knees, rather<br />
than the hips or seat of pants.<br />
• Lower and larger armholes.<br />
• Velcro tabs that adjust garments.<br />
• Pleats in armhole seams for freer arm moti<strong>on</strong>.<br />
• L<strong>on</strong>g zippers in legs so pants fit over a brace or<br />
cast.<br />
368 • UNIT 6 Clothing Selecti<strong>on</strong><br />
• Pre-tied neckties, belts with Velcro fasteners,<br />
and slip-<strong>on</strong> shoes.<br />
Customizing Garments<br />
Since not all garments are “user friendly,” a<br />
pers<strong>on</strong> with sewing skills can adapt ready-towear<br />
clothes. Sometimes a simple alterati<strong>on</strong> is all<br />
that’s needed. You could reinforce an area of<br />
strain by adding a fabric patch. Other customizing<br />
ideas are <strong>on</strong> page 369.<br />
For people who are visually impaired, textural<br />
cues can identify and match garments. You might<br />
mark a green sports shirt by replacing the plastic<br />
butt<strong>on</strong>s with wooden <strong>on</strong>es. Initials embroidered<br />
<strong>on</strong> a pocket distinguish a blue dress shirt. Small<br />
thread knots stitched to the inside of garments<br />
identify colors. One knot could mean red, two<br />
knots blue, and so <strong>on</strong>.<br />
21-11<br />
What types of garments would be easiest to put<br />
<strong>on</strong> and take off while seated in a wheelchair?
How To…<br />
CUSTOMIZE GARMENTS<br />
Simple clothing alterati<strong>on</strong>s can provide comfort and self-sufficiency for people with<br />
disabilities.<br />
• Hook-and-loop tape. One<br />
strip of this tape is covered<br />
with tiny hooks and the<br />
other with tiny loops.<br />
Velcro is a well-known<br />
brand. Although the tapes<br />
hold when pressed together,<br />
they pull apart easily. Use<br />
small pieces to replace snaps<br />
or butt<strong>on</strong>s. Use in l<strong>on</strong>ger<br />
strips to replace a zipper or<br />
provide an adjustable closing.<br />
By opening the seam <strong>on</strong><br />
pants or a sleeve and applying<br />
the tape, dressing over a<br />
cast or brace is easier. p 531<br />
• Elastic. Insert elastic at waistlines to help<br />
keep garments in place. Replace the waistband<br />
of a skirt or pants with a casing; insert<br />
a drawstring or elastic for added comfort.<br />
Replace shoelaces with elastic to eliminate<br />
tying. pp 527–529<br />
• Butt<strong>on</strong>s. Replace small butt<strong>on</strong>s with large,<br />
flat butt<strong>on</strong>s and enlarge the butt<strong>on</strong>holes.<br />
Use elastic thread to sew <strong>on</strong> butt<strong>on</strong>s at cuffs<br />
and other openings and eliminate unbutt<strong>on</strong>ing.<br />
p 534<br />
Exploring Customizati<strong>on</strong><br />
Using an old garment, practice <strong>on</strong>e of the customizati<strong>on</strong>s<br />
described, or adapt a garment for actual use if possible.<br />
• Large hooks. Replace small hooks and eyes<br />
with large metal hooks and bars. For an<br />
adjustable waistline, sew <strong>on</strong> two bars to<br />
accommodate weight changes or provide<br />
added comfort. pp 530–531<br />
• Zippers. Fasten a large ring or a ribb<strong>on</strong> loop<br />
to the zipper pull to make it easier to grasp<br />
and pull up or down. Replace a c<strong>on</strong>venti<strong>on</strong>al<br />
zipper with a two-way <strong>on</strong>e, so the garment<br />
can be opened from the top, bottom, or both.<br />
pp 535–536<br />
CHAPTER 21 Selecting Clothes for Others • 369
CHAPTER 21<br />
CHAPTER SUMMARY<br />
• Gifts of clothing are most appreciated<br />
when they reflect the recipient’s needs and<br />
tastes.<br />
• Clothes for children should be safe, comfortable,<br />
durable, and brightly colored.<br />
They should also promote self-dressing.<br />
• Maternity wear should be flattering, while<br />
accommodating a woman’s changing<br />
shape.<br />
• Older adults have a wide range of needs,<br />
interests, and abilities. Clothing should<br />
be carefully chosen for each pers<strong>on</strong>’s<br />
situati<strong>on</strong>.<br />
• Self-sufficiency, as well as comfort and<br />
appearance, are important factors when<br />
choosing or customizing clothes for some<strong>on</strong>e<br />
with a disability.<br />
USING KEY TERMS<br />
One of the Key Terms, adaptive design, is discussed<br />
in relati<strong>on</strong> to disabilities. Clothing for<br />
elderly people could also have adaptive<br />
designs. Think of specific problems with<br />
mobility that an elderly adult might have.<br />
Then draw an adaptive design of your own<br />
that would suitably address these problems.<br />
370 • UNIT 6 Clothing Selecti<strong>on</strong><br />
Review<br />
RECALLING THE FACTS<br />
1. How can you get ideas for clothing gifts<br />
for a particular pers<strong>on</strong>?<br />
2. Must a clothing gift be expensive to be<br />
appreciated? Explain.<br />
3. Why is buying the correct size for an<br />
infant or child often difficult?<br />
4. Identify general features that promote<br />
safety in young children’s clothes.<br />
5. Why is ease of cleaning particularly<br />
important in children’s clothing?<br />
6. Name four design features that help promote<br />
self-dressing in preschoolers.<br />
7. How do maternity clothes accommodate<br />
a woman’s expanding middle?<br />
8. Suggest ec<strong>on</strong>omical opti<strong>on</strong>s for clothing<br />
gifts for a pregnant woman.<br />
9. What changes might an older pers<strong>on</strong><br />
experience that would affect his or her<br />
clothing needs?<br />
10. Describe clothing features that would be<br />
especially appreciated by some<strong>on</strong>e who<br />
uses a wheelchair.<br />
11. What special features would you look for<br />
when choosing clothes for a pers<strong>on</strong> who<br />
uses a walker or braces?<br />
12. List five examples of adaptive design.<br />
13. What simple customizati<strong>on</strong> can help<br />
a visually impaired pers<strong>on</strong> identify<br />
clothing?
and Activities<br />
THINKING CRITICALLY<br />
1. In some families, people make lists of<br />
gifts they would like to have, and then<br />
share these at gift-giving times. Some<br />
people think the giver should make the<br />
choice and surprise the recipient. Explain<br />
your point of view.<br />
2. How could a pregnant woman extend the<br />
time for wearing her regular clothes in<br />
the early m<strong>on</strong>ths of pregnancy? Give<br />
specific examples.<br />
3. Do you think an elderly pers<strong>on</strong> can comfortably<br />
wear the same clothing designs<br />
that people twenty or more years<br />
younger wear? Why or why not?<br />
APPLYING KNOWLEDGE<br />
1. Gifts. List gifts that you could buy or<br />
make for a friend or relative, using suggesti<strong>on</strong>s<br />
from the chapter. Ask that pers<strong>on</strong><br />
to evaluate your choices.<br />
2. Reference cards. Fill out index cards<br />
with informati<strong>on</strong> about family members<br />
and friends. Include sizes, interests, and<br />
pers<strong>on</strong>al needs and tastes. Update these<br />
with gift ideas as they come to mind.<br />
Keep your file as a reference when buying<br />
gifts.<br />
3. Children’s clothes. Using catalogs, magazines,<br />
or the Internet, analyze children’s<br />
clothing for ease of dressing, safety,<br />
comfort, wearability, and care. Report<br />
your findings in a chart.<br />
CHAPTER 21<br />
4. Maternity wardrobe. Using catalogs,<br />
magazines, or the Internet, put together<br />
a basic maternity wardrobe for a woman<br />
who lives in the Midwest, has a limited<br />
budget, and will be pregnant from<br />
January through September. List the<br />
different factors to c<strong>on</strong>sider when<br />
developing this wardrobe.<br />
MAKING>
<str<strong>on</strong>g>Care</str<strong>on</strong>g>ers<br />
Fashi<strong>on</strong> Merchandising<br />
Walking between the racks of<br />
dresses, a stylish-looking woman glances at<br />
each <strong>on</strong>e, her eyes darting quickly over the<br />
garments. She stops to examine the fabric<br />
of a colorful, patterned dress. “Why do you<br />
think this <strong>on</strong>e isn’t selling?” she asks the sales associate.<br />
Because the woman is the buyer for the department,<br />
the answer is important to her. Like other professi<strong>on</strong>als<br />
in the fashi<strong>on</strong> merchandising field, she pays<br />
close attenti<strong>on</strong> to what the store’s customers buy. She<br />
knows that retailing is a very competitive field.<br />
Fashi<strong>on</strong> merchandising is part of the huge retail<br />
industry that sells goods to c<strong>on</strong>sumers. Fashi<strong>on</strong>s are<br />
sold in stores, as well as through catalogs and the<br />
Internet.<br />
<str<strong>on</strong>g>Care</str<strong>on</strong>g>ers in fashi<strong>on</strong> merchandising are varied.<br />
People must plan what to sell, buy the merchandise,<br />
and then do the selling. Those in management positi<strong>on</strong>s<br />
oversee others and make high-level decisi<strong>on</strong>s. In<br />
a small store, <strong>on</strong>e pers<strong>on</strong> might have varied resp<strong>on</strong>sibilities.<br />
In a large store or a chain, careers tend to be<br />
specialized. Because many stores are open at night<br />
and <strong>on</strong> weekends, hours can be flexible. Technology is<br />
part of most positi<strong>on</strong>s. People use scanners to track<br />
inventory, software to plan shelf space, and informati<strong>on</strong><br />
systems to run Web sites. Fashi<strong>on</strong> merchandising<br />
offers career possibilities for people with wide-ranging<br />
interests and talents.<br />
372 • UNIT 6 Clothing Selecti<strong>on</strong><br />
Outstanding sales associates, who help<br />
customers choose and buy merchandise,<br />
are valued in business. What do you think<br />
it takes for a sales associate to be helpful<br />
but not pushy?<br />
IS THIS FIELD FOR YOU?<br />
Merchandising jobs are people-oriented. They are<br />
also high-pressure and often stress-filled. People<br />
who excel in the field generally identify with the<br />
statements below.<br />
• I’m very interested in fashi<strong>on</strong>.<br />
• I tend to lead rather than follow.<br />
• I can “roll with the punches.”<br />
• I enjoy learning different skills.<br />
• I’m interested in working with others.<br />
• I see new technology as an asset.
Educati<strong>on</strong> and Training<br />
A job as a sales associate or stock clerk is a good<br />
start to a career in retailing. Hours can be flexible and<br />
part-time, which works well for those still in school.<br />
As entry-level positi<strong>on</strong>s, these jobs reveal how a store<br />
operates “from the ground up.”<br />
Educati<strong>on</strong> after high school makes promoti<strong>on</strong><br />
more likely. A two- or four-year degree from a college<br />
or business school is advisable, with course work in<br />
communicati<strong>on</strong>, finance, marketing, merchandising,<br />
and informati<strong>on</strong> systems. For a career in management,<br />
a university degree—perhaps in retailing—plus<br />
business administrati<strong>on</strong> courses is a good plan.<br />
Getting a degree may make a pers<strong>on</strong> eligible for an<br />
executive training program, offered by many large<br />
retailers. A pers<strong>on</strong> gains experience in all areas of a<br />
retailer’s operati<strong>on</strong>, qualifying for a little higher positi<strong>on</strong><br />
<strong>on</strong> the career ladder. Starting as a retail management<br />
trainee rather than a sales associate or as an<br />
assistant buyer instead of a stock clerk is possible.<br />
Possible <str<strong>on</strong>g>Care</str<strong>on</strong>g>er Paths<br />
Although few people rise from stock clerk to company<br />
president, advancement is encouraged. Most<br />
companies find that promoting from within is more<br />
effective, less expensive, and increases employees’<br />
incentive to succeed.<br />
Imagine being the buyer for a<br />
large department store. The<br />
jewelry you like best might not<br />
be right for the store. How<br />
would you choose jewelry and<br />
other items that customers will<br />
like?<br />
THE SKILLS YOU NEED<br />
People in fashi<strong>on</strong> merchandising do well<br />
when they have the skills below.<br />
• Interpers<strong>on</strong>al communicati<strong>on</strong><br />
• Organizati<strong>on</strong><br />
• Management<br />
• Decisi<strong>on</strong> making and problem solving<br />
• Mathematical ability<br />
• Analytical thinking<br />
• Mental and physical stamina<br />
Merchandising careers tend to follow either a fashi<strong>on</strong><br />
or business path. An assistant buyer learns the job<br />
from a head buyer and can advance to that positi<strong>on</strong><br />
when the head buyer is promoted to merchandise<br />
manager. Likewise, after designing window and instore<br />
displays for a few years, a display artist may join<br />
the fashi<strong>on</strong> office staff and eventually become fashi<strong>on</strong><br />
director for the entire store. Of course, crossing<br />
career lines is not uncomm<strong>on</strong>. A display artist may<br />
grow interested in sales promoti<strong>on</strong>, someday becoming<br />
a vice president in that divisi<strong>on</strong>.<br />
UNIT 6 Clothing Selecti<strong>on</strong> • 373
Choosing a Fashi<strong>on</strong><br />
Merchandising <str<strong>on</strong>g>Care</str<strong>on</strong>g>er<br />
BUYER | CUSTOMER SERVICE REPRESENTATIVE | DEPARTMENT MANAGER<br />
| FASHION COORDINATOR | MERCHANDISE MANAGER | PRODUCT<br />
DEVELOPER | SALES ASSOCIATE | STOCK CLERK | STORE MANAGER<br />
Stock Clerk ____<br />
Stock clerks manage the merchandise in stock<br />
rooms and <strong>on</strong> sales floors. In this entry-level positi<strong>on</strong>,<br />
they support the sales staff by restocking the<br />
shelves, tables, and racks with merchandise. Stock<br />
clerks may gather clothes from fitting rooms and<br />
return them to the sales area. They may attach<br />
security tags to expensive items.<br />
In larger stores, as well as mail-order and<br />
Internet businesses, stock clerks may be inventory<br />
clerks or merchandise distributors. Behind the<br />
scenes, they help the shipping clerk unpack and<br />
inspect merchandise when it arrives. They set aside<br />
damaged goods for the store’s buyer to examine.<br />
Although c<strong>on</strong>veyor belts and automatically guided<br />
vehicles are increasingly used, this work can be<br />
physically demanding.<br />
Sales Associate __<br />
Sales associates and sales specialists ring up<br />
sales, rehang clothes, and assist customers. A<br />
good sales associate is familiar enough with the<br />
store’s merchandise to help customers find what<br />
they want and make choices.<br />
Shoppers can be pleasant or unpleasant, but a<br />
good sales associate remains polite and helpful.<br />
Those who work <strong>on</strong> commissi<strong>on</strong>, earning a percentage<br />
of the clothing’s price, benefit by a positive<br />
attitude. Since the retail business is very competitive,<br />
a likable, competent sales staff is needed to<br />
help a store build loyal customers.<br />
374 • UNIT 6 Clothing Selecti<strong>on</strong><br />
Buyer _______<br />
A store’s success depends heavily <strong>on</strong> the<br />
buyer’s fashi<strong>on</strong> foresight. This is the pers<strong>on</strong> who<br />
selects and purchases what the retailer sells. While<br />
you’re looking at what’s trendy now, the buyer is<br />
trying to predict what will be popular next seas<strong>on</strong>.<br />
To make predicti<strong>on</strong>s, buyers do research. They<br />
review industry publicati<strong>on</strong>s and Web sites and<br />
keep a lookout for trends in the making. Another<br />
predicti<strong>on</strong> tool is sales analysis. <str<strong>on</strong>g>Care</str<strong>on</strong>g>ful interpretati<strong>on</strong>s<br />
can indicate where changes are happening.<br />
Buyers travel regularly to market weeks in New<br />
York City, Paris, and other major cities to visit the<br />
showrooms of designers and manufacturers. There<br />
they can see what’s new and place orders for<br />
future deliveries.<br />
Fashi<strong>on</strong> coordinators stay up-to-date <strong>on</strong><br />
fashi<strong>on</strong>. These professi<strong>on</strong>als work with<br />
different departments so that decisi<strong>on</strong>s<br />
about buying, advertising, display, and<br />
promoti<strong>on</strong> are “coordinated.”
Fashi<strong>on</strong><br />
Coordinator ___<br />
Each retailer has a fashi<strong>on</strong> pers<strong>on</strong>ality, an image<br />
to present to the public. Compare the pers<strong>on</strong>alities<br />
of a trendy boutique and family-oriented department<br />
store, for example. Upholding this image is<br />
the task of the fashi<strong>on</strong> office, and especially its<br />
head, an upper-level executive called the fashi<strong>on</strong><br />
coordinator.<br />
The fashi<strong>on</strong> coordinator travels to designers’<br />
showings and textile mills, reads trade publicati<strong>on</strong>s,<br />
and taps other sources to learn about the latest<br />
fashi<strong>on</strong> trends. This informati<strong>on</strong> is shared with the<br />
buyers, department managers, merchandise managers,<br />
and advertising and display departments.<br />
The result is a comm<strong>on</strong> theme or image that unites<br />
every department of the store.<br />
Orchestrating fashi<strong>on</strong> shows is another resp<strong>on</strong>sibility<br />
of coordinators. A fashi<strong>on</strong> coordinator’s<br />
work is demanding but very appealing to many.<br />
Merchandise<br />
Manager _____<br />
Merchandise managers focus <strong>on</strong> the sales performance<br />
of <strong>on</strong>e or more departments. In this role,<br />
they oversee and approve the decisi<strong>on</strong>s of buyers<br />
who report to them.<br />
Merchandise managers must understand market<br />
trends, sales projecti<strong>on</strong>s, and the retailer’s fashi<strong>on</strong><br />
image. Competiti<strong>on</strong> demands that these managers<br />
be creative in coming up with new merchandise and<br />
promoti<strong>on</strong>s that will increase sales. They often<br />
travel with buyers to markets and always authorize<br />
their budget. This career has a high level of resp<strong>on</strong>sibility,<br />
but the financial rewards can be good for<br />
some<strong>on</strong>e who is well organized and energetic.<br />
In working with a buyer, the<br />
merchandise manager guides<br />
decisi<strong>on</strong>s about what items<br />
the store will sell.<br />
CAREER APPLICATIONS<br />
1. Pros and c<strong>on</strong>s. Before choosing a career,<br />
think about the pros and c<strong>on</strong>s. What would the<br />
positive and negative sides of a career in sales<br />
be? List points under each. Then explain why<br />
that would or would not be a suitable career<br />
field for you.<br />
2. FCCLA. Plan a Chapter Service Project <strong>on</strong> balancing<br />
work and family life. Through interviews<br />
and library research, study merchandising company<br />
policies <strong>on</strong> pers<strong>on</strong>al days and child care.<br />
Talk to families about how they handle time<br />
demands. Compile your findings <strong>on</strong> the problems,<br />
soluti<strong>on</strong>s, and resources.<br />
3. Professi<strong>on</strong>alism. Choose <strong>on</strong>e of the careers<br />
described here. Then give examples of how people<br />
in that career might dem<strong>on</strong>strate the following<br />
qualities: h<strong>on</strong>esty, reliability, fairness, cooperati<strong>on</strong>,<br />
self-discipline, and loyalty.<br />
UNIT 6 Clothing Selecti<strong>on</strong> • 375
UNIT 7<br />
The<br />
Workplace<br />
376 • UNIT 7 The Workplace
CHAPTERS<br />
22 <str<strong>on</strong>g>Care</str<strong>on</strong>g>er Preparati<strong>on</strong><br />
23 Success <strong>on</strong> the Job<br />
24 Fashi<strong>on</strong> Entrepreneurs<br />
25 Global Marketplace<br />
FEATURE<br />
Communicati<strong>on</strong> and<br />
Educati<strong>on</strong> <str<strong>on</strong>g>Care</str<strong>on</strong>g>ers<br />
377
CHAPTER 22<br />
<str<strong>on</strong>g>Care</str<strong>on</strong>g>er Preparati<strong>on</strong><br />
OBJECTIVES<br />
• Evaluate your<br />
interests and<br />
skills.<br />
• Research career<br />
paths.<br />
• Compare sources<br />
of informati<strong>on</strong><br />
about jobs.<br />
• Describe the<br />
steps in applying<br />
for a job.<br />
KEY TERMS<br />
applicati<strong>on</strong> form<br />
aptitude<br />
career path<br />
cover letter<br />
entry-level job<br />
interview<br />
networking<br />
portfolio<br />
references<br />
résumé<br />
shadowing<br />
378 • UNIT 7 The Workplace
EXAMINETHISISSUE<br />
Relating school to work. Some<br />
teens w<strong>on</strong>der how their high school<br />
classes relate to the real world of work.<br />
They d<strong>on</strong>’t see how they will use their<br />
studies in the future. Other teens see<br />
c<strong>on</strong>necti<strong>on</strong>s. They believe that learning<br />
builds basic skills and a knowledge<br />
base and that both of these prepare a<br />
pers<strong>on</strong> for more learning and greater<br />
job success.<br />
What do you think?<br />
How do you think high school classes<br />
impact a pers<strong>on</strong>’s future?<br />
As your high school years draw<br />
closer to an end, the future becomes more<br />
of a reality. Are your career plans coming<br />
together? If you’re not sure what career is ahead<br />
for you, now is a good time to explore. Some<br />
careers, including many in the fashi<strong>on</strong> field, may<br />
not have occurred to you as opti<strong>on</strong>s. Would you<br />
like to design clothing, own a fabric store, or be a<br />
store buyer? Taking acti<strong>on</strong> now can help you find<br />
a career and get your future off to a good start.<br />
KNOWING YOURSELF<br />
Have you ever heard a pers<strong>on</strong> say, “I always<br />
knew what I wanted to be”? Most people are<br />
more likely to know what they like to do and<br />
choose a career based <strong>on</strong> those interests. What do<br />
you like to do? What do you do well? Simple<br />
awareness of aptitude, or natural talent and<br />
capacity for learning particular skills, is a good<br />
place to begin when searching for the right career.<br />
Identifying Interests and Skills<br />
To identify your interests and skills, look<br />
closely at yourself for answers. In school, the<br />
classes you like best indicate interests. A future<br />
fashi<strong>on</strong> writer might enjoy language arts more<br />
than science, whereas a love of science might lead<br />
to a career as a textile chemist. See Fig. 22-1.<br />
Leisure activities also offer clues to interests.<br />
Some<strong>on</strong>e who likes to update a home Web site<br />
might choose a career maintaining a catalog company’s<br />
Web site. A love of sewing or other crafts<br />
could lead to a career in designing, manufacturing,<br />
or merchandising. Another clue is a preference<br />
for solitary or group activities. Some career<br />
fields, such as research and graphic arts, involve<br />
lots of independent work. Sales and marketing<br />
careers require much more interacti<strong>on</strong> with customers<br />
and coworkers.<br />
To identify skills, look at school accomplishments.<br />
Getting good grades in math, for example,<br />
takes more than memorizing formulas. Students<br />
must organize informati<strong>on</strong>, see relati<strong>on</strong>ships, and<br />
apply principles. Success with writing and art<br />
shows creativity. Students who do well in science<br />
classes enjoy experiments, evaluati<strong>on</strong>s, and analyses.<br />
When students succeed in clothing, fabrics,<br />
and c<strong>on</strong>structi<strong>on</strong> courses, they show sewing skills<br />
and knowledge of design and fashi<strong>on</strong>. <str<strong>on</strong>g>Care</str<strong>on</strong>g>er success<br />
is more likely when pers<strong>on</strong>al skills relate to<br />
the work.<br />
22-1<br />
Your interests and skills reveal much about you.<br />
Why would it be a good idea to match them to your<br />
career?<br />
CHAPTER 22 <str<strong>on</strong>g>Care</str<strong>on</strong>g>er Preparati<strong>on</strong> • 379
Accomplishments outside of school also point<br />
to skills. What achievements have made you<br />
proud? One teen redecorated her bedroom with a<br />
unique look. Another received compliments<br />
about his photography. Accomplishments like<br />
these show skills that give career ideas.<br />
Even when you d<strong>on</strong>’t recognize your own skills,<br />
some<strong>on</strong>e else might. Turn to people you respect<br />
and who know you well. A teen might be good at<br />
telling amusing stories, but not realize that talent<br />
as a communicator until a friend menti<strong>on</strong>s it.<br />
To identify your skills, think positive. Remember<br />
that no <strong>on</strong>e is “average” in everything. When<br />
you look closely, you can always find things that<br />
you like to do and that you do well.<br />
Interest Surveys<br />
When interests and skills aren’t clearly apparent,<br />
special tools can help. Special surveys identify<br />
interests and skills through a pers<strong>on</strong>’s resp<strong>on</strong>ses<br />
22-2<br />
Decisi<strong>on</strong> making<br />
Leadership<br />
380 • UNIT 7 The Workplace<br />
to carefully c<strong>on</strong>structed questi<strong>on</strong>s. They might<br />
c<strong>on</strong>firm what you already know about yourself or<br />
suggest something new. The results are then<br />
related to certain jobs. Interest surveys aren’t<br />
foolproof, but they give a better idea of what your<br />
abilities are and where they might take you.<br />
Such surveys are am<strong>on</strong>g the resources available<br />
from career counselors. These professi<strong>on</strong>als guide<br />
people in exploring interests and skills and<br />
choosing a line of work. High school guidance<br />
counselors also administer and interpret surveys.<br />
Some schools have interactive software programs<br />
to help students discover their interests, preferences,<br />
and skills.<br />
Developing Skills<br />
With a clear picture of your interests and skills,<br />
you can refine and develop them. If art and clothing<br />
courses awaken an interest in fashi<strong>on</strong> and<br />
Employers want these skills in an employee. In what high school classes are you learning them? Where else can<br />
you develop them?<br />
Science<br />
applicati<strong>on</strong>s<br />
Reading and<br />
writing<br />
Technology<br />
Math<br />
applicati<strong>on</strong>s<br />
SCHOOL-TO-CAREER SKILLS<br />
Listening and<br />
speaking<br />
Goal setting<br />
Management<br />
Problem<br />
solving<br />
Teamwork<br />
Critical<br />
thinking
1. Agriculture & Natural Resources<br />
2. Arts, Audio-Visual Technology &<br />
Communicati<strong>on</strong><br />
3. Business & Administrative Services<br />
4. C<strong>on</strong>structi<strong>on</strong><br />
22-3<br />
drawing, signing up for more classes makes good<br />
sense. A search of community resources might<br />
reveal added opportunities—exhibits at an art<br />
museum, a selecti<strong>on</strong> of useful books at the<br />
library, or a part-time job at a clothing store.<br />
School activities help a teen learn and grow. A<br />
budding fashi<strong>on</strong> writer gains insight by working<br />
<strong>on</strong> the school paper and learning about deadlines<br />
and editorial decisi<strong>on</strong>s. Joining the debate club<br />
builds c<strong>on</strong>fidence in public speaking, a real asset<br />
to a fashi<strong>on</strong> designer who presents a new collecti<strong>on</strong><br />
to a manufacturer.<br />
Academics should never be overlooked. Skills<br />
developed in math, science, and language arts<br />
classes affect performance <strong>on</strong> any job. Helping a<br />
customer find just the right item may take analytical<br />
skills gained in science, problem-solving<br />
techniques learned in math, and communicati<strong>on</strong><br />
skills acquired in language arts. Computer experience—in<br />
word processing, databases, spreadsheets,<br />
desktop publishing, and Internet<br />
research—is valuable in every field. Fig. 22-2 lists<br />
a number of skills that are learned in school and<br />
valued by employers.<br />
RESEARCHING CAREER<br />
PATHS<br />
Once you’ve pinpointed your interests and<br />
skills, look for careers that match. Focusing <strong>on</strong><br />
<strong>on</strong>e or two career clusters narrows your search<br />
more quickly. Each cluster is a group of careers<br />
with similar characteristics. See Fig. 22-3.<br />
By studying a cluster, you can learn where to<br />
begin a career path that links a series of related<br />
<str<strong>on</strong>g>Care</str<strong>on</strong>g>er Clusters<br />
The U.S. Department of Educati<strong>on</strong> has grouped careers into 16 clusters based <strong>on</strong> similar job characteristics. Which<br />
areas appeal to you?<br />
5. Educati<strong>on</strong> & Training Services<br />
6. Financial Services<br />
7. Health Science<br />
8. Hospitality & Tourism<br />
9. Human Services<br />
10. Informati<strong>on</strong> Technology Services<br />
11. Legal & Protective Services<br />
12. Manufacturing<br />
13. Government & Public Administrati<strong>on</strong><br />
14. Retail/Wholesale Sales & Service<br />
15. Scientific—Research, Engineering &<br />
Technical Services<br />
16. Transportati<strong>on</strong>—Distributi<strong>on</strong> &<br />
Logistics Services<br />
jobs within a field of work. You can find out what<br />
experience, educati<strong>on</strong>, and training it takes to<br />
move from <strong>on</strong>e job to another toward your ultimate<br />
goal.<br />
The Internet can start your career research.<br />
Using a search engine, type in a job title to obtain<br />
a list of sources. More informati<strong>on</strong> <strong>on</strong> Internet<br />
job searches occurs later in this chapter. School<br />
guidance counselors are another resource for<br />
informati<strong>on</strong> about the job market and the educati<strong>on</strong><br />
and training needed for careers.<br />
Learning About Training and<br />
Educati<strong>on</strong><br />
Can you name a job that doesn’t require some<br />
type of specialized knowledge? Doing a job well<br />
takes certain skills, whether it’s moving cart<strong>on</strong>s<br />
without hurting your back or developing a new<br />
fiber.<br />
Some jobs are entry-level—little or no special<br />
training or experience is needed. Learning <strong>on</strong> the<br />
job is typical. For many other positi<strong>on</strong>s, you’ll<br />
need training or educati<strong>on</strong>, as shown in Fig. 22-4<br />
<strong>on</strong> page 382. The farther you travel al<strong>on</strong>g a career<br />
path, the more educati<strong>on</strong> or training you’ll need.<br />
In researching educati<strong>on</strong> and training, you’ll<br />
want answers to such questi<strong>on</strong>s as these: What<br />
schools offer a program for the career that interests<br />
you? How l<strong>on</strong>g does the program last? What<br />
is the cost and is financial assistance available?<br />
Your counselor can help you find informati<strong>on</strong><br />
<strong>on</strong> schools. If you wish, c<strong>on</strong>tact a college or university<br />
directly to get brochures and catalogs<br />
about programs and admissi<strong>on</strong> requirements. If<br />
CHAPTER 22 <str<strong>on</strong>g>Care</str<strong>on</strong>g>er Preparati<strong>on</strong> • 381
TRAINING OR EDUCATION<br />
High school educati<strong>on</strong><br />
Technical training<br />
University degree: bachelor’s<br />
University degree: master’s and bey<strong>on</strong>d<br />
you want training, c<strong>on</strong>tact a counselor at a technical<br />
school or community college that offers a<br />
program of interest. Ask where some of their<br />
graduates are employed. What type of career<br />
placement, or help in finding jobs, do they offer?<br />
Many states have tech-prep programs that link<br />
high school and community college courses. The<br />
programs have also formed partnerships with<br />
community businesses and industries. Courses<br />
are coordinated to help students move from high<br />
school, to community colleges, to highly skilled<br />
careers.<br />
Talking to Others<br />
For a real-life look at a job, experienced people<br />
are a good resource. If approached politely and at<br />
their c<strong>on</strong>venience, many people are happy to talk<br />
about their work. Ask about typical daily tasks.<br />
Do they work a standard eight-hour day, or are<br />
weekends, evenings, and overtime included? Does<br />
the job require travel? Are the trips l<strong>on</strong>g or short,<br />
frequent or occasi<strong>on</strong>al, in the United States or<br />
abroad? What school subjects are most useful in<br />
the job? What career paths do they suggest?<br />
Where will you find opportunities in the field?<br />
If possible, arrange to spend a few hours or a<br />
whole day shadowing a worker, accompanying<br />
the pers<strong>on</strong> to learn about job resp<strong>on</strong>sibilities.<br />
This experience can help you see firsthand<br />
whether the career suits you.<br />
382 • UNIT 7 The Workplace<br />
22-4 • Training and Educati<strong>on</strong> Needed for <str<strong>on</strong>g>Care</str<strong>on</strong>g>ers<br />
DESCRIPTION<br />
Four years of high school.<br />
Provided at community college, technical or<br />
vocati<strong>on</strong>al school; courses last few m<strong>on</strong>ths<br />
to several years.<br />
Four years of course work at college or university;<br />
may need specializati<strong>on</strong> in a certain<br />
subject.<br />
Additi<strong>on</strong>al years bey<strong>on</strong>d bachelor’s degree;<br />
course work at college or university.<br />
CAREER EXAMPLES<br />
Sales associate; assembly-line worker; entrylevel<br />
positi<strong>on</strong>s.<br />
Patternmaker; textile machine technician;<br />
dry cleaner.<br />
Retail buyer, public relati<strong>on</strong>s specialist, market<br />
analyst; family and c<strong>on</strong>sumer sciences<br />
teacher.<br />
Textile chemist; envir<strong>on</strong>mental engineer.<br />
Getting Part-Time Experience<br />
Working part-time teaches you about a career<br />
“from the inside out.” Many part-time jobs for<br />
teens are opportunities for career explorati<strong>on</strong>. A<br />
sales associate in a clothing store, for example,<br />
learns about retailing: how buying decisi<strong>on</strong>s are<br />
made; the costs of operating a business; the c<strong>on</strong>cerns<br />
of management. Working in a large department<br />
store gives <strong>on</strong>e view of the industry; working<br />
in a small shoe store offers another. The<br />
experienced people you work with can advise and<br />
teach you. They might even be sources for job<br />
informati<strong>on</strong> later. Equally important, you can<br />
learn whether a job is not for you before investing<br />
time, effort, and expense.<br />
Volunteer work is another valuable experience.<br />
What might you learn as a guide at an art<br />
museum? What skills do you gain by teaching<br />
young children to sew or helping a charity with its<br />
benefit fashi<strong>on</strong> show? For many people, volunteer<br />
work has been the first step <strong>on</strong> their career path.<br />
LOOKING FOR A JOB<br />
To learn what hunting for a job is like, ask<br />
people who’ve d<strong>on</strong>e it. Each story is likely to be<br />
different. Most people agree, however, that you<br />
need to be resourceful and patient and to keep<br />
trying. Whether you’re looking for a part-time<br />
job or a career positi<strong>on</strong>, job-hunting techniques<br />
are similar.
Many job ideas come through networking,<br />
talking to people to gather informati<strong>on</strong> and<br />
advice. Word of mouth can be a swift and efficient<br />
messenger. Tell family, neighbors, teachers,<br />
counselors, friends, parents of friends, and<br />
friends of parents that you’re looking.<br />
Check the classified ads in the newspaper, looking<br />
for job listings. The Sunday editi<strong>on</strong> usually<br />
carries an expanded secti<strong>on</strong>. Small businesses<br />
often advertise openings in weekly community<br />
newspapers. Part-time jobs may be listed under a<br />
separate heading or scattered throughout the listings.<br />
Keep your eyes open for “Help Wanted” signs<br />
at businesses or <strong>on</strong> community bulletin boards.<br />
You can search the Internet for jobs in all<br />
career areas. The informati<strong>on</strong> below explains<br />
how.<br />
Read all print and <strong>on</strong>-line ads carefully, watching<br />
for words and phrases that identify entrylevel<br />
jobs. “Trainee,” “growth opportunity,” and<br />
“must have desire to learn” are clues. Also, compare<br />
names, addresses, and ph<strong>on</strong>e numbers to<br />
make sure you’re not looking at differently<br />
worded ads for the same positi<strong>on</strong>.<br />
If you’re interested in working for a particular<br />
employer, find the name of a c<strong>on</strong>tact pers<strong>on</strong>.<br />
With large companies you may be told to call or<br />
write to their human resources department. Let<br />
Technology Trends<br />
>>JOB SEARCH VIA THE INTERNET<br />
Using the Internet, you can view job<br />
listings, research career opportunities,<br />
and even send your résumé electr<strong>on</strong>ically.<br />
Web sites are sp<strong>on</strong>sored by the U.S.<br />
Department of Labor, large companies,<br />
trade associati<strong>on</strong>s, and professi<strong>on</strong>al<br />
organizati<strong>on</strong>s. Valuable <strong>on</strong>-line resources<br />
by the Department of Labor include the:<br />
• <str<strong>on</strong>g>Care</str<strong>on</strong>g>er Guide to Industries which covers<br />
occupati<strong>on</strong>s in many different industries.<br />
• Occupati<strong>on</strong>al Outlook Handbook which<br />
provides informati<strong>on</strong> about hundreds of<br />
occupati<strong>on</strong>s within those industries.<br />
• Occupati<strong>on</strong>al Outlook Quarterly that<br />
reports <strong>on</strong> l<strong>on</strong>g-term job growth and<br />
employment opportunities.<br />
• Occupati<strong>on</strong>al Informati<strong>on</strong> Network<br />
(O*NET) that offers a database of<br />
occupati<strong>on</strong>al informati<strong>on</strong>, such as job<br />
characteristics.<br />
These Web sites include informati<strong>on</strong><br />
about job training, advancement, earnings,<br />
and working c<strong>on</strong>diti<strong>on</strong>s. There are links to<br />
informati<strong>on</strong> about job markets in each<br />
state.<br />
If you want informati<strong>on</strong> about a particular<br />
company, enter the company’s Web<br />
address or use a search engine and enter<br />
the company’s name. Most sites include<br />
informati<strong>on</strong> about career opportunities<br />
and applying for a job within the company.<br />
INVESTIGATE<br />
Choose a career that interests you. Using<br />
the Internet, research job opportunities.<br />
CHAPTER 22 <str<strong>on</strong>g>Care</str<strong>on</strong>g>er Preparati<strong>on</strong> • 383
Fashi<strong>on</strong><br />
CAREERS OF YESTERDAY.<br />
As a young woman looking for work in the<br />
early 1800s, you could apply at a New<br />
England fabric mill in America. Your<br />
coworkers would have been girls and<br />
women, ages twelve to twenty-five. One<br />
mill built boardinghouses shared by the<br />
female labor force. With about twenty-five<br />
people in each house, the young women<br />
worked, ate, and spent leisure time<br />
together. As wages decreased for l<strong>on</strong>g<br />
hours of work, disc<strong>on</strong>tent grew, leading to<br />
uni<strong>on</strong>izati<strong>on</strong> and strikes in the 1830s and<br />
1840s.<br />
Facts<br />
your interest be known, even if the company isn’t<br />
currently hiring.<br />
If you’re looking for summer work, you might<br />
register with an agency that specializes in temporary<br />
jobs. In this increasingly popular arrangement,<br />
you work for the agency, which sends you<br />
to different employers. One m<strong>on</strong>th you might be<br />
a typist at a company; later you’re a mailroom<br />
clerk at another. The company pays the agency,<br />
and the agency pays you.<br />
Employment agencies are an opti<strong>on</strong> for those<br />
who want full-time jobs. Some agencies charge a<br />
fee or a percentage of your salary if they find you<br />
a job. Sometimes you’re resp<strong>on</strong>sible for paying<br />
the fee, sometimes the employer, and sometimes<br />
each party pays half. Be sure you understand all<br />
the terms before signing a c<strong>on</strong>tract with an<br />
agency.<br />
APPLYING FOR A JOB<br />
Applying for a job may be your first taste of<br />
workplace competiti<strong>on</strong>. Even when workers are<br />
in short supply, employers w<strong>on</strong>’t take “just anybody.”<br />
Filling out a job applicati<strong>on</strong> and going for<br />
an interview are opportunities to dem<strong>on</strong>strate<br />
that you’re the best pers<strong>on</strong> for the job.<br />
384 • UNIT 7 The Workplace<br />
Completing an Applicati<strong>on</strong><br />
A company’s job applicati<strong>on</strong> form is the informati<strong>on</strong><br />
document filled out by a job applicant.<br />
See Fig. 22-5. The form may ask for facts about<br />
you, your educati<strong>on</strong>, your work experience, and<br />
special skills, such as computer use. It cannot<br />
legally require such pers<strong>on</strong>al informati<strong>on</strong> as race,<br />
religi<strong>on</strong>, or marital status.<br />
Before you start to fill out an applicati<strong>on</strong>, read<br />
it carefully. Be sure you understand the directi<strong>on</strong>s<br />
and what informati<strong>on</strong> is requested. Ask for help if<br />
you’re unsure. Print or type your resp<strong>on</strong>ses in blue<br />
or black ink. You may want to ask for two applicati<strong>on</strong><br />
forms—<strong>on</strong>e for practice, the other to turn in.<br />
Since past work experience is part of most job<br />
applicati<strong>on</strong>s, you may need to bring a list of<br />
addresses, starting dates, and ending dates for<br />
previous jobs. You’ll also need the names,<br />
addresses, and teleph<strong>on</strong>e numbers of two or three<br />
references. These are people who will speak well<br />
of your pers<strong>on</strong>al character and qualificati<strong>on</strong>s. A<br />
school official, previous employer, clergy member,<br />
or l<strong>on</strong>g-time adult friend may be a good reference.<br />
Avoid listing relatives or friends your own<br />
age. Be sure to ask permissi<strong>on</strong> from people before<br />
using their names.<br />
22-5<br />
A job applicati<strong>on</strong> form should be filled out neatly.<br />
To avoid mistakes, look over the form carefully before<br />
writing. How would you mark out something that you<br />
didn’t intend to write?
Preparing a Résumé<br />
To apply for some part-time jobs and many<br />
full-time positi<strong>on</strong>s, you may need to mail, e-mail,<br />
or bring in a résumé (REH-zuh-may). This is a<br />
detailed summary of your educati<strong>on</strong>, work experience,<br />
and job-related activities. See Fig. 22-6.<br />
Since your résumé represents you when you<br />
aren’t there to speak for yourself, a professi<strong>on</strong>al<br />
look is a must. Keyboard the informati<strong>on</strong> with single-spacing<br />
<strong>on</strong> <strong>on</strong>e piece of plain white, 8-by-11inch<br />
paper. If keyboarding isn’t <strong>on</strong>e of your skills,<br />
ask some<strong>on</strong>e to keyboard it for you. Computer<br />
programs that enable you to insert pers<strong>on</strong>al informati<strong>on</strong><br />
into an outline format are available.<br />
Proofread your résumé for spelling and grammatical<br />
errors and ask some<strong>on</strong>e else to read it too.<br />
Résumés can be organized in different ways.<br />
One way is to list work experiences chr<strong>on</strong>ologically,<br />
starting with the most recent. Another way<br />
is to organize by skills, such as computer and<br />
communicati<strong>on</strong>. The skills format has become<br />
popular because many companies save résumés<br />
electr<strong>on</strong>ically. When they have a job opening,<br />
they search their résumé database with keywords<br />
for specific skills.<br />
22-6<br />
Most employers d<strong>on</strong>’t have time to read l<strong>on</strong>g<br />
résumés. That’s why <strong>on</strong>e page is best. You can buy<br />
résumé-writing guidebooks that show many different<br />
résumé styles to create <strong>on</strong> the computer.<br />
What can you put <strong>on</strong> a résumé if you haven’t<br />
much work experience? Employers are interested<br />
in any achievement or positi<strong>on</strong> that shows you<br />
have the skills needed for the job. You could list<br />
hobbies and activities that show your skills. If<br />
you’re applying for a job as a sales associate, two<br />
summers spent tutoring children may carry more<br />
weight than two years repairing lawn mowers.<br />
Writing a Cover Letter<br />
Every résumé sent should include a cover letter.<br />
This introductory letter requests a meeting or<br />
interview and shows your written communicati<strong>on</strong><br />
skills, as well as a bit of your pers<strong>on</strong>ality.<br />
Make it brief, but not necessarily dry. You might<br />
menti<strong>on</strong> why you want to work for the company.<br />
Definitely menti<strong>on</strong> any skills or experiences that<br />
would make you a particularly valuable employee,<br />
even when included in your résumé.<br />
A cover letter should be keyboarded and, if<br />
possible, addressed to the pers<strong>on</strong> who handles job<br />
applicati<strong>on</strong>s at the company. If you can’t find a<br />
name, send your letter to the human resources<br />
director. For small businesses, send it to the<br />
owner or manager.<br />
Interviewing for a Job<br />
After reading your applicati<strong>on</strong> form or<br />
résumé, the owner, manager, or human resources<br />
pers<strong>on</strong> may want to interview you. A job interview<br />
is a meeting to discuss the details of the job<br />
and the qualificati<strong>on</strong>s of the applicant. For jobs<br />
that require artistic and creative skills, bring<br />
al<strong>on</strong>g a portfolio of your work. This can include<br />
drawings, photos, written articles, and samples.<br />
Making a Positive Impressi<strong>on</strong><br />
Even seas<strong>on</strong>ed workers may feel nervous about<br />
an interview. It’s easy to think of the interview as<br />
a test to pass. Seeing the meeting as a chance for<br />
you and a potential employer to get acquainted<br />
and learn whether you’d make a good match is<br />
more helpful. Other tips to help ease the job<br />
interview jitters include the following:<br />
• Research the business beforehand. Scan<br />
the business secti<strong>on</strong> of the paper for current<br />
CHAPTER 22 <str<strong>on</strong>g>Care</str<strong>on</strong>g>er Preparati<strong>on</strong> • 385
How To…<br />
DRESS FOR A JOB INTERVIEW<br />
During a job interview, a potential employer notices what you’re wearing first. When<br />
the interview is over, however, your attitude and skills should be remembered, not your<br />
clothes. The following tips can help you present yourself well:<br />
• Wear an appropriate outfit.<br />
A nice, casual outfit is fine<br />
for many interviews, but a<br />
suit is a better choice for<br />
more formal workplaces.<br />
Flattering colors and styles<br />
build c<strong>on</strong>fidence. Blue jeans,<br />
T-shirts, athletic shoes, and<br />
unc<strong>on</strong>venti<strong>on</strong>al garments<br />
are not appropriate.<br />
• Select complementary<br />
jewelry and accessories.<br />
Avoid flashy jewelry and<br />
too many accessories.<br />
• Double-check your appearance<br />
before arriving at the<br />
interview. With c<strong>on</strong>fidence,<br />
you can relax and focus <strong>on</strong><br />
your c<strong>on</strong>versati<strong>on</strong> with the<br />
interviewer.<br />
386 • UNIT 7 The Workplace<br />
• Choose a comfortable outfit that fits<br />
well so you can c<strong>on</strong>centrate <strong>on</strong> the<br />
interview, not what you’re wearing.<br />
Try it <strong>on</strong> a few days early, checking<br />
in a full-length mirror. Females<br />
should choose a modest outfit<br />
that isn’t too dressy, too tight, too<br />
low, or too short.<br />
• On the day before the interview,<br />
make sure the outfit is<br />
clean and pressed. Clean or<br />
shine your shoes, if necessary.<br />
• Follow good grooming practices.<br />
Shower, shave, and use<br />
deodorant. Hair should be<br />
clean and combed, and nails<br />
neatly trimmed. Avoid heavy<br />
make-up and str<strong>on</strong>g perfume<br />
or after-shave.<br />
Exploring Outfits for an Interview<br />
Using a catalog or clothing advertisements, find outfits<br />
that are suitable for a job interview. Present your examples<br />
to the class and explain why you chose them.
news. Ask a reference librarian where to find<br />
background informati<strong>on</strong>, or search the<br />
Internet. If the business is a store, check their<br />
merchandise selecti<strong>on</strong>. Knowing something<br />
about the employer shows your interest. You’ll<br />
be better prepared to resp<strong>on</strong>d if an interviewer<br />
asks, “Why do you want to work here?”<br />
• Dress appropriately. Appearance counts.<br />
Use the ideas <strong>on</strong> page 386 to dress for an<br />
interview.<br />
• Arrive <strong>on</strong> time. Allow plenty of time to prepare<br />
and get to the interview. Learn exactly<br />
where you should be; make a trial run if<br />
needed.<br />
• Show up al<strong>on</strong>e. If you bring relatives or<br />
friends for moral support, have them wait<br />
outside.<br />
Strive to create a winning impressi<strong>on</strong> during<br />
the interview. Remember the following ideas:<br />
• Greet the interviewer in a friendly manner.<br />
If a handshake is offered, accept with a<br />
firm grasp. Sit down <strong>on</strong>ly when invited. Any<br />
items brought with you should be placed <strong>on</strong><br />
the floor, not <strong>on</strong> the interviewer’s desk.<br />
22-7<br />
When your job interview ends, thank the inter-<br />
viewer for spending time with you. Make eye c<strong>on</strong>tact and<br />
smile. A firm handshake often signals that the interview<br />
is over.<br />
• Speak clearly. Look directly at the interviewer<br />
when talking. Avoid slang expressi<strong>on</strong>s.<br />
• Sit comfortably but correctly. Avoid<br />
slumping in the chair and fidgeting with your<br />
hands or hair. Clasp your hands loosely <strong>on</strong><br />
your lap. Try to relax.<br />
• Answer questi<strong>on</strong>s with more than a yes<br />
or no. Try to include something about yourself.<br />
After pointing out membership in the<br />
debate club, an applicant can add, “It’s taught<br />
me a lot about quick thinking and teamwork.”<br />
• Give h<strong>on</strong>est answers, even if they<br />
include negative facts about you.<br />
Explain how you’ve learned from past mistakes<br />
and poor experiences, but d<strong>on</strong>’t dwell <strong>on</strong> this<br />
informati<strong>on</strong>. Avoid blaming or criticizing former<br />
employers.<br />
• Ask questi<strong>on</strong>s about the positi<strong>on</strong>. This<br />
shows your interest. You might ask about specific<br />
duties and opportunities for advancement.<br />
• Express enthusiasm. Have a positive attitude<br />
about work opportunities.<br />
• Thank the interviewer as the meeting<br />
ends. Express appreciati<strong>on</strong> for the time spent<br />
with you. See Fig. 22-7.<br />
Following Up<br />
When you get home, type or neatly write a letter<br />
to the interviewer. Repeat your thanks and<br />
interest in working for the company. Menti<strong>on</strong><br />
again the particular skills that you hope to bring<br />
to the job. Sometimes little extras like these make<br />
the difference in getting the job.<br />
Resp<strong>on</strong>ding to Rejecti<strong>on</strong><br />
Not every job search ends with the welcome<br />
words, “When can you start?” Not getting a job<br />
can be disappointing and feel like pers<strong>on</strong>al rejecti<strong>on</strong>.<br />
If you’re not offered the job, ask yourself<br />
why. You can also ask for feedback from the interviewer.<br />
Were you too quiet at the interview? Learn<br />
to speak out more. Was your résumé lacking? Add<br />
to your résumé with more school activities or<br />
community involvement. Work at improvement<br />
and the next job may be yours.<br />
CHAPTER 22 <str<strong>on</strong>g>Care</str<strong>on</strong>g>er Preparati<strong>on</strong> • 387
CHAPTER 22<br />
CHAPTER SUMMARY<br />
• C<strong>on</strong>sider your own interests and skills<br />
when deciding <strong>on</strong> a career.<br />
• By researching career paths, you can identify<br />
the educati<strong>on</strong>, training, and skills<br />
needed for various careers.<br />
• You can learn about careers through parttime<br />
jobs and talking to others.<br />
• When looking for a job, use many different<br />
resources.<br />
• A carefully completed applicati<strong>on</strong> form and<br />
a thoughtfully written résumé and cover<br />
letter increase your chances of getting an<br />
interview.<br />
• At the interview, strive to present yourself<br />
as c<strong>on</strong>fident, qualified, and eager to learn.<br />
USING KEY TERMS<br />
Work with a partner, taking turns telling <strong>on</strong>e<br />
fact about each Key Term. Repeat until you’ve<br />
covered the related facts discussed in the<br />
chapter.<br />
388 • UNIT 7 The Workplace<br />
Review<br />
RECALLING THE FACTS<br />
1. Explain how a close self-evaluati<strong>on</strong> can<br />
help identify aptitudes.<br />
2. Why are school experiences important to<br />
career success, even when they d<strong>on</strong>’t<br />
seem related?<br />
3. How can a high school counselor’s office<br />
help you choose a career?<br />
4. If you were a sales associate at a clothing<br />
store, what additi<strong>on</strong>al training would<br />
you need to become the store’s retail<br />
buyer?<br />
5. Identify ways to learn about the training<br />
required for a certain career.<br />
6. What are three ways to learn what a job<br />
or career is like?<br />
7. How can working at a part-time job help<br />
you choose a career?<br />
8. List sources for learning about job<br />
openings.<br />
9. Give three tips for filling out an applicati<strong>on</strong><br />
form.<br />
10. Describe the qualities of a professi<strong>on</strong>allooking<br />
résumé.<br />
11. What are five tips for communicating<br />
well during an interview?<br />
12. Should you wear your most formal outfit<br />
to a job interview? Why or why not?<br />
13. If you d<strong>on</strong>’t get the job you’re after, how<br />
can that be a learning experience?
CHAPTER 22<br />
and Activities<br />
THINKING CRITICALLY<br />
1. Should a naturally quiet pers<strong>on</strong> choose a<br />
career that demands an outgoing pers<strong>on</strong>ality<br />
in order to become more outgoing?<br />
Explain.<br />
2. Why are friends and relatives not recommended<br />
as references?<br />
3. Why is giving dish<strong>on</strong>est answers during<br />
an interview a mistake?<br />
APPLYING KNOWLEDGE<br />
1. Interests and skills. Take an interest<br />
survey that helps you identify your interests<br />
and skills.<br />
2. Mapping a path. Research a fashi<strong>on</strong><br />
career. Identify “stepping st<strong>on</strong>e” positi<strong>on</strong>s<br />
for advancing to different job<br />
levels. Use your findings to develop a<br />
pers<strong>on</strong>al career path toward a specific<br />
goal. In writing, describe the career path.<br />
3. Educati<strong>on</strong> and income. Compare salary<br />
levels of jobs requiring <strong>on</strong>ly a high school<br />
educati<strong>on</strong> with those requiring additi<strong>on</strong>al<br />
educati<strong>on</strong>. Compare your findings with<br />
those of your classmates. What c<strong>on</strong>clusi<strong>on</strong>s<br />
can be made about the value of<br />
educati<strong>on</strong>?<br />
4. Cover letter. Write a cover letter that<br />
could be sent with your résumé when<br />
applying for a fashi<strong>on</strong>-industry career.<br />
5. Interview attire. Find magazine illustrati<strong>on</strong>s<br />
of people in various styles of dress.<br />
Explain orally or in writing whether each<br />
outfit would be appropriate for a job<br />
interview.<br />
6. Interview clinic. Working in pairs, write<br />
questi<strong>on</strong>s that might be asked during a<br />
job interview. Take turns interviewing<br />
each other. Discuss ways to improve<br />
your skills.<br />
MAKING>
CHAPTER 23<br />
Success <strong>on</strong> the Job<br />
OBJECTIVES<br />
• Relate pers<strong>on</strong>al<br />
qualities to<br />
<strong>on</strong>-the-job success.<br />
• Dem<strong>on</strong>strate<br />
productive<br />
ways to work with<br />
those in authority.<br />
• Describe ways to<br />
advance or change<br />
jobs.<br />
• Give practical<br />
advice <strong>on</strong><br />
balancing work<br />
and pers<strong>on</strong>al life.<br />
KEY TERMS<br />
ethics<br />
flexibility<br />
initiative<br />
leadership<br />
mentor<br />
parliamentary<br />
procedure<br />
procrastinate<br />
punctuality<br />
teamwork<br />
390 • UNIT 7 The Workplace
EXAMINETHISISSUE<br />
Worker status. One trend in many<br />
industries is the increased use of parttime<br />
and project workers, those hired<br />
<strong>on</strong>ly to work <strong>on</strong> a specific assignment.<br />
The company can pay for help as<br />
needed without having to provide full<br />
benefits. Some employees like the flexibility<br />
this type of work offers. Others are<br />
unhappy if they do similar work to fulltime<br />
employees who receive benefits<br />
and possibly higher pay.<br />
What do you think?<br />
What are possible c<strong>on</strong>sequences of<br />
this practice?<br />
Can you identify some<strong>on</strong>e who has<br />
had a successful career? The pers<strong>on</strong> you<br />
choose says something about how you<br />
view success. Success can be measured in many<br />
ways. Some people point to m<strong>on</strong>ey, prestige, and<br />
power. Others say making a c<strong>on</strong>tributi<strong>on</strong> to society<br />
is a sign of success. Gaining respect for a job<br />
well d<strong>on</strong>e can mean success. So can achieving<br />
23-1<br />
A job well d<strong>on</strong>e can bring feelings of success.<br />
What does success <strong>on</strong> the job mean to you?<br />
career goals. Often success is viewed as gaining a<br />
feeling of self-fulfillment through enjoyable<br />
work. Whatever the mark of success may be to<br />
any individual, certain qualities make getting<br />
there easier. See Fig. 23-1.<br />
INGREDIENTS FOR<br />
SUCCESS<br />
To move ahead in today’s work world, you<br />
need a combinati<strong>on</strong> of attributes. See Fig. 23-2.<br />
High <strong>on</strong> the list is the ability to adapt to a changing<br />
technological workplace. The skills described<br />
<strong>on</strong> page 392 are just a few that you may need.<br />
Specific jobs take many other kinds of technological<br />
know-how.<br />
In additi<strong>on</strong> to specific skills, employers want<br />
people who can think critically, make decisi<strong>on</strong>s,<br />
and solve problems. In additi<strong>on</strong>, people who<br />
dem<strong>on</strong>strate the positive pers<strong>on</strong>al qualities of a<br />
resp<strong>on</strong>sible employee are valued no matter what<br />
the job title may be.<br />
23-2<br />
Some people have qualities that point them<br />
toward success even before they begin a job. Are any<br />
qualities for success apparent here?<br />
CHAPTER 23 Success <strong>on</strong> the Job • 391
Technology Trends<br />
>>TECHNOLOGY SKILLS IN THE WORKPLACE<br />
Today’s employees use many technology<br />
skills for <strong>on</strong>-the-job success. The ability<br />
to use the following technology makes<br />
an employee more valuable:<br />
• Word processing. This software creates<br />
text-based documents. You can easily<br />
insert, move, and delete text with just a<br />
few keystrokes.<br />
• Databases. With this software, you store<br />
data, then search and recombine it in<br />
new ways. A retail store, for example,<br />
might record daily sales and keep inventory<br />
records up-to-date. Recombined<br />
data produces daily, weekly, m<strong>on</strong>thly, or<br />
Qualities of a Resp<strong>on</strong>sible<br />
Employee<br />
Suppose you were an employer. What qualities<br />
would you look for in an employee you trust to<br />
help you keep your business running? Several<br />
qualities are described here, but you may be able<br />
to add more to the list.<br />
392 • UNIT 7 The Workplace<br />
yearly sales reports. One data sort<br />
might show which items are fast and<br />
slow sellers.<br />
• Spreadsheets. On spreadsheets, data is<br />
arranged in rows and columns.<br />
Spreadsheets can also perform math<br />
calculati<strong>on</strong>s. In business, they keep<br />
accounts payable records and predict<br />
sales and expenses.<br />
• Desktop publishing. Using a computer,<br />
printer, and desktop publishing software,<br />
companies design and print their own<br />
brochures, newsletters, reports, invitati<strong>on</strong>s,<br />
business cards, calendars, and<br />
greeting cards.<br />
• Presentati<strong>on</strong> software. With software,<br />
such as PowerPoint ® , an interactive<br />
slide show can be created with text,<br />
graphics, audio, video, and Internet<br />
links. It can be viewed <strong>on</strong> a computer or<br />
projected <strong>on</strong>to a screen or wall.<br />
INVESTIGATE<br />
Choose <strong>on</strong>e of the technologies menti<strong>on</strong>ed<br />
to explore and dem<strong>on</strong>strate for the class.<br />
Reliability<br />
If you have a family car that gets you to school<br />
even <strong>on</strong> the coldest morning, you can appreciate<br />
reliability. Your own reliability is no less important.<br />
An employer counts <strong>on</strong> you to work c<strong>on</strong>scientiously,<br />
without c<strong>on</strong>stant supervisi<strong>on</strong>, carrying<br />
out even tedious jobs to the best of your ability.<br />
Punctuality, or arriving <strong>on</strong> time, is a sign of<br />
reliability. As a punctual employee, you’re at work
and ready to start when your shift begins. You<br />
keep working until it’s over, even staying a while<br />
l<strong>on</strong>ger to finish a task. You take <strong>on</strong>ly the time<br />
allotted for meals and breaks. You might socialize<br />
with coworkers, but not at the expense of work<br />
that needs to be d<strong>on</strong>e. Time is m<strong>on</strong>ey to an<br />
employer. Like nickels and dimes, the few extra<br />
minutes taken when some<strong>on</strong>e is late, unprepared,<br />
or unproductive add up.<br />
Working Well with Others<br />
Most jobs involve interacti<strong>on</strong> with other people,<br />
and all people deserve respect. You show<br />
respect when you’re patient with customers, helpful<br />
to coworkers, and cooperative with your<br />
supervisor. You make allowances for other people’s<br />
mistakes, bad moods, and pers<strong>on</strong>al problems,<br />
knowing that others have d<strong>on</strong>e the same for<br />
you. Your overall manner is <strong>on</strong>e of courtesy and<br />
c<strong>on</strong>siderati<strong>on</strong>.<br />
23-3<br />
Success in almost every job relies heavily <strong>on</strong><br />
communicati<strong>on</strong> skills. Giving and understanding instructi<strong>on</strong>s<br />
is just <strong>on</strong>e example.<br />
Other valuable interpers<strong>on</strong>al skills include recognizing<br />
and showing appreciati<strong>on</strong> for the skills<br />
and c<strong>on</strong>tributi<strong>on</strong>s of coworkers. If you accept<br />
criticism positively, it can help you improve. A<br />
defensive attitude isn’t productive. In turn, offer<br />
<strong>on</strong>ly c<strong>on</strong>structive criticism to others. Keeping a<br />
sense of humor helps relieve tensi<strong>on</strong> and stress in<br />
the workplace.<br />
Good Communicati<strong>on</strong> Skills<br />
Because people communicate daily, many<br />
assume they do it well. Practice doesn’t make perfect,<br />
however, if you repeat poor habits. As a student,<br />
you have many opportunities to practice<br />
reading, writing, listening, and speaking effectively.<br />
If you take advantage of them, you’ll be<br />
repaid <strong>on</strong> the job when you write well-organized<br />
reports, help customers choose flattering styles,<br />
and follow directi<strong>on</strong>s for using equipment. See<br />
Fig. 23-3.<br />
Good communicati<strong>on</strong> skills are also needed<br />
when talking <strong>on</strong> the teleph<strong>on</strong>e and sending messages<br />
by fax or e-mail. See page 407 for ideas<br />
about using e-mail. For written messages, good<br />
grammar and spelling make your words more<br />
credible. Be aware of the t<strong>on</strong>e of your voice or<br />
your writing. You want to c<strong>on</strong>vey the message<br />
clearly, pleasantly, and politely. Good communicati<strong>on</strong><br />
skills will help you share informati<strong>on</strong>, propose<br />
new ideas, and persuade others to follow<br />
your advice.<br />
A Positive Attitude<br />
A positive attitude looks at the pluses, not the<br />
minuses. When a problem arises, positive thinking<br />
focuses <strong>on</strong> advantages and resources, making<br />
a soluti<strong>on</strong> easier to find. Other people enjoy<br />
interacting far more with some<strong>on</strong>e who remains<br />
positive when faced with a disappointment or<br />
problems than with some<strong>on</strong>e who always complains,<br />
criticizes, and blames others.<br />
Willingness to Learn<br />
When you’re new <strong>on</strong> the job, it’s easier to<br />
accept that you d<strong>on</strong>’t know everything and need<br />
to learn workplace routines and methods.<br />
Gaining experience and c<strong>on</strong>fidence in your skills<br />
CHAPTER 23 Success <strong>on</strong> the Job • 393
shouldn’t change this openness to learning. If you<br />
let a coworker or supervisor show you a more<br />
efficient or safer way to do your job, you increase<br />
your own value as an employee.<br />
C<strong>on</strong>tinued learning takes flexibility, a willingness<br />
to adapt to new opportunities and situati<strong>on</strong>s.<br />
Accept new assignments as a chance to<br />
learn more about the business and as a sign of<br />
your employer’s trust. Volunteer for new resp<strong>on</strong>sibilities.<br />
Look for opportunities to get more<br />
training or educati<strong>on</strong>. Some employers pay for<br />
training sessi<strong>on</strong>s, workshops, or college courses<br />
for their employees. These, in turn, make your job<br />
more interesting and provide valuable experience<br />
for future jobs. See Fig. 23-4.<br />
Initiative<br />
Suppose you work for a small business owner<br />
who menti<strong>on</strong>s the need for a better way to keep<br />
track of clients’ accounts. If you offer to work out<br />
a system, you’re showing initiative, the desire and<br />
willingness to plan and carry out a task.<br />
Employers appreciate initiative, within the<br />
limits of a worker’s duties. If you have a terrific<br />
idea and w<strong>on</strong>der, “Why d<strong>on</strong>’t they do this<br />
already?” always ask permissi<strong>on</strong> before taking <strong>on</strong><br />
a project. There may be good reas<strong>on</strong>s why certain<br />
methods are followed. On the other hand, your<br />
idea may be the perfect soluti<strong>on</strong> to a business<br />
problem.<br />
Teamwork<br />
Have you ever played a team sport? Just as in<br />
sports, businesses emphasize teamwork to get a<br />
job d<strong>on</strong>e. Teamwork is work d<strong>on</strong>e cooperatively,<br />
rather than individually, by several associates. By<br />
sharing abilities and skills, team members can be<br />
more efficient in reaching a comm<strong>on</strong> goal. They<br />
share both the resp<strong>on</strong>sibilities and rewards of<br />
their efforts. To be an effective team member, use<br />
the ideas <strong>on</strong> page 395.<br />
Teamwork is generally more productive than<br />
having the same number of employees work separately.<br />
Workers have greater job satisfacti<strong>on</strong><br />
because they help make decisi<strong>on</strong>s and solve problems.<br />
They may rotate tasks and develop new<br />
skills. Because team members must communicate<br />
394 • UNIT 7 The Workplace<br />
23-4<br />
Some companies provide training sessi<strong>on</strong>s. If<br />
they d<strong>on</strong>’t have what you need, reimbursement for the<br />
cost of outside workshops and courses might be possible.<br />
with each other, they get to know their coworkers<br />
better. Greater productivity also means increased<br />
profits for the company.<br />
Leadership<br />
All workers can show leadership skills, not just<br />
people in high-level positi<strong>on</strong>s. Anytime you guide<br />
or influence others, you’re practicing leadership.<br />
Helping coworkers resolve a dispute and accepting<br />
a coworker’s ideas for a window display both<br />
show leadership. Modeling good workplace<br />
habits is a subtle but powerful form of leadership<br />
that any<strong>on</strong>e can dem<strong>on</strong>strate.<br />
Leaders develop a number of skills. They know<br />
how to communicate, set goals, make decisi<strong>on</strong>s,<br />
solve problems, and manage resources. They promote<br />
teamwork and organize group tasks.<br />
C<strong>on</strong>ducting a meeting properly is a leadership
How To…<br />
BE A TEAM MEMBER<br />
Teamwork is the glue that holds many business situati<strong>on</strong>s together. Have you heard that<br />
“two heads are better than <strong>on</strong>e”? Well, often several people can be more productive as a<br />
team than if they work separately. What qualities do you think team members need?<br />
What techniques make them successful? Here are some that work just as well in school<br />
as <strong>on</strong> the job.<br />
• Understand the group’s overall goal. Then<br />
set short-, medium-, and l<strong>on</strong>g-term goals for<br />
each project, al<strong>on</strong>g with specific dates for<br />
completing each task.<br />
• Listen actively and offer suggesti<strong>on</strong>s during<br />
meetings. Communicate with other team<br />
members throughout the project.<br />
• Understand your assigned role and duties. If<br />
you have questi<strong>on</strong>s, ask the group leader or<br />
facilitator.<br />
• Complete assigned tasks <strong>on</strong> time and follow<br />
through <strong>on</strong> any other duties.<br />
• Evaluate progress <strong>on</strong> a daily or weekly basis.<br />
• Help solve problems and resolve c<strong>on</strong>flicts<br />
before they become major.<br />
• Respect other team members. Avoid becoming<br />
competitive or resentful of others.<br />
Exploring Teamwork<br />
Write a descripti<strong>on</strong> of some<strong>on</strong>e you<br />
would like as a teammate <strong>on</strong> an<br />
important assignment. Explain your<br />
reas<strong>on</strong>ing.<br />
CHAPTER 23 Success <strong>on</strong> the Job • 395
esp<strong>on</strong>sibility. After learning the rules of parliamentary<br />
procedure, they lead group discussi<strong>on</strong>s<br />
in an orderly way. Some leaders keep a group <strong>on</strong><br />
task by acting as a moderator.<br />
Like other skills, leadership can be learned and<br />
developed. Students can join organizati<strong>on</strong>s that<br />
promote leadership. Fig. 23-5 describes two<br />
organizati<strong>on</strong>s that offer many opportunities. You<br />
can learn more about them by accessing their<br />
Web sites <strong>on</strong> the Internet.<br />
Ethical Behavior<br />
Ethics are the moral principles and values that<br />
guide a pers<strong>on</strong>’s acti<strong>on</strong>s. In an ethical workplace,<br />
both employers and employees follow high standards<br />
that build trust and respect.<br />
Employees dem<strong>on</strong>strate a str<strong>on</strong>g work ethic by<br />
working hard and doing their best work. H<strong>on</strong>esty<br />
DESCRIPTION<br />
Nati<strong>on</strong>al student<br />
organizati<strong>on</strong> that helps<br />
young men and women<br />
become leaders and<br />
address important pers<strong>on</strong>al,<br />
family, work, and<br />
societal issues through<br />
family and c<strong>on</strong>sumer<br />
sciences educati<strong>on</strong>.<br />
Nati<strong>on</strong>al student<br />
organizati<strong>on</strong> that<br />
develops future leaders<br />
in marketing, management,<br />
and entrepreneurship.<br />
Business<br />
partnerships help support<br />
activities.<br />
396 • UNIT 7 The Workplace<br />
DISTRIBUTIVE EDUCATION CLUBS OF AMERICA (DECA)<br />
High school students<br />
enrolled in marketing<br />
educati<strong>on</strong> and management<br />
courses.<br />
23-5 • Student Organizati<strong>on</strong>s<br />
is expected. See Fig. 23-6. Stealing m<strong>on</strong>ey or<br />
property from an employer or coworkers is dish<strong>on</strong>est.<br />
So are more subtle acts, such as taking<br />
office supplies or copying software for pers<strong>on</strong>al<br />
use. All communicati<strong>on</strong>s should be h<strong>on</strong>est. Lying<br />
to customers or in expense reports is an unethical<br />
act that seldom goes unnoticed. In additi<strong>on</strong> to<br />
destroying your reputati<strong>on</strong> and chances for<br />
advancement, such behavior can result in job terminati<strong>on</strong><br />
and legal charges.<br />
Employees are expected to keep informati<strong>on</strong><br />
about new products, promoti<strong>on</strong>s, and business<br />
plans c<strong>on</strong>fidential. Telling others, especially competitors,<br />
could harm the business. Negative gossip<br />
about the company and its management can<br />
result in lost business as well as lost jobs.<br />
Employees should also respect coworkers’ privacy.<br />
Listening to private c<strong>on</strong>versati<strong>on</strong>s and<br />
MEMBERSHIP<br />
BENEFITS TO STUDENTS<br />
PROGRAM HIGHLIGHTS<br />
FAMILY, CAREER AND COMMUNITY LEADERS OF AMERICA (FCCLA)<br />
Students who are cur- • Develop such leadership skills as • Leaders at Work. <str<strong>on</strong>g>Care</str<strong>on</strong>g>er-related<br />
rently taking or have positive relati<strong>on</strong>ships, c<strong>on</strong>flict man- projects, including the area of tex-<br />
taken family and c<strong>on</strong>agement, and teamwork.<br />
tiles and apparel.<br />
sumer sciences<br />
courses through grade<br />
12.<br />
• Build skills for life needed in the<br />
home and workplace, including<br />
planning, goal setting, problem<br />
solving, decisi<strong>on</strong> making, and<br />
communicati<strong>on</strong>.<br />
• Explore careers, including how to be<br />
successful <strong>on</strong> the job.<br />
• STAR Events. Competiti<strong>on</strong>s that<br />
include career investigati<strong>on</strong>.<br />
• <str<strong>on</strong>g>Care</str<strong>on</strong>g>er C<strong>on</strong>necti<strong>on</strong>. Activities<br />
focused <strong>on</strong> career development.<br />
• Dynamic Leadership. Informati<strong>on</strong>,<br />
activities, and projects that develop<br />
leadership skills.<br />
• Develop understanding of the<br />
business world and career<br />
opportunities.<br />
• Train for leadership, while building<br />
c<strong>on</strong>fidence and communicati<strong>on</strong><br />
skills.<br />
• Develop business skills, including<br />
ethics, a healthy competitive spirit,<br />
business etiquette, and citizenship.<br />
• Explore opportunities for scholarships<br />
and financial awards.<br />
• Competitive Events. Events in such<br />
areas as apparel and accessories<br />
marketing, retail merchandising,<br />
and fashi<strong>on</strong> merchandising.<br />
• Leadership Development.<br />
C<strong>on</strong>ferences that focus <strong>on</strong> leadership<br />
skills.<br />
• C<strong>on</strong>ferences and Meetings.<br />
Includes an annual apparel and<br />
accessories mini-c<strong>on</strong>ference in New<br />
York City.
23-6<br />
Handling m<strong>on</strong>ey <strong>on</strong> the job is a big resp<strong>on</strong>sibility.<br />
An employee who is accurate and h<strong>on</strong>est builds a reputa-<br />
ti<strong>on</strong> that can be carried to future jobs.<br />
ph<strong>on</strong>e calls is unethical. E-mails, faxes, and voice<br />
mail deserve the same privacy as regular mail.<br />
Never go through the desk drawers, file cabinets,<br />
or lockers of coworkers without proper authority.<br />
Sometimes employees are faced with ethical<br />
decisi<strong>on</strong>s about what is right and wr<strong>on</strong>g. What<br />
should you do if you observe unethical behavior<br />
in the workplace? First, c<strong>on</strong>sider whether the<br />
incident is isolated or an <strong>on</strong>going practice. If<br />
dealing with an unfair coworker, try to resolve the<br />
situati<strong>on</strong> before talking to a supervisor. If dealing<br />
with an abusive customer, stay calm and refer the<br />
problem to a manager. If an employer is unethical,<br />
you protect yourself and others by reporting<br />
the situati<strong>on</strong> to authorities. Record your observati<strong>on</strong>s<br />
and collect evidence. No employee has to do<br />
anything that is illegal or unethical. It is better to<br />
resign and find another job.<br />
Working Well with Supervisors<br />
Most employees report to some<strong>on</strong>e; even the<br />
chair of a large corporati<strong>on</strong> is accountable to a<br />
board of directors. For this reas<strong>on</strong>, knowing how<br />
to work well with people in authority is a must<br />
for every<strong>on</strong>e.<br />
Practicing positive work habits helps you<br />
establish a reputati<strong>on</strong> as a solid, resp<strong>on</strong>sible<br />
worker. It paves the way for a smooth relati<strong>on</strong>ship<br />
with supervisors and managers. Disagreements<br />
can still arise, of course, especially when misunderstandings<br />
occur. You might not see the reas<strong>on</strong><br />
for a certain safety rule until you learn that claims<br />
paid for worker’s compensati<strong>on</strong> raise your<br />
employer’s insurance premiums. Your supervisor<br />
might be bothered when you arrive a little late,<br />
not knowing that your last class ends <strong>on</strong>ly twenty<br />
minutes earlier.<br />
How do you prevent misunderstandings?<br />
Clear communicati<strong>on</strong> saves many situati<strong>on</strong>s. See<br />
Fig. 23-7. Make it a point to keep your supervisor<br />
up-to-date <strong>on</strong> your progress, problems, and<br />
activities. If you have c<strong>on</strong>cerns, discuss them<br />
calmly in order to settle them. Try to understand<br />
23-7<br />
Good communicati<strong>on</strong> is a two-way street. What<br />
can both an employee and a supervisor do to communicate<br />
well?<br />
CHAPTER 23 Success <strong>on</strong> the Job • 397
Planning<br />
Management<br />
ASPECT<br />
Finance<br />
Technical and Producti<strong>on</strong> Skills<br />
Underlying Principles of Technology<br />
Labor and Pers<strong>on</strong>nel Issues<br />
Community Issues<br />
Health, Safety, and Envir<strong>on</strong>mental<br />
Issues<br />
your supervisor’s point of view. Learning more<br />
about the business, including people’s resp<strong>on</strong>sibilities<br />
and the costs of operati<strong>on</strong>, may help.<br />
Lastly, recognize that supervisors have strengths<br />
and limitati<strong>on</strong>s, like every<strong>on</strong>e else. If you do, your<br />
outlook will be more realistic.<br />
Understanding Industry<br />
Positive qualities are your first links to success<br />
<strong>on</strong> the job. What else c<strong>on</strong>tributes? An understanding<br />
of the work world can give you a head<br />
start.<br />
Whether you choose a career in fashi<strong>on</strong> or<br />
another field, you’re likely to be part of a large<br />
business or industry. All industries share certain<br />
comm<strong>on</strong> functi<strong>on</strong>s and c<strong>on</strong>cerns that are summarized<br />
in Fig. 23-8. Understanding these can<br />
benefit you as well as your employer, but how?<br />
A guard <strong>on</strong> a basketball team wouldn’t do very<br />
well without knowing what the forward does.<br />
Similarly, employees who understand the workings<br />
of industry see how their role fits into the<br />
“big picture.” They know the “why” behind<br />
expectati<strong>on</strong>s. They see how pers<strong>on</strong>al development<br />
can lead to new opportunities. They appreciate<br />
the challenges that industries face. Sharing<br />
398 • UNIT 7 The Workplace<br />
23-8 • Aspects of Industry<br />
RELATED TASKS IN INDUSTRY<br />
Deciding what to produce or what services to provide; setting goals; developing general policies<br />
and procedures.<br />
Choosing a structure for employees who oversee the work of others; implementing methods<br />
for operating the business.<br />
Handling m<strong>on</strong>ey decisi<strong>on</strong>s and procedures; choosing and carrying out accounting methods.<br />
Developing skills needed by employees <strong>on</strong> the job, such as computer skills, machine operati<strong>on</strong>,<br />
and teamwork.<br />
Understanding how technology is used in a specific industry; identifying the impact of changing<br />
technology <strong>on</strong> the business; taking steps to stay current; analyzing new equipment.<br />
Identifying worker rights and resp<strong>on</strong>sibilities; developing policies that involve labor organizati<strong>on</strong>s,<br />
cultural sensitivity, and employee c<strong>on</strong>cerns.<br />
Developing a positive relati<strong>on</strong>ship with the community; providing community support.<br />
Avoiding job-specific health threats; developing employer and employee resp<strong>on</strong>sibility for a<br />
safe workplace; respecting and protecting the envir<strong>on</strong>ment.<br />
company goals is easier when people recognize<br />
and respect the wide range of c<strong>on</strong>tributi<strong>on</strong>s that<br />
keep a company going.<br />
TRAVELING THE CAREER<br />
PATH<br />
If you’re like most people, your first job w<strong>on</strong>’t<br />
be the <strong>on</strong>ly <strong>on</strong>e you ever have. With more educati<strong>on</strong><br />
and clearer goals, change is likely.<br />
Outgrowing <strong>on</strong>e job can mean moving into<br />
another that offers new challenges.<br />
Today’s flexible workplace may impact your<br />
career choices. Technology allows some people to<br />
work from home and other locati<strong>on</strong>s distant<br />
from the office. To stay competitive in a global<br />
marketplace, companies often turn to less traditi<strong>on</strong>al<br />
work arrangements. Hiring project workers,<br />
who are not full-time employees, provides<br />
flexibility for both employer and worker.<br />
Advancing <strong>on</strong> the Job<br />
During your first days <strong>on</strong> a job, your main<br />
c<strong>on</strong>cern is to learn your duties well. Eventually<br />
you may want to take <strong>on</strong> more resp<strong>on</strong>sibility,<br />
especially in a positi<strong>on</strong> with career potential. As<br />
you look ahead to a career path, find out what’s
A GOOD IMPRESSION. How<br />
can people make a good impressi<strong>on</strong> <strong>on</strong> the<br />
job if they can’t afford suitable clothes for<br />
work? A n<strong>on</strong>profit organizati<strong>on</strong> called Dress<br />
for Success helps lower-income women<br />
overcome this obstacle. The group provides<br />
clients with d<strong>on</strong>ated business suits, as well<br />
as <strong>on</strong>going support and advice. Many of<br />
these women are referred by job training<br />
programs, immigrant relocati<strong>on</strong> services,<br />
and shelters for homeless or abused<br />
women. Dress for Success operates in over<br />
seventy cities inside and outside the United<br />
States. Informati<strong>on</strong> is <strong>on</strong> the Internet.<br />
available. If other jobs interest you, what training<br />
and experience are needed? Do you have these<br />
skills? If not, how can you develop them?<br />
Since promoting from within the company is<br />
generally easier and less expensive, employers<br />
want employees to develop skills. Some offer <strong>on</strong>the-job<br />
training. After dem<strong>on</strong>strating your ability<br />
as a sales associate, for example, you might gradually<br />
assume the resp<strong>on</strong>sibilities of an assistant<br />
manager.<br />
If an employee needs more educati<strong>on</strong>, the<br />
company may pay all or part of the costs. An<br />
assistant manager might get a tuiti<strong>on</strong> refund for<br />
business school classes needed to advance to<br />
manager.<br />
To work toward career goals, you may find an<br />
ally in a mentor, some<strong>on</strong>e who serves as a role<br />
model and advisor. See Fig. 23-9. While some<br />
companies have formal mentoring programs, a<br />
friendship with a more experienced coworker can<br />
bring the same rewards. Under a mentor’s guid-<br />
23-9<br />
Fashi<strong>on</strong><br />
Facts<br />
People who have been <strong>on</strong> the job for<br />
many years often have knowledge and insights to<br />
share with some<strong>on</strong>e new. What term identifies<br />
these experienced people?<br />
ance, you can meet other people in the field and<br />
form mutually helpful relati<strong>on</strong>ships, a practice<br />
called networking.<br />
Leaving a Job<br />
Ideally, you leave <strong>on</strong>e job for another that takes<br />
you closer to your career goals. Finding a new<br />
positi<strong>on</strong> before quitting the <strong>on</strong>e you have typically<br />
makes a better impressi<strong>on</strong> <strong>on</strong> potential<br />
employers.<br />
Maintaining good relati<strong>on</strong>s with employers<br />
and coworkers is worthwhile. They might become<br />
part of your professi<strong>on</strong>al network and references<br />
for your next job. To leave in good standing,<br />
give reas<strong>on</strong>able notice before you resign. Two<br />
weeks is standard. If possible, also help train your<br />
replacement.<br />
Leaving a job under less than ideal circumstances<br />
is awkward. Although being fired or asked<br />
to resign doesn’t reflect well, such events need not<br />
derail career plans. After all, people who were<br />
fired do get hired again. Learning from negative<br />
experiences shows growth.<br />
What can be said at future interviews after a<br />
forced job loss? The best strategy is to acknowledge<br />
the problem. Certain workplace policies<br />
may have been troubling. Differences with a<br />
supervisor may have caused tensi<strong>on</strong>. Words<br />
should be chosen carefully when describing the<br />
situati<strong>on</strong>. One interviewee said, “I felt that some<br />
of my supervisor’s practices were unfair. I could<br />
CHAPTER 23 Success <strong>on</strong> the Job • 399
23-10<br />
The more resp<strong>on</strong>sibilities a pers<strong>on</strong> has, the more<br />
difficult it can be to balance work and pers<strong>on</strong>al life. Do<br />
you think part-time work is manageable for teens?<br />
either accept them or leave.” This statement<br />
shows an objective view of the situati<strong>on</strong> and takes<br />
resp<strong>on</strong>sibility for acti<strong>on</strong>s. If the pers<strong>on</strong> had said,<br />
“My boss always thought she was right,” what<br />
would that have reflected?<br />
Even if you feel pressure to leave a job, c<strong>on</strong>sider<br />
the l<strong>on</strong>g-term c<strong>on</strong>sequences carefully. Think of<br />
each job as a stepping-st<strong>on</strong>e to your career goal.<br />
Evaluate a move in terms of how it can take you<br />
where you want to go in the world of work.<br />
BALANCING WORK AND<br />
PERSONAL LIFE<br />
Have you ever had to choose between spending<br />
time with a friend and finishing a school<br />
assignment? If so, you already know about the<br />
demands of balancing school and pers<strong>on</strong>al life.<br />
Adding a job to this mix adds to the challenge.<br />
See Fig. 23-10.<br />
At <strong>on</strong>e time, people were advised to leave work<br />
problems at work. Work situati<strong>on</strong>s shouldn’t<br />
affect relati<strong>on</strong>ships at home, and vice versa. Were<br />
it possible, this approach might solve a lot of difficulties.<br />
If a teen could shut away problems at<br />
school like books in a locker, being a cheerful<br />
friend and family member might be easier. A teen<br />
400 • UNIT 7 The Workplace<br />
might be a better student if not distracted by<br />
problems at home.<br />
Such a neat separati<strong>on</strong> isn’t possible in today’s<br />
world. It’s not even desirable. Wouldn’t it help to<br />
know that a family member is worried about<br />
something at work or that a coworker has a problem<br />
at home? The relati<strong>on</strong>ship between work and<br />
pers<strong>on</strong>al life has a str<strong>on</strong>g impact <strong>on</strong> happiness,<br />
health, and pers<strong>on</strong>al satisfacti<strong>on</strong>.<br />
Coping with Demands<br />
You can learn to balance your time and energy<br />
so that obligati<strong>on</strong>s and expectati<strong>on</strong>s d<strong>on</strong>’t<br />
become overwhelming. The following techniques<br />
can help you better manage your work, family,<br />
and community life:<br />
• Make a list. This basic step applies to many<br />
situati<strong>on</strong>s. Whether for shopping, school<br />
assignments, or job resp<strong>on</strong>sibilities, writing<br />
your obligati<strong>on</strong>s down helps with memory<br />
and organizati<strong>on</strong>.<br />
• Set priorities. After making a list, rank items<br />
in order of importance. Managing your time,<br />
energy, and m<strong>on</strong>ey will be easier. By prioritizing<br />
according to your values, you make the<br />
most satisfying use of resources.<br />
• Break down large tasks. Look for the small<br />
steps that make up a l<strong>on</strong>g-term project. For<br />
example, what manageable steps might be part<br />
of a bedroom redecorati<strong>on</strong> project? You’re less<br />
likely to procrastinate, or put off a project, if<br />
you tackle <strong>on</strong>ly <strong>on</strong>e part at a time. The stress<br />
that comes when an entire project must be<br />
d<strong>on</strong>e at the last minute can be avoided.<br />
• Set up a weekly schedule. Plan and organize<br />
by writing down what you want to accomplish<br />
<strong>on</strong> each day of the week. If you d<strong>on</strong>’t, you<br />
may have too much to do at week’s end. A<br />
planning book can be purchased to help you<br />
stay organized.<br />
• Dovetail activities. Some tasks d<strong>on</strong>’t<br />
require undivided attenti<strong>on</strong>. While walking the<br />
dog, you could think about a term paper topic.<br />
You could exercise while watching TV or mend<br />
a hem while talking <strong>on</strong> the ph<strong>on</strong>e.
23-11<br />
Time for fun should be part of every pers<strong>on</strong>’s<br />
schedule. What might happen if time spent <strong>on</strong> recre-<br />
ati<strong>on</strong>al activities is either too much or too little?<br />
• Plan for fun. Every<strong>on</strong>e needs recreati<strong>on</strong>.<br />
Even an hour in the evening to read, listen to<br />
music, jog, or work <strong>on</strong> a hobby can be relaxing<br />
and fun. Reserve that hour, just as you would<br />
schedule an appointment. See Fig. 23-11.<br />
• Manage stress. The pressure of multiple<br />
roles can create stress. Learn effective ways to<br />
manage stress—relax, exercise, and plan<br />
ahead—so you d<strong>on</strong>’t feel overwhelmed.<br />
• Have realistic expectati<strong>on</strong>s. The media<br />
show images of perfecti<strong>on</strong>: fashi<strong>on</strong> models<br />
have perfect looks; magazines feature perfect<br />
homes; and recipes produce perfect meals.<br />
Real life is never perfect. Take pride and pleasure<br />
in all that you do accomplish and avoid<br />
worrying about achieving perfecti<strong>on</strong>.<br />
Developing a Support System<br />
Even the best pers<strong>on</strong>al management system<br />
needs support. In times of crisis, people turn to<br />
others for help as normal routines change and<br />
stress increases. See Fig. 23-12. Relatives and<br />
friends may provide child care, transportati<strong>on</strong>, or<br />
meals for working parents. Sometimes coworkers<br />
take <strong>on</strong> extra work resp<strong>on</strong>sibilities. Supervisors<br />
might offer flexible hours or work-at-home<br />
arrangements. Community and professi<strong>on</strong>al<br />
services can also be part of a support system by<br />
providing counseling, health care, and financial<br />
assistance.<br />
When people use good management strategies<br />
and have ready support, work and pers<strong>on</strong>al life<br />
balance well. Success in life and <strong>on</strong> the job<br />
depends <strong>on</strong> the right balance.<br />
23-12<br />
Support systems are a combinati<strong>on</strong> of give and<br />
take. A teen can help make a busy parent’s life easier, just<br />
as people help each other <strong>on</strong> the job.<br />
CHAPTER 23 Success <strong>on</strong> the Job • 401
CHAPTER 23<br />
CHAPTER SUMMARY<br />
• <str<strong>on</strong>g>Care</str<strong>on</strong>g>er success depends <strong>on</strong> developing<br />
technical skills and pers<strong>on</strong>al qualities that<br />
will make you an asset to an employer now<br />
and in the future.<br />
• Valued employees balance teamwork skills,<br />
such as communicating and working with<br />
others, with pers<strong>on</strong>al reliability, initiative,<br />
and a willingness to learn.<br />
• Ethical behavior is a quality desired in all<br />
positi<strong>on</strong>s.<br />
• Maintaining good relati<strong>on</strong>ships with those<br />
in authority and learning other aspects of<br />
business can add to your effectiveness and<br />
satisfacti<strong>on</strong> at work.<br />
• Developing useful skills and a range of<br />
relati<strong>on</strong>ships can help you change jobs and<br />
advance in a career.<br />
• Learning to manage time and energy helps<br />
you balance and enjoy work and family<br />
relati<strong>on</strong>ships.<br />
USING KEY TERMS<br />
Create a crossword or other word puzzle,<br />
using as many of the Key Terms as possible.<br />
Exchange your puzzle with a classmate for<br />
solving.<br />
402 • UNIT 7 The Workplace<br />
Review<br />
RECALLING THE FACTS<br />
1. How can employees who are skilled in<br />
desktop publishing help save an<br />
employer time and m<strong>on</strong>ey?<br />
2. Describe an employee who works well<br />
with others.<br />
3. How can you make written and spoken<br />
messages most effective?<br />
4. What are the advantages of maintaining<br />
a positive attitude at work?<br />
5. List ways to show openness to c<strong>on</strong>tinued<br />
learning.<br />
6. What benefits come when coworkers<br />
show teamwork?<br />
7. How do people show a str<strong>on</strong>g work<br />
ethic?<br />
8. Describe positive ways to deal with<br />
unethical workplace behavior.<br />
9. How can you promote good relati<strong>on</strong>ships<br />
with managers and supervisors?<br />
10. In industry why is it helpful for each pers<strong>on</strong><br />
to know something about what is<br />
going <strong>on</strong> in other areas of the company?<br />
11. How can a mentor help you in your<br />
career?<br />
12. What is the proper way to leave a job in<br />
good standing?<br />
13. When interviewing for a new job, how<br />
should a pers<strong>on</strong> handle the subject of a<br />
forced job loss?<br />
14. List five techniques that can help you<br />
balance work and family life.
and Activities<br />
THINKING CRITICALLY<br />
1. Do you think it’s easier to be a supervisor<br />
or an employee? Why?<br />
2. Should people be required to work <strong>on</strong> a<br />
team with ineffective people? Explain.<br />
3. What might an employer assume about<br />
an applicant who changes jobs frequently?<br />
How accurate might these<br />
assumpti<strong>on</strong>s be?<br />
APPLYING KNOWLEDGE<br />
1. Applying qualities. Choose a career that<br />
interests you. In writing, give specific<br />
examples of how each quality described<br />
in the chapter might be needed in<br />
that job.<br />
2. Teamwork and leadership. Suppose<br />
you’re working <strong>on</strong> a project with two<br />
other people. You’re the leader. Pers<strong>on</strong><br />
A starts working ahead without c<strong>on</strong>sulting<br />
the team. Pers<strong>on</strong> B seems happy to<br />
let A do the work. Describe in writing<br />
how you will handle this situati<strong>on</strong>.<br />
3. Getting al<strong>on</strong>g. In writing, describe how<br />
you would handle these work situati<strong>on</strong>s<br />
effectively: (a) your supervisor often<br />
asks you to do something at the last<br />
minute; (b) your supervisor points out<br />
improvements needed in your work, but<br />
you disagree; (c) your supervisor often<br />
asks you to do something boring and<br />
gives the interesting work to some<strong>on</strong>e<br />
else.<br />
CHAPTER 23<br />
4. Examining ethics. Sometimes people<br />
use the unethical behavior they notice in<br />
others to justify what they do. They<br />
might say something like this to themselves,<br />
“Well, everybody else takes<br />
paperclips, so why shouldn’t I?” Discuss<br />
this reas<strong>on</strong>ing in class.<br />
5. Setting priorities. List and prioritize<br />
what you need to accomplish in the coming<br />
m<strong>on</strong>th. Create a plan for accomplishing<br />
these tasks. Then carry it out.<br />
MAKING>
CHAPTER 24<br />
Fashi<strong>on</strong> Entrepreneurs<br />
OBJECTIVES<br />
• Relate pers<strong>on</strong>al<br />
qualities to<br />
success as an<br />
entrepreneur.<br />
• Compare different<br />
business<br />
opportunities for<br />
self-employment.<br />
• Describe major<br />
resp<strong>on</strong>sibilities of<br />
entrepreneurs.<br />
• Explain the<br />
importance of all<br />
parts of a business<br />
plan.<br />
KEY TERMS<br />
entrepreneur<br />
franchise<br />
freelance<br />
profit<br />
self-motivated<br />
target audience<br />
404 • UNIT 7 The Workplace
EXAMINETHISISSUE<br />
To own or not. Small, privatelyowned<br />
businesses are more comm<strong>on</strong> in<br />
the United States than large, publiclyowned<br />
corporati<strong>on</strong>s. This shows that<br />
many people want to take <strong>on</strong> the challenges<br />
of running their own business.<br />
They like the thought of being in charge,<br />
and they resp<strong>on</strong>d to the lure of becoming<br />
successful <strong>on</strong> their own. Other people<br />
d<strong>on</strong>’t like the idea of putting their security<br />
<strong>on</strong> the line. They see business ownership<br />
as time-c<strong>on</strong>suming and risky, and<br />
they d<strong>on</strong>’t want to deal with the problems<br />
they might face.<br />
What do you think?<br />
What is your attitude toward business<br />
ownership? After studying the chapter,<br />
see whether your opini<strong>on</strong> changes.<br />
Many people make a life-l<strong>on</strong>g<br />
dream come true when they become an<br />
entrepreneur (AHN-truh-pruh-NUR),<br />
some<strong>on</strong>e who organizes and manages his or her<br />
own business. After renting a locati<strong>on</strong>, some<br />
entrepreneurs sell fashi<strong>on</strong> items or offer a service,<br />
such as dry cleaning. They might sell merchandise<br />
supplied by manufacturers or even market their<br />
own jewelry line. Other entrepreneurs offer clothing,<br />
accessories, or home fashi<strong>on</strong>s through catalogs<br />
or the Internet. Still others use their talents to<br />
write, draw, or c<strong>on</strong>sult with clients at home or at<br />
the client’s site. See Fig. 24-1.<br />
24-1<br />
Some people turn a pers<strong>on</strong>al interest into<br />
a business. A love for knitting, for example, could<br />
be transformed into owning a shop that offers less<strong>on</strong>s<br />
and supplies for people who like to knit,<br />
embroider, or do needlepoint.<br />
Owning and managing your own business can<br />
be exciting. Before taking <strong>on</strong> the challenges, however,<br />
a potential entrepreneur weighs the benefits<br />
against the risks.<br />
QUALITIES OF<br />
THE SUCCESSFUL<br />
ENTREPRENEUR<br />
If you’ve earned m<strong>on</strong>ey by taking care of children<br />
or mowing lawns, you’ve already had a taste<br />
of self-employment. A world of difference, however,<br />
separates those experiences from a career as<br />
a business owner. Not every<strong>on</strong>e who takes care of<br />
children could successfully run a child care center.<br />
To be successful and satisfied, an entrepreneur<br />
needs certain pers<strong>on</strong>al traits, including these:<br />
• Self-motivati<strong>on</strong>. When you own a business,<br />
you’re the leader. You make decisi<strong>on</strong>s about the<br />
product or service, the workplace, and how to<br />
do financing and marketing. You can’t wait for<br />
some<strong>on</strong>e else to give directi<strong>on</strong>s and do the<br />
work. That means entrepreneurs must be selfmotivated,<br />
able to set goals and work independently.<br />
People who are self-motivated take<br />
acti<strong>on</strong> without prodding from others. As they<br />
gain satisfacti<strong>on</strong> from accomplishments, their<br />
motivati<strong>on</strong> grows.<br />
• Organizati<strong>on</strong> and management skills.<br />
Suppose you’re hired to knit a sweater. Before<br />
starting, you need to know the sweater size and<br />
CHAPTER 24 Fashi<strong>on</strong> Entrepreneurs • 405
color, yarn type and cost, how l<strong>on</strong>g the project<br />
will take, and how much to charge for your<br />
work. Entrepreneurs make the same decisi<strong>on</strong>s.<br />
They also keep records, pay bills, produce or<br />
order merchandise, and stay current <strong>on</strong> laws<br />
and ec<strong>on</strong>omic trends that affect their business.<br />
They may hire and direct employees. To these,<br />
add obligati<strong>on</strong>s to family, friends, and community,<br />
and you start to appreciate the entrepreneur’s<br />
need to be organized as they manage<br />
time, m<strong>on</strong>ey, and other resources.<br />
• Willingness to take risks. Statistics show<br />
that nine out of ten small businesses begun in<br />
a given year will fail. Although people who<br />
start businesses know that success isn’t guaranteed,<br />
they willingly risk financial and career<br />
security. Successful entrepreneurs know what<br />
hazards new businesses face, yet their c<strong>on</strong>fidence<br />
in themselves and their product or service<br />
outweighs this knowledge. They balance<br />
risk with good planning and foresight. Even<br />
when everything goes well, they risk change to<br />
increase productivity. See Fig. 24-2.<br />
• Physical stamina. Regular nine-to-five<br />
business hours d<strong>on</strong>’t apply to most small busi-<br />
24-2<br />
Owning your own business can be satisfying,<br />
challenging, and risky. Do you see yourself owning your<br />
own business some day?<br />
406 • UNIT 7 The Workplace<br />
ness owners. Entrepreneurs are typically<br />
involved in every aspect of running the business,<br />
especially at the start. After business<br />
hours, the owner may have to print employee<br />
schedules or wash windows. After completing<br />
a job, the self-employed worker may send out<br />
customer satisfacti<strong>on</strong> surveys or design flyers.<br />
To meet such demands, a budding entrepreneur<br />
needs plenty of energy and stamina.<br />
• Ability to handle stress. As you can imagine,<br />
handling so many resp<strong>on</strong>sibilities can take<br />
an emoti<strong>on</strong>al toll. People who are not easily<br />
upset or discouraged by problems and who<br />
can make decisi<strong>on</strong>s, often under pressure, have<br />
the temperament to cope with the stress of<br />
running a business. They keep a sense of perspective<br />
and a sense of humor about their<br />
work. They are anchored by a clear set of values<br />
and priorities.<br />
• Ability to get al<strong>on</strong>g with others. Owning<br />
your own business means selling your product<br />
or service to others. Good communicati<strong>on</strong><br />
skills—listening, speaking, writing, and electr<strong>on</strong>ic—make<br />
interacti<strong>on</strong>s with customers and<br />
suppliers go smoothly. As a business grows, an<br />
entrepreneur might hire producti<strong>on</strong> workers<br />
or sales associates. With effective leadership<br />
skills, small business owners can train, manage,<br />
and motivate these employees.<br />
OPPORTUNITIES FOR<br />
ENTREPRENEURS<br />
Looking at entrepreneurs in acti<strong>on</strong>, people<br />
sometimes w<strong>on</strong>der why they didn’t start a similar<br />
business themselves. Why didn’t they? They<br />
might not have had the courage to take risks or<br />
the drive to figure out how to start a business—or<br />
they might not have had an inspiring idea in the<br />
first place. In the fashi<strong>on</strong> field, ideas for entrepreneurship<br />
are plentiful. Choosing the right idea<br />
and implementing it, however, takes some<br />
thought.<br />
Buying a Business<br />
One way to become an entrepreneur is to buy<br />
an existing business. While growing up, <strong>on</strong>e
How To…<br />
USE E-MAIL<br />
Using e-mail for business is different than using it to communicate with your friends.<br />
Teens tend to be very casual when communicating with peers; however, when e-mail is<br />
used in the business world, more formal standards apply.<br />
If you learn to follow the rules of etiquette for business e-mails, you will be taken more<br />
seriously. This will be a big help when you are searching for a job, communicating by<br />
e-mail as part of your job, or c<strong>on</strong>tacting a company with a c<strong>on</strong>sumer questi<strong>on</strong> or problem.<br />
• When you send an e-mail message, fill in the<br />
subject line with a few words that identify<br />
the message c<strong>on</strong>tent. Some people w<strong>on</strong>’t<br />
open an e-mail that lacks a subject line.<br />
Locating a stored e-mail message at a later<br />
date is easier when this informati<strong>on</strong> is<br />
included.<br />
• Keep e-mail messages short. L<strong>on</strong>g messages<br />
and reports can be attachments.<br />
• Check spelling, grammar, and punctuati<strong>on</strong><br />
with the spell-check feature.<br />
• Avoid using emotic<strong>on</strong>s or smiley faces in<br />
business e-mails. Also avoid letters or symbols<br />
that are used as shorthand for l<strong>on</strong>ger<br />
phrases, such as “g2g” (got to go) and<br />
“btw” (by the way).<br />
• Learn how to use the address book<br />
that came with your e-mail<br />
program. It will help you<br />
keep track of names,<br />
addresses, ph<strong>on</strong>e numbers,<br />
and e-mail<br />
addresses of any<strong>on</strong>e<br />
with whom you communicate.<br />
• Treat e-mail to coworkers the same as pers<strong>on</strong>al<br />
mail or files. D<strong>on</strong>’t read messages<br />
unless they are addressed to you.<br />
• Remember that employers have the right to<br />
set rules regarding the use of company email.<br />
They also have the right to read all<br />
messages.<br />
Exploring E-mail<br />
Suppose you own a fabric store and a<br />
shipment of fabric is late. Write an e-mail<br />
to the supplier about the late shipment.<br />
CHAPTER 24 Fashi<strong>on</strong> Entrepreneurs • 407
24-3<br />
Buying an existing business takes careful<br />
research to be c<strong>on</strong>fident that the business will make<br />
a profit.<br />
young man had a favorite sporting goods store.<br />
Eventually, he owned <strong>on</strong>e of his own. See Fig. 24-3.<br />
Buying a business is something like buying a<br />
home. You inherit all the advantages and disadvantages<br />
in locati<strong>on</strong>, c<strong>on</strong>diti<strong>on</strong>, and reputati<strong>on</strong>.<br />
Like a homebuyer, a business buyer needs to ask<br />
why the owner is selling. Is the owner retiring or<br />
moving <strong>on</strong> to a bigger venture, or is the business<br />
failing or product demand decreasing?<br />
To reduce unknown risks, a franchise business<br />
may be the answer. A franchise is the right to sell<br />
a company’s goods and services in a given area.<br />
Franchise owners first pay the parent company a<br />
set sum to purchase the franchise, then pay royalties<br />
<strong>on</strong> all goods or services sold. In return, they<br />
receive an established name and product, training,<br />
and advertising. They are resp<strong>on</strong>sible for<br />
daily decisi<strong>on</strong>s but have less c<strong>on</strong>trol over the<br />
business’s l<strong>on</strong>g-term directi<strong>on</strong>.<br />
While usually associated with fast-food restaurants,<br />
franchises are rapidly growing for clothing,<br />
accessories, home furnishings, and fabric stores.<br />
The Athlete’s Foot (athletic shoes and activewear),<br />
Gymboree (children’s wear), and Lady Mad<strong>on</strong>na<br />
(maternity) are manufacturer-franchise stores.<br />
408 • UNIT 7 The Workplace<br />
Such designers as Ralph Lauren, Yves Saint<br />
Laurent, D<strong>on</strong>na Karan, and Calvin Klein have<br />
designer-franchised shops in major cities.<br />
Starting a New Business<br />
For many would-be entrepreneurs, starting a<br />
new business is appealing. Self-starters have c<strong>on</strong>fidence<br />
in an idea and also in their pers<strong>on</strong>al abilities.<br />
They feel positive about future success. To<br />
take acti<strong>on</strong>, decisi<strong>on</strong>s must be made about how<br />
much m<strong>on</strong>ey, time, and energy to commit, based<br />
<strong>on</strong> available resources. Other major decisi<strong>on</strong>s<br />
include the following:<br />
• Will a product be sold? Merchandise can<br />
be purchased from manufacturers or craftspeople<br />
to sell to customers. A budding entrepreneur<br />
might sell pers<strong>on</strong>ally produced products.<br />
Examples are hand-knitted sweaters,<br />
decorative pillows, and children’s clothes.<br />
Some entrepreneurs have turned off-the-rack<br />
items into unique, pers<strong>on</strong>alized clothing. By<br />
embroidering a name, painting a sunflower, or<br />
adding a colorful appliqué, they create <strong>on</strong>e-ofa-kind<br />
designs. See Fig. 24-4.<br />
• Will a service be sold? In many communities,<br />
the most visible service jobs are dry clean-<br />
24-4<br />
Adding designs to sweatshirts is a small business<br />
that can be successful when managed well.
ers and alterati<strong>on</strong> specialists. Opportunities<br />
exist behind the scene as well. Copywriters,<br />
illustrators, and photographers sell their work<br />
to retailers, newspapers, magazines, catalogs,<br />
and advertising agencies. Wardrobe c<strong>on</strong>sultants<br />
advise clients <strong>on</strong> their appearance and<br />
image. Dressmakers create custom bridal<br />
gowns and veils. Many writers, artists, and<br />
c<strong>on</strong>sultants in fashi<strong>on</strong> services are freelancers.<br />
To freelance is to sell work or services without<br />
earning a regular salary from any <strong>on</strong>e<br />
employer. Freelancers charge by the job or the<br />
hour.<br />
• Where will the business be located?<br />
Many entrepreneurships begin as an in-home<br />
business. Business growth can lead the owner<br />
to a separate office, workroom, or factory.<br />
Businesses that sell goods made by others are<br />
usually located in a store. An office might be<br />
needed for a service that employs several people,<br />
such as a design office or a mail-order<br />
business.<br />
Technology Trends<br />
>>ERGONOMICS IN THE SEWING ROOM<br />
Erg<strong>on</strong>omics means designing and<br />
arranging physical surroundings and tools<br />
so that a pers<strong>on</strong> is more comfortable at<br />
work or when engaged in a hobby.<br />
Activities can be d<strong>on</strong>e more quickly and<br />
with fewer mistakes.<br />
A quilter cuts out many small fabric<br />
shapes, which can cause cramped hands<br />
and sore fingers. With an erg<strong>on</strong>omically<br />
designed rotary cutter, the handle fits the<br />
human hand, making the process easier. If<br />
the cutting surface is at the proper height,<br />
strain is reduced <strong>on</strong> the back and the<br />
arms. The top surface of the cutting table<br />
should equal the distance from the floor<br />
plus <strong>on</strong>e inch<br />
above the pers<strong>on</strong>’s<br />
elbow.<br />
Any<strong>on</strong>e who sews or works at a<br />
computer spends a lot of time in a chair.<br />
Having an erg<strong>on</strong>omically designed chair<br />
allows a pers<strong>on</strong> to work without straining<br />
the back or putting stress <strong>on</strong> other parts<br />
of the body. The chair should have a cushi<strong>on</strong>ed<br />
or c<strong>on</strong>toured seat to distribute<br />
weight evenly. A padded back rest helps<br />
support the lower back. A sloped fr<strong>on</strong>t<br />
edge helps prevent the seat edge from<br />
pressing into the back of the legs.<br />
Chair height is correct when the work<br />
surface is at elbow height. The entire sole<br />
of the foot should rest <strong>on</strong> the floor, and<br />
the back of the knee should be slightly<br />
higher than the seat of the chair.<br />
Even when using an erg<strong>on</strong>omic chair, a<br />
pers<strong>on</strong> should get up and move around for<br />
at least five minutes every hour. These<br />
mini-breaks increase the body’s blood flow<br />
and help reduce fatigue.<br />
INVESTIGATE<br />
Search the Internet for erg<strong>on</strong>omic tools and<br />
chairs designed for the sewer and quilter.<br />
CHAPTER 24 Fashi<strong>on</strong> Entrepreneurs • 409
• How will customers be reached? If offering<br />
a service, will customers come to a home,<br />
store, or office, or will clients be met at their<br />
own site? If offering a product, will the entrepreneur<br />
sell it in a store, through a catalog, or<br />
<strong>on</strong>-line? Another opti<strong>on</strong> is to sell <strong>on</strong> c<strong>on</strong>signment.<br />
With this method, a handmade item<br />
could be displayed in a craft shop. The maker<br />
receives a percentage of the price after the item<br />
is sold. Since the shop provides the “showroom”<br />
for the product, the craftpers<strong>on</strong>’s overhead<br />
expenses are limited.<br />
In-Home Business<br />
Up to 20 percent of all new businesses operate<br />
from the owner’s home. An office or workroom<br />
can be set up in a den, basement, or spare bedroom.<br />
A copywriter or graphic artist needs a<br />
computer and desk for workspace. An alterati<strong>on</strong>s<br />
specialist needs a sewing machine and pressing<br />
equipment, plus a place for customers to try <strong>on</strong><br />
garments.<br />
With an in-home business, space is not an<br />
extra expense. If the business fails, no m<strong>on</strong>ey is<br />
lost <strong>on</strong> unused property or an unneeded lease.<br />
The arrangement, however, has drawbacks.<br />
Young children, playful pets, and teleph<strong>on</strong>e<br />
callers can be daily disrupti<strong>on</strong>s. The entrepreneur<br />
may need to set strict rules about when family<br />
410 • UNIT 7 The Workplace<br />
24-5<br />
and neighbors are free to interrupt. Operating an<br />
in-home business can affect the homeowner’s<br />
insurance policy, as additi<strong>on</strong>al coverage may be<br />
needed. See Fig. 24-5.<br />
Store or Shop<br />
Have you heard any<strong>on</strong>e describe the “three”<br />
most important c<strong>on</strong>cerns when buying a home?<br />
They are “locati<strong>on</strong>, locati<strong>on</strong>, and locati<strong>on</strong>.” The<br />
point made is certainly also true of a store,<br />
whether a boutique, a fabric store, or a yarn and<br />
needlework shop. The right locati<strong>on</strong> can make<br />
the difference between success and failure. A<br />
highly visible site is not <strong>on</strong>ly easy for customers<br />
to find, but it also encourages passers-by to<br />
window-shop. In this sense, a good locati<strong>on</strong> is<br />
like free advertising.<br />
A new store usually requires c<strong>on</strong>stant attenti<strong>on</strong><br />
from the owner. Finding a trustworthy store<br />
manager to share resp<strong>on</strong>sibility can be challenging,<br />
and training the pers<strong>on</strong> often takes time.<br />
Mail Order<br />
A mailbox stuffed with catalogs may annoy<br />
many c<strong>on</strong>sumers, but catalogs are critical to mailorder<br />
businesses. See Fig. 24-6. Those who<br />
develop mail-order businesses take orders for<br />
merchandise and ship it to customers. They avoid<br />
the cost of buying or leasing space to display their<br />
merchandise. They have other expenses, however,<br />
including advertising, packing, and shipping<br />
costs.<br />
Mail-order businesses can start small. Suppose<br />
a pers<strong>on</strong> makes beautiful baby blankets and<br />
quilts. Showing them at craft fairs, al<strong>on</strong>g with a<br />
business card, might get sales started. Finding<br />
places that allow flyers and photos to be displayed<br />
is another idea. As sales pick up, the entrepreneur<br />
may be able to afford advertising in a newspaper<br />
In-home businesses are comm<strong>on</strong> today,<br />
especially those that can be c<strong>on</strong>ducted via computer.<br />
What are some examples?
or magazine. Since items can be made as orders<br />
are received, <strong>on</strong>ly a small product inventory is<br />
usually needed at first. As the business grows,<br />
additi<strong>on</strong>al space may be needed for producti<strong>on</strong>,<br />
storage, and shipping.<br />
Web Sites<br />
As <strong>on</strong>-line shopping increases, many entrepreneurs<br />
set up Web sites to do business. With just a<br />
few clicks of a mouse, customers from all over the<br />
world can view merchandise and order <strong>on</strong>-line.<br />
Running an <strong>on</strong>-line business has similar advantages<br />
and disadvantages to a mail-order business.<br />
Small business owners may set up a site themselves<br />
or hire a Web-site designer to produce the<br />
pages, c<strong>on</strong>taining text, graphics, and possibly<br />
sound. All Web sites must have a registered<br />
domain name, paid with an annual fee. Space for<br />
the site must be obtained from an Internet<br />
provider, who sometimes supplies this as part of<br />
the service. The size of the site determines<br />
whether customers will be able to actually order<br />
<strong>on</strong>-line or must call the teleph<strong>on</strong>e number shown<br />
<strong>on</strong> the site. When the site is set up, key words that<br />
people might use when searching the Internet are<br />
placed in a special locati<strong>on</strong> for access by the<br />
search engines.<br />
24-6<br />
A mail-order business can send direct mail pieces,<br />
such as a brochure or catalog, to potential customers.<br />
RESPONSIBILITIES OF<br />
ENTREPRENEURS<br />
When you are your own boss—and possibly<br />
some<strong>on</strong>e else’s too—you can’t sit back and wait<br />
for things to happen. You have to take charge<br />
right from the start. Before launching a business,<br />
entrepreneurs make plans and do research. L<strong>on</strong>gterm<br />
success hinges <strong>on</strong> recognizing all resp<strong>on</strong>sibilities<br />
and meeting them.<br />
Market Research<br />
Market research provides informati<strong>on</strong> needed<br />
to start and maintain a business. After hearing<br />
people say they couldn’t find any<strong>on</strong>e to make<br />
wedding and prom gowns, <strong>on</strong>e pers<strong>on</strong> with excellent<br />
sewing skills decided to investigate. She<br />
found that no <strong>on</strong>e was providing this service in<br />
her area. After verifying that the need existed, she<br />
launched a dressmaking business of her own.<br />
Fashi<strong>on</strong><br />
READY OR NOT? Two ec<strong>on</strong>omics<br />
researchers report that entrepreneurs<br />
are becoming an increasingly important<br />
segment of the American ec<strong>on</strong>omy. The<br />
authors state that schools in the United<br />
States should teach and encourage teens<br />
to become entrepreneurs. Without understanding<br />
the basics of owning a business,<br />
teens may not be ready for the workplace.<br />
The report also states that the entrepreneurial<br />
spirit of self-c<strong>on</strong>fidence, problem<br />
solving, and taking chances is valuable to<br />
success in pers<strong>on</strong>al life, as well as to<br />
career success.<br />
Facts<br />
CHAPTER 24 Fashi<strong>on</strong> Entrepreneurs • 411
24-7<br />
Before starting a business, an entrepreneur<br />
needs to know whether a product or service is marketable.<br />
Computer research can provide some of this<br />
informati<strong>on</strong>.<br />
Identifying whether a service or product is in<br />
demand is a basic part of market research.<br />
Market research also predicts which people<br />
will buy, how often, under what c<strong>on</strong>diti<strong>on</strong>s, and<br />
at what price. This informati<strong>on</strong> helps identify a<br />
target audience, a specific group of potential customers.<br />
See Fig. 24-7.<br />
Large corporati<strong>on</strong>s spend huge sums <strong>on</strong> market<br />
research. They check the competiti<strong>on</strong> very<br />
carefully, as any entrepreneur must. To sell a<br />
product yourself, you would need to check the<br />
competiti<strong>on</strong>. You could visit stores to see whether<br />
something similar is sold and for what price.<br />
Advertisements and an Internet search might<br />
yield more informati<strong>on</strong>. Before marketing a<br />
handcrafted product, you could browse craft<br />
fairs. Your product would need to stand out from<br />
the rest. When offering a service, you must decide<br />
how to make it better than the competiti<strong>on</strong>.<br />
412 • UNIT 7 The Workplace<br />
Financing<br />
Almost every business needs funds to cover<br />
start-up costs. A specialist in making slipcovers<br />
and draperies, for example, needs a good sewing<br />
machine and varied equipment to start. The cost<br />
of rented space must be figured. To make the<br />
business grow, advertising m<strong>on</strong>ey is needed.<br />
Without adequate funding, a business might not<br />
be able to survive the growth period that every<br />
new business faces. A bigger undertaking requires<br />
a bigger investment.<br />
Some new entrepreneurs pay costs from their<br />
own savings. Investing their own m<strong>on</strong>ey shows<br />
they have c<strong>on</strong>fidence in the venture, which is<br />
helpful if a loan is also needed. Family and friends<br />
may provide sums of m<strong>on</strong>ey, but this can put<br />
people in an awkward positi<strong>on</strong> if the loan can’t be<br />
repaid.<br />
Many entrepreneurs prefer to apply for a loan<br />
at a bank or credit uni<strong>on</strong>. See Fig. 24-8. Another<br />
possibility is the government-funded Small<br />
24-8<br />
Financial support is needed to get many busi-<br />
nesses started. What resources do people have?
24-9<br />
An attorney can help sort through<br />
the different regulati<strong>on</strong>s an entrepreneur<br />
must c<strong>on</strong>sider when starting a new business.<br />
Business Administrati<strong>on</strong>. This organizati<strong>on</strong><br />
provides financial aid and<br />
advice to independently owned businesses<br />
that have a limited number of<br />
employees, assets, and sales and do not<br />
dominate their field.<br />
Regardless of the lender, aspiring entrepreneurs<br />
must make a str<strong>on</strong>g case for themselves.<br />
They’ll be asked about their educati<strong>on</strong>, business<br />
experience, and pers<strong>on</strong>al finances. A lender needs<br />
to know about the business itself: its size and<br />
locati<strong>on</strong>; the expected start-up costs; the goods or<br />
services offered; and the competiti<strong>on</strong>. The larger<br />
the loan, the more informati<strong>on</strong> the lender wants.<br />
Regulati<strong>on</strong>s<br />
Is a mail-order company that runs out of a<br />
spare bedroom a business? In the eyes of the law, it<br />
may be, and a wise entrepreneur checks and meets<br />
legal requirements—federal, state, and local.<br />
Learning about regulati<strong>on</strong>s should begin early,<br />
since such processes as those involving licensing<br />
and inspecti<strong>on</strong>s can take time. The chamber of<br />
commerce, the secretary of state’s office, and the<br />
Small Business Administrati<strong>on</strong> are excellent<br />
sources of informati<strong>on</strong>. Hiring an attorney who<br />
specializes in business law is often m<strong>on</strong>ey well<br />
invested. See Fig. 24-9.<br />
A business may have to satisfy laws and ordinances<br />
related to the following:<br />
• Z<strong>on</strong>ing. Most communities limit business<br />
operati<strong>on</strong>s in residential areas. Health and<br />
safety codes dictate certain features of commercial<br />
property, such as number and placement<br />
of exits.<br />
• Permits and licenses. Most businesses need<br />
some type of operating permit. Depending <strong>on</strong><br />
its type, a business may also need to register<br />
with a number of government regulatory<br />
groups. For taxati<strong>on</strong> purposes, for instance, a<br />
business needs a tax identificati<strong>on</strong> number. It<br />
may need a city occupati<strong>on</strong>al license. Special<br />
licenses are needed to manufacture some items,<br />
such as stuffed toys and quilts.<br />
• Name registrati<strong>on</strong>. One point of pride in<br />
starting a business is choosing a distinctive<br />
name. For identificati<strong>on</strong> and to prevent duplicati<strong>on</strong>,<br />
this name must be registered with the<br />
state.<br />
Setting Prices<br />
According to <strong>on</strong>e saying, “The fool knows the<br />
price of everything and the value of nothing.” The<br />
entrepreneur, <strong>on</strong> the other hand, must know the<br />
value of many things to set a fair price for a product.<br />
What should an entrepreneur c<strong>on</strong>sider when<br />
deciding how much to charge?<br />
• Cost of goods or supplies. Obviously, the<br />
price has to cover what is spent for ready-made<br />
goods or the supplies to make items.<br />
• Operating expenses. Rent, utilities, advertising,<br />
salaries, and other costs of doing business<br />
add to the markup, or increase in price.<br />
Entrepreneurs should include their own salary<br />
as an operating cost.<br />
CHAPTER 24 Fashi<strong>on</strong> Entrepreneurs • 413
INCOME FROM SALES<br />
Sales<br />
Cost of goods<br />
Gross Profit<br />
OPERATING EXPENSES<br />
Salaries<br />
Rent<br />
Utilities<br />
Advertising<br />
Total Operating Expenses<br />
Net Profit (Before Taxes)<br />
• C<strong>on</strong>sumer demand. Sometimes prices can<br />
be higher when demand is high, partly to make<br />
up for slow sales when demand drops.<br />
• Competitors’ prices. The price of a product<br />
must be <strong>on</strong> a par with what the competiti<strong>on</strong><br />
charges, given the relative quality of the products.<br />
Service providers likewise need to know<br />
how their service compares to that of others,<br />
and whether to ask more or less than the going<br />
rate.<br />
• Profit. The goal of every business is to make a<br />
profit. This is the amount of m<strong>on</strong>ey remaining<br />
after subtracting the cost of goods or supplies<br />
and operating expenses from income. If costs<br />
exceed the income from sales, then the business<br />
has lost m<strong>on</strong>ey. See Fig. 24-10.<br />
414 • UNIT 7 The Workplace<br />
Fabric Store Yearly Income<br />
and Expenses<br />
$248,150<br />
126,795<br />
$ 27,392<br />
18,000<br />
6,785<br />
3,274<br />
$121,355<br />
$ 55,451<br />
$ 65,904<br />
24-10 No business can survive for very l<strong>on</strong>g without a<br />
profit. What determines the amount of profit a business<br />
makes?<br />
24-11<br />
A growing business requires careful<br />
record keeping, inventory c<strong>on</strong>trol, and cost<br />
analysis. Such records can be maintained<br />
with computer software.<br />
Keeping Records<br />
In even the smallest business, accurate<br />
records are vital to success. An inventory<br />
record, for example, reveals whether an item is<br />
selling or just taking up space. This influences<br />
decisi<strong>on</strong>s about buying supplies and setting<br />
prices. Recording income and expenses is<br />
essential to figuring profit or loss, and also<br />
when paying taxes. Spreadsheet software for<br />
financial planning simplifies record keeping<br />
for businesses of every size. See Fig. 24-11.<br />
Advertising and Promoti<strong>on</strong><br />
The most outstanding products and services<br />
are of no use if people are unaware of<br />
them. Entrepreneurs can plan advertising to
Descripti<strong>on</strong> of the<br />
Business<br />
• Type of business<br />
• Product or service<br />
• Locati<strong>on</strong><br />
• Goals<br />
24-12<br />
finalized plan.<br />
Marketing Plan<br />
• Potential<br />
customers<br />
• Competiti<strong>on</strong><br />
• Pricing<br />
• Advertising and<br />
public relati<strong>on</strong>s<br />
reach potential customers most effectively if they<br />
research their target audience. Suppose you had a<br />
business pers<strong>on</strong>alizing T-shirts and caps with<br />
sports symbols. You might advertise in the sports<br />
secti<strong>on</strong> of the local newspaper, leave business<br />
cards at a sporting goods store, and hand out flyers<br />
at sports events.<br />
Promoti<strong>on</strong>, which is advertising that isn’t paid<br />
for, is especially valuable to a new entrepreneur.<br />
For example, an article in a local paper and referrals<br />
by related businesses inform potential customers<br />
at no cost. Word of mouth spread by satisfied<br />
customers is worth more than many paid ads.<br />
DEVELOPING A BUSINESS<br />
PLAN<br />
What would you think if you heard a homebuilder<br />
say, “Oh, we d<strong>on</strong>’t need blueprints. We’ll<br />
just lay a floor until the floorboards are g<strong>on</strong>e and<br />
then start building the walls. Once we run out of<br />
drywall, we’ll know whether we have enough<br />
shingles for a roof.” Would you expect good<br />
results?<br />
Business Plan<br />
Management Plan<br />
• Pers<strong>on</strong>al skills<br />
• Pers<strong>on</strong>nel needs<br />
• Resp<strong>on</strong>sibilities of<br />
self and employees<br />
• Special needs of<br />
employees<br />
Financial Management<br />
Plan<br />
• Start-up m<strong>on</strong>ey<br />
• Operating budget<br />
• Loans needed<br />
• Accounting and<br />
inventory-c<strong>on</strong>trol<br />
systems<br />
A business plan should be thoroughly prepared. These are the main comp<strong>on</strong>ents, but many details go into the<br />
Despite all the time, energy, and m<strong>on</strong>ey<br />
invested, many entrepreneurs treat their business<br />
in a similar way. They’re excited about owning a<br />
business and perhaps encouraged by early success.<br />
They forget a well-known warning am<strong>on</strong>g<br />
established business owners: poor planning, and<br />
not a poor product, is the main reas<strong>on</strong> that businesses<br />
fail.<br />
A business plan is like a blueprint. It organizes,<br />
in outline form, all the informati<strong>on</strong> an aspiring<br />
entrepreneur needs to gather before taking<br />
acti<strong>on</strong>. It details the topics to research and analyzes<br />
competiti<strong>on</strong>. It includes documents and<br />
forms, such as loan applicati<strong>on</strong>s, equipment and<br />
supply lists, and projected earnings statements.<br />
See Fig. 24-12.<br />
A thorough business plan is worth the effort.<br />
The plan identifies potential problems, allowing<br />
the owner to budget more resources where<br />
needed. Equally important, a business plan is a<br />
tool for goal setting. By defining the business in<br />
all of its particulars, the plan promotes a sense of<br />
directi<strong>on</strong> and c<strong>on</strong>fidence in the future.<br />
CHAPTER 24 Fashi<strong>on</strong> Entrepreneurs • 415
CHAPTER 24<br />
CHAPTER SUMMARY<br />
• Entrepreneurs must be self-motivated people<br />
who are willing to assume all risks and<br />
resp<strong>on</strong>sibilities for managing a business.<br />
• An entrepreneur may buy an existing business.<br />
Starting a new business requires<br />
making decisi<strong>on</strong>s about what to sell and<br />
where to locate.<br />
• A small business may be run from the<br />
owner’s home, a rented locati<strong>on</strong>, by mail<br />
order, or over the Internet.<br />
• A would-be business owner needs to investigate<br />
markets, financing, and regulati<strong>on</strong>s.<br />
• An entrepreneur must figure the costs of<br />
business to set a price for goods or services<br />
provided.<br />
• A good business plan helps an entrepreneur<br />
get off to an effective start by organizing<br />
important informati<strong>on</strong> in four main<br />
categories.<br />
USING KEY TERMS<br />
For each Key Term, write a questi<strong>on</strong> that can<br />
be answered by that term <strong>on</strong> a separate slip<br />
of paper. Have <strong>on</strong>e pers<strong>on</strong> read the questi<strong>on</strong>s<br />
while classmates take turns providing the<br />
answers.<br />
416 • UNIT 7 The Workplace<br />
Review<br />
RECALLING THE FACTS<br />
1. Why is self-motivati<strong>on</strong> an important trait<br />
for entrepreneurs?<br />
2. Why do entrepreneurs need good physical<br />
and emoti<strong>on</strong>al health?<br />
3. What are some advantages and disadvantages<br />
of buying a franchise?<br />
4. What questi<strong>on</strong>s about the product to be<br />
sold must an entrepreneur ask?<br />
5. What opti<strong>on</strong>s does an entrepreneur have<br />
for reaching customers?<br />
6. What factors should an entrepreneur<br />
c<strong>on</strong>sider before opening an in-home<br />
business?<br />
7. Describe the expense c<strong>on</strong>cerns of running<br />
a mail-order business.<br />
8. What decisi<strong>on</strong>s does an entrepreneur<br />
have to make when setting up a Web<br />
site?<br />
9. What valuable informati<strong>on</strong> can be<br />
revealed by market research?<br />
10. How might an entrepreneur finance a<br />
business?<br />
11. Name and describe two types of regulati<strong>on</strong>s<br />
that a business owner needs to<br />
comply with.<br />
12. What factors must be c<strong>on</strong>sidered when<br />
deciding what to charge for an item?<br />
13. Compare advertising and promoti<strong>on</strong>.<br />
14. What is the value of a good business<br />
plan?
and Activities<br />
THINKING CRITICALLY<br />
1. Henry Ford said, “A setback is the opportunity<br />
to begin again more intelligently.”<br />
Why is this a useful motto for an<br />
entrepreneur?<br />
2. In a small clothing shop, what training is<br />
needed by sales associates who fill in for<br />
the owner? Is use of equipment enough?<br />
Explain.<br />
3. The number of hits <strong>on</strong> the Web site of a<br />
new Internet company that sells a product<br />
has high impact <strong>on</strong> the owner and<br />
business. Why?<br />
APPLYING KNOWLEDGE<br />
1. Self-analysis. Using a scale of 1-10, rate<br />
yourself <strong>on</strong> each of the six pers<strong>on</strong>al qualities<br />
needed for success as an entrepreneur.<br />
Ten should show a high degree of<br />
that quality. Total the numbers. In writing,<br />
explain whether or not you would<br />
want to be an entrepreneur.<br />
2. Market research. Think of a product or<br />
service that you could provide. Research<br />
the market potential for this idea. How<br />
can you determine the demand and<br />
assess the competiti<strong>on</strong>? How could you<br />
set your product or service apart from<br />
others? Share your research with the<br />
class.<br />
CHAPTER 24<br />
3. Business software. Practice using a<br />
computer software program designed for<br />
business. For example, you might use a<br />
database to record inventory for an<br />
imaginary business or a spreadsheet to<br />
compute pay for several employees.<br />
4. Business brainstorm. Think of a service<br />
that teens could provide in your community.<br />
Create a flyer promoting the new<br />
business.<br />
MAKING>
CHAPTER 25<br />
Global Marketplace<br />
OBJECTIVES<br />
• Compare the pros<br />
and c<strong>on</strong>s of offshore<br />
producti<strong>on</strong>.<br />
• Describe unethical<br />
practices<br />
associated with<br />
sweatshops and<br />
counterfeiting.<br />
• Identify laws and<br />
regulati<strong>on</strong>s<br />
affecting trade.<br />
• Describe current<br />
trends in the<br />
textile and apparel<br />
industries.<br />
KEY TERMS<br />
balance of trade<br />
counterfeit<br />
domestic<br />
exports<br />
free trade<br />
global sourcing<br />
imports<br />
off-shore producti<strong>on</strong><br />
OSHA<br />
quota<br />
sourcing<br />
tariff<br />
418 • UNIT 7 The Workplace
EXAMINETHISISSUE<br />
Getting bigger. In order to expand<br />
their business, many merchandisers have<br />
grown larger by buying out other establishments<br />
or merging with each other.<br />
They save m<strong>on</strong>ey in many ways, streamline<br />
their operati<strong>on</strong>s, and make their lines<br />
available to a wider customer base. Some<br />
people see some disadvantages in this<br />
trend. They point out that small businesses<br />
find it harder to compete against<br />
huge companies. They also note that<br />
unique clothing is harder to find. Wherever<br />
you go, shopping malls have similar<br />
stores with similar merchandise.<br />
What do you think?<br />
Which point of view do you favor? How<br />
is the ec<strong>on</strong>omy of the country affected<br />
when businesses expand? When small<br />
businesses can’t survive?<br />
If you examine the garment labels in<br />
your clothing, you may be surprised. In additi<strong>on</strong><br />
to “Made in the U.S.A.,” you’ll find many<br />
other countries listed as the fabric source or the<br />
place where the garment was made. This list<br />
could include Sri Lanka, India, China, Taiwan,<br />
Egypt, Jamaica, Malaysia, Macao, Turkey, Israel,<br />
Brunei, H<strong>on</strong>g K<strong>on</strong>g, and the Philippines. Your<br />
closet represents the global marketplace. See Fig.<br />
25-1.<br />
GLOBAL ISSUES<br />
In today’s world, raw materials and finished<br />
products flow back and forth am<strong>on</strong>g countries all<br />
over the globe. Bales of cott<strong>on</strong> grown in the<br />
United States, for example, could be shipped<br />
overseas to Turkey, where the fibers are processed<br />
and woven into fabric. The fabric then ships from<br />
Turkey to Taiwan, where it’s cut and sewn into<br />
shirts for an apparel company based in the U.S.<br />
The apparel company sells the shirts to U.S.<br />
retailers, as well as to stores in Europe and Japan.<br />
Decisi<strong>on</strong>s about sourcing, or choosing where<br />
to manufacture or purchase goods, impact a<br />
company’s competitive edge and profitability.<br />
Many textile and apparel manufacturers, as well<br />
as retailers, have turned to global sourcing. By<br />
producing or buying goods in other countries at<br />
lower costs, U.S. companies can compete more<br />
successfully in the global marketplace. Global<br />
sourcing, however, raises issues about imports<br />
and exports, the balance of trade, market shares,<br />
foreign competiti<strong>on</strong>, and internati<strong>on</strong>al laws and<br />
regulati<strong>on</strong>s.<br />
Imports and Exports<br />
Goods that travel between countries are<br />
imports and exports. Imports come into a country<br />
from foreign countries. Exports are sent out<br />
from <strong>on</strong>e country to others. The balance of trade<br />
compares the values of a country’s imports and<br />
exports.<br />
25-1<br />
Labels show that many garments and other<br />
items, including fibers and fabrics, come from a l<strong>on</strong>g<br />
list of different countries.<br />
CHAPTER 25 Global Marketplace • 419
25-2<br />
Many products come to the United States from<br />
countries where producti<strong>on</strong> costs are cheaper. What<br />
explains the lower costs?<br />
The term domestic is often used when talking<br />
about internati<strong>on</strong>al trade. For any country, the<br />
products that originate there and the companies<br />
that reside there are known as domestic. In the<br />
United States, domestic companies produce huge<br />
amounts of fiber, fabric, and apparel goods. At<br />
the same time, the U.S. imports vast quantities of<br />
these from all over the world. In fact, the U.S.<br />
imports three times the amount of textile and<br />
apparel products that it exports. Thus, the value<br />
of exported goods is lower than the value of<br />
imported goods. This deficit in the balance of<br />
trade c<strong>on</strong>cerns the textile and apparel industries.<br />
To increase their share of global markets, many<br />
fabric producers acquire or establish mills<br />
abroad, usually near fiber sources. The mills may<br />
be wholly owned by a U.S. firm or jointly owned<br />
with a partner from another country. By producing<br />
some goods abroad, domestic manufacturers<br />
are better able to defend against the competiti<strong>on</strong><br />
of foreign-made fabrics. This also puts domestic<br />
manufacturers in a more favorable positi<strong>on</strong> to sell<br />
in countries that limit U.S. imports.<br />
The apparel industry also faces tough competitive<br />
challenges as the global clothing market<br />
grows. Producti<strong>on</strong> costs are cheaper in many<br />
other countries. Standards of living are lower.<br />
People are paid much lower wages. Employers in<br />
420 • UNIT 7 The Workplace<br />
many foreign countries d<strong>on</strong>’t provide healthcare<br />
benefits, c<strong>on</strong>tribute to retirement plans, or offer<br />
many of the other benefits that U.S. workers have.<br />
This means that apparel from foreign sources can<br />
be sold at lower prices than clothing manufactured<br />
in the U.S. See Fig. 25-2.<br />
Imports also affect the accessories field. Today,<br />
most higher-priced leather shoes come from<br />
Italian manufacturers. For less expensive leather<br />
shoes, the bulk is imported from China, Brazil,<br />
and Spain. Very little footwear is still manufactured<br />
in the U.S.<br />
To help increase exports, U.S. companies are<br />
promoting the “Made in the U.S.A.” label, which<br />
has prestige in other countries. Because the<br />
apparel industry has a reputati<strong>on</strong> for quality<br />
goods and trend-setting styles, foreign c<strong>on</strong>sumers<br />
eagerly seek many U.S. brands. Individual<br />
American designers also have str<strong>on</strong>g followings<br />
in such countries as Canada and Japan.<br />
Sourcing and Off-Shore<br />
Producti<strong>on</strong><br />
Sourcing decisi<strong>on</strong>s are important to textile and<br />
apparel manufacturers, as well as retailers. Some<br />
companies are very committed to domestic producti<strong>on</strong><br />
and want to label their products “Made<br />
in the U.S.A.” See Fig. 25- 3. Other companies are<br />
c<strong>on</strong>cerned about producing their goods at the<br />
best possible price, regardless of manufacturing<br />
locati<strong>on</strong>.<br />
25-3<br />
Some labels are evidence of domestic producti<strong>on</strong><br />
in the U.S. Why are these labels significant to American<br />
labor?
Fashi<strong>on</strong><br />
SMALL BEGINNINGS.<br />
Because sewing clothes requires little<br />
equipment, it’s a popular way for women in<br />
developing countries to make m<strong>on</strong>ey. Some<br />
internati<strong>on</strong>al aid groups help women<br />
increase their income by funding small<br />
banks, which loan the m<strong>on</strong>ey needed to<br />
buy fabric and sewing machines. The<br />
women pay back the loans from their earnings<br />
and often take out larger loans as<br />
their business expands. Some women pool<br />
their resources to form a cooperative business,<br />
<strong>on</strong>e that is jointly owned. These programs<br />
allow women to lift themselves and<br />
their families out of poverty.<br />
Facts<br />
With off-shore producti<strong>on</strong>, domestic companies<br />
manufacture merchandise in foreign countries.<br />
They can lower costs and compete more<br />
effectively with low-cost imports. Some people<br />
see this as a threat to American labor; others<br />
believe it’s the <strong>on</strong>ly way for U.S. manufacturers to<br />
remain competitive.<br />
Because apparel producti<strong>on</strong> is labor intensive,<br />
labor costs are an issue in sourcing decisi<strong>on</strong>s.<br />
Many U.S. apparel makers have moved some or all<br />
of their producti<strong>on</strong> off shore, where wages are<br />
much lower. Off-shore producti<strong>on</strong> is found in<br />
such developing countries as Costa Rica,<br />
Guatemala, and China and in such newly industrialized<br />
countries as Mexico, Brazil, H<strong>on</strong>g K<strong>on</strong>g,<br />
South Korea, and Taiwan. Even l<strong>on</strong>g-industrialized<br />
countries—Canada, Japan, and those in Western<br />
Europe—produce goods for U.S. manufacturers.<br />
Fabrics are also produced off shore, in such<br />
countries as Korea and China. As a result, most<br />
domestic textile companies now produce fewer<br />
textiles for apparel and more for industrial and<br />
household goods. Over 60 percent of fabrics<br />
made and sold in the U.S. are for the n<strong>on</strong>apparel<br />
market.<br />
Some domestic companies own or lease their<br />
own facilities overseas. They believe producing<br />
products in their own plants provides greater<br />
quality c<strong>on</strong>trol. Others companies use c<strong>on</strong>tractors,<br />
which usually gives greater flexibility. The<br />
companies are free to move producti<strong>on</strong> to<br />
another plant or another country to obtain a better<br />
price or better quality.<br />
For a retailer, buying foreign-made clothing<br />
has limitati<strong>on</strong>s. Purchasing decisi<strong>on</strong>s must be<br />
made very early—at least eight to nine m<strong>on</strong>ths<br />
before the merchandise arrives in the store. If a<br />
particular style turns out to be a best seller, there<br />
is no opportunity for reorders.<br />
Sweatshops<br />
Sweatshops got their name from working c<strong>on</strong>diti<strong>on</strong>s<br />
in the nineteenth century. Clothing manufacturers<br />
profited by paying their employees<br />
very low wages for working excessive hours under<br />
unsanitary c<strong>on</strong>diti<strong>on</strong>s. Profits were said to be<br />
“sweated” out of the workers.<br />
Today, many nati<strong>on</strong>al and internati<strong>on</strong>al laws<br />
prohibit sweatshops. Most manufacturers follow<br />
safe and fair employment practices. See Fig. 25-4<br />
<strong>on</strong> page 422. Unfortunately, sweatshops still exist,<br />
both in the U.S. and in other countries. Unethical<br />
owners and operators pay their employees less<br />
than minimum wage, d<strong>on</strong>’t pay overtime, and<br />
follow other illegal practices, such as evading<br />
taxes and violating fire and building codes. They<br />
often seek and exploit undocumented immigrants,<br />
who suffer l<strong>on</strong>g hours, low pay, and miserable<br />
working c<strong>on</strong>diti<strong>on</strong>s just to have a job. Such<br />
employers take advantage of immigrants who are<br />
not fluent in English and who fear deportati<strong>on</strong> if<br />
they report the poor working c<strong>on</strong>diti<strong>on</strong>s.<br />
One reas<strong>on</strong> sweatshops still exist is the pressure<br />
to produce goods at low cost. As companies<br />
have shifted from owning their own factories to<br />
using c<strong>on</strong>tractors and subc<strong>on</strong>tractors to handle<br />
the assembly part of producti<strong>on</strong>, many specialized<br />
facilities have appeared. These small operators<br />
are more difficult for federal and state agencies<br />
to m<strong>on</strong>itor and inspect.<br />
CHAPTER 25 Global Marketplace • 421
25-4<br />
Since working c<strong>on</strong>diti<strong>on</strong>s are regulated, most<br />
clothing producti<strong>on</strong> takes place in envir<strong>on</strong>ments that are<br />
safe and fair.<br />
In the U.S., government inspectors have found<br />
people working under horrid c<strong>on</strong>diti<strong>on</strong>s, for far<br />
less than minimum wage (as little as 65 cents per<br />
hour), for l<strong>on</strong>g hours (16 to 18 hours a day), and<br />
with children working and playing al<strong>on</strong>gside<br />
their mothers in factories. In other countries<br />
where government officials aren’t interested in<br />
supporting human rights, c<strong>on</strong>diti<strong>on</strong>s may be<br />
even worse. In Bangladesh, apparel workers earn<br />
as little as 20 cents per hour; in parts of El<br />
Salvador, they earn 56 cents an hour.<br />
U.S. government agencies have asked manufacturers<br />
and retailers to take greater resp<strong>on</strong>sibility<br />
for the working c<strong>on</strong>diti<strong>on</strong>s of their c<strong>on</strong>tractors<br />
and subc<strong>on</strong>tractors, both domestically and<br />
off shore. Many large retailers and mass manufacturers<br />
have adopted sourcing guidelines. They<br />
regularly inspect foreign c<strong>on</strong>tractors to ensure<br />
that workers are not exploited. Other groups,<br />
including labor, human rights, and religious<br />
groups, have put pressure <strong>on</strong> apparel manufacturers<br />
and retailers not to use foreign suppliers<br />
and c<strong>on</strong>tractors who violate human rights. In<br />
many cases, the best resp<strong>on</strong>se isn’t easy to identify.<br />
The need to protect children is pressing, yet<br />
many families in developing countries rely <strong>on</strong><br />
children’s c<strong>on</strong>tributi<strong>on</strong>s to family income. A<br />
422 • UNIT 7 The Workplace<br />
recent task force set the internati<strong>on</strong>al minimum<br />
age for hiring at fifteen. This was reduced to age<br />
fourteen <strong>on</strong>ly in countries that allow employment<br />
of factory workers younger than age fifteen.<br />
Industrial Piracy<br />
As you’re aware, well-known labels and logos<br />
<strong>on</strong> apparel and accessories attract c<strong>on</strong>sumers.<br />
Demand for these items has led to such unethical<br />
practices as trademark infringements and counterfeit<br />
goods. Counterfeit items are made with<br />
unauthorized use of registered trade names or<br />
trademarks. Typically, counterfeit goods are of<br />
much lower quality and sold at a far lower price<br />
than the authentic merchandise. Counterfeiting<br />
operati<strong>on</strong>s take many forms, from large-scale<br />
pirates, who reproduce thousands of items, to<br />
small-time operators. See Fig. 25-5.<br />
Another unethical and illegal practice is making<br />
black market or bootleg goods. The same<br />
manufacturers that make the legitimate items<br />
also make these. The goods end up <strong>on</strong> the “black<br />
market,” selling <strong>on</strong> the street for less than half the<br />
retail price.<br />
25-5<br />
Copied labels and logos can make counterfeit<br />
items look real, although prices and quality are lower.<br />
What would you think if you were offered a designer<br />
item by a salespers<strong>on</strong> <strong>on</strong> the street?
25-6<br />
Many products enter and leave the coun-<br />
try at shipping docks. Quotas c<strong>on</strong>trol imported<br />
amounts.<br />
The Trademark Counterfeiting Act of<br />
1984 created criminal sancti<strong>on</strong>s against<br />
domestic manufacturing of counterfeit<br />
goods. This covers everything from fake<br />
Levi jeans, to fake Rolex watches, to fake<br />
Kate Spade bags. Retailers who knowingly<br />
sell such goods can also be charged with<br />
breaking the law. Companies protect their trademark<br />
by m<strong>on</strong>itoring producti<strong>on</strong> of their goods,<br />
using coded labels to distinguish real goods from<br />
imitati<strong>on</strong>s, and working with the U.S. Customs<br />
Service to catch imported counterfeit items.<br />
Laws and Regulati<strong>on</strong>s<br />
As the fashi<strong>on</strong> industry becomes global, many<br />
U.S. producers and manufacturers deal with<br />
companies in other countries. As a result, U.S.<br />
businesses are affected by government regulati<strong>on</strong>s<br />
enacted to ensure that imported goods<br />
w<strong>on</strong>’t provide unfair competiti<strong>on</strong> for goods produced<br />
at home.<br />
Regulati<strong>on</strong> of Imports<br />
One way the Federal government protects U.S.<br />
manufacturers from unfair competiti<strong>on</strong> is with<br />
quotas. A quota is the set amount of specific merchandise<br />
that a country’s government allows to be<br />
imported. In general, quotas are expressed as numbers<br />
of units rather than dollar amounts. Because<br />
silk is not produced in the U.S., silk doesn’t have<br />
quotas. On the other hand, cott<strong>on</strong> is produced in<br />
the U.S., so the amount of cott<strong>on</strong> that can be<br />
imported from other parts of the world is limited.<br />
Quotas <strong>on</strong> cott<strong>on</strong> are varied. For example, different<br />
quotas are set for fibers of different staple<br />
lengths. See Fig. 25-6.<br />
Tariffs are another way to protect U.S. manufacturers.<br />
A tariff is a tax <strong>on</strong> imported items. The<br />
amount is usually a percentage of the item’s<br />
appraised value. The tax rate varies according to<br />
the individual item and its country of origin.<br />
Trade Agreements<br />
Internati<strong>on</strong>al agreements affect how the U.S.<br />
trades with other countries. There are three<br />
major trade agreements.<br />
• Most-Favored Nati<strong>on</strong> status (MFN). For<br />
political and diplomatic reas<strong>on</strong>s, certain countries<br />
are granted lower tariff rates. Some developing<br />
countries can ship goods to the U.S.<br />
duty-free (no tax) to help improve their ec<strong>on</strong>omic<br />
situati<strong>on</strong>.<br />
• North American Free Trade Agreement<br />
(NAFTA). Approved in 1994, this agreement<br />
created free trade, or the movement of goods<br />
not restricted by tariffs or quotas, between the<br />
U.S., Canada, and Mexico. The aim is to create<br />
ec<strong>on</strong>omic growth in all three nati<strong>on</strong>s. Labor<br />
uni<strong>on</strong>s fear, however, that U.S. employment<br />
will suffer because of lower wages in Mexico.<br />
• Caribbean Basin Initiative (CBI). This<br />
program offers trade protecti<strong>on</strong> to U.S. manufacturers,<br />
while encouraging growth of apparel<br />
industries in Latin America. Because these<br />
countries have low labor costs, they have<br />
become important producers of fashi<strong>on</strong> products.<br />
Special tariff schedules are permitted for<br />
products made of U.S. fabrics but assembled<br />
or sewn in CBI countries.<br />
CHAPTER 25 Global Marketplace • 423
Internati<strong>on</strong>al Trade Laws<br />
Federal laws regulate the internati<strong>on</strong>al trade of<br />
products, including textiles and apparel. The primary<br />
objective of these laws is to establish fair<br />
trade am<strong>on</strong>g countries. Any U.S. textile or apparel<br />
company that imports or exports goods is<br />
affected by these laws.<br />
The World Trade Organizati<strong>on</strong> (WTO) is the<br />
global internati<strong>on</strong>al organizati<strong>on</strong> that deals with<br />
trade between nati<strong>on</strong>s. It has negotiated about 30<br />
trade agreements, signed by most of the world’s<br />
trading nati<strong>on</strong>s. The goal of the WTO is to<br />
increase internati<strong>on</strong>al trade by promoting lower<br />
trade barriers. It also handles trade disputes and<br />
m<strong>on</strong>itors trade policies.<br />
Before the establishment of the WTO, global<br />
trade policies permitted the use of tariffs to protect<br />
domestic industries. Import quotas <strong>on</strong> merchandise<br />
from specified countries were also permitted.<br />
Now all WTO member countries are<br />
required to grant most-favored-nati<strong>on</strong> status to<br />
all other members.<br />
FASHION INDUSTRY<br />
TRENDS<br />
New technologies and new ways of doing business<br />
have helped make the fashi<strong>on</strong> industry more<br />
profitable. They have also made it easier to produce<br />
and sell textile and apparel products almost<br />
anywhere in the world.<br />
Advanced Technologies<br />
Advanced technologies have revoluti<strong>on</strong>ized<br />
every segment of the fashi<strong>on</strong> industry, from the<br />
producti<strong>on</strong> of raw materials to the final distributi<strong>on</strong><br />
to c<strong>on</strong>sumers. Their chief advantages are<br />
saving time and reducing costs.<br />
• CAD (computer-aided design). Businesses<br />
that employ CAD systems for textile and garment<br />
designs are able to produce designs<br />
faster, more accurately, and with fewer people.<br />
CAD also provides flexibility, making it easier<br />
to react to changes in market demand.<br />
• CAM (computer-aided manufacturing).<br />
These computer systems c<strong>on</strong>trol the produc-<br />
424 • UNIT 7 The Workplace<br />
25-7<br />
Through specialized technology, such as this<br />
cutting machine, producti<strong>on</strong> in the fashi<strong>on</strong> industry is<br />
streamlined.<br />
ti<strong>on</strong> steps in textile and apparel manufacturing.<br />
Programmable pattern-making machines,<br />
cutting machines, and sewing machines speed<br />
up producti<strong>on</strong>. See Fig. 25-7.<br />
• CIM (computer-integrated manufacturing).<br />
This system links computers to direct the<br />
entire producti<strong>on</strong> process, from design to finished<br />
garments. Both CAD and CAM systems<br />
are linked into CIM. Computers interface with<br />
each other, prepare specificati<strong>on</strong> sheets, and<br />
report costs. A CIM system eliminates repetitious<br />
data entries, reduces errors, and offers<br />
great cost savings.<br />
• Quick Resp<strong>on</strong>se (QR). This technology,<br />
described <strong>on</strong> page 141, covers management<br />
systems and business strategies that reduce the<br />
time between fiber producti<strong>on</strong> and the sale of<br />
finished products to c<strong>on</strong>sumers. Benefits<br />
include increased efficiency, a shorter timeline<br />
for producti<strong>on</strong> and distributi<strong>on</strong>, and increased<br />
profitability.
Business Growth<br />
Businesses are c<strong>on</strong>stantly seeking new methods<br />
to make themselves more efficient and competitive<br />
in the global marketplace. Some comm<strong>on</strong><br />
strategies include the following:<br />
• Mergers and acquisiti<strong>on</strong>s. Companies<br />
merge or purchase (acquire) other companies<br />
to form a larger corporate organizati<strong>on</strong>. The<br />
goal is to increase sales, reduce operating costs,<br />
and obtain financial resources. At the retail<br />
level, Federated Department Stores has<br />
acquired many leading department stores<br />
EDI, or electr<strong>on</strong>ic data interchange, is<br />
the technology that allows computers at<br />
two companies to “talk” to each other.<br />
The two computer systems may communicate<br />
directly or through a third party’s<br />
computer system, called a VAN, or valueadded<br />
network.<br />
Large manufacturers and large retailers<br />
use EDI technology to eliminate paperwork<br />
between the two companies. Such<br />
forms as purchase orders, invoices, packing<br />
slips, inventory forms, and shipping<br />
documents are no l<strong>on</strong>ger needed. EDI<br />
saves clerical time, paper, and postage.<br />
throughout the United States. It has realigned<br />
them into two nati<strong>on</strong>wide brands: Macy’s and<br />
Bloomingdale’s. Gap Inc. owns Gap, Banana<br />
Republic, Old Navy, and Forth & Towne stores.<br />
Limited Brands is the parent company of The<br />
Limited, Express, Victoria’s Secret, and Bath &<br />
Body Works.<br />
• Brand extensi<strong>on</strong>. Many apparel companies<br />
use a successful brand name to diversify their<br />
product line by moving into a related apparel<br />
category. For example, men’s suits can extend<br />
into coats, children’s wear can expand into<br />
Technology Trends<br />
>>ELECTRONIC DATA INTERCHANGE<br />
For retailers, <strong>on</strong>e major advantage of<br />
EDI is that cross-dockable goods are<br />
received at their warehouse. Crossdockable<br />
means that manufacturers ship<br />
goods as “floor ready” merchandise.<br />
These goods arrive at the retailer’s<br />
warehouse <strong>on</strong> hangers with sales tags,<br />
including retail price and UPC code,<br />
already attached. With EDI technology,<br />
the manufacturer knows exactly what to<br />
print <strong>on</strong> the sales tags for each retailer.<br />
EDI technology also gives the retailer’s<br />
warehouse advance notice that goods are<br />
<strong>on</strong> the way. The warehouse can be ready<br />
to receive them and forward the proper<br />
quantities to individual stores. All of<br />
this is d<strong>on</strong>e electr<strong>on</strong>ically, without<br />
any need for ph<strong>on</strong>e calls, faxes, or mail<br />
corresp<strong>on</strong>dence.<br />
INVESTIGATE<br />
What has been the textile industry’s<br />
resp<strong>on</strong>se to EDI? Use the Internet to<br />
make your assessment.<br />
CHAPTER 25 Global Marketplace • 425
25-8<br />
clothes.<br />
Even children wear designer<br />
infants’ garments, and shoe<br />
manufacturers can offer belts<br />
and handbags. Famous designers<br />
have expanded their<br />
businesses by designing for<br />
both genders, for children, and<br />
for different price levels.<br />
Tommy Hilfiger and Ralph<br />
Lauren, for example, design<br />
apparel for men, women, and<br />
children. See Fig. 25-8. D<strong>on</strong>na<br />
Karan designs a high-priced signature<br />
collecti<strong>on</strong> as well as DKNY,<br />
a lower-priced line.<br />
• Crossover merchandising. Some<br />
companies try to extend their brand into a<br />
n<strong>on</strong>apparel category. The most successful<br />
crossovers have been from apparel to fragrances<br />
and cosmetics. Many designer brands<br />
have crossed over into accessories, such as<br />
scarves, ties, jewelry, watches, shoes, belts,<br />
handbags, hosiery, and socks. A few designers,<br />
including Bill Blass, Ralph Lauren, Liz<br />
Claiborne, and Calvin Klein, have expanded<br />
into such home furnishings as sheets, towels,<br />
and table linens. Brand crossovers are often<br />
accomplished through licensing agreements.<br />
• Licensing. Some merchandise is identified<br />
with a highly recognizable name and is often<br />
c<strong>on</strong>sidered a status symbol. As noted in<br />
Chapter 7, many well-known designers license<br />
the use of their original designs or just their<br />
names to manufacturers of a wide variety of<br />
goods. In additi<strong>on</strong> to designers, other “names”<br />
have had licensing successes. For example,<br />
manufacturers of athletic shoes, such as Nike,<br />
Reebok, and Adidas, have licensed their names<br />
and logos to producers of active sportswear.<br />
• Private labels. This merchandise carries a<br />
store’s name or a brand name developed exclu-<br />
426 • UNIT 7 The Workplace<br />
sively for a store. For example, <strong>on</strong>e of<br />
JCPenney’s private labels is Ariz<strong>on</strong>a®; Macy’s<br />
has its Charter Club®. Private label merchandise<br />
can account for 20 to 45 percent of a manufacturer’s<br />
output. Either the manufacturer or<br />
retailer designs the product line and specificati<strong>on</strong>s.<br />
If design is d<strong>on</strong>e by the manufacturer,<br />
separate design teams help maintain different<br />
images for the manufacturer’s nati<strong>on</strong>al brand<br />
and the retailer’s private label brand.<br />
• Franchises. Of all retail sales in the U.S.,<br />
<strong>on</strong>e-third is generated by franchises. Many<br />
established clothing retailers and designer<br />
stores offer franchises in order to expand their<br />
business. See Fig. 25-9.<br />
Safer Working C<strong>on</strong>diti<strong>on</strong>s<br />
Safety in the workplace is a two-way resp<strong>on</strong>sibility.<br />
Employers are obligated to provide a work<br />
envir<strong>on</strong>ment free from recognized health and<br />
accident hazards. This envir<strong>on</strong>ment must include<br />
equipment and materials needed to do the work<br />
safely. Employees must be instructed in their use.<br />
If certain c<strong>on</strong>diti<strong>on</strong>s or materials are hazardous,<br />
the employer must notify workers. In additi<strong>on</strong>,<br />
employers must keep records of all job-related illnesses<br />
and injuries.<br />
25-9<br />
Crossover merchandise extends designer brands<br />
into other markets. What famous crossovers appeal to you?
25-10<br />
Employees must know how to operate equipment<br />
safely and report any unsafe c<strong>on</strong>diti<strong>on</strong>s or practices.<br />
In turn, employees must learn to perform the<br />
job safely. See Fig. 25-10. Workers and employees<br />
alike are resp<strong>on</strong>sible for following envir<strong>on</strong>mental<br />
protecti<strong>on</strong> laws.<br />
To help ensure safety in the workplace, laws<br />
regulate work hours, set standards for safe working<br />
c<strong>on</strong>diti<strong>on</strong>s, and limit child labor. All companies<br />
are regulated by the following laws:<br />
• Fair Labor Standards Act. This act established<br />
a minimum wage and a maximum 40hour<br />
workweek. The child labor provisi<strong>on</strong>s set<br />
the minimum age of fourteen for most jobs<br />
and limit the number of hours that fourteenand<br />
fifteen-year-olds can work. They forbid<br />
the employment of children under sixteen in<br />
many jobs. Those under seventeen are limited<br />
from hazardous jobs, such as operating motor<br />
vehicles or power-driven machinery; handling<br />
explosives or nuclear materials; and working<br />
in the c<strong>on</strong>structi<strong>on</strong>, demoliti<strong>on</strong>, and meat processing<br />
fields. Children of any age can deliver<br />
newspapers, work for parents in a n<strong>on</strong>farm<br />
business, and perform in radio, televisi<strong>on</strong>,<br />
movies, and other theatrical producti<strong>on</strong>s.<br />
• Occupati<strong>on</strong>al Safety and Health Act.<br />
This act set standards for safe and healthful<br />
working c<strong>on</strong>diti<strong>on</strong>s. As a result, the Occupati<strong>on</strong>al<br />
Safety and Health Administrati<strong>on</strong>,<br />
comm<strong>on</strong>ly known as OSHA, was formed.<br />
Operating under the Department of Labor,<br />
OSHA establishes, revises, and enforces job<br />
safety and health standards. It also requires<br />
employers to prepare and maintain records of<br />
occupati<strong>on</strong>al injuries and illnesses.<br />
Envir<strong>on</strong>mental Efforts<br />
Federal envir<strong>on</strong>mental laws regulate business<br />
practices related to polluti<strong>on</strong>. The goal is to protect<br />
the envir<strong>on</strong>ment from toxic pollutants. In the<br />
fashi<strong>on</strong> industry, these laws primarily affect<br />
chemical companies that produce manufactured<br />
fibers. Current laws include the Clean Water Act,<br />
Clean Air Act, Resource C<strong>on</strong>servati<strong>on</strong> and<br />
Recovery Act, and Toxic Substances C<strong>on</strong>trol Act.<br />
The textile industry has invested over a billi<strong>on</strong><br />
dollars in envir<strong>on</strong>mental c<strong>on</strong>trols since the mid-<br />
1980s. Companies have taken time and m<strong>on</strong>ey to<br />
develop cleaner dyeing and finishing processes.<br />
They use fewer toxic materials and less water.<br />
In 1992, the American Textile Manufacturers<br />
Institute (ATMI) launched its Encouraging<br />
Envir<strong>on</strong>mental Excellence (E3) program. It calls<br />
for textile companies to implement a 10-point<br />
plan that includes envir<strong>on</strong>mental policies, audits,<br />
recycling, educati<strong>on</strong>, and community awareness.<br />
Companies must submit written informati<strong>on</strong> to<br />
ATMI that documents their compliance with the<br />
program. See Fig. 25-11 <strong>on</strong> page 428.<br />
C<strong>on</strong>sumer c<strong>on</strong>cerns have helped prompt the<br />
development of envir<strong>on</strong>mentally friendly products.<br />
Many companies manufacture products<br />
that include organic or recycled materials. For<br />
CHAPTER 25 Global Marketplace • 427
25-11<br />
Companies can advertise their commitment to<br />
envir<strong>on</strong>mental excellence by placing this logo <strong>on</strong> product<br />
hangtags.<br />
example, organically grown cott<strong>on</strong> is produced<br />
without synthetic chemical fertilizers or pesticides.<br />
Naturally colored cott<strong>on</strong>, such as Foxfibre®<br />
cott<strong>on</strong>, in shades of green and brown eliminates<br />
the need for dyes. Wool can be obtained from<br />
humanely sheared, free-range sheep.<br />
The call to recycle has led to some interesting<br />
new products. See Fig. 25-12.Tencel® is cellulosic<br />
fiber made from harvested wood pulp that is<br />
processed with recycled chemicals. In producti<strong>on</strong>,<br />
virtually all the dissolving agent is recycled.<br />
The resulting fiber is machine washable, str<strong>on</strong>ger<br />
than cott<strong>on</strong> or wool, and has a silkier touch.<br />
Plastic water and soda bottles take <strong>on</strong> new life as<br />
textile products. The bottles are sorted by color,<br />
chopped into pieces, and washed and dried.<br />
These pieces are heated, purified, and formed<br />
into pellets. From the pellets, the polyester is<br />
extruded as fine fibers for spinning.<br />
Some apparel manufacturers support envir<strong>on</strong>mental<br />
awareness campaigns. These include<br />
sp<strong>on</strong>sorship of beach cleanups, cooperative programs<br />
with envir<strong>on</strong>mental groups, and advertising<br />
campaigns that explain the company’s stance<br />
<strong>on</strong> envir<strong>on</strong>mental issues.<br />
Envir<strong>on</strong>mental awareness has affected other<br />
textile-related industries. In the home furnishings<br />
industry, manufacturers have eliminated toxic<br />
428 • UNIT 7 The Workplace<br />
vapors emitted during producti<strong>on</strong> or product<br />
use, such as formaldehyde <strong>on</strong> fabric wall coverings.<br />
Recycled fibers are used for carpets, and<br />
recycled fiberfill for pillows and comforters. The<br />
floor covering industry collects used carpets for<br />
recycling. This industry has worked to eliminate<br />
certain chemicals in the glue used <strong>on</strong> carpet backings.<br />
These chemicals were suspected of causing<br />
cancer. Even mattress retailers offer c<strong>on</strong>venient<br />
recycling programs. When a new mattress is<br />
delivered, the store will pick up the old mattress<br />
and recycle it.<br />
While these developments are exciting, some<br />
parts of the c<strong>on</strong>sumer market resist due to cost.<br />
Organic and recycled textile products are usually<br />
higher priced. Not every<strong>on</strong>e is willing to pay the<br />
price for the benefits. Such issues facing the fashi<strong>on</strong><br />
industry involve the global marketplace<br />
today.<br />
25-12<br />
Recycled materials are made into ordinary<br />
garments—and some that are not so ordinary.
How To…<br />
PACK FOR TRAVEL<br />
Travel, whether globally or short distances from home, is easier when you know how to<br />
pack. The number <strong>on</strong>e rule is to pack lightly. Some travel experts recommend laying out<br />
everything you plan to bring <strong>on</strong> a trip—and then packing <strong>on</strong>ly half of it!<br />
• Make a list a few days before packing.<br />
Review to be sure nothing is forgotten.<br />
• Choose basic outfits that mix and match for<br />
various occasi<strong>on</strong>s.<br />
• Select accessories that will change the look<br />
of basic outfits.<br />
• When packing, put heavy or bulky items,<br />
including shoes, <strong>on</strong> the bottom.<br />
• Stuff shoes with rolled-up socks, hosiery, or<br />
other small, n<strong>on</strong>breakable items.<br />
• Roll items that d<strong>on</strong>’t wrinkle, such as Tshirts,<br />
sweaters, and jeans, into tight cylinders<br />
to take up less space. Use them to keep<br />
other items from sliding around.<br />
• To prevent wrinkling, place tissue paper<br />
between the folds of clothes. Another technique<br />
is to cover a garment <strong>on</strong> a hanger with<br />
a plastic bag. Then slip out the hanger and<br />
place the bag and garment <strong>on</strong> a flat surface.<br />
Fold and press gently to remove air before<br />
packing.<br />
• Place such items as tops and underwear in<br />
small plastic bags.<br />
Exploring Packing<br />
Dem<strong>on</strong>strate for the class the proper way to<br />
pack a suitcase.<br />
• Purchase travel-size toiletries, such as<br />
shampoo, deodorant, and toothpaste.<br />
• If staying at a hotel, call the toll-free number<br />
to ask whether an alarm clock, hair<br />
dryer, and ir<strong>on</strong> are available for guests.<br />
• If traveling by plane, c<strong>on</strong>tact the airline<br />
about carry-<strong>on</strong> luggage rules. Any carry-<strong>on</strong><br />
item c<strong>on</strong>sidered a<br />
security risk will be<br />
c<strong>on</strong>fiscated at the<br />
security checkpoint.<br />
Depending <strong>on</strong> airline<br />
policy, it may or may<br />
not be returned.<br />
CHAPTER 25 Global Marketplace • 429
CHAPTER 25<br />
CHAPTER SUMMARY<br />
• Increased global sourcing has raised issues<br />
related to fair trade and human rights.<br />
• Off-shore producti<strong>on</strong> brings benefits to<br />
manufacturers but raises c<strong>on</strong>cerns about<br />
fair wages and domestic jobs.<br />
• Manufacturers and governments have<br />
taken steps to discourage industrial piracy.<br />
• Internati<strong>on</strong>al agreements promote fair and<br />
open trade.<br />
• New technologies and business growth<br />
have increased the pace of clothing distributi<strong>on</strong><br />
and availability.<br />
• Working c<strong>on</strong>diti<strong>on</strong>s and the envir<strong>on</strong>ment<br />
are c<strong>on</strong>tinuing c<strong>on</strong>cerns.<br />
USING KEY TERMS<br />
Choose at least five Key Terms and assume<br />
you must teach them to junior high students.<br />
Develop a visual that makes each term easy to<br />
understand. Some possibilities are carto<strong>on</strong><br />
drawings, diagrams, and simple posters. Computer<br />
graphics might be used if available. You<br />
might even plan a skit, with students representing<br />
different countries and manufacturers.<br />
430 • UNIT 7 The Workplace<br />
Review<br />
RECALLING THE FACTS<br />
1. Why might imported denim jeans cost<br />
less than a pair made domestically?<br />
2. Summarize arguments for and against<br />
off-shore producti<strong>on</strong> of goods by U.S.<br />
manufacturers.<br />
3. Describe the working situati<strong>on</strong> of some<strong>on</strong>e<br />
who works in a sweatshop.<br />
4. Describe steps that manufacturers are<br />
taking to end the use of sweatshops.<br />
5. What is the difference between counterfeiting<br />
and bootlegging?<br />
6. How do tariffs and quotas aim to help a<br />
country’s textile industry?<br />
7. What is the purpose of NAFTA?<br />
8. What is the main purpose of internati<strong>on</strong>al<br />
trade laws?<br />
9. How do CAD and CAM reduce costs for<br />
clothing manufacturers?<br />
10. Describe two ways that EDI streamlines<br />
garment distributi<strong>on</strong>.<br />
11. What is the difference between brand<br />
extensi<strong>on</strong> and crossover merchandising?<br />
12. Explain how safe working c<strong>on</strong>diti<strong>on</strong>s<br />
result from a partnership between<br />
employer and employees.<br />
13. What protecti<strong>on</strong>s are provided by the<br />
Fair Labor Standards Act?<br />
14. List two general ways that the fashi<strong>on</strong><br />
industry has resp<strong>on</strong>ded to c<strong>on</strong>cerns<br />
about its effect <strong>on</strong> the envir<strong>on</strong>ment.
and Activities<br />
THINKING CRITICALLY<br />
1. Some fabrics may be lower quality when<br />
produced in countries where looms and<br />
other equipment are old and not well<br />
maintained. Should such fabric be<br />
imported? What are possible c<strong>on</strong>sequences<br />
if they are imported? If they<br />
aren’t?<br />
2. Should young children in developing<br />
countries be allowed to work when their<br />
families need the income? Explain your<br />
reas<strong>on</strong>ing.<br />
APPLYING KNOWLEDGE<br />
1. Off-shore producti<strong>on</strong>. Research the<br />
impact of off-shore producti<strong>on</strong> <strong>on</strong> fiber,<br />
fabric, and apparel manufacturers in the<br />
United States. In a written report,<br />
describe the advantages and disadvantages<br />
of this trend.<br />
2. Trade treaties. Locate a newspaper,<br />
magazine, or Internet article that deals<br />
with <strong>on</strong>e of the trade agreements discussed<br />
in the chapter. Read and summarize<br />
the article. Compare findings with<br />
those of classmates to get an overview<br />
of the implicati<strong>on</strong>s of these agreements.<br />
3. Examining ethics. Counterfeit apparel<br />
and accessories are available in many<br />
cities at far lower prices than the<br />
authentic merchandise. Discuss why people<br />
purchase counterfeit goods and the<br />
impact this has <strong>on</strong> legal manufacturers.<br />
CHAPTER 25<br />
4. Seeking accord. Working with a small<br />
group, imagine you represent the interests<br />
of <strong>on</strong>e of the following: c<strong>on</strong>sumers,<br />
workers, clothing makers, or envir<strong>on</strong>mentalists.<br />
In writing, describe your positi<strong>on</strong><br />
and c<strong>on</strong>cerns regarding each of<br />
these issues: offshore producti<strong>on</strong>; freetrade<br />
agreements; and new producti<strong>on</strong><br />
and distributi<strong>on</strong> technologies. Compare<br />
your views with those of the other<br />
groups. Are there more points of agreement<br />
or disagreement?<br />
MAKING>
<str<strong>on</strong>g>Care</str<strong>on</strong>g>ers<br />
Communicati<strong>on</strong> and<br />
Educati<strong>on</strong><br />
Amodel enters the photography<br />
studio. “Beautiful!” the photographer<br />
exclaims, admiring the fashi<strong>on</strong> look she presents.<br />
He c<strong>on</strong>tinues to chat amiably with her<br />
while readying the set. As the shoot begins,<br />
the model moves gracefully from <strong>on</strong>e pose to another<br />
while the photographer c<strong>on</strong>tinually offers verbal suggesti<strong>on</strong>s<br />
and encouragement. The camera flashes c<strong>on</strong>stantly.<br />
This scene is comm<strong>on</strong> in the world of fashi<strong>on</strong><br />
photography, which is just <strong>on</strong>e career in the interesting<br />
areas of fashi<strong>on</strong> communicati<strong>on</strong> and educati<strong>on</strong>.<br />
The communicati<strong>on</strong> field is a good place for people<br />
who enjoy working with words. As they combine<br />
words with images, fashi<strong>on</strong> writers, editors, illustrators,<br />
and photographers communicate fashi<strong>on</strong>.<br />
In the area of educati<strong>on</strong>, many opportunities exist.<br />
Teachers provide instructi<strong>on</strong> in high schools, vocati<strong>on</strong>al<br />
schools, and colleges. County<br />
extensi<strong>on</strong> agents put <strong>on</strong> community<br />
programs through the U.S.<br />
Department of Agriculture.<br />
C<strong>on</strong>sumer educati<strong>on</strong> specialists promote<br />
products of the companies<br />
that employ them. Anytime people<br />
help others learn, they are a part of<br />
educati<strong>on</strong>.<br />
Historical researchers gather informa-<br />
ti<strong>on</strong> about clothing of the past. A<br />
museum might need this informati<strong>on</strong><br />
in order to prepare a display or to<br />
write an art commentary for museum<br />
guides.<br />
432 • UNIT 7 The Workplace<br />
IS THIS FIELD FOR YOU?<br />
Obviously, good communicati<strong>on</strong> skills count in communicati<strong>on</strong><br />
and educati<strong>on</strong> careers. Some related<br />
abilities that are needed are represented in the<br />
statements below.<br />
• I’m curious about how and why things happen.<br />
• I like a fair amount of independence in my work.<br />
• To me, a deadline is a tool for time management.<br />
• I enjoy learning as much as teaching and doing.<br />
• I can use c<strong>on</strong>structive criticism to my benefit.<br />
• Seeing the results of my work is more rewarding<br />
than m<strong>on</strong>ey.
Educati<strong>on</strong> and Training<br />
In the fields of communicati<strong>on</strong> and educati<strong>on</strong>, a<br />
college degree is usually a necessity. The exact educati<strong>on</strong><br />
needed varies with the career. Illustrators study<br />
color and design and art history, leading to a bachelor-of-fine-arts<br />
degree. A costume historian needs a<br />
background in textile restorati<strong>on</strong>, visual culture, and<br />
textile and design history.<br />
Being an intern, assistant, or volunteer during college<br />
is almost a requirement, especially in the most<br />
competitive fields. This is where a pers<strong>on</strong> starts to<br />
learn the skills of the trade. Setting up the backdrop<br />
for a photo shoot, for instance, a photographer’s<br />
assistant notices techniques that make the staging<br />
effective. Equally important, a network of c<strong>on</strong>necti<strong>on</strong>s<br />
for the job search after graduati<strong>on</strong> can be built.<br />
To remain an expert takes c<strong>on</strong>tinuing educati<strong>on</strong>.<br />
Courses in digital imaging allow a commercial photographer<br />
to take advantage of new opportunities.<br />
Teachers attend seminars and workshops <strong>on</strong> teaching<br />
strategies and issues in educati<strong>on</strong>. For jobs involving<br />
the Internet, staying current <strong>on</strong> software is essential.<br />
Possible <str<strong>on</strong>g>Care</str<strong>on</strong>g>er Paths<br />
In fashi<strong>on</strong> communicati<strong>on</strong> and educati<strong>on</strong> some<br />
careers follow a traditi<strong>on</strong>al path. New graduates<br />
begin as assistants. Those who show the desire and<br />
ability move up. A journalist may start as a proofreader,<br />
then advance to researcher before earning a<br />
chance to write.<br />
Rapidly changing technology and other employment<br />
trends encourage cross-career moves. For<br />
example, a clothing writer might teach a high school<br />
clothing class and then go <strong>on</strong> to become fully certified.<br />
Likewise, some informati<strong>on</strong> technology (IT)<br />
jobs are so new that few colleges and universities have<br />
developed a specific curriculum. Thus, people enter<br />
<strong>on</strong>e field from another.<br />
Some Web-site designers create and main-<br />
tain sites for clothing company catalogs.<br />
On many sites, Internet users can make<br />
catalog purchases <strong>on</strong>-line.<br />
THE SKILLS YOU NEED<br />
To be successful in the fields of communicati<strong>on</strong><br />
and educati<strong>on</strong>, you’ll need skills that<br />
include the following:<br />
• Communicati<strong>on</strong><br />
• Management<br />
• Organizati<strong>on</strong><br />
• Creativity<br />
• Flexibility<br />
• Self-discipline<br />
• Self-c<strong>on</strong>fidence<br />
UNIT 7 The Workplace • 433
Choosing a Communicati<strong>on</strong><br />
or Educati<strong>on</strong> <str<strong>on</strong>g>Care</str<strong>on</strong>g>er<br />
CONSUMER EDUCATION SPECIALIST | COOPERATIVE EXTENSION AGENT | COSTUME<br />
DESIGNER | COSTUME HISTORIAN | FASHION EDITOR | FASHION PHOTOGRAPHER<br />
| FASHION WRITER | FCS TEACHER | WEB-SITE DESIGNER<br />
Fashi<strong>on</strong> Writer __<br />
Fashi<strong>on</strong> writers are journalists whose articles<br />
and columns appear in fashi<strong>on</strong> magazines, newspapers,<br />
press releases, and even <strong>on</strong> the computer<br />
screen. Writers do research and c<strong>on</strong>duct<br />
interviews, often traveling to wherever news<br />
happens. Although the effort is time-c<strong>on</strong>suming,<br />
writers revise drafts of articles to make<br />
improvements.<br />
Some writers work from home as freelancers.<br />
They must satisfy editors, who decide<br />
a publicati<strong>on</strong>’s c<strong>on</strong>tent and focus. Suggesting<br />
story ideas and keeping track of submissi<strong>on</strong>s,<br />
deadlines, and payments are part of the job.<br />
Web-Site Designer<br />
Web-site designers produce Internet sites<br />
with visual appeal and navigati<strong>on</strong> ease. Fashi<strong>on</strong><br />
manufacturers, magazines, and many others<br />
need sites to provide informati<strong>on</strong> and promote<br />
their products. After creating sites, designers<br />
keep them up-to-date and fresh by adding the<br />
most current visual and audio effects.<br />
All of this takes technical as well as artistic<br />
skills with color, line, and other design elements.<br />
The designer must know how to use<br />
numerous computer programs for defining colors,<br />
spacing, and lettering.<br />
434 • UNIT 7 The Workplace<br />
FCS Teacher ___<br />
Many family and c<strong>on</strong>sumer sciences (FCS)<br />
educators teach courses in fashi<strong>on</strong> and clothing<br />
c<strong>on</strong>structi<strong>on</strong>. A teacher’s workday typically<br />
involves preparing less<strong>on</strong>s, gathering materials,<br />
teaching, evaluating work, and record keeping.<br />
Effective teachers manage dem<strong>on</strong>strati<strong>on</strong>s,<br />
discussi<strong>on</strong>s, and group work in the classroom.<br />
Through c<strong>on</strong>tinuing educati<strong>on</strong>, they update their<br />
own skills and knowledge. Teachers must be<br />
licensed by a state board of educati<strong>on</strong>.<br />
Photographic skill<br />
involves more than<br />
just taking a picture.<br />
Knowledge of lighting,<br />
compositi<strong>on</strong>, and<br />
equipment is essential<br />
for the work.
Costume Historian<br />
Costume historians are experts in the clothing<br />
of eras past. They are researchers who use documents<br />
and archives from museums, libraries, and<br />
historical societies. They describe what people<br />
wore and explain how these garments reflect a<br />
period of history.<br />
While some costume historians design costumes,<br />
most work in research and c<strong>on</strong>sulting.<br />
Costume historians may be asked to authenticate<br />
garments for an aucti<strong>on</strong> house or private<br />
collector. They might date and restore antique<br />
clothes given to a museum or help members of a<br />
historical preservati<strong>on</strong> society reproduce period<br />
costumes, as in Col<strong>on</strong>ial Williamsburg. When<br />
fashi<strong>on</strong> houses want to display styles by past<br />
designers, they may hire costume historians to<br />
organize and maintain the collecti<strong>on</strong>.<br />
Photographer __<br />
In the fashi<strong>on</strong> industry top photographers are as<br />
well known and well paid as top models and designers.<br />
Most photographers, however, earn a more<br />
modest income and are not known by name.<br />
Fashi<strong>on</strong> photographers work as salaried employees<br />
and freelancers. They are associated with catalogs,<br />
newspapers, fashi<strong>on</strong> magazines, advertising<br />
agencies, and large stores. Some own their own<br />
studio and sell their photos to publicati<strong>on</strong>s. Independent<br />
photographers may market their photos to<br />
stock agencies that supply illustrati<strong>on</strong>s to go with<br />
printed material. The photographers earn a fee<br />
each time a photo is used.<br />
Photographers work with models, striving for<br />
moods in their photos. Successful photographers<br />
are also artists. Richard Aved<strong>on</strong>, a renowned professi<strong>on</strong>al<br />
photographer for over fifty years, turned<br />
from fashi<strong>on</strong>s to portraits. His work is so distinctive<br />
that it is recognizable even when unsigned.<br />
Educators work in many areas related to<br />
fashi<strong>on</strong>. A family and c<strong>on</strong>sumer sciences<br />
teacher might work at the high school or<br />
college level. Teaching in a cooperative<br />
extensi<strong>on</strong> program is also possible.<br />
CAREER APPLICATIONS<br />
1. Fashi<strong>on</strong> writing. Assuming the role of a<br />
fashi<strong>on</strong> writer, write a magazine article that<br />
reports <strong>on</strong> the fashi<strong>on</strong>s worn at an imaginary<br />
event of your choosing. Include informati<strong>on</strong> that<br />
shows your knowledge of fashi<strong>on</strong> styles and<br />
designs.<br />
2. FCCLA. As an Applied Technology Project,<br />
design a home page and follow-up pages for<br />
a Web site with a fashi<strong>on</strong> focus. Choose and<br />
arrange colors, visuals, and text. Carry out your<br />
design in the most effective medium, including<br />
computer graphics software.<br />
3. Professi<strong>on</strong>alism. Choose a fashi<strong>on</strong> communicati<strong>on</strong><br />
or educati<strong>on</strong> career. Find out how professi<strong>on</strong>alism<br />
is promoted in that career. Is there<br />
a professi<strong>on</strong>al society that people can join? Is<br />
there a code of ethics? Report your findings to<br />
the class.<br />
UNIT 7 The Workplace • 435
Sewing<br />
and<br />
Serging<br />
Handbook<br />
436
PART 1 Patterns, Fabrics,<br />
LESSON 1<br />
and Noti<strong>on</strong>s<br />
Selecting a Pattern<br />
2 Selecting Fabric<br />
3 Selecting Noti<strong>on</strong>s<br />
PART 2 Machines and<br />
Equipment<br />
LESSON 4 Using a Sewing Machine<br />
5 Using a Serger<br />
6 Identifying Sewing Equipment<br />
PART 3 Getting Ready<br />
to Sew<br />
LESSON 7 Understanding Patterns<br />
8 Adjusting a Pattern<br />
9 Preparing Fabric<br />
10 Laying Out a Pattern<br />
11 Cutting and Marking Fabric<br />
PART 4 Basic<br />
LESSON 12<br />
C<strong>on</strong>structi<strong>on</strong><br />
Stitching by Machine<br />
13 Stitching by Hand<br />
14 Pressing Fabric<br />
15 Making Darts<br />
16 Gathering and Easing Fabric<br />
17 Sewing Plain Seams<br />
18 Applying Facings<br />
19 Making Casings<br />
20 Applying Fasteners<br />
21 Putting in Zippers<br />
22 Putting in Hems<br />
23 Checking Fit<br />
PART 5 Special Sewing<br />
Techniques<br />
LESSON 24 Sewing Special Seams<br />
25 Making Tucks and Pleats<br />
26 Applying Interfacings<br />
27 Putting in Linings<br />
28 Sewing Collars<br />
29 Sewing Sleeves<br />
30 Sewing Cuffs<br />
31 Sewing Pockets<br />
32 Finishing Waistlines<br />
33 Applying Bias Bindings<br />
34 Adding Ruffles<br />
35 Adding Trims<br />
437
PART 1<br />
Patterns, Fabrics,<br />
and Noti<strong>on</strong>s<br />
438
Selecting a Pattern<br />
THE PATTERN CATALOG<br />
Once these early decisi<strong>on</strong>s are made, you’re<br />
ready to begin—with a pattern. A pattern is a set<br />
of tissue pattern pieces and instructi<strong>on</strong>s for creating<br />
an item from fabric. Most sewers use a pattern<br />
to guide them, but how do you choose <strong>on</strong>e? Start<br />
by looking through pattern catalogs. Each company<br />
that manufactures patterns produces its<br />
own catalog. See Fig. 1-1. You may have some<br />
copies of catalogs in your classroom.<br />
Catalogs are divided into secti<strong>on</strong>s that make<br />
choosing easy. For example, tabbed secti<strong>on</strong>s are<br />
marked for dresses, sportswear, and easy-to-sew<br />
LESSON 1<br />
When you get ready to sew, you’ll need to make several decisi<strong>on</strong>s. Before you pick a pattern,<br />
think about the following questi<strong>on</strong>s.<br />
• What is your experience level? Experience makes a difference. If you haven’t sewn before, a simple<br />
project is best. Then, with each future project, you can build skills by choosing something more<br />
complicated.<br />
• How much time do you have? With limited time, you’re more likely to complete a project that has<br />
less detail. Ask for help in choosing a project if you’re not sure what’s involved.<br />
• Where will you sew? If you d<strong>on</strong>’t have a sewing machine, you might be able to work at the home<br />
of a family member or friend. In some schools you can get permissi<strong>on</strong> to sew during study halls or<br />
after school.<br />
• What will you sew? Many people like to sew for themselves, perhaps clothing or something for the<br />
home, such as a pillow or placemats. Making a gift for some<strong>on</strong>e is another idea.<br />
styles. Special categories include larger sizes, children<br />
and toddlers, men and boys, home decorating,<br />
crafts, gifts, and accessories.<br />
Garments are sketched in the catalog and often<br />
actual photographs are included. A close look at<br />
these gives you a good idea of what the garment<br />
will look like when d<strong>on</strong>e. You may even get ideas<br />
for accessories.<br />
One pattern usually shows more than <strong>on</strong>e<br />
view, identified by letter. View A might show a<br />
shirt with l<strong>on</strong>g sleeves, while view B is the same<br />
shirt with short sleeves.<br />
1-1<br />
Pattern catalogs provide informa-<br />
ti<strong>on</strong> about the style, fit, design details, and<br />
sewing difficulty of patterns.<br />
LESSON 1 Selecting a Pattern • 439
SEWING TIP<br />
Customizing. If the pattern measurements and style aren’t quite right for you, remember<br />
that you can customize a pattern. Lengthening and shortening are possible. You can<br />
also make the garment a little looser or more fitted in specific places. With careful planning,<br />
the pattern can be adapted to produce a garment that fits you well.<br />
Stores that sell patterns have pattern catalogs.<br />
After browsing through a catalog, note the number<br />
of the pattern you want. Then find the cabinet<br />
drawer that c<strong>on</strong>tains that number. Most<br />
stores allow you to remove the pattern from the<br />
cabinet yourself so you can carry it with you<br />
while choosing fabric and supplies. Store displays<br />
also feature patterns that you can take from racks.<br />
Several times a year most pattern companies<br />
publish a magazine that features a selected group<br />
of patterns. You can subscribe to these magazines<br />
or buy them at the newsstand. In additi<strong>on</strong>, most<br />
pattern companies have Web sites where you can<br />
preview and order patterns.<br />
SELECTING THE RIGHT<br />
STYLE<br />
How can you tell from the drawing <strong>on</strong> a catalog<br />
page what the finished garment will look like<br />
<strong>on</strong> you? One way is to pay careful attenti<strong>on</strong> to the<br />
styles of items you already own. Which <strong>on</strong>es are<br />
flattering and enjoyable to wear? You might<br />
choose patterns with similar designs. Trying <strong>on</strong><br />
ready-to-wear garments in a store is another way<br />
to determine whether a style is right for you.<br />
As you study styles, remember all you’ve<br />
learned about design. Whether sewing or buying<br />
clothes, the design elements and principles can be<br />
helpful.<br />
440 • PART 1 Patterns, Fabrics, and Noti<strong>on</strong>s<br />
Clues <strong>on</strong> the Pattern Envelope<br />
The pattern envelope shows you how the finished<br />
garment should look. <str<strong>on</strong>g>Care</str<strong>on</strong>g>fully examine<br />
the illustrati<strong>on</strong>s <strong>on</strong> the fr<strong>on</strong>t of the envelope,<br />
shown in Fig. 1-2. Note the fit across the shoulders,<br />
waist, and hips. Is the garment fitted to the<br />
shape of the body, or is it full and loose? Also note<br />
1-2<br />
What informati<strong>on</strong> is provided <strong>on</strong> the fr<strong>on</strong>t of this<br />
pattern envelope?
the type of fabric pictured. Is it a heavyweight or<br />
lightweight fabric? Is it a solid color, print, plaid,<br />
or stripe? These clues will help you choose fabric.<br />
The back of the pattern envelope c<strong>on</strong>tains<br />
small line drawings that show the garment back.<br />
You’ll also find other informati<strong>on</strong>, as shown in<br />
Fig. 1-3 <strong>on</strong> page 442. The finished garment measurements,<br />
including “width at lower edge” and<br />
“finished back length,” give an idea of the proporti<strong>on</strong>s<br />
of the finished garment.<br />
Skill Level<br />
For clues about sewing difficulty, read the<br />
descripti<strong>on</strong> in the catalog or <strong>on</strong> the pattern envelope.<br />
Most pattern companies have easy-to-sew<br />
patterns, identified by such brand names as<br />
“Easy,” “Fast & Easy,” “Quick & Easy,” and “6<br />
Made Easy.”<br />
These patterns usually have fewer pattern<br />
pieces, simple-to-follow layouts, and easier c<strong>on</strong>structi<strong>on</strong><br />
techniques. Some easy-to-sew patterns<br />
SEWING TIP<br />
Measurements. The clothes in your<br />
closet can help you interpret the measurements<br />
<strong>on</strong> a pattern envelope. Measure<br />
the lengths of a few jackets, dresses, or<br />
pants that you wear. Also measure the<br />
bottom circumference, or distance<br />
around, of pants and skirts in different<br />
styles. Compare these measurements to<br />
those <strong>on</strong> a pattern you like. Then you’ll<br />
know, for example, whether pant legs<br />
described as 20 inches (51 cm) at the<br />
lower edge are slimmer or fuller than<br />
those you already own.<br />
are even marked with a sewing time that helps<br />
you estimate how l<strong>on</strong>g it will take to make the<br />
item.<br />
SELECTING THE CORRECT<br />
SIZE<br />
To determine the correct pattern size for you,<br />
first take your body measurements. Ideally you<br />
should take measurements over undergarments,<br />
not over clothes. If necessary, you can take them<br />
over snug-fitting clothes. Remove sweaters, belts,<br />
jackets, and other bulky items.<br />
Use a flexible, 60-inch (150-cm), plastic-coated<br />
measuring tape. The tape measure should be held<br />
snugly, but not tightly, around the body. For width<br />
measurements, be sure the tape measure is parallel<br />
to the floor. For accuracy, have some<strong>on</strong>e help<br />
you, writing down each measurement after it is<br />
taken.<br />
As you record height and circumference measurements,<br />
include bust or chest, waist, and hips.<br />
Females need to take a back waist measurement.<br />
Males should take neck and sleeve measurements.<br />
For pants, the waist and inseam measurements<br />
are needed. These measurements are explained in<br />
Fig. 1-4 <strong>on</strong> page 443.<br />
Figure Type<br />
Figure types, such as juniors and misses, are<br />
size categories determined by height and body<br />
proporti<strong>on</strong>s. In order to determine your figure<br />
type, you need to look at three pieces of informati<strong>on</strong>:<br />
your height, your back waist length (for<br />
females), and your body proporti<strong>on</strong>s. Then compare<br />
this informati<strong>on</strong> with the charts that appear<br />
in the back of the pattern catalogs to choose the<br />
figure type for you. See Fig. 1-5 <strong>on</strong> page 444.<br />
Pattern Size<br />
After you have determined your figure type,<br />
the next step is to find your pattern size. Compare<br />
your measurements with those listed in the chart<br />
<strong>on</strong> the pattern envelope back. Make sure you are<br />
LESSON 1 Selecting a Pattern • 441
442 • PART 1 Patterns, Fabrics, and Noti<strong>on</strong>s<br />
1-3 • Pattern Envelope Back<br />
The back of a pattern envelope gives more informati<strong>on</strong> per square inch than any other part of the pattern. Use it to choose fabric,<br />
noti<strong>on</strong>s, and sewing supplies for a project.<br />
• Identificati<strong>on</strong> informati<strong>on</strong>. General informati<strong>on</strong> including pattern<br />
number; basic size category; style, such as “Misses’<br />
Pants”; number of pattern pieces (usually having fewer pieces<br />
means easier to make); and whether French and Spanish translati<strong>on</strong>s<br />
are included.<br />
• Back views. Drawings that show all seams, darts, and design<br />
details <strong>on</strong> the garment back.<br />
• Body measurements. All sizes for which the pattern was<br />
designed; actual pattern pieces are larger to allow for movement<br />
and comfort.<br />
• Yardage chart. Amount of fabric needed for different views,<br />
sizes, and fabric widths. The terms “with nap” and “without<br />
nap” appear after fabric widths. “With nap” means fabric has a<br />
nap, pile, or <strong>on</strong>e-way design, so all pattern pieces must be<br />
placed in <strong>on</strong>e directi<strong>on</strong> <strong>on</strong> the fabric. “With-nap” layouts sometimes<br />
take extra fabric.<br />
• Finished garment measurements. Length and circumference<br />
measurements <strong>on</strong> completed garment. For example, “skirt<br />
width” and “side length” describe the fullness and length of the<br />
design.<br />
• Suggested fabrics. Recommended fabrics for the garment; tells<br />
whether extra fabric is needed to match plaids and stripes and<br />
whether stretch fabric must be used; notes suitability of<br />
stripes, plaids, and diag<strong>on</strong>al designs.<br />
• Noti<strong>on</strong>s. Quantity and recommended sizes of such sewing supplies<br />
as thread, butt<strong>on</strong>s, tapes, and zippers.
looking <strong>on</strong>ly at the measurements within your<br />
figure type category. Find the measurements that<br />
come closest to yours. That will identify your pattern<br />
size. Be sure you choose the size by actual<br />
measurements, not by the size you buy in readyto-wear<br />
clothes. They may not be the same, and<br />
you might not be able to return the pattern. Even<br />
1-4 • Taking Your Measurements<br />
• Height. Stand against a wall in bare feet. Have another pers<strong>on</strong> make a mark that is level with the top of your head. Measure from this<br />
point to the floor. For pants and skirt measurements, it is best to wear shoes.<br />
• Bust/chest. The tape measure should be straight across the back and over the fullest part of the bust or chest.<br />
• Waist. Tie a length of string around the smallest part of the waistline. It will roll into the natural waistline positi<strong>on</strong>. Measure the waistline<br />
exactly where the string settles.<br />
• Hips or seat. Measure over the fullest part of the hips in a straight line around the body. For most females, measure 7 to 9 inches (18<br />
to 23 cm) below the waist. For most men, measure 8 inches (20.5 cm) below the waist; for teen males, measure 7 inches (18 cm) below<br />
the waist.<br />
• Neck (for males <strong>on</strong>ly). Measure around the base of the neck. This measurement plus 1 ⁄2 inch (1.3 cm) is neck size.<br />
• Back waist length (for females <strong>on</strong>ly). Bend the head forward to locate the prominent b<strong>on</strong>e at the base of the neck. Measure from this<br />
b<strong>on</strong>e down the center back to the waistline string.<br />
• In-seam. Place pants that are the correct length <strong>on</strong> a flat surface. Measure al<strong>on</strong>g inner seam from the bottom of <strong>on</strong>e leg to where the<br />
two legs meet.<br />
• Out-seam. Measure from the waist to the point where the pants bottom breaks slightly <strong>on</strong> the shoe.<br />
• Sleeve. Bend the arm up for men. Measure from the base of the neck across the center back to the elbow, across the elbow crook, and<br />
up over the wrist b<strong>on</strong>e. For women, measure from the top of the shoulder over the bent elbow to the wrist.<br />
Female<br />
Male<br />
Sleeve<br />
Back<br />
Bust<br />
Waist<br />
Hips<br />
In-seam<br />
Out-seam<br />
Neckband<br />
Sleeve<br />
Chest<br />
Waist<br />
Hips<br />
In-seam<br />
Out-seam<br />
worse, you might spend time and m<strong>on</strong>ey making<br />
a garment that doesn’t fit.<br />
Since few people are a perfect size, your measurements<br />
might not exactly match the sizes<br />
shown. If your measurements fall between two<br />
sizes, base your choice <strong>on</strong> the design. Select the<br />
smaller size if the design is full or loose fitting.<br />
Select the larger size if the design is closely fitted.<br />
LESSON 1 Selecting a Pattern • 443
1-5<br />
Pattern catalogs provide measurement charts to<br />
help you decide what pattern size to buy.<br />
If you’re choosing a pattern for pants or a skirt,<br />
select the pattern size by waist measurement. It is<br />
important to take this measurement at your natural<br />
waistline. See Fig. 1-6. If your hips are large<br />
in proporti<strong>on</strong> to your waist, however, choose the<br />
pattern by hip measurement.<br />
Almost all patterns are multisized, which<br />
means the pattern is printed with several sizes <strong>on</strong><br />
each pattern piece. This is particularly helpful for<br />
people who are <strong>on</strong>e size <strong>on</strong> top and another <strong>on</strong><br />
the bottom. Each size range is identified by a letter<br />
code printed <strong>on</strong> the catalog page and <strong>on</strong> the<br />
pattern envelope. Be sure you select the size range<br />
that includes your pattern size.<br />
1-6<br />
To find your waistline, tie a length of string<br />
around the middle of your body at the smallest part.<br />
Raise your arms up and bend to the right and the left a<br />
few times. The string will roll into the natural waistline<br />
positi<strong>on</strong>. Take the measurement over the string.<br />
444 • PART 1 Patterns, Fabrics, and Noti<strong>on</strong>s<br />
Pattern Ease<br />
All patterns have a certain amount of built-in<br />
“ease.” In other words, the garment is larger than<br />
your body to give you the space to sit down and<br />
bend over in your clothes. This extra space,<br />
known as wearing ease, is the amount of fullness<br />
needed for movement and comfort. The <strong>on</strong>ly garments<br />
that do not have wearing ease are items<br />
made of stretch fabrics, such as bathing suits,<br />
body suits, and exercise wear.<br />
A sec<strong>on</strong>d kind of ease built into a garment is<br />
called design ease. This is the extra fullness a<br />
designer adds to create a particular style or silhouette.<br />
Some designers want garments to have a<br />
very loose-fitting silhouette. Others want garments<br />
to fit snugly against the body. The picture<br />
and the descripti<strong>on</strong> <strong>on</strong> the pattern envelope give<br />
clues about the amount of ease.
Selecting Fabric<br />
After choosing a pattern, you can pick out fabric. Fabric is sold in rolls called bolts.<br />
To purchase fabric, first select <strong>on</strong>e that suits the pattern style and your sewing skills. Then<br />
take the bolt to a cutting table where a clerk will remove the amount you want.<br />
CHECKING THE PATTERN<br />
How do you know which fabrics would be best<br />
for a garment? Look at the back of the pattern<br />
envelope to find suggesti<strong>on</strong>s. If denim, poplin, or<br />
corduroy is listed, choose <strong>on</strong>e of these or another<br />
fabric that is equally firm. If jersey, tricot, or crepe<br />
is suggested, choose <strong>on</strong>e of these or a similar soft<br />
and drapable fabric.<br />
The pattern also tells what fabrics are not suitable.<br />
For example, stripes, plaids, and obvious<br />
diag<strong>on</strong>al prints can look unattractive in certain<br />
styles.<br />
Sometimes a pattern is designed <strong>on</strong>ly for knit<br />
fabrics, which have some stretch. Make sure the<br />
knit you c<strong>on</strong>sider has the right amount of stretch<br />
for the pattern. All “knits <strong>on</strong>ly” patterns have a<br />
stretch gauge <strong>on</strong> the pattern envelope. The gauge<br />
shows how much the knit must be able to stretch.<br />
Pull the crosswise grain of the fabric with your<br />
fingers and compare the amount of stretch to<br />
what the pattern specifies. See Fig. 2-1.<br />
If the pattern has gathers, grasp the fabric in<br />
your hand to see how it drapes. If the pattern has<br />
pleats, crease a small secti<strong>on</strong> of the fabric between<br />
2-1<br />
LESSON 2<br />
your fingernails to see whether it will hold a pleat.<br />
Check the fabric for any flaws. The color should<br />
be even, with no streaks or spots. Any pattern<br />
design should be printed <strong>on</strong> grain. Check for<br />
wrinkle resistance by squeezing the fabric in your<br />
hand to see whether it wrinkles easily and holds<br />
the wrinkles. Read the end of the fabric bolt for<br />
informati<strong>on</strong> about fibers, finishes, and care<br />
requirements.<br />
CONSIDERING SEWING<br />
SKILLS<br />
The fabric you choose depends <strong>on</strong> your sewing<br />
expertise. If you’re a beginning sewer, choose a<br />
fabric that’s easy to sew. A medium-weight, firmly<br />
woven, or knitted fabric is a good choice.<br />
A small, all-over print helps hide small sewing<br />
mistakes.<br />
Certain fabrics require special sewing techniques.<br />
The following fabrics are not good choices<br />
for beginners:<br />
• Slippery fabrics. Hard to handle as you cut<br />
and stitch.<br />
To use the stretch gauge <strong>on</strong> a pattern, hold a small part of the crosswise grain of the fabric between your hands.<br />
Place the left side at the beginning of the gauge and then stretch the fabric toward the right. As l<strong>on</strong>g as the fabric will<br />
stretch that far, it is usable with the pattern.<br />
LESSON 2 Selecting Fabric • 445
SEWING TIP<br />
Fabric color and design. To check for<br />
color variati<strong>on</strong>s and design directi<strong>on</strong>, fold<br />
fabric so that part of it is turned upsidedown.<br />
Stand back and look carefully at<br />
the color and design.<br />
• Loosely woven fabrics. Ravel easily and<br />
require special seam finishes.<br />
• Sheer or thick, bulky fabrics. Hard to pin,<br />
sew, and press.<br />
• Fabrics with a <strong>on</strong>e-way design. Must have<br />
all pattern pieces laid out in the same directi<strong>on</strong>.<br />
• Pile fabrics. Require special pattern layouts<br />
and pressing techniques; include velvet and<br />
corduroy.<br />
• Stripes and plaids. Must be matched at all<br />
seam lines and design points, such as collars,<br />
cuffs, and pockets.<br />
CHOOSING FABRIC FOR<br />
YOU<br />
A fabric should be right for your appearance<br />
and activities. Pick a color and texture that flatter<br />
your coloring and body shape. Coordinate the<br />
planned garment with items you already own. See<br />
Fig. 2-2.<br />
Choose a fabric that fits your wearing plans.<br />
For example, suppose a pattern envelope suggests<br />
making a dress or shirt in denim. If you’re making<br />
the garment for a formal event, denim probably<br />
w<strong>on</strong>’t be a good choice.<br />
HOW MUCH TO BUY<br />
The label or hangtag at the end of the fabric<br />
bolt tells you the width of the fabric. Most fabrics<br />
are 45 inches (115 cm) or 60 inches (150 cm)<br />
446 • PART 1 Patterns, Fabrics, and Noti<strong>on</strong>s<br />
wide. A few are 36 inches (91.5 cm) wide. The<br />
yardage chart <strong>on</strong> the pattern envelope lists how<br />
much fabric you’ll need for your size and the view<br />
you plan to make.<br />
D<strong>on</strong>’t buy a fabric that is narrower than the<br />
<strong>on</strong>es listed <strong>on</strong> your pattern envelope. For example,<br />
if the chart lists <strong>on</strong>ly 45-inch (115-cm) or 60inch<br />
(150-cm) fabric, you d<strong>on</strong>’t want a smaller<br />
width. Some of the pattern pieces for that style<br />
are probably too large to fit <strong>on</strong> a narrower piece<br />
of fabric.<br />
The yardage chart may indicate that fabrics<br />
with a nap, pile, shading, or <strong>on</strong>e-way design take<br />
extra yardage. Corduroy and velveteen fabrics<br />
have a pile, and many knits have shading. With<br />
such fabrics, all pattern pieces must be cut so the<br />
pile or design runs in the same directi<strong>on</strong>, using a<br />
<strong>on</strong>e-way layout. Otherwise the finished garment<br />
looks as though it was cut from two different<br />
shades of fabric, or part of the fabric’s design is<br />
upside-down. Stripes, plaids, and other designs<br />
may need additi<strong>on</strong>al fabric in order to match the<br />
fabric design at the seams.<br />
2-2<br />
The pattern envelope suggests fabrics that<br />
would be suitable for your project. What other suggesti<strong>on</strong>s<br />
do you have for choosing a fabric?
Selecting Noti<strong>on</strong>s<br />
Sitting down to sew and discovering you d<strong>on</strong>’t<br />
have what you need is frustrating. If you select<br />
noti<strong>on</strong>s when you buy the fabric, this is less likely<br />
to happen.<br />
Lining, interfacing, trim, and elastic are some<br />
of the noti<strong>on</strong>s purchased by the yard or meter.<br />
Because the amount to buy may depend <strong>on</strong> pattern<br />
size, these noti<strong>on</strong>s are listed in the yardage<br />
chart.<br />
Choose noti<strong>on</strong>s carefully, making sure the colors<br />
look good with the fabric. Also, choose butt<strong>on</strong>s,<br />
tapes, trims, and interfacings that require the<br />
same care as the fabric. For example, a cott<strong>on</strong> shirt<br />
can’t be washed if its trim can <strong>on</strong>ly be dry-cleaned.<br />
After purchasing the noti<strong>on</strong>s for your project,<br />
keep them together in a safe place. A shoebox or<br />
zip-top bag makes a good storage c<strong>on</strong>tainer.<br />
When working at school, mark any noti<strong>on</strong> packages<br />
with your name for easy identificati<strong>on</strong>.<br />
CHOOSING THREAD<br />
Thread, which comes in many types and colors,<br />
should be the same color as the fabric. See Fig. 3-1.<br />
If you can’t find the exact color, choose a shade<br />
LESSON 3<br />
To complete your sewing project, you’ll need thread, fasteners, and maybe more. The<br />
small items that become a permanent part of a garment are called noti<strong>on</strong>s. All noti<strong>on</strong>s are<br />
listed <strong>on</strong> the back of the pattern envelope.<br />
SEWING TIP<br />
Thread color. Try to match thread color as closely as possible to the<br />
fabric, especially when the fabric is a solid color. When matching a print<br />
or a plaid, select the background or dominant color for the thread. A<br />
single strand of thread will appear slightly lighter in color than it does<br />
when wound <strong>on</strong> the spool. If a small strand of thread is loose <strong>on</strong> the<br />
spool, hold that against the fabric.<br />
darker. Thread looks lighter after stitching. A good<br />
quality thread is str<strong>on</strong>g and smooth, has even<br />
thickness, and resists tangling. As noted below, fabric<br />
type determines the thread you select.<br />
• Polyester or polyester/cott<strong>on</strong> thread.<br />
This all-purpose thread can be used for sewing<br />
most fabrics. Str<strong>on</strong>g and flexible, it shrinks less<br />
than other threads. Because the thread stretches<br />
slightly, it is recommended for knits and<br />
3-1<br />
Thread color<br />
should match the fabric<br />
as closely as possible.<br />
How would you choose<br />
thread for a plaid<br />
fabric?<br />
LESSON 3 Selecting Noti<strong>on</strong>s • 447
3-2<br />
In what types<br />
of garments would you<br />
find these zippers?<br />
C<strong>on</strong>venti<strong>on</strong>al Invisible Separating Two-way Trouser Decorative<br />
stretch fabrics. Seams are less likely to break as<br />
the garment is worn.<br />
• Mercerized cott<strong>on</strong> thread. This thread can<br />
be used to sew woven fabrics of natural fibers,<br />
such as 100 percent cott<strong>on</strong> or silk. Cott<strong>on</strong><br />
thread is used mostly for quilting and crafts.<br />
• Silk thread. Used <strong>on</strong> silk or wool fabrics, this<br />
thread is excellent for basting delicate fabrics.<br />
• Heavy-duty thread. Use this str<strong>on</strong>g and<br />
durable thread to sew heavy fabrics, such as<br />
those for slipcovers.<br />
• Butt<strong>on</strong>hole twist thread. A thicker thread<br />
than most, this <strong>on</strong>e is used for decorative topstitching<br />
and hand-worked butt<strong>on</strong>holes.<br />
Special threads are available for certain sewing<br />
and craft projects. These include serger thread,<br />
basting thread, quilting thread, ray<strong>on</strong> machine<br />
embroidery thread, and carpet thread.<br />
CHOOSING FASTENERS<br />
Fasteners are used to close a garment. They<br />
include zippers, butt<strong>on</strong>s, snaps, hooks and eyes,<br />
buckles, and hook-and-loop tape.<br />
Zippers<br />
Zippers come in different colors and lengths<br />
and have metal or polyester coils. A lightweight,<br />
polyester, coil zipper works well with lightweight<br />
fabric. Zipper recommendati<strong>on</strong>s are listed <strong>on</strong> the<br />
448 • PART 1 Patterns, Fabrics, and Noti<strong>on</strong>s<br />
back of the pattern envelope. Choose the right<br />
<strong>on</strong>e for the job. See Fig. 3-2.<br />
• C<strong>on</strong>venti<strong>on</strong>al zipper. Opens at the top and<br />
has a stop at the bottom; the most comm<strong>on</strong><br />
zipper.<br />
• Invisible zipper. Disappears into the seam<br />
when closed, so all you see is the tab at the top<br />
of the zipper.<br />
• Separating zipper. Comes apart at the bottom<br />
for use in jackets and coats.<br />
• Two-way zipper. Has sliders at the top and<br />
bottom, so can be opened from either end.<br />
• Trouser zipper. Usually has metal teeth and<br />
wider tape.<br />
• Decorative zipper. Has large teeth and a<br />
pull ring.<br />
Butt<strong>on</strong>s<br />
The pattern envelope<br />
gives the size and<br />
number of butt<strong>on</strong>s<br />
needed for a project. A<br />
butt<strong>on</strong>’s size is measured<br />
across its diameter<br />
and stated in fracti<strong>on</strong>s<br />
of an inch. There<br />
are two basic butt<strong>on</strong><br />
types. See Fig. 3-3.<br />
Sew-through butt<strong>on</strong><br />
Shank butt<strong>on</strong><br />
3-3<br />
Basic Butt<strong>on</strong> Types
• Sew-through butt<strong>on</strong>s. These have two to<br />
four holes <strong>on</strong> the face of the butt<strong>on</strong> for attaching<br />
with thread.<br />
• Shank butt<strong>on</strong>s. These have a metal, plastic,<br />
or fabric loop, called the shank, behind the<br />
butt<strong>on</strong>. Thread is stitched through the shank<br />
to attach the butt<strong>on</strong>. A shank allows room for<br />
the butt<strong>on</strong>hole to lie smoothly between the<br />
butt<strong>on</strong> and the fabric that holds it. Heavy fabrics<br />
may require shank butt<strong>on</strong>s.<br />
Snaps<br />
Snaps range in size from 0000 or 4/0 (small) to<br />
size 4 (large). Snaps and other fasteners are<br />
shown in Fig. 3-4. Smaller snap sizes hold edges<br />
together where the strain or pull is minimal.<br />
Larger sizes are good for heavy-duty use. Large<br />
covered snaps are available for coats and suits.<br />
Snaps pre-attached to fabric tapes are ideal for<br />
sportswear and children’s wear.<br />
Hooks and Eyes<br />
Hooks and eyes range in size from 0 (small) to<br />
3 (large). They are packaged with two types of<br />
eyes.<br />
• Curved eye. Used <strong>on</strong> edges that just meet,<br />
such as the edge of a collar or neckline.<br />
• Straight eye. Used <strong>on</strong> lapped edges, such as<br />
a waistband or cuff.<br />
3-4<br />
Types of Fasteners<br />
Snap<br />
Hook and curved eye<br />
Large covered hooks and eyes are available for<br />
coats and jackets. Specialty waistband fasteners<br />
have a large, flat, hook-and-bar closure.<br />
Buckles<br />
Buckles of many shapes, sizes, and materials<br />
can be purchased separately or in belt kits. There<br />
are two basic types.<br />
• Buckle with a pr<strong>on</strong>g. These buckles must be<br />
used with eyelets. Ready-made metal eyelets<br />
can be applied to the belt with special pliers or<br />
an attaching tool. Eyelets can also be handsewn<br />
with a butt<strong>on</strong>hole stitch.<br />
• Buckle without a pr<strong>on</strong>g. These can simply be<br />
stitched to the belt end; no eyelets are needed.<br />
Hook-and-Loop Tape<br />
This fastener c<strong>on</strong>sists of two nyl<strong>on</strong> strips, <strong>on</strong>e<br />
with tiny hooks and <strong>on</strong>e with looped pile. The<br />
hooks and pile intermesh when pressed together.<br />
Such tape is often used <strong>on</strong> jackets, sportswear,<br />
and children’s clothes. Available by the yard or in<br />
precut shapes, it can be stitched by hand or<br />
machine.<br />
CHOOSING TAPES AND<br />
TRIMS<br />
Tapes and trims can be functi<strong>on</strong>al or decorative.<br />
See Fig. 3-5. They reinforce a seam, cover a<br />
Hook and straight eye Buckle without pr<strong>on</strong>g Buckle with pr<strong>on</strong>g Hook-and-loop tape<br />
LESSON 3 Selecting Noti<strong>on</strong>s • 449
Seam tape Bias tape Twill tape Piping Hem facing Ribbing<br />
3-5<br />
Tapes and Trims<br />
fabric edge, or create a special design <strong>on</strong> the outside<br />
of a garment. You’ll find many types, widths,<br />
and colors. They may be woven, knitted, braided,<br />
or made of lace. If you can’t match trim color to<br />
fabric exactly, select a c<strong>on</strong>trasting color instead.<br />
Purpose determines which tape or trim to<br />
choose. To prevent fabric from stretching, select a<br />
firm, n<strong>on</strong>-stretchable tape or trim. For areas that<br />
should stretch during wear, such as a knitted cuff,<br />
choose a stretchable tape or trim.<br />
Some of the comm<strong>on</strong> tapes and trims include<br />
the following:<br />
• Seam tape. Woven tape or lace used to finish<br />
hem and facing edges.<br />
• Bias tape. Single-fold or double-fold tape for<br />
binding curved or straight edges; also used for<br />
casings, ties, and trims.<br />
• Hem facing. Wide bias tape or lace for facing<br />
hems and binding edges.<br />
• Fold-over braid. Knitted braid folded in half<br />
and used for binding and trimming edges.<br />
• Ribbing. Stretchable knitted band used to finish<br />
a neckline, armhole, sleeve, pant leg, or<br />
lower edge.<br />
• Twill tape. Firmly woven tape for reinforcing<br />
seams.<br />
• Piping. Narrow, corded, bias strip of fabric<br />
inserted into a seam for a decorative trim.<br />
• Cable cord. Filler for piping, cording, and<br />
tubing.<br />
450 • PART 1 Patterns, Fabrics, and Noti<strong>on</strong>s<br />
• Belting. Very stiff band used to reinforce belts<br />
and waistbands.<br />
CHOOSING ELASTICS<br />
Since elastic comes in several types and widths,<br />
your choice depends <strong>on</strong> whether it will be used in<br />
a casing or stitched directly to a garment. Read<br />
the label when purchasing elastic to be sure it will<br />
serve the correct purpose. See Fig. 3-6.<br />
• Woven elastic. Stays the same width when<br />
stretched, so it can be stitched directly to a garment<br />
or used in a casing.<br />
• Braided elastic. Recommended <strong>on</strong>ly for<br />
casings because it narrows when stretched.<br />
• Clear elastic. Very stretchy elastic that is<br />
stitched directly to the fabric; particularly suitable<br />
for swimwear and lingerie.<br />
• Special-purpose elastics. Available for<br />
lingerie, swimwear, and activewear.<br />
CHOOSING INTERFACINGS<br />
AND LININGS<br />
Interfacings and linings are fabrics used <strong>on</strong> the<br />
inside of a garment. They should not be seen<br />
through a garment. Both must be able to receive<br />
the same care as the outer fabric.<br />
Interfacings<br />
Fabric interfacing is placed between the outer<br />
fabric and the facing to prevent stretching of
Woven Braided Clear<br />
3-6<br />
Elastics<br />
necklines, fr<strong>on</strong>t closings, and butt<strong>on</strong>holes. It adds<br />
shape to collars, cuffs, pockets, and hems.<br />
Interfacing can also add crispness and stability to<br />
waistbands and belts. Each of the basic interfacings<br />
has a different applicati<strong>on</strong> method.<br />
• Sew-in interfacing. Must be stitched by<br />
machine or hand to the garment; available in<br />
either woven or n<strong>on</strong>woven fabrics.<br />
• Fusible interfacing. Has a resin coating <strong>on</strong><br />
the back of either woven or n<strong>on</strong>woven fabric;<br />
fuses or b<strong>on</strong>ds to fabric when pressed.<br />
• Combinati<strong>on</strong> fusible/sew-in interfacing.<br />
Temporarily fuses to fabric with a cool ir<strong>on</strong> so<br />
that it acts like a fusible during the sewing<br />
SEWING TIP<br />
Lining and interfacing. To check the<br />
final effect of lining and interfacing, drape<br />
a piece of fabric over them while you’re in<br />
the store. Examine how they look and feel<br />
together. Remember that even though<br />
fusible and sew-in interfacing feel the<br />
same, fusible will give crisper results.<br />
Always test fusible interfacing <strong>on</strong> a<br />
fabric scrap.<br />
process; when the finished garment is washed<br />
or dry-cleaned, the interfacing loses its b<strong>on</strong>d<br />
and becomes a sew-in.<br />
Interfacing weights range from very lightweight<br />
to heavyweight. Choose an interfacing<br />
that is the same weight or lighter than your fabric.<br />
Heavyweight interfacings are recommended<br />
<strong>on</strong>ly for accessories and crafts.<br />
Linings<br />
A lining is a fabric used to finish the inside of<br />
a jacket, coat, skirt, dress, or pants. A lining helps<br />
prevent the garment from stretching and reduces<br />
wrinkling. Select lining fabric that is firmly<br />
woven, slippery, and static-free. The color of a<br />
jacket lining can either match or c<strong>on</strong>trast with the<br />
outer fabric.<br />
A lining is c<strong>on</strong>structed separately and then<br />
inserted into the garment. For skirts and pants,<br />
the lining is attached al<strong>on</strong>g the waistband and<br />
zipper. For coats, jackets, vests, and dresses, the<br />
lining is stitched around the facing edges. The<br />
hem of a lining can be sewn to the garment hem<br />
or hemmed separately. Jacket hems are usually<br />
sewn to the garment; coat and skirt hems are<br />
hemmed separately.<br />
CHOOSING FUSIBLE WEBS<br />
Fusible webs hold two layers of fabric together.<br />
The webs are a network of b<strong>on</strong>dable fibers. See<br />
Fig. 3-7. When heat and/or steam is applied, the<br />
web melts and fuses the fabric layers. Fusible webs<br />
can be used to hem, apply trims, and hold facing<br />
edges in place.<br />
Narrow- and widewidth<br />
fusible webs are<br />
sold by the yard. Some<br />
have a peel-off paper<br />
backing for easier cutting<br />
and use. Before<br />
3-7<br />
applying, read instruc- Fusible Web<br />
ti<strong>on</strong>s and test <strong>on</strong> scrap<br />
fabric.<br />
LESSON 3 Selecting Noti<strong>on</strong>s • 451
PART 1<br />
SUMMARY<br />
• Choosing a pattern that is the right style<br />
and size for you and that matches your<br />
skill level will help you achieve better<br />
sewing results. (Less<strong>on</strong> 1)<br />
• Both the pattern catalog and pattern envelope<br />
have informati<strong>on</strong> about the style and<br />
fit of a pattern. (Less<strong>on</strong> 1)<br />
• To determine your correct pattern size,<br />
compare your measurements with the pattern<br />
charts. (Less<strong>on</strong> 1)<br />
• Certain fabrics require special sewing techniques<br />
and are not good choices for beginning<br />
sewers. (Less<strong>on</strong> 2)<br />
• Purchase all the noti<strong>on</strong>s for a project when<br />
you buy the fabric. (Less<strong>on</strong> 3)<br />
• Choose noti<strong>on</strong>s with care so that they are<br />
suitable for the fabric you’ve selected.<br />
(Less<strong>on</strong> 3)<br />
452 • PART 1 Patterns, Fabrics, and Noti<strong>on</strong>s<br />
Review<br />
RECALLING THE FACTS<br />
1. What can you learn from the fr<strong>on</strong>t of a<br />
pattern envelope? (Less<strong>on</strong> 1)<br />
2. What informati<strong>on</strong> is listed <strong>on</strong> the back of<br />
a pattern envelope? (Less<strong>on</strong> 1)<br />
3. Name three characteristics of easy-tosew<br />
patterns. (Less<strong>on</strong> 1)<br />
4. How are accurate body measurements<br />
taken? (Less<strong>on</strong> 1)<br />
5. How do you determine your figure type?<br />
(Less<strong>on</strong> 1)<br />
6. If body measurements differ from a pattern<br />
size, what should you do? (Less<strong>on</strong> 1)<br />
7. If two people are different sizes, could<br />
they share the same pattern? Explain.<br />
(Less<strong>on</strong> 1)<br />
8. What is the difference between wearing<br />
ease and design ease? (Less<strong>on</strong> 1)
and Activities<br />
9. Do you have to use the fabrics suggested<br />
<strong>on</strong> a pattern envelope? Explain.<br />
(Less<strong>on</strong> 2)<br />
10. List at least five fabrics that a beginning<br />
sewer should avoid. (Less<strong>on</strong> 2)<br />
11. How do you decide how much fabric to<br />
buy? (Less<strong>on</strong> 2)<br />
12. Why is extra yardage needed for some<br />
fabrics? (Less<strong>on</strong> 2)<br />
13. Why should noti<strong>on</strong>s be purchased at the<br />
same time as your fabric? (Less<strong>on</strong> 3)<br />
14. Why do some butt<strong>on</strong>s come with a<br />
shank? (Less<strong>on</strong> 3)<br />
15. Why is interfacing used? (Less<strong>on</strong> 3)<br />
APPLYING KNOWLEDGE<br />
1. Easy-to-sew patterns. Look through a<br />
pattern catalog and select patterns that<br />
beginning sewers might use. In writing,<br />
identify which features make each pattern<br />
easy to sew.<br />
2. Pattern size. Take your measurements.<br />
Then determine the pattern size that<br />
would be right for you.<br />
3. Garment fabrics. Collect photographs of<br />
garments from fashi<strong>on</strong> magazines and<br />
sales catalogs. Choose examples that<br />
identify the fabric. Then find similar garments<br />
in a pattern catalog. How do the<br />
suggested fabrics <strong>on</strong> the pattern compare<br />
with those in the photographs? In<br />
writing, explain possible reas<strong>on</strong>s for any<br />
differences.<br />
4. Noti<strong>on</strong>s. Visit the noti<strong>on</strong>s department in<br />
a store. Research the types and prices of<br />
thread, zippers, butt<strong>on</strong>s, snaps, hooks<br />
and eyes, tapes, trims, and elastics. Put<br />
the results in chart form.<br />
5. Home decorating project. Visit a fabric<br />
store and select a pattern for a home<br />
furnishings project. Note the recommended<br />
fabrics listed <strong>on</strong> the pattern<br />
envelope. Look around the store for fabrics<br />
suitable for home decorating. What<br />
types of fibers, fabrics, and finishes are<br />
most comm<strong>on</strong>? How do they differ from<br />
fabrics used for garments? Summarize<br />
your findings in a report.<br />
MAKING>
PART 2<br />
Machines and<br />
Equipment<br />
454
Using a Sewing Machine<br />
The most important and expensive pieces of sewing equipment are the sewing machine<br />
and serger. In this less<strong>on</strong> you’ll learn about c<strong>on</strong>venti<strong>on</strong>al sewing machines. Fig. 4-1 <strong>on</strong><br />
pages 456-457 shows the parts of a sewing machine. You can work safely and more effectively<br />
when you are familiar with this informati<strong>on</strong>.<br />
All sewing machines operate similarly, but<br />
some makes and models have differences. To<br />
learn how each part functi<strong>on</strong>s <strong>on</strong> the machine<br />
you use, study the instructi<strong>on</strong> manual that comes<br />
with the machine. You’ll find directi<strong>on</strong>s for operating<br />
the machine and any accessories. Machine<br />
care is also covered. Always refer to the instructi<strong>on</strong><br />
manual when you have a specific questi<strong>on</strong> or<br />
problem.<br />
CHOOSING NEEDLE AND<br />
THREAD<br />
Needles, which hold the upper thread <strong>on</strong> a<br />
sewing machine, come in many types and sizes.<br />
Always replace a sewing machine needle when it<br />
becomes dull, bent, or rough. A damaged needle<br />
can cause stitching problems and harm fabric.<br />
Some people insert a new needle when they begin<br />
a project.<br />
Universal Ballpoint Stretch Leather<br />
LESSON 4<br />
Types of Needles<br />
Several types of sewing machine needles are<br />
available. These are shown in Fig. 4-2 below.<br />
• Universal or general-purpose needle.<br />
Has a sharp point and is designed for most<br />
woven and knitted fabrics.<br />
• Ballpoint needle. Designed for knits and<br />
stretch fabrics; slightly rounded tip allows the<br />
needle to slip between fabric yarns.<br />
• Stretch needle. Specially designed to prevent<br />
skipped stitches when sewing <strong>on</strong> synthetic<br />
suede and elastic knitwear.<br />
• Leather needle. Has a wedge-shaped point<br />
designed to pierce leather, vinyl, and heavy<br />
n<strong>on</strong>woven fabric.<br />
• Twin (double) and hemstitch (wing) needles.<br />
Available for decorative stitching.<br />
Hemstitch<br />
Twin<br />
4-2<br />
Sewing<br />
Machine Needles<br />
LESSON 4 Using a Sewing Machine • 455
Tensi<strong>on</strong><br />
c<strong>on</strong>trol<br />
Take-up lever<br />
Fr<strong>on</strong>t thread<br />
guide<br />
Needle<br />
Presser foot<br />
Feed<br />
Bobbin and<br />
bobbin case<br />
Bobbin cover<br />
• Bobbin. Holds the bottom, or bobbin, thread.<br />
• Bobbin case. Holds the bobbin in the machine and regulates<br />
the tensi<strong>on</strong> of the bobbin thread; may be removable or<br />
stati<strong>on</strong>ary.<br />
• Bobbin cover or slide plate. Covers the bobbin and bobbin<br />
case in the machine; may be a small, hinged cover that flips<br />
open or a sliding cover.<br />
• Bobbin winder. Spindle, latch, and tensi<strong>on</strong> discs used to wind<br />
thread <strong>on</strong>to a bobbin.<br />
• Feed dog or feed. Teeth that move the fabric under the presser<br />
foot, advancing the fabric <strong>on</strong>e stitch at a time.<br />
• Foot or knee c<strong>on</strong>trol. Regulates the starting, running, and<br />
stopping of the machine by the amount of pressure applied to<br />
the c<strong>on</strong>trol (not shown).<br />
Needle Sizes<br />
Needle sizes range from 6 (for very delicate<br />
fabrics) to 20 (for very heavy fabrics). Some foreign<br />
manufacturers use a different numbering<br />
system for needles. Although their needles are<br />
numbered 60 to 125 (shown in parentheses), the<br />
same rules apply. The lower the number, the<br />
finer the needle is. The lighter and finer the fab-<br />
456 • PART 2 Machines and Equipment<br />
4-1 • Parts of a Sewing Machine<br />
Top thread<br />
guide<br />
Stitch patterns<br />
Spool pins<br />
Needle clamp<br />
Hand wheel<br />
Stitch pattern<br />
c<strong>on</strong>trol<br />
Presser foot<br />
lifter Throat plate<br />
Stitch length<br />
c<strong>on</strong>trol<br />
Reverse stitch<br />
c<strong>on</strong>trol<br />
Stitch width<br />
c<strong>on</strong>trol<br />
Bobbin<br />
winder<br />
spindle<br />
• Hand wheel. C<strong>on</strong>trols the movement of the take-up lever; can<br />
be turned by hand to raise or lower needle.<br />
• Hand-wheel knob. Small knob inside the hand wheel; stops<br />
the needle from moving while a bobbin is being wound (not<br />
shown).<br />
• Needle. Comes in different types and sizes; must be inserted<br />
firmly into the shaft called a needle bar.<br />
• Needle clamp. Holds the needle firmly in the machine; loosened<br />
and tightened by a screw.<br />
• Power and light switch. Turns <strong>on</strong> the machine and the light<br />
(not shown).<br />
• Presser foot. Holds the fabric against the feed dog as you<br />
stitch.<br />
ric, the finer the needle should be. See Fig. 4-3 <strong>on</strong><br />
page 458.<br />
• Size 9 (70) or 11 (75). For fine, lightweight<br />
fabrics, such as chiff<strong>on</strong> and voile.<br />
• Size 14 (90). For medium-weight fabrics,<br />
such as flannel and corduroy.<br />
• Size 16 (100) or 18 (110). For heavier and<br />
thicker fabrics.
• Presser-foot lifter. Raises and lowers the presser foot.<br />
• Reverse butt<strong>on</strong> or lever. Butt<strong>on</strong> or lever that allows backward<br />
stitching.<br />
• Spool pins. Hold spool of thread.<br />
• Stitch-length c<strong>on</strong>trol. Regulates the length of the stitch.<br />
• Stitch patterns. Show the selecti<strong>on</strong> of stitches available <strong>on</strong><br />
the machine.<br />
• Stitch-pattern c<strong>on</strong>trol. Regulates the selecti<strong>on</strong> of different<br />
stitching patterns, including zigzag, stretch stitch, and decorative<br />
stitches.<br />
• Stitch-width c<strong>on</strong>trol. Regulates the width of zigzag stitching<br />
and positi<strong>on</strong>s the needle for straight stitching.<br />
• Take-up lever. C<strong>on</strong>trols the amount of thread pulled from the<br />
spool to the needle for each stitch; moves up and down as you<br />
stitch.<br />
Thread<br />
The type and weight of your fabric also determines<br />
what thread to use. See Fig. 4-3 <strong>on</strong> page<br />
458. In general, for lightweight fabrics use a fine<br />
needle, fine thread, and short stitches. For heavier<br />
fabrics, use a coarser needle, heavier thread, and<br />
l<strong>on</strong>ger stitches. Except for special decorative<br />
stitching, always use the same type of thread in<br />
the needle and bobbin.<br />
CHANGING NEEDLES<br />
To change a sewing machine needle, follow<br />
these steps:<br />
1. Raise the needle to the highest positi<strong>on</strong> by<br />
turning the hand wheel.<br />
2. Loosen the thumbscrew <strong>on</strong> the needle clamp.<br />
3. Remove the old needle, being sure to notice<br />
its positi<strong>on</strong>. The l<strong>on</strong>g groove <strong>on</strong> the needle<br />
should face the side from which you thread<br />
the needle.<br />
4. Insert the top of the needle firmly up into the<br />
needle clamp.<br />
5. Tighten the thumbscrew securely.<br />
4-1 • Parts of a Sewing Machine (C<strong>on</strong>tinued)<br />
• Tensi<strong>on</strong> c<strong>on</strong>trol. Regulates the tensi<strong>on</strong> placed <strong>on</strong> the needle<br />
thread by tightening or loosening the tensi<strong>on</strong> discs that the<br />
upper thread passes through.<br />
• Thread guides. Help guide upper thread from spool to needle<br />
without tangling.<br />
• Throat or needle plate. Located directly under the needle and<br />
surrounds the feed dog; usually has seam width guidelines to<br />
help keep stitching straight.<br />
Note: Machines vary from model to model. See your owner’s manual<br />
for the names and locati<strong>on</strong>s of the parts and special features<br />
of your machine.<br />
PREPARING THE BOBBIN<br />
The bobbin holds the bottom thread in a<br />
sewing machine. Most bobbins must be removed<br />
from the bobbin case in order to be wound. Some<br />
machines, however, have a bobbin winder built<br />
into the bobbin case for easy rewinding. Keep<br />
extra bobbins in your sewing box to avoid winding<br />
<strong>on</strong>e color thread over another.<br />
Winding the Bobbin<br />
Refer to the machine’s manual for specific<br />
instructi<strong>on</strong>s for winding a bobbin. Here is a comm<strong>on</strong><br />
method used.<br />
1. Loosen the hand-wheel knob to stop movement<br />
of the needle.<br />
2. Insert the end of the thread through a hole in<br />
the bobbin.<br />
3. Wrap the thread securely around the bobbin<br />
several times.<br />
4. Place the bobbin <strong>on</strong> the bobbin winder.<br />
5. Hold the end of the thread until the bobbin<br />
starts winding.<br />
LESSON 4 Using a Sewing Machine • 457
4-3 • Choosing Thread, Needle Size, and Stitch Length<br />
FABRIC<br />
THREAD<br />
NEEDLE SIZE<br />
Delicate fabrics: chiff<strong>on</strong>, fine<br />
lace, silk<br />
polyester, polyester/cott<strong>on</strong>, silk 9 (70)<br />
4-16<br />
Lightweight fabrics: batiste,<br />
crepe, organdy, taffeta<br />
polyester, polyester/cott<strong>on</strong>, silk 11 (75)<br />
12-14<br />
14 (90)<br />
10-12<br />
Medium-weight fabrics:<br />
gingham, poplin, linen, fine<br />
corduroy, lightweight wool,<br />
velveteen<br />
Medium-heavy fabrics: denim,<br />
corduroy, gabardine, woolens,<br />
sailcloth<br />
Heavy fabrics: canvas, coatings,<br />
fake fur, upholstery fabrics<br />
All knits and stretch fabrics<br />
Leather and suede<br />
Decorative topstitching <strong>on</strong><br />
fabrics<br />
polyester, polyester/cott<strong>on</strong>,<br />
mercerized cott<strong>on</strong>, silk<br />
Be sure the bobbin winds evenly. See Fig. 4-4.<br />
If necessary, gently guide the thread with your<br />
finger. If the bobbin winder doesn’t have an automatic<br />
shut-off, wind the bobbin <strong>on</strong>ly about<br />
three-quarters full. Cut the thread with scissors,<br />
and remove the bobbin from the winder. Tighten<br />
the hand-wheel knob.<br />
Inserting the Bobbin<br />
To insert the bobbin, begin by opening the<br />
slide plate that covers the bobbin case. For a builtin<br />
bobbin case, simply insert the bobbin directly<br />
into the case. For a removable bobbin case, take<br />
the case out of the machine and insert the bobbin.<br />
Be sure the thread unwinds in the right<br />
directi<strong>on</strong>. Check the manual for specific instructi<strong>on</strong>s.<br />
Insert the bobbin case back into the<br />
machine.<br />
458 • PART 2 Machines and Equipment<br />
polyester, polyester/cott<strong>on</strong>,<br />
mercerized cott<strong>on</strong>, silk, heavy<br />
duty<br />
polyester, polyester/cott<strong>on</strong>,<br />
heavy duty<br />
polyester, polyester/cott<strong>on</strong><br />
polyester, polyester/cott<strong>on</strong>,<br />
heavy duty<br />
any<br />
16 (100)<br />
18 (110)<br />
ballpoint or stretch<br />
leather<br />
twin or hemstitch<br />
10-12<br />
8-10<br />
STITCH LENGTH<br />
10-14 or special stretch stitch<br />
8-10<br />
8-12<br />
Properly wound Improperly wound<br />
4-4<br />
Winding the Bobbin<br />
The thread goes from the spool to the bobbin <strong>on</strong> a bobbin<br />
winder. The exact process varies am<strong>on</strong>g machines.
Pull the bobbin thread gently to see whether<br />
there is a slight tensi<strong>on</strong>, or tightness, <strong>on</strong> it. If it<br />
unwinds too easily, check the threading of the<br />
bobbin case again. Then close the slide plate.<br />
THREADING THE MACHINE<br />
Threading a machine may look difficult at<br />
first, but the general procedure is simple and the<br />
same for all machines. See Fig. 4-5. The thread<br />
goes from the spool pin through a thread guide to<br />
the tensi<strong>on</strong> discs. Then it goes to the take-up<br />
lever, which c<strong>on</strong>trols the amount of thread that<br />
pulls from the spool. The thread c<strong>on</strong>tinues down<br />
through additi<strong>on</strong>al thread guides and to the needle.<br />
Thread guides direct the thread and keep it<br />
from tangling. Study the illustrati<strong>on</strong> in the manual<br />
for your machine.<br />
4-5 • Threading the Machine<br />
1. Raise the needle to the highest positi<strong>on</strong>.<br />
2. Raise the presser foot.<br />
3. Lead thread through all threading points.<br />
4. Thread tensi<strong>on</strong> discs.<br />
5. Thread take-up lever from right to left.<br />
6. Thread needle.<br />
Tensi<strong>on</strong> Discs<br />
Be sure to check the threading of the tensi<strong>on</strong><br />
discs. Raise the presser foot and pull the thread<br />
gently to look for slight tensi<strong>on</strong>. If the thread<br />
unwinds too easily or without any resistance, try<br />
<strong>on</strong>ce more to pass the thread around the tensi<strong>on</strong><br />
discs. The thread should be placed between two<br />
of the discs and then brought up and caught <strong>on</strong> a<br />
hook or spring <strong>on</strong> the tensi<strong>on</strong> discs. Always<br />
thread the tensi<strong>on</strong> discs before you thread the<br />
take-up lever.<br />
Thread Guides<br />
The placement of thread guides differs am<strong>on</strong>g<br />
machines. The locati<strong>on</strong> of the last thread guide<br />
tells you in which directi<strong>on</strong> to thread the needle.<br />
See Fig. 4-6. If the thread guide is <strong>on</strong> the right,<br />
thread the needle from the right. If the guide is <strong>on</strong><br />
the left, thread the needle from the left. If the<br />
guide is <strong>on</strong> the fr<strong>on</strong>t of the needle bar, thread the<br />
needle from fr<strong>on</strong>t to back.<br />
4-6<br />
The thread must pass through the thread guides<br />
before going through the needle.<br />
LESSON 4 Using a Sewing Machine • 459
Pull out at least 3 inches (7.5 cm) of thread<br />
from the needle. This will prevent the thread<br />
from pulling out of the needle as it is raised and<br />
lowered.<br />
Raising the Bobbin Thread<br />
After the bobbin and needle have been threaded,<br />
bring the bobbin thread up through the hole<br />
in the needle or throat plate. See Fig. 4-7. To do<br />
this, hold the needle thread in your left hand.<br />
With your right hand, turn the hand wheel slowly<br />
toward you until the needle enters the throat<br />
plate. C<strong>on</strong>tinue turning until the needle rises and<br />
brings up a loop of the bobbin thread. Pull up the<br />
loop to bring the end of the bobbin thread out.<br />
Pull both thread ends under the presser foot and<br />
1. The needle goes<br />
down through the<br />
cloth and brings<br />
the top thread<br />
close to the<br />
bobbin.<br />
4-7<br />
2. The needle moves<br />
up and the top<br />
thread forms a<br />
loop to be caught<br />
and held by the<br />
shuttle hook.<br />
460 • PART 2 Machines and Equipment<br />
The bobbin<br />
thread must be pulled<br />
up before you can sew.<br />
Where should it be<br />
placed?<br />
4-8 • How a Stitch Is Formed<br />
3. The shuttle hook<br />
brings the thread<br />
loop around and<br />
under the bobbin<br />
case.<br />
toward the back of the machine so the threads<br />
w<strong>on</strong>’t tangle as you start to stitch.<br />
ADJUSTING THE MACHINE<br />
How does a sewing machine work? As the needle<br />
thread intertwines with the bobbin thread, a<br />
lockstitch forms. See Fig. 4-8. This intertwining<br />
of threads creates a stitch that doesn’t pull out or<br />
unravel when a loop or loose thread is pulled.<br />
To get the best stitch for each fabric, make different<br />
adjustments. You can change the type of<br />
stitch, length of stitch, tensi<strong>on</strong>, and pressure.<br />
Always check your owner’s manual and pretest<br />
the adjustments by stitching <strong>on</strong> a scrap of the<br />
same fabric. Use a double thickness of fabric to<br />
imitate sewing actual seams.<br />
Adjusting Stitch Type<br />
Although any garment can be c<strong>on</strong>structed<br />
with a straight stitch, most machines offer other<br />
stitches, including zigzag, stretch, and decorative<br />
stitches. See Fig. 4-9. The stitch is usually regulated<br />
by c<strong>on</strong>trols <strong>on</strong> the machine. Sometimes specialty<br />
stitches are c<strong>on</strong>trolled by separate discs,<br />
which are inserted into the machine.<br />
4. The thread loop<br />
slips off the shuttle<br />
hook and goes<br />
around the bobbin<br />
thread.<br />
5. The threads are<br />
pulled up by the<br />
needle, making a<br />
lockstitch.
4-9<br />
Although a straight stitch is typical, some spe-<br />
cial situati<strong>on</strong>s might call for a decorative stitch.<br />
Adjusting Stitch Length<br />
The numbers <strong>on</strong> the stitch-length c<strong>on</strong>trol are<br />
based <strong>on</strong> either English or metric measurement.<br />
See Fig. 4-10. Numbers from 6 to 20 indicate the<br />
number of stitches per inch. Numbers from 1 to<br />
5 indicate the length of stitch in millimeters. For<br />
example, the number 4 indicates that each stitch<br />
is 4 mm l<strong>on</strong>g, or about 6 stitches per inch.<br />
Stitch length should match fabric type and<br />
stitching purpose, as indicated below.<br />
• Regular stitching. Choose a mediumlength<br />
stitch for most fabrics. This is 10 to 12<br />
stitches per inch (or a stitch length of 2 to 2.5<br />
mm). For lightweight fabrics, use a shorter<br />
stitch. For heavier fabrics, use a l<strong>on</strong>ger stitch.<br />
• Machine basting. Use the l<strong>on</strong>gest stitch possible,<br />
for easy removal. Basting is 6 to 8 stitches<br />
per inch (or a stitch length of 3 to 4 mm).<br />
• Reinforcement stitching. Use very short<br />
stitches to prevent stretching or pulling in certain<br />
areas. This is 15 to 20 stitches per inch (or<br />
a stitch length of 1 to 1.5 mm).<br />
4-10 • Stitch-Length C<strong>on</strong>versi<strong>on</strong><br />
Some sewing machines show stitch length in millimeters<br />
rather than stitches per inch.<br />
STITCHES PER INCH<br />
24<br />
13<br />
9<br />
6<br />
5<br />
MM EQUIVALENT OF<br />
STITCH LENGTH<br />
1<br />
2<br />
3<br />
4<br />
5<br />
Adjusting Tensi<strong>on</strong><br />
A properly balanced stitch has two threads that<br />
lock in the center between the two layers of fabric.<br />
If the stitches are too tight or too loose, adjust<br />
the tensi<strong>on</strong>.<br />
Check the tensi<strong>on</strong> by examining sample stitches<br />
sewn <strong>on</strong> a double layer of fabric. See Fig. 4-11.<br />
If the top thread lies flat <strong>on</strong> the surface of the fabric<br />
and loops show <strong>on</strong> the top, then the top tensi<strong>on</strong><br />
is too tight. Turn the tensi<strong>on</strong> dial to a lower<br />
4-11<br />
Although the stitches are balanced in the top<br />
drawing, they’re not in the others. How would you correct<br />
each situati<strong>on</strong>?<br />
Properly balanced<br />
Bottom loose<br />
Top loose<br />
LESSON 4 Using a Sewing Machine • 461
number. If the bottom row of stitching is flat<br />
al<strong>on</strong>g the bottom layer of fabric with loops showing<br />
<strong>on</strong> the surface, then the top tensi<strong>on</strong> is too<br />
loose. Turn the dial to a higher number.<br />
Keep adjusting and testing to get the proper<br />
balance. Test the tensi<strong>on</strong> balance by pulling the<br />
fabric until the stitching breaks. If <strong>on</strong>e thread<br />
breaks first, the tensi<strong>on</strong> <strong>on</strong> that thread is tighter.<br />
Adjusting Pressure<br />
The presser foot holds fabric against the feed<br />
dog, which moves the fabric forward. Correct<br />
pressure between these two parts moves the two<br />
layers of fabric smoothly under the needle. If <strong>on</strong>e<br />
layer of fabric feeds faster than the other, the fabric<br />
will ripple. If the pressure is too great, <strong>on</strong>e<br />
layer of fabric may be l<strong>on</strong>ger than the other after<br />
the seam is sewn. When the pressure is correct,<br />
both layers of fabric feed smoothly under the<br />
needle. The result is an evenly stitched seam.<br />
Some machines have a pressure regulator that<br />
can be adjusted. Refer to your manual.<br />
USING THE SEWING<br />
MACHINE<br />
With practice, you can c<strong>on</strong>trol sewing machine<br />
speed. Use light pressure <strong>on</strong> the knee or foot c<strong>on</strong>trol.<br />
Experiment with slowly increasing and<br />
decreasing speeds. Learn how to start slowly,<br />
build up speed, and slow down toward the end.<br />
Guidelines <strong>on</strong> Stitching<br />
1. Before you start to stitch, raise the take-up<br />
lever and the needle to the highest positi<strong>on</strong>.<br />
This will prevent the upper thread from<br />
pulling out of the needle when you begin. Be<br />
sure both threads are pulled back behind the<br />
presser foot to prevent tangled stitches.<br />
2. Place the fabric under the presser foot. Put<br />
the bulk of the fabric to the left of the needle.<br />
3. Positi<strong>on</strong> the stitching line directly under the<br />
needle.<br />
462 • PART 2 Machines and Equipment<br />
SEWING TIP<br />
Straight and curved stitching. If your<br />
needle plate doesn’t have guideline markings,<br />
place a piece of masking tape 5 ⁄8<br />
inch (1.5 cm) from the needle to act as a<br />
guide for regular seams. Stitching curves<br />
takes more practice. Draw curved lines <strong>on</strong><br />
fabric scraps and practice stitching until<br />
you can sew them smoothly.<br />
4. To begin stitching, turn the hand wheel to<br />
lower the needle into the fabric. Then lower<br />
the presser foot. Gradually apply pressure <strong>on</strong><br />
the knee or foot c<strong>on</strong>trol to stitch at a slow,<br />
even speed.<br />
5. When you stop stitching, turn the hand<br />
wheel to raise the take-up lever and needle to<br />
the highest point. Raise the presser foot.<br />
Gently slide the fabric toward the back of the<br />
machine. D<strong>on</strong>’t pull the fabric forward<br />
because you could bend the needle. Clip the<br />
threads.<br />
Stitching Straight<br />
Your first attempts at stitching may not produce<br />
perfectly straight rows. Learn to guide the<br />
fabric with your hands, without pulling or pushing.<br />
Keep <strong>on</strong>e hand in fr<strong>on</strong>t and <strong>on</strong>e hand behind<br />
the presser foot to guide the fabric smoothly. See<br />
Fig. 4-12.<br />
4-12<br />
When you sew,<br />
positi<strong>on</strong> your hands as<br />
shown.
SAFETY TIP<br />
When sewing with a machine, follow<br />
these safety tips:<br />
• Use a slow speed when learning how<br />
to use the machine.<br />
• Keep your fingers away from the<br />
needle.<br />
• D<strong>on</strong>’t lean your face too close when<br />
stitching in case the needle breaks.<br />
• D<strong>on</strong>’t stitch over pins. <str<strong>on</strong>g>Care</str<strong>on</strong>g>fully<br />
remove them as you sew.<br />
• Unplug the cord from the outlet when<br />
the machine is not in use.<br />
SKIPPED STITCHES<br />
• Replace dull or bent needle.<br />
• Rethread machine.<br />
• Check size and type of needle for fabric.<br />
• Loosen upper thread tensi<strong>on</strong>.<br />
• Check needle positi<strong>on</strong>.<br />
PUCKERING<br />
• Loosen upper tensi<strong>on</strong>.<br />
• Replace dull or bent needle.<br />
• Use same type of thread in needle and bobbin.<br />
• Loosen pressure <strong>on</strong> presser foot.<br />
• Shorten stitch length.<br />
THREAD BREAKS<br />
• Check threading of machine.<br />
• Replace needle.<br />
• Check size of needle.<br />
• Check thread for knots or unevenness.<br />
• Begin stitching at a slower speed.<br />
4-13 • Correcting Stitching Problems<br />
Use the guideline markings <strong>on</strong> the throat or<br />
needle plate to help keep the rows of stitching<br />
straight. Line up the edge of the fabric with the<br />
guideline for the seam width you’re sewing. Keep<br />
your eyes <strong>on</strong> this marking instead of watching the<br />
needle.<br />
Stitching Problems<br />
Frequently the cause of stitching problems is<br />
incorrect threading. If rethreading the machine<br />
doesn’t correct a problem, check the needle and<br />
the tensi<strong>on</strong> setting. Refer to Fig. 4-13 for soluti<strong>on</strong>s<br />
to specific stitching problems.<br />
NEEDLE BREAKS<br />
• <str<strong>on</strong>g>Care</str<strong>on</strong>g>fully guide the fabric through the machine; do not<br />
pull it.<br />
• Check needle positi<strong>on</strong>.<br />
• Tighten presser foot.<br />
• Use fewer layers of fabric.<br />
MACHINE JAMS<br />
• Check for loops of matted thread under stitching.<br />
• Check bobbin for caught thread.<br />
• Check needle positi<strong>on</strong>.<br />
• Check machine threading.<br />
MACHINE DOESN’T SEW<br />
• Check <strong>on</strong>/off switch.<br />
• Tighten hand-wheel knob.<br />
• Check electrical cord.<br />
• Check knee or foot c<strong>on</strong>trol.<br />
BUNCHING OF THREAD<br />
• Pull thread ends behind presser foot and hold when<br />
starting to stitch.<br />
• Rethread machine.<br />
LESSON 4 Using a Sewing Machine • 463
SEWING MACHINE<br />
ACCESSORIES<br />
Many machines come with accessories. Some<br />
are described below.<br />
• Straight-stitch foot. Has a narrow opening<br />
and is used for sewing straight stitches.<br />
• Zigzag foot. Has a wide opening to allow for<br />
the sideways needle moti<strong>on</strong> of zigzag and special<br />
stitches; works for straight stitches too.<br />
• Zipper foot. Can be adjusted to the right or<br />
left side of the needle for stitching close to zipper<br />
teeth or cording.<br />
• Butt<strong>on</strong>hole foot. Has markings for measuring<br />
butt<strong>on</strong>hole stitches.<br />
• Blindstitch-hem foot. Guides the fabric for<br />
a blindstitch hem.<br />
SEWING MACHINE CARE<br />
Routine care keeps a sewing machine in top<br />
working c<strong>on</strong>diti<strong>on</strong>. How often is cleaning needed?<br />
That depends <strong>on</strong> how often the machine is<br />
used. Lint from fabric collects around the bobbin<br />
and needle bar and can eventually clog the<br />
machine. Many people clean their machine<br />
before starting a new project. In the sewing laboratory,<br />
your instructor will give you guidelines.<br />
Always unplug the machine before cleaning.<br />
Use a soft cloth to remove lint or fuzz from the<br />
machine base and needle bar. Use a soft brush to<br />
gently clean the bobbin and bobbin case. If possible,<br />
remove the entire bobbin case mechanism,<br />
following the directi<strong>on</strong>s in the manual. Wipe<br />
away old oil with a cloth.<br />
Many new machines are designed to never<br />
need additi<strong>on</strong>al oil. The oil is permanently<br />
imbedded in the machine. Never oil such<br />
machines. If your machine does require oil, the<br />
manual will show the specific areas to be oiled.<br />
Use <strong>on</strong>ly high-grade sewing machine oil. Wipe<br />
the machine with a cloth to remove any drips or<br />
excess oil. Then plug it in and stitch <strong>on</strong> a fabric<br />
scrap to be sure excess oil is removed. Machine oil<br />
stains fabric and is very difficult to remove.<br />
464 • PART 2 Machines and Equipment<br />
COMPUTERIZED MACHINES<br />
Computerized sewing machines are state of<br />
the art for sewers. Although expensive, they make<br />
sewing easier and more creative. See Fig. 4-14.<br />
Many computerized machines feature pushbutt<strong>on</strong><br />
commands and large, easy-to-read LCD<br />
panels that display stitches. Just press a butt<strong>on</strong> to<br />
select a stitch. The machines also automatically<br />
adjust tensi<strong>on</strong> and pressure settings.<br />
Special stitches, with some that do embroidery,<br />
are stored in a computerized machine’s memory.<br />
Hundreds of stitch programs are possible, including<br />
alphabets, m<strong>on</strong>ograms, butt<strong>on</strong>hole styles, and<br />
decorative stitches. Machines can be programmed<br />
to combine stitches into unique patterns<br />
or to sew them in single units.<br />
Some machines have sewing advisory LCD<br />
panels that give informati<strong>on</strong> and tips. You can<br />
even get instructi<strong>on</strong>s in eight different languages.<br />
Using the command ball as a pencil, you can<br />
draw your own design <strong>on</strong> the screen of some<br />
machines. One machine has a separate embroidery<br />
unit that attaches to the machine and can be<br />
c<strong>on</strong>nected to a pers<strong>on</strong>al computer. You create<br />
your own design <strong>on</strong> the computer and download<br />
it to the sewing machine, which then stitches the<br />
design. You can store your original designs in the<br />
machine’s memory. You can also download<br />
embroidery designs from the Internet to a pers<strong>on</strong>al<br />
computer and then transfer them to the<br />
machine.<br />
4-14<br />
Computerized Sewing Machine
Using a Serger<br />
The serger, also called an overlock machine, is a special<br />
sewing machine that can stitch, trim, and overcast<br />
a seam all at the same time. Moreover, it’s twice<br />
as fast as a c<strong>on</strong>venti<strong>on</strong>al machine. See Fig. 5-1.<br />
Because a serger can handle thicker threads<br />
than a c<strong>on</strong>venti<strong>on</strong>al machine, it can create special<br />
effects <strong>on</strong> seams and edges. It also does a special<br />
edge finish, called a narrow rolled hem.<br />
The serger can’t replace a c<strong>on</strong>venti<strong>on</strong>al<br />
machine. It can’t make butt<strong>on</strong>holes, insert a zipper,<br />
or do embroidery. Using both machines,<br />
however, allows you to make clothes with the<br />
same sewing techniques used for ready-to-wear.<br />
Sergers are described by the number of threads<br />
they use. Machines may be three-, four-, five-,<br />
and eight-thread machines. Each thread sits <strong>on</strong> a<br />
separate spool pin <strong>on</strong> the serger. Although an<br />
eight-thread serger doesn’t use all threads at the<br />
same time, it can create all the versi<strong>on</strong>s of a serger<br />
stitch. A serger may have <strong>on</strong>e or two needles.<br />
Only the needle thread penetrates the fabric<br />
when serging.<br />
PARTS OF A SERGER<br />
Fig. 5-2 shows the parts of a serger. Instead of<br />
a bobbin, the serger has two loopers, called the<br />
SAFETY TIP<br />
Never sew over pins with a serger. The<br />
knives will cut through a pin, which dulls<br />
the blades. The pin fragments can cut<br />
your face, hurt your eyes, or damage the<br />
inner workings of the machine. If pins<br />
are needed to hold the fabric pieces<br />
together, place them 1 inch (2.5 cm)<br />
away from the edge. A glue stick or<br />
basting stitches can also be used.<br />
LESSON 5<br />
Serger stitches<br />
upper looper and the lower looper. See Fig. 5-3 <strong>on</strong><br />
page 466. The two looper threads come up from<br />
underneath the needle plate. The upper looper<br />
thread appears <strong>on</strong> the top of the fabric, the lower<br />
looper thread <strong>on</strong> the underside. The two looper<br />
threads interlock at the fabric edge.<br />
5-2<br />
5-1<br />
just <strong>on</strong>e step.<br />
Pressure<br />
c<strong>on</strong>trol<br />
regulator<br />
Tensi<strong>on</strong><br />
c<strong>on</strong>trols<br />
Side<br />
cover<br />
Spool pin<br />
Fr<strong>on</strong>t<br />
cover<br />
A serger can trim, stitch, and overcast in<br />
Parts of a Serger<br />
How does a serger differ from a c<strong>on</strong>venti<strong>on</strong>al machine?<br />
Thread<br />
guide<br />
pole<br />
Thread<br />
c<strong>on</strong>e<br />
Spool<br />
base<br />
Hand<br />
wheel<br />
Power<br />
switch<br />
LESSON 5 Using a Serger • 465
Edge or<br />
fold<br />
Heavier<br />
thread fits<br />
through<br />
looper eyes<br />
5-3<br />
fabric.<br />
On the right side of the needle plate are moveable<br />
and stati<strong>on</strong>ary knives. See Fig. 5-4. These<br />
trim off the excess fabric before the stitch is<br />
formed. Most machines have knives that are<br />
retractable so you can serge without cutting the<br />
fabric.<br />
5-4<br />
Presser<br />
foot<br />
Movable<br />
knife<br />
Stati<strong>on</strong>ary<br />
knife<br />
466 • PART 2 Machines and Equipment<br />
Upper<br />
looper<br />
Lower<br />
looper<br />
Serger stitches are formed over the edge of the<br />
What purpose do the knives serve <strong>on</strong> a serger?<br />
Right<br />
looper<br />
Left<br />
looper<br />
Rear<br />
feed<br />
5-5<br />
Fr<strong>on</strong>t<br />
feed<br />
What is the purpose of the differen-<br />
tial feed <strong>on</strong> a serger?<br />
Some sergers have a differential feed, which is<br />
two sets of feed dogs that move the fabric<br />
through the machine at different speeds. See Fig.<br />
5-5. This can be used to gather <strong>on</strong>e layer of fabric<br />
to a straight piece of fabric. It can also prevent<br />
puckered seams <strong>on</strong> lightweight, silky fabrics and<br />
prevent wavy seams <strong>on</strong> stretchy knits.<br />
STITCH VARIATIONS<br />
Some sergers create <strong>on</strong>ly <strong>on</strong>e or two stitch<br />
variati<strong>on</strong>s; others perform several. An eightthread<br />
machine can create all of the stitches. Here<br />
are different types of serger stitches.<br />
• Three-thread serger stitch. This basic<br />
stitch is formed with <strong>on</strong>e needle and two looper<br />
threads. See Fig. 5-6. All three threads interlock<br />
at the fabric edge. With this stitch, you can<br />
stitch and overcast a seam, finish the fabric<br />
edges of a c<strong>on</strong>venti<strong>on</strong>al seam, and hem.<br />
Needle thread<br />
Upper<br />
looper<br />
thread<br />
Needle<br />
thread<br />
Lower<br />
looper<br />
thread<br />
5-6<br />
Serger Stitch<br />
Three-Thread
5-7<br />
Left needle<br />
Upper<br />
looper<br />
Four-thread<br />
safety stitch<br />
Four-Thread Stitches<br />
Right<br />
needle<br />
Lower<br />
looper<br />
Left needle Right<br />
needle<br />
Upper<br />
looper<br />
Four-thread<br />
overlock stitch<br />
Left needle<br />
Upper<br />
looper<br />
• Four-thread serger stitch. By adding an<br />
extra row of stitches, this stitch is more durable<br />
than the three-thread. It uses two needles and<br />
two loopers. One variati<strong>on</strong> is the four-thread<br />
safety stitch, which c<strong>on</strong>sists of a two-thread<br />
serger stitch and a two-thread chain stitch. It is<br />
recommended for woven fabrics, because the<br />
chain stitch may break if the fabric is stretched.<br />
The four-thread mock safety stitch, another<br />
variati<strong>on</strong>, can be used for both knits and<br />
wovens. These stitches are shown in Fig. 5-7.<br />
• Two-thread serger stitch. This stitch is<br />
created by <strong>on</strong>e needle and <strong>on</strong>e looper thread.<br />
See Fig. 5-8. The two threads interlock at the<br />
fabric edge. The needle thread forms a V <strong>on</strong><br />
the underside of the fabric. The stitch is used<br />
mainly as a seam finish <strong>on</strong> a c<strong>on</strong>venti<strong>on</strong>al<br />
seam or as an edge finish.<br />
Lower<br />
looper<br />
Right<br />
needle<br />
Lower<br />
looper<br />
Four-thread<br />
mock safety stitch<br />
5-8<br />
Serger Stitch<br />
Two-Thread<br />
Looper<br />
thread<br />
Needle<br />
thread<br />
5-9<br />
Chain Stitch<br />
Two-Thread<br />
• Two-thread chain stitch. This stitch is<br />
formed by <strong>on</strong>e needle and <strong>on</strong>e looper. See Fig.<br />
5-9. Since it doesn’t overcast the edge, it can’t<br />
make a c<strong>on</strong>venti<strong>on</strong>al seam. If the cutter can be<br />
disengaged, the chain stitch can be used for<br />
decorative topstitching. Only a few sergers<br />
offer this stitch.<br />
• Five-thread serger stitch. This stitch<br />
combines a two-thread chain stitch with a<br />
three-thread serger stitch. The more threads<br />
involved, the more durable the seam.<br />
• Rolled hemstitch. As a variati<strong>on</strong> of the<br />
three-thread serger stitch, this stitch creates a<br />
narrow row of short, dense stitches. See Fig. 5-<br />
10 <strong>on</strong> page 468. With a bulk-free hem, this<br />
edge finish is often used <strong>on</strong> placemats, napkins,<br />
ruffles, scarves, and garment hems. On<br />
some sergers, you can switch to the rolled<br />
LESSON 5 Using a Serger • 467
Needle thread<br />
5-10<br />
Rolled hem<br />
Rolled Hemstitch<br />
Upper<br />
looper<br />
thread<br />
Needle<br />
thread<br />
Lower<br />
looper<br />
thread<br />
This stitch is often used <strong>on</strong> placemats and napkins.<br />
Upper looper<br />
5-11<br />
Needle<br />
thread<br />
Lower<br />
looper<br />
thread<br />
(straight<br />
line)<br />
Three-Thread Flatlock Stitch<br />
468 • PART 2 Machines and Equipment<br />
Stitch<br />
width<br />
Seam<br />
line<br />
1. Guide fabric under serger so stitches<br />
overhang edge of fabric.<br />
2. Gently pull seam flat.<br />
Loop<br />
stitch<br />
Ladder<br />
stitch<br />
Edge<br />
3. Finished flatlock seam has loops<br />
<strong>on</strong> <strong>on</strong>e side, ladders <strong>on</strong> the other side.<br />
5-12<br />
Creating a Flatlock Seam
5-13<br />
Cover Stitch<br />
hemstitch by changing the dials. On others, the<br />
needle plate and/or presser foot must be<br />
changed.<br />
5-14<br />
• Flatlock stitch. Use this stitch to create a<br />
decorative outside seam with two or three<br />
threads, depending <strong>on</strong> the machine. See Fig. 5-<br />
11. The stitch forms loops <strong>on</strong><br />
the fabric top; a ladder stitch<br />
forms <strong>on</strong> the underside after<br />
the fabric is pulled flat. See Fig.<br />
5-12. The stitch is reversible<br />
because you can plan to have<br />
either the loops or the ladder<br />
stitches show <strong>on</strong> the outside of<br />
the fabric.<br />
• Cover stitch. This stitch uses<br />
<strong>on</strong>e looper and two or three<br />
needles for decorative hemming<br />
or topstitching. See Fig. Overlock seam<br />
5-13. Two or three parallel<br />
rows of stitching form <strong>on</strong> <strong>on</strong>e<br />
side of the fabric. On the other<br />
side, <strong>on</strong>e set of loops intersects<br />
with the needle threads. The<br />
stitch is reversible. Because it<br />
has some stretch, this stitch is<br />
often used for knits.<br />
As you can see, the serger is<br />
capable of several versatile stitches.<br />
Some uses for these stitches<br />
are shown in Fig. 5-14.<br />
SERGER TENSION<br />
Each thread that forms a serger stitch has a<br />
tensi<strong>on</strong> c<strong>on</strong>trol. Thus, you can adjust the tensi<strong>on</strong><br />
separately for each looper and each needle. In<br />
general, the heavier the thread, the looser the tensi<strong>on</strong><br />
should be.<br />
To create a balanced stitch, adjust the tensi<strong>on</strong><br />
whenever you change fabric, thread, stitch width,<br />
or stitch length. The upper and lower looper<br />
threads should hug the top and bottom of the<br />
Sergers sew seams as well as hems. They can<br />
also be used for decorative seams that show <strong>on</strong> garments,<br />
as <strong>on</strong> a vest or jacket. Another use is creating<br />
stretchable seams, such as those needed for a pullover<br />
top with ribbing at the wrists.<br />
C<strong>on</strong>venti<strong>on</strong>al seam with<br />
overlock finish<br />
Blindstitch hem Narrow rolled hem<br />
LESSON 5 Using a Serger • 469
Upper looper thread<br />
Needle<br />
thread<br />
Upperside<br />
Lower looper<br />
thread<br />
Underside<br />
5-15<br />
Stitch<br />
seam and meet exactly at the edge. See Fig. 5-15.<br />
If <strong>on</strong>e thread is pulled to the other side of the fabric<br />
or overhangs the fabric edge, the tensi<strong>on</strong><br />
needs adjustment.<br />
The needle thread should look like a line of<br />
straight stitching <strong>on</strong> the top of the fabric, with<br />
<strong>on</strong>ly tiny loops <strong>on</strong> the underside. If the tensi<strong>on</strong> is<br />
too tight, the seam will pucker. If too loose, the<br />
seam will spread apart when gently pulled.<br />
Always check the tensi<strong>on</strong> by serging <strong>on</strong> a fabric<br />
swatch before starting a project.<br />
SKIPPED STITCHES<br />
• Replace dull or bent needle.<br />
• Check size and type of needle.<br />
• Loosen upper looper tensi<strong>on</strong>.<br />
• Rethread machine.<br />
LOOPS FORM AT EDGE OF FABRIC<br />
• Check threading at tensi<strong>on</strong> disks, take-up lever, thread<br />
guides.<br />
• Increase looper tensi<strong>on</strong>.<br />
• Check knife alignment.<br />
MACHINE JAMS<br />
• Serge a thread chain at end of seam so thread will not<br />
get caught under presser foot.<br />
• Insert fabric in fr<strong>on</strong>t of needle and knife.<br />
470 • PART 2 Machines and Equipment<br />
Balanced Serger<br />
5-16 • Correcting Serging Problems<br />
SEWING TIP<br />
Tensi<strong>on</strong> c<strong>on</strong>trol. To identify the tensi<strong>on</strong><br />
dial that c<strong>on</strong>trols each thread, make<br />
some practice seams using different<br />
thread colors for each needle and looper.<br />
Change the dials to see what happens to<br />
the stitch.<br />
Tensi<strong>on</strong> settings. Start a notebook<br />
where you record the tensi<strong>on</strong> settings for<br />
different fabrics and threads. Include a<br />
sample of the stitch <strong>on</strong> a fabric swatch.<br />
You can refer to this notebook the next<br />
time you use a similar thread and fabric.<br />
If problems occur while sewing, incorrect tensi<strong>on</strong><br />
or another c<strong>on</strong>diti<strong>on</strong> could be the source.<br />
Fig. 5-16 shows some possible problems and<br />
soluti<strong>on</strong>s.<br />
THREAD BREAKS<br />
• Check threading sequence.<br />
• Check thread spool or c<strong>on</strong>e.<br />
• Loosen tensi<strong>on</strong> of thread.<br />
• Replace dull or bent needle.<br />
• Try a different thread.<br />
STITCHES PULL THROUGH TO RIGHT SIDE OF FABRIC<br />
• Increase needle thread tensi<strong>on</strong>.<br />
• Check threading at tensi<strong>on</strong> disks and thread guides.<br />
• Replace dull or bent needle.<br />
• Use wider stitch width.<br />
• Check knife alignment.
5-17<br />
C<strong>on</strong>e Compact tube King tube<br />
Serger Thread<br />
SERGER THREADS AND<br />
ACCESSORIES<br />
C<strong>on</strong>venti<strong>on</strong>al polyester or polyester/cott<strong>on</strong><br />
thread can be used for general sewing. Because<br />
the serger sews faster and uses more threads in<br />
each seam, however, some special threads are<br />
helpful.<br />
• Polyester or polyester/cott<strong>on</strong> serger<br />
thread. Similar to c<strong>on</strong>venti<strong>on</strong>al all-purpose<br />
thread; slightly finer and comes <strong>on</strong> large c<strong>on</strong>es<br />
or tubes. See Fig. 5-17.<br />
• Woolly nyl<strong>on</strong> thread. Soft, fuzzy thread that<br />
stretches when sewn; good for serging<br />
swimwear and lingerie and giving a narrow<br />
rolled hem an attractive, “filled in” appearance.<br />
Woolly nyl<strong>on</strong> thread is used in loopers; allpurpose<br />
serger thread is used in needles.<br />
• Decorative threads. Various threads that<br />
include metallic, pearl cott<strong>on</strong>, silk or ray<strong>on</strong><br />
ribb<strong>on</strong> that is 1 ⁄16 inch wide (1 to 2 mm), and<br />
crochet cott<strong>on</strong>; used in loopers to create special<br />
effects. Because loopers have large eyes, a<br />
wider range of decorative threads can be used<br />
<strong>on</strong> a serger than <strong>on</strong> a c<strong>on</strong>venti<strong>on</strong>al sewing<br />
machine. Regular serger thread is used in the<br />
needles.<br />
The following special noti<strong>on</strong>s help ensure<br />
smooth stitching with a serger:<br />
• Adapter c<strong>on</strong>es. Fit over spool pins to hold<br />
the large thread c<strong>on</strong>es and prevent them from<br />
vibrating while the machine is <strong>on</strong>.<br />
• Spool caps. Fit over the top of standard<br />
thread spools to hold them in place <strong>on</strong> the<br />
spool pins. See Fig. 5-18. Always place the spool<br />
with the notch down to prevent the thread<br />
from catching in the notch and breaking.<br />
• Thread nets. Fit over thread spools to keep<br />
thread from unwinding too quickly.<br />
• Tweezers and a loop threader. Helpful for<br />
threading the machine.<br />
SERGER CARE<br />
As the knife trims the fabric, it creates a great<br />
deal of lint. For good performance, keep the serger<br />
lint-free. Use the small brush that comes with<br />
the machine to remove lint from the area around<br />
the knife and loopers. Canned, compressed air is<br />
also good for cleaning and can be purchased at<br />
fabric, sewing machine, and camera stores.<br />
Follow what the instructi<strong>on</strong> manual says about<br />
oiling the serger.<br />
5-18<br />
Spool Cap<br />
Notch<br />
LESSON 5 Using a Serger • 471
LESSON 6<br />
Identifying Sewing Equipment<br />
People who sew regularly collect various tools and equipment,<br />
some needed for routine tasks and some for special purposes.<br />
As your skills and interest grow, you can add to your<br />
sewing supplies, but for now you’ll probably need <strong>on</strong>ly a few basic<br />
items. Check with your instructor to find out what those are.<br />
Sewing equipment can be divided into six<br />
groups, according to purpose. You’ll be using<br />
tools to help you measure, pin, cut, mark, stitch,<br />
and press as you learn to sew.<br />
MEASURING TOOLS<br />
Your sewing box w<strong>on</strong>’t be complete without<br />
measuring tools. Most of these tools have scales<br />
in both English and metric. The three essential<br />
measuring tools are a tape measure, a sewing<br />
gauge, and a yardstick or meterstick. Fig. 6-1<br />
shows the measuring tools listed below.<br />
• Tape measure. This flexible tape is 60 inches<br />
(150 cm) l<strong>on</strong>g. With it, you can take body<br />
measurements and measure fabric; keep the<br />
tape neatly rolled in a sewing box. See Fig. 6-1A.<br />
• Sewing or seam gauge. With a 6-inch (15cm)<br />
scale, this gauge measures short lengths,<br />
such as hem and seam widths. You can set a<br />
marker <strong>on</strong> the gauge for the width to be measured.<br />
See Fig. 6-1B.<br />
• Yardstick or meterstick. To check grain<br />
lines and mark hemlines, this 36-inch (91.5cm),<br />
rigid, measuring stick is useful. It may be<br />
wood, metal, or plastic. See Fig. 6-1C.<br />
• Transparent ruler. The ability to see<br />
through this device makes it useful for measuring<br />
and marking butt<strong>on</strong>holes, pleats, tucks,<br />
and bias strips. See Fig. 6-1D.<br />
• Hem gauge. Made of metal or plastic, this<br />
tool marks straight or curved hems. See Fig.<br />
6-1E.<br />
• Skirt marker. This device is used to measure<br />
and mark hemlines with either pins or chalk.<br />
See Fig. 6-1F.<br />
472 • PART 2 Machines and Equipment<br />
F<br />
6-1<br />
EE<br />
D<br />
A<br />
B<br />
C<br />
Measuring Tools
PINNING TOOLS<br />
For many stages of sewing, you’ll need pins.<br />
See Fig. 6-2. Use them to hold patterns to fabric,<br />
to hold two layers of fabric together while stitching,<br />
and to mark hemlines. To avoid damaging<br />
the fabric, pins should be sharp, slender, and<br />
smoothly finished.<br />
• Silk pins. Made of stainless steel or brass,<br />
silk pins can be used with most fabrics. See<br />
Fig. 6-2A.<br />
• Ballpoint pins. These are silk pins with<br />
rounded points that allow them to slip easily<br />
between strands of yarn, preventing fabric<br />
snags. Use them <strong>on</strong> knitted fabrics. See Fig.<br />
6-2A.<br />
• Ball-head pins. These pins have colorful,<br />
round, plastic or glass heads, which make them<br />
easy to see and pick up. See Fig. 6-2B.<br />
• T-pins. Distinguished by a large T-shaped<br />
head, these pins work well <strong>on</strong> loosely woven,<br />
bulky, or pile fabrics. See Fig. 6-2C.<br />
Pincushi<strong>on</strong>s<br />
Pincushi<strong>on</strong>s come in many different styles.<br />
The pins in Fig. 6-2 have been placed in <strong>on</strong>e com-<br />
6-2<br />
C<br />
A pincushi<strong>on</strong> provides a safe way to store pins<br />
c<strong>on</strong>veniently. How would you use the pins shown?<br />
A<br />
B<br />
SAFETY TIP<br />
Follow these safety suggesti<strong>on</strong>s when<br />
using sewing equipment.<br />
• To prevent accidental swallowing,<br />
never hold pins in your mouth.<br />
• D<strong>on</strong>’t place pins in the clothes you’re<br />
wearing. Forgotten pins might cause<br />
injury or be dropped and later picked<br />
up by a child.<br />
• Keep shears and scissors closed when<br />
not in use.<br />
• Pass a sharp object handle-first to<br />
another pers<strong>on</strong>.<br />
• Keep all tools in your sewing box<br />
when not in use.<br />
m<strong>on</strong> pincushi<strong>on</strong> style. Another style has an elastic<br />
or plastic band for wearing around your wrist.<br />
Others use an adhesive backing to attach to the<br />
sewing machine. Magnetic pincushi<strong>on</strong>s hold pins<br />
securely, even when tipped over. When turned<br />
upside down, <strong>on</strong>e style in the shape of a bowl<br />
picks up scattered pins.<br />
CUTTING TOOLS<br />
Cutting tools are essential for sewing. Two<br />
basics that you’ll need are shears and scissors.<br />
Shears have l<strong>on</strong>g blades and two handles with<br />
different shapes. They are used for cutting out<br />
fabric. Scissors, which are smaller than shears,<br />
have two handles with the same shape. Use them<br />
to trim and clip fabric and cut threads. Scissors<br />
and shears need to be sharp since dull blades<br />
make it very difficult to cut accurately.<br />
The list <strong>on</strong> the following page summarizes<br />
the cutting tools you may use in<br />
sewing. They’re shown in Fig. 6-3.<br />
LESSON 6 Identifying Sewing Equipment • 473
• Dressmaker’s shears. The bent handles <strong>on</strong><br />
these shears allow fabric to lie flat <strong>on</strong> the table<br />
as you cut. Results are more accurate when you<br />
d<strong>on</strong>’t lift up the fabric while cutting. One handle<br />
fits your thumb and the other handle, with<br />
its different shape, fits several fingers. Blades<br />
are usually 7 to 8 inches (18 to 20 cm) in<br />
length. Quality shears have an adjustable screw<br />
so you can change the cutting acti<strong>on</strong> of the<br />
blades. See Fig. 6-3A.<br />
• Sewing scissors. These scissors have small<br />
round handles and blades 4 to 6 inches (10 to<br />
15 cm) in length. The blades are different<br />
widths. Sewing scissors are easier to handle<br />
than shears for detail work. Use them to trim<br />
seams, clip curves, and cut into corners. See<br />
Fig. 6-3B.<br />
• Pinking or scalloping shears. With these<br />
shears, you can finish a seam edge or other raw<br />
edge <strong>on</strong> firmly woven fabrics. The zigzag or<br />
scallop design helps to prevent raveling. These<br />
are not for cutting out fabric pieces because the<br />
uneven edge is difficult to follow when stitching.<br />
Instead, pink or scallop the seam edges<br />
after the seams are stitched. See Fig. 6-3C.<br />
• Embroidery scissors. These small scissors<br />
are <strong>on</strong>ly 3 to 4 inches (7.5 to 10 cm) in length,<br />
with very pointed blades. Use them for such<br />
detail work as cutting butt<strong>on</strong>holes and ripping<br />
stitches. See Fig. 6-3D.<br />
• Seam ripper. You can remove<br />
stitches with the small blade <strong>on</strong><br />
<strong>on</strong>e end of this pen-shaped<br />
gadget. The blade lifts the<br />
thread away from the fabric<br />
before cutting. Be careful not to E<br />
cut the fabric. See Fig. 6-3E.<br />
• Thread clipper. This tool has<br />
spring-acti<strong>on</strong> blades for clipping<br />
thread ends or stitches. See<br />
Fig. 6-3F.<br />
474 • PART 2 Machines and Equipment<br />
• Rotary cutter. The round, retractable blade<br />
<strong>on</strong> this tool makes it resemble a pizza cutter.<br />
Crafters and quilters like the straight, clean<br />
cuts they can make through multiple layers of<br />
fabric. The cutter must be used with a special<br />
“self-healing” mat. See Fig. 6-3G.<br />
MARKING TOOLS<br />
Marking tools transfer symbols and lines from<br />
pattern pieces to fabric. Accurate markings help<br />
make c<strong>on</strong>structi<strong>on</strong> easier. The marking equip-<br />
6-3<br />
C<br />
D<br />
SEWING TIP<br />
Keeping tools sharp. Sewing tools<br />
w<strong>on</strong>’t stay sharp if you use them to cut<br />
paper (other than pattern tissue), string,<br />
and other objects. At home, keep a pair of<br />
household shears handy for other cutting<br />
jobs. To have your shears or scissors<br />
sharpened, check with a fabric store or<br />
hardware store.<br />
Cutting Tools<br />
A<br />
B<br />
F<br />
G
ment you choose depends <strong>on</strong> the fabric.<br />
These tools are shown in Fig. 6-4.<br />
• Fabric marking pen. Because of this<br />
pen’s disappearing ink, you can mark <strong>on</strong><br />
the right or wr<strong>on</strong>g side of fabric. With<br />
some pens, the ink marks disappear when<br />
treated with water. With others, the ink<br />
evaporates, usually in less than 48 hours.<br />
See Fig. 6-4A.<br />
• Tracing wheel. When you run this<br />
wheel over dressmaker’s tracing paper,<br />
the marks transfer to fabric. Use a<br />
smooth-edged wheel for delicate fabrics,<br />
and a saw-toothed wheel for most others.<br />
Special waxed carb<strong>on</strong> paper for tracing is<br />
available in several colors. Washing or<br />
dry-cleaning the fabric removes the tracing<br />
marks. See Fig. 6-4B and C.<br />
• Tailor’s chalk. These small squares or pencils<br />
will mark fabrics. The markings can be<br />
brushed away or will disappear when pressed<br />
with an ir<strong>on</strong>. See Fig. 6-4D and E.<br />
• Ordinary thread. Make simple hand-sewn<br />
stitches to mark c<strong>on</strong>structi<strong>on</strong> lines <strong>on</strong> fabric.<br />
SPECIAL SEWING ITEMS<br />
Here are some special items for faster and easier<br />
sewing.<br />
• Disappearing basting thread. Dissolves in<br />
the wash or when you ir<strong>on</strong> over it with a damp<br />
press cloth.<br />
SEWING TIP<br />
Marking pens. Ir<strong>on</strong>ing over the marks<br />
made by some fabric marking pens may<br />
permanently set the ink. Be sure to<br />
remove the marks before pressing the<br />
area.<br />
6-4<br />
E<br />
C<br />
B<br />
Marking Tools<br />
• Liquid seam sealant. Prevents cut edges<br />
from fraying when you apply this colorless liquid<br />
to fabric or ribb<strong>on</strong>.<br />
• Stabilizer. Adds temporary body and support<br />
to fabric; particularly useful for machine<br />
embroidery and machine appliqué work. One<br />
type of stabilizer can be torn away after the<br />
work is finished. Another type dissolves when<br />
washed or sprayed with water.<br />
STITCHING TOOLS<br />
Although machine stitching nearly completes<br />
most projects, some hand sewing may be needed.<br />
All sewing boxes need a variety of needles and at<br />
least <strong>on</strong>e thimble. Some other possibilities are<br />
also listed here. See Fig. 6-5 <strong>on</strong> page 476.<br />
• Needles. Needles should have sharp points<br />
and smooth eyes to avoid snagging fabric or<br />
splitting thread. Sizes range from 1 (coarse) to<br />
12 (fine). The smaller the number, the larger<br />
the needle is. For most hand-sewing tasks, use<br />
a size 7 or 8 needle. Use a finer needle <strong>on</strong> delicate<br />
fabrics and a coarser needle <strong>on</strong> heavy fab-<br />
D<br />
LESSON 6 Identifying Sewing Equipment • 475<br />
A
6-5<br />
Stitching Tools<br />
G<br />
rics. Some packages c<strong>on</strong>tain<br />
<strong>on</strong>ly <strong>on</strong>e size; others<br />
c<strong>on</strong>tain a variety. The<br />
lengths and shapes of the<br />
needle eye vary. Needles<br />
called sharps are all-purpose, medium-length<br />
needles with a small eye and sharp point.<br />
Embroidery and crewel needles have larger<br />
eyes and are easier to thread. Specialty needles<br />
are available for heavy-duty fabrics and crafts.<br />
See Fig. 6-5A.<br />
• Thimble. This tool will help protect your finger<br />
when sewing by hand. Made of metal or<br />
plastic, thimbles come in different sizes. Small<br />
indentati<strong>on</strong>s <strong>on</strong> the top and sides help hold the<br />
end of the needle as you push it through the<br />
fabric. See Fig. 6-5B.<br />
• Needle threader. This small device has a<br />
thin metal wire that helps thread a needle. See<br />
Fig. 6-5C.<br />
• Glue stick. Use this fast, easy way to temporarily<br />
hold two layers of fabric together. Be<br />
sure the glue is thoroughly dry before stitching<br />
through it. See Fig. 6-5D.<br />
• Basting tape. This narrow, double-faced<br />
tape holds two layers of fabric together or a<br />
zipper in place for stitching. See Fig. 6-5E.<br />
• Bodkin. A bodkin resembles a large, blunt<br />
needle. Pull cord, elastic, or tape through casings<br />
with it. See Fig. 6-5F.<br />
• Loop turner. A l<strong>on</strong>g metal rod with a hook,<br />
this tool turns bias tubing right side out. See<br />
Fig. 6-5G.<br />
476 • PART 2 Machines and Equipment<br />
A<br />
F<br />
B<br />
C<br />
• Pointer. This wooden tool has <strong>on</strong>e pointed<br />
end for pushing out sharp corners, as <strong>on</strong> a collar<br />
point. The other end is rounded for holding<br />
seams open for pressing. See Fig. 6-5H.<br />
PRESSING EQUIPMENT<br />
A garment takes <strong>on</strong> a professi<strong>on</strong>al finish when<br />
carefully pressed. You should press as you sew and<br />
also when a garment is complete. Three essential<br />
items are an ir<strong>on</strong>, ir<strong>on</strong>ing board, and press cloth.<br />
Pressing equipment is shown in Fig. 6-6.<br />
• Ir<strong>on</strong>. Needs a wide temperature range for all<br />
fabrics. A combinati<strong>on</strong> steam-and-dry ir<strong>on</strong><br />
gives best results. See Fig. 6-6A.<br />
Thimbles. Using a thimble may seem<br />
awkward at first. Choose <strong>on</strong>e that fits<br />
your middle finger well. Try dampening<br />
the end of your finger. The sucti<strong>on</strong> will<br />
hold the thimble firmly in place.<br />
H<br />
D<br />
E<br />
SEWING TIP
• Ir<strong>on</strong>ing board. Level and sturdy surface with<br />
a tight fitting cover and smooth padding. A<br />
silic<strong>on</strong>e-treated cover helps prevent scorching<br />
and sticking.<br />
• Press cloth. Lightweight cloth that protects<br />
certain fabrics from developing a shine, or<br />
glossy marking, and from scorching. Dampen<br />
a press cloth to create steam for special pressing<br />
techniques. You can use a clean cloth or<br />
handkerchief as a press cloth. See Fig. 6-6B.<br />
• Tailor’s ham. A firm, round cushi<strong>on</strong> used to<br />
press curved areas of a garment, such as darts<br />
and curved seams. See Fig. 6-6C.<br />
• Sleeve board. A small ir<strong>on</strong>ing board about<br />
20 inches (51 cm) l<strong>on</strong>g; used to press narrow<br />
areas, such as sleeves, that d<strong>on</strong>’t fit over the end<br />
of a regular ir<strong>on</strong>ing board. See Fig. 6-6D.<br />
• Seam roll. A l<strong>on</strong>g, firm tubular cushi<strong>on</strong> used<br />
to press l<strong>on</strong>g seams and small curved areas. A<br />
seam line can be pressed without having the<br />
imprint of the seam allowances showing<br />
through <strong>on</strong> the right side of the fabric. See Fig.<br />
6-6E.<br />
6-6<br />
A<br />
Pressing Equipment<br />
B<br />
D<br />
C<br />
SEWING TIP<br />
Ir<strong>on</strong>s. Handle an ir<strong>on</strong> carefully. If you<br />
drop it, the thermostat c<strong>on</strong>trol, which<br />
regulates the temperature, can be damaged.<br />
Avoid ir<strong>on</strong>ing over pins since they<br />
can scratch the soleplate, or bottom, of<br />
an ir<strong>on</strong>. When using fusible interfacings or<br />
fusible webs, make sure the adhesive<br />
doesn’t touch the ir<strong>on</strong>. Drain any water<br />
from an ir<strong>on</strong> before storing.<br />
• Point presser. A narrow wooden surface<br />
with a pointed end for pressing collar points.<br />
Other edges can be used for pressing curved<br />
and straight edges. See Fig. 6-6F.<br />
STORING EQUIPMENT<br />
By keeping sewing equipment together in a<br />
box or basket, you’ll always be able to find what<br />
you need. A measuring tape can be folded and<br />
held with a rubber band. Needles<br />
may be kept in original c<strong>on</strong>tainers<br />
or placed in a pincushi<strong>on</strong>. Small<br />
boxes or plastic bags can hold small<br />
items, such as thimbles, chalk, butt<strong>on</strong>s,<br />
and other fasteners.<br />
Spilling a box of pins is frustrating,<br />
yet it happens easily. Using a<br />
pincushi<strong>on</strong> helps prevent such accidents.<br />
You may want to store a large<br />
E supply of pins in a c<strong>on</strong>tainer but<br />
keep the <strong>on</strong>es you use regularly in a<br />
pincushi<strong>on</strong>.<br />
F<br />
Taking care of your equipment<br />
through good organizati<strong>on</strong> helps<br />
ensure that items last l<strong>on</strong>ger and<br />
d<strong>on</strong>’t get lost.<br />
LESSON 6 Identifying Sewing Equipment • 477
PART 2<br />
SUMMARY<br />
• All sewing machines operate in a similar<br />
manner. (Less<strong>on</strong> 4)<br />
• Choose needles and thread according to<br />
fabric type. (Less<strong>on</strong> 4)<br />
• Needles should be replaced when dull,<br />
bent, or rough. (Less<strong>on</strong> 4)<br />
• Adjusting the machine produces the best<br />
stitch. (Less<strong>on</strong> 4)<br />
• C<strong>on</strong>trolling sewing machine speed comes<br />
with practice. (Less<strong>on</strong> 4)<br />
• The serger can stitch, trim, and overcast a<br />
seam at the same time. (Less<strong>on</strong> 5)<br />
• A serger creates different stitches with<br />
three, four, five, or eight threads.<br />
(Less<strong>on</strong> 5)<br />
• Special equipment and tools are used for<br />
measuring, pinning, cutting, marking,<br />
stitching, and pressing. (Less<strong>on</strong> 6)<br />
478 • PART 2 Machines and Equipment<br />
Review<br />
RECALLING THE FACTS<br />
1. If you have a specific questi<strong>on</strong> or problem<br />
with your sewing machine or serger,<br />
what should you do? (Less<strong>on</strong> 4)<br />
2. When choosing a machine needle and<br />
thread, what should you c<strong>on</strong>sider?<br />
(Less<strong>on</strong> 4)<br />
3. Why is the l<strong>on</strong>g groove <strong>on</strong> a sewing<br />
machine needle significant? (Less<strong>on</strong> 4)<br />
4. What three recommendati<strong>on</strong>s would you<br />
make for winding and inserting a bobbin?<br />
(Less<strong>on</strong> 4)<br />
5. What does thread guide locati<strong>on</strong> tell you<br />
about threading a machine? (Less<strong>on</strong> 4)<br />
6. What causes a lockstitch to form?<br />
(Less<strong>on</strong> 4)<br />
7. What stitch length is recommended for<br />
regular stitching <strong>on</strong> most fabrics?<br />
(Less<strong>on</strong> 4)
and Activities<br />
8. Before you start to stitch, what two<br />
things should you do to prevent tangled<br />
stitches? (Less<strong>on</strong> 4)<br />
9. Where are the hands placed when stitching<br />
with a c<strong>on</strong>venti<strong>on</strong>al machine?<br />
(Less<strong>on</strong> 4)<br />
10. What are three features of computerized<br />
sewing machines? (Less<strong>on</strong> 4)<br />
11. What three tasks does a serger do at the<br />
same time? (Less<strong>on</strong> 5)<br />
12. Why does a serger have a looper instead<br />
of a bobbin? (Less<strong>on</strong> 5)<br />
13. Why shouldn’t you sew over pins with a<br />
serger? (Less<strong>on</strong> 5)<br />
14. Name the three essential measuring<br />
tools. (Less<strong>on</strong> 6)<br />
15. How should you use and store pins safely?<br />
(Less<strong>on</strong> 6)<br />
16. What is the difference between scissors<br />
and shears? (Less<strong>on</strong> 6)<br />
17. Why is a thimble useful? (Less<strong>on</strong> 6)<br />
18. Name the three essential items needed<br />
for pressing. (Less<strong>on</strong> 6)<br />
APPLYING KNOWLEDGE<br />
1. Sewing machine use. Wind the bobbin<br />
<strong>on</strong> a c<strong>on</strong>venti<strong>on</strong>al sewing machine. Then<br />
thread the machine and stitch a row of<br />
regular stitches, basting stitches, and<br />
reinforcement stitches.<br />
2. Serger use. Thread a serger and adjust<br />
the tensi<strong>on</strong> for each looper and needle.<br />
Then sew the stitches that the machine<br />
can create.<br />
3. Safety poster. Create a poster of safety<br />
tips for using sewing machines, sergers,<br />
and equipment.<br />
4. Basic tools and equipment. Make a list<br />
of the basic tools and equipment that a<br />
beginning sewer will need for a simple<br />
project.<br />
MAKING>
PART 3<br />
Getting Ready<br />
to Sew<br />
480
Understanding Patterns<br />
Often people are so eager to see their completed sewing project that they rush<br />
the process. Before you begin to sew, think about how helpful an organized<br />
approach can be.<br />
STAYING ORGANIZED<br />
What can you do to save time and energy<br />
before and during a sewing project? Keep these<br />
ideas in mind:<br />
• Gather all the noti<strong>on</strong>s and supplies you’ll<br />
need. Check the list <strong>on</strong> the back of the pattern<br />
envelope.<br />
• Double-check the steps to take. Verify the layout<br />
before cutting. Before stitching, make sure<br />
fabric pieces are pinned together correctly. Be<br />
sure the fit is correct before c<strong>on</strong>tinuing.<br />
• Press after each c<strong>on</strong>structi<strong>on</strong> step. Pressing<br />
some areas after stitching can be difficult.<br />
• Fit as you go. Minor adjustments made during<br />
c<strong>on</strong>structi<strong>on</strong> are easier than a major alterati<strong>on</strong><br />
at the end.<br />
PATTERNS AND THEIR<br />
PARTS<br />
Your most helpful assistant throughout a<br />
sewing project will probably be the pattern. Like<br />
a blueprint, a pattern has all the instructi<strong>on</strong>s you<br />
need to c<strong>on</strong>struct a project. Following the pattern<br />
is <strong>on</strong>e more way to stay organized as you sew.<br />
Before beginning a project, read the pattern<br />
carefully. Every pattern c<strong>on</strong>sists of the three parts<br />
shown in Fig. 7-1: an envelope, a guide sheet, and<br />
tissue pattern pieces. Each item c<strong>on</strong>tains valuable<br />
informati<strong>on</strong>.<br />
Pattern Envelope<br />
On the fr<strong>on</strong>t of the pattern envelope is a drawing<br />
or photograph of the design. Several garment<br />
views may be shown to give you a selecti<strong>on</strong> of<br />
styles. From the illustrati<strong>on</strong>s, you can see how the<br />
garment fits—whether it’s slim or full <strong>on</strong> the<br />
body.<br />
LESSON 7<br />
The envelope fr<strong>on</strong>t lists the pattern number,<br />
size, and price. Sometimes a label indicates that<br />
the pattern is “Easy” or “Includes an Estimated<br />
Sewing Time.” A special feature of the pattern<br />
may be menti<strong>on</strong>ed. For example, whether a pattern<br />
is a designer fashi<strong>on</strong>, sewing less<strong>on</strong>, or craft<br />
project might be noted.<br />
As you learned earlier, the reverse side of the<br />
pattern envelope shows how the garment looks<br />
from the back and lists the amount of fabric and<br />
noti<strong>on</strong>s needed. See Fig. 1-3 <strong>on</strong> page 442.<br />
Guide Sheet<br />
The guide sheet gives step-by-step informati<strong>on</strong><br />
for cutting, marking, and sewing. See Fig.<br />
7-2 <strong>on</strong> page 482. On the fr<strong>on</strong>t are cutting layouts<br />
and general informati<strong>on</strong>, including how to<br />
lengthen and shorten a pattern. The reverse side<br />
has sewing directi<strong>on</strong>s. By referring regularly to<br />
the pattern guide sheet, you’re less likely to have<br />
to rip out and redo stitches.<br />
7-1<br />
How are the three parts of a pattern used?<br />
LESSON 7 Understanding Patterns • 481
SEWING TIP<br />
Guide sheet. Always keep your guide sheet handy for quick<br />
reference through layout and c<strong>on</strong>structi<strong>on</strong>. By circling<br />
the cutting layout you’re using, you’ll always focus <strong>on</strong> the<br />
right <strong>on</strong>e at each glance and be less likely to copy something<br />
incorrectly from a different layout.<br />
Cutting Layouts<br />
The cutting layout is a diagram that shows<br />
how to arrange pattern pieces <strong>on</strong> fabric. See Fig.<br />
7-3. This diagram makes it easier to recognize<br />
and find the pattern pieces you need. Select the<br />
diagram that matches your particular design<br />
view, pattern size, and fabric width and nap.<br />
Separate layouts may be provided for fabrics with<br />
and without nap. A separate cutting layout may<br />
be included for interfacing and lining.<br />
Sewing Directi<strong>on</strong>s<br />
Step-by-step sewing directi<strong>on</strong>s appear <strong>on</strong> the<br />
back of the guide sheet. For patterns with several<br />
views, the directi<strong>on</strong>s may c<strong>on</strong>tinue to <strong>on</strong>e or<br />
more additi<strong>on</strong>al sheets. As you follow the directi<strong>on</strong>s,<br />
you’ll want to be sure you follow the steps<br />
that apply to the view you’re making.<br />
A fabric key shows how shading and texture<br />
indicate the right and wr<strong>on</strong>g sides of fabric and<br />
any interfacing or lining. Some c<strong>on</strong>structi<strong>on</strong><br />
details may be enlarged to show the specific<br />
sewing procedure clearly.<br />
Pattern Pieces<br />
Each pattern piece is marked with a number or<br />
letter and with a specific name, such as collar or<br />
sleeve. The number of fabric pieces to be cut is<br />
also printed <strong>on</strong> the pattern piece.<br />
482 • PART 3 Getting Ready to Sew<br />
7-2 You’ll use the guide sheet from start to finish<br />
when sewing with a pattern.<br />
The symbols and lines <strong>on</strong> the pattern pieces<br />
serve as guides during cutting and sewing. Some<br />
pattern pieces have many markings; others have<br />
<strong>on</strong>ly a few. Learn to recognize and understand<br />
these symbols and lines. See Fig. 7-4 <strong>on</strong> page 484.<br />
PATTERN PREPARATION<br />
Remember to handle pattern pieces carefully<br />
because they tear easily. Follow these steps to prepare<br />
the pattern pieces:<br />
1. Remove the entire pattern from the envelope.<br />
2. On the guide sheet, circle the cutting layout<br />
you’ll use.<br />
3. Select the pattern pieces for the view you’re<br />
sewing.<br />
4. Fold the rest of the pattern pieces and put<br />
them back into the envelope.
7-3<br />
Although there are many cutting layouts for a pattern, you’ll use <strong>on</strong>ly the diagrams that show a particular view,<br />
size, and fabric width and nap.<br />
5. Cut apart any pattern pieces printed together<br />
<strong>on</strong> <strong>on</strong>e large piece of tissue paper. You need<br />
not trim away extra tissue paper from around<br />
the pieces. This will be cut off as you cut out<br />
the fabric.<br />
6. Write your name <strong>on</strong> the guide sheet, the pattern<br />
envelope, and all the pattern pieces.<br />
7. Smooth out pattern pieces. If necessary, press<br />
them with a cool, dry ir<strong>on</strong>. Wrinkled pattern<br />
pieces make it very difficult to cut fabric<br />
accurately.<br />
8. On a multisized pattern, mark cutting lines<br />
for your size with a felt-tip pen, as shown in<br />
Fig. 7-5 <strong>on</strong> page 485.<br />
LESSON 7 Understanding Patterns • 483
Grain line. Heavy, solid line with an arrow at each end; appears <strong>on</strong><br />
all pattern pieces not placed <strong>on</strong> a fold. The grain line indicates<br />
how to place the pattern piece <strong>on</strong> grain. To do this, the grain-line<br />
arrow must be exactly parallel to the selvage unless otherwise<br />
noted.<br />
Cutting line. Heavy line that outlines pattern pieces. Sometimes a<br />
scissors symbol <strong>on</strong> the line shows the proper cutting directi<strong>on</strong>.<br />
Occasi<strong>on</strong>ally a cutting line appears within the pattern to indicate<br />
a shorter hemline, lower neckline, or lining cut from the same pattern<br />
piece. If the pattern is multisized, major pattern pieces have<br />
several cutting lines. Each cutting line is marked to indicate the<br />
corresp<strong>on</strong>ding size. To avoid c<strong>on</strong>fusi<strong>on</strong>, use a felt-tip pen to mark<br />
the cutting lines for your size.<br />
Notches. Diam<strong>on</strong>d-shaped symbols that extend bey<strong>on</strong>d the cutting<br />
line; used for matching seams and joining garment pieces. Always<br />
cut around notches to create fabric extensi<strong>on</strong>s that can be clearly<br />
seen. When two or more notches are grouped together, cut them<br />
as a single block.<br />
Stitching line, or seam line. If you are using an older pattern, it<br />
may have broken lines that indicate where to sew. These seam<br />
lines are not printed <strong>on</strong> multisized patterns. See Fig. 7-5. However,<br />
it will be easier to make pattern adjustments if you draw these<br />
seam lines <strong>on</strong> your pattern pieces. The width of the seam<br />
allowance is listed in the general directi<strong>on</strong>s <strong>on</strong> the fr<strong>on</strong>t of the<br />
guide sheet. The most comm<strong>on</strong> width is 5 ⁄8 inch (1.5 cm).<br />
Dots, squares, and triangles<br />
484 • PART 3 Getting Ready to Sew<br />
7-4 • Pattern Symbols and Lines<br />
Locati<strong>on</strong> of<br />
stitching<br />
line, or<br />
seam line<br />
Fold line<br />
Grain line<br />
Placement line<br />
Center fr<strong>on</strong>t and center back<br />
Center fr<strong>on</strong>t and center back. Solid line that indicates the center<br />
of the garment. If brackets appear <strong>on</strong> this line, it should be placed<br />
<strong>on</strong> a fold.<br />
Place <strong>on</strong> fold. Bracketed grain line that indicates the pattern<br />
edge is to be placed exactly <strong>on</strong> the fold.<br />
Fold line. Solid line that shows where fabric will be folded to form<br />
a finished edge, such as a hemline or cuff.<br />
Dots, squares, and triangles. Symbols used to help match and<br />
join garment secti<strong>on</strong>s, especially areas that are gathered or<br />
eased.<br />
Dart. Triangular or diam<strong>on</strong>d shape indicated by dots and two broken<br />
lines.<br />
Butt<strong>on</strong>holes. Solid lines that show the exact locati<strong>on</strong>s and lengths<br />
of butt<strong>on</strong>holes.<br />
Placement lines. Single, solid, or broken lines that show the exact<br />
locati<strong>on</strong>s of pockets, pleats, zippers, and trims.<br />
Adjustment lines. Double parallel lines that show where the pattern<br />
pieces can be lengthened or shortened.<br />
Hemline. Solid line that indicates the finished edge of the garment<br />
and the depth of the hem.<br />
Butt<strong>on</strong>holes<br />
Place <strong>on</strong> fold<br />
Adjustment line<br />
Hemline<br />
Dart<br />
Notch<br />
Cutting line
7-5<br />
XL<br />
XL<br />
LG<br />
LG<br />
MD<br />
MD<br />
SM<br />
SM<br />
XS<br />
XS<br />
XL<br />
LG<br />
MD<br />
SM<br />
XS<br />
Simplicity<br />
oooo<br />
FRONT<br />
XL<br />
LG<br />
MD<br />
SM<br />
XS<br />
On a multisized pattern, the lines can be hard to follow. Outlining the<br />
size you want <strong>on</strong> the pattern makes cutting easier and reduces the chances of<br />
error.<br />
LESSON 7 Understanding Patterns • 485
LESSON 8<br />
Adjusting a Pattern<br />
Few people have exactly the same measurements as those listed <strong>on</strong> a pattern.<br />
Therefore, some minor adjustments may be needed.<br />
For loosely fitted garments, minor differences<br />
in measurements can be overlooked. For fitted<br />
garments, your measurements should corresp<strong>on</strong>d<br />
very closely to the body measurements for your<br />
pattern size.<br />
Before laying pattern pieces <strong>on</strong> fabric, check to<br />
see whether the pattern needs to be adjusted.<br />
After the fabric is cut, it’s too late to add extra<br />
inches to any part.<br />
UNDERSTANDING EASE<br />
Pattern sizes are designed for the body measurements<br />
listed <strong>on</strong> the pattern envelope. Only<br />
such garments as bodysuits and swimsuits, however,<br />
measure exactly the same as those body<br />
measurements. Most garments have wearing ease<br />
added to the pattern.<br />
As you read earlier, wearing ease is the amount<br />
of fullness added to a pattern to allow for movement<br />
and comfort. For fitted garments, most patterns<br />
have the following amounts of ease:<br />
• About l inch (2.5 cm) at the waistline.<br />
• 2 to 2 1 ⁄2 inches (5 to 6.5 cm) at the hips.<br />
• 2 1 ⁄2 to 4 inches (6.5 to 10 cm) at the bust or<br />
chest.<br />
Bust/Chest<br />
Waist<br />
Hip<br />
Back/Side<br />
Length<br />
486 • PART 3 Getting Ready to Sew<br />
8-1 • Pers<strong>on</strong>al Measurements Chart<br />
MY OWN PATTERN + OR –<br />
MEASUREMENTS MEASUREMENTS<br />
For fuller garments, designers have added<br />
extra fullness to create a particular style or silhouette.<br />
This is called design ease.<br />
COMPARING<br />
MEASUREMENTS<br />
Compare your own measurements to those<br />
listed <strong>on</strong> the pattern envelope. Make a chart like<br />
the <strong>on</strong>e in Fig. 8-1, which lists both sets of measurements<br />
for bust or chest, waist, hip, and back or<br />
side length. If any measurements are not the<br />
same, enter the plus or minus difference in your<br />
chart. When complete, the chart shows where to<br />
make adjustments and how much to take in or let<br />
out. For example, if your waistline is 1 inch (2.5<br />
cm) larger than the pattern size, you will have to<br />
increase the pattern pieces at the waistline a total<br />
of 1 inch (2.5 cm).<br />
Some measurements are not listed <strong>on</strong> the pattern<br />
envelope. For these, measure the actual pattern<br />
pieces. Be sure to measure <strong>on</strong>ly from seam<br />
line to seam line. Since seam lines are not marked<br />
<strong>on</strong> multisized patterns, draw them in before you<br />
measure the pattern pieces. Most seam lines are 5 ⁄8<br />
inch (1.3 cm) in from the cutting line. Check the
general directi<strong>on</strong>s <strong>on</strong> the fr<strong>on</strong>t of the guide sheet.<br />
Do not include any darts, pleats, tucks, or overlapping<br />
edges. For total width, measure both the<br />
fr<strong>on</strong>t and back secti<strong>on</strong>s and then double the<br />
amount. For length, measure <strong>on</strong>ly from seam line<br />
to hemline. Do not include the hem allowance.<br />
PATTERN ADJUSTMENTS<br />
The two most comm<strong>on</strong> pattern adjustments<br />
are for length and width. Be sure you make them<br />
<strong>on</strong> both fr<strong>on</strong>t and back pattern pieces. As you do<br />
so, check that grain lines remain straight. Also,<br />
redraw any darts or design details. Blend sizes by<br />
drawing a new cutting line that tapers from the<br />
smaller to the larger size.<br />
When making pattern adjustments, accuracy is<br />
critical. If you make an error of just 1 ⁄4 inch (6<br />
mm) at each side seam of a pants pattern, for<br />
example, it will become a 1-inch (2.5-cm) error<br />
when all four seam allowances are added together.<br />
Adjusting Length<br />
Many patterns have adjustment lines for<br />
length printed <strong>on</strong> the pattern pieces. Other patterns<br />
are altered at the lower edge. See Figs. 8-2<br />
and 8-3.<br />
• Lengthening at the adjustment line. Cut<br />
the pattern apart at the adjustment line. Place<br />
8-2<br />
Pattern<br />
Lengthening a<br />
8-3<br />
Pattern<br />
Shortening a<br />
paper under the opening and spread the pieces<br />
the necessary amount. Keep cut edges parallel<br />
across the entire opening, verifying this with a<br />
ruler. Also check that the center-fr<strong>on</strong>t line and<br />
grain line are straight. Tape pattern pieces in<br />
place. Redraw the cutting line al<strong>on</strong>g the outer<br />
edge. Redraw any darts or design details. For<br />
pants, first adjust crotch length and then adjust<br />
overall length.<br />
• Lengthening at the lower edge. Tape<br />
paper to the edge of the pattern. Measure<br />
down the necessary amount and draw a new<br />
cutting line parallel to the lower edge. Extend<br />
the cutting lines al<strong>on</strong>g the side edges.<br />
• Shortening at the adjustment line.<br />
Measure up from the adjustment line the necessary<br />
amount to be shortened and draw a<br />
line. Fold the pattern al<strong>on</strong>g the adjustment line<br />
and bring the fold up to exactly meet the new<br />
line. Check the grain line. Tape the fold in<br />
place. Redraw cutting lines and any darts or<br />
design lines.<br />
• Shortening at the lower edge. Draw a<br />
new hemline above the original line. Redraw<br />
the cutting lines.<br />
Adjusting Width<br />
A total width adjustment of 2 inches (5 cm) or<br />
less can be made at the side seams. Because a garment<br />
has two side seams and four side-seam<br />
allowances, the amount to be adjusted <strong>on</strong> the<br />
fr<strong>on</strong>t pattern piece is 1 ⁄4 of the total amount.<br />
For example, to increase the waistline by 2<br />
inches (5 cm), you add 1 ⁄2 inch (1.3 cm) to the<br />
LESSON 8 Adjusting a Pattern • 487
side seam of the fr<strong>on</strong>t pattern piece and 1 ⁄2 inch<br />
(1.3 cm) to the side seam of the back pattern<br />
piece. Thus, each side seam increases 1 inch (2.5<br />
cm), and the total waistline increases 2 inches<br />
(5 cm).<br />
Width adjustments larger than 2 inches (5 cm)<br />
require cutting and spreading or overlapping the<br />
pattern pieces. For these, check the procedure in<br />
an alterati<strong>on</strong> book or a detailed sewing book.<br />
Increase Decrease Increase Decrease<br />
Waistline<br />
Waistline<br />
Hipline<br />
488 • PART 3 Getting Ready to Sew<br />
Waistline<br />
Hip and thigh<br />
Methods for increasing and decreasing pattern<br />
width are shown in Fig. 8-4 and described here.<br />
• Increasing pattern width. Tape paper<br />
al<strong>on</strong>g the pattern piece edge. Measure out 1 ⁄4 of<br />
the necessary amount at the area to be<br />
widened. Redraw cutting lines and seam lines,<br />
tapering gradually. For a waistline, taper side<br />
seams up to the armhole or down to the<br />
hipline. Be sure to make the same adjustments<br />
8-4<br />
Adjusting Width <strong>on</strong> a Pattern<br />
These diagrams show how to increase<br />
and decrease the width of pattern<br />
pieces. On the pattern for a top, the<br />
changes are made at the waistline. On<br />
the skirt and pants, changes can be<br />
made at the waistline as well as the<br />
hip.
<strong>on</strong> the waistband pattern. For the hipline, c<strong>on</strong>tinue<br />
the adjustments down to the hemline to<br />
retain the original shape of pants or skirt.<br />
Above the hipline, taper side seams in to meet<br />
the original waistline. For pants thigh, add 1 ⁄4<br />
of the amount to each inseam and side seam,<br />
extending the lines straight down to the hem<br />
edge.<br />
• Decreasing pattern width. Measure in 1 ⁄4<br />
of the necessary amount <strong>on</strong> each pattern piece.<br />
Redraw the cutting lines and side seams, tapering<br />
gradually. For a waistline, taper the side<br />
seams up to the armhole or down to the<br />
hipline. For a waistband, fold 1 ⁄2 of the necessary<br />
amount out of each side seam marking.<br />
For the hipline, taper cutting lines and side<br />
seams up to the original waistline and straight<br />
down to the hemline. For pants thigh, take in<br />
1 ⁄4 of the amount <strong>on</strong> the inside seam and side<br />
seam, redrawing the lines straight down to the<br />
hemline.<br />
Blending Sizes<br />
Multisized patterns are helpful to people who<br />
are a different size <strong>on</strong> top and bottom. For example,<br />
a pers<strong>on</strong> might have a size 10 bust and size 12<br />
hips. To blend two sizes, draw a new cutting line<br />
that gradually tapers out from the smaller size to<br />
the larger size. See Fig. 8-5.<br />
8-5<br />
TOP<br />
SKIRT<br />
When blending two sizes <strong>on</strong> a multisized pattern,<br />
draw a new cutting line. Taper gradually from <strong>on</strong>e size to<br />
the other.<br />
LESSON 8 Adjusting a Pattern • 489
LESSON 9<br />
Preparing Fabric<br />
Although you may be eager to cut out the pattern, fabric preparati<strong>on</strong> steps should<br />
not be overlooked. These steps help fabric pieces go together more easily and promote<br />
a proper fit when the completed garment is worn and laundered.<br />
STRAIGHTENING FABRIC<br />
ENDS<br />
When fabric is cut from a bolt, the cut may not<br />
be straight. Uneven edges make it hard to check<br />
the straightness of the grain.<br />
If you can clearly see the individual crosswise<br />
yarns, cut al<strong>on</strong>g a single yarn from <strong>on</strong>e selvage to<br />
the other. See Fig. 9-1 to learn about selvages and<br />
other fabric terms. If you can’t see the crosswise<br />
yarns, clip the selvage and pull <strong>on</strong>e crosswise<br />
yarn, gently pushing the fabric al<strong>on</strong>g the yarn.<br />
The pulled yarn leaves a mark you can use as a<br />
cutting line. See Fig. 9-2. If the yarn breaks in the<br />
middle of the fabric, cut up to the broken point,<br />
pick up the end of the yarn, and c<strong>on</strong>tinue pulling.<br />
Knitted fabrics d<strong>on</strong>’t have a thread that can be<br />
pulled. Straighten the ends by cutting al<strong>on</strong>g <strong>on</strong>e<br />
crosswise row of loops. First, baste across the fab-<br />
Selvages. Two, finished, lengthwise edges <strong>on</strong> fabric; usually stiffer<br />
than the rest of the fabric. Avoid placing pattern pieces over the<br />
selvage when laying out the pattern.<br />
Lengthwise grain. Grain that runs in the same directi<strong>on</strong> as the<br />
selvage; usually the str<strong>on</strong>gest and sturdiest directi<strong>on</strong> of the fabric.<br />
Most garments are cut with the lengthwise grain running vertically,<br />
or up and down, for more strength and durability during<br />
wear. Directi<strong>on</strong>s referring to straight grain or grain line mean the<br />
lengthwise grain.<br />
Crosswise grain. Grain that runs across the fabric from <strong>on</strong>e selvage<br />
to the other; usually has a slight amount of give or stretch.<br />
Bias grain. Grain that runs diag<strong>on</strong>ally across the fabric; any directi<strong>on</strong><br />
other than lengthwise or crosswise. Fabric cut <strong>on</strong> the bias has<br />
more stretchability than fabric cut <strong>on</strong> the straight grain. Folding<br />
the fabric at a 45-degree angle so the crosswise grain is parallel<br />
to the selvage creates true bias, which has the most stretch.<br />
490 • PART 3 Getting Ready to Sew<br />
9-1 • Fabric Terms<br />
ric, following <strong>on</strong>e row of loops. Then use the<br />
basting as a cutting line. See Fig. 9-3.<br />
PRESHRINKING FABRIC<br />
By preshrinking, you wash or dry-clean the<br />
fabric to prevent or minimize later shrinkage.<br />
Preshrinking also helps remove some fabric finishes<br />
that cause stitching problems <strong>on</strong> lighter<br />
weight, woven, and knitted fabrics. The method<br />
you choose depends <strong>on</strong> how the finished garment<br />
will be cleaned. Check the fabric care instructi<strong>on</strong>s.<br />
9-2<br />
Pulled Yarn<br />
Cutting al<strong>on</strong>g<br />
Wales or ribs. Lengthwise chains of loops in knitted fabric. They<br />
corresp<strong>on</strong>d to the lengthwise grain of woven fabrics.<br />
Courses. Crosswise rows of loops in knitted fabrics. In most knits,<br />
the crosswise loops have the most stretch.<br />
Selvage<br />
Lengthwise grain<br />
True bias<br />
Crosswise grain<br />
Selvage
9-3<br />
Fabric<br />
Basting Knit<br />
• Washable fabrics. Simply wash the fabric in<br />
the machine with other clothes. For fabrics<br />
that ravel easily, first machine zigzag the raw<br />
edges. Dry either in a tumble dryer or lay flat,<br />
keeping the edges square.<br />
• Hand-washable fabrics. Fold the fabric<br />
and place in hot or warm water for 30 minutes.<br />
If the fabric cannot be tumble-dried, lay flat to<br />
dry.<br />
• Fabrics to be dry-cleaned. Take the fabric<br />
to a professi<strong>on</strong>al dry cleaner or a self-service<br />
dry cleaner for preshrinking.<br />
STRAIGHTENING GRAIN<br />
Fabric is off-grain when the crosswise and<br />
lengthwise yarns are not at right angles. This may<br />
happen during the finishing process or when the<br />
fabric is rolled <strong>on</strong>to the bolt. If the fabric isn’t<br />
straightened before cutting, the finished garment<br />
may pull or twist to <strong>on</strong>e side of your body or the<br />
hemline may hang unevenly.<br />
Check to see whether your fabric needs<br />
straightening. Fold the fabric in half lengthwise<br />
and match the selvages accurately. If the crosswise<br />
ends match exactly and are at right angles to the<br />
selvage, the fabric is straight. The fold should be<br />
smooth and wrinkle-free. If the edges d<strong>on</strong>’t match<br />
or the fabric puckers when you try to line up the<br />
edges, the fabric is not straight. See Fig. 9-4.<br />
To straighten the fabric, pull it <strong>on</strong> the true bias.<br />
Open up the fabric and pull the two opposite<br />
corners that are too short. See Fig. 9-5. Ifnecessary,<br />
ask some<strong>on</strong>e to help you. Refold the fabric<br />
to check whether you have pulled enough.<br />
Most fabrics can be realigned by pulling. If the<br />
yarns became off-grain during the finishing<br />
9-4<br />
When you<br />
fold your fabric in half<br />
lengthwise, it will look<br />
like <strong>on</strong>e of these.<br />
Which <strong>on</strong>e needs to<br />
be straightened?<br />
Why?<br />
A<br />
B<br />
process, however, the grain may be locked in positi<strong>on</strong><br />
permanently. The fabric must be used as is.<br />
PRESSING FABRIC<br />
Press your fabric to remove all wrinkles.<br />
Wrinkled fabric cannot be cut accurately. Check<br />
to be sure the center fold can be pressed out of the<br />
fabric. If the fold doesn’t press out with a steam<br />
ir<strong>on</strong> and a damp press cloth, it w<strong>on</strong>’t come out<br />
with washing or dry cleaning. This sometimes<br />
occurs with knits and permanently finished fabrics.<br />
Plan a special cutting layout to avoid the fold<br />
line.<br />
9-5<br />
To straighten fabric grain, pull the fabric <strong>on</strong> the<br />
true bias between the corners that are closer together.<br />
Can you straighten the grain correctly if you haven’t<br />
straightened the ends first?<br />
LESSON 9 Preparing Fabric • 491
LESSON 10<br />
Laying Out a Pattern<br />
Locate and circle the cutting layout for your particular<br />
view, size, and fabric width. If your fabric has a nap, pile, shading,<br />
or <strong>on</strong>e-way design, use the with-nap layout. You’ll use the<br />
least amount of fabric while still having all the pieces match.<br />
FINDING THE RIGHT SIDE<br />
For many fabrics, the right side is obvious due<br />
to the nap, pattern, or print. On other fabrics,<br />
however, the right side may be difficult to determine.<br />
One clue is the way the fabric is folded or<br />
rolled <strong>on</strong> the bolt. Cott<strong>on</strong>s and linens usually<br />
have the right side out <strong>on</strong> the bolt. Wools and<br />
most other fabrics are folded with the right side<br />
toward the inside.<br />
Fold <strong>on</strong>e edge back and compare the two surfaces.<br />
The right side may be shinier or have a<br />
more pr<strong>on</strong>ounced weave, more nap, or a brighter,<br />
clearer print. Some plain-weave fabrics are the<br />
same <strong>on</strong> both sides. For knitted fabrics, stretch a<br />
crosswise cut edge. The edge will usually roll to<br />
the right side of the fabric.<br />
If you are undecided, pick the side you like better.<br />
Then be sure to keep the same side throughout<br />
so the finished garment will not have any differences<br />
in color or sheen. To help identify the sides,<br />
mark the wr<strong>on</strong>g side of the fabric with chalk<br />
marks or small pieces of masking tape.<br />
FOLDING THE FABRIC<br />
The cutting layout shows exactly how to fold<br />
the fabric. For most layouts, the fabric is folded<br />
with the right side in. The pattern pieces are<br />
placed <strong>on</strong> the wr<strong>on</strong>g side of the fabric for ease in<br />
transferring markings. This also protects fabric<br />
from soil and dirt during handling.<br />
Stripes, plaids, and prints should be folded<br />
with the right side out. Matching fabric design is<br />
easier this way. When cutting a single layer of fabric,<br />
place the fabric right side up.<br />
Your fabric may need to be folded lengthwise,<br />
crosswise, double, or partial. See Fig. 10-1.<br />
492 • PART 3 Getting Ready to Sew<br />
10-1<br />
Fabric Folds<br />
Lengthwise fold<br />
Crosswise fold<br />
Partial fold Double fold<br />
• Lengthwise fold. Fold fabric in half lengthwise<br />
with right sides together. Match selvages<br />
and ends.<br />
• Crosswise fold. Fold fabric in half crosswise<br />
with right sides together. Match cut ends and<br />
keep the two layers of selvage even al<strong>on</strong>g each<br />
side. For napped fabrics, the nap must run in<br />
the same directi<strong>on</strong> <strong>on</strong> both layers. Cut the fabric<br />
al<strong>on</strong>g the crosswise fold and turn the top<br />
layer around end to end. Match all edges.<br />
• Double fold. Fold fabric twice al<strong>on</strong>g the<br />
lengthwise grain, right sides together. Usually<br />
the selvages meet in the center. This layout is<br />
often used for knitted fabrics.<br />
• Partial fold. Fold fabric <strong>on</strong> the lengthwise<br />
grain, right sides together, <strong>on</strong>ly wide enough to<br />
fit the widest pattern piece.
After folding the fabric, smooth out any wrinkles<br />
by pulling both layers of fabric at the ends or<br />
sides. D<strong>on</strong>’t try to smooth <strong>on</strong>ly the top layer with<br />
your hand, or the two layers will be off-grain.<br />
When the grain lines are straight, pin the two layers<br />
together al<strong>on</strong>g the edges. This prevents the<br />
fabric from shifting as you lay out the pattern<br />
pieces.<br />
Always work <strong>on</strong> a large, hard surface so the full<br />
width of the fabric can be laid out without any<br />
fabric hanging over the sides. In school, use a l<strong>on</strong>g<br />
cutting table. At home, work <strong>on</strong> a large table,<br />
folding cutting board, or the floor. D<strong>on</strong>’t use a<br />
bed because the fabric can easily shift <strong>on</strong> a soft<br />
surface.<br />
PINNING THE PATTERN<br />
PIECES<br />
Lay out all pattern pieces in the same positi<strong>on</strong><br />
shown in the cutting layout. Most pattern pieces<br />
are placed printed side up <strong>on</strong> the fabric. Pattern<br />
pieces that are shaded <strong>on</strong> the layout should be<br />
placed with the printed side down.<br />
An arrow or a “place-<strong>on</strong>-fold” bracket indicates<br />
the grain line <strong>on</strong> each pattern piece. Place<br />
every pattern piece exactly <strong>on</strong> the proper grain<br />
line. Never try to tilt or angle a piece to fit a smaller<br />
space. If you do, that secti<strong>on</strong> of the garment<br />
will not hang properly.<br />
Place pins at right angles to the pattern edge,<br />
making sure the points d<strong>on</strong>’t go past the cutting<br />
line. Pin every 6 to 8 inches (15 to 20.5 cm) al<strong>on</strong>g<br />
folds and straight edges. On curved edges and<br />
slippery fabrics, place pins 3 to 6 inches (7.5 to 15<br />
cm) apart.<br />
Follow these steps for pinning the pattern<br />
pieces:<br />
1. Start with large pattern pieces that go <strong>on</strong> the<br />
fold. Place the pattern fold line exactly al<strong>on</strong>g<br />
the fabric fold. Pin al<strong>on</strong>g the fold. Smooth the<br />
pattern away from the fold and pin diag<strong>on</strong>ally<br />
into the corners. Then pin the remaining<br />
edges.<br />
2. Next, pin pattern pieces that have a grain-line<br />
arrow. Place a pin at the end of each arrow,<br />
pinning through all fabric layers. Measure<br />
carefully from the point of each arrow to the<br />
fabric edge. See Fig. 10-2. If the measurements<br />
are not exactly the same, unpin <strong>on</strong>e<br />
end and shift the pattern. Re-pin and measure<br />
again. Repeat until the grain line is<br />
straight. Smooth out the pattern in all directi<strong>on</strong>s<br />
from the grain-line arrow and pin diag<strong>on</strong>ally<br />
into the corners. Finish pinning all<br />
edges.<br />
3. Count the number of pieces <strong>on</strong> the cutting<br />
layout and compare to the number <strong>on</strong> the<br />
fabric. If any pattern pieces must be cut more<br />
than <strong>on</strong>ce to create four or more layers, be<br />
sure you have left the needed space. If two<br />
pieces must be cut from a single fabric layer,<br />
turn the pattern over when cutting the sec<strong>on</strong>d<br />
piece. If a piece extends bey<strong>on</strong>d the folded<br />
edge of the fabric, cut the other pieces<br />
first. Then unfold the fabric and cut the<br />
remaining pattern piece.<br />
10-2<br />
Grain Line<br />
Checking the<br />
LESSON 10 Laying Out a Pattern • 493
4. Double-check your layout. Are all pieces<br />
positi<strong>on</strong>ed correctly? Are the grain lines<br />
straight? Are there any special instructi<strong>on</strong>s<br />
for certain pattern pieces?<br />
SPECIAL LAYOUTS<br />
Special pattern layouts and extra fabric may be<br />
needed if you choose certain fabric designs.<br />
When laying these out, always place the largest<br />
pattern pieces <strong>on</strong> the fabric first. Visualize where<br />
the dominant lines or designs will fall <strong>on</strong> the<br />
body.<br />
• Napped fabrics. Place all pattern pieces in<br />
the same directi<strong>on</strong>. For a richer color in corduroy<br />
and velvet, lay out the pattern so the nap<br />
or pile runs up the garment. Use a with-nap<br />
layout. See Fig. 10-3A.<br />
• Plaids. Plaids can be even or uneven, depending<br />
<strong>on</strong> the repeat of the lines. Even plaids are<br />
the same in both vertical and horiz<strong>on</strong>tal directi<strong>on</strong>s.<br />
Use a without-nap layout. For uneven<br />
plaids, use a with-nap layout so all pattern<br />
10-3<br />
A<br />
B<br />
Special Layouts for Different Fabric Designs<br />
494 • PART 3 Getting Ready to Sew<br />
pieces are laid in the same directi<strong>on</strong>. Use the<br />
dominant line of the plaid for the center fr<strong>on</strong>t<br />
and center back. Match plaids at side seams<br />
and sleeves. See Fig. 10-3B.<br />
• Stripes. For even stripes, use a without-nap<br />
layout. For uneven stripes, use a with-nap layout.<br />
For vertical stripes, place the dominant<br />
stripe at center fr<strong>on</strong>t and center back. Match<br />
stripes at side seams and sleeves. Stripes will<br />
chevr<strong>on</strong>, or meet <strong>on</strong> an angle, <strong>on</strong> bias seams.<br />
See Fig. 10-3C.<br />
• Directi<strong>on</strong>al prints. Use a with-nap layout.<br />
Match designs at seam lines. See Fig. 10-3D.<br />
• Border prints. Place all pattern pieces <strong>on</strong> the<br />
crosswise grain. Match hemline markings to<br />
the lower edge of the border design. Place<br />
other pieces in the space available above the<br />
design. See Fig. 10-3E.<br />
Match stripes, plaids, and prints by placing<br />
corresp<strong>on</strong>ding notches of the pattern pieces <strong>on</strong><br />
the same line or design of the fabric. Be sure to<br />
match at the seam line, not at the cutting line.<br />
D E<br />
C
Cutting and Marking Fabric<br />
Once you have pinned all pattern pieces to the fabric, you can cut them out.<br />
Then the lines and symbols <strong>on</strong> the pattern pieces must be transferred to the fabric.<br />
These markings will help you assemble the garment.<br />
CUTTING ACCURATELY<br />
Follow these guidelines when cutting out fabric<br />
pieces. See Fig. 11-1.<br />
11-1<br />
Cutting Fabric<br />
• Use bent-handled shears. Cut with l<strong>on</strong>g,<br />
even strokes without closing the blades completely.<br />
Hold the fabric flat <strong>on</strong> the cutting surface<br />
with your other hand. Cut slowly and<br />
accurately. Never use pinking shears.<br />
• Cut directi<strong>on</strong>ally with the grain line.<br />
Some patterns have a symbol printed <strong>on</strong> the<br />
cutting line or stitching line to show the directi<strong>on</strong><br />
to cut and stitch. If in doubt, cut from the<br />
widest point to the narrowest point.<br />
• Follow the correct cutting line <strong>on</strong> a<br />
multisized pattern. Mark the cutting lines<br />
for your own size with a felt-tip pen to make<br />
them easier to follow, or trim the pattern<br />
pieces before laying them out.<br />
• Cut carefully around notches. Use the tip<br />
of the shears for greater accuracy. Cut double<br />
and triple notches together with <strong>on</strong>e l<strong>on</strong>g edge<br />
across the top. See Fig. 11-2.<br />
• Leave pattern pieces pinned to the fabric<br />
until you’re ready to sew. You’ll need<br />
<strong>on</strong>t A or B<br />
LESSON 11<br />
to transfer c<strong>on</strong>structi<strong>on</strong> markings to the fabric<br />
before unpinning.<br />
• Save all fabric scraps. Use them to test<br />
marking methods, type and length of stitches,<br />
and pressing temperatures.<br />
WHAT TO MARK<br />
The lines and symbols <strong>on</strong> pattern pieces are<br />
important guides during c<strong>on</strong>structi<strong>on</strong>. Before<br />
unpinning the pattern, transfer these marks to<br />
the fabric: darts, pleats, tucks, dots, and placement<br />
lines for butt<strong>on</strong>holes, butt<strong>on</strong>s, pockets, and<br />
11-2<br />
Markings <strong>on</strong> a pattern tell you where to cut. How<br />
should you cut two notches that are together?<br />
LESSON 11 Cutting and Marking Fabric • 495
SEWING TIP<br />
Finishing seam allowances. Before<br />
stitching your project together, you may<br />
want to finish the seam allowances <strong>on</strong> the<br />
serger. If so, remember that the serger<br />
will trim off notches. Therefore, mark<br />
each notch with a line that extends from<br />
the tip of the notch to the stitching line.<br />
any trims. You may also want to mark fold lines<br />
and center fr<strong>on</strong>t and back lines.<br />
Seam allowances and hemlines need not be<br />
marked. Seam allowances can be measured as you<br />
stitch by using the guides marked <strong>on</strong> the sewing<br />
machine. After the garment is made, hems are<br />
measured and turned under.<br />
MARKING METHODS<br />
Markings must be visible as you sew, but they<br />
should never show <strong>on</strong> the outside of a finished<br />
garment. Different marking methods may be<br />
used for different fabrics and types of marks.<br />
Fabric-Marking Pens<br />
Fabric-marking pens c<strong>on</strong>tain ink that removes<br />
with water or evaporates from fabric. Because the<br />
ink is removable, you can use these pens to mark<br />
<strong>on</strong> the right side of fabric. Follow this procedure.<br />
See Fig. 11-3.<br />
1. Stick pins straight through the pattern and<br />
both fabric layers at all marking points.<br />
2. Start at an outside edge of the pattern piece,<br />
and carefully separate the layers of fabric just<br />
enough to place an ink dot where the pin is<br />
inserted. Mark both layers of fabric.<br />
3. Repeat, working toward the center of the garment<br />
secti<strong>on</strong> until all symbols are marked.<br />
496 • PART 3 Getting Ready to Sew<br />
11-3<br />
Using a Fabric-Marking Pen<br />
Tracing Wheel and<br />
Dressmaker’s Tracing Paper<br />
Marking with a tracing wheel is quick and useful<br />
for most fabrics. See Fig. 11-4. Use a sawtoothed<br />
wheel for most fabrics and a smoothedged<br />
wheel for delicate fabrics. Tracing paper<br />
SEWING TIP<br />
Marking cauti<strong>on</strong>. Before using a marking<br />
pen or removable dressmaker’s tracing<br />
paper <strong>on</strong> a project, always test the<br />
removal procedure <strong>on</strong> a fabric scrap.<br />
D<strong>on</strong>’t use evaporating ink if it leaves an<br />
oily residue. If the fabric water spots or is<br />
“dry-clean <strong>on</strong>ly,” d<strong>on</strong>’t use water-soluble<br />
ink or removable dressmaker’s tracing<br />
paper.
11-4<br />
and Paper<br />
Marking with a Tracing Wheel<br />
has a waxy surface <strong>on</strong> <strong>on</strong>e side and is available in<br />
several colors. Pay close attenti<strong>on</strong> to whether<br />
marks are removable.<br />
• Papers that make permanent marks.<br />
Use these <strong>on</strong>ly <strong>on</strong> the wr<strong>on</strong>g side of fabric.<br />
Choose a color that is similar to the fabric<br />
color but still shows. Test <strong>on</strong> a fabric scrap to<br />
be sure the marks d<strong>on</strong>’t show <strong>on</strong> the right side.<br />
Use cauti<strong>on</strong> with light-colored and lightweight<br />
fabrics. To mark your garment, place the waxy<br />
side of the paper against the wr<strong>on</strong>g side of the<br />
fabric.<br />
• Papers that make removable marks. Use<br />
these <strong>on</strong> the right or wr<strong>on</strong>g side of fabric. Test<br />
<strong>on</strong> a scrap of fabric to make sure the marks<br />
disappear. To mark your garment, place the<br />
waxy side of the paper against the right or<br />
wr<strong>on</strong>g side of the fabric.<br />
To mark fabric, use two layers of paper for a<br />
double layer of fabric. For small areas, fold the<br />
paper in half. Mark all symbols by guiding the<br />
tracing wheel over each line or symbol <strong>on</strong>ly <strong>on</strong>ce.<br />
Press down lightly <strong>on</strong> the tracing wheel. Mark<br />
dots with an X. Mark the end of a dart with a<br />
short line. For l<strong>on</strong>ger lines, use a ruler to keep<br />
lines straight.<br />
Tailor’s Chalk<br />
Chalk markings can be made <strong>on</strong> most fabrics.<br />
Mark <strong>on</strong>ly the wr<strong>on</strong>g side of the fabric with either<br />
Fr<strong>on</strong>t A or B<br />
a flat square of tailor’s chalk or a chalk pencil. Be<br />
sure the edge or point is sharp so the markings<br />
are accurate. Follow this procedure. See Fig. 11-5.<br />
1. Push a pin through both layers of fabric at<br />
each symbol. <str<strong>on</strong>g>Care</str<strong>on</strong>g>fully loosen the pattern<br />
and slip it over the pins. Be careful not to pull<br />
out any pins.<br />
2. Make a chalk mark at each pin <strong>on</strong> the top<br />
layer of fabric.<br />
3. Turn the fabric over and mark the other layer<br />
at each pin.<br />
Chalk markings can be easily brushed off some<br />
fabrics, so handle carefully until all c<strong>on</strong>structi<strong>on</strong><br />
is complete.<br />
11-5<br />
Marking with Tailor’s Chalk<br />
LESSON 11 Cutting and Marking Fabric • 497
PART 3<br />
SUMMARY<br />
• Pattern informati<strong>on</strong> and instructi<strong>on</strong>s are<br />
provided <strong>on</strong> the envelope, guide sheet, and<br />
tissue pattern pieces. (Less<strong>on</strong> 7)<br />
• Body measurements should be compared<br />
to those <strong>on</strong> a pattern envelope to see if<br />
any adjustments are needed. (Less<strong>on</strong> 8)<br />
• Fabric may need straightening, preshrinking,<br />
or pressing. (Less<strong>on</strong> 9)<br />
• The cutting layout shows how to arrange<br />
pattern pieces <strong>on</strong> fabric. (Less<strong>on</strong> 10)<br />
• Each pattern piece should be placed <strong>on</strong> the<br />
proper grain line before pinning in place.<br />
(Less<strong>on</strong> 10)<br />
• Bent-handled shears are used to cut out<br />
pattern pieces. (Less<strong>on</strong> 11)<br />
• C<strong>on</strong>structi<strong>on</strong> lines and symbols can be<br />
marked with a fabric-marking pen, tracing<br />
wheel and dressmaker’s tracing paper, or<br />
tailor’s chalk. (Less<strong>on</strong> 11)<br />
498 • PART 3 Getting Ready to Sew<br />
Review<br />
RECALLING THE FACTS<br />
1. For what specific reas<strong>on</strong>s do you need a<br />
pattern guide sheet? (Less<strong>on</strong> 7)<br />
2. What are the lines and symbols <strong>on</strong> pattern<br />
pieces? Explain the purpose of each.<br />
(Less<strong>on</strong> 7)<br />
3. Why should pattern pieces be smoothed<br />
or pressed? (Less<strong>on</strong> 7)<br />
4. How do you widen a pattern? (Less<strong>on</strong> 8)<br />
5. How do you combine two different sizes<br />
<strong>on</strong> a multisized pattern? (Less<strong>on</strong> 8)<br />
6. Why are most garments cut with the<br />
lengthwise grain running vertically?<br />
(Less<strong>on</strong> 9)<br />
7. How can you preshrink washable fabric?<br />
(Less<strong>on</strong> 9)<br />
8. What does “off-grain” mean? (Less<strong>on</strong> 9)<br />
9. How can fabric grain be straightened?<br />
(Less<strong>on</strong> 9)<br />
10. How can you determine the right side of<br />
a fabric? (Less<strong>on</strong> 10)<br />
11. Why are some fabrics folded with right<br />
side in and some with it out? Give examples.<br />
(Less<strong>on</strong> 10)<br />
12. Why shouldn’t you tilt or angle a pattern<br />
piece to save fabric? (Less<strong>on</strong> 10)<br />
13. Why do some fabrics require special pattern<br />
layouts? Give examples. (Less<strong>on</strong> 10)<br />
14. How can you know in which directi<strong>on</strong> to<br />
cut a pattern piece? (Less<strong>on</strong> 11)
and Activities<br />
15. Describe how to cut around notches.<br />
(Less<strong>on</strong> 11)<br />
16. Why should you save fabric scraps?<br />
(Less<strong>on</strong> 11)<br />
17. List five c<strong>on</strong>structi<strong>on</strong> lines and symbols<br />
that need to be marked and two that<br />
d<strong>on</strong>’t. (Less<strong>on</strong> 11)<br />
APPLYING KNOWLEDGE<br />
1. Measurements. Compare your own<br />
measurements with the body measurements<br />
listed <strong>on</strong> a pattern envelope.<br />
Indicate any differences. In writing<br />
explain what adjustments, if any, you<br />
would need to make in the pattern.<br />
2. Marking techniques. Use the three<br />
marking methods <strong>on</strong> different types of<br />
fabrics. Compare the results.<br />
3. Pattern preparati<strong>on</strong>. Complete the following<br />
steps <strong>on</strong> your pattern: circle the<br />
layout diagram, select needed pattern<br />
pieces, write your name <strong>on</strong> all pattern<br />
parts, smooth out or press pattern<br />
pieces, and mark cutting lines <strong>on</strong> multisized<br />
pattern.<br />
4. Pattern adjustment. Make any needed<br />
length or width adjustments <strong>on</strong> your pattern<br />
pieces.<br />
5. Layout, cutting, and marking.<br />
Dem<strong>on</strong>strate the proper techniques for<br />
laying out, pinning, cutting, and marking<br />
fabric.<br />
MAKING>
PART 4<br />
Basic<br />
C<strong>on</strong>structi<strong>on</strong><br />
500
Stitching by Machine<br />
After laying out your pattern and cutting and marking the pieces, you’re ready to<br />
sew. Both machine and hand stitching are involved in most projects. The machine<br />
stitching described in this less<strong>on</strong> is used <strong>on</strong> seams, darts, and facings. Machine stitches<br />
can also be used to finish seam edges, insert zippers, create butt<strong>on</strong>holes, and attach trims.<br />
STITCH LENGTHS<br />
The stitch length you choose depends <strong>on</strong> the<br />
purpose. A medium length is comm<strong>on</strong> for most<br />
stitching. Basting stitches are very l<strong>on</strong>g, while reinforcement<br />
stitches are very short. See Fig. 12-1.<br />
12-1<br />
Stitch Lengths<br />
Basting<br />
Standard<br />
Reinforcement<br />
• Standard stitching. Use these stitches for<br />
permanent seams and c<strong>on</strong>structi<strong>on</strong> details. For<br />
most fabrics, 10 to 12 stitches per inch (2 to 2.5<br />
mm in length) work well. Finer fabrics take a<br />
shorter stitch of 12 to 15 stitches per inch (1.5<br />
SEWING TIP<br />
LESSON 12<br />
to 2 mm in length). Heavy fabrics need a<br />
l<strong>on</strong>ger stitch of 8 to 10 stitches per inch (2.5 to<br />
3 mm in length).<br />
• Basting. Machine basting temporarily holds<br />
two or more pieces of fabric together until<br />
they’re permanently stitched. It can also be<br />
used <strong>on</strong> a single layer of fabric for easing, gathering,<br />
and marking guidelines. Use a very l<strong>on</strong>g<br />
stitch of 6 stitches per inch (2.5 cm in length).<br />
Decrease the upper tensi<strong>on</strong> <strong>on</strong>e or two settings<br />
for easy removal of basting stitches.<br />
• Reinforcement stitching. These stitches<br />
add strength to areas that will be trimmed or<br />
clipped close to the stitching. Use a very short<br />
stitch, 15 to 20 stitches per inch (2.5 cm in<br />
length), to hold the fabric yarns in place.<br />
TYPES OF MACHINE<br />
STITCHING<br />
To complete a project, you’re likely to use a<br />
number of machine stitches, each with a specific<br />
purpose. Since you’ll see the names often in directi<strong>on</strong>s,<br />
you’ll want to become familiar with these<br />
stitches.<br />
Stitching guidelines. As you stitch, keep your eyes <strong>on</strong> the fabric edge and guideline<br />
marking—not <strong>on</strong> the needle. Guide the fabric with your fingers, without pushing or<br />
pulling the fabric. As you come to a corner, curve, or the end of a seam, slow down the<br />
machine’s speed. If you’re having trouble with the tensi<strong>on</strong> or stitch quality, try a new<br />
needle. A good guideline is to use a new needle <strong>on</strong> every project.<br />
LESSON 12 Stitching by Machine • 501
• Stay-stitching. Prevents stretching as you<br />
handle fabric. This stitching is placed al<strong>on</strong>g<br />
bias and curved edges. See Fig. 12-2.It’s added<br />
after fabric is marked and before pinning, basting,<br />
and permanent stitching. Stay-stitches<br />
bel<strong>on</strong>g <strong>on</strong> a single layer of fabric 1 ⁄8 inch (3<br />
mm) away from the seam line and within the<br />
seam allowance. Use standard machine stitching<br />
and stitch directi<strong>on</strong>ally. Stay-stitching can<br />
act as a guideline for clipping and joining<br />
curved edges.<br />
12-2<br />
Stay-Stitching<br />
• Directi<strong>on</strong>al stitching. Helps prevent a seam<br />
from stretching or changing shape as you<br />
stitch. Directi<strong>on</strong>al stitching is produced by<br />
stitching with, or in the same directi<strong>on</strong> as, the<br />
fabric grain. See Fig. 12-3. To determine grain<br />
directi<strong>on</strong>, run your finger al<strong>on</strong>g the fabric<br />
edge. The directi<strong>on</strong> that smoothes the yarns<br />
12-3<br />
Stitching<br />
Directi<strong>on</strong>al<br />
502 • PART 4 Basic C<strong>on</strong>structi<strong>on</strong><br />
against the fabric is with the grain. Stitch in<br />
this directi<strong>on</strong>. If you stitch from the wide part<br />
of a fabric secti<strong>on</strong> to the narrow part, you’ll be<br />
stitching with the grain in most situati<strong>on</strong>s.<br />
Seams <strong>on</strong> straight grain can be stitched in<br />
either directi<strong>on</strong>.<br />
• Standard seam stitching. Produces a seam<br />
that is 5 ⁄8 inch (1.5 cm) wide. This stitching is<br />
used <strong>on</strong> almost all patterns. If another seam<br />
width is needed, it’s marked <strong>on</strong> the pattern<br />
piece.<br />
• Backstitching. Secures the ends of a row of<br />
stitching. To backstitch, begin stitching 1 ⁄2 inch<br />
(1.3 cm) in from<br />
the beginning of<br />
the stitching line.<br />
Stitch backward to<br />
the edge of the<br />
fabric; then stitch<br />
forward over the<br />
stitches you just<br />
made. See Fig. 12-<br />
4. C<strong>on</strong>tinue stitching<br />
the seam, and<br />
backstitch at the 12-4<br />
Backstitching<br />
SEWING TIP<br />
Stitch directi<strong>on</strong>. On a c<strong>on</strong>venti<strong>on</strong>al<br />
machine, the top fabric layer always feeds<br />
slightly faster than the bottom layer.<br />
Therefore, you should stitch with the<br />
grain whenever possible. With a serger,<br />
you can stitch a seam in any directi<strong>on</strong>.<br />
The serger’s presser foot has a firmer<br />
pressure, and the loopers interlock the<br />
threads across the fabric and al<strong>on</strong>g the<br />
length of the fabric. Thus, shifting is eliminated<br />
<strong>on</strong> most fabrics.
other end for 1 ⁄2 inch (1.3 cm) exactly over the<br />
first stitching.<br />
• Understitching.<br />
Keeps the facing or<br />
the bottom layer of<br />
fabric rolled out of<br />
sight. You can create<br />
this stitch with<br />
standard stitching.<br />
Stitch from the<br />
right side, through<br />
the facing and<br />
seam allowances,<br />
1<br />
⁄8 inch (3 mm) 12-5 Understitching<br />
from the seam line.<br />
See Fig. 12-5.<br />
• Topstitching. Provides decorative or functi<strong>on</strong>al<br />
stitching when placed <strong>on</strong> the outside of a<br />
garment. Topstitching outlines seams, secures<br />
facings, attaches pockets, stitches pleats, and<br />
holds hems. See Fig. 12-6. Using either matching<br />
or c<strong>on</strong>trasting thread,<br />
stitch <strong>on</strong> the right side of<br />
the fabric with a slightly<br />
l<strong>on</strong>ger stitch length of 8<br />
to 10 stitches per inch<br />
(2.5 cm in length). To<br />
keep topstitching even,<br />
use the edge of the presser<br />
foot, guideline mark-<br />
12-6 Topstitching <strong>on</strong><br />
ings, or sewing tape as a<br />
Garment<br />
guide. See Fig. 12-7.<br />
12-7<br />
Using Guides to Topstitch<br />
• Edgestitching. Holds fabric and seams<br />
tightly in place. This<br />
row of topstitching is<br />
placed very close to a<br />
finished edge. See<br />
Fig. 12-8. You can<br />
use edgestitching in<br />
many places, such as<br />
<strong>on</strong> zippers and neck<br />
edges.<br />
12-8 Edgestitching<br />
• Stitch-in-the-ditch. Holds two or more<br />
layers of fabric together at the seams. With this<br />
technique, you can secure neckline, armhole,<br />
or waistband facings,<br />
as well as fold-up<br />
cuffs. This row of<br />
standard machine<br />
stitching is placed <strong>on</strong><br />
the outside of a garment<br />
in the groove<br />
of a seam line. On<br />
the outside, stitch<br />
directly in the seam<br />
groove through all<br />
layers of fabric. See<br />
Fig. 12-9.<br />
12-9 Stitch-in-the-Ditch<br />
• Zigzag stitching. Used to finish seams,<br />
stitch butt<strong>on</strong>holes, attach cording and elastic,<br />
and create decorative designs. See Fig. 12-10.<br />
Both the length<br />
and width of a<br />
zigzag stitch can<br />
be adjusted. The<br />
stitch can range<br />
from very narrow<br />
and closely spaced<br />
for a satin stitch<br />
to very wide and<br />
far apart for a<br />
seam finish. Most<br />
12-10<br />
Zigzag Stitching<br />
machines can do zigzag stitching.<br />
• Specialty stitches. Serve many purposes,<br />
especially decorative, when available <strong>on</strong> a<br />
LESSON 12 Stitching by Machine • 503
Stitching<br />
For a smooth start, serge a 3- to<br />
4-inch (7.5- to 10-cm) thread<br />
chain. See Fig. A. Then place the<br />
fabric in fr<strong>on</strong>t of the presser foot,<br />
aligning the seam line with the<br />
needles. The presser foot can be<br />
left in the down positi<strong>on</strong> because<br />
the feed dogs will pull the fabric<br />
under the presser foot.<br />
Always remove pins before the<br />
knife reaches them. See Fig. B. For<br />
l<strong>on</strong>g seams, place the pins at least<br />
1 inch (2.5 cm) from the cut edge<br />
504 • PART 4 Basic C<strong>on</strong>structi<strong>on</strong><br />
B<br />
A<br />
Starting to Serge<br />
Removing Pins<br />
S erging<br />
Techniques<br />
and parallel to the seam line. Then<br />
the pins will not come near the<br />
cutting blades. See Fig. C.<br />
To end the stitching, serge off<br />
the fabric for about 5 to 6 inches<br />
(12.5 to 15 cm). This is called<br />
chaining off. Without raising the<br />
presser foot, bring the chain and<br />
the fabric around so the chain<br />
crosses in fr<strong>on</strong>t of the knife. See<br />
Fig. D. Stitch for a few more sec<strong>on</strong>ds<br />
so that the knives automatically<br />
cut the thread chain.<br />
C<br />
1"<br />
(2.5cm)<br />
Knife<br />
Placing Pins <strong>on</strong> L<strong>on</strong>g Seams<br />
D<br />
Ending Stitching
machine. Refer to your sewing machine manual<br />
for specific directi<strong>on</strong>s.<br />
CHECKING THE MACHINE<br />
Before you begin to sew, always check the<br />
machine. Practice sewing <strong>on</strong> two layers of scrap<br />
fabric to make sure everything is set correctly and<br />
working well. Here’s a checklist to follow.<br />
• Is the stitch length correct?<br />
• Are stitches the correct width?<br />
• Is the tensi<strong>on</strong> producing an even stitch?<br />
• Is the needle smooth and straight?<br />
• Has the needle been inserted properly?<br />
• Is the presser foot firm and tight?<br />
• Has the bobbin been inserted properly into the<br />
case?<br />
• Was the wheel knob tightened after winding<br />
the bobbin?<br />
UNIT CONSTRUCTION<br />
With your machine in working order, you can<br />
start putting a project together. Many experienced<br />
sewers recommend unit c<strong>on</strong>structi<strong>on</strong> for<br />
assembling a project. With this method, you<br />
complete individual parts as fully as possible<br />
before sewing them together. Because you work<br />
<strong>on</strong> small areas first, they’re easier to handle and<br />
you can press each part before seams are added.<br />
12-11<br />
12-12<br />
Using a Seam Ripper<br />
Pulling Out Threads<br />
S erging<br />
Techniques<br />
Removing Stitches<br />
Most serging involves more than two<br />
threads. To remove stitches, a seam ripper<br />
can be used to cut through the looper<br />
threads so the other threads pull free.<br />
Sometimes the needle threads can be<br />
gently pulled out, freeing the looper<br />
threads. Pulling <strong>on</strong> the looper thread at<br />
the end of the stitching line can unravel<br />
a serger chain stitch.<br />
To do unit c<strong>on</strong>structi<strong>on</strong>, first complete all staystitching.<br />
Next, sew any darts, gathers, tucks, or<br />
pleats <strong>on</strong> each piece. Such details as butt<strong>on</strong>holes<br />
and plackets can be completed <strong>on</strong> small secti<strong>on</strong>s.<br />
Interfacing can be applied. Then all pieces are<br />
carefully pressed before combining them.<br />
REMOVING STITCHES<br />
Mistakes do happen. To rip out stitches, use a<br />
seam ripper, thread clippers, or small scissors. Cut<br />
threads about every 2 inches (5 cm) al<strong>on</strong>g <strong>on</strong>e side<br />
of the fabric. See Fig. 12-11. Pull the thread out <strong>on</strong><br />
the other side, and then remove the short threads<br />
from the clipped side. See Fig. 12-12.<br />
LESSON 12 Stitching by Machine • 505
LESSON 13<br />
Stitching by Hand<br />
Hand stitches are used primarily for finishing steps, such as hemming and<br />
sewing <strong>on</strong> fasteners. Hand stitches are also used for basting, reinforcement, and<br />
decorative stitching.<br />
THREADING A NEEDLE<br />
To thread a needle, unwind no more than 24<br />
inches (61 cm) of thread. L<strong>on</strong>ger lengths may<br />
tangle or knot as you sew. Use scissors to cut the<br />
thread at an angle so the end will slide easily<br />
through the eye of the needle. Biting or breaking<br />
the thread causes it to fray and makes it difficult<br />
to slip through the needle’s eye.<br />
Most hand sewing is d<strong>on</strong>e with a single thread.<br />
Make a knot in just <strong>on</strong>e thread end. If you need a<br />
double thread, hold the two ends together as you<br />
tie the knot. Fig. 13-1 shows how to tie a knot.<br />
13-1<br />
Tying a Knot<br />
1 Place the end of the<br />
thread across the tip of<br />
your index finger and<br />
hold in place with thumb.<br />
3 Roll the thread off your<br />
index finger with thumb.<br />
The thread will twist and a<br />
loop will form as it slides off<br />
your finger.<br />
506 • PART 4 Basic C<strong>on</strong>structi<strong>on</strong><br />
2 Wrap the thread around<br />
your fingertip, overlapping<br />
the thread<br />
slightly.<br />
4 Hold the loop against the<br />
thumb with your middle<br />
finger and pull <strong>on</strong> the<br />
thread with your other<br />
hand to make the knot.<br />
SEWING TIP<br />
Needle threading. For easy needle<br />
threading, hold the needle against a white<br />
background to see the eye clearly. To use<br />
a needle threader, push the wire through<br />
the eye of the needle. Then insert the<br />
thread through the wire. Pull the wire<br />
back out of the needle, drawing the<br />
thread through the eye.<br />
TYPES OF HAND<br />
STITCHING<br />
For most hand stitches, hold the<br />
fabric so that you sew from right to left<br />
if you’re right-handed. Left-handed<br />
sewers move from left to right.<br />
To secure the beginning and end<br />
stitches, make a small knot or take two<br />
small stitches, <strong>on</strong>e <strong>on</strong> top of the other,<br />
<strong>on</strong> the wr<strong>on</strong>g side of the garment.<br />
The following stitches are d<strong>on</strong>e by<br />
hand:<br />
• Basting stitch. Hand basting is<br />
temporary stitching that marks or<br />
holds fabric layers together.<br />
Basting should be removed from<br />
the garment as so<strong>on</strong> as the permanent<br />
stitching is completed and no<br />
l<strong>on</strong>ger needed. There are two types<br />
of basting stitches. Even basting
holds seams together<br />
for fitting or permanent<br />
stitching, such<br />
as basting sleeves<br />
into armholes. Make<br />
stitches about 1 ⁄4 inch<br />
(6 mm) l<strong>on</strong>g and<br />
even <strong>on</strong> both sides of<br />
the fabric. See Fig.<br />
13-2. Uneven basting<br />
marks or holds hems<br />
in place for stitching.<br />
Make 1-inch (2.5cm)<br />
stitches <strong>on</strong> the<br />
top side of the fabric<br />
and short 1 ⁄4-inch (6mm)<br />
stitches <strong>on</strong> the<br />
underside. See Fig.<br />
13-3. To save time,<br />
take several stitches<br />
with the needle before pulling the thread<br />
through.<br />
• Running stitch. This is the simplest hand<br />
stitch. Use it to<br />
gather, ease, tuck,<br />
quilt, and sew<br />
seams that have little<br />
or no strain <strong>on</strong><br />
them. Make tiny,<br />
even stitches 1 13-2 Even Basting Stitch<br />
13-3<br />
13-4 Running Stitch<br />
⁄16 to<br />
1<br />
⁄4 inch (1.5 to 6<br />
mm) in length. See<br />
Fig. 13-4.<br />
• Backstitch. As <strong>on</strong>e of the str<strong>on</strong>gest hand<br />
stitches, backstitches<br />
repair machinestitched<br />
seams and<br />
fasten thread ends<br />
securely. Use a tiny<br />
running stitch. To<br />
begin the back-<br />
13-5 Backstitch<br />
stitch, insert the<br />
needle at the end of<br />
Uneven Basting Stitch<br />
the previous stitch. Bring it out <strong>on</strong>e stitch<br />
length in fr<strong>on</strong>t of the thread. Keep inserting<br />
the needle in the end of the last stitch and<br />
bringing it out ahead of the thread. The stitches<br />
<strong>on</strong> the underside will be twice as l<strong>on</strong>g as<br />
those <strong>on</strong> the upper side. See Fig. 13-5.<br />
• Pickstitch. This variati<strong>on</strong> of the backstitch is<br />
used to insert zippers<br />
by hand and<br />
as a decorative<br />
stitch. The needle<br />
is brought back<br />
<strong>on</strong>ly <strong>on</strong>e or two<br />
threads so that a<br />
very tiny stitch<br />
forms <strong>on</strong> the<br />
upper side. See<br />
Fig. 13-6.<br />
• Slip stitch. Since it’s almost invisible, the slip<br />
stitch can attach<br />
<strong>on</strong>e folded edge to<br />
another piece of<br />
fabric, as <strong>on</strong> patch<br />
pockets, hems, linings,<br />
and trims.<br />
Slip the needle<br />
inside the fold of<br />
the upper fabric<br />
for 1 13-6 Pickstitch<br />
13-7 Slip Stitch<br />
⁄4 inch (6 mm). Then pick up <strong>on</strong>e or two<br />
threads of the under fabric directly below.<br />
C<strong>on</strong>tinue to take a stitch through the fold and<br />
then in the other fabric. See Fig. 13-7.<br />
• Overcast stitch. You can prevent raw edges<br />
from raveling with<br />
this stitch. Make<br />
diag<strong>on</strong>al stitches<br />
over the edge of<br />
the fabric, spacing<br />
them evenly apart.<br />
See Fig. 13-8.<br />
13-8<br />
Overcast Stitch<br />
LESSON 13 Stitching by Hand • 507
S erging<br />
Techniques<br />
Belt Carrier<br />
To make belt carriers, set the serger for<br />
a narrow, rolled hemstitch. Without any<br />
fabric in the machine, serge a l<strong>on</strong>g chain<br />
of stitches. Thread the chain <strong>on</strong>to a<br />
hand-sewing needle. Working from the<br />
outside of the garment, insert the needle<br />
in the seam line. Gently pull the tail of<br />
the chain to the inside of the garment<br />
and tie a knot. Repeat for the other end<br />
of the chain.<br />
508 • PART 4 Basic C<strong>on</strong>structi<strong>on</strong><br />
Seam line<br />
• Hemming stitch. This slanted stitch finishes<br />
different hems,<br />
especially those<br />
with seam binding<br />
or a folded<br />
edge. Make a tiny<br />
stitch in the garment.<br />
Then bring<br />
the needle diag<strong>on</strong>ally<br />
up through<br />
the folded edge<br />
of the fabric or<br />
the seam binding. Space stitches about 1 ⁄4 inch<br />
(6 mm) apart. See Fig. 13-9.<br />
• Blindstitch. Since it’s barely visible from the<br />
garment’s right side, the blindstitch is excellent<br />
for hemming and<br />
holding facings in<br />
place. It also allows<br />
movement without<br />
pulling. Fold the<br />
hem or facing edge<br />
back about 1 13-9 Hemming Stitch<br />
⁄4 inch<br />
(6 mm). Take a 13-10 Blindstitch<br />
small stitch in the<br />
garment, catching<br />
<strong>on</strong>ly <strong>on</strong>e or two threads. Then take a tiny stitch<br />
diag<strong>on</strong>ally above in the hem or facing. D<strong>on</strong>’t<br />
pull the stitches tight. C<strong>on</strong>tinue to form a very<br />
narrow zigzag stitch. See Fig. 13-10.<br />
• Catchstitch. This criss-cross stitch holds two<br />
layers of fabric together with flexibility. Use it<br />
to hem stretchy<br />
fabrics or attach<br />
sew-in interfacings.<br />
Stitch from<br />
left to right if you<br />
are right-handed.<br />
Make a small 13-11<br />
Catchstitch<br />
horiz<strong>on</strong>tal stitch<br />
from right to left<br />
in <strong>on</strong>e layer of fabric a short distance from the<br />
edge. Then make another horiz<strong>on</strong>tal stitch just
over the edge and diag<strong>on</strong>ally to the right <strong>on</strong><br />
the other layer of fabric. The threads will cross<br />
each other between stitches. See Fig. 13-11.<br />
• Blind catchstitch. This stitch is c<strong>on</strong>cealed<br />
between two layers<br />
of fabric. Fold the<br />
hem edge back<br />
about 1 ⁄4 inch (6<br />
mm). Make catchstitches<br />
between<br />
the two layers. See<br />
Fig. 13-12.<br />
• Cross-stitch. This decorative stitch holds<br />
layers of fabric together. A series of crossstitches<br />
is often used<br />
at the center back<br />
pleat of a jacket lining.<br />
Make a series of<br />
horiz<strong>on</strong>tal stitches<br />
about 1 ⁄4 to 3 13-12 Blind Catchstitch<br />
⁄8 inch<br />
(6 to 9 mm) wide,<br />
13-13 Cross-stitch spaced as far apart as<br />
they are l<strong>on</strong>g, to<br />
form a diag<strong>on</strong>al design. Then reverse directi<strong>on</strong><br />
and c<strong>on</strong>tinue making horiz<strong>on</strong>tal stitches at the<br />
same locati<strong>on</strong> as the previous stitches to form<br />
an X design. See Fig. 13-13. A cross-stitch tack<br />
holds a facing edge in<br />
place at a seam line.<br />
Make a cross-stitch<br />
over the edge without<br />
allowing stitches<br />
to show <strong>on</strong> the outside.<br />
C<strong>on</strong>tinue making<br />
several cross-<br />
13-14 Cross-Stitch Tack<br />
stitches over the first<br />
<strong>on</strong>e. See Fig. 13-14.<br />
• Butt<strong>on</strong>hole stitch. Making handworked<br />
butt<strong>on</strong>holes and attaching hooks and eyes are<br />
uses for this stitch. It also provides a decorative<br />
finish al<strong>on</strong>g the edge of a garment by placing<br />
stitches farther apart. Use a double thread.<br />
Begin by inserting the needle through the but-<br />
t<strong>on</strong>hole slash and bringing it out <strong>on</strong> the right<br />
side of the fabric. Then loop the thread under<br />
the eye of the<br />
needle and under<br />
the point. Pull<br />
the needle out of<br />
the fabric and<br />
draw up the loop<br />
to form a knot<br />
al<strong>on</strong>g the but- 13-15 Butt<strong>on</strong>hole Stitch<br />
t<strong>on</strong>hole edge. See<br />
Fig. 13-15.<br />
• Blanket stitch. This stitch makes thread<br />
loops, eyes, and belt carriers, as well as bar<br />
tacks, French tacks, and a decorative finish<br />
al<strong>on</strong>g a fabric edge. Stitch from left to right,<br />
holding the fabric edge toward you. Point<br />
the needle toward<br />
you and insert it<br />
through the fabric<br />
from the right<br />
side. Keep the<br />
thread under the<br />
needle as the<br />
stitch is pulled 13-16<br />
Blanket Stitch<br />
up. See Fig. 13-16.<br />
Make a thread<br />
loop, eye, or belt carrier by working blanket<br />
stitches over l<strong>on</strong>ger base stitches. Use a double<br />
thread. Take two or three stitches the desired<br />
length of the loop, eye, or carrier. Secure the<br />
ends with small backstitches. Be sure the base<br />
stitches are l<strong>on</strong>g enough for the butt<strong>on</strong>, hook,<br />
or belt to pass through. Then with the same<br />
thread, make closely spaced blanket stitches<br />
over the entire length of the base stitches.<br />
Secure with several small stitches <strong>on</strong> the<br />
underside of the fabric. See Fig. 13-17 <strong>on</strong> page<br />
510. A French tack holds a lining hem to a skirt<br />
hem or a coat hem at a seam line. Form them<br />
by working blanket stitches over several l<strong>on</strong>g<br />
stitches. See Fig. 13-18 <strong>on</strong> page 510.<br />
LESSON 13 Stitching by Hand • 509
13-18<br />
French Tack<br />
13-17<br />
• Chain stitch. This stitch also forms thread<br />
loops, eyes, and carriers. Use a double thread<br />
to form a series of loops. Secure the thread<br />
with several overlapping stitches <strong>on</strong> the underside.<br />
Then take a short stitch to form a loop <strong>on</strong><br />
the right side. Slip your thumb and first two<br />
fingers through the loop. Reach through the<br />
loop with a finger and catch the thread to form<br />
510 • PART 4 Basic C<strong>on</strong>structi<strong>on</strong><br />
Thread Loop<br />
Making a<br />
a new loop. See Fig. 13-19. Pull the new loop<br />
through the first loop and tighten so that the<br />
first loop forms a knot at the base of the thread<br />
chain. Keep forming new loops and sliding<br />
them down the thread evenly until the desired<br />
length. Slip the needle and thread through the<br />
last loop to end the chain. See Fig. 13-20.Stitch<br />
into the fabric and secure with small stitches<br />
<strong>on</strong> the underside.<br />
13-19<br />
Chain Stitch<br />
Starting a<br />
13-20<br />
Completing a<br />
Chain Stitch
Pressing Fabric<br />
Since pressing takes place throughout the sewing process, good pressing techniques<br />
are as necessary as good sewing skills. At the start, pressing ensures that both<br />
pattern and fabric are wrinkle-free for accurate cutting. Through every step of c<strong>on</strong>structi<strong>on</strong>,<br />
pressing smoothes and shapes a garment.<br />
If you keep pressing equipment near the<br />
sewing machine, you’ll be less tempted to skip<br />
this step. An ir<strong>on</strong>ing board, a steam ir<strong>on</strong>, and a<br />
press cloth are essential. A tailor’s ham helps press<br />
curved areas. Other pressing equipment,<br />
although less essential, can make the job easier.<br />
(See Fig. 6-6 <strong>on</strong> page 477.)<br />
PRESSING BASICS<br />
To press fabric correctly, use the following<br />
guidelines:<br />
• Press rather than<br />
ir<strong>on</strong>. As you’ve read,<br />
the ir<strong>on</strong> slides back<br />
and forth when<br />
ir<strong>on</strong>ing. This can<br />
cause the fabric to<br />
wrinkle and stretch,<br />
which makes pressing<br />
a better technique<br />
for garment 14-1 Pressing<br />
c<strong>on</strong>structi<strong>on</strong>. In<br />
pressing, the ir<strong>on</strong> is<br />
lowered to the fabric, then raised up and lowered<br />
to a different spot. The heat and steam do<br />
most of the work, so heavy pressure isn’t needed.<br />
See Fig. 14-1.<br />
• Use the correct temperature setting. Set the<br />
temperature according to the fiber c<strong>on</strong>tent of<br />
your fabric; however, d<strong>on</strong>’t use the cott<strong>on</strong> and<br />
linen settings for pressing because the fabric<br />
could scorch. If your fabric is a blend, use the<br />
setting for the most heat-sensitive fiber in the<br />
blend.<br />
• Always test fabric for any reacti<strong>on</strong> to heat,<br />
steam, and pressure. Press a scrap of fabric and<br />
LESSON 14<br />
check for damage or marks left by the ir<strong>on</strong>. If<br />
the fabric sticks, puckers, or melts, the ir<strong>on</strong> is<br />
too hot. Check to see whether the fabric holds<br />
water spots. Too much pressure can crush<br />
napped fabrics or create press marks <strong>on</strong> the<br />
right side.<br />
• Press <strong>on</strong> the wr<strong>on</strong>g side of the fabric whenever<br />
possible. Pressing <strong>on</strong> the inside prevents shine<br />
<strong>on</strong> the right side of the fabric. Also, seams can<br />
be seen clearly and pressed correctly.<br />
• When pressing <strong>on</strong><br />
the right side of the<br />
fabric, always use a<br />
press cloth. Some<br />
areas, such as pleats<br />
and pockets, may<br />
have to be pressed<br />
<strong>on</strong> the outside of<br />
the garment. A<br />
press cloth pre- 14-2<br />
Using a Press Cloth<br />
vents leaving shiny<br />
marks <strong>on</strong> fabric.<br />
See Fig. 14-2.<br />
• Never press over pins. Pins leave an impressi<strong>on</strong><br />
<strong>on</strong> fabric and may scratch the ir<strong>on</strong>.<br />
• Always press seams and darts before other<br />
seams are stitched across them. This reduces<br />
bulk in the finished garment.<br />
• Press directi<strong>on</strong>ally with the grain of the fabric.<br />
This prevents stretching.<br />
• Press seams flat before you press them open.<br />
Press <strong>on</strong>e side and then turn the seam over and<br />
press <strong>on</strong> the other side. This allows the stitches<br />
to settle into the fabric. Puckers will be eliminated<br />
and the seam will be smoother when<br />
pressed open.<br />
LESSON 14 Pressing Fabric • 511
S erging<br />
Techniques<br />
Pressing Seams<br />
To press a serged seam, press the seam<br />
allowance flat <strong>on</strong> both sides. Then press<br />
the seam allowance to <strong>on</strong>e side.<br />
• Press curved areas over a curved surface. Use a<br />
tailor’s ham to maintain the curved shape of<br />
the fabric.<br />
• Prevent press marks <strong>on</strong> the right side of the<br />
fabric. Slip strips<br />
of paper or an<br />
envelope under<br />
the edges of seam<br />
allowances, darts,<br />
and pleats when<br />
pressing. This prevents<br />
imprints <strong>on</strong><br />
the outside of the<br />
garment. See Fig.<br />
14-3.<br />
14-3 Using Strips of Paper<br />
• Check the fit of the garment before you press<br />
any sharp creases, such as pleats.<br />
• D<strong>on</strong>’t overpress. Avoid heavy pressure and let<br />
the steam do the work. Use the tip of the ir<strong>on</strong><br />
in small places. Never press the fabric completely<br />
dry.<br />
512 • PART 4 Basic C<strong>on</strong>structi<strong>on</strong><br />
• When pressing an entire garment, start with<br />
small areas. First press the collar, cuffs, and<br />
other detail areas. Then press the small areas,<br />
such as sleeves and yokes. Finally, press the<br />
large flat areas of the garment.<br />
PRESSING TECHNIQUES<br />
Which pressing method to use depends up<strong>on</strong><br />
whether the garment area is flat, curved,<br />
enclosed, gathered, or has fullness.<br />
Flat Areas<br />
Flat areas, such as straight seams, can be<br />
pressed flat <strong>on</strong> the ir<strong>on</strong>ing board.<br />
1. Place the garment <strong>on</strong> an ir<strong>on</strong>ing board with<br />
both seam allowances to <strong>on</strong>e side. Press the<br />
seam line to blend the stitches into the fabric.<br />
2. Open up the fabric and place it over the ir<strong>on</strong>ing<br />
board. Press the seam allowances open,<br />
using your fingers and the tip of the ir<strong>on</strong> to<br />
open the seam completely. Check <strong>on</strong> the right<br />
side to be sure the seam is perfectly smooth.<br />
If a seam is to be pressed to <strong>on</strong>e side, <strong>on</strong> a yoke<br />
or waistline, for example, first press the seam flat.<br />
Then press the seam allowances open. Finally,<br />
press the seam allowances toward <strong>on</strong>e side.<br />
SAFETY TIP<br />
Use special care with an ir<strong>on</strong>. Never<br />
touch a hot ir<strong>on</strong> except <strong>on</strong> the handle.<br />
Keep your fingers and face away from<br />
the steam. D<strong>on</strong>’t overfill the ir<strong>on</strong> or the<br />
water can boil out. If recommended by<br />
the manufacturer, use distilled water.<br />
Always rest the ir<strong>on</strong> <strong>on</strong> its heel, not flat<br />
down <strong>on</strong> the soleplate. Turn off and<br />
unplug the ir<strong>on</strong> after each use. Some<br />
ir<strong>on</strong>s should be drained of water before<br />
storing.
Curved Areas<br />
Darts and curved seams should be pressed<br />
over a curved tailor’s ham to maintain their<br />
shape.<br />
1. Press darts and seams flat to blend stitches<br />
into the fabric. Press the darts <strong>on</strong>ly up to the<br />
point, and not bey<strong>on</strong>d, to prevent pressing in<br />
a crease.<br />
2. Place the fabric wr<strong>on</strong>g side up over a tailor’s<br />
ham. Press the seams open; then press the<br />
darts to <strong>on</strong>e side.<br />
Enclosed Seams<br />
Enclosed seams are <strong>on</strong> the edge of a collar, facing,<br />
or cuff. They should be pressed flat and then<br />
pressed open. This creates a sharper edge when<br />
the garment secti<strong>on</strong> is turned to the right side.<br />
1. Press the seam flat to blend stitches.<br />
2. Press the seam open. Use <strong>on</strong>ly the tip of the<br />
ir<strong>on</strong> near the point or corner.<br />
3. Turn right side out. Gently push out the corner<br />
or point.<br />
4. Press the garment secti<strong>on</strong> flat <strong>on</strong> an ir<strong>on</strong>ing<br />
board, slightly rolling the seam to the underside.<br />
This helps prevent the seam from showing<br />
at the edge of the completed garment.<br />
Gathered Areas<br />
Gathers and ruffles should ripple softly below<br />
the seam line. The ir<strong>on</strong> shouldn’t pleat or crush<br />
them.<br />
1. Press the seam allowances together to flatten<br />
the fabric above the seam line.<br />
2. Slip the garment over the end of an ir<strong>on</strong>ing<br />
board. Turn the seam allowances away from<br />
the fullness.<br />
3. Press directly up into the gathers with the<br />
point of the ir<strong>on</strong>. Hold the seam allowance<br />
taut above the gathers by using your other<br />
hand to lift it slightly up from the ir<strong>on</strong>ing<br />
board. This helps prevent folds from pressing<br />
into the gathers at the seam line. See Fig. 14-4.<br />
Shrinking in Fullness<br />
Sometimes you’ll need to shrink in the fullness<br />
of a hem or sleeve cap.<br />
1. Hold the ir<strong>on</strong> above the fabric to allow steam<br />
to penetrate before pressure is applied. See<br />
Fig. 14-5.<br />
2. Use your fingers to pat out any folds and flatten<br />
the fabric.<br />
3. Press the edge of the fabric to shrink in fullness.<br />
Check to be sure the sleeve or hem looks<br />
smooth <strong>on</strong> the right side of the garment.<br />
14-5<br />
Fullness<br />
Using Steam <strong>on</strong><br />
14-4<br />
Pressing Gathers<br />
FINAL PRESSING<br />
If you press carefully while c<strong>on</strong>structing your<br />
garment, <strong>on</strong>ly a light pressing will remove any final<br />
wrinkles caused by handling. This final pressing<br />
should be merely for touch-up. It should never be<br />
a cure-all for poor pressing during c<strong>on</strong>structi<strong>on</strong>.<br />
LESSON 14 Pressing Fabric • 513
LESSON 15<br />
Making Darts<br />
Triangular folds of fabric stitched to a point are called darts. They c<strong>on</strong>trol fullness<br />
and give shape to fitted clothing. Darts should point to the fullest part of the<br />
body and end about 1 inch (2.5 cm) from the body curve to which they point. The<br />
two basic darts are single-pointed and double-pointed.<br />
STITCHING DARTS<br />
The following four basic steps produce singlepointed<br />
darts:<br />
1. Fold the dart with right sides of the fabric<br />
together, matching stitching lines. Place <strong>on</strong>e<br />
pin exactly at the point and other pins at the<br />
small dot markings.<br />
2. Stitch from the wide end of the dart to the<br />
point. See Fig. 15-1.<br />
3. Stitch the last two or three stitches as close to<br />
the fold line as possible. This creates a sharp<br />
point without any bubbles. D<strong>on</strong>’t backstitch<br />
because it can cause puckering at the point.<br />
4. Tie the thread ends in a knot or simply leave<br />
1-inch (2.5-cm) thread ends, which w<strong>on</strong>’t<br />
pull out. See Fig. 15-2.<br />
For double-pointed darts, start at the center<br />
and stitch to each point. Overlap stitching lines in<br />
the center about 1 inch (2.5 cm). Make <strong>on</strong>e or<br />
more clips in the dart al<strong>on</strong>g the fold so it can be<br />
flat. See Fig. 15-3.<br />
15-2<br />
Threads <strong>on</strong> Dart<br />
15-1<br />
514 • PART 4 Basic C<strong>on</strong>structi<strong>on</strong><br />
Sewing a Dart<br />
15-3<br />
Double-Pointed Dart<br />
PRESSING DARTS<br />
Always press a dart before crossing it with<br />
another seam. Horiz<strong>on</strong>tal darts are pressed with<br />
the fold downward. Vertical darts are pressed<br />
with the fold toward center fr<strong>on</strong>t or center back.<br />
See Fig. 15-4.<br />
15-4 Pressing<br />
Directi<strong>on</strong>s <strong>on</strong> Darts<br />
SEWING TIP<br />
Darts. Never use a serger to stitch<br />
darts. You can’t get a smooth, tapered-t<strong>on</strong>othing<br />
point with a serger stitch.
1. Press the dart flat, as stitched. See Fig. 15-5.<br />
15-5<br />
Pressing Dart Flat<br />
2. Place the dart over a tailor’s ham and press it<br />
to <strong>on</strong>e side. See Fig. 15-6.<br />
15-6<br />
to the Side<br />
Pressing Dart<br />
Wide darts or darts in heavy fabric should be<br />
pressed open. Refer to your pattern guide sheet.<br />
Slash the dart al<strong>on</strong>g the fold line to within 1 inch<br />
(2.5 cm) of the point. See Fig. 15-7. Trim the slash<br />
to 1 ⁄2 inch (1.3 cm) from the stitching line. Press<br />
the dart flat, as stitched. Then press the trimmed<br />
edges open and press the point flat. See Fig. 15-8.<br />
15-8<br />
15-7<br />
al<strong>on</strong>g Fold<br />
Cutting Wide Dart<br />
Pressing Wide Dart Open<br />
LESSON 15 Making Darts • 515
LESSON 16<br />
Gathering and Easing Fabric<br />
Gathering and easing are methods that c<strong>on</strong>trol fullness al<strong>on</strong>g a seam line.<br />
Gathers are soft folds of fabric formed by pulling up basting stitches to make the<br />
fabric fit into a smaller space. Easing allows fabric to be shaped over a curved area<br />
of the body. It’s used when <strong>on</strong>e edge of fabric is slightly l<strong>on</strong>ger than the other. Easing should<br />
not create any visible folds or gathers.<br />
GATHERING<br />
An area to be gathered is marked <strong>on</strong> the pattern<br />
with “gather” or “gathering line” <strong>on</strong> the seam<br />
line. Notches or dots mark the beginning and end<br />
of the area to be gathered. Usually fabric is gathered<br />
into 1 ⁄2 or 1 ⁄3 of its original width. It takes<br />
more yardage to create full gathers in lightweight<br />
fabrics than in heavier <strong>on</strong>es.<br />
How to Gather<br />
Gathers start with two parallel rows of<br />
machine basting. Then the bobbin threads are<br />
pulled from both ends to draw up the fabric.<br />
Finally the gathered fabric is stitched to the shorter<br />
length of fabric.<br />
1. Adjust the stitch length for 6 to 8 stitches per<br />
inch (3 to 4 mm in length). Loosen the upper<br />
thread tensi<strong>on</strong>.<br />
2. Stitch the first row of basting next to the<br />
seam line in the seam allowance. Leave the<br />
l<strong>on</strong>g thread ends. For l<strong>on</strong>g areas, start and<br />
stop stitching at the seams.<br />
3. Stitch the sec<strong>on</strong>d row 1 ⁄4 inch (6 mm) away in<br />
the seam allowance. Leave the l<strong>on</strong>g thread<br />
ends. See Fig. 16-1.<br />
SEWING TIP<br />
Gathering fabric. When gathering fabric<br />
by machine, use a c<strong>on</strong>trasting thread<br />
color in the bobbin. You’ll see which<br />
thread to pull more easily.<br />
516 • PART 4 Basic C<strong>on</strong>structi<strong>on</strong><br />
16-1<br />
Gathering Stitches<br />
4. Pin the fabric edges, right sides together,<br />
matching notches, seams, and markings.<br />
5. Pull up both<br />
bobbin threads<br />
from <strong>on</strong>e end.<br />
Gently slide the<br />
fabric al<strong>on</strong>g the<br />
thread to gather<br />
half the secti<strong>on</strong>.<br />
Repeat at the<br />
other end until<br />
the gathered secti<strong>on</strong><br />
is the proper<br />
length. See Fig.<br />
16-2.<br />
6. Wrap the threads<br />
in a figure 8<br />
around a pin to<br />
secure. See Fig.<br />
16-3.<br />
7. Distribute the<br />
gathers evenly<br />
and pin in place<br />
about every 1 16-2 Pulling Up Gathering<br />
Stitches<br />
⁄2<br />
inch (1.3 cm).<br />
16-3<br />
Securing Thread<br />
8. Stitch with standard stitching al<strong>on</strong>g the seam<br />
line, gathered side up. See Fig. 16-4. Use your<br />
fingers to hold the gathers evenly <strong>on</strong> both<br />
sides of the needle to prevent any folds from<br />
catching in the seam.
Gathering<br />
To gather lightweight to mediumweight<br />
fabrics, follow these<br />
steps:<br />
1. Adjust the serger for a wide,<br />
three-thread stitch.<br />
2. Serge a thread chain for gathering<br />
that is at least 6 inches<br />
(15 cm) l<strong>on</strong>ger than the edge<br />
to be gathered. D<strong>on</strong>’t cut the<br />
chain. Gently run your fingers<br />
al<strong>on</strong>g the chain to smooth it<br />
out.<br />
3. Raise the presser foot. Bring<br />
the chain under the presser<br />
foot and around to the fr<strong>on</strong>t,<br />
then up and over the toe of the<br />
presser foot to the left of the<br />
knife. Lower the presser foot.<br />
16-4<br />
Stitching Gathers<br />
S erging<br />
Techniques<br />
4. Serge al<strong>on</strong>g the fabric edge,<br />
encasing the chain in stitches.<br />
D<strong>on</strong>’t serge off the fabric at<br />
the end. Instead, stop stitching.<br />
Raise the needle and<br />
presser foot. Turn the hand<br />
wheel several times and gently<br />
ease the fabric away from<br />
the presser foot. Cut the<br />
threads. Do not cut the gathering<br />
chain.<br />
5. Pull up <strong>on</strong> the chain to gather<br />
the fabric.<br />
For heavy fabrics, use a zigzag stitch over a narrow<br />
cord for easier gathering. Place a thin cord <strong>on</strong><br />
the seam allowance, 1 ⁄4 inch (6 mm) from the<br />
seam line. Zigzag over the cord, being careful not<br />
to catch the cord. Pull the cord ends to form gathers.<br />
Stitch al<strong>on</strong>g the seam line with the gathered<br />
side up. Remove the cord.<br />
LESSON 16 Gathering and Easing Fabric • 517
Pressing Gathers<br />
To press gathers, follow these steps:<br />
1. Press the seam allowances flat.<br />
2. Lay the garment flat <strong>on</strong> an ir<strong>on</strong>ing board,<br />
with the seam allowances turned away from<br />
the gathers.<br />
3. Press carefully up into the fullness with the<br />
tip of an ir<strong>on</strong> <strong>on</strong> the wr<strong>on</strong>g side of the fabric.<br />
Hold the seam allowances taut above the<br />
gathers to prevent folds from being pressed<br />
into the gathers at the seam line. (See Fig. 14-<br />
4 <strong>on</strong> page 513.)<br />
Shirring<br />
Shirring is formed<br />
by several rows of<br />
gathering. Use <strong>on</strong>ly<br />
<strong>on</strong> soft or lightweight<br />
fabrics. Stitch as many<br />
rows of gathering as<br />
desired and secure<br />
each row with a knot.<br />
Then stitch over the<br />
knots in the seam<br />
allowance. See Fig. 16-5.<br />
16-5 Shirring<br />
Using elastic thread in the bobbin makes elasticized<br />
shirring. Wind elastic thread <strong>on</strong> the bobbin<br />
by hand, stretching slightly. Use a l<strong>on</strong>g stitch,<br />
6 to 8 stitches (3 to 4 mm in length) per inch.<br />
Stitch <strong>on</strong> the right side of the fabric, stretching<br />
the previously stitched rows as you sew each new<br />
row.<br />
EASING<br />
Easing is most often used at shoulder seams,<br />
sleeves, yokes, and waistbands. The most comm<strong>on</strong><br />
eased seam is a set-in sleeve. The finished<br />
seam should look smooth, without any gathers or<br />
tucks.<br />
518 • PART 4 Basic C<strong>on</strong>structi<strong>on</strong><br />
Pin Basting<br />
If <strong>on</strong>e fabric edge<br />
is <strong>on</strong>ly slightly l<strong>on</strong>ger<br />
than the other, pinbaste<br />
the right sides<br />
of the fabric together,<br />
with the l<strong>on</strong>ger<br />
side <strong>on</strong> top. Place<br />
pins every 1 ⁄2 inch<br />
(1.3 cm) to keep full-<br />
16-6 Pin Basting<br />
ness from shifting. See Fig. 16-6. Stitch with the<br />
l<strong>on</strong>ger side <strong>on</strong> top and gently ease in extra fullness<br />
as you stitch.<br />
Ease Stitching<br />
To ease a greater amount of fullness, use <strong>on</strong>e or<br />
two rows of ease stitching. Follow the techniques<br />
used for gathering. See Fig. 16-7.<br />
1. Stitch close to the seam line with l<strong>on</strong>g<br />
machine stitches, extending the stitching<br />
slightly bey<strong>on</strong>d the markings.<br />
2. Stitch a sec<strong>on</strong>d row 1 ⁄4 inch (6 mm) away in<br />
the seam allowance for set-in sleeves.<br />
3. Pin the fabric, right sides together, with the<br />
eased side up.<br />
4. Pull up the thread between markings and distribute<br />
the fullness evenly.<br />
5. Stitch with standard stitching al<strong>on</strong>g the seam<br />
line, being careful not to stitch in any folds or<br />
gathers.<br />
16-7<br />
Ease Stitching
Sewing Plain Seams<br />
Aseam is a line of stitching that holds two layers of fabric together. A plain seam is<br />
the standard seam used for most sewing. It is 5 ⁄8 inch (1.5 cm) deep and stitched with<br />
the standard stitch length for your fabric. Patterns are designed with standard seams<br />
unless stated otherwise. (For special types of seams, see pages 547-550.)<br />
STITCHING A SEAM<br />
For best results in stitching seams, always follow<br />
these steps:<br />
1. Stay-stitch any bias or curved areas 1 ⁄2 inch<br />
(1.3 cm) from the cut edge.<br />
2. Pin-baste the fabric layers al<strong>on</strong>g the seam<br />
line, with right sides together. Match fabric<br />
ends and notches; then pin. To keep the fabric<br />
edges even, place additi<strong>on</strong>al pins 5 inches<br />
(15 cm) apart. Insert pins at a right angle to<br />
the stitching line, with heads toward the seam<br />
allowance.<br />
3. Raise the needle and take-up lever to their<br />
highest point by turning the hand wheel. Be<br />
sure thread ends are behind the presser foot<br />
to prevent the thread from pulling out or<br />
jamming when you start to stitch.<br />
4. Positi<strong>on</strong> the fabric under the needle. Line up<br />
the fabric edge with the 5 ⁄8-inch (1.5-cm)<br />
marking <strong>on</strong> the right side of the needle plate.<br />
Place the fabric about 1 ⁄2 inch (1.3 cm) in<br />
from the end for backstitching. Turn the<br />
hand wheel to lower the needle into the fabric.<br />
Lower the presser foot.<br />
5. Backstitch for 1 ⁄2 inch (1.3 cm) to the beginning<br />
of the seam line.<br />
6. Stitch forward slowly and evenly to the end of<br />
the seam. Remove pins as you stitch.<br />
7. Backstitch 1 ⁄2 inch (1.3 cm) to secure seam.<br />
8. Remove the fabric by turning the hand wheel<br />
to raise the take-up lever and needle to their<br />
highest positi<strong>on</strong>. Lift the presser foot. Slide<br />
the fabric toward the back of the machine.<br />
9. Clip threads at seam beginning and end.<br />
10. Finish the seam edges if necessary.<br />
11. Press the seam open.<br />
LESSON 17<br />
Turning a Corner<br />
To turn a corner in the<br />
middle of a seam,<br />
stitch to within 5 ⁄8 inch<br />
(1.5 cm) of the corner<br />
and stop with the needle<br />
in the fabric. Lift<br />
the presser foot and<br />
turn the fabric <strong>on</strong> the<br />
17-1<br />
Turning a Corner<br />
needle. Lower the<br />
presser foot and c<strong>on</strong>tinue stitching in the new<br />
directi<strong>on</strong>. See Fig. 17-1.<br />
SAFETY TIP<br />
When sewing with a c<strong>on</strong>venti<strong>on</strong>al sewing<br />
machine, remove each pin just before it<br />
reaches the presser foot. A needle can<br />
bend or break if it hits a pin. Never place<br />
pins <strong>on</strong> the underside of the fabric. They<br />
can catch in the feed dog and break the<br />
machine needle or tear the fabric.<br />
Never sew over pins with a serger. Pins<br />
can damage the knives and needle, and<br />
pin fragments could fly into your eyes or<br />
face. Instead, place pins at least 1 inch<br />
(2.5 cm) from the edge, parallel to the<br />
stitching line, or remove each pin before<br />
it reaches the knives.<br />
To keep pins off the floor, place them in<br />
a pincushi<strong>on</strong> as you stitch. Never place<br />
pins in your mouth or clothes.<br />
LESSON 17 Sewing Plain Seams • 519
Seam<br />
line<br />
S erging<br />
Techniques<br />
Plain Seams<br />
1. Pin the seam. Positi<strong>on</strong> the fabric in<br />
fr<strong>on</strong>t of the presser foot. Match the<br />
stitching line <strong>on</strong> the fabric to the<br />
appropriate mark <strong>on</strong> the seam guide.<br />
2. Serge a 4- to 5-inch (10- to 12.5-cm)<br />
thread chain. Then gently feed the<br />
fabric under the presser foot.<br />
3. Serge off the fabric for 5 to 6 inches<br />
(12.5 to 15 cm). Bring the thread chain<br />
around to the fr<strong>on</strong>t so the knife can<br />
cut it.<br />
4. Secure the thread ends. Run your fingers<br />
al<strong>on</strong>g the thread chain to<br />
smooth it out. Tie the thread in a<br />
loose loop knot. Insert a pin through<br />
the center of the loop so the pin tip<br />
is next to the fabric edge. Pull the<br />
thread chain until the loop tightens<br />
into a knot at the pin tip.<br />
Remove the pin and clip the<br />
thread tails.<br />
Seam<br />
allowance<br />
is 1/4 inch.<br />
Cutting<br />
line<br />
Trimmed<br />
fabric<br />
is<br />
3/8 inch.<br />
520 • PART 4 Basic C<strong>on</strong>structi<strong>on</strong><br />
Turning a Sharp Point<br />
To turn a sharp point,<br />
such as the point of a<br />
collar, take <strong>on</strong>e or two<br />
diag<strong>on</strong>al stitches across<br />
the corner. The extra<br />
stitch makes a thinner,<br />
neater corner when the 17-2<br />
point is turned to the<br />
right side. See Fig. 17-2.<br />
To do this, stitch to the corner and leave the<br />
needle in the fabric. Raise the presser foot and<br />
turn the fabric diag<strong>on</strong>ally. Lower the presser foot<br />
and make <strong>on</strong>e or two stitches by turning the hand<br />
wheel. Leave the needle in the fabric, raise the<br />
presser foot, and turn the fabric to complete the<br />
corner. Lower the presser foot and c<strong>on</strong>tinue<br />
stitching.<br />
Turning a Sharp Point<br />
Reinforcing<br />
To reinforce a sharp<br />
corner or point, such<br />
as a V-neckline or<br />
placket, use reinforcement<br />
stitches. Stitch<br />
again for about 1 inch<br />
(2.5 cm) <strong>on</strong> each side<br />
17-3 Reinforcing a Point<br />
of the point. This helps prevent fabric yarns from<br />
pulling out of the seam after the fabric is<br />
trimmed and turned. See Fig. 17-3.<br />
SPECIAL SEAM<br />
TREATMENTS<br />
Some seams may need special treatment to<br />
reduce bulk in the seam allowance. Enclosed<br />
seams, such as those in necklines, collars, and<br />
cuffs, should lie flat and smooth. Curved seams<br />
and corners also need special treatment. You can<br />
reduce the bulk of a seam by trimming, grading,<br />
clipping, and notching.
Trimming<br />
The seam allowances<br />
of enclosed<br />
seams should be<br />
trimmed to an even<br />
width, usually 1 ⁄4 inch<br />
(6 mm). See Fig. 17-4.<br />
The corner of a seam<br />
allowance should be<br />
trimmed diag<strong>on</strong>ally<br />
to remove extra<br />
thickness when the<br />
corner is turned. See<br />
Fig. 17-5. If the corner<br />
is very pointed,<br />
make an additi<strong>on</strong>al<br />
diag<strong>on</strong>al cut <strong>on</strong> each<br />
side of the point,<br />
trimming to 1 ⁄8 inch<br />
(3 mm). See Fig. 17-6.<br />
Curved seams, such<br />
as the lower part of an<br />
armhole and the center<br />
back seam of pants<br />
are usually trimmed.<br />
These areas can be<br />
reinforced with two<br />
rows of stitching 1 ⁄4<br />
inch (6 mm) apart<br />
and then trimmed<br />
close to the sec<strong>on</strong>d<br />
row of stitching. See<br />
Fig. 17-7.<br />
17-4<br />
Allowance<br />
17-5<br />
17-6<br />
17-7<br />
Trimming Seam<br />
Trimming Diag<strong>on</strong>ally<br />
Making Extra Cuts<br />
Trimming Curved Seam<br />
Grading<br />
Grading means to trim each layer of the seam<br />
allowance to a different width to reduce bulk.<br />
Enclosed seams in heavier fabrics should be graded.<br />
Seams with three layers of fabric, such as a collar<br />
stitched to a neckline, should also be graded.<br />
Always grade a seam so that the widest seam<br />
allowance is next to the outside of the garment.<br />
This reduces press marks <strong>on</strong> the right side. To<br />
SEWING TIP<br />
Fraying fabric. If fabric frays a lot, seal<br />
a corner or point <strong>on</strong> a garment secti<strong>on</strong><br />
with a dot of liquid seam sealant after<br />
trimming it.<br />
grade, trim the seam allowances in half. Then<br />
trim the seam allowance toward the inside of the<br />
garment in half again. See Fig. 17-8. For three layers,<br />
trim each <strong>on</strong>e slightly narrower.<br />
17-8<br />
Grading a Seam<br />
Clipping<br />
On a curved seam, the seam allowances should<br />
be clipped to allow the curve to lie flat when<br />
pressed. Clipping means making tiny clips, or<br />
snips, in the seam allowance every 1 ⁄4 to 1 ⁄2 inch (6<br />
to 13 mm). Using the point of the scissors, clip to<br />
within 1 ⁄8 inch (3 mm) of the seam line or up to<br />
the stay-stitching line. The sharper the curve, the<br />
closer together the clips should be made.<br />
Clipping is d<strong>on</strong>e after the seam is<br />
trimmed or graded. See Fig. 17-9.<br />
17-9<br />
Curved Seam<br />
Clipping a<br />
LESSON 17 Sewing Plain Seams • 521
Sometimes an inward curve or corner must be<br />
clipped before stitching the seam. Stitch a row of<br />
reinforcement stitches just inside the seam line in<br />
the seam allowance. Clip up to the reinforcement<br />
stitches to allow the fabric to lie flat for stitching<br />
the seam.<br />
Notching<br />
Some curved seams have too much fabric in<br />
the seam allowance after being trimmed or graded.<br />
The extra fabric forms ripples and doesn’t<br />
allow the seam to lie flat. These are usually outward<br />
curves that are turned and pressed to form<br />
an inward curve, as <strong>on</strong> the outer edge of a collar.<br />
Notching means cutting out tiny wedgeshaped<br />
pieces of fabric from the seam allowances.<br />
See Fig. 17-10. Notch no closer than 1 ⁄8 inch (3<br />
mm) to the seam line. When the seam is turned<br />
and pressed, the sides of the notches should meet.<br />
17-11<br />
1. Press seam flat. 2. Press seam open.<br />
Presssing a Seam<br />
522 • PART 4 Basic C<strong>on</strong>structi<strong>on</strong><br />
17-10<br />
Notching a Curved Seam<br />
PRESSING SEAMS<br />
Seams should be pressed after they are stitched<br />
and before they are crossed by another seam.<br />
Check your pattern guide sheet to see whether the<br />
seam is to be pressed open or to <strong>on</strong>e side.<br />
First, press all seams flat to blend in the stitches.<br />
Then open the seam allowances and press<br />
again. If necessary, press both seam allowances to<br />
<strong>on</strong>e side. Curved seams should be pressed over a<br />
tailor’s ham. See Fig. 17-11.<br />
Enclosed seams in a collar or cuff<br />
should be pressed open before turning.<br />
Use a point presser or sleeve board and<br />
press with the tip of an ir<strong>on</strong>. Then turn<br />
the fabric to the right side and lay flat <strong>on</strong><br />
an ir<strong>on</strong>ing board with the underside up.<br />
Roll edges in just until the seam shows<br />
and press lightly. This helps prevent the<br />
underside or facing from showing al<strong>on</strong>g<br />
the edge. See Fig. 17-12.<br />
17-12<br />
1. Press enclosed seam<br />
open before turning.<br />
Pressing Enclosed Seams<br />
2. Roll seam to underside<br />
and press.
SEAM FINISHES<br />
A seam finish is any method of sewing or trimming<br />
seam edges to prevent raveling. A seam finish<br />
is needed <strong>on</strong> woven fabrics, but not <strong>on</strong> most<br />
knitted fabrics. After the seams of a garment are<br />
stitched and pressed, a seam finish can be added.<br />
Seam Finishing Methods<br />
When finishing a seam, the method to use<br />
depends <strong>on</strong> the type of fabric and the reas<strong>on</strong> for<br />
finishing the seams. Zigzag stitching and serging<br />
are the easiest and quickest methods.<br />
• Machine zigzag finish. This is a fast and<br />
easy method for finishing fabrics that ravel. Set<br />
the zigzag setting for medium width and<br />
length. For loosely woven or heavy fabrics, use<br />
a wide stitch. Zigzag al<strong>on</strong>g the edge of each<br />
seam allowance. See Fig. 17-13.<br />
• Pinked finishes. Most firmly woven fabrics<br />
can be trimmed with pinking shears. See Fig.<br />
17-14. Pinking doesn’t prevent raveling entirely.<br />
For more protecti<strong>on</strong>, stitch 1 ⁄4 inch (6 mm)<br />
from each edge before pinking. Press the seam<br />
open.<br />
17-14<br />
17-13<br />
Machine<br />
Zigzag Finish<br />
Pinked Finish<br />
• Hand-overcast finish. Although very timec<strong>on</strong>suming,<br />
this method is sometimes used for<br />
sheer or delicate fabrics. Make overcast stitches<br />
by hand over the edge of the seam<br />
allowances. See Fig. 17-15.<br />
17-15<br />
Finish<br />
Hand-Overcast<br />
S erging<br />
Techniques<br />
Seam Finishes<br />
To finish a c<strong>on</strong>venti<strong>on</strong>al seam, use a twothread<br />
or three-thread serger stitch. As<br />
you serge, the knife should skim the<br />
edge of the fabric so nothing is trimmed<br />
from the seam allowance except a few<br />
loose threads. Finish the edges of the<br />
fabric before stitching the seam.<br />
• Hemmed finishes. This method forms a<br />
narrow, single-fold hem al<strong>on</strong>g the edges of the<br />
seam allowances. It is also called a clean finish<br />
or a turned-and-stitched finish. Use this<br />
method <strong>on</strong> lightweight to medium-weight fabrics.<br />
The finish is attractive <strong>on</strong> unlined jackets.<br />
Turn the edges under 1 ⁄4 inch (6 mm) and<br />
press. Stitch close to the folded edge. See Fig.<br />
17-16.<br />
17-16<br />
Hemmed Finish<br />
LESSON 17 Sewing Plain Seams • 523
LESSON 18<br />
Applying Facings<br />
To finish a raw edge, such as a neckline or armhole, facings are used. The facing<br />
piece may be separate or cut in <strong>on</strong>e with the garment. A facing is turned to the inside<br />
for a smooth finish. Facings should not be visible from the outside. Three basic facings<br />
are used.<br />
• Shaped facing. A<br />
separate pattern piece<br />
is provided for shaped<br />
facing. The shape of<br />
the piece is the same as<br />
the area to be covered.<br />
After stitching, the facing<br />
is turned to the<br />
inside of the garment.<br />
See Fig. 18-1. A shaped<br />
facing is also called a<br />
fitted facing.<br />
• Extended facing.<br />
This facing is an<br />
extensi<strong>on</strong> of the garment<br />
pattern piece,<br />
so both are cut as <strong>on</strong>e.<br />
See Fig. 18-2. The facing<br />
is then folded to<br />
the inside. It is used<br />
al<strong>on</strong>g a fr<strong>on</strong>t or back<br />
18-1 Shaped Facing<br />
opening.<br />
• Bias facing. This is a<br />
18-2 Extended Facing<br />
strip of bias fabric<br />
stitched to the garment and turned to the<br />
inside. See Fig. 18-3. It’s used mostly for very<br />
bulky or sheer fabrics. Purchased bias tape or<br />
bias strips cut from fabric can be used.<br />
18-3<br />
524 • PART 4 Basic C<strong>on</strong>structi<strong>on</strong><br />
Bias Facing<br />
STITCHING SHAPED AND<br />
EXTENDED FACINGS<br />
Both shaped and extended facings are attached<br />
to a garment in the same way. The facing pieces<br />
must be stitched together at the ends before<br />
attaching to the garment. Then the facing is<br />
understitched to prevent the facing from rolling<br />
to the outside of the garment. Finally, the facing<br />
edge is fastened at each seam allowance. Apply<br />
facing according to the steps that follow.<br />
C<strong>on</strong>structing the Facing<br />
1. Stay-stitch the notched edge.<br />
2. Pin the right sides of the facing pieces together<br />
at the ends, matching notches.<br />
3. Stitch the seams, trim, and press them open.<br />
4. Finish the outside edge of the facing with<br />
a zigzag, hemmed, or serged finish. See Fig.<br />
18-4. (Also see the seam finishes <strong>on</strong> page<br />
523.)<br />
18-4<br />
C<strong>on</strong>structing the Facing<br />
Attaching the Facing<br />
1. Pin the facing to the garment edge, right sides<br />
together. For extended facing, turn the facing<br />
to the right side al<strong>on</strong>g the fold line.<br />
2. Stitch the seams. See Fig. 18-5. Trim or grade<br />
seam allowances; trim corners. Clip curved<br />
areas. See Fig. 18-6.
Hemmed finish. For a hemmed finish <strong>on</strong> facing, first stay-stitch 1 ⁄4 inch (6 mm) from<br />
the outside <strong>on</strong> the unnotched facing edge. The stay-stitching line makes it easier to<br />
turn the hem under. Knitted fabrics d<strong>on</strong>’t need a finish; however, a row of stay-stitching<br />
around the outer edge helps the facings hold their shape better.<br />
18-5<br />
SEWING TIP<br />
Armhole Facing<br />
18-6<br />
Grading and<br />
Clipping Extended Facing<br />
3. Press the seam allowances open; then press<br />
them toward the facing.<br />
4. Turn the facing to the garment inside. Press<br />
al<strong>on</strong>g the seam line, rolling the seam slightly<br />
toward the facing side.<br />
Understitching the Facing<br />
1. Open the facing out flat, with seam allowances<br />
toward the facing.<br />
2. Machine-stitch close to the seam line from<br />
the right side of the facing through all seam<br />
allowances. See<br />
Fig. 18-7. Gently<br />
pull the fabric<br />
<strong>on</strong> each side of<br />
the seam line to<br />
keep it flat.<br />
3. Turn the facing<br />
to the inside and<br />
press. An alternative<br />
is to topstitch<br />
the garment<br />
edge from<br />
the outside instead<br />
of under- 18-7<br />
Understitching<br />
stitching.<br />
SEWING TIP<br />
Clipping. If you’ve clipped the seam<br />
allowance, check frequently as you understitch<br />
to make sure the small wedges of<br />
fabric d<strong>on</strong>’t get folded under while stitching.<br />
If the garment edge will be topstitched,<br />
facings d<strong>on</strong>’t need to be tacked<br />
in place.<br />
LESSON 18 Applying Facings • 525
Facings<br />
S erging<br />
Techniques<br />
A serger can finish facing edges. If the<br />
faced edge is straight or a gradual curve,<br />
use the serger to attach the facing to the<br />
garment. The serger stitch creates very<br />
narrow seam allowances that need no<br />
trimming, grading, notching, or clipping.<br />
1. Serge facing secti<strong>on</strong>s together at the<br />
shoulder seams. To reduce bulk, press<br />
the seams in the opposite directi<strong>on</strong> of<br />
the garment shoulder seams.<br />
2. Serge-finish the outer edge of the<br />
facing.<br />
3. Pin the facing to the garment edge. If<br />
the faced edge has an opening, fold<br />
both the garment and facing to the<br />
inside at the opening edge and pin.<br />
4. Serge al<strong>on</strong>g the neckline seam.<br />
5. Press the seam allowances toward the<br />
facing.<br />
6. Understitch with a c<strong>on</strong>venti<strong>on</strong>al sewing<br />
machine.<br />
526 • PART 4 Basic C<strong>on</strong>structi<strong>on</strong><br />
Tacking Facing at Seams<br />
The edge of the facing<br />
should be tacked, or<br />
fastened, at each seam<br />
allowance. See Fig. 18-8.<br />
Use a hemming stitch,<br />
blindstitch, cross-stitch<br />
tack, or stitch-in-theditch<br />
method. Another<br />
method is to fuse the<br />
facing and garment<br />
18-8<br />
seam allowance togeth-<br />
Seam<br />
er with a small piece of<br />
fusible web, following<br />
the manufacturer’s directi<strong>on</strong>s.<br />
Tacking Facing at<br />
STITCHING BIAS FACINGS<br />
For a bias facing, open out <strong>on</strong>e l<strong>on</strong>g edge of<br />
bias tape. Then follow these steps:<br />
1. Pin the crease line of the tape al<strong>on</strong>g the seam<br />
line of the garment,<br />
right sides<br />
together.<br />
2. Stitch the seam<br />
line. See Fig. 18-<br />
9. Trim, grade,<br />
18-9<br />
and clip the seam<br />
Stitching Bias Facing<br />
allowances.<br />
3. Fold the bias tape to the garment inside and<br />
press.<br />
4. Slip-stitch the edge in place. See Fig. 18-10.<br />
18-10<br />
Facing<br />
Slip-Stitching Bias
Making Casings<br />
Aclosed tunnel of fabric that holds a piece of elastic or a drawstring inside is<br />
called a casing. Casings are used at sleeve edges, necklines, waistlines, and hemlines<br />
to help c<strong>on</strong>trol fullness. The elastic or drawstring makes the garment adjustable. A<br />
casing is much easier to c<strong>on</strong>struct than a waistband or a cuff and thus is used in many easyto-sew<br />
patterns.<br />
Casings can be sewn with headings. A heading<br />
is a width of fabric between the casing and the<br />
edge of the garment. A<br />
narrow heading has a<br />
more tailored appearance.<br />
A wider heading<br />
creates a ruffled edge.<br />
See Fig. 19-1.<br />
The two basic types<br />
of casing are self-casing<br />
19-1 Heading and applied casing.<br />
SELF-CASING<br />
Similar to a hem, a self-casing is formed by<br />
folding over the<br />
edge of the garment<br />
and stitching<br />
in place. Use the<br />
following steps:<br />
1. Turn the raw<br />
edge under 1 ⁄4<br />
inch (6 mm)<br />
and press. See<br />
Fig. 19-2.<br />
2. Turn the casing<br />
19-2 Folded Edge <strong>on</strong> Casing<br />
to the inside of the garment al<strong>on</strong>g the fold<br />
line and pin in place. Press the outer edge of<br />
the casing.<br />
3. Stitch close to the inner, pinned edge of the<br />
casing. Leave a 2-inch (5-cm) opening at the<br />
side seam or center back to insert the elastic.<br />
See Fig. 19-3. If the casing has a header, stitch<br />
around the heading line.<br />
19-3<br />
Casing<br />
Opening <strong>on</strong><br />
LESSON 19<br />
APPLIED CASING<br />
An applied casing can be sewn to the edge of a<br />
garment or inside a garment. An example of the<br />
latter is the waistline casing in a jumpsuit.<br />
Make applied casing by sewing single-fold bias<br />
tape or a separate strip of fabric to the garment.<br />
The length of the tape or fabric strip should be 1 ⁄2<br />
inch (1.3 cm) l<strong>on</strong>ger than the finished casing. The<br />
width of the strip should be 1 inch (2.5 cm) wider<br />
than the width of the elastic. The pattern guide<br />
sheet may include cutting instructi<strong>on</strong>s or a separate<br />
pattern piece for the casing. Fold in the l<strong>on</strong>g<br />
edges of the fabric strip 1 ⁄4 inch (6 mm) and press<br />
before you begin.<br />
Applying to Garment Edge<br />
To sew casing to the garment edge, use the following<br />
steps:<br />
1. Pin <strong>on</strong>e edge of the casing to the garment,<br />
with right sides together. Fold back the ends.<br />
See Fig. 19-4.<br />
19-4<br />
Pinning and<br />
Stitching Casing<br />
LESSON 19 Making Casings • 527
19-6<br />
Casing<br />
Edgestitching<br />
2. Stitch a 1 ⁄4-inch (6-mm) seam. Trim. See Fig.<br />
19-5.<br />
3. Turn the casing to the inside of the garment<br />
and press.<br />
4. Edgestitch the other casing edge to the garment.<br />
See Fig. 19-6.<br />
Applying within Garment<br />
To sew casing<br />
within the garment,<br />
follow these steps.<br />
See Fig. 19-7.<br />
1. Pin the casing<br />
to the garment,<br />
using the placement<br />
markings<br />
<strong>on</strong> the pattern.<br />
Turn the casing<br />
ends under so<br />
the folds meet<br />
without over- 19-7 Casing within Garment<br />
lapping.<br />
2. Edgestitch al<strong>on</strong>g both l<strong>on</strong>g edges of the<br />
casing.<br />
ELASTICS<br />
Elastics are varied, including special types for<br />
swimwear and lingerie. The pattern recommends<br />
the proper elastic width to use. Elastic should be<br />
about 1 ⁄8 inch (3 mm) narrower than the finished<br />
528 • PART 4 Basic C<strong>on</strong>structi<strong>on</strong><br />
19-5<br />
Casing Seam<br />
Trimming<br />
casing so it can be pulled through easily. If the<br />
casing is too wide, the elastic may twist and roll<br />
inside the casing when the garment is worn.<br />
The guide sheet should give directi<strong>on</strong>s for cutting<br />
the right length of elastic. If not, measure<br />
your body at the casing positi<strong>on</strong> and add 1 inch<br />
(2.5 cm) for overlapping the elastic ends.<br />
To insert the elastic, follow these steps:<br />
1. Pull the elastic through the casing with a safety<br />
pin, being careful not to twist it. See Fig.<br />
19-8. Let the ends extend several inches at the<br />
opening.<br />
19-8<br />
through Casing<br />
Pulling Elastic<br />
2. Overlap the ends 1 ⁄2 inch (1.3 cm) and pin<br />
together. Try the garment <strong>on</strong> to check fit and<br />
adjust the elastic if necessary.<br />
3. Stitch the overlapped ends securely by<br />
machine. See Fig. 19-9.<br />
19-9<br />
Elastic Ends<br />
Stitching<br />
4. Finish the opening of the self-casing by completing<br />
the edgestitching, stretching the elastic<br />
as you stitch. Finish the opening of the<br />
applied casing by slip-stitching al<strong>on</strong>g the<br />
folded ends. See Fig. 19-10.<br />
19-10<br />
Casing<br />
Finishing
DRAWSTRINGS<br />
Drawstrings can<br />
be made from cord,<br />
tubing, braid, and<br />
ribb<strong>on</strong>. You’ll need<br />
an opening in the<br />
garment to pull the<br />
drawstring through<br />
to the outside or<br />
inside. See Fig. 19- 19-11 Opening for Drawstring<br />
11. The opening<br />
can be two butt<strong>on</strong>holes<br />
or a slit in a seam and should be reinforced<br />
with a small piece of fabric or fusible interfacing.<br />
Make butt<strong>on</strong>hole openings in the outer fabric<br />
before the casing is stitched. See Fig. 19-12. A<br />
seam opening is<br />
made as you stitch<br />
the seam. Leave the<br />
seam open between<br />
markings, and reinforce<br />
the opening<br />
with backstitching.<br />
Use a safety pin to<br />
pull the drawstring<br />
through the casing. 19-12 Butt<strong>on</strong>hole Openings<br />
The ends of the<br />
for Drawstring<br />
drawstring can be<br />
knotted to prevent<br />
it from pulling out of the casing when washing<br />
and wearing.<br />
SEWING TIP<br />
Drawstrings. To prevent a drawstring<br />
from pulling out of the casing, stitch the<br />
drawstring to the casing at the center<br />
back.<br />
S erging<br />
Techniques<br />
Applying Elastic to Lingerie<br />
1. Leave <strong>on</strong>e garment seam open.<br />
2. Divide and mark the garment edge into<br />
quarters or eighths. Divide and mark<br />
special lingerie elastic into quarters or<br />
eighths.<br />
3. Pin the elastic to<br />
the right side of the<br />
fabric, with the<br />
straight edge of the<br />
elastic al<strong>on</strong>g the<br />
fold line.<br />
4. Positi<strong>on</strong> the straight edge of the elastic<br />
next to the knife. Serge a couple of<br />
stitches to anchor the elastic. Be careful<br />
not to cut the elastic.<br />
5. C<strong>on</strong>tinue serging, using the flatlock<br />
stitch. Hold the elastic<br />
up against the<br />
presser-foot toe,<br />
slightly off the fabric.<br />
As you stitch, stretch<br />
the elastic to fit<br />
between the pins.<br />
Remove the pins as<br />
you come to them.<br />
6. Pull <strong>on</strong> the elastic until the decorative<br />
edge is turned up and the seam is flat.<br />
7. To finish, serge the remaining seam<br />
with a serger stitch.<br />
LESSON 19 Making Casings • 529
LESSON 20<br />
Applying Fasteners<br />
You can choose from many fasteners to close garments securely. They include hooks<br />
and eyes, snaps, special nyl<strong>on</strong> tapes, butt<strong>on</strong>s, and zippers. Some fasteners are decorative<br />
as well as functi<strong>on</strong>al. A combinati<strong>on</strong> of fasteners may be used <strong>on</strong> the same closing of a<br />
garment—such as a hook and eye above a zipper or a snap with a butt<strong>on</strong>.<br />
The pattern envelope recommends fasteners<br />
for your garment. Usually snaps, hooks and eyes,<br />
and butt<strong>on</strong>s are attached by hand. Use a double<br />
strand of thread. Always secure the stitches with a<br />
knot or tiny backstitches.<br />
HOOKS AND EYES<br />
Hooks and eyes come in many sizes and types.<br />
Small hooks and eyes are used most often at<br />
necklines. Large covered hooks and eyes are available<br />
for jackets and coats. Special heavy-duty<br />
hooks and bars<br />
are designed for<br />
waistbands <strong>on</strong><br />
20-1 Heavy-Duty Hook and Bar<br />
pants and skirts.<br />
The hooks are<br />
str<strong>on</strong>g and flat so<br />
they w<strong>on</strong>’t slide<br />
out of the bar.<br />
See Fig. 20-1.<br />
Hooks are typically sold with two kinds of<br />
eyes—a round eye for edges that meet and a<br />
straight eye for edges that overlap. A thread eye<br />
may be used in place of a metal eye to make it less<br />
noticeable. Use either a blanket stitch or a chain<br />
stitch.<br />
Edges That Meet<br />
A hook with a round eye is the right choice for<br />
edges that meet. To attach the hook, follow these<br />
steps. See Fig. 20-2.<br />
1. Positi<strong>on</strong> the hook 1 ⁄8 inch (3 mm) from the<br />
edge.<br />
2. Stitch around each loop with a butt<strong>on</strong>hole or<br />
overcast stitch. Sew <strong>on</strong>ly to the facing fabric.<br />
530 • PART 4 Basic C<strong>on</strong>structi<strong>on</strong><br />
20-2<br />
Meet<br />
Edges That<br />
No stitches should show <strong>on</strong> the right side of<br />
the garment.<br />
3. Slide the needle between the fabric layers to<br />
the end of the hook. Take three or four stitches<br />
across the end of the hook to hold it flat<br />
against the fabric. Secure the threads.<br />
To attach the round eye, follow these steps:<br />
1. Match the garment edges.<br />
2. Positi<strong>on</strong> the eye so the loop extends 1 ⁄8 inch (3<br />
mm) bey<strong>on</strong>d the edge. When the hook and<br />
eye are each attached, the garment edges<br />
should meet exactly.<br />
3. Stitch around each loop with butt<strong>on</strong>hole or<br />
overcast stitches. Sew <strong>on</strong>ly to the facing fabric.<br />
Secure the threads.<br />
Edges That Overlap<br />
A hook and a<br />
straight eye are<br />
used for edges that<br />
overlap. The hook<br />
is placed <strong>on</strong> the<br />
overlap side, following<br />
these steps.<br />
See Fig. 20-3.<br />
1. Place the hook<br />
<strong>on</strong> the underside<br />
of the overlap at least 1 20-3 Edges That Overlap<br />
⁄8 inch (3 mm)<br />
from the edge.
2. Stitch around each loop with butt<strong>on</strong>hole or<br />
overcast stitches. Be sure no stitches show <strong>on</strong><br />
the garment’s right side.<br />
3. Stitch across the end of the hook to hold it<br />
flat against the fabric. Secure the threads.<br />
Use a straight eye <strong>on</strong> the under lap side according<br />
to this procedure:<br />
1. Overlap the edges.<br />
2. Mark the positi<strong>on</strong> of the eye by placing a pin<br />
in the fabric under the bend of the hook.<br />
3. Stitch the eye in place with butt<strong>on</strong>hole or<br />
overcast stitches around each loop. Secure the<br />
threads.<br />
SNAPS<br />
Snaps hold overlapping edges together where<br />
there isn’t much strain. Sizes vary. Small snaps are<br />
used at necklines or cuffs. Heavy gripper snaps<br />
are good for children’s clothes and sportswear.<br />
Large covered snaps are available for jackets and<br />
coats.<br />
Snaps have two secti<strong>on</strong>s—a ball and a socket.<br />
The ball half is sewn to<br />
the overlap. The socket<br />
half is sewn to the<br />
under lap. See Fig. 20-4.<br />
Use this procedure:<br />
1. Center the ball half<br />
of the snap over<br />
the marking <strong>on</strong> the<br />
underside of the<br />
overlap. Be sure it’s at least 1 20-4 Sewing <strong>on</strong> Snaps<br />
⁄8 inch (3 mm)<br />
from the edge.<br />
2. Sew three or four stitches through each hole,<br />
using either an overcast or butt<strong>on</strong>hole stitch.<br />
Carry the thread under the snap from <strong>on</strong>e<br />
hole to the next. Stitch <strong>on</strong>ly through the facing,<br />
making sure the stitches d<strong>on</strong>’t show <strong>on</strong><br />
the right side of the garment. Secure the<br />
threads.<br />
3. Mark the positi<strong>on</strong> for the socket half of the<br />
snap. Overlap the edges and push a pin<br />
SEWING TIP<br />
Snap locati<strong>on</strong>. When sewing <strong>on</strong> snaps,<br />
first stitch the ball half in place. Then rub<br />
tailor’s chalk <strong>on</strong> the ball. Overlap the fabric<br />
and press the ball against the fabric to<br />
mark the positi<strong>on</strong> of the socket half of<br />
the snap.<br />
through the ball of the snap and into the<br />
under lap.<br />
4. Place the socket half over the marking. Hold<br />
it in place by inserting a pin through the center<br />
hole of the socket and into the fabric.<br />
5. Stitch in place in the same manner as the ball<br />
half, except stitch through all layers of the<br />
fabric.<br />
HOOK-AND-LOOP TAPE<br />
Hook-and-loop tape is a special nyl<strong>on</strong>-tape<br />
fastener that comes in strips or precut round or<br />
square shapes. One side<br />
has tiny hooks; the<br />
other has a looped pile.<br />
When pressed together,<br />
the two sides interlock<br />
until pulled apart. See<br />
Fig. 20-5. Hook-and- 20-5<br />
Hook-and-Loop<br />
loop tape can be used Tape<br />
<strong>on</strong> overlapping edges.<br />
It is excellent for sportswear, children’s clothes,<br />
home furnishings, and craft items.<br />
To stitch hook-and-loop tape, follow these<br />
steps:<br />
1. Cut the strips to the desired length.<br />
2. Place the loop half <strong>on</strong> the underside of the<br />
overlapping edge.<br />
3. Positi<strong>on</strong> the hook half directly underneath<br />
<strong>on</strong> the under lap.<br />
4. Machine-stitch around both tapes.<br />
LESSON 20 Applying Fasteners • 531
BUTTONHOLES AND<br />
BUTTONS<br />
Butt<strong>on</strong>s and butt<strong>on</strong>holes can be used <strong>on</strong> all<br />
types of overlapping edges, including collars,<br />
cuffs, center fr<strong>on</strong>ts and backs, pockets, and waistbands.<br />
These str<strong>on</strong>g fasteners are able to withstand<br />
much pulling and strain. Besides being<br />
functi<strong>on</strong>al, butt<strong>on</strong>s and butt<strong>on</strong>holes can add a<br />
decorative accent to a garment.<br />
Butt<strong>on</strong>holes should always be completed<br />
before butt<strong>on</strong>s are sewn in place. Traditi<strong>on</strong>ally,<br />
butt<strong>on</strong>holes are made <strong>on</strong> the right fr<strong>on</strong>t side of<br />
garments for females. For males, they are placed<br />
<strong>on</strong> the left fr<strong>on</strong>t side.<br />
Butt<strong>on</strong>s come in a wide variety of sizes, shapes,<br />
and designs. The pattern envelope lists the butt<strong>on</strong><br />
size to use, stated in fracti<strong>on</strong>s of an inch. A butt<strong>on</strong>’s<br />
size is the measurement of its diameter.<br />
Butt<strong>on</strong>s should be sewn with a double strand<br />
of thread. Heavy-duty thread can be used for<br />
extra strength <strong>on</strong> heavier garments.<br />
Butt<strong>on</strong>hole Types<br />
The three types of butt<strong>on</strong>holes are described<br />
below.<br />
• Machine-stitched butt<strong>on</strong>holes. A zigzag<br />
machine stitch makes these butt<strong>on</strong>holes when<br />
the garment is completed.<br />
See Fig. 20-6.<br />
Machine-stitched butt<strong>on</strong>holes<br />
can be used<br />
<strong>on</strong> almost all fabrics.<br />
• Hand-stitched but- 20-6 Machine-Stitched<br />
t<strong>on</strong>holes. These are Butt<strong>on</strong>hole<br />
made with a butt<strong>on</strong>hole<br />
stitch. They are used primarily <strong>on</strong> fabrics<br />
that are too lightweight or too loosely woven<br />
to machine-stitch.<br />
• Bound butt<strong>on</strong>holes. With strips of fabric<br />
for the opening, these butt<strong>on</strong>holes are made in<br />
the garment before the facing is attached. See<br />
Fig. 20-7. Bound butt<strong>on</strong>holes used to be very<br />
532 • PART 4 Basic C<strong>on</strong>structi<strong>on</strong><br />
popular <strong>on</strong> tailored garments. Today even<br />
expensive ready-towear<br />
garments feature<br />
machine-stitched butt<strong>on</strong>holes.<br />
Some couture<br />
designers, however,<br />
still use bound<br />
butt<strong>on</strong>holes <strong>on</strong> their<br />
garments.<br />
20-7 Bound Butt<strong>on</strong>hole<br />
Butt<strong>on</strong>hole Placement<br />
The locati<strong>on</strong> of each butt<strong>on</strong>hole is indicated<br />
<strong>on</strong> the pattern pieces. If you have adjusted the<br />
length of your pattern, changes may be needed.<br />
Re-space the butt<strong>on</strong>holes evenly between the top<br />
and bottom butt<strong>on</strong>holes <strong>on</strong> the pattern.<br />
Sometimes a butt<strong>on</strong>hole may have to be added or<br />
omitted.<br />
Butt<strong>on</strong>holes should extend a little bey<strong>on</strong>d the<br />
butt<strong>on</strong> placement marking to allow for the shank<br />
of the butt<strong>on</strong>.<br />
• Horiz<strong>on</strong>tal butt<strong>on</strong>holes.<br />
Begin these 1 ⁄8 inch (3<br />
mm) bey<strong>on</strong>d the butt<strong>on</strong><br />
marking toward the fabric<br />
edge. See Fig. 20-8.<br />
20-8<br />
Butt<strong>on</strong>holes<br />
Horiz<strong>on</strong>tal<br />
• Vertical butt<strong>on</strong>holes. Begin these 1 ⁄8 inch (3<br />
mm) above the butt<strong>on</strong> marking. Vertical butt<strong>on</strong>holes<br />
are often used<br />
<strong>on</strong> shirt bands or for a<br />
row of small butt<strong>on</strong>s.<br />
See Fig. 20-9.<br />
20-9<br />
Vertical Butt<strong>on</strong>holes
If you choose a larger butt<strong>on</strong> size than the pattern<br />
recommends, double-check the butt<strong>on</strong>hole<br />
placement. Be sure the butt<strong>on</strong>holes are sewn far<br />
enough from the edge of the garment to prevent<br />
butt<strong>on</strong>s from extending bey<strong>on</strong>d the edge when<br />
the garment is butt<strong>on</strong>ed.<br />
Butt<strong>on</strong>hole Length<br />
Adding the following three measurements<br />
determines butt<strong>on</strong>hole length: the diameter of<br />
the butt<strong>on</strong>; the thickness of the butt<strong>on</strong>; and 1 ⁄8<br />
inch (3 mm) to allow for fabric thickness. The<br />
pattern piece has butt<strong>on</strong>hole markings that<br />
match the recommended butt<strong>on</strong> size and fabric<br />
type. If you choose a different butt<strong>on</strong> size, you’ll<br />
have to adjust the butt<strong>on</strong>hole length.<br />
Butt<strong>on</strong>hole Markings<br />
Machine-stitched butt<strong>on</strong>holes<br />
are placed <strong>on</strong><br />
the right side of the fabric.<br />
Be sure to choose a<br />
marking method that<br />
w<strong>on</strong>’t leave a permanent<br />
20-10<br />
line <strong>on</strong> the outside of the<br />
Lines to Mark<br />
garment. Several lines for Butt<strong>on</strong>holes<br />
should be marked. See<br />
Fig. 20-10.<br />
• Centerlines. Must meet when the garment is<br />
fastened.<br />
• Short lines. Indicate the ends of each<br />
butt<strong>on</strong>hole.<br />
• L<strong>on</strong>g lines. Indicate the length of each<br />
butt<strong>on</strong>hole.<br />
Machine-Stitched Butt<strong>on</strong>holes<br />
Before making any butt<strong>on</strong>holes <strong>on</strong> a garment,<br />
always do a sample butt<strong>on</strong>hole <strong>on</strong> a piece of scrap<br />
fabric. Many sewing machines have a built-in butt<strong>on</strong>hole<br />
attachment. Others are operated manually<br />
by changing the zigzag-stitch width. Check to<br />
be sure the bobbin has plenty of thread.<br />
Rethreading in the middle of a butt<strong>on</strong>hole is difficult.<br />
Follow these steps to complete a butt<strong>on</strong>hole:<br />
1. Mark the locati<strong>on</strong> of<br />
the butt<strong>on</strong>hole <strong>on</strong> the<br />
right side of the garment.<br />
See Fig. 20-11.<br />
2. Stitch the butt<strong>on</strong>hole,<br />
following instructi<strong>on</strong>s<br />
in the sewing machine<br />
20-11<br />
manual.<br />
3. Place a pin across<br />
each end of the butt<strong>on</strong>hole<br />
to prevent<br />
cutting through the<br />
end stitching. See Fig.<br />
20-12.<br />
4. Cut the butt<strong>on</strong>hole<br />
Butt<strong>on</strong>hole Mark<br />
opening, using small,<br />
sharp scissors. Insert<br />
20-12 Cutting the<br />
the scissors blade in<br />
the center of the but-<br />
Opening<br />
t<strong>on</strong>hole and cut carefully from the center in<br />
both directi<strong>on</strong>s.<br />
Placing Foot over<br />
Butt<strong>on</strong> Placement<br />
After the butt<strong>on</strong>holes have been created, you<br />
can sew <strong>on</strong> the butt<strong>on</strong>s. Mark their placement<br />
through the butt<strong>on</strong>hole openings rather than<br />
using the pattern. This ensures that each butt<strong>on</strong><br />
will corresp<strong>on</strong>d to the actual butt<strong>on</strong>hole locati<strong>on</strong>.<br />
Follow these steps:<br />
1. Overlap fabric edges with the butt<strong>on</strong>hole <strong>on</strong><br />
top. Match centerlines or overlap lines.<br />
2. Place a pin through the butt<strong>on</strong>hole, 1 ⁄8 inch (3<br />
mm) from the end, al<strong>on</strong>g the centerline.<br />
3. Slip the butt<strong>on</strong>hole over the head of each pin<br />
and separate the<br />
garment secti<strong>on</strong>s.<br />
See Fig. 20-13. Be<br />
careful when doing<br />
this step.<br />
20-13<br />
Marking Butt<strong>on</strong><br />
Locati<strong>on</strong><br />
LESSON 20 Applying Fasteners • 533
Attaching Sew-Through<br />
Butt<strong>on</strong>s<br />
Sew-through butt<strong>on</strong>s have holes, or “eyes,” in<br />
the face of the butt<strong>on</strong>. Butt<strong>on</strong>s used <strong>on</strong>ly for decorati<strong>on</strong><br />
can be sewn flat against the fabric.<br />
Butt<strong>on</strong>s used with a butt<strong>on</strong>hole should be<br />
attached with a thread shank. The shank allows<br />
the butt<strong>on</strong>hole to fit smoothly between the butt<strong>on</strong><br />
and the under fabric. The length of the thread<br />
shank is determined by the thickness of the fabric.<br />
To attach this type of butt<strong>on</strong>, follow these steps:<br />
1. Using small backstitches, secure a double<br />
thread at the butt<strong>on</strong> marking.<br />
2. Place a toothpick, heavy pin, or similar object<br />
<strong>on</strong> top of the butt<strong>on</strong>.<br />
3. Bring the needle up through <strong>on</strong>e hole, over<br />
the toothpick, and down through the sec<strong>on</strong>d<br />
hole. See Fig. 20-14. C<strong>on</strong>tinue to make several<br />
stitches through<br />
the butt<strong>on</strong> and<br />
fabric. If the butt<strong>on</strong><br />
has four holes,<br />
repeat the stitching<br />
at the other<br />
pair of holes. End<br />
the stitching with 20-14 Attaching Sewthe<br />
needle and<br />
Through Butt<strong>on</strong><br />
thread under the<br />
butt<strong>on</strong>.<br />
4. Remove the toothpick and pull the butt<strong>on</strong> to<br />
the top of the thread loop.<br />
534 • PART 4 Basic C<strong>on</strong>structi<strong>on</strong><br />
5. Wind the thread<br />
tightly around the<br />
stitches under the<br />
butt<strong>on</strong> to form a<br />
thread shank. See<br />
Fig. 20-15. Fasten<br />
the thread securely<br />
in the fabric under<br />
the butt<strong>on</strong>.<br />
20-15<br />
Making a Shank<br />
Shank Butt<strong>on</strong>s<br />
These butt<strong>on</strong>s have<br />
a metal or plastic loop<br />
<strong>on</strong> the back of the butt<strong>on</strong>.<br />
Thread is stitched<br />
through the shank to<br />
attach the butt<strong>on</strong> to<br />
the fabric, as described<br />
20-16<br />
Attaching Shank<br />
below. See Fig. 20-16.<br />
1. Using backstitch-<br />
Butt<strong>on</strong><br />
es, secure a double thread at the marking.<br />
2. Stitch through the shank and fabric with four<br />
or five small, even stitches.<br />
3. Fasten the thread securely in the fabric under<br />
the butt<strong>on</strong>.<br />
SEWING TIP<br />
Butt<strong>on</strong> reinforcement. Sometimes<br />
butt<strong>on</strong>s need reinforcement <strong>on</strong> heavy fabric<br />
or in areas of extra strain. Sew a<br />
small, flat butt<strong>on</strong> to the wr<strong>on</strong>g side of the<br />
garment as you stitch the sew-through or<br />
shank butt<strong>on</strong> in place.
Putting in Zippers<br />
Zippers come in different types, weights, and lengths. The most comm<strong>on</strong> is the<br />
c<strong>on</strong>venti<strong>on</strong>al zipper, which has a stop at the bottom. Such specialty zippers as invisible,<br />
separating, decorative, and heavy-duty are also available. The pattern envelope<br />
recommends the zipper type and length for a project.<br />
ZIPPER PREPARATIONS<br />
Before putting in a zipper, several acti<strong>on</strong>s<br />
should be taken.<br />
• Check the zipper package. If the zipper tape is<br />
100 percent polyester, press the tape to remove<br />
any folds. If the tape is not 100 percent polyester,<br />
preshrink the zipper.<br />
• Stay-stitch any curved or bias seam lines to<br />
prevent stretching.<br />
• If seam allowances are less than 5 ⁄8 inch (1.5<br />
cm), stitch seam tape to the edge for extra<br />
width.<br />
• Check the pattern guide sheet to see whether<br />
the zipper should be stitched before or after<br />
any facing is attached.<br />
• Check the length of the zipper opening, or<br />
placket. Place the zipper teeth, or coils, 3 ⁄4 inch<br />
(2 cm) from the top edge of the fabric. If a fastener<br />
will be sewn above the zipper, place the<br />
zipper 1 inch (2.5 cm) below the top edge.<br />
Mark the fabric where the coils end at the bottom<br />
of the zipper.<br />
• To shorten a zipper, machine zigzag or whipstitch<br />
across the coils in <strong>on</strong>e place to form a<br />
new bottom stop. Cut away the zipper 1 ⁄2 inch<br />
(1.3 cm) below the stitching.<br />
• Stitch the garment seam below the zipper<br />
marking, using a regular machine stitch.<br />
Backstitch 1 ⁄4 inch (6 mm) to secure the seam.<br />
• To prepare the zipper opening, machine-baste<br />
it closed. Be sure to match plaids and stripes<br />
carefully. Press the seam open. After the zipper<br />
has been put in, you can clip the basting<br />
threads every inch (2.5 cm) for easier removal.<br />
LESSON 21<br />
APPLYING A ZIPPER<br />
Zippers can be sewn in several ways, known as<br />
applicati<strong>on</strong>s. Zippers are typically applied with<br />
machine stitching, which requires a zipper foot<br />
attachment for stitching close to the zipper. If<br />
sewing a zipper by hand, use a pickstitch. Always<br />
stitch both sides of a zipper in the same directi<strong>on</strong><br />
to prevent any wrinkles or puckers in the zipper<br />
placket.<br />
To choose the right applicati<strong>on</strong> method, refer<br />
to the pattern guide sheet. Applicati<strong>on</strong> instructi<strong>on</strong>s<br />
are also in the zipper package. The most<br />
comm<strong>on</strong> applicati<strong>on</strong>s are for centered, lapped,<br />
and fly-fr<strong>on</strong>t zippers. A different procedure is<br />
used for invisible zippers.<br />
Centered Zipper Applicati<strong>on</strong><br />
For a centered zipper applicati<strong>on</strong>, follow these<br />
steps:<br />
1. Machine-baste the seam and press open.<br />
2. Place the zipper face down <strong>on</strong> the open seam<br />
allowance. Center the zipper coils exactly <strong>on</strong><br />
top of the basted seam. Hold the zipper in<br />
place with hand<br />
basting or sewing<br />
tape. See Fig. 21-1.<br />
3. Spread the garment<br />
flat, right<br />
side up. Mark the<br />
bottom zipper stop<br />
with a pin. Attach<br />
the zipper foot.<br />
4. Begin stitching at<br />
21-1<br />
Basting Centered<br />
the lower end of<br />
the zipper <strong>on</strong> the<br />
Zipper<br />
right side of the fabric. Stitch across the end,<br />
LESSON 21 Putting in Zippers • 535
pivot, and stitch up<br />
al<strong>on</strong>g <strong>on</strong>e side 1 ⁄4<br />
inch (6 mm) from<br />
the basted seam.<br />
5. Begin again at the<br />
lower end and stitch<br />
the other side in the<br />
same manner.<br />
6. Pull the thread ends<br />
at the bottom to the 21-2<br />
wr<strong>on</strong>g side of the Zipper<br />
fabric and knot.<br />
7. Remove the machine basting and press. See<br />
Fig. 21-2.<br />
Lapped and Fly-Fr<strong>on</strong>t<br />
Applicati<strong>on</strong><br />
To apply a zipper with the lapped or fly-fr<strong>on</strong>t<br />
applicati<strong>on</strong>, follow these steps:<br />
1. Machine-baste the seam and press open.<br />
2. Open the zipper. Place it<br />
face down <strong>on</strong> the back<br />
seam allowance with the<br />
coils at the seam line.<br />
Pin, baste, or tape in<br />
place.<br />
3. Machine-stitch through<br />
the zipper tape and<br />
seam allowance <strong>on</strong>ly,<br />
21-3<br />
from the bottom to the<br />
Stitching First<br />
top of the zipper. Use Lap<br />
the zipper foot to stitch<br />
close to the zipper’s edge. See Fig. 21-3.<br />
4. Close the zipper and turn it face up. Smooth<br />
the fabric away from the zipper, forming a<br />
narrow fold between the zipper coil and the<br />
basted seam.<br />
5. Machine-stitch close to the fold, beginning at<br />
the lower end of the zipper. Sew through the<br />
folded seam allowance and zipper tape <strong>on</strong>ly.<br />
See Fig. 21-4.<br />
536 • PART 4 Basic C<strong>on</strong>structi<strong>on</strong><br />
Completed Centered<br />
21-5<br />
Zipper<br />
21-4<br />
Completed Lapped<br />
Sewing <strong>on</strong> Fold<br />
6. Open out the fabric and place the zipper face<br />
down <strong>on</strong> the fr<strong>on</strong>t seam allowance. Turn the<br />
tab up and pin in place.<br />
7. Machine-baste through the tape and seam<br />
allowance <strong>on</strong>ly, starting at the top of the zipper.<br />
This will hold the zipper in place for the<br />
final stitching.<br />
8. Stitch from the right side of the garment,<br />
beginning at the lower end of the zipper.<br />
Stitch across the bottom, pivot, and stitch up<br />
the lap side. Stitching should be 3 ⁄8 to 1 ⁄2 inch<br />
(1 to 1.3 cm) from the seam. See Fig. 21-5.<br />
9. Pull the thread ends to the wr<strong>on</strong>g side of the<br />
fabric and knot.<br />
10. Remove the basting stitches and press.<br />
Invisible Zippers<br />
An invisible zipper is a special zipper that<br />
looks like a plain seam <strong>on</strong> the outside of the garment.<br />
All you see is a small pull-tab at the top of<br />
the seam. Generally, if your pattern calls for a zipper,<br />
you can choose c<strong>on</strong>venti<strong>on</strong>al or invisible.<br />
An invisible zipper is applied before the rest of<br />
the seam is stitched. You’ll need a special zipper<br />
foot, usually available where you purchase the<br />
zipper. This foot holds the zipper coil upright<br />
during stitching so you can stitch very close to the<br />
coil, making the zipper invisible <strong>on</strong> the outside of<br />
the garment. To apply an invisible zipper, follow<br />
the directi<strong>on</strong>s provided in the zipper package.
Putting in Hems<br />
Ahem finishes the bottom edge of a shirt, jacket, sleeve, skirt, or pants leg. Hem<br />
lengths follow fashi<strong>on</strong> trends, but a length that flatters body proporti<strong>on</strong>s is best.<br />
A well-made hem should not be noticeable.<br />
Stitches should not show <strong>on</strong> the outside of the<br />
garment, and the hem edge should be flat and<br />
smooth. In additi<strong>on</strong>, the garment should hang<br />
evenly around your body.<br />
Hems can be an important part of the garment<br />
design. A decorative binding or topstitching adds<br />
special interest to a hemline.<br />
Hems are made in ways that depend <strong>on</strong> the<br />
garment’s fabric and design. Turning the raw<br />
edge of fabric to the inside of the garment, however,<br />
is the most comm<strong>on</strong> way to make a hem.<br />
The edge of the hem is held in place by hand<br />
stitching, machine stitching, or fusing. To finish a<br />
hem, follow these four basic steps:<br />
1. Mark the hem length.<br />
2. Turn up the hem.<br />
3. Finish the hem edge.<br />
4. Attach the hem to the garment.<br />
MARKING HEM LENGTH<br />
Your garment should hang <strong>on</strong> a hanger for at<br />
least 24 hours before the hem is marked. This<br />
allows any bias areas of the garment to stretch<br />
and prevents the hemline from sagging. Put <strong>on</strong><br />
the garment with the clothes and shoes to be<br />
worn with it. Fasten all openings and any belt.<br />
Stand in normal posture with your weight <strong>on</strong><br />
both feet. For complete accuracy, have some<strong>on</strong>e<br />
else mark the hem for you. You should remain<br />
standing still, and the pers<strong>on</strong> doing the marking<br />
should move around you.<br />
• Skirts and dresses. Use a yardstick, meterstick,<br />
or skirt marker. Be sure to keep the<br />
marker at a right angle to the floor. Place pins<br />
or mark with chalk every 3 or 4 inches (7.5 or<br />
10 cm) around the hemline. Turn the hem to<br />
22-1<br />
Pinning Hems<br />
LESSON 22<br />
the inside al<strong>on</strong>g markings and pin to check the<br />
length. Readjust if necessary. See Fig. 22-1.<br />
• Pants. Fold the fabric edge under and pin.<br />
The fr<strong>on</strong>t of pants should just touch the top of<br />
the shoe; the back should be about 1 ⁄2 inch (1.3<br />
cm) l<strong>on</strong>ger than the top of the shoe. See Fig.<br />
22-1.<br />
• Jackets. Fold the fabric under al<strong>on</strong>g the<br />
hemline markings and pin. Adjust the length<br />
according to body proporti<strong>on</strong>s. Be sure the<br />
hem is even around the entire body.<br />
• Sleeves. Bend the arm so the hand is in the<br />
center of the waistline. Fold the sleeve edge<br />
under until it just covers the wrist b<strong>on</strong>e. Pin in<br />
place.<br />
TURNING UP HEM<br />
After the hemline is marked, the hem must be<br />
trimmed to the proper width and any extra fullness<br />
eliminated.<br />
LESSON 22 Putting in Hems • 537
Trimming Hem Width<br />
Your pattern recommends the proper width<br />
for the finished hem. Most hems are 2 to 3 inches<br />
(5 to 7.5 cm) wide. This gives added weight to<br />
the hemline and helps it fall evenly.<br />
The width of the hem, however, depends <strong>on</strong><br />
the flare of the garment and the fabric weight. A<br />
curved edge takes a narrower hem than a straight<br />
edge. Knitted and heavier weight fabrics may<br />
have a narrower hem too. Sheer fabrics usually<br />
have a narrow rolled hem or a very deep hem.<br />
To trim hem width, follow these steps:<br />
1. Fold the hem up al<strong>on</strong>g the marked line.<br />
2. Measure an even distance from the folded<br />
edge with a sewing gauge or small ruler.<br />
3. Mark the desired hem width with chalk. See<br />
Fig. 22-2.<br />
22-2<br />
Marking Hem Width<br />
4. Trim away any excess fabric.<br />
5. Remove any pins and lightly press the fold of<br />
the hem.<br />
Eliminating Hem Fullness<br />
If the garment is flared, the turned-up hem<br />
will be wider at the upper edge than the garment.<br />
Follow these steps to ease this fullness in to fit flat<br />
against the garment:<br />
1. Machine-baste 1 ⁄4 inch (6 mm) from the<br />
hem’s upper edge.<br />
2. Turn the hem up and pin at each seam and at<br />
the center.<br />
538 • PART 4 Basic C<strong>on</strong>structi<strong>on</strong><br />
3. Use a pin to pick<br />
up a stitch of the<br />
bobbin thread.<br />
See Fig. 22-3.<br />
Gently pull the<br />
thread toward a<br />
seam to ease in 22-3 Easing in Hem Fullness<br />
extra fabric.<br />
4. Press the hem allowance to shrink out the<br />
fullness.<br />
On fabrics that cannot be eased, remove the<br />
extra fullness by tapering the seam line below the<br />
hem. See Fig. 22-4. Take the same amount off<br />
each seam. Remove the original stitching and<br />
trim the seam allowances to remove bulk. Press<br />
the seam open.<br />
22-4<br />
Tapering<br />
Seam Allowance<br />
FINISHING THE HEM EDGE<br />
The hem finish depends <strong>on</strong> the fabric and the<br />
garment. The same finishes used for seams can<br />
also be used for hems. (See the seam finishes <strong>on</strong><br />
page 523.)<br />
If the fabric ravels, a finish that prevents this<br />
problem is needed. Most knits d<strong>on</strong>’t need a finish.<br />
If you want to cover the edge of the hem, you can<br />
use seam tape, bias tape, lace, or other decorative<br />
trim.<br />
• Machine zigzag finish.<br />
Used for all fabric<br />
weights. Zigzag close to<br />
the fabric edge or serge<br />
the edge with a serger<br />
22-5<br />
Machine Zigzag<br />
stitch. See Fig. 22-5.<br />
Hem Finish
• Seam tape, bias<br />
tape, or lace finish.<br />
Used <strong>on</strong> all fabrics.<br />
Place the tape or<br />
trim 1 ⁄4 inch (6 mm)<br />
over the raw edge<br />
and stitch, overlapping<br />
the ends. See<br />
Fig. 22-6.<br />
• Pinked finish. Used for more firmly woven<br />
fabrics. Pink the edge or stitch 1 22-6 Seam Tape Hem<br />
Finish<br />
⁄4 inch (6 mm)<br />
from the edge and then pink. See Fig. 22-7.<br />
22-8<br />
Hemmed Finish<br />
22-7<br />
Finish<br />
Pinked Hem<br />
• Hemmed finish. Used for lightweight to<br />
medium-weight fabrics. Turn the raw edge<br />
under 1 ⁄4 inch (6 mm) and stitch. See Fig. 22-8.<br />
ATTACHING HEM TO<br />
GARMENT<br />
The hem can be attached to the garment by<br />
hand stitching, machine stitching, or fusing. Each<br />
method has advantages and disadvantages.<br />
Hand-Stitching a Hem<br />
To hem by hand, use a single thread. Make sure<br />
the stitches d<strong>on</strong>’t show <strong>on</strong> the outside of the garment.<br />
Keep the stitches slightly loose so the fabric<br />
doesn’t pull or ripple. (See Less<strong>on</strong> 13, pages 506-<br />
510, for specific directi<strong>on</strong>s <strong>on</strong> different stitches.)<br />
• Blindstitch. Used with all fabrics and hem<br />
finishes. This stitch shows less than others and<br />
allows for movement without pulling.<br />
Hems<br />
S erging<br />
Techniques<br />
The serger can finish the raw edge of a<br />
hem that will be stitched to the garment<br />
by hand or machine.<br />
1. Plan the hem allowance with at least<br />
1<br />
⁄16 inch (1.2 mm) of extra fabric that<br />
can be trimmed off during serging.<br />
2. Serge al<strong>on</strong>g the raw edge of the hem<br />
allowance. Secure the thread chains.<br />
3. Complete the hem by folding up the<br />
hem allowance and handstitch<br />
or topstitch <strong>on</strong> the<br />
c<strong>on</strong>venti<strong>on</strong>al machine.<br />
The serger can be used to make a hem<br />
with a “raw edge” look. The serger<br />
stitches will keep the fabric from<br />
raveling.<br />
1. Plan the hem allowance with a least 1 ⁄2<br />
inch (1.3 cm) of extra fabric that can be<br />
trimmed off during serging.<br />
Hemline<br />
1/2 inch (1.3 cm)<br />
2. Serge al<strong>on</strong>g the hemline with the garment<br />
right side up and secure the<br />
thread chains.<br />
LESSON 22 Putting in Hems • 539
• Hemming stitch. Used to stitch a hem with<br />
seam tape or lace finish.<br />
• Catchstitch. Good for hemming knits and<br />
stretch fabrics. This stitch can be d<strong>on</strong>e at the<br />
hem edge or as a blind catchstitch inside the<br />
hem.<br />
• Slip stitch. Used to join a folded edge, such<br />
as a hemmed finish, to the garment. This stitch<br />
is excellent for narrow, hand-rolled hems.<br />
Machine-Stitching a Hem<br />
Machine stitching can be used for both invisible<br />
and decorative stitching. It’s a fast, easy way to<br />
complete a garment or other sewing project.<br />
Some machines have a built-in blindstitch.<br />
Fold the garment back 1 ⁄4 inch (6 mm) below the<br />
hem edge. Machine-stitch so the straight stitches<br />
fall <strong>on</strong> the hem allowance<br />
and single zigzag stitches<br />
just catch the garment al<strong>on</strong>g<br />
the fold line. See Fig. 22-9.<br />
Topstitching can attach the hem and decorate<br />
the garment at the same time. Fold the hem to the<br />
desired width. For woven fabrics, turn the raw<br />
edge under 3 ⁄8 inch (1 cm) and press. Stitch close<br />
to the upper edge. Knitted fabrics can be stitched<br />
single thickness and then trimmed close to the<br />
stitching. Use two or more rows of stitching for a<br />
more decorative finish. Be sure to<br />
keep the rows straight and parallel.<br />
See Fig. 22-10.<br />
22-10<br />
Attaching Hem<br />
with Topstitch<br />
22-9<br />
540 • PART 4 Basic C<strong>on</strong>structi<strong>on</strong><br />
Built-In Blindstitch<br />
Fusing a Hem<br />
With fusible web, you can hold two layers of<br />
fabric together for hemming. Place fusible web<br />
between the garment and hem about 1 ⁄4 inch (6<br />
mm) below the top of the hem. This helps prevent<br />
the hem outline from showing <strong>on</strong> the garment’s<br />
right side. Also, it keeps any web from<br />
accidentally touching the ir<strong>on</strong> and sticking to it.<br />
Press to fuse, following the manufacturer’s<br />
directi<strong>on</strong>s. See Fig. 22-11.<br />
22-11<br />
To alter a fused hem, press the area with steam<br />
until the two fabric layers can be gently pulled<br />
apart.<br />
SPECIAL HEM TECHNIQUES<br />
Some hems require special hemming techniques.<br />
These include a rolled hem, a faced hem,<br />
and a hem with a pleat.<br />
Rolled Hem<br />
A narrow, rolled hem works well <strong>on</strong> lightweight<br />
to medium-weight fabrics. Use it to hem<br />
scarves, ruffles, sashes, blouses, evening clothes,<br />
lingerie, tablecloths, napkins, and curtains. The<br />
hem can be stitched by hand or machine as<br />
described in the steps that follow.<br />
Hand-Rolled Hem<br />
1. Machine-stitch 1 ⁄4 inch<br />
(6 mm) from the raw<br />
edge and trim close to<br />
the stitching.<br />
2. Roll the edge between<br />
your thumb and forefinger<br />
until the stitching<br />
is c<strong>on</strong>cealed.<br />
Fusing a Hem<br />
22-12<br />
Slip-Stitching<br />
Hand-Rolled Hem
Lower<br />
looper<br />
thread<br />
Rolled Hem<br />
The serger can roll fabric to the<br />
underside as a hem is stitched,<br />
creating a professi<strong>on</strong>al appearance.<br />
The lower looper tensi<strong>on</strong> is<br />
tightened to produce the rolled<br />
edge.<br />
1. Plan at least a 1 ⁄2-inch (1.3-cm)<br />
hem allowance.<br />
Hemline<br />
2. Do a test swatch and adjust<br />
tensi<strong>on</strong> settings until the hem<br />
rolls properly. Tighten the lower<br />
looper tensi<strong>on</strong> and loosen the<br />
upper looper tensi<strong>on</strong> if the<br />
lower looper thread forms large<br />
loops <strong>on</strong> the underside.<br />
Needle<br />
thread<br />
1/2 inch (1.3 cm)<br />
Upper<br />
looper<br />
thread<br />
3. Slip-stitch the hem in place, completing <strong>on</strong>e<br />
small secti<strong>on</strong> at a time. See Fig. 22-12.<br />
Machine-Rolled Hem<br />
1. Mark the hemline 1 ⁄8 inch (3 mm) l<strong>on</strong>ger<br />
than the desired finished length. Fold the fabric<br />
up al<strong>on</strong>g the hemline. D<strong>on</strong>’t press.<br />
S erging<br />
Techniques<br />
Needle<br />
thread<br />
Cover-Stitch Hem<br />
Some sergers can make a cover<br />
stitch. This stitch uses <strong>on</strong>e looper<br />
and two or three needle<br />
threads. The needle threads create<br />
parallel rows <strong>on</strong> <strong>on</strong>e side of<br />
the fabric. The other side has a<br />
more decorative look because<br />
the looper thread interlocks<br />
between the needle threads. You<br />
can decide which look you want<br />
<strong>on</strong> the outside of the fabric.<br />
1. Plan at least a 1 ⁄2-inch (1.3 cm)<br />
hem allowance. See Step 1 for<br />
rolled hems.<br />
2. Fold the fabric up al<strong>on</strong>g the<br />
hemline and press.<br />
3. Positi<strong>on</strong> the hem under the<br />
presser foot so that the folded<br />
edge of the fabric is to the<br />
right of the needles and the<br />
raw edge of the hem allowance<br />
will be caught in the stitch.<br />
Looper<br />
Thread<br />
Cover<br />
Needle<br />
Thread<br />
2. Stitch as close as you can to the fold. Trim the<br />
hem allowance close to the stitching, using<br />
embroidery scissors. See Fig. 22-13 <strong>on</strong> page<br />
542.<br />
3. Press the hem allowance up al<strong>on</strong>g the stitching<br />
line. See Fig. 22-14 <strong>on</strong> page 542. As you<br />
press, roll the stitching line just to the inside<br />
of the garment.<br />
LESSON 22 Putting in Hems • 541
22-13<br />
22-15<br />
Trimming Hem Allowance<br />
22-14<br />
Stitching Again<br />
Pressing Hem Allowance<br />
4. Stitch again close to the first fold. See Fig.<br />
22-15.<br />
Faced Hem<br />
When there’s not enough fabric for the hem<br />
allowance, a hem may be faced. Facings are also<br />
used when the hem edge is an unusual shape,<br />
such as scallops, or the fabric is very heavy or<br />
bulky. Purchase bias hem facing or cut your own<br />
fabric facing and follow these steps:<br />
542 • PART 4 Basic C<strong>on</strong>structi<strong>on</strong><br />
22-16<br />
Hem<br />
Slip-Stitching Faced<br />
1. Pin the facing to the garment, with right sides<br />
together and ends overlapped.<br />
2. Stitch a 1 ⁄4-inch (6-mm) seam.<br />
3. Turn the facing to the inside of the garment<br />
and slip-stitch in place. See Fig. 22-16.<br />
Hem with Pleat<br />
This technique helps create sharp pleats:<br />
1. Clip the seam allowance above the hem area.<br />
2. Press the seam allowance open below the clip<br />
and trim to reduce bulk. See Fig. 22-17.<br />
3. Complete the hem.<br />
4. Press the pleat with the seam <strong>on</strong> the fold<br />
edge.<br />
5. Edgestitch al<strong>on</strong>g the fold through all thicknesses<br />
of the hem. See Fig. 22-18.<br />
22-18<br />
Edgestitching<br />
Hem with Pleat<br />
22-17<br />
Clipped and<br />
Trimmed Seam
Checking the Fit<br />
One of the nicest compliments some<strong>on</strong>e who sews can receive comes when people<br />
can’t tell a garment was made pers<strong>on</strong>ally. In other words, the item doesn’t have<br />
any telltale signs that it was handmade. Puckers, visible stitches, uneven areas, and<br />
poor fit just aren’t there. How can you prevent these?<br />
Besides taking the time to follow directi<strong>on</strong>s<br />
and sew carefully, you can also check the fit as you<br />
go. D<strong>on</strong>’t wait until your garment is d<strong>on</strong>e to try it<br />
<strong>on</strong>. By then it may be too difficult or impossible<br />
to make necessary changes. Instead, check the fit<br />
as sewing progresses. Try <strong>on</strong> the garment as so<strong>on</strong><br />
as the major seams are joined. Stand in fr<strong>on</strong>t of a<br />
full-length mirror to make your analysis. See Fig.<br />
23-1<br />
As you take note, begin at the top and work<br />
your way down. The fit at the top affects<br />
the fit of the lower part of the garment. A<br />
wrinkle or a break line in the fabric indicates<br />
a problem. Make any necessary fitting<br />
changes. Try the garment <strong>on</strong> again,<br />
making sure any problem has been corrected<br />
before going <strong>on</strong> to other steps.<br />
CHECKLIST FOR<br />
EVALUATION<br />
The following checklist will help<br />
you evaluate the fit of your garment:<br />
• Does the neckline lie smooth, with no<br />
pulling or gapping?<br />
• Does the collar roll evenly?<br />
• Are the collar points identical?<br />
• Do the shoulder seams rest smoothly over<br />
the shoulders?<br />
LESSON 23<br />
• Do the darts taper toward the fullest part of<br />
the body?<br />
• Do the sleeves hang straight from the shoulders<br />
to the elbow?<br />
• Are the center fr<strong>on</strong>t and center back seams in<br />
the center of the body and perpendicular to<br />
the floor?<br />
• Do the side seams hang straight?<br />
• Does the butt<strong>on</strong>ed closing lie flat<br />
without any gapping?<br />
• Is the waistline seam at the natural<br />
waistline just above the hipb<strong>on</strong>e<br />
and not too snug?<br />
• Is the crotch length comfortable<br />
for sitting?<br />
• Is the fit of pants or skirt smooth<br />
through the hips and thigh area,<br />
with no wrinkles or extra fabric?<br />
• Are hemlines even and parallel to the<br />
floor?<br />
• Can you stand, sit, stretch, and<br />
bend comfortably?<br />
23-1<br />
When you check the fit of a gar-<br />
ment as you sew, you’ll be pleased with<br />
the results when your project is d<strong>on</strong>e.<br />
LESSON 23 Checking the Fit • 543
PART 4<br />
SUMMARY<br />
• Machine stitching is used for the major<br />
seams and c<strong>on</strong>structi<strong>on</strong> techniques needed<br />
to make a garment. Hand stitching takes<br />
care of finishing steps. (Less<strong>on</strong>s 12 and 13)<br />
• Pressing should be d<strong>on</strong>e after each step of<br />
c<strong>on</strong>structi<strong>on</strong>. (Less<strong>on</strong> 14)<br />
• Darts, gathers, and easing are used to c<strong>on</strong>trol<br />
fullness. (Less<strong>on</strong>s 15 and 16)<br />
• Curved and enclosed seams may need to<br />
be trimmed, graded, clipped, or notched.<br />
(Less<strong>on</strong> 17)<br />
• Facings finish necklines, fr<strong>on</strong>t openings,<br />
and armholes. (Less<strong>on</strong> 18)<br />
• Casings hold elastic or a drawstring.<br />
(Less<strong>on</strong> 19)<br />
• Fasteners can be both functi<strong>on</strong>al and decorative.<br />
(Less<strong>on</strong> 20)<br />
• Zipper type determines how it is applied.<br />
(Less<strong>on</strong> 21)<br />
• Hems must be marked, turned up, finished<br />
al<strong>on</strong>g the edge, and attached to the garment.<br />
(Less<strong>on</strong> 22)<br />
• The fit of a garment should be<br />
checked as it’s c<strong>on</strong>structed.<br />
(Less<strong>on</strong> 23)<br />
544 • PART 4 Basic C<strong>on</strong>structi<strong>on</strong><br />
Review<br />
RECALLING THE FACTS<br />
1. Name at least six machine stitches and<br />
explain how they’re used. (Less<strong>on</strong> 12)<br />
2. What is the width of a standard seam?<br />
(Less<strong>on</strong> 12)<br />
3. What is the basic purpose for each of<br />
these hand stitches: basting stitch; backstitch;<br />
pickstitch; slip stitch; overcast<br />
stitch; and blindstitch? (Less<strong>on</strong> 13)<br />
4. What is the difference between pressing<br />
and ir<strong>on</strong>ing? (Less<strong>on</strong> 14)<br />
5. Why is pressing after each c<strong>on</strong>structi<strong>on</strong><br />
step necessary? (Less<strong>on</strong> 14)<br />
6. Why should curved areas be pressed<br />
over a tailor’s ham? (Less<strong>on</strong> 14)<br />
7. In what directi<strong>on</strong>s should horiz<strong>on</strong>tal<br />
darts and vertical darts be pressed?<br />
(Less<strong>on</strong> 15)<br />
8. What is the difference between easing<br />
and gathering? (Less<strong>on</strong> 16)<br />
9. When pin-basting a seam, how far apart<br />
should the pins be placed? (Less<strong>on</strong> 17)
and Activities<br />
10. When grading a seam, which seam<br />
allowance should be the widest?<br />
(Less<strong>on</strong> 17)<br />
11. Why are curved seams often clipped?<br />
(Less<strong>on</strong> 17)<br />
12. What is the difference between shaped<br />
and extended facings? (Less<strong>on</strong> 18)<br />
13. Why are self-casings easier to make than<br />
applied casings? (Less<strong>on</strong> 19)<br />
14. Why do hooks and eyes have both<br />
straight and round eyes? (Less<strong>on</strong> 20)<br />
15. If you choose butt<strong>on</strong>s wider than the<br />
pattern suggests, what must happen?<br />
(Less<strong>on</strong> 20)<br />
16. Why should you stitch both sides of a<br />
zipper in the same directi<strong>on</strong>? (Less<strong>on</strong> 21)<br />
17. What are the four basic steps in finishing<br />
a hem? (Less<strong>on</strong> 22)<br />
18. If a hem has too much fullness, what can<br />
you do? (Less<strong>on</strong> 22)<br />
19. Why should you check the fit of a garment<br />
throughout c<strong>on</strong>structi<strong>on</strong>? (Less<strong>on</strong> 23)<br />
APPLYING KNOWLEDGE<br />
1. C<strong>on</strong>structi<strong>on</strong> features. Using magazines<br />
and catalogs, collect photos of garments<br />
that have different c<strong>on</strong>structi<strong>on</strong> features.<br />
Look for darts, gathers, seams,<br />
facings, casings, fasteners, and hems.<br />
Prepare a classroom display.<br />
2. Comparing time. Try attaching a facing<br />
or finishing a hem <strong>on</strong> both a serger and<br />
c<strong>on</strong>venti<strong>on</strong>al machine. Compare the time<br />
each machine takes. Which machine is<br />
faster for the task you chose?<br />
3. Sewing samples. Make samples of the<br />
following techniques: different hand<br />
stitches, darts, gathering and easing,<br />
seams and seam finishes, facings, casings,<br />
fasteners, and hems. Mount samples<br />
<strong>on</strong> heavy paper and write a descripti<strong>on</strong><br />
of each technique.<br />
4. Sewing project. C<strong>on</strong>struct a simple garment,<br />
accessory, or home-decorating<br />
item. Evaluate your success with the c<strong>on</strong>structi<strong>on</strong><br />
techniques used in the project.<br />
MAKING>
PART 5<br />
Special Sewing<br />
Techniques<br />
546
Sewing Special Seams<br />
When sewing, you may have occasi<strong>on</strong> to use something different from a plain<br />
seam. Seams can enclose the seam allowance and create decorative effects. Some<br />
seaming techniques are needed to stitch special areas.<br />
SELF-FINISHED SEAMS<br />
Self-finished seams enclose the seam<br />
allowances as the seam is stitched. They provide a<br />
more attractive appearance and strengthen<br />
seams. Self-finished seams include the French<br />
seam, flat-felled seam, double-stitched seam, and<br />
narrow serged seam.<br />
French Seam<br />
A French seam works well <strong>on</strong> sheer fabric<br />
because no raw edges show through. The seam<br />
looks like a plain seam <strong>on</strong> the garment’s outside<br />
and a narrow tuck <strong>on</strong> the wr<strong>on</strong>g side. This seam<br />
can be used <strong>on</strong> straight seams but isn’t flexible<br />
enough for curved seams. Here’s how the seam is<br />
created.<br />
1. Pin the wr<strong>on</strong>g sides of the fabric together.<br />
2. Stitch 3 ⁄8 inch (9 mm) from the raw edges.<br />
Trim the seam allowances to 1 ⁄8 inch (3 mm).<br />
Press the seam allowances open.<br />
3. Fold the fabric al<strong>on</strong>g the seam line with right<br />
sides together. Press.<br />
4. Stitch 1 ⁄4 inch (6 mm) from the folded edge.<br />
The two seams, 3 ⁄8 inch and 1 ⁄4 inch (9 mm<br />
and 6 mm), combine to make a 5 ⁄8-inch (1.5cm)<br />
seam. See Fig. 24-1.<br />
24-1<br />
French Seam<br />
LESSON 24<br />
Flat-Felled Seam<br />
You’ll find this sturdy and durable seam <strong>on</strong><br />
shirts, jeans, sportswear, pajamas, and other garments.<br />
Two rows of stitching show <strong>on</strong> the outside<br />
of the garment. C<strong>on</strong>trasting thread can be used as<br />
an accent. Follow these steps to make the seam:<br />
1. Pin the wr<strong>on</strong>g sides of the fabric together.<br />
2. Stitch a 5 ⁄8-inch (1.5-cm) standard seam.<br />
Press open.<br />
S erging<br />
Techniques<br />
Narrow Rolled Seam<br />
A narrow rolled seam is especially good<br />
for lingerie fabrics and laces, which are<br />
sheer and lightweight.<br />
1. Pin the wr<strong>on</strong>g sides of the fabric<br />
together.<br />
2. Adjust the serger for a narrow rolled<br />
hem with a l.5- to 2.5-mm stitch<br />
length and a balanced tensi<strong>on</strong>.<br />
3. Serge the seam.<br />
LESSON 24 Sewing Special Seams • 547
S erging<br />
Techniques<br />
Reinforced Seam<br />
In areas of stress, combining a serged<br />
seam with <strong>on</strong>e sewn c<strong>on</strong>venti<strong>on</strong>ally creates<br />
a str<strong>on</strong>ger seam.<br />
1. Stitch the seam <strong>on</strong> a c<strong>on</strong>venti<strong>on</strong>al<br />
machine, using a straight stitch.<br />
2. Press the seam allowances flat, as<br />
they were stitched.<br />
3. Serge the edges together, using the<br />
two-thread serger stitch, 1 ⁄8 inch (3<br />
mm) from the seam line.<br />
3. Press both seam allowances to <strong>on</strong>e side.<br />
4. Trim the under-seam allowance to 1 ⁄8 inch (3<br />
mm).<br />
5. Fold in the edge of the upper seam allowance<br />
1<br />
⁄4 inch (6 mm). Place it over the trimmed<br />
seam allowance. Press.<br />
6. Stitch close to the folded edge through all<br />
thicknesses. See<br />
Fig. 24-2.<br />
24-2<br />
Seam<br />
Flat-Felled<br />
548 • PART 5 Special Sewing Techniques<br />
Double-Stitched Seam<br />
As described below, this seam works well <strong>on</strong><br />
curved seams, such as armhole or crotch seams.<br />
1. Stitch a 5 ⁄8-inch (1.5-cm) standard seam, with<br />
right sides of the fabric together.<br />
2. Stitch again about 1 ⁄8 inch (3 mm) from the<br />
seam line in the seam allowance. A narrow<br />
zigzag stitch can be used for this sec<strong>on</strong>d row<br />
of stitching.<br />
3. Trim the seam<br />
allowances close<br />
to the stitching.<br />
See Fig. 24-3.<br />
24-3<br />
Seam<br />
Double-Stitched<br />
DECORATIVE SEAMS<br />
Decorative seams create special effects with<br />
topstitching or cording. They give a sporty, tailored,<br />
or c<strong>on</strong>trasting finish to a garment.<br />
Decorative seams include the topstitched seam,<br />
welt seam, lapped seam, and piped or corded<br />
seam.<br />
Topstitched Seam<br />
Topstitching holds bulky seam allowances flat<br />
and emphasizes the seams of a garment.<br />
Topstitching can be d<strong>on</strong>e <strong>on</strong> <strong>on</strong>e or both sides of<br />
a seam. Follow these steps:<br />
1. Stitch a 5 ⁄8-inch (1.5-cm) standard seam.<br />
Press the seam allowances open.<br />
2. Topstitch al<strong>on</strong>g each side of the seam,<br />
through both layers of fabric. Keep stitching a<br />
straight and equal distance from the seam<br />
line. See Fig. 24-4.
24-4<br />
Double Row<br />
of Topstitching<br />
As an alternative, you can press both seam<br />
allowances to <strong>on</strong>e side as indicated <strong>on</strong> the pattern.<br />
Topstitch through all three layers of fabric.<br />
See Fig. 24-5.<br />
24-5<br />
Topstitching<br />
Welt Seam<br />
Because it’s less bulky than the flat-felled seam,<br />
a welt seam gives a tailored finish <strong>on</strong> heavier fabrics.<br />
Follow these steps:<br />
1. Stitch a 5 ⁄8-inch (1.5-cm) standard seam, with<br />
right sides of the fabric together. Press the<br />
seam open.<br />
2. Press both seam allowances to <strong>on</strong>e side.<br />
3. Trim the seam allowance against the garment<br />
to 1 ⁄4 inch (6 mm).<br />
4. Stitch from the outside through the garment<br />
and the wider seam allowance. Keep stitching<br />
an even distance from the seam line. See Fig.<br />
24-6.<br />
24-6<br />
Single row of<br />
Welt Seam<br />
S erging<br />
Techniques<br />
Topstitched Seam<br />
A serged seam can be topstitched <strong>on</strong>ce<br />
or twice for a sporty look. Press the<br />
serged seam to <strong>on</strong>e side. Then topstitch<br />
<strong>on</strong> a c<strong>on</strong>venti<strong>on</strong>al machine.<br />
Lapped Seam<br />
With this seam, <strong>on</strong>e piece is lapped over the<br />
other and topstitched in place. It is often used<br />
with natural or synthetic leather and suede.<br />
Follow these steps to make a lapped seam:<br />
1. Turn the seam allowance under <strong>on</strong> the secti<strong>on</strong><br />
to be lapped. Press. For leather and<br />
suede, trim away the seam allowance.<br />
2. Lap the folded<br />
or trimmed edge<br />
over the other<br />
piece at the seam<br />
line, wr<strong>on</strong>g side<br />
to right side.<br />
3. Edgestitch al<strong>on</strong>g<br />
the folded or<br />
trimmed edge.<br />
See Fig. 24-7. 24-7<br />
Lapped Seam<br />
LESSON 24 Sewing Special Seams • 549
S erging<br />
Techniques<br />
Flatlock Seam<br />
A flatlock seam is a good choice for<br />
straight seams <strong>on</strong> knit fabric.<br />
• The traditi<strong>on</strong>al flatlock seam is formed<br />
by using the two-thread serger stitch.<br />
• A mock flatlock seam is created with<br />
the three-thread serger stitch. Loosen<br />
the needle tensi<strong>on</strong> almost as much as<br />
possible, and tighten the lower looper<br />
tensi<strong>on</strong>. When the serger is properly<br />
adjusted, the needle thread forms a V<br />
<strong>on</strong> the underside of the fabric. The<br />
lower looper thread forms a straight<br />
line al<strong>on</strong>g the fabric edge.<br />
• For both types of flatlock seams, serge<br />
the seam. Then gently pull <strong>on</strong> the layers<br />
until the fabric lies flat and the cut<br />
edges meet. The stitch will have a<br />
ladder-like appearance <strong>on</strong> <strong>on</strong>e side of<br />
the garment and loops <strong>on</strong> the other.<br />
550 • PART 5 Special Sewing Techniques<br />
4. Topstitch again 1 ⁄4 inch (6 mm) from the<br />
edge.<br />
Piped or Corded Seam<br />
Piping is a narrow band of fabric stitched into<br />
a seam to accent the seam line or outer edge of a<br />
garment. As the procedure below describes, piping<br />
can be inserted into a seam while it is stitched.<br />
Cording covered with bias strips of fabric may<br />
also be used.<br />
1. Pin the piping or cording to the right side of<br />
<strong>on</strong>e fabric secti<strong>on</strong> al<strong>on</strong>g the seam line. Be<br />
sure the piping or cording is facing the garment<br />
and the seam allowance is toward the<br />
edge of the fabric.<br />
2. Stitch close to the seam line in the seam<br />
allowance, using a zipper foot.<br />
3. Pin the sec<strong>on</strong>d piece of fabric over the piping<br />
or cording, with right sides together.<br />
4. Stitch al<strong>on</strong>g the seam line through all thicknesses,<br />
using a zipper foot. See Fig. 24-8.<br />
24-8<br />
Piped Seam
Making Tucks and Pleats<br />
Tucks and pleats are folds of fabric that c<strong>on</strong>trol fullness or add design interest.<br />
They are folded and then pressed or stitched in place.<br />
TUCKS<br />
The narrow folds of fabric <strong>on</strong> tucks may be<br />
stitched part way or the entire length. The width<br />
of the tucks and the spacing between them varies<br />
according to design. See Fig. 25-1. The pattern<br />
indicates narrow pin tucks by a series of fold lines.<br />
Wide tucks usually have both fold and stitching<br />
lines indicated. Follow the pattern guide for<br />
stitching directi<strong>on</strong>s. The basic steps are as follows:<br />
25-1<br />
Tucks<br />
1. Mark the stitching and fold lines for each<br />
tuck. To save time, use clips to mark the ends<br />
of stitching lines, and notches to mark the<br />
ends of fold lines.<br />
2. Fold the fabric al<strong>on</strong>g the fold lines, matching<br />
stitching lines.<br />
3. Stitch each tuck from the side that will be<br />
seen after the tuck is pressed flat. Keep stitching<br />
straight and even. See Fig. 25-2.<br />
SEWING TIP<br />
Adding tucks. You can add your own<br />
tucks to a garment by tucking the fabric<br />
before cutting out the pattern pieces. Be<br />
sure to purchase extra fabric to allow for<br />
the tucks.<br />
25-2<br />
LESSON 25<br />
Stitching Tucks<br />
4. Press each tuck flat, as stitched. Then press<br />
each tuck to <strong>on</strong>e<br />
side, as shown <strong>on</strong><br />
the guide sheet.<br />
See Fig. 25-3.<br />
25-3<br />
Pressing Tucks<br />
PLEATS<br />
Pleats are folds of fabric that are wider than<br />
tucks and stitched or pressed in place. A garment<br />
may have <strong>on</strong>e single pleat or a series. Pleats can be<br />
pressed sharp al<strong>on</strong>g the edges or fall in soft folds.<br />
For a more tailored look, they can also be<br />
stitched.<br />
The way pleats are<br />
turned creates various<br />
effects. See Fig. 25-4.<br />
On knife pleats the<br />
folds are turned in <strong>on</strong>e<br />
directi<strong>on</strong>. Turning two<br />
pleats toward each<br />
other makes box pleats<br />
Knife Box Inverted<br />
and inverted pleats.<br />
Follow the guide sheet 25-4 Pleat Styles<br />
for specific instructi<strong>on</strong>s<br />
<strong>on</strong> folding, pressing, and stitching pleats.<br />
Some basic steps are provided here.<br />
LESSON 25 Making Tucks and Pleats • 551
Tucks<br />
S erging<br />
Techniques<br />
Tucks can be stitched <strong>on</strong> the serger.<br />
Mark and fold the fabric the same as for<br />
c<strong>on</strong>venti<strong>on</strong>al tucks.<br />
• For pin tucks, adjust the serger for the<br />
narrow rolled hemstitch.<br />
• For wider tucks, use the three-thread<br />
or four-thread serger stitch. Disengage<br />
the knife, or keep the fold slightly to<br />
the left of the knife so the fabric is not<br />
cut.<br />
• For decorative tucks, use metallic<br />
thread, embroidery<br />
floss, pearl cott<strong>on</strong>,<br />
or narrow<br />
ribb<strong>on</strong><br />
in the upper<br />
looper.<br />
Folding Pleats<br />
1. Mark the fold line<br />
and placement line<br />
for each pleat. If the<br />
pleats are to be made<br />
from the right side,<br />
clip and notch the<br />
ends of the lines or<br />
mark with a fabric<br />
marking pen.<br />
2. Fold the fabric,<br />
matching the fold<br />
25-5 Folding a Pleat<br />
and placement lines, and pin. See Fig. 25-5.<br />
An arrow <strong>on</strong> the pattern piece shows the<br />
directi<strong>on</strong> to fold.<br />
3. Stay-stitch the pleats al<strong>on</strong>g the upper seam<br />
line.<br />
Fold line<br />
Placement line<br />
552 • PART 5 Special Sewing Techniques<br />
Fold line<br />
Pressing Pleats<br />
1. Press pleats gently<br />
from the inside of<br />
the garment. If the<br />
pleats leave an<br />
impressi<strong>on</strong> <strong>on</strong> the<br />
fabric, slip strips of<br />
paper under each<br />
25-6 Pressing Pleats<br />
fold before pressing.<br />
See Fig. 25-6.<br />
2. Turn the garment to the right side.<br />
3. Press the pleats in place, using a press cloth.<br />
For soft pleats, press lightly. For sharp pleats,<br />
use plenty of steam and a damp press cloth.<br />
4. Let the pleats dry <strong>on</strong> the ir<strong>on</strong>ing board.<br />
Stitching Pleats<br />
Pleats may be topstitched or edgestitched for a<br />
smoother appearance. Stitching also holds the<br />
pleats in place. For pleats that are edgestitched<br />
and topstitched, do edgestitching first.<br />
Edgestitching, described here, gives a sharper<br />
crease al<strong>on</strong>g the outer<br />
or inner fold of a pleat.<br />
See Fig. 25-7.<br />
1. Complete the hem.<br />
2. Stitch from the bottom<br />
of the pleat to<br />
the top as close to<br />
the fold as possible. 25-7<br />
3. Repeat <strong>on</strong> the other<br />
fold of the pleat, if desired.<br />
Topstitching is stitched <strong>on</strong>ly part way, usually<br />
between the waist and hip areas. Use this technique.<br />
See Fig. 25-8.<br />
1. Topstitch from the<br />
right side through<br />
all thicknesses.<br />
Begin at the hip;<br />
d<strong>on</strong>’t backstitch.<br />
Stitch to pleat top.<br />
2. Pull threads to the 25-8<br />
Topstitching Pleats<br />
under side and tie.<br />
Edgestitching Pleats
Applying Interfacings<br />
Interfacing is a layer of fabric that is placed between the facing and the<br />
outer fabric of a garment. See Fig. 26-1. As part of the inner c<strong>on</strong>structi<strong>on</strong>,<br />
interfacing provides shape and support for the outer fabric, although it<br />
shouldn’t show <strong>on</strong> the outside.<br />
Interfacing gives shape to collars, cuffs, and<br />
waistbands. It prevents edges <strong>on</strong> necklines and<br />
fr<strong>on</strong>t closings from stretching and gives added<br />
body to a belt, bag, or hat. Sometimes a separate<br />
pattern piece is provided for interfacing. If not,<br />
the interfacing is cut from the facing, collar, cuff,<br />
or waistband pattern piece.<br />
Special woven, knitted, and n<strong>on</strong>woven interfacing<br />
fabrics are available in many types and<br />
weights. Sew-in interfacings are stitched by<br />
machine or by hand to the garment. Fusible interfacings<br />
are fused directly to the fabric with an<br />
ir<strong>on</strong>, using a combinati<strong>on</strong> of heat, steam, and<br />
pressure. Always follow the manufacturer’s fusing<br />
directi<strong>on</strong>s carefully.<br />
When choosing interfacing, always drape the<br />
garment fabric over the interfacing. How do the<br />
two fabrics look and feel together? Check to be<br />
sure they are compatible in weight and fiber c<strong>on</strong>tent.<br />
Also make sure the fabrics take the same<br />
cleaning and pressing methods.<br />
SEW-IN INTERFACING<br />
To use sew-in interfacing, cut the interfacing<br />
pieces according to the directi<strong>on</strong>s <strong>on</strong> the guide<br />
SEWING TIP<br />
26-1<br />
Interfacing adds shape<br />
to parts of a garment and<br />
keeps fabric from stretching.<br />
Interfacings. Usually the interfacing should be slightly lighter in<br />
weight than the outer fabric. Remember that some fusible interfacings<br />
are crisper after fusing. Always pretest <strong>on</strong> a scrap of fabric to be sure<br />
you like the results.<br />
LESSON 26<br />
sheet. Lightweight to medium-weight interfacing<br />
can be stitched into the seam of a garment.<br />
Follow these steps:<br />
1. Pin the interfacing to the wr<strong>on</strong>g side of the<br />
garment or facing.<br />
2. Machine-baste 1 ⁄2 inch (1.3 cm) from the fabric<br />
edge.<br />
3. Trim the interfacing close to the stitching. See<br />
Fig. 26-2.<br />
4. Catchstitch the<br />
interfacing by<br />
hand al<strong>on</strong>g a<br />
folded edge, such<br />
as an extended<br />
facing or cuff.<br />
26-2<br />
Stitching Interfacing<br />
LESSON 26 Applying Interfacings • 553
SEWING TIP<br />
Minimizing bulk. To minimize bulk, trim either sew-in or fusible<br />
interfacing diag<strong>on</strong>ally at corners. Trim just inside the point where the<br />
seam lines meet. Also trim off any hem allowances <strong>on</strong> the interfacing<br />
pieces before stitching or fusing to the garment fabric.<br />
FUSIBLE INTERFACING<br />
Before applying fusible interfacing to garment<br />
secti<strong>on</strong>s, test the fusing process <strong>on</strong> a scrap of fabric.<br />
If the interfacing leaves an outline al<strong>on</strong>g the<br />
edge, then fuse it to the facing rather than the garment.<br />
Follow these steps:<br />
554 • PART 5 Special Sewing Techniques<br />
1. Trim any corners or hem allowances. For<br />
medium-weight interfacings, trim away all<br />
seam allowances.<br />
2. Place the adhesive side of interfacing <strong>on</strong> the<br />
wr<strong>on</strong>g side of the fabric, matching the cut<br />
edges of the interfacing to the seam lines.<br />
3. Fuse in place, using a press cloth and following<br />
the fusing directi<strong>on</strong>s. See Fig. 26-3.<br />
26-3<br />
Applying Fusible Interfacing
Putting in Linings<br />
Alining is a layer of fabric attached to the inside of a garment. See<br />
Fig. 27-1. It is c<strong>on</strong>structed separately from the outer garment and<br />
then joined at <strong>on</strong>e or more major seams. A lining gives an attractive<br />
appearance to the inside of a garment and helps prevent the outer fabric<br />
from stretching and wrinkling. Some coat linings are backed with a<br />
napped finish or insulati<strong>on</strong> for added warmth. A lining may have a center<br />
back pleat to allow for movement.<br />
Lining fabrics are firmly woven and have a<br />
smooth, slippery texture. To choose a lining fabric,<br />
always drape the garment fabric over the lining<br />
fabric. Check to see how the two fabrics look<br />
and feel together.<br />
• Is the lining too soft or too crisp for the shape<br />
you want?<br />
• Does the color show through or change the<br />
color of the outer fabric?<br />
• Do the two fabrics have compatible fiber<br />
c<strong>on</strong>tent?<br />
• Can both fabrics be cleaned in the same<br />
manner?<br />
• Do they require pressing?<br />
CUTTING AND STITCHING<br />
Some linings are cut from the same pattern<br />
pieces as the outer fabric. A coat or jacket pattern,<br />
however, might have separate pattern pieces for<br />
lining.<br />
Follow the pattern guide sheet to stitch the lining<br />
pieces together. Seam finishes aren’t needed<br />
<strong>on</strong> the outer fabric or the lining unless the fabric<br />
Lining Hemmed Separately Attaching Lining to Hem<br />
27-1<br />
LESSON 27<br />
A lining gives support to<br />
a garment and adds a finished<br />
look.<br />
ravels easily. Use machine or hand stitching to<br />
attach the lining to the garment al<strong>on</strong>g the facing<br />
or the waistline seam.<br />
HEMMING<br />
Some linings are hemmed separately; others<br />
are sewn to the garment. See Fig. 27-2. Coat, skirt,<br />
and dress linings are usually hemmed separately.<br />
Make the lining hem 1 ⁄2 to 1 inch (1.3 to 2.5 cm)<br />
shorter than the outer garment. (See “Putting in<br />
Hems” <strong>on</strong> page 537.) For coats, use French tacks<br />
to hold the hems together at the seam lines.<br />
Jacket, sleeve, and pant linings are usually<br />
attached to the garment hem, as described here.<br />
1. Match the folded hem edges of the lining and<br />
garment.<br />
2. Pin the folded edge of the lining at least 1 ⁄2<br />
inch (1.3 cm) above the garment edge, creating<br />
a small tuck that allows for movement.<br />
3. Slip-stitch the edge of the lining to the garment<br />
hem.<br />
27-2<br />
Hemming the Lining<br />
LESSON 27 Putting in Linings • 555
LESSON 28<br />
Sewing Collars<br />
There are many different collar<br />
styles. Four collar styles are basic.<br />
See Fig. 28-1.<br />
• Flat collar. Lies flat against the garment.<br />
Both upper and lower collars are<br />
cut from the same pattern piece.<br />
• Rolled collar. Stands up at the back of<br />
the neck and then turns down to create<br />
a rolled edge around the neck. It can be<br />
cut with a <strong>on</strong>e-piece upper collar and a<br />
two-piece under collar that is slightly smaller.<br />
Another way is to cut the entire collar as <strong>on</strong>e<br />
piece and fold it at the outer edge.<br />
• Shirt collar. Has a separate stand, or band,<br />
that attaches the collar to the neckline.<br />
• Standing collar. Forms a band that stands<br />
straight up or folds over to create a turtleneck.<br />
Because a collar is close to your face and<br />
attracts attenti<strong>on</strong>, it should be well made and<br />
carefully pressed. The collar should have the following<br />
qualities: circles the neck smoothly without<br />
rippling; has fr<strong>on</strong>t points or curves with identical<br />
shape; and has an under collar that doesn’t<br />
show al<strong>on</strong>g the edge. A rolled collar and a shirt<br />
collar should cover the neck seam in back.<br />
Interfacing gives collars added shape and support.<br />
It is usually stitched or fused to the under<br />
collar. If the outer fabric is lightweight, however,<br />
the interfacing can be stitched to the upper collar<br />
to prevent the seam allowances from showing.<br />
To make a collar, c<strong>on</strong>struct it first and then<br />
attach it to the garment.<br />
CONSTRUCTING THE<br />
COLLAR<br />
To c<strong>on</strong>struct a collar, first cut out the collar and<br />
any facings. The upper and under collar may be<br />
cut from the same or separate pattern pieces. Some<br />
collars are cut from <strong>on</strong>e piece of fabric and folded<br />
lengthwise. After cutting, follow these steps:<br />
556 • PART 5 Special Sewing Techniques<br />
Flat<br />
28-1<br />
Types of Collars<br />
Shirt<br />
Rolled Standing<br />
1. Stitch or fuse the interfacing to the wr<strong>on</strong>g<br />
side of the under collar. For a <strong>on</strong>e-piece collar,<br />
catchstitch the interfacing al<strong>on</strong>g the fold<br />
line if the interfacing hasn’t been fused. Stitch<br />
the center back seam of the under collar, if<br />
necessary. Press the seam open and trim.<br />
2. Pin the collar secti<strong>on</strong>s with right sides<br />
together. Follow the pattern guide sheet for<br />
specific directi<strong>on</strong>s.<br />
3. Stitch the outer seam of the collar. Strengthen<br />
the corners or points with short reinforcement<br />
stitches.<br />
4. Trim and grade the seam allowances. See Fig.<br />
28-2. Trim the corners close to the stitching<br />
for crisp, sharp points. Clip or notch curved<br />
areas. Press the seam open, using a point<br />
presser.<br />
28-2<br />
Trimming and<br />
Grading Seam Allowances<br />
5. Turn the collar to the right side. See Fig. 28-3.<br />
Gently pull out the points. (To prevent poking<br />
a hole in the fabric, d<strong>on</strong>’t push the points<br />
out with scissors.)
28-3<br />
Turning the Collar<br />
6. Press the outer seam, rolling slightly to the<br />
collar’s underside.<br />
7. Understitch the under collar to the seam<br />
allowances to help prevent it from showing at<br />
the edge, or topstitch around the edge of the<br />
collar.<br />
For a shirt collar, stitch the collar band to the<br />
upper collar and the under collar at the inner<br />
edge. See Fig. 28-4. Trim, grade, clip, notch, and<br />
press the seams.<br />
28-4<br />
Attaching a Collar Band<br />
ATTACHING THE COLLAR<br />
A collar may be stitched to a garment with no<br />
facing, a partial neckline facing, or complete facing.<br />
Use the directi<strong>on</strong>s in your pattern guide<br />
sheet. The following steps are basic:<br />
Collar without Facing<br />
This method is used for shirt collars and<br />
standing collars.<br />
1. Stay-stitch the garment neckline and clip.<br />
2. Pin the under collar or band to the neckline,<br />
right sides together, matching all markings.<br />
3. Stitch the seam, trim, and clip. Press the seam<br />
toward the collar. See Fig. 28-5.<br />
28-5<br />
to Neckline<br />
Attaching Collar<br />
4. Turn in the seam allowance of the upper collar<br />
or band. Press. Trim the seam allowance to<br />
1 ⁄4 inch (6 mm).<br />
5. Pin the folded edge over the neckline seam.<br />
Machine-stitch close to the edge, or slipstitch<br />
by hand. See Fig. 28-6.<br />
28-6<br />
Folded Edge<br />
Stitching the<br />
Collar with Partial Facing<br />
This method is used for flat and rolled collars.<br />
1. Stay-stitch the garment neckline and clip.<br />
2. Pin the collar to the neckline, matching<br />
notches and markings.<br />
3. Machine-baste the collar to the neck edge<br />
between the fr<strong>on</strong>t openings and shoulder<br />
markings. Machine-baste the under collar<br />
<strong>on</strong>ly to the back neck edge between shoulder<br />
markings. See Fig. 28-7.<br />
4. Pin the fr<strong>on</strong>t facings to the<br />
neckline, with right sides<br />
together. Match all the<br />
markings. Clip the neck<br />
edges through all layers<br />
at both shoulder markings.<br />
5. Stitch the neck seam as basted,<br />
being careful not to catch<br />
the free edge of the collar back.<br />
See Fig. 28-8. Trim, grade, and<br />
clip the seam allowances.<br />
28-8<br />
28-7<br />
in Place<br />
Stitching Neck Seam<br />
Basting Collar<br />
LESSON 28 Sewing Collars • 557
Collar<br />
6. Turn the facing to the inside and press.<br />
7. Understitch the facing to the neckline seam<br />
allowances. Omit understitching<br />
if collar will be<br />
worn open.<br />
8. Turn under 5 ⁄8 inch (1.5 cm)<br />
<strong>on</strong> the raw edge of the collar<br />
back. Press. Trim to 1 ⁄4<br />
inch (6 mm). See Fig. 28-9.<br />
9. Slip-stitch the folded edge<br />
of the collar over the back<br />
neck seam. Tack the facing<br />
to the shoulder seam<br />
allowances.<br />
28-9<br />
S erging<br />
Techniques<br />
Use this method for a collar with a partial<br />
or full neckline facing.<br />
1. Follow Steps 1 to 5 for “Collar with<br />
Neckline Facing” to prepare facing,<br />
baste the collar to the neckline, and<br />
pin the facing to the neckline.<br />
2. Serge the neckline seam.<br />
3. Follow Steps 7 to 9 to turn, understitch,<br />
and tack the facing.<br />
Turning Collar Edge Under<br />
558 • PART 5 Special Sewing Techniques<br />
Collar with Neckline Facing<br />
1. Stitch facing secti<strong>on</strong>s together. Trim and<br />
press the seams. Finish the outer, unnotched<br />
edge of the facing.<br />
2. Stay-stitch the garment neckline and clip.<br />
3. Pin the collar to the neckline, matching<br />
notches and markings.<br />
4. Machine-baste the collar to the neck edge.<br />
See Fig. 28-10.<br />
28-10<br />
Neck Edge<br />
Basting Collar to<br />
5. Pin the facing to the neckline, with right sides<br />
together. Match markings and seam lines.<br />
6. Stitch the neckline seam. Trim, grade, and<br />
clip seam allowances. See Fig. 28-11.<br />
7. Turn the facing to the inside and press.<br />
8. Understitch the facing to the neckline seam<br />
allowances. See Fig. 28-12. If the collar will be<br />
worn open, understitch <strong>on</strong>ly the back facing.<br />
28-12<br />
and Tacking<br />
Understitching<br />
28-11<br />
Seam<br />
Stitching Neckline<br />
9. Tack the edge of the facing to the shoulder<br />
seam allowances.
Sewing Sleeves<br />
Because sleeves are so different, they are sewn with<br />
varied techniques. Sleeves can be finished at the bottom<br />
edge with a hem, facing, casing, or cuff. There are three<br />
basic sleeve styles. See Fig. 29-1.<br />
• Set-in sleeve. Joined to a garment by an<br />
armhole seam that circles the arm near the<br />
shoulder.<br />
• Raglan sleeve. Has a fr<strong>on</strong>t and back<br />
diag<strong>on</strong>al seam that extends from the<br />
neckline to the underarm.<br />
• Kim<strong>on</strong>o sleeve. Cut in <strong>on</strong>e piece with the<br />
fr<strong>on</strong>t and back of the garment.<br />
SET-IN SLEEVE<br />
Although it’s the most comm<strong>on</strong> sleeve style, a<br />
set-in sleeve is also the most difficult to sew. A<br />
set-in sleeve nearly always measures more than<br />
the armhole that holds it. With extra fullness, the<br />
sleeve fits well over the top curve of the arm and<br />
allows movement.<br />
Some set-in sleeves are very full across the cap,<br />
or top, of the sleeve. This fullness must be eased<br />
into the seam without any gathers or puckers.<br />
Other sleeves, <strong>on</strong> a tailored shirt, for example,<br />
have a short sleeve cap that is <strong>on</strong>ly slightly larger<br />
than the armhole.<br />
The two techniques for sewing a set-in sleeve<br />
are the open-sleeve and the closed-sleeve methods.<br />
Open-Sleeve Method<br />
The open-sleeve method is fast and easy but<br />
can <strong>on</strong>ly be used for sleeves that need little easing.<br />
Tailored shirts, sports shirts, and shirts with<br />
dropped shoulders are examples.<br />
With this method, the sleeve is first stitched to<br />
the armhole. See Fig. 29-2. Then the side and<br />
underarm seams are stitched in <strong>on</strong>e c<strong>on</strong>tinuous<br />
seam. Because the sleeve and garment seams<br />
remain open while the sleeve is attached, this<br />
Kim<strong>on</strong>o<br />
29-1<br />
Sleeve Styles<br />
LESSON 29<br />
Set-In<br />
Raglan<br />
method is also called<br />
the flat c<strong>on</strong>structi<strong>on</strong><br />
method. Follow these<br />
steps:<br />
1. Match the sleeve to<br />
the garment, right<br />
sides together, and<br />
pin.<br />
2. Stitch the seam with<br />
the sleeve side up. Ease<br />
in any fullness with<br />
your fingers as you<br />
sew.<br />
3. Stitch a sec<strong>on</strong>d row of stitching 3 ⁄8 inch (1<br />
cm) from the outer edge. Trim close to the<br />
stitching. Press the seam allowances toward<br />
the garment. Alternatives: topstitch <strong>on</strong> the<br />
outside of the garment 1 ⁄4 to 3 29-2<br />
Stitching Open<br />
Sleeve to Garment<br />
⁄8 inch (6 to 9<br />
mm) from the seam <strong>on</strong> the body side, or<br />
serge to finish the seam.<br />
LESSON 29 Sewing Sleeves • 559
29-3<br />
Stitching C<strong>on</strong>tinuous Underarm Seam<br />
4. Match and pin the side seam and underarm<br />
sleeve seam.<br />
5. Stitch the seam from the bottom of the garment<br />
to the end of the sleeve in <strong>on</strong>e c<strong>on</strong>tinuous<br />
line of stitching. See Fig. 29-3. Press the<br />
seams open. Alternatives: trim the seam<br />
allowances and zigzag together, or serge the<br />
seam.<br />
Closed-Sleeve Method<br />
Use the closed-sleeve method for sleeves with<br />
extra fullness across the sleeve cap. With this<br />
method, the underarm seam of the sleeve and the<br />
side seam of the garment are first stitched separately.<br />
Then the sleeve is attached to the armhole.<br />
Because the sleeve is completed before stitching<br />
to the armhole, this method is also called the unit<br />
method of c<strong>on</strong>structi<strong>on</strong>. Follow the directi<strong>on</strong>s in<br />
your pattern guide sheet. These are the basic<br />
steps:<br />
1. Using about 8 stitches per inch (3 mm in<br />
length), machine-baste close to the 5 ⁄8-inch<br />
(1.5-cm) seam line within the seam<br />
allowance. Stitch around the top of the sleeve<br />
between the notches. If the sleeve cap is full,<br />
the pattern guide sheet will recommend a<br />
sec<strong>on</strong>d row of machine basting 3 ⁄8 inch (l cm)<br />
from the outer edge. See Fig.<br />
29-4.<br />
29-4<br />
<strong>on</strong> Sleeve<br />
560 • PART 5 Special Sewing Techniques<br />
Machine Basting<br />
2. Stitch the underarm seam of the sleeve, and<br />
stitch the garment side seam separately. Press<br />
seams open.<br />
3. Pull up the bobbin thread ends of the<br />
machine basting until the sleeve cap fits the<br />
armhole. Adjust the fullness evenly between<br />
the notches.<br />
4. Turn the garment wr<strong>on</strong>g side out. Turn the<br />
sleeve right side out and slip it inside the<br />
armhole.<br />
5. Pin the sleeve to the<br />
garment, with right<br />
sides together. Match<br />
the underarm seams,<br />
shoulder markings,<br />
and notches. Adjust<br />
the fullness. Place<br />
pins at right angles<br />
to the seam line so<br />
they can be easily<br />
removed as you sew.<br />
See Fig. 29-5.<br />
6. Stitch the sleeve to<br />
the armhole with<br />
the sleeve side up.<br />
This allows you to<br />
c<strong>on</strong>trol fullness and<br />
prevents tucks or<br />
puckers from forming.<br />
See Fig. 29-6.<br />
7. Reinforce the armhole<br />
seam with a<br />
sec<strong>on</strong>d row of<br />
stitches 3 29-5 Pinning and<br />
Adjusting Fullness<br />
29-6 Stitching Sleeve to<br />
Armhole<br />
⁄8 inch (1<br />
cm) from the outer edge. Trim close to the<br />
stitching or serge to finish the seam. Some<br />
armhole seams are reinforced <strong>on</strong>ly in the<br />
underarm secti<strong>on</strong>. Stitch from notch to<br />
notch.<br />
8. Press the seam allowances together from the<br />
sleeve side, using the side of the ir<strong>on</strong>. See Fig.<br />
29-7. Do not press the seam from the right<br />
side of the garment. An armhole seam is sup-
posed to be gently<br />
curved. Turn the<br />
seam allowances<br />
toward the sleeve.<br />
RAGLAN<br />
SLEEVE<br />
A raglan sleeve is 29-7 Pressing Seam<br />
loose fitting and com-<br />
Allowances<br />
fortable to wear. A<br />
shoulder dart or seam<br />
shapes the sleeve over the shoulder area. Follow<br />
these steps to make this sleeve:<br />
1. Stitch the shoulder dart or seam. Slash and<br />
press open. See Fig. 29-8.<br />
29-8<br />
Sleeve<br />
2. Pin the diag<strong>on</strong>al seams of the sleeve to the<br />
garment, with right sides together. Match<br />
notches, markings, and underarm seams.<br />
3. Stitch the seams.<br />
See Fig. 29-9.<br />
29-9<br />
Seams<br />
Dart in a Raglan<br />
Stitching Diag<strong>on</strong>al<br />
4. Reinforce the underarm secti<strong>on</strong> between the<br />
notches by stitching again, 3 ⁄8 inch (1 cm) from<br />
the outer edge, or serge to finish the seam.<br />
5. Clip at the end of the sec<strong>on</strong>d row of stitching.<br />
Trim the underarm seams. Press the seams<br />
open between notches and neckline.<br />
6. Stitch the underarm seam of the sleeve and<br />
side seam, and press open. See Fig. 29-10.<br />
Alternatives: trim the seam allowances and<br />
zigzag together, or serge the underarm seam<br />
of the sleeve and side seam.<br />
29-10<br />
Seams<br />
Sleeves<br />
S erging<br />
Techniques<br />
For sweatshirts and similar sportswear<br />
knit garments, use the two-thread flatlock<br />
or three-thread, mock, flatlock<br />
stitch to join the sleeve to the garment.<br />
(See Steps 3 and 4 for the “Raglan<br />
Sleeve.”) Use the three-thread or fourthread<br />
serger stitch to serge the underarm<br />
seam.<br />
Stitching Underarm<br />
KIMONO SLEEVE<br />
This is the easiest<br />
sleeve for a beginner<br />
because it’s simply an<br />
extensi<strong>on</strong> of the garment<br />
fr<strong>on</strong>t and back.<br />
Here’s the procedure.<br />
See Fig. 29-11.<br />
1. Stitch the shoulder<br />
seam, right sides<br />
together. Press open.<br />
2. Stitch the underarm seam.<br />
3. Reinforce the underarm seam with a sec<strong>on</strong>d<br />
row of stitching 3 29-11<br />
Stitching a Kim<strong>on</strong>o<br />
Sleeve<br />
⁄8 inch (1 cm) from the outer<br />
edge. To give the seam extra strength, sew a<br />
piece of seam tape over the curved underarm<br />
seam, stitching through all layers.<br />
4. Clip the curve of the seam, but d<strong>on</strong>’t clip the<br />
seam tape. Press the seam open, or trim the<br />
seam and zigzag the seam allowances together.<br />
You can also serge to finish the seam.<br />
LESSON 29 Sewing Sleeves • 561
LESSON 30<br />
Sewing Cuffs<br />
Cuffs give a tailored finish to the end of a sleeve. They have three<br />
basic styles: fold-up, band, and butt<strong>on</strong>ed. See Figs. 30-1, 30-2, and<br />
30-3. Some cuffs are interfaced. Follow<br />
your pattern guide sheet and the informati<strong>on</strong><br />
<strong>on</strong> interfacings.<br />
FOLD-UP CUFF<br />
A fold-up cuff is actually a deep hem at the<br />
bottom of a sleeve or pant leg, but it’s folded to<br />
the right side of the garment. You can create this<br />
cuff with the following procedure:<br />
1. Finish the lower edge of the fabric with a<br />
zigzag, hemmed, or bound finish. (See the<br />
seam finishes <strong>on</strong> page 523.)<br />
2. Turn the cuff to the inside al<strong>on</strong>g the fold line<br />
and pin.<br />
3. Hem by hand or use machine stitching. See<br />
Fig. 30-4.<br />
30-4<br />
Fold-Up Cuff<br />
Hemming a<br />
30-1<br />
Fold-Up Cuff<br />
4. Turn the lower edge of the garment to the<br />
right side al<strong>on</strong>g the hemline to form a cuff.<br />
5. Tack or stitch-in-the-ditch to hold the cuff in<br />
place at each seam.<br />
See Fig. 30-5.<br />
30-5<br />
Cuff<br />
562 • PART 5 Special Sewing Techniques<br />
Tacking Fold-Up<br />
30-2<br />
Band Cuff<br />
30-3<br />
Butt<strong>on</strong>ed Cuff<br />
BAND CUFF<br />
A band cuff has no side opening, so it must be<br />
large enough for your hand to slip through easily.<br />
Follow these steps to make the cuff:<br />
1. Interface the cuff, if desired.<br />
2. Fold the unnotched seam allowance of the<br />
cuff to the inside and press. Trim the seam<br />
allowance to 1 ⁄4 inch (6 mm).<br />
3. Pin the notched edge of the cuff to the bottom<br />
edge of the sleeve, right sides together,<br />
matching markings. Adjust fullness.<br />
4. Stitch the seam with the sleeve side up. Trim,<br />
grade, and press the seam allowances toward<br />
the cuff. See Fig. 30-6.<br />
30-6<br />
to Sleeve<br />
Stitching Band<br />
5. Stitch the sleeve and cuff seams. Trim the cuff<br />
and press the seams open. See Fig. 30-7.<br />
30-7<br />
Stitching Sleeve and Cuff Seam
6. Fold the cuff in half al<strong>on</strong>g<br />
the fold line, wr<strong>on</strong>g sides<br />
together.<br />
7. Pin the folded edge of the<br />
cuff over the seam line.<br />
Topstitch from the right<br />
side or slip-stitch the edge<br />
in place. See Fig. 30-8.<br />
BUTTONED CUFF<br />
A butt<strong>on</strong>ed cuff fits snugly around the wrist<br />
and fastens with a butt<strong>on</strong> or other fastener. There<br />
must be an opening in the sleeve to allow the cuff<br />
to slide over the hand. The opening, called a<br />
placket, is sewn before attaching the cuff.<br />
Sewing Sleeve Plackets<br />
A placket is a slit at the wrist, neck, or waist of<br />
a garment to make it easier to put <strong>on</strong> and take off.<br />
The three most comm<strong>on</strong> sleeve plackets are<br />
faced, c<strong>on</strong>tinuous lap, and banded plackets. See<br />
Fig. 30-9. The pattern guide sheet gives complete<br />
directi<strong>on</strong>s for making the placket for a particular<br />
garment. Basic procedures are covered here.<br />
Faced Placket<br />
A faced placket forms a split opening that can<br />
be used <strong>on</strong> a sleeve or neckline.<br />
1. Finish the edge of the placket facing.<br />
2. Center the placket over the opening, with<br />
right sides together.<br />
30-9<br />
Sleeve Plackets<br />
30-8<br />
Cuff in Place<br />
Stitching<br />
3. Stitch al<strong>on</strong>g the stitching lines, using short<br />
reinforcement stitches. Take <strong>on</strong>e small stitch<br />
across the point. See Fig. 30-10.<br />
30-10<br />
Placket<br />
4. Slash carefully up to the point.<br />
5. Turn the facing to the inside and press. See<br />
Fig. 30-11.<br />
30-11<br />
Placket<br />
Stitching a Faced<br />
Completed Faced<br />
C<strong>on</strong>tinuous Lap Placket<br />
A c<strong>on</strong>tinuous lap is a narrow binding that<br />
overlaps at the opening. It can be used <strong>on</strong> sleeves<br />
or the waistline of pants, skirts, and shorts.<br />
1. Stay-stitch the placket opening al<strong>on</strong>g the<br />
stitching lines, using reinforcement stitches.<br />
Take <strong>on</strong>e small stitch across the point.<br />
2. Slash carefully<br />
up to the point.<br />
See Fig. 30-12.<br />
30-12<br />
Faced C<strong>on</strong>tinuous Lap Banded<br />
Stitching Placket Opening<br />
LESSON 30 Sewing Cuffs • 563
Open the slash until the line of stitching is<br />
almost straight.<br />
3. Cut a fabric strip 1 1 ⁄2 inches wide (3.8 cm)<br />
and twice the length of the slash. Pin the fabric<br />
strip to the slashed edge, matching the<br />
right side of the strip to the wr<strong>on</strong>g side of the<br />
sleeve so that the stitching line is 1 ⁄4 inch (6<br />
mm) from the edge of the strip. The fabric<br />
edges will not match.<br />
4. Stitch al<strong>on</strong>g the first row of stitching. See Fig.<br />
30-13. Press the seam allowances toward the<br />
fabric strip.<br />
30-13<br />
Attaching Fabric Strip<br />
5. Turn in the raw edge of the fabric strip 1 ⁄4<br />
inch (6 mm) and pin over the seam. Topstitch<br />
in place. See Fig. 30-14.<br />
30-14<br />
Topstitching Fabric Strip<br />
6. Press the fr<strong>on</strong>t porti<strong>on</strong> of the lap to the inside<br />
and baste in place across the lower edge of the<br />
opening. See Fig. 30-15.<br />
30-15<br />
the Lap<br />
Completing<br />
564 • PART 5 Special Sewing Techniques<br />
Banded Placket<br />
A banded placket gives a tailored<br />
finish to a sleeve. It is similar<br />
to the neckline placket used<br />
<strong>on</strong> a shirtfr<strong>on</strong>t. The placket can<br />
be <strong>on</strong>e or two pieces.<br />
1. Reinforce the opening with<br />
stitching.<br />
2. Slash and clip into the corners.<br />
See Fig. 30-16. 30-16 Opening<br />
3. Stitch under the lap to the for Banded<br />
back edge of the opening,<br />
following directi<strong>on</strong>s in the<br />
guide sheet. See Fig. 30-17.<br />
Placket<br />
4. Stitch the overlap to the fr<strong>on</strong>t edge of the<br />
opening. See Fig. 30-18.<br />
5. Overlap the placket and stitch at the upper<br />
edge. Stitch through all thicknesses across the<br />
point and around the edges. See Fig. 30-19.<br />
30-17<br />
30-19<br />
Adding the Underlap<br />
30-18<br />
Completing the Overlap<br />
Adding the Overlap
Sewing Butt<strong>on</strong>ed Cuff<br />
Some butt<strong>on</strong>ed cuffs are cut in <strong>on</strong>e piece and<br />
folded lengthwise. Others are cut in two pieces<br />
and stitched al<strong>on</strong>g the outer edge. Follow these<br />
steps to sew the cuffs:<br />
1. Complete the sleeve opening.<br />
2. Interface the cuff, if desired.<br />
3. Fold the l<strong>on</strong>g, unnotched edge of the cuff to<br />
the inside and press. Trim to 1 ⁄4 inch (6 mm).<br />
See Fig. 30-20.<br />
30-20<br />
Folding Cuff to Inside<br />
4. Stitch the ends of the cuff, right sides together,<br />
or stitch the cuff secti<strong>on</strong>s together al<strong>on</strong>g<br />
the outer edge. Trim and grade the seams and<br />
press. Turn the cuff to the right side.<br />
5. Pin the cuff to the gathered sleeve edge, right<br />
sides together, matching notches and markings.<br />
For a shirtsleeve, the cuff edges will be<br />
even with the placket edges. For other sleeve<br />
openings, the cuff will extend bey<strong>on</strong>d the<br />
back edge of the placket.<br />
6. Stitch the seam. Trim, grade, and clip the<br />
seam allowances. Press the seam allowances<br />
toward the cuff. See Fig. 30-21.<br />
30-21<br />
Seam<br />
Stitching the Cuff<br />
7. Place the folded edge of the cuff over the<br />
seam and extensi<strong>on</strong> end. Topstitch in place<br />
from the right side. If desired, topstitch the<br />
outer edge of the cuff.<br />
8. Make machine butt<strong>on</strong>holes and attach the<br />
butt<strong>on</strong>s. See Fig. 30-22.<br />
30-22<br />
Butt<strong>on</strong>hole<br />
Adding Butt<strong>on</strong> and<br />
LESSON 30 Sewing Cuffs • 565
LESSON 31<br />
Sewing Pockets<br />
Pockets can be functi<strong>on</strong>al, decorative, or both. A pocket c<strong>on</strong>cealed in a side<br />
seam is purely functi<strong>on</strong>al, while a patch pocket is both functi<strong>on</strong>al and decorative.<br />
Before adding a pocket, check the locati<strong>on</strong> to be sure the placement is correct for your<br />
height and size. You may have to raise or lower it for c<strong>on</strong>venience or for better proporti<strong>on</strong>.<br />
Pocket styles vary. Some are located inside the<br />
garment and open through a seam or slash.<br />
Others are stitched <strong>on</strong> the outside of the garment.<br />
Some may have a flap covering the top of the<br />
pocket.<br />
Three pockets that are easy to make are the inseam<br />
pocket, the patch pocket, and the fr<strong>on</strong>t hip<br />
pocket. See Figs. 31-1, 31-2, and 31-3.<br />
31-2<br />
Patch Pocket<br />
Pocket<br />
31-3<br />
31-1<br />
566 • PART 5 Special Sewing Techniques<br />
In-Seam<br />
Fr<strong>on</strong>t Hip Pocket<br />
IN-SEAM POCKET<br />
As the easiest to make, the in-seam pocket is<br />
simply attached to the side seam of the garment.<br />
It can be cut as part of the garment fr<strong>on</strong>t and<br />
back, or it can be cut from a separate pattern<br />
piece and stitched to the seam. If the outer fabric<br />
is bulky or heavy, cut the pocket pieces from lining<br />
fabric. All c<strong>on</strong>structi<strong>on</strong> is d<strong>on</strong>e <strong>on</strong> the inside<br />
of the garment, as you’ll see in the following<br />
steps:<br />
1. If the pocket is cut separately, stitch the pocket<br />
pieces to the fr<strong>on</strong>t and back opening, right<br />
sides together. Press the seam allowances<br />
toward the pocket pieces.<br />
2. Pin the garment fr<strong>on</strong>t to the garment back,<br />
matching markings at the seam line and<br />
pocket.<br />
3. Stitch directi<strong>on</strong>ally al<strong>on</strong>g the seam and<br />
around the pocket in <strong>on</strong>e step. Use reinforcement<br />
stitches at the corners. Press the seam<br />
allowances flat. See Fig. 31-4.<br />
31-4<br />
One Step<br />
Stitching Seam in<br />
4. Turn the pocket toward the fr<strong>on</strong>t of the garment.<br />
Clip the back seam allowance above<br />
and below the pocket so the seam allowances<br />
of the garment can be pressed open.<br />
5. If necessary, finish the seam allowances. See<br />
Fig. 31-5.
Reinforcing in-seam pockets. When making an in-seam pocket,<br />
you may want to reinforce the pocket opening to prevent stretching.<br />
Stitch a piece of seam tape or twill tape al<strong>on</strong>g the fr<strong>on</strong>t and<br />
back fold line or seam line. As an alternative, you can fuse a strip<br />
of interfacing al<strong>on</strong>g the opening edge of the pocket.<br />
31-5<br />
Allowances<br />
SEWING TIP<br />
Finishing Seam<br />
PATCH POCKET<br />
Patch pockets are made from the same fabric<br />
as the garment and stitched to the outside by<br />
machine or hand. If using a plaid, stripe, or printed<br />
fabric, match the pocket to the garment, or cut<br />
the pocket <strong>on</strong> the bias for a special design effect.<br />
When making a pair of patch pockets, be sure<br />
both pockets are the same size and shape. Attach<br />
the pockets to the garment evenly.<br />
Patch pockets may have straight or curved<br />
sides and be lined or unlined. A lining is needed<br />
for fabrics that stretch or sag. Fabrics that are<br />
firm enough to hold their shape can be used<br />
without a lining. Sometimes a flap is stitched<br />
above the pocket.<br />
The instructi<strong>on</strong>s that follow outline procedures<br />
for making different patch pockets.<br />
Unlined Patch Pocket<br />
1. Turn under the top edge of the pocket hem 1 ⁄4<br />
inch (6 mm), press, and stitch.<br />
2. Turn the hem to the right side of the pocket<br />
al<strong>on</strong>g the fold line, and pin.<br />
3. Stay-stitch around the pocket <strong>on</strong> the seam<br />
line, beginning at the fold line of the hem.<br />
Stay-stitching acts as a guide for turning and<br />
pressing the edges and corners.<br />
4. Trim and grade the seam allowances. Trim<br />
the upper corners diag<strong>on</strong>ally. See Fig. 31-6.<br />
Turn the hem right side out and press.<br />
31-6<br />
Hemming Pocket<br />
5. Fold in the seam allowances al<strong>on</strong>g the stitching<br />
and press. Square corners must be<br />
mitered, made to fit together with a precise<br />
right angle at the corner; curved edges must<br />
be notched. These procedures are described<br />
in the following secti<strong>on</strong>s.<br />
6. Stitch the edge of the hem to the pocket by<br />
hand, or topstitch from the right side. See Fig.<br />
31-7 <strong>on</strong> page 568.<br />
7. Pin the pocket to the garment. Topstitch<br />
around the edge of the pocket, or slip-stitch<br />
in place. Reinforce the corners by backstitch-<br />
LESSON 31 Sewing Pockets • 567
31-7<br />
Hem<br />
Stitching Pocket<br />
31-8<br />
Pocket<br />
ing or by stitching a small triangle or square.<br />
See Fig. 31-8.<br />
Mitering Square Corners<br />
Miter square corners to eliminate bulk and<br />
form a flat, smooth right angle.<br />
1. Open out the seam allowances.<br />
2. Trim each corner diag<strong>on</strong>ally to 1 ⁄4 inch (6<br />
mm) from the fold.<br />
3. Fold the corner in diag<strong>on</strong>ally and press. See<br />
Fig. 31-9.<br />
31-9<br />
568 • PART 5 Special Sewing Techniques<br />
Completing Patch<br />
Mitering a Corner<br />
SEWING TIP<br />
Blind hem foot. Use a blind hem foot<br />
to help keep topstitching straight and<br />
even.<br />
4. Refold the seam allowances <strong>on</strong> both sides of<br />
the corner to form a square edge, and press<br />
again.<br />
Curving Edges<br />
Extra fabric must be eased in when pocket edges<br />
are curved. Follow these steps. See Fig. 31-10.<br />
1. Machine-baste around the curved edges 1 ⁄2<br />
inch (1.3 cm) from<br />
the outer edge.<br />
2. Pull <strong>on</strong> the bobbin<br />
thread until the seam<br />
allowance curves in<br />
and lies flat.<br />
3. Trim and notch the<br />
seam allowance to 31-10 Making Curved<br />
eliminate bulk and Pocket<br />
puckers.<br />
4. Press.<br />
Lined Patch Pocket<br />
1. Pin the upper edge of the lining to the upper<br />
edge of the pocket, right sides together.<br />
2. Stitch <strong>on</strong> the seam line, leaving a 1-inch (2.5cm)<br />
opening in the center for turning. See<br />
Fig. 31-11. Press the seam toward the lining.<br />
31-11<br />
Attaching<br />
Lining to Pocket<br />
3. Fold the pocket, right sides together, al<strong>on</strong>g<br />
the upper fold line.<br />
4. Pin and stitch the lining to the pocket around<br />
all three sides. Trim and grade the seam<br />
allowances. See Fig. 31-12. Clip the corners<br />
and notch the curved areas.<br />
5. Turn the pocket right side out through the<br />
opening. Roll the seam slightly toward the<br />
lining and press.
31-13<br />
Opening<br />
Slip-Stitching the<br />
6. Slip-stitch the opening closed. See Fig. 31-13.<br />
7. Pin the pocket to the garment, and topstitch<br />
or slip-stitch in place.<br />
Pocket Flap<br />
If a pocket flap is planned, follow these steps to<br />
add <strong>on</strong>e:<br />
1. Interface the outer half of the flap.<br />
2. Fold the flap in half, right sides together, and<br />
stitch the end seams, or pin two flap secti<strong>on</strong>s<br />
together and stitch around the outer edge.<br />
Trim and grade the seam allowances. See Fig.<br />
31-14. Notch any curved areas.<br />
31-14<br />
31-12<br />
to Pocket<br />
Stitching End Seams of Flap<br />
Stitching Lining<br />
3. Turn the flap right side out and press.<br />
4. Pin the flap above the pocket, with the outer<br />
side of the flap against the outside of the garment.<br />
Match the seam line of the flap to the<br />
placement line <strong>on</strong> the garment.<br />
5. Stitch through all thicknesses. Trim the seam<br />
allowance next to the garment close to the<br />
stitching. See Fig. 31-15.<br />
31-15<br />
S erging<br />
Techniques<br />
Curved Patch Pocket<br />
The following technique makes the seam<br />
allowances curl to the inside of a curved<br />
patch pocket:<br />
1. Set the machine for the widest threethread<br />
serger stitch. Adjust the tensi<strong>on</strong>s<br />
so the needle is normal, the<br />
upper looper slightly tight, and the<br />
lower looper slightly loose.<br />
2. Serge around the outside edge of the<br />
pocket, with the needle just inside the<br />
seam line. When you reach the curved<br />
area, tighten the needle tensi<strong>on</strong>. When<br />
you are past it, set the needle tensi<strong>on</strong><br />
back to normal.<br />
to Pocket<br />
Attaching Flap<br />
Tighten<br />
needle<br />
tensi<strong>on</strong><br />
around<br />
curves<br />
6. Fold under the l<strong>on</strong>g edge of the upper seam<br />
allowance, turning the ends in diag<strong>on</strong>ally. Pin<br />
over the trimmed edge and edgestitch. See<br />
Fig. 31-16 <strong>on</strong> page 570.<br />
LESSON 31 Sewing Pockets • 569
31-16<br />
the Flap<br />
Completing<br />
7. Turn the flap down and press.<br />
8. Slip-stitch the upper corners of the flap to the<br />
garment to hold in place.<br />
FRONT HIP POCKET<br />
Fr<strong>on</strong>t hip pockets are often used <strong>on</strong> pants and<br />
shorts. This diag<strong>on</strong>al or curved pocket attaches to<br />
the waist and side seams. Because the back secti<strong>on</strong><br />
of the pocket is part of the main garment at<br />
the fr<strong>on</strong>t of the hip, it must be cut from the garment<br />
fabric. The inside fr<strong>on</strong>t secti<strong>on</strong> of the pocket<br />
can be cut from the same fabric or a<br />
lining fabric. Follow these steps to<br />
make the pocket:<br />
1. To prevent stretching, reinforce<br />
the upper edge of the pocket<br />
with interfacing or seam<br />
tape. See Fig. 31-17.<br />
31-17<br />
2. Pin the fr<strong>on</strong>t edge of the<br />
Reinforcing<br />
garment to the fr<strong>on</strong>t Pocket Edge<br />
pocket secti<strong>on</strong>, right<br />
sides together. Stitch, trim, and<br />
grade the seam. See Fig. 31-18.<br />
Press.<br />
31-18<br />
Stitching Fr<strong>on</strong>t Pocket to Garment<br />
570 • PART 5 Special Sewing Techniques<br />
3. Understitch or topstitch the seam to prevent<br />
the pocket from rolling to the right side of<br />
the garment. See Fig. 31-19.<br />
4. Pin the back secti<strong>on</strong> of the pocket to the fr<strong>on</strong>t<br />
secti<strong>on</strong>, right sides together. Stitch around<br />
the seam line, being careful not to catch in<br />
the garment fr<strong>on</strong>t. Press the seam flat. Finish<br />
the raw edges with zigzag stitching. See Fig.<br />
31-20.<br />
31-20<br />
to Back<br />
Attaching Fr<strong>on</strong>t<br />
31-19<br />
Understitching Seam<br />
5. Pin and stitch the side seams, catching in the<br />
back secti<strong>on</strong> of the pocket as part of the garment<br />
fr<strong>on</strong>t.<br />
6. Finish the waistline according to the pattern<br />
directi<strong>on</strong>s. See Fig. 31-21.<br />
31-21<br />
and Hip Pockets<br />
Finished Waistlines
Finishing Waistlines<br />
The waistline of a garment can be finished with a waistband, facing, or casing.<br />
Most waistlines fall at the natural waistline. Some garments, however, may have a<br />
raised or lowered waistline, depending <strong>on</strong> the design.<br />
WAISTBANDS<br />
A waistband is a strip of fabric attached to the<br />
waistline of pants, skirts, or shorts. Both straight<br />
and curved waistbands are attached to the garment<br />
in the same way. A straight waistband, however,<br />
usually has a fold al<strong>on</strong>g the upper edge,<br />
while a curved, or shaped, waistband has a seam.<br />
To allow for movement and comfort, the waistband<br />
should be about 1 inch (2.5 cm) larger than<br />
the waistline. It shouldn’t fit too tight. Easing or<br />
gathering the garment <strong>on</strong>to the waistband allows<br />
for the body’s curve below the waistline.<br />
Usually the zipper is inserted before the waistband<br />
is applied. A side opening is always <strong>on</strong> the<br />
left side, and the waistband laps from fr<strong>on</strong>t to<br />
back. If the opening is in the fr<strong>on</strong>t, the waistband<br />
overlaps in the same directi<strong>on</strong> as the lapped zipper<br />
applicati<strong>on</strong>. If the opening is in the center<br />
back, the waistband laps left over right.<br />
Interface a waistband to prevent stretching and<br />
wrinkling. Usually the side that will be <strong>on</strong> the<br />
outside of the garment is interfaced. Follow pattern<br />
directi<strong>on</strong>s.<br />
SEWING TIP<br />
LESSON 32<br />
Plain Waistband<br />
A plain waistband is stitched to the right side<br />
of the garment, turned to the inside, and stitched<br />
by hand.<br />
1. Interface the waistband.<br />
2. Turn in the seam allowance <strong>on</strong> the<br />
unnotched edge of the waistband and press.<br />
Trim the seam allowance to 1 ⁄4 inch (6 mm).<br />
See Fig. 32-1.<br />
3. Pin the waistband to the garment, right sides<br />
together. Match the notches and ease the garment<br />
to the waistband between markings.<br />
Check that the extensi<strong>on</strong> is <strong>on</strong> the correct<br />
side of the opening.<br />
32-1<br />
Seam Allowance<br />
Interfacing and Turning<br />
Stays. A stay, or support, can be stitched over the waistline<br />
seam to prevent stretching. Cut the stay from seam tape, twill<br />
tape, or grosgrain ribb<strong>on</strong>, making it the same length as the<br />
waistline measurement of the garment. To attach the stay, pin<br />
it to the seam allowance <strong>on</strong> the bottom secti<strong>on</strong> of the garment,<br />
with <strong>on</strong>e edge al<strong>on</strong>g the waistline seam. Machine-stitch just above the waistline<br />
seam through the stay and seam allowances. Trim the seam allowances even with the<br />
stay. Zigzag the upper edge of the stay and the seam allowances together.<br />
LESSON 32 Finishing Waistlines • 571
S erging<br />
Techniques<br />
Plain Waistband<br />
With heavyweight or bulky fabrics, it may<br />
be helpful to eliminate a layer of fabric<br />
at the waistline seam of a plain waistband.<br />
Serge al<strong>on</strong>g the unnotched edge of<br />
the waistband, trimming off the 5 ⁄8-inch<br />
(1.5-cm) seam allowances.<br />
When turning the waistband<br />
right side out,<br />
place the serged edge so<br />
that it meets the waistband<br />
seam <strong>on</strong> the<br />
inside of the garment.<br />
4. Stitch the waistband to the garment al<strong>on</strong>g the<br />
seam line. Trim the<br />
interfacing close to<br />
the stitching. Trim<br />
and grade the<br />
seam allowances;<br />
clip if necessary.<br />
Press the seams 32-2 Attaching the<br />
flat and then up Waistband<br />
toward the waistband.<br />
See Fig. 32-2.<br />
5. Fold the ends of the waistband, right sides<br />
together as shown in Fig. 32-2. Pin carefully,<br />
being sure the folded edge exactly meets the<br />
seam line.<br />
6. Stitch both ends. Trim and grade the seam<br />
allowances. Clip the corners, and press.<br />
7. Turn the waistband right side out. Pin the<br />
folded edge over the seam.<br />
8. Slip-stitch the waistband in place, c<strong>on</strong>tinuing<br />
across the extensi<strong>on</strong>. See Fig. 32-3.<br />
9. Attach the fasteners.<br />
572 • PART 5 Special Sewing Techniques<br />
32-3<br />
Waistband<br />
Slip-Stitching<br />
Topstitched Waistband<br />
A topstitched waistband is stitched to the<br />
wr<strong>on</strong>g side of the garment, turned to the outside,<br />
and topstitched in place.<br />
1. Interface the waistband.<br />
2. Turn in the unnotched edge of the waistband<br />
al<strong>on</strong>g the seam line<br />
and press. Trim to 1 ⁄4<br />
inch (6 mm). See Fig.<br />
32-4.<br />
32-4<br />
Trimming Unnotched Edge<br />
3. Pin the right side of the waistband to the<br />
wr<strong>on</strong>g side of the garment, matching notches<br />
and markings. Check to be sure the waistband<br />
will flip over so the right side is <strong>on</strong><br />
the outside of the garment.<br />
4. Stitch the seam. Grade the seam allowances<br />
so the widest layer is toward the outside of<br />
the garment. See Fig. 32-5. Clip if necessary.<br />
Press the seam allowances up toward the<br />
waistband.<br />
32-5<br />
Grading Seam<br />
Stitching and<br />
5. Stitch the ends of the waistband, with right<br />
sides together. Trim, grade, and clip the corners.<br />
Press. See<br />
Fig. 32-6.<br />
32-6<br />
Stitching<br />
Waistband Ends
6. Fold the waistband<br />
over the seam line<br />
to the right side of<br />
the garment. Press<br />
and pin.<br />
7. Topstitch al<strong>on</strong>g the 32-7<br />
bottom edge of the<br />
waistband close to<br />
the fold. See Fig. 32-7.<br />
8. Attach the fasteners.<br />
Waistband<br />
Topstitching<br />
WAISTLINE FACING<br />
A facing finishes a waistline edge, allowing the<br />
finished edge of a garment to rest right at the natural<br />
waistline. Prevent stretching by interfacing the<br />
waistline seam according to the pattern directi<strong>on</strong>s.<br />
1. Apply fusible interfacing to the facing secti<strong>on</strong>s<br />
or sew-in interfacing to the garment edge.<br />
2. Prepare the facing, and finish the outer edge<br />
with serger stitching, zigzag stitching, or a<br />
hem.<br />
3. Stitch the facing to<br />
the garment, right<br />
sides together. Match<br />
seams, notches, and<br />
markings. Trim,<br />
grade, and clip the 32-8 Stitching Facing to<br />
seam allowances. See Garment<br />
Fig. 32-8. Press the<br />
seam allowances<br />
toward the facing.<br />
4. Understitch the<br />
facing to the seam<br />
allowances. See<br />
Fig. 32-9.<br />
5. Turn the facing to<br />
the inside of the 32-9 Understitching<br />
garment and press. Facing<br />
Tack at the seams<br />
with small cross-stitches.<br />
6. Turn under the ends of the facing at the garment<br />
opening. Slip-stitch to the zipper tape.<br />
See Fig. 32-10.<br />
32-10<br />
Ends<br />
S erging<br />
Techniques<br />
Attaching Waistbands<br />
1. Fold the waistband in half lengthwise,<br />
with right sides together.<br />
2. Stitch across the ends, using a c<strong>on</strong>venti<strong>on</strong>al<br />
machine. On the under-lap<br />
side, pivot and stitch al<strong>on</strong>g the waistline<br />
seam, ending at the dot. Clip at<br />
the dot, and trim the ends.<br />
3. Turn the waistband right side out, and<br />
press.<br />
4. Pin both edges of the waistband to the<br />
outside of the garment, matching<br />
notches and markings.<br />
5. Serge the waistline seam, with garment<br />
side up.<br />
Press the<br />
seam toward<br />
the garment.<br />
Finishing Facing<br />
WAISTLINE CASING<br />
A casing can be made at the waistline edge of a<br />
garment or within a garment. Use it with either<br />
elastic or a drawstring. (See Less<strong>on</strong> 19 <strong>on</strong> page<br />
527.)<br />
LESSON 32 Finishing Waistlines • 573
LESSON 33<br />
Applying Bias Bindings<br />
Astrip of fabric cut <strong>on</strong> the true bias is used to make bias bindings. When<br />
attached to the edge of a garment or other item, they cover the raw edge and create<br />
decorative trimming. Because bias bindings are flexible, they can be used <strong>on</strong> curved<br />
as well as straight edges.<br />
Bias bindings have a number of uses: as a substitute<br />
for the facing or hem <strong>on</strong> a neckline, armhole,<br />
or hemline; as an edge finish for placemats,<br />
pillows, backpacks, wall hangings, and other<br />
items; and as piping or tubing for trim, loops,<br />
ties, shoulder straps, and belts.<br />
The pattern guide sheet gives cutting and<br />
stitching directi<strong>on</strong>s for self-fabric bindings. The<br />
pattern envelope may list single-fold or doublefold<br />
bias tape to use as binding. Sometimes foldover<br />
braid trim can also be used. Ready-made<br />
bindings come in different widths and colors to<br />
match or c<strong>on</strong>trast with your fabric.<br />
CUTTING BIAS STRIPS<br />
The method you use to cut bias strips depends<br />
<strong>on</strong> the length you need. The two methods are<br />
described here.<br />
C<strong>on</strong>tinuous Bias-Strip Method<br />
Use this method to create l<strong>on</strong>g bias strips:<br />
1. Cut a square or rectangular piece of fabric.<br />
2. Fold <strong>on</strong>e corner <strong>on</strong> the true bias by matching<br />
the crosswise grain to the lengthwise<br />
grain. Cut the fabric al<strong>on</strong>g the fold line. See<br />
Fig. 33-1.<br />
33-1<br />
Bias<br />
Cutting <strong>on</strong> True<br />
3. Mark parallel lines the desired width for the<br />
bias strip <strong>on</strong> the wr<strong>on</strong>g side of the fabric.<br />
Unless the pattern states otherwise, use a 1 1 ⁄2inch<br />
(3.8-cm) width. Cut away the remaining<br />
fabric. See Fig. 33-2.<br />
574 • PART 5 Special Sewing Techniques<br />
33-2<br />
Marking Bias Strips<br />
4. Pin the fabric, right sides together, to form a<br />
tube. Be sure <strong>on</strong>e strip width extends bey<strong>on</strong>d<br />
the edge at each end of the tube.<br />
5. Stitch a 1 ⁄4-inch (6-mm) seam and press<br />
open.<br />
6. Cut al<strong>on</strong>g the marked line at <strong>on</strong>e end to create<br />
a c<strong>on</strong>tinuous bias strip of fabric. See Fig.<br />
33-3.<br />
Cut-and-Piece, Bias-Strip<br />
Method<br />
For smaller lengths, you can cut individual<br />
strips and stitch them together.<br />
1. Fold the fabric diag<strong>on</strong>ally, matching crosswise<br />
grain to lengthwise grain, to find the<br />
true bias.<br />
2. Mark the bias strips <strong>on</strong> the wr<strong>on</strong>g side of the<br />
fabric. Cut apart. See Fig. 33-4.<br />
33-4<br />
33-3<br />
Cutting<br />
C<strong>on</strong>tinuous Strip<br />
5<br />
Cutting Bias Strips<br />
5<br />
4<br />
4<br />
3<br />
3<br />
2<br />
2<br />
1<br />
1
3. Pin the ends of the strips, right sides together,<br />
matching the straight grain. Strips will<br />
form a right angle. See Fig. 33-5.<br />
4. Stitch a 1 ⁄4-inch (6-mm) seam al<strong>on</strong>g the<br />
straight grain of the fabric. Press the seam<br />
open. See Fig. 33-6.<br />
33-6<br />
Pressed Seam<br />
33-5<br />
Combining Bias Strips<br />
ATTACHING BINDING<br />
Bias strips can be attached with a <strong>on</strong>e-step or<br />
two-step method. Always follow the directi<strong>on</strong>s in<br />
the pattern guide sheet. Special techniques create<br />
smooth curves and sharp corners.<br />
One-Step Method<br />
Use the <strong>on</strong>e-step method to attach double-fold<br />
bias tape and fold-over braid, which have <strong>on</strong>e<br />
edge folded slightly wider than the other. Slip the<br />
binding over the edge of the fabric and stitch in<br />
place with <strong>on</strong>e row of machine stitching.<br />
1. Trim away the seam allowance from the edge<br />
to be bound.<br />
2. Slip the binding over the raw edge with the<br />
wider edge <strong>on</strong> the wr<strong>on</strong>g side of the garment.<br />
Turn the ends under, overlapping if necessary,<br />
and pin.<br />
3. Machine-stitch close to the edge of the binding<br />
through all layers. See Fig. 33-7.<br />
33-7<br />
Attaching<br />
Double-Fold Bias Tape<br />
Two-Step Method<br />
Use the two-step method for single-fold bias<br />
tape and bias strips you cut yourself. The pattern<br />
gives directi<strong>on</strong>s for cutting self-fabric strips.<br />
Usually the bias strip is four times the finished<br />
binding width. After stitching <strong>on</strong>e edge of the<br />
binding to the fabric, fold the binding over the<br />
fabric edge and stitch again by machine or hand.<br />
1. Trim away the seam allowances from the fabric<br />
edge.<br />
2. Pin the edge of the binding to the fabric, with<br />
right sides together.<br />
3. Stitch an equal distance from the edge,<br />
according to pattern directi<strong>on</strong>s. See Fig. 33-8.<br />
For single-fold bias tape, stitch al<strong>on</strong>g the<br />
crease line of the binding.<br />
4. Turn the binding over the seam allowance<br />
and pin.<br />
5. Slip-stitch or machine-stitch in place. See Fig.<br />
33-9.<br />
33-9<br />
in Place<br />
Stitching Tape<br />
33-8<br />
Stitching<br />
Single-Fold Bias Tape<br />
Alternative: stitch the binding to the wr<strong>on</strong>g<br />
side of the garment. Flip the binding to the right<br />
side of the garment and edgestitch in place.<br />
Stitching Curves<br />
Pre-shape the binding with a steam ir<strong>on</strong> before<br />
stitching to the fabric.<br />
1. Lay the tape <strong>on</strong> top of the pattern piece, shaping<br />
to fit the curve.<br />
2. Press with steam to shrink out excess fullness<br />
and prevent puckers. See Fig. 33-10.<br />
LESSON 33 Applying Bias Bindings • 575
33-10<br />
Fullness<br />
Stitching Outward Corners<br />
1. Stitch the binding to <strong>on</strong>e edge, ending exactly<br />
where the seam lines meet. See Fig. 33-11.<br />
2. Fold the binding diag<strong>on</strong>ally at the corner,<br />
forming a neat diag<strong>on</strong>al fold, or miter, <strong>on</strong><br />
both sides of the binding at the corner. Pin<br />
the binding al<strong>on</strong>g the other edge of the fabric.<br />
See Fig. 33-12.<br />
3. Stitch the binding, starting at the corner and<br />
c<strong>on</strong>tinuing al<strong>on</strong>g the other edge. For the twostep<br />
method, finish by stitching the inside<br />
edge of the binding in place. For wider bindings,<br />
edgestitch or slip-stitch al<strong>on</strong>g the<br />
mitered folds to secure. See Fig. 33-13.<br />
33-13<br />
33-11<br />
Mitered Corner<br />
Shrinking Out<br />
Stitching Binding to One Edge<br />
Edgestitching a<br />
33-12<br />
Corner<br />
Stitching Inward Corners<br />
1. Reinforce the corner with small machine<br />
stitches.<br />
2. Clip into the corner. See Fig. 33-14.<br />
3. To finish, choose <strong>on</strong>e of the following:<br />
576 • PART 5 Special Sewing Techniques<br />
Mitering the<br />
33-16<br />
33-14<br />
Corner<br />
Clipping into<br />
For the <strong>on</strong>e-step method. Slip the binding<br />
over <strong>on</strong>e edge and stitch to the clip. Form<br />
a neat miter at the corner. Slip the binding<br />
over the other edge and c<strong>on</strong>tinue stitching.<br />
See Fig. 33-15. Edgestitch al<strong>on</strong>g the mitered<br />
fold if necessary. See Fig. 33-16.<br />
Edgestitching<br />
an Inward Corner<br />
33-17<br />
33-15<br />
Edges<br />
Stitching Both<br />
For the two-step method. Stitch the<br />
binding to the edge up to the clip. Spread the<br />
fabric at the clipped corner to form a straight<br />
edge and c<strong>on</strong>tinue stitching. See Fig. 33-17.<br />
Fold the binding over the edge, mitering the<br />
corner. Finish by stitching the inside edge by<br />
hand or machine. See Fig. 33-18.<br />
to Opened Corner<br />
Attaching Binding<br />
33-18<br />
Finishing<br />
Inside Edge
PIPING<br />
Piping accents the seam line or outer edge of a<br />
garment. This narrow band of fabric stitched into<br />
a seam is sometimes used around a neckline, at<br />
the edge of a collar or cuff, or al<strong>on</strong>g a yoke seam.<br />
1. Cut a bias strip of fabric twice as wide as the<br />
finished piping, plus 1 1 ⁄4 inches (3.2 cm) for<br />
seam allowances.<br />
2. Fold and press the strip lengthwise, with<br />
wr<strong>on</strong>g sides together.<br />
3. Pin the piping to the garment’s right side,<br />
with cut edges even.<br />
4. Machine-baste just inside the seam line in the<br />
seam allowance. See Fig. 33-19. Clip the seam<br />
allowance of the piping around curves.<br />
5. Pin and stitch the seam. See Fig. 33-20.<br />
33-20<br />
Stitching Seam<br />
Corded Piping<br />
Piping can encase cable cord to create a thicker<br />
trim.<br />
1. Fold a bias strip over cable cord, with the<br />
cording <strong>on</strong> the inside of the fabric.<br />
2. Stitch as close as possible<br />
to the cord, using a<br />
zipper foot. See Fig.<br />
33-21.<br />
33-21<br />
Pinning and<br />
33-19<br />
Stitching Close to Cording<br />
Basting Piping<br />
Pinning and<br />
3. Pin the corded piping to the garment’s right<br />
side so the stitching rests <strong>on</strong> top of the seam<br />
line.<br />
4. Machine-baste just inside the stitching line in<br />
the seam allowance. Clip around curves.<br />
5. Pin and stitch the seam line, working with the<br />
corded secti<strong>on</strong> <strong>on</strong> top so you can see the basting<br />
stitches. Use a zipper foot. Place the<br />
stitches up close to the cord so the basting<br />
stitches are in the seam allowance. See Fig.<br />
33-22.<br />
33-22<br />
Corded Seam<br />
Stitching<br />
TUBING<br />
Tubing is a strip of fabric stitched and turned<br />
right side out so the seam allowances are inside<br />
the tube. Use it for straps, loops, and belts.<br />
1. Cut a bias strip of fabric two times the finished<br />
width of tubing plus seam allowances.<br />
2. Fold the fabric in half lengthwise, with right<br />
sides together.<br />
3. Stitch, stretching the bias slightly as you sew.<br />
At the end, slant the stitches out toward the<br />
raw edge to make the tube easier to turn. See<br />
Fig. 33-23.<br />
33-23<br />
Stitching Tubing<br />
4. Trim the seam allowances the same width as<br />
the tubing. For heavier fabrics, trim the seam<br />
allowances closer to the stitching.<br />
5. Turn the tubing by attaching a heavy thread<br />
to the wide end of the seam. Pull, using a<br />
large needle, bodkin, or loop turner. See Fig.<br />
33-24 <strong>on</strong> page 578.<br />
LESSON 33 Applying Bias Bindings • 577
Tubing<br />
S erging<br />
Techniques<br />
Tubing can be made easily <strong>on</strong> the serger.<br />
1. Serge a thread chain at least 2 inches<br />
(5 cm) l<strong>on</strong>ger than the bias strip. Run<br />
your fingers al<strong>on</strong>g the chain to tighten<br />
the stitches.<br />
2. Pull the chain around to the fr<strong>on</strong>t of<br />
the presser foot and center it lengthwise<br />
<strong>on</strong> the right side of the bias strip.<br />
Fold the strip so the cut edges meet<br />
and the chain is next to the fold.<br />
3. Serge the raw edges together, being<br />
careful not to cut the inside chain.<br />
Remove the strip from the serger.<br />
4. Pull gently <strong>on</strong> the thread tail to turn<br />
the tubing right side out.<br />
578 • PART 5 Special Sewing Techniques<br />
33-24<br />
Turning Tubing<br />
Corded Tubing<br />
Corded tubing is filled with cable cord for<br />
added fullness and strength.<br />
1. Cut a bias strip wide enough to fit around the<br />
cord plus seam allowances.<br />
2. Cut the cording twice the length of the bias<br />
strip plus 1 inch (2.5 cm).<br />
3. Fold the bias strip over <strong>on</strong>e end of the cord,<br />
with right sides together and edges even.<br />
4. Stitch across the cord and bias strip at the<br />
center of the cording.<br />
5. Stitch the l<strong>on</strong>g edge close to the cord, stretching<br />
the bias slightly, using a zipper foot. Trim<br />
the seam allowances. See Fig. 33-25.<br />
33-25<br />
Close to Cord<br />
Stitching<br />
6. Turn the right side out by gently pulling the<br />
fabric down over the cord and working the<br />
fabric al<strong>on</strong>g with your hands. See Fig. 33-26.<br />
Trim off any excess cording.<br />
33-26<br />
Turning Right Side Out
Adding Ruffles<br />
Ruffles decorate garments, accessories, and home<br />
decorating items. They can accent the edge of a neckline,<br />
collar, cuff, or hem. See Fig. 34-1. They also decorate<br />
curtains and pillows and form the dust ruffle<br />
around a bed.<br />
The amount of fullness built into a ruffle<br />
depends <strong>on</strong> the ruffle’s width. To keep them from<br />
looking skimpy, wide ruffles need more fullness<br />
than narrow <strong>on</strong>es.<br />
The two basic ruffles you’ll learn to make are<br />
straight and circular.<br />
STRAIGHT RUFFLES<br />
A straight ruffle is made from a straight strip<br />
of fabric that is gathered al<strong>on</strong>g <strong>on</strong>e edge and<br />
stitched into a seam or to a fabric edge. Straight<br />
ruffles can also be gathered down the center or<br />
off-center and stitched to the outside of a garment<br />
or curtain.<br />
The outer edge of a ruffle can be finished with<br />
a narrow hem stitched by hand or machine. On<br />
lightweight and sheer fabrics, the ruffle may be<br />
cut twice the desired width and folded lengthwise<br />
to create a double thickness.<br />
Follow these steps to make a straight ruffle:<br />
1. Cut a straight piece of fabric that is two to<br />
three times the length of the edge or area to<br />
which the ruffle will be stitched.<br />
2. Stitch and gather the ruffle al<strong>on</strong>g the upper<br />
edge. See Fig. 34-2.<br />
34-2<br />
Gathering<br />
Stitches for<br />
34-1<br />
Decorative Ruffles<br />
LESSON 34<br />
3. Pin the ruffle to the edge of the garment,<br />
adjusting fullness evenly.<br />
4. Stitch the ruffle in place, with the ruffle <strong>on</strong><br />
top to prevent stitching tucks into the seam.<br />
See Fig. 34-3.<br />
34-3<br />
Stitching Ruffle<br />
You can cover the gathering stitches <strong>on</strong> doubleedge<br />
ruffles by putting a trim, such as rickrack, <strong>on</strong><br />
top of the stitches. See Fig. 34-4.<br />
34-4<br />
Attaching<br />
Rickrack to Double-Edge<br />
Ruffle<br />
CIRCULAR RUFFLES<br />
Stitching two or more circles of fabric together<br />
creates a circular ruffle. The ruffle fits smoothly<br />
al<strong>on</strong>g the edge joined to the garment and ripples<br />
softly <strong>on</strong> the outer edge of the ruffle.<br />
1. Cut out circles, following the directi<strong>on</strong>s <strong>on</strong><br />
the pattern.<br />
LESSON 34 Adding Ruffles • 579
Ruffles<br />
S erging<br />
Techniques<br />
Use the serger to finish the outer edge<br />
of a ruffle with a narrow rolled hem.<br />
Then use a serger stitch to attach a<br />
straight ruffle or a circular ruffle to the<br />
garment.<br />
2. Stitch the circles together, with narrow<br />
seams, to form the ruffle. Finish the outer<br />
edge of the ruffle with a narrow hem.<br />
(Sometimes the ruffle is cut as two layers and<br />
stitched together at the outer edge. Then it is<br />
trimmed, clipped, and<br />
turned right side<br />
out.)<br />
3. Stay-stitch the<br />
inner edge of the<br />
ruffle 1 ⁄2 inch<br />
(1.3 cm) from<br />
the edge. Clip<br />
up to the stay-<br />
34-5<br />
stitching. See<br />
Stay-Stitching and<br />
Fig. 34-5. Clipping Inner Edge<br />
4. Stay-stitch the<br />
garment edge to prevent stretching.<br />
5. Pin and stitch the ruffle to the garment, right<br />
sides together. Press the seam allowances flat,<br />
and trim.<br />
6. Finish the inside edge with facing or a double<br />
row of stitching. See Fig. 34-6.<br />
580 • PART 5 Special Sewing Techniques<br />
34-6<br />
Garment<br />
Attaching Ruffle to<br />
SEWING TIP<br />
Gathering technique. If the gathers<br />
will be hidden in a seam, try this easy<br />
gathering technique for ruffles.<br />
1. Cut a piece of str<strong>on</strong>g, thin cord, such<br />
as pearl cott<strong>on</strong> or light packing<br />
string, slightly l<strong>on</strong>ger than the ruffle.<br />
2. Set the sewing machine for a zigzag<br />
stitch that is wide enough to cover<br />
the cord without catching it.<br />
3. Positi<strong>on</strong> the cord inside the seam<br />
allowance so the left side of the<br />
zigzag stitch is just inside the seam<br />
line. Stitch over the cord.<br />
4. Insert a straight pin at <strong>on</strong>e end of<br />
the ruffle, and wrap the end of the<br />
cord around the pin in a figure eight.<br />
5. Pin the ruffle to the garment edge,<br />
matching markings. Hold the loose<br />
end of the cord<br />
taut. Gather<br />
the fabric by<br />
sliding it al<strong>on</strong>g<br />
the cord.<br />
6. Straight-stitch<br />
al<strong>on</strong>g the seam line,<br />
with gathered side<br />
up. Be careful not to<br />
catch the cord.<br />
7. Pull out the cord.
Adding Trims<br />
Trims come in many shapes, sizes, and colors. Rickrack, braid, ribb<strong>on</strong>, lace, eyelet,<br />
piping, and fringe are all examples of trims. Fabric appliqués can also be used for<br />
trimming.<br />
Trims should be coordinated to the design of a<br />
project and its fabric. Be sure the trim you select<br />
can be washed or dry-cleaned in the same manner<br />
as the fabric that will hold the trim. Preshrink<br />
washable trims by soaking them in hot water for<br />
30 minutes. You can leave them wrapped around<br />
the cardboard, which should be bent slightly to<br />
allow for any shrinkage. Let them dry before<br />
using.<br />
Three basic methods allow you to apply trim:<br />
the flat method, edging method, and inserted<br />
method.<br />
FLAT METHOD<br />
The flat method can be used with any trim that<br />
is finished <strong>on</strong> both sides, such as braid, ribb<strong>on</strong>,<br />
and rickrack. Use narrow trims for curved areas.<br />
Before stitching in place, shape the trim by pressing<br />
it with a steam ir<strong>on</strong>. Then follow these steps<br />
to apply the trim:<br />
1. Pin the trim al<strong>on</strong>g the placement line.<br />
2. Stitch al<strong>on</strong>g <strong>on</strong>e edge, both edges, or through<br />
the center. Rickrack should be stitched with a<br />
straight row of stitching down the center. See<br />
Fig. 35-1.<br />
35-1<br />
Rickrack<br />
Attaching<br />
3. Miter the corners by stitching the outside<br />
edge up to the corner. Lift the presser foot,<br />
pivot, and c<strong>on</strong>tinue stitching in the new<br />
directi<strong>on</strong>. Fold the trim diag<strong>on</strong>ally at the corner<br />
and pin. See Fig. 35-2.<br />
4. Stitch the inside edge of the trim. Stitch the<br />
mitered fold, if necessary. See Fig. 35-3.<br />
35-2<br />
at Corner<br />
Attaching Trim<br />
LESSON 35<br />
EDGING METHOD<br />
Use the edging method for trims with <strong>on</strong>ly <strong>on</strong>e<br />
finished edge, such as piping, gathered lace, gathered<br />
eyelet, and fringe. The trim can be stitched<br />
to the edge of a garment or inserted into a seam.<br />
To stitch the trim to the edge of the garment,<br />
follow these steps:<br />
1. Pin the trim al<strong>on</strong>g the edge or seam line, with<br />
right sides together. Be sure the trim is<br />
toward the garment.<br />
2. Stitch close to the trim, using a zipper foot if<br />
necessary. See Fig. 35-4.<br />
35-4<br />
to Trim<br />
Stitching Close<br />
35-3<br />
Corner<br />
Mitering the<br />
3. Finish the edge by turning the seam<br />
allowance to the inside and topstitching<br />
LESSON 35 Adding Trims • 581
Trims<br />
S erging<br />
Techniques<br />
You can use the serger to apply a<br />
straight-edge trim, such as lace, to the<br />
edge of a garment.<br />
1. Trim the edge of the garment so there<br />
is a 5 ⁄8-inch (1.5-cm) seam or hem<br />
allowance.<br />
2. Place the lace and fabric right sides<br />
together, with the straight edge of the<br />
lace 1 ⁄2 inch (1.3 cm) from the raw<br />
edge of the fabric. Pin or use a glue<br />
stick to hold the lace in place.<br />
3. Serge with the lace side up, using a<br />
two-thread or three-thread serger<br />
stitch, a flatlock stitch, or a rolled hemstitch.<br />
Keep the edge of the trim slightly<br />
to the left of the knife. Press the<br />
seam allowance toward the garment.<br />
A serger can also be used to insert lace<br />
with two straight edges. Use either a<br />
flatlock stitch or a rolled hemstitch. For<br />
the flatlock method, place the lace and<br />
fabric right sides together. For the rolledhem<br />
method, place them wr<strong>on</strong>g sides<br />
together. After serging, open out the<br />
garment secti<strong>on</strong> so the lace lies flat;<br />
press.<br />
582 • PART 5 Special Sewing Techniques<br />
through all thicknesses. See Fig. 35-5. You can<br />
also finish the edge with a facing.<br />
To stitch trim into a seam, place the other secti<strong>on</strong><br />
of fabric <strong>on</strong> top of the trim, with right sides<br />
together. Stitch the seam and trim in <strong>on</strong>e step. See<br />
Fig. 35-6.<br />
35-6<br />
35-5<br />
Stitching Trim into Seam<br />
Finishing the Edge<br />
INSERTED METHOD<br />
The inserted method works well <strong>on</strong> any<br />
straight secti<strong>on</strong> of a garment, such as down the<br />
fr<strong>on</strong>t of a shirt or blouse or around the bottom of<br />
a jacket or skirt. It cannot be used for curved<br />
areas. Choose flat trims, such as lace or eyelet.<br />
Follow these steps:<br />
1. Cut the fabric al<strong>on</strong>g the placement line.<br />
2. Turn under each fabric edge 1 ⁄2 the width<br />
of the exposed trim. Press the edges. See Fig.<br />
35-7.<br />
35-7<br />
Edges Under<br />
Turning Fabric
3. Place the flat trim under the folded edges of<br />
fabric.<br />
4. Edgestitch through all thicknesses. See Fig.<br />
35-8.<br />
35-8<br />
Inserted Trim<br />
FINISHING ENDS<br />
Several methods are possible for finishing the<br />
ends of trims to create a neat appearance.<br />
• Stitch the trim to the fabric before stitching the<br />
seams so the ends will be hidden in the seam.<br />
See Fig. 35-9.<br />
• Turn the ends to the wr<strong>on</strong>g side and slip-stitch.<br />
See Fig. 35-10.<br />
35-10<br />
<strong>on</strong> Wr<strong>on</strong>g Side<br />
• For overlapping ends, fold <strong>on</strong>e end under.<br />
Overlap ends and stitch in place. See Fig. 35-11.<br />
35-11<br />
Ends<br />
Edgestitching<br />
Slip-Stitching<br />
Overlapping<br />
35-9<br />
Seam<br />
• For heavy trims, fold both ends under 1 ⁄4 inch<br />
(6 mm), so the ends just meet. Stitch in place.<br />
See Fig. 35-12.<br />
35-12<br />
Trim Ends<br />
Ends Hidden in<br />
Joining Folded<br />
RAW-EDGE TRIMS<br />
There are several ways to create a frayed edge<br />
or fringe al<strong>on</strong>g the hemline of a garment.<br />
• This frayed-edge works best <strong>on</strong> denim garments.<br />
See Fig. 35-13.<br />
35-13<br />
Frayed Edge<br />
1. Machine-stitch al<strong>on</strong>g desired hemline. Trim<br />
fabric 1 ⁄2 inch to 1 inch (1.3 cm to 2.5 cm)<br />
below the stitching line.<br />
2. Launder the garment in the washing machine<br />
so the raw edge will fray.<br />
• A self-fringed edge<br />
can be created <strong>on</strong> the<br />
edge of woven fabrics<br />
cut <strong>on</strong> the straight<br />
grain. See Fig. 35-14.<br />
35-14<br />
1. Mark the top of the fringe by pulling a thread<br />
to create a line. Machine-stitch <strong>on</strong> this line.<br />
2. Clip the fabric every 2 inches to 3 inches (5<br />
cm to 7.5 cm), just up to the stitching. Pull<br />
out the threads between the clips.<br />
• This method can be used <strong>on</strong> both straight and<br />
curved edges and seams. See Fig. 35-15.<br />
35-15<br />
Fabric Fringe<br />
Self-Fringed Edge<br />
1. Cut strips of fabric equal to the desired depth<br />
of the fringe plus 5 ⁄8 inch (1.5 cm). Cut the<br />
strips exactly <strong>on</strong> grain.<br />
2. Machine-stitch 5 ⁄8 inch (1.5 cm) from <strong>on</strong>e<br />
l<strong>on</strong>g edge.<br />
3. Pull out threads, following step 2 above.<br />
4. Stitch the fringe to your garment, following<br />
the edging method <strong>on</strong> page 581.<br />
LESSON 35 Adding Trims • 583
PART 5<br />
SUMMARY<br />
• Special seams can enclose a seam<br />
allowance or create a decorative effect.<br />
(Less<strong>on</strong> 24)<br />
• Tucks and pleats c<strong>on</strong>trol fullness or add<br />
design interest. (Less<strong>on</strong> 25)<br />
• Interfacings and linings help shape and support<br />
the outer fabric. (Less<strong>on</strong>s 26 and 27)<br />
• The four basic collars are flat, rolled, shirt,<br />
and standing. (Less<strong>on</strong> 28)<br />
• The three basic sleeves are set in, raglan,<br />
and kim<strong>on</strong>o. They can be finished with a<br />
hem, facing, casing, or cuff. (Less<strong>on</strong>s 29<br />
and 30)<br />
• Three popular pocket styles are in-seam,<br />
patch, and fr<strong>on</strong>t hip. (Less<strong>on</strong> 31)<br />
• A waistline can be finished with a waistband,<br />
facing, or casing. (Less<strong>on</strong> 32)<br />
• Some garments are trimmed with bias<br />
binding. Others are decorated with ruffles<br />
or trims. (Less<strong>on</strong>s 33, 34, and 35)<br />
584 • PART 5 Special Sewing Techniques<br />
Review<br />
RECALLING THE FACTS<br />
1. Why might you use a flat-felled seam<br />
instead of a French seam? (Less<strong>on</strong> 24)<br />
2. Why are seams sometimes topstitched?<br />
(Less<strong>on</strong> 24)<br />
3. What is the difference between tucks and<br />
pleats? (Less<strong>on</strong> 25)<br />
4. What should you do before applying<br />
fusible interfacing to garment secti<strong>on</strong>s?<br />
(Less<strong>on</strong> 26)<br />
5. What should you c<strong>on</strong>sider when choosing<br />
lining fabric? (Less<strong>on</strong> 27)<br />
6. Describe four basic collars. (Less<strong>on</strong> 28)<br />
7. To which side of a collar is interfacing<br />
usually applied? (Less<strong>on</strong> 28)<br />
8. How can you make crisp, sharp points <strong>on</strong><br />
a collar? (Less<strong>on</strong> 28)<br />
9. Describe three basic sleeves. (Less<strong>on</strong> 29)<br />
10. Why is a kim<strong>on</strong>o sleeve easy to sew?<br />
(Less<strong>on</strong> 29)
and Activities<br />
11. Describe three basic cuffs. (Less<strong>on</strong> 30)<br />
12. Why is a placket added to a sleeve?<br />
(Less<strong>on</strong> 30)<br />
13. How do you miter the corners <strong>on</strong> a pocket?<br />
(Less<strong>on</strong> 31)<br />
14. How is the directi<strong>on</strong> of a waistband overlap<br />
determined? (Less<strong>on</strong> 32)<br />
15. What are bias bindings? (Less<strong>on</strong> 33)<br />
16. What is the difference between piping<br />
and tubing? (Less<strong>on</strong> 33)<br />
17. How do straight and circular ruffles differ?<br />
(Less<strong>on</strong> 34)<br />
18. Describe the three methods used to<br />
apply trims. (Less<strong>on</strong> 35)<br />
APPLYING KNOWLEDGE<br />
1. C<strong>on</strong>structi<strong>on</strong> features. Look at actual<br />
garments or photos from magazines and<br />
catalogs. Identify such c<strong>on</strong>structi<strong>on</strong> features<br />
as tucks; pleats; waistbands; and<br />
varied styles of collars, sleeves, plackets,<br />
cuffs, pockets, and bias bindings.<br />
2. Decorative trims. Using fashi<strong>on</strong> magazines<br />
and catalogs, collect photos that<br />
show decorative trims used <strong>on</strong> garments<br />
or home decorating items. Describe the<br />
c<strong>on</strong>structi<strong>on</strong> method used to apply each<br />
trim.<br />
3. Samples. Sew samples of the following:<br />
self-finished seams, decorative seams,<br />
tucks, pleats, bias bindings, tubing, and<br />
trims. Make mini-samples of a flat or<br />
rolled collar, set-in sleeve, cuff, in-seam<br />
pocket, patch pocket, waistband, and ruffle.<br />
How might you improve your samples?<br />
4. Project. C<strong>on</strong>struct a garment that has a<br />
collar, sleeves, and pockets. Evaluate<br />
each of the special sewing techniques<br />
used in the project.<br />
5. Serging. If a serger is available, use it to<br />
stitch a sample collar, sleeve, pocket, or<br />
waistband.<br />
MAKING>
GLOSSARY<br />
Chapter numbers and Sewing and Serging Handbook part numbers are shown in parentheses. These<br />
indicate where terms are located.<br />
A<br />
abrasi<strong>on</strong>. Worn spot that can develop when<br />
fibers rub against something. (11)<br />
absorbent. Able to take moisture. (11)<br />
adaptive design. Type of design that reduces the<br />
effort needed to put <strong>on</strong> and take off garments<br />
and promotes independence for people with<br />
disabilities. (21)<br />
adornment. Decorati<strong>on</strong>s that express uniqueness<br />
and creativity and bring admirati<strong>on</strong> and<br />
recogniti<strong>on</strong>. (1)<br />
agitator. Center post in a top-loading washing<br />
machine; jiggles clothes during the wash and<br />
rinse cycles to loosen dirt and get out soil. (15)<br />
alterati<strong>on</strong>s. Modificati<strong>on</strong>s that change a garment<br />
in some way. (19)<br />
applicati<strong>on</strong> form. Informati<strong>on</strong> document filled out<br />
by a job applicant for a potential employer. (22)<br />
appliqué. Cutout pieces of fabric applied as a<br />
decorati<strong>on</strong>. (16)<br />
appropriate. Suitable; for clothing, suitable or<br />
acceptable to wear. (2)<br />
aptitude. Natural talent and capacity for learning<br />
particular skills. (22)<br />
arbitrati<strong>on</strong>. Settlement of a dispute by a pers<strong>on</strong><br />
or panel that hears each party and issues a<br />
decisi<strong>on</strong>. (20)<br />
assembly line. System by which each worker specializes<br />
in a certain task in order to manufacture<br />
a product; items pass from worker to<br />
worker for step-by-step completi<strong>on</strong>. (8)<br />
asymmetrical. Design of a garment with visually<br />
different sides; balanced by design elements<br />
with various visual “weights.” (10)<br />
atelier (a-tul-YAY). Designer’s workroom. (7)<br />
avant-garde (ah-vahn-GARD). Ahead of fashi<strong>on</strong><br />
(French). (6)<br />
586 • GLOSSARY<br />
B<br />
balance. One of the five design principles; c<strong>on</strong>cerns<br />
whether the spaces <strong>on</strong> both sides of a central<br />
line, real or imagined, appear equal. (10)<br />
balance of trade. Comparis<strong>on</strong> of the value of a<br />
country’s imports and exports. (25)<br />
barter. Trading goods, services, ideas, and techniques<br />
without the use of m<strong>on</strong>ey. (5)<br />
bias bindings. Cover raw edges and create decorative<br />
trims when sewing a garment; made<br />
from a fabric strip cut <strong>on</strong> true bias. (Part 5)<br />
blends. Yarns that are made with a combinati<strong>on</strong><br />
of different fibers. (12)<br />
bobbin. Sewing machine accessory that holds the<br />
bottom thread in the machine. (Part 2)<br />
body language. N<strong>on</strong>verbal messages, c<strong>on</strong>sisting of<br />
eye c<strong>on</strong>tact, facial expressi<strong>on</strong>s, posture, arm<br />
and leg positi<strong>on</strong>s, and distance from others. (4)<br />
bolts. Rolls of fabric. (Part 1)<br />
boutique. Specialty store that features very fashi<strong>on</strong>able<br />
or unique designs. (17)<br />
budget. Plan or schedule used by an individual or<br />
family to c<strong>on</strong>trol spending and cover all<br />
expenses. (3)<br />
C<br />
career path. Series of related jobs within a field of<br />
work. (22)<br />
casing. Closed tunnel of fabric that holds a piece<br />
of elastic or a drawstring inside. (Part 4)<br />
cellulose. Main comp<strong>on</strong>ent of such plants as cott<strong>on</strong><br />
and flax; produced by dissolving the<br />
fibrous inner bark of mulberry trees. (5)<br />
chain. Large retail company with stores in many<br />
cities and towns all over the country. (8)<br />
classics. Certain styles that stay in fashi<strong>on</strong> for a<br />
l<strong>on</strong>g time. (6)
clipping. Making tiny clips, or snips, in the seam<br />
allowance every 1 ⁄4 to 1 ⁄2 inch (6 to 12 mm).<br />
(Part 4)<br />
collecti<strong>on</strong>. Group of clothes designed and produced<br />
by a designer for a specific seas<strong>on</strong>. (7)<br />
colorfast. Fabric that doesn’t fade, whether it’s<br />
been washed or exposed to chlorine or sunlight.<br />
(13)<br />
color scheme. Plan for using a color or a combinati<strong>on</strong><br />
of colors to decorate a room or put<br />
together an outfit. (9)<br />
comparis<strong>on</strong> shopping. Looking at the quality,<br />
price, and usefulness of similar items to find<br />
the best value for your m<strong>on</strong>ey. (18)<br />
complementary colors. Colors that are directly<br />
opposite each other <strong>on</strong> the color wheel. (9)<br />
compromise. Helpful communicati<strong>on</strong> tool when<br />
resolving disagreements; settlement comes<br />
through give-and-take. (3, 19)<br />
computer-aided design (CAD). Software programs<br />
used to create fashi<strong>on</strong> designs; take the<br />
place of hand sketching. (7)<br />
c<strong>on</strong>formity. When an individual complies with<br />
certain standards, attitudes, or practices followed<br />
by the group. (4)<br />
c<strong>on</strong>signment shop. Shop that sells garments supplied<br />
by multiple sellers; pays the seller a percentage<br />
of the selling price after selling. (16)<br />
c<strong>on</strong>tractors. Companies that specialize in sewing<br />
certain garments, according to a manufacturer’s<br />
designs and specificati<strong>on</strong>s and for a specific<br />
price. (8)<br />
c<strong>on</strong>verters. Companies or individuals who serve<br />
as middle agents between textile mills and<br />
apparel manufacturers. (8)<br />
copy. Words and sentences used in advertising to<br />
help promote a product; in fashi<strong>on</strong>, communicates<br />
a fashi<strong>on</strong> message. (8)<br />
cost per wearing. Method of determining what<br />
each wearing of a garment costs; computed by<br />
adding purchase price to the cleaning costs<br />
and dividing by the number of wearings. (19)<br />
counterfeit. Items (in fashi<strong>on</strong>, garments and<br />
accessories) made with unauthorized use of<br />
registered trade names or trademarks. (25)<br />
couture (koo-TOOR). Designing, making, and<br />
selling of high-fashi<strong>on</strong> clothing; French word<br />
for dressmaking. (7)<br />
couturiers (koo-TOOR-ee-ays). Designers who<br />
make fashi<strong>on</strong>able, custom-made clothes. (7)<br />
cover letter. Introductory letter that requests<br />
a meeting or interview with a potential<br />
employer and shows a pers<strong>on</strong>’s written communicati<strong>on</strong><br />
skills, as well as pers<strong>on</strong>ality. (22)<br />
cowl. Softly draped neckline <strong>on</strong> dress or blouse. (6)<br />
creativity. Ability to use imaginati<strong>on</strong> to come up<br />
with an original idea or product. (17)<br />
credit card. Purchasing method that allows the<br />
cardholder to buy and receive merchandise,<br />
but pay for it later. (20)<br />
croquis (kro-KEY). Preliminary fashi<strong>on</strong> design<br />
sketch. (7)<br />
culture. Collected ideas, skills, beliefs, and instituti<strong>on</strong>s<br />
of a society at a particular time in history.<br />
(2)<br />
customs. L<strong>on</strong>g-established practices that regulate<br />
social life in a community of people. (2)<br />
cutting layout. Diagram that shows how to<br />
arrange pattern pieces <strong>on</strong> fabric when sewing a<br />
garment. (Part 3)<br />
D<br />
darts. Triangular folds of fabric stitched to a<br />
point when sewing a garment. (Part 4)<br />
debit card. Used to make a m<strong>on</strong>ey payment;<br />
amount transfers electr<strong>on</strong>ically from a pers<strong>on</strong>’s<br />
checking account to the store’s account<br />
via computer. (20)<br />
decorative seams. Special effects made with topstitching<br />
or cording when sewing a garment.<br />
(Part 5)<br />
delegate. To assign resp<strong>on</strong>sibilities to another<br />
pers<strong>on</strong>. (3)<br />
department store. Large store with merchandise<br />
grouped into areas according to specialty. (17)<br />
design ease. Extra fullness built into clothes by<br />
the designer to create a particular style or silhouette.<br />
(Part 1)<br />
detergents. Cleaning agents that remove soil<br />
from fabric and prevent it from returning. (15)<br />
GLOSSARY • 587
differential feed. Two sets of feed dogs <strong>on</strong> a<br />
sewing machine; move the fabric through the<br />
machine at different speeds. (Part 2)<br />
disability. C<strong>on</strong>diti<strong>on</strong> that hinders a pers<strong>on</strong>’s<br />
functi<strong>on</strong>ing in some way. (21)<br />
discount store. Store where merchandise is sold<br />
at less than full retail price. (17)<br />
domestic. For any country, the products that<br />
originate there and the companies that reside<br />
there. (25)<br />
draping. Arranging fabric into graceful folds and<br />
attractive lines. (7)<br />
dress code. Set of rules that describe acceptable<br />
or required clothing. (2)<br />
dry cleaning. Process that uses special liquids<br />
c<strong>on</strong>taining organic solvents to clean fabrics<br />
without water. (15)<br />
dyes. Compounds that color fabrics. (13)<br />
E<br />
easing. Allows fabric being sewn to be shaped<br />
over a curved area of the body. (Part 4)<br />
ec<strong>on</strong>omical. Describes purchasing techniques<br />
that help a pers<strong>on</strong> save m<strong>on</strong>ey. (17)<br />
emphasis. One of the five design principles; focal<br />
point of a design; draws attenti<strong>on</strong>. (10)<br />
entrepreneur (AHN-truh-pruh-NUR). Some<strong>on</strong>e<br />
who organizes and manages his or her own<br />
business. (24)<br />
entry-level job. Job requiring little or no special<br />
training or experience; where learning <strong>on</strong> the<br />
job is typical. (22)<br />
enzymes. Special proteins that c<strong>on</strong>trol chemical<br />
activity. (14)<br />
ethics. Moral principles and values that guide a<br />
pers<strong>on</strong>’s acti<strong>on</strong>s. (23)<br />
expectati<strong>on</strong>s. As related to clothing, thoughts<br />
about what is reas<strong>on</strong>able for people to wear. (2)<br />
exports. Products sent out from <strong>on</strong>e country to<br />
others. (25)<br />
F<br />
fabric care symbols. Symbols <strong>on</strong> garment labels<br />
that show in a visual way the special care<br />
needed for fabrics. (14)<br />
fabric key. Shows how shading and texture indicate<br />
the right and wr<strong>on</strong>g sides of fabric and<br />
588 • GLOSSARY<br />
any interfacing or lining; located <strong>on</strong> a pattern<br />
guide sheet. (Part 3)<br />
facings. Finish a raw edge <strong>on</strong> a garment, such as<br />
a neckline or armhole. (19, Part 4)<br />
fad. Fashi<strong>on</strong> that is very popular for a short time.<br />
(6)<br />
family life cycle. Basic stages through which a<br />
family goes during its existence. (3)<br />
fashi<strong>on</strong>. Style that is popular at a given time. (6)<br />
fashi<strong>on</strong> cycle. “Life-time” of each fashi<strong>on</strong>; has<br />
four stages: introducti<strong>on</strong>, growth, maturity,<br />
and decline.<br />
fashi<strong>on</strong> merchandising. Critical comp<strong>on</strong>ent of<br />
fashi<strong>on</strong> industry; retailers display, advertise,<br />
promote, and sell items, choosing techniques<br />
they hope will entice people to buy. (8)<br />
fashi<strong>on</strong> promoti<strong>on</strong>. All the efforts to inform<br />
people about what’s new in fashi<strong>on</strong> and to<br />
c<strong>on</strong>vince them to buy. (8)<br />
feed dog. Teeth <strong>on</strong> a sewing machine that move<br />
the fabric under the presser foot, advancing<br />
the fabric <strong>on</strong>e stitch at a time. (Part 2)<br />
fiber. Basic unit that makes fabric. (11)<br />
filament yarns. Yarns made entirely of filament<br />
fibers, which are the l<strong>on</strong>g, c<strong>on</strong>tinuous fibers<br />
measured in yards or meters. (12)<br />
filling yarns. Crosswise yarns in fabric. (12)<br />
finance charge. Fee added for use of credit. (20)<br />
finishes. Special treatments applied to improve a<br />
fabric’s appearance, texture, or performance.<br />
(13)<br />
flexibility. Willingness to adapt to new opportunities<br />
and situati<strong>on</strong>s. (23)<br />
forecasting services. Services that predict color,<br />
fabric, and fashi<strong>on</strong> trends two or more years in<br />
advance. (8)<br />
franchise. Right to sell a company’s goods or services<br />
in a given area. (24)<br />
freelance. Selling work or services without earning<br />
a regular salary from any employer; freelancers<br />
charge by the job or the hour. (24)<br />
free trade. Movement of goods that are not<br />
restricted by tariffs or quotas between countries.<br />
(25)<br />
fusible webs. Network of b<strong>on</strong>dable fibers used to<br />
hold two layers of fabric together. (Part 1)
G<br />
gathers. Soft folds of fabric formed by pulling up<br />
basting stitches to make the fabric fit into a<br />
smaller space. (Part 4)<br />
generic name. Fiber name for a general classificati<strong>on</strong><br />
of fibers of similar compositi<strong>on</strong>. (11)<br />
global sourcing. When a company manufactures<br />
or purchases goods at a lower cost in another<br />
country of the world. (25)<br />
grading. To trim each layer of the seam allowance<br />
to a different width to reduce bulk. (Part 4)<br />
grain. Directi<strong>on</strong> that yarns run in woven fabric. (12)<br />
gray goods. Name for fabric that lacks color<br />
when it first comes from the loom. (13)<br />
guide sheet. Step-by-step informati<strong>on</strong> for cutting,<br />
marking, and sewing fabric pieces<br />
together. (Part 3)<br />
H<br />
harm<strong>on</strong>y. One of five design principles; a visual<br />
effect created when design elements complement<br />
each other. (10)<br />
haute couture (oht koo-TOOR). Dressmaking<br />
industry that creates the most fashi<strong>on</strong>able,<br />
expensive, and exclusive designer clothing. (7)<br />
heading. Width of fabric between the casing and<br />
the edge of a garment; may be included when<br />
sewing casing. (Part 4)<br />
heritage. Cultural background and ethnic traditi<strong>on</strong>s<br />
handed down from ancestors. (2)<br />
hidden costs. Expenses for customer carelessness,<br />
theft, and returns; included in the price of<br />
merchandise. (20)<br />
hues. Precise way to describe colors, using the<br />
specific names that identify them, such as red,<br />
green, and blue. (9)<br />
I-J<br />
image ads. Advertisements that use emoti<strong>on</strong>al<br />
appeals to tempt a c<strong>on</strong>sumer to buy. (18)<br />
imports. Goods that come into a country from<br />
foreign countries. (25)<br />
impressi<strong>on</strong>. Image that forms in the minds of<br />
others. (4)<br />
impulse buying. Making unplanned purchases;<br />
often not based <strong>on</strong> knowledge and reas<strong>on</strong>ing.<br />
(18)<br />
individuality. Total combinati<strong>on</strong> of characteristics<br />
that set <strong>on</strong>e pers<strong>on</strong> apart from another. (4)<br />
Industrial Revoluti<strong>on</strong>. Period in history characterized<br />
by rapid changes that resulted from the<br />
inventi<strong>on</strong> of power-driven machines. (5)<br />
informati<strong>on</strong> ads. Advertisements that include<br />
informati<strong>on</strong> about the product. (18)<br />
initiative. Desire and willingness to plan and<br />
carry out a task. (23)<br />
inseam. Inside leg measurement <strong>on</strong> pants, from<br />
the crotch to the hemmed edge. (19)<br />
intensity. Brightness or dullness of a color. (9)<br />
interfacing. Piece of fabric placed between the<br />
outer fabric and facing to prevent stretching, add<br />
shape, or add crispness to a certain area. (Part 1)<br />
intermediate color. Combinati<strong>on</strong> of a primary<br />
color with a neighboring sec<strong>on</strong>dary color <strong>on</strong><br />
the color wheel. (9)<br />
interview. Meeting with potential employer to<br />
discuss the details of the job and the qualificati<strong>on</strong>s<br />
of the applicant. (22)<br />
inventory. List of items <strong>on</strong> hand, as in products<br />
in a store or garments in a wardrobe. (17)<br />
ir<strong>on</strong>ing. Process of removing wrinkles from<br />
clothes with an ir<strong>on</strong>, using heat, slight pressure,<br />
and possibly moisture with a gliding,<br />
back-and-forth moti<strong>on</strong>. (15)<br />
K<br />
kim<strong>on</strong>o sleeve. Sleeve style that is cut in <strong>on</strong>e piece<br />
al<strong>on</strong>g with the garment fr<strong>on</strong>t and back. (6)<br />
knitting. Looping yarns together to make fabric. (12)<br />
knock-offs. Less expensive versi<strong>on</strong>s of highfashi<strong>on</strong><br />
design. (7)<br />
L<br />
laundering. Washing fabric by hand or machine<br />
with a soil-removing product. (15)<br />
leadership. Ability to guide or influence others. (23)<br />
licensing. Giving legal permissi<strong>on</strong> to use your<br />
name to promote a product. (7)<br />
line. One of the five design elements; series of<br />
points c<strong>on</strong>nected to form a narrow path. (10)<br />
Designer’s clothing collecti<strong>on</strong>. (8)<br />
lining. Fabric used to finish the inside of a garment;<br />
c<strong>on</strong>structed separately and then joined<br />
at <strong>on</strong>e or more major seams. (Part 1)<br />
GLOSSARY • 589
lockstitch. Type of stitch that does not pull out or<br />
unravel when a loop or loose thread is pulled.<br />
(Part 2)<br />
logo. Identifying symbol of manufacturer. (18)<br />
loopers. Two parts of a serger (upper and lower<br />
loopers) that hold the threads; like the bobbin<br />
<strong>on</strong> a sewing machine. (Part 2)<br />
luster. Fabric sheen created by the amount of<br />
reflected light. (11)<br />
M<br />
management process. Useful tool that helps people<br />
plan how to use resources to achieve goals.<br />
(3)<br />
mandatory. Required by law. (18)<br />
manufactured fibers. “Test tube” fibers developed<br />
during scientific experimentati<strong>on</strong>. (11)<br />
market week. Time when designers and manufacturers<br />
introduce their new fashi<strong>on</strong> lines. (8)<br />
marketing. Aspect of fashi<strong>on</strong> industry c<strong>on</strong>cerned<br />
with developing, promoting, and selling<br />
products. (8)<br />
mass-produced. Making many garments at the<br />
same time, with machines doing most of the<br />
work. (8)<br />
maternity clothes. Clothes designed for wear by<br />
pregnant women. (21)<br />
media. Method of communicating messages to a<br />
large audience, as through magazine and televisi<strong>on</strong><br />
advertising. (1)<br />
mediati<strong>on</strong>. Settling a dispute with the help of a<br />
neutral third party. (20)<br />
mentor. Advisor or role model, often <strong>on</strong> job. (23)<br />
microfibers. Extremely thin fibers recently developed<br />
through fiber research. (11)<br />
mitered. Made to fit together with a precise right<br />
angle at the corner; makes sharp corners and<br />
eliminates bulk when sewing garments. (Part 5)<br />
modesty. Belief about the proper way to cover the<br />
body with clothes. (1)<br />
m<strong>on</strong>ey order. Purchased document stating that<br />
m<strong>on</strong>ey is to be paid to a particular pers<strong>on</strong> or<br />
store named <strong>on</strong> the form. (20)<br />
multiple roles. More than <strong>on</strong>e role, including<br />
inside and outside the family, such as s<strong>on</strong>,<br />
volunteer, and student. (3)<br />
590 • GLOSSARY<br />
multisized. Printed with several sizes <strong>on</strong> the same<br />
pattern tissue. (Part 1)<br />
N<br />
nap. Soft and fuzzy surface <strong>on</strong> a fabric; created by<br />
raised, short fiber ends. (13)<br />
natural fibers. Fibers that come from natural<br />
sources, such as plants and animals. (11)<br />
networking. Talking to people to get informati<strong>on</strong><br />
or advice, often about jobs. (22)<br />
n<strong>on</strong>verbal messages. Communicati<strong>on</strong> without<br />
words. (4)<br />
notching. Cutting out tiny wedge-shaped pieces<br />
of fabric from the seam allowances to remove<br />
bulk and make seams lie smooth. (Part 4)<br />
noti<strong>on</strong>s. Small items that become a permanent<br />
part of the garment, such as thread and seam<br />
tape. (Part 1)<br />
O<br />
off-grain. When crosswise yarns in fabric are not<br />
at right angles to lengthwise yarns. (Part 3)<br />
off-price retailers. Stores that sell brand-name and<br />
designer merchandise at reduced prices. (17)<br />
off-shore producti<strong>on</strong>. When domestic companies<br />
manufacture merchandise in foreign<br />
countries. (25)<br />
OSHA. Occupati<strong>on</strong>al Safety and Health<br />
Administrati<strong>on</strong>; government organizati<strong>on</strong> that<br />
establishes, revises, and enforces safety and<br />
health standards for workers. (25)<br />
outlet. Stores that sell <strong>on</strong>ly the brands produced<br />
by the designer, manufacturer, or factory that<br />
owns the store. (17)<br />
overlock seam. Special combinati<strong>on</strong> of stitches<br />
that join the fabric and finish the seam edges<br />
in <strong>on</strong>e sewing operati<strong>on</strong>; creates a narrow<br />
seam allowance and prevents fraying. (19)<br />
P<br />
parliamentary procedure. Way of c<strong>on</strong>ducting a<br />
meeting properly and leading group discussi<strong>on</strong>s<br />
in an orderly way. (23)<br />
patchwork. Sewing craft in which small fabric<br />
shapes are sewn together to create a new, decorative<br />
fabric. (16)
pattern. C<strong>on</strong>tains all the instructi<strong>on</strong>s needed for<br />
c<strong>on</strong>structing a sewing project. (Part 1)<br />
peer group. Group of people with a similar background,<br />
social status, and age. (1)<br />
peer pressure. Peer group’s push to c<strong>on</strong>form. (4)<br />
pers<strong>on</strong>ality. Individual’s unique combinati<strong>on</strong> of<br />
mental, emoti<strong>on</strong>al, and social qualities. (4)<br />
pigments. Substances that are in items and that<br />
absorb some light rays and reflect others, causing<br />
the items to be seen in varying colors. (9)<br />
pile. Raised surface of loops or yarn ends <strong>on</strong><br />
fabric. (12)<br />
pill. When tiny balls of fiber form <strong>on</strong> fabric. (11)<br />
piping. Narrow band of fabric stitched into a<br />
seam to accent the seam line or outer edge of a<br />
garment. (Part 5)<br />
placket. Finished slit in fabric at the wrist, neck,<br />
or waist of a garment to make it easier to put<br />
<strong>on</strong> and take off. (Part 5)<br />
pleats. Folds of fabric, which are wider than tucks<br />
and stitched or pressed in place. (Part 5)<br />
ply. Identifies the number of yarn strands<br />
twisted together to make a thicker yarn; ply<br />
yarns may have two or more single yarns<br />
twisted together. (12)<br />
portfolio. Set of drawings, photos, written articles,<br />
and samples that exemplify a pers<strong>on</strong>’s<br />
work or skills; useful for presentati<strong>on</strong> when<br />
seeking a job. (22)<br />
preshrinking. To cause a fabric to c<strong>on</strong>tract in<br />
order to prevent or minimize shrinkage after<br />
the finished garment is washed or dry-cleaned.<br />
(Part 3)<br />
presser foot. Holds the fabric against the feed<br />
dog <strong>on</strong> a sewing machine. (Part 2)<br />
pressing. When ir<strong>on</strong> is lowered to the fabric, then<br />
raised up and lowered to a different spot; often<br />
used for touch-up pressing. (14, Part 4)<br />
pret-a-porter (PRET-a-por-TAY). Deluxe, readyto-wear,<br />
French fashi<strong>on</strong> collecti<strong>on</strong>s; more<br />
practical and less expensive than couture. (7)<br />
pretreating. Method of cleaning heavily soiled<br />
area <strong>on</strong> fabric just before laundering in order<br />
to give it extra attenti<strong>on</strong>. (14)<br />
prewash soil-and-stain remover. Substance that<br />
is effective in dissolving oily, greasy, or heavily<br />
soiled stains <strong>on</strong> fabric. (14)<br />
primary colors. Three basic colors from which all<br />
other colors are made: red, yellow, and blue. (9)<br />
printing. Transfer of color to the surface of a fabric<br />
to form a pattern. (13)<br />
priorities. Ranking the importance of different<br />
items or opti<strong>on</strong>s. (3)<br />
prioritize. To rank items so you know which <strong>on</strong>es<br />
are most important. (17)<br />
procrastinate. To put off doing something. (23)<br />
profit. Amount of m<strong>on</strong>ey remaining after subtracting<br />
the cost of goods or supplies and operating<br />
expenses from a business’s income. (24)<br />
proporti<strong>on</strong> (scale). One of five design principles;<br />
describes how separate garment parts relate to<br />
each other and to the whole in size. (10)<br />
prosthesis (prahs-THEE-sus). Artificial device<br />
used to replace a limb <strong>on</strong> the human body. (21)<br />
punctuality. Arriving <strong>on</strong> time. (23)<br />
Q<br />
quality. Superior characteristics; in fashi<strong>on</strong>, good<br />
fabric and good workmanship. (19)<br />
quota. Set amount of specific merchandise that a<br />
country’s government allows to be imported.<br />
(25)<br />
R<br />
raglan sleeve. Sleeve style formed with a fr<strong>on</strong>t<br />
and back diag<strong>on</strong>al seam that extends from the<br />
neckline to the underarm. (6)<br />
ready-to-wear. Clothing made in advance for sale<br />
to any purchaser. (5)<br />
recalled. When notice is given by a manufacturer<br />
that a product needs to be returned for repair<br />
or replacement. (20)<br />
recycle. To reclaim items for another use; in<br />
interest of the envir<strong>on</strong>ment. (16)<br />
redesign. To change an existing garment to make<br />
it suitable for more wear. (16)<br />
references. Names, addresses, and teleph<strong>on</strong>e<br />
numbers of people who will speak positively<br />
about your pers<strong>on</strong>al character and qualificati<strong>on</strong>s<br />
for a job. (22)<br />
GLOSSARY • 591
esale store. Store that specializes in used or sec<strong>on</strong>dhand<br />
clothing. (17)<br />
resilient. Able to spring back into shape after<br />
crushing or wrinkling of fabric. (11)<br />
resource. Means used to reach a goal or manage<br />
life. (3)<br />
resourceful. Able to identify all the means and<br />
methods for accomplishing goals. (17)<br />
résumé (REH-zuh-may). Detailed summary of a<br />
pers<strong>on</strong>’s educati<strong>on</strong>, work experience, and jobrelated<br />
activities. (22)<br />
retail. Sale of goods in small quantities to<br />
c<strong>on</strong>sumers. (8)<br />
retro. Clothing style of an earlier time that comes<br />
back into fashi<strong>on</strong>. (6)<br />
rhythm. One of the five design principles; effect<br />
produced by design elements, carrying the eye<br />
through a regular repeated pattern. (10)<br />
roles. Different positi<strong>on</strong>s people have in society,<br />
such as daughter, student, and employee. (2)<br />
royalty. Fee and a percentage of profits; paid<br />
when licensing occurs in fashi<strong>on</strong> industry. (7)<br />
S<br />
scissors. Cutting tool that is smaller than shears<br />
and with both handles the same shape. (Part 2)<br />
seam allowance. Extra fabric inside the garment<br />
between the seam line and the fabric edge. (19)<br />
seam finish. Any method that stitches or trims<br />
seam allowances to prevent fraying. (19)<br />
sec<strong>on</strong>dary color. Combinati<strong>on</strong> of equal amounts<br />
of two primary colors <strong>on</strong> the color wheel. (9)<br />
self-c<strong>on</strong>cept. Image you have of yourself. (4)<br />
self-finished seams. Seams that enclose the seam<br />
allowances as the seam is stitched. (Part 5)<br />
self-motivated. Able to set goals and work independently.<br />
(24)<br />
selvage. Self-edge formed by the filling yarn<br />
when it turns to go back in the other directi<strong>on</strong><br />
as fabric is created; the two finished lengthwise<br />
edges of fabric. (12, Part 3)<br />
set-in sleeve. Sleeve style created by joining the<br />
sleeve to the garment with an armhole seam<br />
that circles the arm near the shoulder. (6)<br />
shade. Darker color that results when black is<br />
added to a color. (9)<br />
592 • GLOSSARY<br />
shadowing. Accompanying a pers<strong>on</strong> at work to<br />
learn about job resp<strong>on</strong>sibilities. (22)<br />
shape. One of five design elements; outline or silhouette<br />
of a garment, forms when <strong>on</strong>e or more<br />
lines come together to enclose an area. (10)<br />
shears. Cutting tool with l<strong>on</strong>g blades and two<br />
handles that are shaped differently. (Part 2)<br />
shirring. Method of gathering fabric with several<br />
rows of gathers. (Part 4)<br />
silhouette. Outline or shape of a garment that<br />
forms when <strong>on</strong>e or more lines come together<br />
to enclose an area. (10)<br />
sloper. A basic pattern that has been used successfully<br />
by a designer for a particular body<br />
shape; the basis for a new pattern design. ( 7)<br />
snags. Loops of yarn that pull out of a fabric. (16)<br />
society. Group of individuals who live together in<br />
a particular area, sometimes as a nati<strong>on</strong> or<br />
community. (1)<br />
solvent. Substance that dissolves another substance.<br />
(15)<br />
sourcing. When a company chooses where to<br />
manufacture or purchase goods. (25)<br />
space. One of the five design elements; area<br />
inside shape. (10)<br />
specialty store. Store that carries limited line of<br />
merchandise, such as clothing, accessories, or<br />
fabrics. (17)<br />
spool pins. Hold spools of thread <strong>on</strong> a sewing<br />
machine. (Part 2)<br />
spun yarns. Yarns made of staple fibers, the short<br />
fibers measured in inches or centimeters. (12)<br />
standards. Guidelines and principles that set<br />
forth what’s suitable to wear. (2) Specific models<br />
of quality or performance against which<br />
products are judged. (20)<br />
status. Pers<strong>on</strong>’s positi<strong>on</strong> or rank within a group. (1)<br />
status symbols. Items worn to give the wearer a<br />
special feeling of importance or wealth; may be<br />
names, initials, or symbols of fashi<strong>on</strong> designers,<br />
sports figures, and other celebrities <strong>on</strong><br />
clothes and accessories. (1)<br />
stereotype. Simplified or standardized image of a<br />
pers<strong>on</strong> or group. (4)
stretch gauge. Guide <strong>on</strong> pattern; shows how much<br />
knit fabric must be able to stretch. (Part 1)<br />
style. Characteristics that distinguish <strong>on</strong>e particular<br />
item of clothing from another. (6)<br />
sumptuary laws. Regulati<strong>on</strong>s that c<strong>on</strong>trolled<br />
what each social class could wear during the<br />
Middle Ages. (5)<br />
sweatshops. Name applied to early clothing factories<br />
because of dark, airless, uncomfortable<br />
and unhealthful working c<strong>on</strong>diti<strong>on</strong>s. (5)<br />
symmetrical balance. Design of a garment that<br />
has identical spaces <strong>on</strong> each of two sides. (10)<br />
T<br />
take-up lever. C<strong>on</strong>trols the amount of thread<br />
pulled from the spool to the needle for each<br />
stitch; moves up and down as you stitch <strong>on</strong> a<br />
sewing machine. (Part 2)<br />
target audience. Specific group of potential customers.<br />
(24)<br />
tariff. Tax <strong>on</strong> imported items. (25)<br />
teamwork. Work d<strong>on</strong>e cooperatively, rather than<br />
individually, by several associates. (23)<br />
technology. New developments brought about by<br />
increasing scientific knowledge. (5)<br />
tensile strength. Ability to withstand tensi<strong>on</strong> or<br />
pulling. (11)<br />
tensi<strong>on</strong>. Tightness of thread when sewing <strong>on</strong> a<br />
machine. (Part 2)<br />
texture. Describes the surface characteristics that<br />
determine the look and feel of an object, such<br />
as fabric. (10)<br />
texturing. Process using chemicals, heat, or special<br />
machinery to turn straight, rod-like filaments<br />
into coiled, looped, or crimped yarns. (12)<br />
thread guides. Parts <strong>on</strong> a sewing machine that<br />
help guide upper thread from spool to needle<br />
without tangling. (Part 2)<br />
tint. Lighter color that results when white is<br />
added to a color. (9)<br />
toxic. Pois<strong>on</strong>ous, as in the lead in paint, a special<br />
danger for young children who tend to put<br />
things in their mouth. (20)<br />
trademark. Identifying mark used by manufacturer<br />
or retailer to distinguish its products<br />
from those of the competiti<strong>on</strong>. (18)<br />
trade names. Names, as for fibers, registered as<br />
trademarks and protected by law. (11)<br />
trade-off. Exchange of <strong>on</strong>e item for another. (19)<br />
tubing. Strip of fabric stitched and turned right<br />
side out so the seam allowances are inside the<br />
tube. (Part 5)<br />
tucks. Folds of fabric that c<strong>on</strong>trol fullness or add<br />
design interest. (Part 5)<br />
tumble dry. Drying a garment in a tumble dryer<br />
at the specified setting—high, medium, low, or<br />
no heat. (14)<br />
U<br />
unit c<strong>on</strong>structi<strong>on</strong>. Completing individual parts<br />
of a garment as fully as possible before sewing<br />
them together. (Part 4)<br />
V<br />
value. The degree of lightness or darkness of a<br />
color, which was created by the amount of<br />
white or black added. (9)<br />
values. Pers<strong>on</strong>’s or family’s beliefs about what’s<br />
important, desirable, or worthwhile. (1)<br />
verbal messages. Communicati<strong>on</strong> that uses<br />
words. (4)<br />
versatile. Having multiple capabilities or functi<strong>on</strong>s,<br />
as when a garment can be worn for more<br />
than <strong>on</strong>e activity. (17)<br />
vintage. Fashi<strong>on</strong>s from earlier decades. (6, 17)<br />
W<br />
wardrobe plan. Guide for making future additi<strong>on</strong>s<br />
to a wardrobe. (17)<br />
warp yarns. Yarns that run the length of a fabric.<br />
(12)<br />
warranty. Manufacturer’s pledge of assurance<br />
about a product’s quality or performance. (18)<br />
wearing ease. Amount of fullness needed for<br />
movement and comfort when wearing a garment.<br />
(Part 1)<br />
weaving. Interlaces two yarns that are at right<br />
angles to each other. (12)<br />
wholesale. Price paid by stores to manufacturers<br />
when buying goods to sell. (8)<br />
X-Y-Z<br />
yarns. Fibers twisted together or laid side by side.<br />
(12)<br />
GLOSSARY • 593
CREDITS<br />
Interior Design: Bill Smith Studio<br />
Cover Design: Bill Smith Studio<br />
Cover Photography: Ken Karp<br />
Special thanks to Art MacDillo’s Gary<br />
Skillestad, Marshall Greenberg,<br />
Jeff Stoecker, and Jo-Ann Fabrics<br />
& Crafts for their assistance with<br />
art and photographs in the<br />
Sewing and Serging Handbook.<br />
AKG L<strong>on</strong>d<strong>on</strong>, 85<br />
Alamy, Pablo Delfos-Image Shop, 145<br />
AP/Wide World Photos, Herman<br />
Miller, 409<br />
AP/Wide World Photos, 90, 91<br />
Tim Graham, 131T<br />
Jennifer Graylock, 131B<br />
John Gress, 30<br />
Ann Heisenfelt, 313<br />
Maria Hesse, 410<br />
Kathy Willens, 130<br />
Peter Arnold, Aldo Brando, 202, 212<br />
Artville, 175, 188<br />
ATMI, 428<br />
Burt<strong>on</strong> Snowboards, 32<br />
Todd Carroll, 452<br />
Celanese Acetate, 179, 209<br />
Ken Clubb, 176, 537<br />
Coldwater Creek, 186, 208<br />
Coldwater Creek, David R. Frazier,<br />
David R. Frazier Photography,<br />
72, 140, 298, 373, 433<br />
Coolibar, 277<br />
Comstock, 173, 300-301<br />
Corbis, 16, 90, 103, 131, 158, 170, 406<br />
Paul Almasy, 119<br />
James L. Amos, 422<br />
Andrea Altemueller, 126-131<br />
Cecil Beat<strong>on</strong>, C<strong>on</strong>dé Nast Archives,<br />
127<br />
Niall Benvie, 203<br />
Bettman Archives, 126<br />
Andrea Comas/Reuters NewMedia,<br />
Inc., 7, 9, 11, 13, 124<br />
Jack Dabaghian/ Reuters NewMedia<br />
Inc., 96<br />
Duomo/Chris Trotman, 364<br />
Macduff Evert<strong>on</strong>, 419<br />
Eye Ubiquitous, 428<br />
Owen Franken, 118, 420<br />
594 • CREDITS<br />
John Hicks, 8, 156<br />
Jack Hollingsworth, 412<br />
Robert Holmes, 4, 7, 9, 11, 13, 100<br />
Edward Holub, 64<br />
Image 100, 62<br />
Catherine Karnow, 313<br />
Wolfgang Kaehler, 172<br />
Reed Kaestner, 94<br />
Doug Kanter/AFP, 75<br />
Catherine Karnow, 39<br />
Yuri Kazakov/Reuters NewMedia<br />
Inc., 124<br />
Bob Krist, 134<br />
Robert Llewellyn, 62<br />
Gail Mo<strong>on</strong>ey, 312<br />
Jean-Pierre Muller/AFP, 116<br />
Mug Shots, 157<br />
Helen Norman, 67, 70<br />
Reuters, 128<br />
Reuters NewMedia, Inc., 422<br />
Ariel Skelley, 52<br />
Richard Hamilt<strong>on</strong> Smith, 196<br />
Brad Rickerby/ Reuters NewMedia<br />
Inc., 147<br />
Christine Schneider, zefa, 93<br />
Mike Seger/ Reuters NewMedia Inc.,<br />
76-77<br />
Tom Stewart, 166<br />
Strauss/Curtis, 4, 192<br />
Brian A. Vikander, 40<br />
Edina Vittorio, 78<br />
Tim Wright, 5, 197<br />
Michael S. Yamashita, 200<br />
Mike Zens, 423<br />
Corbis (formerly Stock Market)<br />
Roger Ball, 190, 222, 427<br />
Michael Barley, 410<br />
Paul Bart<strong>on</strong>, 366, 390<br />
Ed Bock, 314<br />
Paul Chmielowiec/LWA, 546<br />
Dex Images, Inc., 73, 319<br />
DiMaggio/Kalish, 210<br />
Peter M. Fisher, 24<br />
Charles Gupt<strong>on</strong>, 251<br />
Brownie Harris, 10, 139, 237<br />
John Henley, 324, 349<br />
Ted Horowitz, 10, 244<br />
R<strong>on</strong>nie Kaufman, 367<br />
Michael Keller, 318<br />
Bill Miles, 117<br />
Mug Shots, 328, 359<br />
Mug Shots, Jeremy Beet<strong>on</strong>, 328, 330<br />
Alese & Mort Pechter, 368<br />
Jose Luis Pelaez, Inc., 15, 25, 30, 65,<br />
122, 320, 322, 360, 392<br />
Chuck Savage, 51, 321, 391, 397, 399<br />
Robert Shaw, 150<br />
Shot Gun, 354<br />
Ben Simm<strong>on</strong>s, 215, 232<br />
Ariel Skelley, 369, 408, 434<br />
Tom Stewart, 307, 395<br />
Dann Tardiff/LWA, 379<br />
William Taufic, 5, 8, 9, 11, 118, 132,<br />
139, 142, 152, 153, 191, 193, 245,<br />
247, 296, 372, 378<br />
Stephen Welstead/LWA, 282, 393<br />
David Woods, 168, 240<br />
Corel, 436-437<br />
Cott<strong>on</strong> Incorporated, 200<br />
Creatas, 332, 425<br />
DECA (Distributive Educati<strong>on</strong> Clubs<br />
of America), 396<br />
Design 5, 54<br />
Courtesy Barbara Ericks<strong>on</strong>, 85<br />
Eye Wire/Getty, 344<br />
Fashi<strong>on</strong> Syndicate Press, Randy Brooke,<br />
322<br />
FCCLA (Family <str<strong>on</strong>g>Care</str<strong>on</strong>g>er and Community<br />
Leaders of America), 396<br />
FPG/Getty<br />
T<strong>on</strong>y Anders<strong>on</strong>, 50<br />
Mark Scott, 358<br />
David R. Frazier, David R. Frazier<br />
Photography, 72, 140, 298, 373,<br />
433<br />
Tim Fuller, 297, 299, 432<br />
Eric Futran, 184, 185, 306<br />
Ann Garvin, 5, 7, 9, 11, 13, 43, 55, 69,<br />
181, 217, 218, 230, 256, 260, 275,<br />
286, 287, 293, 310, 339, 345, 346,<br />
353, 364, 374, 391, 435, 446, 461,<br />
478, 482<br />
Gerber Technologies, 14, 123, 183, 424<br />
Getty Images, 129<br />
Daniel Allan, 31<br />
T<strong>on</strong>y Anders<strong>on</strong>, 383, 444<br />
Jim Arbogast, 28<br />
Bruce Ayres, 412, 413<br />
Jan Cobb Photography Ltd., 63<br />
Ryan Chapple/Taxi, 321
Color Day Producti<strong>on</strong>s, 401<br />
Urbano Delvalle/Time-Life Pictures,<br />
327<br />
Digital Visi<strong>on</strong>, 259<br />
George Doyle, 113<br />
Frazer Harris<strong>on</strong>, 146<br />
Paul Hawthorne, 8, 125<br />
Gavin Hellier, 41<br />
Noel Hendricks<strong>on</strong>, 324<br />
Image Source, 68<br />
Roberta Krasnig, 12, 257<br />
Joe McBride, 33<br />
Ryan McVay, 6, 58<br />
Suzanne Larr<strong>on</strong>de Murphy, 22-23<br />
Erin Patrice O’Brien, 67<br />
Nicolas Russel, 42<br />
Ezra Shaw, 26<br />
Elizabeth Young, 99<br />
The Granger Collecti<strong>on</strong>, NY, 83, 84<br />
Steve Greiner, 294<br />
Renie Hanna, 103, 119, 120, 169, 174,<br />
176, 177, 180, 181, 185, 186, 187,<br />
277, 308, 309, 336, 444<br />
Linda Hens<strong>on</strong>, 346<br />
Herff J<strong>on</strong>es Cap & Gown Divisi<strong>on</strong>, 27<br />
Hult<strong>on</strong>/Archive by Getty, 90, 91, 92, 97,<br />
99, 103, 114<br />
Image Bank<br />
Francisco Rojo Alvarez, 250<br />
Gabriel M. Covian, 194-195<br />
Farmhouse Producti<strong>on</strong>s,418<br />
Maria Taglienti, 234<br />
The Image Works<br />
DPA, 6, 8, 10, 12, 14, 38, 48<br />
Lee Snider, 15, 38<br />
Index Stock<br />
Myrleen Cate, 208<br />
Diaphor Agency, 151<br />
Mark Gibs<strong>on</strong>, 17, 307<br />
Chip Henders<strong>on</strong>, 214<br />
SW Producti<strong>on</strong>s, 397, 402<br />
Internati<strong>on</strong>al Stock<br />
James Davis, 182<br />
Intellifit, 337<br />
Jupiter, 45, 65, 199<br />
Randa Bishop, 26<br />
Brand X, 426<br />
First Light, 414<br />
Jack Hollingsworth, 385<br />
Tetra Images, 98<br />
Ken Karp, 480<br />
Ken Lax, 46, 89, 305, 306, 386, 500<br />
Land’s End, 27, 47<br />
Magellan, 205<br />
Masterfile<br />
Dan Lim, 60<br />
Masterfile Producti<strong>on</strong>s, 404<br />
Ted Mishima, 4, 7, 8, 9, 10, 11, 12, 13, 14,<br />
37, 217, 228-231, 236, 238, 242,<br />
405, 416, 440, 442, 444, 445, 459,<br />
481, 483, 495, 584<br />
Morgan-Cain, 167, 204, 262<br />
Nader photo courtesy Christian Worth,<br />
122<br />
Newscom, 131C<br />
North Wind Picture Archives, 79, 80, 81,<br />
82, 83, 87, 88, 142<br />
Tom Pantages, 136, 236, 237, 246<br />
Scott Pease, 239, 252, 367, 408<br />
Brent Phelps, 144<br />
Photo Spin, 129<br />
Photo Disc, 14, 46, 128, 129, 137, 261,<br />
303, 385, 429<br />
PhotoEdit<br />
John Neubauer, 42<br />
Michael Newman, 32, 57<br />
David Young-Wolff, 34, 407<br />
PictureQuest, Burke/Triolo, 248-249<br />
John Portman & Assoc., 143<br />
Pristine, 241<br />
Reuni<strong>on</strong> des Musees Nati<strong>on</strong>aux/Art<br />
Resource, NY, 81<br />
Paul Rico, 44<br />
Mark Romine, 438, 454<br />
Jill Seiler, 487, 488, 489, 492, 493, 494,<br />
495, 497<br />
Sensatex, 220<br />
Simplicity Pattern Company, 56, 185,<br />
440, 442, 444, 445, 481, 483, 485,<br />
495, 543<br />
Gary Skillestad, 101, 211, 219, 284, 285,<br />
288, 465, 466, 467, 468, 469, 470,<br />
490, 491, 504, 505, 508, 512, 517,<br />
520, 523, 526, 529, 539, 541, 547,<br />
548, 549, 578, 580, 582<br />
Stock Bost<strong>on</strong><br />
Robert Fried, 6, 8, 10, 12, 14, 39<br />
Stock C<strong>on</strong>necti<strong>on</strong>s, Minardi, 198<br />
Stockbyte, 128<br />
Jeff Stoecker, 135, 160, 161, 162, 163,<br />
165, 283, 348, 541, 549, 583<br />
St<strong>on</strong>e/Getty Images<br />
Roy Botterell, 138<br />
Robert E. Daemmrich, 36<br />
Robert Daly, 302<br />
David Harriman, 376-377<br />
Paul Kenward, 312<br />
Anth<strong>on</strong>y Saint James, 154-155<br />
Brooke Slezak, 313<br />
David Young-Wolff, 266<br />
Superstock<br />
Jiang Jin, 394<br />
M<strong>on</strong>tage, 86<br />
Texas Highways, 200, 201<br />
Tim Tucker, 365<br />
TYR Sport, Inc. 227<br />
Uni<strong>on</strong> of Needletrades, Industrial and<br />
Textile Employees, AFL-CIO,<br />
CLC, 327<br />
USDA, 158<br />
Vanguard Supreme, 224<br />
Victoria & Albert Museum L<strong>on</strong>d<strong>on</strong>/Art<br />
Resource, NY, 84<br />
Vote Photography, 13, 17, 141, 148, 235,<br />
239, 252, 253, 257, 258, 259, 260,<br />
263, 267, 269, 270, 271, 272, 273,<br />
274, 276, 279, 280, 284, 286, 287,<br />
289, 290, 292, 310, 311, 315, 320,<br />
323, 325, 326, 327, 329, 338, 340,<br />
342, 347, 350, 353, 355, 360, 361,<br />
439, 447, 464, 579<br />
Dana White, 13, 40, 61, 74, 258, 260,<br />
264, 268, 276, 278, 291, 356, 362,<br />
370,375, 380, 383, 384, 387, 388,<br />
400, 406, 411, 414<br />
The Woolmark Company, 202<br />
Ian Worpole, 409, 443, 449, 450, 519<br />
Duane Zehr, 16, 420, 544<br />
CREDITS • 595
INDEX<br />
A<br />
Abercrombie & Fitch, 425<br />
Abrasi<strong>on</strong>, 198, 586<br />
Abrasi<strong>on</strong> resistance, 198<br />
Absorbent, 198, 200, 201, 202, 586<br />
Accented neutral, 165<br />
Accessories, 291<br />
adding, 285–86<br />
choosing, 69<br />
Accessories manufacturers, 139<br />
Acetate, 203, 206, 207, 208–9, 271<br />
identifying in lab, 210<br />
Acid washing, 239<br />
Acquisiti<strong>on</strong>s, 425<br />
Acrilan®, 198<br />
Acrylic, 205, 206, 207, 208<br />
identifying in lab, 210<br />
Activities, clothing needs and, 51–52<br />
Adapter c<strong>on</strong>es, 471<br />
Adaptive design, 368, 586<br />
Adidas, 426<br />
Adolfo, 126<br />
Adornment, 27, 586<br />
Advertising, 145, 319–20, 414–15<br />
influence of, <strong>on</strong> clothing, 28–29<br />
informati<strong>on</strong>, 319<br />
media for, 320–22<br />
in perspective, 322<br />
point-of-sale, 322<br />
Advertorials, 321<br />
African garments, fashi<strong>on</strong> for, 92<br />
Agitator, 270, 586<br />
Air permeability, 218<br />
A-line dress, 108<br />
Allergy protecti<strong>on</strong>, 241<br />
All-purpose detergents, 268<br />
Aloha shirt, 109<br />
Alpaca, 203<br />
Alterati<strong>on</strong>s, 335, 337, 586<br />
Amalgamated Clothing Workers of<br />
America (ACWA), 143, 326<br />
American Apparel & Footwear<br />
Associati<strong>on</strong> (AAFA), 147<br />
American Fibers Manufacturers<br />
Associati<strong>on</strong> (AFMA), 147<br />
American Textile Manufacturers<br />
Institute (ATMI), 147, 427<br />
596 • INDEX<br />
Analogous color scheme, 164<br />
Angora, 199, 219<br />
Annunciators, 346<br />
Antibacterial finish, 240<br />
Antiseptic finish, 240<br />
Antistatic finish, 240<br />
Apparel designer, 192<br />
Apparel design with computer-aided<br />
design, 123<br />
Apparel industry, 138–43<br />
designers in, 118–19<br />
Apparel manufacturers, 135<br />
Apparel producti<strong>on</strong>, 150–53<br />
Apparel stylist, 192<br />
Appearance, 61–62<br />
Applicati<strong>on</strong> form, 384, 586<br />
Applied casing, 527–28<br />
Appliqués, 286, 586<br />
Appropriateness, 43, 586<br />
Aptitude, 379, 586<br />
Aramid, 210<br />
Arbitrati<strong>on</strong>, 353, 586<br />
Ariz<strong>on</strong>a®, 426<br />
Armani, Giorgio, 118, 129<br />
Arm positi<strong>on</strong>s, 63<br />
Aroma enhancement, 220<br />
Artificial finger, 236<br />
As is c<strong>on</strong>diti<strong>on</strong>, 329<br />
Aspects of industry, 398<br />
Assembly line, 142, 586<br />
Asymmetrical balance, 184–85, 586<br />
Atelier, 122, 586<br />
Athlete’s Foot, 408<br />
At-home selling, 315<br />
Attitude, 393<br />
Avant-garde, 100, 586<br />
B<br />
Baby doll sleeve, 106<br />
Backpacks, 69<br />
Backstitching, 502–3, 507<br />
Baday, Lida, 129<br />
Balance, 184–85, 586<br />
Balance of trade, 420, 586<br />
Balancing work and pers<strong>on</strong>al life,<br />
400-1<br />
Balenciaga, Cristobal, 124, 126<br />
Ball-head pins, 473<br />
Ballpoint needle, 455<br />
Ballpoint pins, 473<br />
Banana Republic, 425<br />
Band cuff, 562–63<br />
Banded placket, 564<br />
Bank cards, 350<br />
Bar code technology, 141<br />
Barter, 86, 586<br />
Basic weaves, 222–23<br />
Baskets, 262<br />
Basket weave, 222<br />
Basting, 501<br />
pin, 518<br />
stitches in, 506–7<br />
Basting tape, 476<br />
Bateau neckline, 104<br />
Bath and Body Works, 425<br />
Batiste, 228<br />
Beene, Geoffrey, 126<br />
Behavior, 61, 62<br />
Bell shape of clothes, 179, 180<br />
Belt carrier, 508<br />
Belting, 450<br />
Bent-handled shears, 495<br />
Bermuda shorts, 111<br />
Better Business Bureau (BBB), 353<br />
Bias bindings, 574–78, 586<br />
Bias facings, 524, 526<br />
Bias grain, 221, 490<br />
Bias strips, cutting, 574<br />
Bias tape, 450<br />
Billboards, 322<br />
Black market goods, 422–23<br />
Blahnik, Manolo, 129<br />
Blanket stitch, 509<br />
Blass, Bill, 126, 426<br />
Blazer jacket, 112<br />
Bleaching, 256, 260<br />
Blended yarns, 217, 219<br />
Blending sizes, 489<br />
Blends, 216–17, 219, 586<br />
Blind catchstitch, 509<br />
Blind hem foot, 568<br />
Blindstitch, 508<br />
Blindstitch-hem foot, 464<br />
Bloomingdale’s Burdines, 425<br />
Blue jean insulati<strong>on</strong>, 292
Bobbin, 221, 586<br />
inserting, 458<br />
preparing, for sewing machine,<br />
457–58<br />
raising thread, 460<br />
Bodkin, 476<br />
Body frame size, wrist size in estimating,<br />
173<br />
Body language, 62–63, 586<br />
Body shape, color and, 168–69<br />
Boiled wool, 228<br />
Bolero jacket, 113<br />
Bolts, 586<br />
B<strong>on</strong>ded fabrics, 226, 227<br />
B<strong>on</strong>ding, 219<br />
Bootleg goods, 422–23<br />
Boots, 292<br />
Border prints, 494<br />
Bound butt<strong>on</strong>holes, 532<br />
Boutique, 312, 586<br />
Boxes, 262<br />
Braided elastic, 450<br />
Brand names <strong>on</strong> garment label, 326<br />
Brando, Marl<strong>on</strong>, 91<br />
Broadcloth, 222, 228<br />
Broadway, 425<br />
Brocade, 224, 228<br />
Buckles, 449<br />
Budget, 54–55, 56, 586<br />
Bulk, minimizing, 554<br />
Burlap, 228<br />
Burlingt<strong>on</strong> Industries, 136<br />
Burrows, Stephen, 129<br />
Business<br />
buying, 406, 408<br />
growth of, 425<br />
starting new, 408–10<br />
Business casual, 45<br />
Business plan, developing, 415<br />
Butterick, Ebenezer, 87<br />
Butt<strong>on</strong>(s), 448–49<br />
changing, 285<br />
in customizing garments, 369<br />
placement of, 533<br />
reattaching, 288<br />
reinforcement of, 534<br />
sew-through, 534<br />
shank, 534<br />
Butt<strong>on</strong>ed cuff, 563, 565<br />
Butt<strong>on</strong>hole(s)<br />
length of, 533<br />
markings for, 533<br />
placement of, 532–33<br />
types of, 532<br />
Butt<strong>on</strong>hole foot, 464<br />
Butt<strong>on</strong>hole stitch, 509<br />
Butt<strong>on</strong>hole twist thread, 448<br />
Buyer, 374<br />
C<br />
Cable cord, 450<br />
Cacique, 425<br />
Caftan, 38<br />
Calendering, 239<br />
Calico, 228<br />
Camel hair, 203<br />
Canvas, 228<br />
Cardigan jacket, 112<br />
Cardin, Pierre, 126<br />
<str<strong>on</strong>g>Care</str<strong>on</strong>g>er(s). See also Job(s)<br />
in apparel producti<strong>on</strong>, 150–53<br />
in communicati<strong>on</strong> and educati<strong>on</strong>,<br />
432-35<br />
in design, 190–93<br />
in fashi<strong>on</strong> merchandising, 372-75<br />
in fashi<strong>on</strong> promoti<strong>on</strong>, 72–75<br />
in fashi<strong>on</strong> services, 296–99<br />
identifying goals, 137<br />
preparati<strong>on</strong> for, 379–87<br />
in textile producti<strong>on</strong>, 244–47<br />
<str<strong>on</strong>g>Care</str<strong>on</strong>g>er clusters, 381<br />
<str<strong>on</strong>g>Care</str<strong>on</strong>g>er paths, 586<br />
researching, 137, 381–82<br />
traveling, 398–400<br />
<str<strong>on</strong>g>Care</str<strong>on</strong>g> instructi<strong>on</strong>s <strong>on</strong> garment labels,<br />
326<br />
<str<strong>on</strong>g>Care</str<strong>on</strong>g> Labeling Rule, 258, 353<br />
<str<strong>on</strong>g>Care</str<strong>on</strong>g> labels, 258, 260<br />
Caribbean Basin Initiative (CBI), 423<br />
Cashin, B<strong>on</strong>nie, 126<br />
Cashmere, 199, 203<br />
Cash-<strong>on</strong>-delivery (C.O.D.), 347<br />
Cash transacti<strong>on</strong>s, 347–48<br />
Casings, 527–28, 573, 586<br />
Catalogs, 322–23<br />
shopping in, 314–15, 324<br />
Catchstitch, 508–9, 540<br />
Celebrities, influence of, <strong>on</strong> clothing, 29<br />
Cellulose, 90, 204, 586<br />
Cellulosic fibers, 203<br />
Chain stitch, 510, 586<br />
Chain stores, 144<br />
Challis, 228<br />
Chambray, 229<br />
Chanel, Gabrielle “Coco,” 124, 126<br />
Charmeuse, 229<br />
Charter Club®, 426<br />
Check, 348–49<br />
Chelsea collar, 105<br />
Chemical damage, 259<br />
Chemical technician, 246<br />
Chemise dress, 107<br />
Chenille, 229<br />
Che<strong>on</strong>gsam, 81<br />
Chesterfield jacket, 113<br />
Chiff<strong>on</strong>, 229<br />
Children’s clothes<br />
choosing, 361–64<br />
in history, 363<br />
licensed wear for, 364<br />
recycling, 291–92<br />
sizes of, 361–62<br />
Chino, 223, 229<br />
Chintz, 229<br />
Chit<strong>on</strong>, 80<br />
Chlorine beach, 256, 269<br />
Circular knitting, 224–25<br />
Circular ruffles, 579–80<br />
Ciré, 239<br />
Classics, 99, 586<br />
Clean Air Act, 427<br />
Cleaning fluid, 256<br />
Clean Water Act, 427<br />
Clearance sales, 328<br />
Clear elastic, 450<br />
Climate sensitivity, 220<br />
Clipping, 521–22, 587<br />
Closed circuit cameras, 346<br />
Closed-sleeve method, 560–61<br />
Closet, 263<br />
Clothes dryers, 271<br />
Clothier, 299<br />
Clothing<br />
basic functi<strong>on</strong>s of, 26–27<br />
behavior and, 61<br />
bey<strong>on</strong>d basic functi<strong>on</strong>s of, 32<br />
budgeting for, 54–55<br />
children’s, 291–92, 361–64<br />
choosing, 25–27<br />
color and, 157<br />
in communicati<strong>on</strong>, 64–67<br />
drying, 275–76<br />
earliest, 79–82<br />
global trends in, 38–39<br />
handling mistakes, 47<br />
influences <strong>on</strong>, 25–33<br />
ir<strong>on</strong>ing, 276–78<br />
laundering, 272–75<br />
for older adults, 366–67<br />
for others, 359–69<br />
for people with disabilities, 367–69<br />
putting away, 257–58<br />
recycling, 290–91, 293<br />
redesigning, 283–87<br />
reflecti<strong>on</strong> of cultures in, 37–39<br />
repairing, 287<br />
sorting, 272–73<br />
INDEX • 597
storing, 260, 262–63<br />
as symbols, 39–42<br />
Clothing care, 251–63<br />
evaluating, 339–40<br />
labels, 258–60<br />
routine, 251–58<br />
Clothing customs, 42–44, 46–47<br />
Clothing management, 53–55, 57<br />
Clothing space, creating, 262<br />
Coat styles, 112–13<br />
Coin-operated dry cleaning, 279<br />
Collar colors, 43<br />
Collars, 556–58<br />
attaching, 557<br />
c<strong>on</strong>structing, 556<br />
styles of, 104–5<br />
Collecti<strong>on</strong>s, 118, 587<br />
designer, 122–25<br />
Color bleeding, 259<br />
Color blindness, correcting, 163<br />
Colorfast, 587<br />
Colorfastness, 236–37<br />
Color loss in fabrics, 259<br />
Colors, 156–69<br />
analyzing, 166<br />
body shape and, 168–69<br />
changing, 286<br />
in children’s clothes, 363–64<br />
clothing and, 157<br />
complementary, 161<br />
c<strong>on</strong>trasting, 186<br />
defined, 160<br />
design finishes and, 235–37, 239<br />
of distincti<strong>on</strong>, 159<br />
gang violence and, 157<br />
impact of, 157–59<br />
intermediate, 161<br />
language of, 160<br />
mood and, 159<br />
movement and, 159<br />
neutral, 163<br />
primary, 161<br />
seas<strong>on</strong>al, 167<br />
sec<strong>on</strong>dary, 161<br />
selecting, 165–69<br />
as symbols, 158<br />
temperature and, 158–59<br />
thread, 447<br />
Color scheme, 164–65, 587<br />
Color variati<strong>on</strong>s, 162<br />
Color wheel, 160–61<br />
Combinati<strong>on</strong> detergents, 268<br />
Combinati<strong>on</strong> fusible/sew-in interfacing,<br />
451<br />
Comfort in children’s clothes, 362–63<br />
Communicati<strong>on</strong><br />
clothing in, 64–67<br />
598 • INDEX<br />
educati<strong>on</strong> and, careers 432–435<br />
skills in, 393<br />
Company cards, 350<br />
Comparis<strong>on</strong> shopping, 327, 587<br />
Complaints, effective, 352, 354<br />
Complementary colors, 161, 164, 587<br />
Compromise, 57, 341, 587<br />
Computer, fabrics by, 183<br />
Computer-aided design (CAD) programs,<br />
121, 123, 141, 183, 193,<br />
424, 587<br />
Computer-aided manufacturing<br />
(CAM) system, 141, 142, 424<br />
Computer filter, 163<br />
Computer-integrated manufacturing<br />
(CIM), 424<br />
Computerized embroidory machines,<br />
364<br />
Computerized sewing machines, 464<br />
Computer resources, 55<br />
C<strong>on</strong>e Mills Corporati<strong>on</strong>, 136<br />
C<strong>on</strong>formity, 66, 587<br />
C<strong>on</strong>signment shop, 290–91, 313, 587<br />
C<strong>on</strong>structi<strong>on</strong>, 219<br />
C<strong>on</strong>sumer agencies and organizati<strong>on</strong>s,<br />
352–53<br />
C<strong>on</strong>sumer bill of rights, 352<br />
C<strong>on</strong>sumer Credit Protecti<strong>on</strong> Act, 355<br />
C<strong>on</strong>sumer power, 31<br />
C<strong>on</strong>sumer Product Safety Commissi<strong>on</strong><br />
(CPSC), 353<br />
C<strong>on</strong>sumer protecti<strong>on</strong>, 352–53, 355<br />
C<strong>on</strong>sumers, resp<strong>on</strong>sibilities of, 345–55<br />
C<strong>on</strong>tinuous bias-strip method, 574<br />
C<strong>on</strong>tinuous lap, 563–64<br />
C<strong>on</strong>tractors, 139, 587<br />
C<strong>on</strong>trasting color, 186<br />
C<strong>on</strong>venti<strong>on</strong>al zipper, 448<br />
C<strong>on</strong>verters, 587<br />
Copy, advertising, 145, 587<br />
Copyright laws, embroidery designs,<br />
364<br />
Corded piping, 577<br />
Corded seam, 550<br />
Corded tubing, 578<br />
Corduroy, 223, 229<br />
Corner, turning, 519<br />
Cost of care, 340–41<br />
Cost per wearing, 341, 587<br />
Costs<br />
establishing, 140<br />
hidden, 345<br />
quality versus, 340<br />
Costume historian, 435<br />
Cott<strong>on</strong>, 197, 198, 199, 200, 219, 271<br />
identifying in lab, 210<br />
Cott<strong>on</strong> gin, 87<br />
Cott<strong>on</strong> Incorporated, 147<br />
Council of Fashi<strong>on</strong> Designers of<br />
America (CFDA), 147<br />
Counterfeit items, 422, 587<br />
Country of origin <strong>on</strong> garment labels,<br />
326<br />
Coup<strong>on</strong> sales, 328<br />
Courrègas, André, 127<br />
Courses, 224, 490<br />
Couture, 122–24, 587<br />
Couturiers, 123, 587<br />
Cover, fabric, 218<br />
Cover letter, 385, 587<br />
Cover stitch, 469<br />
Cover-stitch hem, 541<br />
Cowl, 104, 587<br />
Crates, 262<br />
Cravat, 83<br />
Crease-resistant finish, 240<br />
Creativity, 587<br />
Credit, 349–51<br />
Credit cards, 350–51, 587<br />
Crepe, 222, 229<br />
Crew neckline, 104<br />
Crocking, 259<br />
Crompt<strong>on</strong>, Samuel, 87<br />
Croquis, 121, 587<br />
Crossover merchandising, 426<br />
Cross-stitch, 509<br />
Crosswise fold, 492<br />
Crosswise grain, 490<br />
Cuffs, sewing, 562–65<br />
Culotte pants, 111<br />
Cultures, 37–39, 587<br />
Curved patch pocket, 569<br />
Curved stitching, 462<br />
Curves, stitching, 575–76<br />
Customized fit, 337<br />
Customized garments, 369<br />
Customizing services, 47<br />
Customs, 42–44, 46–47, 587<br />
Cut-and-piece bias-strip method,<br />
574–75<br />
Cutting layout, 482, 587<br />
Cutting tools, 473–74<br />
D<br />
Dacr<strong>on</strong>®, 197–98<br />
Daily News Record, 147<br />
Damask, 224, 229<br />
Dan River, 136<br />
Darts, 514–15, 587<br />
Databases, 392<br />
Dean, James, 91<br />
Debit card, 349, 587<br />
Decisi<strong>on</strong>s, making, 33
Decorative lines, 181<br />
Decorative seams, 548–50, 587<br />
Decorative threads, 471<br />
Decorative zipper, 448<br />
De La Renta, Oscar, 129<br />
Delegating, 57, 587<br />
Denim, 223, 229<br />
Denim®, reused, 292<br />
Department stores, 312, 587<br />
De Pompadour, Madame, 83–84<br />
Design associate, 193<br />
Design ease, 444, 486, 587<br />
Designer collecti<strong>on</strong>s, 122–25<br />
Designer ready-to-wear, 124–25<br />
Designers, use of lines by, 176–78<br />
Design finishes, color and, 235–37, 239<br />
Design illusi<strong>on</strong>s, 178<br />
Designing, business of, 119<br />
Design process, 119, 121–22<br />
Designs, 172–87, 190–93<br />
elements of, 175–77, 179–84<br />
individuality and, 187<br />
principles of, 184–87<br />
sketching, 121<br />
Design sketch, creating, 120<br />
Desktop publishing, 392<br />
Detergents, 268, 587<br />
Diag<strong>on</strong>al lines, 177<br />
Differential feed, 588<br />
Dior, Christian, 91, 124, 126<br />
Directi<strong>on</strong>al prints, 494<br />
Directi<strong>on</strong>al stitching, 502<br />
Direct retailers, 144<br />
Dirndl shirt, 110<br />
Disability, 367, 588<br />
Disagreements, settling, 57<br />
Disappearing basting thread, 475<br />
Discount stores, 313, 588<br />
Disinfectants, 270<br />
Distance, 63<br />
Distincti<strong>on</strong>, colors of, 159<br />
Distributive Educati<strong>on</strong> Clubs of<br />
America (DECA), 396<br />
DKNY, 312, 426<br />
Dobby weave, 223–24<br />
Dolce, Domenico, 129<br />
Dolman sleeve, 106<br />
Domestic, 420, 588<br />
Dotted swiss, 229<br />
Double fold, 492<br />
Double knits, 92, 225, 226, 229<br />
Double-stitched seam, 548<br />
Drapability, 218<br />
Draping, 121, 588<br />
Drawers, 263<br />
Drawstrings, 529<br />
Dress codes, 43, 588<br />
Dress, job interview, 386<br />
Dressmaker’s shears, 474<br />
Dressmaker’s tracing paper, 496<br />
Dress shirt, 91, 109<br />
Dry cleaning, 256, 260, 278–79, 298,<br />
339, 588<br />
Dry-cleanng kits, home, 256<br />
Dryers, 270–71<br />
Drying clothes, 260, 275–76<br />
Dry spinning, 204<br />
Duck, 229<br />
DuP<strong>on</strong>t, 136<br />
Durability, 198<br />
Durable-press fabrics, 240, 273, 275<br />
Dye-free detergents, 268<br />
Dyeing fabric, 286<br />
Dyeing textiles, 235–36<br />
Dyes, 588<br />
E<br />
Early inventi<strong>on</strong>s, textiles and sewing, 87<br />
Ease of dressing, 363<br />
Ease of pattern, 486<br />
Ease stitching, 518<br />
Easing, 518, 588<br />
Eb<strong>on</strong>y, 146<br />
Ec<strong>on</strong>omical, 588<br />
EcoSpun®, 292<br />
Edgestitching, 503<br />
Edging method of adding trims,<br />
581–82<br />
Elastic in customizing garments, 369<br />
Elasticity, 198<br />
Elastics, 450, 528–29<br />
Elastoester, 206–07, 209<br />
Electr<strong>on</strong>ic article surveillance, 346<br />
Electr<strong>on</strong>ic data interchange (EDI), 425<br />
Ellis, Perry, 127<br />
E-mail, using, 407<br />
Embellishments, adding, 69<br />
Embossing, 239<br />
Embroidery designs, 364<br />
Embroidery scissors, 474<br />
Emergency repairs, making, 290<br />
Emoti<strong>on</strong>s, 65<br />
Emphasis, 186, 588<br />
color for, 169<br />
Employee, qualities of resp<strong>on</strong>sible,<br />
392–94, 396–98<br />
Employee theft, preventing, 346<br />
Encapsulati<strong>on</strong>, 220<br />
Entrepreneurs, 405–15, 588<br />
opportunities for, 406, 408–11<br />
qualities of successful, 405–6<br />
resp<strong>on</strong>sibilities of, 411–15<br />
Entry-level jobs, 381, 588<br />
Envir<strong>on</strong>mental efforts, 427–28<br />
Envir<strong>on</strong>mental engineer, 247<br />
Enzyme presoaks, 268, 273<br />
Enzymes, 253, 588<br />
Erg<strong>on</strong>omics, sewing room, 409<br />
E-shopping, 314<br />
Ethics, 396–97, 588<br />
Etiquette <strong>on</strong>-line, 63<br />
Exchanges, 351–52<br />
Expectati<strong>on</strong>s, 42–43, 588<br />
Exports, 419–20, 588<br />
Express, 425<br />
Extended facing, 524<br />
Eye c<strong>on</strong>tact, 62<br />
Eyelet, 229<br />
F<br />
Fabric(s)<br />
buying correct amount, 446<br />
characteristics of, 219<br />
choosing, for you, 446<br />
color loss in, 259<br />
by computer, 183<br />
c<strong>on</strong>structi<strong>on</strong> of, 215–31<br />
cutting, 141, 495<br />
dull, 182<br />
dyeing, 286<br />
evaluating, 218<br />
extra-crisp, 182<br />
fleece, 227<br />
folding, 492–93<br />
fraying, 521<br />
gathering and easing, 516–18<br />
judging, 338<br />
marking, 495–97<br />
moderately crisp, 182<br />
nubby and bulky, 182<br />
painting, 238, 287<br />
preparing, 490–91<br />
preshrinking, 490–91<br />
pressing, 491, 511–13<br />
selecting, 121, 445–46<br />
shiny, 182<br />
smart, 220<br />
smooth, 182<br />
soft and clingy, 182<br />
straightening ends, 490<br />
straightening grain, 491<br />
terms for, 490<br />
tie-dying, 238<br />
uses of, 135, 136<br />
woven, 219<br />
Fabric care symbols, 260, 261, 588<br />
Fabric designer, 183, 193<br />
INDEX • 599
Fabric dicti<strong>on</strong>ary, 228-31<br />
Fabric finishes, 234–41<br />
color, 235–37, 239<br />
costs of, 235<br />
design, 235–37, 239<br />
processes, 235<br />
texture and performance, 239<br />
Fabric keys, 482, 588<br />
Fabric-marking pens, 475, 496<br />
Fabric softeners, 269–70<br />
Faced hem, 542<br />
Faced placket, 563<br />
Facial expressi<strong>on</strong>, 62<br />
Facings, 339, 588<br />
applying, 524–26<br />
waistline, 573<br />
Factories, development of, 87–88<br />
Fad, 99–100, 588<br />
Fading, 259<br />
Faille, 222, 229<br />
Fair Credit Billing Act, 355<br />
Fair Labor Standards Act, 427<br />
Fairs, 315<br />
Fake fur, 229<br />
Family<br />
clothing needs of, 51–53<br />
influence of, <strong>on</strong> clothing, 28<br />
life cycle of, 52, 588<br />
values of, 53<br />
Family, <str<strong>on</strong>g>Care</str<strong>on</strong>g>er and Community<br />
Leaders of America (FCCLA),<br />
75, 153, 193, 247, 299, 375, 396,<br />
435<br />
Family and c<strong>on</strong>sumer sciences, 434<br />
Farthingale, 83<br />
Fashi<strong>on</strong>(s), 97, 99–103, 588<br />
changing, 97<br />
cycles in, 101, 588<br />
of early civilizati<strong>on</strong>s, 80–82<br />
evoluti<strong>on</strong> of, 82–85<br />
features of, 103–7<br />
influences <strong>on</strong> history of, 85–88,<br />
90–93<br />
retro, 100<br />
spreading message, 113<br />
swings in, 101–3<br />
terms in, 97<br />
the 2000s and Bey<strong>on</strong>d, 93<br />
theories of, 121<br />
of the Twentieth Century, 90–93<br />
vintage, 100<br />
The Fashi<strong>on</strong> Associati<strong>on</strong> (TFA), 147<br />
Fashi<strong>on</strong> careers, exploring, 137<br />
Fashi<strong>on</strong> centers, 143<br />
Fashi<strong>on</strong> coordinator, 375<br />
Fashi<strong>on</strong> copy, writing, 98<br />
600 • INDEX<br />
Fashi<strong>on</strong> designers, 117–19, 190<br />
The Fashi<strong>on</strong> Group, 147<br />
Fashi<strong>on</strong> industry, trends in, 424–28<br />
news in, 113<br />
Fashi<strong>on</strong> leaders, 144<br />
Fashi<strong>on</strong> merchandising, 143–45, 372,<br />
374, 588<br />
Fashi<strong>on</strong> message, spreading, 113<br />
Fashi<strong>on</strong> model, 75<br />
Fashi<strong>on</strong> promoti<strong>on</strong>, 72–75, 113,<br />
145–47, 588<br />
Fashi<strong>on</strong> publicati<strong>on</strong>s, 113, 146<br />
Fashi<strong>on</strong> services, 296–99<br />
Fashi<strong>on</strong> shows, 113, 124<br />
<strong>on</strong>-line, 113<br />
Fashi<strong>on</strong> Web sites, 47<br />
Fashi<strong>on</strong> writer, 434<br />
Fasteners<br />
applying, 530–34<br />
choosing, 448–49<br />
replacing, 287, 289<br />
Federal Hazardous Substance Act, 355<br />
Federal Trade Commissi<strong>on</strong> (FTC),<br />
352–53<br />
Federated Department Stores, 425<br />
Fédérati<strong>on</strong> Française de la Couture, 147<br />
Feed dog, 462, 588<br />
Felt, 226, 230<br />
Felting, 202<br />
Females, size categories for, 334<br />
Fiber(s)<br />
characteristics of, 198–99, 588<br />
c<strong>on</strong>tent of, <strong>on</strong> garment labels, 325<br />
defined, 197<br />
generic name, 197<br />
identifying, 210, 211<br />
inventi<strong>on</strong> of new, 90<br />
manufactured, 203–11<br />
microfibers, 205<br />
names of, 197–98<br />
natural, 199–203<br />
percentage of, by weight, <strong>on</strong> garment<br />
labels, 325<br />
trade name, 197<br />
uses of, 135, 136<br />
Fiber companies, 136<br />
Fiber preferences, 197<br />
Figure type in pattern selecti<strong>on</strong>, 441<br />
Filament fibers, 199<br />
Filament yarns, 216, 588<br />
Filling yarns, 219, 588<br />
Finance charges, 350–51, 588<br />
Financing, 412–13<br />
Finishes, 588<br />
Finishing processes, 235<br />
Finishing seam allowances, 496<br />
Fit<br />
adjusting, 284<br />
evaluating, 335–37, 543<br />
Fitting room, virtual, 47<br />
Five-thread serger stitch, 467<br />
Flame-resistant finish, 240<br />
Flammable Fabrics Act, 355<br />
Flannel, 230<br />
Flapper dress, 90<br />
Flared pants, 111<br />
Flat collar, 556<br />
Flat drying, 276<br />
Flat-felled seam, 547<br />
Flat knitting, 224<br />
Flatlock seam, 550<br />
Flatlock stitch, 469<br />
Flat method of adding trims, 581<br />
Flax, 199, 200–201<br />
identifying in lab, 210<br />
Flea markets, 315<br />
Fleece, 230<br />
Fleece fabrics, 227<br />
Flexibility, 391, 394, 588<br />
Flying shuttle, 87<br />
Fold-over braid, 450<br />
Fold-up cuff, 562<br />
Forecasting services, 136–37, 588<br />
Forth & Towne, stores, 425<br />
Fortrel®, 198<br />
Fortuny, Mariano, 127<br />
Four-thread serger stitch, 467<br />
Fragrance-free detergents, 268<br />
Frame, 173<br />
Franchises, 408, 426, 588<br />
Fraying fabric, 521<br />
Freelance, 409, 588<br />
Free trade, 423, 588<br />
French seam, 547<br />
Friends, influence of, <strong>on</strong> clothing, 28<br />
Fr<strong>on</strong>t hip pocket, 570<br />
Full shapes of clothes, 179, 180<br />
Functi<strong>on</strong>s of clothing, basic, 26–27<br />
bey<strong>on</strong>d basic 32<br />
Fur Products Labeling Act, 355<br />
Fusible interfacing, 451, 554<br />
Fusible webs, 451, 588<br />
Fusing, 219, 290<br />
Fusing hem, 540<br />
G<br />
Gabardine, 223, 230<br />
Gabbana, Stefano, 129<br />
Galliaño, John, 129<br />
Gang violence, colors and, 157<br />
GAP, Inc., 425
Garment(s)<br />
assembling, 142<br />
checking fit of, 336<br />
customizing, 368–69<br />
dyeing, 236<br />
examining, 251–52<br />
finishing, 142<br />
making sample, 121–22<br />
producti<strong>on</strong> of, 135<br />
styles of, 107–8<br />
Garment care label, 267<br />
Garment manufacturers, 139<br />
Gathered areas, pressing, 513<br />
Gathering, 516–18, 580<br />
Gathers, 589<br />
pressing, 518<br />
Gaultier, Jean-Paul, 129<br />
Gender, 41<br />
General-purpose needle, 455<br />
Generic name, 197–98, 589<br />
Geometric shape, 174–75<br />
Gernreich, Rudi, 127<br />
Ghesquière, Nicholas, 129<br />
Gibs<strong>on</strong>, Charles Dana, 85<br />
Gingham, 230<br />
Givenchy, Hubert De, 127<br />
Glamour, 146<br />
Glazing, 239<br />
Global issues, 419–24<br />
Global marketplace, 31–32, 419–28<br />
Global sourcing, 419, 589<br />
Global trends in clothing, 38–39<br />
Glue stick, 476<br />
Going-out-of-business sales, 329<br />
Gored skirt, 110<br />
GoreTex®, 241<br />
Government regulati<strong>on</strong>s, 353, 355<br />
GQ (Gentlemen’s Quarterly), 146<br />
Gradati<strong>on</strong>, 186<br />
Grading, 521, 589<br />
Grain, 219, 589<br />
Grain line, 495<br />
Graphic designer, 75<br />
Gray (greige) goods, 138, 235, 589<br />
Grès, Alix, 128<br />
Guarantee <strong>on</strong> garment label, 326<br />
Gucci, Guccio, 127<br />
Guide sheet, 481, 482, 589<br />
H<br />
Hair care, 85<br />
Hall, Kevan, 129<br />
Halst<strong>on</strong>, 127<br />
Halter neckline, 104<br />
Hand, 219<br />
Handbags, 69<br />
Hand-overcast finish, 523<br />
Hand-printing, 238<br />
Hand-rolled hem, 540–41<br />
Hand-stitched butt<strong>on</strong>holes, 532<br />
Hand stitching, types of, 506–10<br />
Hand-stitching hem, 539–40<br />
Hand-washable fabrics, 491<br />
Hand washing, 275<br />
Hangers, 262<br />
Hangtags, 325<br />
Hargreaves, James, 87<br />
Harm<strong>on</strong>y, 187, 589<br />
Harnesses, 221<br />
Haute couture, 122–24, 589<br />
Hawaiian shirt, 109<br />
Head, Edith, 127<br />
Heading, 589<br />
Heat-transfer printing, 239<br />
Heavy-duty thread, 448<br />
Height, effect of color <strong>on</strong>, 169<br />
Hem(s)<br />
attaching, to garment, 539<br />
finishing edge, 538–39<br />
fusing, 540<br />
hand-stitching, 539–40<br />
lengthening, 284<br />
of linings, 555<br />
machine-stitching, 540<br />
marking length of, 537<br />
repairing, 288<br />
restitching, 287<br />
rolled, 540–42<br />
turning up, 537–38<br />
Hem facing, 450<br />
Hem gauge, 472<br />
Hemmed finishes, 523<br />
Hemming stitch, 508, 540<br />
Hemstitch (wing) needles, 455<br />
Hem with pleat, 542<br />
Henley shirt, 109<br />
Heritage, 39–40, 589<br />
Hernandez, Lazaro, 131<br />
Herrera, Caroline, 129<br />
Hidden costs, 345, 589<br />
High-efficiency (HE) detergents, 268<br />
High-fashi<strong>on</strong> designers, 117–18<br />
High-performance finishes, 241<br />
High-twist yarns, 216<br />
Hilfiger, Tommy, 118, 129, 312, 426<br />
History, children’s clothes in, 363<br />
Hoechst Celanese, 136<br />
Holes, patching, 289–90<br />
Holiday sales, 328<br />
Home decorating, sewing projects<br />
for, 56<br />
Home, dry cleaning at, 256, 279<br />
Home Shopping Network (HSN), 315<br />
Home shopping programs, 315<br />
H<strong>on</strong>esty, 347<br />
Hook-and-loop tape, 369, 449, 531<br />
Hooks, 262, 369<br />
Hooks and eyes, 449, 530–31<br />
Horiz<strong>on</strong>tal butt<strong>on</strong>holes, 532<br />
Horiz<strong>on</strong>tal lines, 176–77<br />
Hosiery, 69<br />
Hotel Employees and Restaurant<br />
Employees Internati<strong>on</strong>al Uni<strong>on</strong><br />
(HERE), 143<br />
Household cleaning, 293<br />
Howe, Elias, 87<br />
Hues, 589<br />
I<br />
Identificati<strong>on</strong>, 26<br />
Illusi<strong>on</strong>s<br />
design, 178<br />
lines and, 176–77<br />
texture and, 182<br />
Image ads, 320, 589<br />
Imports, 419–20, 589<br />
regulati<strong>on</strong> of, 423<br />
Impressi<strong>on</strong>s, 61–64, 589<br />
Impulse buying, 327, 589<br />
Individuality, 67, 187, 589<br />
Industrial piracy, 422–23<br />
Industrial Revoluti<strong>on</strong>, 86–87, 589<br />
Industry, aspects of, 398<br />
Infomercials, 321<br />
Informati<strong>on</strong><br />
mandatory, 325–26<br />
sources of, 319–26<br />
using effectively, 327<br />
voluntary, 326<br />
Informati<strong>on</strong> ads, 319, 589<br />
In-home business, 410<br />
Initiative, 394, 589<br />
Inseam, 334, 589<br />
In-seam pockets, 566, 567<br />
Inserted method of adding trims,<br />
582–83<br />
Inspecti<strong>on</strong>, 142<br />
Inspector, 152<br />
Inspirati<strong>on</strong>, finding, 119, 121<br />
Intellifit, 337<br />
Intensity, 162, 165, 589<br />
Interests, identifying, 379–80<br />
Interest surveys, 380<br />
Interfacings, 450–51, 589<br />
applying, 553–54<br />
Interlocking, 219<br />
Interlock knits, 225, 226<br />
Intermediate colors, 161, 589<br />
Internati<strong>on</strong>al Ladies’ Garment Workers’<br />
Uni<strong>on</strong> (ILGWU), 143<br />
INDEX • 601
Internati<strong>on</strong>al trade laws, 424<br />
Internet, 63, 315, 321, 323, 325<br />
buying patterns over, 323<br />
job search via, 383<br />
shopping <strong>on</strong>, 303<br />
using wisely, 63<br />
Internships, 73<br />
Interview, job, 44, 385–86, 589<br />
Inventory, 303, 589<br />
Inventory c<strong>on</strong>trol <strong>on</strong> garment label,<br />
326<br />
Inventory sales, 328<br />
Invisible zippers, 448, 536<br />
Inward corners, stitching, 576<br />
Irezumi, 64<br />
Ir<strong>on</strong>ing, 260, 276, 278, 589<br />
Ir<strong>on</strong>ing boards, 272, 477<br />
Ir<strong>on</strong>-<strong>on</strong> patches, 290<br />
Ir<strong>on</strong>s, 271–72, 476, 477<br />
safety with, 512<br />
Irregulars, 329<br />
Ivy League look, 91<br />
602 • INDEX<br />
J<br />
Jabot collar, 105<br />
Jacobs, Marc, 129<br />
Jacket styles, 112–13<br />
Jacquard weave, 224<br />
James, Charles, 124, 127<br />
Jeans, 93<br />
Jersey knits, 225, 230<br />
Jewel neckline, 104<br />
Jewelry, 69<br />
Job(s). See also <str<strong>on</strong>g>Care</str<strong>on</strong>g>er(s)<br />
advancing, 398–99<br />
applying for, 384–85, 387<br />
clothing for, 44<br />
educati<strong>on</strong> and training for, 381–82<br />
exploring possibilities, 137<br />
leaving, 399–400<br />
looking for, 382–84<br />
success <strong>on</strong>, 391–401<br />
Job interviews, 385–86<br />
dressing for, 44, 386<br />
Job search via Internet, 383<br />
Johns<strong>on</strong>, Betsy, 129<br />
Jordan, Michael, 29<br />
Josephine, Empress, 84<br />
Jumpsuit, 111<br />
K<br />
Kamali, Norma, 130<br />
Karan, D<strong>on</strong>na, 117, 130, 408, 426<br />
Kawakubo, Rei, 130<br />
Kay, John, 87<br />
Kennedy, Jacqueline, 91<br />
Kente cloth, 92<br />
Kibr, 38<br />
Kilt, 37–38<br />
Kim<strong>on</strong>o, 38, 40, 81–82<br />
Kim<strong>on</strong>o sleeve, 106, 559, 561, 589<br />
Klein, Ann, 127<br />
Klein, Calvin, 130, 408<br />
Knit fabrics, 224–26<br />
Knits, types of, 225–26<br />
Knitted textiles, 215<br />
Knitting, 219, 589<br />
process of, 224–25<br />
Knock-offs, 118, 589<br />
Knot, tying, 506<br />
Kors,Michael,130<br />
L<br />
Labels, 325<br />
care, 258, 260<br />
Laces, 83, 226, 227, 230<br />
Lacroix, Christian, 130<br />
Lady Mad<strong>on</strong>na, 408<br />
Lagerfeld, Karl, 130<br />
Lamb’s wool, 201–2<br />
Lamé, 230<br />
Laminated fabrics, 226, 227<br />
Lane Bryant, 425<br />
Languages of fashi<strong>on</strong>, 146<br />
Lapped seam, 549–50<br />
Laundering, 272–75, 589<br />
Laundry bleaches, 269<br />
Laundry detergents, 268<br />
Laundry products and equipment,<br />
267–72<br />
selecting, 267<br />
Lauper, Cyndi, 93<br />
Lauren, Ralph, 117, 118, 130, 191, 312,<br />
408, 426<br />
Laws and regulati<strong>on</strong>s, 423–24<br />
Layaway plans, 347, 349<br />
Layouts, creating, 141<br />
Lazarus, 425<br />
Leadership, 394, 396, 589<br />
Learn, willingness to, 393–94<br />
Leather Industries, 147<br />
Leather needle, 455<br />
Lederhosen, 40<br />
Leggings, 111<br />
Leg-of-mutt<strong>on</strong> sleeve, 107<br />
Leg positi<strong>on</strong>s, body language, 63<br />
Leisurewear, 93<br />
Length adjustments, 284<br />
in pattern, 487<br />
Lengthwise fold, 492<br />
Lengthwise grain, 490<br />
Leno weave, 223<br />
Licensing, 125, 413, 426, 589<br />
Life cycle, family, 52, 588<br />
Light-duty detergents, 268<br />
The Limited, Inc., 425<br />
Lined patch pocket, 568–69<br />
Line drying, 275–76<br />
Linen, 200, 201, 271<br />
Lines, 175–77, 589<br />
designer use of, 176, 178<br />
designing, 140<br />
illusi<strong>on</strong> and, 176–77<br />
Lingerie, applying elastic to, 529<br />
Linings, 451, 589<br />
hemming of, 555<br />
putting in, 555<br />
Lint buildup, 271<br />
Liquid seam sealant, 475<br />
Llama, 203<br />
Locati<strong>on</strong>, clothing needs and, 51–52<br />
Lockstitch, 590<br />
Logo, 590<br />
<strong>on</strong> garment label, 326<br />
Look books, 113<br />
Loopers, 590<br />
Looping, 219<br />
Loop threader, 471<br />
Loop turner, 476<br />
Luster, 198, 590<br />
Lycra® spandex, 241<br />
Lyocell, 203, 206, 207, 208<br />
identifying in lab, 210<br />
M<br />
Machine basting, 461<br />
Machine drying, 275<br />
Machine operator, 247<br />
Machine-rolled hem, 541–42<br />
Machine-stitched butt<strong>on</strong>holes, 532, 533<br />
Machine stitching<br />
of hem, 540<br />
types of, 501–3, 505<br />
Machine wash, 258, 260, 273–75<br />
Machine zigzag finish, 523<br />
Macy’s, 312, 425<br />
Mad<strong>on</strong>na, 29, 93<br />
Madras, 230<br />
Magazines, 320<br />
Mail order, 410–11<br />
Making decisi<strong>on</strong>s, 33<br />
Malden Mills, 136<br />
Males, size categories for, 334–35<br />
Management, clothing, 53–55, 57, 590<br />
Management skills, 287, 405–6<br />
Mandarin collar, 105
Mandatory informati<strong>on</strong>, 325–26, 590<br />
Manufactured fibers, 197, 203–11, 215,<br />
226, 227, 590<br />
making, 204<br />
specific, 204<br />
Manufacturers<br />
identificati<strong>on</strong> of, <strong>on</strong> garment labels,<br />
326<br />
types of, 138-139<br />
Manufacturing process, 139–43<br />
Market analyst, 74<br />
Marketing, 145, 590<br />
Market research, 411–12<br />
Market week, 143, 590<br />
Marking fabric, 495–97<br />
Marking methods, 496<br />
Marking tools, 474–75<br />
Mass customizati<strong>on</strong>, 337<br />
Mass merchants, 144<br />
Mass merchandise discounters, 313<br />
Mass-produced, 138, 139–43, 590<br />
Materials, ordering, 140<br />
Maternity clothes, 590<br />
Maternity wear, selecting, 364–65<br />
McCall, James, 87<br />
McCardell, Claire, 124, 127<br />
McCollough, Jack, 131<br />
McCartney, Stella, 130<br />
McQueen, Alexander, 130<br />
Measurements<br />
in adjusting patterns, 486–87<br />
taking your, 443<br />
Measuring tools, 472<br />
Medias, 590<br />
influence of, <strong>on</strong> clothing, 28<br />
Mediati<strong>on</strong>, 353, 590<br />
Melt spinning, 204<br />
Mend<strong>on</strong>ca, Arthur, 130<br />
Mentor, 399, 590<br />
Mercerizati<strong>on</strong>, 240<br />
Mercerized cott<strong>on</strong> thread, 448<br />
Merchandise<br />
checking, 329<br />
handling carefully, 346–47<br />
Merchandise manager, 375<br />
Mergers, 425<br />
Metallic, 209<br />
Meterstick, 472<br />
Microfibers, 205, 230, 590<br />
Middy collar, 105<br />
Miller, Nicole, 130<br />
Milliken & Company, 136<br />
Miniskirt, 92<br />
Miss<strong>on</strong>i, Ottavio, 130<br />
Miss<strong>on</strong>i, Rosita, 130<br />
Mitered, 590<br />
Miyaki, Issey, 130<br />
Mizrahi, Isaac, 125, 131<br />
Modacrylic, 206, 207, 208<br />
Modesty, 27, 590<br />
Mohair, 203<br />
Moiré, 239<br />
M<strong>on</strong>ey order, 349, 590<br />
M<strong>on</strong>ochromatic color scheme, 164<br />
M<strong>on</strong>ofilament yarn, 216<br />
M<strong>on</strong>tana, Claude, 131<br />
M<strong>on</strong>thly statement, 350<br />
Mood, colors and, 159<br />
Most-Favored Nati<strong>on</strong> (MFN) status,<br />
423<br />
Mothproof finish, 240<br />
Moth protecti<strong>on</strong>, 263<br />
Moth resistance, 202<br />
Movement, colors and, 159<br />
Multifilament yarn, 216<br />
Multiple roles, 52, 590<br />
Multisized patterns, 444, 489, 590<br />
Muslin, 222, 230<br />
Muumuu, 38<br />
N<br />
Name registrati<strong>on</strong>, 413<br />
Nap, 239, 590<br />
Napped fabrics, 494<br />
Narrow rolled seam, 547<br />
Nati<strong>on</strong>al Associati<strong>on</strong> of Men’s<br />
Sportswear Buyers (NAMSB),<br />
147<br />
Nati<strong>on</strong>al costumes, 37–38<br />
Nati<strong>on</strong>al Cott<strong>on</strong> Council, 147<br />
Nati<strong>on</strong>al Retail Federati<strong>on</strong>, 147<br />
Natural fibers, 197, 199–203, 215, 590<br />
Natural rubber, 203<br />
Natural shape of clothes, 179, 180<br />
Neckline facing, collar with, 558<br />
Neckline styles, 103–4<br />
Neckties, 102–3<br />
Needles, 475–76<br />
sizes of, for sewing machine, 456<br />
threading, 506<br />
types of sewing machine, 455<br />
Needle threader, 476<br />
Nets, 227<br />
Networking, 383, 590<br />
Neutral, accented, 165<br />
Neutral colors, 163<br />
Newspapers, 321<br />
Nike, 426<br />
N<strong>on</strong>cellulosic fibers, 203<br />
N<strong>on</strong>chlorine, 256<br />
N<strong>on</strong>chlorine bleach, 269<br />
N<strong>on</strong>stick garments, 241<br />
N<strong>on</strong>verbal messages, 62, 590<br />
N<strong>on</strong>woven fabrics, 225, 226<br />
Norrell, Norman, 124, 127<br />
North American Free Trade Agreement<br />
(NAFTA), 423<br />
Notching, 522, 590<br />
Noti<strong>on</strong>s, 447, 590<br />
Novelty yarns, 216<br />
Nyl<strong>on</strong>, 197, 198, 205, 206, 207, 271<br />
identifying in lab, 210<br />
O<br />
Obi, 82<br />
Occupati<strong>on</strong>, 40<br />
Occupati<strong>on</strong>al Safety and Health Act,<br />
427<br />
Occupati<strong>on</strong>al Safety and Health<br />
Administrati<strong>on</strong> (OSHA), 590<br />
Odor preventi<strong>on</strong>, 220<br />
Off-grain, 491, 590<br />
Off-price retailers, 313, 590<br />
Off-shore producti<strong>on</strong>, 420–21, 590<br />
Older adults, choosing clothes for,<br />
366–67<br />
Old Navy, 313, 425<br />
Olefin, 206, 209<br />
On grain, 338<br />
On-line etiquette, 63<br />
On-line fashi<strong>on</strong> informati<strong>on</strong>, 47<br />
On-line sewing informati<strong>on</strong>, 323<br />
On-line shopping, 314<br />
Open-sleeve method, 559–60<br />
Orders, taking, 140<br />
Organdy, 230<br />
Organizati<strong>on</strong>s, student, 396<br />
Organizati<strong>on</strong> skills, 405–6<br />
Organza, 230<br />
Outlets, 313, 590<br />
Outward corners, stitching, 576<br />
Overcast stitch, 507<br />
Overlock seam, 590<br />
Overruns, 329<br />
Oxford cloth, 222, 230<br />
P<br />
Painting fabric, 238, 287<br />
Palazzo pants, 111<br />
Palla, 81<br />
Pants<br />
length of, 102<br />
styles of, 110–11<br />
Paper pattern, 87<br />
Parliamentary procedures, 396, 590<br />
Partial fold, 492<br />
INDEX • 603
Part-time experience, 382<br />
Patches, ir<strong>on</strong>-<strong>on</strong>, 290<br />
Patch pocket, 567–70<br />
Patchwork projects, 293, 590<br />
Pattern(s), 182–84, 439, 591<br />
adjusting, 486–89<br />
buying <strong>on</strong>-line, 323<br />
checking, in fabric selecti<strong>on</strong>, 445<br />
customizing, 440<br />
laying out, 492–94<br />
multisized, 489<br />
parts of, 481–82<br />
preparati<strong>on</strong> of, 482–83<br />
selecting, 439–41<br />
sizes of, 441, 443–44<br />
symbols and lines for, 484<br />
Pattern catalog, 439–40<br />
Pattern ease, 444<br />
Pattern envelope, 442, 481<br />
informati<strong>on</strong> <strong>on</strong>, 440–41<br />
Patternmaker, 152<br />
Pattern-making software, 337<br />
Pattern pieces, 482<br />
pinning, 493–94<br />
Pea jacket, 113<br />
Peer disapproval, handling, 67<br />
Peer group, 591<br />
influence of, <strong>on</strong> clothing, 28<br />
Peer pressure, 66–67, 591<br />
People with disabilities, selecting<br />
clothes for, 367–69<br />
Percale, 222, 230<br />
Performance finishes, 239–40, 240–41<br />
Permits, 413<br />
Pers<strong>on</strong>al clothing, 166<br />
Pers<strong>on</strong>ality, 64–65, 591<br />
Pers<strong>on</strong>al life, balancing work and,<br />
400–1<br />
Pers<strong>on</strong>al qualities and skills, evaluating,<br />
137<br />
Pers<strong>on</strong>al shoppers, 299<br />
Pers<strong>on</strong>al style, developing your, 67–68<br />
Peter Pan collar, 105<br />
Photographers, 434<br />
Photos, transferring to fabric, 55<br />
Pickstitch, 507<br />
Piece dyeing, 236<br />
Pigments, 160, 591<br />
Pile, 591<br />
Pile weave, 223<br />
Pill, 198, 200, 207, 591<br />
Pin basting, 518<br />
Pincushi<strong>on</strong>s, 473<br />
Pinked finishes, 523<br />
Pinking shears, 474<br />
Pinning tools, 473<br />
604 • INDEX<br />
Pins<strong>on</strong>ic quilting, 226, 227<br />
Piped seam, 550<br />
Piping, 450, 550, 577, 591<br />
Piqué, 224, 231<br />
PLA fiber, 206–07, 209–10<br />
Placket, 591<br />
Plaids, 494<br />
Plain waistband, 571, 572<br />
Plain weave, 222<br />
Plastic bottles to parkas, 292<br />
Pleats, 551–52, 591<br />
folding, 552<br />
pressing, 552<br />
stitching, 552<br />
Ply yarns, 216, 591<br />
Pocket flap, 569–70<br />
Pockets, sewing, 566–70<br />
Point, turning sharp, 520<br />
Pointer, 476<br />
Point-of-purchase check c<strong>on</strong>versi<strong>on</strong>,<br />
348–49<br />
Point presser, 477<br />
Poirot, Paul, 127<br />
Polo shirt, 109<br />
Polyester, 197, 198, 205, 206, 207, 219,<br />
271<br />
identifying in lab, 210<br />
Polyester/cott<strong>on</strong> thread, 447–48<br />
Polyester thread, 447–48<br />
Polymers, 203<br />
Polyolefin, 206–07, 209<br />
Polypropylene, 209<br />
P<strong>on</strong>chos, 40<br />
Poplin, 222, 231<br />
Portfolio, 385, 591<br />
Posen, Zac, 131<br />
Posture, 62<br />
Prada, Miuccia, 131<br />
Preferred customer sales, 328<br />
Preserving textiles, 89<br />
Presentati<strong>on</strong> software, 392<br />
Pre-seas<strong>on</strong> sales, 328<br />
Preshrinking fabric, 490–91, 591<br />
Press cloth, 477<br />
Presser foot, 591<br />
Pressing, 256–57, 591<br />
of darts, 514–15<br />
equipment for, 476–77<br />
of fabric, 491, 511–13<br />
of gathers, 518<br />
of pleats, 552<br />
of seams, 522<br />
Pressure, adjusting, <strong>on</strong> sewing machine,<br />
462<br />
Pret-a-porter, 125, 591<br />
Pretreating, 253, 273, 591<br />
Prewash soil-and-stain remover, 253,<br />
268, 591<br />
Prices<br />
evaluating, 340–41<br />
setting, 140, 413–14<br />
Primary colors, 160, 591<br />
Prince, 93<br />
Princess dress, 108<br />
Printing, 237, 239, 591<br />
Priorities, 307, 591<br />
setting clothing, 54<br />
Private labels, 426<br />
Procrastinati<strong>on</strong>, 400, 591<br />
Product placement, 321<br />
Producti<strong>on</strong> patterns, creating, 141<br />
Professi<strong>on</strong>al dry cleaning, 278–79<br />
Profit, 414, 591<br />
Promoti<strong>on</strong>, 414–15<br />
Promoti<strong>on</strong>al articles, 321<br />
Promoti<strong>on</strong> methods, 145–46<br />
Proporti<strong>on</strong>, 185–86, 591<br />
Prosthesis, 367, 591<br />
Protecti<strong>on</strong>, 26<br />
Publicity, 146<br />
Public relati<strong>on</strong>s specialist, 74<br />
Pucci, Emilio, 128<br />
Puff sleeve, 106<br />
Punctuality, 392–93, 591<br />
Purchases, paying for, 347–49<br />
Puritan collar, 105<br />
Purl knits, 225<br />
Q<br />
Quality, 591<br />
cost versus, 340<br />
evaluating, 338-339<br />
Quality assurance (QA), 142<br />
Quant, Mary, 128<br />
Quick Resp<strong>on</strong>se (QR), 141, 424<br />
Quilted fabrics, 226, 227<br />
Quota, 423, 591<br />
QVC, 315<br />
R<br />
Radiati<strong>on</strong>, 186<br />
Radio, 321<br />
Raglan sleeve, 106, 559, 561, 591<br />
Ramie, 199, 203<br />
Raw-edge trims, 583<br />
Raschel knits, 225, 226<br />
Ray<strong>on</strong>, 197, 203, 205, 206, 271<br />
identifying in lab, 210<br />
Ready-to-wear, 88, 591<br />
growth of, 88, 90<br />
Recall, 355, 591
Records, keeping, 414<br />
Recycled wool, 292<br />
Recycling clothes, 290–91, 293, 591<br />
Redesign, 591<br />
Redesigning clothes, 283–87<br />
Reebok, 426<br />
Reese, Tracy, 131<br />
References, 384, 591<br />
Regular stitching, 461<br />
Regulati<strong>on</strong>s, 413<br />
Reinforced seam, 548<br />
Reinforcement stitching, 461, 501<br />
Reinforcing, 520<br />
Rejecti<strong>on</strong>, resp<strong>on</strong>ding to, 387<br />
Reliability, 392–93<br />
Renting, 311<br />
Repairs, 256, 287<br />
Repetiti<strong>on</strong>, 186<br />
Resale stores, 313, 592<br />
Resiliency, 198, 202<br />
Resilient, 592<br />
Resource C<strong>on</strong>servati<strong>on</strong> and Recovery<br />
Act, 427<br />
Resourcefulness, 592<br />
Resources, 592<br />
identifying, 54<br />
identifying your, 307–8<br />
Resp<strong>on</strong>sibilities, sharing, 55<br />
Restitching<br />
hems, 287<br />
seams, 287<br />
Résumé, 385, 592<br />
Retail, 143, 144–45, 592<br />
Retail stores, 144<br />
Retro, 100, 592<br />
Returns, 351–52<br />
Reused Denim®, 292<br />
Rhythm, 186–87, 592<br />
Ribbed weave, 222<br />
Ribbing, 450<br />
Rib knits, 225<br />
Ribs, 224, 490<br />
Rinsing, 253<br />
Roles, 41, 52, 590, 592<br />
Rolled collar, 556<br />
Rolled hems, 540–42<br />
Rolled hemstitch, 467, 469<br />
Roller printing, 237<br />
Rotary cutter, 474<br />
Rotary screen printing, 239<br />
Routine care of garments, 251–58<br />
Royalty, 592<br />
Rubber, natural, 203<br />
Ruff collar, 105<br />
Ruffles, 579–80<br />
Ruffs, 83<br />
Running stitch, 507<br />
S<br />
Safety tips<br />
in children’s clothes, 362<br />
with ir<strong>on</strong>, 512<br />
for sergers, 465<br />
with sewing equipment, 473<br />
for sewing machine, 463<br />
with sewing machine, 519<br />
Sailcloth, 231<br />
Sailor collar, 105<br />
Saint Laurent, Yves, 130, 408<br />
Sales<br />
evaluating, 329<br />
types of, 328–29<br />
Sales associate, 374<br />
Sales promoti<strong>on</strong>s, 322<br />
Sales representative, 74<br />
Samples, making, 140<br />
Sanchez, Angel, 131<br />
Sari, 38, 40<br />
Sateen, 231<br />
Satin, 231<br />
Satin weave, 223<br />
Scale, 185–86, 591<br />
Scalloping shears, 474<br />
Scheduling, 57<br />
Schiaparelli, Elsa, 128<br />
Schouler, Proenza, 131<br />
Scissors, 473, 474, 592<br />
Screen printing, 237<br />
Seam(s)<br />
decorative, 548–50<br />
pressing, 522<br />
restitching, 287, 288<br />
sewing special, 547–50<br />
special treatments for, 520–22<br />
stitching, 519–20<br />
Seam allowance, 337, 592<br />
Seam finish, 338, 523, 592<br />
Seam gauge, 472<br />
Seam ripper, 474<br />
Seam roll, 477<br />
Seam tape, 450<br />
Seas<strong>on</strong>al colors, 167<br />
Seas<strong>on</strong>al storage, 263<br />
Sec<strong>on</strong>dary colors, 161, 592<br />
Sec<strong>on</strong>d-generati<strong>on</strong> fibers, 204<br />
Sec<strong>on</strong>ds, 329<br />
Security, store, 346<br />
Seersucker, 231<br />
Selecti<strong>on</strong>s, evaluating, 332–41<br />
Self-adornment, 64<br />
Self-casing, 527<br />
Self-c<strong>on</strong>cept, 65–66, 592<br />
Self-dressing, children, 363<br />
Self-finished seams, 547, 592<br />
Self-motivati<strong>on</strong>, 405, 592<br />
Selvages, 219, 490, 592<br />
Separating zipper, 448<br />
Serger<br />
care, 471<br />
parts of, 465–66<br />
removing stitches, 505<br />
safety tip, 465<br />
stitching by, 504<br />
stitch variati<strong>on</strong>s, 466–69<br />
tensi<strong>on</strong>, 469–70<br />
threads and accessories, 470–71<br />
using, 465–71<br />
Serging techniques<br />
applying elastic to lingerie, 529<br />
attaching waistbands, 573<br />
belt carrier, 508<br />
collar, 558<br />
curved patch pocket, 569<br />
facings, 526<br />
flatlock seam, 550<br />
hems, 539<br />
narrow rolled seam, 547<br />
plain seams, 520<br />
plain waistband, 572<br />
pressing seams, 512<br />
reinforced seam, 548<br />
rolled hems, 541<br />
ruffles, 580<br />
sleeves, 561<br />
topstitched seam, 549<br />
trims, 582<br />
tubing, 578<br />
tucks, 552<br />
Set-in sleeve, 106, 559–60, 592<br />
Seventeen, 146<br />
Sewing directi<strong>on</strong>, 482<br />
Sewing equipment, 472–77<br />
Sewing gauge, 472<br />
Sewing, home décor, 56<br />
Sewing machine, 87, 455–64<br />
accessories, 464<br />
adjusting, 460–62<br />
adjusting pressure, 462<br />
adjusting stitch length, 461<br />
adjusting tensi<strong>on</strong>, 461–62<br />
care of, 464<br />
changing needles, 457<br />
choosing needle and thread for,<br />
455–57<br />
computerized, 464<br />
guidelines <strong>on</strong> stitching, 462<br />
needle sizes for, 456<br />
parts of, 456–57<br />
preparing bobbin, 457–58<br />
safety tips, 463<br />
safety with, 519<br />
INDEX • 605
stitching by, 501–3, 505<br />
stitching problems, 463<br />
stitching straight, 462–63<br />
tensi<strong>on</strong> discs for, 459<br />
thread guides for, 459–60<br />
threading, 458–60<br />
Sewing machine operator, 152<br />
Sewing projects, staying organized, 481<br />
for the home, 56<br />
Sewing skills in fabric selecti<strong>on</strong>, 445–46<br />
Sew-in interfacing, 451, 553<br />
Sew-through butt<strong>on</strong>s, 449<br />
Shade, 162, 592<br />
Shadowing, 382, 592<br />
Shank butt<strong>on</strong>s, 449, 534<br />
Shantung, 231<br />
Shape, 177, 179, 180, 181, 592<br />
retenti<strong>on</strong> of, 198, 218<br />
Shaped facing, 524<br />
Shears, 592<br />
Sheath dress, 107<br />
Shelves, 263<br />
Shift dress, 107<br />
Shipping and receiving clerks, 153<br />
Shirring, 518, 592<br />
Shirt collar, 556<br />
Shirt styles, 109<br />
Shirtwaists, 88<br />
Shoe bags, 262<br />
Shoes, 69, 292<br />
Shoplifting, 345, 346<br />
Shopping<br />
as entertainment, 32<br />
multiple opti<strong>on</strong>s for, 30–31<br />
Shrinkage c<strong>on</strong>trol, 240<br />
Shuttle, 221<br />
Silhouette, 179, 592<br />
Silk, 199, 202–3, 215, 219, 271<br />
identifying in lab, 210<br />
Silk pins, 473<br />
Silk thread, 448<br />
Singer Sewing Machine Company, 87<br />
Size ratios, 174<br />
Sizes<br />
blending, 489<br />
children’s, 361–62<br />
finding correct, 333–35<br />
<strong>on</strong> garment label, 326<br />
selecting correct, for pattern, 441<br />
Sizing, 240<br />
Skills<br />
developing, 380–81<br />
identifying, 379–80<br />
level of, in pattern selecti<strong>on</strong>, 441<br />
Skin t<strong>on</strong>es, 166<br />
Skirt marker, 472<br />
606 • INDEX<br />
Skirts<br />
length of, 101–2<br />
styles of, 110<br />
Sleeve board, 477<br />
Sleeve plackets, 563–64<br />
Sleeves, 561<br />
sewing, 559–61<br />
styles of, 106–7<br />
Slip stitch, 507, 540<br />
Sloper, 121, 592<br />
Smart performance fabrics, 220<br />
Smith, Willi, 128<br />
Snags, 592<br />
fixing, 289<br />
Snaps, 449, 531<br />
Soaking, 253<br />
Society, 592<br />
influence <strong>on</strong> clothing, 29–30<br />
Socks, 69<br />
Soeurs, Callet, 126<br />
Soil-and-stain removers, 268<br />
Soil release, 241<br />
Soluti<strong>on</strong> dyeing, 236<br />
Solvent, 278, 592<br />
Sourcing, 419, 420–21, 592<br />
Space, 179, 181, 592<br />
Spandex, 206, 209<br />
Special events, 146<br />
Special needs. See Disability<br />
Special occasi<strong>on</strong>s, clothing for, 44, 46<br />
Special purpose elastics, 450<br />
Specialty animal fibers, 203<br />
Specialty stitches, 503, 505<br />
Specialty stores, 312, 592<br />
Spectrum, 160<br />
Speed enhancement, 241<br />
Spinning jenny, 87<br />
Spinning mule, 87<br />
Split-complementary color scheme, 165<br />
Spool caps, 471<br />
Spool pins, 465, 592<br />
Sports shirt, 109<br />
Spreadsheets, 392<br />
Springs Industries, 136<br />
Spun yarns, 215–16, 592<br />
Stabilizer, 475<br />
Stages of life, 52–53<br />
Stain and spot resistance, 339<br />
Stain removal, 252–56, 275<br />
Stain-repellent finish, 241<br />
Standards, 42–43, 353, 592<br />
Standard seam stitching, 502<br />
Standard stitching, 501<br />
Standing collar, 556<br />
Staple fibers, 199, 200, 215<br />
Starches, 270<br />
Status, 27, 592<br />
Status symbols, 29, 592<br />
Stays, 571<br />
Stay-stitching, 502<br />
Stereotype, 64, 592<br />
Stitches<br />
adjusting type of, 460<br />
directi<strong>on</strong> of, 502<br />
length of, 461, 501<br />
removing, 505<br />
variati<strong>on</strong>s for sergers, 466–69<br />
Stitching<br />
curved, 462<br />
of curves, 575–76<br />
of darts, 514<br />
guidelines for, 501<br />
guidelines <strong>on</strong>, for sewing machine,<br />
462<br />
by machine, 501–3, 505<br />
of pleats, 552<br />
of seams, 519–20<br />
by serger, 504<br />
straight, 462<br />
tools for, 475–76<br />
Stitch-in-the-ditch, 503<br />
Stock clerk, 374<br />
Stock dyeing, 236<br />
Stola, 81<br />
St<strong>on</strong>e washing, 239<br />
Stores, 311–14<br />
policies of, 347<br />
Storing clothes, 260, 262–63<br />
Straight pants, 111<br />
Straight ruffles, 579<br />
Straight-stitch foot, 464<br />
Straight stitching, 462<br />
Strength, 198, 218<br />
Stress, ability to handle, 406<br />
Stretchability, 338<br />
Stretch fabrics, 226, 227<br />
Stretch gauge, 445, 593<br />
Stretch needle, 455<br />
Stripes, 494<br />
Structural lines, 181<br />
Student organizati<strong>on</strong>s, 396<br />
Styles, 97, 99, 593<br />
changing, 283–84<br />
choosing appropriate, 43–44, 46–47<br />
selecting right, in pattern, 440–41<br />
Stylists, 298<br />
Suede cloth, 231<br />
Sui, Anna, 130<br />
Sumptuary laws, 82, 593<br />
Sun protecti<strong>on</strong>, 241<br />
Supervisors, 153<br />
working well with, 397–98<br />
Support system, developing, 401<br />
Sweatshops, 88, 421–22, 593<br />
Sweetheart neckline, 104
Symbols<br />
clothing as, 39–42<br />
colors as, 158<br />
Symmetrical balance, 184, 593<br />
T<br />
Tack facing at seams, 526<br />
Taffeta, 222, 231<br />
Tailor’s chalk, 475, 497–98<br />
Tailor’s ham, 477<br />
Take-up lever, 593<br />
Tank top shirt, 109<br />
Tape measure, 472<br />
Tapered pants, 111<br />
Tapes, choosing, 449–50<br />
Tapestry, 224<br />
Target audience, 412, 593<br />
Tariff, 423, 593<br />
Teamwork, 394, 395, 593<br />
Tears, mending, 289<br />
Technologies, 86, 593<br />
advanced, 424<br />
Technology trends<br />
apparel design with computer-aided<br />
design, 123<br />
buying sewing patterns <strong>on</strong>-line, 323<br />
color loss in fabrics, 259<br />
computer resources, 55<br />
correcting color blindness, 163<br />
dry cleaning at home, 279<br />
early inventi<strong>on</strong>s, 87<br />
electr<strong>on</strong>ic data interchange (EDI),<br />
425<br />
erg<strong>on</strong>omics, 409<br />
e-shopping, 314<br />
fabrics by computer, 183<br />
fashi<strong>on</strong> Web sites, 47<br />
high-performance finishes, 241<br />
job search via Internet, 383<br />
licensed children’s wear, 364<br />
mass customizati<strong>on</strong>, 337<br />
microfibers, 205<br />
<strong>on</strong>-line etiquette, 63<br />
from plastic bottles to parkas, 292<br />
preventing shoplifting and theft, 346<br />
quick resp<strong>on</strong>se, 141<br />
shopping as entertainment, 32<br />
skills in the workplace, 392<br />
smart performance fabrics, 220<br />
spreading fashi<strong>on</strong> message, 113<br />
Tefl<strong>on</strong>® yarns, 241<br />
Telec<strong>on</strong>ferencing, 392<br />
Televisi<strong>on</strong>, 315, 321<br />
home shopping programs <strong>on</strong>, 315<br />
Temperature, colors and, 158–59<br />
Tencel®, 428<br />
Tensile strengths, 198, 593<br />
Tensi<strong>on</strong>, 593<br />
<strong>on</strong> serger, 459, 469–70<br />
<strong>on</strong> sewing machine, 461–62<br />
Terminating employment, 399<br />
Terrycloth, 223, 231<br />
Textile chemist, 246<br />
Textile c<strong>on</strong>verters, 138, 246<br />
Textile Fiber Products Identificati<strong>on</strong><br />
Act (TFPIA) (1958), 197, 325,<br />
353<br />
Textile fibers, 196–211<br />
Textile industry, 135–37<br />
Textile mills, 136–37<br />
Textiles<br />
dyeing, 235–36<br />
preserving, 89<br />
printing, 237, 239<br />
producti<strong>on</strong> of, 244–47<br />
Texture, 181–82, 219, 593<br />
in children’s clothes, 363–64<br />
illusi<strong>on</strong> and, 182<br />
Textured yarns, 217<br />
Texture finishes, 239–40<br />
Texturing, 216–17, 217, 593<br />
Thimbles, 476<br />
The Fashi<strong>on</strong> Associati<strong>on</strong> (TFA), 147<br />
Third-generati<strong>on</strong> fibers, 204<br />
Thread(s), 475<br />
choosing, 447–48<br />
color of, 447<br />
disappearing basting, 475<br />
serger, 470–71<br />
for sewing machine, 457<br />
Thread clipper, 474<br />
Thread guides for sewing machines,<br />
459–60, 593<br />
Thread nets, 471<br />
Three-thread serger stitch, 466<br />
Thrift stores, 313<br />
Tie-dye patterns, 238<br />
Tie-dying fabric, 238<br />
Tilaka, 64<br />
Tint, 162, 593<br />
Topstitched seam, 548–49<br />
Topstitched waistband, 572–73<br />
Topstitching, 290, 503, 540<br />
Toxic, 427, 593<br />
Toxic Substances C<strong>on</strong>trol Act, 427<br />
T-pins, 473<br />
Tracing wheel, 475, 496<br />
Trade agreements, 423<br />
Trade associati<strong>on</strong>s, 147<br />
Trademark Counterfeiting Act (1984),<br />
423<br />
Trademarks, 326, 593<br />
Trade name, 197–98, 593<br />
Trade-off, 341, 593<br />
Trade publicati<strong>on</strong>s, 146-147<br />
Traditi<strong>on</strong>al retailers, 144<br />
Training and educati<strong>on</strong>, 381–82<br />
Transfer fabric, photos, 55<br />
Transfer paper, photos, 55<br />
Transferring photos to fabric, 55<br />
Transparent ruler, 472<br />
Travel, packing for, 429<br />
Travel and entertainment cards, 350<br />
Trench jacket, 113<br />
Triacetate, 203, 206, 209<br />
Triadic color scheme, 165<br />
Tricot, 225, 226, 231<br />
Trimming, 521<br />
Trims, 582<br />
adding, 285–86, 582–84<br />
choosing, 449–50<br />
selecting, 121<br />
Trouser zipper, 448<br />
Truth-in-Lending Law, 351, 355<br />
T-shirts, 91, 93<br />
Tubing, 577–78, 578, 593<br />
Tubular shape of clothes, 179, 180<br />
Tucks, 551, 552, 593<br />
Tulle, 231<br />
Tumble dry, 593<br />
Tunic, 81<br />
Tunic shirt, 109<br />
Turban, 38<br />
Tuxedo, 46<br />
Tuxedo collar, 105<br />
Tuxedo jacket, 113<br />
Tuxedo shirt, 109<br />
Tweed, 231<br />
Tweezers, 471<br />
Twentieth century, fashi<strong>on</strong>s of, 90–93<br />
Twill tape, 450<br />
Twill weave, 222–23<br />
Twin (double) needles, 455<br />
Twisting, 219<br />
Two-thread chain stitch, 467<br />
Two-thread serger stitch, 467<br />
Two-way zipper, 448<br />
U<br />
Ultra detergents, 268<br />
Understitching, 503<br />
Understitching facing, 525–26<br />
Ungaro, Emanuel, 131<br />
Uni<strong>on</strong> of Needletrades, Industrial, and<br />
Textile Employees (UNITE), 143,<br />
326<br />
INDEX • 607
UNITE HERE, 143<br />
Uni<strong>on</strong>s, role of, 143<br />
Unisex look, 92<br />
Unit c<strong>on</strong>structi<strong>on</strong>, 505, 593<br />
Universal needle, 455<br />
Unlined patch pocket, 567–68<br />
UPF fabrics, 277<br />
608 • INDEX<br />
V<br />
Valentino, 131<br />
Value-added network (VAN), 425<br />
Values, 26, 41–42, 162, 593<br />
family, 53<br />
Velour, 223, 231<br />
Velvet, 219, 223, 231<br />
Velveteen, 223, 231<br />
Verbal messages, 62, 593<br />
Versace, Gianni, 131<br />
Versatile, 593<br />
Vertical butt<strong>on</strong>holes, 532–33<br />
Vertical lines, 176<br />
Victoria (Queen of England), 86<br />
Victoria’s Secret, 425<br />
Vicuna, 203<br />
Video cameras, 345<br />
Vintage, 96, 100, 313<br />
Vintage fashi<strong>on</strong>s, 100, 313, 593<br />
Vinyl, 231<br />
Vi<strong>on</strong>net, Madeleine, 128<br />
Virtual dressing rooms, 333<br />
Virtual fitting room, 47<br />
Visual displays, 146<br />
Vogue, 146<br />
Voile, 222, 231<br />
Voluntary informati<strong>on</strong>, 326<br />
V<strong>on</strong> Furstenberg, Diane, 131<br />
Vuitt<strong>on</strong>, Louis, 128<br />
W<br />
Waistline casing, 573<br />
Waistline facing, 573<br />
Waistlines, 571–73<br />
Wales, 224, 490<br />
Wang, Vera, 131<br />
Wardrobe<br />
evaluating your, 303–7<br />
expanding, 308–15<br />
Wardrobe chart, 304<br />
Wardrobe c<strong>on</strong>sultant, 298<br />
Wardrobe plan, 307, 593<br />
Warm-up pants, 111<br />
Warp knits, 225, 226<br />
Warp yarns, 219, 221, 235, 593<br />
Warranty, 326, 593<br />
Washability, 199, 339<br />
Washable fabrics, 491<br />
Wash cycle, 274–75<br />
Washers, 270–71<br />
Waterproof, 241<br />
Water repellent finish, 241<br />
Water softeners, 270<br />
Watt, James, 86<br />
Wearable electr<strong>on</strong>ics, 225, 226<br />
Wearing ease, 444, 486, 593<br />
Weaving, 219, 221–24, 593<br />
pattern companies, 323<br />
process of, 221<br />
Web-site designer, 435<br />
Web sites, 411<br />
Weft knits, 225–26<br />
Weight, 219<br />
Weight sensor devices, 346<br />
Welt seam, 549<br />
Wesetley, Michael, 131<br />
Wet spinning, 204<br />
Whitney, Eli, 87<br />
Wholesale price, 140, 593<br />
Wicking, 198<br />
Width adjustments, 284–85<br />
in pattern, 487–89<br />
Williams, Serena, 29<br />
Williams, Venus, 29<br />
Women’s Wear Daily, 147<br />
Woods, Tiger, 29<br />
Wool, 197, 198, 199, 201–2, 271<br />
identifying in lab, 210<br />
recycled, 292<br />
Wool Bureau, 147<br />
Woolly nyl<strong>on</strong> thread, 471<br />
Wool Products Labeling Act, 353, 355<br />
Word processing, 392<br />
Work, balancing pers<strong>on</strong>al life and,<br />
400–1<br />
Worker status, 391<br />
Working c<strong>on</strong>diti<strong>on</strong>s, safer, 426–27<br />
Workmanship, judging, 338–39<br />
Workplace, technology skills in, 392<br />
World Trade Organizati<strong>on</strong> (WTO), 424<br />
Worth, Charles Frederick, 123, 128<br />
Woven elastic, 450<br />
Woven fabrics, 219<br />
Woven textiles, 215<br />
Wrap skirt, 110<br />
Wrinkle resistance, 198, 218, 235, 338,<br />
339<br />
Wrist size in estimating body frame<br />
size, 173<br />
Y<br />
Yardstick, 472<br />
Yarmulka, 41<br />
Yarns, 197, 215, 593<br />
blended, 217, 219<br />
dyeing, 236<br />
filament, 216<br />
filling, 219<br />
multifilament, 216<br />
novelty, 216<br />
ply, 216<br />
spun, 215–16<br />
textured, 217<br />
warp, 219<br />
Z<br />
Zigzag foot, 464<br />
Zigzag stitch, 503, 517<br />
Zipper foot, 464<br />
Zippers, 448<br />
applying, 535–36<br />
in customizing garments, 369<br />
preparati<strong>on</strong>s, 535<br />
Z<strong>on</strong>ing, 413