Page 1 of 4 UTM: How to Open PPTP traffic to a PPTP server behind ...
Page 1 of 4 UTM: How to Open PPTP traffic to a PPTP server behind ...
Page 1 of 4 UTM: How to Open PPTP traffic to a PPTP server behind ...

Create successful ePaper yourself
Turn your PDF publications into a flip-book with our unique Google optimized e-Paper software.
<strong>UTM</strong>: <strong>How</strong> <strong>to</strong> <strong>Open</strong> <strong>PPTP</strong> <strong>traffic</strong> <strong>to</strong> a <strong>PPTP</strong> <strong>server</strong> <strong>behind</strong> the SonicWALL (SonicOS En...<br />
<strong>How</strong> <strong>to</strong> <strong>Open</strong> <strong>PPTP</strong> <strong>traffic</strong> <strong>to</strong> a <strong>PPTP</strong> <strong>server</strong> <strong>behind</strong> the SonicWALL (SonicOS Enhanced)<br />
Answer/Article<br />
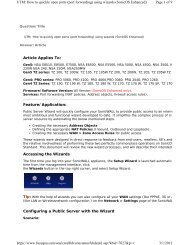
Article Applies To:<br />
Affected SonicWALL Security Appliance Platforms:<br />
Gen5: NSA E7500, NSA E6500, NSA E5500, NSA 5000, NSA 4500, NSA 3500, NSA 2400, NSA 240.<br />
Gen4: PRO series: PRO 5060, PRO 4100, PRO 4060,PRO 3060, PRO 2040, PRO 1260.<br />
TZ series: TZ 100, TZ 100 Wireless, TZ 200, TZ 200 W, TZ 210, TZ 210 W, TZ 190, TZ 190 W, TZ 180, TZ 180 W, TZ 170, TZ 170 W, TZ 170<br />
SP, TZ 170 SP Wireless.<br />
Firmware/S<strong>of</strong>tware Version: All SonicOS Enhanced Versions.<br />
Services: Port forwarding (NAT policies, Address objects, firewall access rules).<br />
Feature/Application:<br />
The Point-<strong>to</strong>-Point Tunneling Pro<strong>to</strong>col (<strong>PPTP</strong>) is a method for implementing virtual private networks. <strong>PPTP</strong> uses a control channel over TCP and a<br />
GRE tunnel operating <strong>to</strong> encapsulate PPP packets. A <strong>PPTP</strong> tunnel is instantiated by communication <strong>to</strong> the peer on TCP port 1723. This TCP<br />
connection is then used <strong>to</strong> initiate and manage a second GRE tunnel <strong>to</strong> the same peer.<br />
Please Note: It is not necessary <strong>to</strong> add GRE (IP pro<strong>to</strong>col 47) <strong>to</strong> the SonicWALL in order <strong>to</strong> support <strong>PPTP</strong> pass-through (either for a client<br />
connecting <strong>to</strong> a <strong>server</strong> on the Internet, or clients on the WAN connecting <strong>to</strong> a <strong>server</strong> on the LAN side). GRE is handled au<strong>to</strong>matically as needed<br />
whenever a <strong>PPTP</strong> connection is established. Currently,<br />
Manually opening <strong>PPTP</strong> <strong>traffic</strong> from Internet <strong>to</strong> a <strong>server</strong> <strong>behind</strong> the SonicWALL in SonicOS Enhanced involves the following steps:<br />
Step 1: Creating the necessary Address Objects<br />
Step 2: Defining the appropriate NAT Policies (Inbound, Outbound and Loopback)<br />
Step 3: Creating the necessary WAN > Zone Access Rules for public access<br />
Recommendation: The Public Server Wizard quickly configure your SonicWALL <strong>to</strong> provide public access <strong>to</strong> an internal <strong>server</strong>. The Public Server<br />
Wizard is the most ambitious and functional wizard developed <strong>to</strong> date. It simplifies the complex process <strong>of</strong> creating a publicly and internally<br />
accessible <strong>server</strong> resource by au<strong>to</strong>mating above mentioned steps. Please refer KBID 7027 and KBID 4178 for complete instructions.<br />
Scenario:<br />
The following example covers allowing <strong>PPTP</strong> service from the Internet <strong>to</strong> a <strong>server</strong> on the LAN with private IP address as 192.168.1.100. Once<br />
the configuration is complete, Internet users can access the <strong>PPTP</strong> service <strong>behind</strong> the SonicWALL <strong>UTM</strong> appliance through the WAN<br />
(Public) IP address 1.1.1.1.<br />
Procedure:<br />
In this example we have chosen <strong>to</strong> demonstrate using <strong>PPTP</strong> service, however the following steps apply <strong>to</strong> any service you wish <strong>to</strong> use (like<br />
https://www.fuzeqna.com/sonicwallkb/consumer/kbdetail.asp?kbid=7606<br />
<strong>Page</strong> 1 <strong>of</strong> 4<br />
1/5/2012
<strong>UTM</strong>: <strong>How</strong> <strong>to</strong> <strong>Open</strong> <strong>PPTP</strong> <strong>traffic</strong> <strong>to</strong> a <strong>PPTP</strong> <strong>server</strong> <strong>behind</strong> the SonicWALL (SonicOS En...<br />
HTTPS, SMTP, FTP, Terminal Services, SSH, etc).<br />
Step 1: Creating the necessary Address Objects<br />
TIP: For complete information on creating Address Objects refer: KBID 7486<br />
1. Select Network > Address Objects.<br />
2. Click the Add a new address object but<strong>to</strong>n and create two address objects one for Server IP on LAN and another for Public IP <strong>of</strong> the<br />
<strong>server</strong>:<br />
Address Object for Server<br />
on LAN<br />
Name: <strong>PPTP</strong><br />
Server Private<br />
Zone Assignment: LAN<br />
Type: Host<br />
IP Address: 192.168.1.100<br />
Address Object for Server's<br />
Public IP<br />
Name: <strong>PPTP</strong> Server Public<br />
Zone Assignment: WAN<br />
Type: Host<br />
IP Address: 1.1.1.1<br />
3. Click the OK but<strong>to</strong>n <strong>to</strong> complete creation <strong>of</strong> the new address objects.<br />
Step 2: Defining the appropriate NAT Policies<br />
1. Select Network > NAT Policies.<br />
2. Click the Add a new NAT Policy but<strong>to</strong>n and chose the following settings from the drop-down menu:<br />
Understanding how <strong>to</strong> use NAT policies starts with the construction <strong>of</strong> an IP packet. Every packet contains addressing information that allows the<br />
packet <strong>to</strong> get <strong>to</strong> its destination, and for the destination <strong>to</strong> respond <strong>to</strong> the original requester. The packet contains (among other things) the<br />
requester’s IP address, the pro<strong>to</strong>col information <strong>of</strong> the reques<strong>to</strong>r, and the destination’s IP address. The NAT Policies engine in SonicOS Enhanced<br />
can inspect the relevant portions <strong>of</strong> the packet and can dynamically rewrite the information in specified fields for incoming, as well as outgoing<br />
<strong>traffic</strong>.<br />
Note: To Add cus<strong>to</strong>m port in SonicOS Enhanced refer KBID 7133<br />
Adding appropriate NAT Policies<br />
Original Source: Any<br />
Translated Source: Original<br />
Original Destination: <strong>PPTP</strong> Server<br />
Public<br />
Translated Destination: <strong>PPTP</strong> Server<br />
https://www.fuzeqna.com/sonicwallkb/consumer/kbdetail.asp?kbid=7606<br />
<strong>Page</strong> 2 <strong>of</strong> 4<br />
1/5/2012
<strong>UTM</strong>: <strong>How</strong> <strong>to</strong> <strong>Open</strong> <strong>PPTP</strong> <strong>traffic</strong> <strong>to</strong> a <strong>PPTP</strong> <strong>server</strong> <strong>behind</strong> the SonicWALL (SonicOS En...<br />
Private<br />
Original Service: <strong>PPTP</strong><br />
Translated Service: Original<br />
Inbound Interface: Any<br />
Outbound Interface: Any<br />
Comment: <strong>PPTP</strong> Server <strong>behind</strong><br />
SonicWALL.<br />
Enable NAT Policy: Checked<br />
Create a reflexive policy: Checked<br />
Note: Create a reflective policy: When you check this box, a mirror outbound or inbound NAT policy for the NAT policy you defined in the Add NAT Policy<br />
window is au<strong>to</strong>matically created.<br />
3. Click the Add but<strong>to</strong>n.<br />
Loopback Policy:<br />
If you wish <strong>to</strong> access this <strong>server</strong> from other internal zones using the Public IP address Http://1.1.1.1 consider creating a Loopback NAT Policy<br />
else go <strong>to</strong> next step:<br />
� Original Source: Firewalled Subnets<br />
� Translated Source: <strong>PPTP</strong> Server Public<br />
� Original Destination: <strong>PPTP</strong> Server Public<br />
� Translated Destination: <strong>PPTP</strong> Server Private<br />
� Original Service: <strong>PPTP</strong><br />
� Translated Service: Original<br />
� Inbound Interface: Any<br />
� Outbound Interface: Any<br />
� Comment: Loopback policy<br />
� Enable NAT Policy: Checked<br />
� Create a reflexive policy: unchecked<br />
4. Upon completion under Network > Nat Policies tab the above Inbound and Outbond NAT policies will be created.<br />
Step 3: Creating Firewall Access Rules<br />
1. Click Firewall > Access Rules tab.<br />
2. Select the type <strong>of</strong> view in the View Style section and go <strong>to</strong> WAN <strong>to</strong> LAN access rules.<br />
3. Click Add a new entry and create the rule by entering the following in<strong>to</strong> the fields:<br />
<strong>Page</strong> 3 <strong>of</strong> 4<br />
Caution: The ability <strong>to</strong> define network access rules is a very powerful <strong>to</strong>ol. Using cus<strong>to</strong>m access rules can disable firewall protection or block all<br />
access <strong>to</strong> the Internet. Use caution when creating or deleting network access rules.<br />
https://www.fuzeqna.com/sonicwallkb/consumer/kbdetail.asp?kbid=7606<br />
1/5/2012
<strong>UTM</strong>: <strong>How</strong> <strong>to</strong> <strong>Open</strong> <strong>PPTP</strong> <strong>traffic</strong> <strong>to</strong> a <strong>PPTP</strong> <strong>server</strong> <strong>behind</strong> the SonicWALL (SonicOS En...<br />
Action: Allow<br />
From Zone: WAN<br />
To Zone: LAN<br />
Service: <strong>PPTP</strong><br />
Source: Any<br />
Destination: <strong>PPTP</strong> Server Public<br />
Users Allowed: All<br />
Schedule: Always on<br />
Enable Logging: checked<br />
Allow Fragmented Packets:<br />
checked<br />
4. Under the Advanced tab, you can leave the “Inactivity Timeout in Minutes” at 15 minutes. Some pro<strong>to</strong>cols, such as Telnet, FTP, SSH,<br />
VNC and RDP can take advantage <strong>of</strong> longer timeouts where increased values like 30 or 60 minutes can be tried with caution in those cases.<br />
Longer timeout values will not help at all for HTTP or HTTPS.<br />
5: Click OK.<br />
<strong>How</strong> <strong>to</strong> Test:<br />
� Testing from within the private network: Try <strong>to</strong> access the <strong>PPTP</strong> Server through its private IP address (Http://192.168.1.100) <strong>to</strong><br />
ensure it is working from within the private network itself.<br />
� Testing from the Internet: Login <strong>to</strong> a computer on the Internet and try <strong>to</strong> access the <strong>PPTP</strong> Server by entering the public IP<br />
(Http://1.1.1.1) in the Browser address bar.<br />
https://www.fuzeqna.com/sonicwallkb/consumer/kbdetail.asp?kbid=7606<br />
<strong>Page</strong> 4 <strong>of</strong> 4<br />
1/5/2012