Most viewed solutions for HP Z620 Workstation - HP Support Center
Most viewed solutions for HP Z620 Workstation - HP Support Center
Most viewed solutions for HP Z620 Workstation - HP Support Center

You also want an ePaper? Increase the reach of your titles
YUMPU automatically turns print PDFs into web optimized ePapers that Google loves.
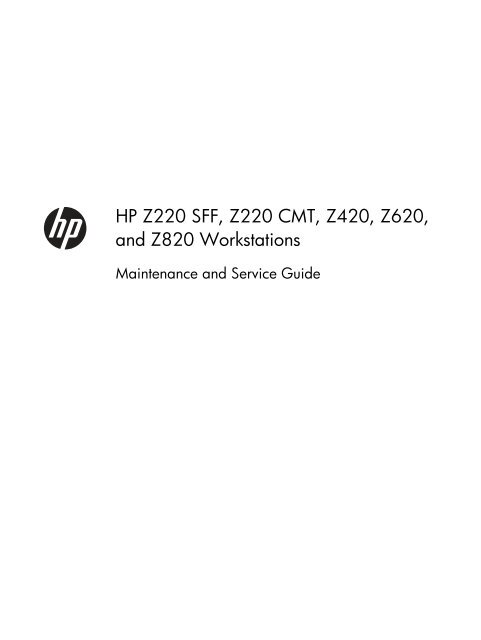
<strong>HP</strong> Z220 SFF, Z220 CMT, Z420, <strong>Z620</strong>,<br />
and Z820 <strong>Workstation</strong>s<br />
Maintenance and Service Guide
Copyright In<strong>for</strong>mation<br />
© Copyright 2012 Hewlett-Packard<br />
Development Company, L.P<br />
669531-002<br />
Second Edition: July 2012<br />
Warranty<br />
Hewlett-Packard Company shall not be<br />
liable <strong>for</strong> technical or editorial errors or<br />
omissions contained herein or <strong>for</strong> incidental<br />
or consequential damages in connection<br />
with the furnishing, per<strong>for</strong>mance, or use of<br />
this material. The in<strong>for</strong>mation in this<br />
document is provided “as is” without<br />
warranty of any kind, including, but not<br />
limited to, the implied warranties of<br />
merchantability and fitness <strong>for</strong> a particular<br />
purpose, and is subject to change without<br />
notice. The warranties <strong>for</strong> <strong>HP</strong> products are<br />
set <strong>for</strong>th in the express limited warranty<br />
statements accompanying such products.<br />
Nothing herein should be construed as<br />
constituting an additional warranty.<br />
This document contains proprietary<br />
in<strong>for</strong>mation that is protected by copyright.<br />
No part of this document may be<br />
photocopied, reproduced, or translated to<br />
another language without the prior written<br />
consent of Hewlett-Packard Company.<br />
Trademark Credits<br />
Microsoft and Windows are U.S. registered<br />
trademarks of Microsoft Corporation.<br />
Intel is a trademark of Intel Corporation in<br />
the U.S. and other countries and is used<br />
under license.<br />
ENERGY STAR is a U.S. registered mark of<br />
the United States Environmental Protection<br />
Agency.
About this guide<br />
This guide provides service and maintenance in<strong>for</strong>mation, technical details and configuration guidance<br />
<strong>for</strong> the <strong>HP</strong> Z220 SFF, Z220 CMT, Z420, <strong>Z620</strong>, and Z820 <strong>Workstation</strong>s.<br />
IMPORTANT: Removal and replacement procedures are now available in videos on<br />
the <strong>HP</strong> website.<br />
Go to the <strong>HP</strong> Customer Self Repair Services Media Library at http://www.hp.com/go/sml.<br />
Hardware overview on page 1<br />
System management on page 39<br />
Guide topics<br />
Component Replacement In<strong>for</strong>mation and Guidelines on page 77<br />
Diagnostics and troubleshooting on page 115<br />
Configuring password security and resetting CMOS on page 158<br />
Linux technical notes on page 162<br />
Configuring RAID devices on page 166<br />
System board designators on page 178<br />
NOTE: View the <strong>HP</strong> Z220 SFF, Z220 CMT, Z420, <strong>Z620</strong>, and Z820 <strong>Workstation</strong> Series User Guide<br />
at http://www.hp.com/support/workstation_manuals.<br />
iii
iv About this guide
Table of contents<br />
1 Hardware overview ......................................................................................................... 1<br />
<strong>HP</strong> Z220 SFF <strong>Workstation</strong> components ....................................................................................... 1<br />
<strong>HP</strong> Z220 SFF <strong>Workstation</strong> front panel components ........................................................ 2<br />
<strong>HP</strong> Z220 SFF <strong>Workstation</strong> rear panel components ........................................................ 3<br />
<strong>HP</strong> Z220 SFF <strong>Workstation</strong> chassis components ............................................................. 4<br />
<strong>HP</strong> Z220 SFF <strong>Workstation</strong> system board component ...................................................... 5<br />
<strong>HP</strong> Z220 SFF <strong>Workstation</strong> system board architecture ..................................................... 6<br />
<strong>Workstation</strong> specifications .......................................................................................... 7<br />
<strong>HP</strong> Z220 CMT <strong>Workstation</strong> components ..................................................................................... 8<br />
<strong>HP</strong> Z220 CMT <strong>Workstation</strong> front panel components ...................................................... 9<br />
<strong>HP</strong> Z220 CMT <strong>Workstation</strong> rear panel components .................................................... 10<br />
<strong>HP</strong> Z220 CMT <strong>Workstation</strong> chassis components ......................................................... 11<br />
<strong>HP</strong> Z220 CMT <strong>Workstation</strong> system board component .................................................. 12<br />
<strong>HP</strong> Z220 CMT <strong>Workstation</strong> system board architecture ................................................. 13<br />
<strong>Workstation</strong> specifications ........................................................................................ 14<br />
<strong>HP</strong> Z420 <strong>Workstation</strong> components ........................................................................................... 15<br />
<strong>HP</strong> Z420 <strong>Workstation</strong> front panel ............................................................................. 16<br />
<strong>HP</strong> Z420 <strong>Workstation</strong> rear panel .............................................................................. 17<br />
<strong>HP</strong> Z420 <strong>Workstation</strong> chassis components ................................................................. 18<br />
<strong>HP</strong> Z420 <strong>Workstation</strong> system board components ........................................................ 19<br />
<strong>HP</strong> Z420 <strong>Workstation</strong> system board architecture ......................................................... 20<br />
<strong>HP</strong> Z420 <strong>Workstation</strong> specifications .......................................................................... 21<br />
<strong>HP</strong> <strong>Z620</strong> <strong>Workstation</strong> components ........................................................................................... 23<br />
<strong>HP</strong> <strong>Z620</strong> <strong>Workstation</strong> front panel ............................................................................. 23<br />
<strong>HP</strong> <strong>Z620</strong> <strong>Workstation</strong> rear panel .............................................................................. 24<br />
<strong>HP</strong> <strong>Z620</strong> <strong>Workstation</strong> chassis components ................................................................. 25<br />
<strong>HP</strong> <strong>Z620</strong> <strong>Workstation</strong> system board components ........................................................ 26<br />
<strong>HP</strong> <strong>Z620</strong> <strong>Workstation</strong> system board architecture ......................................................... 27<br />
<strong>HP</strong> <strong>Z620</strong> <strong>Workstation</strong> specifications .......................................................................... 28<br />
<strong>HP</strong> Z820 <strong>Workstation</strong> components ........................................................................................... 30<br />
<strong>HP</strong> Z820 <strong>Workstation</strong> front panel ............................................................................. 30<br />
<strong>HP</strong> Z820 <strong>Workstation</strong> rear panel .............................................................................. 31<br />
<strong>HP</strong> Z820 <strong>Workstation</strong> chassis components ................................................................. 32<br />
<strong>HP</strong> Z820 <strong>Workstation</strong> system board components ........................................................ 33<br />
<strong>HP</strong> Z820 <strong>Workstation</strong> system board architecture ......................................................... 34<br />
<strong>HP</strong> Z820 <strong>Workstation</strong> specifications .......................................................................... 35<br />
v
vi<br />
Environmental specifications .................................................................................................... 37<br />
ENERGY STAR qualification .................................................................................................... 37<br />
Ensuring proper ventilation ...................................................................................................... 38<br />
2 System management ...................................................................................................... 39<br />
Power management and per<strong>for</strong>mance features .......................................................................... 39<br />
ERP compliance mode ............................................................................................. 39<br />
Hyper-Threading Technology (HTT) ............................................................................ 40<br />
SATA Power Management ....................................................................................... 40<br />
Intel Turbo Boost Technology .................................................................................... 40<br />
<strong>HP</strong> Cool Tools ......................................................................................................... 40<br />
Non-Uni<strong>for</strong>m Memory Access (NUMA) ...................................................................... 41<br />
BIOS ROM ............................................................................................................................ 41<br />
The Computer Setup (F10) Utility .............................................................................................. 42<br />
Computer Setup (F10) functionality ............................................................................ 42<br />
Accessing the Computer Setup (F10) Utility ................................................................ 43<br />
The Computer Setup (F10) Utility menu ...................................................................... 44<br />
Desktop management ............................................................................................................. 60<br />
Initial computer configuration and deployment ............................................................ 61<br />
Installing a remote system ......................................................................................... 61<br />
Copying a setup configuration to another computer ..................................................... 62<br />
Updating and managing software ............................................................................. 63<br />
<strong>HP</strong> Client Management Solutions .............................................................................. 63<br />
Altiris Client Management Solutions .......................................................................... 63<br />
<strong>HP</strong> SoftPaq Download Manager ............................................................................... 64<br />
System Software Manager ....................................................................................... 64<br />
ROM Flash ............................................................................................................. 64<br />
Remote ROM Flash ................................................................................... 64<br />
<strong>HP</strong>QFlash ................................................................................................ 64<br />
FailSafe Boot Block .................................................................................................. 64<br />
Recovering the computer from Boot Block Recovery mode ............................. 65<br />
<strong>Workstation</strong> security ................................................................................................ 65<br />
Asset tracking .......................................................................................... 66<br />
SATA hard disk drive security .................................................................... 67<br />
DriveLock applications ............................................................... 68<br />
Using DriveLock ........................................................................ 68<br />
Password security ..................................................................................... 70<br />
Establishing a setup password using Computer Setup (F10) Utility ... 70<br />
Establishing a power-on password using computer setup ................ 71<br />
Entering a power-on password .................................................... 71<br />
Entering a setup password ......................................................... 72
Changing a power-on or setup password ..................................... 72<br />
Deleting a power-on or setup password ....................................... 73<br />
National keyboard delimiter characters ....................................... 73<br />
Clearing passwords ................................................................... 74<br />
Chassis security ....................................................................................... 74<br />
Smart Cover Sensor (optional) .................................................... 74<br />
Side access panel solenoid lock (<strong>HP</strong> Z420 <strong>Workstation</strong> only) ......... 75<br />
Cable lock (optional) ................................................................. 75<br />
Fault notification and recovery .................................................................................. 75<br />
Drive Protection System ............................................................................. 75<br />
ECC fault prediction ................................................................................. 75<br />
Thermal sensors ....................................................................................... 75<br />
Programmable power button .................................................................................... 76<br />
Changing the power button configuration (Windows only) ............................ 76<br />
3 Component Replacement In<strong>for</strong>mation and Guidelines ..................................................... 77<br />
Warnings and cautions ........................................................................................................... 78<br />
Service considerations ............................................................................................................ 79<br />
Tools and software requirements ............................................................................... 79<br />
Electrostatic discharge (ESD) in<strong>for</strong>mation .................................................................... 79<br />
Product recycling ................................................................................................................... 81<br />
Component replacement guidelines .......................................................................................... 81<br />
Battery ................................................................................................................... 81<br />
Cable management ................................................................................................. 82<br />
CPU (processor) and CPU heatsink ............................................................................ 83<br />
Expansion slots ....................................................................................................... 84<br />
Card configuration restrictions <strong>for</strong> power supplies ........................................ 84<br />
Choosing an expansion card slot ............................................................... 84<br />
<strong>HP</strong> Z220 SFF <strong>Workstation</strong> slot identification and description ......................... 85<br />
<strong>HP</strong> Z220 SFF <strong>Workstation</strong> installation sequence recommendations ................. 85<br />
<strong>HP</strong> Z220 CMT <strong>Workstation</strong> slot identification and description ....................... 86<br />
<strong>HP</strong> Z220 CMT <strong>Workstation</strong> installation sequence recommendations ............... 87<br />
<strong>HP</strong> Z420 <strong>Workstation</strong> slot identification and description ............................... 88<br />
<strong>HP</strong> Z420 <strong>Workstation</strong> installation sequence recommendations ....................... 89<br />
<strong>HP</strong> <strong>Z620</strong> <strong>Workstation</strong> slot identification and description ............................... 90<br />
<strong>HP</strong> <strong>Z620</strong> <strong>Workstation</strong> installation sequence recommendations ....................... 91<br />
<strong>HP</strong> Z820 <strong>Workstation</strong> slot identification and description ............................... 92<br />
<strong>HP</strong> Z820 <strong>Workstation</strong> installation sequence recommendations ....................... 93<br />
Hard disk drives and optical disc drives ..................................................................... 94<br />
Carefully handle hard disk drives ............................................................... 94<br />
Removal and replacement tips ................................................................... 94<br />
vii
viii<br />
Drive installation and cabling scenarios ...................................................... 95<br />
<strong>HP</strong> Z220 SFF <strong>Workstation</strong>s — SATA cable connection guidelines ... 95<br />
<strong>HP</strong> Z220 CMT <strong>Workstation</strong>s — SATA cable connection<br />
guidelines ................................................................................ 95<br />
<strong>HP</strong> Z420 <strong>Workstation</strong>s — Intel AHCI SATA controller guidelines ..... 96<br />
<strong>HP</strong> Z420 <strong>Workstation</strong>s — LSI 9212-4i RAID controller guidelines .... 97<br />
<strong>HP</strong> <strong>Z620</strong> <strong>Workstation</strong>s — Intel AHCI SATA controller guidelines ..... 98<br />
<strong>HP</strong> <strong>Z620</strong> <strong>Workstation</strong>s — LSI 9212-4i RAID controller guidelines .... 99<br />
<strong>HP</strong> Z820 <strong>Workstation</strong> cabling guidelines ................................... 100<br />
Memory ............................................................................................................... 101<br />
<strong>Support</strong>ed DIMM configurations ............................................................... 101<br />
BIOS errors and warnings ....................................................................... 102<br />
DIMM installation guidelines .................................................................... 102<br />
<strong>HP</strong> Z220 SFF <strong>Workstation</strong> DIMM installation order .................................... 103<br />
<strong>HP</strong> Z220 CMT <strong>Workstation</strong> DIMM installation order ................................... 103<br />
<strong>HP</strong> Z420 <strong>Workstation</strong> DIMM installation order .......................................... 104<br />
<strong>HP</strong> <strong>Z620</strong> <strong>Workstation</strong> DIMM installation order .......................................... 105<br />
<strong>HP</strong> Z820 <strong>Workstation</strong> DIMM installation order .......................................... 106<br />
Power supply ........................................................................................................ 107<br />
Power supply specifications ..................................................................... 107<br />
Power consumption and heat dissipation ................................................... 109<br />
Resetting the power supply ...................................................................... 109<br />
System board ....................................................................................................... 109<br />
System cabling ...................................................................................... 110<br />
<strong>HP</strong> Z220 SFF <strong>Workstation</strong> system cabling .................................. 110<br />
<strong>HP</strong> Z220 CMT <strong>Workstation</strong> system cabling ................................ 111<br />
<strong>HP</strong> Z420 <strong>Workstation</strong> system cabling ........................................ 112<br />
<strong>HP</strong> <strong>Z620</strong> <strong>Workstation</strong> system cabling ........................................ 113<br />
<strong>HP</strong> Z820 <strong>Workstation</strong> system cabling ........................................ 114<br />
4 Diagnostics and troubleshooting ................................................................................... 115<br />
Calling support .................................................................................................................... 116<br />
Locating ID labels ................................................................................................................. 117<br />
Locating warranty in<strong>for</strong>mation ............................................................................................... 118<br />
Diagnosis guidelines ............................................................................................................ 118<br />
Diagnosis at startup ............................................................................................... 118<br />
Diagnosis during operation .................................................................................... 119<br />
Troubleshooting checklist ....................................................................................................... 120<br />
<strong>HP</strong> troubleshooting resources and tools ................................................................................... 121<br />
<strong>HP</strong> <strong>Support</strong> Assistant .............................................................................................. 121<br />
Online support ...................................................................................................... 121
Troubleshooting a problem ...................................................................... 122<br />
Instant <strong>Support</strong> and Active Chat ............................................................... 122<br />
Customer Advisories, Customer and Security Bulletins, and Customer Notices 122<br />
Product Change Notifications .................................................................. 122<br />
Helpful hints ......................................................................................................... 123<br />
At startup .............................................................................................. 123<br />
During operation .................................................................................... 123<br />
Customer self-repair ................................................................................ 124<br />
Troubleshooting scenarios and <strong>solutions</strong> .................................................................................. 125<br />
Solving minor problems ......................................................................................... 125<br />
Solving hard drive problems ................................................................................... 127<br />
Solving display problems ....................................................................................... 129<br />
Solving audio problems ......................................................................................... 131<br />
Solving printer problems ........................................................................................ 132<br />
Solving power supply problems .............................................................................. 133<br />
Testing power supply .............................................................................. 133<br />
Self-troubleshooting with <strong>HP</strong> Vision Diagnostics ........................................................................ 135<br />
Overview ............................................................................................................. 135<br />
Downloading and accessing <strong>HP</strong> Vision Diagnostics ................................................... 136<br />
Accessing <strong>HP</strong> Vision Diagnostics on the computer ..................................................... 136<br />
Creating and using a bootable USB key ................................................... 137<br />
Creating and using a bootable DVD ......................................................... 137<br />
Using the <strong>HP</strong> Memory Test utility .............................................................. 137<br />
User interface ....................................................................................................... 138<br />
Survey tab ............................................................................................. 139<br />
Test tab ................................................................................................. 140<br />
Status tab .............................................................................................. 141<br />
History tab ............................................................................................ 141<br />
Errors tab .............................................................................................. 142<br />
Help tab ............................................................................................... 142<br />
Saving and printing in<strong>for</strong>mation in <strong>HP</strong> Vision Diagnostics ........................................... 143<br />
Self-troubleshooting with <strong>HP</strong> Advanced System Diagnostics UEFI ................................................ 144<br />
Downloading <strong>HP</strong> Advanced System Diagnostics ....................................................... 145<br />
Accessing <strong>HP</strong> Advanced System Diagnostics ............................................................ 146<br />
User interface ....................................................................................................... 146<br />
Running <strong>HP</strong> Advanced System Diagnostics ............................................................... 147<br />
System in<strong>for</strong>mation ................................................................................. 147<br />
Hardware diagnostic tests ....................................................................... 148<br />
Diagnostic codes and errors .................................................................................................. 149<br />
Diagnostic LED and audible (beep) codes ................................................................ 149<br />
LED color definitions .............................................................................................. 153<br />
ix
x<br />
POST error messages ............................................................................................ 153<br />
5 Configuring password security and resetting CMOS ...................................................... 158<br />
Preparing to configure passwords .......................................................................................... 158<br />
Resetting the password jumper ............................................................................................... 159<br />
Clearing and Resetting the CMOS ......................................................................................... 160<br />
Using the CMOS Button to Reset CMOS .................................................................. 160<br />
Using the Computer Setup (F10) Utility to Reset CMOS .............................................. 161<br />
Appendix A Linux technical notes .................................................................................... 162<br />
System RAM ........................................................................................................................ 162<br />
Audio ................................................................................................................................. 162<br />
Network cards ..................................................................................................................... 163<br />
Hyper-Threading Technology (HTT) ......................................................................................... 163<br />
NVIDIA® Graphics <strong>Workstation</strong>s ........................................................................................... 164<br />
AMD® Graphics <strong>Workstation</strong>s .............................................................................................. 165<br />
Appendix B Configuring RAID devices .............................................................................. 166<br />
<strong>Support</strong>ed hard drive maximum and storage controller options .................................................. 166<br />
<strong>Support</strong>ed RAID configurations .............................................................................................. 167<br />
Configuring Intel SATA RAID ................................................................................................. 168<br />
Configuring system BIOS ....................................................................................... 169<br />
Configuring RAID with the Intel utility ....................................................................... 170<br />
Configuring RAID on an LSI 2308 or LSI 9212-4i controller ....................................................... 171<br />
RAID 0 configuration ............................................................................................. 171<br />
RAID 1 configuration ............................................................................................. 172<br />
RAID 1E/10 configuration ..................................................................................... 173<br />
Configuring RAID on an LSI 9260-8i MegaRAID controller ........................................................ 174<br />
RAID 0 ................................................................................................................. 174<br />
Software RAID solution ......................................................................................................... 176<br />
Software RAID considerations ................................................................................. 176<br />
Per<strong>for</strong>mance considerations .................................................................................... 176<br />
Configuring software RAID ..................................................................................... 177<br />
Appendix C System board designators ............................................................................ 178<br />
<strong>HP</strong> Z220 SFF <strong>Workstation</strong> ..................................................................................................... 178<br />
<strong>HP</strong> Z220 CMT <strong>Workstation</strong> ................................................................................................... 179<br />
<strong>HP</strong> Z420 and <strong>Z620</strong> <strong>Workstation</strong> system board designators ...................................................... 180<br />
<strong>HP</strong> Z820 <strong>Workstation</strong>s ......................................................................................................... 182
Index ............................................................................................................................... 185<br />
xi
xii
1 Hardware overview<br />
This chapter presents an overview of workstation hardware components. It includes these topics:<br />
Topics<br />
<strong>HP</strong> Z220 SFF <strong>Workstation</strong> components on page 1<br />
<strong>HP</strong> Z220 CMT <strong>Workstation</strong> components on page 8<br />
<strong>HP</strong> Z420 <strong>Workstation</strong> components on page 15<br />
<strong>HP</strong> <strong>Z620</strong> <strong>Workstation</strong> components on page 23<br />
<strong>HP</strong> Z820 <strong>Workstation</strong> components on page 30<br />
Environmental specifications on page 37<br />
ENERGY STAR qualification on page 37<br />
Ensuring proper ventilation on page 38<br />
<strong>HP</strong> Z220 SFF <strong>Workstation</strong> components<br />
For complete and current in<strong>for</strong>mation on supported accessories and components <strong>for</strong> the workstation,<br />
see http://partsurfer.hp.com.<br />
Topics<br />
<strong>HP</strong> Z220 SFF <strong>Workstation</strong> front panel components on page 2<br />
<strong>HP</strong> Z220 SFF <strong>Workstation</strong> rear panel components on page 3<br />
<strong>HP</strong> Z220 SFF <strong>Workstation</strong> chassis components on page 4<br />
<strong>HP</strong> Z220 SFF <strong>Workstation</strong> system board component on page 5<br />
<strong>HP</strong> Z220 SFF <strong>Workstation</strong> system board architecture on page 6<br />
<strong>Workstation</strong> specifications on page 7<br />
<strong>HP</strong> Z220 SFF <strong>Workstation</strong> components 1
<strong>HP</strong> Z220 SFF <strong>Workstation</strong> front panel components<br />
Figure 1-1 Front panel components<br />
Table 1-1 Component description<br />
1 Optical drive 5<br />
2 Power button 6<br />
Optional media card reader (shown)<br />
or optional second hard disk drive<br />
Hard drive or optical drive activity<br />
light<br />
3 USB 2.0 ports (4, black) 7 Headphones connector<br />
4<br />
2 Chapter 1 Hardware overview<br />
Microphone or headphones connector<br />
(software selectable, default mode is<br />
microphone)
<strong>HP</strong> Z220 SFF <strong>Workstation</strong> rear panel components<br />
Figure 1-2 Rear panel components<br />
NOTE: The labels <strong>for</strong> the rear panel connectors use industry-standard icons and colors.<br />
Table 1-2 Component descriptions<br />
1 RJ–45 network connector 7 DisplayPort (DP)<br />
2<br />
Serial port<br />
3 PS/2 mouse connector (green) 9<br />
8 VGA (monitor) (blue)<br />
PS/2 keyboard connector<br />
(purple)<br />
4 Power cord connector 10 Audio line-out connector (green)<br />
5 USB 2.0 ports (2) (back) 11 Audio line-in connector (blue)<br />
6 USB 3.0 ports (4) (blue)<br />
The DP and VGA ports are not supported when the system is configured with Intel Xeon E3-12x0 v2 processors. Also, if a discrete graphics card<br />
NOTE:<br />
is installed, these ports are disabled by default.<br />
Simultaneous usage of integrated Intel HD graphics and discrete graphics cards (in order to drive more than two displays) can be enabled using<br />
NOTE:<br />
the Computer (F10) Setup Utility. However, <strong>HP</strong> recommends using only discrete graphics cards when attaching three or more displays.<br />
<strong>HP</strong> Z220 SFF <strong>Workstation</strong> components 3
<strong>HP</strong> Z220 SFF <strong>Workstation</strong> chassis components<br />
For complete and current in<strong>for</strong>mation on supported accessories and components <strong>for</strong> the computer, see<br />
http://partsurfer.hp.com.<br />
The following image shows the components of a typical computer layout. Drive configurations can vary.<br />
Figure 1-3 Chassis components<br />
Table 1-3 Component descriptions<br />
1 Access panel 8 Optional media reader or second hard disk drive<br />
2 Memory module (DIMM) 9 Speaker<br />
3 System board 10 CPU<br />
4 Hard disk drive 11 Heatsink<br />
5 Power supply 12 Airflow guide<br />
6 Chassis 13 System fan<br />
7 Optical drive 14 Front bezel<br />
4 Chapter 1 Hardware overview
<strong>HP</strong> Z220 SFF <strong>Workstation</strong> system board component<br />
The following illustration and table identify computer system board components.<br />
Figure 1-4 System board component locations<br />
Table 1-4 System board component descriptions<br />
I/O SATA Power<br />
1 Display Port 13 AHCI 3Gb/s 20 Battery<br />
2 Front audio 14 AHCI 6Gb/s 21 CPU power<br />
3 Front speaker NOTE: Only the port labeled 22 Front power button/LED<br />
eSATA is eSATA compatible.<br />
4 Front USB 2.0 23 Main power<br />
5 Internal USB 2.0 PCI/PCIe 24 Power COMM<br />
6 Keyboard/mouse 15 PCIe2 x1 25 SATA power<br />
7 Network/rear USB 2.0 16 PCIe2 x16 (4) Security<br />
8 Parallel (optional) 17 PCIe3 x16 26 Chassis solenoid lock<br />
9 Rear audio 18 PCI 32/33 27 Hood sense<br />
10 Rear USB 3.0 NOTE: For related expansion<br />
Service<br />
11 Serial (optional)<br />
card slot in<strong>for</strong>mation, see<br />
Expansion slots on page 84 28 Clear CMOS button<br />
12 VGA/serial Cooling 29 Crisis recovery jumper<br />
19 Chassis fan 30 ME/AMT flash override<br />
31 Password jumper<br />
<strong>HP</strong> Z220 SFF <strong>Workstation</strong> components 5
<strong>HP</strong> Z220 SFF <strong>Workstation</strong> system board architecture<br />
This section describes the system architectures.<br />
The following figure shows the typical system board block diagram.<br />
Figure 1-5 System board block diagram<br />
PCIe 3.0 x16<br />
VGA<br />
Display<br />
Port<br />
Z220 SFF Block Diagram<br />
DMI<br />
SATA 3.0 (2)<br />
SATA 2.0<br />
(2) Intel PCH<br />
Panther Point<br />
USB 3.0<br />
Rear (4)<br />
C216<br />
USB 2.0<br />
Rear (2)<br />
(1)<br />
USB 2.0 Front – Cabled (4)<br />
USB 2.0 Internal – Cabled (4)<br />
Serial<br />
2 nd Serial<br />
Parallel<br />
(1)<br />
(1)<br />
(1)<br />
Cabled (1)<br />
Cabled (1)<br />
128 Mbit<br />
SPI<br />
TPM<br />
Last Modified<br />
on:1/11/12<br />
Intel Socket<br />
LGA1155<br />
FDI<br />
LPC<br />
SIO12<br />
LCI<br />
Intel HD<br />
Audio<br />
DDR3<br />
1600 MHz<br />
ECC/NonECC<br />
DDR3<br />
1600 MHz<br />
ECC/NonECC<br />
(1)<br />
(1)<br />
Intel<br />
Lewisville<br />
NIC PHY<br />
Audio Codec<br />
(1)<br />
DIMM<br />
DIMM<br />
PCI 2.3<br />
PCIe 2.0 x1<br />
PCIe 2.0 x4 w x16 connector<br />
Rear (1)<br />
Front Cabled<br />
PS2<br />
PS2<br />
Rear (1)<br />
Front Cabled<br />
NOTE: The PCIe designators indicate the mechanical connector size and number of electrical PCIe<br />
lanes routed to an expansion slot. For example, x16(8) means that the expansion slot is mechanically a<br />
x16 length connector, with 8 PCIe lanes supported.<br />
6 Chapter 1 Hardware overview<br />
DIMM<br />
RJ45<br />
Line<br />
In<br />
Line<br />
Out<br />
<strong>HP</strong><br />
MIC<br />
KB<br />
MS<br />
DIMM
<strong>Workstation</strong> specifications<br />
Processor<br />
technology<br />
Power supply<br />
Memory<br />
technology<br />
Graphics cards<br />
I/O technology<br />
Intel® Series C216 chipset with:<br />
<strong>HP</strong> Z220 SFF<br />
● <strong>Support</strong> <strong>for</strong> the Intel® Xeon® Processor E3 v2 Family, third generation Intel Core (TM) processors<br />
up to 95W, or Pentium G640<br />
● Integrated 2-channel memory controller<br />
● Microarchitecture improvements<br />
● Integrated graphics (some models)<br />
● Advanced Vector Extensions (AVX) to increase floating point per<strong>for</strong>mance<br />
● Intel DMI2 interface connecting the processor to the I/O controller<br />
● 240W, 90% efficient, 80 PLUS Gold, compatible with ENERGY STAR Version 5 requirements<br />
● <strong>Support</strong>s European Union ERP Lot 6 tier2 power limit of less than 0.5W in off mode<br />
● Dual in-line memory modules (DIMMs) based on DDR3 1600MHz technology<br />
● <strong>Support</strong>s error checking and correcting (ECC) and non-ECC DIMMs<br />
● Two direct-attach memory channels enable low-latency access and fast data transfer <strong>for</strong> improved<br />
per<strong>for</strong>mance<br />
● Up to 32 GB system memory (8 GB DIMMs)<br />
● 1600 MHz 2, 4, 8 GB ECC unbuffered DIMM<br />
● 1600 MHz 2, 4, 8 GB non ECC unbuffered DIMM<br />
<strong>Support</strong>s:<br />
● PCIe Gen3 (PCIe3) bus speeds; can support dual PCIe Gen2 graphics cards in mechanical PCIe<br />
x16 slots<br />
● Multiple graphics cards provided their total power usage is within 45W<br />
● Up to two displays with integrated Intel HD graphics (depending on processor type)<br />
● Up to four 2D displays or two 3D displays<br />
NOTE: <strong>Most</strong> supported Intel Core processors provide Intel HD Graphics 2000/2500/4000; Intel<br />
Xeon processors with model designations that end in "---5" provide Intel HD Graphics P4000.<br />
NOTE: To drive more than two displays, use the Computer (F10) Setup Utility to intermix integrated<br />
Intel HD graphics and discrete graphics cards (with three or more displays, <strong>HP</strong> recommends using only<br />
discrete graphics cards).<br />
● RAID configurations <strong>for</strong> SATA RAID levels 0, 1<br />
● <strong>Support</strong>s eSATA (3.0 Gbps) using an optional adapter<br />
● Six external and four internal USB 2.0 ports<br />
● Four external USB 3.0 ports<br />
● Parallel and serial headers that can be used with an optional PCI bulkhead connector<br />
<strong>HP</strong> Z220 SFF <strong>Workstation</strong> components 7
<strong>HP</strong> Z220 CMT <strong>Workstation</strong> components<br />
For complete and current in<strong>for</strong>mation on supported accessories and components <strong>for</strong> the computer, see<br />
http://partsurfer.hp.com.<br />
Topics<br />
<strong>HP</strong> Z220 CMT <strong>Workstation</strong> front panel components on page 9<br />
<strong>HP</strong> Z220 CMT <strong>Workstation</strong> rear panel components on page 10<br />
<strong>HP</strong> Z220 SFF <strong>Workstation</strong> chassis components on page 4<br />
<strong>HP</strong> Z220 SFF <strong>Workstation</strong> system board component on page 5<br />
<strong>HP</strong> Z220 SFF <strong>Workstation</strong> system board architecture on page 6<br />
8 Chapter 1 Hardware overview
<strong>HP</strong> Z220 CMT <strong>Workstation</strong> front panel components<br />
Figure 1-6 Front panel components<br />
Table 1-5 Component descriptions<br />
1 Optical drive 5 USB 3.0 ports (2) (blue)<br />
2 Power button 6 Headphone connector<br />
3 Hard drive activity light 7 Microphone connector<br />
4 USB 2.0 ports (1) (black) 8<br />
1394a FireWire connector (optional<br />
and plugged unless configured)<br />
<strong>HP</strong> Z220 CMT <strong>Workstation</strong> components 9
<strong>HP</strong> Z220 CMT <strong>Workstation</strong> rear panel components<br />
Figure 1-7 Rear panel components<br />
Table 1-6 Component descriptions<br />
1 Power cord connector 9 Power supply Built-In Self Test (BIST) LED<br />
2 PS/2 keyboard connector (purple) 10 PS/2 mouse connector (green)<br />
3 DVI-I connector 11 Universal chassis clamp opening<br />
4 Display Port (DP) connector 12 Cable lock slot<br />
5 USB 2.0 ports (4) (black) 13 Padlock loop<br />
6 USB 3.0 ports (2) (blue) 14 RJ-45 network connector<br />
7 Microphone connector (pink) 15 Audio line-in connector (blue)<br />
8 Audio line-out connector (green)<br />
NOTE: The DP and DVI-I ports are not supported when the system is configured with Intel Xeon E3-12x0 v2 processors. Also, if a discrete graphics card<br />
is installed these ports are disabled by default.<br />
NOTE: Simultaneous usage of integrated Intel HD graphics and discrete graphics cards (in order to drive more than two displays) can be enabled using<br />
the Computer (F10) Setup Utility. However, <strong>HP</strong> recommends using only discrete graphics cards when attaching three or more displays.<br />
10 Chapter 1 Hardware overview
<strong>HP</strong> Z220 CMT <strong>Workstation</strong> chassis components<br />
The following figure shows the chassis components of a typical <strong>HP</strong> Z220 CMT <strong>Workstation</strong> layout.<br />
Drive configurations can vary.<br />
Figure 1-8 Chassis components<br />
Table 1-7 <strong>Workstation</strong> component descriptions<br />
Item Description Item Description<br />
1 Power supply 8 Memory module (DIMM)<br />
2 Side access panel 9 PCIe card<br />
3 Rear system fan 10 PCI card<br />
4 Optical drive 11 Speaker<br />
5 CPU heatsink 12 Hard disk drive<br />
6 CPU 13 Front bezel<br />
7 System board 14 Chassis<br />
<strong>HP</strong> Z220 CMT <strong>Workstation</strong> components 11
<strong>HP</strong> Z220 CMT <strong>Workstation</strong> system board component<br />
The following illustration and table identify workstation system board components.<br />
Figure 1-9 System board component locations<br />
9<br />
2<br />
1<br />
10<br />
13<br />
12<br />
17<br />
18<br />
19<br />
20<br />
21<br />
22<br />
23<br />
27<br />
26<br />
28<br />
31 32<br />
CPU<br />
3 11 14<br />
8 4<br />
Table 1-8 System board component descriptions<br />
24<br />
35<br />
Memory Sockets<br />
5 4<br />
36<br />
34<br />
5<br />
16<br />
1 0<br />
I/O SATA Power<br />
1 Display Port 15 AHCI 3Gb/s 27 Battery<br />
2 DVI video 16 AHCI 6Gb/s 28 CPU power<br />
3 Front audio PCI/PCIe 29 Front power button/LED<br />
4 Front speaker 17 PCIe2 x8 (4) 30 Main power<br />
5 Front USB 2.0/3.0 18 PCIe3 x16 Security<br />
6 Internal USB 2.0 19 PCIe2 x1 31 Chassis solenoid lock<br />
7 Internal USB 2.0 20 PCIe2 x16 (4) 32 Hood sense<br />
8 Internal USB 2.0 21 PCIe2 x1 Service<br />
9 Keyboard/mouse 22 PCI 32/33 33 Clear CMOS button<br />
10 Network/rear USB 2.0 23 PCI 32/33 34 Crisis recovery jumper<br />
11 Parallel (optional) Cooling 35 ME/AMT flash override<br />
12 Rear audio 24 CPU fan 36 Password jumper<br />
13 Rear USB 2.0/3.0 25 Front fan NOTE: For related expansion card slot<br />
14 Serial (optional) 26 Rear fan<br />
in<strong>for</strong>mation, see Expansion slots<br />
on page 84<br />
12 Chapter 1 Hardware overview<br />
33<br />
3<br />
2<br />
6<br />
15<br />
30<br />
29<br />
7<br />
25
<strong>HP</strong> Z220 CMT <strong>Workstation</strong> system board architecture<br />
The following figure shows the typical system board block diagram.<br />
Figure 1-10 System board block diagram<br />
PCIe 3.0 x16<br />
PCIe 2.0 x4 w/ x16<br />
Connector<br />
DVI-I<br />
Display<br />
Port<br />
Z220 CMT Block Diagram<br />
(1)x<br />
DMI<br />
SATA 3.0 (2)x<br />
SATA 2.0<br />
(4)x Intel PCH<br />
Panther Point<br />
USB 3.0<br />
Rear (2)x<br />
C216<br />
USB 2.0<br />
Rear (4)x<br />
USB 3.0 Front – Cabled (2)x<br />
USB 2.0 Front – Cabled (1)x<br />
USB 2.0 Internal – Cabled (5)x<br />
LCIx<br />
2 nd Serial<br />
Parallel<br />
(1)x<br />
(1)x<br />
(1)x<br />
Cabled (1)x<br />
Cabled (1)x<br />
128 Mbit<br />
SPI<br />
TPM<br />
Intel Socket<br />
LGA1155<br />
FDI<br />
LPC<br />
SIO12<br />
Intel HD<br />
Audio<br />
DDR3<br />
1600 MHz<br />
ECC/NonECC<br />
DDR3<br />
1600 MHz<br />
ECC/NonECC<br />
(2)x<br />
(1)x<br />
Intel<br />
Lewisville<br />
NIC PHY<br />
Audio Codec<br />
(2)x<br />
DIMM<br />
DIMM<br />
PCI 2.3<br />
PCIe 2.0 x1<br />
PCIe 2.0 x4 w/ x8 Connector<br />
Rear (1)x<br />
Front Cabledx<br />
PS2x<br />
PS2x<br />
Rear (1)<br />
Rear (1)x<br />
Front Cabledx<br />
NOTE: The PCIe designators indicate the mechanical connector size and number of electrical PCIe<br />
lanes routed to an expansion slot. For example, x16(8) means that the expansion slot is mechanically a<br />
x16 length connector, with 8 PCIe lanes supported.<br />
DIMM<br />
RJ45<br />
MIC<br />
Line<br />
In<br />
Line<br />
Out<br />
<strong>HP</strong><br />
MIC<br />
KB<br />
MS<br />
DIMM<br />
<strong>HP</strong> Z220 CMT <strong>Workstation</strong> components 13
<strong>Workstation</strong> specifications<br />
Processor<br />
technology<br />
Power supply<br />
Memory<br />
technology<br />
Graphics cards<br />
I/O technology<br />
Intel® Series C216 chipset with:<br />
<strong>HP</strong> Z220 CMT<br />
● <strong>Support</strong> <strong>for</strong> the Intel® Xeon® Processor E3 v2 Family or 3nd generation Intel Core(TM)<br />
processors up to 95W<br />
● Integrated 2-channel memory controller<br />
● Microarchitecture improvements<br />
● Integrated graphics (some models)<br />
● Advanced Vector Extensions (AVX) to increase floating point per<strong>for</strong>mance<br />
● Intel DMI2 interface connecting the processor to the I/O controller<br />
● 400W, 90% efficient, 80 PLUS Gold, compatible with ENERGY STAR Version 5 requirements<br />
● <strong>Support</strong>s European Union ERP Lot 6 tier2 power limit of less than 0.5W in off mode<br />
● Dual in-line memory modules (DIMMs) based on DDR3 1600MHz technology<br />
● <strong>Support</strong>s error checking and correcting (ECC) and non-ECC DIMMs<br />
● Two direct-attach memory channels enable low-latency access and fast data transfer <strong>for</strong> improved<br />
per<strong>for</strong>mance<br />
● Up to 32 GB system memory (8 GB DIMMs)<br />
● 1600 MHz 2, 4, 8 GB ECC unbuffered DIMM<br />
● 1600 MHz 2, 4, 8 GB non ECC unbuffered DIMM<br />
<strong>Support</strong>s:<br />
14 Chapter 1 Hardware overview<br />
● PCIe Gen3 (PCIe3) bus speeds; can support dual PCIe Gen2 graphics cards in mechanical PCIe<br />
x16 slots<br />
● Multiple graphics cards provided their total power usage is within 150W<br />
● Up to two displays with integrated Intel HD graphics (depending on processor type)<br />
● Up to four 2D displays or two 3D displays<br />
NOTE: <strong>Most</strong> supported Intel Core processors provide Intel HD Graphics 2000/2500/4000; Intel<br />
Xeon processors with model designations that end in "---5" provide Intel HD Graphics P4000.<br />
NOTE: To drive more than two displays, use the Computer (F10) Setup Utility to intermix integrated<br />
Intel HD graphics and discrete graphics cards (with three or more displays, <strong>HP</strong> recommends using only<br />
discrete graphics cards).<br />
● RAID configurations <strong>for</strong> SATA RAID levels 0, 1<br />
● <strong>Support</strong>s eSATA (3.0 Gbps) using an optional adapter<br />
● Six external and four internal USB 2.0 ports<br />
● Four external USB 3.0 ports<br />
● Parallel and serial headers that can be used with an optional PCI bulkhead connector
<strong>HP</strong> Z420 <strong>Workstation</strong> components<br />
For complete and current in<strong>for</strong>mation on supported accessories and components <strong>for</strong> the computer, see<br />
http://partsurfer.hp.com.<br />
Topics<br />
<strong>HP</strong> Z420 <strong>Workstation</strong> front panel on page 16<br />
<strong>HP</strong> Z420 <strong>Workstation</strong> rear panel on page 17<br />
<strong>HP</strong> Z420 <strong>Workstation</strong> chassis components on page 18<br />
<strong>HP</strong> Z420 <strong>Workstation</strong> system board components on page 19<br />
<strong>HP</strong> Z420 <strong>Workstation</strong> system board architecture on page 20<br />
<strong>HP</strong> Z420 <strong>Workstation</strong> specifications on page 21<br />
<strong>HP</strong> Z420 <strong>Workstation</strong> components 15
<strong>HP</strong> Z420 <strong>Workstation</strong> front panel<br />
Figure 1-11 Front panel components<br />
Table 1-9 Component descriptions<br />
1 Optical drive 5 USB 3.0 ports (2, blue)<br />
2 Power button 6 Headphone connector<br />
3 Hard drive activity light 7 Microphone connector<br />
4 USB 2.0 port (black) 8 IEEE–1394a connector<br />
16 Chapter 1 Hardware overview
<strong>HP</strong> Z420 <strong>Workstation</strong> rear panel<br />
Figure 1-12 Rear panel components<br />
Table 1-10 Component descriptions<br />
1<br />
Power supply Built-In Self Test<br />
(BIST) LED<br />
9 Audio line-out connector (green)<br />
2 Universal chassis clamp opening 10 Microphone connector (pink)<br />
3 PS/2 mouse connector (green) 11<br />
AMT-enabled RJ-45 network<br />
connector (orange)<br />
4 USB 2.0 ports (4, black) 12 USB 3.0 ports (2, blue)<br />
5 Security slot 13 IEEE-1394a connector (white)<br />
6 Padlock loop 14<br />
PS/2 keyboard connector<br />
(purple)<br />
7 Audio line-in connector (blue) 15 Rear power button<br />
8 Graphics card connector 16 Power cord connector<br />
<strong>HP</strong> Z420 <strong>Workstation</strong> components 17
<strong>HP</strong> Z420 <strong>Workstation</strong> chassis components<br />
Figure 1-13 Chassis components<br />
Table 1-11 Component descriptions<br />
1 Power supply 9 CPU<br />
2 Side access panel 10 Memory module (DIMM)<br />
3 Rear system fan 11 System board<br />
4 Memory airflow guide 12 PCIe card<br />
5 Hard disk drive 13 PCI card<br />
6 Hard disk drive 14 Speaker<br />
7 Optical drive 15 Front bezel<br />
8 Heatsink 16 Chassis<br />
18 Chapter 1 Hardware overview
<strong>HP</strong> Z420 <strong>Workstation</strong> system board components<br />
Figure 1-14 System board component locations<br />
Table 1-12 System board component descriptions<br />
I/O SATA (SAS optional) Cooling Security<br />
1 Front 1394a 14 AHCI 3Gb/s 25 CPU0 fan 34 Chassis solenoid lock<br />
2 Front audio 15 AHCI 6Gb/s 26 Front fan 35 Chassis intrusion sensor<br />
3 Front speaker 16 HDD LED 27 Memory fan Service<br />
4 Front USB 2.0 17 SCU 3Gb/s 28 Rear fan 36 Clear CMOS button<br />
5 Front USB 3.0 18 SAS (optional) Power 37 ME/AMT flash override<br />
6 Internal USB 2.0 PCI/PCIe 29 Battery 38 Password jumper<br />
7 Keyboard/mouse 19 PCIe2 x4 (1) 30 Front power button/LED<br />
8 Network 20 PCIe3 x16 31 Main power<br />
9 Rear 1394a 21 PCIe2 x8 (4) 32 CPU/MEM power<br />
10 Rear audio 22 PCIe3 x8 33 Rear power button/LED<br />
11 Rear USB 2.0 23 PCIe3 x16 For related expansion card slot in<strong>for</strong>mation, see Expansion<br />
slots on page 84<br />
12 Rear USB 3.0 24 PCI 32/33<br />
13 Serial (optional)<br />
<strong>HP</strong> Z420 <strong>Workstation</strong> components 19
<strong>HP</strong> Z420 <strong>Workstation</strong> system board architecture<br />
Figure 1-15 <strong>HP</strong> Z420 <strong>Workstation</strong> system board block diagram<br />
NOTE: The PCIe designators indicate the mechanical connector size and number of electrical PCIe<br />
lanes routed to an expansion slot. For example, x16(8) means that the expansion slot is mechanically a<br />
x16 length connector, with 8 PCIe lanes supported.<br />
20 Chapter 1 Hardware overview
<strong>HP</strong> Z420 <strong>Workstation</strong> specifications<br />
Processor technology<br />
Power supply<br />
Memory technology<br />
Graphics cards<br />
I/O technology<br />
Intel ® Series C602 chipset with:<br />
● <strong>Support</strong> <strong>for</strong> the Intel® Xeon Processor E5-1600 Series and E5-2600 Series,<br />
including processors up to 150W<br />
● Integrated 4-channel memory controller<br />
● Microarchitecture improvements<br />
● Large L3 cache <strong>for</strong> superior per<strong>for</strong>mance<br />
● Intel QuickPath Interconnect (QPI) connects processors and I/O controller with speeds<br />
up to 8 GT/s<br />
<strong>HP</strong> Liquid Cooling option is available <strong>for</strong> all Z420 processors and is required on the<br />
E5-2687W processor model.<br />
● 600W Gold, 90% efficient, wide-ranging, active Power Factor Correction, two<br />
auxiliary dongles on two separate 12V rails, ERP 0.5W, Built-in-Self Test (BIST)<br />
● Dual in-line memory modules (DIMMs) based on DDR3 1600 MHz technology<br />
● Error checking and correcting (ECC)-protected<br />
● Four direct-attach memory channels enable low-latency access and fast data transfer<br />
<strong>for</strong> improved per<strong>for</strong>mance<br />
● Up to 64 GB system memory (8 GB DIMMs)<br />
● 1600 MHz 2, 4, 8 GB ECC unbuffered DIMMs<br />
NOTE: Do not mix any of the different types (unbuffered, registered, and load reducing<br />
DIMMs) of memory. The system will not boot and will produce a memory error.<br />
NOTE: Distribute DIMMs across all memory channels <strong>for</strong> optimal per<strong>for</strong>mance.<br />
<strong>Support</strong>s:<br />
● PCIe Gen3 (PCIe3) bus speeds; can support two PCIe Gen3 graphics cards in PCIe3<br />
x16 slots<br />
● Up to 225W graphics or compute card in the primary graphics slot<br />
● A second graphics card in the second PCIe3 x16 slot<br />
● Third and fourth 2D graphics cards in additional PCIe2 slots<br />
● Combined power consumption of all cards cannot exceed 270W (subject to overall<br />
system power limitations and configuration restrictions)<br />
● SATA RAID 0/1/5/10 on either AHCI or SCU<br />
● SAS RAID 0/1/10 on SCU (requires PCIe SAS Controller)<br />
● Ten SATA ports (2 AHCI 6 Gb/s, 4 AHCI 3 Gb/s, 4 SCU 3 Gb/s)<br />
● Two ports capable of optional eSATA<br />
● Four external USB 3.0 ports (2 front, 2 rear)<br />
● Five external USB 2.0 ports (1 front, 4 rear)<br />
● Six internal USB 2.0 ports<br />
● Serial Attached SCSI (SAS) drives supported with 9212-4i plug-in card<br />
<strong>HP</strong> Z420 <strong>Workstation</strong> components 21
Weight<br />
Chassis dimensions<br />
22 Chapter 1 Hardware overview<br />
● Standard configuration: 13.2 kg (29.2 lb)<br />
● Minimum configuration: 12.5 kg (27.5 lb)<br />
● Maximum configuration: 17.7 kg (39.4 lb)<br />
Tower configuration:<br />
● Height: 44.76 cm (17.62 in)<br />
● Width: 17.78 cm (7.00 in)<br />
● Depth: 44.50 cm (17.53 in)<br />
Desktop configuration:<br />
● Height: 17.78 cm (7.00 in)<br />
● Width: 44.76 cm (17.62 in)<br />
● Depth: 44.50 cm (17.53 in)
<strong>HP</strong> <strong>Z620</strong> <strong>Workstation</strong> components<br />
For complete and current in<strong>for</strong>mation on supported accessories and components <strong>for</strong> the computer, see<br />
http://partsurfer.hp.com.<br />
Topics<br />
<strong>HP</strong> <strong>Z620</strong> <strong>Workstation</strong> front panel on page 23<br />
<strong>HP</strong> <strong>Z620</strong> <strong>Workstation</strong> rear panel on page 24<br />
<strong>HP</strong> <strong>Z620</strong> <strong>Workstation</strong> chassis components on page 25<br />
<strong>HP</strong> <strong>Z620</strong> <strong>Workstation</strong> system board components on page 26<br />
<strong>HP</strong> <strong>Z620</strong> <strong>Workstation</strong> system board architecture on page 27<br />
<strong>HP</strong> <strong>Z620</strong> <strong>Workstation</strong> specifications on page 28<br />
<strong>HP</strong> <strong>Z620</strong> <strong>Workstation</strong> front panel<br />
Figure 1-16 Front panel components<br />
Table 1-13 Component descriptions<br />
1 Optical drive 5 USB 3.0 ports (2, blue)<br />
2 Power button 6 Headphone connector<br />
3 Hard drive activity light 7 Microphone connector<br />
4 USB 2.0 port (black) 8 IEEE–1394a connector<br />
<strong>HP</strong> <strong>Z620</strong> <strong>Workstation</strong> components 23
<strong>HP</strong> <strong>Z620</strong> <strong>Workstation</strong> rear panel<br />
Figure 1-17 Rear panel components<br />
Table 1-14 Component descriptions<br />
1 Power cord connector 8 Audio line-out connector (green)<br />
2 PS/2 mouse connector (green) 9 Microphone connector (pink)<br />
3 USB 2.0 ports (4, black) 10 USB 3.0 ports (2, blue)<br />
4<br />
RJ-45 network connectors (orange)<br />
Bottom connector is AMT enabled<br />
11 IEEE-1394a connector (white)<br />
5 Audio line-in connector (blue) 12 PS/2 keyboard connector (purple)<br />
6 Graphics card connector 13 Rear power button<br />
7 Security slot 14<br />
24 Chapter 1 Hardware overview<br />
Power supply Built-In Self Test (BIST)<br />
LED
<strong>HP</strong> <strong>Z620</strong> <strong>Workstation</strong> chassis components<br />
Figure 1-18 Chassis components<br />
1<br />
7<br />
2<br />
8<br />
15<br />
9<br />
16 17<br />
3<br />
18<br />
4<br />
10 11<br />
13<br />
Table 1-15 Component descriptions<br />
19<br />
20<br />
1 Side access panel 13 Second CPU memory module (DIMM) (optional)<br />
2 Second CPU module rear guide bracket 14 CPU<br />
3 Memory fans 15 Second CPU module (optional)<br />
4 Rear system fans 16 PCIe card<br />
5 Power supply 17 PCI card<br />
6 Speaker 18 Card guide and front fan<br />
7 Side access panel key lock 19 Hard disk drive<br />
8 Second CPU heatsink (optional) 20 Hard disk drive carrier<br />
9 Second CPU (optional) 21 Optical drive<br />
10 CPU heatsink 22 External bay filler<br />
11 Memory module (DIMM) 23 Chassis<br />
12 System board<br />
14<br />
5<br />
21<br />
12<br />
22<br />
6<br />
23<br />
<strong>HP</strong> <strong>Z620</strong> <strong>Workstation</strong> components 25
<strong>HP</strong> <strong>Z620</strong> <strong>Workstation</strong> system board components<br />
Figure 1-19 System board component locations<br />
Second CPU Module<br />
Connector<br />
Table 1-16 System board components descriptions<br />
Second CPU Module<br />
I/O PCI/PCIe Power<br />
1 Front 1394a 13 PCIe2 x4 (1) 25 Battery<br />
2 Front audio 14 PCIe3 x16 26 CPU and memory power<br />
3 Front USB 2.0 15 PCIe2 x8 (4) 27 Front power button, LED, speaker<br />
4 Front USB 3.0 16 PCIe3 x8 28 Main power<br />
5 Internal USB 2.0 17 PCIe3 x 16 29 Rear power button/LED<br />
6 Keyboard/mouse 18 PCI 32/33 SATA (SAS optional)<br />
7 Network Cooling 30 AHCI 3Gb/s<br />
8 Rear 1394a 19 CPU0 memory fan 31 AHCI 6Gb/s<br />
9 Rear audio 20 CPU1 memory fan 32 Hard disk drive LED<br />
10 Rear USB 2.0 21 Front fan 33 SCU 3Gb/s<br />
11 Rear USB 3.0 22 CPU0 memory fan 34 SAS (optional)<br />
12 Serial (optional) 23 CPU1 memory fan (optional) Service<br />
24 Rear fans 35 Clear CMOS button<br />
For related expansion card slot in<strong>for</strong>mation, see Expansion slots<br />
on page 84<br />
26 Chapter 1 Hardware overview<br />
36 ME/AMT flash override<br />
37 Password jumper
<strong>HP</strong> <strong>Z620</strong> <strong>Workstation</strong> system board architecture<br />
Figure 1-20 System board block diagram<br />
NOTE: The PCIe designators indicate the mechanical connector size and number of electrical PCIe<br />
lanes routed to an expansion slot. For example, x16 (8) means that the expansion slot is mechanically<br />
a x16 length connector, with 8 PCIe lanes supported.<br />
<strong>HP</strong> <strong>Z620</strong> <strong>Workstation</strong> components 27
<strong>HP</strong> <strong>Z620</strong> <strong>Workstation</strong> specifications<br />
Processor<br />
technology<br />
Power supply<br />
Memory<br />
technology<br />
Graphics cards<br />
I/O technology<br />
28 Chapter 1 Hardware overview<br />
Intel ® Series C602 chipset with:<br />
● <strong>Support</strong> <strong>for</strong> the Intel® Xeon Processor E5-1600 Series and E5-2600 Series<br />
● Integrated 4-channel memory controller<br />
● Microarchitecture improvements<br />
● Large L3 cache <strong>for</strong> superior per<strong>for</strong>mance<br />
● Intel QuickPath Interconnect (QPI) connects processors and I/O controller with speeds up to 8<br />
GT/s<br />
● 800W Gold, 90% efficient, wide-ranging, active Power Factor Correction, two auxiliary dongles<br />
on two separate 12V rails, ERP 0.5W, Built-in-Self Test (BIST)<br />
● Dual in-line memory modules (DIMMs) based on DDR3 1600MHz technology<br />
● Error checking and correcting (ECC)-protected<br />
● Eight direct-attach memory channels (four per CPU) enable low-latency access and fast data<br />
transfer <strong>for</strong> improved per<strong>for</strong>mance<br />
● Configurations with one CPU have eight DIMM slots; a second CPU adds four more DIMM slots<br />
● With one processor, up to 64 GB system memory (8 GB DIMMs)<br />
● With second processor, up to 96 GB system memory (8 GB DIMMs)<br />
● 1600 MHz 2, 4 GB ECC unbuffered DIMMs<br />
● 1600 MHz 4, 8 GB ECC registered DIMMs<br />
NOTE: Do not mix any of the different types (unbuffered, registered, and load reducing DIMMs) of<br />
memory. The system will not boot and will produce a memory error.<br />
NOTE: For maximum per<strong>for</strong>mance, on workstations with two CPUs, install the same number of<br />
DIMMs per CPU and install them in pairs of the same size.<br />
NOTE: Distribute DIMMs across all memory channels <strong>for</strong> optimal per<strong>for</strong>mance.<br />
● PCIe Gen3 (PCIe3) bus speeds; can support two PCIe Gen3 graphics cards in PCIe3 x16 slots<br />
● Up to 225W graphics or compute card in the primary graphics slot<br />
● A second graphics card in the second PCIe3 x16 slot<br />
● Third and fourth 2D graphics cards in additional PCIe2 slots<br />
● Combined power consumption of all cards cannot exceed 300W (subject to overall system<br />
power limitations and configuration restrictions)<br />
● SATA RAID 0/1/5/10 on either AHCI or SCU<br />
● SAS RAID 0/1/10 on SCU<br />
● Ten SATA ports (2 AHCI 6 Gb/s, 4 AHCI 3 Gb/s, 4 SCU 3 Gb/s)<br />
● Two ports available <strong>for</strong> optional eSATA<br />
● Four external USB 3.0 ports (2 front, 2 rear)<br />
● Five external USB 2.0 ports (1 front, 4 rear)<br />
● Six internal USB 2.0 ports
Weight<br />
Chassis<br />
dimensions<br />
● Standard configuration: 17.9 kg (39.4 lb)<br />
● Minimum configuration: 15.5 kg (34.2 lb)<br />
● Maximum configuration: 22.6 kg (49.9 lb)<br />
● Height: 44.45 cm (17.50 in)<br />
● Width: 17.15 cm (6.75 in)<br />
● Depth: 46.48 cm (18.30 in)<br />
<strong>HP</strong> <strong>Z620</strong> <strong>Workstation</strong> components 29
<strong>HP</strong> Z820 <strong>Workstation</strong> components<br />
For in<strong>for</strong>mation on supported accessories and components, see http://partsurfer.hp.com.<br />
Topics<br />
<strong>HP</strong> Z820 <strong>Workstation</strong> system board architecture on page 34<br />
<strong>HP</strong> Z820 <strong>Workstation</strong> chassis components on page 32<br />
<strong>HP</strong> Z820 <strong>Workstation</strong> front panel on page 30<br />
<strong>HP</strong> Z820 <strong>Workstation</strong> rear panel on page 31<br />
<strong>HP</strong> Z820 <strong>Workstation</strong> system board components on page 33<br />
<strong>HP</strong> Z820 <strong>Workstation</strong> specifications on page 35<br />
<strong>HP</strong> Z820 <strong>Workstation</strong> front panel<br />
Figure 1-21 Front panel components<br />
Table 1-17 Component descriptions<br />
1 Optical drive 5 USB 3.0 ports (2, blue)<br />
2 Power button 6 Headphone connector<br />
3 Hard drive activity light 7 Microphone connector<br />
4 USB 2.0 port (black) 8 IEEE–1394a connector<br />
30 Chapter 1 Hardware overview
<strong>HP</strong> Z820 <strong>Workstation</strong> rear panel<br />
Figure 1-22 Rear panel components<br />
Table 1-18 Component descriptions<br />
1 Power cord connector 9 USB 3.0 ports (2, blue)<br />
2 PS/2 mouse connector (green) 10 USB 2.0 ports (4, black)<br />
3 Audio line-in connector (blue) 11 Audio line-out connector (green)<br />
4<br />
RJ-45 network connectors (2, orange)<br />
Top connector is AMT enabled<br />
12 Microphone connector (pink)<br />
5 IEEE-1394a connector (white) 13 PS/2 keyboard connector (purple)<br />
6 Security slot 14 Rear power button<br />
7 Graphics card connector(s) 15<br />
8 Serial connector (teal blue)<br />
Power supply Built-In Self Test (BIST)<br />
LED<br />
<strong>HP</strong> Z820 <strong>Workstation</strong> components 31
<strong>HP</strong> Z820 <strong>Workstation</strong> chassis components<br />
Figure 1-23 Chassis components<br />
Table 1-19 Component descriptions<br />
1 CPU/memory fans 12 Processor (CPU) heatsink<br />
2 Power supply 13 Processor (CPU)<br />
3 Optical drive 14 Chassis<br />
4 Side access panel 15 Processor (CPU) liquid cooling unit (optional upgrade<br />
to standard heatsink)<br />
5 Side access panel key lock 16 PCI Retainer<br />
6 Rear system fans 17 PCIe card<br />
7 Memory module (DIMM) 18 PCI card<br />
8 Front bay filler (optional) 19 Hard disk drive carrier<br />
9 Second processor (CPU) heatsink (optional) 20 Hard disk drive<br />
10 Second processor (CPU) (optional) 21 Front system fan (two fans with 1125W power supply)<br />
11 System board 22 Speaker<br />
32 Chapter 1 Hardware overview
<strong>HP</strong> Z820 <strong>Workstation</strong> system board components<br />
Figure 1-24 System board component locations<br />
Table 1-20 System board component descriptions<br />
I/O PCI/PCIe Power<br />
1 Front 1394a 16 PCIe3 x8 (4) — CPU0 31 Battery<br />
2 Front audio 17 PCIe3 x16 — CPU0 32 CPU0 power<br />
3 Front USB 2.0 18 PCIe3 x16 (8) — CPU1 33 CPU1 power<br />
4 Front USB 3.0 19 PCIe3 x16 — CPU1 34 Front power button /LED/<br />
speaker<br />
5 Internal USB 2.0 20 PCIe2 x8 (4) — CPU0 35 Main power<br />
6 Keyboard/mouse 21 PCIe3 x16 — CPU0 36 Memory power<br />
7 Rear audio 22 PCI 32/33 — CPU0 37 Rear power button /LED<br />
8 Rear USB 2.0/Network Cooling Service<br />
9 Rear USB 3.0/1394a 23 Auxiliary fan 1 (front) 38 Clear CMOS button<br />
10 Serial 24 Auxiliary fan 2 (rear) 39 Crisis recovery jumper<br />
SAS/SATA 25 CPU/memory fans 40 ME/AMT Flash override<br />
11 AHCI 6Gb/s 26 Front fan 1 (top) 41 Password jumper<br />
12 Hard disk drive LED 27 Front fan 2 (bottom)<br />
13 SAS/SATA 6Gb/s 28 Liquid cooling 0 power<br />
14 SAS (optional) 29 Liquid cooling 1 power<br />
15 SCU 3Gb/s 30 Rear chassis fans<br />
NOTE: For related expansion card<br />
slot in<strong>for</strong>mation, see Expansion slots<br />
on page 84.<br />
<strong>HP</strong> Z820 <strong>Workstation</strong> components 33
<strong>HP</strong> Z820 <strong>Workstation</strong> system board architecture<br />
Figure 1-25 System board block diagram<br />
NOTE: The PCIe designators indicate the mechanical connector size and number of electrical PCIe<br />
lanes routed to an expansion slot. For example, x16(8) means that the expansion slot is mechanically a<br />
x16 length connector, with 8 PCIe lanes supported.<br />
34 Chapter 1 Hardware overview
<strong>HP</strong> Z820 <strong>Workstation</strong> specifications<br />
Processor<br />
technology<br />
Power supply<br />
Memory<br />
technology<br />
Graphics cards<br />
Intel® Series C602 chipset with:<br />
● <strong>Support</strong> <strong>for</strong> the Intel® Xeon Processor E5-2600 Series, including processors up to 150W<br />
● Integrated 4-channel memory controller<br />
● Microarchitecture improvements<br />
● Large L3 cache <strong>for</strong> superior per<strong>for</strong>mance<br />
● Intel QuickPath Interconnect (QPI) connects processors and I/O controller with speeds up to 8.0<br />
GT/s<br />
NOTE: <strong>HP</strong> Liquid Cooling option is available <strong>for</strong> all Z820 processors.<br />
● 850W Silver, 88% efficient, wide-ranging, active Power Factor Correction, two auxiliary dongles<br />
on two separate 12V rail, ERP 0.5W, Built-in-Self Test (BIST)<br />
● 1125W Gold, 90% efficient, wide-ranging, active Power Factor Correction, three auxiliary<br />
dongles on three separate 12V rails, ERP 0.5W, Built-in-Self Test (BIST)<br />
● China’s Energy Conservation Program (CECP) configurations<br />
● European Union ErP LOT6 2013 power limit of 0.5W in off mode<br />
● Dual in-line memory modules (DIMMs) based on DDR3 1600MHz technology<br />
● Error checking and correcting (ECC)-protected<br />
● Eight direct-attach memory channels (four per CPU) enable low-latency access and fast data<br />
transfer <strong>for</strong> improved per<strong>for</strong>mance<br />
● Configurations with one CPU have eight DIMM slots; a second CPU adds eight more DIMM slots<br />
● With one processor, up to 256 GB system memory (32 GB DIMMs)<br />
● With second processor, up to 512 GB system memory (32 GB DIMMs)<br />
● 1600 MHz 2, 4 GB ECC unbuffered DIMM<br />
● 1600 MHz 4, 8, 16 GB ECC registered DIMM<br />
● 1333 MHz 32 GB ECC Load Reducing DIMM (available second half of 2012)<br />
NOTE: Do not mix any of the different types (unbuffered, registered, and load reducing DIMMs) of<br />
memory. The system will not boot and will produce a memory error.<br />
NOTE: For maximum per<strong>for</strong>mance, on workstations with two CPUs, install the same number of<br />
DIMMs per CPU and install them in pairs of the same size<br />
NOTE: Distribute DIMMs across all memory channels <strong>for</strong> optimal per<strong>for</strong>mance<br />
● PCIe Gen3 (PCIe3) bus speeds; can support three PCIe Gen3 graphics cards in PCIe3 x16 slots<br />
● Up to one 160W or two 75W graphics cards with 850W power supply<br />
● Up to two 300W or three 225W graphics cards with optional 1125W power supply (other<br />
configuration restrictions may be required)<br />
<strong>HP</strong> Z820 <strong>Workstation</strong> components 35
I/O technology<br />
Weight<br />
Chassis<br />
dimensions<br />
36 Chapter 1 Hardware overview<br />
● SATA RAID 0/1/5/10 on SCU<br />
● SAS RAID 0/1/10 on LSI SAS 2308 controller<br />
● Six SATA ports: four SCU (3 GB/s); two AHCI (6 GB/s)<br />
● Eight SAS ports (6 GB/s)<br />
● Two ports (6.0 GB/s) available <strong>for</strong> optional eSATA<br />
● Four external USB 3.0 ports<br />
● Five external and six internal USB 2.0 ports<br />
● Standard configuration: 26.6 kg (58.7 lb)<br />
● Minimum configuration: 24.0 kg (52.9 lb)<br />
● Maximum configuration: 32.0 kg (70.5 lb)<br />
● Height: 44.4 cm (17.5 in)<br />
● Width: 20.3 cm (8.0 in)<br />
● Depth: 52.5 cm (20.7 in)
Environmental specifications<br />
The following table lists the environmental specifications of <strong>HP</strong> <strong>Workstation</strong>s.<br />
Table 1-21 <strong>HP</strong> <strong>Workstation</strong> environmental specifications<br />
Temperature<br />
Humidity<br />
Altitude<br />
Shock<br />
Vibration<br />
Operating: 5 to 35°C (40 to 95°F)<br />
Non-operating: -40 to 60°C (-40 to 140°F)<br />
NOTE: Derate by one degree C (1.8 degrees F) <strong>for</strong> every 305m (1,000 ft) altitude over<br />
1,524m (5,000 ft).<br />
Operating: 8 to 85% Relative Humidity (RH), non-condensing<br />
Non-operating: 8 to 90% Relative Humidity, non-condensing<br />
Operating: 0 to 3,048m (10,000 ft)<br />
Non-operating: 0 to 9,144m (30,000 ft)<br />
Operating: ½-sine: 40g, 2-3ms<br />
Non-operating:<br />
● ½-sine: 160 cm/s, 2-3ms (~100g)<br />
● square: 422 cm/s, 20g<br />
NOTE: Values represent individual shock events and do not indicate repetitive shock events.<br />
Operating Random: 0.5g (rms), 5-300 Hz<br />
Non-Operating: random: 2.0g (rms), 10-500 Hz<br />
NOTE: Values do not indicate continuous vibration.<br />
ENERGY STAR qualification<br />
<strong>HP</strong> computers marked with the ENERGY STAR logo are compliant with the applicable U.S.<br />
Environmental Protection Agency (EPA) ENERGY STAR specifications <strong>for</strong> computers. The EPA ENERGY<br />
STAR logo does not imply endorsement by the EPA. As an ENERGY STAR Partner, Hewlett-Packard<br />
Company has determined the products marked with the ENERGY STAR logo are ENERGY STAR<br />
qualified per the applicable ENERGY STAR guidelines <strong>for</strong> energy efficiency. The following logo<br />
appears on all ENERGY STAR qualified computers.<br />
Environmental specifications 37
Ensuring proper ventilation<br />
Proper ventilation <strong>for</strong> the system is important <strong>for</strong> workstation operation. Follow these guidelines:<br />
● Operate the workstation on a sturdy, level surface.<br />
● Provide at least 15.24 cm (6 inches) of clearance at the front and back of the workstation.<br />
(<strong>Workstation</strong> models vary.)<br />
Figure 1-26 Proper workstation ventilation<br />
● Ensure that the ambient air temperature falls within the environmental specifications listed in this<br />
document.<br />
NOTE: The ambient upper limit of 35°C (95°F) is only good up to 1524 m (5000 ft) elevation.<br />
There is a 1°C (33.8°F) per 304.8 m (1000 ft) derating above 1524 m (5000 ft). So, at 3,048 m<br />
(10,000 ft), the upper ambient air temperature limit is 30°C (86°F).<br />
● For cabinet installation, ensure adequate cabinet ventilation and ensure that the ambient<br />
temperature within the cabinet does not exceed specified limits.<br />
● Never restrict the incoming or outgoing airflow of the workstation by blocking any vents or air<br />
intakes, as shown in the following figure.<br />
Figure 1-27 Proper workstation placement<br />
38 Chapter 1 Hardware overview
2 System management<br />
This section describes the tools and utilities that provide system management <strong>for</strong> the workstation. It<br />
includes these topics:<br />
Topics<br />
Power management and per<strong>for</strong>mance features on page 39<br />
BIOS ROM on page 41<br />
The Computer Setup (F10) Utility on page 42<br />
Desktop management on page 60<br />
Power management and per<strong>for</strong>mance features<br />
ERP compliance mode<br />
This computer provides ERP compliance mode capability.<br />
When enabled, the computer shuts down to the lowest possible power state. The computer must then be<br />
turned on with the power button. One of the effects is that "wake on LAN" is disabled.<br />
When disabled, the computer powers down conventionally.<br />
Enabling ERP compliance<br />
mode<br />
Disabling ERP compliance<br />
mode<br />
1. Press F10 during startup.<br />
2. Using the arrow keys, select the Power > Hardware Power Management > S5<br />
Maximum Power Savings, then select Enable.<br />
3. Press F10 to accept the change.<br />
4. Select File > Save Change and Exit, and then press Enter to accept the change.<br />
1. Press F10 during startup.<br />
2. Using the arrow keys, select Power > Hardware Power Management > S5<br />
Maximum Power Savings, then select Disable.<br />
3. Press F10 to accept the change.<br />
4. Select File > Save Change and Exit, and then press Enter to accept the change.<br />
Power management and per<strong>for</strong>mance features 39
Hyper-Threading Technology (HTT)<br />
This computer supports HTT, an Intel-proprietary technology that improves processor per<strong>for</strong>mance<br />
through parallelization of computations (doing multiple tasks at once).<br />
The operating system treats an HTT-enabled processor as two virtual processors, and shares the<br />
workload between them when possible. This feature requires that the operating system support multiple<br />
processors and be specifically optimized <strong>for</strong> HTT.<br />
Use the Computer Setup (F10) Utility to enable HTT.<br />
Go to http://www.hp.com/go/quickspecs to determine if your CPU supports HTT.<br />
SATA Power Management<br />
SATA Power Management enables or disables SATA bus and/or device power management.<br />
Intel Turbo Boost Technology<br />
The <strong>HP</strong> Z <strong>Workstation</strong> series supports Intel® Turbo Boost Technology.<br />
This feature enables the CPU to run at a higher than normal rate. When all CPU cores are not<br />
necessary <strong>for</strong> the workload, inactive cores are turned off and power is diverted to the active cores to<br />
increase their per<strong>for</strong>mance.<br />
Turbo Boost is enabled and disabled with the Computer Setup (F10) Utility.<br />
Go to http://www.hp.com/go/quickspecs to determine if your CPU supports Turbo Boost.<br />
<strong>HP</strong> Cool Tools<br />
<strong>HP</strong> workstations and computers installed with Windows include additional software tools. To access or<br />
learn more about these tools that can enhance the computer experience:<br />
1. Double-click the <strong>HP</strong> Cool Tools icon on the desktop.<br />
2. To learn more about an <strong>HP</strong> Cool Tool application, just click on the application's "Learn More"<br />
link.<br />
3. To install or launch the applications, select the appropriate application and follow the instructions<br />
given.<br />
40 Chapter 2 System management
Non-Uni<strong>for</strong>m Memory Access (NUMA)<br />
Non-Uni<strong>for</strong>m Memory Access (NUMA) is available on some Z series <strong>Workstation</strong>s. NUMA can improve<br />
memory bandwidth and latency <strong>for</strong> multi-process or multi-threaded applications or workloads.<br />
Observed per<strong>for</strong>mance improvements depend on the operating system, customer workload, system<br />
configuration, and the degree to which the applications used are designed to be NUMA-aware/<br />
efficient.<br />
NUMA requires that both processor sockets be populated. Installed memory should be balanced<br />
between both processors <strong>for</strong> maximum per<strong>for</strong>mance.<br />
NUMA is enabled if Memory Node Interleave is disabled in the system BIOS. To do this, press F10<br />
during startup to enter the Computer Setup (F10) Utility. Select Advanced > Chipset/Memory. Use<br />
the arrow keys to set Memory Node Interleave to Disable. Press F10 to exit the menu, then select<br />
File > Save Changes and Exit. NUMA is enabled when the system is restarted.<br />
BIOS ROM<br />
The BIOS ROM is a collection of machine language applications stored as firmware in ROM. It includes<br />
functions such as Power on Self Test (POST), PCI device initialization, Plug and Play support, power<br />
management, and the Computer Setup (F10) Utility.<br />
Go to http://www.hp.com/go/quickspecs to review the latest BIOS ROM specifications.<br />
BIOS ROM 41
The Computer Setup (F10) Utility<br />
This section includes these topics:<br />
Topics<br />
Computer Setup (F10) functionality on page 42<br />
Accessing the Computer Setup (F10) Utility on page 43<br />
The Computer Setup (F10) Utility menu on page 44<br />
Computer Setup (F10) functionality<br />
The Computer Setup (F10) Utility enables you to:<br />
● Update BIOS using a USB device.<br />
● Change factory default settings and set or change the workstation configuration, which might be<br />
necessary when you add or remove hardware.<br />
● Determine if all devices installed on the workstation are recognized by the system and functioning.<br />
● Determine in<strong>for</strong>mation about the operating environment of the workstation.<br />
● Solve system configuration errors that are detected but not fixed during the Power-On Self-Test<br />
(POST).<br />
● Establish and manage passwords and other security features.<br />
● Establish and manage energy-saving time-outs.<br />
● Modify or restore factory default settings.<br />
● Set the workstation date and time.<br />
● Set, view, change, or verify the workstation configuration, including settings <strong>for</strong> CPU, graphics,<br />
memory, audio, storage, communications, and input devices.<br />
● Modify the boot order of installed mass storage devices such as SATA, optical disk drives and<br />
network drives.<br />
● Configure the boot priority of SATA hard-drive controllers.<br />
● Enable or disable Network Server Mode, which enables the workstation to start the operating<br />
system when the power-on password is enabled with or without a keyboard or mouse attached.<br />
When attached to the workstation, the keyboard and mouse remain locked until the power-on<br />
password is entered.<br />
● Enable or disable POST Messages to change the display status of POST messages. POST<br />
Messages suppresses most POST messages, such as memory count, product name, and other<br />
nonerror text messages. If a POST error occurs, the error is displayed regardless of the mode<br />
selected. To manually switch to POST Messages Enabled during POST, press any key except F1<br />
through F12.<br />
● Specify an Ownership Tag, which appears when the workstation is powered on or restarted.<br />
42 Chapter 2 System management
● Specify the Asset Tag or property identification number assigned by the company to this<br />
workstation.<br />
● Enable power-on password prompts during system restarts (warm-starts) and power on.<br />
● Hide or show the integrated I/O functionality, including serial, USB, or parallel ports, audio, or<br />
embedded NIC. Hidden devices are inaccessible, which increases system security.<br />
● Enable or disable removable media boot ability.<br />
● Enable or disable removable media write ability (if supported by hardware).<br />
● Replicate the workstation setup by saving system configuration in<strong>for</strong>mation on CD and restoring it<br />
on workstations.<br />
● Execute self-tests on specified SATA hard disk drives (if supported by the drive).<br />
Accessing the Computer Setup (F10) Utility<br />
To access the Computer Setup (F10) Utility:<br />
1. Power on or restart the workstation.<br />
2. When the display is active and Press the ESC key <strong>for</strong> Startup Menu appears at the bottom<br />
of the screen, press F10 or Esc.<br />
If you do not press F10 or Esc at the appropriate time, try again. Turn the workstation off, then on,<br />
and press F10 again to access the utility. You can also press Ctrl + Alt + Delete be<strong>for</strong>e starting if<br />
you miss the opportunity to press F10.<br />
3. Select the language from the list and press the Enter key.<br />
In the Computer Setup (F10) Utility menu, five headings are displayed: File, Storage, Security,<br />
Power, and Advanced.<br />
NOTE: The option <strong>for</strong> selecting the language is available on first boot only.<br />
4. Use the left and right arrow keys to select the appropriate heading, use the up and down arrow<br />
keys to select an option, and then press Enter.<br />
5. Choose from the following:<br />
● To apply and save changes, select File > Save Changes and Exit, then press Enter to<br />
accept the changes.<br />
● To remove changes you have made, select Ignore Changes and Exit, then press Enter to<br />
acknowledge the cancellation.<br />
● To reset to factory settings, select File > Default Setup > Restore Factory Settings as<br />
Default. Press Enter to accept the changes, and then select Apply Defaults and Exit.<br />
This restores the original factory system defaults.<br />
CAUTION: Do not power off the workstation while the ROM is saving the Computer Setup (F10)<br />
Utility changes, because the Complementary Metal-Oxide Semiconductor (CMOS) nonvolatile storage<br />
could become corrupted. After you exit the F10 Setup screen, you can disconnect power from the<br />
workstation.<br />
The Computer Setup (F10) Utility 43
The Computer Setup (F10) Utility menu<br />
The following tables describe the functions available in the Computer Setup (F10) (BIOS) utility menu.<br />
NOTE: With new BIOS releases, the following content is subject to change, so the menu might be<br />
different than shown.<br />
Table 2-1 Computer Setup (F10) Utility menu descriptions <strong>for</strong> the <strong>HP</strong> Z220 SFF and Z220 CMT<br />
<strong>Workstation</strong>s<br />
Heading Option Description<br />
File System In<strong>for</strong>mation Displays the following system characteristics:<br />
44 Chapter 2 System management<br />
● Product Name<br />
● SKU Number<br />
● Processor Type<br />
● Processor Speed<br />
● Processor Stepping (stepping designation and patch number)<br />
● Cache Size (L1/L2/L3)<br />
● Memory Size (Channel A, Channel B)<br />
● Integrated MAC (onboard NIC)<br />
● System BIOS<br />
● Chassis Serial Number<br />
● Asset Tracking Number<br />
● ME (Intel Management Engine) Firmware Version<br />
● ME Management Mode<br />
About Displays copyright in<strong>for</strong>mation.<br />
Set Time and Date Lets you set system time and date. Use the keyboard Tab and arrow keys to make<br />
changes.<br />
Flash System ROM Lets you upgrade the BIOS from a ROM image on optical media or USB.<br />
Replicated Setup Provides these options:<br />
Default Setup Provides these options:<br />
● Save to Removable Media—Saves the computer configuration, including<br />
CMOS, to a USB storage device. The saved configuration file is named<br />
cpqsetup.txt.<br />
● Restore from Removable Media—Restores the computer configuration from a<br />
USB storage device.<br />
● Save Current Settings as Default—Saves the current settings as default settings<br />
<strong>for</strong> the next operation.<br />
● Restore Factory Settings as Default—Restores the factory settings as the default<br />
settings <strong>for</strong> the next operation.<br />
Apply Defaults and Exit Restores the default settings defined in Default Setup.
Table 2-1 Computer Setup (F10) Utility menu descriptions <strong>for</strong> the <strong>HP</strong> Z220 SFF and Z220 CMT<br />
<strong>Workstation</strong>s (continued)<br />
Heading Option Description<br />
Ignore Changes and<br />
Exit<br />
Exits computer setup without applying or saving changes.<br />
Save Changes and Exit Saves changes to system configuration and exits the computer setup.<br />
Storage Device Configuration Lists installed storage devices and provides specific in<strong>for</strong>mation about each device:<br />
Storage Options Provides these options:<br />
● Hard Disk—Provides in<strong>for</strong>mation about the hard disk drives.<br />
● CD-ROM—Provides in<strong>for</strong>mation about the optical disk drives.<br />
● eSATA Port—Displays the internal SATA port(s) that are configured to operate<br />
as eSATA. Changing this to None provisions the port(s) as internal SATA.<br />
● SATA Emulation—Sets the SATA emulation mode with the following options:<br />
◦ RAID + AHCI—both the RAID and AHCI OPROMs execute. This<br />
emulation mode is the default and offers the best per<strong>for</strong>mance and most<br />
functionality.<br />
◦ IDE—offers standard SATA support. Some higher-numbered SATA ports<br />
may not be available in this mode.<br />
● Removable Media Boot (Enabled/Disabled)—Enabling allows the workstation<br />
to boot from removable media, such as a USB flash drive.<br />
● Max eSATA Speed—Configures eSATA port speeds:<br />
◦ Gen 2 (3.0 Gbps)<br />
◦ Gen 1 (1.5 Gbps)<br />
DPS Self-test Select a drive—Lets you execute self-tests on SATA hard drives capable of<br />
per<strong>for</strong>ming Drive Protection System (DPS) self-tests.<br />
NOTE: This selection appears only when the system has one or more drives<br />
capable of per<strong>for</strong>ming the DPS self-tests.<br />
Boot Order Lets you configure the boot order by physically reordering the menu entries. The<br />
default boot order is:<br />
● EFI Boot Sources<br />
◦ USB Floppy/CD<br />
◦ USB Hard Drive<br />
◦ ATAPI CD/DVD Drive<br />
● Legacy Boot Sources<br />
◦ ATAPI CD/DVD Drive<br />
◦ USB Floppy/CD<br />
The Computer Setup (F10) Utility 45
Table 2-1 Computer Setup (F10) Utility menu descriptions <strong>for</strong> the <strong>HP</strong> Z220 SFF and Z220 CMT<br />
<strong>Workstation</strong>s (continued)<br />
Heading Option Description<br />
◦ Hard Drive<br />
◦ Network Controller<br />
You can take the following actions:<br />
● Press Enter to drag a device with the arrow keys to a preferred place, then<br />
press Enter again to drop the device in place.<br />
● Press F5 to remove the device from consideration as a bootable device.<br />
● You must confirm changes by selecting File>Save Changes and Exit and then<br />
press Enter. The computer then stores boot order changes in the physical<br />
ROM.<br />
To temporarily override the boot order and boot from a device other than the<br />
default device specified in Boot Order:<br />
1. Restart the computer.<br />
2. Press F9 when the F9=Boot Menu message appears on the screen.<br />
3. Wait <strong>for</strong> POST to finish and <strong>for</strong> the list of bootable devices to display.<br />
4. Use the arrow keys to select the preferred boot device.<br />
5. Press Enter. The computer then starts from the selected nondefault device. (This<br />
does not change the default boot device.)<br />
Security Setup Password Lets you set and enable a setup password <strong>for</strong> the administrator.<br />
46 Chapter 2 System management<br />
If you create a setup password, you must use it to change computer setup options,<br />
to flash the ROM, and to make changes to certain Plug and Play settings under<br />
Windows.<br />
Power-On Password Let you set and enable the power-on password.<br />
Password Options This option becomes available depending on the presence of setup or power-on<br />
passwords. It provides these options:<br />
● Lock Legacy Resources (Enabled/Disabled)—Prevents the operating system<br />
from changing resources to serial, parallel, or diskette controller. (Appears if a<br />
setup password is set.)<br />
● Setup Browse Mode (Enabled/Disabled)—Lets you view but not change the<br />
F10 Setup Options without having to enter the setup password. (Appears if a<br />
setup password is set.)<br />
● Password prompt on F9 and F12 (Enabled/Disabled)—Lets you access menus<br />
without entering the setup password.<br />
● Network Server Mode (Disabled/Enabled)—Enables network server mode.<br />
(Appears if a power-on password is set.)<br />
Smart Cover Lets you enable/disable the cover removal sensor 1 .
Table 2-1 Computer Setup (F10) Utility menu descriptions <strong>for</strong> the <strong>HP</strong> Z220 SFF and Z220 CMT<br />
<strong>Workstation</strong>s (continued)<br />
Heading Option Description<br />
Device Security Makes the following devices available or hidden to the computer:<br />
● Embedded Security Device (hidden by default)<br />
● System Audio<br />
● Network Controller<br />
● SATA ports<br />
With the exception of Embedded Security Device (TPM), Device Available is the<br />
default setting <strong>for</strong> all devices (allows the operating system to access the device).<br />
Device Hidden disables the device by the BIOS so that the operating system can no<br />
longer enable the device.<br />
NOTE: An entry <strong>for</strong> enabling DriveLock appears in the setup menu if the computer<br />
has a DriveLock-compatible hard disk drive.<br />
USB Security Set workstation USB ports to Enabled/Disabled:<br />
● Front USB Ports<br />
● Rear USB Ports<br />
● Internal USB Ports<br />
Slot Security Lets you disable any PCI or PCI Express slot.<br />
Network Boot Lets you enable/disable the ability to boot from the network using the F12 key or<br />
the boot order.<br />
System IDs Provides these options:<br />
Master Boot Record<br />
(MBR) Security<br />
● Asset Tag—A user-editable, 16-byte string identifying the computer.<br />
● Ownership Tag—A user-editable, 80-byte string identifying ownership of the<br />
computer. This tag appears on the screen during POST.<br />
● Universal Unique Identifier (UUID)—An ID number set in the factory that<br />
uniquely identifies the computer.<br />
● Keyboard—Lets you set the keyboard locale <strong>for</strong> System ID entry.<br />
When MBR Security is enabled, the BIOS prevents any changes being made to the<br />
MBR of the current bootable disk while in MS-DOS or Windows Safe Mode—<br />
(Enable or Disable).<br />
NOTE: <strong>Most</strong> operating systems control access to the MBR of the current bootable<br />
disk; the BIOS cannot prevent changes that may occur while the operating system is<br />
running.<br />
The Computer Setup (F10) Utility 47
Table 2-1 Computer Setup (F10) Utility menu descriptions <strong>for</strong> the <strong>HP</strong> Z220 SFF and Z220 CMT<br />
<strong>Workstation</strong>s (continued)<br />
Heading Option Description<br />
48 Chapter 2 System management<br />
System Security With the exception of the first option, Data Execution Prevention, changing any of<br />
these system security settings and choosing File > Save Changes and Exit will<br />
result in the computer per<strong>for</strong>ming a global reset, automatically turning itself off and<br />
then back on. Note also that these options are hardware dependent and may not<br />
be available on some models:<br />
● Data Execution Prevention (Enabled/Disabled)—Helps prevent operating<br />
system security breaches.<br />
● Virtualization Technology (VTx) 1 (Disabled/Enabled)—Controls the<br />
virtualization features of the processor.<br />
● Virtualization Technology Directed I/O (VTd) 1 (Disabled/Enabled)—Controls<br />
virtualization DMA remapping features of the chipset.<br />
● Intel TXT(LT) <strong>Support</strong> 1 (Enabled/Disabled)—Controls the underlying processor<br />
and chipset features needed to support a virtual appliance. To enable this<br />
feature you must enable:<br />
◦ Virtualization Technology (VTx)<br />
◦ Virtualization Technology Directed I/O (VTd)<br />
◦ Embedded Security Device<br />
● Embedded Security Device 1 (Disabled/Enabled)—Permits activation and<br />
deactivation of the Embedded Security Device.<br />
NOTE: Embedded Security Device must be set to Device Available in the<br />
Device Security menu, and you must create a Setup Password, in order to<br />
configure the Embedded Security Device.<br />
● Reset to Factory Settings 1 (Do not reset/Reset)—Restores factory defaults and<br />
erases all security keys.<br />
CAUTION: Choosing Reset to Factory Settings may result in significant data<br />
loss. The embedded security device is a critical component of many security<br />
schemes. Erasing the security keys prevent access to data protected by the<br />
Embedded Security Device.<br />
● OS Management of Embedded Security Device 1 (Disabled/Enabled)—Limits<br />
operating system control of the Embedded Security Device.<br />
● Reset of Embedded Security Device through OS 1 (Enabled/Disabled)—Limits<br />
the operating system ability to request a Reset to Factory Settings of the<br />
Embedded Security Device.<br />
NOTE: You must create a Setup Password to use this option.<br />
Drive Lock Security Lets you assign or modify a master password or user password <strong>for</strong> hard drives.<br />
When enabled, this feature prompts the user to provide one of the DriveLock<br />
passwords during POST. If the user does not successfully enter one of the<br />
passwords, the hard drive remains inaccessible until one of the passwords is<br />
successfully entered during a subsequent cold-boot sequence.<br />
NOTE: This selection appears only when the system includes at least one drive<br />
that supports the DriveLock feature.
Table 2-1 Computer Setup (F10) Utility menu descriptions <strong>for</strong> the <strong>HP</strong> Z220 SFF and Z220 CMT<br />
<strong>Workstation</strong>s (continued)<br />
Heading Option Description<br />
Power OS Power<br />
Management<br />
Hardware Power<br />
Management<br />
Enables or disables:<br />
● Runtime Power Management<br />
● Idle Power Savings: Extended (default) or Normal; extended mode reduces<br />
processor power consumption when the CPU is idle<br />
● ACPI S3 PS2 Mouse Wakeup<br />
● Unique Sleep State Blink Rates<br />
Enables or disables:<br />
● SATA Power Management<br />
● S5 Maximum Power Savings<br />
Thermal Lets you set the minimum speed of the system fan when the CPU is idle.<br />
Advanced 2 Power-On Options Sets the following:<br />
● POST Mode:<br />
◦ QuickBoot—Do not clear memory or per<strong>for</strong>m a memory test.<br />
◦ FullBoot—Memory test (count) on cold boot. Clears memory on all boots.<br />
◦ Clear Memory—No memory test (count) on cold boot. Clears memory on<br />
all boots.<br />
◦ FullBoot Every x Days—Memory count on first cold boot on or after the<br />
Xth day and no more memory counts until that boot occurs. Clears<br />
memory on all boots.<br />
● POST Messages (Enabled/Disabled)<br />
● Press the ESC key <strong>for</strong> Startup Menu (Enabled/Disabled)<br />
● Option ROM Prompt (Enabled/Disabled)—Enabling this feature causes the<br />
computer to display a message be<strong>for</strong>e loading option ROMs.<br />
● After Power Loss—Lets you specify computer behavior after a power loss:<br />
◦ Power Off—Computer remains powered off when power is restored<br />
(default).<br />
◦ Power On—Computer automatically powers on when power is<br />
restored. (This lets you power on the computer using a power strip switch,<br />
if the computer is connected to an electric power strip.)<br />
◦ Previous state—Computer powers on automatically when power is<br />
restored only if computer was on when power was lost.<br />
The Computer Setup (F10) Utility 49
Table 2-1 Computer Setup (F10) Utility menu descriptions <strong>for</strong> the <strong>HP</strong> Z220 SFF and Z220 CMT<br />
<strong>Workstation</strong>s (continued)<br />
Heading Option Description<br />
50 Chapter 2 System management<br />
NOTE: If you turn off power to the computer using a power strip, you<br />
cannot use the suspend/sleep feature or the Remote Management<br />
features.<br />
● POST Delay (None (default), 5, 10, 15, 20 seconds)—Delays start of the<br />
POST process. You might need a delay to:<br />
◦ Allow time <strong>for</strong> some hard disk drives to spin up be<strong>for</strong>e POST is finished.<br />
◦ Give yourself more time to select F10 to enter the Computer Setup (F10)<br />
Utility.<br />
● Remote Wakeup Boot Source (Local Hard Drive/Remote Server). Sets the boot<br />
device <strong>for</strong> the workstation when it is started using Remote Wakeup (takes<br />
precedence over the Boot Order menu setting).<br />
● Bypass F1 Prompt on Confirmation Changes (Enabled/Disabled)—Prevents<br />
display of a confirmation prompt when you make changes to the system.<br />
BIOS Power-On Lets you disable or specify a weekday and time <strong>for</strong> BIOS power-on.<br />
Onboard Devices Lets you disable or set resources (IRQ, DMA, I/O Range) <strong>for</strong> onboard system<br />
devices such as the serial port and parallel ports. Operating system parameters<br />
generally override Onboard Devices settings.<br />
Bus options Enable/disable these options:<br />
● PCI SERR# Generation (Enabled/Disabled)—Controls PCI SERR# generation<br />
<strong>for</strong> ill-behaved PCI add-in cards (that can generate SERR# spuriously).<br />
● PCI VGA Palette Snooping (Disabled/Enabled)—Controls PCI VGA Palette<br />
Snooping <strong>for</strong> compatibility purposes.<br />
● PCI Latency Timer (32/64/96/128/160/192/224/248). 128 PCI Clocks is<br />
the default.<br />
Device Options Enable/disable the following device options:<br />
● S5 Wake-on-LAN (Enabled/Disabled)<br />
● Printer Mode (EPP+ECP, Output Only, Bi-Directional)<br />
● Num Lock State at Power-On (On/Off)<br />
● Integrated Video 1 (Enabled/Disabled)<br />
● IGD (Integrated Graphics Device) Memory—Displayed when Integrated Video<br />
is Enabled. Sets the maximum amount of system memory that can be allocated<br />
as graphics memory (32, 64 (default), 128, 256, 512 MB) 1<br />
● Internal Speaker (Enabled/Disabled)<br />
● NIC Option ROM 2 Download (PXE/Disabled)<br />
● SATA RAID Option ROM 2 Download (Enabled/EFI/Disabled)<br />
● UEFI Option ROM <strong>Support</strong> (Enabled/Disabled)<br />
● Multi-Processor (Enabled/Disabled)<br />
● Hyperthreading 1 (Disabled/Enabled)
Table 2-1 Computer Setup (F10) Utility menu descriptions <strong>for</strong> the <strong>HP</strong> Z220 SFF and Z220 CMT<br />
<strong>Workstation</strong>s (continued)<br />
Heading Option Description<br />
Slot Settings Lets you Enable/Disable Option ROM Download <strong>for</strong> each slot. Selective disabling<br />
of Option ROM downloads can help manage limited Option ROM space.<br />
Management<br />
Operations<br />
1 *Available on selected models.<br />
2 *These options should be used by advanced users only.<br />
Lets you set the following AMT (Intel Active Management Technology) configuration<br />
options:<br />
● AMT (Enabled/Disabled)—Allows <strong>for</strong> remote discovery, repair and protection<br />
of networked workstations. Enabling the AMT function also enables the<br />
Network Controller (required <strong>for</strong> AMT to function correctly).<br />
● Unconfigure AMT/ME (Disabled/Enabled) 2 —Restores AMT/ME defaults.<br />
When you save and exit after enabling this option, you will be prompted to<br />
complete the process upon restart. A Setup Password (even if one is set) does<br />
not need to be entered to complete the process.<br />
NOTE: In<strong>for</strong>mation about Intel AMT can be found at www.intel.com.<br />
● Hide Un-configure ME Confirmation Prompt—(Enabled/Disabled).<br />
● WatchDog Timer (Enabled/Disabled)—OS and BIOS WatchDog Timers can<br />
be set independently (in minutes):<br />
◦ OS WatchDog Timer—Sets the OS WatchDog Timer.<br />
◦ BIOS WatchDog Timer—Sets the BIOS WatchDog Timer.<br />
The Computer Setup (F10) Utility 51
Table 2-2 Computer Setup (F10) Utility menu descriptions <strong>for</strong> the <strong>HP</strong> Z420, <strong>Z620</strong>, and the Z820<br />
<strong>Workstation</strong>s<br />
Heading Option Description<br />
File System In<strong>for</strong>mation Displays the following system characteristics:<br />
● Product Name<br />
● Memory Size<br />
● SKU Number<br />
● Integrated MAC 1<br />
● Integrated MAC 2<br />
● System BIOS<br />
● Boot Block Date<br />
● Chassis serial number<br />
● Asset Tracking Number<br />
● ME Firmware Version<br />
● ME Management Mode<br />
● Processor Type<br />
● Processor Speed<br />
● Processor Stepping<br />
● Cache Size<br />
● DIMMs<br />
About Displays copyright in<strong>for</strong>mation.<br />
Set Time and Date Enables you to set system time and date.<br />
Flash System ROM Enables you to upgrade the BIOS from a ROM image on diskette, CD, or USB.<br />
Replicated Setup Provides these options:<br />
● Save to Removable Storage Device—Saves the workstation configuration, including<br />
CMOS, in the qsetup.txt file. This file can be saved to a USB device or other storage<br />
media.<br />
● Restore from Removable Storage Device—Restores the workstation configuration from<br />
a USB device or other storage media.<br />
Default Setup Provides these options:<br />
Apply Defaults<br />
and Exit<br />
Ignore Changes<br />
and Exit<br />
52 Chapter 2 System management<br />
● Save Current Settings as Default—Saves the current settings as default settings <strong>for</strong> the<br />
next operation.<br />
● Restore Factory Settings as Default—Restores the factory settings as the default settings<br />
<strong>for</strong> the next operation.<br />
Restores the default settings defined in Default Setup.<br />
Exits workstation setup without applying or saving changes.
Table 2-2 Computer Setup (F10) Utility menu descriptions <strong>for</strong> the <strong>HP</strong> Z420, <strong>Z620</strong>, and the Z820<br />
<strong>Workstation</strong>s (continued)<br />
Heading Option Description<br />
Save Changes<br />
and Exit<br />
Storage Device<br />
Configuration<br />
Saves changes to system configuration and exits the workstation setup.<br />
Lists installed non-SCSI storage devices (except SATA devices) and provides options <strong>for</strong><br />
obtaining specific in<strong>for</strong>mation about each device:<br />
● CD-ROM SATA0—Shows the ODD default settings.<br />
● Default Values (SATA defaults)—<br />
Storage Options Provides these options:<br />
◦ Translation Mode—Enables the BIOS to determine the translation mode used to<br />
configure a <strong>for</strong>matted SATA or USB mass storage device. This prevents you from<br />
needing to know how the mass storage device was <strong>for</strong>matted. Options are<br />
Automatic, Bit Shift, LBA Assisted, User (Cylinders, Heads, Sectors), and Off.<br />
Automatic is the default.<br />
Ordinarily, you should not change the translation mode selected by the BIOS. If<br />
the selected translation mode is not compatible with the translation mode that<br />
was active when the drive was partitioned and <strong>for</strong>matted, the data on the disk is<br />
inaccessible.<br />
● Removable Media Boot—Enables and disables the ability to start the workstation from<br />
removable media.<br />
● SATA Mode—Sets the SATA emulation mode with the following options:<br />
◦ RAID + AHCI—Both the RAID and AHCI OPROMs execute. This emulation mode<br />
is the default and offers the best per<strong>for</strong>mance and most functionality.<br />
◦ IDE —Offers standard SATA supports (four ports only).<br />
● Serial-ATA Controller—Enhanced, Compatable, or Disabled. The default is Enhanced.<br />
This option is only available when in IDE-mode.<br />
Boot Order Enables you to configure the boot, diskette drive, and hard disk drive orders by physically<br />
reordering the menu entries. The following is the default boot order presented in the menu:<br />
● EFI Boot Sources<br />
◦ USB Floppy/CD<br />
◦ USB Hard Drive<br />
◦ ATAPI CD/DVD Drive<br />
● Legacy Boot Service<br />
◦ ATAPI CD/DVD Drive<br />
◦ USB Floppy/CD<br />
The Computer Setup (F10) Utility 53
Table 2-2 Computer Setup (F10) Utility menu descriptions <strong>for</strong> the <strong>HP</strong> Z420, <strong>Z620</strong>, and the Z820<br />
<strong>Workstation</strong>s (continued)<br />
Heading Option Description<br />
◦ Hard Drive<br />
◦ Network Controller<br />
Press Enter to drag a device to a preferred place. Press F5 to remove the device from<br />
consideration as a bootable device. Press F10 to accept.<br />
MS-DOS drive lettering assignments might not apply after an operating system other than<br />
MS-DOS has started.<br />
Boot devices can be disabled in the boot order process. These order changes are stored in<br />
the physical ROM when the F10 Setup changes are confirmed with File>Save Changes<br />
and Exit.<br />
You can temporarily override the boot order. To start one time from a device other than the<br />
default device specified in Boot Order, restart the workstation and press F9 when the<br />
F9=Boot Menu message appears on the screen. After POST completes, a list of bootable<br />
devices is displayed. Use the arrow keys to select the preferred bootable device and press<br />
Enter. The workstation then starts from the selected nondefault device <strong>for</strong> this one time.<br />
DPS Self-text Select a drive—Lets you execute self-tests on SATA hard drives capable of per<strong>for</strong>ming Drive<br />
Protection System (DPS) self-tests.<br />
NOTE: This selection appears only when the system has one or more drives capable of<br />
per<strong>for</strong>ming the DPS self-tests.<br />
Security Setup Password Enables you to set and enable a setup password <strong>for</strong> the administrator.<br />
Power-On<br />
Password<br />
54 Chapter 2 System management<br />
If you create a setup password, you must use it to change workstation setup options, to<br />
flash the ROM, and to make changes to certain Plug and Play settings under Windows.<br />
Enables you to set and enable the power-on password.<br />
Password Options This option becomes available when you create a setup and/or power-on password. It<br />
provides these options:<br />
● Lock Legacy Resources—Prevents the operating system from changing resources to<br />
serial, parallel, or diskette controller.<br />
● Setup Browse Mode—Enables read-only functionality <strong>for</strong> password info.<br />
● Password Prompt on F9 & F12—Enables a password prompt on a warm boot.<br />
● Network Server Mode—Enables network server mode.
Table 2-2 Computer Setup (F10) Utility menu descriptions <strong>for</strong> the <strong>HP</strong> Z420, <strong>Z620</strong>, and the Z820<br />
<strong>Workstation</strong>s (continued)<br />
Heading Option Description<br />
Device Security Makes the following devices available or hidden to the workstation:<br />
● Embedded Security Device<br />
● SAS Controller<br />
● SCU Controller<br />
● USB3 Controller<br />
● Intel High Definition (HD) Audio<br />
● 1394 Controller<br />
● NIC Controller<br />
● NIC1 Controller (select models)<br />
● SATA0<br />
● SATA1<br />
● Serial Port A<br />
For each device, Device Available is the default setting and allows the operating system to<br />
access the device. Device Hidden makes the device unavailable; it is disabled by the BIOS<br />
and cannot be enabled by the operating system.<br />
NOTE: An entry <strong>for</strong> enabling DriveLock appears in the setup menu if the workstation has<br />
a DriveLock-compatible hard disk drive.<br />
USB Security Set workstation USB ports to Enabled/Disabled:<br />
● Front USB Ports—(1–3)<br />
● Rear USB Ports—(1–6)<br />
● Internal USB Ports—(1–6)<br />
Slot Security Lets you enable or disable any PCI or PCI Express slot.<br />
Network Boot Enables or disables the ability to boot to the network using the F12 key or the boot order.<br />
System IDs Provides these options:<br />
Master Boot<br />
Record Security<br />
(MBR)<br />
● Asset Tag—A 16-byte string identifying the workstation.<br />
● Ownership Tag—An 80-byte string identifying ownership of the workstation. This tag<br />
appears on the screen during POST.<br />
● Universal Unique Identifier (UUID)—Can only be updated if the current chassis serial<br />
number is invalid. (These ID numbers are normally set in the factory and are used to<br />
uniquely identify the workstation.)<br />
● Keyboard—Enables you to set the keyboard locale <strong>for</strong> System ID entry.<br />
Enable or Disable—When MBR Security is enabled, the BIOS prevents any changes being<br />
made to the MBR of the current bootable disk while in MS-DOS or Windows Safe Mode.<br />
<strong>Most</strong> operating systems control access to the MBR of the current bootable disk; the BIOS<br />
cannot prevent changes that may occur while the operating system is running.<br />
The Computer Setup (F10) Utility 55
Table 2-2 Computer Setup (F10) Utility menu descriptions <strong>for</strong> the <strong>HP</strong> Z420, <strong>Z620</strong>, and the Z820<br />
<strong>Workstation</strong>s (continued)<br />
Heading Option Description<br />
56 Chapter 2 System management<br />
System Security Provides these options:<br />
● Data Execution Prevention—Enables or disables Data Execution Prevention mode in<br />
the CPUs. This mode prohibits code from running in pages that were set up as data<br />
pages, and prevents attacks such as buffer overflows. Operating system support is<br />
required <strong>for</strong> this feature.<br />
● Virtualization Technology (VTx)—Enables or disables Intel ® Virtualization Technology<br />
to increase workstation per<strong>for</strong>mance.<br />
● Intel ® (VTd)—(Enabled or Disabled) Controls the underlying processor and chipset<br />
features needed to support a virtual appliance.<br />
● Interrupt Remapping—Enables or disables—Only available when Intel ® (VTx) is<br />
enabled.<br />
● Coherency <strong>Support</strong>—Enables or disables—Only available when Intel ® (VTx) is<br />
enabled.<br />
● ATS <strong>Support</strong>—Enables or disables—Only available when Intel ® (VTx) is enabled.<br />
● Pass-through DMA—Enables or disables—Only available when Intel(R) (VTx) is<br />
enabled.<br />
● Embedded Security Device—This option becomes available if Embedded Device is set<br />
to Available under Device Security.<br />
NOTE: Embedded Security Device must be set to Device Available in the Device<br />
Security menu, and you must create a Setup Password, in order to configure the<br />
Embedded Security Device.<br />
Embedded Security Device (Hidden or Available) turns the Trusted Plat<strong>for</strong>m<br />
Mechanism (TPM) on and off. Device Hidden is the default. If this option is made<br />
available, the following options become available:<br />
◦ Power-On Authentication <strong>Support</strong>—Enables and disables an authentication<br />
feature that requires you to enter a TPM user key password to start the<br />
workstation. This feature uses the TPM to generate and store the authentication<br />
password.<br />
◦ Reset Authentication Credential—Resets the authentication functionality and<br />
clears authentication credentials.<br />
To enable the Embedded Security Device and to access any security features<br />
associated with the device, you must enter a setup password.<br />
Setting a device to Available enables the operating system to access the device.<br />
Hidden makes the device unavailable. It is disabled by the BIOS and cannot be<br />
enabled by the operating system.
Table 2-2 Computer Setup (F10) Utility menu descriptions <strong>for</strong> the <strong>HP</strong> Z420, <strong>Z620</strong>, and the Z820<br />
<strong>Workstation</strong>s (continued)<br />
Heading Option Description<br />
Power OS Power<br />
Management<br />
CAUTION: Choosing Reset to Factory Settings may result in significant data loss.<br />
The embedded security device is a critical component of many security schemes.<br />
Erasing the security keys prevent access to data protected by the Embedded Security<br />
Device.<br />
● OS Management of Embedded Security Device—Enables or disables the ability of the<br />
operating system to control the TPM device, including turning it on and off, initializing<br />
it, and resetting it.<br />
◦ Reset of Embedded Security Device through OS—Enables or disables the ability<br />
of the operating system to reset the TPM. Available only when OS Management<br />
of Embedded Security Device is enabled.<br />
DriveLock Security Lets you assign or modify a master password or user password <strong>for</strong> hard drives. When<br />
enabled, this feature prompts the user to provide one of the DriveLock passwords during<br />
POST. If the user does not successfully enter one of the passwords, the hard drive remains<br />
inaccessible until one of the passwords is successfully entered during a subsequent coldboot<br />
sequence.<br />
Hardware Power<br />
Management<br />
NOTE: This selection appears only when the system includes at least one drive that<br />
supports the DriveLock feature.<br />
Enables or disables:<br />
● Runtime Power Management—(Enable or Disable)<br />
● Turbo Mode—(Enable or Disable)<br />
● Idle Power Savings—Extended (default) or Normal; extended mode reduces processor<br />
power consumption when the CPU is idle.<br />
● Unique Sleep State Blink Rates—(Enable or Disable)<br />
Enables or disables:<br />
● SATA Power Management<br />
● S5 Maximum Power Savings<br />
Thermal Enables you to set the rate of the system fan when the CPU is in idle (Fan Idle Mode).<br />
The Computer Setup (F10) Utility 57
Table 2-2 Computer Setup (F10) Utility menu descriptions <strong>for</strong> the <strong>HP</strong> Z420, <strong>Z620</strong>, and the Z820<br />
<strong>Workstation</strong>s (continued)<br />
Heading Option Description<br />
Advanced 2 Power-On Options Enables you to set the following:<br />
58 Chapter 2 System management<br />
● POST Messages—Enables or disables the splash screen during POST.<br />
● Press the ESC key <strong>for</strong> Startup Menu.<br />
● Option ROM 1 prompt (Enable or Disable)—Enabling this feature causes the<br />
workstation to display a message be<strong>for</strong>e loading options ROMs.<br />
● After Power Loss (On, Off, Last State)—Enabling this option directs the previous state<br />
to be the default.<br />
● POST Delay (in seconds) (5, 10, 15, 20, None)—Adds a specified delay to the POST<br />
process. This delay is sometimes needed <strong>for</strong> hard disk drives on some expansion<br />
cards that spin up slowly (so slowly that they are not ready to start by the time POST<br />
is finished). The POST delay also gives you time to select F10 to enter the Computer<br />
Setup (F10) Utility.<br />
● Remote Wakeup Boot Source—Enables you to set the remote wakeup boot source as:<br />
◦ Local Hard Drive<br />
◦ Remote Server<br />
● Bypass F1 Prompt on Configuration Changes.<br />
BIOS Power-On Enables you to disable or specify a weekday and time <strong>for</strong> BIOS power-on.<br />
Onboard Devices Enables you to set resources (IRQ, DMA, I/O Rate) <strong>for</strong> or disable onboard system devices<br />
such as serial port and diskette controller. Operating system parameters generally override<br />
Onboard Devices settings.<br />
Bus Options Configures graphics cards per workstation slots. In multi-graphics card configurations, this<br />
option designates one card as primary graphics, and the other card as secondary<br />
graphics.<br />
● Numa—(Enable or Disable)<br />
● SERR# Generation (Enabled/Disabled)—Controls PCI SERR# generation <strong>for</strong> illbehaved<br />
PCI add-in cards (that can generate SERR# spuriously)<br />
● VGA Palette Snoop (Disabled/Enabled)—Controls PCI VGA Palette Snooping <strong>for</strong><br />
compatibility purposes<br />
● PCI Latency Timer—(32/64/128/160/192/224/248). 128 PCI Clocks is the<br />
default.
Table 2-2 Computer Setup (F10) Utility menu descriptions <strong>for</strong> the <strong>HP</strong> Z420, <strong>Z620</strong>, and the Z820<br />
<strong>Workstation</strong>s (continued)<br />
Heading Option Description<br />
Device Options Enables you to set the following device options:<br />
● Num Lock State at Power-On (On or Off)<br />
● S5 Wake-on-LAN (Enable or Disable)<br />
● Internal speaker—(Enable or Disable)<br />
● NIC Option ROM 1 Download (Enable or Disable)<br />
● NIC1 Option ROM 1 Download (Enable or Disable)<br />
● SATA RAID Option ROM 1 Download (Enable/EFI/Disable)<br />
● SAS Option ROM 1 Download (Enable/EFI/Disable) (Not available on some<br />
workstations.)<br />
● SCU Option ROM Download (Enable/EFI/Disable) (Not available on some<br />
workstations.)<br />
● Multiprocessor (Activates a single core.)—(Enable or Disable)<br />
● Active Processor Cores—Selects a single core, or multiple cores per socket<br />
● Hyper-Threading—(Enable or Disable)<br />
● CECP Mode—(Enable or Disable)<br />
Slot Settings Enable/disable the PCIe and PCI slots (1 - 7).<br />
AMT<br />
Configuration<br />
1 Available on selected models<br />
2 These options should be used by advanced users only<br />
Lets you set the following AMT (Intel Active Management Technology) configuration<br />
options:<br />
● AMT (Enabled/Disabled)—Allows <strong>for</strong> remote discovery, repair and protection of<br />
networked workstations. Enabling the AMT function also enables the Network<br />
Controller (required <strong>for</strong> AMT to function correctly).<br />
● Unconfigure AMT/ME (Disabled/Enabled) 2—Restores AMT/ME defaults. When you<br />
save and exit after enabling this option, you will be prompted to complete the process<br />
upon restart. A Setup Password (even if one is set) does not need to be entered to<br />
complete the process.<br />
NOTE: In<strong>for</strong>mation about Intel AMT can be found at www.intel.com.<br />
● WatchDog Timer (Enabled/Disabled)—OS and BIOS WatchDog Timers can be set<br />
independently (in minutes):<br />
◦ OS WatchDog TimerTimer—Sets the OS WatchDog Timer<br />
◦ BIOS WatchDog Timer—Sets the BIOS WatchDog Timer<br />
The Computer Setup (F10) Utility 59
Desktop management<br />
This section summarizes capabilities, features, and key components of computer management,<br />
including:<br />
Topics<br />
Initial computer configuration and deployment on page 61<br />
Installing a remote system on page 61<br />
Copying a setup configuration to another computer on page 62<br />
Updating and managing software on page 63<br />
<strong>HP</strong> Client Management Solutions on page 63<br />
Altiris Client Management Solutions on page 63<br />
<strong>HP</strong> SoftPaq Download Manager on page 64<br />
System Software Manager on page 64<br />
ROM Flash on page 64<br />
FailSafe Boot Block on page 64<br />
<strong>Workstation</strong> security on page 65<br />
Fault notification and recovery on page 75<br />
Programmable power button on page 76<br />
NOTE: <strong>Support</strong> <strong>for</strong> specific features described in this guide can vary by model and software version.<br />
60 Chapter 2 System management
Initial computer configuration and deployment<br />
The computer includes a preinstalled system software image. After a brief software unbundling process,<br />
the computer is ready to use.<br />
If you prefer to replace the preinstalled software image with a customized set of system and application<br />
software, you can deploy a customized software image by:<br />
● Installing additional software applications after unbundling the preinstalled software image<br />
● Using a disk cloning process to copy the contents from one hard disk drive to another<br />
The <strong>HP</strong> Recovery Manager DVDs, ROM-based setup, and ACPI hardware provide further assistance<br />
with recovery of system software, configuration management and troubleshooting, and power<br />
management.<br />
<strong>Support</strong> <strong>for</strong> specific features described in this guide can vary by model and software version.<br />
The best deployment method depends on the in<strong>for</strong>mation technology environment and processes.<br />
Installing a remote system<br />
Remote system installation enables starting and setting up the computer using software and<br />
configuration in<strong>for</strong>mation on a network server. This feature is usually used <strong>for</strong> system setup and<br />
configuration and can be used to:<br />
● Deploy a software image on new PCs<br />
● Format a hard disk drive<br />
● Install application software or drivers<br />
● Update the operating system, application software, or drivers<br />
To initiate a remote system installation, press F12 when F12=Network Service Boot appears in the<br />
lower right corner of the <strong>HP</strong> logo screen. Follow the onscreen instructions to continue the installation<br />
process. The default boot order is a BIOS configuration setting that can be changed to always attempt<br />
a network boot.<br />
Desktop management 61
Copying a setup configuration to another computer<br />
This section provides in<strong>for</strong>mation about replicating the computer setup.<br />
CAUTION: Setup configuration is model-specific. File system corruption can result if source and<br />
target computers are not the same model.<br />
To copy a setup configuration:<br />
1. Select a setup configuration to copy, and then restart the computer.<br />
2. As soon as the computer powers on, press and hold F10 until you enter the Computer Setup (F10)<br />
Utility. If necessary, press Enter to bypass the title screen.<br />
NOTE: If you do not press F10 at the appropriate time, you must restart the computer, and then<br />
press and hold F10 again to access the utility.<br />
If you are using a PS/2 keyboard, you might see a keyboard error message. Disregard it.<br />
3. Select File > Replicated Setup > Save to Removable Storage Device. Follow the<br />
instructions on the screen to create the configuration file cpqsetup.txt and write it to a USB storage<br />
device.<br />
4. Power off the computer you are configuring and insert the removeable USB media device<br />
containing the configuration file.<br />
5. Power on the computer you are configuring.<br />
6. Press and hold the F10 key until you enter the Computer Setup (F10) Utility. If necessary, press<br />
Enter to bypass the title screen.<br />
7. Select File > Replicated Setup > Restore from Removable Storage Device, and then<br />
follow the instructions on the screen.<br />
8. Restart the computer when the configuration is complete.<br />
62 Chapter 2 System management
Updating and managing software<br />
<strong>HP</strong> provides several tools <strong>for</strong> managing and updating software on desktops and computers:<br />
● <strong>HP</strong> Client Manager Software<br />
● Altiris Client Management Solutions<br />
● <strong>HP</strong> SoftPaq Download Manager<br />
● System Software Manager<br />
<strong>HP</strong> Client Management Solutions<br />
<strong>HP</strong> Client Management Solutions (CMS), available <strong>for</strong> download from http://www.hp.com/go/<br />
easydeploy, are standards-based <strong>solutions</strong> <strong>for</strong> managing and controlling computers in a networked<br />
environment.<br />
<strong>HP</strong> Client Management Solutions offers these services:<br />
● Detailed views of hardware inventory <strong>for</strong> asset management<br />
● PC health-check monitoring and diagnostics<br />
● Proactive notification of changes in the hardware environment<br />
● Web-accessible reporting of business-critical details such as thermal warnings and memory alerts<br />
● Remote updating of system software such as device drivers and ROM BIOS<br />
● Remote changing of boot order<br />
● Configuration of system BIOS settings<br />
Altiris Client Management Solutions<br />
Altiris and <strong>HP</strong> have partnered to provide comprehensive, tightly integrated systems management<br />
<strong>solutions</strong> to reduce the cost of owning <strong>HP</strong> client PCs.<br />
The <strong>HP</strong> CMS is the foundation <strong>for</strong> additional Altiris Client Management Solutions that address the<br />
following topics.<br />
● Inventory and asset management<br />
● Deployment and migration<br />
● Help desk and problem resolution<br />
● Software and operations management<br />
Go to http://www.hp.com/go/Altiris_Solutions <strong>for</strong> in<strong>for</strong>mation about:<br />
● How <strong>HP</strong> CMS works<br />
● Which <strong>solutions</strong> are compatible with the operating system<br />
● How to download a fully functional, 30-day evaluation version of Altiris <strong>solutions</strong><br />
Desktop management 63
<strong>HP</strong> SoftPaq Download Manager<br />
<strong>HP</strong> SoftPaq Download Manager is a free, easy-to-use interface <strong>for</strong> locating and downloading software<br />
updates <strong>for</strong> the <strong>HP</strong> client PC models in your environment. By specifying your models, operating system,<br />
and language, you can quickly locate, sort, and select the softpaqs you need. For more in<strong>for</strong>mation, go<br />
to http://www.hp.com/go/sdm.<br />
System Software Manager<br />
ROM Flash<br />
System Software Manager (SSM) is a utility available on Windows computers that enables you to<br />
update system-level software on multiple systems simultaneously. When executed on a PC client system,<br />
SSM detects hardware and software versions and then updates the software from a central repository,<br />
known as a file store. Driver versions supported by SSM are noted with a special icon on the software,<br />
the driver download website, and on the <strong>Support</strong> Software CD.<br />
To download the utility or to obtain more in<strong>for</strong>mation about SSM, see http://www.hp.com/go/ssm.<br />
BIOS settings are stored on a programmable flash ROM. By establishing a setup password in the<br />
Computer Setup (F10) Utility, you can protect unauthorized users from modifying the BIOS settings. This<br />
function is important to ensure the operating integrity of the computer.<br />
To upgrade the BIOS, download the latest SoftPaq images from http://www.hp.com/support/<br />
workstation_swdrivers.<br />
Remote ROM Flash<br />
<strong>HP</strong>QFlash<br />
Remote ROM Flash allows system administrators to safely upgrade the ROM on remote <strong>HP</strong> computers<br />
from a centralized network management console, resulting in a consistent deployment of, and greater<br />
control over, <strong>HP</strong> PC ROM images over the network.<br />
To use Remote ROM Flash, the computer must be powered on, or turned on using Remote Wakeup.<br />
For more in<strong>for</strong>mation about Remote ROM Flash and <strong>HP</strong>QFlash, see the <strong>HP</strong> Client Manager Software or<br />
System Software Manager sections at http://www.hp.com/go/ssm.<br />
The <strong>HP</strong>QFlash utility is used to locally update or restore the system ROM on PCs using a Windows<br />
operating system. For more in<strong>for</strong>mation about <strong>HP</strong>QFlash, see http://www.hp.com/go/ssm, and enter<br />
the name of the computer.<br />
FailSafe Boot Block<br />
The FailSafe Boot Block enables BIOS recovery in the unlikely event of a ROM flash failure. For<br />
example, if a power failure occurs during a ROM upgrade, the Boot Block uses a flash-protected<br />
section of the ROM to verify a valid system ROM flash when power is restored to the computer.<br />
If the system ROM is valid, the computer starts normally.<br />
64 Chapter 2 System management
If the system ROM fails the validation check, the FailSafe Boot Block provides enough support to start<br />
the computer from a BIOS image CD created from a SoftPaq. The BIOS image CD programs the system<br />
ROM with a valid image.<br />
When Boot Block detects an invalid system ROM, the computer power LED blinks red eight times and<br />
the computer beeps eight times; then the computer pauses <strong>for</strong> two seconds. On some models, a Boot<br />
Block recovery mode message appears.<br />
In preparation <strong>for</strong> system recovery, use the BIOS CD media file in the SoftPaq to create a BIOS image<br />
CD or USB key.<br />
Recovering the computer from Boot Block Recovery mode<br />
To recover the computer after it enters Boot Block recovery mode:<br />
1. Remove any media such as USB keys or disks in the optical disk drives.<br />
2. Insert a BIOS image CD into the DVD drive. You can also use USB media such as an <strong>HP</strong> DriveKey.<br />
3. Power off, then power on the computer.<br />
If no BIOS image CD or USB media is found, you are prompted to insert one and restart the<br />
computer.<br />
If a setup password has been established, the Caps Lock light illuminates and you are prompted<br />
<strong>for</strong> the password.<br />
4. Enter the setup password.<br />
If the computer starts from the boot media and successfully reprograms the ROM, three keyboard<br />
lights illuminate and a rising-tone series of beeps signals successful recovery.<br />
5. Remove the boot media and power off the computer.<br />
6. Restart the computer.<br />
<strong>Workstation</strong> security<br />
This section provides in<strong>for</strong>mation about providing system security through asset tracking, password<br />
security, hard disk drive locking, and chassis locks.<br />
Desktop management 65
Asset tracking<br />
Asset tracking features provide asset tracking data that can be managed using <strong>HP</strong> Systems Insight<br />
Manager (<strong>HP</strong> SIM), <strong>HP</strong> Console Management Controller (CMC), or other systems-management<br />
applications.<br />
Seamless, automatic integration between asset tracking features and these products enables you to<br />
choose the management tool that is best suited to the environment and to leverage investments in<br />
existing tools.<br />
<strong>HP</strong> also offers several <strong>solutions</strong> <strong>for</strong> controlling access to valuable components and in<strong>for</strong>mation:<br />
● <strong>HP</strong> ProtectTools Embedded Security prevents unauthorized access to data, checks system integrity,<br />
and authenticates third-party users attempting system access.<br />
● Security features such as ProtectTools and the Smart Cover Sensor (side access panel sensor) help<br />
prevent unauthorized access to the data and to the internal components of the computer.<br />
● By disabling parallel, serial, or USB ports, or by disabling removable-media boot capability, you<br />
can protect valuable data assets.<br />
● Memory Change and Side access panel sensor (Smart Cover Sensor) alerts can be <strong>for</strong>warded to<br />
system management applications to deliver proactive notification of tampering with a computer’s<br />
internal components.<br />
ProtectTools, the Smart Cover Sensor, and the side access panel solenoid lock (Hood Lock) are<br />
available as options on select systems.<br />
You can manage security settings:<br />
● Locally with the Computer Setup (F10) Utility<br />
● Remotely with <strong>HP</strong> CMS or <strong>HP</strong> System Software Manager (SSM), which enable the secure,<br />
consistent deployment and control of security settings from a simple command line utility<br />
For more in<strong>for</strong>mation about the Computer Setup (F10) Utility, see The Computer Setup (F10) Utility<br />
menu on page 44.<br />
The following Computer Setup (F10) Utility features let you manage computer security.<br />
Table 2-3 F10 security features overview<br />
Feature Purpose<br />
Removable Media Boot Control Prevents booting from removable media drives<br />
Serial, Parallel, USB, or Infrared<br />
Interface Control<br />
Power-On Password<br />
Setup Password<br />
Prevents transfer of data through the integrated serial, parallel, USB, or infrared<br />
interface<br />
Prevents use of the computer until the password is entered (applies to initial system<br />
startup and restarts)<br />
Prevents reconfiguration of the computer (through the Setup utility) until the<br />
password is entered<br />
Network Server Mode Provides unique security features <strong>for</strong> computers used as servers<br />
66 Chapter 2 System management
SATA hard disk drive security<br />
<strong>HP</strong> computers include the <strong>HP</strong> DriveLock facility <strong>for</strong> SATA hard disk drives to prevent unauthorized<br />
access to data.<br />
WARNING! Enabling DriveLock can render a SATA hard disk drive permanently inaccessible if the<br />
master password is lost or <strong>for</strong>gotten. No method exists to recover the password or access the data.<br />
DriveLock has been implemented as an extension to Computer Setup (F10) functions. It is only available<br />
when hard disk drives that support the ATA security command set are detected. On <strong>HP</strong> computers, it is<br />
not available when the SATA emulation mode is RAID+AHCI or RAID.<br />
DriveLock is <strong>for</strong> <strong>HP</strong> customers <strong>for</strong> whom data security is a paramount concern. For such customers, the<br />
cost of a hard disk drive and the loss of the data stored on it is inconsequential when compared to the<br />
damage that could result from unauthorized access to its contents.<br />
To balance this level of security with the need to address the issue of a <strong>for</strong>gotten password, the <strong>HP</strong><br />
implementation of DriveLock employs a two-password security scheme. One password is intended to be<br />
set and used by a system administrator, while the other is typically set and used by the user.<br />
No "back door" can be used to unlock the drive if both passwords are lost. There<strong>for</strong>e, DriveLock is<br />
most safely used when the data contained on the hard disk drive is replicated on a corporate<br />
in<strong>for</strong>mation system or is regularly backed up.<br />
If both DriveLock passwords are lost, the hard disk drive is rendered unusable. For users who do not fit<br />
the previously defined customer profile, this might not be acceptable. For users who fit this profile, it<br />
might be a tolerable risk, given the nature of the data stored on the hard disk drive.<br />
Desktop management 67
DriveLock applications<br />
Using DriveLock<br />
The most practical use of DriveLock is in a corporate environment. The system administrator would be<br />
responsible <strong>for</strong> configuring the hard disk drive, which involves setting the DriveLock master password<br />
and a temporary user password. If you <strong>for</strong>get the user password or if the equipment is passed on to<br />
another employee, the master password can be used to reset the user password and regain access to<br />
the hard disk drive.<br />
<strong>HP</strong> recommends that corporate system administrators who enable DriveLock also establish a corporate<br />
policy <strong>for</strong> setting and maintaining master passwords. This should be done to prevent a situation where<br />
an employee sets both DriveLock passwords be<strong>for</strong>e leaving the company. In such a scenario, the hard<br />
disk drive is unusable and requires replacement. Likewise, by not setting a master password, system<br />
administrators might find themselves locked out of a hard disk drive and unable to per<strong>for</strong>m routine<br />
checks <strong>for</strong> unauthorized software, other asset control functions, and support.<br />
For users with less stringent security requirements, <strong>HP</strong> does not recommend enabling DriveLock. Users in<br />
this category include personal users, or users who do not maintain sensitive data on their hard disk<br />
drives as a common practice. For these users, the potential loss of a hard disk drive resulting from<br />
<strong>for</strong>getting both passwords is much greater than the value of the data DriveLock protects.<br />
Access to Computer Setup (F10) and DriveLock can be restricted through the setup password. By<br />
specifying a setup password and not giving it to users, system administrators can restrict users from<br />
enabling DriveLock.<br />
When hard disk drives that support the ATA security command set are detected, DriveLock appears<br />
under the Security menu in the Computer Setup (F10) menu. You are presented with options to set the<br />
master password and to enable DriveLock. You must provide a user password to enable DriveLock.<br />
Because the initial configuration of DriveLock is typically per<strong>for</strong>med by a system administrator, a master<br />
password should be set first.<br />
<strong>HP</strong> encourages system administrators to set a master password whether they plan to enable DriveLock<br />
or not. This gives the administrator the ability to modify DriveLock settings if the drive is locked in the<br />
future. After the master password is set, the system administrator can enable DriveLock or leave it<br />
disabled.<br />
If a locked hard disk drive is present, POST requires a password to unlock the device. If a power-on<br />
password is set and it matches the device’s user password, POST does not prompt the user to re-enter<br />
the password. Otherwise, the user is prompted to enter a DriveLock password.<br />
For a cold start, use the master or user password. For a warm start, enter the same password used to<br />
unlock the drive during the preceding cold start.<br />
Users have two attempts to enter a correct password. During cold start, if neither attempt succeeds,<br />
POST continues but the drive remains inaccessible. During a warm-start or restart from Windows, if<br />
neither attempt succeeds, POST halts and the user is instructed to cycle power.<br />
68 Chapter 2 System management
Enabling DriveLock<br />
To enable and set the DriveLock user password:<br />
1. Power on or restart the computer.<br />
2. As soon as the computer is powered on, repeatedly press the F10 key until you enter the<br />
Computer Setup (F10) Utility.<br />
If you do not press F10 at the appropriate time, you must restart the computer, then repeatedly<br />
press F10 again to access the utility.<br />
3. Select Security > DriveLock Security.<br />
4. For each DriveLock-capable drive, select a drive by pressing F10 to accept.<br />
5. Under Enable/Disable DriveLock options, select Enable, and then press F10 to enable DriveLock<br />
<strong>for</strong> a specific drive.<br />
NOTE: To set the DriveLock master password, select Master.<br />
CAUTION: If you <strong>for</strong>get the DriveLock password, the drive is unusable.<br />
6. Enter a new user password (1 to 32 characters long), and then press F10 to accept.<br />
7. Enter the password again in the Enter New Password Again field. If you <strong>for</strong>get this password, the<br />
drive is rendered permanently disabled.<br />
8. Select File > Save Changes and Exit, and then press Enter to accept the changes. After you<br />
press Enter, the computer per<strong>for</strong>ms a cold start be<strong>for</strong>e invoking the DriveLock function.<br />
When the computer starts, you are prompted to enter the DriveLock password <strong>for</strong> each DriveLockcapable<br />
drive <strong>for</strong> which you have set a password. You have two attempts to enter the password<br />
correctly. If the password is not entered correctly, the computer attempts to start anyway.<br />
However, the boot process most likely fails because data from a locked drive cannot be accessed.<br />
In a single drive computer, if the drive has DriveLock enabled, the computer might not be able to<br />
boot to the operating system, and might try to boot from the network or from another storage<br />
device (depending on the boot ordering options). Regardless of the outcome of the start attempts,<br />
the drive-locked drive remains inaccessible without the DriveLock password.<br />
In a two-drive computer that has a boot drive and a data drive, you can apply the DriveLock<br />
feature to the data drive only. In this case, the computer can always start, but the data drive is<br />
accessible only when the DriveLock password is entered.<br />
Cold starts require that you enter DriveLock passwords. However, DriveLock passwords are also<br />
required <strong>for</strong> warm starts. For example, if you boot to DOS and press Ctrl+Alt+Del, you must enter<br />
the DriveLock password be<strong>for</strong>e the computer completes the next start cycle. This warm-start<br />
behavior is consistent with the DriveLock feature.<br />
Desktop management 69
Password security<br />
The power-on password prevents unauthorized use of the computer by requiring entry of a password to<br />
access applications or data when the computer is powered on or restarted. The setup password<br />
specifically prevents unauthorized access to the Computer Setup (F10) Utility and can also be used as<br />
an override to the power-on password. When prompted <strong>for</strong> the power-on password, entering the setup<br />
password instead enables access to the computer.<br />
You can establish a network-wide setup password to enable the system administrator to log in to all<br />
network systems to per<strong>for</strong>m maintenance without needing to know the power-on password.<br />
Establishing a setup password using Computer Setup (F10) Utility<br />
Establishing a setup password through the Computer Setup (F10) Utility prevents reconfiguration of the<br />
computer (through the use of the Computer Setup (F10) Utility) until the password is entered.<br />
To establish a setup password using the Computer Setup (F10) menu:<br />
1. Power on or restart the computer.<br />
2. As soon as the computer is powered on, press and hold F10 until you enter the Computer Setup<br />
(F10) Utility. Press Enter to bypass the title screen, if necessary.<br />
If you do not press F10 at the appropriate time, you must restart the computer, and then press and<br />
hold F10 again to access the utility.<br />
If you are using a PS/2 keyboard, you might see a keyboard error message. Disregard it.<br />
3. Select Security > Setup Password and then follow the onscreen instructions.<br />
4. Be<strong>for</strong>e exiting, select File > Save Changes and Exit.<br />
70 Chapter 2 System management
Establishing a power-on password using computer setup<br />
Establishing a power-on password through the Computer Setup (F10) Utility prevents access to the<br />
computer when power is connected, unless you specify the password. When a power-on password is<br />
set, the Computer Setup (F10) Utility presents Password Options in the Security menu. The password<br />
options include Network Server Mode and Password Prompt on Warm Boot.<br />
When Network Server Mode is disabled, you must enter the password when the computer is powered<br />
on, when the key icon appears on the monitor. When Password Prompt on Warm Boot is enabled, you<br />
must enter the password. The password must also be entered each time the computer is restarted.<br />
When Network Server Mode is enabled, the password prompt is not presented during POST, but an<br />
attached PS/2 keyboard remains locked until you enter the power-on password.<br />
To enable Network Server Mode, you must set a power-on password under Advanced > Password<br />
Options. This option enables the computer to start without requiring the power-on password, but the<br />
keyboard and mouse are locked until you enter the password. The keyboard LEDs rotate constantly<br />
when the computer is in locked mode.<br />
To establish a power-on password through the Computer (F10) menu:<br />
1. Power on or restart the computer.<br />
2. As soon as the computer is powered on, press and hold F10 until you enter the Computer Setup<br />
(F10) Utility. Press Enter to bypass the title screen, if necessary.<br />
If you do not press F10 at the appropriate time, you must restart the computer and then press and<br />
hold F10 again to access the utility.<br />
If you are using a PS/2 keyboard, you might see a keyboard error message. Disregard it.<br />
3. Select Security > Power-On Password and then follow the onscreen instructions.<br />
4. Be<strong>for</strong>e exiting, select File > Save Changes and Exit.<br />
Entering a power-on password<br />
To enter a power-on password:<br />
1. Restart the computer.<br />
2. When the key icon appears on the monitor, enter the current password, and then press Enter.<br />
Type carefully. For security reasons, the characters you enter do not appear on the screen.<br />
If you enter the password incorrectly, a broken key icon appears. Try again. After three unsuccessful<br />
tries, you will enter the F10 setup screen with read-only permission. (See the Setup Browse Mode option<br />
under the Power-On options.)<br />
Desktop management 71
Entering a setup password<br />
If a setup password has been established on the computer, you will be prompted to enter it each time<br />
you run the Computer Setup (F10) Utility.<br />
To enter a setup password:<br />
1. Restart the computer.<br />
2. As soon as the computer is powered on, press and hold F10 until you enter the Computer Setup<br />
(F10) Utility. Press Enter to bypass the title screen, if necessary.<br />
If you do not press F10 at the appropriate time, you must restart the computer and press and hold<br />
F10 again to access the utility.<br />
If you are using a PS/2 keyboard, you might see a keyboard error message. Disregard it.<br />
3. When the key icon appears on the monitor, enter the setup password, and press Enter.<br />
Type carefully. For security reasons, the characters you enter do not appear on the screen.<br />
If you enter the password incorrectly, a broken key icon appears. Try again. After three unsuccessful<br />
tries, you must restart the computer be<strong>for</strong>e you can continue.<br />
Changing a power-on or setup password<br />
To change a power-on or setup password:<br />
1. Restart the computer.<br />
2. To change the power-on password, go to step 4.<br />
3. To change the setup password, as soon as the computer is powered on, press and hold F10 until<br />
you enter the Computer Setup (F10) Utility. Press Enter to bypass the title screen, if necessary.<br />
If you do not press F10 at the appropriate time, you must restart the computer, and then press and<br />
hold the F10 key again to access the utility.<br />
If you are using a PS/2 keyboard, you might see a keyboard error message. Disregard it.<br />
4. When the key icon appears, enter the current password, a slash (/) or alternative delimiter<br />
character, the new password, another slash (/) or alternative delimiter character, and the new<br />
password again as shown:<br />
current password/new password/new password<br />
For in<strong>for</strong>mation about the alternative delimiter characters, see National keyboard delimiter<br />
characters on page 73.<br />
Type carefully. For security reasons, the characters you enter do not appear on the screen.<br />
5. Press Enter.<br />
The new password takes effect the next time you power on the computer.<br />
The power-on and setup passwords can also be changed using the Security options in the Computer<br />
Setup (F10) Utility.<br />
72 Chapter 2 System management
Deleting a power-on or setup password<br />
To delete a power-on or setup password:<br />
1. Power on or restart the computer.<br />
2. Choose from the following:<br />
● To delete the power-on password, go to step 4.<br />
● To delete the setup password, as soon as the computer is powered on, press and hold F10<br />
until you enter the Computer Setup (F10) Utility. Press Enter to bypass the title screen, if<br />
necessary.<br />
If you do not press F10 at the appropriate time, you must restart the computer and then press<br />
and hold F10 again to access the utility.<br />
Use the appropriate operating system shutdown process.<br />
3. When the key icon appears, enter the current password followed by a slash (/) or alternative<br />
delimiter character: current password/.<br />
For in<strong>for</strong>mation about the alternative delimiter characters see the following section.<br />
4. Press Enter.<br />
National keyboard delimiter characters<br />
Each keyboard meets country-specific requirements. The syntax and keys you use <strong>for</strong> changing or<br />
deleting passwords depend on the keyboard included with the computer.<br />
Table 2-4 National keyboard delimiter characters<br />
Language Delimiter Language Delimiter Language Delimiter<br />
Arabic / Greek - Russian /<br />
Belgian = Hebrew . Slovakian -<br />
BHCSY * - Hungarian - Spanish -<br />
Brazilian / Italian - Swedish/Finnish /<br />
Chinese / Japanese / Swiss -<br />
Czech - Korean / Taiwanese /<br />
Danish - Latin American - Thai /<br />
French ! Norwegian - Turkish .<br />
French Canadian é Polish - U.K. English /<br />
German - Portuguese - U.S. English /<br />
* Bosnia-Herzegovina, Croatia, Slovenia, and Yugoslavia<br />
Desktop management 73
Clearing passwords<br />
If you <strong>for</strong>get the password, you cannot access the computer.<br />
For instructions about clearing passwords, see Configuring password security and resetting CMOS<br />
on page 158.<br />
Chassis security<br />
Smart Cover Sensor (optional)<br />
The optional Smart Cover Sensor is a combination of hardware and software technology that alerts you<br />
if the interior or the computer is accessed (provided the sensor has been configured in the Computer<br />
Setup (F10) Utility). The sensor alerts you when the side panel is removed.<br />
Three levels of protection are available:<br />
Table 2-5 Smart Cover Sensor protection levels<br />
Level Setting Description<br />
Level 0 Disabled Sensor * is disabled (default).<br />
Level 1 Notify User<br />
Level 2 Setup Password<br />
When the computer restarts, a message indicates that the computer has been<br />
opened or the access panel has been removed.<br />
When the computer restarts, a message indicates that the computer has been<br />
opened or the access panel has been removed. You must enter the setup<br />
password to continue.<br />
* Smart Cover Sensor settings can be changed using the Computer Setup (F10) Utility.<br />
Setting the protection level<br />
To set the Smart Cover Sensor protection level:<br />
1. Power on or restart the computer.<br />
2. During startup, press and hold the F10 key until you enter the Computer Setup (F10) Utility. Press<br />
Enter to bypass the title screen, if necessary.<br />
NOTE: If you do not press the F10 key at the appropriate time, you must restart the computer,<br />
and then press and hold the F10 key again to access the Computer Setup (F10) Utility.<br />
If you are using a PS/2 keyboard, you might see a keyboard error message. Disregard it.<br />
3. Select Security > Smart Cover > Cover Removal Sensor, and follow the onscreen<br />
instructions.<br />
4. Be<strong>for</strong>e exiting, select File > Save Changes and Exit.<br />
74 Chapter 2 System management
Side access panel solenoid lock (<strong>HP</strong> Z420 <strong>Workstation</strong> only)<br />
The side access panel solenoid locks the side access panel to the chassis. The solenoid is controlled by<br />
a local or remote signal.<br />
To lock the solenoid, set a password <strong>for</strong> the solenoid lock in the Computer Setup (F10) Utility. To unlock<br />
the solenoid, remove the solenoid lock password in the Computer Setup (F10) Utility.<br />
The solenoid lock FailSafe Key (available from <strong>HP</strong>) is is a device <strong>for</strong> manually disabling the solenoid<br />
lock. You will need the FailSafe Key in case of <strong>for</strong>gotten password, power loss, or computer<br />
malfunction.<br />
Cable lock (optional)<br />
To prevent theft, you can attach a keyed cable lock to the rear chassis panel. This cable lock attaches<br />
to the chassis and secures it to the work area.<br />
Fault notification and recovery<br />
Fault notification and recovery features combine innovative hardware and software technology to<br />
prevent the loss of critical data and minimize unplanned downtime.<br />
If the computer is connected to a network that is managed by <strong>HP</strong> CMS, the computer sends a fault<br />
notice to the network management application. With <strong>HP</strong> CMS, you can also remotely schedule<br />
diagnostics to run on managed PCs and create a summary report of failed tests.<br />
Drive Protection System<br />
The Drive Protection System (DPS) is a diagnostic tool built into hard disk drives and is installed in select<br />
<strong>HP</strong> computers. The DPS helps diagnose problems that might result in unwarranted hard disk drive<br />
replacement.<br />
When <strong>HP</strong> computers are built, each installed hard disk drive is tested using the DPS, and a permanent<br />
record of key in<strong>for</strong>mation is written onto each drive. Every time the DPS is run, test results are written to<br />
the hard disk drive. The service provider can use this in<strong>for</strong>mation to help diagnose conditions that<br />
required you to run the DPS software.<br />
ECC fault prediction<br />
When the computer encounters an excessive number of error checking and correcting (ECC) memory<br />
errors, it displays a local alert message. This message contains in<strong>for</strong>mation about the errant DIMM,<br />
enabling you to take action be<strong>for</strong>e you experience noncorrectable memory errors. ECC DIMMs are<br />
standard on this computer.<br />
Thermal sensors<br />
Several thermal sensors in the <strong>HP</strong> workstation regulate computer fans to maintain an acceptable,<br />
efficient chassis temperature.<br />
Desktop management 75
Programmable power button<br />
With ACPI (Advanced Configuration and Power Interface) enabled, you can customize the behavior of<br />
the power button so that rather than powering down, the workstation enters sleep mode (low power<br />
state), or hibernate mode (very low power state). This lets you go to standby without closing<br />
applications, and then return to the same operational state without any data loss.<br />
Changing the power button configuration (Windows only)<br />
To change the power button configuration:<br />
1. Select Start, and then select Control Panel > System and Security > Power Options.<br />
2. In Power Options Properties, select Choose What the Power Button Does.<br />
3. Select the desired options.<br />
If you choose sleep or hibernate, you can press the power button to go to standby, then press it again<br />
to enter full power state. To completely power down the workstation, select Start > Shut Down.<br />
NOTE: If the computer is unresponsive, press and hold the power button <strong>for</strong> four seconds to<br />
completely turn off power to the computer.<br />
CAUTION: Do not use the power button to power off the computer unless the system is not<br />
responding, as data loss can occur.<br />
76 Chapter 2 System management
3 Component Replacement<br />
In<strong>for</strong>mation and Guidelines<br />
This chapter provides warnings, cautions, in<strong>for</strong>mation, and guidelines <strong>for</strong> removal and replacement<br />
procedures. It does not document the step-by-step procedures.<br />
IMPORTANT: Removal and replacement procedures are now available in videos on<br />
the <strong>HP</strong> website.<br />
Go to the <strong>HP</strong> Customer Self Repair Services Media Library at http://www.hp.com/go/sml.<br />
This chapter includes these topics:<br />
Topics<br />
Warnings and cautions on page 78<br />
Service considerations on page 79<br />
Product recycling on page 81<br />
Component replacement guidelines on page 81<br />
77
Warnings and cautions<br />
WARNING! These symbols on any surface or area of the equipment indicate the following:<br />
Presence of a hot surface or hot component. If this surface is contacted, the potential <strong>for</strong> injury<br />
exists. To reduce the risk of injury from a hot component, let the surface cool be<strong>for</strong>e touching.<br />
Presence of an electrical shock hazard. To reduce the risk of injury from electrical shock, do not<br />
open any enclosed area marked with this symbol.<br />
Product must always be lifted by two persons to avoid personal injury due to product weight.<br />
WARNING! To reduce the risk of electric shock or damage to your equipment:<br />
— Do not disable the power cord grounding plug. The grounding plug is an important safety feature.<br />
— Plug the power cord in a grounded (earthed) outlet that is easily accessible at all times.<br />
— Disconnect power from the equipment by unplugging the power cord from the electrical outlet.<br />
WARNING! To reduce the risk of serious injury, read the Safety & Com<strong>for</strong>t Guide. It describes<br />
proper computer setup, posture, health, and work habits <strong>for</strong> computer users, and provides important<br />
electrical and mechanical safety in<strong>for</strong>mation. This guide is located at http://www.hp.com/ergo.<br />
WARNING! Do not use the front bezel as a handle or lifting point when lifting or moving the<br />
computer. Lifting the computer from the front bezel, or lifting it incorrectly, could cause the computer to<br />
fall, causing possible injury to you and damage to the computer. To properly and safely lift the<br />
computer, lift from the bottom of the computer.<br />
CAUTION: Static electricity can damage the electronic components of the computer. To prevent<br />
damage to the computer, observe the following Electrostatic Discharge (ESD) precautions while<br />
servicing the computer:<br />
— Discharge static electricity by briefly touching a grounded metal object be<strong>for</strong>e you begin.<br />
— Work on a static-free mat.<br />
— Wear a static strap to ensure that any accumulated electrostatic charge is discharged from your<br />
body to the ground.<br />
— Create a common ground <strong>for</strong> the equipment you are working on by connecting the static-free mat,<br />
static strap, and peripheral units to that piece of equipment.<br />
NOTE: <strong>HP</strong> accessories are <strong>for</strong> use in <strong>HP</strong> products. They have been extensively tested <strong>for</strong> reliability<br />
and are manufactured to high quality standards.<br />
78 Chapter 3 Component Replacement In<strong>for</strong>mation and Guidelines
Service considerations<br />
Tools and software requirements<br />
The tools necessary <strong>for</strong> computer component removal and installation are:<br />
● Torx T-15 driver<br />
● Flat blade and cross-tip screwdrivers<br />
● Diagnostics software<br />
Electrostatic discharge (ESD) in<strong>for</strong>mation<br />
Generating static Different activities generate different amounts of static electricity through electrostatic discharge<br />
(ESD). Static electricity increases as humidity decreases.<br />
Preventing ESD<br />
equipment<br />
damage<br />
CAUTION: Static electricity in the amount of 700 volts might degrade a product.<br />
Event<br />
Walking across carpet<br />
Walking across vinyl floor<br />
Motions of bench worker<br />
Removing bubble pack from PCB<br />
Packing PCBs in foam-lined box<br />
Relative humidity<br />
55% 40% 10%<br />
7,500V<br />
3,000V<br />
400V<br />
7,000V<br />
5,000V<br />
15,000V<br />
5,000V<br />
800V<br />
20,000V<br />
11,000V<br />
35,000V<br />
12,000V<br />
6,000V<br />
26,500V<br />
21,000V<br />
Many electronic components are sensitive to ESD. Circuitry design and structure determine the<br />
degree of sensitivity. The following packaging and grounding precautions are necessary to prevent<br />
damage to electric components and accessories:<br />
● Transport products in static-safe containers such as tubes, bags, or boxes, to avoid hand<br />
contact.<br />
● Protect electrostatic parts and assemblies with nonconductive or approved containers or<br />
packaging.<br />
● Keep electrostatic-sensitive parts in their containers until they arrive at static-free stations.<br />
● Place items on a grounded surface be<strong>for</strong>e removing them from containers.<br />
● When handling or touching a sensitive component or assembly, ground yourself by touching<br />
the chassis.<br />
● Avoid contact with pins, leads, or circuitry.<br />
● Place reusable electrostatic-sensitive parts from assemblies in protective packaging or<br />
nonconductive foam.<br />
Service considerations 79
Personal<br />
grounding<br />
methods and<br />
equipment<br />
Static shielding<br />
materials<br />
Grounding the<br />
work area to<br />
prevent static<br />
damage<br />
Recommended<br />
ESD prevention<br />
materials and<br />
equipment<br />
Use the following items to help prevent ESD damage:<br />
● Wrist straps — These are flexible straps with a maximum of one megohm ± 10% resistance<br />
in the ground cords. To provide a proper ground, wear the strap against bare skin. The<br />
ground cord must be connected and fit snugly into the banana plug connector on the<br />
grounding mat or computer.<br />
● Heel straps, toe straps, and boot straps — These can be used at standing computers<br />
and are compatible with most types of shoes or boots. On conductive floors or dissipative<br />
floor mats, use them on both feet with a maximum of one megohm ± 10% resistance between<br />
the operator and ground.<br />
Static shielding materials provide the following levels of protection.<br />
Method<br />
Antistatic plastic<br />
Carbon-loaded plastic<br />
Metalized laminate<br />
● Cover the work surface with approved<br />
static-dissipative material. Use a wrist<br />
strap connected to the work surface, and<br />
properly grounded tools and equipment.<br />
● Use static-dissipative mats, foot straps, or<br />
air ionizers to give added protection.<br />
● Handle electrostatic-sensitive<br />
components, parts, and assemblies by<br />
the case or PCB laminate. Handle them<br />
only in static-free work areas.<br />
● Antistatic tape<br />
● Antistatic smocks, aprons, and sleeve<br />
protectors<br />
● Conductive bins and other assembly or<br />
soldering aids<br />
● Conductive foam<br />
● Conductive tabletop computers with a<br />
ground cord of one megohm ± 10%<br />
resistance<br />
● Static-dissipative table or floor mats with<br />
a hard-tie to ground<br />
● Field service kits<br />
80 Chapter 3 Component Replacement In<strong>for</strong>mation and Guidelines<br />
Voltage<br />
1,500V<br />
7,500V<br />
15,000V<br />
● Disconnect power and input signals be<strong>for</strong>e<br />
inserting and removing connectors or test<br />
equipment.<br />
● Use fixtures made of static-safe materials<br />
when fixtures must directly contact<br />
dissipative surfaces.<br />
● Keep work area free of nonconductive<br />
materials, such as plastic assembly aids and<br />
Styrofoam.<br />
● Use field service tools (such as cutters,<br />
screwdrivers, and vacuums) that are<br />
conductive.<br />
● Static awareness labels<br />
● Wrist straps and footwear straps providing<br />
one megohm ± 10% resistance<br />
● Material-handling packages<br />
● Conductive plastic bags<br />
● Conductive plastic tubes<br />
● Conductive tote boxes<br />
● Opaque shielding bags<br />
● Transparent metallized shielding bags<br />
● Transparent shielding tubes
Product recycling<br />
<strong>HP</strong> encourages customers to recycle used electronic hardware, <strong>HP</strong> original print cartridges, and<br />
rechargeable batteries.<br />
For in<strong>for</strong>mation about recycling <strong>HP</strong> components or products, see http://www.hp.com/go/recycle.<br />
Component replacement guidelines<br />
Battery<br />
This section provides in<strong>for</strong>mation and guidelines <strong>for</strong> removal and replacement procedures. It does not<br />
document the step-by-step procedures.<br />
IMPORTANT: Removal and replacement procedures are now available in videos on<br />
the <strong>HP</strong> website.<br />
Go to the <strong>HP</strong> Customer Self Repair Services Media Library at http://www.hp.com/go/sml. In Media<br />
Selection, choose the Desktops & <strong>Workstation</strong>s product category and the Personal<br />
<strong>Workstation</strong>s product family, then choose your plat<strong>for</strong>m<br />
This chapter provides guidelines <strong>for</strong> removal and replacement procedures. Topics include:<br />
Battery on page 81<br />
Cable management on page 82<br />
CPU (processor) and CPU heatsink on page 83<br />
Expansion slots on page 84<br />
Hard disk drives and optical disc drives on page 94<br />
Memory on page 101<br />
Power supply specifications on page 107<br />
System board on page 109<br />
The battery that comes with the computer provides power to the real-time clock and has a minimum<br />
lifetime of about three years. Observe the following warning and caution when replacing the battery.<br />
WARNING! <strong>HP</strong> Z series <strong>Workstation</strong>s use lithium batteries. There is a risk of fire and chemical burn<br />
if the battery is handled improperly. Do not disassemble, crush, puncture, short external contacts,<br />
dispose of in water or fire, or expose battery to temperatures higher than 60°C (140°F).<br />
CAUTION: Be<strong>for</strong>e removing the battery, back up the CMOS settings in case they are lost when the<br />
battery is removed. Use the the Computer Setup (F10) Utility to back up the settings.<br />
NOTE: Do not dispose of batteries, battery packs, and accumulators with general household waste.<br />
Product recycling 81
Cable management<br />
Proper routing of the internal cables is critical to the operation of the workstation. Follow good cable<br />
management practices when removing and installing components.<br />
● Handle cables with care to avoid damage.<br />
● Apply only the tension required to seat or unseat cables during insertion or removal from the<br />
connector.<br />
● When possible, handle cables by the connector or pull-strap.<br />
● Route cables in such a way that they cannot be caught or snagged by parts being removed or<br />
replaced.<br />
● Keep cables away from direct contact with major heat sources, such as the heatsink. (Some air<br />
flow guides have a cable guide that lets you route cables safely around the heatsink.)<br />
● Do not jam cables on top of expansion cards or DIMMs. Circuit cards and DIMMs are not<br />
designed to take excessive pressure.<br />
● Keep cables clear of movable or rotating parts (such as the power supply and drive cage) to<br />
prevent them from being cut or crimped when the component is lowered into its normal position.<br />
● In all cases, avoid bending or twisting the cables. Do not bend any cable sharply. A sharp bend<br />
can break the internal wires.<br />
● Never bend a SATA data cable tighter than a 30 mm (1.18 in) radius.<br />
● Never crease a SATA data cable.<br />
● Do not rely on components like the drive cage, power supply, or computer cover to push cables<br />
down into the chassis. Always position the cables to lay properly by themselves or in the cable<br />
guides and chassis areas designed <strong>for</strong> cable routing.<br />
When removing the power supply power cable from the connector on the system board, always follow<br />
these steps:<br />
1. Squeeze on the top of the retaining latch attached to the cable end of the connector.<br />
2. Grasp the cable end of the connector and pull it straight out.<br />
CAUTION: Always pull the connector — NEVER pull on the cable. Pulling on the cable could<br />
damage the cable and result in a failed power supply.<br />
82 Chapter 3 Component Replacement In<strong>for</strong>mation and Guidelines
CPU (processor) and CPU heatsink<br />
CAUTION: Observe the following cautions when removing or replacing the heatsink.<br />
— When removing the heatsink, loosen all screws a little at a time to ensure the CPU remains level. Do<br />
not fully loosen one screw, and then move on to the next.<br />
— After you remove the CPU heatsink from the chassis, use alcohol and a soft cloth to clean the thermal<br />
compound residue from the CPU and the heatsink, allowing the alcohol on the CPU and CPU heatsink<br />
to dry completely.<br />
— If you are reusing the original heatsink, apply thermal compound to the center of the CPU top<br />
surface.<br />
— If you are using a new CPU heatsink, do not apply thermal compound to the CPU because the new<br />
heatsink already has thermal compound applied to the heatsink surface. Instead, remove the thermal<br />
compound protective liner from the bottom of the new heatsink.<br />
— Do not overtighten the heatsink screws. Overtightening can strip the threads in the chassis.<br />
— Do not fully tighten one screw and then move on to the next. Instead, tighten all screws a little at a<br />
time, ensuring that the CPU remains level.<br />
CAUTION: Observe the following cautions when removing or replacing the CPU.<br />
— If you are installing a second CPU, it must be of the same type as the first CPU.<br />
— Internal components might be powered even when the computer is off. To prevent damage,<br />
disconnect the computer power cord be<strong>for</strong>e you remove or install a component.<br />
— The CPU socket contacts and pads are extremely fragile. Do not touch the CPU socket contacts or<br />
the gold pads underneath the CPU. Use extreme care and handle the CPU only by the edges.<br />
— The CPU socket contacts are delicate and bend easily. To avoid bending the contacts, use extreme<br />
care when installing the CPU in the socket.<br />
— Installing a processor incorrectly can damage the system board. Contact an <strong>HP</strong> authorized reseller<br />
or service provider to install the processor. If you plan to install the processor yourself, view the entire<br />
remove and replace video be<strong>for</strong>e you begin.<br />
— Failure to follow the computer preparation instructions can result in an improperly installed<br />
processor, causing extensive computer damage.<br />
Component replacement guidelines 83
Expansion slots<br />
This section identifies and describes computer expansion card slots, and presents card configuration<br />
in<strong>for</strong>mation.<br />
Go to http://www.hp.com/go/quickspecs to learn which graphics cards are supported in the<br />
workstation, how much memory each graphics card includes, and graphics card power requirements.<br />
Card configuration restrictions <strong>for</strong> power supplies<br />
CAUTION: To prevent damage, the overall power consumption of the computer (including I/O<br />
cards, CPU, and memory) must not exceed the maximum rating of the computer power supply. For<br />
power supply in<strong>for</strong>mation, see Power supply specifications on page 107.<br />
Choosing an expansion card slot<br />
Whenever possible, use the following tips to help you select the proper slot <strong>for</strong> an expansion card:<br />
● Use the PCIe x16 slot <strong>for</strong> the primary graphics card. If you do not use this slot <strong>for</strong> the graphics<br />
card, only cards certified as After Market Options are supported.<br />
● Install a second graphics card in the other PCIe x16 slot.<br />
● Install a card in a slot that most closely matches its interface technology:<br />
◦ Install a PCIe Gen1 x16 or a PCIe Gen1 x8 card in the PCIe Gen2 x16 slot.<br />
◦ Install a PCIe Gen1 x4 card in the PCIe Gen1 x4 slot.<br />
◦ Install a PCIe Gen1 x1 card in the PCIe Gen1 x1 slot.<br />
◦ Install a PCI card in the PCI slot.<br />
◦ Whenever possible, install a PCIe x1 card in an x1 slot.<br />
● Leave as much space as possible between cards (especially graphics cards) to allow heat to<br />
dissipate more efficiently.<br />
● For best operational efficiency, select a slot that:<br />
◦ Electrically matches the number of PCIe card lanes (<strong>for</strong> example, x1 in an x1 slot).<br />
◦ Has more lanes electrically.<br />
◦ Has fewer lanes, but is closer to your needs. For example, place an x16 card in an x4 slot,<br />
and an x4 card in a an x1 slot.<br />
● An x1 connector supports an x1 card only. While an x1 card can be inserted into a larger slot,<br />
this may limit potential future card placement.<br />
84 Chapter 3 Component Replacement In<strong>for</strong>mation and Guidelines
<strong>HP</strong> Z220 SFF <strong>Workstation</strong> slot identification and description<br />
Maximum power used by all slots must not exceed total system power and is subject to configuration<br />
limitations.<br />
Figure 3-1 Identifying expansion card slots<br />
Table 3-1 PCI slots<br />
Slot Type Mechanical compatibility Electrical compatibility<br />
1 PCIe2 x1 x1 x1<br />
2 PCIe2 x16 (4) x16 x4<br />
3 PCIe3 x16 x16 x16<br />
4 PCI 32/33 PCI PCI<br />
NOTE: The PCIe designators indicate the mechanical connector size and number of electrical PCIe<br />
lanes routed to an expansion slot. For example, x16 (8) means that the expansion slot is mechanically<br />
a x16 length connector, with 8 PCIe lanes supported.<br />
<strong>HP</strong> Z220 SFF <strong>Workstation</strong> installation sequence recommendations<br />
Table 3-2 Slot Installation sequence<br />
Load<br />
order<br />
Card description Slot 1 Slot 2 Slot 3 Slot 4<br />
1 PCIe graphic card Only<br />
2 Second PCIe graphic card Only<br />
3 PCIe audio card 1st 2nd<br />
4 PCIe NIC card 1st 2nd<br />
5 PCIe 1394a card 1st 2nd<br />
6 PCIe Wireless card 1st 2nd<br />
7 Second serial port kit 1st 2nd<br />
8 Parallel port kit 1st 2nd<br />
9 eSATA bulkhead kit 1st 2nd 3rd<br />
NOTE: Slot sequenced from the rear I/O aperture to the board edge.<br />
Component replacement guidelines 85
<strong>HP</strong> Z220 CMT <strong>Workstation</strong> slot identification and description<br />
Maximum power used by all slots must not exceed total system power and is subject to configuration<br />
limitations.<br />
Figure 3-2 Identifying expansion card slots<br />
1<br />
2<br />
3<br />
4<br />
5<br />
6<br />
7<br />
Table 3-3 PCI slots<br />
Slot Type Mechanical compatibility Electrical compatibility<br />
1 PCIe2 x8 (4) x8 x4<br />
2 PCIe3 x16 x16 x16<br />
3 PCIe2 x1 x1 x1<br />
4 PCIe2 x16 (4) x16 x4<br />
5 PCIe2 x1 x1 x1<br />
6 PCI 32/33 PCI PCI<br />
7 PCI 32/33 PCI PCI<br />
NOTE: The PCIe designators indicate the mechanical connector size and number of electrical PCIe<br />
lanes routed to an expansion slot. For example, x16 (8) means that the expansion slot is mechanically<br />
a x16 length connector, with 8 PCIe lanes supported.<br />
Slot two is the primary graphics slot; slot four is the secondary graphics slot.<br />
Slots one, two, and four use open-ended PCIe connectors, so a PCIe x16 card can be inserted.<br />
Graphics cards greater than 75 watts require the use of an auxiliary power cable adapter.<br />
86 Chapter 3 Component Replacement In<strong>for</strong>mation and Guidelines
<strong>HP</strong> Z220 CMT <strong>Workstation</strong> installation sequence recommendations<br />
Table 3-4 Slot installation sequence<br />
Load<br />
order<br />
Card description Slot 1 Slot 2 Slot 3 Slot 4 Slot 5 Slot 6 Slot 7<br />
1 PCIe graphic card Only<br />
2 Second PCIe graphic card Only<br />
3 PCIe NIC card 1st 3rd 2nd<br />
4 PCIe 1394 card 1st 3rd 2nd<br />
5 PCIe USB3.0 card 1st 2nd<br />
6 PCIe audio card 1st 2nd 3rd<br />
7 eSATA bulkhead kit 3rd 2nd 1st<br />
8 Parallel port kit Only<br />
9 Second serial port kit 2nd 1st<br />
NOTE: Slot sequenced from the rear I/O aperture to the board edge.<br />
Component replacement guidelines 87
<strong>HP</strong> Z420 <strong>Workstation</strong> slot identification and description<br />
Maximum power used by all slots must not exceed total system power and is subject to configuration<br />
limitations.<br />
Figure 3-3 Identifying expansion card slots<br />
Table 3-5 PCI slots<br />
Slot Type Mechanical compatibility Electrical compatibility<br />
1 PCIe2 x4 (1) x4 x1<br />
2 PCIe3 - x16 x16 x16<br />
3 PCIe2 - x8 (4) x8 x4<br />
4 PCIe3 x8 x8 x8<br />
5 PCIe3 x16 x16 x16<br />
6 PCI 32/33 PCI PCI<br />
NOTE: The PCIe designators indicate the mechanical connector size and number of electrical PCIe<br />
lanes routed to an expansion slot. For example, x16 (8) means that the expansion slot is mechanically<br />
a x16 length connector, with 8 PCIe lanes supported.<br />
Slot two is the primary graphics slot; slot five is the secondary graphics slot.<br />
Slots one, three, and four use open-ended PCIe connectors, so a PCIe x16 card can be inserted.<br />
Graphics cards greater than 75 watts require the use of an auxiliary power cable adapter.<br />
88 Chapter 3 Component Replacement In<strong>for</strong>mation and Guidelines
<strong>HP</strong> Z420 <strong>Workstation</strong> installation sequence recommendations<br />
Table 3-6 Slot installation sequence<br />
Load<br />
order<br />
Card description Slot 1 Slot 2 Slot 3 Slot 4 Slot 5 Slot 6<br />
1 First PCIe graphic card Only<br />
2<br />
Second PCIe graphic card<br />
or Tesla C2075<br />
3 Third PCIe graphic card Only<br />
4 Fourth PCIe graphic card Only<br />
5 SAS card 2nd 1st 3rd<br />
6 PCIe 1394b card 1st 2nd<br />
7 PCIe audio card 1st 2nd 3rd 4th<br />
8 PCIe NIC card (LAN) 1st 2nd 3rd 4th<br />
9 e-SATA bulkhead kit 2nd 3rd 1st<br />
10 Second serial port kit 2nd 3rd 1st<br />
NOTE: Slot sequenced from the rear I/O aperture to the board edge.<br />
Only<br />
Component replacement guidelines 89
<strong>HP</strong> <strong>Z620</strong> <strong>Workstation</strong> slot identification and description<br />
Maximum power used by all slots must not exceed total system power and is subject to configuration<br />
limitations.<br />
Figure 3-4 Identifying expansion card slots<br />
NOTE: Slot 1 is not available in dual processor configurations.<br />
Table 3-7 PCI slots<br />
Slot Type Mechanical compatibility Electrical compatibility<br />
1 PCIe2 x4 (1) x4 x1<br />
2 PCIe3 - x16 x16 x16<br />
3 PCIe2 - x8 (4) x8 x4<br />
4 PCIe3 x8 x8 x8<br />
5 PCIe3 x16 x16 x16<br />
6 PCI 32/33 PCI PCI<br />
NOTE: The PCIe designators indicate the mechanical connector size and number of electrical PCIe<br />
lanes routed to an expansion slot. For example, x16 (8) means that the expansion slot is mechanically<br />
a x16 length connector, with 8 PCIe lanes supported.<br />
NOTE: Slots two, four, and five are PCIe GEN3 slots. Slot two is the primary graphics slot; slot five is<br />
the secondary graphics slot.<br />
Slots three and four use open-ended PCIe connectors, so a PCIe x16 card can be inserted. This allows<br />
the workstation to support more PCIe x16 expansion cards. A x16 card typically trains and runs at the<br />
maximum lane width available by the expansion slot. The card runs at the reduced lane width, with a<br />
corresponding per<strong>for</strong>mance decrease. Graphics cards greater than 75 watts require the use of an<br />
auxiliary power cable adapter.<br />
90 Chapter 3 Component Replacement In<strong>for</strong>mation and Guidelines
<strong>HP</strong> <strong>Z620</strong> <strong>Workstation</strong> installation sequence recommendations<br />
Table 3-8 Slot installation sequence<br />
Load<br />
order<br />
1<br />
Card description Slot 1 Slot 2 Slot 3 Slot 4 Slot 5 Slot 6<br />
Second System Board<br />
(Riser)<br />
Only<br />
2 First PCIe graphic card Only<br />
3<br />
Second PCIe graphic card<br />
or High Per<strong>for</strong>mance GPU<br />
Compute card<br />
4 PCIe 1394b card Only<br />
5 Third PCIe Graphics card Only<br />
6 Fourth PCIe Graphics card Only<br />
7 Controller card 1st 2nd 3rd<br />
8 PCIe audio card 4th 1st 2nd 3rd<br />
9 PCIe Network (LAN) card 4th 1st 2nd 3rd<br />
10 eSATA bulkhead kit 4th 1st 2nd 3rd<br />
11 Serial port bulkhead 3rd 2nd 1st<br />
NOTE: Slot sequenced from the rear I/O aperture to the board edge.<br />
Only<br />
Component replacement guidelines 91
<strong>HP</strong> Z820 <strong>Workstation</strong> slot identification and description<br />
Maximum power used by all slots must not exceed total system power and is subject to configuration<br />
limitations.<br />
Figure 3-5 Identifying expansion card slots<br />
Table 3-9 Expansion card slot description and compatibility<br />
1<br />
2<br />
3<br />
4<br />
5<br />
6<br />
7<br />
Slot Type Mechanical compatibility Electrical compatibility<br />
1 PCIe3 x8 (4) — CPU0 x8 x4<br />
2 PCIe3 x16 — CPU0 x16 x16<br />
3 PCIe3 x16 (8) — CPU1 x16 x8<br />
4 PCIe3 x16 — CPU1 x16 x16<br />
5 PCIe2 x8 (4) — CPU0 x8 x4<br />
6 PCIe3 x16 — CPU0 x16 x16<br />
7 PCI 32/33 — CPU0 PCI PCI<br />
NOTE: The PCIe designators indicate the mechanical connector size and number of electrical PCIe<br />
lanes routed to an expansion slot. For example, x16(8) means that the expansion slot is mechanically a<br />
x16 length connector, with 8 PCIe lanes supported.<br />
NOTE: Slots one and five use open-ended PCIe connectors, so a PCIe x16 card can inserted. This<br />
allows the workstation to support more PCIe x16 expansion cards. A x16 card typically trains and runs<br />
at the maximum lane width available by the expansion slot. The card runs at the reduced lane width,<br />
with a corresponding per<strong>for</strong>mance decrease.<br />
NOTE: A eighth slot opening in the chassis has no corresponding expansion connector on the system<br />
board. This slot opening is provided <strong>for</strong> devices that do not require system board card plug-in<br />
capability.<br />
NOTE: It is normal <strong>for</strong> the expansion card retention clamp to have a slight (5-10 degree) angle when<br />
closed. If the angle is greater than this, open the clamp and ensure that all cards are properly seated<br />
and all the brackets are mated to the chassis, then re-close the clamp.<br />
92 Chapter 3 Component Replacement In<strong>for</strong>mation and Guidelines
<strong>HP</strong> Z820 <strong>Workstation</strong> installation sequence recommendations<br />
Table 3-10 Slot installation sequence<br />
Load<br />
order<br />
1<br />
2<br />
Card description Type<br />
1st high per<strong>for</strong>mance GPU<br />
Compute card<br />
2nd high per<strong>for</strong>mance<br />
GPU Compute card<br />
(requires 2nd CPU and<br />
1125w PSU)<br />
3 1st PCIe graphics card<br />
4 2nd PCIe graphics card<br />
5<br />
6<br />
3rd PCIe graphics<br />
(requires 2nd CPU)<br />
4th PCIe graphics<br />
(requires 2nd CPU and<br />
1125w PSU)<br />
7 Graphics test card<br />
8 Controller card<br />
9<br />
10<br />
11<br />
12<br />
Controller card with<br />
battery<br />
PCIex16<br />
PCIex16<br />
PCIex16<br />
PCIex16<br />
PCIex16<br />
PCIex16<br />
PCIex16<br />
PCIex8<br />
PCIex8<br />
PCIe 1394 card PCIex1<br />
PCIe audio card PCIex1<br />
PCIe Network (LAN) PCIex1<br />
Slot<br />
0<br />
Slot<br />
1<br />
Slot<br />
2<br />
Only<br />
* Slot<br />
3<br />
* Slot<br />
4<br />
Slot 5 Slot 6<br />
2nd 1st 1<br />
Only<br />
2nd 1st<br />
Only<br />
1st 2nd<br />
2nd 1st 1<br />
2nd 5th 4th 3rd 1st 2<br />
2nd 5th 4th 3rd 1st 2<br />
Only<br />
1st 4th 5th 2nd 3rd<br />
1st 4th 5th 2nd 3rd<br />
13 Mini SAS-4x bulkhead kit N/A 1st 2nd<br />
14 eSATA bulkhead kit N/A 1st 2nd<br />
* Slots 3 and 4 require second CPU.<br />
1: If a second graphics card is used with a High Per<strong>for</strong>mance GPU Compute card, place the High Per<strong>for</strong>mance GPU<br />
Compute card in Slot 6 and the second graphics in the alternate slot(s).<br />
2: If a Controller card is being used with a High Per<strong>for</strong>mance GPU Compute card or second graphics card, place the<br />
High Per<strong>for</strong>mance GPU Compute card/graphics card in Slot 6 and the RAID card in the alternate slot(s).<br />
NOTE: Slot sequenced from the rear I/O aperture to the board edge.<br />
Slot<br />
7<br />
Component replacement guidelines 93
Hard disk drives and optical disc drives<br />
Carefully handle hard disk drives<br />
CAUTION: Take proper precautions when handling hard disk drives to prevent loss of work and<br />
damage to the computer or drive.<br />
● Do not remove hard drives from the shipping package <strong>for</strong> storage. Keep hard drives in their<br />
protective packaging until they are mounted in the computer.<br />
● Always shut down the operating system, turn off the power, and unplug the power cord. Never<br />
remove a drive while the computer is on or in standby mode.<br />
● Be<strong>for</strong>e handling a drive, make sure you discharge static electricity. While handling a drive, avoid<br />
touching the connector.<br />
● Handle a drive carefully. Do not drop it from any height.<br />
● To prevent possible ESD damage when the drive is installed, connect the drive power cable be<strong>for</strong>e<br />
connecting the data cable. This discharges accumulated static electricity through the drive power<br />
cable to the computer chassis.<br />
● Do not use excessive <strong>for</strong>ce when inserting a drive.<br />
● Avoid exposing a hard drive to liquids, temperature extremes, or products that have magnetic<br />
fields such as monitors or speakers.<br />
● If you must mail a drive, use a bubble-pack mailer or other protective packaging and label the<br />
package “Fragile: Handle With Care.”<br />
Removal and replacement tips<br />
● To verify the type, size, and capacity of the storage devices installed in the computer, run the<br />
Computer Setup (F10) Utility.<br />
● Adding a new drive may require that you make new connections from the drive to the system<br />
board. Note that:<br />
◦ The primary Serial ATA (SATA) hard drive must be connected to the dark blue primary SATA<br />
connector on the system board labeled SATA0.<br />
◦ Connect a secondary hard drive to SATA.<br />
◦ Connect SATA optical drives to the black SATA2 connector.<br />
◦ Connect an optional eSATA adapter cable to the black ESATA connector on the system<br />
board.<br />
◦ Connect a media card reader USB cable to the USB connector on the system board labeled<br />
MEDIA. If the media card reader has a 1394 port, connect the 1394 cable to the 1394 PCI<br />
card.<br />
94 Chapter 3 Component Replacement In<strong>for</strong>mation and Guidelines
Drive installation and cabling scenarios<br />
This section presents cabling guidelines <strong>for</strong> the most common maximum storage configurations. If you<br />
add or remove drives, <strong>HP</strong> recommends you follow these guidelines <strong>for</strong> highest drive per<strong>for</strong>mance and<br />
efficient cable routing.<br />
<strong>HP</strong> Z220 SFF <strong>Workstation</strong>s — SATA cable connection guidelines<br />
Configuration /<br />
PCA SATA<br />
connector<br />
SATA 0 SATA 1 SATA 2 SATA 4<br />
HDD x1 ODD x1 1st HDD 1st ODD e-SATA<br />
HDD x2 ODD x1 1st HDD 2nd HDD 1st ODD e-SATA<br />
<strong>HP</strong> Z220 CMT <strong>Workstation</strong>s — SATA cable connection guidelines<br />
Table 3-11 SATA cable connection guidelines<br />
Configuration / PCA<br />
SATA connector<br />
SATA 0 SATA 1 SATA 2 SATA 3 SATA 4 SATA 5<br />
HDD x1 ODD x1 1st HDD 1st ODD e-SATA<br />
HDD x1 ODD x2 1st HDD 1st ODD 2nd ODD e-SATA<br />
HDD x2 ODD x1 1st HDD 2nd HDD 1st ODD e-SATA<br />
HDD x2 ODD x2 1st HDD 2nd HDD 1st ODD 2nd ODD e-SATA<br />
HDD x3 ODD x1 1st HDD 2nd HDD 3rd HDD 1st ODD e-SATA<br />
HDD x3 ODD x2 1st HDD 2nd HDD 3rd HDD 1st ODD 2nd ODD e-SATA<br />
Component replacement guidelines 95
<strong>HP</strong> Z420 <strong>Workstation</strong>s — Intel AHCI SATA controller guidelines<br />
See <strong>HP</strong> Z420 <strong>Workstation</strong> system board components on page 19 to determine the location of system<br />
board connectors.<br />
NOTE: Port 0 is the default port <strong>for</strong> the boot drive (the default port can be changed manually in the<br />
BIOS).<br />
System board<br />
connector<br />
Drive configuration scenarios<br />
1 2 3 4<br />
SATA 0 SATA HDD 1 SATA HDD 1 SATA HDD 1 SATA HDD 1<br />
SATA 1 SATA HDD 2 SATA HDD 2 SATA HDD 2 SATA HDD 2<br />
SATA 2 ODD 1 ODD 1 ODD 1 ODD 1<br />
SATA 3 ODD 2 SATA HDD 3 SATA HDD 3 SATA HDD 3<br />
SATA 4 eSATA (top) ODD 2 SATA HDD 4 eSATA (top)<br />
SATA 5 eSATA (bottom) — ODD 2 eSATA (bottom)<br />
SCU 0 — — — —<br />
SCU 1 — — — —<br />
SCU 2 — — — —<br />
SCU 3 — — — —<br />
eSATA = external SATA (2 ports per cable assembly)<br />
HDD = hard disk drive<br />
ODD = optical disc drive<br />
NOTE: Only the most common configurations are shown here.<br />
96 Chapter 3 Component Replacement In<strong>for</strong>mation and Guidelines
<strong>HP</strong> Z420 <strong>Workstation</strong>s — LSI 9212-4i RAID controller guidelines<br />
See <strong>HP</strong> Z420 <strong>Workstation</strong> system board components on page 19 to determine the location of system<br />
board connectors.<br />
NOTE: Hard disk drives attached to RC J8 are designated by the 9212-4i BIOS to be boot devices. If<br />
the hard disk drive connected to RC J8 is a member of a RAID array, the RAID array is the boot device.<br />
RAID card (RC) or<br />
system board (SB)<br />
connector<br />
Drive installation scenarios<br />
1 2 3<br />
RC J8 SAS HDD 1 SAS HDD 1-B SATA HDD 1-B<br />
RC J7 SAS HDD 2 SATA HDD 2-D SAS HDD 2-D<br />
RC J6 SAS HDD 3 SATA HDD 3-D SAS HDD 3-D<br />
RC J5 SAS HDD 4 SATA HDD 4-D SAS HDD 4-D<br />
SB SATA 0 — — —<br />
SB SATA 1 — — —<br />
SB SATA 2 ODD 1 ODD 1 ODD 1<br />
SB SATA 3 ODD 2 ODD 2 ODD 2<br />
SB SATA 4 eSATA (top) eSATA (top) eSATA (top)<br />
SB SATA 5 eSATA (bottom) eSATA (bottom) eSATA (bottom)<br />
SB SCU 0 — — —<br />
SB SCU 1 — — —<br />
SB SCU 2 — — —<br />
SB SCU 3 — — —<br />
eSATA = external SATA (2 ports per cable assembly)<br />
HDD = hard disk drive<br />
ODD = optical disc drive<br />
NOTE: Only the most common configurations are shown here.<br />
Component replacement guidelines 97
<strong>HP</strong> <strong>Z620</strong> <strong>Workstation</strong>s — Intel AHCI SATA controller guidelines<br />
See <strong>HP</strong> <strong>Z620</strong> <strong>Workstation</strong> system board components on page 26 to determine the location of system<br />
board connectors.<br />
NOTE: Port 0 is the default port <strong>for</strong> the boot drive (the default port can be changed manually in the<br />
BIOS).<br />
System board<br />
connector<br />
Drive installation scenarios<br />
1 2 3<br />
SATA 0 SATA HDD 1 SATA HDD 1 SATA HDD 1<br />
SATA 1 SATA HDD 2 SATA HDD 2 SATA HDD 2<br />
SATA 2 ODD 1 ODD 1 ODD 1<br />
SATA 3 SATA HDD 3 SATA HDD 3 SATA HDD 3<br />
SATA 4 SATA HDD 4 ODD 2 eSATA (top)<br />
SATA 5 — — eSATA (bottom)<br />
SCU 0 — — —<br />
SCU 1 — — —<br />
SCU 2 — — —<br />
SCU 3 — — —<br />
eSATA = external SATA (2 ports per cable assembly)<br />
HDD = hard disk drive<br />
ODD = optical disc drive<br />
NOTE: If there are fewer than three hard drives in the configuration, the cables from HDD bays 1 and 2<br />
are pre-plugged to the system board SATA ports.<br />
NOTE: Only the most common configurations are shown here.<br />
98 Chapter 3 Component Replacement In<strong>for</strong>mation and Guidelines
<strong>HP</strong> <strong>Z620</strong> <strong>Workstation</strong>s — LSI 9212-4i RAID controller guidelines<br />
See <strong>HP</strong> <strong>Z620</strong> <strong>Workstation</strong> system board components on page 26 to determine the location of system<br />
board connectors.<br />
NOTE: Hard disk drives attached to RC J8 are designated by the 9212-4i BIOS to be boot devices. If<br />
the hard disk drive connected to RC J8 is a member of a RAID array, the RAID array is the boot device.<br />
RAID card connector<br />
(RC) or system board<br />
connector (SB)<br />
Drive installation scenarios<br />
1 2 3<br />
RC J8 SAS HDD 1 SAS HDD 1-B SATA HDD 1-B<br />
RC J7 SAS HDD 2 SATA HDD 2-D SAS HDD 2-D<br />
RC J6 SAS HDD 3 SATA HDD 3-D SAS HDD 3-D<br />
RC J5 SAS HDD 4 SATA HDD 4-D SAS HDD 4-D<br />
SB SATA 0 — — —<br />
SB SATA 1 — — —<br />
SB SATA 2 ODD 1 ODD 1 ODD 1<br />
SB SATA 3 ODD 2 ODD 2 ODD 2<br />
SB SATA 4 eSATA (top) eSATA (top) eSATA (top)<br />
SB SATA 5 eSATA (bottom) eSATA (bottom) eSATA (bottom)<br />
SB SCU 0 — — —<br />
SB SCU 1 — — —<br />
SB SCU 2 — — —<br />
SB SCU 3 — — —<br />
eSATA = external SATA (2 ports per cable assembly)<br />
HDD = hard disk drive<br />
ODD = optical disc drive<br />
NOTE: If there are fewer than three hard drives in the configuration, the cables from HDD bays 1 and 2<br />
are pre-plugged to the RAID card adapter ports.<br />
NOTE: Only the most common configurations are shown here.<br />
Component replacement guidelines 99
<strong>HP</strong> Z820 <strong>Workstation</strong> cabling guidelines<br />
See <strong>HP</strong> Z820 <strong>Workstation</strong> system board components on page 33 to determine the location of system<br />
board connectors.<br />
NOTE: Port 0 is the default port <strong>for</strong> the boot drive (the default port can be changed manually in the<br />
BIOS).<br />
System board<br />
connector<br />
Drive configuration scenarios<br />
1 2 3 4<br />
5<br />
SATA RAID<br />
5 only<br />
6<br />
SATA RAID<br />
5 only<br />
SAS 0 HDD 1 HDD 1 eSAS 2 HDD 1 — —<br />
SAS 1 HDD 2 HDD 2 eSAS 2 HDD 2 — —<br />
SAS 2 HDD 3 HDD 3 eSAS 2 HDD 3 — —<br />
SAS 3 HDD 4 HDD 4 eSAS 2 HDD 4 — —<br />
SAS 4 HDD 5 eSAS 1 eSAS 1 HDD 5 — —<br />
SAS 5 HDD 6 eSAS 1 eSAS 1 HDD 6 — —<br />
SAS 6 — eSAS 1 eSAS 1 ODD 1 ODD 1 —<br />
SAS 7 — eSAS 1 eSAS 1 ODD 2 ODD 2 —<br />
SATA 0 ODD 1 ODD 1 ODD 1 eSATA eSATA ODD 1<br />
SATA 1 ODD 2 ODD 2 ODD 2 eSATA eSATA ODD 2<br />
SCU 0 — — HDD 1 — HDD 1 HDD 1<br />
SCU 1 — — HDD2 — HDD 2 HDD 2<br />
SCU 2 — — HDD3 — HDD 3 HDD 3<br />
SCU 3 — — HDD4 — HDD 4 HDD 4<br />
eSAS 1 / eSAS 2 = external SAS (<strong>HP</strong> external SAS back panel or PCI bracket – 4 ports per cable assembly)<br />
eSATA = external SATA (2 ports per cable assembly)<br />
HDD = SATA or SAS hard disk drive<br />
ODD = optical disc drive<br />
NOTE: Only the most common configurations are shown here.<br />
100 Chapter 3 Component Replacement In<strong>for</strong>mation and Guidelines
Memory<br />
<strong>Support</strong>ed DIMM configurations<br />
NOTE: Mirroring and DIMM sparing are not supported.<br />
Table 3-12 <strong>Support</strong>ed DIMM configurations<br />
Plat<strong>for</strong>m Configuration<br />
<strong>HP</strong> Z220 SFF<br />
<strong>HP</strong> Z220 CMT<br />
<strong>HP</strong> Z420<br />
<strong>HP</strong> <strong>Z620</strong><br />
<strong>HP</strong> Z820<br />
● Four DIMM slots<br />
● Unbuffered ECC/nECC DIMMS only<br />
● Maximum capacity: 32 GB<br />
● Four DIMM slots<br />
● Unbuffered ECC/nECC DIMMS only<br />
● Maximum capacity: 32 GB<br />
● Eight DIMM slots<br />
● Unbuffered ECC DIMMS only<br />
● Maximum capacity: 64 GB<br />
● Eight DIMM slots (single CPU) or 12 DIMM slots (dual CPU)<br />
● Unbuffered or registered ECC DIMMS<br />
● Maximum capacity: 64 GB (single CPU), 96 GB (dual CPU)<br />
● In dual processor configurations, the workstation can be configured <strong>for</strong> NUMA or non-NUMA<br />
modes<br />
● 16 DIMM slots<br />
● Both Unbuffered ECC and Registered DIMMs<br />
● Maximum capacity: 512 GB<br />
● In dual processor configurations, the workstation can be configured <strong>for</strong> NUMA or non-NUMA<br />
modes<br />
Component replacement guidelines 101
BIOS errors and warnings<br />
The BIOS generates warnings/errors on invalid memory configurations:<br />
● If the BIOS can find a valid memory configuration by disabling plugged-in memory, it does so and<br />
reports a warning during POST. the workstation can still be started. The warning will indicate the<br />
location of the failed DIMM on the system board.<br />
● If there is no way <strong>for</strong> the BIOS to obtain a valid memory configuration by disabling plugged-in<br />
memory, the BIOS halts with a diagnostics 2006 code <strong>for</strong> memory error (five beeps and blinks).<br />
DIMM installation guidelines<br />
● Install only <strong>HP</strong>-approved DDR3 DIMMs<br />
CAUTION: <strong>HP</strong> ships only DIMMs that are electrically and thermally compatible with this<br />
workstation. Because third-party DIMMs might not be electrically or thermally compatible, they are<br />
not supported by <strong>HP</strong>.<br />
● Install only <strong>HP</strong>-approved DDR3 DIMMs. See http://www.hp.com/go/quickspecs to find DIMMs<br />
that are compatible with the workstation.<br />
● Do not intermix DIMMs of different technologies. ECC Unbuffered DIMMs (UDIMMs), Registered<br />
DIMMs (RDIMMs), and Load Reduced DIMMs (LRDIMMs) are supported on <strong>HP</strong> Z series<br />
<strong>Workstation</strong>s. <strong>Support</strong>ed DIMM configurations on page 101 specifies which technologies are<br />
supported on each plat<strong>for</strong>m.<br />
CAUTION: DIMMs and their sockets are keyed <strong>for</strong> proper installation. To prevent socket or DIMM<br />
damage, align these guides properly when installing DIMMs.<br />
102 Chapter 3 Component Replacement In<strong>for</strong>mation and Guidelines
<strong>HP</strong> Z220 SFF <strong>Workstation</strong> DIMM installation order<br />
Install DIMMs in this order.<br />
NOTE: If you install DIMMs of different sizes, load them in order of size, starting with largest and<br />
finishing with the smallest (largest in DIMM 1, smallest in last loaded DIMM).<br />
Figure 3-6 DIMM installation order<br />
<strong>HP</strong> Z220 CMT <strong>Workstation</strong> DIMM installation order<br />
Install DIMMs in this order.<br />
NOTE: If you install DIMMs of different sizes, load them in order of size, starting with largest and<br />
finishing with the smallest (largest in DIMM 1, smallest in last loaded DIMM).<br />
Figure 3-7 DIMM installation order<br />
Component replacement guidelines 103
<strong>HP</strong> Z420 <strong>Workstation</strong> DIMM installation order<br />
Install DIMMs in this order.<br />
NOTE: If you install DIMMs of different sizes, load them in order of size, starting with largest and<br />
finishing with the smallest (largest in DIMM 1, smallest in last loaded DIMM).<br />
Figure 3-8 DIMM installation order<br />
104 Chapter 3 Component Replacement In<strong>for</strong>mation and Guidelines
<strong>HP</strong> <strong>Z620</strong> <strong>Workstation</strong> DIMM installation order<br />
Install DIMMs in this order.<br />
NOTE: If you install DIMMs of different sizes, load them in order of size, starting with largest and<br />
finishing with the smallest (largest in DIMM 1, smallest in last loaded DIMM).<br />
Figure 3-9 Single processor DIMM installation order<br />
Figure 3-10 Dual processor DIMM installation order<br />
Component replacement guidelines 105
<strong>HP</strong> Z820 <strong>Workstation</strong> DIMM installation order<br />
Install DIMMs in this order.<br />
NOTE: If you install DIMMs of different sizes, load them in order of size, starting with largest and<br />
finishing with the smallest (largest in DIMM 1, smallest in last loaded DIMM).<br />
Figure 3-11 Single-processor DIMM installation order<br />
Figure 3-12 Dual-processor DIMM installation order<br />
106 Chapter 3 Component Replacement In<strong>for</strong>mation and Guidelines
Power supply<br />
Power supply specifications<br />
All power supplies have these specifications:<br />
● Wide-ranging, active Power Factor Correction (PFC)<br />
● ENERGY STAR® qualified (configuration dependent)<br />
● FEMP Standby Power compliant @115V (
Table 3-13 Power supply specifications (continued)<br />
Heat<br />
dissipation,<br />
maximum<br />
(configuration<br />
and software<br />
dependent)<br />
Power supply<br />
fan<br />
All fans are<br />
variable speed<br />
Built-in Self Test<br />
LED<br />
Power<br />
Consumption in<br />
sleep mode (as<br />
defined by<br />
ENERGY STAR)<br />
80 PLUS<br />
certification<br />
Z220 SFF Z220 CMT Z420 <strong>Z620</strong> Z820<br />
646.6 btu/hr<br />
(163.0 kcal/<br />
hr)<br />
One fan,<br />
92mm x 25mm<br />
899.1 btu/hr<br />
(226.6 kcal/<br />
hr)<br />
One fan,<br />
92mm x 25mm<br />
2354 btu/hr<br />
(593.2 kcal/hr)<br />
One fan,<br />
92mm x 25mm<br />
3139 btu/hr<br />
(791 kcal/hr)<br />
One fan,<br />
92mm x 25mm<br />
Max: 3335<br />
btu/hr (840<br />
kcal/hr)<br />
Two fans,<br />
80mm x 25mm<br />
Max1: 3878<br />
btu/hr (977<br />
kcal/hr)<br />
Max2: 5002<br />
btu/hr (1260<br />
kcal/hr)<br />
Two fans,<br />
80mm x<br />
25mm<br />
No Yes Yes Yes Yes Yes<br />
Power consumption and heat dissipation<br />
Power consumption and heat dissipation specifications are available <strong>for</strong> multiple configurations. To<br />
review available specifications, see http://www.hp.com/go/quickspecs.<br />
To reach zero power consumption, unplug the workstation from the power outlet or use a power strip<br />
with an on/off switch. For additional in<strong>for</strong>mation about power-saving features, see the operating system<br />
installation instructions.<br />
This product is in compliance with U.S. Executive Order 13221.<br />
Resetting the power supply<br />
If an overload triggers the power supply overload protection, power is immediately disconnected.<br />
To reset the power supply:<br />
1. Disconnect the power cord from the workstation.<br />
2. Determine what caused the overload and fix the problem. For troubleshooting in<strong>for</strong>mation, see<br />
Diagnostics and troubleshooting on page 115.<br />
3. Reconnect the power cord and restart the workstation.<br />
When you power off the workstation through the operating system, power consumption falls below<br />
what is considered low power consumption but does not reach zero. This low power consumption<br />
feature extends the life of the power supply.<br />
System board<br />
If you replace the system board:<br />
● Make a note of the cable connections be<strong>for</strong>e disconnecting them from the system board.<br />
● Follow good cable management practices. See Cable management on page 82.<br />
The following tables show system cabling <strong>for</strong> the workstations.<br />
Component replacement guidelines 109
System cabling<br />
<strong>HP</strong> Z220 SFF <strong>Workstation</strong> system cabling<br />
See <strong>HP</strong> Z220 SFF <strong>Workstation</strong> components on page 1 to determine the location of system board<br />
connectors.<br />
Cable To<br />
Cable designator on system<br />
board<br />
PSU cable PCA (Main power) P1 (White)<br />
PSU cable PCA (PWR COMM) P2 (White)<br />
SATA power cable PCA (CPU power) P3 (White)<br />
SATA power cable HDD/ODD P160 (Black)<br />
SATA power cable First HDD D4<br />
SATA power cable First ODD D6<br />
Speaker PCA P6 (White)<br />
Cooler fan cable PCA P9 (Brown)<br />
Front audio cable PCA P23 (Blue)<br />
LED/Power button cable PCA P5 (Black)<br />
Front USB 2.0 cable-1 PCA P24 (Yellow)<br />
Front USB 2.0 cable-2 PCA P25 (Green)<br />
Serial cable PCA P52<br />
Chassis solenoid lock PCA P124<br />
SATA cable First HDD P60 (Blue)<br />
SATA cable Second HDD P61 (Blue)<br />
SATA cable First ODD P62 (Black)<br />
SATA power cable First HDD D4<br />
SATA power cable Second HDD D5<br />
SATA power cable First ODD D6<br />
eSATA bracket cable<br />
(optional)<br />
First External SATA device P64 (black)<br />
110 Chapter 3 Component Replacement In<strong>for</strong>mation and Guidelines
<strong>HP</strong> Z220 CMT <strong>Workstation</strong> system cabling<br />
See <strong>HP</strong> Z220 CMT <strong>Workstation</strong> system board component on page 12 to determine the location of<br />
system board connectors.<br />
Cable To<br />
PSU cable PCA (Main Power) P1 (White)<br />
PSU cable PCA (CPU Power) P3 (White)<br />
PSU cable First hard drive (Bay 6) P8 (Black)<br />
PSU cable Second hard drive (Bay 5) P9 (Black)<br />
PSU cable Third hard drive (Bay 4) P10 (Black)<br />
PSU cable First optical drive (Bay 1) P12 (Black)<br />
PSU cable Second optical drive (Bay 2) P13 (Black)<br />
PSU cable Other drive (Bay 3) P14 (White)<br />
PSU cable First graphics card P6 (Black)<br />
Speaker PCA P6 (White)<br />
Cooler fan cable PCA P71 (White)<br />
System fan cable PCA P8 (Brown)<br />
Front fan cable (optional) PCA P9 (Brown)<br />
Front audio cable PCA P28 (Black)<br />
Front LED/Power button<br />
cable<br />
PCA P5 (Black)<br />
Front USB 2.0/3.0 cable PCA P24 (Black)<br />
Serial cable (optional)<br />
Parallel cable (optional)<br />
PCA P52 (Black)<br />
PCA P126 (Black)<br />
Hood sense PCA P125 (White)<br />
Chassis solenoid lock PCA P124 (Black)<br />
SATA cable First HDD P60 (Blue)<br />
SATA cable Second HDD P61 (Blue)<br />
SATA cable Thrird HDD P62 (Black)<br />
SATA cable First ODD P63 (Black)<br />
SATA cable Second ODD P64 (Black)<br />
eSATA bracket cable<br />
(optional)<br />
First external SATA device P65 (Black)<br />
Cable designator on system<br />
board<br />
Component replacement guidelines 111
<strong>HP</strong> Z420 <strong>Workstation</strong> system cabling<br />
See <strong>HP</strong> Z420 <strong>Workstation</strong> system board components on page 19 to determine the location of system<br />
board connectors.<br />
Cable To<br />
Cable designator on system<br />
board<br />
PSU cable PCA (Main PWR) P1<br />
PSU cable PCA (PWR MEM) P2<br />
PSU cable First hard drive (Bay 6) D1<br />
PSU cable Second hard drive (Bay 5) D2<br />
PSU cable Third hard drive (Bay 4) D3<br />
PSU cable First optical drive (Bay 1) D4<br />
PSU cable Second optical drive (Bay 2) D5<br />
PSU cable Other drive (Bay 3) D6<br />
PSU cable First graphics card G1<br />
PSU cable Second graphics card G2<br />
Speaker PCA P6 (SPKR) white<br />
Cooler fan cable PCA P8 (CPU0 FAN) white<br />
System fan cable PCA P95 (REAR FAN) white<br />
Memory fan cable PCAx P92 (MEM FAN) white<br />
Front audio cable * PCA P28 (FRONT AUD) black<br />
Front 1394 cable PCA J12 1394,White<br />
LED/Power button cable PCA P5 (PB/LED) black<br />
Front USB 3.0 cable PCA P29 (USB 3.0) blue<br />
Front USB 2.0 cable PCA P27 (FRONT USB 2.0) yellow<br />
Media card reader PCA P24 (USB2) blue<br />
Front fan cable PCA P9 (FRNTFAN) white<br />
Second serial port PCA P52 (COM) black<br />
Chassis solenoid lock PCA P124 (SOL_LOCK) black<br />
Chassis Intrusion Sender PCA P125 (I_SENSE) white<br />
* If an audio card is installed, connect the front audio cable to the audio card connector.<br />
112 Chapter 3 Component Replacement In<strong>for</strong>mation and Guidelines
<strong>HP</strong> <strong>Z620</strong> <strong>Workstation</strong> system cabling<br />
See <strong>HP</strong> <strong>Z620</strong> <strong>Workstation</strong> system board components on page 26 to determine the location of system<br />
board connectors.<br />
Cable To Cable/system board designator<br />
PSU cable PCA P1(PWR) P1<br />
PSU cable PCA P2(PWRMEM) P2<br />
PSU cable First hard drive HDD BAY 0<br />
PSU cable Second hard drive HDD BAY 1<br />
PSU cable Third hard drive HDD BAY 2<br />
PSU cable First optical drive D1<br />
PSU cable Second optical drive D2<br />
PSU cable First graphic card G1<br />
PSU cable Second graphic card G2<br />
Speaker PCA Pre-connected to FUI cable<br />
CPU 0 HS fan cable PCA P8 (CPU 0 FAN) white<br />
Rear fans cable PCA P11 (REAR FANS) white<br />
MB memory fan cable PCA P91(MEM FAN) black blind-mate<br />
Front fan cable PCA P9 (FRNTFAN) white<br />
Front audio cable * PCA P28 (FRONT AUDIO) black<br />
Front USB3.0 cable PCA P29 (FRNT USB3) blue<br />
Front USB2.0 cable PCA P27 (FRNT USB2) yellow<br />
Front UI cable PCA P5(PB/LED) black<br />
Front 1394 cable PCA J12 (1394) white<br />
Media card reader PCA P24 (I-USB2.0) blue<br />
SAS card LED cable PCA P127 black<br />
eSATA external connection PCA<br />
P64 (SATA4) black, P65 (SATA5)<br />
black<br />
Hood lock cable PCA P124 (HOOD_LOCK) black<br />
Hood sensor cable PCA P2 on FUI Cable, white<br />
Serial option cable PCA P52 (COM) black<br />
Second CPU PCA memory<br />
fan cable<br />
Riser PCA P9 (MEM_FAN) black blind-mate<br />
* If an audio card is installed, connect the front audio cable to the audio card connector.<br />
Component replacement guidelines 113
<strong>HP</strong> Z820 <strong>Workstation</strong> system cabling<br />
See <strong>HP</strong> Z820 <strong>Workstation</strong> system board components on page 33 to determine the location of system<br />
board connectors.<br />
Cable To Cable/system board designator<br />
PSU cable (C1) PCA (P1) P1<br />
PSU cable (C3) PCA (P2) P2<br />
PSU cable (C3) PCA (P3) P3<br />
PSU cable (C3) PCA (P4) P4<br />
PSU cable (C2) Graphics card G1<br />
PSU cable (C2) Graphics card G2<br />
PSU cable (C2) Graphics card G3<br />
PSU cable (C1) Hard drive cable H1<br />
PSU cable (C1) Optical drive / hard drive D1 (SATA power)<br />
PSU cable (C1) Optical drive / hard drive D2 (SATA power)<br />
PSU cable (C1) Optical drive / hard drive D3 (SATA power)<br />
PSU cable (C1) Optical drive D4 (IDE power)<br />
PSU cable (C1) Optical drive D5 (IDE power)<br />
Front fan cable (top) PCA P94 (FRONT FAN 1) white<br />
Front fan cable (bottom) PCA P93 (FRONT FAN 2) white<br />
Rear fan cable PCA P8 (REAR FAN) white<br />
Front audio cable * PCA P28 (FRONT AUD) black<br />
Front 1394 cable PCA J13 (FRONT 1394) white<br />
Front UI cable cable PCA P5 (FRONT PANEL) black<br />
Front USB 2.0 cable PCA P27 (FRONT USB 2.0) yellow<br />
Front USB 3.0 cable PCA P29 (FRONT USB 3.0) blue<br />
* If an audio card is installed, connect the front audio cable to audio card connector.<br />
114 Chapter 3 Component Replacement In<strong>for</strong>mation and Guidelines
4 Diagnostics and troubleshooting<br />
This chapter describes the tools available <strong>for</strong> diagnosing and troubleshooting system issues, and<br />
includes these topics:<br />
Calling support on page 116<br />
Locating ID labels on page 117<br />
Topics<br />
Locating warranty in<strong>for</strong>mation on page 118<br />
Diagnosis guidelines on page 118<br />
Troubleshooting checklist on page 120<br />
<strong>HP</strong> troubleshooting resources and tools on page 121<br />
<strong>HP</strong> troubleshooting resources and tools on page 121<br />
Self-troubleshooting with <strong>HP</strong> Vision Diagnostics on page 135<br />
Self-troubleshooting with <strong>HP</strong> Advanced System Diagnostics UEFI<br />
on page 144<br />
Diagnostic codes and errors on page 149<br />
115
Calling support<br />
At times you might encounter an issue that requires support. When you call support:<br />
● Have the computer readily accessible.<br />
● Write down the computer serial numbers, product numbers, model names, and model numbers<br />
and have them in front of you.<br />
● Note any applicable error messages.<br />
● Note any add-on options.<br />
● Note the operating system.<br />
● Note any third-party hardware or software.<br />
● Note the details of any blinking LEDs on the front of the computer (tower and desktop<br />
configurations) or on the side of the computer (all-in-one configurations).<br />
● Note the applications you were using when you encountered the problem.<br />
NOTE: When calling in <strong>for</strong> service or support, you might be asked <strong>for</strong> the product number (example:<br />
PS988AV) of the computer. If the computer has a product number, it is generally located next to the 10or<br />
12-digit serial number of the computer.<br />
NOTE: On most models, the serial number and product number labels can be found on the top or<br />
side panel and at the rear of the computer (tower and desktop configurations) or on a pull-out card on<br />
the side of the display (all-in-one configurations).<br />
For a listing of all worldwide support phone numbers, go to http://www.hp.com/support, select your<br />
region, and click Connect with <strong>HP</strong> in the upper-right corner.<br />
116 Chapter 4 Diagnostics and troubleshooting
Locating ID labels<br />
To assist in troubleshooting, product, serial, and authentication numbers are available on each<br />
computer.<br />
● All workstations have a serial number (unique <strong>for</strong> each workstation) and product number. Have<br />
these numbers available when you contact support.<br />
● The Certificate of Authentication (COA) is used only <strong>for</strong> systems preinstalled with Windows.<br />
● A service label shows the build ID and Feature Byte strings, which are needed <strong>for</strong> system board<br />
replacement.<br />
In general (tower and desktop configuration), these labels can be found in the top, rear or bottom of<br />
the chassis (your workstation might look different).<br />
Figure 4-1 Tower and desktop label locations<br />
Locating ID labels 117
Locating warranty in<strong>for</strong>mation<br />
To locate base warranty in<strong>for</strong>mation, see http://www.hp.com/support/warranty-lookuptool.<br />
To locate an existing Care Pack, see http://www.hp.com/go/lookuptool.<br />
To extend a standard product warranty, visit http://www.hp.com/hps/carepack. <strong>HP</strong> Care Pack<br />
Services offer upgraded service levels to extend and expand a standard product warranty.<br />
Diagnosis guidelines<br />
If you encounter a problem with the computer, monitor, or software, the following sections provide a list<br />
of general suggestions that help you isolate and focus on the problem be<strong>for</strong>e taking further action.<br />
Diagnosis at startup<br />
● Verify that the computer and monitor are plugged into a working electrical outlet.<br />
● Remove all CDs, or USB drive keys from your system be<strong>for</strong>e turning it on.<br />
● Verify that the computer is turned on and the blue power light is blue (normal operation) and not<br />
red (error state).<br />
● If you have installed an operating system other than the factory-installed operating system, check<br />
to be sure that it is supported on your system by visiting http://www.hp.com/go/quickspecs.<br />
● Verify that the monitor is turned on and the green monitor light is on. Note that not all monitors are<br />
equipped with LED lights to indicate their functionality.<br />
● Turn up the brightness and contrast controls of the monitor if the monitor is dim.<br />
118 Chapter 4 Diagnostics and troubleshooting
Diagnosis during operation<br />
● Look <strong>for</strong> blinking LEDs on the side of the computer. The blinking lights are error codes that will<br />
help you diagnose the problem. Refer to the Diagnostic LED and audible (beep) codes<br />
on page 149 section of this document <strong>for</strong> in<strong>for</strong>mation on interpreting diagnostic lights and<br />
audible codes.<br />
● Check all cables <strong>for</strong> loose or incorrect connections.<br />
● Wake the computer by pressing any key on the keyboard or the power button. If the system<br />
remains in suspend mode, shut down the system by pressing and holding the power button <strong>for</strong> at<br />
least four seconds, then press the power button again to restart the system. If the system does not<br />
shut down, unplug the power cord, wait a few seconds, then plug it in again. If it does not restart,<br />
press the power button to start the computer.<br />
● Reconfigure the computer after installing a non–plug and play expansion board or other option.<br />
● Be sure that all required device drivers have been installed. For example, if you have connected a<br />
printer, you must install a printer driver.<br />
● If you are working on a network, plug another computer with a different cable into the network<br />
connection. There might be a problem with the network plug or cable.<br />
● If you recently added new hardware, remove the hardware and verify if the computer functions<br />
properly.<br />
● If you recently installed new software, uninstall the software and verify if the computer functions<br />
properly.<br />
● If the screen is blank, plug the monitor into a different video port on the computer if one is<br />
available. Alternatively, replace the monitor with a monitor that you know is working properly.<br />
● Upgrade the BIOS. A new release of the BIOS might have been released that supports new<br />
features or fixes your problem.<br />
● Press the Caps Lock key. If the Caps Lock LED toggles on or off, the keyboard is operating<br />
correctly.<br />
Diagnosis guidelines 119
Troubleshooting checklist<br />
Be<strong>for</strong>e running diagnostic utilities, make sure that.<br />
● The computer is connected to a working electrical outlet and powered on, and the power light is<br />
illuminated.<br />
● The monitor (<strong>for</strong> tower or desktop configurations) is connected to a working electrical outlet and<br />
powered on, and the power light is illuminated.<br />
● The monitor brightness and contrast are properly adjusted.<br />
● The keyboard is operating correctly (press and hold any key and listen <strong>for</strong> a beep).<br />
● All cables are properly connected.<br />
● All necessary device drivers are installed<br />
● All external media (such as optical disks or USB drive keys) are removed be<strong>for</strong>e startup.<br />
● The latest version of BIOS, drivers, and software are installed.<br />
120 Chapter 4 Diagnostics and troubleshooting
<strong>HP</strong> troubleshooting resources and tools<br />
This section provides in<strong>for</strong>mation on the <strong>HP</strong> Help and <strong>Support</strong> <strong>Center</strong>, Online support, and Helpful<br />
Hints <strong>for</strong> troubleshooting.<br />
<strong>HP</strong> <strong>Support</strong> Assistant<br />
<strong>HP</strong> <strong>Support</strong> Assistant (Windows 7 systems only) helps you maintain workstation per<strong>for</strong>mance and<br />
resolve problems. <strong>HP</strong>SA provides automated updates, onboard diagnostics, product in<strong>for</strong>mation, and<br />
guided assistance to help maintain optimum workstation per<strong>for</strong>mance. To access <strong>HP</strong>SA, click Start ><br />
All Programs > <strong>HP</strong> Help and <strong>Support</strong> > <strong>HP</strong> <strong>Support</strong> Assistant.<br />
NOTE: <strong>HP</strong> <strong>Support</strong> Assistant is not available on Linux.<br />
Online support<br />
Online access and support resources include web-based troubleshooting tools, technical knowledge<br />
databases, driver and patch downloads, online communities, and product change notification services.<br />
The following websites are also available to you:<br />
● http://www.hp.com—Provides useful product in<strong>for</strong>mation.<br />
● http://www.hp.com/support/workstation_manuals—Provides the latest online documentation.<br />
● http://www.hp.com/go/workstationsupport—Provides technical support in<strong>for</strong>mation <strong>for</strong><br />
workstations.<br />
● http://www.hp.com/support—Provides a listing of the worldwide technical support phone<br />
numbers. Access the telephone numbers by visiting the website, then select your region, and click<br />
Contact <strong>HP</strong> in the upper-left corner.<br />
● http://www.hp.com/support/workstation_swdrivers—Provides access to software and drivers <strong>for</strong><br />
workstations.<br />
<strong>HP</strong> troubleshooting resources and tools 121
Troubleshooting a problem<br />
To help you troubleshoot problems with your system, <strong>HP</strong> provides the Business <strong>Support</strong> <strong>Center</strong> (BSC).<br />
The BSC is a portal to an extensive selection of online tools. To access BSC and troubleshoot a problem<br />
with the workstation, complete the following:<br />
1. Visit http://www.hp.com/go/workstationsupport.<br />
2. Under the Business <strong>Support</strong> <strong>Center</strong> menu on the left, select Troubleshoot a problem.<br />
3. Under Select your product (center window), select <strong>Workstation</strong>s (under personal<br />
computing).<br />
4. Under Select your product, continue with selections as appropriate to the workstation series<br />
and model, and to the problem you are troubleshooting.<br />
Instant <strong>Support</strong> and Active Chat<br />
<strong>HP</strong> Instant <strong>Support</strong> is a set of web-based support tools that automate and speed up the resolution of<br />
desktop computing, tape storage, and printing problems.<br />
Active Chat enables you to electronically submit a support ticket to <strong>HP</strong> over the web. When you submit<br />
a support ticket, Active Chat collects in<strong>for</strong>mation about the computer and pass it to an online support<br />
specialist. The collection of in<strong>for</strong>mation might take up to 30 seconds depending on the computer<br />
configuration. When you submit a support ticket, you receive a confirmation message containing your<br />
case ID, the support hours <strong>for</strong> your location, and the estimated time of response.<br />
For more in<strong>for</strong>mation about <strong>HP</strong> Instant <strong>Support</strong> and Active Chat and how to use them, go to<br />
http://instantsupport.hp.com/.<br />
NOTE: This feature is not available on Linux.<br />
Customer Advisories, Customer and Security Bulletins, and Customer Notices<br />
To find advisories, bulletins, and notices:<br />
1. Visit http://www.hp.com/go/workstationsupport.<br />
2. Select the desired product.<br />
3. Under Resources <strong>for</strong> , select See more….<br />
4. Under Self-Help resources: in the center of the window, choose the desired action and<br />
appropriate in<strong>for</strong>mation in the scroll list to view the index.<br />
Product Change Notifications<br />
Product Change Notifications (PCNs) are proactive notifications <strong>for</strong> product changes occurring within a<br />
30-60 day window of the effective date of the change in the manufacturing process. PCNs give<br />
customers advanced notice of changes to their product, such as an updated BIOS version that they may<br />
need to qualify prior to the change taking place. The latest PCNs are located at: http://www.hp.com/<br />
go/workstationsupport.<br />
122 Chapter 4 Diagnostics and troubleshooting
Helpful hints<br />
At startup<br />
If you encounter a problem with the workstation, monitor, or software, the following general<br />
suggestions might help you isolate and focus on the problem be<strong>for</strong>e taking further action.<br />
● Verify that the workstation and monitor are plugged into a working electrical outlet.<br />
● Remove all optical discs and USB drive keys from the drives be<strong>for</strong>e powering on the workstation.<br />
● Verify that the workstation is turned on and the power light is on.<br />
● If you have installed an operating system other than the factory-installed operating system, check<br />
to be sure that it is supported on your system by visiting http://www.hp.com/go/quickspecs.<br />
● Verify that the monitor is turned on and the green monitor light is on.<br />
● Turn up the brightness and contrast controls of the monitor if the monitor is dim.<br />
● If the workstation has multiple video sources and only a single monitor, the monitor must be<br />
connected to the source selected as the primary VGA adapter. During startup, the other monitor<br />
connectors are disabled; if the monitor is connected to one of these ports, it will not function after<br />
Power-on Self Test (POST). You can select the default VGA source in Computer Setup (F10).<br />
During operation<br />
● Look <strong>for</strong> blinking LEDs on the workstation. The blinking lights are error codes that will help you<br />
diagnose the problem. Refer to the Diagnostic lights and audible (beep) codes section of this<br />
document <strong>for</strong> in<strong>for</strong>mation on interpreting diagnostic lights and audible codes.<br />
● Press and hold any key. If the system beeps, then your keyboard is operating correctly.<br />
● Check all cables <strong>for</strong> loose or incorrect connections.<br />
● Wake the workstation by pressing any key on the keyboard or the power button. If the system<br />
remains in suspend mode, shut down the system by pressing and holding the power button <strong>for</strong> at<br />
least four seconds, then press the power button again to restart the system. If the system does not<br />
shut down, unplug the power cord, wait a few seconds, then plug it in again. If it does not restart,<br />
press the power button to start the workstation.<br />
● Reconfigure the workstation after installing a non–plug and play expansion board or other option.<br />
Refer to the Hardware installation problems section of this document <strong>for</strong> instructions.<br />
● Be sure that all required device drivers have been installed. For example, if you have connected a<br />
printer, you must install a printer driver.<br />
● If you are working on a network, plug another workstation with a different cable into the network<br />
connection. There might be a problem with the network plug or cable.<br />
● If you recently added new hardware, remove the hardware and verify if the workstation functions<br />
properly.<br />
● If you recently installed new software, uninstall the software and verify if the workstation functions<br />
properly.<br />
<strong>HP</strong> troubleshooting resources and tools 123
● If the monitor connected to a tower, desktop or all-in-one computer is blank:<br />
◦ Plug the monitor into a different video port on the computer if one is available. Alternatively,<br />
replace the monitor with a monitor that you know is working properly.<br />
◦ Verify that the computer and monitor are plugged into a working electrical outlet.<br />
◦ Verify that the monitor is turned on and the green monitor light is on.<br />
◦ Turn up the brightness and contrast controls of the monitor if the monitor is dim.<br />
● If the internal display on an all-in-one computer is blank, open the computer and make sure the<br />
graphics card is properly installed.<br />
● Upgrade the BIOS. A new release of the BIOS might have been released that supports new<br />
features or fixes your problem.<br />
Customer self-repair<br />
Under the Customer Self-Repair program, you can order a replacement part and install the part without<br />
onsite <strong>HP</strong> technical assistance. Customer self-repair may be required <strong>for</strong> some components. See<br />
http://www.hp.com/go/selfrepair <strong>for</strong> in<strong>for</strong>mation on the program.<br />
NOTE: Some components are not eligible <strong>for</strong> customer self-repair and must be returned to <strong>HP</strong> <strong>for</strong><br />
service. Call <strong>HP</strong> <strong>Support</strong> <strong>for</strong> further instructions be<strong>for</strong>e attempting to remove or repair these<br />
components.<br />
124 Chapter 4 Diagnostics and troubleshooting
Troubleshooting scenarios and <strong>solutions</strong><br />
This section presents troubleshooting scenarios and possible <strong>solutions</strong> <strong>for</strong> a Windows-based system.<br />
Solving minor problems<br />
Table 4-1 Minor problems<br />
Problem Cause Possible Solution<br />
<strong>Workstation</strong> appears frozen<br />
and does not shut down when<br />
the power button is pressed.<br />
<strong>Workstation</strong> seems to be<br />
frozen.<br />
<strong>Workstation</strong> date and time<br />
display is incorrect.<br />
<strong>Workstation</strong> appears to pause<br />
periodically.<br />
Cursor does not move using<br />
the arrow keys on the keypad.<br />
Poor per<strong>for</strong>mance is<br />
experienced.<br />
Software control of the power<br />
switch is not functional.<br />
Program in use has stopped<br />
responding to commands.<br />
Real-time clock (RTC) battery<br />
might need replacement.<br />
Network driver is loaded and no<br />
network connection is<br />
established.<br />
1. Press and hold the power button <strong>for</strong> at least four<br />
seconds until the computer shuts down.<br />
2. Disconnect the electrical plug from the outlet.<br />
3. Restart the computer.<br />
1. If possible, use the Windows Task Manager to isolate<br />
and terminate the offending process.<br />
2. Attempt the normal Windows shutdown procedure.<br />
3. Restart the computer using the power button.<br />
1. Reset the date and time in the Control Panel.<br />
2. Replace the RTC battery.<br />
Establish a network connection, or use the Computer Setup<br />
(F10) Utility or the Microsoft Windows Device Manager to<br />
disable the network controller.<br />
The Num Lock key might be on. Press Num Lock. The Num Lock key can be disabled or<br />
enabled in the Computer Setup (F10) Utility.<br />
Processor is hot. 1. Verify that airflow to the computer is not blocked.<br />
2. Verify that chassis fans are connected and working<br />
properly. Some fans operate only when needed.<br />
3. Verify that the processor heatsink is installed properly.<br />
Hard drive is full. Transfer data from the hard drive to create more space on<br />
the hard drive.<br />
Troubleshooting scenarios and <strong>solutions</strong> 125
Table 4-1 Minor problems (continued)<br />
Problem Cause Possible Solution<br />
<strong>Workstation</strong> powered off<br />
automatically and the Power<br />
LED flashes red 2 times (once<br />
every second), followed by a<br />
2-second pause, and then two<br />
simultaneous beeps sounded.<br />
System does not power on,<br />
and the LEDs on the front of<br />
the computer are not flashing.<br />
Processor thermal protection is<br />
activated.<br />
A fan might be blocked or not<br />
turning.<br />
OR<br />
The processor heatsink is not<br />
properly attached to<br />
the processor.<br />
126 Chapter 4 Diagnostics and troubleshooting<br />
1. Verify that the computer air vents are not blocked.<br />
2. Open the access panel and press the computer power<br />
button.<br />
3. Verify that the system fan is running.<br />
4. Verify that the processor heatsink fan spins. If the fan is<br />
not spinning, verify that the heatsink fan cable is<br />
plugged into the system board connector and that the<br />
heatsink is properly seated.<br />
5. Replace the processor heatsink.<br />
System cannot power on. Press and hold the power button <strong>for</strong> less than four seconds.<br />
If the hard drive LED turns green:<br />
1. To find a faulty device, remove all devices one at a<br />
time:<br />
a. Disconnect AC power to the computer.<br />
b. Remove a device.<br />
c. Reconnect AC power and power on the<br />
computer.<br />
2. Repeat this process until the faulty device is identified.<br />
Remove the graphics card last. Replace the faulty<br />
device.<br />
3. If no faulty device is found, replace the system board.<br />
OR<br />
1. Press and hold the power button <strong>for</strong> less than four<br />
seconds. If the hard drive LED does not illuminate:<br />
a. Verify that the computer is plugged into a<br />
working AC outlet.<br />
b. Verify that the power button harness is connected<br />
to the inline front panel I/O device assembly<br />
connector.<br />
2. Verify that the power supply unit (PSU) cables are<br />
connected to the system board.<br />
3. Verify power supply unit PSU functionality:<br />
a. Disconnect the AC power.<br />
b. <strong>HP</strong> Z820 <strong>Workstation</strong> only—Remove PSU. All<br />
other workstations, unplug cables connected to<br />
the system board.<br />
c. Reconnect AC power<br />
● If the PSU fan spins and the BIST LED<br />
illuminates, the PSU is good; replace the<br />
system board.<br />
● If the PSU fan does not spin or the LED does<br />
not illuminate, replace the PSU.
Solving hard drive problems<br />
Table 4-2 Hard drive problems<br />
Problem Cause Solution<br />
Hard drive error occurs. Hard disk has bad sectors or<br />
has failed.<br />
Disk transaction problem. The directory structure is bad,<br />
or there is a problem with a<br />
file.<br />
Locate and block the usage of bad sectors. If necessary,<br />
re<strong>for</strong>mat the hard disk.<br />
If the drive is detected by the BIOS, run DPS Self-test.<br />
1. Right-click Start, select Explore, and select a drive.<br />
2. Select File>Properties>Tools.<br />
3. Under Error-checking, select Check Now.<br />
Drive not found (identified). Improper cable connection On computers with discrete data and power cables,<br />
ensure that the data and power cables are securely<br />
connected to the hard drive. (See the Hard drive section of<br />
this guide <strong>for</strong> connection details.)<br />
Improperly seated hard drive On systems with blind-mate drive connections, check <strong>for</strong><br />
connector damage on the drive and in the chassis.<br />
The system might not have<br />
automatically recognized a<br />
newly installed device.<br />
Drive responds slowly<br />
immediately after power-up.<br />
Reseat the hard drive and its carrier in the chassis to<br />
ensure a proper connection. (See the Hard drive section of<br />
this guide <strong>for</strong> connection details.)<br />
1. Run the Computer Setup (F10) Utility.<br />
2. If the system does not recognize the new device,<br />
verify that the device is listed in the Computer Setup<br />
(F10) Utility.<br />
If it is listed, the probable cause is a driver problem.<br />
If it is not listed, the probable cause is a hardware<br />
problem.<br />
3. If this drive is newly installed, enter Setup and try<br />
adding a POST delay under Advanced > Power-<br />
On.<br />
Run the Computer Setup (F10) utility and increase the<br />
POST Delay in Advanced > Power-On Options.<br />
Troubleshooting scenarios and <strong>solutions</strong> 127
Table 4-2 Hard drive problems (continued)<br />
Problem Cause Solution<br />
Non-system disk or NTLDR missing<br />
message.<br />
System is trying to start from<br />
nonbootable media.<br />
System is trying to start from a<br />
damaged hard drive.<br />
System files missing or not<br />
properly installed.<br />
Hard drive boot disabled in<br />
Computer Setup.<br />
Remove the optical disc or USB drive.<br />
<strong>Workstation</strong> will not start. Hard drive is damaged. Replace the hard drive.<br />
128 Chapter 4 Diagnostics and troubleshooting<br />
1. Insert a bootable system optical disc or USB drive<br />
and restart the computer.<br />
2. If the hard drive is still inaccessible and MBR Security<br />
is enabled, try restoring the previously saved<br />
MBR image by entering Setup and selecting<br />
Security > Restore Master Boot Record.<br />
1. Insert a bootable system optical disc or USB drive<br />
and restart.<br />
2. Verify that the hard drive is partitioned and<br />
<strong>for</strong>matted.<br />
3. Install the system files <strong>for</strong> the appropriate operating<br />
system, if necessary.<br />
Run the Computer Setup (F10) Utility and enable the hard<br />
drive entry in the Storage > Boot Order list.
Solving display problems<br />
These suggestions apply to monitors connected to desktop and tower configurations, and to external<br />
monitors connected to all-in-one configurations.<br />
Table 4-3 Display problems<br />
Problem Cause Solution<br />
Blank screen (no video). The cable connections are not<br />
correct.<br />
The display works properly during<br />
the POST but goes blank when the<br />
operating system starts.<br />
Verify the cable connections from the monitor to the<br />
computer and to a working electrical outlet.<br />
The monitor is off. Turn the monitor on (LED is on). You might need to refer to<br />
the monitor manual <strong>for</strong> an explanation of LED signals.<br />
Screen blanking utility installed<br />
or energy saver features<br />
enabled.<br />
System ROM is bad; system is<br />
running in FailSafe Boot Block<br />
mode (indicated by 8 beeps).<br />
Fixed-sync monitor does not<br />
sync at the resolution<br />
specified.<br />
Computer is in Hibernate<br />
mode.<br />
<strong>Workstation</strong> monitor settings<br />
are not compatible with the<br />
monitor.<br />
The display settings in the<br />
operating system are<br />
incompatible with your<br />
graphics card and monitor.<br />
Press a key or the mouse button and, if set, enter your<br />
password.<br />
Reflash the ROM using a SoftPaq.<br />
Verify that the monitor can accept the same horizontal<br />
scan rate as the resolution specified.<br />
Press the power button to resume from Hibernate mode.<br />
1. When you see Press F8 in the bottom-right corner of<br />
the screen, restart the computer and press F8 during<br />
startup.<br />
2. Using the keyboard arrow keys, select Enable VGA<br />
Mode and then press Enter.<br />
3. For Windows, double-click the Display icon in the<br />
Control Panel and then select the Settings tab.<br />
4. Use the sliding control to reset the resolution.<br />
1. For Windows, restart your computer in VGA mode.<br />
2. After the operating system starts, change the display<br />
settings to match those supported by your graphics<br />
card and monitor.<br />
3. Refer to your operating system and graphics card<br />
documentation <strong>for</strong> in<strong>for</strong>mation about changing<br />
display settings.<br />
Troubleshooting scenarios and <strong>solutions</strong> 129
Table 4-3 Display problems (continued)<br />
Problem Cause Solution<br />
Power LED flashes red 6 times<br />
(once every second), followed by a<br />
2-second pause, and then the<br />
computer beeps 6 times.<br />
Monitor does not function when<br />
used with Energy Saver features.<br />
Pre-video graphics error. For systems with a graphics card:<br />
Monitor without Energy Saver<br />
capabilities is being used with<br />
Energy Saver features<br />
enabled.<br />
Dim characters The brightness and contrast<br />
controls are not set properly.<br />
Blurry video or requested<br />
resolution cannot be set.<br />
The picture is broken up, rolls,<br />
jitters, or flashes.<br />
Vibrating or rattling noise coming<br />
from inside a CRT monitor when<br />
powered on.<br />
Clicking noise coming from inside<br />
a CRT monitor.<br />
High pitched noise coming from<br />
inside a flat-panel monitor.<br />
Cables are not properly<br />
connected.<br />
If the graphics controller was<br />
upgraded, the correct video<br />
drivers might not be loaded.<br />
Monitor cannot display<br />
requested resolution.<br />
The monitor connections might<br />
be faulty, or the monitor might<br />
be incorrectly adjusted.<br />
1. Reseat the graphics card.<br />
2. If the card requires external power, make sure the<br />
power cable is properly connected.<br />
3. Replace the graphics card.<br />
4. Replace the system board.<br />
For systems with no graphics card installed, the CPU may<br />
have no integrated graphics capability.<br />
Disable the monitor Energy Saver feature.<br />
Adjust the monitor brightness and contrast controls.<br />
Verify that the graphics cable is connected to the graphics<br />
card and the monitor.<br />
Install the video drivers included in the upgrade kit, or<br />
download and install the latest drivers <strong>for</strong> your graphics<br />
card from http://welcome.hp.com/country/us/en/<br />
support.html.<br />
Change the requested resolution.<br />
Monitor must be degaussed. Degauss the monitor.<br />
Monitor degaussing coil has<br />
been activated.<br />
Electronic relays have been<br />
activated inside the monitor.<br />
Brightness and contrast<br />
settings are too high.<br />
130 Chapter 4 Diagnostics and troubleshooting<br />
1. Be sure the monitor cable is securely connected to the<br />
computer.<br />
2. In a multiple CRT monitor system, ensure that the<br />
monitors' electromagnetic fields are not interfering<br />
with each other . Move them apart if necessary.<br />
3. Move fluorescent lights or fans that are too close to<br />
the CRT monitor.<br />
None. It is normal <strong>for</strong> the degaussing coil to be activated<br />
when the monitor is powered on.<br />
None. It is normal <strong>for</strong> some monitors to make a clicking<br />
noise when turned on and off, when going in and out of<br />
Standby mode, and when changing re<strong>solutions</strong>.<br />
Lower brightness and contrast settings.
Table 4-3 Display problems (continued)<br />
Problem Cause Solution<br />
Fuzzy focus; streaking, ghosting,<br />
or shadowing effects; horizontal<br />
scrolling lines; faint vertical bars;<br />
or unable to center the picture on<br />
the screen (flat-panel monitors<br />
using an analog VGA input<br />
connection only.)<br />
Some typed symbols do not<br />
appear correctly.<br />
Solving audio problems<br />
Table 4-4 Audio problems<br />
Flat-panel monitor’s internal<br />
digital conversion circuits<br />
might be unable to correctly<br />
interpret the output<br />
synchronization of the<br />
graphics card.<br />
The font you are using does<br />
not support that symbol.<br />
Problem Cause Solution<br />
Sound does not come out of the<br />
speaker or headphones.<br />
Software volume control is<br />
turned down.<br />
The external speakers are not<br />
turned on.<br />
External speakers plugged into<br />
the wrong audio jack.<br />
Digital CD audio is<br />
not enabled.<br />
Headphones or devices<br />
connected to the line-out<br />
connector have muted the<br />
internal speaker.<br />
1. Select the monitor’s Auto-Adjustment option in the<br />
monitor’s onscreen display menu.<br />
2. Manually synchronize the Clock and Clock Phase<br />
onscreen display functions.<br />
3. Download SoftPaq SP22333 to assist with the<br />
synchronization).<br />
Use the Character Map to locate and select the<br />
appropriate symbol.<br />
Select Start>All Programs> Accessories>System<br />
Tools>Character Map. You can copy the symbol from<br />
the Character Map into a document.<br />
Double-click the Speaker icon on the taskbar and use the<br />
volume slider to adjust the volume.<br />
Turn on the external speakers.<br />
See your sound card documentation <strong>for</strong> proper speaker<br />
connection.<br />
Enable digital CD audio:<br />
1. From the Control Panel, select System.<br />
2. On the Hardware tab, select the Device Manager<br />
button.<br />
3. Right-click the CD/DVD device and select<br />
Properties.<br />
4. On the Properties tab, select Enable digital CD<br />
audio <strong>for</strong> this CD-ROM device.<br />
Turn on and use headphones or external speakers, if<br />
connected, or disconnect headphones or external<br />
speakers.<br />
Volume is muted. 1. From the Control Panel, select Sound, Speech and<br />
Audio Devices, and then select Sounds and<br />
Audio Devices.<br />
2. Deselect the Mute checkbox.<br />
Computer is in Standby mode. Press the power button to resume from Standby mode.<br />
Troubleshooting scenarios and <strong>solutions</strong> 131
Table 4-4 Audio problems (continued)<br />
Problem Cause Solution<br />
Noise or no sound comes out of<br />
the speakers or headphones.<br />
Sound occurs intermittently. Processor resources are being<br />
used by other open<br />
applications.<br />
<strong>Workstation</strong> appears to be locked<br />
up while recording audio.<br />
Solving printer problems<br />
Table 4-5 Printer problems<br />
1. If you are using digital speakers that have a stereo<br />
jack and you want the system to autoswitch to digital,<br />
use a stereo-to-mono adapter to engage the auto<br />
sense feature, or use multimedia device properties<br />
to switch the audio signal from analog to digital.<br />
2. If the headphones have a mono jack, use the<br />
multimedia device properties to switch the system to<br />
analog out.<br />
NOTE: If you set digital as the Output Mode, the<br />
internal speaker and external analog speakers no<br />
longer output audio until you switch back to an auto<br />
sense or analog mode.<br />
If you set analog as the Output Mode, external digital<br />
speakers do not function until you change the output<br />
mode back to an auto-sense or digital mode.<br />
Shut down all open processor-intensive applications.<br />
The hard disk might be full. 1. Be<strong>for</strong>e recording, be sure there is enough free space<br />
on the hard disk.<br />
2. Try recording the audio file in a compressed <strong>for</strong>mat.<br />
Problem Cause Solution<br />
Printer does not print. Printer is not turned on and<br />
online.<br />
The correct printer driver <strong>for</strong><br />
the application is not installed.<br />
If you are on a network, you<br />
might not have made a<br />
connection to the printer.<br />
Printer does not turn on. The cables might not be<br />
connected properly.<br />
132 Chapter 4 Diagnostics and troubleshooting<br />
Turn the printer on and be sure it is online.<br />
1. Install the correct printer driver <strong>for</strong> the application.<br />
2. Try printing using the MS-DOS command:<br />
DIR C:\> [printer port]<br />
Printer might have failed. Run printer self-test.<br />
Replace printer port with the address of the printer<br />
used. If the printer works, reload the printer driver.<br />
Make the proper network connection to the printer.
Solving power supply problems<br />
This section presents power supply troubleshooting scenarios.<br />
Testing power supply<br />
Be<strong>for</strong>e replacing the power supply unit (PSU), use the Built-In Self-Test (BIST) feature to learn if the power<br />
supply still works.<br />
NOTE: Not all PSUs have the BIST functionality. Refer to the Rear panel components section of this<br />
document to determine BIST availability <strong>for</strong> your workstation.<br />
To test the power supply:<br />
1. Unplug the AC power.<br />
NOTE: For the <strong>HP</strong> Z820 <strong>Workstation</strong>, you must remove the power supply from the chassis.<br />
2. Unplug all power cables to the system boards.<br />
3. Plug in AC power and verify the following:<br />
● If the green BIST LED on the rear of the workstation is illuminated and the fan is spinning, the<br />
PSU is functional.<br />
● If the green BIST LED is not illuminated or the fan is not spinning, replace the PSU.<br />
See the Rear panel components section of this document to locate the BIST LED on your workstation.<br />
Table 4-6 Power supply problems<br />
Problem Cause Solution<br />
PSU shuts down intermittently. Power supply fault. Replace the PSU.<br />
<strong>Workstation</strong> powers off and the<br />
Power LED flashes red 2 times<br />
(once every second), followed by a<br />
2-second pause.<br />
Power LED flashes red (once every<br />
2 seconds).<br />
Processor thermal protection is<br />
activated.<br />
A fan might be blocked or not<br />
turning.<br />
OR<br />
The processor heatsink fan<br />
assembly is not properly<br />
attached to the processor.<br />
Power failure (power supply is<br />
overloaded).<br />
1. Ensure that the workstation air vents are not blocked.<br />
2. Open the access panel and press the workstation<br />
power button.<br />
3. Verify that the system fan is running.<br />
4. Verify that the processor heatsink fan spins.<br />
If the heatsink fan is not spinning, verify that the fan<br />
cable is plugged into the system board connector.<br />
Verify that the fan is properly seated.<br />
5. Replace the processor heatsink.<br />
1. Determine whether a device is causing the problem<br />
by per<strong>for</strong>ming the following:<br />
a. Disconnect AC power.<br />
b. Remove all attached devices.<br />
c. Power on the workstation.<br />
Troubleshooting scenarios and <strong>solutions</strong> 133
Table 4-6 Power supply problems (continued)<br />
Problem Cause Solution<br />
134 Chapter 4 Diagnostics and troubleshooting<br />
If the system enters the POST, per<strong>for</strong>m the following:<br />
a. Power off the workstation.<br />
b. Replace one device at a time and repeat this<br />
procedure until a failure occurs.<br />
c. Replace the device causing the failure<br />
d. Continue adding devices one at a time to verify<br />
that all devices are functioning.<br />
2. Verify power supply functionality.<br />
a. Disconnect AC power.<br />
b. Remove the Z820 PSU from the chassis.<br />
c. Unplug all system board power cables <strong>for</strong> the<br />
Z220 CMT, Z420, and <strong>Z620</strong>.<br />
d. Plug in AC power.<br />
● If the PSU fan spins and the LED<br />
illuminates (see Testing power supply<br />
on page 133), the power supply is good.<br />
Replace the system board.<br />
● If the PSU fan does not spin or the LED<br />
does not illuminate (see Testing power<br />
supply on page 133), replace the power<br />
supply.
Self-troubleshooting with <strong>HP</strong> Vision Diagnostics<br />
Overview<br />
Hewlett-Packard Vision Diagnostics is a diagnostic tool that can be used by the end user or technical<br />
support personnel to view in<strong>for</strong>mation about the hardware configuration of the computer and per<strong>for</strong>m<br />
hardware troubleshooting on <strong>HP</strong> desktop and workstation systems. This diagnostic tool is used to<br />
troubleshoot hardware failures. Accessible by either CD or USB key, these diagnostics run outside the<br />
operating system and make it easy to isolate potential issues that may be related to the operating<br />
system and not to the hardware.<br />
<strong>HP</strong> Vision Diagnostics benefits:<br />
● Captures complete system configuration in<strong>for</strong>mation that can be shared as an HTML file,<br />
including:<br />
◦ System serial number, product number and BIOS revision<br />
◦ Memory size and configuration<br />
◦ Processor in<strong>for</strong>mation<br />
◦ Storage device in<strong>for</strong>mation and configuration<br />
◦ Graphics, audio, and communications in<strong>for</strong>mation and configuration<br />
● Comprehensive list of diagnostic tests:<br />
◦ Highly configurable testing options: quick, complete, custom, interactive, non-interactive<br />
◦ Identifies specific failed memory DIMM<br />
◦ Tests video card memory<br />
◦ Launches DST SMART tests <strong>for</strong> both SATA and SAS drives<br />
◦ Many other tests and diagnostics<br />
● Diagnostic Failure Code Output — A unique warranty code is generated <strong>for</strong> each failure and can<br />
be used to validate diagnostic use <strong>for</strong> a specific system.<br />
● Easy to use — Interface is similar to previous field diagnostics, <strong>HP</strong> Insight Diagnostics.<br />
● True End2End diagnostics — Same diagnostics modules used in factory.<br />
● Easy to obtain:<br />
◦ Download from <strong>HP</strong> website.<br />
◦ Install on bootable USB key, CD or DVD.<br />
◦ Included with restore media.<br />
<strong>HP</strong> Vision Diagnostics allows you to view in<strong>for</strong>mation about the hardware configuration of the computer<br />
and per<strong>for</strong>m hardware diagnostic tests on the subsystems of the computer. The utility simplifies the<br />
process of effectively identifying, diagnosing, and isolating hardware issues.<br />
When started, <strong>HP</strong> Vision Diagnostics displays the Survey tab, which shows the current configuration<br />
of the computer. Other tabs provide additional in<strong>for</strong>mation, including diagnostic test options and test<br />
Self-troubleshooting with <strong>HP</strong> Vision Diagnostics 135
esults. The in<strong>for</strong>mation in each tab can be saved as an HTML file and stored on an optical disc or USB<br />
flash drive.<br />
Use <strong>HP</strong> Vision Diagnostics to determine if all the devices installed on the computer are recognized by<br />
the system and functioning properly. Running tests is optional but recommended after installing or<br />
connecting a new device.<br />
Be<strong>for</strong>e placing a call to the Customer <strong>Support</strong> <strong>Center</strong> <strong>HP</strong> recommends you run the tests, then save and<br />
print the test results so that you have the reports available.<br />
NOTE: Third-party devices may not be detected by <strong>HP</strong> Vision Diagnostics.<br />
Downloading and accessing <strong>HP</strong> Vision Diagnostics<br />
Follow these steps to download the <strong>HP</strong> Vision Diagnostics utility from the <strong>HP</strong> website to a DVD or USB,<br />
and then use it to per<strong>for</strong>m diagnostics on the computer:<br />
1. Go to http://www.hp.com.<br />
2. Click the <strong>Support</strong> and Drivers link.<br />
3. Click the Drivers and Software link.<br />
4. Enter your product number in the text box, and then press Search.<br />
5. Select your operating system.<br />
6. Under the operating system section, select Diagnostic.<br />
7. Locate <strong>HP</strong> Vision Diagnostics. Click Download next to the most recent version appropriate<br />
<strong>for</strong> your target media (USB flash or ISO file <strong>for</strong> CD).<br />
8. Copy the file to an optical disc or follow the instructions to install the diagnostics on a USB flash<br />
drive.<br />
9. While the computer is on, insert the disc or flash drive.<br />
10. Shut down the operating system and turn off the computer.<br />
11. Turn on the computer. The system will boot into <strong>HP</strong> Vision Diagnostics.<br />
NOTE: If the system does not boot to the disc in the optical drive or to the USB flash drive, you<br />
might need to change the boot order. Use the Computer Setup (F10) utility to change the boot<br />
order, or press F9 to select the appropriate boot device.<br />
12. At the boot menu, select either the <strong>HP</strong> Vision Diagnostics utility to test the various hardware<br />
components in the computer or the <strong>HP</strong> Memory Test utility to test memory only.<br />
13. If running <strong>HP</strong> Vision Diagnostics, select the appropriate language and click Continue.<br />
14. In the End User License Agreement page, select Agree if you agree with the terms. The <strong>HP</strong> Vision<br />
Diagnostics utility launches with the Survey tab displayed.<br />
Accessing <strong>HP</strong> Vision Diagnostics on the computer<br />
The following procedures describe how to access the <strong>HP</strong> Vision Diagnostics utilities that are included in<br />
the computer software.<br />
136 Chapter 4 Diagnostics and troubleshooting
Creating and using a bootable USB key<br />
This section describes how to use a USB key to access the <strong>HP</strong> Vision Diagnostics.<br />
NOTE: Using a USB key is the most convenient method to access the <strong>HP</strong> Vision Diagnostics. It is<br />
faster than using a CD, and it accommodates both Memory and Vision diagnostics.<br />
The <strong>HP</strong> Memory Test is a comprehensive memory diagnostic utility that is run as a stand-alone<br />
application, outside of <strong>HP</strong> Vision Diagnostics. If the computer is booted from a CD, a separate boot CD<br />
will be required to use the memory diagnostic.<br />
1. In the C:\VisionDiagnostics\ directory, double-click on VisionDiagUSB.exe. A setup menu<br />
appears.<br />
2. Follow the setup prompts to create a bootable ISO image of the diagnostic utilities on a USB key.<br />
3. Turn off the computer and restart it with the USB key installed. The computer will boot to the USB<br />
key and initiate the <strong>HP</strong> Vision Diagnostics utility.<br />
4. Follow the <strong>HP</strong> Vision Diagnostic prompts to troubleshoot the computer.<br />
Creating and using a bootable DVD<br />
This section describes how to use a DVD to access the <strong>HP</strong> Vision Diagnostics.<br />
1. In the C:\VisionDiagnostics\ directory, double-click on the VisionDiagISO.exe file. A setup menu<br />
appears.<br />
2. Follow the setup prompts to create a bootable ISO image of the diagnostic utilities on a DVD.<br />
3. Enable the computer to boot from DVD.<br />
4. Turn off the computer and restart it with the DVD installed in the optical drive. The computer will<br />
boot to the DVD and initiate the <strong>HP</strong> Vision Diagnostics utility.<br />
5. Follow the <strong>HP</strong> Vision Diagnostic prompts to troubleshoot the computer.<br />
Using the <strong>HP</strong> Memory Test utility<br />
This section describes how to access the <strong>HP</strong> Memory Test utility.<br />
NOTE: The <strong>HP</strong> Memory Test is a comprehensive memory diagnostic utility that is run as a stand-alone<br />
application, outside of <strong>HP</strong> Vision Diagnostics.<br />
If the computer is booted from a CD, a separate boot CD will be required to use the memory<br />
diagnostic. Hence, <strong>HP</strong> recommends that a USB key be used to boot the diagnostic utilities. It is faster<br />
than using a CD, and it accommodates both Memory and Vision diagnostics.<br />
1. In the C:\VisionDiagnostics\ directory, double-click on the MemoryDiagISO.exe file. A setup<br />
menu appears.<br />
2. Follow the setup prompts to create a bootable ISO image of the memory diagnostic utility on a<br />
DVD.<br />
3. Turn off the computer and restart it with the DVD installed in the optical drive. The computer will<br />
boot to the DVD and initiate the memory diagnostic utility.<br />
4. Follow the diagnostic prompts to troubleshoot computer memory.<br />
Self-troubleshooting with <strong>HP</strong> Vision Diagnostics 137
User interface<br />
The <strong>HP</strong> Vision Diagnostics application provides six major functions, accessible through tabs:<br />
● Survey — Current system hardware in<strong>for</strong>mation<br />
● Test — List of all diagnostics available <strong>for</strong> the system; tests are started here<br />
● Status — Progress and status of currently running diagnostics<br />
● History — Past diagnostics runs and status<br />
● Errors — Past diagnostics failures<br />
● Help — User help about <strong>HP</strong> Vision Diagnostics<br />
Common operations include:<br />
● Exit Diagnostics button — Closes <strong>HP</strong> Vision Diagnostic application and reboots the system; any<br />
running test is aborted.<br />
● Reload button — If available, rescans your system hardware and reloads the diagnostics without<br />
the need to restart the system.<br />
● Save button — If available, saves your system survey, test history or error data as an HTML file to<br />
removable media.<br />
138 Chapter 4 Diagnostics and troubleshooting
Survey tab<br />
The Survey tab shows your system hardware in<strong>for</strong>mation, organized into eleven Categories (<strong>for</strong><br />
example Processors) and device instances (<strong>for</strong> example Processor 1).<br />
You can control the amount of in<strong>for</strong>mation displayed by selecting a combination of View Level and<br />
Category.<br />
The View Levels include:<br />
● Overview (default) — High-level summary of the system hardware<br />
● Summary — Limited configuration data <strong>for</strong> each specific category<br />
● Advanced — More technical and low-level data <strong>for</strong> the computer-savvy user<br />
The Categories Levels include:<br />
● All — All categories<br />
● Architecture — System architecture in<strong>for</strong>mation such as high-level PCI devices, low-level<br />
SMBIOS, CMOS, and PCI configuration space data<br />
● Audio — All embedded and add-on audio devices<br />
● Asset Control — Asset control related in<strong>for</strong>mation such as product name, serial number, asset<br />
tag, and universal unique ID in<strong>for</strong>mation<br />
● Communication — Communication devices such as serial, parallel, USB, network, IEEE-1394a,<br />
modem, and Bluetooth ports and devices<br />
● Graphics — All embedded and add-on video cards<br />
● Input Devices — User input devices such as all connected mice and keyboards<br />
● Memory — System memory in<strong>for</strong>mation<br />
● Miscellaneous — Any device or data that doesn't belong to any other category<br />
● Processors — System processors<br />
● Storage — Mass storage devices such as floppy drives, optical drives, SATA, SAS hard disk<br />
drives and controllers, as well as any RAID arrays<br />
● System — In<strong>for</strong>mation about system board devices such as fans and cables<br />
Self-troubleshooting with <strong>HP</strong> Vision Diagnostics 139
Test tab<br />
The Test tab lists all available diagnostics. The lists have been tailored according to your system<br />
configuration. Individual test may be selected or desselected.<br />
Tests have three modes:<br />
● Quick — Test runs quickly while covering all hardware. Test parameters cannot be modified.<br />
● Complete — Includes all available tests and may take a long time to complete. Test parameters<br />
cannot be modified.<br />
● Custom — Includes all available tests and may take a long time to complete. Test parameters<br />
may be modified to fit specific needs. For advanced users only!<br />
By default, the three test modes do not display prompts and require no interaction. Any errors are<br />
displayed when testing is complete.<br />
However, <strong>for</strong> each test type, you may also optionally add interactive tests by clicking the Include<br />
interactive tests box under Test mode. Selecting interactive tests provides the maximum control<br />
over the testing process. The diagnostic software will prompt you <strong>for</strong> input during tests.<br />
NOTE: Memory can not be tested from within the <strong>HP</strong> Vision Diagnostics application. To test the<br />
memory in your computer, exit <strong>HP</strong> Vision Diagnostic, boot to either the CD or USB flash drive and<br />
select <strong>HP</strong> Memory Test from the boot menu.<br />
The Duration of Test options control the duration of the test sequence:<br />
● Number of loops — Test runs specified number of times (default is 1).<br />
● Total test time (hours:minutes) — Test runs <strong>for</strong> a specified amount of time; some tests might<br />
not run if the specified time is not long enough to run all tests.<br />
● Stop at first error — Test stops as soon as one error is encountered.<br />
Test Controls provide additional functions:<br />
● Select All, Unselect All — Select/unselect all tests in test selection tree<br />
● Expand, Collapse — Expand/collapse test selection tree<br />
● Start Test — Starts executing selected tests and switches to the Status tab to display test<br />
execution and status<br />
WARNING! Once started, do not reboot or power off your computer until all the tests have been<br />
completed.<br />
To begin testing:<br />
1. Select the Test tab.<br />
2. Select the type of tests you want to run: Quick, Complete, or Custom.<br />
3. Include optional interactive tests by selecting Include interactive tests.<br />
4. Choose how you want the test to be executed, either Number of Loops or Total Test Time.<br />
When choosing to run the test over a specified number of loops, enter the number of loops to<br />
per<strong>for</strong>m. If you want the diagnostic test <strong>for</strong> a specified time period, enter the amount of time in<br />
minutes.<br />
140 Chapter 4 Diagnostics and troubleshooting
Status tab<br />
History tab<br />
5. Click the Start Test button. The Status tab, which allows you to monitor the progress of the<br />
tests, automatically displays during the testing process. When the tests are complete, the Status tab<br />
shows whether the devices passed or failed.<br />
6. If errors are found, go to the Errors tab to view detailed in<strong>for</strong>mation and recommended actions.<br />
The color-coded Status tab displays the overall progress and status of the test scenario and of each test.<br />
The states and colors are:<br />
● Waiting (black) — No test is running.<br />
● Running (blue) — At least one test is currently running.<br />
● Passed (green) — All tests have run successfully, meaning that no hardware error or defect was<br />
detected.<br />
● Failed (red) — The tests have detected at least one error with your system.<br />
● Canceled (orange) — The test scenario has been explicitly canceled, in which case no pass or<br />
fail conclusion can be drawn.<br />
The available data is:<br />
● Current Loop — Current execution loop out of total number of loops specified in the Test panel<br />
● Test Time — Total time elapsed since the beginning of the test execution<br />
● Test Complete — Number of tests successfully completed out of the total number of test to<br />
execute<br />
● Cancel button — Immediately terminates all currently running tests<br />
The History tab shows the history of the past test executions.<br />
The History Log displays all tests that have been executed, the number of times of execution, the number<br />
of times failed, the date each test was executed, and the time it took to complete each test. The Clear<br />
History button will clear the contents of the History Log.<br />
The contents of the History Log may be saved as a HTML file to either floppy or USB flash drive by<br />
clicking the Save button.<br />
Self-troubleshooting with <strong>HP</strong> Vision Diagnostics 141
Errors tab<br />
Help tab<br />
The Errors tab displays detailed in<strong>for</strong>mation about any errors found, as well as any recommended<br />
actions.<br />
The Error Log displays the tests <strong>for</strong> devices that have failed during the diagnostic testing and includes<br />
the following in<strong>for</strong>mation:<br />
● Device — Device tested<br />
● Test — Type of test run<br />
● Times Failed — Number of times the device has failed a test<br />
● Defect Code — Numerical code <strong>for</strong> the failure (error codes are defined in the Help tab)<br />
● Description — Error the diagnostic test found<br />
● Reason — Likely cause of the error<br />
● Recommended Repair — Recommended action that should be per<strong>for</strong>med to resolve the failed<br />
hardware<br />
● Warranty ID — A unique error code associated with the specific error on your computer; be<br />
prepared to provide it when contacting the <strong>HP</strong> <strong>Support</strong> <strong>Center</strong> <strong>for</strong> assistance with a hardware<br />
failure.<br />
● Clear Errors — Clears the contents of the Error Log<br />
Click the Save button to save the Error Log as an HTML file to removable media.<br />
The Help tab contains a Vision Help section and a Test Components section. This tab includes search<br />
and index features. You may also review the <strong>HP</strong> End User License Agreement (EULA), as well as the <strong>HP</strong><br />
Vision Diagnostic application version in<strong>for</strong>mation on this tab.<br />
The Help sections are:<br />
● Vision Help — Help on the major functions of <strong>HP</strong> Vision Diagnostics<br />
● Test components — A description of each test, as well as the parameters that may be adjusted<br />
when running in Custom test mode<br />
● Defect codes — Descriptions of the numerical error codes that appear in the Errors tab<br />
● Memory test tab — In<strong>for</strong>mation on the <strong>HP</strong> Memory Test application that can be launched from<br />
the boot menu<br />
● <strong>HP</strong> <strong>Support</strong> — How to obtain support from <strong>HP</strong><br />
142 Chapter 4 Diagnostics and troubleshooting
Saving and printing in<strong>for</strong>mation in <strong>HP</strong> Vision Diagnostics<br />
You can save the in<strong>for</strong>mation displayed in the <strong>HP</strong> Vision Diagnostics Survey, History and Errors tabs to<br />
removable media. You cannot save to the hard drive. The system automatically creates an HTML file<br />
that has the same appearance as the in<strong>for</strong>mation displayed on the screen.<br />
1. Insert removable media.<br />
2. Click Save in the bottom on any of the Survey, History or Errors tabs. The three log files are<br />
saved regardless of where the Save button is clicked.<br />
3. Select the removable media drive and click Save.<br />
NOTE: Do not remove the media until a message indicates the files have been written.<br />
4. Print the desired in<strong>for</strong>mation HTML file.<br />
NOTE: To exit <strong>HP</strong> Vision Diagnostics, click Exit Diagnostics at the bottom of the screen. Be<br />
sure to remove the removable media.<br />
Self-troubleshooting with <strong>HP</strong> Vision Diagnostics 143
Self-troubleshooting with <strong>HP</strong> Advanced System<br />
Diagnostics UEFI<br />
<strong>HP</strong> Advanced System Diagnostics is a Unified Extensible Firmware Interface (UEFI) based diagnostic<br />
tool that can be used by the end user or technical support personnel to view in<strong>for</strong>mation about the<br />
system configuration and to per<strong>for</strong>m hardware troubleshooting. The diagnostic tool runs outside of the<br />
operating system to isolate hardware failures from issues that might be caused by the operating system<br />
or other software components.<br />
<strong>HP</strong> Advanced System Diagnostics:<br />
● Easy to obtain:<br />
◦ Installed on original image of every system hard drive (HDD)<br />
◦ Core set of tests installed in the BIOS of every system<br />
◦ Download to a USB key drive<br />
● Captures complete system configuration in<strong>for</strong>mation, including:<br />
◦ System serial number, product ID number, asset tag, and model<br />
◦ Memory size and configuration<br />
◦ Processor in<strong>for</strong>mation (including, type and speed)<br />
◦ Storage device in<strong>for</strong>mation<br />
◦ HDD: Launches Drive Self Test (DST) SMART tests <strong>for</strong> SATA drives<br />
◦ Keyboard controller revision<br />
◦ Bundles of tests to per<strong>for</strong>m a quick test or extensive test of the entire system<br />
◦ BIOS date and revision<br />
● Diagnostic tests:<br />
◦ System tests (Start-up, Run-In and System Tune-Up)<br />
◦ Individual component tests (Hard Disk Test and Memory Tests)<br />
● Diagnostic Failure Code Output — A unique, 24–digit Failure ID code is generated <strong>for</strong> each<br />
failure:<br />
◦ Randomly generated, unique each occurrence<br />
◦ Identifies the specific components that did not pass validation<br />
◦ Includes warranty in<strong>for</strong>mation with in<strong>for</strong>mation about the customer’s service entitlement<br />
◦ Provides in<strong>for</strong>mation about the model, serial number, test time stamp, and failure<br />
144 Chapter 4 Diagnostics and troubleshooting
◦ Includes recommended actions with URL in<strong>for</strong>mation on whom to contact<br />
◦ Generation of the failure code indicates a definite hardware failure – no additional<br />
troubleshooting is required<br />
● Error Log — The tool automatically saves an error log on the device from which the test was run<br />
(either the hard drive or USB drive). This log is available <strong>for</strong> future access from the tool and<br />
includes the test that was run, date of the test, and Pass/Fail in<strong>for</strong>mation including the Failure ID if<br />
one was generated.<br />
Downloading <strong>HP</strong> Advanced System Diagnostics<br />
NOTE: The most likely cause of the diagnostics file being unavailable on the hard drive is a hard<br />
drive fault, or a missing or corrupted <strong>HP</strong>_TOOLS partition. For example, some corporate customers<br />
reimage the workstation with their own custom image, which can remove the <strong>HP</strong>_TOOLs partition. In<br />
this case, a SoftPaq is available from the <strong>HP</strong> website.<br />
The <strong>HP</strong> UEFI <strong>Support</strong> Environment must be installed on and run from a FAT or FAT32 partition with a<br />
volume name of <strong>HP</strong>_TOOLS. The installer gives you the option to install to the HDD or a USB drive. If<br />
you install to the hard drive and the <strong>HP</strong>_TOOLS partition is not present, the installer prompts you to<br />
create the <strong>HP</strong>_TOOLS partition. If you install to a USB drive, the installer renames the partition on the<br />
USB drive to <strong>HP</strong>_TOOLS. If you use a custom image, you can create the <strong>HP</strong>_TOOLS partition manually<br />
with FAT32 and make the volume name <strong>HP</strong>_TOOLS.<br />
Follow these steps to download the <strong>HP</strong> Advanced System Diagnostics utility from the <strong>HP</strong> website to a<br />
USB key:<br />
1. Navigate to www.hp.com and select <strong>Support</strong> & Drivers.<br />
2. Select Drivers & Software.<br />
3. Enter the product name: Z220 to search <strong>for</strong> the Z220 product media.<br />
4. Select the specific model of <strong>HP</strong> Z220 <strong>Workstation</strong>.<br />
5. Choose the software/driver language. English (International) is the default.<br />
6. Select the appropriate operating system.<br />
7. On the Quick jump to downloads by category list, click Diagnostic.<br />
8. Next to <strong>HP</strong> UEFI <strong>Support</strong> Environment, click Download and save the file.<br />
9. Double-click the downloaded file and follow the on-screen instructions to expand the contents of<br />
the SoftPaq onto a USB key drive.<br />
CAUTION: The <strong>HP</strong>_TOOLS partition is not protected and can there<strong>for</strong>e be deleted. For these<br />
reasons, <strong>HP</strong> recommends that you do not place additional data on the <strong>HP</strong>_TOOLS partition. Because<br />
the partition is not backed up, corruption or failure of the partition will result in loss of all data on the<br />
partition, plus loss of UEFI functionality. You can find more in<strong>for</strong>mation on www.hp.com/go/<br />
techcenter/startup.<br />
Self-troubleshooting with <strong>HP</strong> Advanced System Diagnostics UEFI 145
Accessing <strong>HP</strong> Advanced System Diagnostics<br />
The process to access the diagnostics tool is the same regardless of the location from which it is run.<br />
The user presses ESC, while the system boots. This brings up the BIOS menu, which include an option<br />
to run diagnostics (F2). Once selected, the BIOS searches <strong>for</strong> a diagnostic signature. The diagnostic<br />
tool runs from the first location where the file is found.<br />
The system searches <strong>for</strong> the file in the follow sequence: USB device, hard drive (HDD), and BIOS.<br />
If the system does not find the diagnostics on either a USB device or the hard drive, the system presents<br />
a core set diagnostics (memory and HDD) that are located in the BIOS. The BIOS version is only<br />
accessible if the USB or hard drive versions are not available.<br />
User interface<br />
The first screen to appear is the Main Menu, which includes:<br />
● The current version of the diagnostics<br />
● The URL at which you can find more documentation about the diagnostics<br />
It also includes the following options:<br />
● System In<strong>for</strong>mation— Includes complete system, memory, and HDD<br />
● System Tests— Bundles of component tests to run in a sequence: Includes options <strong>for</strong> Quick and<br />
Extensive tests<br />
● Component Tests— HDD, memory<br />
● Error Log— Results of current and previous diagnostic tests<br />
● Language— 34 languages are supported<br />
● Exit button— Closes Diagnostic application and reboots the system<br />
● Esc key—Stops a diagnostics test while it is running<br />
146 Chapter 4 Diagnostics and troubleshooting
Running <strong>HP</strong> Advanced System Diagnostics<br />
The System in<strong>for</strong>mation screen provides extensive system in<strong>for</strong>mation, which is retrieved from the<br />
SMBIOS tables if they are available. Otherwise it is retrieved directly from the BIOS hardware.<br />
System in<strong>for</strong>mation<br />
To display the system in<strong>for</strong>mation, click System In<strong>for</strong>mation on the Main Menu.<br />
System in<strong>for</strong>mation includes:<br />
● Memory in<strong>for</strong>mation<br />
◦ Number of DIMMs installed<br />
◦ Device locator<br />
◦ Manufacturer<br />
◦ Serial number<br />
◦ Part number<br />
◦ Memory size<br />
◦ Memory speed<br />
◦ Memory type<br />
● Hard drivein<strong>for</strong>mation<br />
◦ Type<br />
◦ Model<br />
◦ Firmware version<br />
◦ Serial number<br />
◦ Capacity<br />
◦ LBA48 support<br />
◦ Self-Monitoring, Analysis, and Reporting Technology (SMART) (Enabled/Disabled)<br />
◦ Sector type<br />
Self-troubleshooting with <strong>HP</strong> Advanced System Diagnostics UEFI 147
Hardware diagnostic tests<br />
<strong>HP</strong> Advanced System Diagnostics provides five sets of hardware diagnostic tests to validate the<br />
functionality of hardware components (including the CPU, memory, graphics, and system board) prior<br />
to booting the operating system.<br />
If the operating system cannot load because of a hardware failure, the diagnostics can be used to<br />
determine which hardware component has failed.<br />
In the case of system failure, the diagnostics generate a unique 24–digit Failure ID code to identify the<br />
specific components that did not pass validation.<br />
Table 4-7 Hardware diagnostics tests<br />
Test Function<br />
Start-Up<br />
Test<br />
Analyzes the main components to make sure they are functioning properly to start the computer, the processor<br />
(CPU), the memory modules, and the hard drive. It checks the SMART attributes of the hard drive and<br />
per<strong>for</strong>ms the built-in Self-Test.<br />
Run-In Test Repeats the Start-up Test and checks <strong>for</strong> intermittent problems that the start-up test does not detect. Use this test<br />
if the computer is having intermittent problems while running, that do not appear to be related to system<br />
startup.<br />
System<br />
Tune-Up<br />
Hard Disk<br />
Test<br />
Memory<br />
Test<br />
Similar to the Start-Up Test, the System Tune-Up per<strong>for</strong>ms the Start-Up Test plus tests the video memory.<br />
The Hard Disk Test allows the selection of the Quick Extensive Test or Extensive Test of user selected drives in<br />
the system. The user can select a single drive, or they can select all of the drives in the system to run<br />
concurrently. The tests consists of the following subtests:<br />
● Quick Test<br />
◦ Hard Disk SMART Check<br />
◦ Hard Disk Short DST<br />
● Extensive Test<br />
◦ Hard Disk SMART Check<br />
◦ Hard Disk Short DST<br />
◦ Hard Disk Optimized DST Check<br />
◦ Hard Disk Long DST<br />
148 Chapter 4 Diagnostics and troubleshooting<br />
Analyzes the physical condition of the memory modules and reports any faulty modules. If this test reports an<br />
error, the faulty memory module(s) should be replaced immediately.<br />
The Memory Test allows selection of the Quick Memory Test or Extensive Memory Test.<br />
The Quick Test is the same version run in the Start-Up Test, and takes around five minutes <strong>for</strong> 4GB of memory<br />
to complete.<br />
The Extensive Test runs a longer version of the Memory Test, which adds additional pattern and transfer types<br />
to make it a more comprehensive test of the memory. This test normally runs approximately eight minutes/GB.<br />
Test times varies depending on system architecture, processor speed, and amount of memory.
Diagnostic codes and errors<br />
This section presents in<strong>for</strong>mation about diagnostic LED codes, LED color definitions, and POST error<br />
messages to help you troubleshoot problems.<br />
Diagnostic LED and audible (beep) codes<br />
This section describes the front panel LED error and operation codes as well as the audible codes that<br />
might occur be<strong>for</strong>e or during the POST.<br />
Table 4-8 Diagnostic lights and audible codes<br />
Activity Possible cause Recommended action<br />
Blue Power LED * on. No<br />
beeps.<br />
Blue Power LED * blinks<br />
every two seconds. * No<br />
beeps.<br />
Blue Power LED * is off. *<br />
No beeps.<br />
Blue Power LED * blinks<br />
three times*, once per<br />
second. * No beeps.<br />
Blue Power LED * blinks<br />
four times*, once per<br />
second. * No beeps.<br />
Computer on.<br />
Computer in Sleep mode<br />
(S3-Suspend to RAM).<br />
Select models only.<br />
Computer in Hibernate<br />
mode (S4-Suspend to<br />
disk) or system is off<br />
(S5).<br />
Computer in Sleep mode<br />
(S3-Suspend to RAM).<br />
Select models only.<br />
Computer in Hibernate<br />
mode (S4-Suspend to<br />
disk).<br />
*User-selectable. See The Computer Setup (F10)<br />
Utility menu on page 44 <strong>for</strong> details.<br />
For the following LED activity and beeps, the beeps are heard through the chassis speaker. Blinks and beeps repeat <strong>for</strong> five<br />
cycles, after which, only the blinks continue to repeat.<br />
Red Power LED blinks two<br />
times, once every second,<br />
followed by a two-second<br />
pause. Two beeps.<br />
CPU thermal protection<br />
activated by either of the<br />
following methods:<br />
● A fan might be<br />
blocked or not<br />
turning.<br />
● The heatsink and<br />
fan assembly is not<br />
properly attached<br />
to the CPU.<br />
N/A<br />
CAUTION: Internal components might be powered even when<br />
the computer is off. To prevent damage, disconnect the computer<br />
power cord be<strong>for</strong>e you remove a component.<br />
1. Ensure that the computer air vents are not blocked and the<br />
cooling fan is running.<br />
2. Open the access panel, press power button, and verify that<br />
the CPU fan is spinning. If the CPU fan is not spinning, make<br />
sure the fan cable is plugged into the computer board<br />
header. Ensure the fan is fully and properly seated or<br />
installed.<br />
3. If fan is plugged in and seated properly, but is not spinning,<br />
the problem might be in the CPU fan. Contact <strong>HP</strong> <strong>for</strong><br />
assistance.<br />
4. Verify that the fan assembly is properly attached. If problems<br />
persist, there might be a problem with the CPU heatsink.<br />
Contact <strong>HP</strong> <strong>for</strong> assistance.<br />
Diagnostic codes and errors 149
Table 4-8 Diagnostic lights and audible codes (continued)<br />
Activity Possible cause Recommended action<br />
Red Power LED blinks<br />
three times, once every<br />
second, followed by a<br />
two-second pause. Three<br />
beeps.<br />
Red Power LED blinks four<br />
times, once every second,<br />
followed by a two-second<br />
pause. Four beeps.<br />
Red Power LED blinks five<br />
times, once every second,<br />
followed by a two-second<br />
pause. Five beeps.<br />
Red Power LED blinks six<br />
times, once every second,<br />
followed by a two-second<br />
pause. Six beeps.<br />
Red Power LED blinks<br />
seven times, once every<br />
second, followed by a<br />
two- second pause. Seven<br />
beeps.<br />
CPU not installed (not an<br />
indicator of bad CPU).<br />
Power failure (power<br />
supply is overloaded).<br />
1. Verify that the CPU is present.<br />
2. Reseat the CPU.<br />
CAUTION: Internal components might be powered even when<br />
the computer is off. To prevent damage, disconnect the computer<br />
power cord be<strong>for</strong>e you remove a component.<br />
1. Open the access panel and ensure that all power<br />
connections are secure on the system board.<br />
2. Check if a device is causing the problem by removing all<br />
attached devices (such as hard, diskette, or optical disk<br />
drives, and expansion cards.) Power on the computer. If the<br />
system enters the POST, power off and replace one device at<br />
a time; repeat this procedure until failure occurs. Replace the<br />
device that is causing the failure. Continue adding devices<br />
one at a time to ensure all devices are functioning properly.<br />
Pre-video memory error. CAUTION: Internal components might be powered even when<br />
the computer is off. To prevent damage, disconnect the computer<br />
power cord be<strong>for</strong>e you remove a component.<br />
1. Reseat DIMMs.<br />
2. Replace DIMMs one at a time to isolate faulty module.<br />
3. Replace third-party memory with <strong>HP</strong> memory.<br />
4. The problem might be on the system board. Contact <strong>HP</strong> <strong>for</strong><br />
assistance.<br />
Pre-video graphics error. CAUTION: Internal components might be powered even when<br />
the computer is off. To prevent damage, disconnect the computer<br />
power cord be<strong>for</strong>e you remove a component.<br />
System board failure<br />
(ROM detected failure<br />
prior to video).<br />
150 Chapter 4 Diagnostics and troubleshooting<br />
1. Reseat the graphics card.<br />
2. Verify the graphics auxiliary power cable is connected (if<br />
applicable).<br />
3. Confirm the graphics card is in the appropriate slot (PCIe<br />
x16).<br />
4. The problem might be on the graphics card. Contact <strong>HP</strong> <strong>for</strong><br />
assistance.<br />
1. Clear CMOS.<br />
NOTE: Refer to the Maintenance and Service Guide <strong>for</strong><br />
the computer model <strong>for</strong> detailed in<strong>for</strong>mation on clearing<br />
CMOS.<br />
2. The problem might be on the system board. Contact <strong>HP</strong> <strong>for</strong><br />
assistance.
Table 4-8 Diagnostic lights and audible codes (continued)<br />
Activity Possible cause Recommended action<br />
Red Power LED blinks<br />
eight times, once every<br />
second, followed by a<br />
two-second pause. Eight<br />
beeps.<br />
Red Power LED blinks nine<br />
times, once every second,<br />
followed by a two-second<br />
pause. Nine beeps.<br />
Invalid ROM based on<br />
bad checksum.<br />
System powers on but<br />
does not start.<br />
CAUTION: Internal components might be powered even when<br />
the computer is off. To prevent damage, disconnect the computer<br />
power cord be<strong>for</strong>e you remove a component.<br />
1. Clear CMOS.<br />
NOTE: Refer to the Maintenance and Service Guide <strong>for</strong><br />
the computer model <strong>for</strong> detailed in<strong>for</strong>mation on clearing<br />
CMOS.<br />
2. Upgrade the ROM using SoftPaq, either from the hard disk<br />
drive, CD, diskette, or USB removable device (<strong>for</strong> example,<br />
<strong>HP</strong> Drive Key). See the ROM Flash section of the<br />
Maintenance and Service Guide at http://www.hp.com/<br />
support/workstation_manuals. SoftPaq is a self-extracting<br />
executable, which contains instructions <strong>for</strong> its use, that<br />
enables you to upgrade the ROM. To download the Softpaq<br />
executable, visit http://www.hp.com/go/<br />
workstationsupport.<br />
3. The problem might be on the system board. Contact <strong>HP</strong> <strong>for</strong><br />
assistance.<br />
4.<br />
1. The problem might be on the system board. Contact <strong>HP</strong> <strong>for</strong><br />
assistance.<br />
2. The problem might be in the CPU. Contact <strong>HP</strong> <strong>for</strong> assistance.<br />
Diagnostic codes and errors 151
Table 4-8 Diagnostic lights and audible codes (continued)<br />
Activity Possible cause Recommended action<br />
System does not power-on<br />
and LEDs are not blinking.<br />
No beeps.<br />
System unable to power<br />
on.<br />
CAUTION: Internal components might be powered even when<br />
the computer is off. To prevent damage, disconnect the computer<br />
power cord be<strong>for</strong>e you remove a component.<br />
To resolve the problem, choose one of the following options:<br />
Press and hold the power button <strong>for</strong> less than four seconds. If the<br />
hard disk drive LED turns green, then:<br />
1. Remove the expansion cards one at a time and try holding<br />
the power button again <strong>for</strong> less than four seconds.<br />
2. The problem might be on the system board. Contact <strong>HP</strong> <strong>for</strong><br />
assistance.<br />
Press and hold the power button <strong>for</strong> less than four seconds. If the<br />
hard disk drive LED does not turn on green then:<br />
1. Check that unit is plugged into a working AC outlet.<br />
2. Open the access panel and check that the power button<br />
harness is properly connected to the system board.<br />
3. Check that all power supply cables are properly connected<br />
to the system board.<br />
4. Check the power supply functionality.<br />
a. Disconnect the AC power.<br />
b. <strong>HP</strong> Z820 <strong>Workstation</strong> only—Remove the power supply<br />
from the chassis. All other workstations, unplug cables<br />
connected to system board.<br />
c. Plug in AC power.<br />
* The BIOS option you select controls the blue LED function during these suspend modes.<br />
152 Chapter 4 Diagnostics and troubleshooting<br />
● If the power supply fan spins and the BIST LED<br />
illuminates, the power supply is good; replace the<br />
system board.<br />
● If the power supply fan does not spin or the LED<br />
does not illuminate, replace the power supply.
LED color definitions<br />
The following table describes what each LED light on the computer front panel signifies.<br />
Table 4-9 LED color definitions<br />
LED state LED color System status<br />
Solid Blue System is on.<br />
Flashing Blue System is in Standby.<br />
Solid or flashing Red System has experienced an error. (See POST error<br />
messages on page 153.)<br />
None No light System is in Hibernate, or is off.<br />
POST error messages<br />
The Power-On Self Text (POST) is a series of diagnostic tests that runs automatically when the computer<br />
is powered on.<br />
Audible and visual messages occur be<strong>for</strong>e the operating system starts if the POST encounters a<br />
problem. POST checks the following items to ensure that the computer system is functioning properly:<br />
● Keyboard<br />
● DIMMs<br />
● Diskette drives<br />
● All mass storage devices<br />
● CPUs<br />
● Controllers<br />
● Fans<br />
● Temperature sensors<br />
● Cables (front/rear panels, audio, and USB ports)<br />
The table shown next describes the POST error messages.<br />
Table 4-10 POST error messages<br />
Screen message Probable cause Recommended action<br />
102—System Board Failure Potential system board problem; contact <strong>HP</strong> <strong>Support</strong>.<br />
110—Out of memory space<br />
<strong>for</strong> option ROMs<br />
161—Real-Time Clock Power<br />
Loss<br />
Option ROM <strong>for</strong> a device could not<br />
run because of memory constraints.<br />
Run the Computer Setup (F10) Utility to disable<br />
unneeded option ROMs, and to enable ACPI/USB<br />
Buffers at Top of Memory.<br />
1. Run the Computer Setup (F10) utility and set<br />
default settings.<br />
2. Replace the CMOS battery.<br />
3. Replace the system board.<br />
Diagnostic codes and errors 153
Table 4-10 POST error messages (continued)<br />
Screen message Probable cause Recommended action<br />
162—Systems Options Error 1. Run the Computer Setup (F10) utility and set<br />
default settings.<br />
163—Time and Date Not Set ● Invalid time or date in<br />
configuration memory.<br />
● RTC battery might need<br />
replacement.<br />
● CMOS jumper might not be<br />
properly installed.<br />
2. Replace the CMOS battery.<br />
3. Replace the system board.<br />
1. Set the date and time from the Control Panel or in<br />
the Computer Setup (F10) Utility (depending on<br />
the operating system).<br />
2. If the problem persists, replace the RTC battery.<br />
164—Memory Size Error Memory configuration is incorrect. Confirm that the correct memory is installed in the<br />
system.<br />
201—Memory Error RAM failure. 1. Run the Computer Setup (F10) utility or the<br />
Windows utilities.<br />
214—DIMM Configuration<br />
Warning<br />
DIMMs are not installed correctly (not<br />
paired correctly).<br />
2. Be sure that memory modules are installed<br />
correctly.<br />
3. Verify the memory module type.<br />
4. Remove and replace memory modules one at a<br />
time to isolate faulty modules.<br />
5. Replace faulty memory modules.<br />
6. If the error persists after replacing memory<br />
modules, replace the system board.<br />
See the service label on the computer access panel <strong>for</strong><br />
the correct memory configurations, and reseat the<br />
DIMMs accordingly.<br />
301—Keyboard Error Keyboard failure. 1. Reconnect the keyboard with the computer<br />
powered off.<br />
303—Keyboard Controller<br />
Error<br />
154 Chapter 4 Diagnostics and troubleshooting<br />
I/O board keyboard controller is<br />
defective or is not set properly.<br />
2. Connect a keyboard directly to the computer<br />
(instead of through a switch box).<br />
3. Be sure that none of the keys are pressed.<br />
4. Replace the keyboard.<br />
1. Reconnect the keyboard with the computer<br />
powered off.<br />
2. Connect a keyboard directly to the computer<br />
(instead of through a switch box).<br />
3. Replace the system board.
Table 4-10 POST error messages (continued)<br />
Screen message Probable cause Recommended action<br />
304—Keyboard or System<br />
Unit Error<br />
510—Splash Screen image<br />
corrupted<br />
Keyboard failure. 1. Reconnect the keyboard with the computer<br />
powered off.<br />
2. Connect a keyboard directly to the computer<br />
(instead of through a switch box).<br />
3. Be sure that none of the keys are pressed.<br />
4. Replace keyboard.<br />
5. Replace system board.<br />
Splash Screen image has errors. Update system BIOS/UEFI.<br />
511—CPU Fan not detected Fan is not connected or is defective. 1. Reseat the fan cable.<br />
512—Rear chassis fan not<br />
detected<br />
513—Front Chassis fan not<br />
detected<br />
514—Power supply wattage<br />
insufficient <strong>for</strong> hardware<br />
configuration<br />
515—Power supply fan not<br />
detected<br />
517—Memory fan not<br />
detected<br />
Fan missing, disconnected, or<br />
defective.<br />
Front fan missing, disconnected, or<br />
defective.<br />
Computer configuration requires more<br />
power than the power supply can<br />
provide<br />
Power supply fan is disconnected or<br />
defective.<br />
Memory fan missing, disconnected, or<br />
defective.<br />
518—PCI fan not detected PCI fan missing, disconnected, or<br />
defective.<br />
519—Hard drive fan not<br />
detected<br />
520—Memory fan (2) not<br />
detected<br />
Hard drive fan missing, disconnected,<br />
or defective.<br />
Memory fan (2) missing, disconnected,<br />
or defective.<br />
2. Reseat the fan.<br />
3. Replace the fan.<br />
1. Reseat the fan cable.<br />
2. Reseat the fan.<br />
3. Replace the fan.<br />
1. Reseat the fan cable.<br />
2. Reseat the fan.<br />
3. Replace the fan.<br />
Reduce the computer power consumption.<br />
1. Reseat the power supply cables.<br />
2. Replace the power supply.<br />
1. Reseat the fan cable.<br />
2. Reseat the fan.<br />
3. Replace the fan.<br />
1. Reseat the fan cable.<br />
2. Reseat the fan.<br />
3. Replace the fan.<br />
1. Reseat the fan cable.<br />
2. Reseat the fan.<br />
3. Replace the fan.<br />
1. Reseat the fan cable.<br />
2. Reseat the fan.<br />
3. Replace the fan.<br />
Diagnostic codes and errors 155
Table 4-10 POST error messages (continued)<br />
Screen message Probable cause Recommended action<br />
521—Memory fan (3) not<br />
detected<br />
522—Memory fan (4) not<br />
detected<br />
523—CPU fan (2) not<br />
detected<br />
524—Rear chassis fan(2) not<br />
detected<br />
525—Front chassis fan(2) not<br />
detected<br />
526—CPU Liquid Cooling<br />
pump not detected<br />
527—CPU Liquid Cooling<br />
pump (2) not detected<br />
528—CPU requires Liquid<br />
Cooling solution<br />
529—Unsupported WiFi<br />
Device(s) Detected<br />
917—Front Audio Not<br />
Connected<br />
918—Front USB Not<br />
Connected<br />
921—Front USB Not<br />
Connected<br />
Memory fan(3) missing, disconnected,<br />
or defective.<br />
Memory fan(4) missing, disconnected,<br />
or defective.<br />
CPU fan(2) missing, disconnected, or<br />
defective.<br />
Rear chassis fan(2) missing,<br />
disconnected, or defective.<br />
Front chassis fan(2) missing,<br />
disconnected, or defective.<br />
156 Chapter 4 Diagnostics and troubleshooting<br />
Liquid cooling pump on CPU1 is not<br />
detected.<br />
Liquid cooling pump on CPU2 is not<br />
detected.<br />
1. Reseat the fan cable.<br />
2. Reseat the fan.<br />
3. Replace the fan.<br />
1. Reseat the fan cable.<br />
2. Reseat the fan.<br />
3. Replace the fan.<br />
1. Reseat the fan cable.<br />
2. Reseat the fan.<br />
3. Replace the fan.<br />
1. Reseat the fan cable.<br />
2. Reseat the fan.<br />
3. Replace the fan.<br />
1. Reseat the fan cable.<br />
2. Reseat the fan.<br />
3. Replace the fan.<br />
1. Reseat the pump cable.<br />
2. Replace the pump.<br />
1. Reseat the pump cable.<br />
2. Replace the pump.<br />
Invalid system configuration. 1. Remove incorrect processor and reinstall original<br />
processor.<br />
An unsupported WiFi device has been<br />
installed into an internal slot.<br />
Front Audio mechanism is missing or is<br />
not connected.<br />
Front USB mechanism is missing or is<br />
not connected.<br />
Front USB mechanism is missing or is<br />
not connected.<br />
2. Remove incorrect cooling solution and reinstall<br />
original liquid cooling solution.<br />
Remove the unsupported device.<br />
1. Replace or reconnect the missing front audio<br />
mechanism to the system board.<br />
2. Reseat or replace the missing mechanism cable.<br />
1. Replace or reconnect the missing Front USB<br />
mechanism to the system board.<br />
2. Reseat or replace the missing mechanism cable.<br />
1. Replace or reconnect the missing Front USB<br />
mechanism to the system board.<br />
2. Reseat or replace the missing mechanism cable.
Table 4-10 POST error messages (continued)<br />
Screen message Probable cause Recommended action<br />
922—Front USB 2 Not<br />
Connected<br />
Front USB 2 mechanism is missing or<br />
is not connected.<br />
1. Replace or reconnect the missing Front USB 2<br />
mechanism to the system board.<br />
2. Reseat or replace the missing mechanism cable.<br />
923—Fatal IRPP error. Potential system problem; contact <strong>HP</strong> <strong>Support</strong>.<br />
924—Fatal IIO error Potential system problem; contact <strong>HP</strong> <strong>Support</strong>.<br />
927—Fatal error on DIMM in<br />
slot CPU X DIMM Y<br />
928—Fatal error occurred in<br />
the designated slot.<br />
939—Front USB 3.0 Not<br />
Connected<br />
940—Front 1394 Not<br />
Connected<br />
941—PCIe Device(s) installed<br />
in slots 3 or 4 with a single<br />
CPU<br />
1801—Microcode Update<br />
Error<br />
1802—Processor Not<br />
<strong>Support</strong>ed<br />
Fatal multibit ECC error detected on<br />
the DIMM in the slot labeled DIMM Y<br />
(where Y is a number), as labeled on<br />
the system board.<br />
Fatal error occurred in the designated<br />
slot.<br />
Front USB 3.0 mechanism is missing<br />
or is not connected.<br />
Front 1394 mechanism is missing or is<br />
not connected.<br />
Replace the DIMM in the identified slot.<br />
Move the card to a different slot. If the problem<br />
persists, replace the card.<br />
1. Replace or reconnect the missing Front USB 3.0<br />
mechanism to the system board.<br />
2. Reseat or replace the missing mechanism cable.<br />
1. Replace or reconnect the missing Front 1394<br />
mechanism to the system board.<br />
2. Reseat or replace the missing mechanism cable.<br />
Invalid system configuration. 1. Move the PCIe device from PCIe slots 3 and/or 4<br />
to other PCIe slots.<br />
Unknown or unsupported processor<br />
stepping.<br />
The system board does not support the<br />
processor.<br />
2. Add a second processor using appropriate <strong>HP</strong><br />
accessory kit.<br />
The microcode update failed. If the processor stepping<br />
is supported, contact <strong>HP</strong> <strong>Support</strong>.<br />
Replace the processor with a compatible one.<br />
Diagnostic codes and errors 157
5 Configuring password security and<br />
resetting CMOS<br />
This chapter describes how to configure password security and to reset CMOS, and includes these<br />
topics:<br />
● Preparing to configure passwords on page 158<br />
● Resetting the password jumper on page 159<br />
● Clearing and Resetting the CMOS on page 160<br />
Preparing to configure passwords<br />
The Computer Setup (F10) Utility enables you to create setup and power-on passwords.<br />
There are three possibilities <strong>for</strong> setting passwords:<br />
● Define a setup password only. You will need the password to enter the Computer Setup (F10)<br />
Utility, but do not need a password to start the workstation.<br />
● Define a power-on password only. This password lets you start the workstation or enter the setup<br />
utility.<br />
● Define both. In this case, the setup password lets you start the workstation and enter the setup<br />
utility. The power-on password starts the workstation but does not let you enter the setup utility,<br />
After you create both passwords, you can use the setup password in place of the power-on password<br />
as an override to log into the computer (a useful feature <strong>for</strong> a network administrator).<br />
NOTE: You can only clear the passwords with the password jumper. Clearing CMOS does not clear<br />
the passwords.<br />
CAUTION: Be<strong>for</strong>e pressing the Clear CMOS button, back up your computer CMOS settings.<br />
Pressing the Clear CMOS button resets CMOS values to factory defaults and erases customized<br />
in<strong>for</strong>mation, including asset numbers and special settings.<br />
To back up the CMOS settings, run the Computer Setup (F10) Utility and select Save to Diskette<br />
from the File menu.<br />
158 Chapter 5 Configuring password security and resetting CMOS
Resetting the password jumper<br />
Use the following procedure to disable the power-on or setup password features and clear the poweron<br />
and setup passwords.<br />
WARNING! To reduce the risk of personal injury from electrical shock and hot surfaces, be sure to<br />
disconnect the power cord from the wall outlet and allow the internal system components to cool be<strong>for</strong>e<br />
touching.<br />
CAUTION: When the computer is plugged in, the power supply has voltage applied to the system<br />
board, even when the computer is turned off. Failure to disconnect the power cord can result in<br />
damage to the system.<br />
CAUTION: Static electricity can damage the electronic components of the computer or optional<br />
equipment. Be<strong>for</strong>e beginning these procedures, be sure that you are discharged of static electricity by<br />
briefly touching a grounded metal object.<br />
1. Access the jumper:<br />
a. Shut down the operating system, power off the computer and external devices, and<br />
disconnect the computer power cord and external devices from power outlets.<br />
b. Disconnect any external devices.<br />
c. Verify that the AC power cord is disconnected from the power outlet.<br />
d. Open the workstation.<br />
e. Locate the password header and jumper.<br />
The password header is E49. The password jumper is blue so it can be easily identified.<br />
2. Remove the jumper from pins 1 and 2. Do not lose the jumper.<br />
3. Restart the computer:<br />
a. Close the workstation.<br />
b. Reconnect the AC power cord to the computer.<br />
c. Power on the computer and wait <strong>for</strong> the workstation to display the <strong>HP</strong> splash screen.<br />
4. Repeat step 1.<br />
5. Replace the jumper on pins 1 and 2.<br />
6. Repeat step 3, except press the F10 key during startup to access the Computer Setup (F10) Utility.<br />
7. Use the Setup Utility to create new passwords.<br />
Resetting the password jumper 159
Clearing and Resetting the CMOS<br />
This section describes the steps necessary to successfully clear and reset the CMOS. The CMOS of the<br />
computer stores password in<strong>for</strong>mation and in<strong>for</strong>mation about the computer configuration.<br />
Using the CMOS Button to Reset CMOS<br />
To clear CMOS using the Clear CMOS button, use the following procedure:<br />
WARNING! To reduce the risk of personal injury from electrical shock and hot surfaces, disconnect<br />
the power cord from the wall outlet and allow the internal system components to cool be<strong>for</strong>e touching.<br />
CAUTION: When the computer is plugged in, the power supply has voltage applied to the system<br />
board, even when the computer is powered off. Failure to disconnect the power cord can result in<br />
damage to the system.<br />
Static electricity can damage the electronic components of the computer or optional equipment. Be<strong>for</strong>e<br />
beginning these procedures, be sure that you are discharged of static electricity by briefly touching a<br />
grounded metal object.<br />
1. Back up your computer CMOS settings Run the Computer Setup (F10) Utility, and select File ><br />
Save to Disk.<br />
CAUTION: Pressing the Clear CMOS button resets CMOS values to factory defaults and erases<br />
customized in<strong>for</strong>mation, including asset numbers and special settings.<br />
2. Shut down the operating system, power off the computer and external devices, and disconnect<br />
peripheral devices.<br />
3. Disconnect the AC power cord from the power outlet.<br />
NOTE: The CMOS button does not clear CMOS if the power cord is connected.<br />
4. Open the workstation.<br />
5. Locate, press, and hold the CMOS button <strong>for</strong> five seconds.<br />
For assistance locating the CMOS button and other system board components, see the system<br />
board layout in <strong>HP</strong> Z820 <strong>Workstation</strong> system board components on page 33.<br />
6. Close the workstation, reconnect external devices, connect the power cord and power on the<br />
workstation.<br />
7. The system boots to an F1 prompt and displays a message that the date/time has changed and<br />
that system options have changed.<br />
8. Press F1. The system shuts down <strong>for</strong> three seconds and then powers on again.<br />
9. Use the F10 (Setup) Utility to reset the date and time.<br />
160 Chapter 5 Configuring password security and resetting CMOS
Using the Computer Setup (F10) Utility to Reset CMOS<br />
1. Access the Computer Setup (F10) Utility menu.<br />
2. When the Computer Setup message appears in the lower-right corner of the screen, press F10,<br />
and then press Enter to bypass the title screen, if necessary.<br />
If you do not press F10 while the message is displayed, the computer must be rebooted to access<br />
this utility.<br />
3. From the Computer Setup (F10) Utility menu, select File > Default Setup.<br />
This restores the settings that include boot sequence order and other factory settings. However, it<br />
does not <strong>for</strong>ce hardware rediscovery.<br />
4. Choose Restore Factory Settings as Default, and the press F10 to accept.<br />
5. Select File > Apply Defaults and Exit, and then press F10 to accept.<br />
6. Reset the computer passwords and configuration in<strong>for</strong>mation, such as the system date and time.<br />
NOTE: This step does not clear the passwords.<br />
Clearing and Resetting the CMOS 161
A Linux technical notes<br />
<strong>HP</strong> offers a variety of Linux <strong>solutions</strong> <strong>for</strong> <strong>HP</strong> workstation customers:<br />
● <strong>HP</strong> certifies and supports Red Hat Enterprise Linux (RHEL) on <strong>HP</strong> workstations.<br />
● <strong>HP</strong> certifies SUSE® Linux Enterprise Desktop (SLED) on <strong>HP</strong> workstations.<br />
● <strong>HP</strong> offers a SLED 11 preload on some Z series <strong>Workstation</strong>s.<br />
For Linux set up and restore procedures, see the user guide <strong>for</strong> your workstation at<br />
http://www.hp.com/support/workstation_manuals.<br />
System RAM on page 162<br />
Audio on page 162<br />
Network cards on page 163<br />
Topics<br />
Hyper-Threading Technology (HTT) on page 163<br />
NVIDIA ® Graphics <strong>Workstation</strong>s on page 164<br />
NOTE: After you set up the operating system, make sure the latest BIOS, drivers, and software<br />
updates are installed.<br />
CAUTION: Do not add optional hardware or third-party devices to the workstation until the<br />
operating system is successfully installed. Adding hardware might cause errors and prevent the<br />
operating system from installing correctly.<br />
System RAM<br />
Audio<br />
<strong>HP</strong> supports different amounts of total RAM in various <strong>HP</strong> workstations based on the number of<br />
hardware DIMM slots and the capabilities of the system. The total memory supported <strong>for</strong> each<br />
configuration is listed in the Hardware <strong>Support</strong> Matrix <strong>for</strong> <strong>HP</strong> Linux <strong>Workstation</strong>s at<br />
http://www.hp.com/support/linux_hardware_matrix.<br />
All <strong>HP</strong> workstations come with built-in audio hardware. The audio hardware is supported by the<br />
Advanced Linux Sound Architecture (ALSA) drivers included with all modern Linux distributions.<br />
The audio hardware provides basic playback and recording features. The ability to simultaneously play<br />
audio from multiple sources, such as applications and CDs, is provided by software mixing functionality<br />
in the ALSA driver. The per<strong>for</strong>mance of software audio mixing and playback functionality is greatly<br />
improved in ALSA version 1.0.13 and later drivers.<br />
162 Appendix A Linux technical notes
The optional Nvidia and AMD graphics supported in <strong>HP</strong> Personal workstations also provide audio<br />
functionality over HDMI, which can be passed through the DisplayPort connector to a monitor with<br />
audio capabilities. The vendor proprietary driver must be installed. Such a configuration may present<br />
two audio hardware choices. If you do not hear sound through the speakers, one possible reason is<br />
that the graphics card has been chosen by default. Check the audio settings (<strong>for</strong> example, Sound in<br />
gnome-control-center).<br />
In some systems, embedded Intel HD graphics may also present a similar HDMI audio device that can<br />
be used through the DisplayPort interface. No proprietary driver is needed <strong>for</strong> this device, just a<br />
sufficiently-recent kernel.<br />
Network cards<br />
All <strong>HP</strong> workstations include one or two integrated network interface controllers. Some support optional<br />
NICs. <strong>Most</strong> Linux distributions have drivers <strong>for</strong> these interfaces.<br />
Hyper-Threading Technology (HTT)<br />
The Z series <strong>Workstation</strong>s support HTT, an Intel-proprietary technology that improves processor<br />
per<strong>for</strong>mance through parallelization of computations (doing multiple tasks at once). The operating<br />
system treats an HTT-enabled processor as two virtual processors and shares the workload between<br />
them when possible. This feature requires that the operating system support multiple processors and be<br />
specifically optimized <strong>for</strong> HTT.<br />
To enable HTT:<br />
1. During startup, press F10 to enter the Computer Setup (F10) Utility.<br />
2. Select Advanced > Device Options.<br />
3. Use the arrow keys to set Hyper-Threading to Enable, and then press F10 to exit the menu.<br />
4. Select File > Save Changes and Exit.<br />
5. Restart the system to enable HTT.<br />
NOTE: On most recent Linux distributions (including RHEL 5, RHEL 6, SLED 11, and updates to those<br />
streams), the kernel automatically detects that HTT is enabled and works correctly.<br />
Network cards 163
NVIDIA ® Graphics <strong>Workstation</strong>s<br />
Some workstation configurations come with NVIDIA ® Quadro graphics hardware. <strong>HP</strong> recommends<br />
use of NVIDIA proprietary graphics drivers <strong>for</strong> best results on Linux systems.<br />
<strong>HP</strong> provides recommended versions of the drivers with RPM-compatible installers <strong>for</strong> RHEL and SLED<br />
distributions. These are available from the <strong>HP</strong> Installer Kit <strong>for</strong> Linux and from workstation driver<br />
repositories on hp.com. When <strong>HP</strong> installers are used, their contents and documentation links are<br />
installed in the /opt/hp/nvidia folder.<br />
When installing Linux on a workstation that has an NVIDIA card, administrators should select a VESAcompatible<br />
driver to avoid instability experienced with some open-source versions of the Nouveau and<br />
DRM drivers.<br />
Open source versions of Nouveau drivers and NVIDIA proprietary graphics drivers cannot coexist in<br />
the same runtime environment because they use the same hardware resources. If administrators create<br />
their own Linux environments using NVIDIA proprietary graphics drivers but choose not to use <strong>HP</strong>packaged<br />
versions, <strong>HP</strong> recommends that they manually append the following boot loader parameters<br />
to properly suppress the Nouveau driver at runtime (grub example below):<br />
kernel /vmlinuz ... rdblacklist=nouveau nouveau.modeset=0<br />
This action is applied by <strong>HP</strong> installers but must be applied/restored under other circumstances.<br />
To customize the display characteristics and re<strong>solutions</strong> of an NVIDIA proprietary graphics driver<br />
environment, execute:<br />
/usr/bin/nvidia-settings<br />
To create and manipulate the /etc/X11/xorg.conf file, execute:<br />
/usr/bin/nvidia-xconfig<br />
164 Appendix A Linux technical notes
AMD ® Graphics <strong>Workstation</strong>s<br />
Some workstation configurations include AMD ® graphics hardware. <strong>HP</strong> recommends use of AMD<br />
proprietary graphics drivers <strong>for</strong> best results on Linux systems.<br />
<strong>HP</strong> also provides recommended versions of AMD proprietary graphics drivers with RPM-compatible<br />
installers <strong>for</strong> RHEL and SLED distributions. These are available from the <strong>HP</strong> Installer Kit <strong>for</strong> Linux and<br />
workstation driver support packages on hp.com.<br />
The open source RADEON and RADEONHD drivers can conflict with the AMD proprietary graphics<br />
drivers, by claiming the hardware early in the boot process. The AMD driver installation process usually<br />
blacklists conflicting drivers and turns off kernel mode-setting in the initial RAM image.<br />
Administrator customization of the display characteristics and many other aspects of an AMD<br />
proprietary graphics driver environment is available through the following command, which starts the<br />
Catalyst Control <strong>Center</strong>:<br />
/usr/bin/amdcccle<br />
Some settings <strong>for</strong> AMD graphics, including reconfiguration of the /etc/X11/xorg.conf file, can be<br />
accomplished through the many options provided by the command:<br />
/usr/bin/aticonfig<br />
In<strong>for</strong>mation can be found in these directories after the driver is installed:<br />
/opt/hp/ati<br />
/usr/share/ati<br />
/usr/share/doc/fglrx<br />
If the automatic init script attempts to rebuild the kernel module, the log file is:<br />
/var/log/fglrx-build.log<br />
AMD® Graphics <strong>Workstation</strong>s 165
B Configuring RAID devices<br />
This appendix explains how to configure RAID arrays on your workstation. It includes these topics:<br />
Topics<br />
<strong>Support</strong>ed hard drive maximum and storage controller options on page 166<br />
<strong>Support</strong>ed RAID configurations on page 167<br />
Configuring Intel SATA RAID on page 168<br />
Configuring RAID on an LSI 2308 or LSI 9212-4i controller on page 171<br />
Configuring RAID on an LSI 9260-8i MegaRAID controller on page 174<br />
Software RAID solution on page 176<br />
For additional in<strong>for</strong>mation about RAID configuration, go to http://www.hp.com/support/RAID_FAQs.<br />
<strong>Support</strong>ed hard drive maximum and storage<br />
controller options<br />
This section lists the maximum number of hard drives supported on <strong>HP</strong> workstations <strong>for</strong> RAID<br />
configurations and storage controller options.<br />
NOTE: This section applies to internal workstation configurations that do not use add-in cards and<br />
external enclosures.<br />
Table B-1 Maximum hard drives allowed<br />
8.5 mm<br />
(3.5 in)<br />
Hard Drives Storage Controllers<br />
SATA SAS Onboard Optional<br />
6.3 mm<br />
(2.5 in)<br />
8.5 mm<br />
(3.5 in)<br />
6.3 mm<br />
(2.5 in)<br />
RST RSTe<br />
LSI<br />
2308<br />
LSI<br />
9212-4i<br />
LSI<br />
9260-8i<br />
Z220 SFF 2 2 — — Yes — — — —<br />
Z220<br />
CMT<br />
3 3 — — Yes — — — —<br />
Z420 4 4 4 4 — Yes — Yes Yes<br />
<strong>Z620</strong> 4 4 4 4 — Yes — Yes Yes<br />
Z820 6 8 6 8 — Yes Yes — Yes<br />
166 Appendix B Configuring RAID devices
<strong>Support</strong>ed RAID configurations<br />
All workstation plat<strong>for</strong>ms have Intel controllers. Three LSI controllers are supported on some plat<strong>for</strong>ms:<br />
● LSI 2308 — <strong>HP</strong> Z820 <strong>Workstation</strong>s<br />
● LSI 9212-4i — <strong>HP</strong> Z420 and <strong>Z620</strong> <strong>Workstation</strong>s (optional)<br />
● LSI 9260-8i — <strong>HP</strong> Z420, <strong>Z620</strong>, and Z820 <strong>Workstation</strong>s (optional)<br />
The following RAID configurations are supported.<br />
Table B-2 RAID configuration details<br />
Configuration Description Controllers<br />
RAID 0<br />
Integrated striped disk<br />
array<br />
RAID 1<br />
Mirrored disk array<br />
RAID 5<br />
Striped disk array with<br />
distributed parity<br />
RAID 10<br />
Striped and mirrored<br />
disk array<br />
RAID 1E<br />
Two-way mirroring<br />
● Two drive minimum.<br />
● Improved I/O per<strong>for</strong>mance.<br />
● No fault tolerance.<br />
● Failure of any disk in the array results in<br />
complete data loss.<br />
● Used to increase disk per<strong>for</strong>mance.<br />
● Two drive maximum.<br />
● 100% redundancy: all data from one drive is<br />
duplicated on a second drive.<br />
● Can recover from single drive failure.<br />
● Good entry-level redundant system.<br />
● Three or more drives (<strong>for</strong> workstations that<br />
support three or more hard drives).<br />
● Fault tolerant and provides I/O per<strong>for</strong>mance<br />
improvement, especially <strong>for</strong> write-biased<br />
applications.<br />
● Single drive failure does not cause data loss<br />
(per<strong>for</strong>mance is compromised until the failed<br />
drive is replaced and the array rebuilt).<br />
● Four or more disks (<strong>for</strong> workstations that support<br />
four or more hard drives).<br />
● Excellent per<strong>for</strong>mance.<br />
● Uses several drives to stripe data, then copies the<br />
striped drives to provide redundancy.<br />
● Offers high data transfer of striped arrays and<br />
increased data accessibility (reads).<br />
● Similar to RAID 10.<br />
● Must have an odd number of disks.<br />
● Improved read per<strong>for</strong>mance.<br />
● Intel with RSTe or RST<br />
● LSI 2308<br />
● LSI 9212-4i<br />
● LSI 9260-8i<br />
● Intel with RSTe or RST<br />
● LSI 2308<br />
● LSI 9212-4i<br />
● LSI 9260-8i<br />
● Intel with RSTe or RST<br />
● LSI 9260-8i<br />
● Intel with RSTe or RST<br />
● LSI 2308<br />
● LSI 9212-4i<br />
● LSI 9260-8i<br />
● LSI 2308<br />
● LSI 9212-4i<br />
<strong>Support</strong>ed RAID configurations 167
Configuring Intel SATA RAID<br />
This section describes how to use Intel ® Rapid Storage Technology enterprise (Intel ® RSTe) or Intel ®<br />
Rapid Storage Technology (RST) to set up and manage SATA RAID volumes.<br />
NOTE: These instructions apply to Windows. They also apply to Linux distributions that include the<br />
isci kernel driver support <strong>for</strong> the RSTe technology. This driver is included on recent releases of most<br />
upstream and enterprise distributions, and may be available to be added to some previous releases. If<br />
this driver is not available in the distribution, or is not applicable to the plat<strong>for</strong>m (e.g. the RST<br />
controller), the Software RAID solution is recommended.<br />
You can create a SATA RAID array that contains up to the maximum number of internal SATA hard disk<br />
drives and eSATA drives (if you use an optional eSATA bulkhead cable) supported on your workstation.<br />
Two or more hard drives must be attached to a controller (AHCI or SCU) <strong>for</strong> that controller's option<br />
ROM to run. If two or more drives are on each controller, a unique option ROM executes <strong>for</strong> each<br />
controller.<br />
The Intel SATA AHCI option ROM and SCU option ROM configuration utilities run when you select<br />
RAID+AHCI <strong>for</strong> the SATA emulation mode.<br />
168 Appendix B Configuring RAID devices
Configuring system BIOS<br />
To set up a RAID configuration, the emulation mode must be set to RAID+AHCI in the Computer Setup<br />
(F10) Utility. This is the default setting. If the mode has been changed, follow these steps to change it<br />
back.<br />
1. During startup, press F10 to enter the Computer Setup (F10) Utility.<br />
2. Using the arrow keys, navigate to:<br />
a. Desired language, then press Enter.<br />
b. Storage > Storage Options, then press Enter.<br />
c. SATA Emulation > RAID+AHCI, then press F10 to accept the new settings.<br />
3. Navigate to:<br />
a. Advanced > Power-On Options, then press Enter.<br />
b. POST Messages > Enable, then press F10 to accept the new settings.<br />
4. Navigate to:<br />
a. Advanced > Device Options, then press Enter.<br />
b. SATA RAID Option ROM Download, then press Enter.<br />
c. Enable, then press F10 to accept the new settings.<br />
5. Navigate to File > Save Changes and Exit, then press Enter.<br />
6. Press Enter to accept the changes when prompted.<br />
Configuring Intel SATA RAID 169
Configuring RAID with the Intel utility<br />
Follow these steps to create RAID volumes.<br />
NOTE: The option ROM displays once <strong>for</strong> each controller. For example, if you have two drives on the<br />
AHCI controller and two on the SCU controller, then both option ROMs will display. Select Ctrl+I when<br />
prompted to choose the controller.<br />
1. Press Ctrl+l when prompted to enter the Intel Rapid Storage Technology enterprise utility (RSTe).<br />
NOTE: If only one hard drive is attached, the utility does not display.<br />
NOTE: On the <strong>HP</strong> Z220 <strong>Workstation</strong>s, the Intel Rapid Storage Technology utility (RST) is used.<br />
2. Use the arrow keys to navigate to 1. Create RAID Volume, then press Enter.<br />
3. Enter the desired RAID volume name in the Name field, then press Tab.<br />
4. Select to a level in the RAID Level field, then press Tab.<br />
5. If three or more hard drives are installed (<strong>for</strong> workstations that support this configuration):<br />
a. Press Enter to display the Select dialog.<br />
b. Use the up/down arrow keys and the space bar to mark individual physical as members of<br />
the volume.<br />
c. Press Enter to exit the Select dialog and return to the Create Volume Menu dialog.<br />
6. If appropriate, select a size in the Stripe Size field, then press Tab.<br />
7. Enter the desired volume size in the Capacity field, then press Tab.<br />
8. Press Enter to initiate volume creation.<br />
9. When prompted, press Y to acknowledge the warning message and create the volume.<br />
10. Navigate to 5. Exit, then press Enter.<br />
11. Press Y when prompted to confirm the exit.<br />
170 Appendix B Configuring RAID devices
Configuring RAID on an LSI 2308 or LSI 9212-4i<br />
controller<br />
This section explains how to use the LSI Logic Configuration Utility to set up a SATA or SAS RAID array<br />
on the LSI 2308 or LSI 9212-4i controllers.<br />
NOTE: These instructions apply to Windows and Linux.<br />
RAID 0 configuration<br />
Follow these steps to configure an Integrated Striped (IS) volume with the BIOS-based configuration<br />
utility. The procedure assumes that the system has the required disk and disk controllers.<br />
1. During startup, press Ctrl-C when prompted to start the LSI Logic Configuration Utility.<br />
2. Using the arrow keys, navigate to:<br />
a. An appropriate adapter, then press Enter.<br />
b. RAID Properties, then press Enter.<br />
c. Create IS Volume, then press Enter.<br />
3. In the Create New Array screen, select the first disk <strong>for</strong> the IS volume. Move to the RAID Disk<br />
column <strong>for</strong> this disk, and use the Space bar and + or – arrows to select Yes.<br />
NOTE: If partitions are defined on the selected disk, a message warns you that data on the disk<br />
will be lost when the striped volume is created.<br />
4. To select additional drives <strong>for</strong> the striped volume (up to the maximum number allowed <strong>for</strong> the<br />
workstation), repeat step 3.<br />
5. When all drives are selected, press C to create the array. Navigate to Save changes then<br />
exit this menu and press Enter.<br />
6. When the new array is created, the Adapter Properties screen appears. Press Esc twice, then<br />
select Exit.<br />
Configuring RAID on an LSI 2308 or LSI 9212-4i controller 171
RAID 1 configuration<br />
Follow these steps to configure an Integrated Mirroring (IM) volume with the BIOS-based configuration<br />
utility. The procedure assumes that the system has the required drives and drive controllers.<br />
1. During BIOS startup, press Ctrl-C when prompted to start the LSI Logic Configuration Utility.<br />
2. Using the arrow keys, navigate to:<br />
a. An appropriate adapter, then press Enter.<br />
b. RAID Properties, then press Enter.<br />
c. Create IM Volume, then press Enter.<br />
3. To configure a two-disk mirrored volume with an optional hot spare disk:<br />
a. In the Create New Array screen, select the primary disk <strong>for</strong> the IM volume (the disk with<br />
the data you want to mirror.)<br />
b. Navigate to the RAID Disk column <strong>for</strong> this disk, then use the Space bar and + or – arrows<br />
to select Yes. The value in the Array Disk column changes to Primary.<br />
NOTE: If partitions are defined on the selected disk, a message warns you that data on the<br />
disk will be lost when the mirrored volume is created.<br />
c. Navigate to the secondary (mirrored) disk <strong>for</strong> the IM volume and set the Array Disk column<br />
value to Yes.<br />
NOTE: If partitions are defined on the selected disk, a message warns you that data on the<br />
disk will be lost when the mirrored volume is created.<br />
d. Press Delete to confirm that the data on the disk can be erased, or press any other key to<br />
deselect the disk.<br />
4. When all drives are selected, press C to create the array. Navigate to Save changes then<br />
exit this menu and press Enter.<br />
5. When the new array is created, the Adapter Properties screen appears. Press Esc twice, then<br />
select Exit.<br />
172 Appendix B Configuring RAID devices
RAID 1E/10 configuration<br />
Follow these steps to configure an Integrated Mirroring Extended (IME) volume. The procedure assumes<br />
the system has the required disk and disk controllers.<br />
NOTE: If an odd number of drives are used, a RAID 1E array is created. If an even number of drives<br />
are used, a RAID 10 array is created.<br />
1. During BIOS startup, press Ctrl-C when prompted to start the LSI Logic Configuration Utility.<br />
2. Using the arrow keys, navigate to:<br />
a. An appropriate adapter, then press Enter.<br />
b. RAID Properties, then press Enter.<br />
c. Create IME Volume, then press Enter.<br />
3. To configure a mirrored volume or an optional hot spare drive with up to the maximum number of<br />
drives allowed <strong>for</strong> the workstation:<br />
a. In the Create New Array screen, select the primary disk <strong>for</strong> the IME volume (the disk with<br />
the data you want to mirror.)<br />
b. Navigate to the RAID Disk column <strong>for</strong> this disk, then use the Space bar and + or – arrows<br />
to select Yes. The value in the Array Disk column changes to Primary.<br />
NOTE: If partitions are defined on the selected disk, a message warns you that data on the<br />
disk will be lost when the mirrored volume is created.<br />
c. Navigate to the next disk <strong>for</strong> the IME volume (mirrored) disk <strong>for</strong> the IM volume and set the<br />
Array Disk column value to Yes.<br />
NOTE: If partitions are defined on the selected disk, a message warns you that data on the<br />
disk will be lost when the mirrored volume is created.<br />
d. Press Delete to confirm that the data on the disk can be erased, or press any other key to<br />
deselect the disk.<br />
4. Repeat step 3 to select up to the workstation-specific maximum number of drives <strong>for</strong> the IME<br />
volume, including configuration of a hot spare.<br />
5. When all drives are selected, press C to create the array. Navigate to Save changes then<br />
exit this menu and press Enter.<br />
6. When the new array is created, the Adapter Properties screen appears. Press Esc twice, then<br />
select Exit.<br />
Configuring RAID on an LSI 2308 or LSI 9212-4i controller 173
Configuring RAID on an LSI 9260-8i MegaRAID<br />
controller<br />
RAID 0<br />
This section explains how to use the LSI Logic Configuration Utility to set up SATA or SAS RAID arrays<br />
on the LSI 9260-8i MegaRAID controller.<br />
NOTE: This section applies to Windows and Linux.<br />
Follow these steps to configure a RAID 0 volume with the BIOS-based configuration utility. The<br />
procedure assumes that the system has the required disk and disk controllers.<br />
NOTE: For more in<strong>for</strong>mation about the 9260-8i RAID controller, see the MegaRAID SAS Software<br />
User Guide at http://www.lsi.com/downloads/Public/MegaRAID%20Common%20Files/<br />
51530-00_RevE.pdf, particularly the “Introduction to RAID” and WebBIOS Configuration Utility”<br />
sections.<br />
1. Make sure the drives you want to configure are connected to the LSI 9260-8i MegaRAID<br />
controller.<br />
NOTE: For details, see LSI MegaRAID SAS 9260-8i Card Installation at<br />
http://bizsupport1.austin.hp.com/bc/docs/support/<strong>Support</strong>Manual/c02027249/<br />
c02027249.pdf.<br />
2. During startup, press Ctrl-H to enter the LSI 9260-8i WebBios utility.<br />
3. Configure the array:<br />
a. In the left pane, click Configuration Wizard.<br />
b. Select Add Configuration, then click Next.<br />
c. Select Manual Configuration, then click Next.<br />
d. Select the drives to include in the RAID array, then click Add To Array.<br />
e. Click Accept DG, then click Next.<br />
f. Click Add to SPAN, then click Next.<br />
4. Select the desired options <strong>for</strong> your RAID array. Available options:<br />
● RAID Level (available options depends on the number of disks in your RAID volume): RAID<br />
0, RAID 1, RAID 5, RAID 6<br />
● Strip Size: 8KB, 16KB, 32KB, 64KB, 128KB, 256KB, 512KB, 1MB<br />
● Access Policy: RW (Read/Write), Read Only, Blocked<br />
● Read Policy: Normal, Ahead<br />
● Write Policy: Write Through, Always Write Back, Write Back with BBU<br />
● IO Policy: Direct, Cached<br />
● Drive Cache: No Change, Enable, Disable<br />
174 Appendix B Configuring RAID devices
● Disable BGI: No, Yes<br />
● Select Size: Specify the size of the RAID array<br />
5. Click Next.<br />
6. A dialog warns you that if your Write Policy is set to:<br />
● Write Through, the configuration may result in slower per<strong>for</strong>mance.<br />
● Always Write Back, the configuration will result in optimal per<strong>for</strong>mance, but there is a<br />
risk of data loss in the event of power failure.<br />
● Write Back with BBU and you do not have BBU installed, write back is only enabled<br />
when the battery has a sufficient charge, and that during a learning cycle the caching policy<br />
will revert to write through until the learning cycle is complete.<br />
7. Click Yes to accept the warning, then click Next.<br />
8. Click Accept, then click Yes to save the configuration.<br />
9. Click Yes to initialize the virtual drive you just created.<br />
Configuring RAID on an LSI 9260-8i MegaRAID controller 175
Software RAID solution<br />
This section provides a summary of software RAID considerations when running the Linux operating<br />
system, as well as references to configuration procedures.<br />
Software RAID considerations<br />
The Linux kernel software RAID driver (called md, <strong>for</strong> multiple device) offers integrated software RAID<br />
without the need <strong>for</strong> additional hardware disk controllers or kernel patches. All that is required are<br />
multiple hard disks and a small amount of setup. Unlike most hardware RAID <strong>solutions</strong>, software RAID<br />
can be used with all types of disk technologies, including SATA, SAS, SCSI and solid state drives.<br />
Compared to hardware-based RAID, software RAID has disadvantages in managing the disks,<br />
breaking up data as necessary, and managing parity data. The CPU must assume some extra loading:<br />
disk-intensive workloads result in roughly double the CPU overhead (<strong>for</strong> example, from 15% to 30%).<br />
For most applications, this overhead is easily handled by excess headroom in the processors. But <strong>for</strong><br />
some applications where disk and CPU per<strong>for</strong>mance are very well balanced and already nearbottleneck<br />
levels, this additional CPU overhead can become troublesome. Hardware RAID offers<br />
advantages because of its large hardware cache and the capability <strong>for</strong> better scheduling of operations<br />
in parallel. However, software RAID offers more flexibility <strong>for</strong> disk and disk controller setup.<br />
Additionally, hardware RAID requires that a failed RAID controller must be replaced with an identical<br />
model to avoid data loss, whereas software RAID imposes no such requirements.<br />
Some software RAID schemes offer data protection through mirroring (copying the data to multiple disks<br />
in case one fails) or parity data (checksums that allow error detection and limited rebuilding of data in<br />
case of a failure), but all software RAID <strong>solutions</strong> on <strong>HP</strong> workstations require the shutdown of the system<br />
so that the failed drive can be replaced be<strong>for</strong>e redundancy can be restored. The replacement of failed<br />
drives in software RAID requires only a minimum amount of work.<br />
Per<strong>for</strong>mance considerations<br />
Disk I/O bandwidth is typically limited by the system bus speeds, the disk controller, and the disks<br />
themselves. The balance of these hardware limitations, as affected by the software configuration,<br />
determines where the real bottleneck is in the system.<br />
Several RAID levels offer improved per<strong>for</strong>mance relative to a standalone disk. If the disk throughput is<br />
lessened by a single disk controller, there is probably little you can do with RAID to improve the<br />
per<strong>for</strong>mance without adding another controller. On the other hand, if the raw disk per<strong>for</strong>mance is the<br />
bottleneck, a tuned software RAID solution can dramatically improve the throughput. The slower the<br />
disk is relative to the rest of the system, the better RAID per<strong>for</strong>mance will scale, because the slowest<br />
piece of the per<strong>for</strong>mance pipeline is being directly addressed by moving to RAID.<br />
176 Appendix B Configuring RAID devices
Configuring software RAID<br />
See the following sites <strong>for</strong> additional in<strong>for</strong>mation on configuring software RAID on Red Hat Enterprise<br />
Linux (RHEL) or SUSE Linux Enterprise Desktop (SLED).<br />
● Red Hat Enterprise Linux 6 — See the Storage Administration Guide at<br />
http://docs.redhat.com/docs/en-US/Red_Hat_Enterprise_Linux/6/html/<br />
Storage_Administration_Guide/index.html<br />
● Red Hat Enterprise Linux 5 — See the Deployment Guide at http://docs.redhat.com/docs/<br />
en-US/Red_Hat_Enterprise_Linux/5/html/Deployment_Guide/ch-raid.html<br />
● SLED 11 — See the Deployment Guide at http://www.suse.com/documentation/sled11/<br />
book_sle_deployment/?page=/documentation/sled11/book_sle_deployment/data/<br />
book_sle_deployment.html<br />
See the following site <strong>for</strong> more in<strong>for</strong>mation:<br />
● Open Source and Linux at <strong>HP</strong>: http://h10018.www1.hp.com/ww<strong>solutions</strong>/linux/index.html<br />
Software RAID solution 177
C System board designators<br />
<strong>HP</strong> Z220 SFF <strong>Workstation</strong><br />
Designator Silk screen Component/Description<br />
E15 E15 Crisis recovery header/jumper<br />
E49 E49 Clear password header/jumper<br />
J9 RJ45/USB LAN/DUAL USB 2.0<br />
J10 J10 Quad rear USB 3.0<br />
J20 PCI1J20 PCI slot (white)<br />
J31 J31 X1PCIEXP1 PCIe2 x1 slot (black)<br />
J41 J41 X16PCIEXP PCIe3 x16 slot (black)<br />
J42 J42 X4PCIEXP PCIe2 x16(4) slot (black)<br />
J53 VGA/COMA Serial port connector stacked over VGA port<br />
J64 DISPLAYPORT Display port connector<br />
J68 PS2 Mouse connector stacked over keyboard connector<br />
J78 IN/OUT Audio line in stacked over audio line out<br />
SW50 SW50 CMOS Clear CMOS switch/push button<br />
P1 PWR Power supply, 6-pin (white)<br />
P2 PWRCMD Power command, 6-pin (white)<br />
P3 PWRCPU Power supply, 4-pin (white)<br />
P5 P5 PB/LED Front power button/LED (black)<br />
P6 SPRK Internal speaker (white)<br />
P9 CHFAN1 Front chassis fan<br />
P23 FRONT AUD Front audio (blue)<br />
P24 FRONT USB Front I/O USB (yellow)<br />
P25 FRONT USB2 Front I/O USB (green)<br />
P52 COMB Serial port<br />
P124 HLCK Hood lock solenoid (black)<br />
P125 HSENSE Hood sensor<br />
P126 PAR Flying parallel port (black)<br />
P150 MEDIA Media card reader<br />
178 Appendix C System board designators
Designator Silk screen Component/Description<br />
P151 MEDIA2 Media card reader<br />
P160 SATAPWR1 HDD power (black)<br />
XBT1 XBT1 BAT Battery holder<br />
XMM1 - XMM4 XMM1 - XMM4<br />
DIMM1 - DIMM4<br />
Memory slots<br />
XU1 XU1 CPU socket<br />
<strong>HP</strong> Z220 CMT <strong>Workstation</strong><br />
Table C-1 <strong>HP</strong> Z220 CMT <strong>Workstation</strong> system board designators<br />
Designator Silk screen Component<br />
E15 E15 Crisis recovery header/jumper<br />
E49 E49 Clear password header/jumper<br />
J9 J9 RJ/USB LAN/DUAL USB<br />
J10 J10 QUAD USB Dual USB3.0/Dual USB2.0<br />
J20 J20 SLOT6 PCI 32/33 PCI slot<br />
J21 J21 SLOT7 PCI 32/33 PCI slot<br />
J31 J31 SLOT3 PCIe2 x1 PCIe2 x1 slot<br />
J32 J32 SLOT5 PCIe2 x1 PCIe2 x1 slot<br />
J33 J33 SLOT1 PCIe2 x8(4) PCIe2 x8(4) slot<br />
J34 J34 SLOT4 PCIe2 x16(4) PCI slot<br />
J41 J41 SLOT2 PCIe3 x16 75W PCIe3 x16 slot<br />
J64 DP Display port connector<br />
J65 DVI DVI-I connector<br />
J68 J68 PS2 Stacked keyboard/mouse connector<br />
J83 J83 Triple stacked audio jacks<br />
J86 J86 Slot2 PCIe x16 retention clip<br />
MTG1-MTG10 N/A Mounting holes<br />
P1 P1 Power supply connector (18-pin)<br />
P3 P3 CPU PWR CPU power connector (4-pin)<br />
P5 P5 Power button/HDD LED/Power LED switch/Side<br />
access panel sensor/Temperature header<br />
<strong>HP</strong> Z220 CMT <strong>Workstation</strong> 179
Table C-1 <strong>HP</strong> Z220 CMT <strong>Workstation</strong> system board designators (continued)<br />
Designator Silk screen Component<br />
P6 SPKR Speaker<br />
P8 P8 CHFAN Rear system fan<br />
P9 P9 Front fan header<br />
P24 P24 FRONT USB Front panel USB header<br />
P25 P25 INTERNAL USB2 Dual internal USB header<br />
P26 P26 INTERNAL USB3 Single internal USB header<br />
P27 DASH/USB1 DASH/Dual internal USB<br />
P29 P29 HDD LED Hard disk drive LED connector<br />
P54 COM Serial port header<br />
P60-P64 SATA0 - SATA4 SATA connectors<br />
P65 eSATA eSATA connector<br />
P66 - P67 P66 - P67<br />
SATA4 - SATA5<br />
SATA connectors<br />
P70 P70 CPU0 FAN Primary CPU fan header<br />
P124 P124 HOOD LOCK Side access panel solenoid lock header<br />
P126 PAR Parallel port header<br />
SW50 SW50 CMOS Clear CMOS switch/push button<br />
XBT1 XBT1 BAT Battery holder<br />
XMM1 - XMM4 XMM1 - XMM4<br />
DIMM1 - DIMM4<br />
Memory slots<br />
XU1 XU1 Primary CPU socket<br />
<strong>HP</strong> Z420 and <strong>Z620</strong> <strong>Workstation</strong> system board<br />
designators<br />
Table C-2 <strong>HP</strong> Z420 and <strong>Z620</strong> <strong>Workstation</strong> system board designators<br />
Designator Name on board Component<br />
E14 BB ROM bootblock header<br />
E15 BBR ROM bootblock recovery header<br />
E16 ROM RCVRY ROM Recovery header/jumper<br />
E17 LPC LPC Debug<br />
180 Appendix C System board designators
Table C-2 <strong>HP</strong> Z420 and <strong>Z620</strong> <strong>Workstation</strong> system board designators<br />
(continued)<br />
Designator Name on board Component<br />
E49/JP49 PSWD Clear Password header<br />
J9 RJ45/USB Stacked RJ45/Dual USB<br />
J10 USB Quad Stacked USB<br />
J20-22 PCIx (x=1-3) PCI slots<br />
J31-32 X1PCIEXPx (x=1-2) PCI Express X1 slot<br />
J41 X16PCIEXP or MXM PCI Express x16 or MXM graphics slot<br />
J42 X4PCIEXP PCI Express x4 graphics slot<br />
J68 PS2 Stack keyboard/mouse connector<br />
J69 VGA or VGA/COMA VGA connector or VGA+serial port<br />
J70 USB Primary Single USB<br />
J71 USB Secondary Single USB<br />
J90 USB 3rd Single USB<br />
J91 USB 4th Single USB<br />
J72 MIC Microphone jack<br />
J73 IN Line-In audio jack<br />
J74 OUT Line-out audio jack<br />
J76 HDPH Headphone jack<br />
J77 PH/MIC Double Stacked PH/MIC<br />
J78 IN/OUT Double Stacked Line-in/out<br />
J80 SER/AUD Stacked Serial/Audio<br />
J81 USB Primary Double USB<br />
J82 USB Secondary Double USB<br />
J83 AUD Triple Stacked Audio<br />
J103 PWR DC Input Power<br />
P1 PWR P/S connector<br />
P2 PWRMEM P/S memory power connector<br />
P3 PWRCPU VCCP 12V header<br />
P4 (<strong>Z620</strong> only) PWRCPU2 P/S 2nd CPU & Memory 12V Connector<br />
P5 PB/LE Control panel<br />
P6 SPKR Speaker connector<br />
P8 CPUFAN CPU fan header<br />
<strong>HP</strong> Z420 and <strong>Z620</strong> <strong>Workstation</strong> system board designators 181
Table C-2 <strong>HP</strong> Z420 and <strong>Z620</strong> <strong>Workstation</strong> system board designators<br />
(continued)<br />
Designator Name on board Component<br />
P9 CHFAN Front chassis fan header<br />
P10 FLOPPY Floppy header<br />
P11 CHFAN2 Rear chassis fan header (<strong>Z620</strong>)<br />
P23 FRONT AUD Header <strong>for</strong> Front Panel Audio<br />
P24/25 FRONT USB/FRONT USB2 Header <strong>for</strong> Front Panel USB<br />
P52 COMAB Header/Connector <strong>for</strong> 2nd Serial Port<br />
P54 COMA Header/Connector <strong>for</strong> 1st Serial Port<br />
P60 SATA0 SATA0 connector<br />
P61 SATA1 SATA1 connector<br />
P626 SATA2 SATA2 connector<br />
P63 SATA3 SATA3 connector<br />
P66 SATA4 SATA4 connector<br />
P91 P91 <strong>Z620</strong> memory fan<br />
P92 P92 Z420 memory fan<br />
P95 CHFAN2 Rear chassis fan header (Z420)<br />
P125 SATA4 Hood sense (Z420)<br />
<strong>HP</strong> Z820 <strong>Workstation</strong>s<br />
Table C-3 <strong>HP</strong> Z820 <strong>Workstation</strong> system board designators<br />
Designator Name on board Component<br />
E1/JP1 SPI BIOS ME/AMT Flash Override Header<br />
E15/JP15 BIOS Crisis Recovery Header<br />
E49/JP49 PSWR Password Clear Jumper<br />
J2 SAS OPT SAS Option ROM Header<br />
J9 RJ-45/USB Stacked RJ-45/Dual USB 2.0<br />
J11 RJ-45/USB2.0 Stacked RJ-45/Dual USB 2.0<br />
J12 1394A/USB3.0 Stacked 1394a/Dual USB 3.0<br />
J13 FRONT 1394A Front 1394a<br />
J20 J20 SLOT7-PCI PCI 32/33 Slot<br />
J31 J31 SLOT1-PCIe3 x8(4) PCI Express Gen 3 x8(4) Slot, Open-Ended<br />
182 Appendix C System board designators
Table C-3 <strong>HP</strong> Z820 <strong>Workstation</strong> system board designators (continued)<br />
Designator Name on board Component<br />
J32 J32 SLOT5-PCIe2 x8(4) PCI Express Gen 2 x8 (4) Slot, Open-Ended<br />
J33 J33 SLOT4-PCIe3 x16 PCI Express Gen 3 x16 Graphics Slot<br />
J34 J34 SLOT3-PCIe3 x16(8) PCI Express Gen 3 x16(8) Slot<br />
J41 J41 SLOT2-PCIe3 x16 PCI Express Gen 3 x16 Graphics Slot<br />
J42 J42 SLOT6-PCIe3 x16 PCI Express Gen 3 x16 Graphics Slot<br />
J68 PS2 Stacked Keyboard/Mouse<br />
J83 Triple Stacked Audio<br />
P1 MAIN POWER Main Power Connector<br />
P2 MEM PWR Memory Power Connector<br />
P3 CPU0 PWR CPU0 Power Connector<br />
P4 CPU1 PWR CPU1 Power Connector<br />
P5 FRONT UI Front Power Button/LED/Speaker Header<br />
P8 REAR FANS Rear Chassis Fans Header<br />
P24 USB 2.0 Internal USB 2.0 2x5 Header<br />
P25 USB 2.0 Internal USB 2.0 2x5 Header<br />
P26 USB 2.0 DASH Internal USB 2.0 2x5 Header<br />
P27 FRONT USB 2.0 Front USB 2.0 Header<br />
P28 FRONT AUDIO Front Audio<br />
P29 Front USB 3.0 Front USB 3.0 Header<br />
P54 SERIAL Serial Port<br />
P60 SATA0 AHCI SATA0 Connector<br />
P61 SATA1 AHCI SATA1 Connector<br />
P62 SCU3 SCU SATA3 Connector<br />
P63 SCU2 SCU SATA2 Connector<br />
P64 SCU1 SCU SATA1 Connector<br />
P65 SCU0 SCU SATA0 Connector<br />
P70 CPU+MEM FANS CPU and Memory Fans<br />
P80 SAS0 SAS/SATA Port 0<br />
P81 SAS1 SAS/SATA Port 1<br />
P82 SAS2 SAS/SATA Port 2<br />
P83 SAS3 SAS/SATA Port 3<br />
P84 SAS4 SAS/SATA Port 4<br />
<strong>HP</strong> Z820 <strong>Workstation</strong>s 183
Table C-3 <strong>HP</strong> Z820 <strong>Workstation</strong> system board designators (continued)<br />
Designator Name on board Component<br />
P85 SAS5 SAS/SATA Port 5<br />
P86 SAS6 SAS/SATA Port 6<br />
P87 SAS7 SAS/SATA Port 7<br />
P93 FRNT FAN2 Front Fan 2 Header<br />
P94 FRNT FAN1 Front Fan 1 Header<br />
P125 LC1 Liquid Cooling Header 1<br />
P126 LC0 Liquid Cooling Header 0<br />
SW3 SW3 Rear Power Button/LED<br />
SW50 CMOS Clear CMOS Button<br />
XBT1 XBT1 Battery<br />
XMM1 CPU0-DIMM8 CPU0 Memory DIMM8<br />
XMM2 CPU0-DIMM7 CPU0 Memory DIMM7<br />
XMM3 CPU0-DIMM6 CPU0 Memory DIMM6<br />
XMM4 CPU0-DIMM5 CPU0 Memory DIMM5<br />
XMM5 CPU0-DIMM1 CPU0 Memory DIMM1<br />
XMM6 CPU0-DIMM2 CPU0 Memory DIMM2<br />
XMM7 CPU0-DIMM3 CPU0 Memory DIMM3<br />
XMM8 CPU0-DIMM4 CPU0 Memory DIMM4<br />
XMM9 CPU1-DIMM1 CPU1 Memory DIMM1<br />
XMM10 CPU1-DIMM2 CPU1 Memory DIMM2<br />
XMM11 CPU1-DIMM3 CPU1 Memory DIMM3<br />
XMM12 CPU1-DIMM4 CPU1 Memory DIMM4<br />
XMM13 CPU1-DIMM8 CPU1 Memory DIMM8<br />
XMM14 CPU1-DIMM7 CPU1 Memory DIMM7<br />
XMM15 CPU1-DIMM6 CPU1 Memory DIMM6<br />
XMM16 CPU1-DIMM5 CPU1 Memory DIMM5<br />
184 Appendix C System board designators
Index<br />
B<br />
BIOS ROM 41<br />
C<br />
Cable management 82<br />
CMOS 158<br />
clearing and resetting 160<br />
Computer Setup (F10) Utility 42<br />
Menu description 44<br />
Configuring RAID devices 166<br />
maximum hard drives allowed<br />
166<br />
SAS RAID on LSI 2308 or LSI<br />
9212-4i controllers 171<br />
SAS RAID on LSI 9260-8i<br />
MegaRAID controller 174<br />
SATA RAID 168<br />
D<br />
Desktop management 60<br />
Altiris Client Management<br />
Solutions 63<br />
FailSafe Boot Block ROM 64<br />
Fault notification and recovery<br />
75<br />
<strong>HP</strong> Client Manager Software<br />
63<br />
<strong>HP</strong> SoftPaq Download<br />
Manager 64<br />
<strong>HP</strong>QFlash 64<br />
Initial configuration 61<br />
programmable power button<br />
76<br />
Remote ROM Flash 64<br />
Remote system install 61<br />
ROM Flash 64<br />
System Software Manager 64<br />
Updating software 63<br />
<strong>Workstation</strong> security 65<br />
Diagnostic codes and errors 149<br />
LED and beep codes 149<br />
LED colors 153<br />
POST errors 153<br />
Diagnostics 115<br />
Diagnostics and troubleshooting<br />
Diagnosis guidelines 118<br />
<strong>HP</strong> Advanced System<br />
Diagnostics 144<br />
<strong>HP</strong> Vision Diagnostics 135<br />
Locating ID labels 117<br />
Locating warranty info 118<br />
DIMM configurations, supported<br />
101<br />
DIMM installation order<br />
<strong>HP</strong> Z420 <strong>Workstation</strong> 103,<br />
104<br />
<strong>HP</strong> <strong>Z620</strong> <strong>Workstation</strong> 105<br />
<strong>HP</strong> Z820 <strong>Workstation</strong> 106<br />
E<br />
Expansion card slot identification<br />
<strong>HP</strong> Z220 CMT <strong>Workstation</strong> 86<br />
<strong>HP</strong> Z220 SFF <strong>Workstation</strong> 85<br />
<strong>HP</strong> Z420 <strong>Workstation</strong> 88<br />
<strong>HP</strong> <strong>Z620</strong> <strong>Workstation</strong> 90<br />
<strong>HP</strong> Z820 <strong>Workstation</strong> 92<br />
M<br />
Memory<br />
DIMM installation guidelines<br />
102<br />
O<br />
Operating system setup 162<br />
P<br />
Password configuration 158<br />
Password jumper<br />
resetting 159<br />
Power supply<br />
Expansion card configuration<br />
restrictions 84<br />
power consumption 109<br />
resetting 109<br />
specifications 107<br />
Product features 1<br />
Computer components 4<br />
ERP compliance mode 39<br />
Front panel components 2<br />
<strong>HP</strong> Cool Tools 40<br />
Hyper-threading 40<br />
Physical characteristics 7, 14,<br />
21, 28, 35<br />
Rear panel components 3, 9,<br />
10<br />
SATA Power Management 40<br />
System board architecture 6,<br />
13, 20, 27<br />
Turbo Boost 40<br />
Product overview 1<br />
R<br />
Replacing components<br />
Battery 81<br />
cable management 82<br />
Component locations 5, 12,<br />
19, 26, 33<br />
CPU (processor) and CPU<br />
heatsink 83<br />
expansion slots 84<br />
guidelines 81<br />
hard disk drive 94<br />
in<strong>for</strong>mation and guidelines 77<br />
Memory 101<br />
power supply 107<br />
Service considerations 79<br />
warnings and cautions 77<br />
S<br />
System board components 5<br />
System board designators 178<br />
System management 39<br />
T<br />
Troubleshooting 115<br />
W<br />
<strong>Workstation</strong> components<br />
<strong>HP</strong> Z420 <strong>Workstation</strong> 15<br />
<strong>HP</strong> Z420 <strong>Workstation</strong> front<br />
panel 16<br />
<strong>HP</strong> Z420 <strong>Workstation</strong> rear<br />
panel 17<br />
<strong>HP</strong> <strong>Z620</strong> <strong>Workstation</strong> 23<br />
Index 185
<strong>HP</strong> <strong>Z620</strong> <strong>Workstation</strong> chassis<br />
25<br />
<strong>HP</strong> <strong>Z620</strong> <strong>Workstation</strong> front<br />
panel 23<br />
<strong>HP</strong> <strong>Z620</strong> <strong>Workstation</strong> rear<br />
panel 24<br />
<strong>HP</strong> Z820 <strong>Workstation</strong> 30<br />
<strong>HP</strong> Z820 <strong>Workstation</strong> chassis<br />
32<br />
<strong>HP</strong> Z820 <strong>Workstation</strong> front<br />
panel 30<br />
<strong>HP</strong> Z820 <strong>Workstation</strong> rear<br />
panel 31<br />
<strong>Workstation</strong> setup<br />
Ensuring proper ventilation 38<br />
186 Index