V-752EW - Schuss Home Electronic
V-752EW - Schuss Home Electronic
V-752EW - Schuss Home Electronic

Sie wollen auch ein ePaper? Erhöhen Sie die Reichweite Ihrer Titel.
YUMPU macht aus Druck-PDFs automatisch weboptimierte ePaper, die Google liebt.
Alignment and Adjustment<br />
5-3 Head Switching Point Adjustment<br />
1) Playback the alignment tape.<br />
2) Press the “SW713” button on Main PCB with pincers to set the adjustment mode. (See Fig. 5-2 )<br />
3) Press the “SP/LP” button of remote control then adjustment is operated automatically. (See Fig. 5-1)<br />
4) Turn the Power off.<br />
5-4 NVRAM Option Setting<br />
1) NVRAM Option is adjusted at production line basically.<br />
2) In case Micom (IC601) and NVRAM (IC605 ; EEPROM) is replaced, be sure to set the corresponding ooption number of the repaired<br />
model. (If the option is not set, the unit is not operated.)<br />
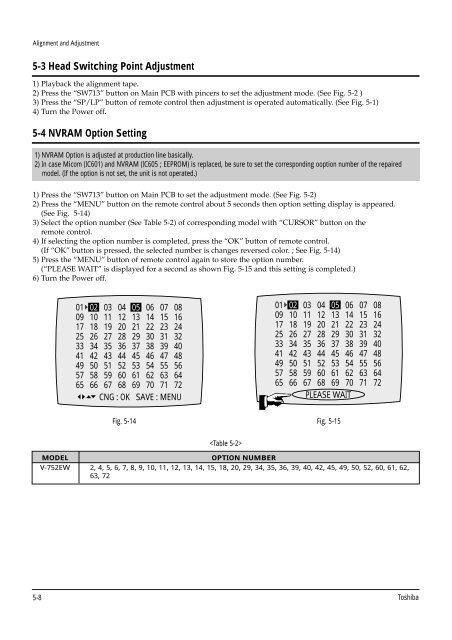
1) Press the “SW713” button on Main PCB to set the adjustment mode. (See Fig. 5-2)<br />
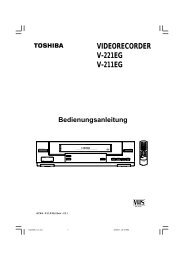
2) Press the “MENU” button on the remote control about 5 seconds then option setting display is appeared.<br />
(See Fig. 5-14)<br />
3) Select the option number (See Table 5-2) of corresponding model with “CURSOR” button on the<br />
remote control.<br />
4) If selecting the option number is completed, press the “OK” button of remote control.<br />
(If “OK” button is pressed, the selected number is changes reversed color. ; See Fig. 5-14)<br />
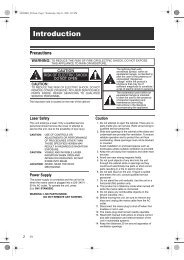
5) Press the “MENU” button of remote control again to store the option number.<br />
(“PLEASE WAIT” is displayed for a second as shown Fig. 5-15 and this setting is completed.)<br />
6) Turn the Power off.<br />
01 02 03 04 05 06 07 08<br />
09 10 11 12 13 14 15 16<br />
17 18 19 20 21 22 23 24<br />
25 26 27 28 29 30 31 32<br />
33 34 35 36 37 38 39 40<br />
41 42 43 44 45 46 47 48<br />
49 50 51 52 53 54 55 56<br />
57 58 59 60 61 62 63 64<br />
65 66 67 68 69 70 71 72<br />
CNG : OK SAVE : MENU<br />
Fig. 5-14<br />
<br />
01 02 03 04 05 06 07 08<br />
09 10 11 12 13 14 15 16<br />
17 18 19 20 21 22 23 24<br />
25 26 27 28 29 30 31 32<br />
33 34 35 36 37 38 39 40<br />
41 42 43 44 45 46 47 48<br />
49 50 51 52 53 54 55 56<br />
57 58 59 60 61 62 63 64<br />
65 66 67 68 69 70 71 72<br />
PLEASE WAIT<br />
Fig. 5-15<br />
MODEL OPTION NUMBER<br />
V-<strong>752EW</strong> 2, 4, 5, 6, 7, 8, 9, 10, 11, 12, 13, 14, 15, 18, 20, 29, 34, 35, 36, 39, 40, 42, 45, 49, 50, 52, 60, 61, 62,<br />
63, 72<br />
5-8 Toshiba