Erfolgreiche ePaper selbst erstellen
Machen Sie aus Ihren PDF Publikationen ein blätterbares Flipbook mit unserer einzigartigen Google optimierten e-Paper Software.
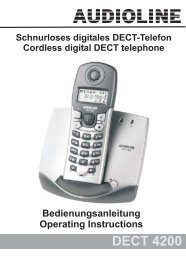
Schnurloses digitales DECT−Telefon<br />
Cordless digital DECT telephone<br />
Bedienungsanleitung<br />
Operating Instructions<br />
<strong>EURO</strong> <strong>100</strong>
2<br />
2<br />
Euro <strong>100</strong><br />
Bedienungsanleitung . . . . . . . . . . . . . . . . . . . . . . . . 3<br />
Operating Instructions . . . . . . . . . . . . . . . . . . . . . . . 23<br />
Vous trouverez le mode d’emploi en français<br />
sur Internet www.audioline.de<br />
Le istruzioni per l’uso in italiano sono disponibili<br />
sul nostro sito Internet www.audioline.de<br />
De Nederlandse gebruiksaanwijzing vindt u op de<br />
website: www.audioline.de<br />
Instrukcja obsługi w wersji polskiej dostępna jest na<br />
naszej stronie internetowej pod adresem<br />
www.audioline.de<br />
A magyar nyelvŹ használati útmutató a<br />
www.audioline.de internetoldalon található.<br />
El manual de instrucciones en español lo puede<br />
encontrar en Internet en www.audioline.de
− Inhaltsverzeichnis −<br />
1 Sicherheitshinweise . . . . . . . . . . . . . . . . . . . . . 4<br />
2 Bedienelemente . . . . . . . . . . . . . . . . . . . . . . . . 6<br />
3 Schnellstart . . . . . . . . . . . . . . . . . . . . . . . . . . . . 7<br />
4 Display . . . . . . . . . . . . . . . . . . . . . . . . . . . . . . . . 9<br />
5 Telefonieren . . . . . . . . . . . . . . . . . . . . . . . . . . . 10<br />
6 Telefon einstellen . . . . . . . . . . . . . . . . . . . . . . . 13<br />
7 Besondere Funktionen . . . . . . . . . . . . . . . . . . 17<br />
8 Fehlerbeseitigung . . . . . . . . . . . . . . . . . . . . . . 19<br />
9 Wichtige Informationen . . . . . . . . . . . . . . . . . . 21<br />
10 Stichwortverzeichnis . . . . . . . . . . . . . . . . . . . .<br />
23<br />
3
4<br />
− Sicherheitshinweise −<br />
1 Sicherheitshinweise<br />
Lesen Sie diese Bedienungsanleitung sorgfältig durch.<br />
1.1 Bestimmungsgemäße Verwendung<br />
Dieses Telefon ist geeignet für das Telefonieren innerhalb eines<br />
Telefonnetzes. Jede andere Verwendung gilt als nicht<br />
bestimmungsgemäß. Eigenmächtige Veränderungen oder Umbauten<br />
sind nicht zulässig. Öffnen Sie das Gerät in keinem Fall selbst und<br />
führen Sie keine eigenen Reparaturversuche durch.<br />
1.2 Aufstellungsort<br />
Das Telefon ist für den Betrieb in Innenäumen mit einem<br />
Temperaturbereich von 10°C bis 30°C ausgelegt. Die Basisstation darf<br />
nicht in Feuchträumen wie Bad oder Waschküche aufgestellt werden.<br />
Vermeiden Sie Belastungen durch Rauch, Staub, Erschütterungen,<br />
Chemikalien, Feuchtigkeit, Hitze oder direkte Sonneneinstrahlung.<br />
Stellen Sie die Basisstation mit einem Abstand von 1 m zu anderen<br />
elektronischen Geräten auf, da es sonst zu gegenseitiger Störung<br />
kommen kann.<br />
Verwenden Sie das Mobilteil nicht in explosionsgefährdeten Bereichen.<br />
1.3 Netzteil<br />
Verwenden Sie nur das mitgelieferte Steckernetzteil, da andere<br />
Netzteile das Telefon zerstören können. Sie dürfen den Zugang<br />
zum Steckernetzteil nicht durch Möbel oder andere Gegenstände<br />
versperren.<br />
1.4 Telefonanschlusskabel<br />
Achten Sie beim Austauschen des mitgelieferten<br />
Telefonanschlusskabels auf die identische Steckerbelegung.<br />
1.5 Aufladbare Akkus<br />
Werfen Sie Akkus nicht ins Feuer und tauchen Sie sie nicht ins Wasser.<br />
1.6 Stromausfall<br />
Bei Stromausfall kann mit dem Telefon nicht telefoniert werden. Halten<br />
Sie für Notfälle ein schnurgebundenes Telefon bereit, welches ohne eine<br />
externe Stromversorgung arbeitet.<br />
1.7 Nebenstellenanlagen<br />
Sie können das Telefon an einer Nebenstellenanlage anschließen. Es<br />
kann nicht garantiert werden, dass das Telefon an jeder<br />
Nebenstellenanlage funktioniert.
− Sicherheitshinweise −<br />
1.8 Hinweis für medizinische Geräte<br />
Benutzen Sie das Telefon nicht in der Nähe von medizinischen Geräten.<br />
Eine Beeinflussung von Herzschrittmachern kann nicht völlig<br />
ausgeschlossen werden. DECT−Telefone* können in Hörgeräten einen<br />
unangenehmen Brummton verursachen.<br />
1.9 Reinigung und Pflege<br />
Reinigen Sie die Gehäuseoberflächen mit einem weichen und<br />
fusselfreien Tuch. Verwenden Sie keine Reinigungsmittel oder<br />
Lösungsmittel. Die Gummifüße der Basisstation sind nicht gegen alle<br />
Reinigungsmittel beständig.<br />
1.10 Entsorgung<br />
Sie sind gesetzlich zur sachgerechten Entsorgung von<br />
Gebrauchsgütern verpflichtet. Das nebenstehende Symbol auf<br />
Ihrem Telefon bedeutet, dass elektrische und elektronische<br />
Altgeräte und Akkus getrennt vom Hausmüll zu entsorgen sind.<br />
Elektrische oder elektronische Geräte entsorgen Sie bei einer<br />
Sammelstelle eines geeigneten Entsorgungsträgers.<br />
Akkus entsorgen Sie beim batterievertreibenden Handel sowie<br />
bei zuständigen Sammelstellen, die entsprechende Behälter<br />
bereitstellen.<br />
Verpackungsmaterialien entsorgen Sie entsprechend den<br />
lokalen Vorschriften.<br />
* DECT: Digital Enhanced Cordless Telephone = Standard für kabellose<br />
Telefone.<br />
5
6<br />
− Bedienelemente −<br />
2 Bedienelemente<br />
Die Tasten werden in dieser Bedienungsanleitung mit einer einheitlichen<br />
Kontur abgebildet. Abweichungen von Tastensymbolen Ihres Telefons<br />
gegenüber den hier abgebildeten Tastensymbolen sind möglich.<br />
2.1 Mobilteil<br />
1 Display<br />
2 Anrufliste<br />
3 Wahlwiederholung<br />
4 Programmiertaste<br />
5 Tastensperre<br />
1<br />
6 Tonruf Ein / Aus<br />
7 Gesprächstaste<br />
8 R−Taste<br />
10<br />
9<br />
/<br />
2<br />
3<br />
9 Kurzwahltaste<br />
10 Löschen / Stumm<br />
8<br />
4<br />
2.2 Basisstation<br />
11 Paging−Taste<br />
(Mobilteil suchen)<br />
7<br />
6<br />
11<br />
5
− Schnellstart −<br />
3 Schnellstart<br />
3.1 Sicherheitshinweise<br />
Achtung: Lesen Sie vor der Inbetriebnahme unbedingt die Sicherheitshinweise<br />
in Kapitel 1.<br />
3.2 Verpackungsinhalt prüfen<br />
Zum Lieferumfang gehören:<br />
eine Basisstation mit Netzteil ein Telefonanschlusskabel<br />
ein Mobilteil mit Gürtelclip zwei Akkus<br />
eine Bedienungsanleitung<br />
3.3 Basisstation anschließen<br />
Schließen Sie die Basisstation wie auf der Skizze abgebildet an.<br />
Verwenden Sie aus Sicherheitsgründen nur das mitgelieferte Netzteil<br />
sowie das beigefügte Telefonanschlusskabel.<br />
Telefonanschlussdose<br />
Netzsteckdose<br />
7
8<br />
− Schnellstart −<br />
3.4 Akkus einsetzen<br />
Legen Sie die Akkus in das<br />
geöffnete Batteriefach ein.<br />
Verwenden Sie nur Akkus des Typs<br />
AAA Ni−MH 1,2 V. Achten Sie auf die<br />
richtige Polung! Schließen Sie das<br />
Batteriefach.<br />
3.5 Akkus aufladen<br />
Stellen Sie das Mobilteil bei der ersten Inbetriebnahme für mindestens<br />
14 Stunden auf die Basisstation. Das Mobilteil erwärmt sich beim Laden.<br />
Dies ist normal und ungefährlich. Laden Sie das Mobilteil nicht mit<br />
fremden Aufladegeräten. Bei nicht richtig geladenen Akkus kann es zu<br />
Fehlfunktionen des Telefons kommen. Der aktuelle Akkuladezustand<br />
wird im Display angezeigt:<br />
Voll Halb Leer
− Display −<br />
4 Display<br />
Das Display zeigt Ihnen alle wichtigen Funktionen mit verschiedenen<br />
Symbolen und Meldungen an.<br />
Symbol Beschreibung<br />
Blinkend: Sie verlieren die Verbindung zur Basisstation.<br />
Dauerhaft: Die Verbindung zur Basisstation ist gut.<br />
Sie führen ein Gespräch.<br />
Das Mikrofon ist ausgeschaltet.<br />
Der Tonruf ist ausgeschaltet.<br />
Die Tastensperre ist eingeschaltet.<br />
Es sind neue Einträge in der Anrufliste.<br />
Zeigt den aktuellen Akkuladezustand an.<br />
��� Interne Rufnummer des Mobilteils. Das interne Telefonieren<br />
ist nur in der �Bundle Version" möglich.<br />
9
10<br />
− Telefonieren −<br />
5 Telefonieren<br />
5.1 Darstellungen und Schreibweisen<br />
� Nummern eingeben<br />
2 sec � Abgebildete Taste 2 Sekunden<br />
drücken<br />
1 bis 10 x � Abgebildete Taste zwischen 1 und<br />
10 mal drücken<br />
��� Tonsignalisierung am Mobilteil<br />
� Mobilteil aus der Basisstation<br />
nehmen<br />
� Mobilteil in die Basisstation stellen<br />
��� oder Text oder Symbole im Display<br />
5.2 Anrufe entgegennehmen<br />
���, � oder � Gespräch annehmen<br />
� oder � Gespräch beenden<br />
5.3 Zwei Anrufe entgegennehmen<br />
Sie werden durch Signaltöne darauf hingewiesen (Anklopfen), dass<br />
während des Telefonierens ein weiterer Anruf eingeht. Sie können<br />
zwischen beiden Gesprächspartnern hin− und herwechseln.<br />
�, � Gesprächspartner wechseln<br />
Achtung: Die Rufnummernanzeige, das Halten von Gesprächen<br />
und das Anklopfen sind Mehrwertdienste Ihres Netzbetreibers.<br />
Bitte fragen Sie Ihren Netzbetreiber nach weiteren Informationen.<br />
Bitte fragen Sie Ihren Netzbetreiber, welche Flash−Zeit Sie zur<br />
Nutzung von Mehrwertdiensten einstellen müssen.
− Telefonieren −<br />
5.4 Anrufe führen<br />
� Rufnummer eingeben (max. 18<br />
Stellen)<br />
� Bei Falscheingabe letzte Stelle<br />
löschen<br />
� Rufnummer wählen<br />
Sie können auch zuerst die Gesprächstaste � drücken und erhalten<br />
damit das Freizeichen. Die eingegebenen Ziffern Ihrer gewünschten<br />
Rufnummer werden sofort gewählt. Eine Korrektur einzelner Ziffern der<br />
Rufnummer ist bei dieser Form des Gesprächaufbaus nicht möglich.<br />
5.5 Zwei Anrufe führen<br />
Während eines Gesprächs können Sie eine zweite Rufnummer wählen.<br />
Der erste Gesprächspartner wird gehalten, während Sie mit dem<br />
anderen Gesprächspartner sprechen. Sie können manuell eine<br />
Rufnummer über das Zahlenfeld eingeben. Sie können dann zwischen<br />
beiden Gesprächspartnern hin− und herwechseln.<br />
� Während des Gesprächs drücken<br />
� Rufnummer manuell eingeben<br />
�, � Gesprächspartner wechseln<br />
5.6 Wahlwiederholung<br />
Ihr Telefon speichert die 10 zuletzt gewählten Rufnummern in einer<br />
Wahlwiederholungsliste ab.<br />
1 bis 10 x �, � Wahlwiederholungsliste öffnen,<br />
Rufnummer auswählen und<br />
Verbindung herstellen<br />
5.7 Verpasste Anrufe zurückrufen<br />
Ihr Telefon speichert 10 verpasste Anrufe in einer Anrufliste ab.<br />
1 bis 10 x �, � Anrufliste öffnen, Rufnummer<br />
auswählen und Verbindung<br />
herstellen<br />
11
12<br />
− Telefonieren −<br />
5.8 Mikrofon im Mobilteil stummschalten<br />
Sie können während eines Telefongesprächs das Mikrofon des<br />
Mobilteils aus− und einschalten.<br />
� Drücken zum Einschalten<br />
� Drücken zum Ausschalten<br />
5.9 Tastensperre<br />
Bei eingeschalteter Tastensperre können eingehende Anrufe wie<br />
gewohnt entgegengenommen werden.<br />
2 sec � Drücken zum Einschalten<br />
2 sec � Drücken zum Ausschalten<br />
5.10 Tonrufmelodie des Mobilteils<br />
Sie können die Tonrufmelodie am Mobilteil ausschalten.<br />
2 sec � Drücken zum Ausschalten<br />
2 sec � Drücken zum Einschalten<br />
5.11 Einstellen der Hörerlautstärke<br />
Sie können während eines Gesprächs die Lautstärke in 3 Stufen<br />
anpassen.<br />
�, � bis �, � Lautstärke anpassen<br />
5.12 Anzeige der Gesprächsdauer<br />
Nach dem Beenden eines Gesprächs wird die Gesprächsdauer in<br />
Minuten und Sekunden angezeigt.<br />
5.13 Paging von der Basisstation zum Mobilteil<br />
Drücken Sie an der Basisstation die Paging−Taste �, um für 60<br />
Sekunden die Rufsignale des Mobilteils zu hören. Drücken Sie erneut<br />
die Paging−Taste � oder die Gesprächstaste � am Mobilteil, um<br />
die Funktion vor Ablauf der 60 Sekunden zu beenden.
− Telefon einstellen −<br />
6 Telefon einstellen<br />
6.1 Tonruflautstärke<br />
Sie können die Tonruflautstärke in drei Stufen einstellen.<br />
�, � Programmierung starten<br />
��� Aktuelle Einstellung wird angezeigt<br />
� bis �, � Tonruflautstärke auswählen und<br />
bestätigen<br />
6.2 Tonrufmelodie<br />
Sie können zwischen sechs verschiedenen Tonrufmelodien wählen.<br />
�, � Programmierung starten<br />
��� Aktuelle Einstellung wird angezeigt<br />
� bis �, � Tonrufmelodie auswählen und<br />
bestätigen<br />
6.3 Hörerlautstärke<br />
Sie können die Hörerlautstärke in drei Stufen einstellen.<br />
�, � Programmierung starten<br />
��� Aktuelle Einstellung wird angezeigt<br />
� bis �, � Hörerlautstärke auswählen und<br />
bestätigen<br />
6.4 Kurzwahl<br />
Sie können die zehn Zahlentasten mit einer Kurzwahl belegen.<br />
6.4.1 Kurzwahltasten belegen<br />
� Programmierung starten<br />
1 bis 10 x � Kurzwahltaste auswählen<br />
�, � Rufnummer eingeben und<br />
bestätigen<br />
6.4.2 Rufnummer über Kurzwahl wählen<br />
1 bis 10 x �, � Rufnummer auswählen und<br />
Verbindung herstellen<br />
6.4.3 Löschen aller Kurzwahltasten<br />
�, �, �, � Belegung der Kurzwahltasten<br />
löschen<br />
13
14<br />
− Telefon einstellen −<br />
6.5 Babycall<br />
Mit dieser Funktion haben Sie die Möglichkeit, eine bestimmte<br />
Rufnummer zu speichern, die bei Betätigen einer beliebigen Taste<br />
(außer �) automatisch angerufen wird.<br />
6.5.1 Babycall−Rufnummer speichern<br />
�, � Programmierung starten<br />
�, � PIN−Code eingeben und bestätigen<br />
�, � Rufnummer eingeben und<br />
bestätigen<br />
6.5.2 Babycall ein −, ausschalten<br />
Je nach Einstellung wird der Babycall ein − oder ausgeschaltet. Ist der<br />
Babycall eingeschaltet, wird die gespeicherte Rufnummer im Display<br />
angezeigt. Der Babycall kann nur eingeschaltet werden, wenn vorher<br />
eine Babycall−Rufnummer gespeichert wurde (siehe Kapitel 6.5.1).<br />
�, � Programmierung starten<br />
�, 2 x � PIN−Code eingeben und bestätigen<br />
6.6 Externe Anrufbeantworter<br />
Wenn Ihr Netzbetreiber einen externen Anrufbeantworter für Sie<br />
bereitstellt, können Sie die Taste � mit der Rufnummer des externen<br />
Anrufbeantworters belegen.<br />
Der externe Anrufbeantworter ist ein optionaler Service Ihres<br />
Netzbetreibers. Bitte fragen Sie Ihren Netzbetreiber nach weiteren<br />
Informationen.<br />
6.6.1 Rufnummer des externen Anrufbeantworters speichern<br />
�, � Programmierung starten<br />
�, � PIN−Code eingeben und bestätigen<br />
�, � Rufnummer eingeben und<br />
bestätigen<br />
6.6.2 Externen Anrufbeantworter abfragen<br />
2 sec � Verbindung zum externen<br />
Anrufbeantworter herstellen
− Telefon einstellen −<br />
6.7 Flash−Zeit<br />
Sie können die R−Taste mit sieben unterschiedlichen Flashzeiten<br />
belegen, um Funktionen in Nebenstellenanlagen oder Mehrwertdienste<br />
Ihres Netzbetreibers zu nutzen.<br />
Folgende Flash−Zeiten stehen Ihnen zur Verfügung: 1= 80 ms,<br />
2= <strong>100</strong> ms, 3= 120 ms, 4= 180 ms, 5= 250 ms, 6= 300 ms, 7= 600 ms<br />
�, � Programmierung starten<br />
��� Aktuelle Einstellung wird angezeigt<br />
� bis �, � Flash−Zeit auswählen und bestätigen<br />
6.8 Tastenton ein −, ausschalten<br />
Bei jedem Tastendruck wird ein Ton vom Mobilteil wiedergegeben.<br />
Je nach Einstellung wird der Tastenton ein − oder ausgeschaltet.<br />
�, �, � Tastenton ein −, auschalten<br />
6.9 PIN−Code ändern<br />
Der PIN−Code besteht aus vier Zahlen. Die Werkseinstellung des<br />
PIN−Codes ist "0000". Wenn Sie den PIN−Code ändern, bewahren Sie<br />
den neuen PIN−Code gut auf. Sollten Sie den PIN−Code vergessen oder<br />
verloren haben, wenden Sie sich an unsere Service−Hotline (siehe<br />
Kapitel 8).<br />
�, � Programmierung starten<br />
� ���� , � PIN−Code eingeben und bestätigen<br />
� ���� , � Neuen PIN−Code eingeben und<br />
bestätigen<br />
� ���� , � Neuen PIN−Code erneut eingeben<br />
und bestätigen<br />
15
16<br />
− Telefon einstellen −<br />
6.10 Werkseinstellungen wiederherstellen<br />
�, � Programmierung starten<br />
� ���� , � PIN−Code eingeben und bestätigen<br />
Folgende Einstellungen werden wiederhergestellt:<br />
Mobilteil Basisstation<br />
Tonruflautstärke: 3 PIN−Code: 0000<br />
Tonrufmelodie: 1 Flash−Zeit: <strong>100</strong> ms<br />
Hörerlautstärke: 2 Anrufliste: leer<br />
Tastenton: Ein Wahlwiederholungsliste: leer<br />
Tastensperre: Aus Kurzwahlspeicher: leer
− Besondere Funktionen −<br />
7 Besondere Funktionen<br />
7.1 Wahlverfahren<br />
Sie können Ihr Telefon sowohl an den analogen Vermittlungsstellen<br />
(Impuls−Wahlverfahren / 2) als auch an den neuen digitalen<br />
Vermittlungsstellen (Ton−Wahlverfahren / 1) betreiben.<br />
�, �, � oder �, � Wahlverfahren auswählen<br />
7.1.1 Temporäre Tonwahl<br />
Können Sie Ihr Telefon nur mit dem Impuls−Wahlverfahren betreiben,<br />
brauchen Sie nicht auf die Vorteile des Ton−Wahlverfahrens<br />
(z. B.: Abfrage eines Anrufbeantworters im Telefonnetz) zu verzichten.<br />
Während einer bestehenden Verbindung können Sie vorübergehend<br />
zum Ton−Wahlverfahren wechseln.<br />
1 sec � Während des Gesprächs drücken<br />
Nach Gesprächsende wird wieder automatisch auf das<br />
Impuls−Wahlverfahren zurückgeschaltet.<br />
7.2 Wahlpause manuell eingeben<br />
Sie können nach der Amtskennziffer manuell eine Wahlpause einfügen,<br />
um direkt weiter wählen zu können, ohne das Freizeichen abzuwarten.<br />
2 sec � Wahlpause einfügen<br />
Nach der Amtskennziffer wartet Ihr Telefon für 3 Sekunden mit dem<br />
Wählen der eigentlichen Rufnummer.<br />
7.3 R−Taste an Nebenstellenanlagen<br />
Ist Ihr Telefon über eine Nebenstellenanlage angeschlossen, können Sie<br />
über die R−Taste � alle Möglichkeiten, wie z. B. Anrufe weiterleiten,<br />
automatischen Rückruf, nutzen. An einer Nebenstellenanlage wird eine<br />
Flash−Zeit von <strong>100</strong> ms benötigt. Ob Ihr Telefon an Ihrer<br />
Nebenstellenanlage einwandfrei funktioniert, erfahren Sie bei dem<br />
Händler, bei dem die Anlage gekauft wurde.<br />
17
18<br />
− Besondere Funktionen −<br />
7.4 R−Taste und Mehrwertdienste<br />
Ihr Telefon unterstützt die wichtigsten Mehrwertdienste Ihres<br />
Netzbetreibers (z. B. Makeln, Anklopfen, Dreier−Konferenz). Die R−Taste<br />
� können Sie bei der Verwendung der Mehrwertdienste nutzen. Bitte<br />
fragen Sie Ihren Netzbetreiber, welche Flash−Zeit Sie zur Nutzung von<br />
Mehrwertdiensten einstellen müssen. Zur Freischaltung wenden Sie sich<br />
an Ihren Netzbetreiber.<br />
7.5 Rufnummernanzeige (CLIP)<br />
Die Rufnummernanzeige ist ein optionaler Service Ihres Netzbetreibers.<br />
Fragen Sie Ihren Netzbetreiber nach weiteren Informationen.<br />
Wenn diese Funktion an Ihrer Telefonleitung zur Verfügung steht, zeigt<br />
Ihnen das Display bereits die Rufnummer des Anrufers, wenn das<br />
Telefon klingelt. Hat der Anrufer das Übertragen seiner Rufnummer<br />
unterdrückt, zeigt das Display eine entsprechende Meldung.
− Fehlerbeseitigung −<br />
8 Fehlerbeseitigung<br />
Haben Sie Probleme mit Ihrem Telefon, kontrollieren Sie zuerst die<br />
folgenden Hinweise. Bei technischen Problemen können Sie sich an<br />
unsere Hotline unter Tel. 0180 5 00 13 88 (Kosten Telekom bei<br />
Drucklegung: 12ct/min) wenden. Bei Garantieansprüchen wenden Sie<br />
sich an Ihren Fachhändler. Die Garantiezeit beträgt 2 Jahre.<br />
Fehler Lösungen<br />
Kein Telefongespräch<br />
möglich<br />
Verbindung abgehackt,<br />
fällt aus<br />
− Die Telefonleitung ist nicht korrekt angeschlossen<br />
oder gestört. Verwenden<br />
Sie nur das mitgelieferte Telefonanschlusskabel.<br />
− Testen Sie mit einem anderen Telefon,<br />
ob Ihr Telefonanschluss in Ordnung<br />
ist.<br />
− Das Netzteil ist nicht eingesteckt oder<br />
es liegt ein totaler Stromausfall vor.<br />
− Die aufladbaren Akkus sind leer oder<br />
defekt.<br />
− Sie haben sich zu weit von der Basisstation<br />
entfernt.<br />
− Sie haben sich zu weit von der Basisstation<br />
entfernt.<br />
− Falscher Aufstellungsort der Basisstation.<br />
Keine Wahl möglich − Wahlverfahren falsch eingestellt.<br />
Das System reagiert nicht<br />
mehr oder befindet sich in<br />
einem undefinierten Zustand<br />
Das Mobilteil schaltet sich<br />
von selbst ab<br />
− Setzen Sie alle Funktionen in den<br />
Werkszustand zurück.<br />
− Ziehen Sie kurzzeitig das Netzteil aus<br />
der Steckdose.<br />
− Stellen Sie das Mobilteil für 14 Stunden<br />
auf die Basisstation. Erneuern Sie<br />
die aufladbaren Akkus.<br />
19
20<br />
− Fehlerbeseitigung −<br />
Fehler Lösungen<br />
Nach einer Aufladezeit<br />
von 14 Stunden zeigt das<br />
Display unverändert das<br />
Symbol<br />
− Die aufladbaren Akkus sind leer oder<br />
defekt.<br />
− Stellen Sie das Mobilteil richtig auf die<br />
Basisstation. Reinigen Sie die Kontaktflächen<br />
am Mobilteil und an der<br />
Basisstation mit einem weichen, trokkenen<br />
Tuch.<br />
Display−Anzeige dunkel − Verursacht durch direkte Sonnenbestrahlung.<br />
Lassen Sie das Mobilteil<br />
abkühlen.<br />
Die Rufnummernanzeige<br />
(CLIP) funktioniert nicht<br />
− Die Rufnummernanzeige ist ein optionaler<br />
Service Ihres Netzbetreibers.<br />
Bitte fragen Sie Ihren Netzbetreiber<br />
nach weiteren Informationen.<br />
− Der Anrufer hat das Übertragen seiner<br />
Rufnummer unterdrückt.
9 Wichtige Informationen<br />
9.1 Technische Daten<br />
− Wichtige Informationen −<br />
Merkmal Wert<br />
Standard DECT<br />
Stromversorgung Eingang: 220/230 V, 50 Hz<br />
Ausgang: 6 V, 300 mA<br />
Reichweite (Außen / Innen) 300 m / 50 m<br />
Standby bis zu <strong>100</strong> h<br />
Max. Gesprächsdauer bis zu 10 h<br />
Aufladbare Standard−Akkus 2 x 1.2 V, Größe: AAA<br />
Wahlverfahren Ton−Wahlverfahren<br />
Impuls−Wahlverfahren<br />
Zulässige Umgebungstemperatur 10°C bis 30°C<br />
Zulässige relative Luftfeuchtigkeit 20% bis 75%<br />
Flash−Funktion 80, <strong>100</strong>, 120, 180, 250, 300, 600<br />
oder 800 ms<br />
DECT: Digital Enhanced Cordless Telephone = Standard für kabellose<br />
Telefone.<br />
21
22<br />
− Wichtige Informationen −<br />
9.2 Garantie<br />
AUDIOLINE − Geräte werden nach den modernsten<br />
Produktionsverfahren hergestellt und geprüft. Ausgesuchte Materialien<br />
und hoch entwickelte Technologien sorgen für einwandfreie Funktion<br />
und lange Lebensdauer. Ein Garantiefall liegt nicht vor, wenn die<br />
Ursache einer Fehlfunktion des Gerätes bei dem Telefonnetzbetreiber<br />
oder einer eventuell zwischengeschalteten Nebenstellenanlage liegt. Die<br />
Garantie gilt nicht für die in den Produkten verwendeten Akkus oder<br />
Akkupacks. Die Garantiezeit beträgt 24 Monate, gerechnet vom Tage<br />
des Kaufs.<br />
Innerhalb der Garantiezeit werden alle Mängel, die auf Material− oder<br />
Herstellungsfehler zurückzuführen sind, kostenlos beseitigt. Der<br />
Garantieanspruch erlischt bei Eingriffen durch den Käufer oder durch<br />
Dritte. Schäden, die durch unsachgemäße Behandlung oder Bedienung,<br />
durch falsches Aufstellen oder Aufbewahren, durch unsachgemäßen<br />
Anschluss oder Installation sowie durch höhere Gewalt oder sonstige<br />
äußere Einflüsse entstehen, fallen nicht unter die Garantieleistung. Wir<br />
behalten uns vor, bei Reklamationen die defekten Teile auszubessern<br />
oder zu ersetzen oder das Gerät auszutauschen. Ausgetauschte Teile<br />
oder ausgetauschte Geräte gehen in unser Eigentum über.<br />
Schadenersatzansprüche sind ausgeschlossen, soweit sie nicht auf<br />
Vorsatz oder grober Fahrlässigkeit des Herstellers beruhen.<br />
Sollte Ihr Gerät dennoch einen Defekt innerhalb der Garantiezeit<br />
aufweisen, wenden Sie sich bitte unter Vorlage Ihrer Kaufquittung<br />
ausschließlich an das Geschäft, in dem Sie Ihr AUDIOLINE − Gerät<br />
gekauft haben. Alle Gewährleistungsansprüche nach diesen<br />
Bestimmungen sind ausschließlich gegenüber Ihrem Fachhändler<br />
geltend zu machen. Nach Ablauf von zwei Jahren nach Kauf und<br />
Übergabe unserer Produkte können Gewährleistungsrechte nicht mehr<br />
geltend gemacht werden.<br />
9.3 Konformitätserklärung<br />
Dieses Gerät erfüllt die Anforderungen der EU−Richtlinie:<br />
1999/5/EG Richtlinie über Funkanlagen und<br />
Telekommunikationsendeinrichtungen und die gegenseitige<br />
Anerkennung ihrer Konformität. Die Konformität mit der o. a. Richtlinie<br />
wird durch das CE−Zeichen auf dem Gerät bestätigt.<br />
Für die komplette Konformitätserklärung nutzen Sie bitte den<br />
kostenlosen Download von unserer Website www.audioline.de.
10 Stichwortverzeichnis<br />
A<br />
Akkuladezustand, 8<br />
Akkus aufladen, 8<br />
Akkus einsetzen, 8<br />
Anklopfen, 10<br />
Anrufe entgegennehmen, 10<br />
B<br />
Babycall, 14<br />
Basisstation anschließen, 7<br />
Bedienelemente, 6<br />
Besondere Funktionen, 17<br />
D<br />
Darstellungen, 10<br />
Display, 9<br />
E<br />
Externe Anrufbeantworter, 14<br />
F<br />
Fehlerbeseitigung, 19<br />
Flash−Zeit, 15<br />
G<br />
Garantie, 22<br />
Gesprächsdauer, 12<br />
− Stichwortverzeichnis −<br />
H<br />
Hörerlautstärke, 12, 13<br />
K<br />
Konformitätserklärung, 22<br />
Kurzwahl, 13<br />
M<br />
Mehrwertdienste, 18<br />
Mikrofon stummschalten, 12<br />
N<br />
Nebenstellenanlagen, 17<br />
P<br />
Paging, 12<br />
PIN−Code, 15<br />
R<br />
R−Taste, 15, 17<br />
Rufnummernanzeige, 18<br />
S<br />
Schreibweisen, 10<br />
Sicherheitshinweise, 4<br />
23
24<br />
T<br />
Tastensperre, 12<br />
Tastenton, 15<br />
Technische Daten, 21<br />
Telefonieren, 10<br />
Temporäre Tonwahl, 17<br />
Tonruflautstärke, 13<br />
Tonrufmelodie, 12, 13<br />
V<br />
Verpackungsinhalt, 7<br />
W<br />
Wahlpause manuell<br />
eingeben, 17<br />
Wahlverfahren, 17<br />
Wahlwiederholung, 11<br />
Werkseinstellungen, 16<br />
− Stichwortverzeichnis −
− Contents −<br />
1 Safety Information . . . . . . . . . . . . . . . . . . . . . . 26<br />
2 Operating Elements . . . . . . . . . . . . . . . . . . . . . 28<br />
3 Starting Up . . . . . . . . . . . . . . . . . . . . . . . . . . . . 29<br />
4 Display . . . . . . . . . . . . . . . . . . . . . . . . . . . . . . . . 31<br />
5 Making calls . . . . . . . . . . . . . . . . . . . . . . . . . . . 32<br />
6 Setting Up the Telephone . . . . . . . . . . . . . . . . 35<br />
7 Special Functions . . . . . . . . . . . . . . . . . . . . . . . 39<br />
8 Troubleshooting . . . . . . . . . . . . . . . . . . . . . . . . 41<br />
9 Important Information . . . . . . . . . . . . . . . . . . . 43<br />
10 Index . . . . . . . . . . . . . . . . . . . . . . . . . . . . . . . . .<br />
45<br />
25
26<br />
− Safety Information −<br />
1 Safety Information<br />
Please read this operating instruction manual thoroughly.<br />
1.1 Intended use<br />
The telephone is suitable for telephoning within a public telephone<br />
network system. Any other use is considered unintended use.<br />
Unauthorised modification or reconstruction is not permitted. Under no<br />
circumstances open the device or complete any repair work yourself.<br />
1.2 Installation location<br />
The telephone is designed for use indoors in rooms with a temperature<br />
range from 10 °C to 30 °C. The base station should not be used in rooms<br />
exposed to moisture, such as bathrooms or laundries. Prevent excessive<br />
exposure to smoke, dust, vibration, chemicals, moisture, heat and direct<br />
sunlight. Position the base station with a distance of 1 m to other<br />
electronic devices or there is a risk of mutual disturbance.<br />
Do not use the handset in potentially explosive areas.<br />
1.3 Power supply<br />
Only use the power adapter plug supplied because other power<br />
supplies could destroy the telephone. Ensure access to the<br />
power adapter plug is not obstructed by furniture or such.<br />
1.4 Telephone connection cable<br />
If the telephone connection cable supplied needs to be replaced, ensure<br />
the pin assignment is identical on the new one.<br />
1.5 Rechargeable batteries<br />
Do not throw batteries into a fire or immerse them in water.<br />
1.6 Power failure<br />
The telephone cannot be used to make calls in the event of a power<br />
failure. Always keep a cord connected telephone which operates without<br />
an external power supply available in case of emergency situations.<br />
1.7 Private branch exchanges<br />
The telephone can be connected to a private branch exchange. There is<br />
no guarantee that the telephone will work on every private branch<br />
exchange.
− Safety Information −<br />
1.8 Notes on medical equipment<br />
Never use the telephone in the vicinity of medical equipment. It cannot<br />
be fully ruled out that they will not affect heart pacemakers. DECT*<br />
telephones can cause an unpleasant humming sound in hearing aids.<br />
1.9 Cleaning and upkeep<br />
Clean the housing surfaces with a soft, fluff−free cloth. Never use<br />
cleaning agents or solvents. The rubber footpads on the base station are<br />
not resistant to all cleaning agents.<br />
1.10 Disposal<br />
You are legally obliged to dispose of consumable goods<br />
according to the applicable laws. The adjacent symbol on the<br />
telephone indicates that electrical and electronic apparatus and<br />
batteries no longer required must be disposed of separate from<br />
domestic waste.<br />
Electrical and electronic devices must be disposed of<br />
at a suitable collection point provided by the public waste<br />
authorities.<br />
Batteries must be disposed of at the point of sale or at the<br />
appropriate collection points provided by the public waste<br />
authorities.<br />
Packaging materials must be disposed of according to local<br />
regulations.<br />
* DECT: Digital Enhanced Cordless Telephone = Standard for cordless<br />
telephones.<br />
27
28<br />
− Operating Elements −<br />
2 Operating Elements<br />
The buttons in this operating manual are depicted with a uniform contour.<br />
Variations in the symbols on the telephone buttons compared to those<br />
depicted here are possible.<br />
2.1 Handset<br />
1 Display<br />
2 Calls log<br />
3 Redialling button<br />
4 Programming button<br />
5 Key lock<br />
1<br />
6 Ringing tone on/off<br />
7 Call button<br />
8 R−button<br />
10<br />
9<br />
/<br />
2<br />
3<br />
9 Quick Dial button<br />
10 Delete / Mute<br />
8<br />
4<br />
2.2 Base station<br />
11 Paging button<br />
(locate handset)<br />
7<br />
6<br />
11<br />
5
− Starting Up −<br />
3 Starting Up<br />
3.1 Safety information<br />
Caution: It is essential to read the Safety Information in Chapter<br />
1 before starting up.<br />
3.2 Checking the contents of the package<br />
The package contains:<br />
a base station with power adapter a telephone connection cable<br />
plug<br />
a handset with belt clip two rechargeable batteries<br />
an operating manual<br />
3.3 Connecting the base station<br />
Connect the base station as illustrated in the diagram. For reasons of<br />
safety, only use the power adapter plug and telephone connection line<br />
supplied.<br />
Telephone connection socket<br />
Mains power outlet<br />
29
30<br />
− Starting Up −<br />
3.4 Inserting the batteries<br />
Insert the "AAA" rechargeable<br />
batteries in the open battery<br />
compartment. Only use rechargeable<br />
batteries of the type AAA Ni−MH 1.2<br />
V. Pay attention to correct polarity.<br />
Close the battery compartment<br />
cover.<br />
3.5 Charging the batteries<br />
Before the handset is used for the first time, insert it in the base station<br />
for at least 14 hours. The handset warms up during the charging<br />
process. This is normal and does not represent a risk. Do not charge the<br />
handset with charging units from other manufacturers. Failure to charge<br />
the batteries properly can lead to telephone malfunction. The current<br />
battery charge status is indicated on the display:<br />
Full Half empty Empty
− Display −<br />
4 Display<br />
The display indicates all the important functions by means of various<br />
icons and messages.<br />
Icon Description<br />
Flashing: The connection to the base station is poor.<br />
Continuously: The connection to the base station is good.<br />
A call is currently being made.<br />
The microphone is switched off.<br />
The ringing tone has been switched off.<br />
The key lock function is switched on.<br />
There are new entries in the calls list.<br />
Indicates the current battery charge status.<br />
��� Internally assigned call number of the handset. The internal<br />
call number is only relevant in the �Bundle Version".<br />
31
32<br />
− Making calls −<br />
5 Making calls<br />
5.1 Display and explanation of operation sequences<br />
� Enter numbers<br />
2 sec � Press the button depicted for 2<br />
seconds<br />
1x to 10x � Press the button depicted between<br />
one and ten times<br />
��� Acoustic signal on the handset<br />
� Remove the handset from the base<br />
station<br />
� Place the handset in the base station<br />
��� or Text or icon in the display<br />
5.2 Taking a call<br />
���, � or � Take the call<br />
� or � End the call<br />
5.3 Answering two calls<br />
You will hear acoustic signals (call waiting) if a second call is received<br />
while you are talking on the telephone. It is possible to switch between<br />
the two callers.<br />
�, � Switch to other caller<br />
Caution: The functions for phone number display, holding calls<br />
and call waiting are supplementary services offered by your telephone<br />
network provider. Contact your network provider for further<br />
information.<br />
Please contact your telephone network provider regarding which<br />
Flash time must be set to use the supplementary services.
− Making calls −<br />
5.4 Making a call<br />
� Enter the phone number (max. 18<br />
digits)<br />
� Delete the last digit if incorrect<br />
� Dial the phone number<br />
It is also possible to press the Call button � first to obtain the dialling<br />
tone for an outside line. The phone number then entered is dialled<br />
immediately. It is not possible to correct wrong digits individually using<br />
this dialling procedure.<br />
5.5 Making two calls<br />
It is possible to dial a second number while making a call. The first caller<br />
is put on hold while you converse with the second person called. A<br />
scond phone number can be entered using the numeric key pad. It is<br />
possible to switch between the two callers.<br />
� Press the button during the call<br />
� Enter the phone number manually<br />
�, � Switch to other caller<br />
5.6 Redialling<br />
The telephone stores the last ten numbers dialled in a redialling list.<br />
1x to 10x �, � Open the redialling list, select a<br />
phone number and connect<br />
5.7 Calling back missed numbers<br />
The telephone stores the last ten numbers not taken in a calls log.<br />
1x to 10x �, � Open the calls list, select a phone<br />
number and connect<br />
5.8 Muting the microphone in the handset<br />
The microphone in the handset can be activated and deactivated during<br />
a telephone conversation.<br />
� Press the buttons to activate the<br />
function<br />
� Press the button to deactivate the<br />
function<br />
33
34<br />
− Making calls −<br />
5.9 Key lock<br />
Calls can still be taken in the normal way even when the key lock<br />
function is activated.<br />
2 sec � Press the buttons to activate the<br />
function<br />
2 sec � Press the buttons to deactivate the<br />
function<br />
5.10 Handset ringing melody<br />
The ringing melody on the handset can be deactivated.<br />
2 sec � Press the buttons to deactivate the<br />
function<br />
2 sec � Press the button to activate the<br />
function<br />
5.11 Adjusting the receiver volume<br />
The volume can be adjusted to one of 3 settings during a call.<br />
�, � to �, � Adjust the volume<br />
5.12 Talk time display<br />
When you have finished a call, its duration is displayed in hours, minutes<br />
and seconds.<br />
5.13 Paging the handset from the base station<br />
Press the Paging button � on the base station; the handset rings for<br />
60 seconds. Press the Paging button � or Call button � on the<br />
handset to end the function before the 60 seconds has expired.
− Setting Up the Telephone −<br />
6 Setting Up the Telephone<br />
6.1 Ringing volume<br />
The ringing volume can be set to one of three different volume levels.<br />
�, � Enable programming mode<br />
��� The current setting is shown<br />
� to �, � Select and confirm a ringing tone<br />
volume<br />
6.2 Ringing melody<br />
There are six different melodies available for selection.<br />
�, � Enable programming mode<br />
��� The current setting is shown<br />
� to �, � Select and confirm a ringing melody<br />
6.3 Receiver volume<br />
The receiver volume can be set to one of three different volume levels.<br />
�, � Enable programming mode<br />
��� The current setting is shown<br />
� to �, � Select and confirm a receiver volume<br />
6.4 Quickdial<br />
Each of the ten numeric keys can be assigned a quickdial number.<br />
6.4.1 Assigning quickdial numbers<br />
� Enable programming mode<br />
1x to 10x � Select a quick dial button<br />
�, � Enter and confirm a phone number<br />
6.4.2 Dialling a quickdial number<br />
1x to 10x �, � Select a number and connect<br />
6.4.3 Clearing all quickdial numbers<br />
�, �, �, � Remove the numbers assigned to<br />
the quickdial buttons<br />
35
36<br />
− Setting Up the Telephone −<br />
6.5 Touch & dial<br />
Use this function to store a set phone number that will be dialled when<br />
any button (except �) is pressed.<br />
6.5.1 Saving a touch & dial number<br />
�, � Enable programming mode<br />
�, � Enter the PIN code and confirm<br />
�, � Enter and confirm a phone number<br />
6.5.2 Touch & dial on/off<br />
Select a setting to enable or disable the Touch & Dial function. If it is<br />
enabled, the saved phone number is shown on the display. The Touch &<br />
Dial function can only be switched on when a Touch & Dial number has<br />
been stored beforehand (refer to chapter 6.5.1).<br />
�, � Enable programming mode<br />
�, 2 x � Enter the PIN code and confirm<br />
6.6 External answering machines<br />
Assuming your telephone network provider makes an external<br />
answering machine available to you, the phone number for calling the<br />
external answering machine can be assigned to key �.<br />
The external answering machine is an optional service from the network<br />
provider. Contact your network provider for further information.<br />
6.6.1 Saving the phone number of the external answering machine<br />
�, � Enable programming mode<br />
�, � Enter the PIN code and confirm<br />
�, � Enter and confirm a phone number<br />
6.6.2 Phoning the external answering machine<br />
2 sec � Connect to the external answering<br />
machine
− Setting Up the Telephone −<br />
6.7 Flash time<br />
The R button can be assigned one of seven different Flash times in<br />
order to be able to use functions in private branch exchanges or<br />
supplementary services offered by your telephone network provider.<br />
The following Flash times are available: 1= 80 ms,<br />
2= <strong>100</strong> ms, 3= 120 ms, 4= 180 ms, 5= 250 ms, 6= 300 ms, 7= 600 ms<br />
�, � Enable programming mode<br />
��� The current setting is shown<br />
� to �, � Select and confirm a Flash time<br />
6.8 Key tone on/off<br />
An acoustic signal is issued each time a button on the handset is<br />
pressed.<br />
Changing the setting enables or disables the key tone.<br />
�, �, � Press to enable or disable the key<br />
tone<br />
6.9 Change PIN code<br />
The PIN code is comprised of four digits. The default setting of the PIN<br />
code is "0000". If you change a PIN code, keep a note of the new PIN<br />
code in a safe place. In case you forget or lose your PIN code, please<br />
contact our Service Hotline (refer to Chapter 8).<br />
�, � Enable programming mode<br />
� ���� , � Enter the PIN code and confirm<br />
� ���� , � Enter the new PIN code and confirm<br />
� ���� , � Enter the new PIN code again and<br />
confirm<br />
37
38<br />
− Setting Up the Telephone −<br />
6.10 Restoring the default settings<br />
�, � Enable programming mode<br />
� ���� , �<br />
The following settings are restored:<br />
Enter the PIN code and confirm<br />
Handset Base station<br />
Ringing volume: 3 PIN code: 0000<br />
Ringing melody: 1 Recall time: <strong>100</strong> ms<br />
Receiver volume: 2 Calls log: Empty<br />
Key tone: On Redialling list: Empty<br />
Key lock: OFF Quickdial memory: Empty
− Special Functions −<br />
7 Special Functions<br />
7.1 Dialling mode<br />
The telephone can be operated in new, digital exchanges (TONE / 2) as<br />
well as analogue exchanges (PULSE / 1).<br />
�, �, � or �, � Setting the dialling mode<br />
7.1.1 Temporary tone dialling<br />
If you only operate the telephone using the PULSE dialling mode, you<br />
can still make use of the advantages of the TONE dialling mode<br />
(e.g.: remote access of the answering machine in the conventional<br />
telephone network). You can temporarily switch to Tone dialling when a<br />
connection has already been made.<br />
1 sec � Press the button when a connection<br />
has been established<br />
When the call is ended, the equipment automatically switches back to<br />
Pulse dialling.<br />
7.2 Entering a dialling pause manually<br />
It is possible to insert a dialling pause manually after the number for an<br />
outside line to be able to continue dialling directly without waiting for the<br />
dialling tone.<br />
2 sec � Insert dialling pause<br />
After dialling the number for the outside line, the telephone waits 3<br />
seconds<br />
before dialling the actual phone number.<br />
7.3 R button on private branch exchanges<br />
If the telephone is connected to a private branch exchange, all the<br />
functions associated with the R button � such as transferring calls,<br />
automatic call back, etc., can be used. When used on a private branch<br />
exchange, a Flash time of <strong>100</strong> ms must be set. The dealer where you<br />
purchased the exchange can provide information as to whether the<br />
telephone will work properly with the exchange.<br />
39
40<br />
− Special Functions −<br />
7.4 R button and Supplementary services<br />
Your telephone supports the most important supplementary services<br />
provided by your telephone network provider (e.g. brokering, call waiting,<br />
three−way conferencing, etc.). The R button � can be used when<br />
implementing these functions. Please contact your telephone network<br />
provider regarding which Flash time must be set to use the<br />
supplementary services. Please contact your telephone network provider<br />
with regard to enabling these functions.<br />
7.5 Call number display (CLIP)<br />
The caller number display function is an optional service offered by<br />
telephone network providers. Contact your network provider for further<br />
information.<br />
If this function is provided by your telephone service, the number of the<br />
caller appears in the display when the telephone rings. If the caller has<br />
suppressed transmission of his phone number, the corresponding<br />
message appears in the display.
− Troubleshooting −<br />
8 Troubleshooting<br />
Should problems arise with the telephone, please refer to the following<br />
information first. In the case of technical problems, contact our Hotline,<br />
tel. 0180 5 00 13 88 (Telekom costs at time of going to print: 12 ct/min).<br />
In the case of claims under the terms of guarantee, contact your sales<br />
outlet. There is a 2 year period of guarantee.<br />
Faults Corrective measures<br />
No telephone calls possible<br />
Connection is disturbed or<br />
cut off<br />
The system no longer responds<br />
or is in an undefined<br />
state<br />
The handset switches itself<br />
off<br />
− The telephone line is not connected<br />
properly or is defective. Only use the<br />
telephone connection cable supplied.<br />
− Test whether the telephone connection<br />
is in order by using another telephone.<br />
− The power adaptor plug is not plugged<br />
in or there is a complete power failure.<br />
− The rechargeable batteries are empty<br />
or defective.<br />
− The handset is too far from the base<br />
station.<br />
− The handset is too far from the base<br />
station.<br />
− The base station is in an unsuitable<br />
location.<br />
− Reset all the functions to their default<br />
settings.<br />
− Disconnect the power adapter plug<br />
briefly from the power socket.<br />
− Place the handset in the base station<br />
for 14 hours. Replace the rechargeable<br />
batteries.<br />
41
42<br />
− Troubleshooting −<br />
Faults Corrective measures<br />
Following a charge time of<br />
14 hours, the icon remains<br />
unchanged in the<br />
display<br />
− The rechargeable batteries are empty<br />
or defective.<br />
− Place the handset in the base station<br />
properly. Clean the contact surfaces<br />
on the handset and base station with a<br />
soft, dry cloth.<br />
Display is dark − Caused by exposure to direct sunlight.<br />
Allow the handset to cool down.<br />
The caller number display<br />
(CLIP) does not function<br />
− The caller number display function is<br />
an optional service offered by telephone<br />
network providers. Contact<br />
your network provider for further information.<br />
− The caller has suppressed the transmission<br />
of their phone number.
9 Important Information<br />
9.1 Technical data<br />
− Important Information −<br />
Feature Value<br />
Standard DECT<br />
Power supply Input: 220/230 V, 50 Hz<br />
Output: 6 V, 300 mA<br />
Range (outdoors/indoors) 300 m, 50 m<br />
Standby Up to <strong>100</strong> h<br />
Max. talk time Up to 10 h<br />
Rechargeable standard batteries 2 x 1.2 V, size: AAA<br />
Dialling mode Tone dialling mode<br />
Pulse dialling mode<br />
Permissible ambient temperature 10°C to 30°C<br />
Permissible relative humidity 20% to 75%<br />
Flash function 80, <strong>100</strong>, 120, 180, 250, 300, 600<br />
or 800 ms<br />
DECT: Digital Enhanced Cordless Telephone = Standard for cordless<br />
telephones.<br />
43
44<br />
− Important Information −<br />
9.2 Guarantee<br />
AUDIOLINE equipment is produced and tested according to the latest<br />
production methods. The implementation of carefully chosen materials<br />
and highly developed technologies ensure trouble−free functioning and a<br />
long service life. The terms of guarantee do not apply where the cause<br />
of equipment malfunction is the fault of the telephone network operator<br />
or any interposed private branch extension system. The terms of<br />
guarantee do not apply to the batteries or power packs used in the<br />
products. The period of guarantee is 24 months from the date of<br />
purchase.<br />
All deficiencies resulting from material or production faults which occur<br />
during the period of guarantee will be eliminated free of charge. Rights to<br />
claims under the terms of guarantee are annulled following intervention<br />
by the purchaser or third parties. Damage caused as a result of improper<br />
handling or operation, incorrect positioning or storing, improper<br />
connection or installation, Acts of God or other external influence are not<br />
covered by the terms of guarantee. In the case of complaints, we reserve<br />
the right to repair or replace defect parts or provide a replacement<br />
device. Replacement parts or devices become our property. Rights to<br />
compensation in the case of damage are excluded where there is no<br />
evidence of intent or gross negligence by the manufacturer.<br />
If your device shows signs of defect during the period of guarantee,<br />
please return it to the sales outlet in which you purchased the<br />
AUDIOLINE device together with the purchase receipt. All rights to<br />
claims under the terms of guarantee in accordance with this agreement<br />
must be asserted exclusively with regard to your sales outlet. Two years<br />
after the purchase and transfer of our products, claims under the terms<br />
of guarantee can no longer be asserted.<br />
9.3 Declaration of Conformity<br />
This device fulfils the requirements stipulated in the EU directive:<br />
1999/5/EU directive on radio equipment and telecommunications<br />
terminal equipment and the mutual recognition of their conformity.<br />
Conformity with the above mentioned directive is confirmed by the CE<br />
symbol on the device.<br />
To view the complete Declaration of Conformity, please refer to the free<br />
download available on our web site www.audioline.de.
10 Index<br />
B<br />
Battery charge status, 30<br />
C<br />
Call number display, 40<br />
Call waiting, 32<br />
Charging the batteries, 30<br />
Connecting the base station, 29<br />
D<br />
Declaration of Conformity, 44<br />
Default settings, 38<br />
Dialling mode, 39<br />
Display, 31, 32<br />
E<br />
Entering a dialling pause manually,<br />
39<br />
Explanations, 32<br />
External answering<br />
machines, 36<br />
F<br />
Flash time, 37<br />
G<br />
Guarantee, 44<br />
I<br />
Inserting the batteries, 30<br />
− Index −<br />
K<br />
Key lock, 34<br />
Key tone, 37<br />
M<br />
Making external calls, 32<br />
Muting the microphone, 33<br />
O<br />
Operating elements, 28<br />
P<br />
Package contents, 29<br />
Paging, 34<br />
PIN code, 37<br />
Private branch exchanges, 39<br />
Q<br />
Quickdial, 35<br />
R<br />
R button, 37, 39<br />
Receiver volume, 34, 35<br />
Redialling, 33<br />
Ringing melody, 34, 35<br />
Ringing volume, 35<br />
45
46<br />
S<br />
Safety information , 26<br />
Special Functions, 39<br />
Supplementary services, 40<br />
T<br />
Taking a call, 32<br />
Talk time, 34<br />
Technical data, 43<br />
Temporary tone dialling, 39<br />
Touch & dial, 36<br />
Troubleshooting , 41<br />
− Index −
− Index −<br />
47
Wichtige Garantiehinweise<br />
Die Garantiezeit für Ihr AUDIOLINE − Produkt beginnt mit dem<br />
Kaufdatum. Ein Garantieanspruch besteht bei Mängeln, die auf Material−<br />
oder Herstellungsfehler zurückzuführen sind. Der Garantieanspruch<br />
erlischt bei Eingriffen durch den Käufer oder durch Dritte. Schäden, die<br />
durch unsachgemäße Behandlung oder Bedienung, natürliche<br />
Abnutzung, durch falsches Aufstellen oder Aufbewahren, durch<br />
unsachgemäßen Anschluss oder Installation sowie durch höhere Gewalt<br />
oder sonstige äußere Einflüsse entstehen, fallen nicht unter die<br />
Garantieleistung.<br />
BITTE WENDEN SIE SICH IM GARANTIEFALL AUSSCHLIESSLICH<br />
AN DEN HÄNDLER, BEI DEM SIE DAS GERÄT GEKAUFT HABEN,<br />
UND VERGESSEN SIE NICHT, DEN KAUFBELEG VORZULEGEN.<br />
UM UNNÖTIG LANGE WARTEZEITEN ZU VERMEIDEN, SENDEN<br />
SIE REKLAMATIONSGERÄTE BITTE NICHT AN UNSERE<br />
BÜROADRESSE.<br />
BEI FRAGEN ZUR BEDIENUNG UND GARANTIELEISTUNG LESEN<br />
SIE BITTE DIE BEDIENUNGSANLEITUNG ODER WENDEN SIE<br />
SICH AN UNSERE HOTLINE:<br />
0180 500 13 88 (Kosten Telekom bei Drucklegung: 12ct/min)<br />
AUDIOLINE GmbH<br />
Neuss<br />
Service Hotline 0180 500 13 88<br />
(Kosten Telekom bei Drucklegung: 12ct/min)<br />
Internet: www.audioline.de − E−mail: info@audioline.de<br />
Version 2.0 − 10.04.2006


