IFU_WD_CPD06_CytoPath Disc_6mm

Sie wollen auch ein ePaper? Erhöhen Sie die Reichweite Ihrer Titel.
YUMPU macht aus Druck-PDFs automatisch weboptimierte ePaper, die Google liebt.
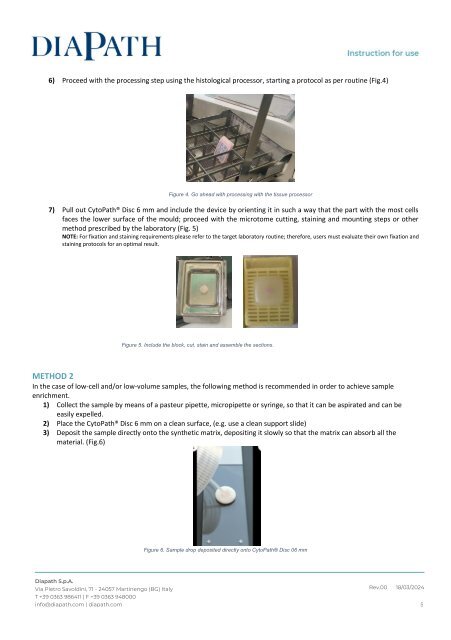
6) Proceed with the processing step using the histological processor, starting a protocol as per routine (Fig.4)<br />
Figure 4. Go ahead with processing with the tissue processor<br />
7) Pull out <strong>CytoPath</strong>® <strong>Disc</strong> 6 mm and include the device by orienting it in such a way that the part with the most cells<br />
faces the lower surface of the mould; proceed with the microtome cutting, staining and mounting steps or other<br />
method prescribed by the laboratory (Fig. 5)<br />
NOTE: For fixation and staining requirements please refer to the target laboratory routine; therefore, users must evaluate their own fixation and<br />
staining protocols for an optimal result.<br />
Figure 5. Include the block, cut, stain and assemble the sections.<br />
METHOD 2<br />
In the case of low-cell and/or low-volume samples, the following method is recommended in order to achieve sample<br />
enrichment.<br />
1) Collect the sample by means of a pasteur pipette, micropipette or syringe, so that it can be aspirated and can be<br />
easily expelled.<br />
2) Place the <strong>CytoPath</strong>® <strong>Disc</strong> 6 mm on a clean surface, (e.g. use a clean support slide)<br />
3) Deposit the sample directly onto the synthetic matrix, depositing it slowly so that the matrix can absorb all the<br />
material. (Fig.6)<br />
Figure 6. Sample drop deposited directly onto <strong>CytoPath</strong>® <strong>Disc</strong> 06 mm<br />
Diapath S.p.A.<br />
Via Pietro Savoldini, 71 - 24057 Martinengo (BG) Italy<br />
T +39 0363 986411 | F +39 0363 948000<br />
info@diapath.com | diapath.com<br />
Rev.00 18/03/2024<br />
5