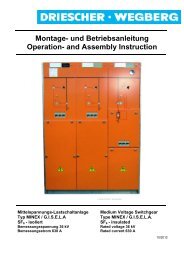
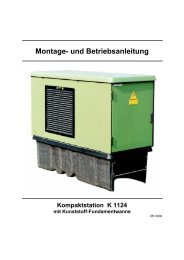
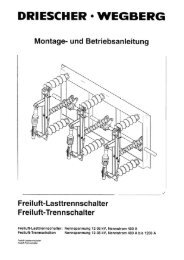
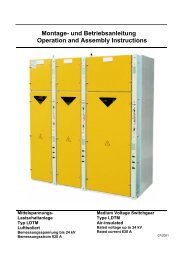
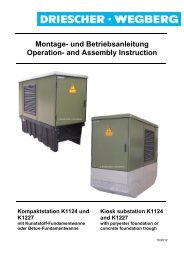
Montage- und Betriebsanleitung Operation- and Assembly Instruction
Montage- und Betriebsanleitung Operation- and Assembly Instruction
Montage- und Betriebsanleitung Operation- and Assembly Instruction

Sie wollen auch ein ePaper? Erhöhen Sie die Reichweite Ihrer Titel.
YUMPU macht aus Druck-PDFs automatisch weboptimierte ePaper, die Google liebt.
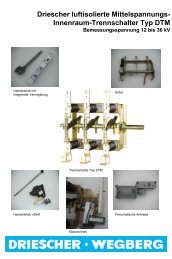
DRIESCHER � WEGBERG<br />
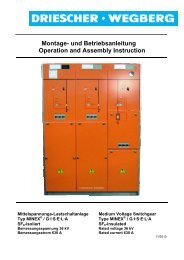
Bedienung<br />
Die Bedienung erfolgt mittels einer Schaltkurbel.<br />
r<strong>und</strong>er Schlitzzapfen für Lasttrennschalter (schwarz)<br />
ro<strong>und</strong> U- journal for switch-disconnector (black)<br />
Schalterstellungsanzeiger<br />
Die Schalterstellungsanzeiger geben in Verbindung<br />
mit dem Blindschaltbild den Schaltzust<strong>and</strong> von Lasttrennschalter,<br />
Erdungsschalter <strong>und</strong> der HH-<br />
Sicherungsauslösung an.<br />
Öffnen der Kabelraumabdeckung<br />
Die Kabelraumabdeckung lässt sich nur<br />
entfernen, wenn der entsprechende Abzweig<br />
geerdet ist!<br />
Abnehmen der Blende<br />
- Lösen Sie die Schnellverschlussschrauben mit<br />
der Schaltkurbel (Innensechskant SW14 am roten<br />
Ende)<br />
- Abdeckblende nach vorne schwenken <strong>und</strong> geneigt<br />
abnehmen.<br />
Für eine Kabelprüfung kann der Erdungsschalter<br />
wieder ausgeschaltet werden (nicht im Transformatorfeld).<br />
Durch eine Einschaltsperre lässt sich der Lasttrennschalter<br />
bei geöffneter Kabelraumblende nicht wieder<br />
einschalten.<br />
Einsetzen der Blende<br />
<strong>Operation</strong><br />
Sechskantschlüssel (SW5) für HH-Sicherungen<br />
hexagonal wrench (SW5) for HV HRC fuses<br />
� DRIESCHER � WEGBERG<br />
- Setzen Sie die Kabelraumblende nach vorn geneigt<br />
mit den unteren Rastnocken in die entsprechenden<br />
Schlitze im unteren Querholm.<br />
- Schwenken Sie die Kabelraumblende an die<br />
Schaltanlage <strong>und</strong> schließen die Schnellverschlussschrauben<br />
mit der Schaltkurbel.<br />
32 MINEX / G.I.S.E.L.A<br />
The operation is performed with a switching<br />
crank.<br />
Switch position indicator<br />
The switch position indicators together with the<br />
mimic diagram show the switch condition of<br />
switch-disconnector, earthing switch <strong>and</strong> the HV<br />
HRC fuse indication.<br />
Open the cable compartment cover<br />
The cable compartment cover can only be<br />
removed, if the corresponding outgoing<br />
circuit is earthed!<br />
Removal of the cover<br />
- Untie the quick-release screws with the operating<br />
crank (hexagonal recess SW 14 at the red<br />
end)<br />
- Turn the cover forward, incline <strong>and</strong> remove it.<br />
For a cable testing the earthing switch can be<br />
switched off again (not in the transformer cubicle)<br />
There is a closing lock-out so that the switchdisconnector<br />
cannot be reclosed if the cable compartment<br />
cover is open.<br />
Insert the cover<br />
r<strong>und</strong>er Zapfen für Erdungsschalter (rot)<br />
ro<strong>und</strong> journal for earthing switch (red<br />
Innensechskant (SW 14) für Schnellverschluss<br />
Inner hexagonal recess (SW14) for quick<br />
release lock<br />
- Turn the cable compartment cover forward <strong>and</strong><br />
insert it into the corresponding slots situated at<br />
the lower cross beam together with the bottom<br />
latched cams.<br />
- Turn the cable compartment cover to the<br />
switchgear <strong>and</strong> close the quick-release screws<br />
with the operating crank.